Plugins are the lifeblood of the WordPress ecosystem. They make the CMS (content management system) unique among its peers because of the sheer extensibility they bring to the platform. Many users are drawn to WordPress because of plugins, but don’t know how to install this one or that one they got as a free download or can’t find on the repository. If that’s you, no worries. We are going to walk you through how to install a WordPress plugin in 3 different ways so you won’t ever be left without the cool stuff your site needs.
Subscribe To Our Youtube Channel
How to Install a WordPress Plugin
There are three main ways to install a plugin in WordPress: within the WordPress dashboard by searching for it, by uploading a plugin, or through file transfer protocol (FTP). In this post, we’ll demonstrate each method to give you a full understanding of the process.
1. How to Install a WordPress Plugin Using the WordPress Plugin Search
The WordPress repository is chock full of free plugins to add features and functionalities to your WordPress website. It’s the easiest and most convenient way to install plugins since they’ve been reviewed for security and compatibility with WordPress. Plus, plugins from the repository receive automatic updates, ensuring you always have the latest features and bug fixes.
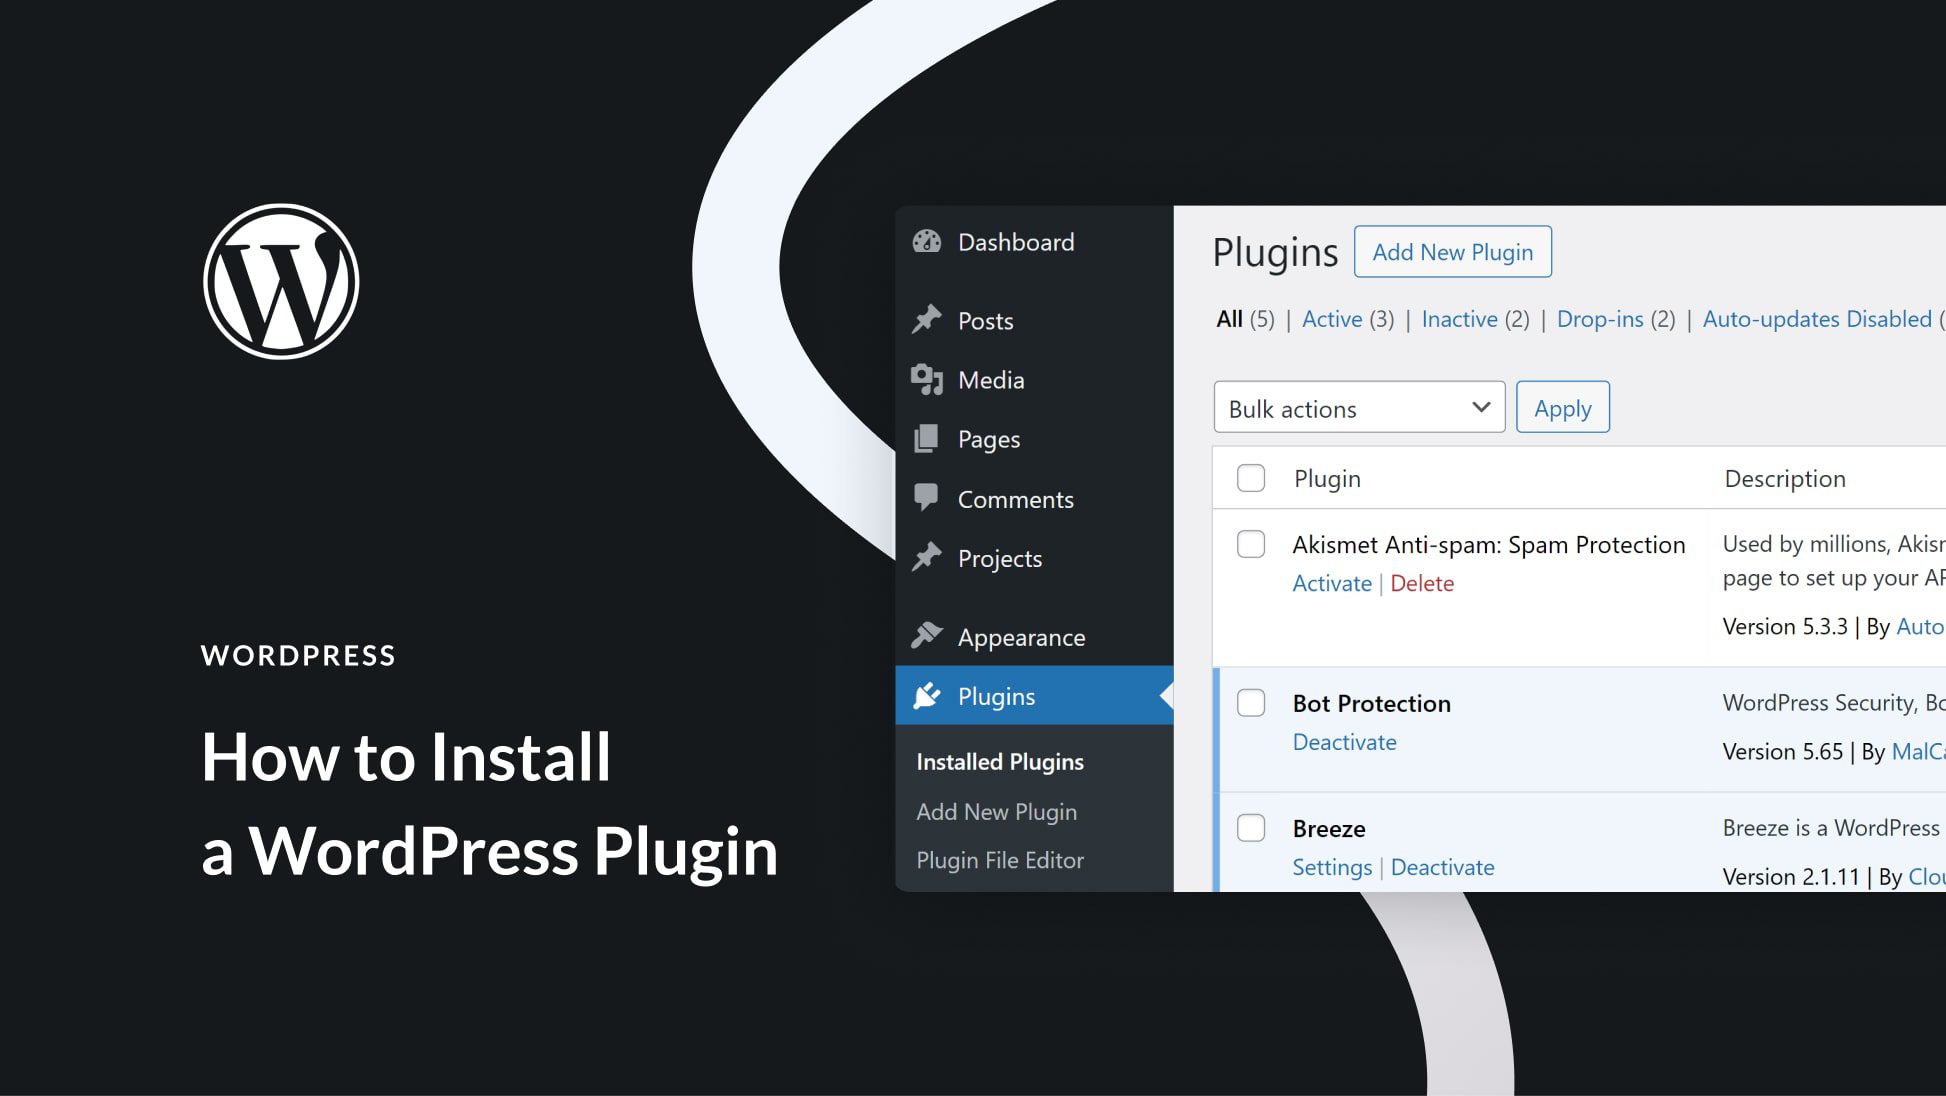
To add a new plugin from the WordPress repository, navigate to Plugins > Add New Plugin.

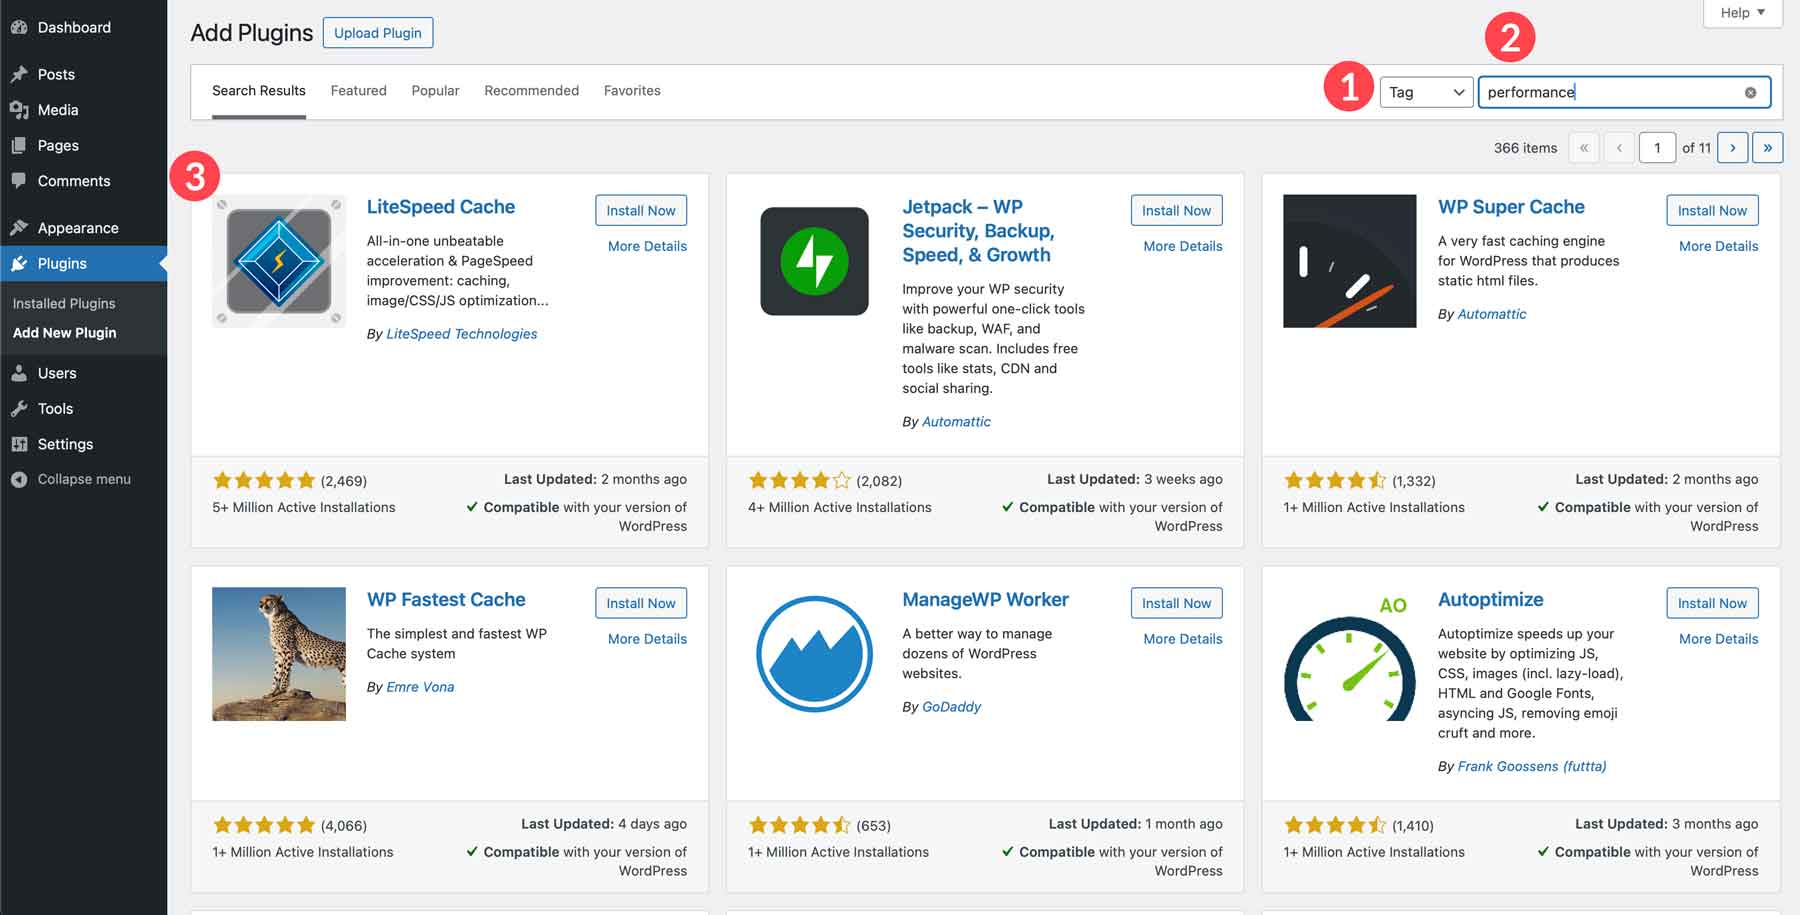
When the page refreshes, you’ll notice a search field towards the top right of the page. You can search by keyword, author, or tag. The plugin repository is where you’ll find plugins for search engine optimization (SEO), like Rank Math. There are also backup plugins, like UpdraftPlus, that will allow you to back up your website locally to Amazon S3, Dropbox, and others.
To search for a plugin to install, type a search term into the field. For example, if you know you need a plugin to speed up your site, you can select tag from the dropdown menu and type performance into the search bar, and click enter. This will reveal all the plugins listed in the repository that we tagged with that keyword. It presents the most popular options first. In this case, LiteSpeed Cache has the most installs and best reviews.
Tips For Installing Plugins From the WordPress Repository
When installing plugins from the WordPress repository, there are a few things to remember. Before installing any plugins, take a step back and identify your needs first. Do you need a contact form plugin like WP Forms, an image gallery, an SEO plugin like AIOSEO, or something else? Knowing your needs will help you focus your search and avoid installing unnecessary plugins that could bloat your website and slow it down.
Another general tip is to look for popular plugins and note the active installations. Popular plugins with many active installations are typically a good sign. A large user base has tested them, and they are less likely to have major compatibility issues. As previously mentioned, be sure to read reviews and check ratings before installing any plugin. Look for plugins with a high average rating and positive reviews.
2. How to Install a WordPress Plugin Using the WordPress Plugin Upload
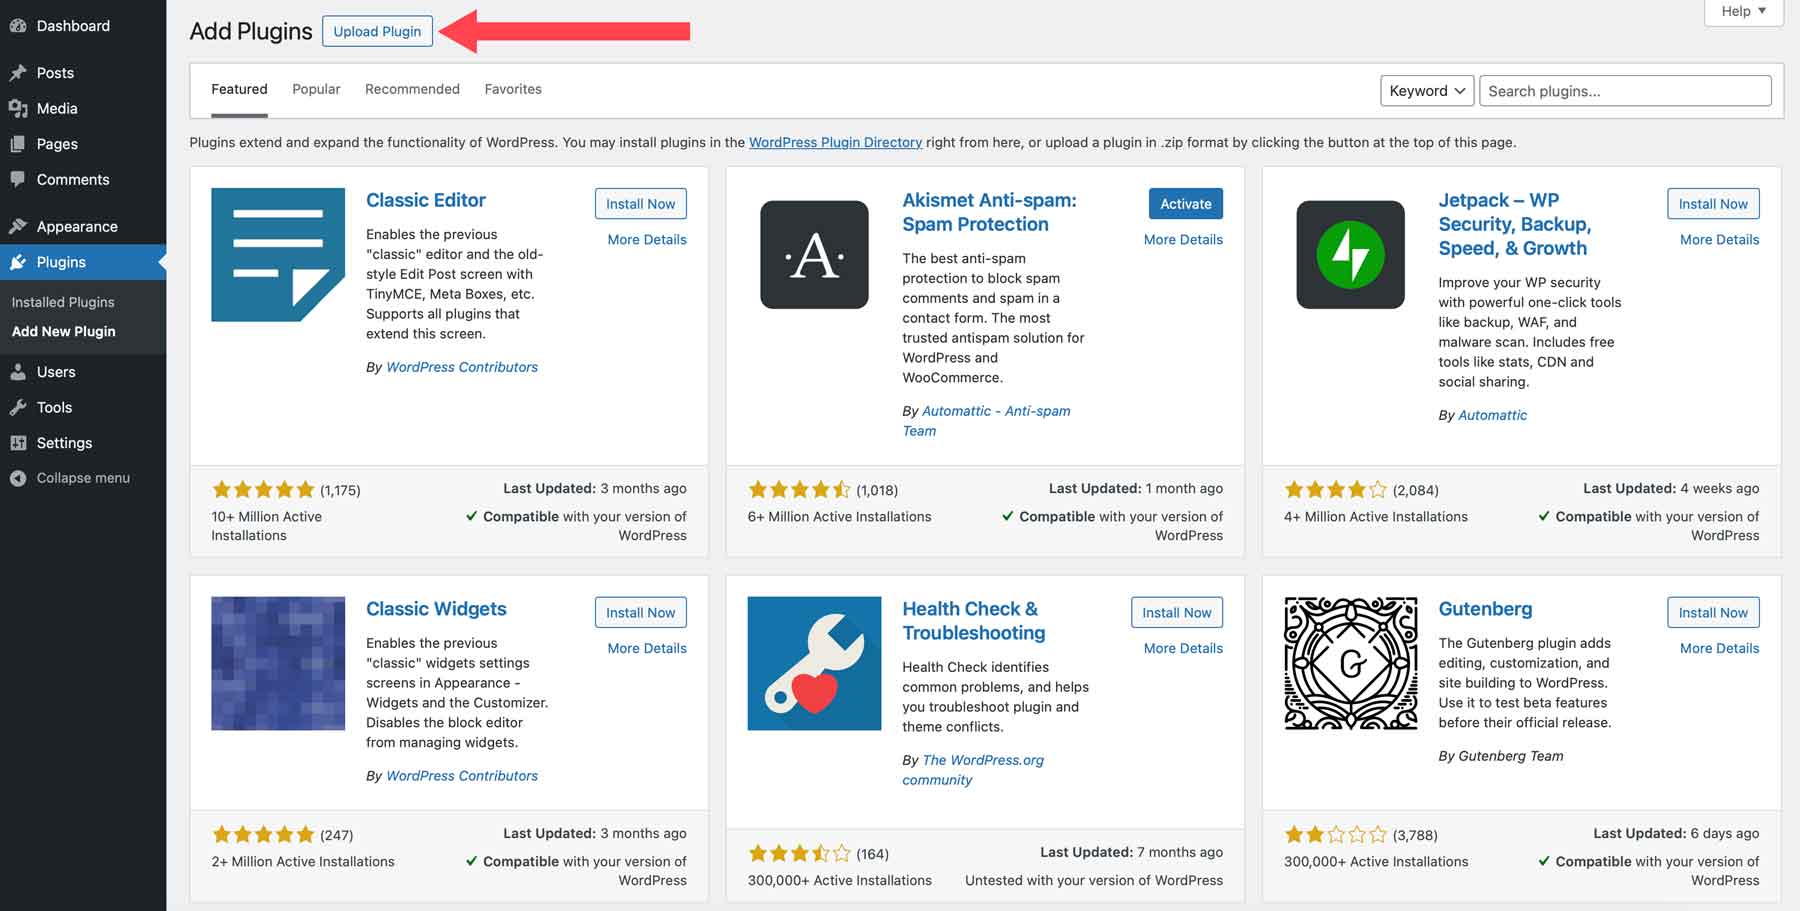
If you look under the Plugins> Add New Plugin menu option, you will see the search box we used above, as well as the Upload Plugin button. You will use this option when an external site (outside your WordPress dashboard itself) provides a plugin as a .zip file.
Important note: do not unzip any plugins that you download this way. WordPress reads the compressed archive, so you will always upload the .zip itself, not the files within.
The most likely place that you will find downloadable plugins is the WordPress.org plugin repository. When you searched for a plugin above, this is what you were searching through. You simply do the same thing here.
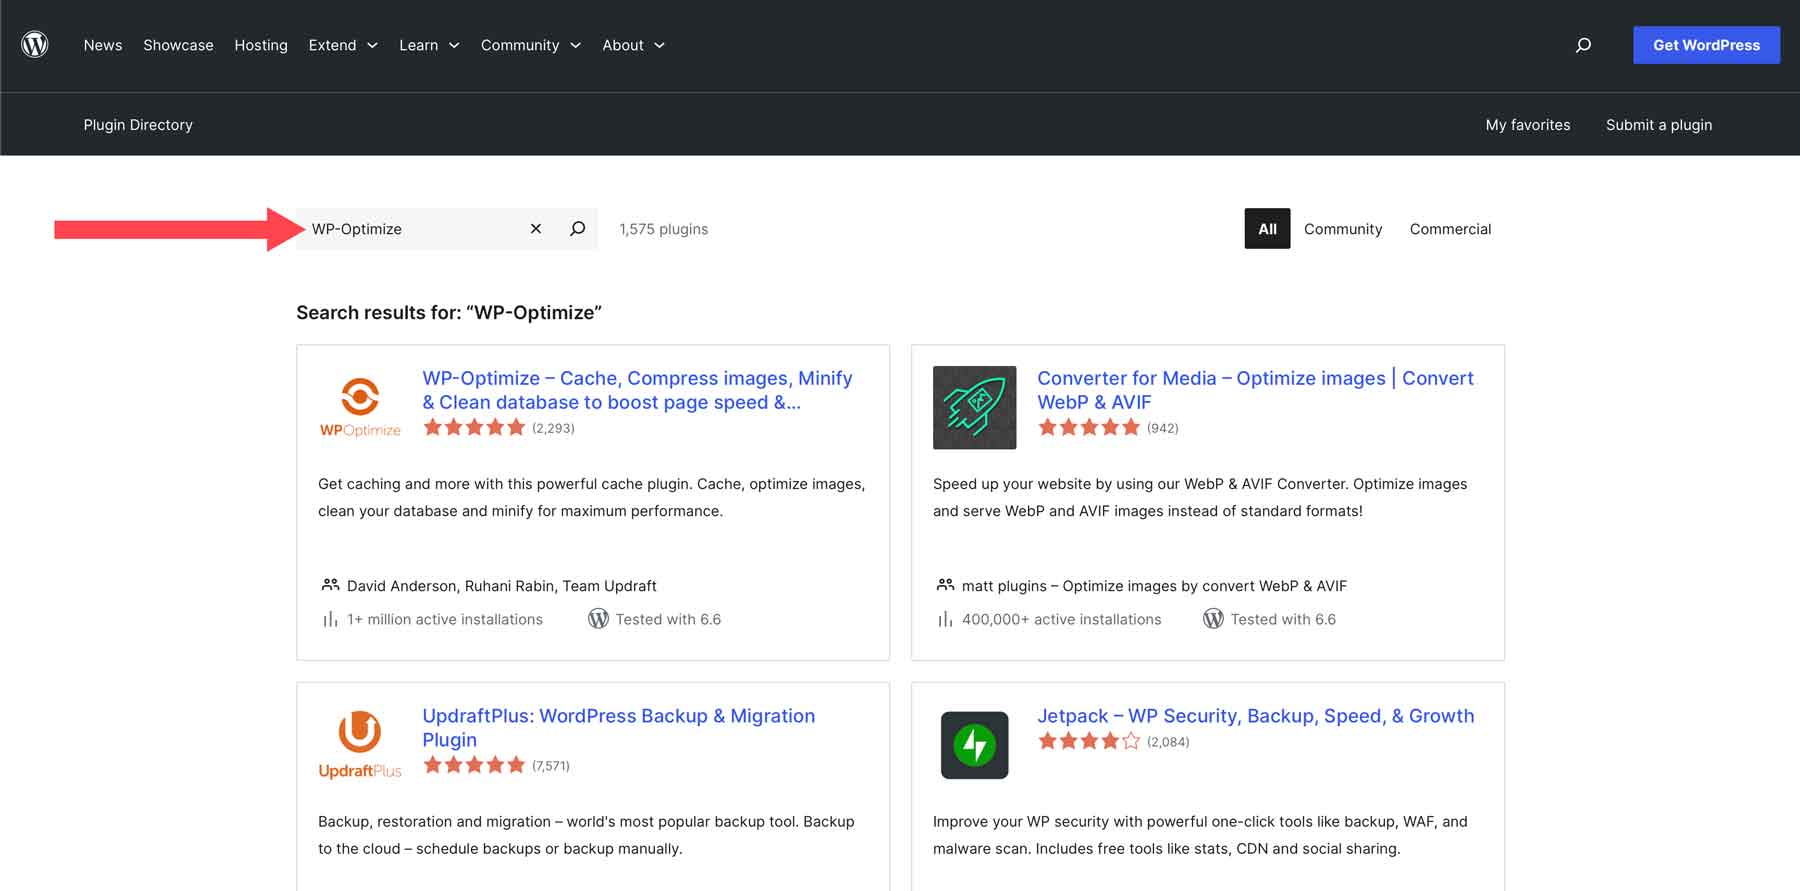
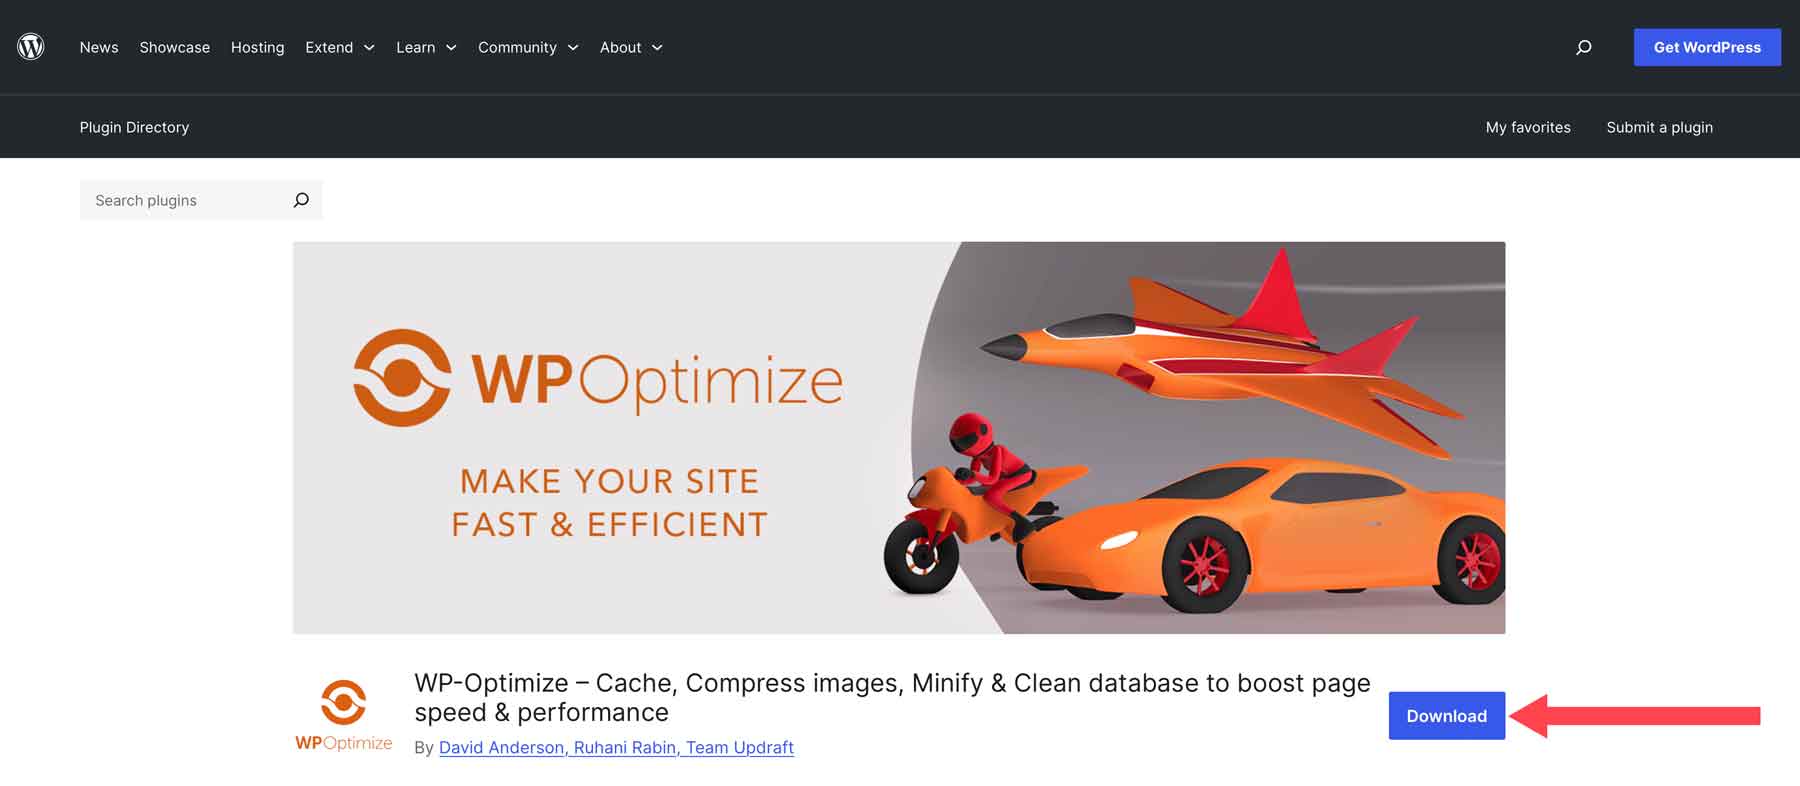
On the plugin page, however, this time, there is a download button instead of an installation button.
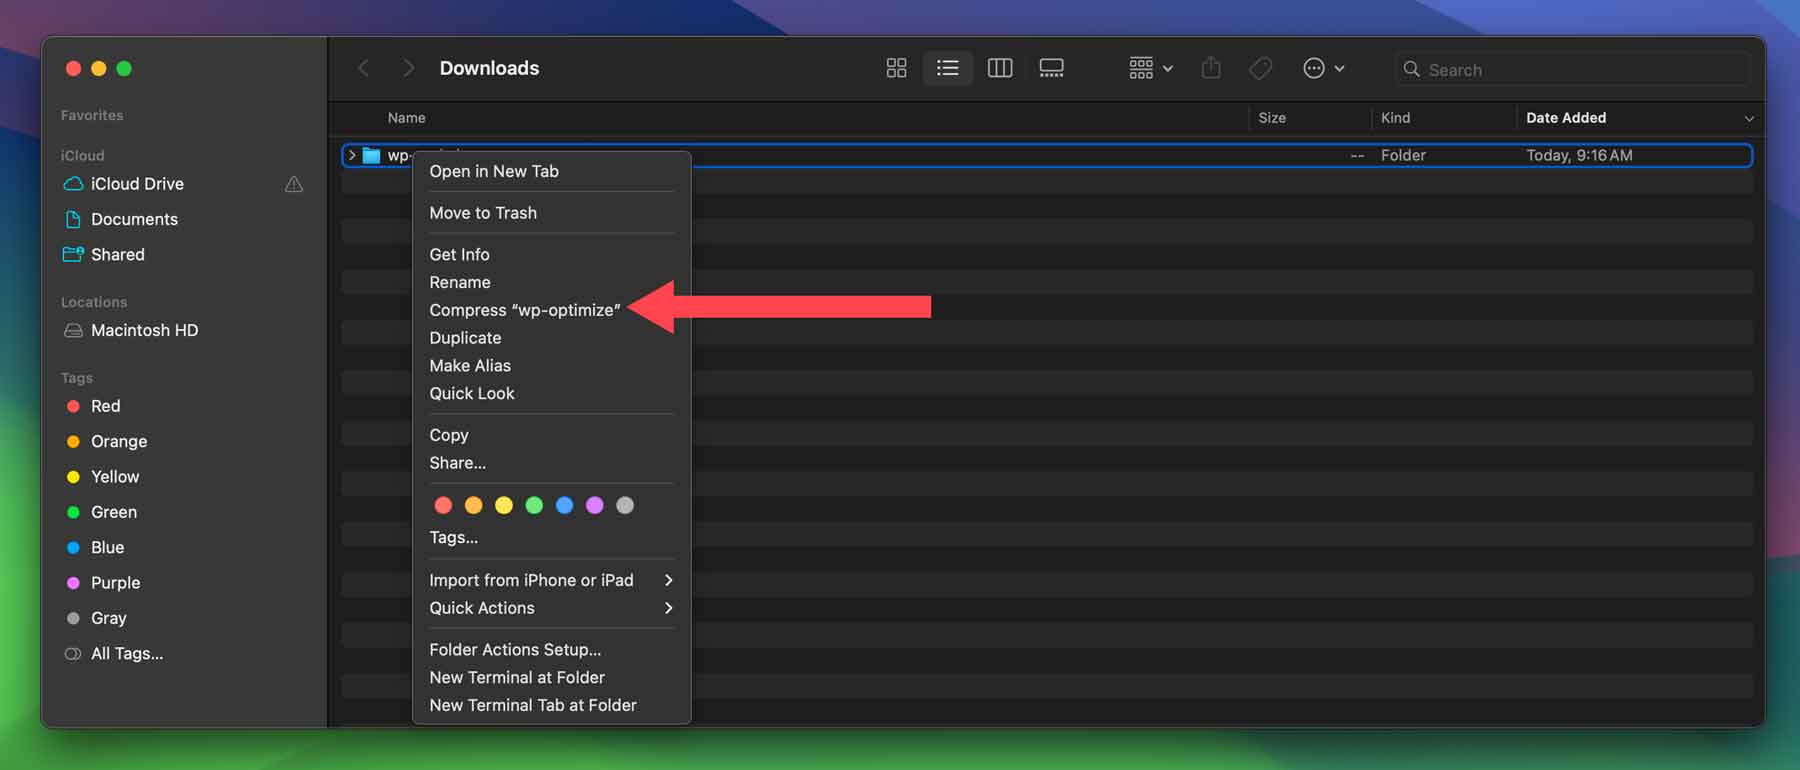
Using WP-Optimize as an example, simply click the download button to download the plugin files to your computer. Depending on the computer you use, you may have to zip the files to install them into WordPress. On a Mac, plugins are automatically extracted when downloaded, so you’ll likely need to right-click on it to re-zip the folder to install it into WordPress.
Next, return to Plugins > Add New Plugin and click the Upload Plugin button. The page will expand to reveal a Choose File button. After you press it, you will find the file on your local computer and click Install Now.
Be sure to click Install Now only once. Multiple clicks can cause database errors as WordPress unzips the files and creates directories in your file system. The next screen is where you will activate the plugin. When that is complete, you will have installed a WordPress plugin via download. The newly installed plugin will appear on your list as though you’d installed it directly through the dashboard search.

Alternatives To the WordPress Repository
In addition to installing plugins from the WordPress repository, there are nearly endless third-party developers that offer incredible WordPress plugins you can easily upload for added functionality. There are so many options available that it’s a good idea to research the options available to find the top-performing plugins. We have an incredible Best WordPress Plugins category on our blog that provides dozens of listicles for useful plugins offered by third-party developers. Learning about your options is a great way to determine the best plugin for your needs all while keeping the bloat down on your website.
In addition to SEO and backup plugins, here are a few more examples of plugins available from third-party vendors:
- Form Plugins: Create easy-to-use forms for your WordPress website, such as contact, opt-in, and survey forms. Some popular options include WP Forms, Formidable Forms, and Gravity Forms.
- Security Plugins: Protect your website from malware, hacking attempts, and other security threats. Options Like Solid Security and WP Activity Log provide protection and peace of mind.
- Image Optimization Plugins: These plugins reduce image file size, improving your website’s speed. EWWW Image Optimizer and ShortPixel provide the best value.
- Speed Optimization Plugins: Improve the speed and performance of your website by installing plugins like WP Rocket or NitroPack.
- Ecommerce Plugins: Turn WordPress into an online store with options like WooCommerce, Easy Digital Downloads, or Dokan Multivendor.
Browse Theme-Specific Third-Party Plugins
In addition to third-party vendors who develop plugins to appeal to a variety of WordPress users, there are other plugins offered by third-party vendors created specifically for certain WordPress themes. One such example is the Divi Marketplace. It offers plugins that are specifically designed to work with the Divi theme. Divi comes packed with incredible features, like a Theme Builder for designing headers and footers, a no-code front-end Visual Builder, and over 200 design modules. However, there may be situations where you need your website to do more. In cases like these, the Divi Marketplace is incredible.
You can find products like Divi Pixel, which adds over 50 design modules, 5 extensions (plugins), and 40 professionally-designed layouts. Divi Pixel allows you to customize every aspect of your WordPress website, from headers and footers to login pages and mobile menus. You can also integrate user-friendly features like custom map makers, a scroll-to-top button, smooth scrollbars, and more. If you’re looking to push the boundaries of Divi, Divi Pixel is a great option.
Another popular option is Divi Flash. This product adds more functionality to Divi through modules and extensions. Some options include design elements like vertical and horizontal timelines, star ratings, content toggles, advanced tables, and more. There are also modules to provide an enhanced user experience to your visitors with elements, such as fancy boxes, scroll animations, and Lightbox effects to keep visitors engaged and coming back for more.
3. How to Install a WordPress Plugin Manually using FTP
Installing a plugin via SFTP isn’t that different from installing it via upload. You’re still performing similar tasks, just by an external connection rather than inside your dashboard.
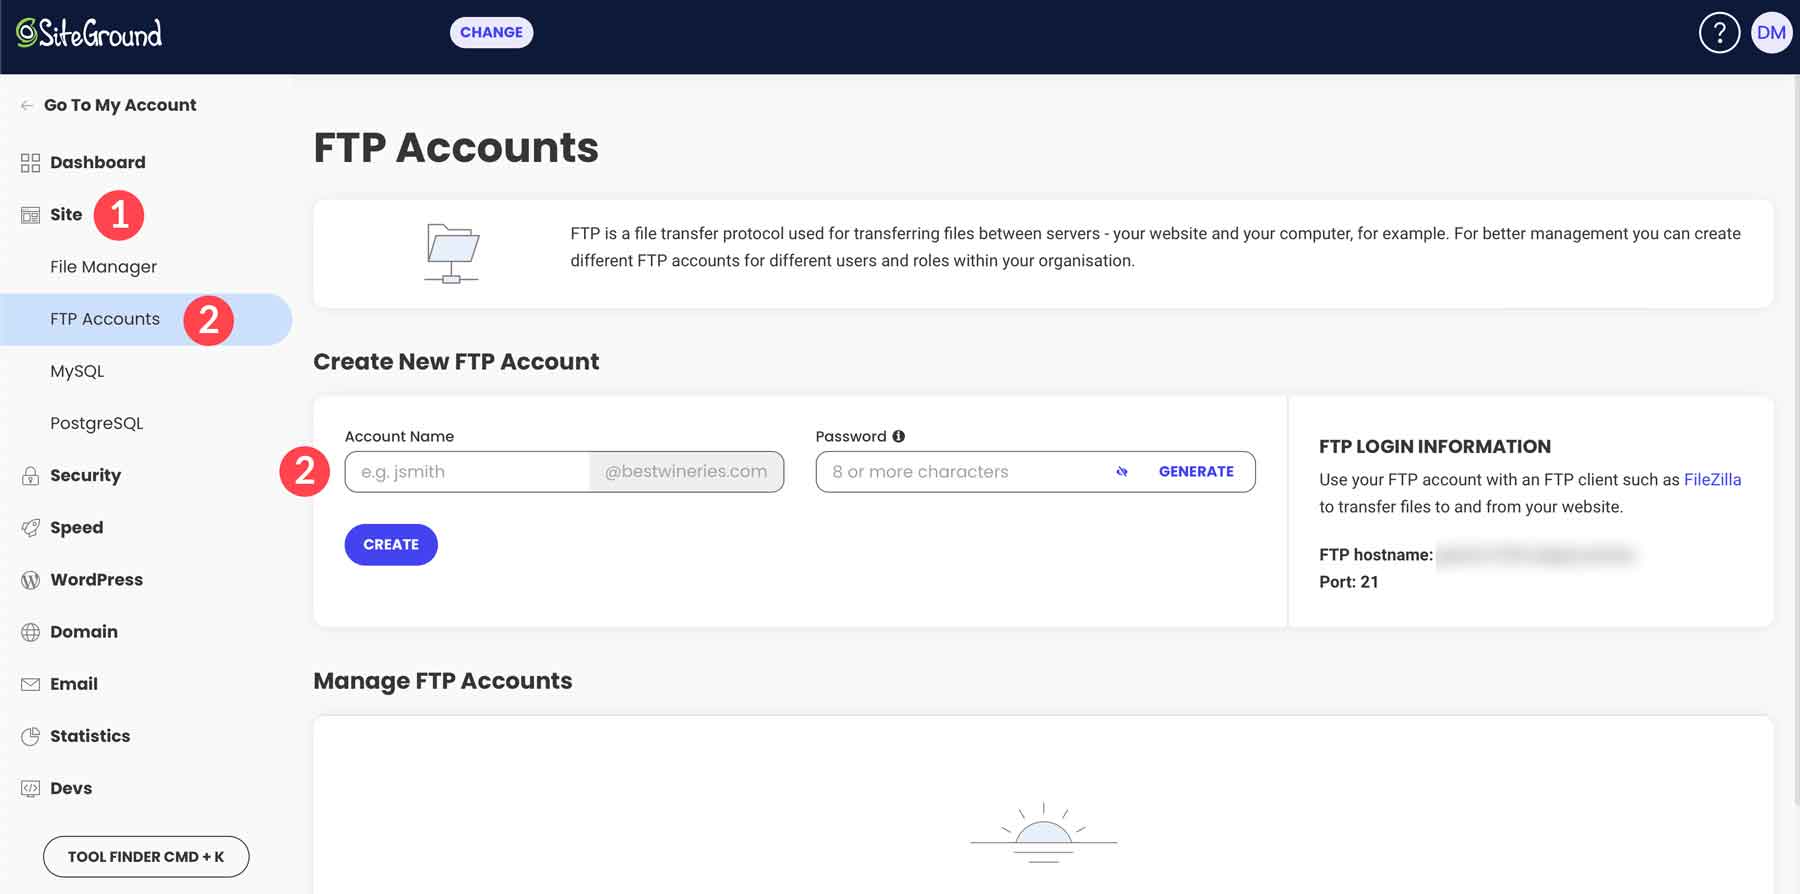
That said, you will need an FTP client, and we will be using FileZilla for this example. First off, you will need to have SFTP access to your website, which can either be obtained from your website administrator (if that’s not you) or through your hosting account. Most hosts have a place in their site tools or cPanel to create SFTP accounts.
Using SiteGround, for instance, it’s under Site > FTP Accounts and then you create the account with the username and password you want.
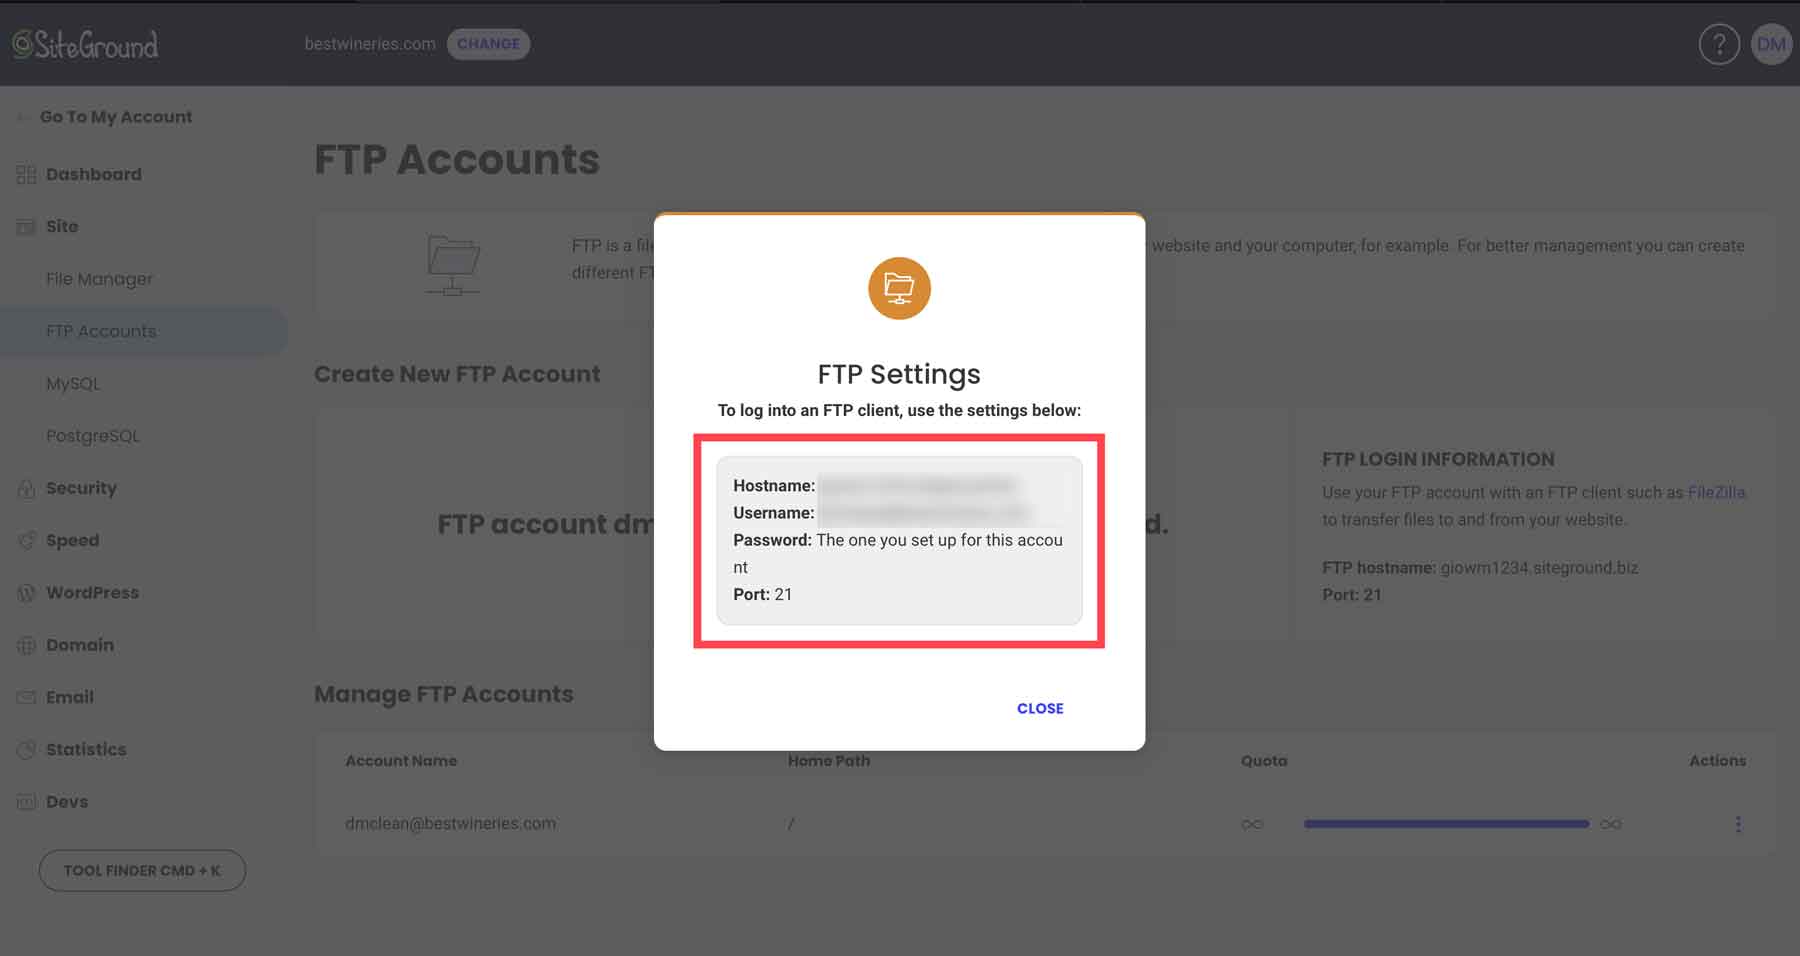
A popup will then tell you the exact information that you need to enter into your FTP client to connect to your site.
Enter that information into the FTP client, and you will see status updates that indicate you’re connected.

The primary difference between this method and uploading a plugin above is that you will now manually unzip the archive’s contents. To upload a WordPress plugin via SFTP, you will upload the uncompressed files, not the zipped folder. Be sure not to rename anything.
At this point, in your FTP client, you will see your local machine’s files on the left side of the client and your website’s on the right. You need to find the extracted plugin files on your own machine, and you will need to find the /public_html/wp-content/plugins/ directory on your website.
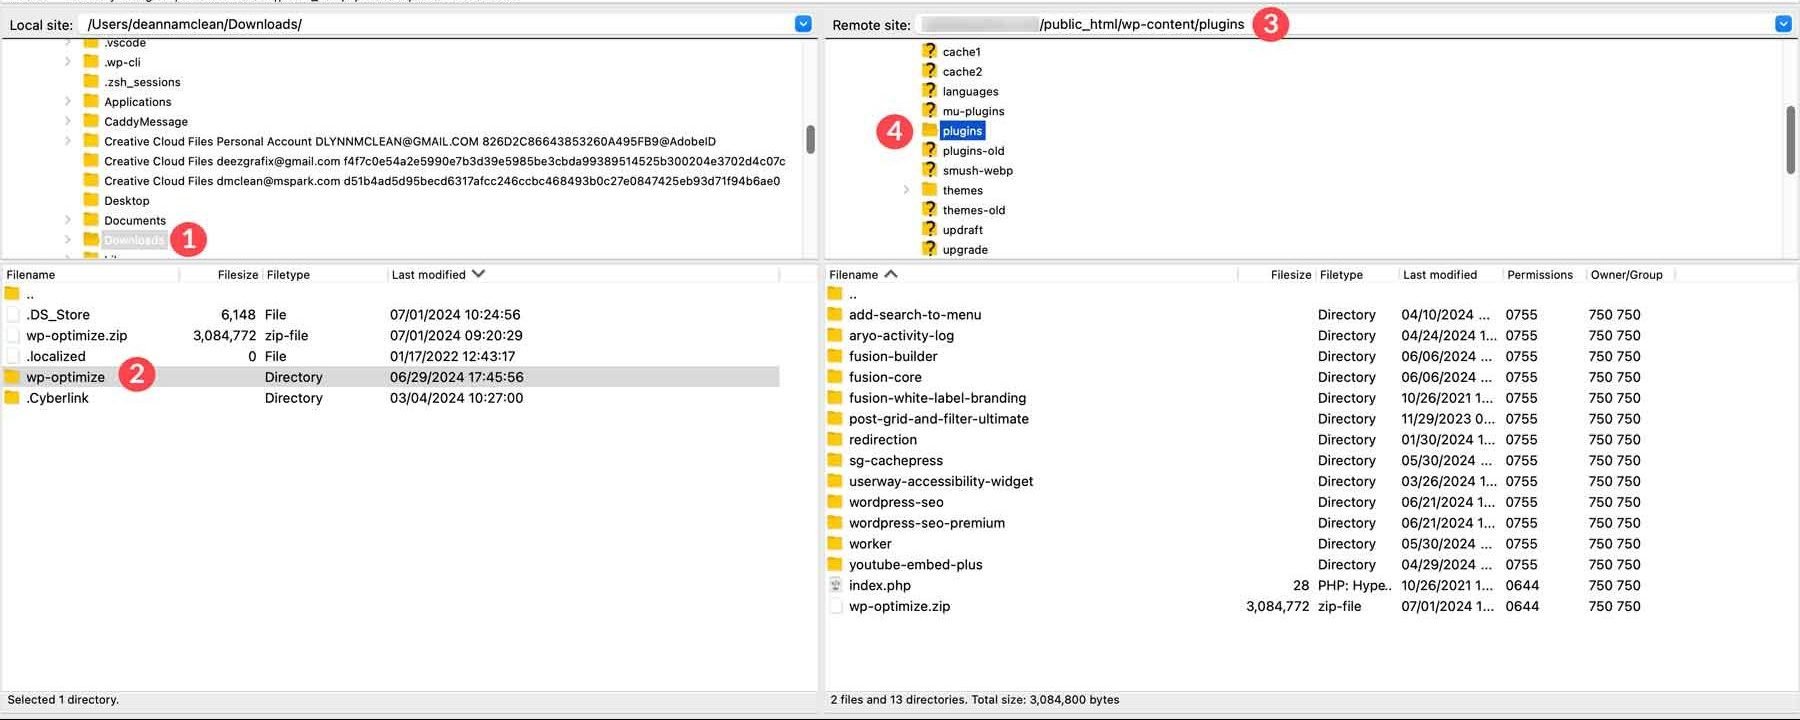
Next, simply right-click the plugin folder and select Upload as long as you’ve navigated to your /public_html/wp-content/plugins/ folder. This will automatically install the WordPress plugin via SFTP, appearing in the plugins folder when finished.
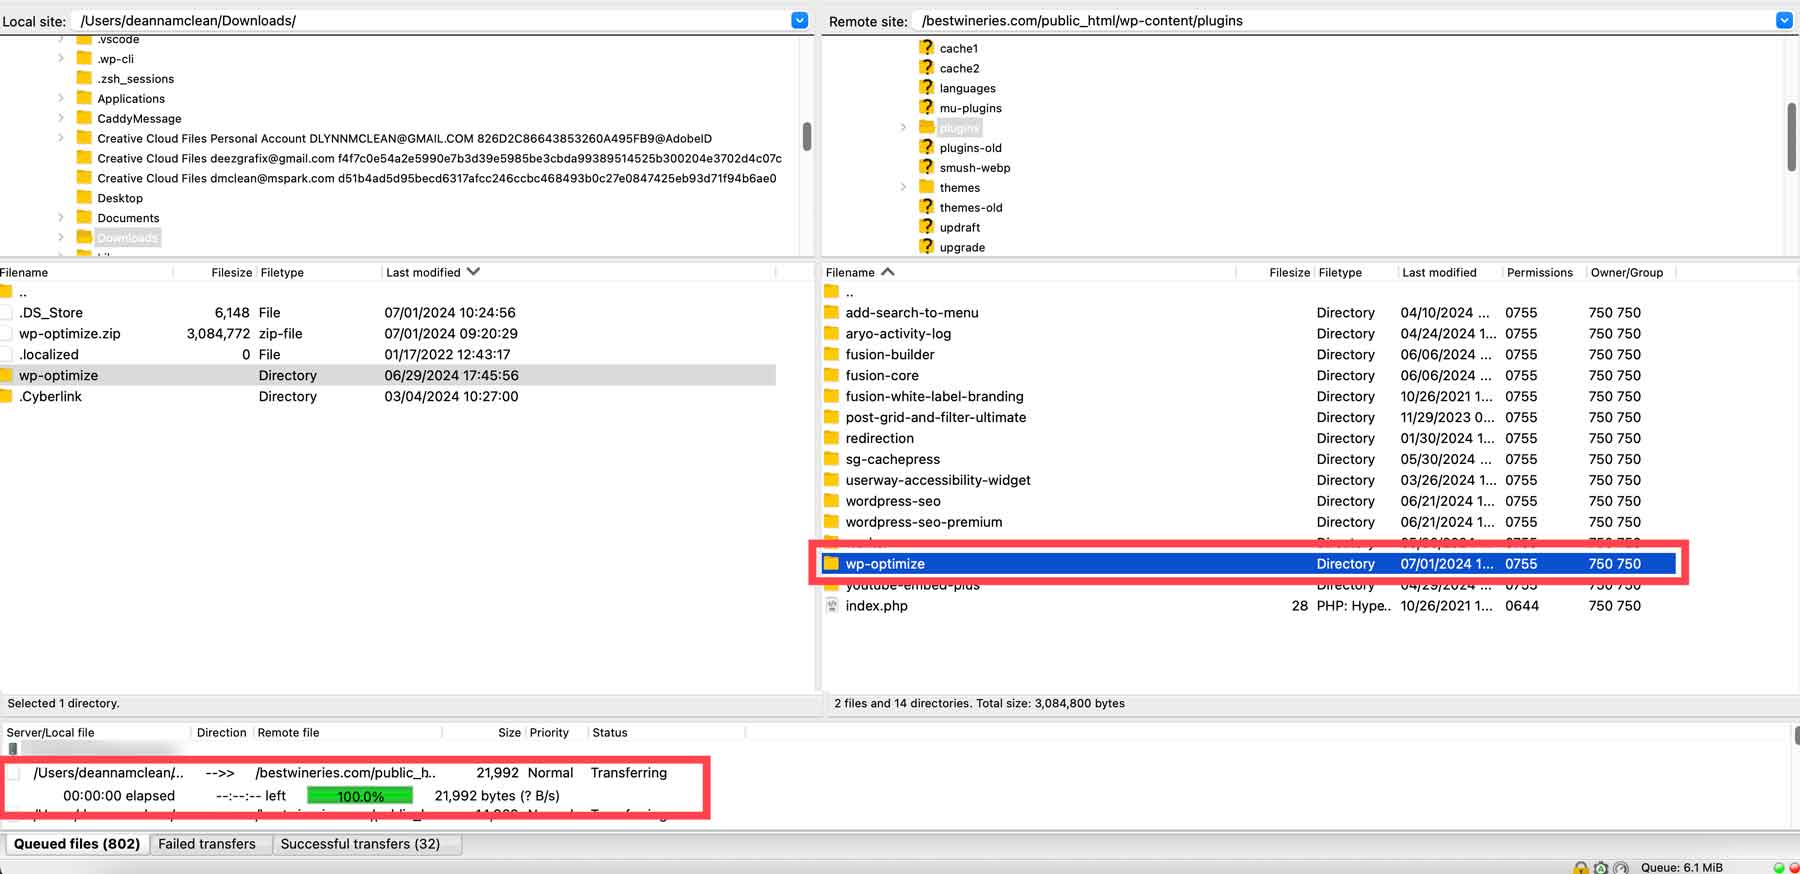
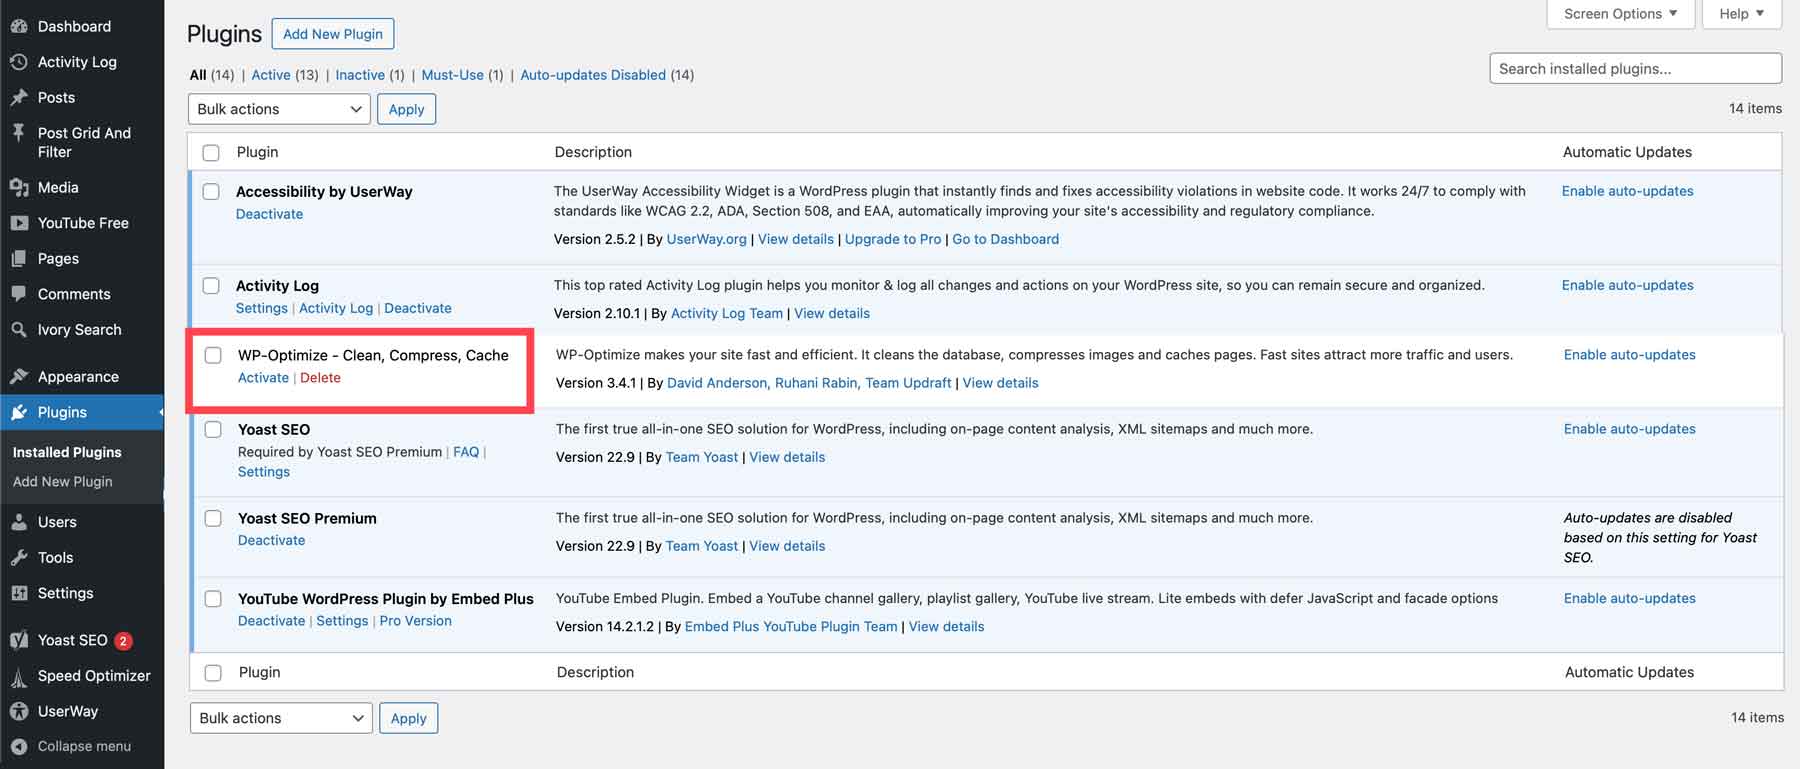
Next, it’s business as usual, heading into the Plugins > Installed and clicking Activate.
That’s all there is to it. You can disconnect your FTP client and start using your new plugin immediately.
Wrapping Up
Without plugins, WordPress is still a fantastic platform that can do a lot. With plugins, however, it can do just about anything. You can optimize for SEO with Rank Math, speed it up with WP-Optimize, or create killer forms with WP Forms. That’s the biggest draw for WordPress, so being able to install them no matter what is a must. Following the steps above, you can safely and securely install plugins that you download from anywhere. Whether it’s the official free repository or a members area like ours, installing WordPress plugins is quick, simple, and easy.
One Last Thing
We do want to warn, however, that downloading plugins from disreputable sources and installing them can lead to compromised sites, malware, and various other negative consequences. The WP.org repository and developer websites are safe. But if you find yourself downloading a plugin from a random site you found during a Google search…well, don’t install it. Always choose reputable third-party developers like weDevs or, if you’re a Divi user, the Divi Marketplace.
If you’d like to learn more about the products mentioned in this post, check out the table below that showcases links and pricing for each.
| Products Mentioned | Starting Price | Description | Action | |
|---|---|---|---|---|
| 1 | SiteGround | $2.99/month | Hosting Provider | Get |
| 2 | Divi | $89/year | WordPress Theme | Get |
| 3 | Visual Builder | Included with Divi | Page Builder Plugin | Get |
| 4 | Design Elements | Included with Divi | Page Builder Plugin | Get |
| 5 | Theme Builder | Included with Divi | Full Site Editing | Get |
| 6 | Divi Marketplace | Prices Vary | Extensions, Child Themes, and Layouts for Divi | Get |
| 7 | Divi Pixel | $169/year | Extensions, modules, and layouts for Divi | Get |
| 8 | Divi Flash | $79/year | Extensions, modules, and layouts for Divi | Get |
| 9 | Solid Security | $99/year | Security Plugin | Get |
| 10 | WP Activity Log | Free, $139/year | Security Plugin | Get |
| 11 | UpdraftPlus | Free, $95/year | Backup Plugin | Get |
| 12 | Rank Math | Free, $6.99/month | SEO Plugin | Get |
| 13 | WP-Optimize | Free, $49/year | Cache Plugin | Get |
| 14 | EWWW | $7/month | Image Optimization Plugin | Get |
| 15 | Short Pixel | Free, $19.99/one-time | Image Optimization Plugin | Get |
| 16 | WP Rocket | $59/year | Speed Optimization Plugins | Get |
| 17 | NitroPack | $21/month | Speed Optimization Plugins | Get |
| 18 | Litespeed | Free | Speed Optimization Plugins | Get |
| 19 | WP Forms | Free, $49.60/year | Contact Form Plugin | Get |
| 20 | Formidable Forms | $39.50/year | Contact Form Plugin | Get |
| 21 | AIOSEO | Free, $49.60/year | SEO Plugin | Get |
| 22 | WooCommerce | Free, add-ons available | Ecommerce Plugin | Get |
| 23 | Easy Digital Downloads | Free, $89.55/year (billed annually) | Ecommerce Plugin | Get |
| 24 | Dokan | Free, $149/year | Ecommerce Plugin | Get |
Frequently Asked Questions
We’ve tried to be thorough in our post, but you still have a few lingering questions. Review the FAQ section below to find the answers.




Hi, I’m a new blogger after reading your article i could learn how to install plugin from ftp also. Thank you
The easiest way is to install it from the dashboard itself by clicking add new option under plugins. Anyways thanks for this information with other ways to add a plugin.
Thanks for that,
Infromative.
I already knew about the first two methods. I will try the 3rd one.
Thanks for sharing
What’s funny is that I had to use the third method on a site for a side-project not long after finishing this article. And I was like…well, I am glad that’s in the front of my mind. 🙂