Driving engagement and brand loyalty through your WordPress website can be tricky. One of the best ways to stay connected with users is for them to sign up for accounts with your site. However, many visitors may feel this task is a hassle, especially if it requires them to generate and later remember a new, secure password. One way to circumvent this problem is offer Facebook login functionality.
By making it easier for visitors to create accounts and access your site, you can indirectly encourage engagement while making life easier for your users at the same time. In this article, we’ll show you exactly how to set up a Facebook login button on your WordPress site.
Let’s dig in!
Why You Might Want to Add Facebook Login to Your WordPress Site
WordPress enables you to allow user registration out of the box. Since your website already has a login option, so you might be wondering why you should bother adding Facebook integration. The main reasons all boil down to convenience for your users.
Considering the platform has nearly 2.8 billion monthly active users, the vast majority of your site’s visitors probably already have Facebook accounts. Considering the number of usernames and passwords people have to remember these days, the ability to use an existing account to register on your site is extremely convenient. Visitors may be more likely to create accounts if they can use login information they’re already familiar with.
Adding Facebook login to your website lets users create accounts with the click of a single button.
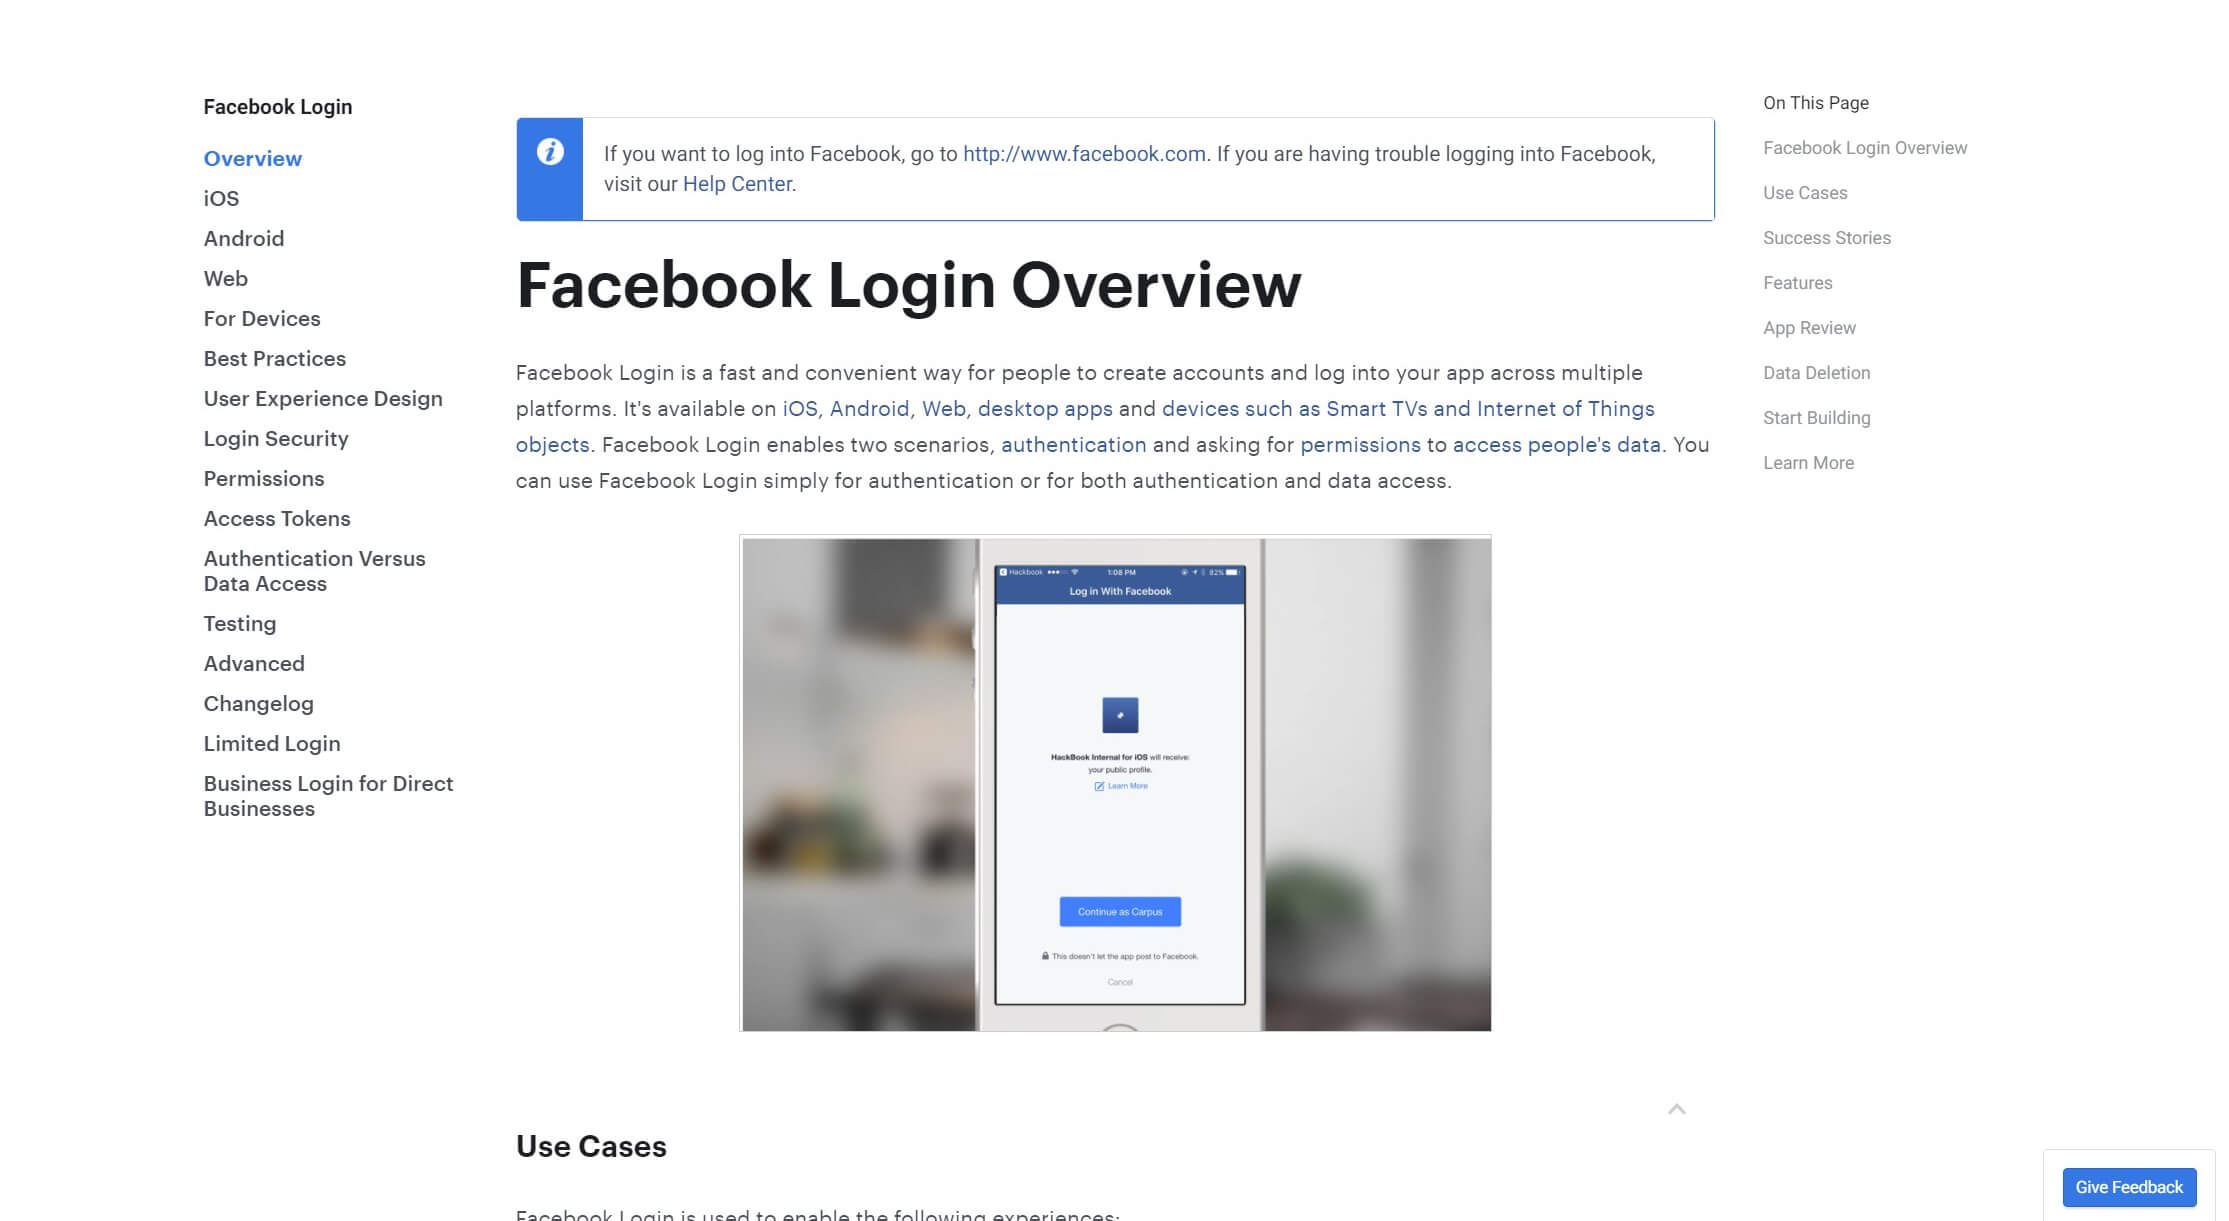
Of course, this convenience isn’t without benefits for your business. By making it easier for users to register, you’re indirectly encouraging them to engage more with your site. This is desirable for a number of reasons, such as:
- Having an account on your website may help users feel more invested in your brand.
- Users may be more likely to leave comments and interact with your content. This creates a sense of community and helps boost Search Engine Optimization (SEO).
- They may be more likely to share content with their social networks if they’re already connected, which helps increase the reach of your posts.
- Registered users can be easier to reach with promotions and notifications of new content.
Finally, Facebook’s huge user base means integration can provide powerful analytics and demographic information that you might not otherwise have access to. These details can be invaluable when it comes to growing your business.
How to Integrate Facebook Login with WordPress (In 5 Steps)
Now that you know why you should consider Facebook login integration, it’s time to learn how to set it up and start reaping the benefits. The process can seem complex, but it’s actually easier than it looks. Let’s walk through it.
Step 1: Set Up a Facebook Developer Account
The first thing you’ll need to do is sign up for a Facebook Developer account. This will enable you to use the Facebook Software Development Kit (SDK) to create various apps and integrations, including a login button for your site:
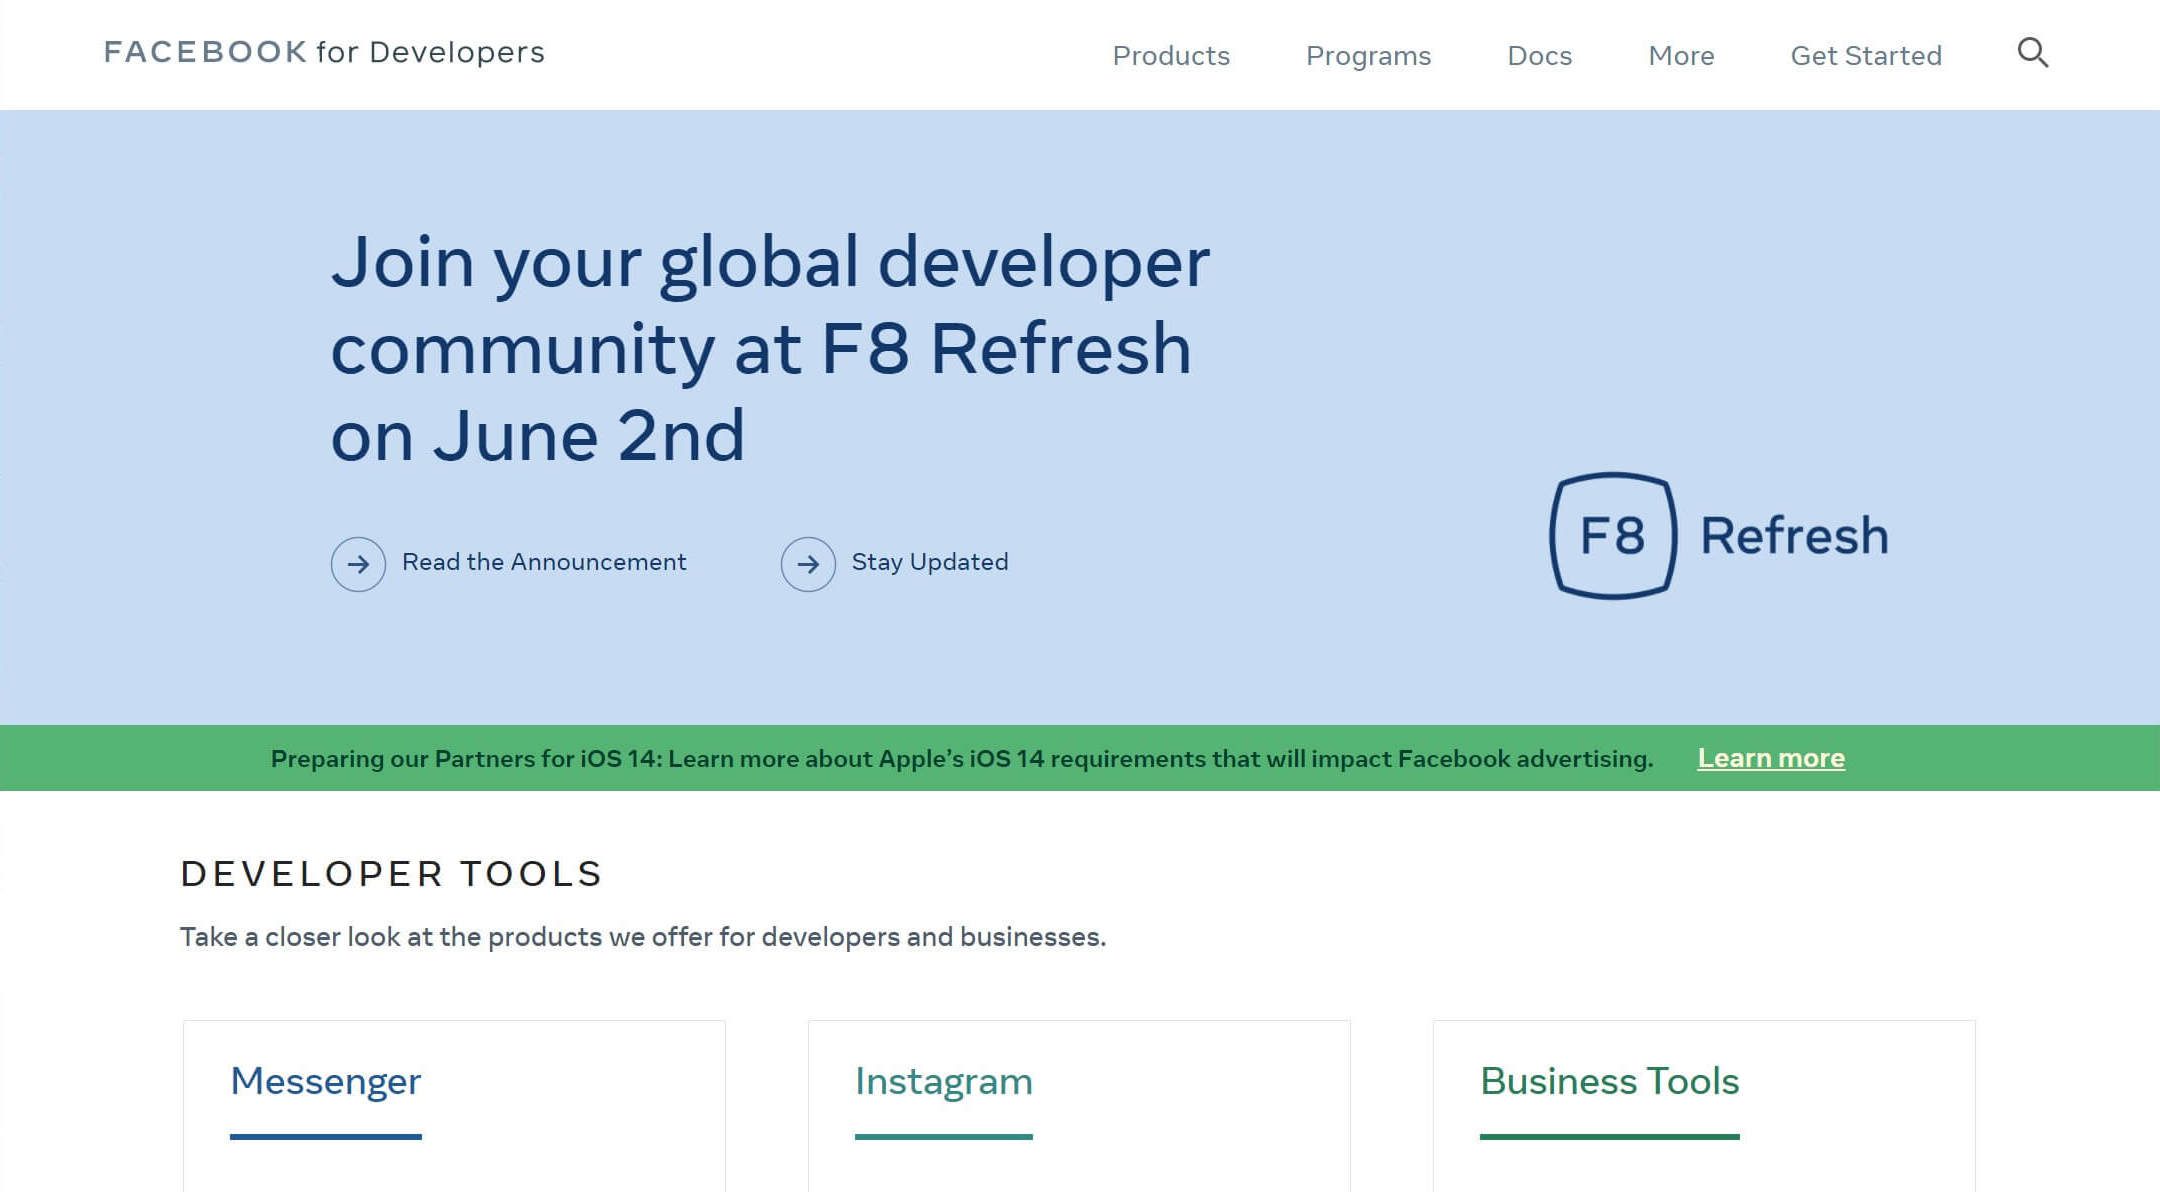
Visit the Facebook Developer site and click on Get Started in the upper right-hand corner. You’ll be asked a handful of questions, but if you already have a Facebook account, the process is extremely quick. When you’re finished, you’ll land on the Facebook Apps page, which leads to the next step.
Step 2: Create a New Facebook App
The next step is to create a Facebook app, which is the vessel that will contain the code for your integration. From the main Apps page, click on the green Create App button to get started:
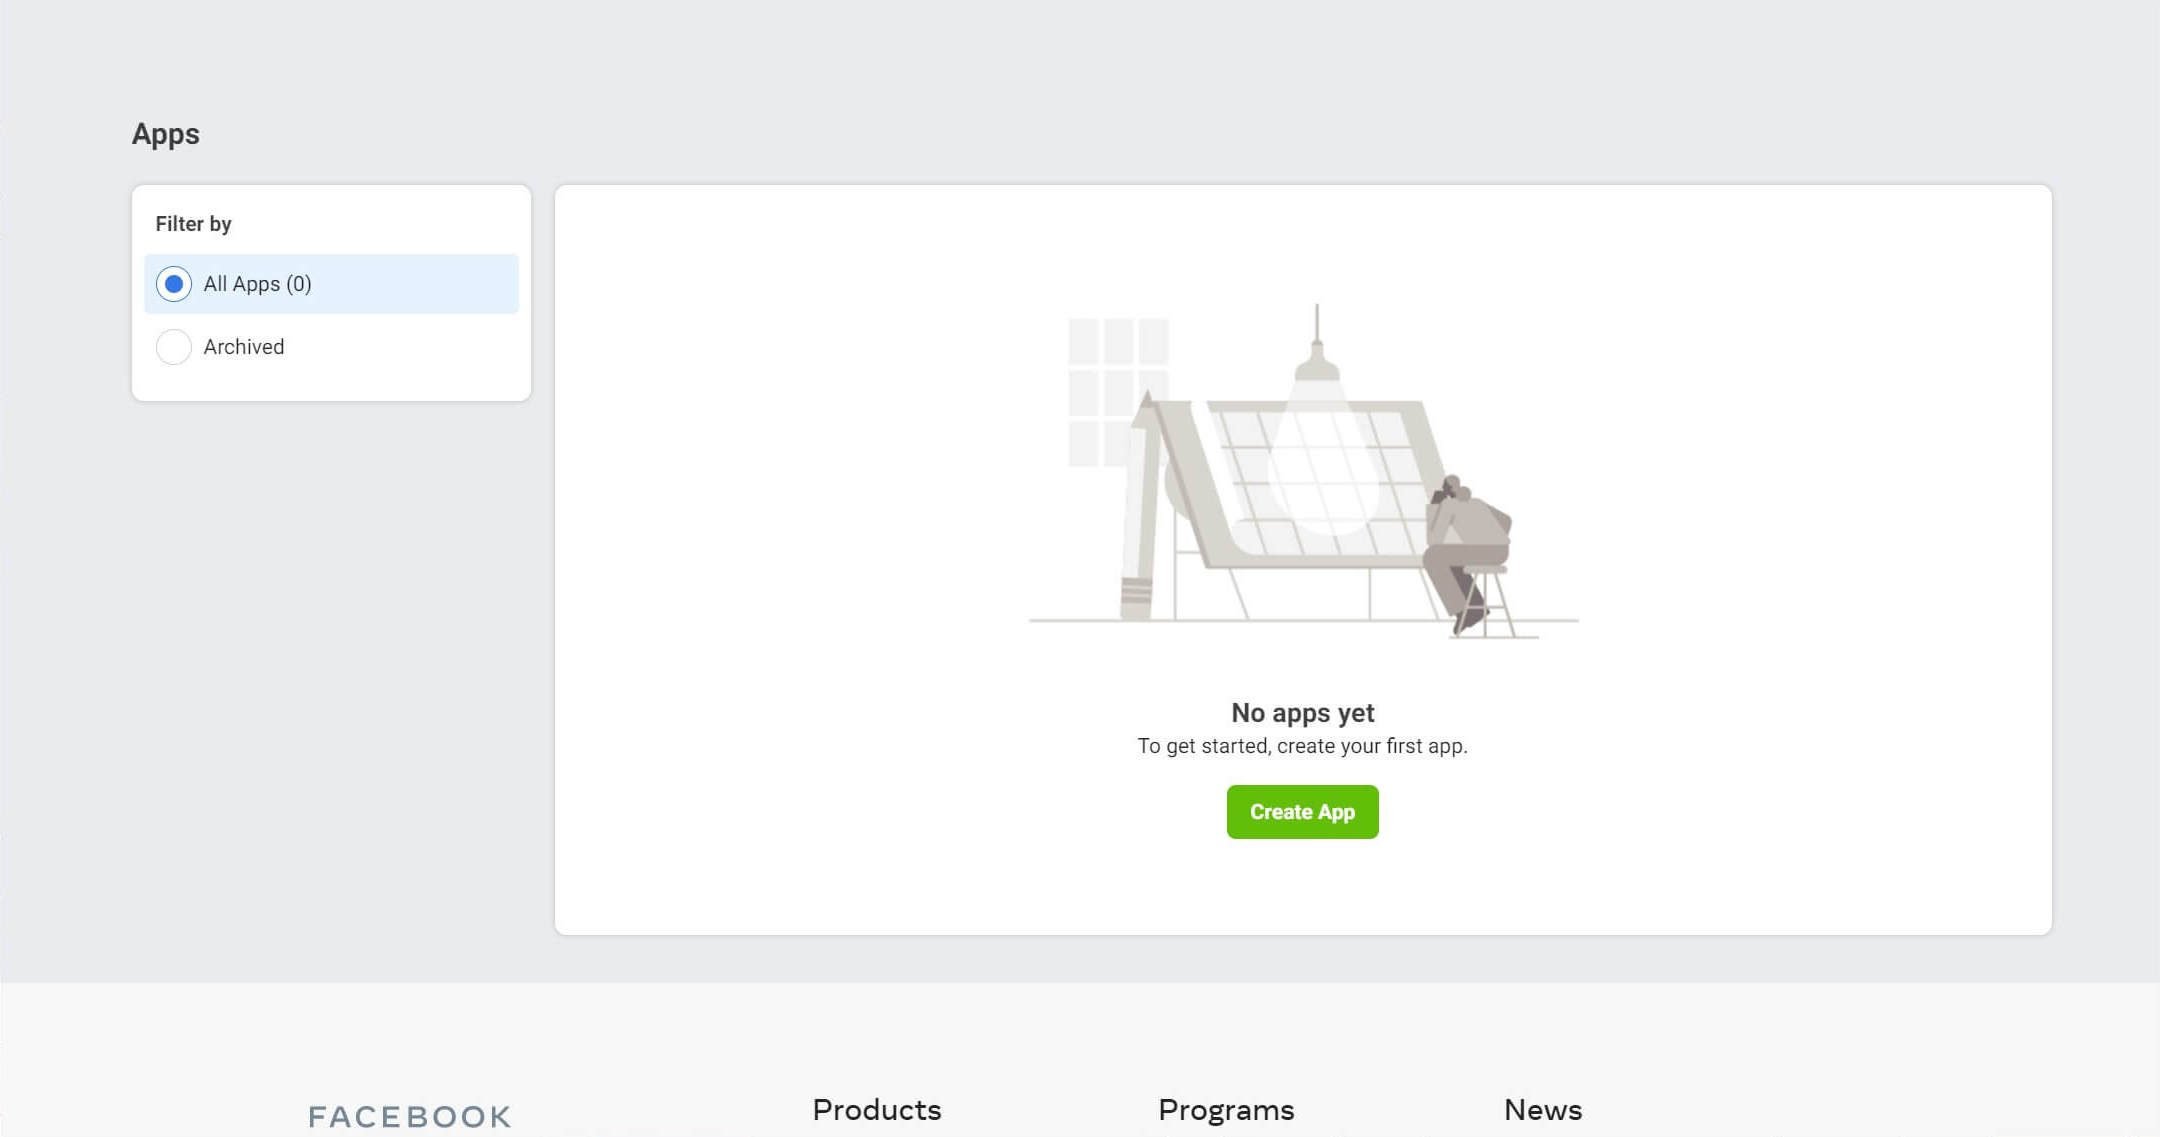
This will open a window prompting you to select what you need your app to do:
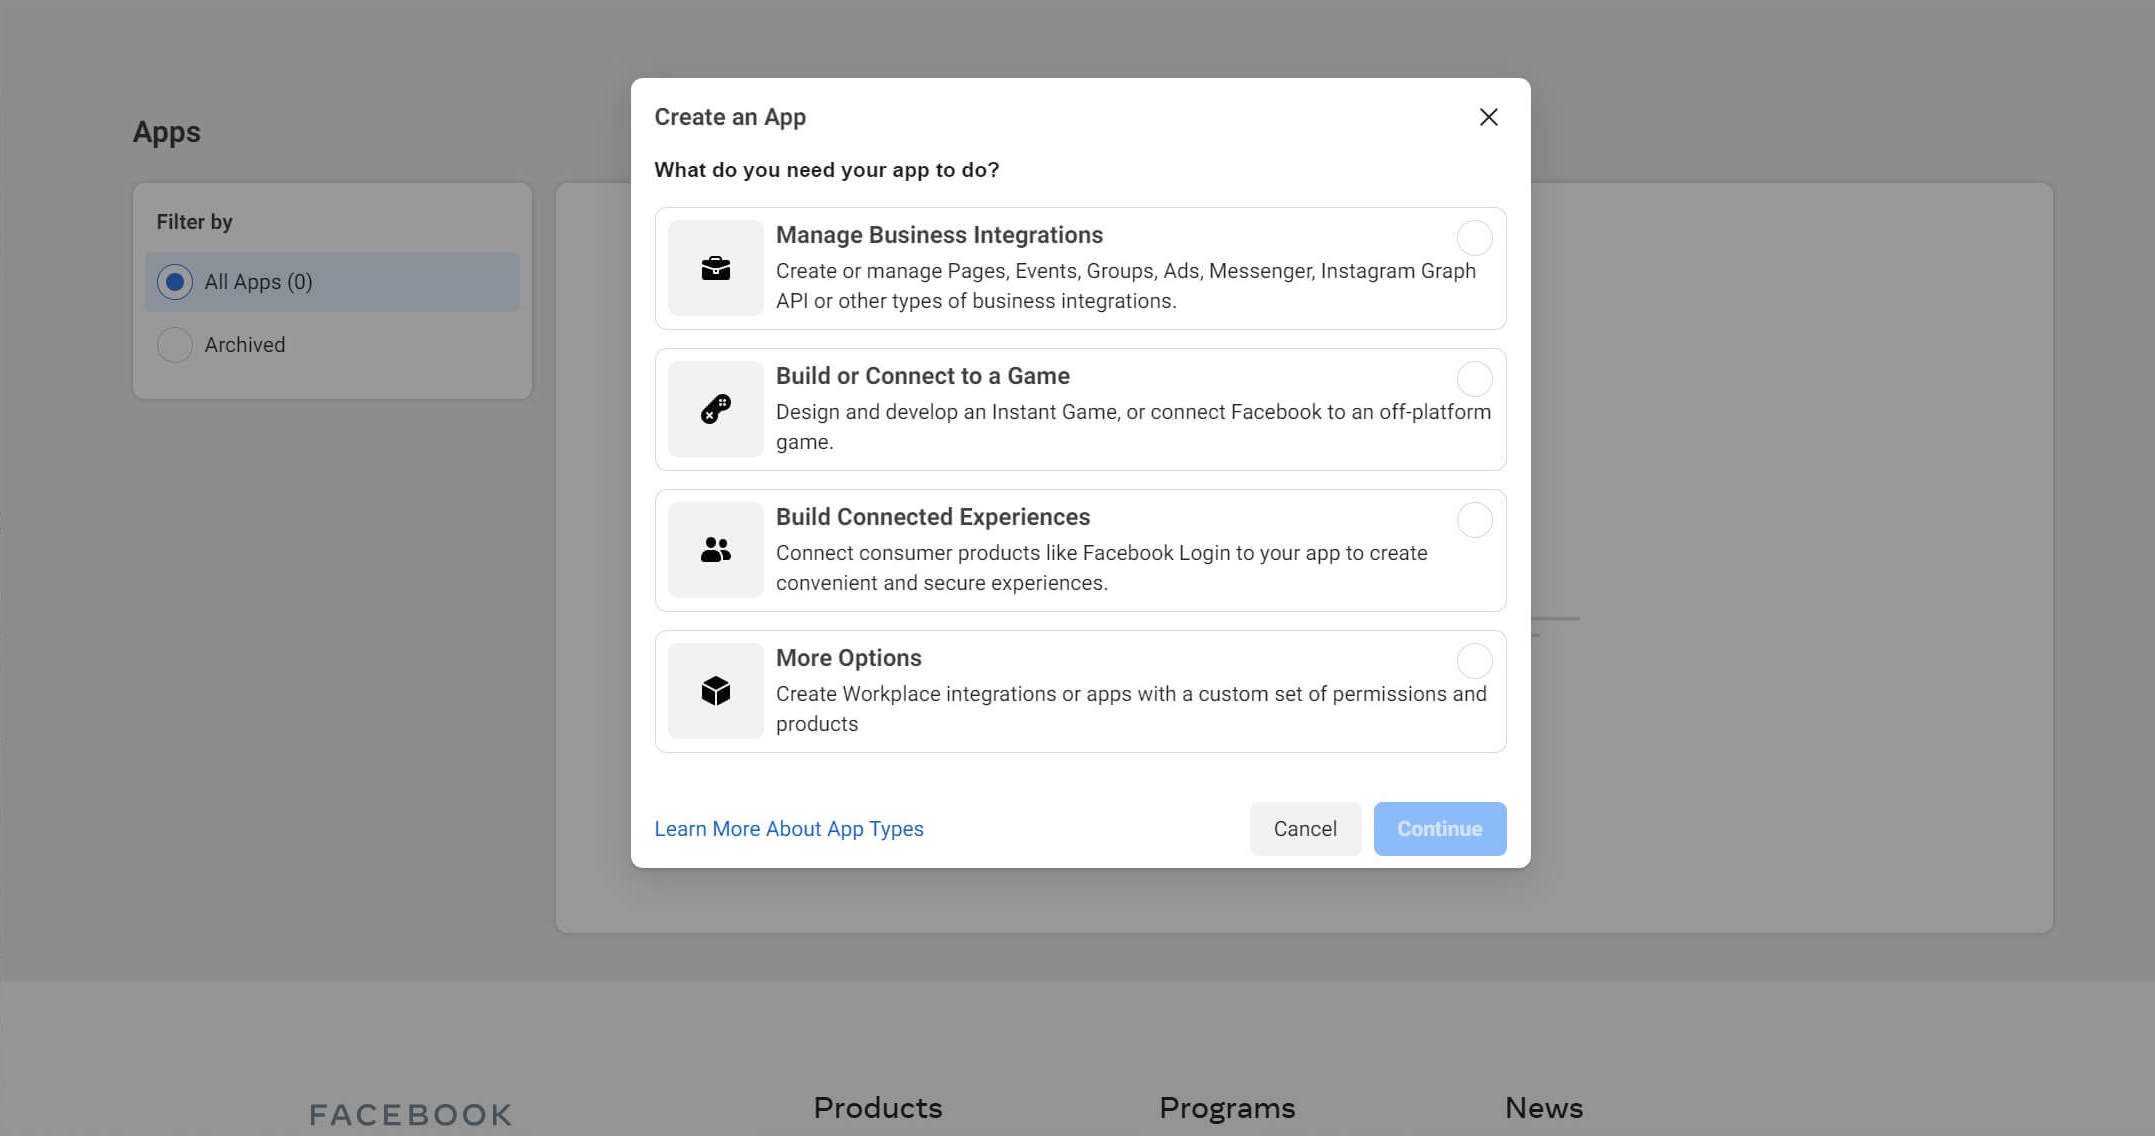
Choose Build Connected Experiences to set up Facebook Login. Next, you’ll need to give your app a name and provide a contact email:
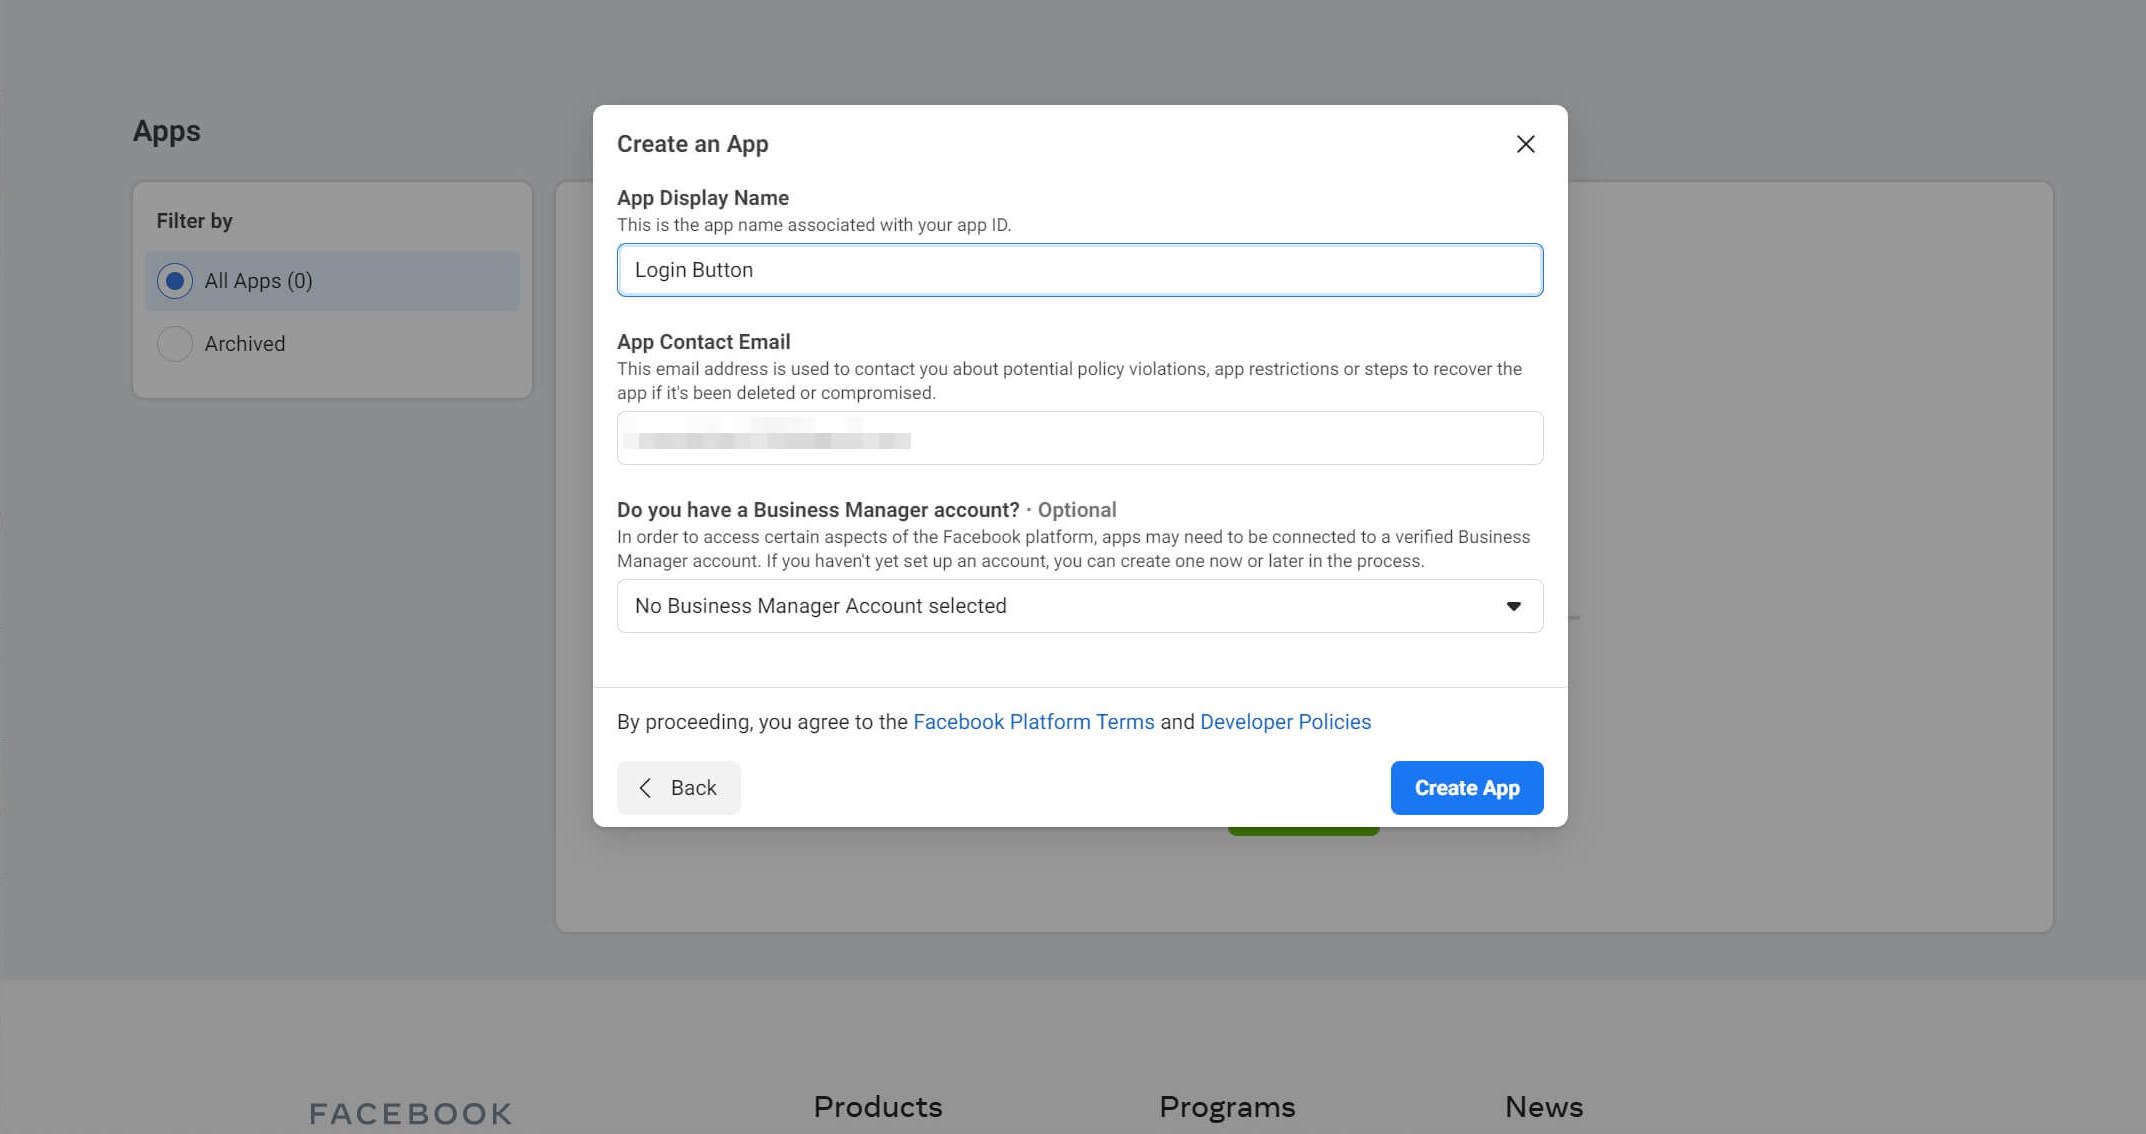
When you’re finished, click on Create App. You’ll be asked to confirm your humanity with a CAPTCHA, and then you can proceed to the next step.
Step 3: Add a Product for the New App
Next, you’ll need to choose a product for your new app. This is basically a prepackaged bit of code to help start you off in the right direction. If you chose Build Connected Experiences in Step 2, you should see an option on this page for Facebook Login:
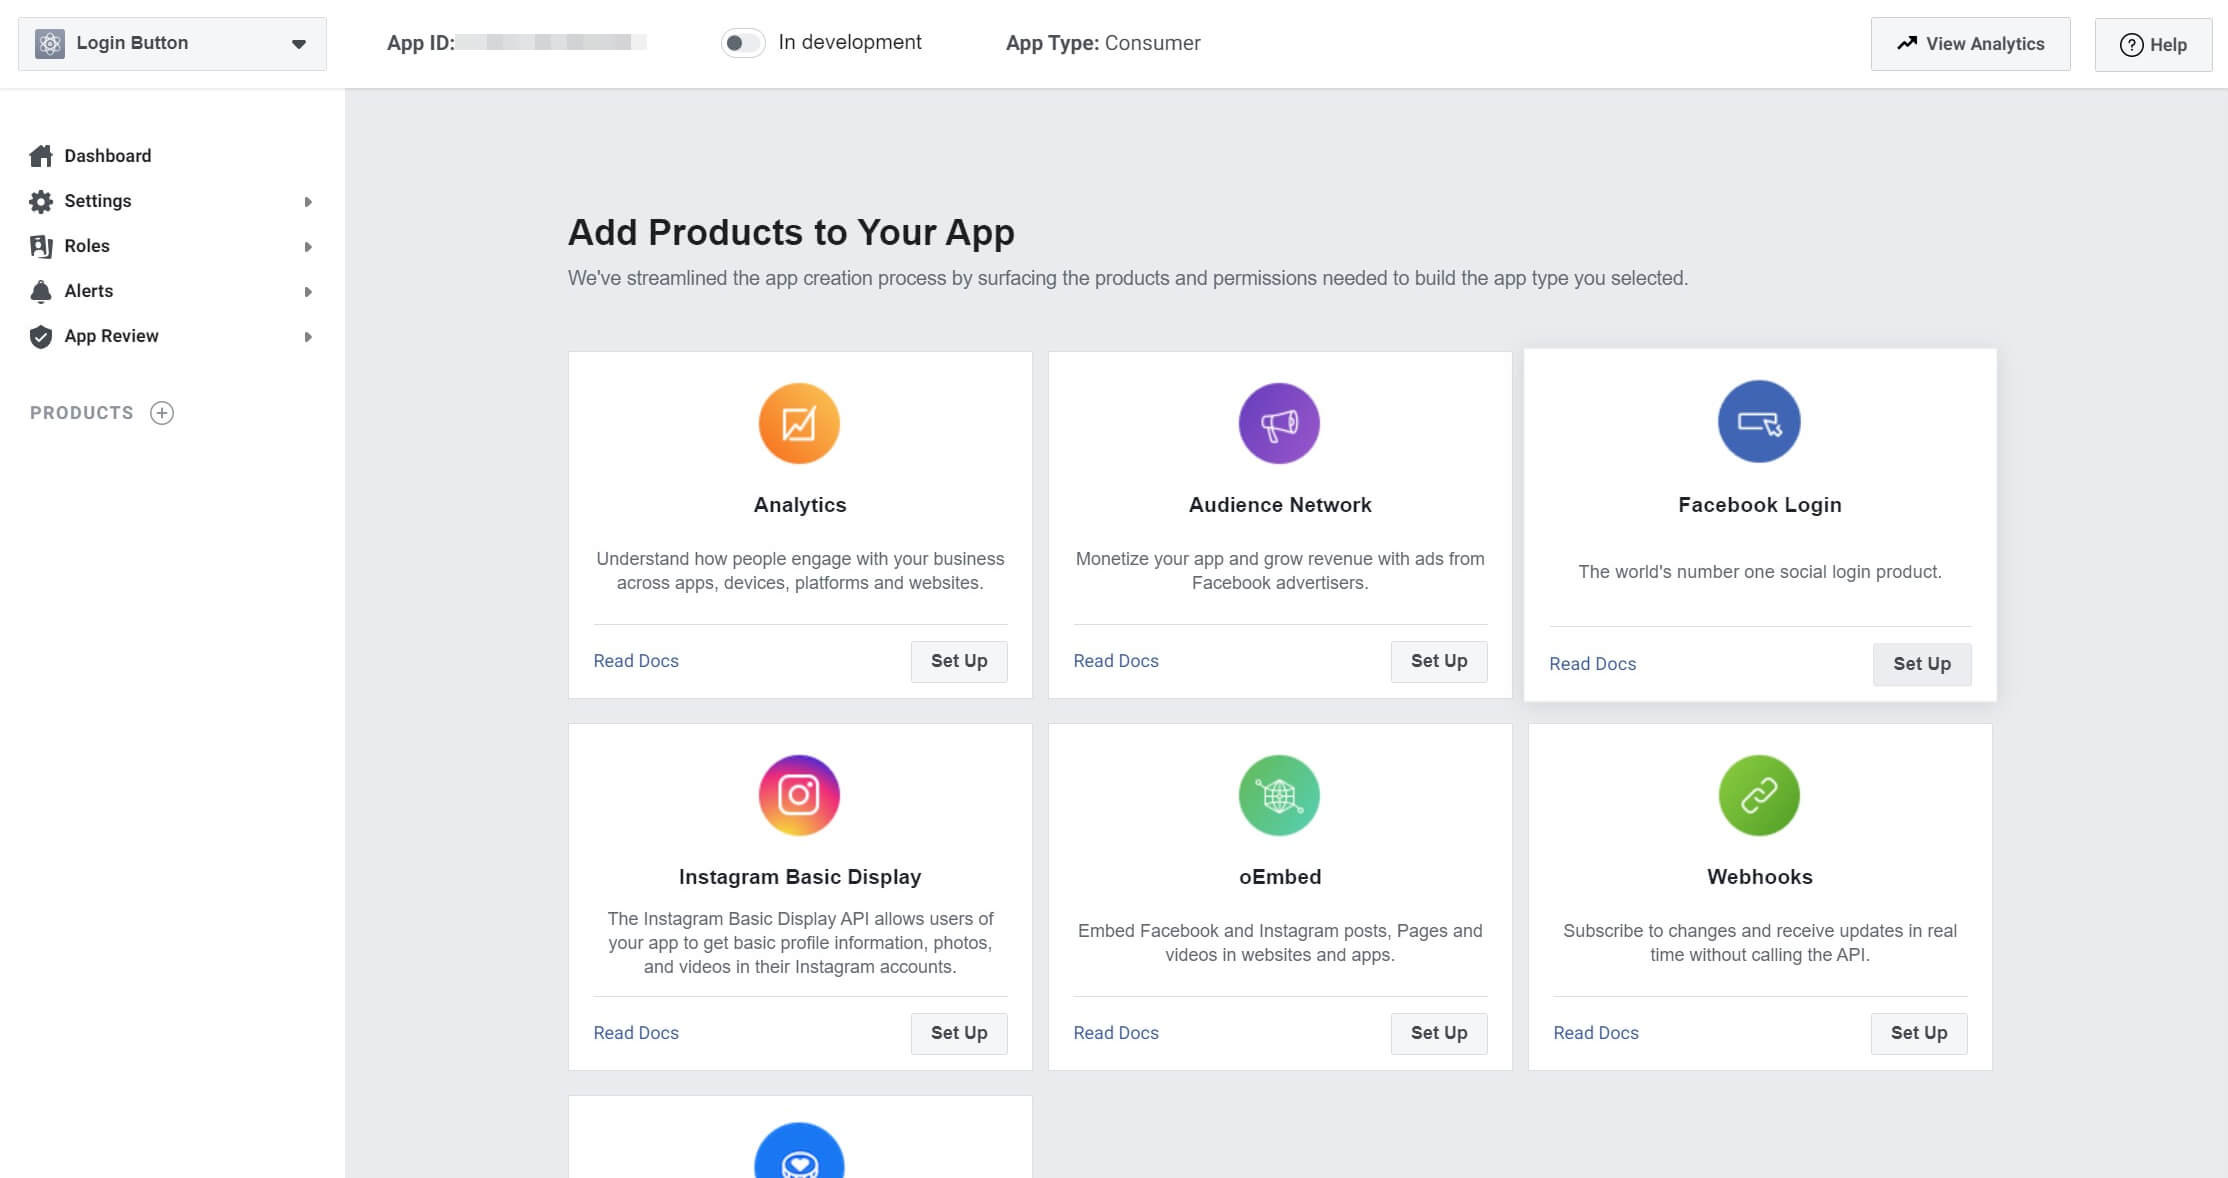
Hover over it and click on Set Up. Facebook will then prompt you to choose a platform for the app:
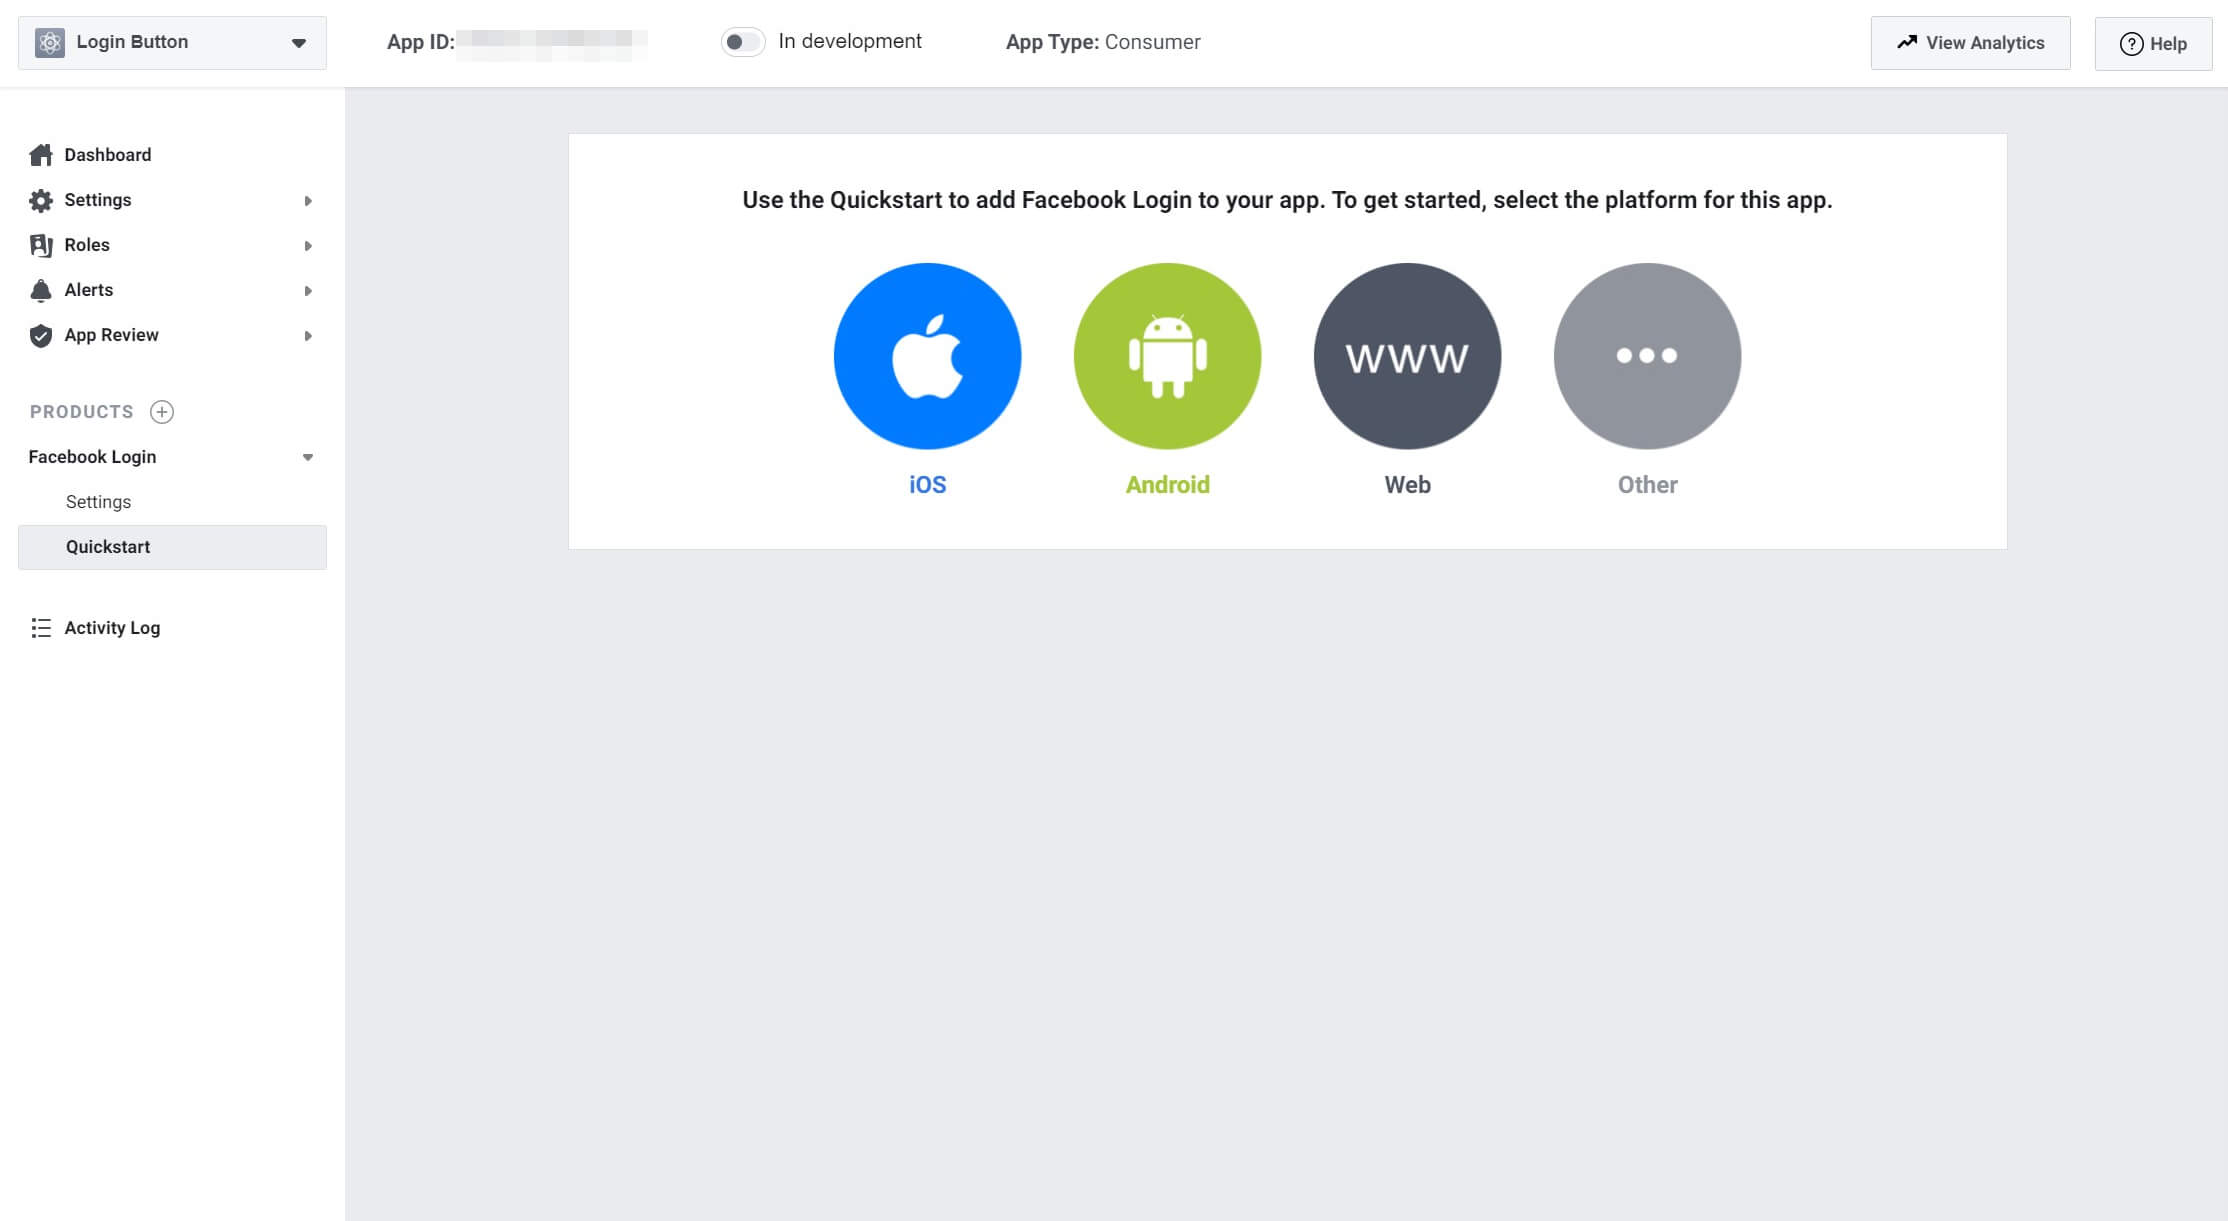
Since this is for your website, select Web. On the next screen, you’ll see a guided list of steps to walk through, starting with providing your website’s URL:
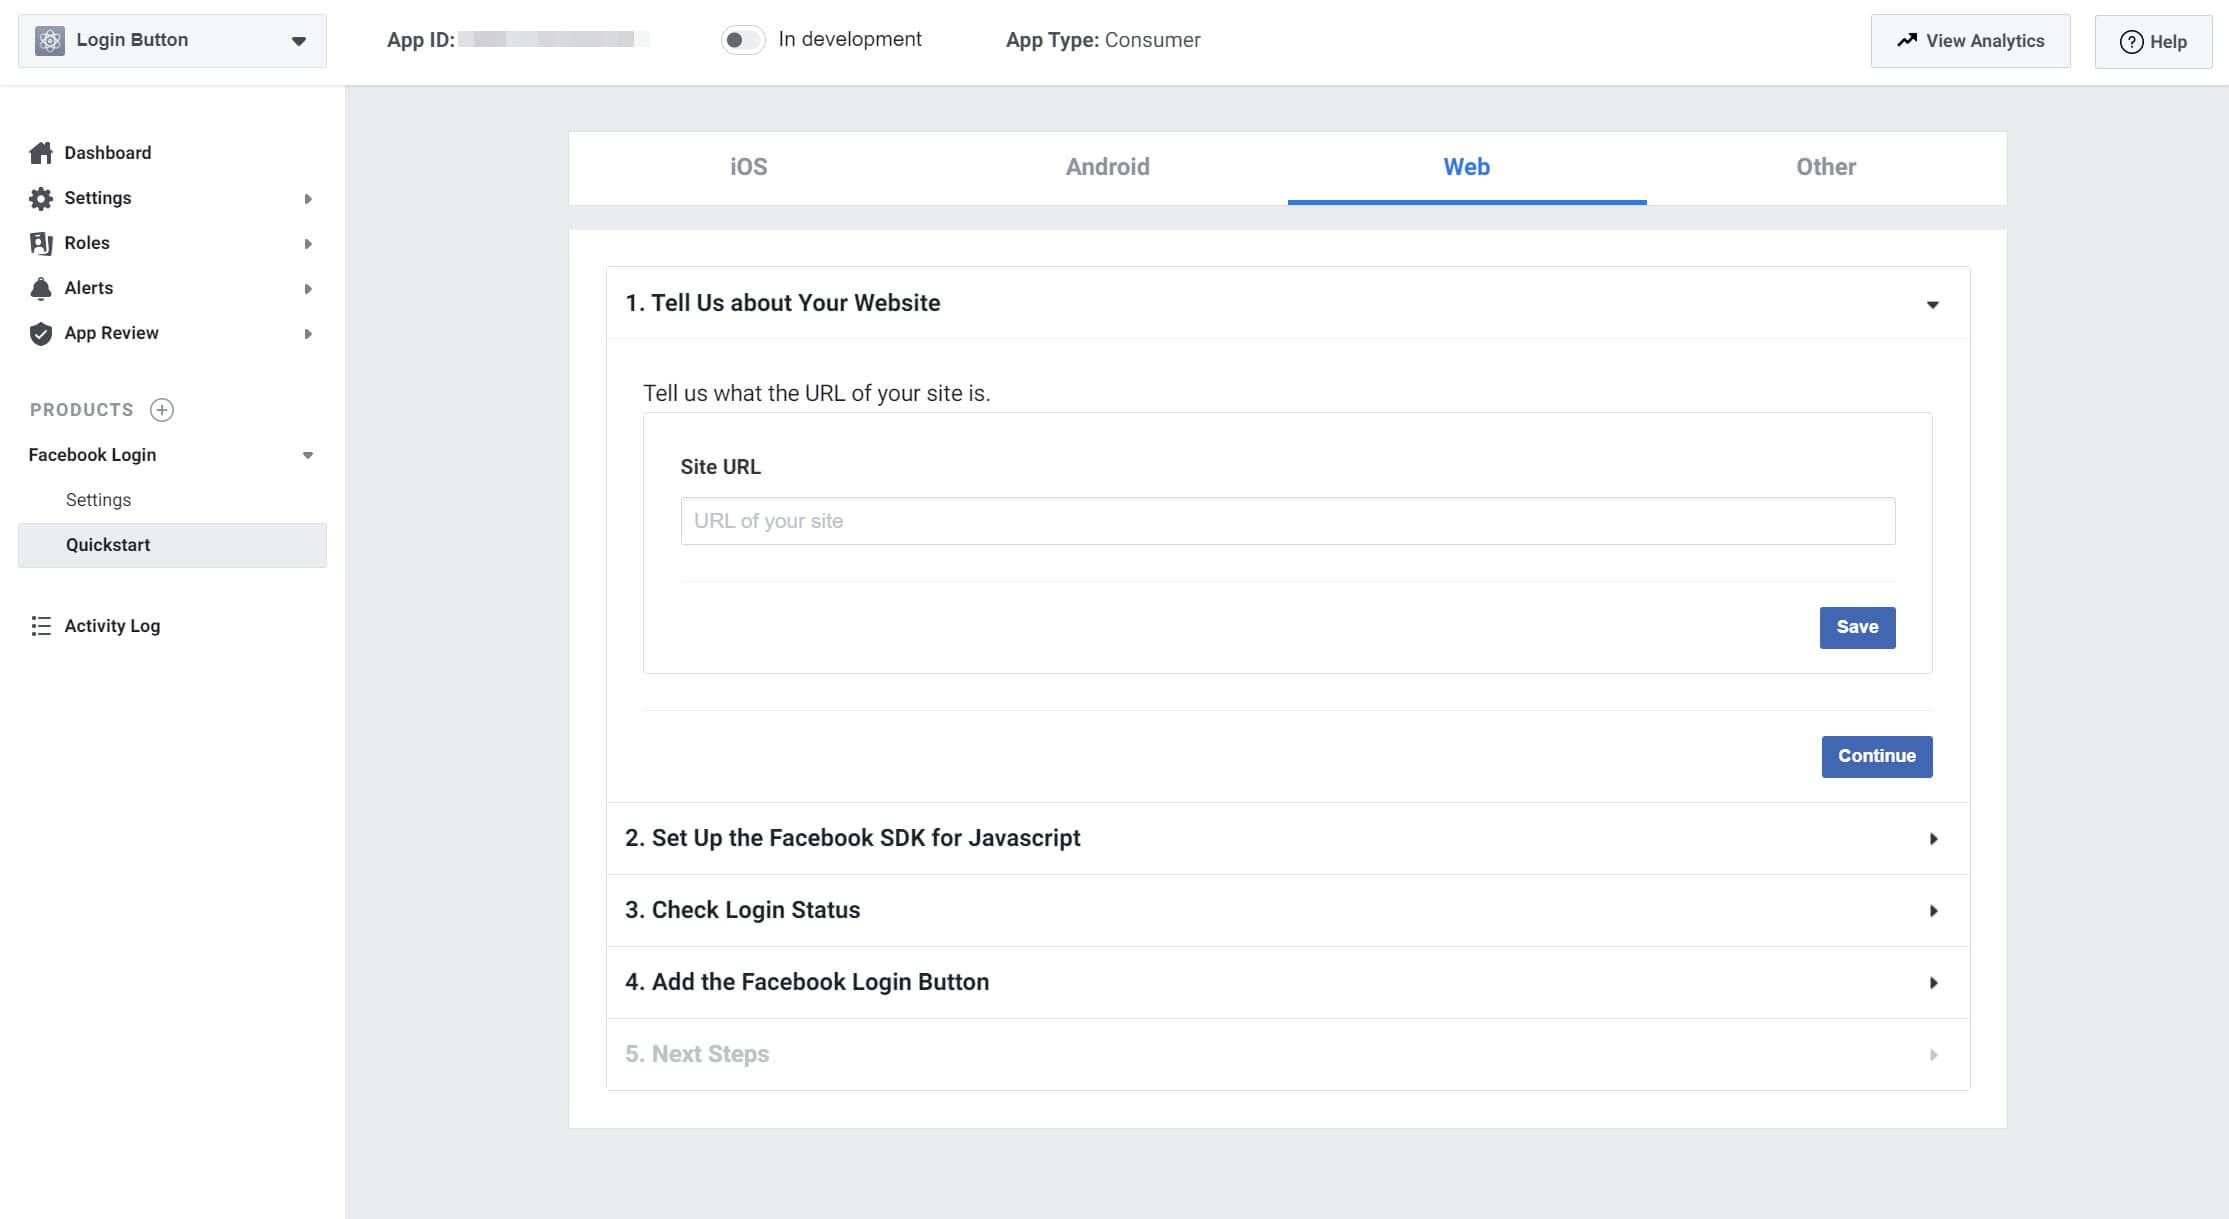
Some of the steps will instruct you to copy and paste code into various places on your website to enable analytics and add the Connect with Facebook button. While it is possible do this manually, and it works just fine, we’ll be using a WordPress plugin in Step 5 to make the process even easier. You can safely skip through these steps if you like.
When you get to Step 4 in the process of adding your product, Facebook will give you the code for the login button. At this point, you can configure its appearance.
Facebook provides a very useful code generator that you can use to set up your login button just how you like:
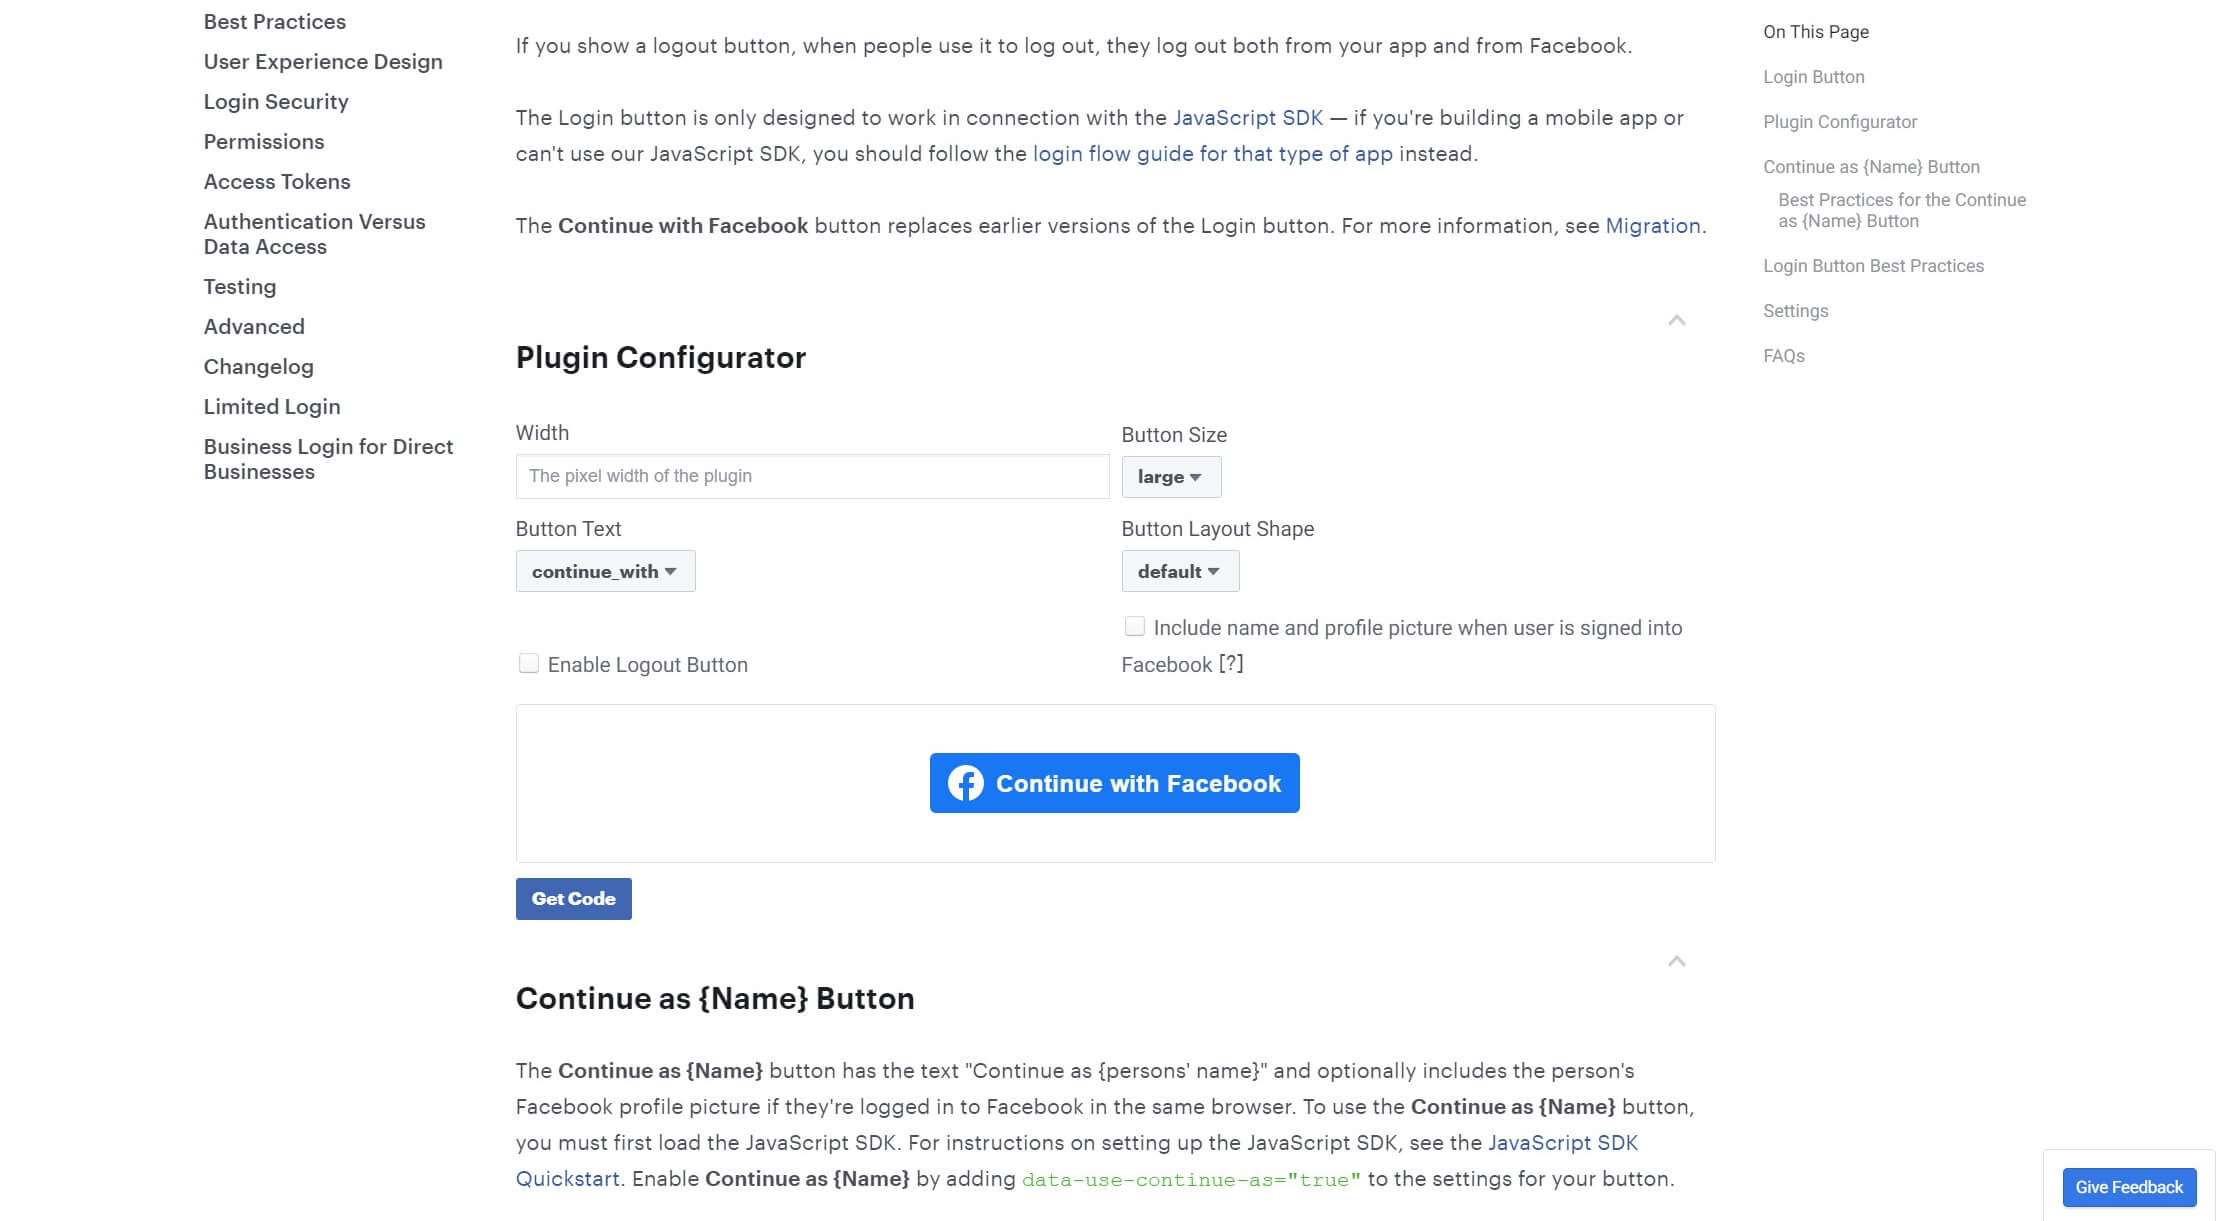
You can then simply copy and paste the generated code on the appropriate page of your site. Again, we’ll be using a plugin to accomplish this instead of integrating the Facebook login button manually, but the customization options can still come in handy.
At this point, you’re all set to display your Facebook login button on your WordPress website. While you can manually add it by following the instructions in your Facebook Developer account dashboard, we recommend using a plugin to keep things simple. Nextend Social Login is a fantastic solution that also works for Google and Twitter:

To install this plugin, open up your WordPress dashboard and navigate to Plugins > Add New. Search for “Nextend” and install the plugin. Don’t forget to activate it as well.
Then, head to Settings > Nextend Social Login:
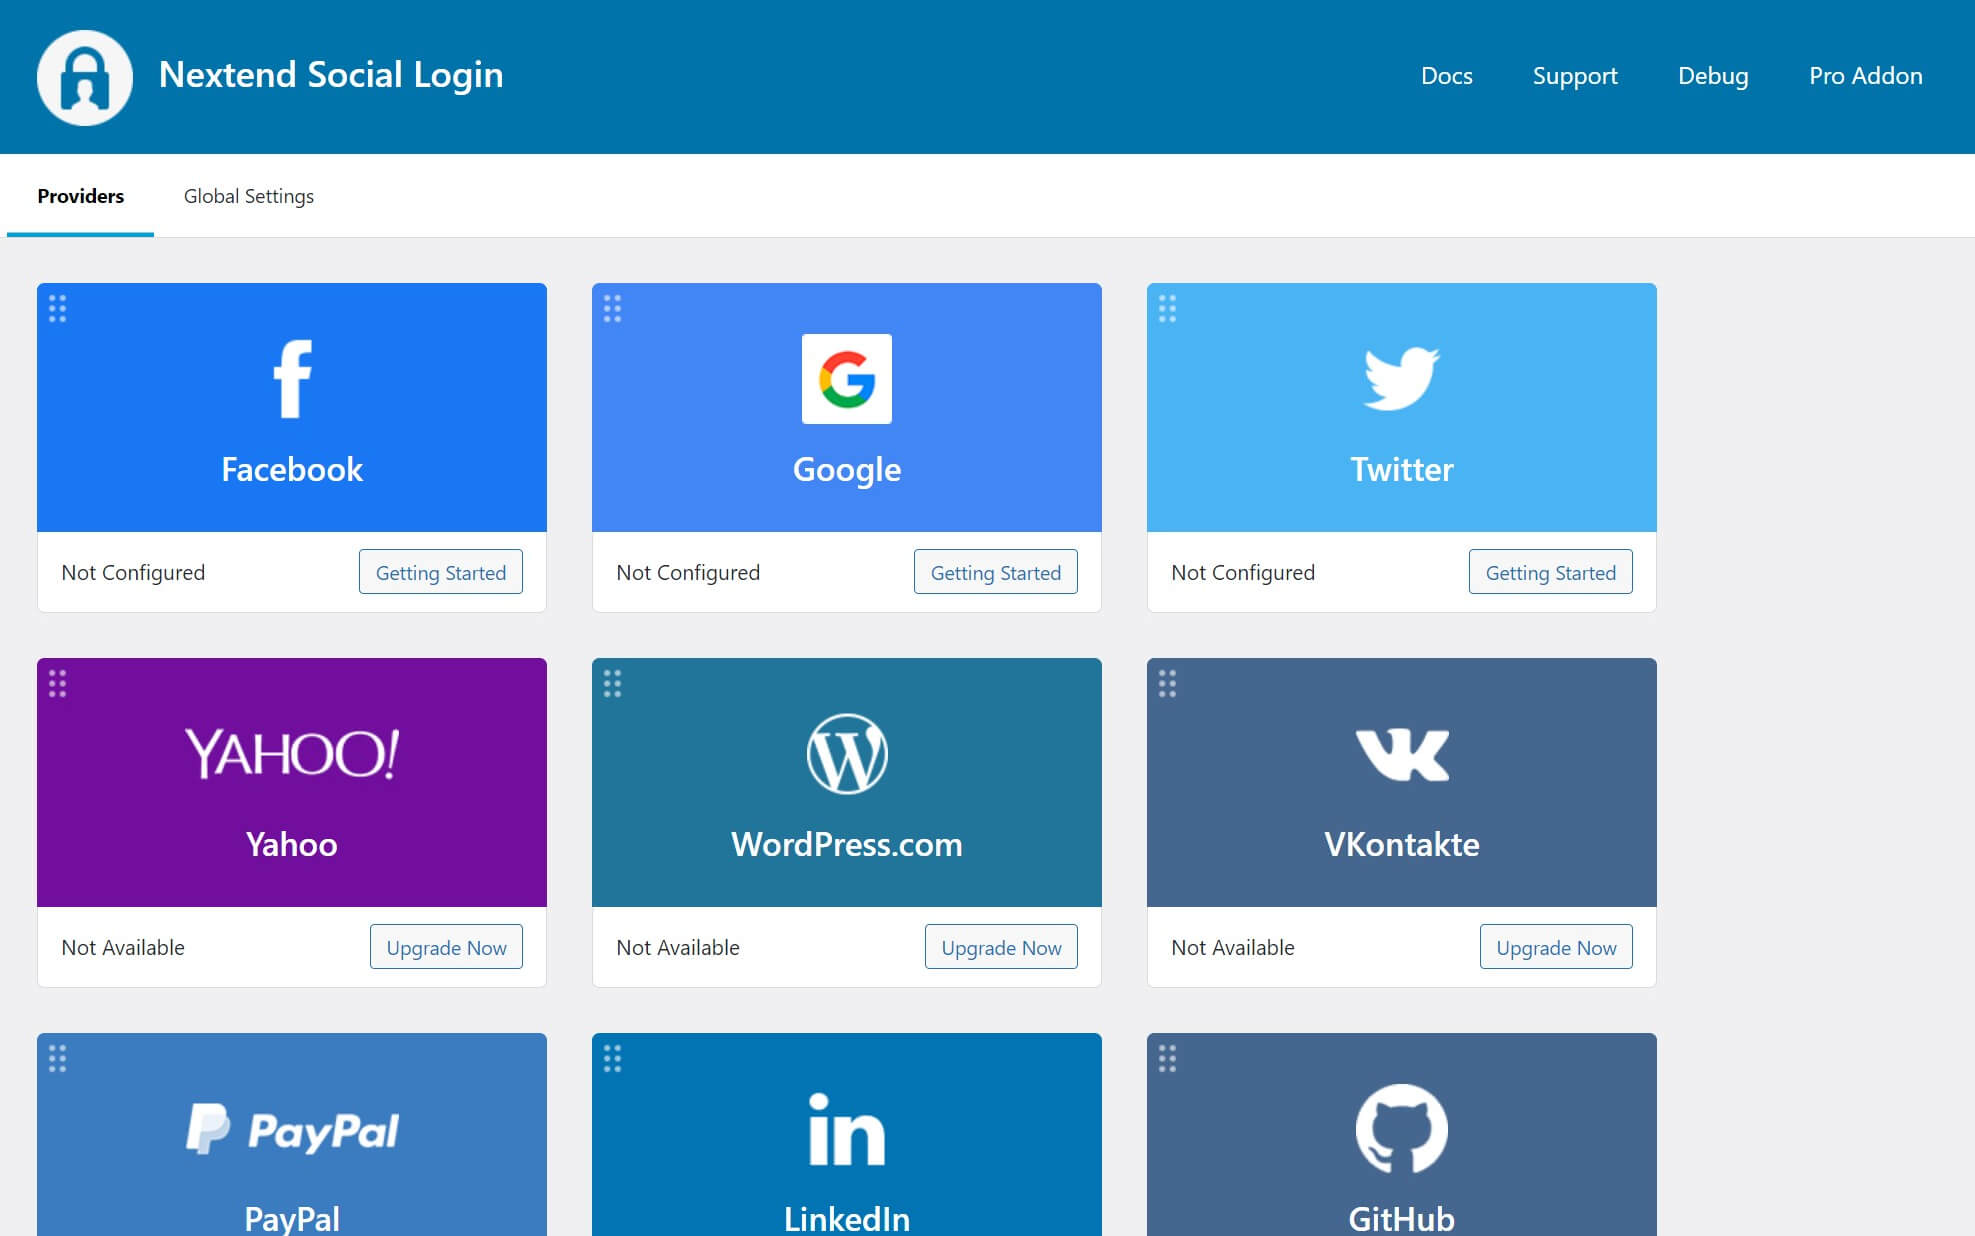
Click on Getting Started under the Facebook option to configure the plugin. You’ll be presented with a list of instructions for creating a Facebook app – since we already did this, you can scroll down and click on the button that reads I am done setting up my Facebook App.
Next, you’ll be presented with a settings screen:
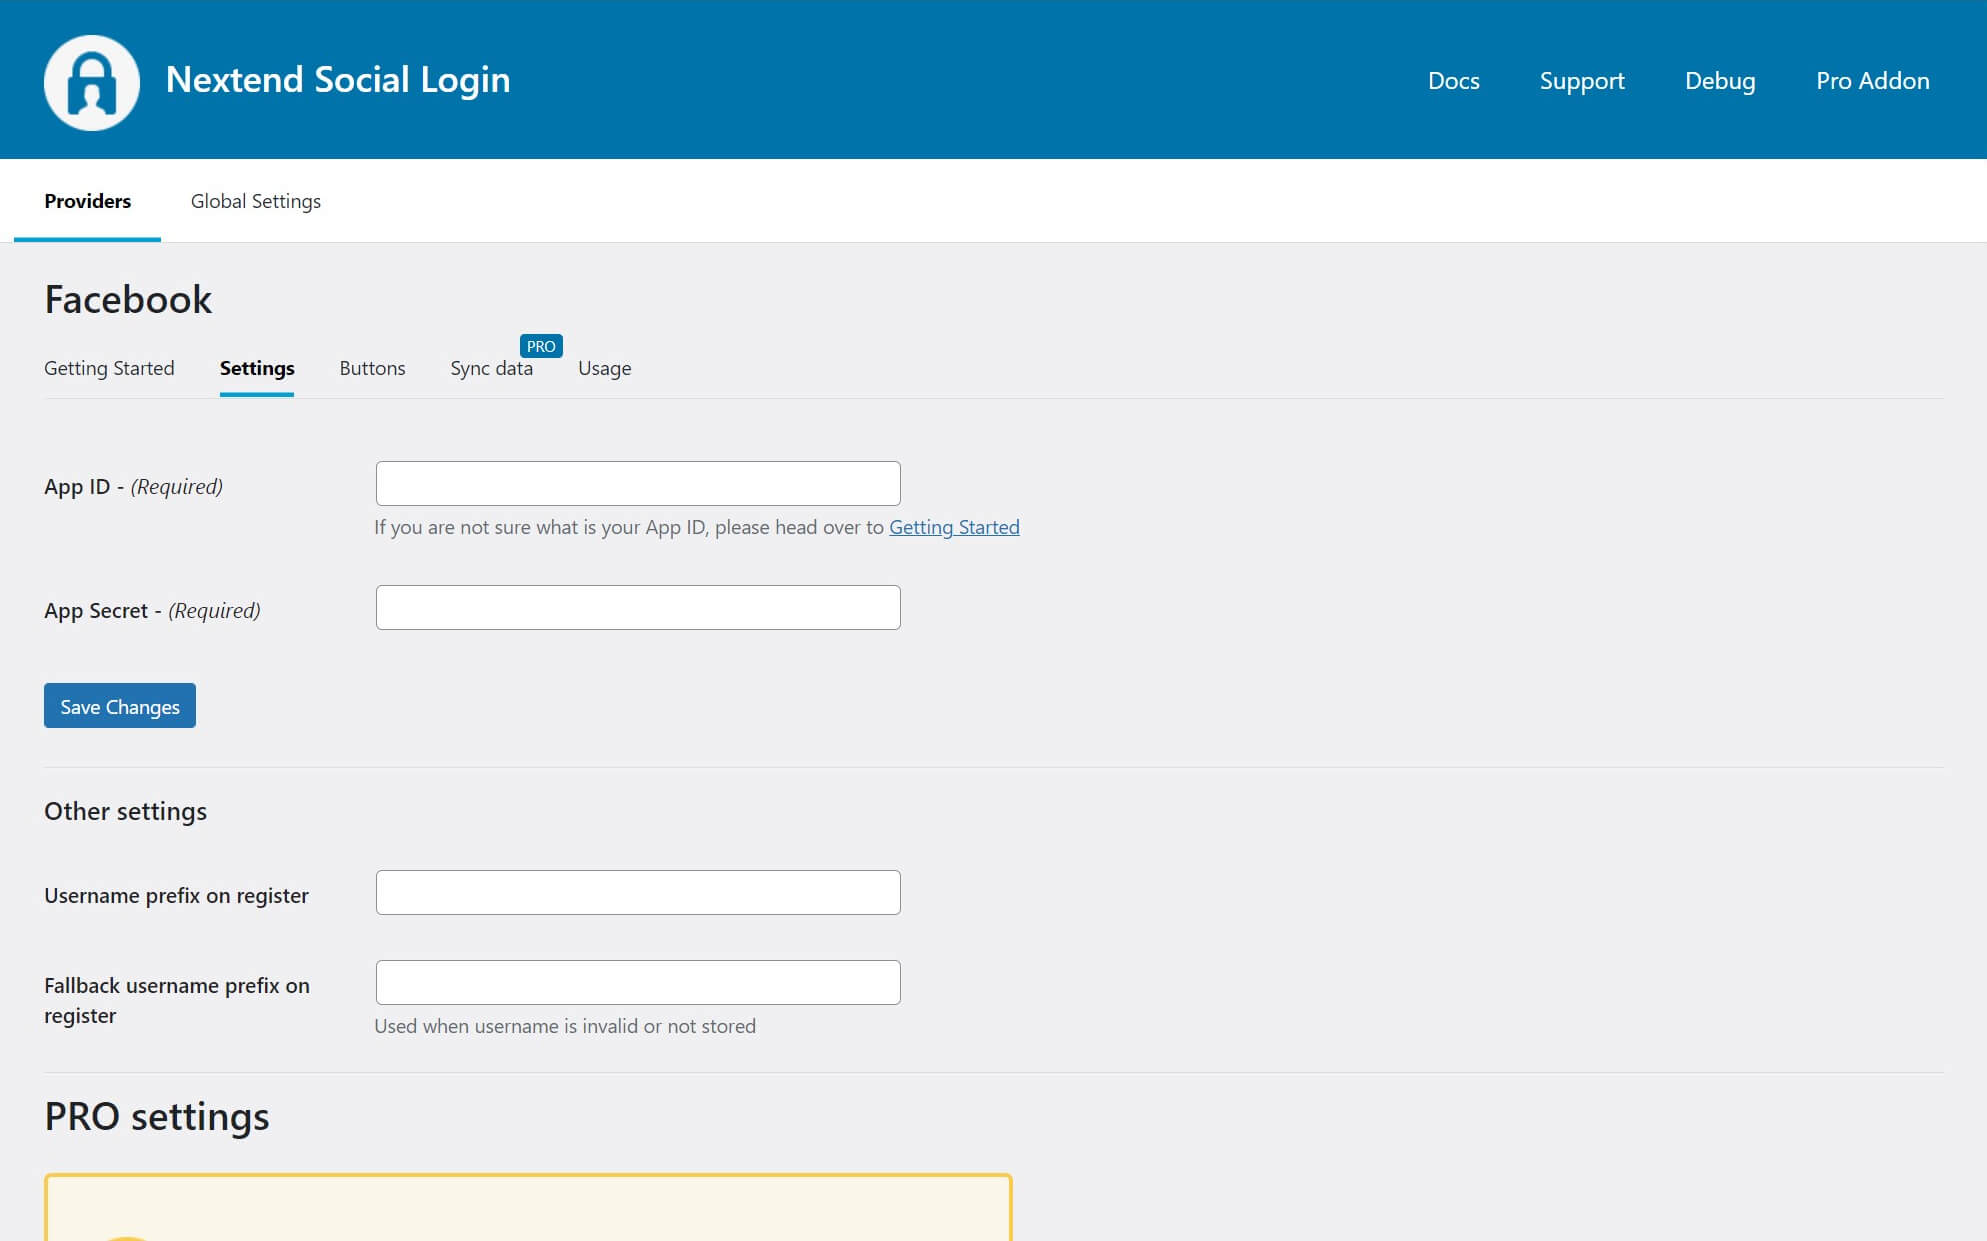
You’ll need to enter your App ID and App Secret. These can be found in your Facebook Developer account. Click on My Apps at the top, then select the app you created earlier. In the sidebar on the left, click on Settings > Basic:
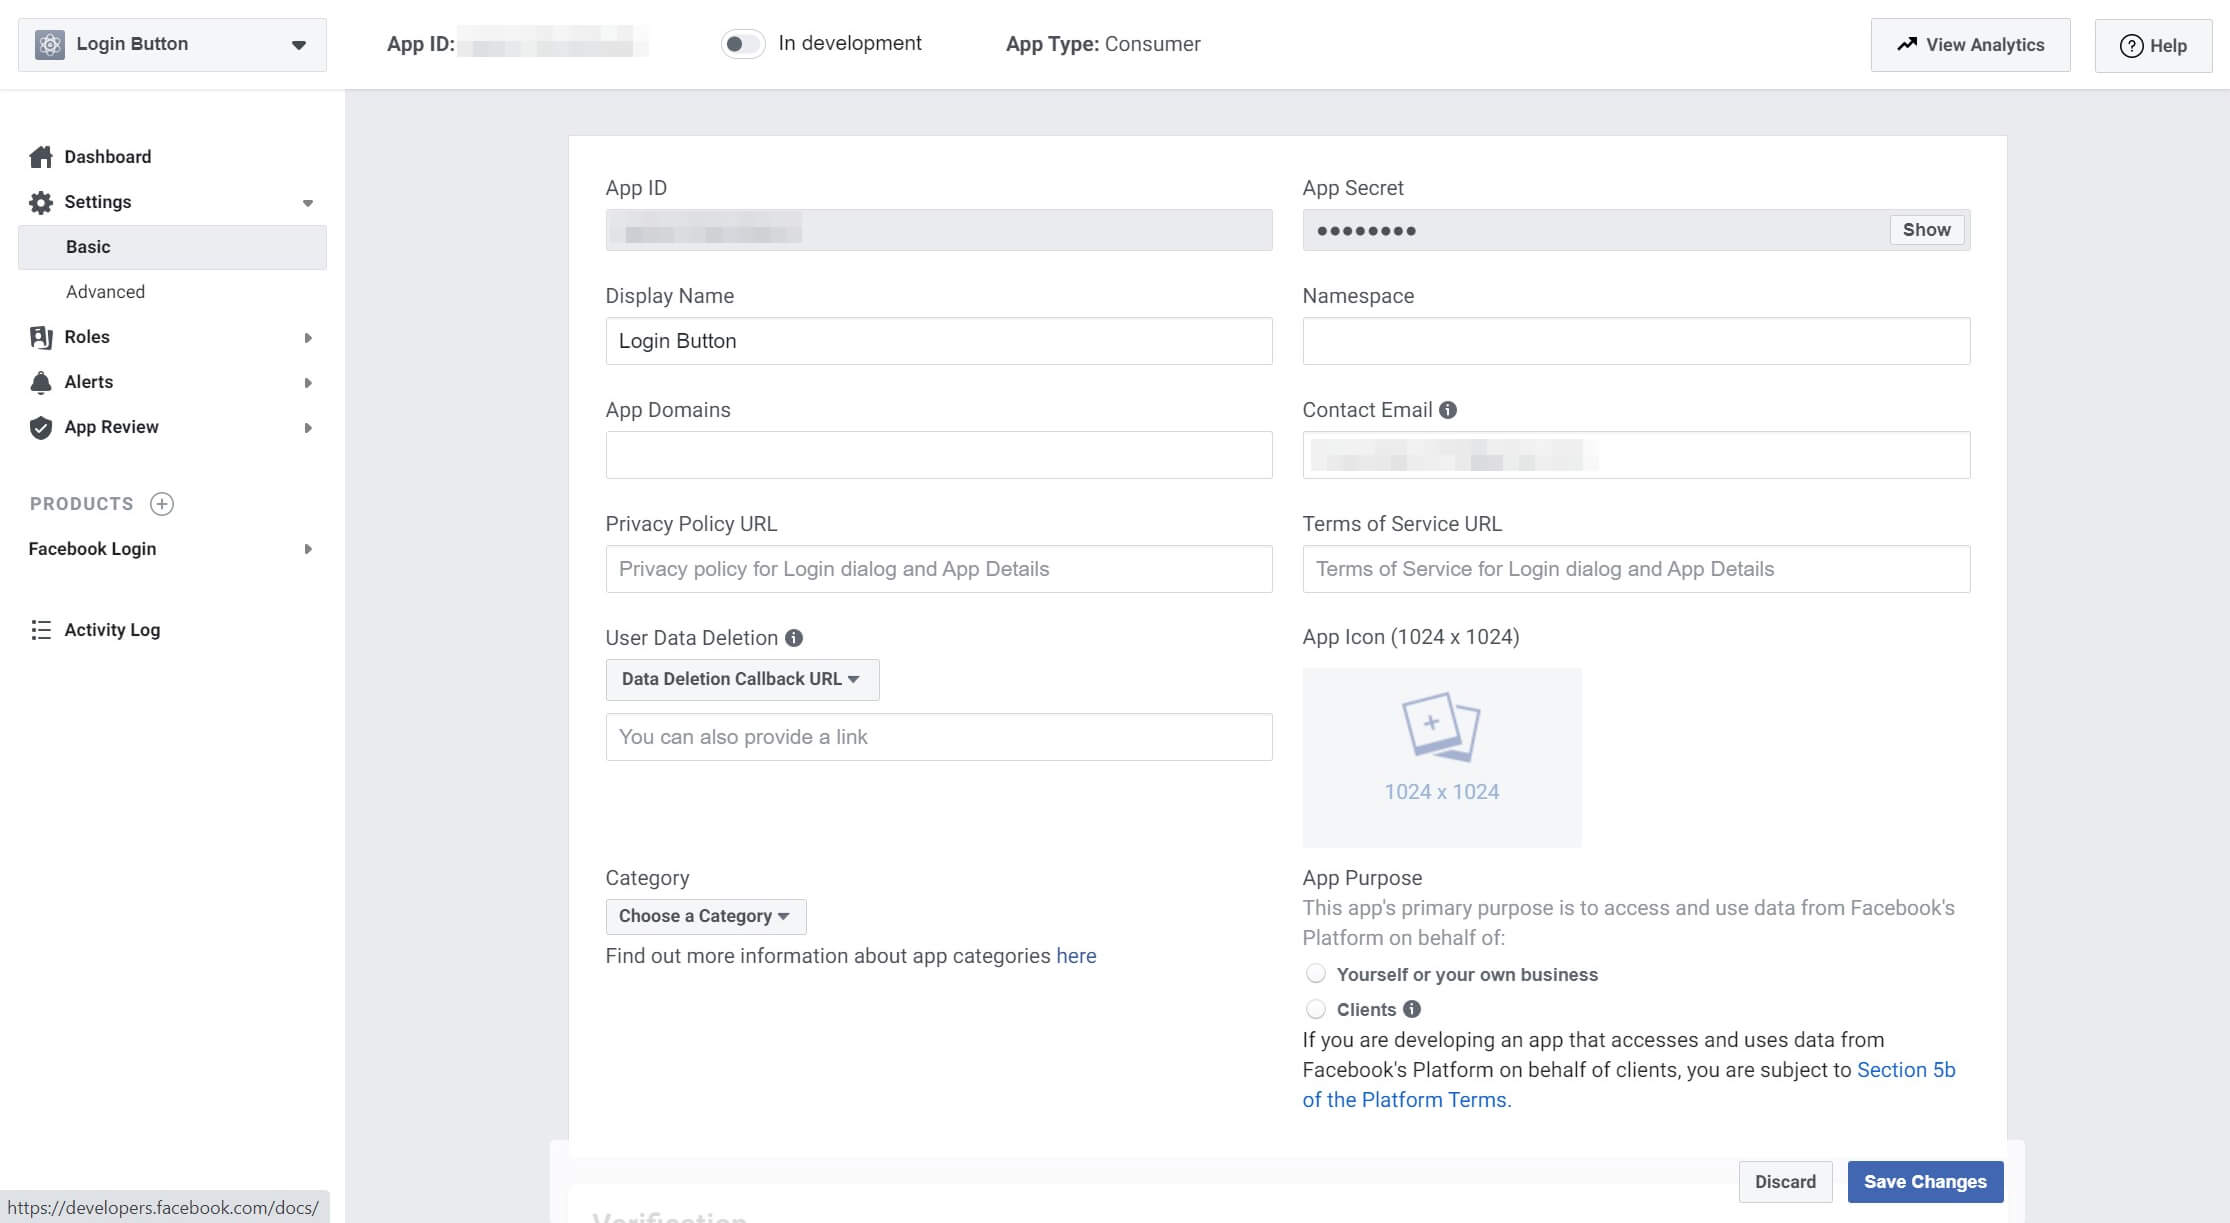
Your App ID and App Secret are at the top of the screen. Enter these in the Nextend settings. You can configure your button’s appearance here using one of Nextend’s pre-built styles, or use your own custom button that you created in Step 4:
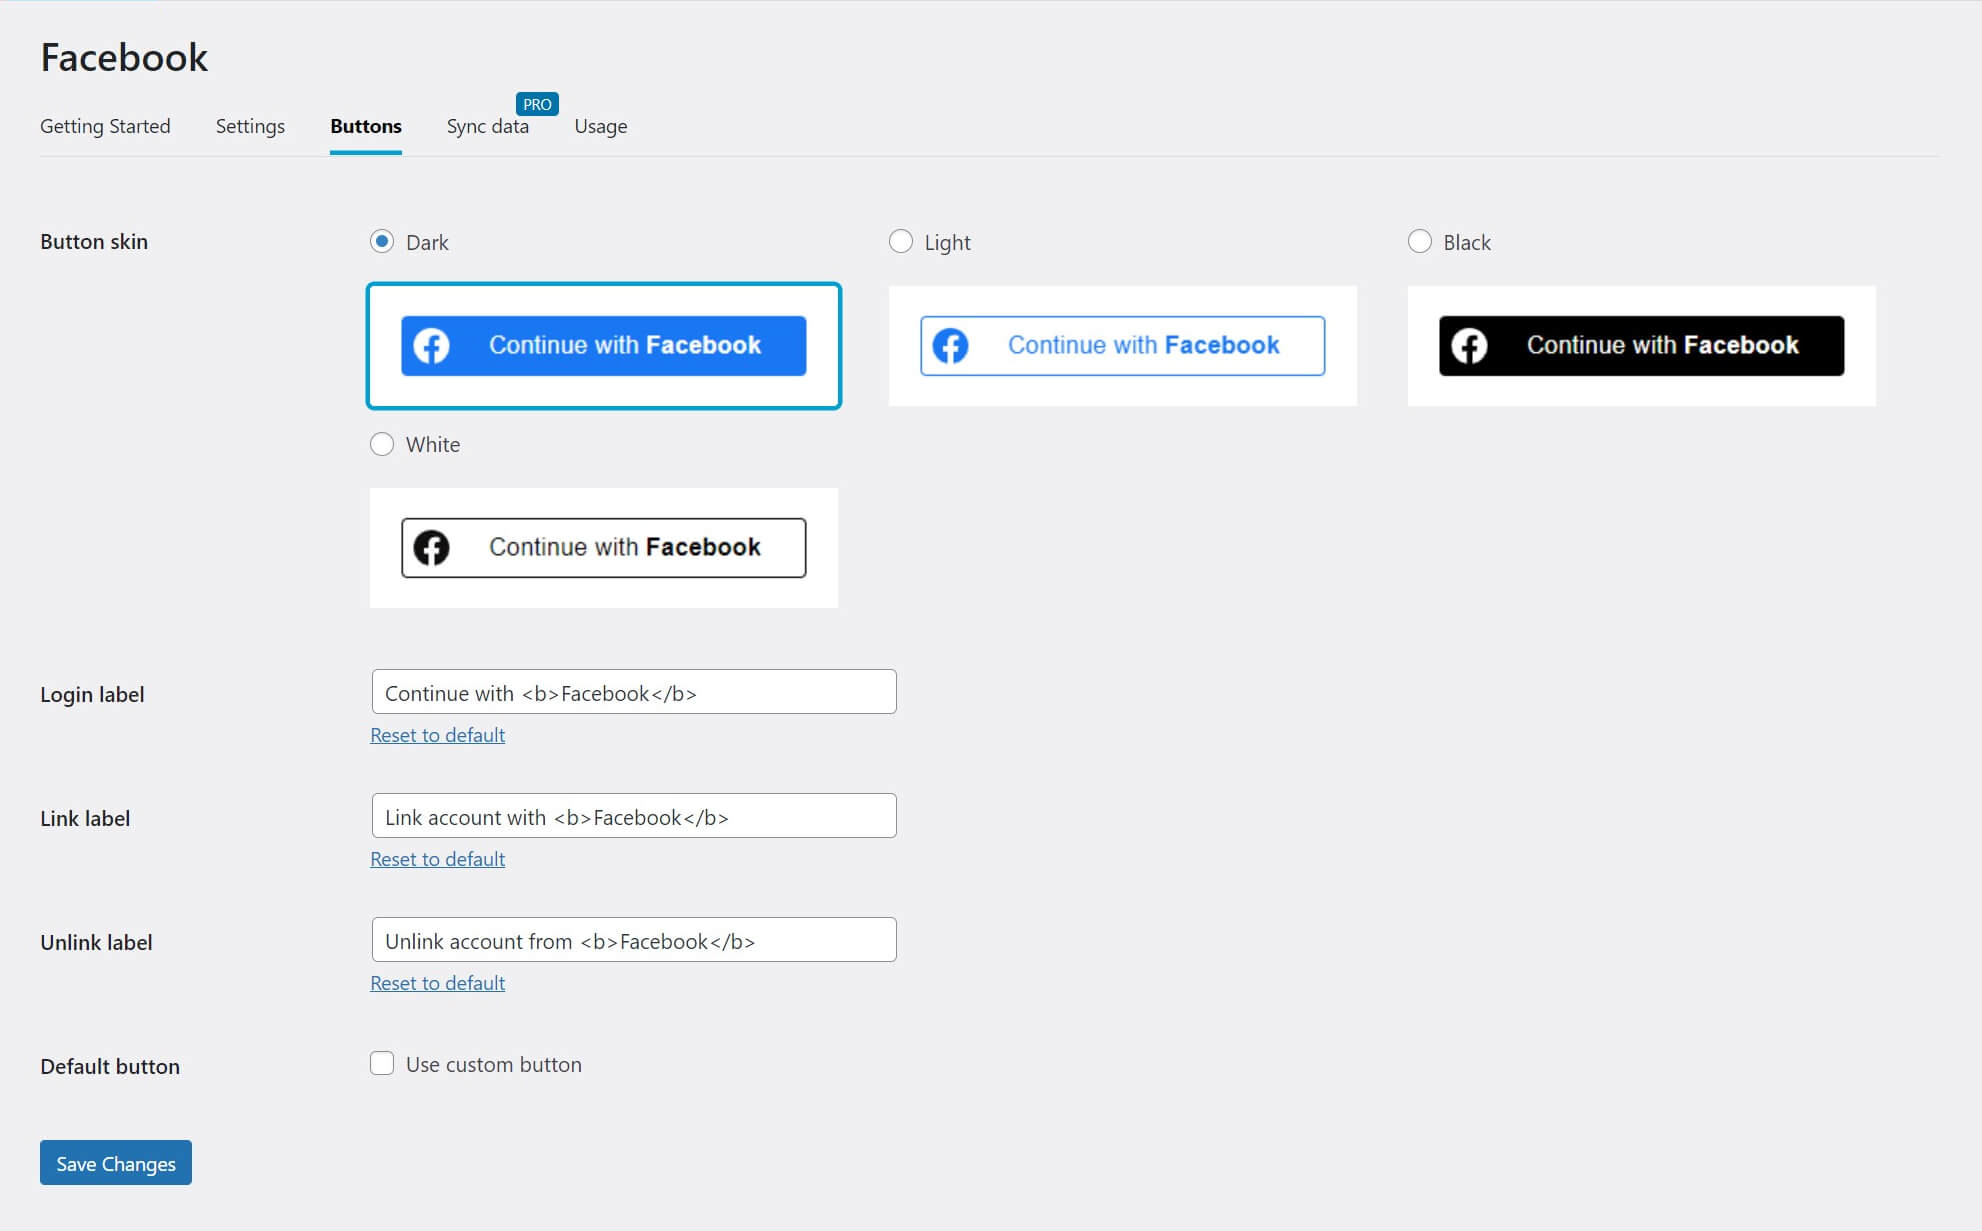
Once you’ve done this and saved your changes, your login page should display a Continue with Facebook button (or whatever text you choose in the settings).
Conclusion
Whether you want to drive more signups, encourage more comments, or gain access to better analytics, integrating Facebook with your WordPress site can be an excellent way to achieve your goals. The process may seem intimidating, but it’s not so bad once you get started.
Simply follow these five steps to enable Facebook login integration for your site:
- Set up a Facebook Developer account.
- Create a Facebook app.
- Add a product for the app.
- Configure your Facebook login button.
- Display the login button on your site using the Nextend Social Login plugin.
Do you have any questions about adding Facebook integration to your site? Let us know in the comments section below!
Featured image via V3rc4 / shutterstock.com



I bought “Login and Registration Addon for Divi” and I have configured “Nextend Social Login Pro”, but no social login appears on the login page…
Is this ONLY for WordPress login page?
It’s best if you submit a ticket to the author of “Login and Registration Addon for Divi”. You can do that via this page: https://www.elegantthemes.com/marketplace/login-and-registration-addon-for-divi/support/tickets/1
I will try
Thank you for the great content.
The Facebook page is already linked to my website.
What’s the difference between the Facebook link that already connected to the website via Monarch plugin and Facebook login functionality? How this Nextend Social plugin will work with Monarch plugin, please?
Thank you.
Hi Inhee – Monarch is a social sharing plugin, which means it enables users to easily post content from your site to their social media accounts. This functionality is separate from social login. Rather than linking your own Facebook account to your website, this enables registered users to access their accounts on your website with their Facebook credentials.
The two plugins should work just fine alongside one another, as they don’t have overlapping functionality (even though they’re both related to social media).