Many business websites show a phone number so their customers can contact them. When desktops were the most popular way to access the sites, users would make note of the phone number and call from a separate device. Of course, most users now access the website and make the phone call from the same device. This opens an opportunity to add a call link – creating an HTML phone number that’s clickable.
In this article, we’ll take a look at how to add a call link as well as a few other clickable links such as email and other CTAs.
Subscribe To Our Youtube Channel
-
1
How Call Links Work
- 1.1 Adding an HTML Phone Number Call Link to your Website
- 1.2 Adding an Extension
- 1.3 Adding Country Codes
- 1.4 Adding Microdata for Local SEO
- 1.5 Other Calls to Action
- 1.6 Adding the Code to Your Contact Page
- 1.7 Creating Code for an Email Link or URL
- 1.8 Adding Code to Open URLs
- 1.9 Disable on Desktop and Tablet
- 1.10 Adding the Code to your Header or Footer
- 1.11 Styling the Links
- 1.12 Adding the Code to the Divi Secondary Menu
- 1.13 Testing on Mobile
- 2 Adding Call Links with Plugins
- 3 Final Thoughts
How Call Links Work
Making a phone number clickable is easily done with HTML. HTML5 includes protocols such as tel: and mailto: that browsers can use. Browsers respond differently to these protocols. Some will launch the phone app and add the number to the display while waiting for you to click the Call button. Others will make the call, while others will ask if it’s okay first.
Since it’s HTML, you can add the protocols anywhere on your site including the header, footer, sidebars, within the content of posts and pages, and within widgets.
Adding an HTML Phone Number Call Link to your Website
Add the code as text to the location you want the link to appear:
<a href="tel:123-456-7890">123-456-7890</a>
Href=tel: creates the call link. This tells the browser how to use the number.
“Tel: 123-456-7890 “creates the HTML phone number. The number within the quotes is the number it will call.
The number within the >< tags is the visual portion and it can be anything you want it to be including the phone number, a line of text such as “Click to Call” or “Call Now”, or any other call to action you want. It should be descriptive of what’s going to happen when they click.
Displaying a message instead of the number would look like this:
<a href="tel:123-456-7890">CLICK TO CALL</a>
Your visitors will see the text but when they click on it they see the dialing screen of their phones with your number ready for them to click the call button.
Adding an Extension
Some phone numbers have an extension. You can add code that will create a brief pause before dialing the extension number. Adding P in front of the extension will add a one-second pause. The code might look like this:
<a href="tel:123-456-7890p123">CLICK TO CALL</a>
This dials the number, waits one second, and then dials extension.
You can have it to wait for a dial tone by using w instead of p.
Adding Country Codes
Country codes can be added by including a + along with your country’s code before the phone number. An example might look like this:
<a href="tel:+1123-456-7890">123-456-7890</a>
Adding Microdata for Local SEO
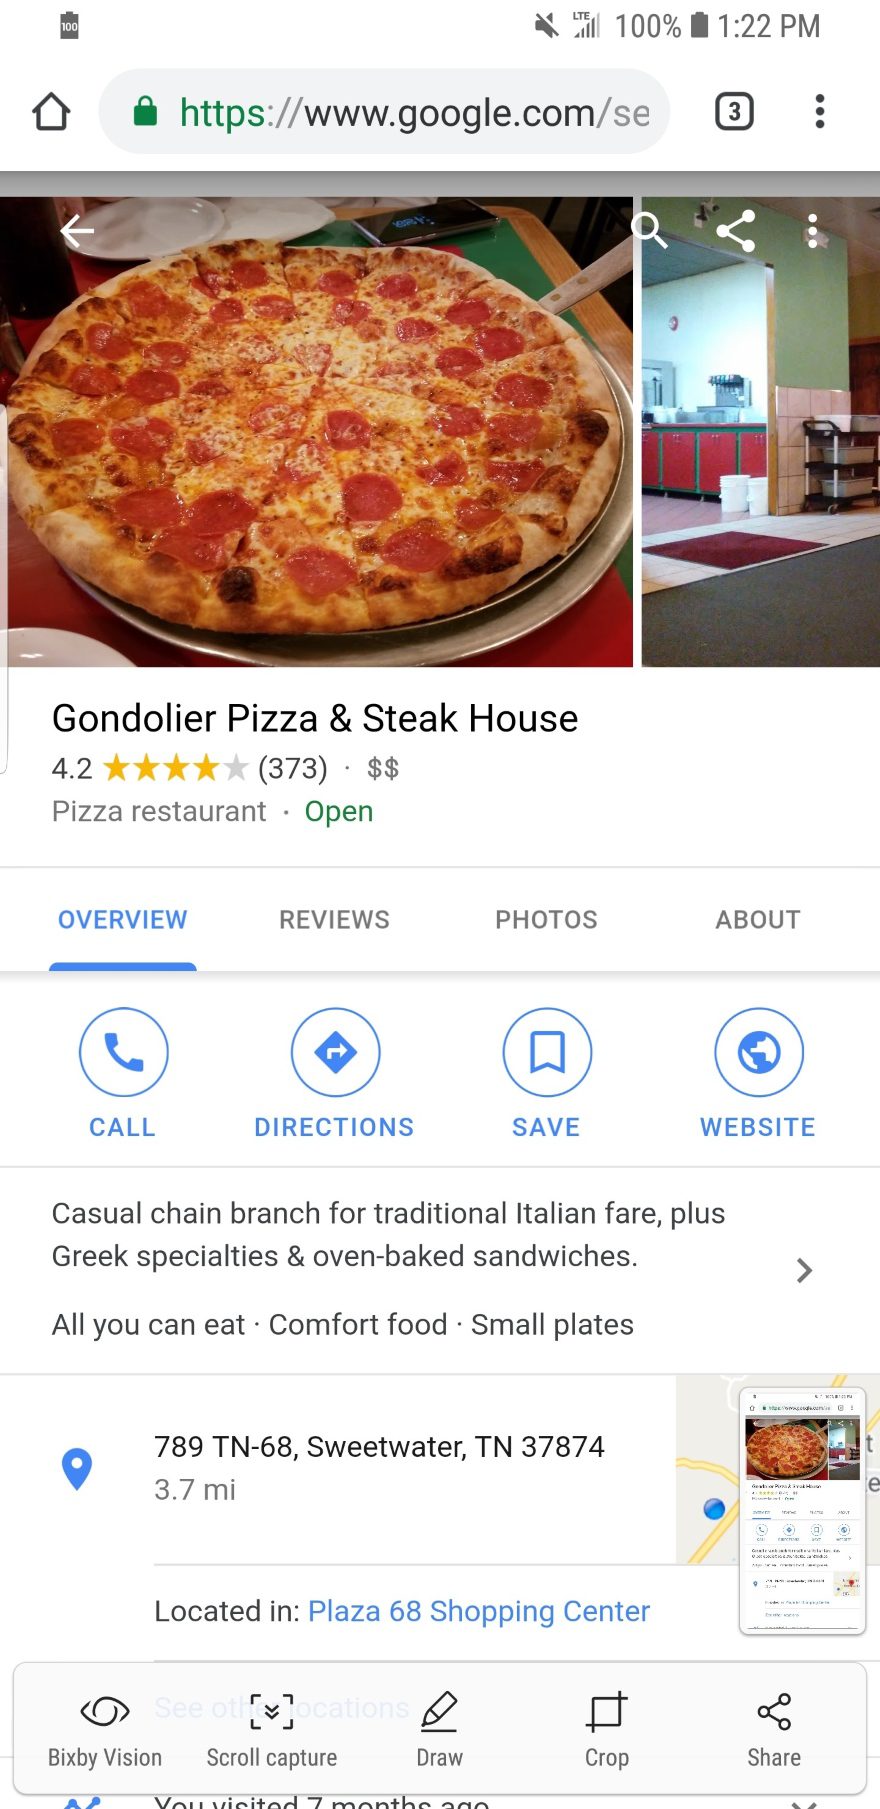
One of my favorite conveniences of carrying around a smartphone is when I search for a local business and the result in Google gives me a clickable phone number. I can click the number to make the call without having to write it down or try to memorize it. This feature is now a necessity. Fortunately, you can add it to your website so Google can provide your phone number in local searches.
This is done with microdata. Microdata informs search engines that the numbers are a phone number so they are shown as a clickable call link. You can create this by enriching the markup with a few tags for local searches.
For example, the code might look like this:
<div itemscope itemtype="https://schema.org/LocalBusiness">
<h1 itemprop="name">WordPress Theme</h1>
Phone: <span itemprop="telephone"><a href="tel:+123456890">
234567890</a></span>
</div>
Other Calls to Action
With HTML5, you’re not limited to phone numbers. You can add other calls to action such as email, messaging, fax, etc. HTML5 protocols include:
- tel: – place a phone call
- mailto: – open an email app
- callto: open Skype
- sms: – send a text message
- fax: – send a fax
All of these protocols are used in the same way as we saw above. Let’s look at a few examples.
Adding the Code to Your Contact Page
One of the best places to add a call link is within your contact info on your Contact Us page.
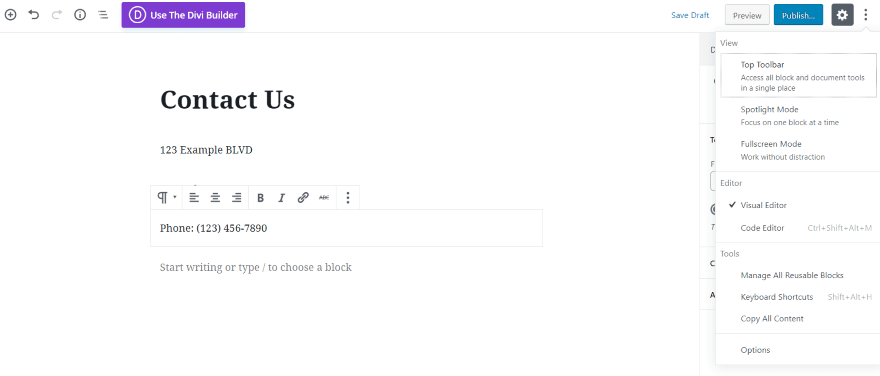
Whether you’re using the Classic Editor or the new Gutenberg editor, you’ll need to view the Text version of the page. In the Classic editor click the Text tab. In Gutenberg, click the three dots in the upper right and select Code Editor.
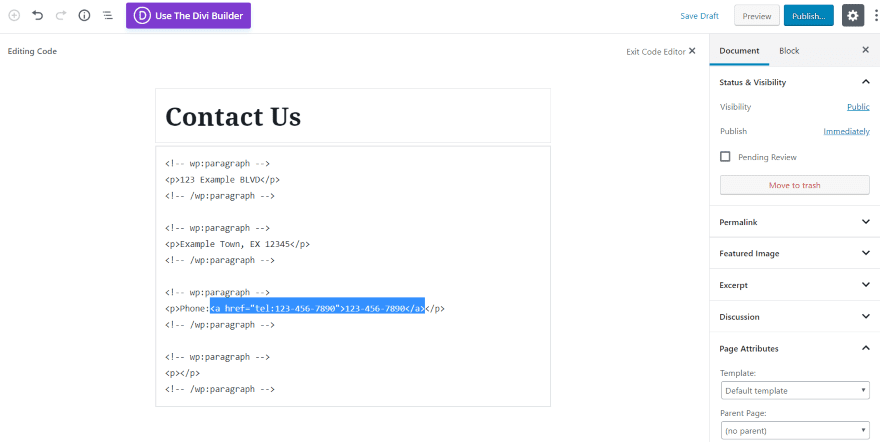
Add the code in place of your phone number.
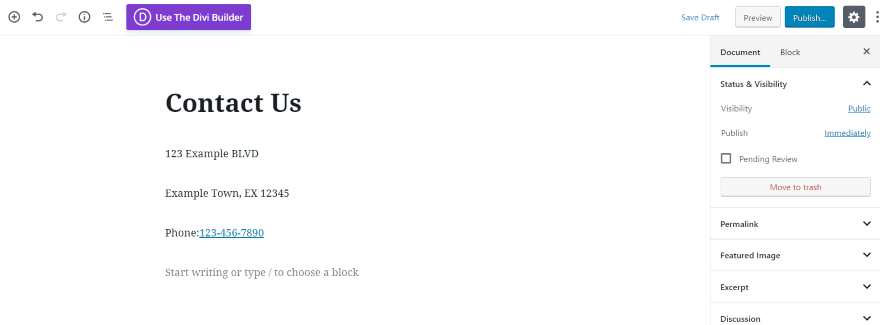
Exit the Code Editor or Preview the page and you’ll see that your phone number is now a clickable link.
Creating Code for an Email Link or URL
The HTML code for email is mailto: The email address is added to the end, like this:
<a href="mailto:[email protected]"> [email protected] </a>
Just like the phone link, you can use the visual portion to add a message, such as:
<a href="mailto: [email protected]"> Click here to send me an email</a>
Just like the phone link, you can use the visual portion to add a message, such as:
< href="mailto: [email protected]"; Click here to send me an email</a>
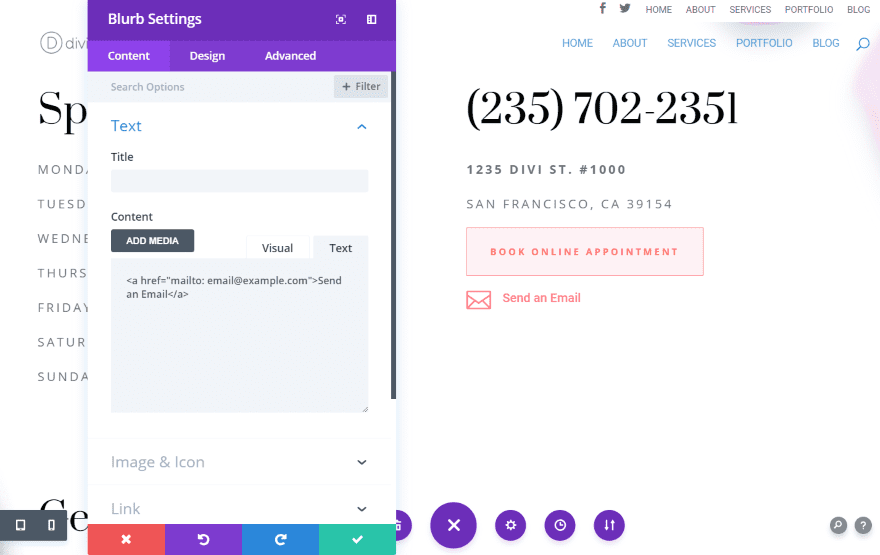
Here’s an example from the Spa layout pack’s contact page. I’ve added a blurb module with an icon and the text Send an Email. I selected the Text tab and added the email HTML. The text is now clickable and will open your email app.
Adding Code to Open URLs
You can have the HTML to open any URL you want. This is good if you want to send readers to pages for newsletter signups, events, etc. In order to link to them, your HTML code will include the URL. For example:
<a href=" http://MySampleSite.com/SamplePage/"> See the sample page>
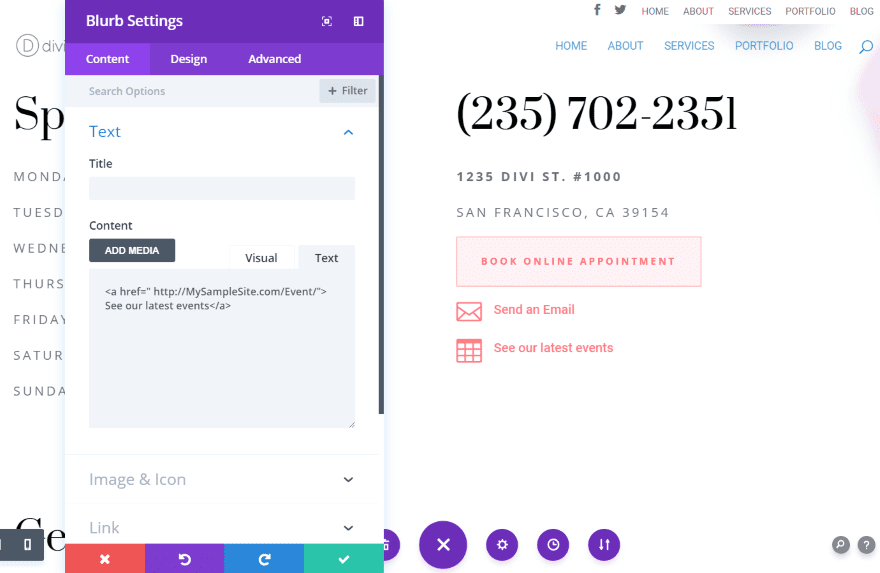
I’ve added another blurb with code to see the events page.
Disable on Desktop and Tablet
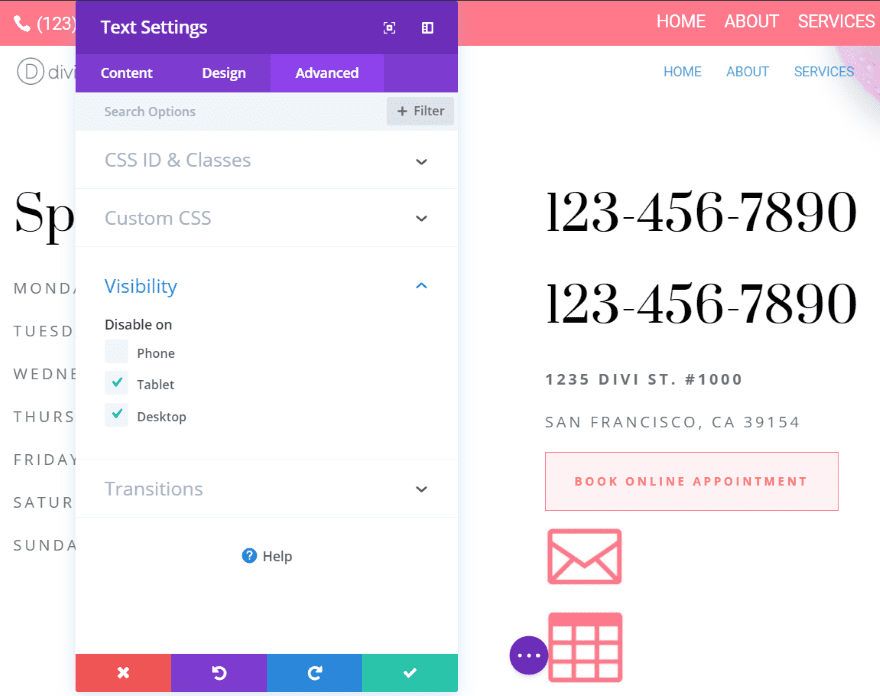
One problem with call links is they’re not useful for desktops or tablets. You can solve this with Divi by creating modules that are specific to each type of device, and then disabling them on the other devices.
Here, I’ve created two modules with the phone number: one includes an HTML phone number and the other doesn’t. I’ve disabled the one with the clickable number on tablets and desktops, so they’ll never see the link. I’ve also disabled the module without the link for phones, so phone users will only see the module with the link.
You can add the code to your header or footer using the theme editor. Always use a child theme or your PHP code will be overwritten when you update the theme. This will require some CSS styling to look good.
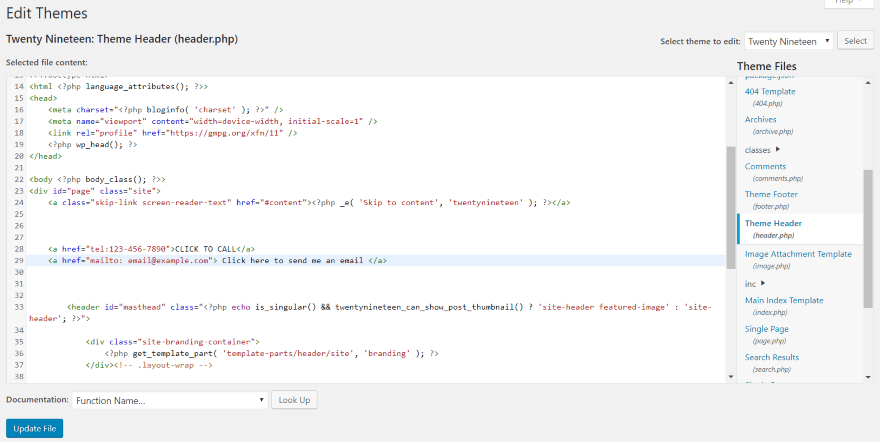
In your Dashboard, go to Appearance > Editor > Theme Header (or Theme Footer). Place the code within the <body> portion of code. I looked for an ending tag </a>, clicked enter to add a few extra lines, and pasted in my code. You can see the code here on lines 28 and 29.
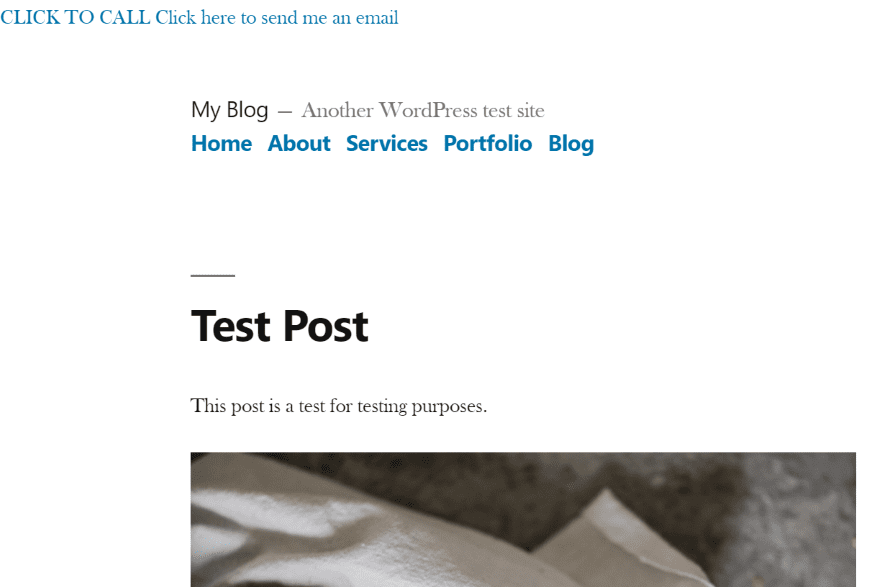
Here’s what it looks like when I placed the call link and email link within the header of the Twenty Nineteen theme. It’s there and it works, but it’s not very pretty. This is fixable by adding color and margin space so they’ll stand apart from each other. Of course, this is done in CSS.
Styling the Links
You’ll need to add code to the Additional CSS field in the Customizer.
Your code might look like this:
a[href^="tel:"] {
color: brown;
text-decoration: none;
margin-right: 0.em;
}
a[href^="mailto:"] {
color: orange;
text-decoration: none;
margin-right: 0.8em;
}
This tells the CSS how to style the text for tel: and mailto:. It changes the telephone number font to brown, the email font orange, and adds a small margin to the right of each link.
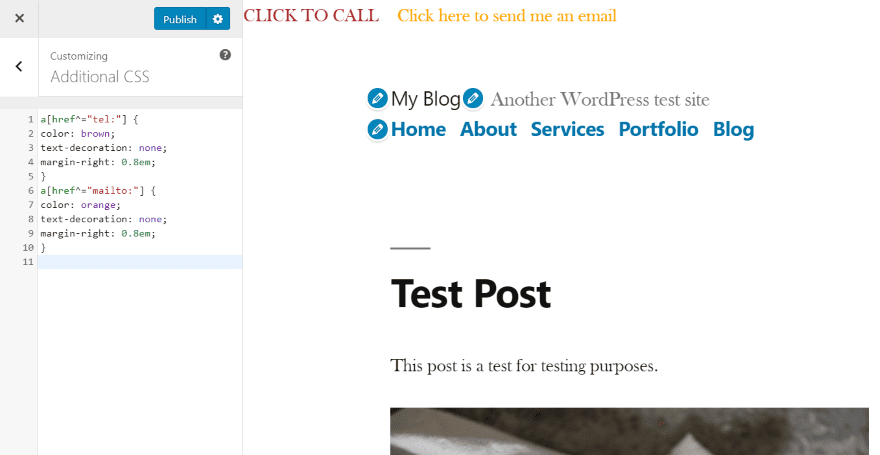
The CSS works wherever the code is including within widgets, posts, etc. You can even use icons instead of text.
Divi can include your phone number and email in the Secondary Menu above the header. The email button is already clickable by default, but the phone number isn’t. The phone number can be turned into a call link by using a similar HTML phone number that we’ve used in previous examples.
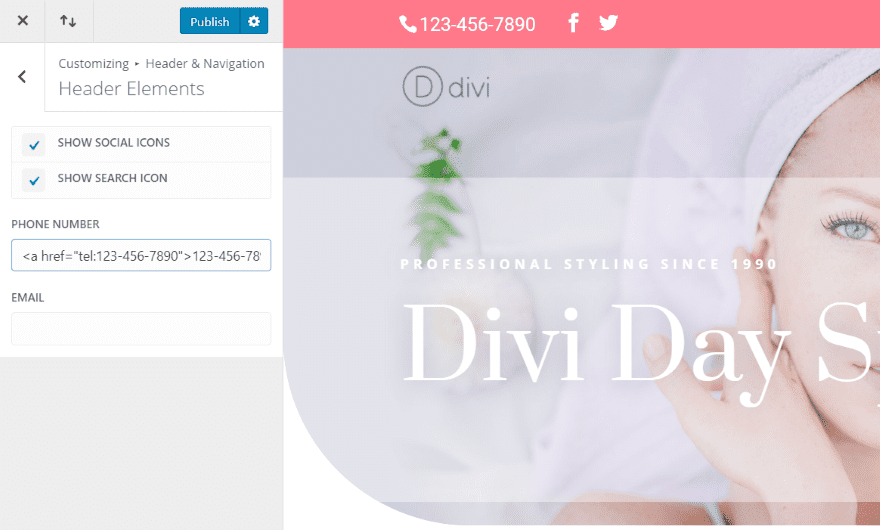
Go to the Theme Customizer > Header & Navigation > Header Elements. This will give you a textbox where you can add your phone number. Fortunately, you’re not limited to just numbers. You can also add HTML. I’ve added the HTML from the previous examples. I also increased the phone number’s font size to make it easier to see for the images.
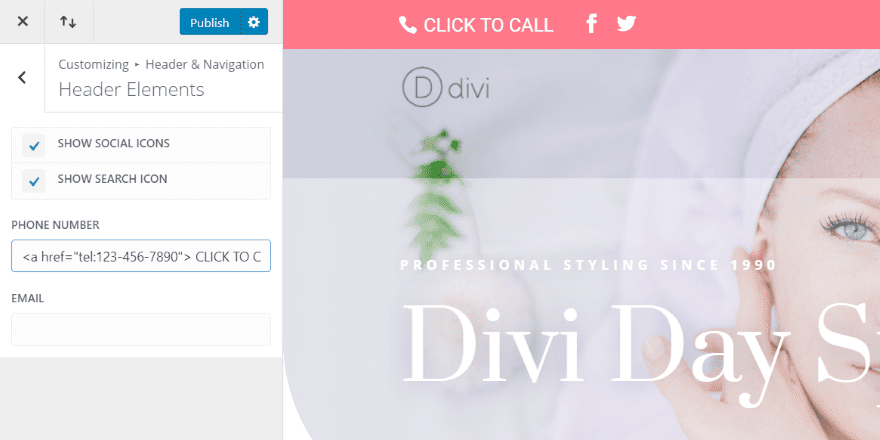
You can make obvious that it’s clickable by adding a message to the visual portion of the link. You could replace the number with the message, or add the message to the end of the number. It could look like this:
<a href="tel:123-456-7890">123-456-7890 CLICK TO CALL</a>
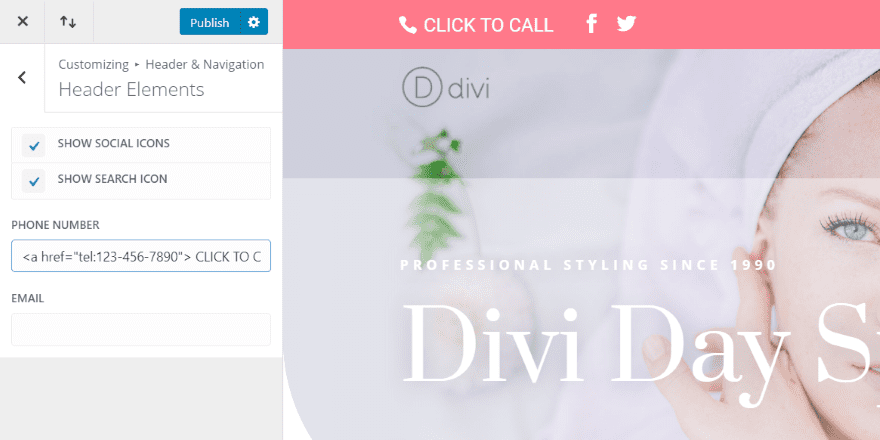
This example just shows the text.
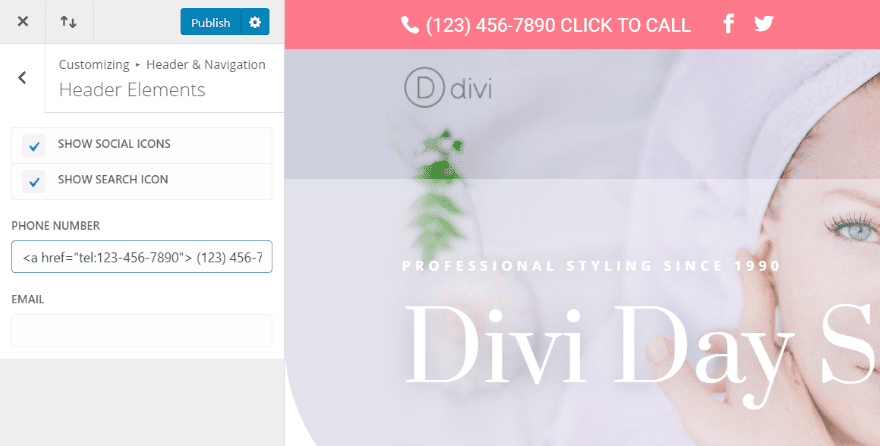
In this one, I’ve added the phone number along with the text.
Testing on Mobile
I recommend testing the links with mobile devices to make sure it works. If you don’t have access to a smartphone you can use Google Chrome’s Developer Tools.
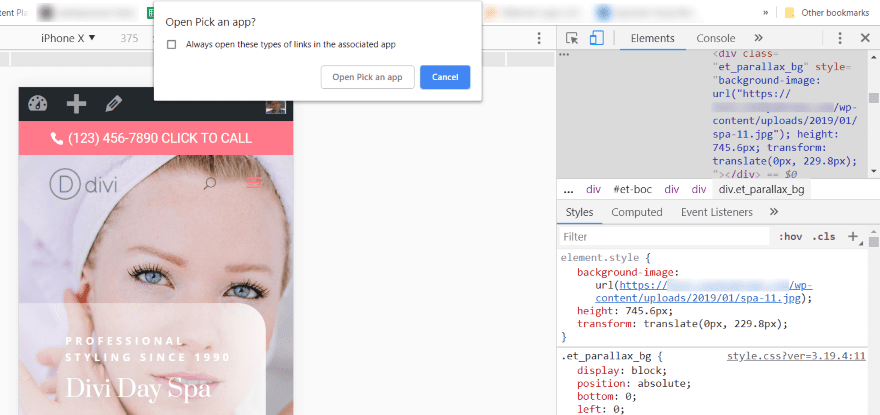
Right click on your homepage and select Inspect. At the top left corner of your screen, you’ll see a list of devices. Select the one to see how your website looks on that screen. Clicking the HTML phone number link should open a dialog box asking you to choose an app. If you see this, the link works. I still recommend trying it on an actual smartphone, but this is a good indication that the link it doing something.
Adding Call Links with Plugins
You can also add a call link to your header with a plugin. They typically include features for styling, adding multiple calls to action, and the ability to be turned on or off based on the device of the visitor. They’re also easy to set up and use. These are great choices if you don’t want to handle code. Here are a few of the best options.

Call Now Button adds a click-to-call button to the bottom of the screen for your mobile visitors. It doesn’t show on other devices. You can also add text if you want. The button is a phone icon so it’s easy to understand what it’s for. All you have to do is enable the button and enter your phone number. You can change the default behavior in the advanced settings.

This plugin lets you add buttons that stick to the side of your website and remain on screen when the user scrolls. You can add a clickable phone number, email address, social media icons, and store locations. Set them on the right or left, choose animation and rollover styles, customize the colors, and choose where they show.
Speed Contact Bar

This one adds a contact bar that includes clickable links for a phone number, fax number, a headline, address, email, social networks, and custom URLs. Set the bar to the top or bottom and adjust the size, color, color of the text and links, and how the bar reacts. You can also adjust the size. you can add more content using filter hooks.
Mobile Contact Bar

This plugin adds links to your website when viewed on mobile devices. You can choose which links are shown from 13 options including phone, email, Skype, custom URLs, and social networks. It has FontAwesome integration for the icons. You can style the links and choose the size, border, opacity, etc. Set the menu at the top or bottom of the screen. The menu remains on the screen when the user scrolls. It also includes scroll to top and WooCommerce cart with item counter buttons.
Final Thoughts
The popularity of smartphones to access websites is increasing every day. This popularity takes call links from being a simple convenience to a complete necessity. Adding clickable phone numbers can make the difference between users calling your business or your competitors. Fortunately, it isn’t that difficult to create clickable links to add HTML phone numbers to your headers, footers, widgets, pages, and posts of your WordPress website.
We want to hear from you. Have you added a call links to your website? Let us know about your experience in the comments below.
Featured Image via Jane Kelly / shutterstock.com






Great information, but you haven’t touched on Skype and if you use Microsoft Outlook for your phone, it adds Skype automatically to every phone link you have on your site. Which means that when someone clicks on my client’s phone contact, Skype appears not a phone call, and unless you you have it you have to join – an unnecessary hinderance to the value of a quick dial from your phone . There doesn’t seem to be a simple solution to uncouple this addition, unless you start adding code to site. There should be a easy solution that Divi provides.
Great post. I haven’t seen that kind of detail explaining how to customize the call me buttons!
I am impressed, but I personally moved onto “callback” buttons instead. I found it to be more practical. People don’t want to call, they want someone to do that work for them I realized. My agency uses Callback Tracker because it is more customizable so it looks really professional, which is great for our site.
Everyone needs a call me button on their site, but a callback button just performs better from personal experience.
I must say you are such a Genius Guy Randy very well explaind Phone number insertion.What i have been looking for i got it here on your blog posts.
Thank you so much for sharing such helpful informations
Hoping to increase my knowledge with your Blog Thanks Again
astonishing work, you discuss everything in so much depth.
just love all your blogs so informative
please keep up the good work
I think the more simple way is put the fontawesome code to widget, then link it to WhatsApp number via API.
“mailto” links very often do not work due to gmail (and other email packages) integrations into your operating system (e.g. Windows).
When you use an online email system (e.g. gmail) the link ‘tend’ to not work without installing add-ons (not advisable).
IMHO Always stick to have a contact form on your site!
I usually advice my clients to simply add clickable telephone numbers. However, I setup the their analytics to only track a ‘call conversion’ if the click happens from a phone.
The user experience is not worse on desktop due to the clickable number – but it should definitely not be tracked since almost no one calls from their laptop ;o)
My two cents. Just another, maybe easier, way to do it.
This was so easy to do! Thank you for the step by step instructions especially for the Divi secondary menu.
Great post for those of us who are not coders! Thanks – your blog is my favorite.
Thank you Randy for this very interesting post.
Can we hope to see the phone call feature built into the Monarch plugin?