WordPress has a built-in feature for sending emails from your email provider, but unfortunately, that email functionality doesn’t always work as expected. When you rely on WordPress, it’s possible that a portion of your emails will never get where they’re going. To make sure your recipients receive the emails you send them, use WordPress SMTP (Simple Mail Transfer Protocol) instead. You can use SMTP either via a plugin or an external service. In this article, we’re going to cover both options.
Why doesn’t the WordPress email feature always work?
WordPress uses the PHP coding language for almost all of its functionality, including sending email. However, the PHP mail function can be finicky, and your server has to be set up correctly for it to work as it should. Sometimes, your WordPress hosting company will disable PHP email functionality, preventing website owners from sending spam emails.
However, with the PHP function disabled, people may miss totally legitimate, non-spam emails — such as your newsletter, registration confirmations, or password reset requests. In contrast, SMTP servers handle sending and receiving emails while boasting a high delivery rate.
How to Use SMTP with WordPress
Servers have specific purposes, which don’t always include supporting email. Or supporting email the way you need. Even if your host hasn’t disabled PHP, you may still want to use WordPress SMTP, a more secure and reliable way to deliver emails. SMTP servers are specifically designed to handle email, so it’s like getting expert-level services for one dedicated function. While some SMTP providers will have free options, a premium plan will probably be necessary if you need to send transactional emails (form submission confirmations, payment receipts, etc.).
How to Set Up SMTP with a Plugin
For this walk-through, we will use the Easy WP SMTP plugin, but we have a list of other recommended plugins below so you can choose the one that’s right for you. Note that you’ll need to contact your host or search online for your web host’s SMTP details.
Getting Started with Easy WP SMTP
Log in to WordPress and click Plugins in the dashboard’s left-hand sidebar. At the top-right, type “Easy WP SMTP” into the Search Plugins box.

The correct plugin should be the first choice. Click Install Now.

When it’s finished installing (it just takes a couple of seconds), click Activate. You’ll automatically go to your Plugins page. Click Settings under Easy WP SMTP.
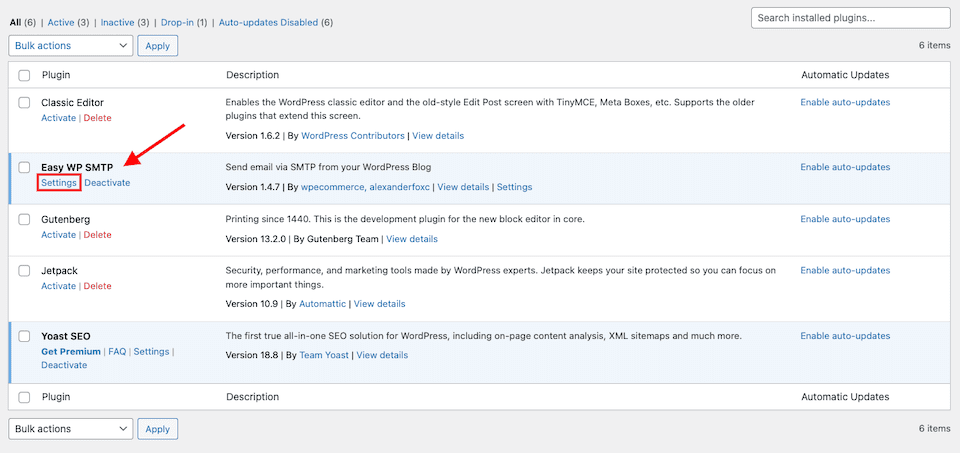
Easy WP SMTP Settings
The Settings page will show, with three tabs up top. The first, SMTP Settings, is the default. Let’s review the information to fill out.
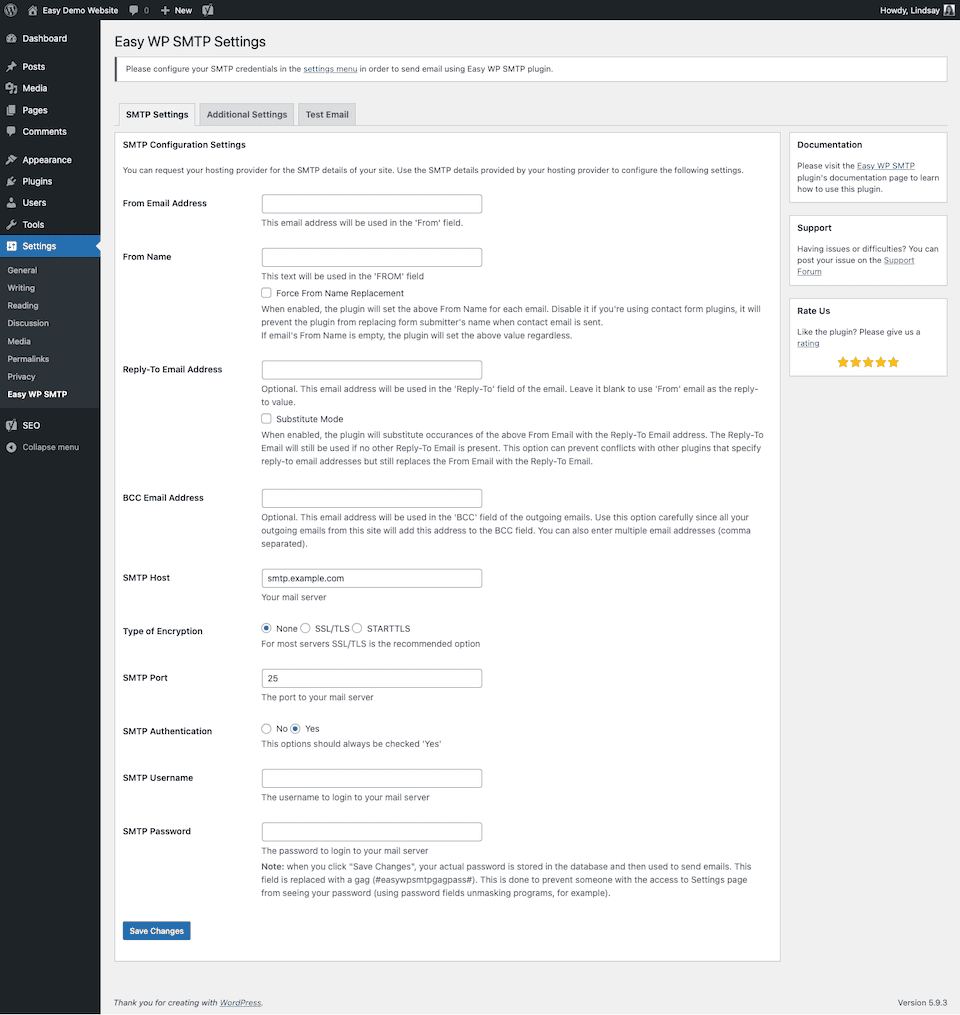
- From Email Address: This is your email address, which will probably include the domain name. For example, [email protected].
- From Name: This is the name you want to show in the email’s “From” field. It may be your first name, your full name, or your business name.
- Reply-To Email Address: This is optional. Fill this in if you want replies to go to a different email address than the “From” email address.
- BCC Email Address: This is optional. Add one or more email addresses here if you want to send blind copies of every outgoing email.
- SMTP Host: This is your mail server. You can get this information from your web host.
- Type of Encryption: You’ll usually select SSL, but you can check this with your web host.
- SMTP Port: This is the port to your mail server; you can get this info from your web host.
- SMTP Authentication: “Yes” is the correct option, chosen by default.
- Your SMTP Username and SMTP Password: These are the login details for your mail server. You can get this information through your web host.
Click Save Changes when you’re done. The plugin you use may have additional optional settings you can choose to set up. With Easy WP SMTP, these are the optional settings:
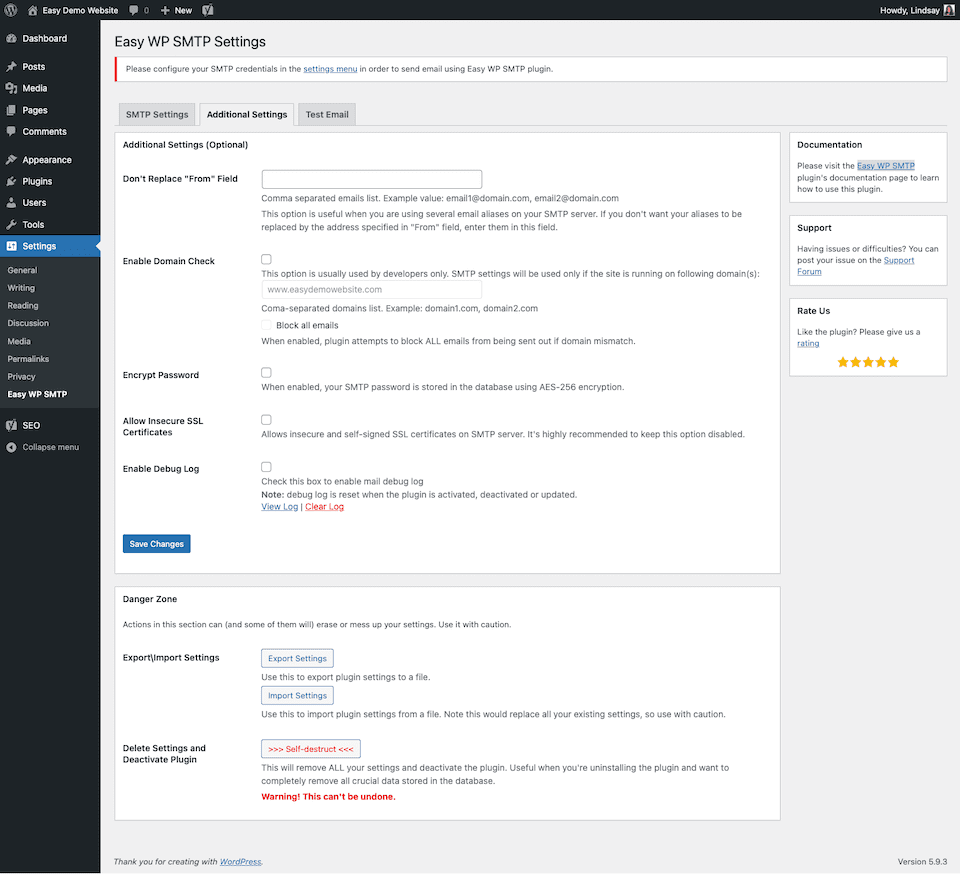
You may also be able to send a test email to ensure you’ve set up the SMTP correctly:

How to Set Up SMTP with an External Service
You’ll need to use a plugin to set up an SMTP with an external service. In this section, I’ll use WP Mail SMTP by WPForms because it allows you to integrate any SMTP service. For the SMTP, I’ll be using the Mailtrap Email API/SMTP service, which is part of the Mailtrap Email Delivery Platform.
The process involves a few steps, and you’ll need to create associated accounts and verify your WordPress domain. However, the extra effort is worth it because it helps optimize email delivery and safeguard your sender’s reputation.
Read the step-by-step guide on setting up Mailtrap with the WP Mail SMTP plugin.
Step 1: Set up Mailtrap and verify your domain
Begin by creating an account on Mailtrap. Once logged in, navigate to the in-app homepage and select Start Sending under Email API/SMTP.
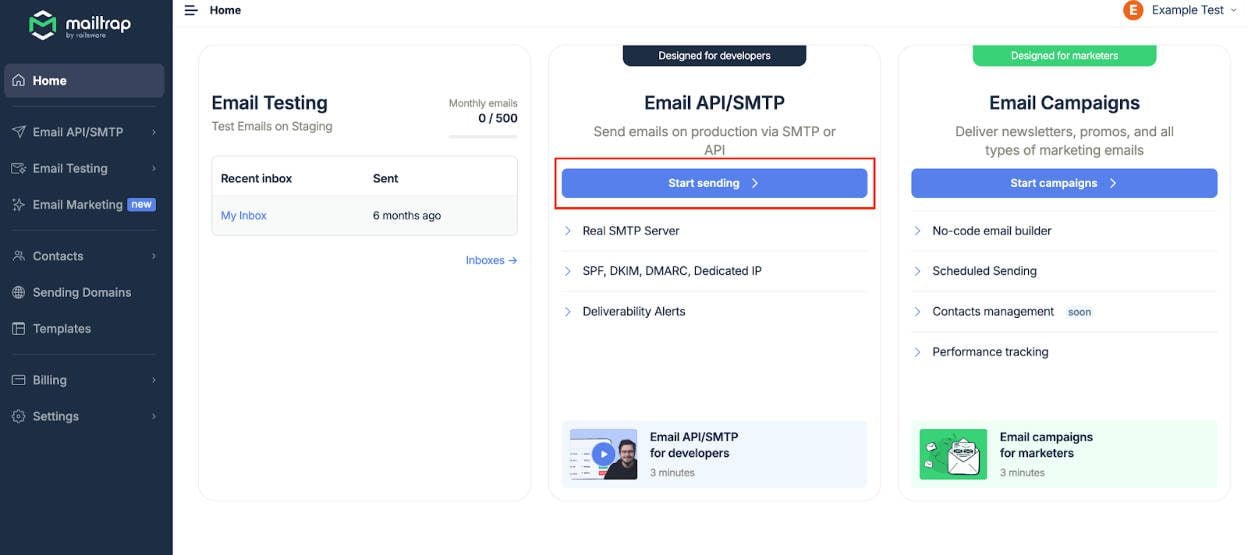
Enter your domain name in the provided field and click Add Your Domain.
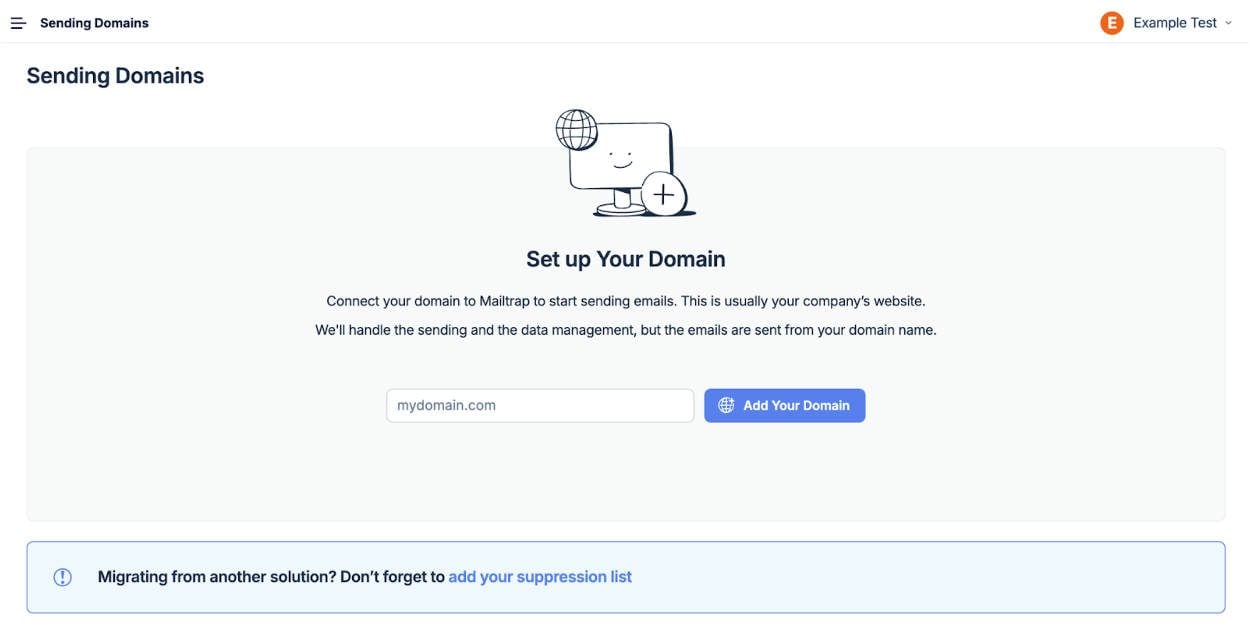
Then, copy the DNS records Mailtrap generates and paste them into your domain provider’s DNS settings.
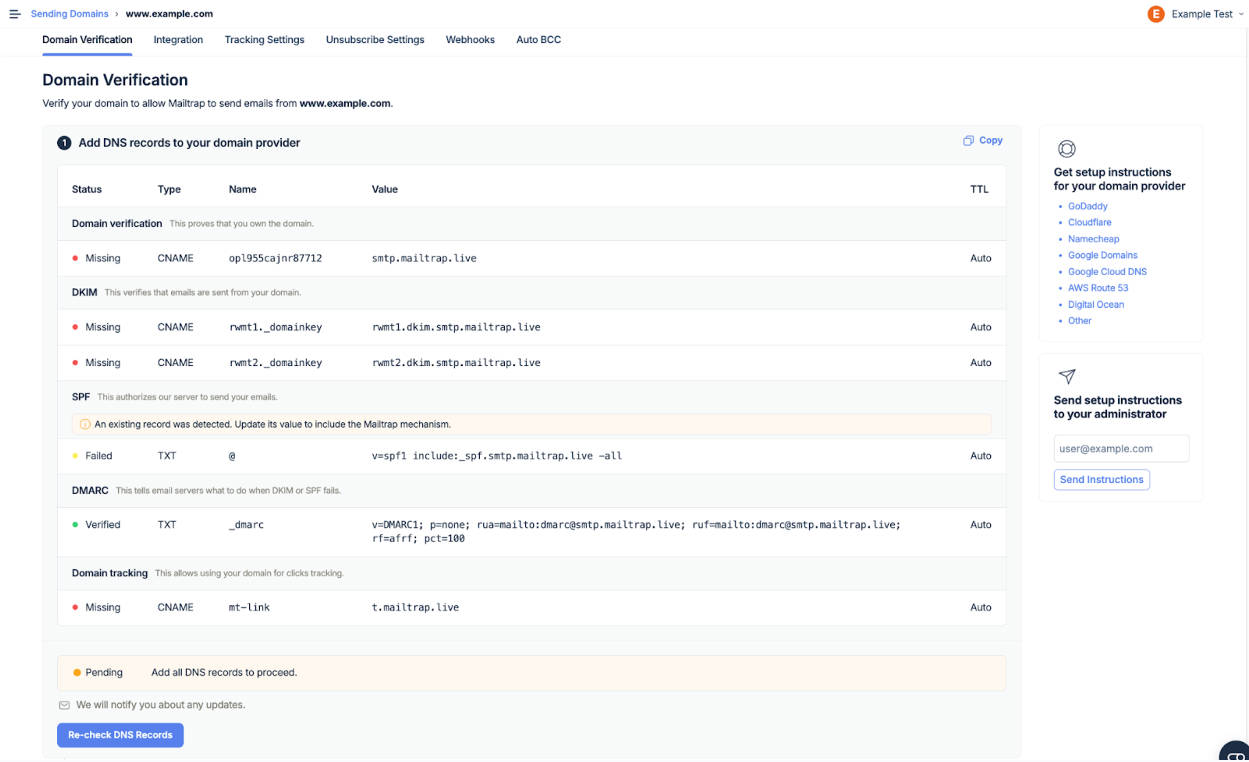
Before proceeding, verify all DNS records. If you need assistance, refer to Mailtrap’s Sending Domain Setup Guide, linked in the app menu.
Step 2: Configure Mailtrip SMTP and Install the WP MAIL SMTP Plugin
Once your domain is verified, go to the Intragrion tab in Mailtrap and select the sending stream that matches your needs—transactional or bulk.
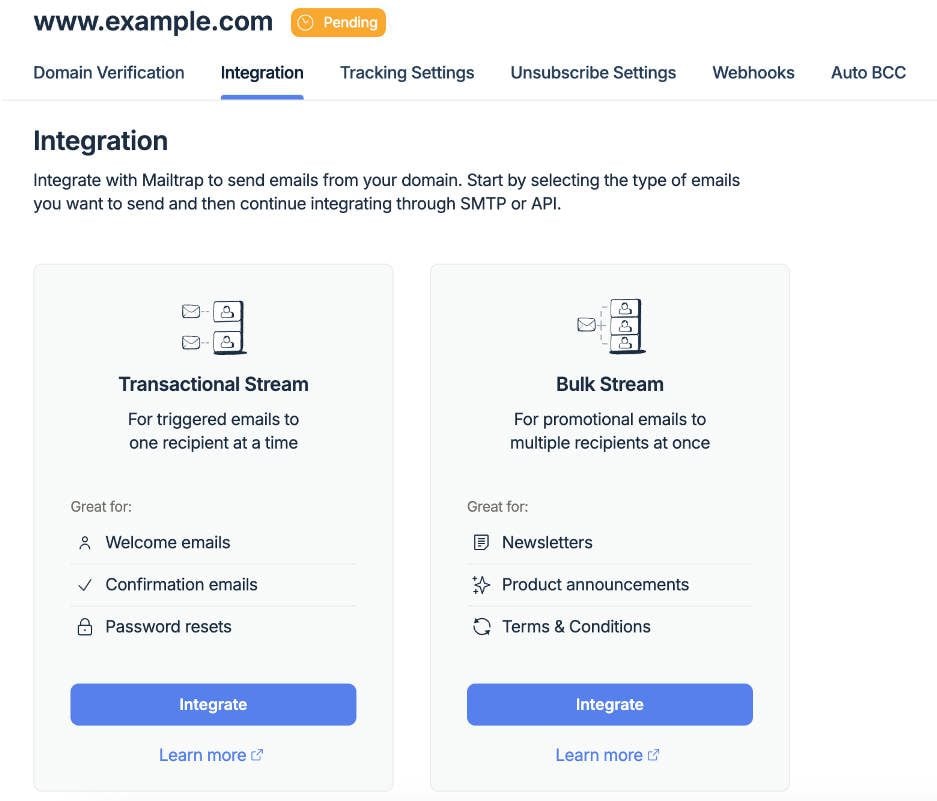
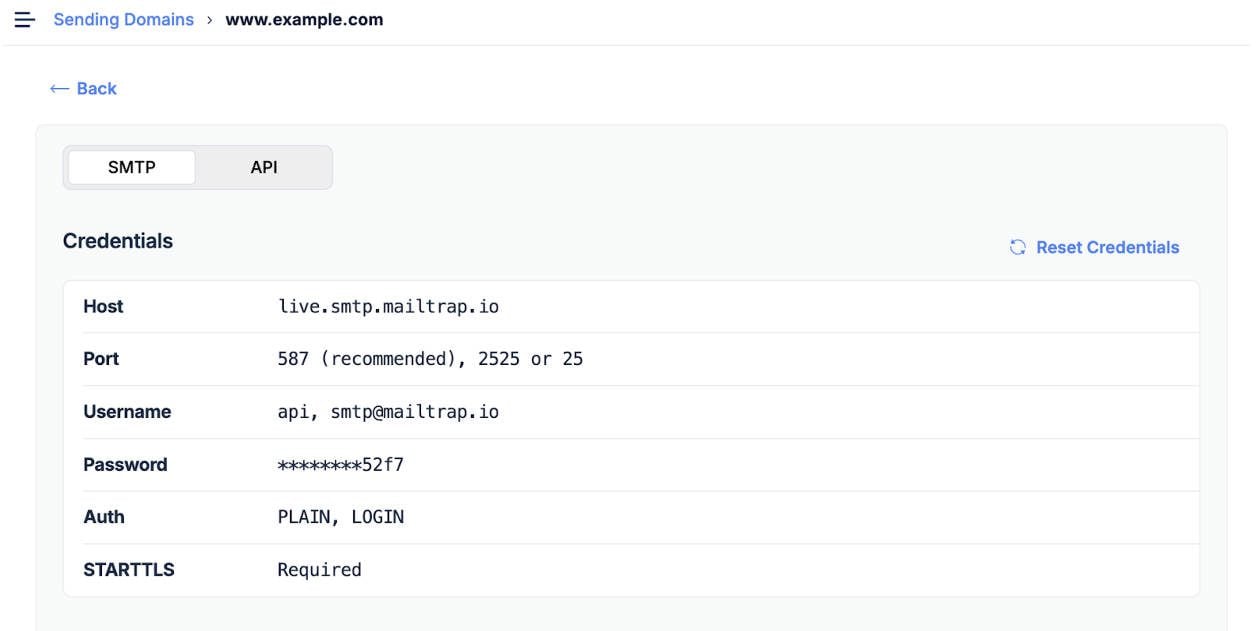
Click the Integrate button, and make sure the SMTP tab is selected.
Next, open your WordPress admin dashboard in a new tab, navigate to Plugins, and click Add New. Search for and install the WP Mail SMTP by WPForms plugin.
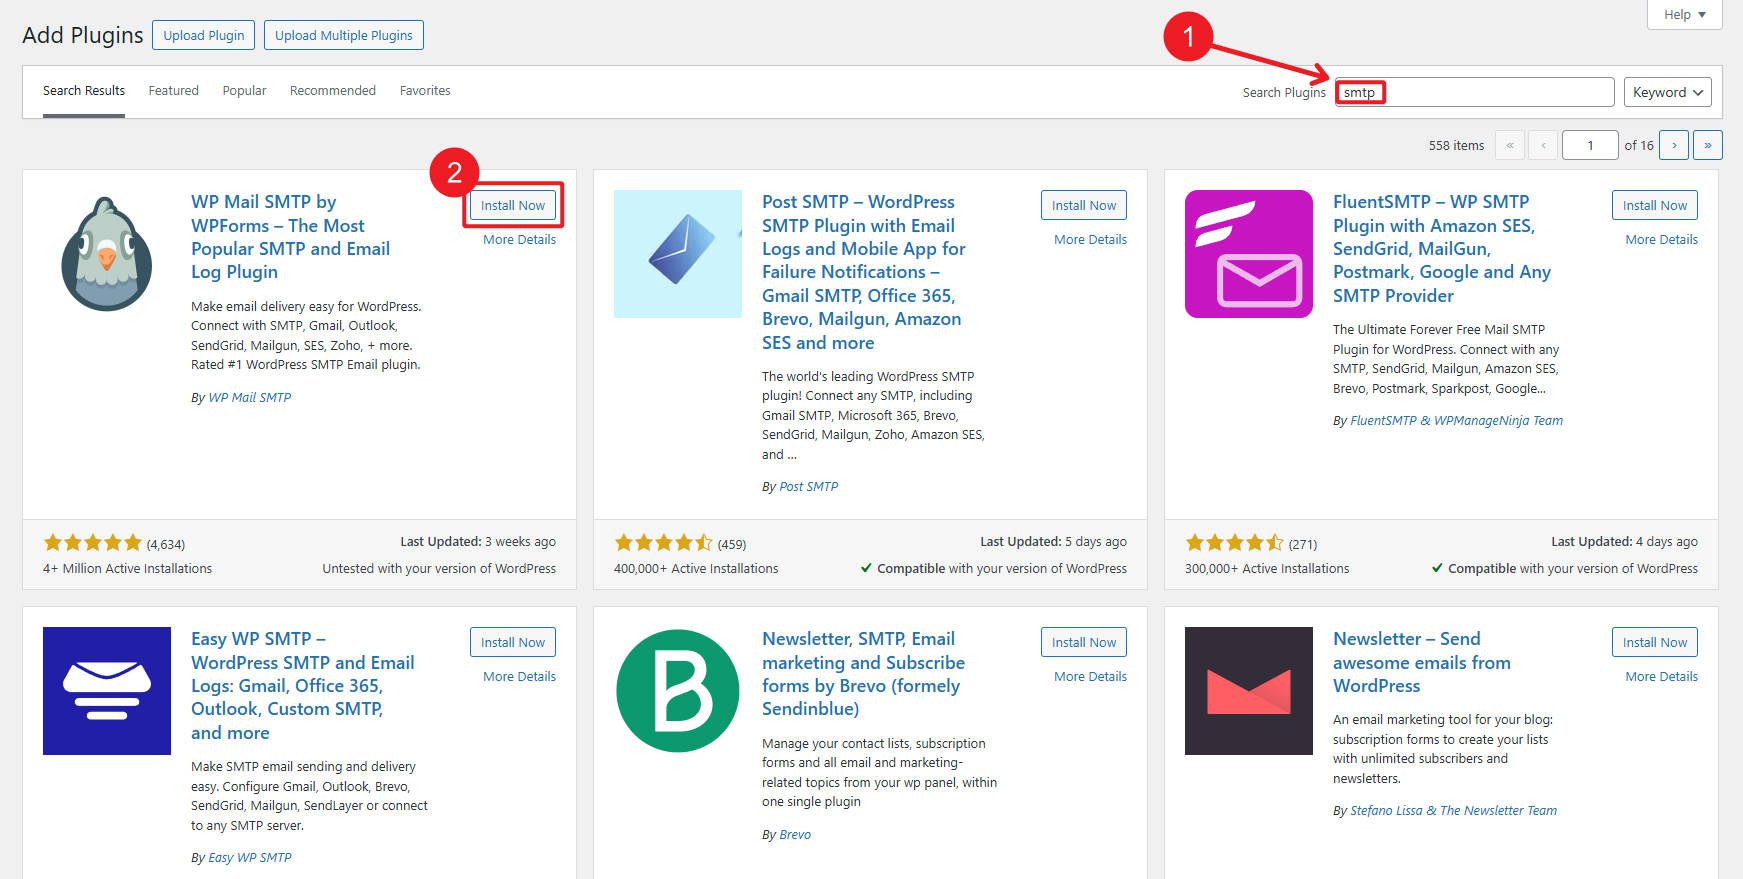
After installation, activate the plugin and go to its Settings page via the side menu.
Under the General tab, you can configure the From Email and From Name fields. These fields are pre-filled with your WordPress account email and domain name, but you can adjust them as needed.
In the Mailer section, select Other SMTP to integrate Mailtrap. Avoid using the default PHP option, as it lacks reliability. You’ll also notice other mailer options, including Mailgun and SMPT.com, but stick with Other SMTP for this setup.

Step 3. Set Up Mailtrip CMTP with WP Mail SMTP
Scroll to the Other SMTP configuration section and begin entering your Mailtrap credentials.
- SMTP Host: Use live.cmtp.mailtrap.io for transactionemails or bulk.smtp.mailtrap.io for bulk emails.
- Encryption: Select TLS.
- SMTP Port: Set it to 587 (which is the recommended value).
- Authentication & Auto TLS: Ensure these options are enabled (green toggles in the image below).
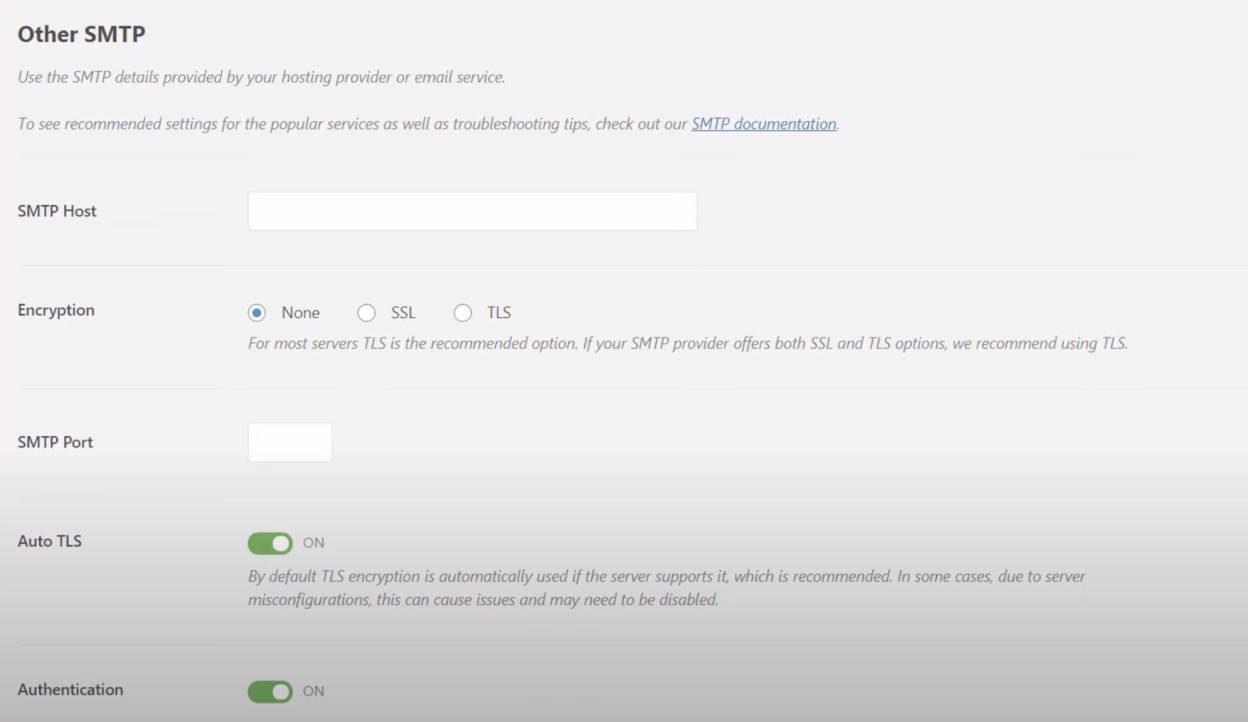
Next, copy the Username and Password provided by Mailtrap into the respective fields. Mailtrap’s default username is API, and each account generates a unique password. Use the Copy button to paste the hidden password securely.
After filling out the fields, click Save Settings. A confirmation message will appear at the top of the General tab.
Security Tip: For added security, avoid storing the SMTP password in plain text. Instead, add the following lines to your wp-config.php file.

This approach disables the password field in the plugin settings while still enabling secure SMTP access.
Step 4. Test your configuration
Go to the Email Test tab in the WP Mail SMTP plugin to verify your setup. Enter an email address in the Send To field and click Send Email. Make sure the HTML option is enabled for the test.
Once the email is sent successfully, you’ll receive a notification at the top of the page.
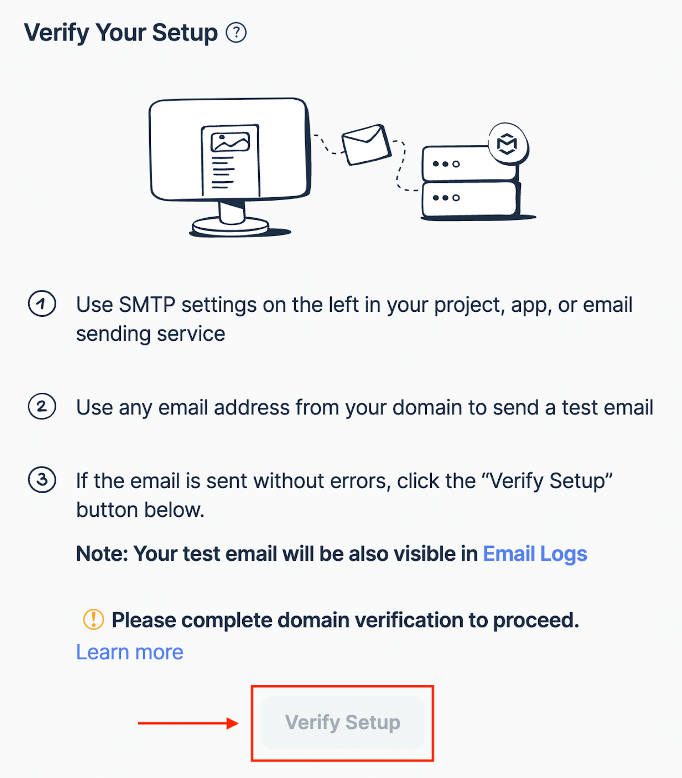
Finally, return to Mailtrap and click Verify Setup to confirm the test email. You can also check the email’s appearance under the Email Logs section in Mailtrap.
4 Best WordPress SMTP Plugins
If you’re not interested in using the tools we walked through in this article or want to see other options, you’re in the right place. Let’s go over the best WordPress SMTP plugins so you can get your email strategy up and running.
1. WP Mail SMTP
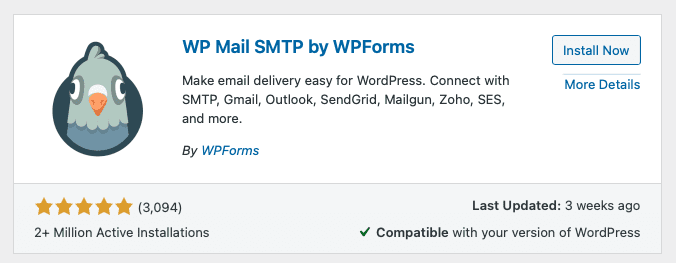
WP Mail SMTP is user-friendly and easy to set up, with a setup wizard that shows you how to do everything. If you already have an SMTP plugin, WP Mail SMTP will import the data for you. You’ll then choose your SMTP Mailer, which includes Google, Sendinblue, and several more, or you can set up your own mailer, so long as you have your SMTP server info.
You can use WP Mail SMTP for free, but an upgrade option gives you extra features. You can have them configure the setup for you, track open and click-thru rates, get weekly email summaries delivered to your inbox, etc. Paid plans range from $49 to $399 per year, depending on your needs.
2. Post SMTP Mailer/Email Log
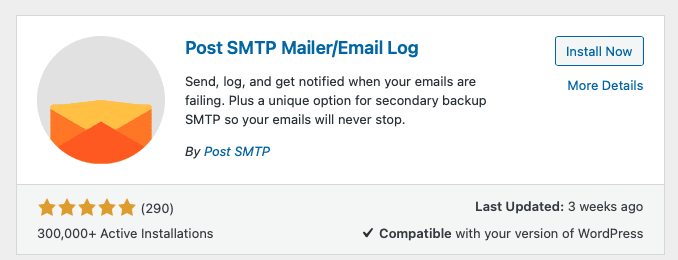
With Post SMTP Mailer/Email Log, you can connect your site with your SMTP, but it also has some advanced settings and functionality you may not find elsewhere. For example, if your host blocks SMTP ports, the plugin can deliver using HTTPS instead. There’s also a diagnostics tool so you can troubleshoot any integration issues. Unfortunately, you can’t do a manual SMTP setup with this plugin. That means that if you’re using a provider the plugin doesn’t support, this isn’t a good option for you.
3. Gmail SMTP

If you only use Gmail to send emails, consider the Gmail SMTP plugin. You won’t have to enter SMTP details; the plugin authorizes using OAuth 2.0. That means you’ll have to perform a few setup steps in the Google Developers Console, which has instructions to walk you through. There’s a tool to test that it’s set up correctly, and then you can start sending emails through your WordPress website using Gmail.
4. SMTP Mailer
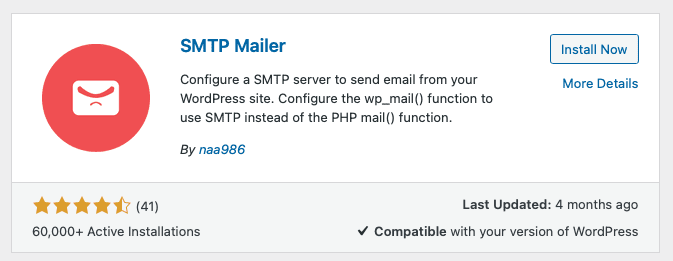
If you don’t need support from a specific SMTP provider, you may like the minimalism of SMTP Mailer. You’ll enter the SMTP credentials yourself, and you can send a test email to make sure it’s set up correctly. So long as your email provider lets you connect to SMTP servers, this plugin should work. It’s known to work with most contact form tools, too.
We encourage you to see our extended list of best SMTP plugins for WordPress if you want a full list of options.
Final Thoughts About SMTP WordPress Integration
Being able to sync your contacts and automatic emails with WordPress is invaluable. That type of automation makes it possible to stay connected to your customers and visitors even while you sleep. SMTP is a low-cost way to manage your emails and know they’re always received by those essential to your business. Your mailing list is a huge part of your marketing strategy. (And if you’re a Divi user, we’ve put together some awesome email opt-in modules for you, too.)
If your host’s SMTP services are lacking and you’re looking for a new one, be sure to check out SiteGround. Their SMTP services have been more reliable than others in our tests.
How do you handle SMTP with WordPress? Let’s talk shop in the comments!


How do we connect this with bloom? I don’t see an option?? ty
Yes, SMTP is a setting for mail servers. So, Bloom isn’t the right connect point anyways. SMTP can take over the mail delivery of your WordPress site and/or connect with special plugins that routinely send email (like self-hosted email marketing services). Bloom is meant to route contact information to the correct services for you (whether that’s on or off WP).
To clarify, Bloom specializes in capturing email addresses through opt-in forms to help grow your email list, but it does not directly handle the sending of emails. This design focus means that Bloom itself doesn’t include settings or options for email delivery configurations, such as SMTP setup, which is essential for sending emails.
The following From address failed: info@fBlockedouta : MAIL FROM command failed,Verification failed for Unrouteable address Sender verify failed ,550,SMTP server error: MAIL FROM command failed Detail: Verification failed for Unrouteable address Sender verify failed SMTP code: 550
Hi I get this issue. I can resend then it goes through. I am assuming that the the address its trying to send from is not active or accessible. Shouldn’t the plugin disable that>
Its helps me to manipulate my WordPress website.
Great article, Easy wp SMTP plugin is best for WordPress. Thanks for sharing…
Sending email via an SMTP server is essential nowadays due to most mail server sending PHP generated mail straight into the junk folder.
Very helpful guide an a must to enhance email deliverability!
Didn’t know we could send emails from that! Getting surprises every day.
Thank you for sharing by the way. The article is amazing.
Cheers,
Jany
Its helps me to manage my WordPress website.
So now there are two articles with almost the same title. Better to update the old article:
How to Use SMTP to Send Email from WordPress
Posted on April 6, 2016 by Lyn Wildwood in Tips & Tricks | 22 comments
in /blog/tips-tricks/use-smtp-to-send-email-from-wordpress