Membership websites are exploding in popularity, especially in recent years. Whether you’re a fitness instructor offering exclusive workout routines, a photographer sharing behind-the-scenes tutorials, or a woodworking society building an online community, membership websites provide a powerful way to connect with your audience and generate recurring revenue.
In this post, we’ll walk you through creating a WordPress membership website using Divi and MemberPress. Let’s dive in!
- 1 What are the Benefits of a Membership Website?
- 2 What You’ll Need to Make a Membership Website with WordPress
-
3
How to Make a Membership Website with WordPress
- 3.1 Step 1: Purchase a Domain
- 3.2 Step 2: Purchase WordPress Hosting
- 3.3 Step 3: Purchase a Premium WordPress Theme
- 3.4 Step 4: Purchase & Install a Membership Plugin
- 3.5 Step 5: Set up MemberPress
- 3.6 Step 6: Creating Membership Pages with Divi
- 3.7 Step 7: Creating Additional Pages With Divi AI
- 3.8 Step 8: Extending Your Membership Website With Plugins
- 3.9 Step 9: Enhance Your Membership Website With Divi-Specific Products
- 4 Making a Membership Website With WordPress is Easy With Divi
- 5 Frequently Asked Questions
What are the Benefits of a Membership Website?
Launching a membership website with WordPress has many advantages. The most obvious benefit is recurring revenue. You can move beyond one-time sales and generate a steady income stream through monthly or annual subscriptions. Membership websites provide a predictable income source, allowing you to focus on creating valuable content and growing your community.
Another benefit of creating a membership website is fostering a sense of community. Membership websites create a space for visitors to connect, share ideas, and build a sense of belonging. A loyal community can become a powerful asset for promoting your work or attracting new members.
Other benefits include:
- Increased engagement
- The ability to showcase exclusive content
- Establishing yourself as a valuable resource
- A thriving membership website builds trust and credibility, attracting new members and potential clients who value your expertise
What You’ll Need to Make a Membership Website with WordPress
Building a membership website doesn’t have to be expensive. WordPress makes the process easy and serves as your secret weapon for success. With its user-friendly platform and vast ecosystem of plugins and themes, WordPress allows anyone to create a professional membership site.
Because WordPress is so robust, you’ll need only a few things to get the job done: a good domain name, a WordPress hosting plan, a premium WordPress theme like Divi, and a membership plugin such as MemberPress.
Here’s a full list of things you should expect to purchase to get your membership website up and running:
- A Domain Name: This serves as your address on the internet
- Web Hosting: Storage space for your website
- WordPress: Installed on your web host, either manually or through a one-click install
- A Membership Plugin: To sell memberships, subscriptions, gate content, and accept payments
- A WordPress Theme: Opt for a premium theme that has extensive customization options and features
How to Make a Membership Website with WordPress
Subscribe To Our Youtube Channel
In this section of our How to Make a Membership Website with WordPress guide, we’ll help you plan your content, purchase a domain, set up hosting, and create your membership website with Divi.
Step 1: Purchase a Domain
Before building your membership website, you must purchase a domain name. A domain name serves as your website’s address on the internet. Therefore, it’s crucial to choose one that’s memorable and relevant to your membership site.
Consider brainstorming some ideas when deciding on the perfect domain name. For example, try to use keywords related to your website’s niche or target audience. If you have a brand name, using it in your domain is a great idea. It gives your domain name authority, which is helpful for search engine optimization (SEO).
You should also keep it short and sweet. Try to limit it to 15 characters or less. A longer domain name that’s difficult to spell will frustrate your potential customers, leading to potential revenue loss.
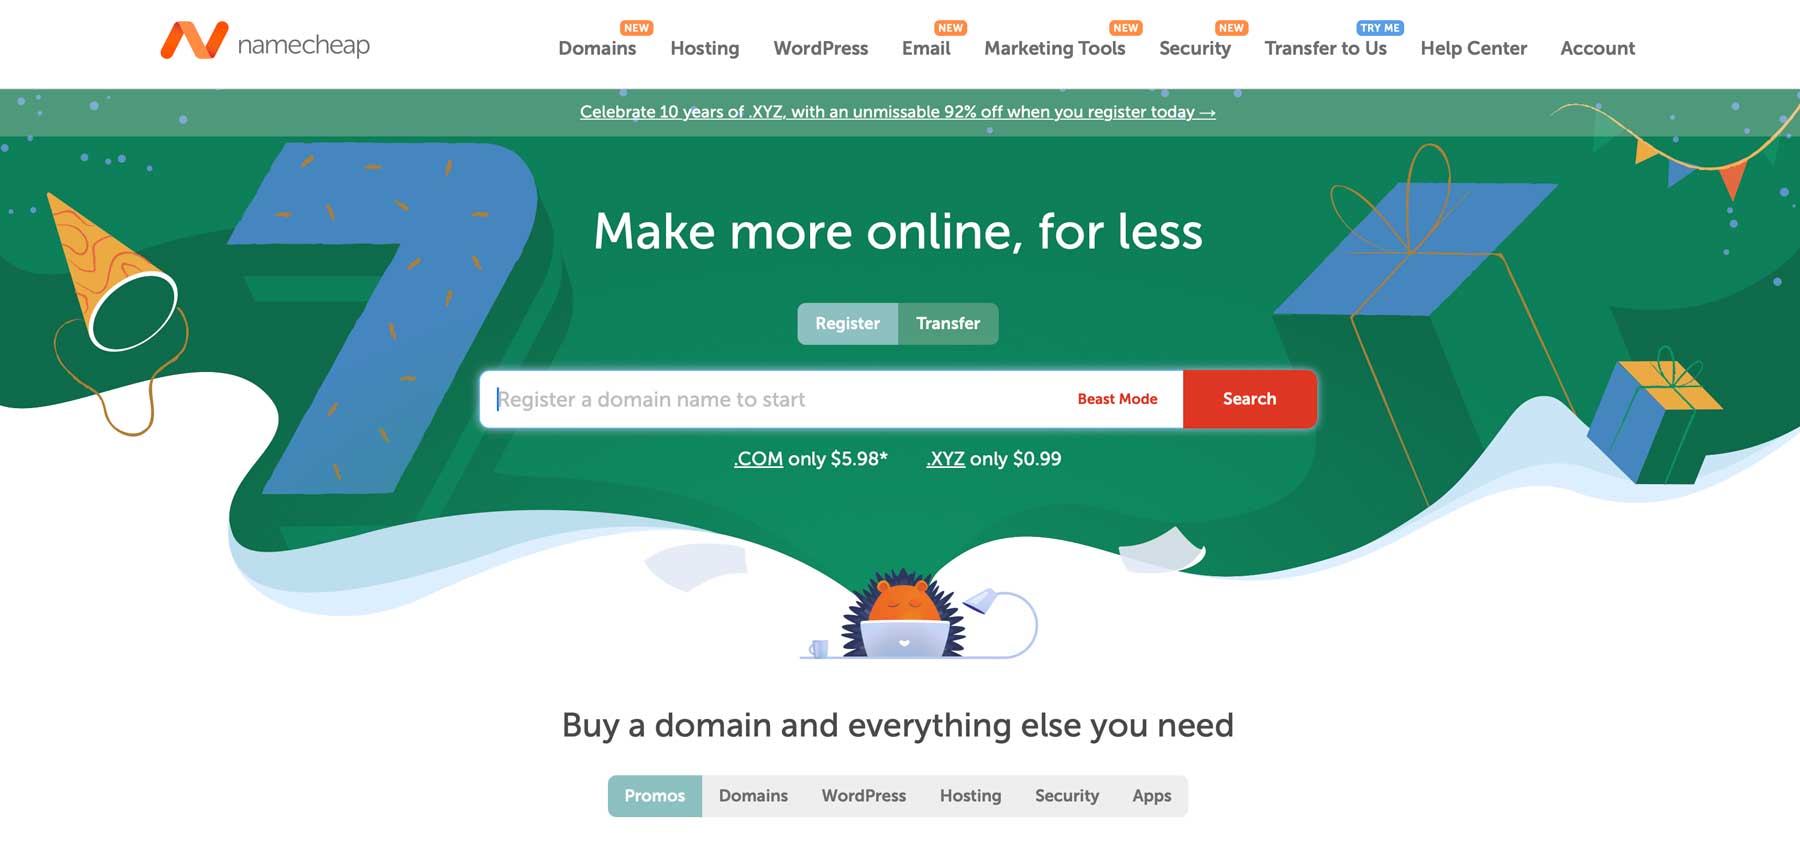
Lastly, use a good domain name registrar, such as Namecheap, that offers a domain search feature. This will allow you to check for available names and easily pick your favorite.
Namecheap is one of the most recognizable names in domain registration. It offers top-level domains, such as .com, .net, and .org, for as little as $5.98 per year. In addition to affordability, the Namecheap interface is extremely user-friendly. You can easily search for the perfect domain name with little effort.
One of Namecheap’s best features is the free WhoisGuard Protection. While most other domain registrars charge for this feature, Namecheap provides this important service for free. That way, you won’t have to worry about your private information being leaked to the world.
Step 2: Purchase WordPress Hosting
Purchasing a WordPress hosting plan is the next step in our how to make a membership website with WordPress guide. Like a domain name, a web host serves as your digital land or house. Web hosts offer secure storage space for your website’s files, allowing your site to be visible 24/7. When considering which hosting provider to choose, there are a few things to look for. First is security. Good security features are imperative because your website will handle sensitive member information, like credit cards, addresses, or phone numbers.
There are a few other factors to consider in addition to security. Make sure to pick a hosting provider that offers ample storage and bandwidth. While you may be tempted to start out with more budget-friendly WordPress hosts, it’s a good idea to choose a host that can grow with you. Opt for a provider that lets you easily switch your plan when you need more features.
Lastly, choose a web host that offers hosting that’s optimized for WordPress. Hosts such as Cloudways, Flywheel, and SiteGround offer features such as WordPress-optimized security, one-click WordPress installs, automatic updates, daily backups, and more at reasonable prices.
SiteGround Provides WordPress Optimized Hosting For Less
One of our go-to WordPress hosts is SiteGround. It offers several hosting plans specifically designed for WordPress. Take the guesswork out of installing WordPress, thanks to SiteGround’s one-click WordPress install feature. You’ll also have access to a proprietary, user-friendly dashboard, Site Tools. It provides an easy way to handle every aspect of your website, its files, and server-side settings.
Every SiteGround plan has at least 10 GB of storage space, unmetered bandwidth, and tons of free features. Freebies include professional email, site migrations, a content delivery system (CDN), a domain for one year, and an SSL certificate. SiteGround also has robust security, including a web application firewall (WAF), an AI-powered antibot system, and a security plugin to monitor and block threats.
There are three plans, StartUp, GrowBig, and GoGeek, with plans starting at $2.99 monthly.
With a secured domain and WordPress hosting plan, your focus should shift to purchasing a WordPress theme. Selecting a premium theme provides more customization options versus a free theme. Premium themes offer a strong foundation for building a feature-rich, visually appealing, and user-friendly membership website. Many of them provide global style options, drag-and-drop page builders, performance settings, and complete design control. While there is an upfront cost, the long-term benefits translate to a polished and professional membership website.
Divi Is The Ultimate WordPress Theme
The next step in making your membership website with WordPress is purchasing and installing a premium theme, such as Divi. It is one of the most popular WordPress themes in the world, offering unlimited design options and features. It’s perfect for making a membership website, primarily thanks to its drag-and-drop page builder, Visual Builder. Divi is also a full site editing theme, with its proprietary Theme Builder allowing you to create templates for posts, archives, products, and more.
Divi comes with over 200 design elements capable of creating all types of websites. You can easily design login, registration, pricing, and core web pages. If you’d like a simpler approach, you can start your membership website with a premade layout. Every Elegant Themes membership comes with 2000+ premade layouts. You’ll also have access to Elegant Themes plugins, such as Monarch and Bloom, which are perfect for displaying social media icons and creating popups. Divi is available starting at $89 per year.
Step 4: Purchase & Install a Membership Plugin
For this tutorial, we assume you’ve purchased a domain, web hosting plan, and Divi and installed WordPress. If not, refer to our in-depth guide for installing WordPress. With most of your foundation set, it’s time to add the membership functionality needed to set up user registrations, payments, gated content, and more.
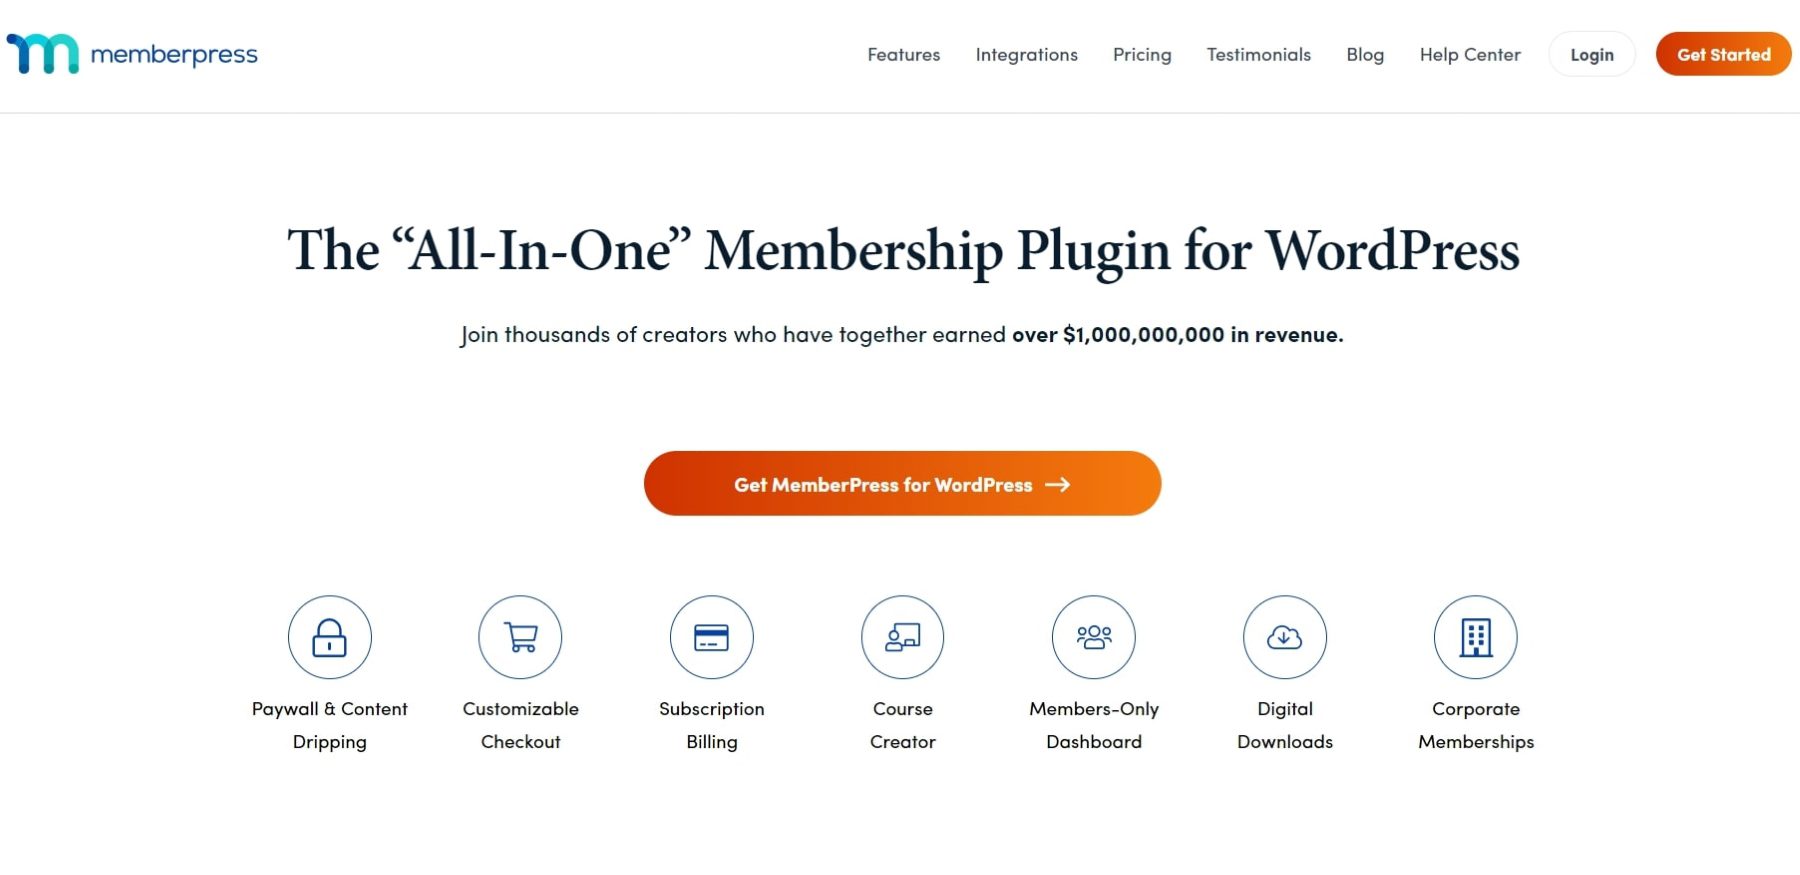
MemberPress is a powerful and user-friendly plugin specifically designed for WordPress. It allows you to create membership levels, restrict access to content based on those levels, and integrate secure payment gateways for accepting payments. MemberPress excels at controlling access to your website’s content. You can easily restrict pages, posts, categories, tags, files, and, if you’re a Divi user, content at the module level. Content can be restricted based on role, ensuring only members can access all content on your site.
With MemberPress, you can create unlimited membership levels, assign pricing for each tier, and assign specific content. You can even assign a time for each subscription, offering options when creating your website. MemberPress is perfect for all types of membership sites, including online magazines, learning sites, web design tutorials, and more. It is available for $179.50 per year.
Step 5: Set up MemberPress
After installing MemberPress, it’s time to configure some essential settings to turn your website into a membership site. MemberPress offers a user-friendly setup wizard that guides you through the initial configuration process.
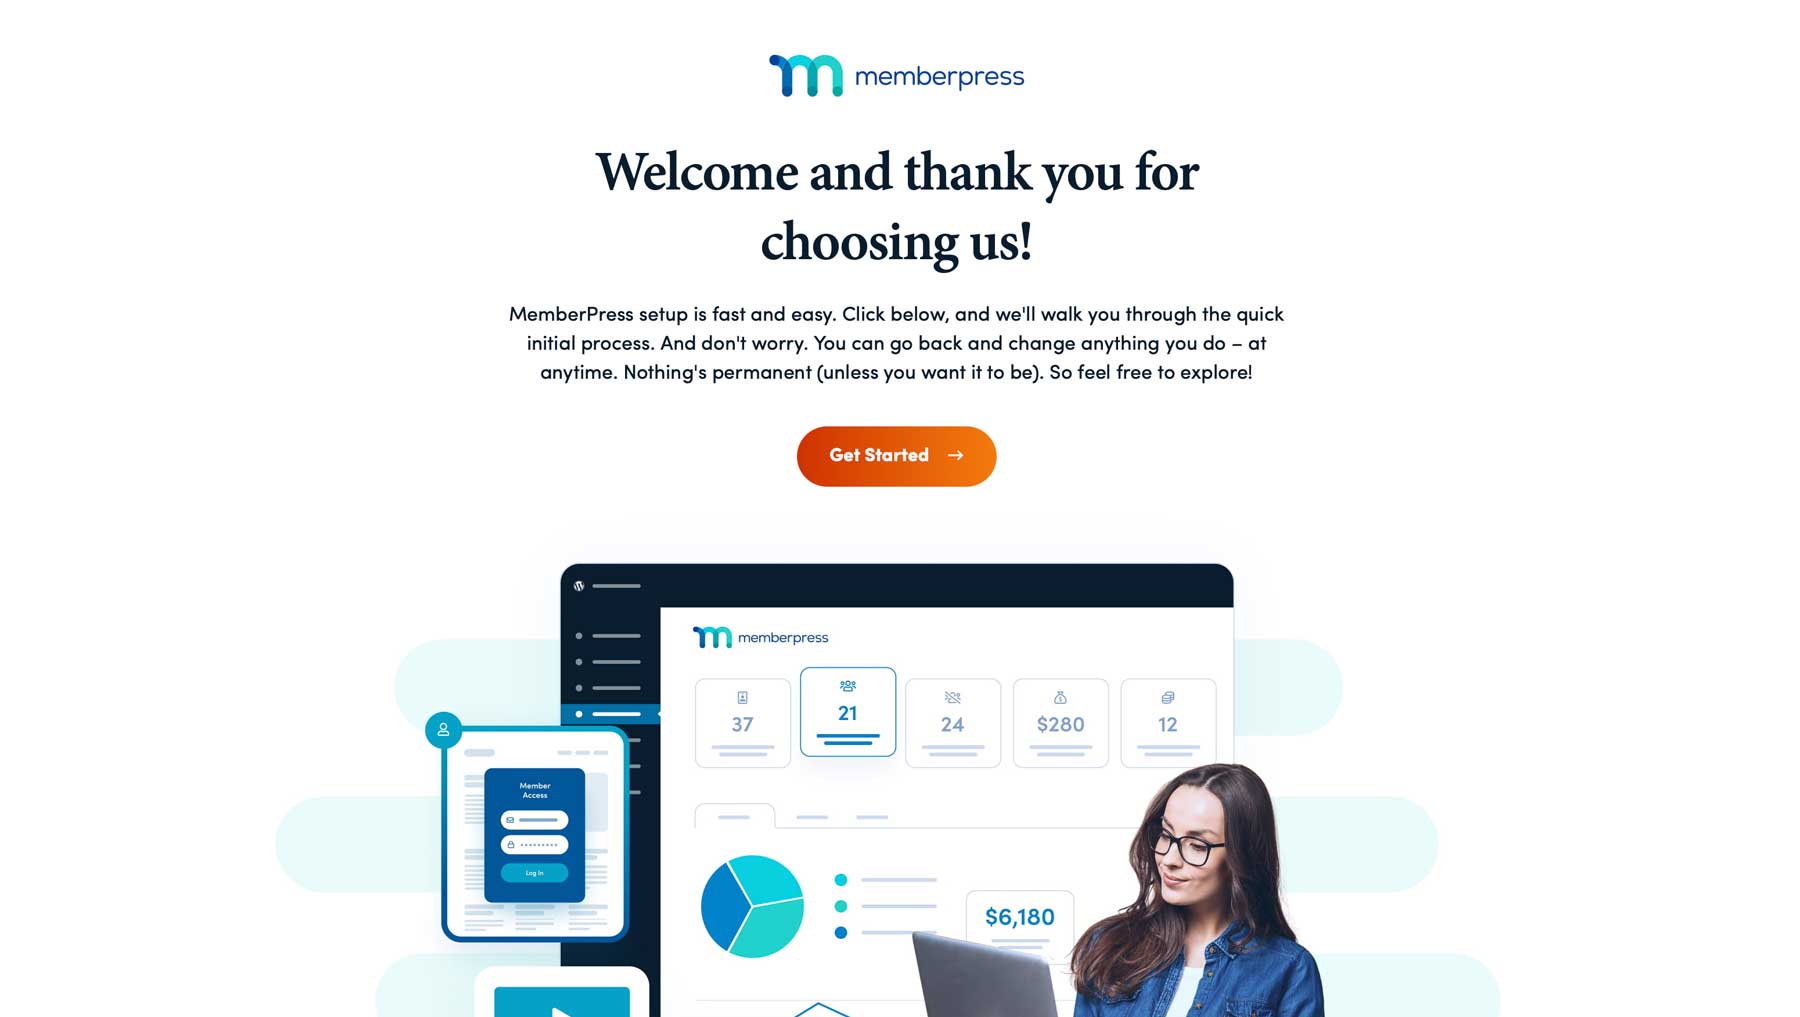
The wizard walks you through adding your license key, enabling essential features, creating or selecting content to restrict, creating membership levels, and setting up a payment gateway. MemberPress offers several add-ons, including a course creator, digital downloads, a VIP forum, and more. By default, MemberPress comes with Stripe as a payment gateway. It allows you to accept major credit cards, Apple Pay, Google Wallet, and others, with a small fee per transaction.
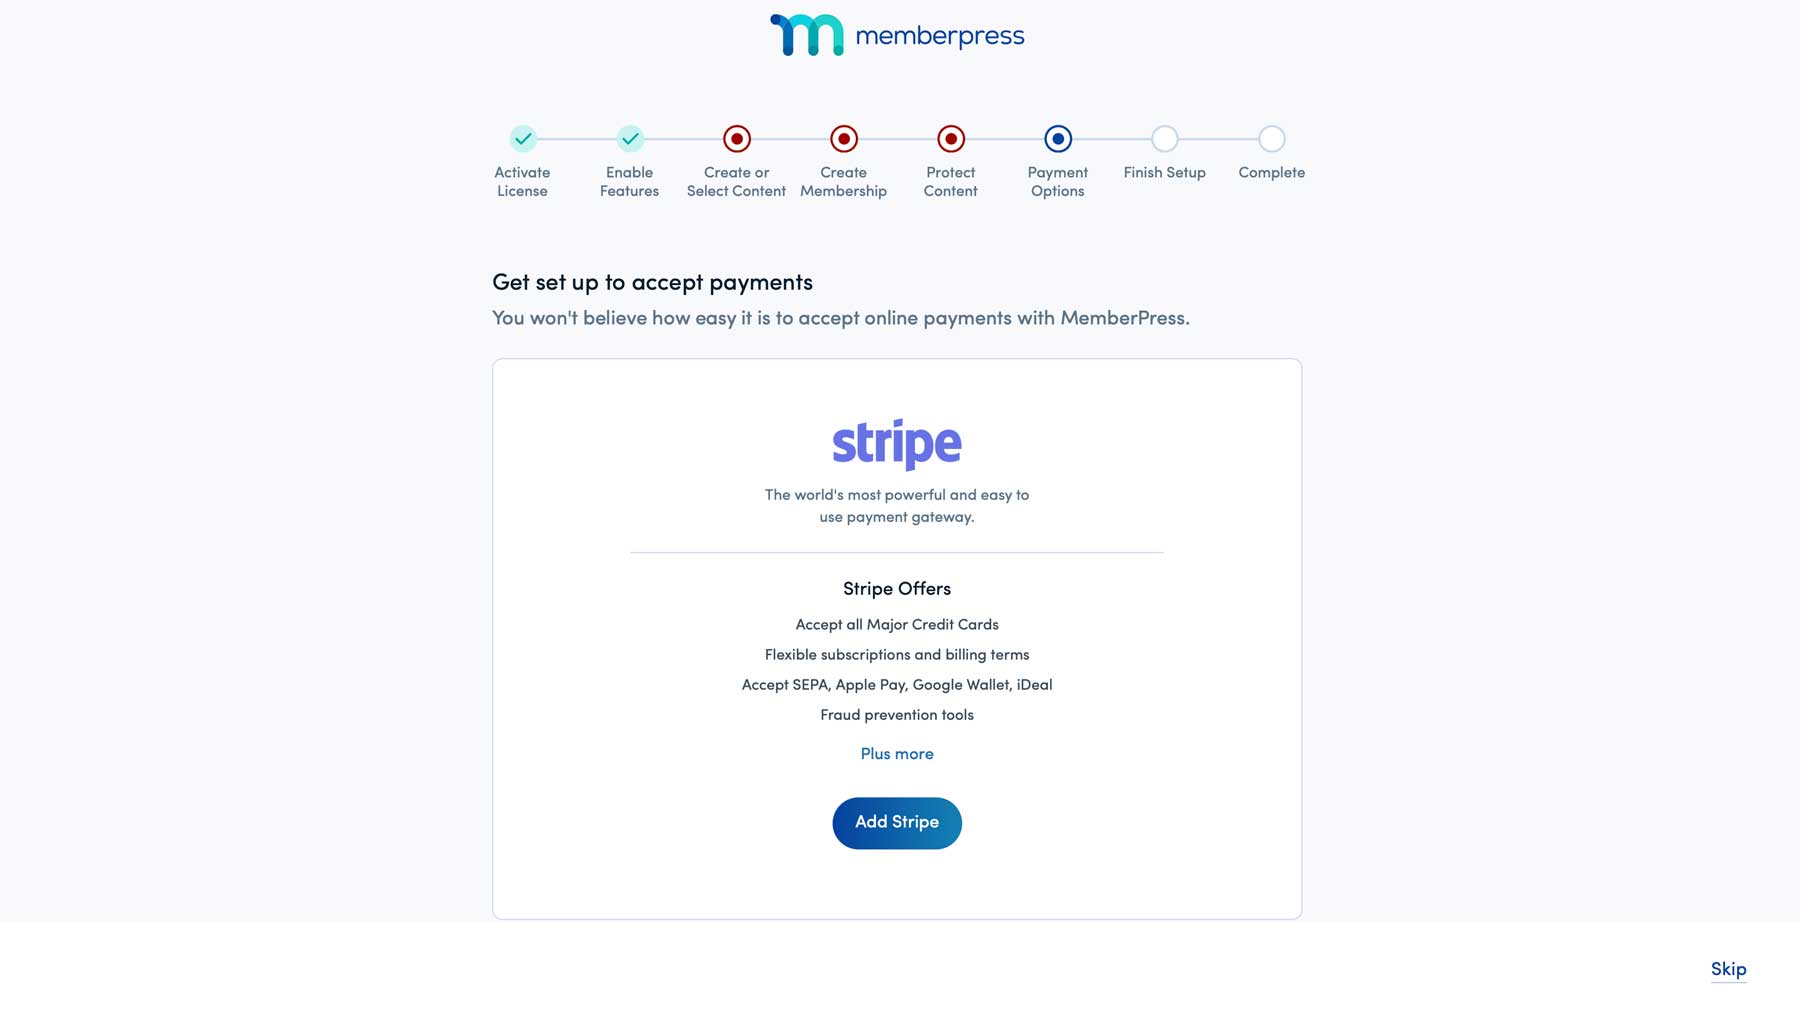
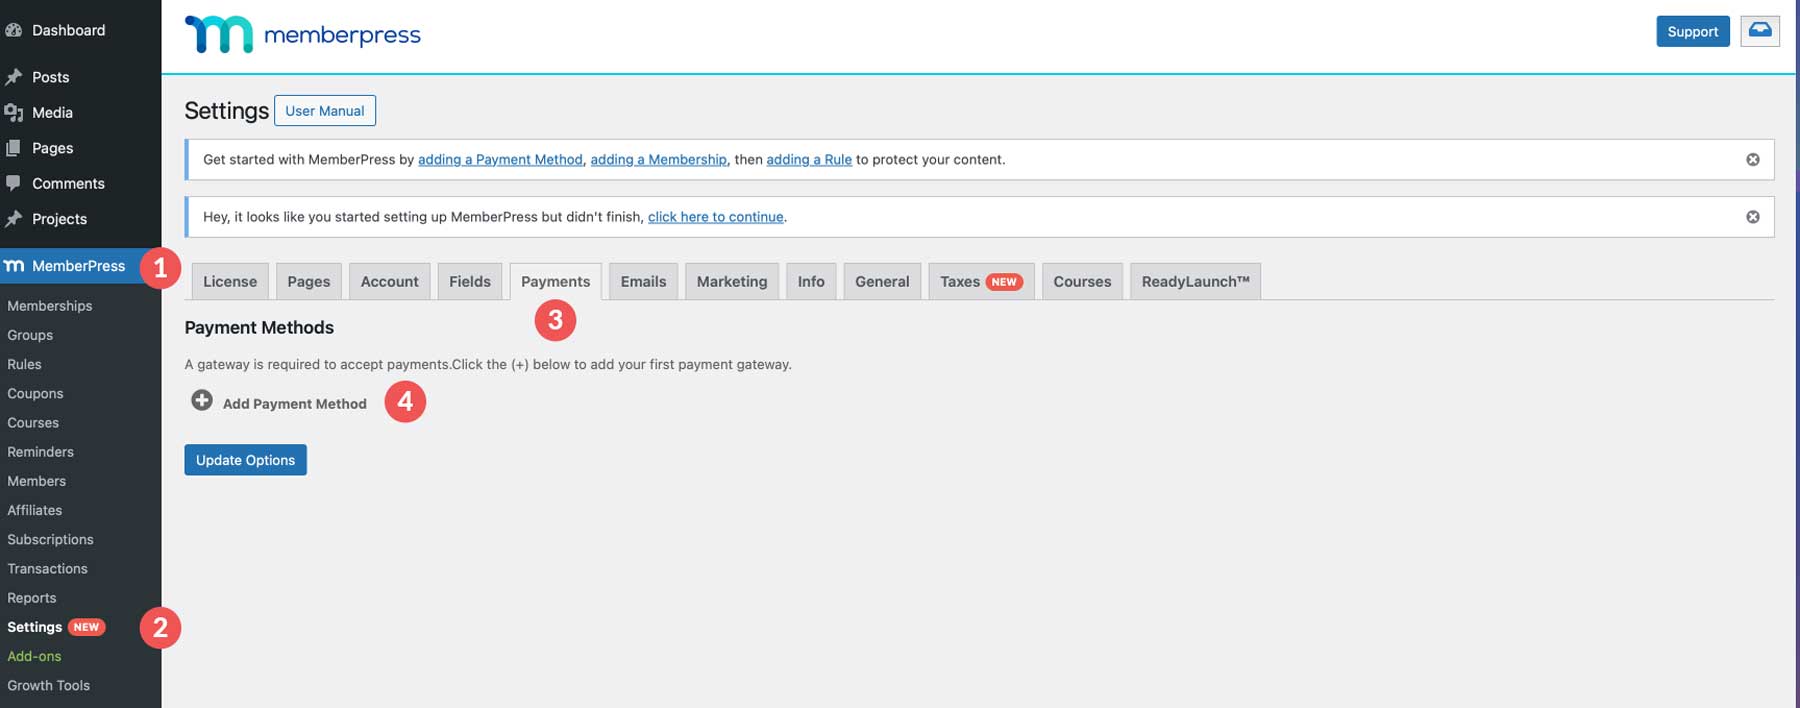
Once you complete the wizard, you should take steps to familiarize yourself with the MemberPress settings. You can find the settings by navigating MemberPress > Settings. We won’t go over every detail in this section. Instead, we’ll walk you through the most common tasks you’ll complete to get your membership website up and running.
Adding A Payment Method
Before setting up membership levels, you’ll want to ensure you can take payments. By default, MemberPress uses Stripe, but there are other options available. You can also accept offline payments, set up an Authorize.net account, or link your PayPal account. To make things easy, we’ll set up payments through Stripe. Navigate to the Payments tab. Click the Add Payment Method button to add Stripe.
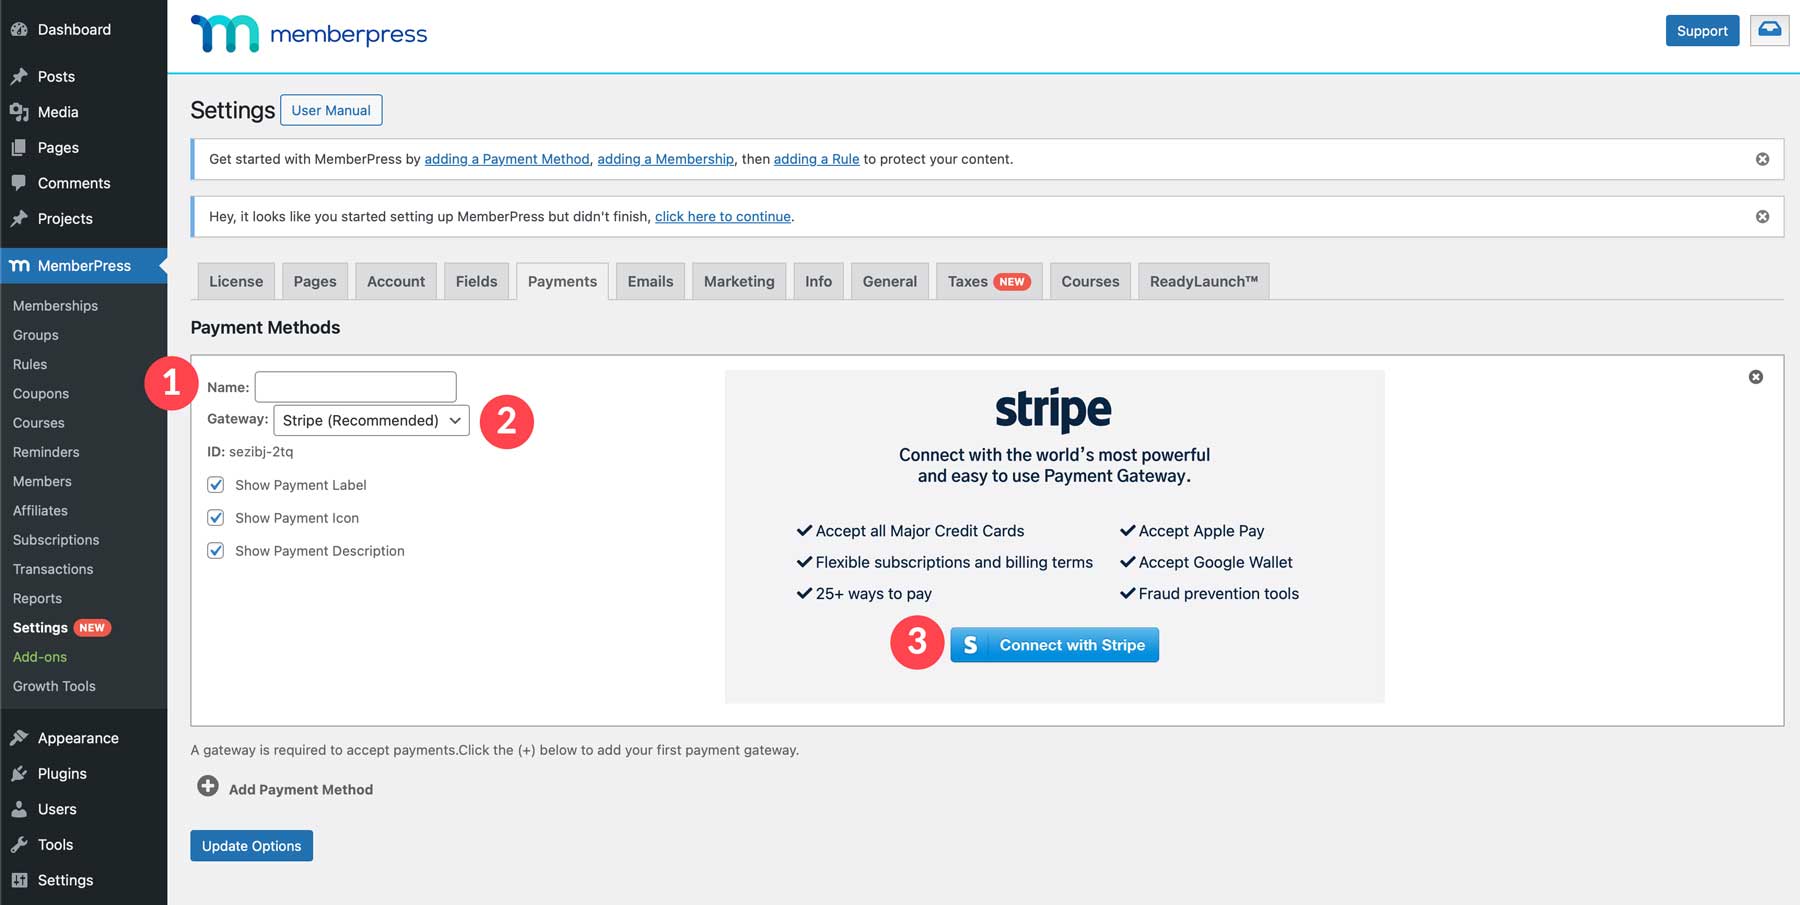
Give the payment gateway a name, select Stripe as the gateway, and click the Connect with Stripe button.
When the page refreshes, enter your email address and click the Submit button.
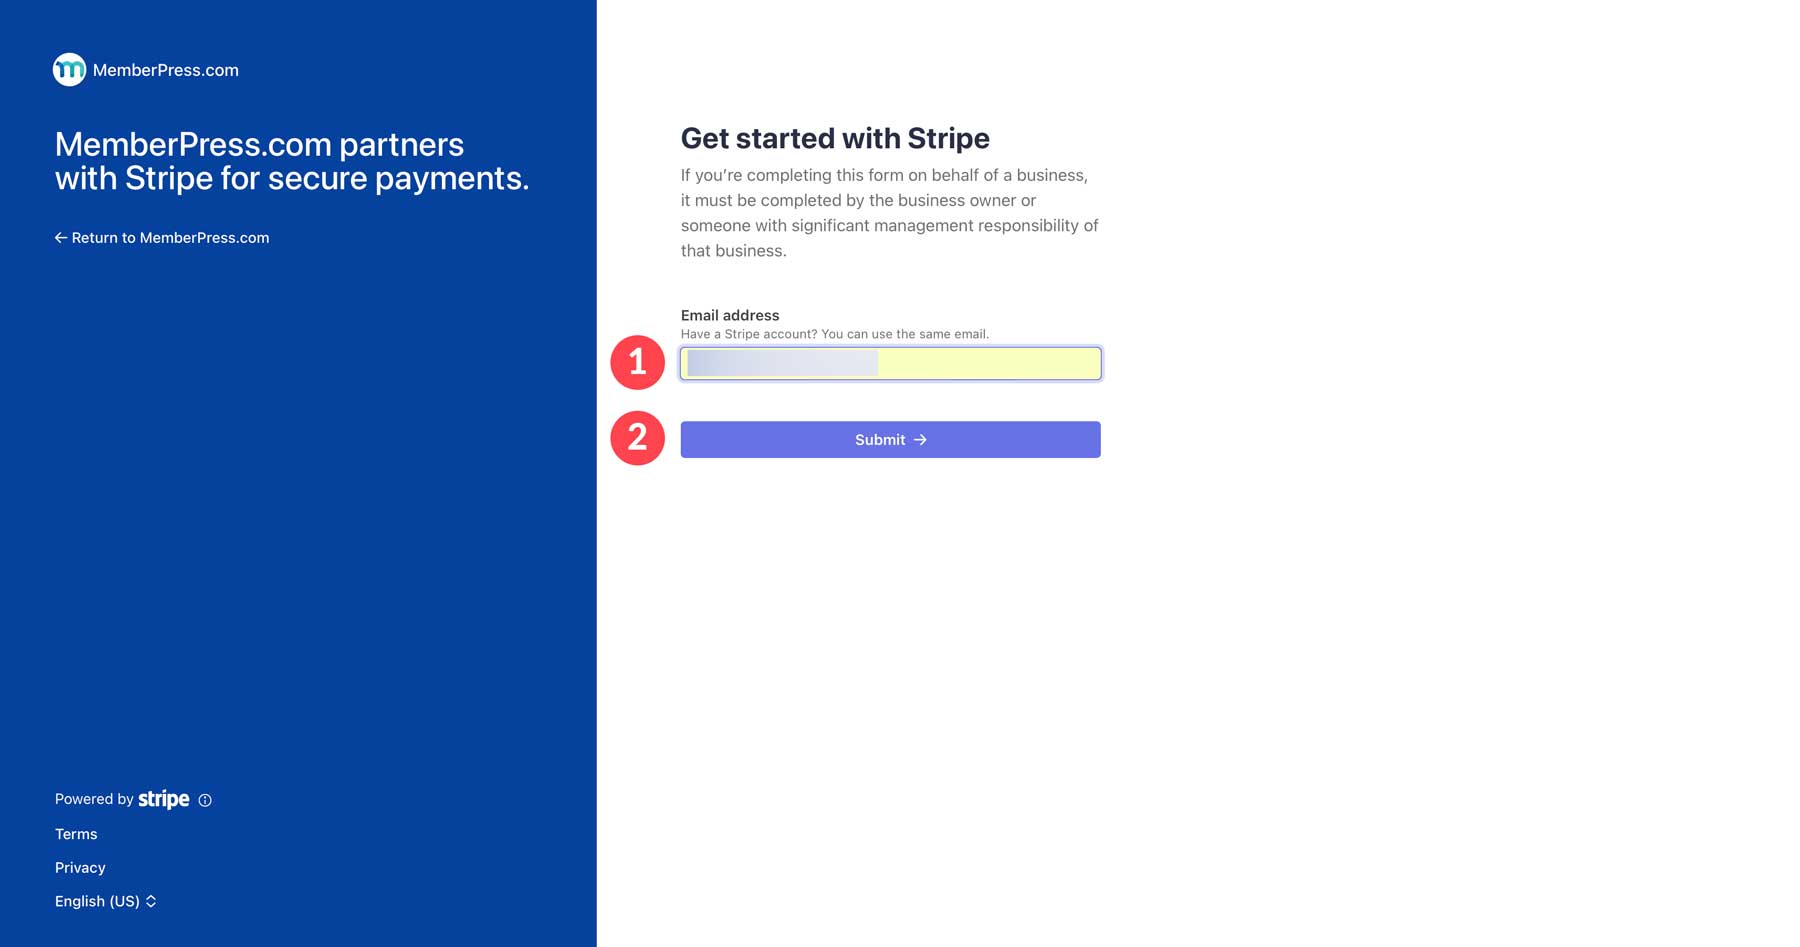
Those with a Stripe account must only enter a password to continue. If you’re a new user, you’ll be prompted to create one. Once your account is created, you’ll enter a one-time code to log in.

Select your Stripe account and click the Connect button to continue. Alternatively, you can create a new account.

Once the connection is made, you’ll be forwarded to the WordPress dashboard. To complete the process, click the Update Options button at the bottom of the page.
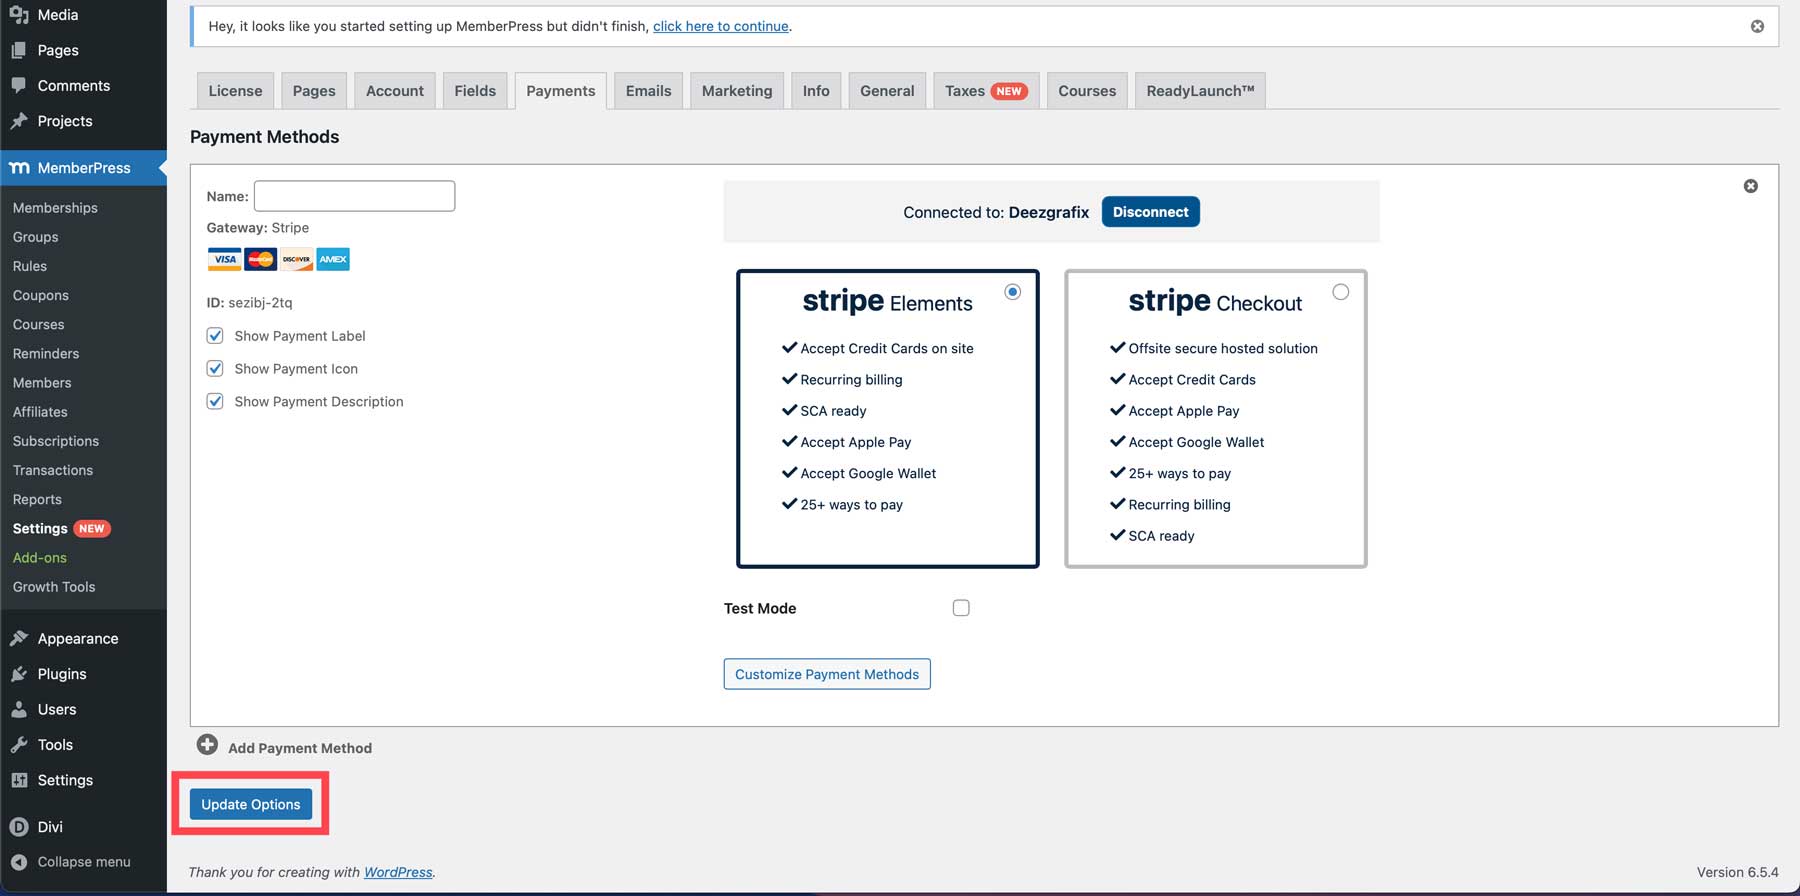
Creating Membership Levels
Another important step in creating a WordPress membership website is creating membership levels. These allow you to cater to a wider audience with different needs and budgets. Only some people are ready for that level of commitment. By offering a range of options, including a free tier, you’ll attract potential members who might not normally sign up. Free memberships entice new visitors, while premium membership levels offer a deeper level of value for committed members.
Start by defining the different types of members you want to attract. Create a free membership with basic access to your content. This serves as a great starting point for potential members to experience the benefits of your site and incentivize them to update for more.
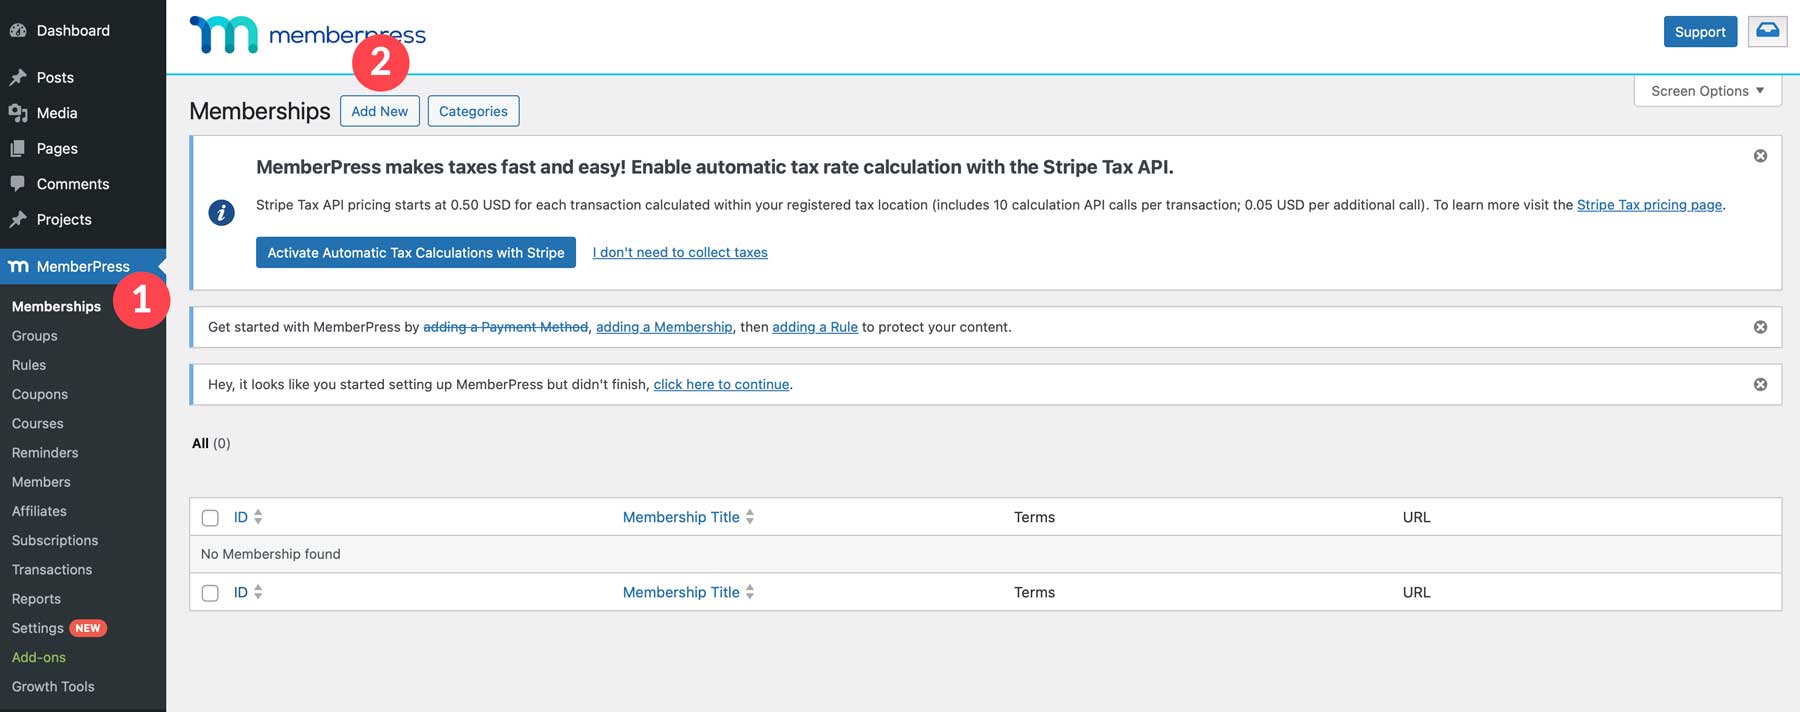
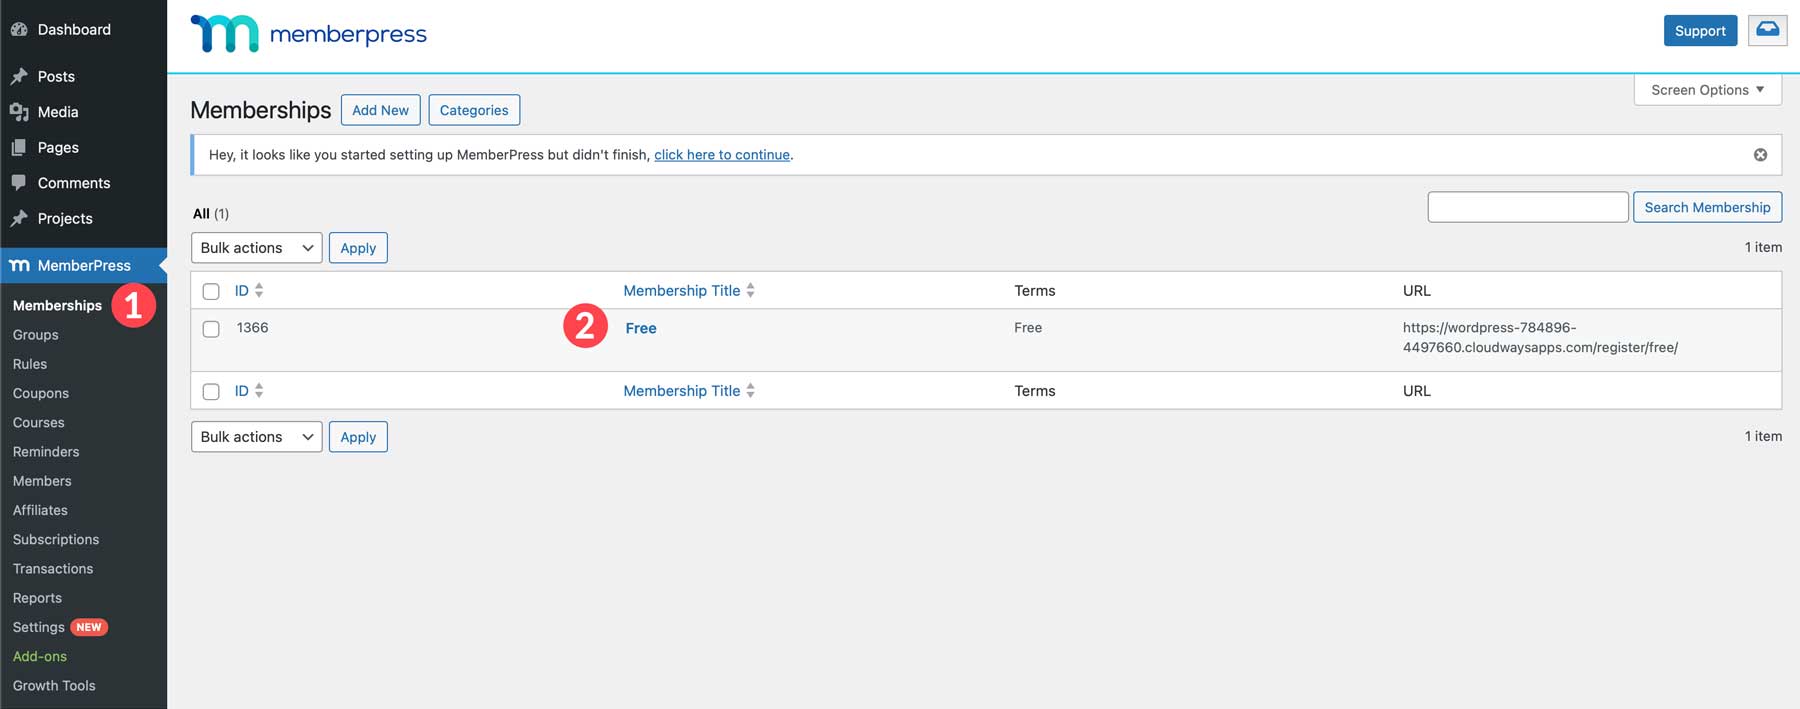
To create a new membership, navigate to MemberPress > Memberships. Click the Add New button to begin.
There are a few steps to take when creating membership levels. The first is to give your membership level a name. Next, you’ll want to set a price for your membership. We’re creating a free membership tier in this case, so leave the price set to 0.00. Leave the access set to lifetime and click the Publish button.
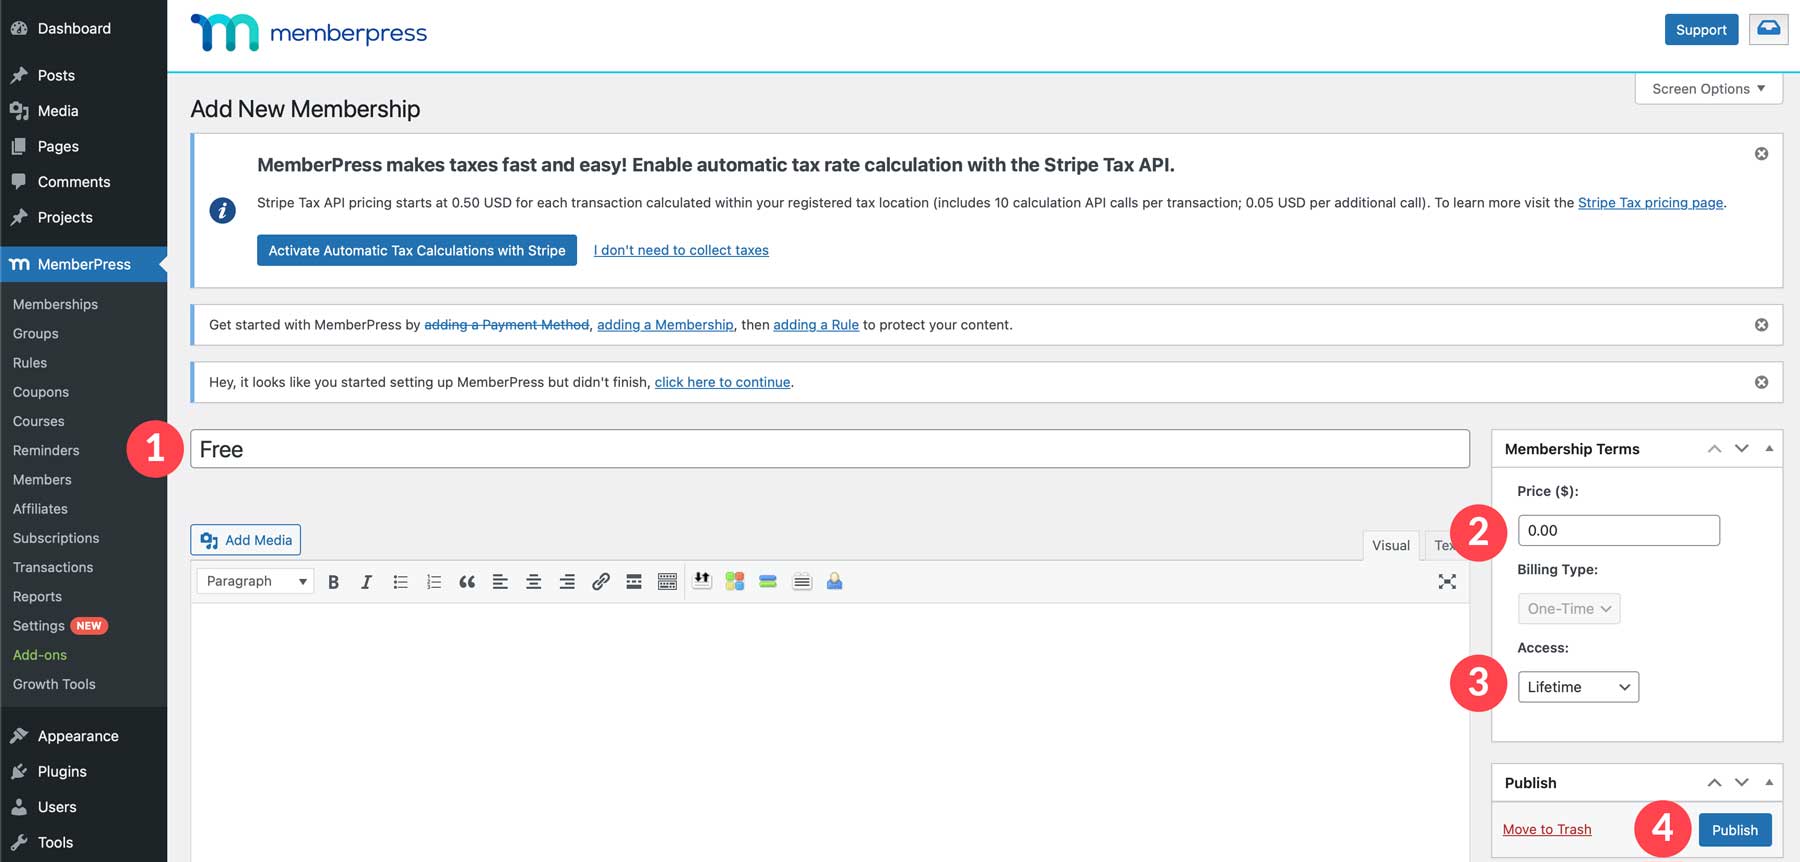
Membership Level Settings
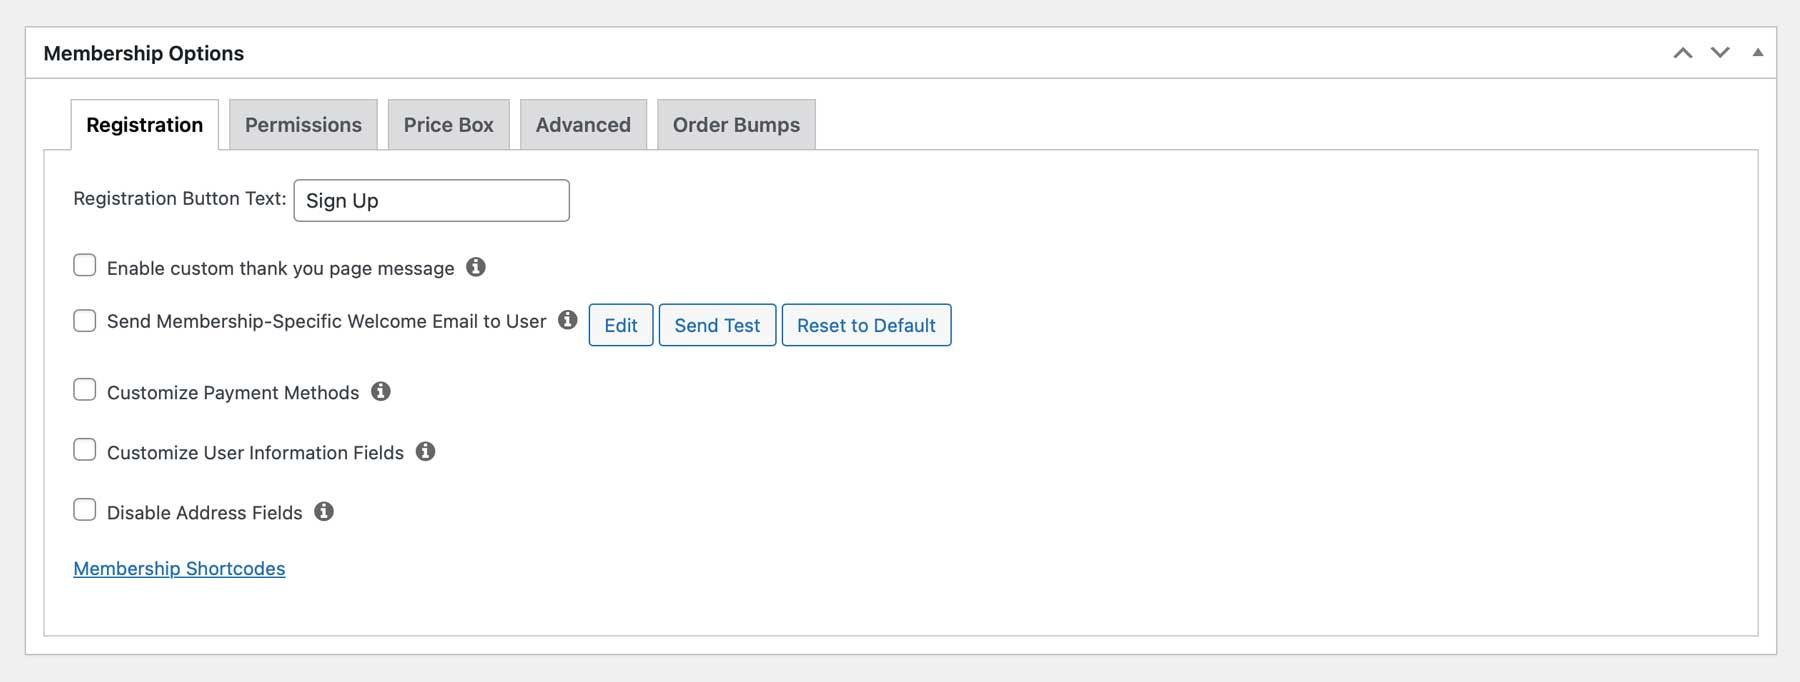
Before we move on, let’s discuss a few other important settings when creating a membership level. Each membership level will have its own registration form, user permissions, and custom emails to set up. You can customize the registration button’s text, enable a custom thank you page message, configure a welcome email, customize the payment method, and more.
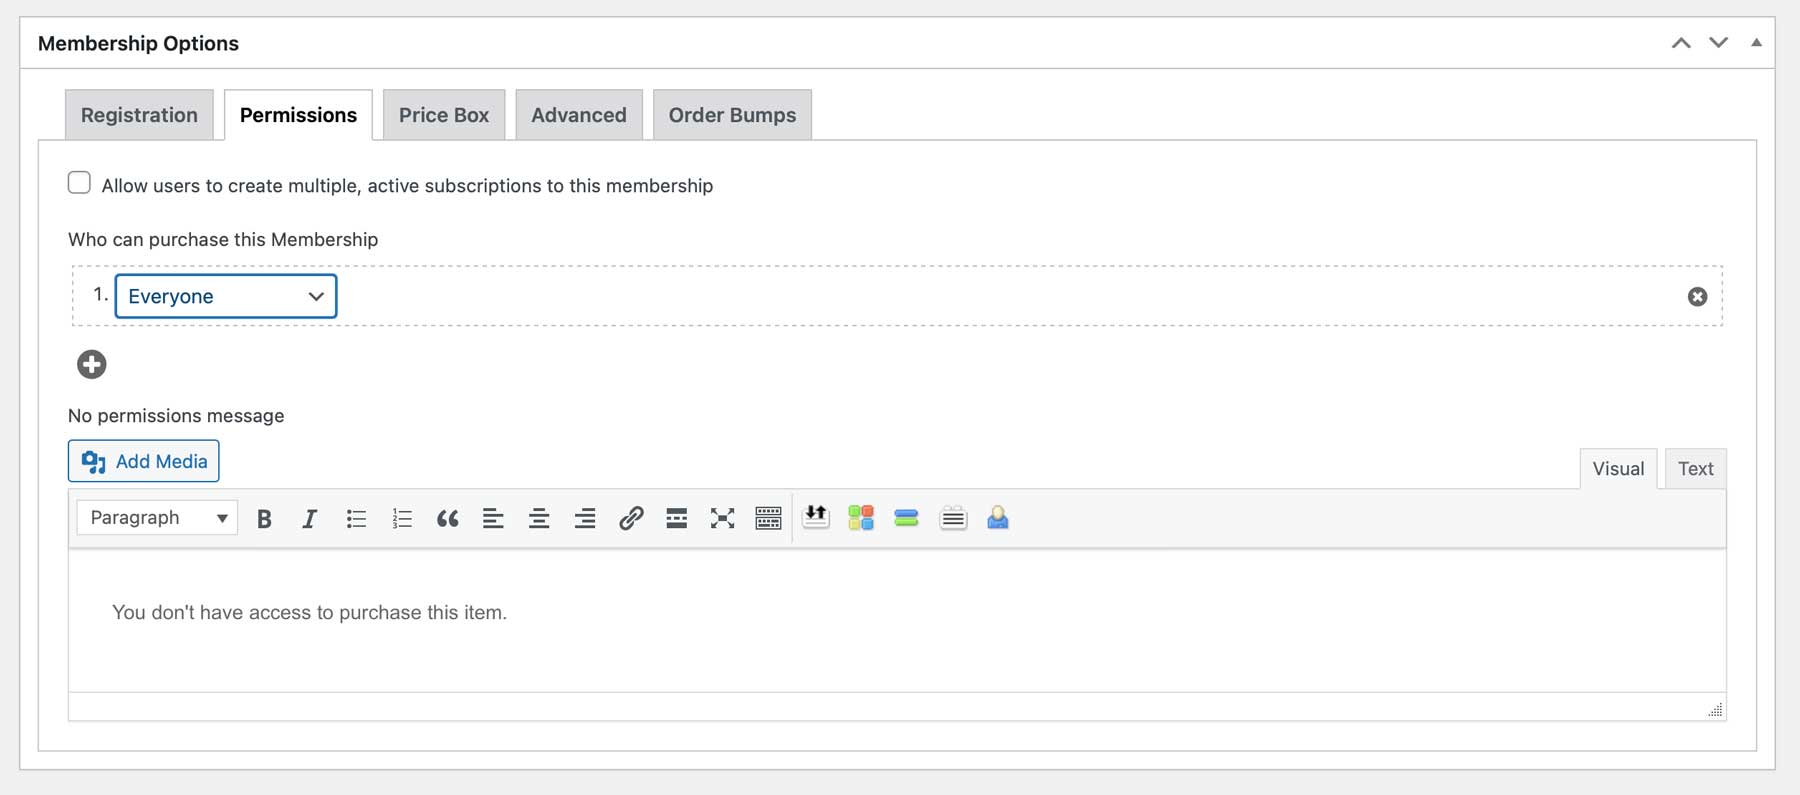
Under the permissions tab, you can specify who can purchase this membership, add a custom permissions message, and allow users to create multiple active subscriptions.
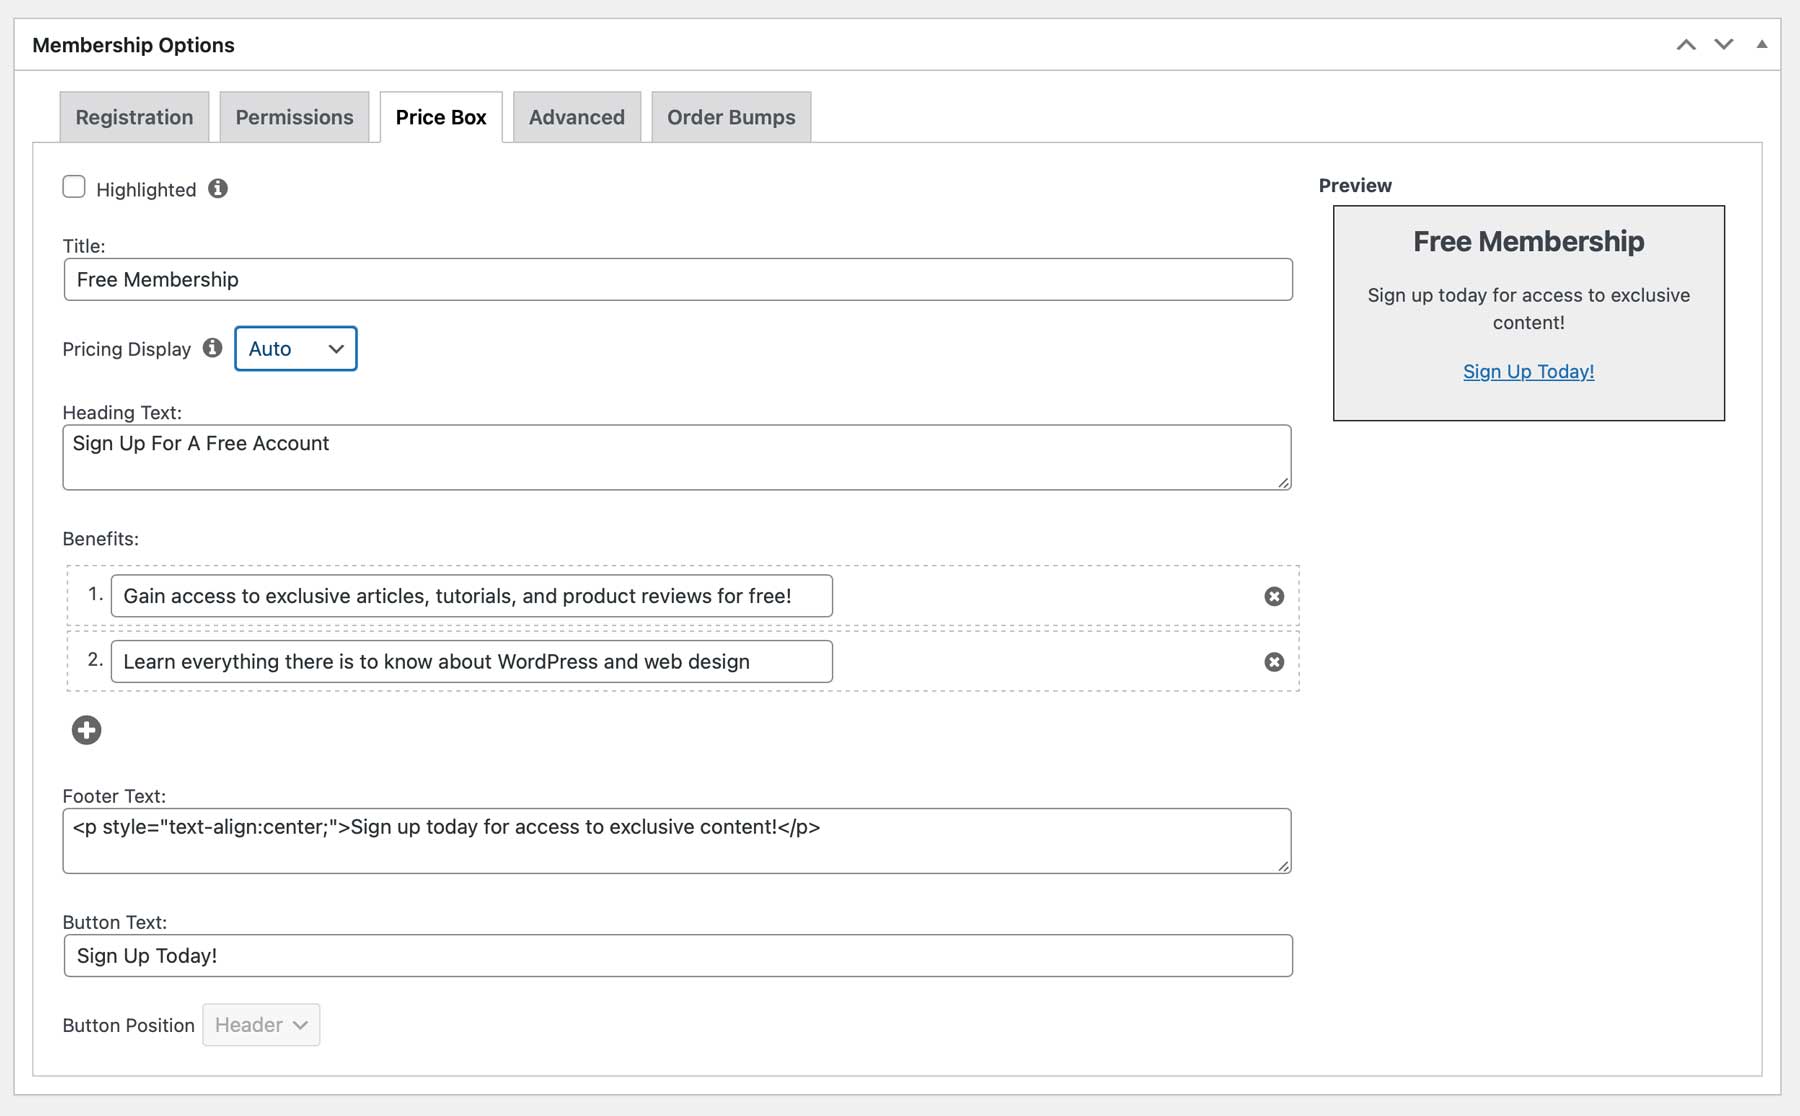
You can also create a custom pricing box to display on your pricing page to aid users in signing up. You can add a heading, membership benefits, footer text, and a custom sign-up button.
Under advanced settings, you can create a custom membership access URL, define pricing terms, add a custom login redirect URL, and specify user roles.

Repeat the steps to create additional membership levels.
Step 6: Creating Membership Pages with Divi
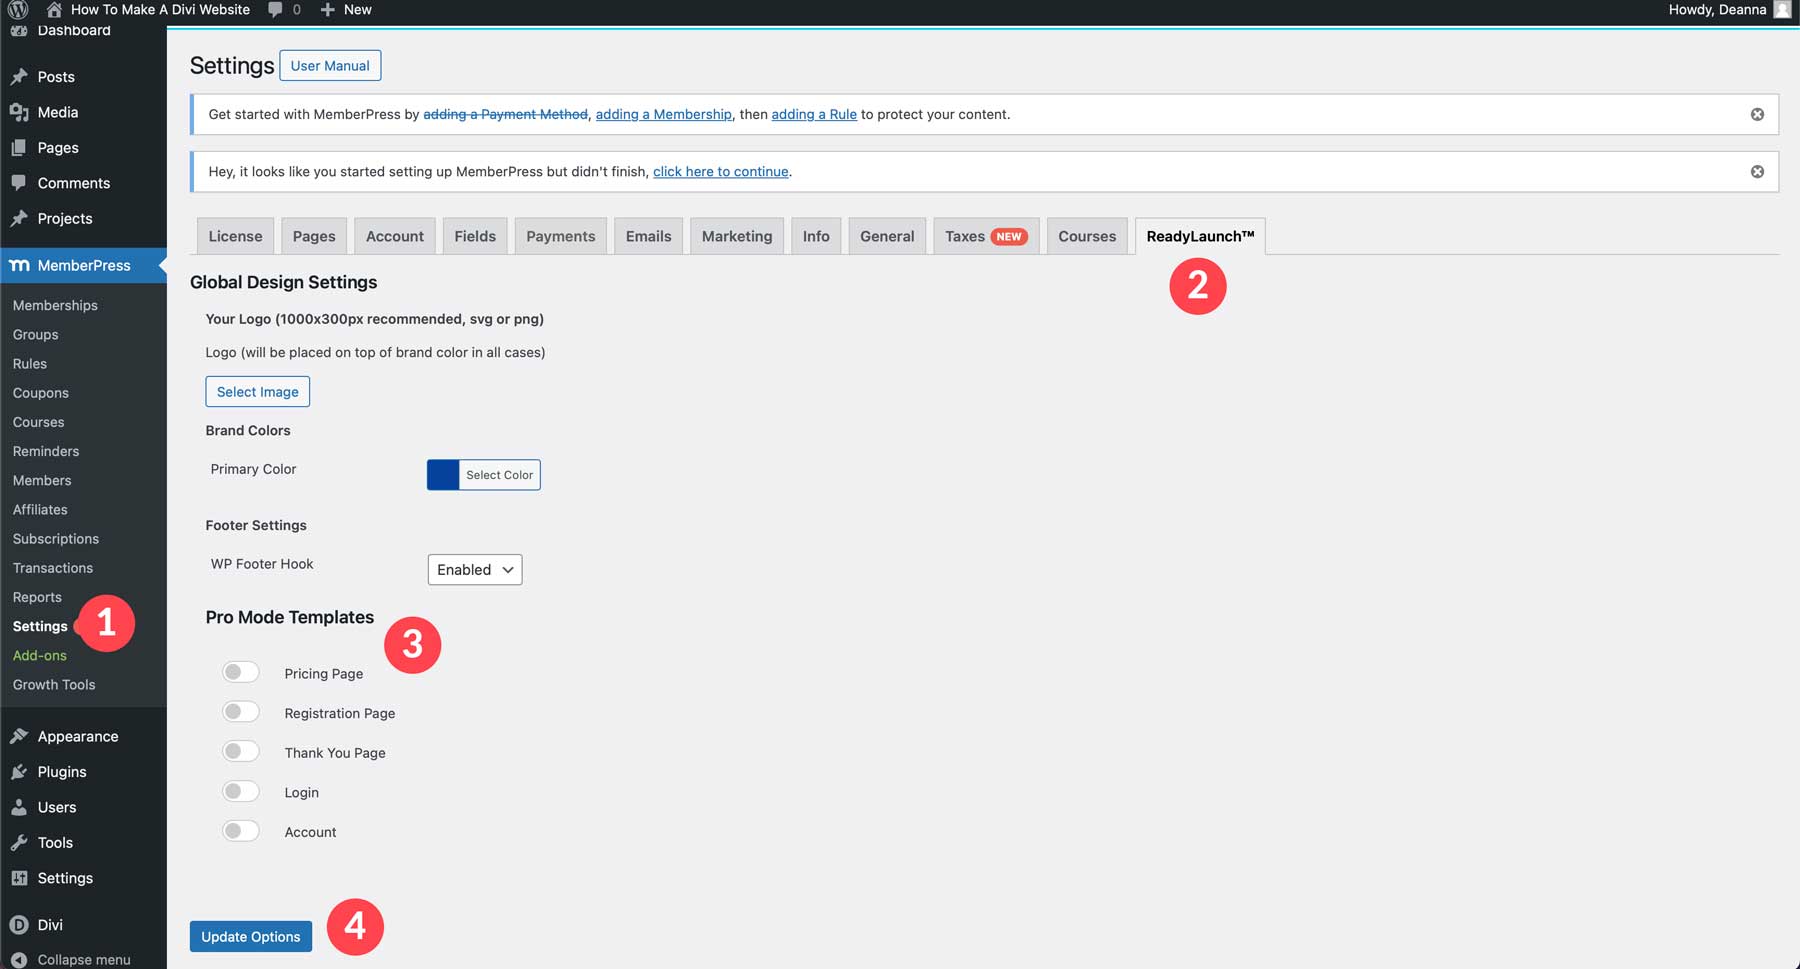
MemberPress has a ReadyLaunch feature that automatically creates all of MemberPress’s core pages. The pages automatically generated when MemberPress is installed are the member account, log in, registration, pricing, and thank you pages. You can allow ReadyLaunch to generate these pages or create them with the Divi builder. To use the Divi Builder, you must first disable ReadyLaunch. Navigate to MemberPress > Settings > ReadyLaunch. Under Pro Mode Templates, turn all toggles to disabled and then click the Update Options button.
Activate The Visual Builder For MemberPress Custom Post Types
When creating a MemberPress pricing page with Divi, one of the first things you must do is ensure the Visual Builder is enabled for custom post types. This will allow us to design our MemberPress core pages with Divi’s drag-and-drop visual editor. Head to Divi > Theme Options and navigate to the Builder tab. Enable Groups and Memberships and click the Save Changes button.
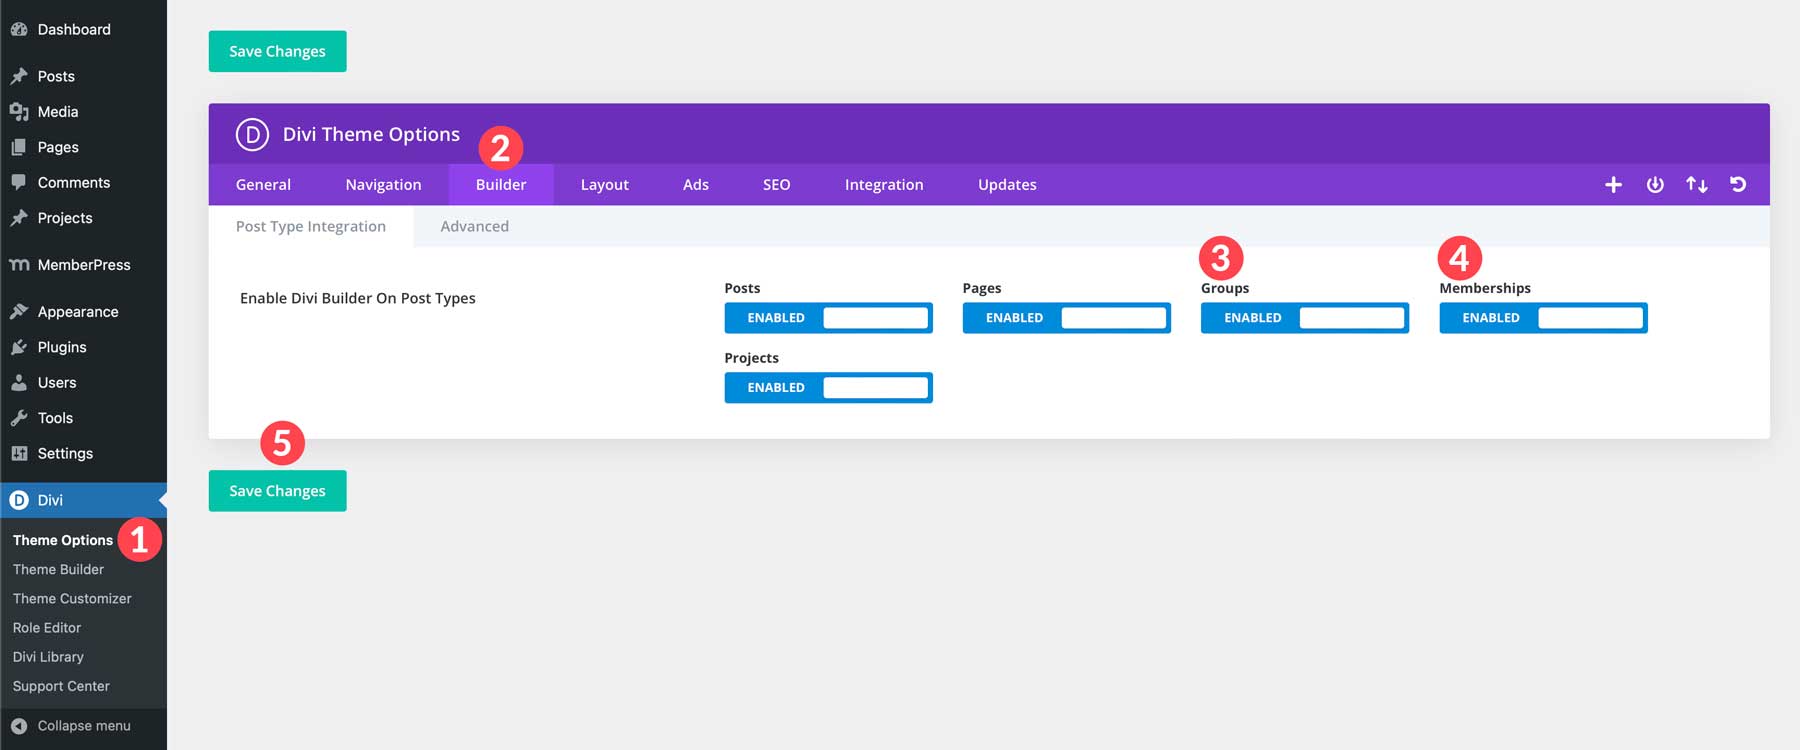
Create a Membership Page Template
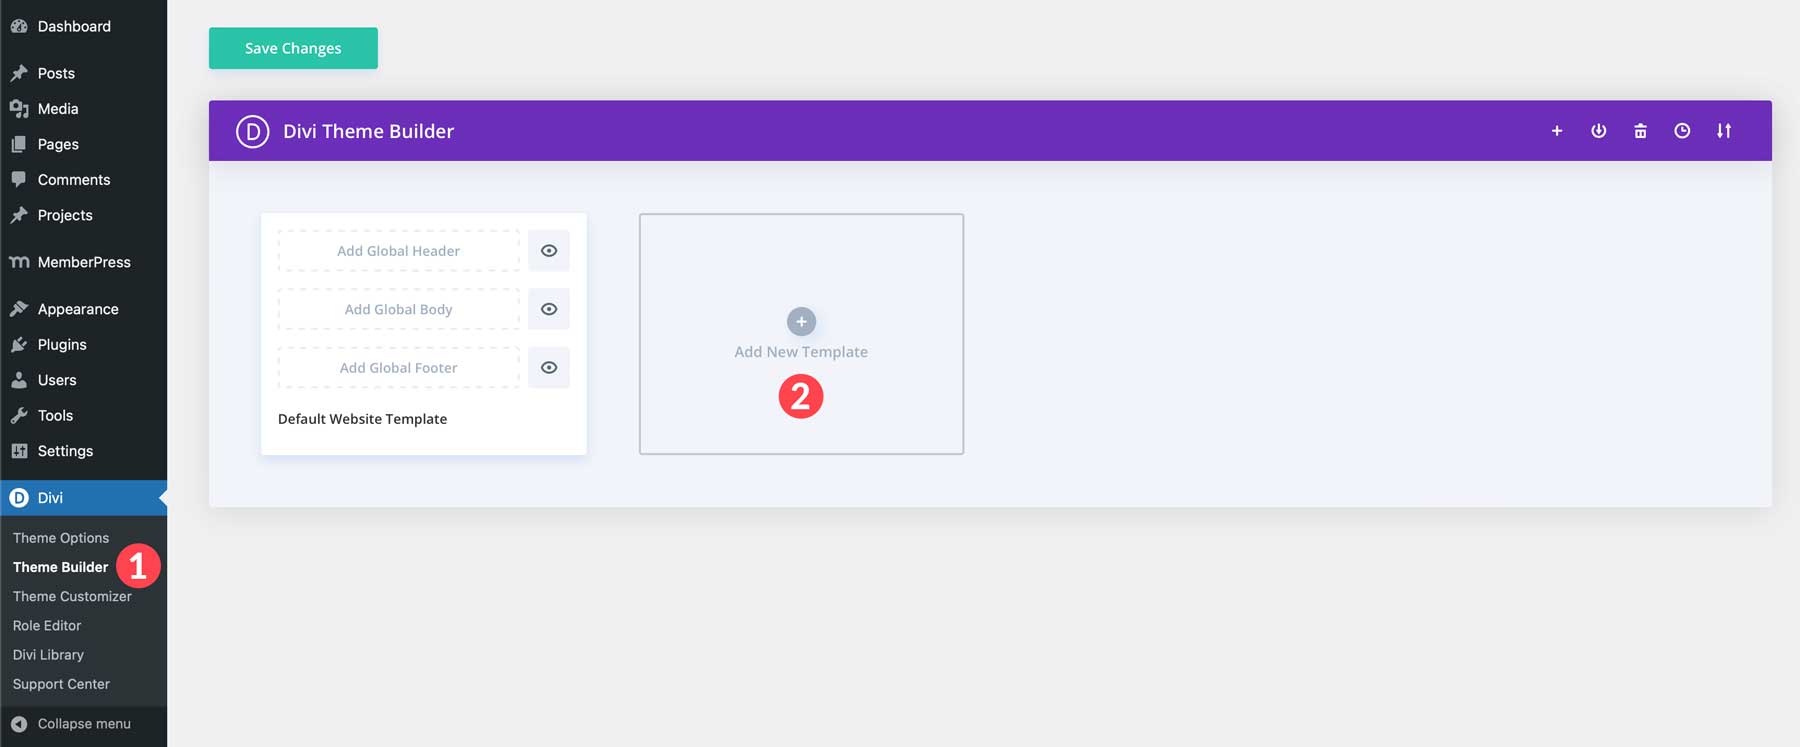
Next, we’ll create a template for our membership page. To do this, we’ll need to use the Theme Builder, along with MemberPress shortcodes, to display the content. Navigate to Divi > Theme Builder and click the Add New Template button.
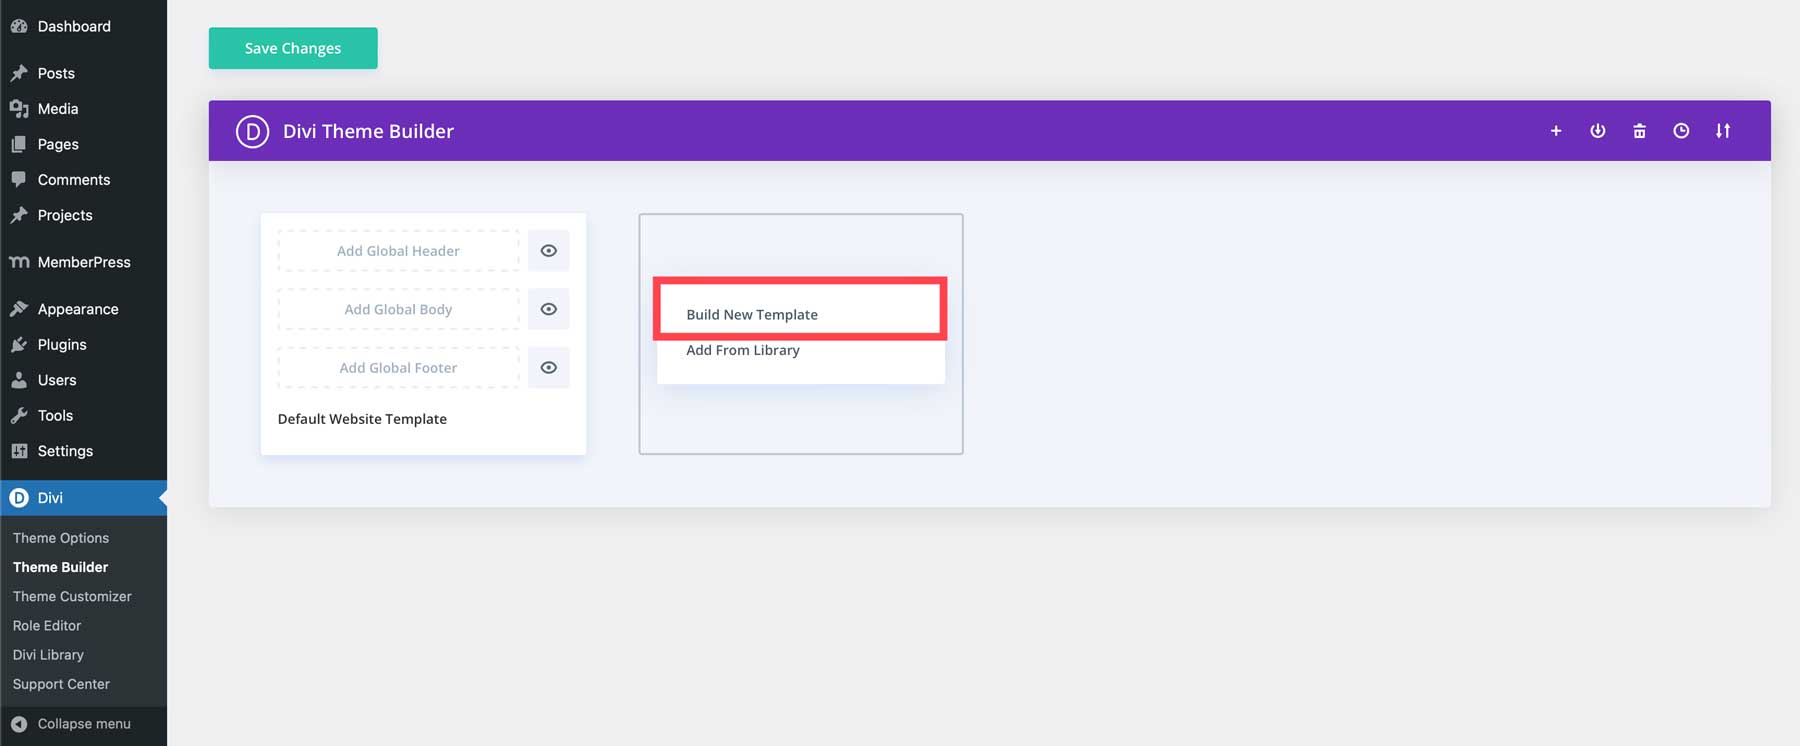
Click Build New Template.
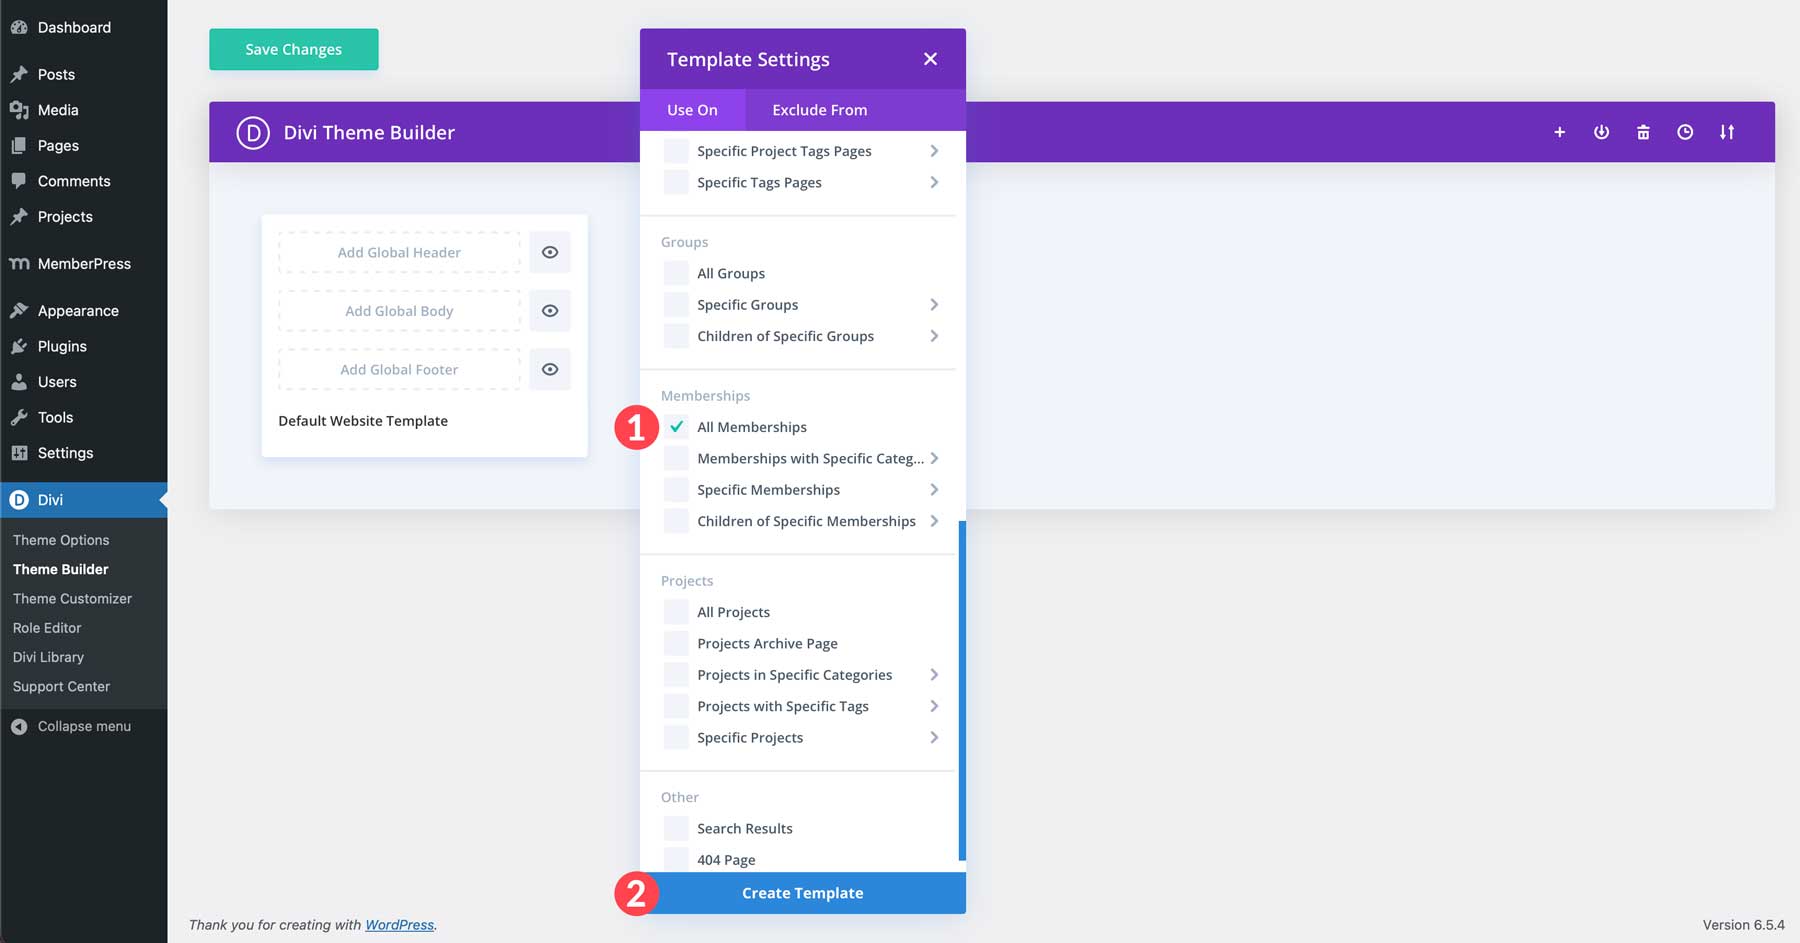
Next, scroll down, select All Memberships, and click the Create Template button.
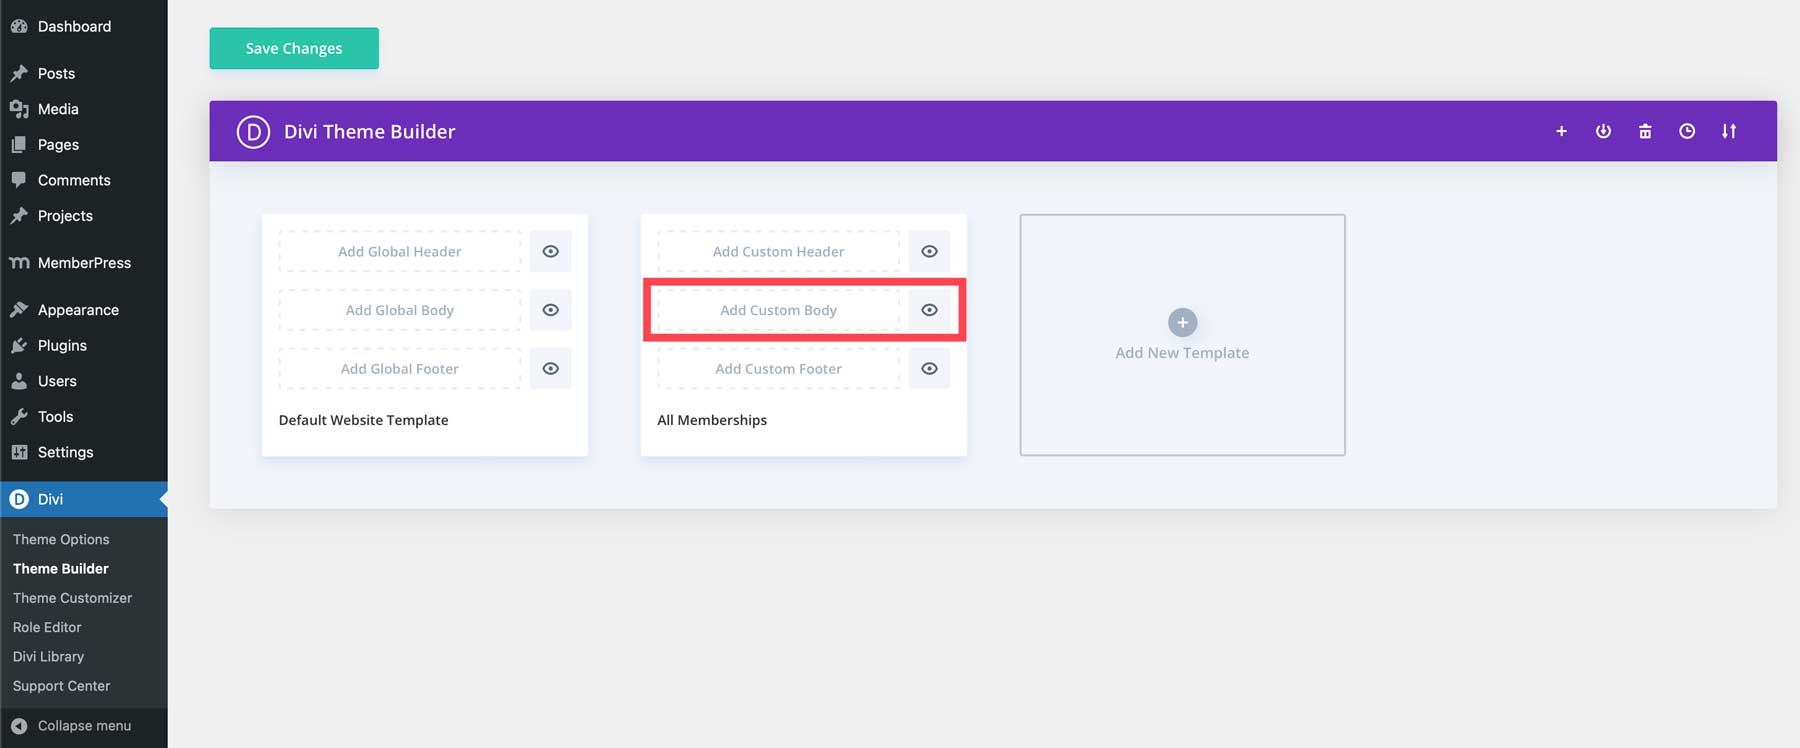
Next, click the Add Custom Body button.
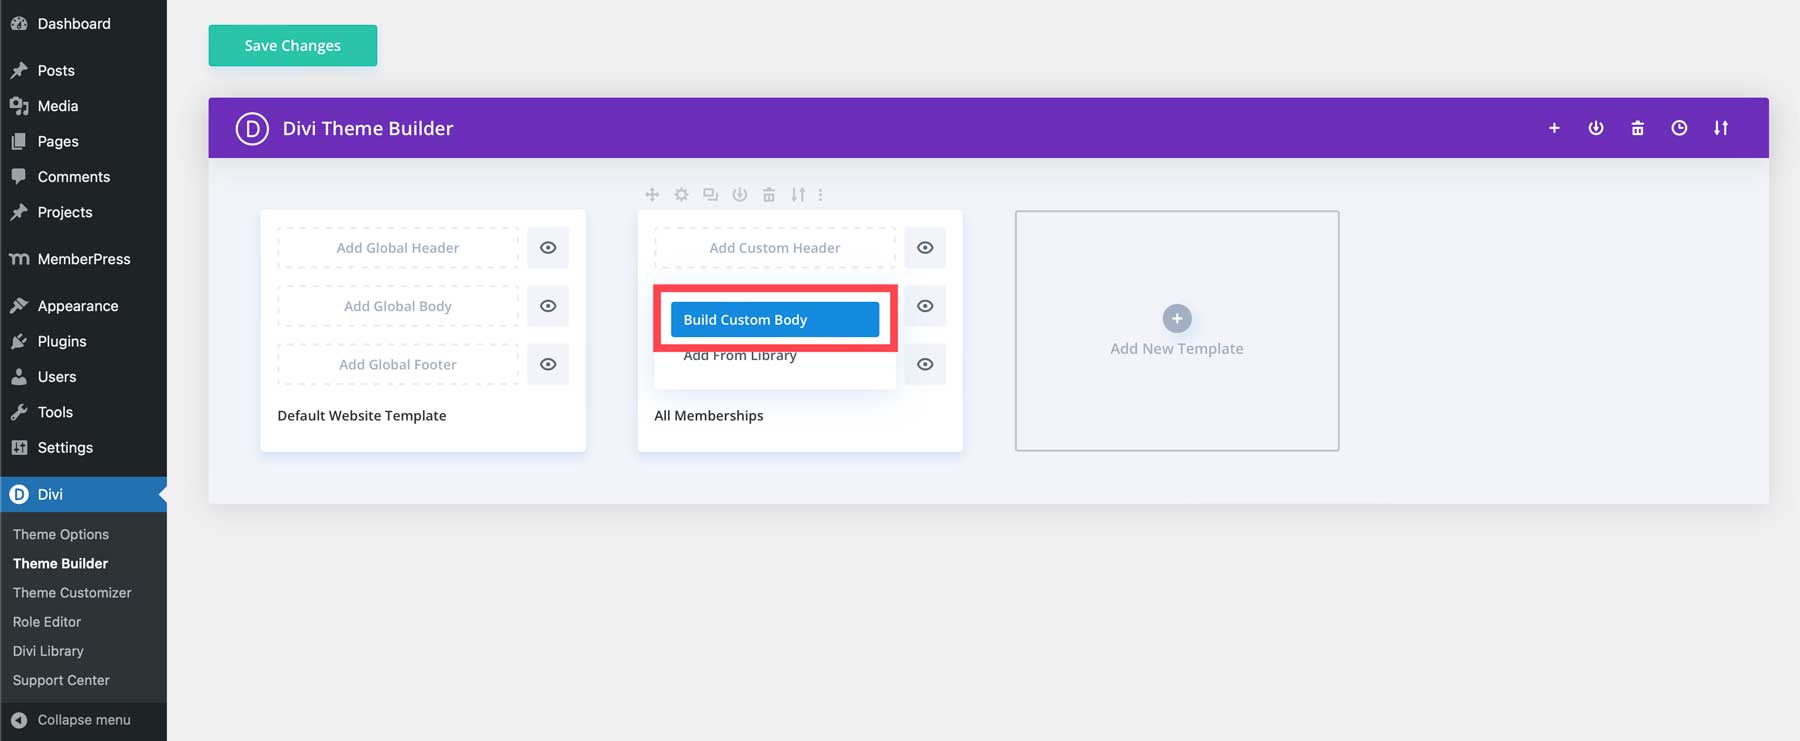
Click Build Custom Body to launch the Visual Builder.
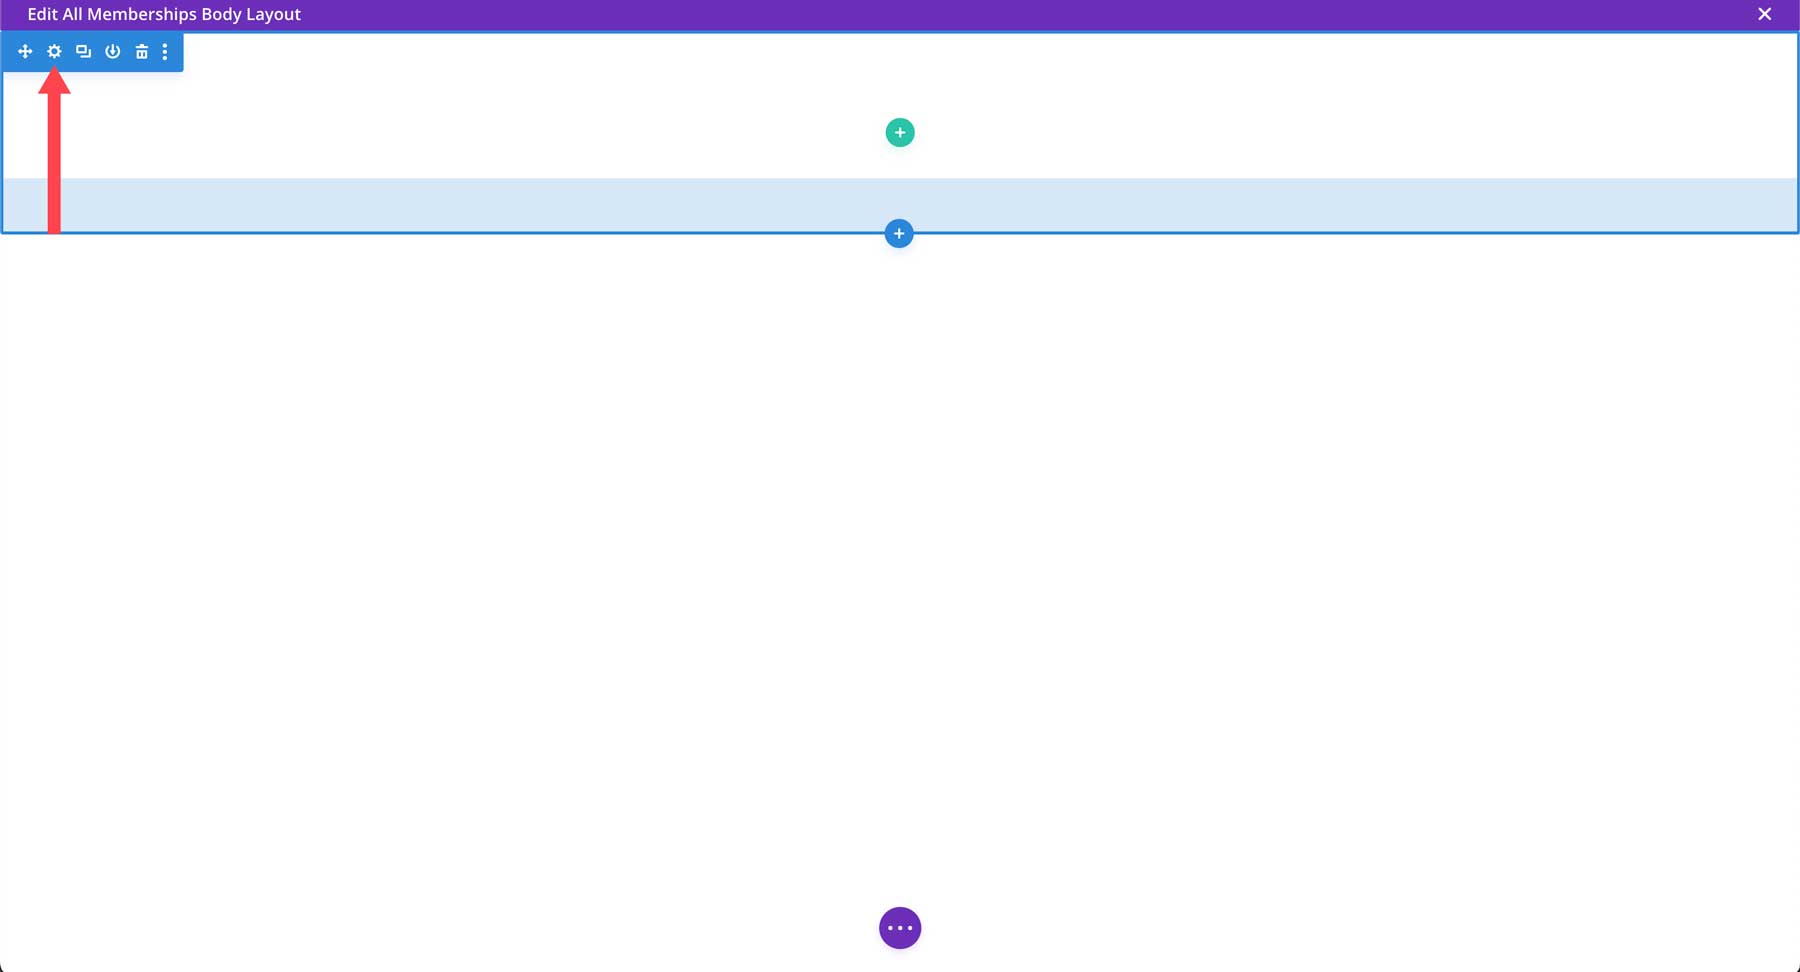
Building a membership page with Divi is simple, but there are a few steps involved. For the membership template, we only need to add the post content module to add content using Divi directly into the Free Trial membership level. With the Visual Builder active, hover over the section at the top of the blank page. When the blue border appears, click the settings icon to bring up the section module’s settings.
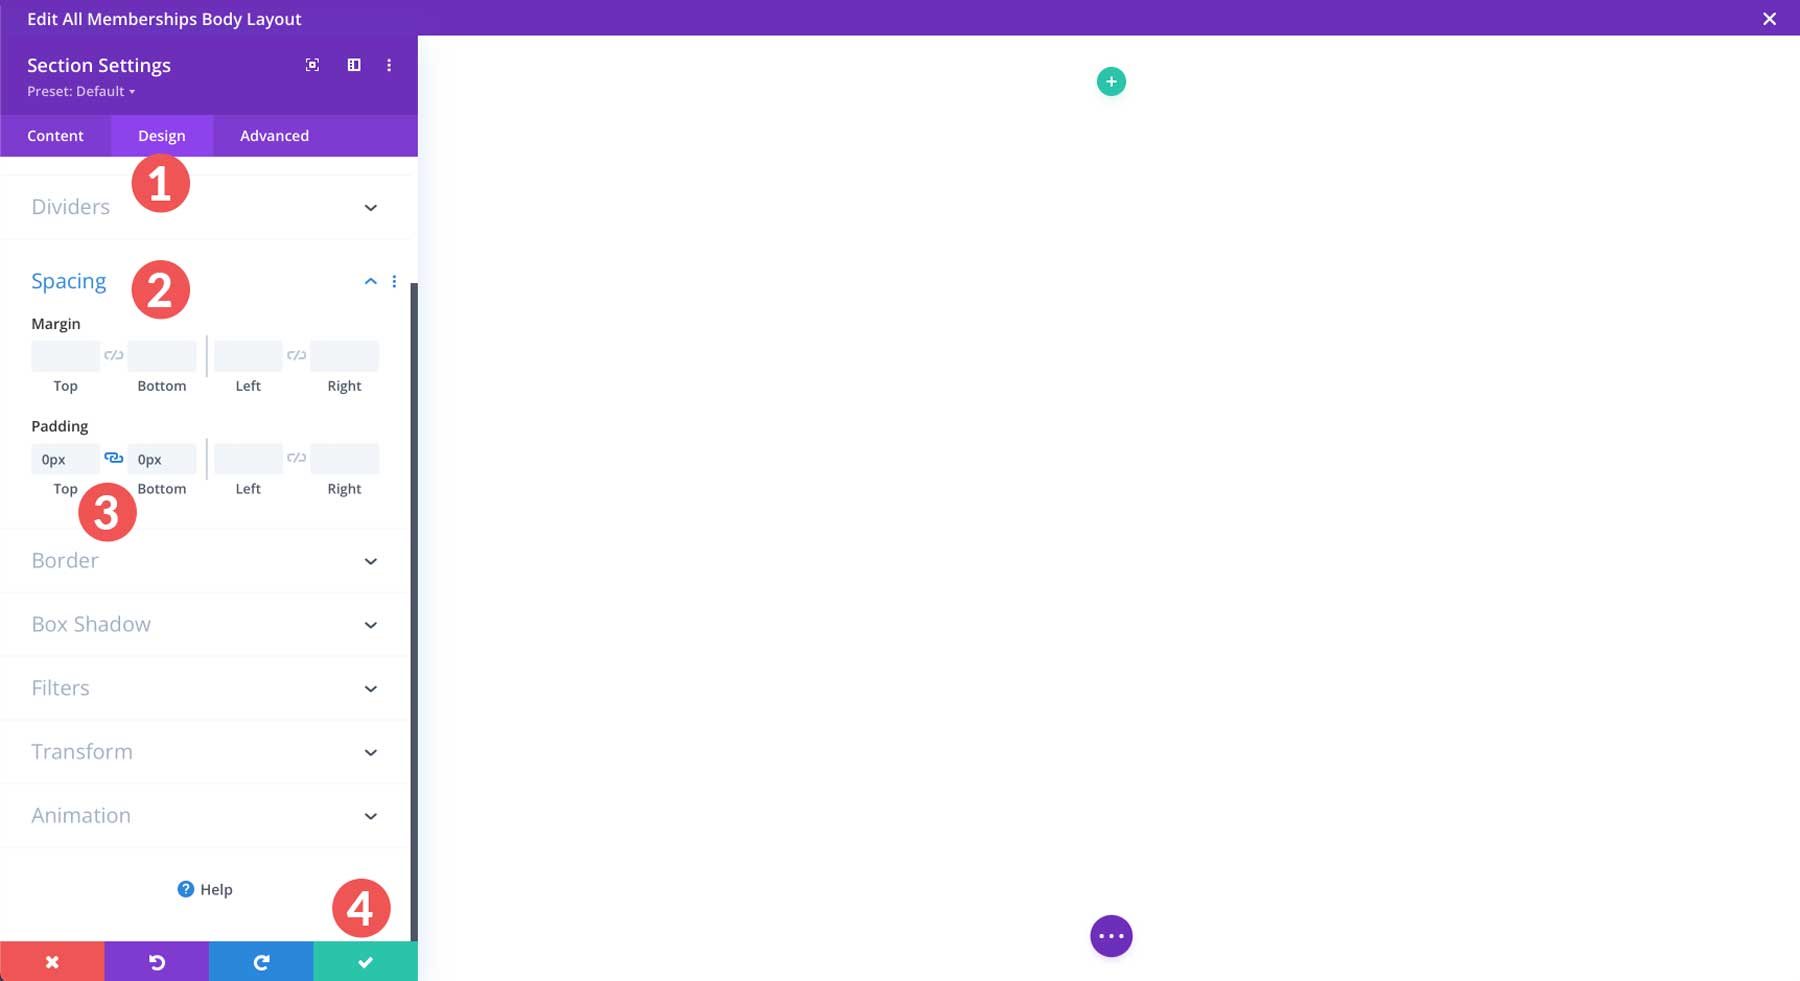
Click on the design tab, select spacing, and set the padding to 0. Click the green check button to save the module’s settings.
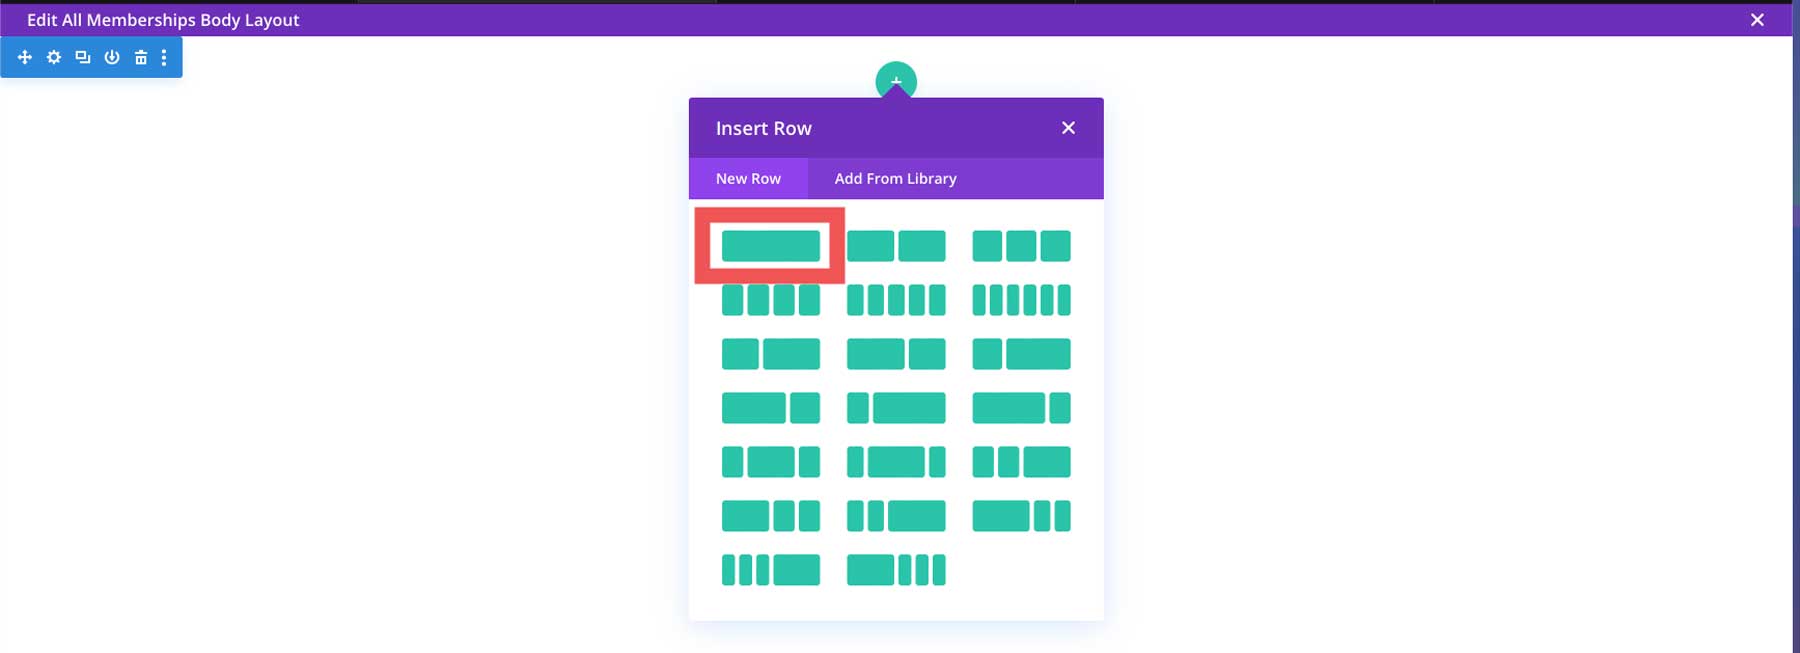
Next, we’ll add a row module. Click the green plus icon to add a row.

Select the single-column row module.
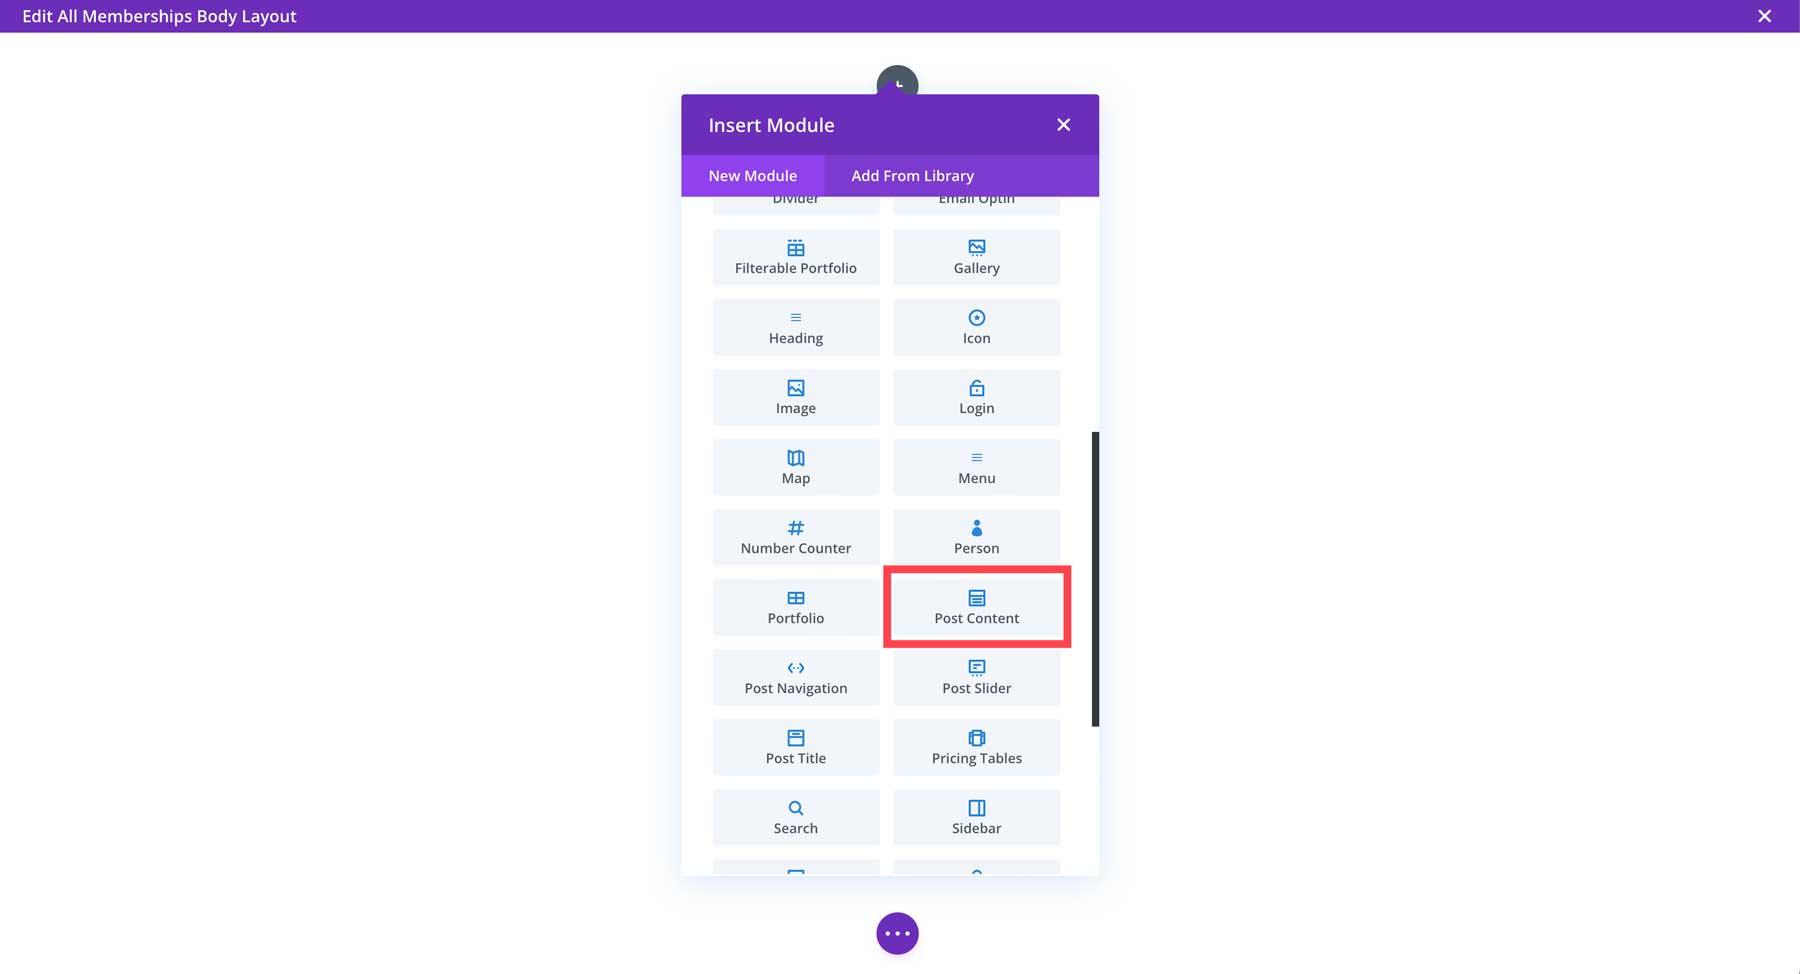
Next, search for the Post Content Module and add it to the template.
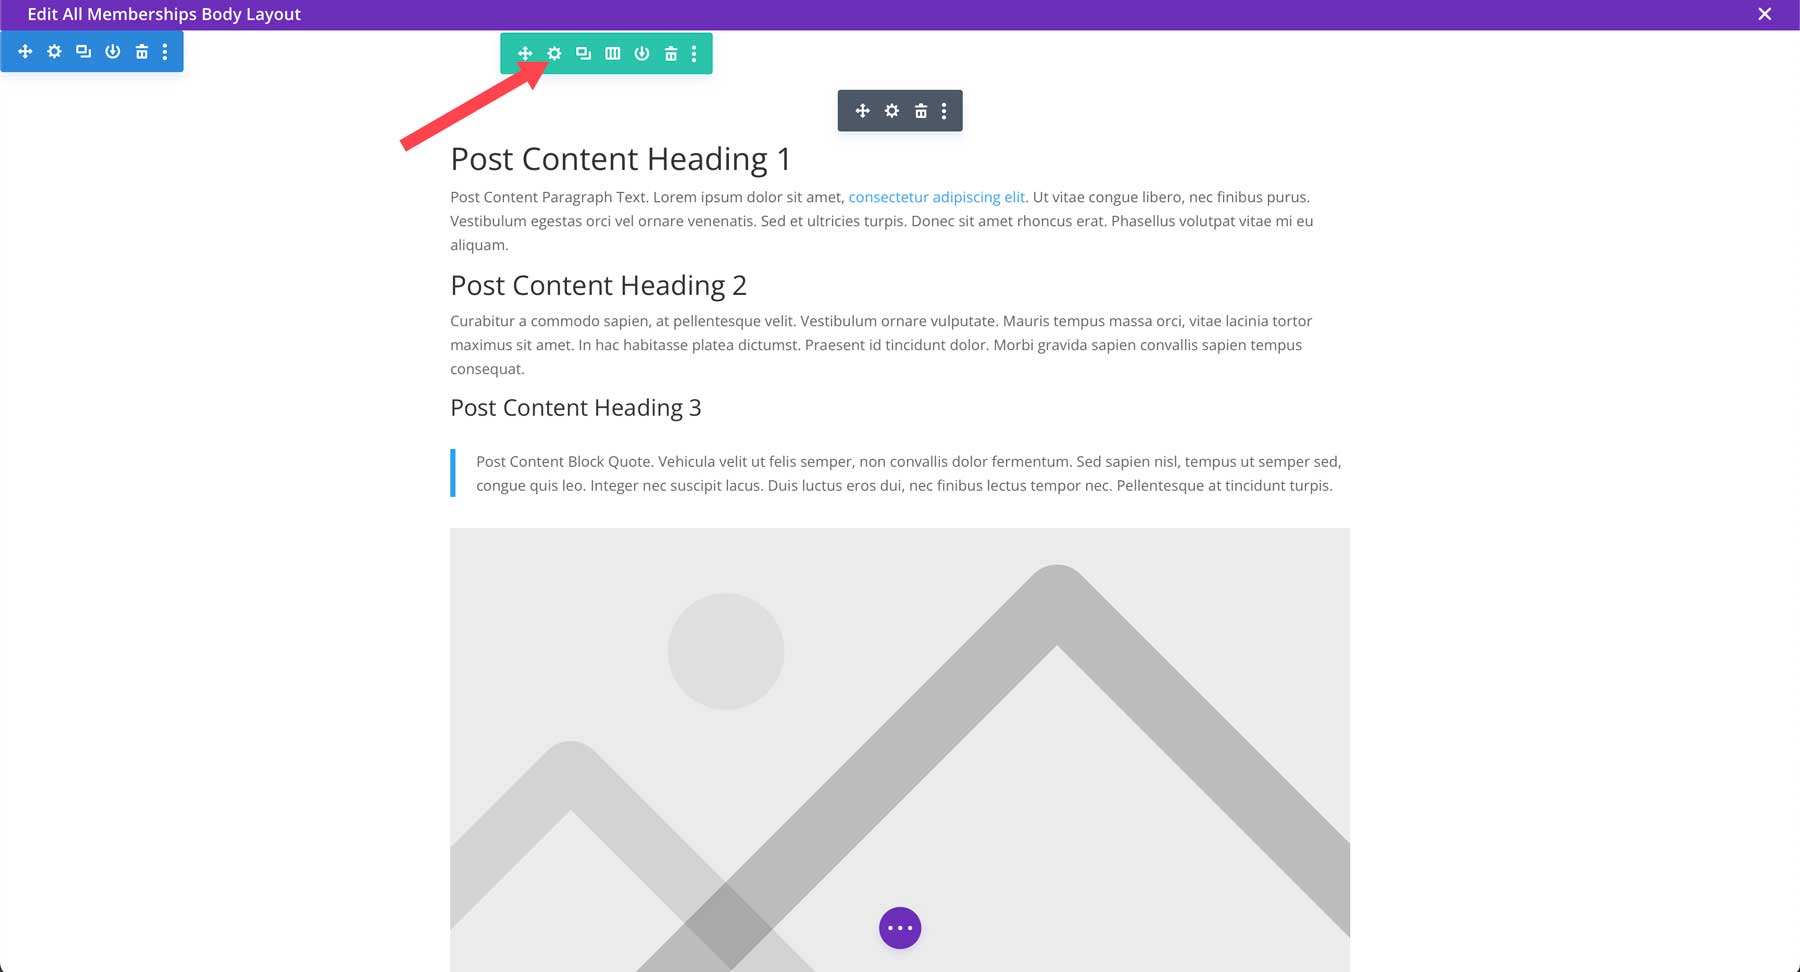
Next, we’ll alter the spacing for the row the same way we did for the section module. This time, hover over the row to reveal the green border. Click the settings icon to alter the row’s settings.
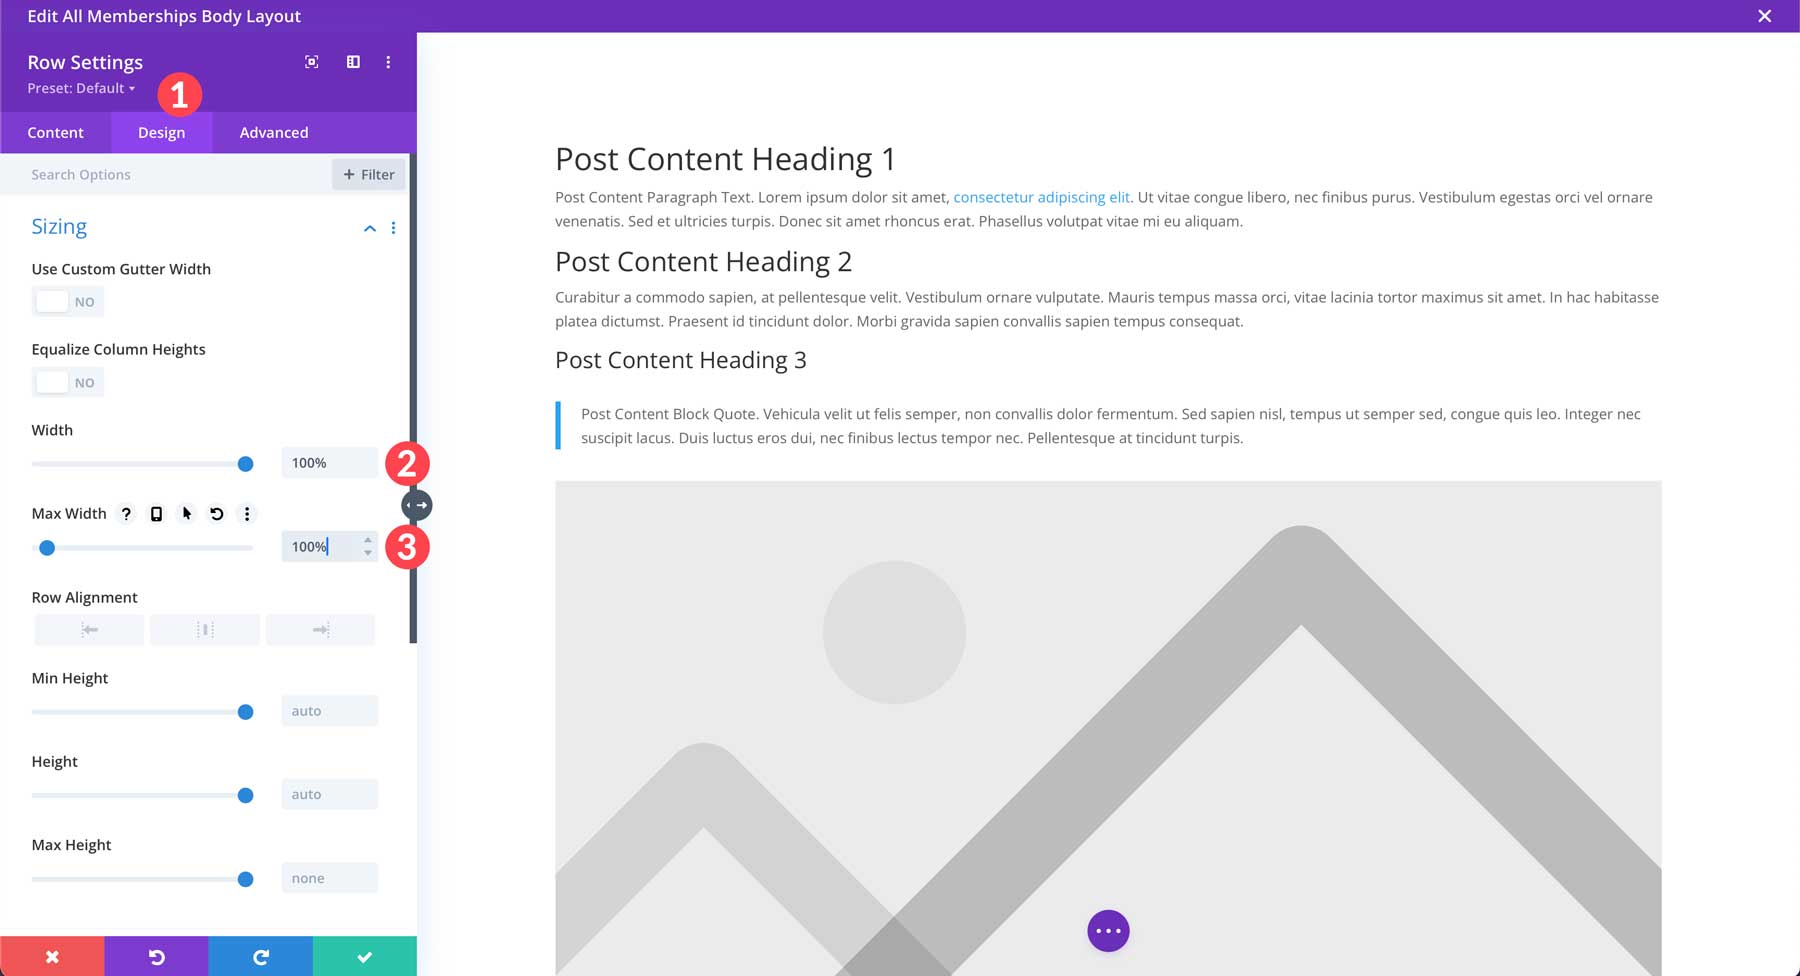
Under Design > Sizing, adjust the width and max width to 100%.
We’ll adjust the padding to 0, just like the section.
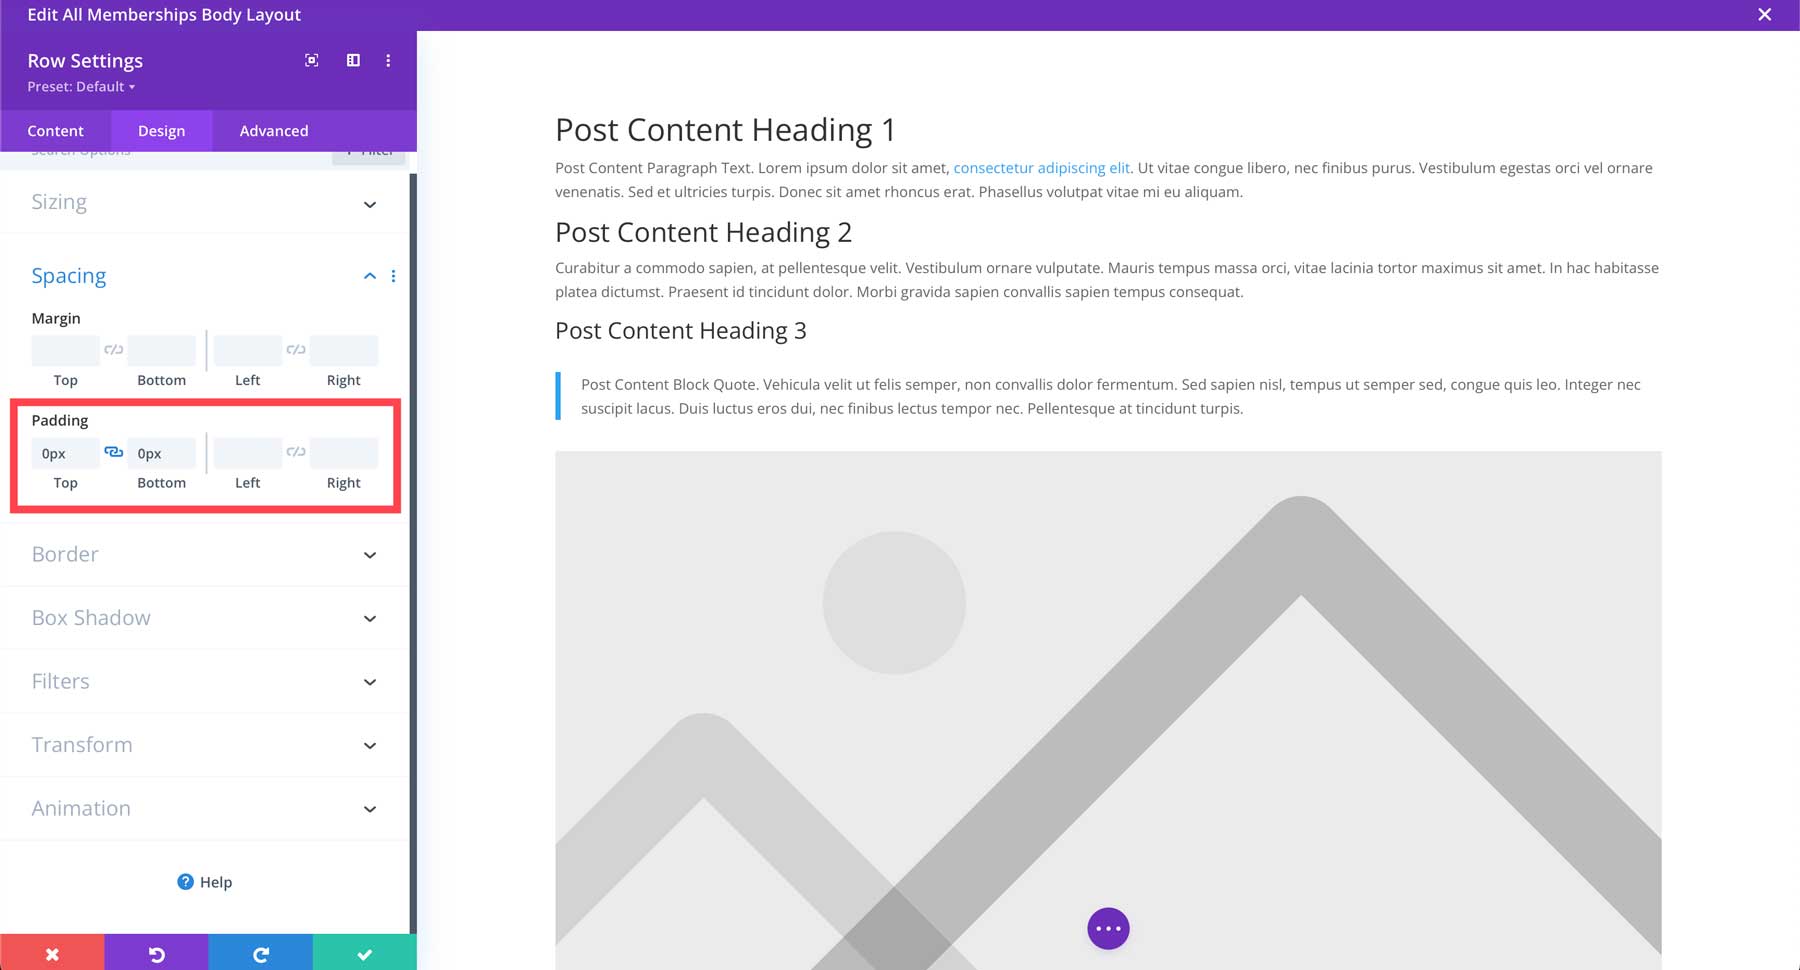
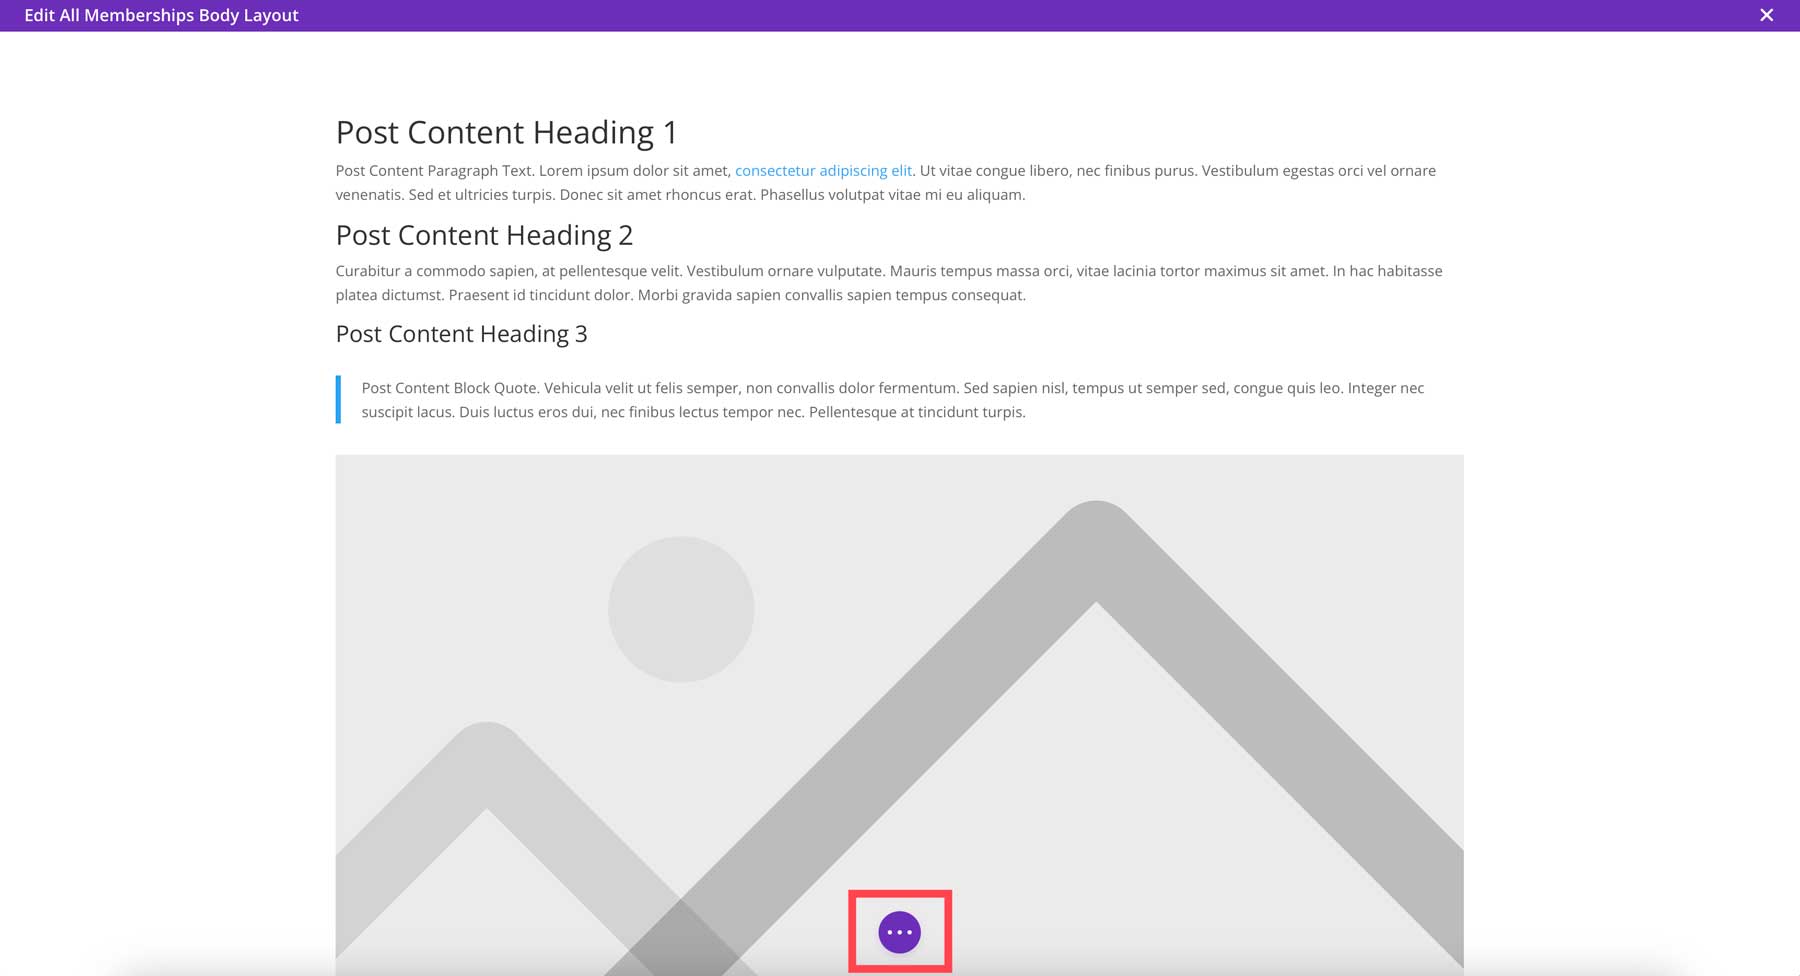
Save the row by clicking the green check button. These are the only steps we need to take to prepare our template. To save it, click the purple ellipsis menu at the bottom center of your screen.
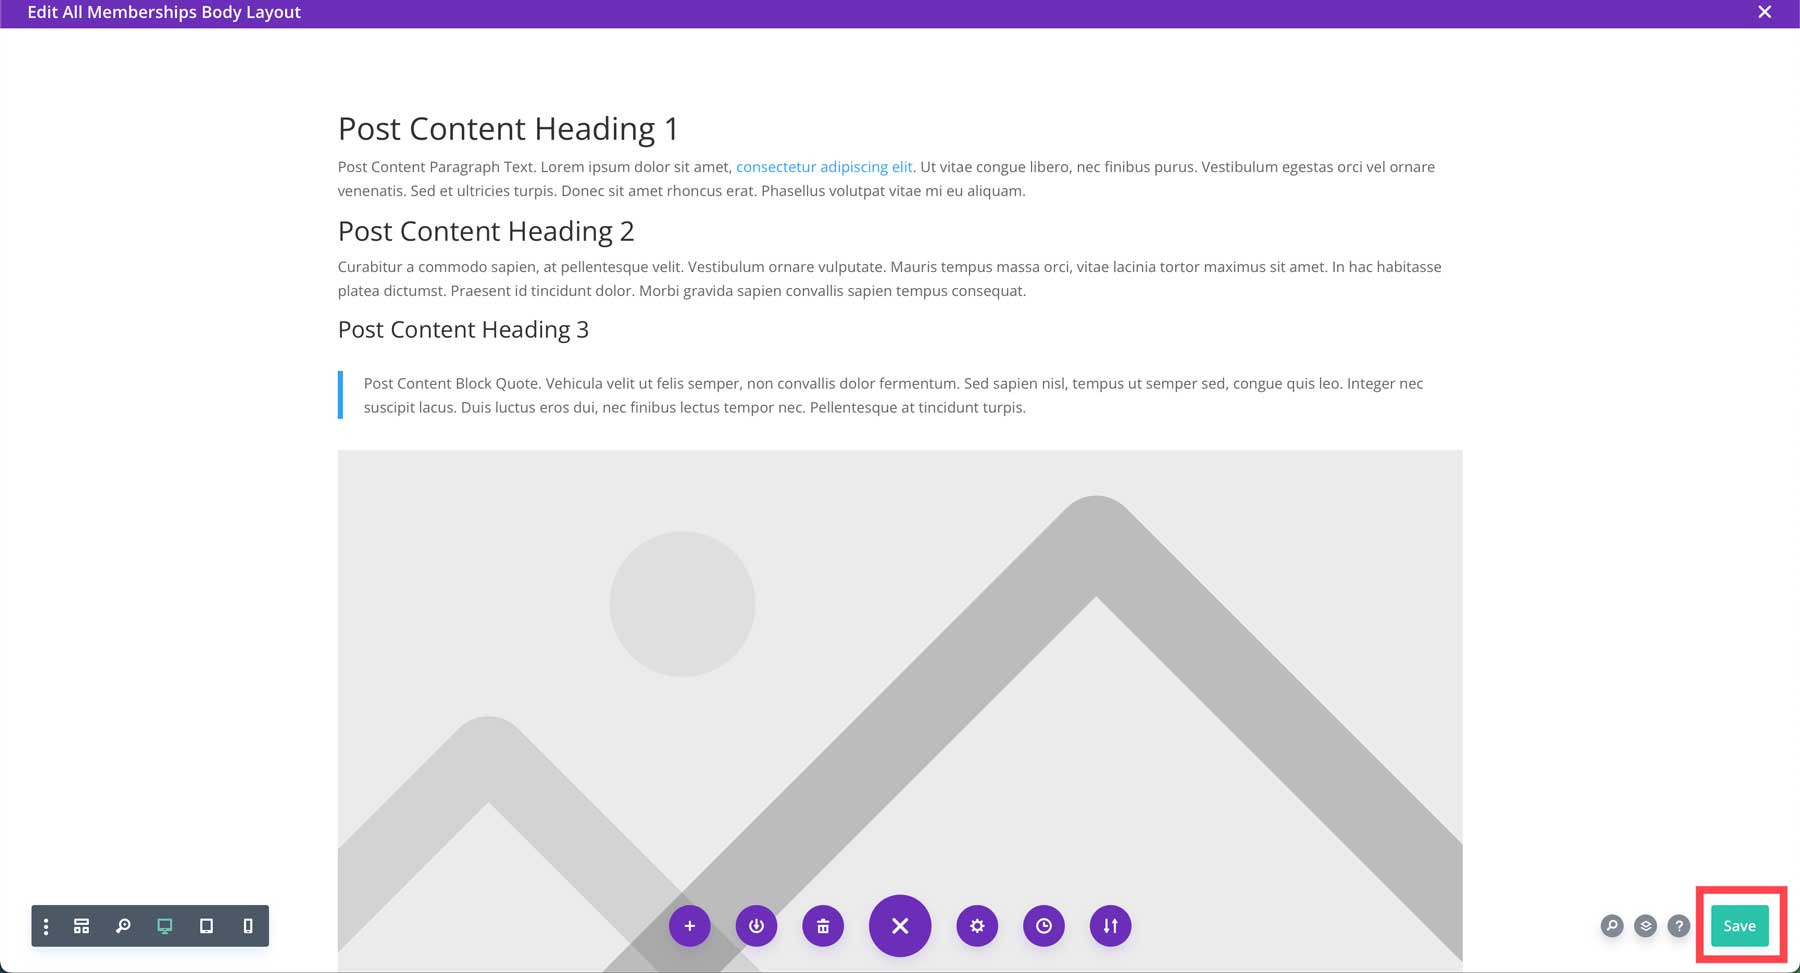
Click the green save button at the bottom right corner of the screen to save the template.
Build a Membership Page With the Visual Builder
The Visual Builder is a beautifully designed system that allows you to build pages and templates on the front end. More than 200 design modules allow you to design any page you can imagine. Since we have enabled the Visual Builder on membership pages and created the template, we can start designing the page.
Head back to MemberPress > Memberships and open the Free membership.
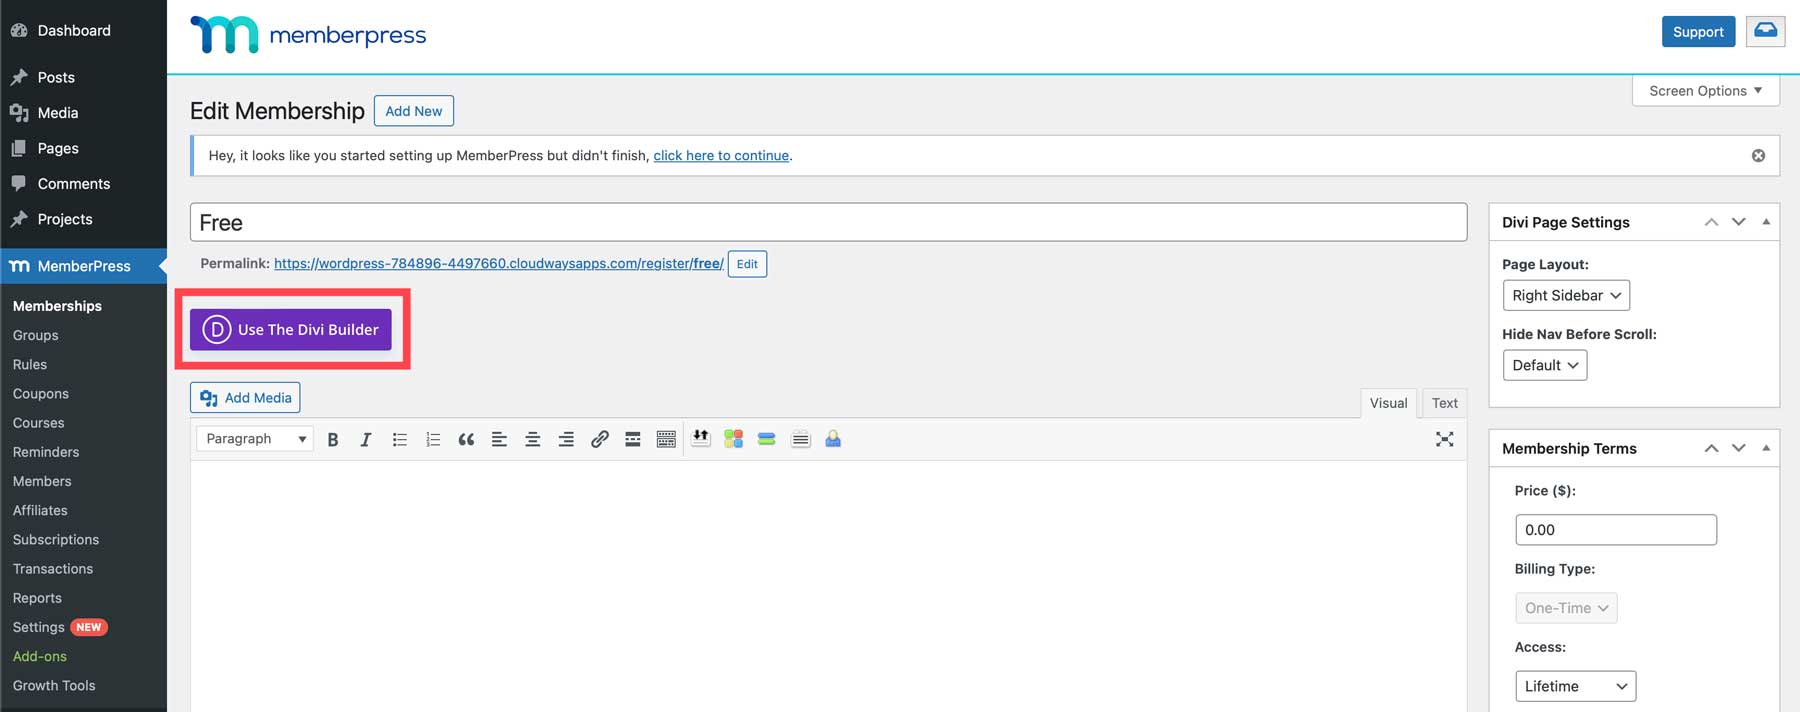
You’ll notice a new button: Use The Divi Builder. Click it to launch the Visual Builder.
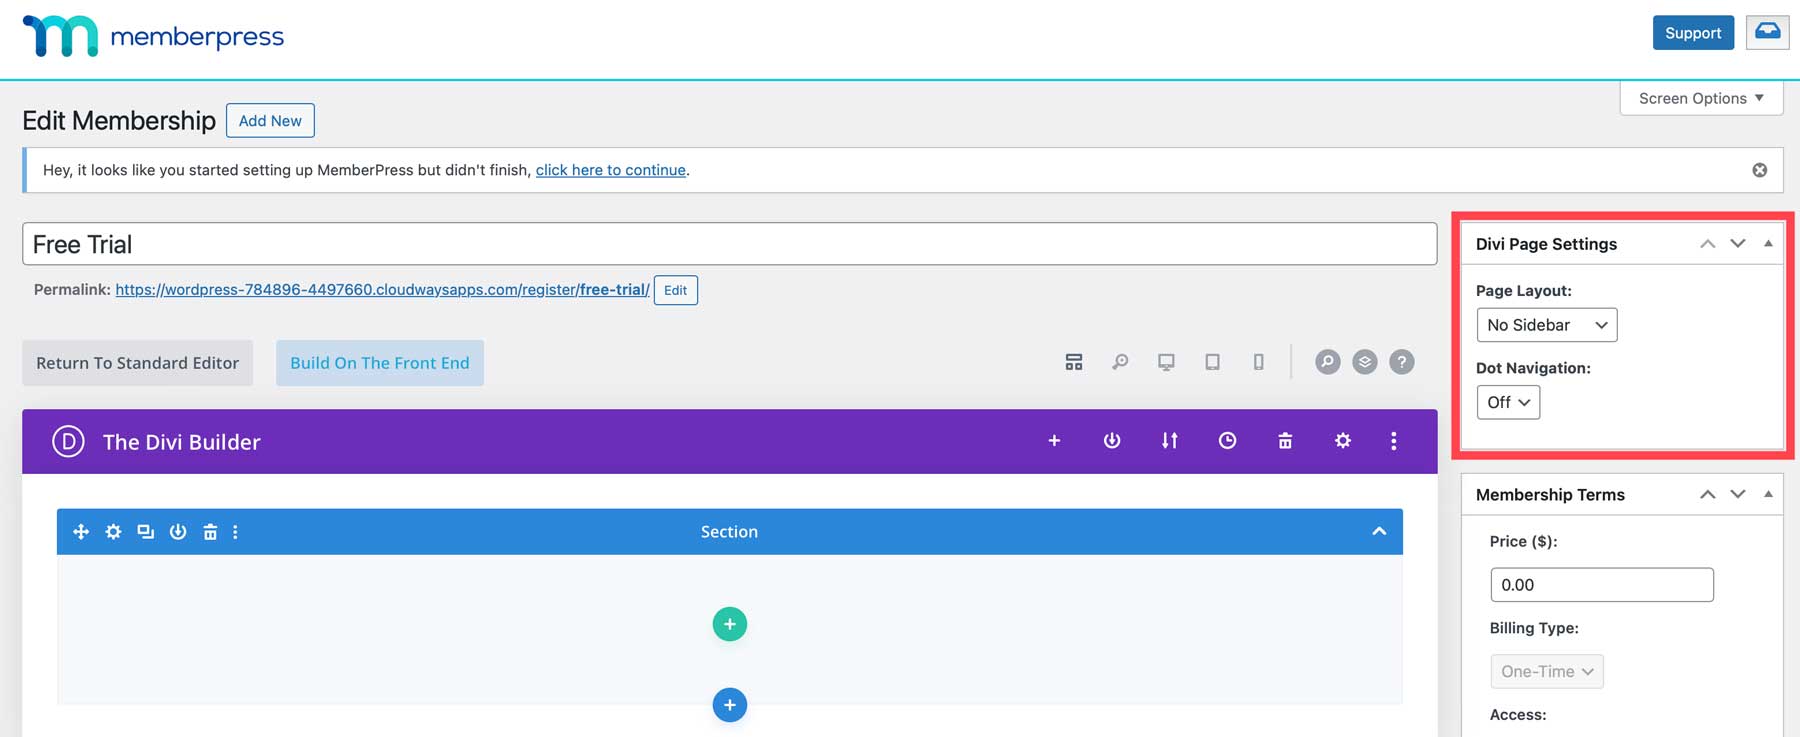
To use the Divi Builder effectively, we must alter a few settings in the membership. Under Divi Page Settings, set the page layout to No Sidebar.
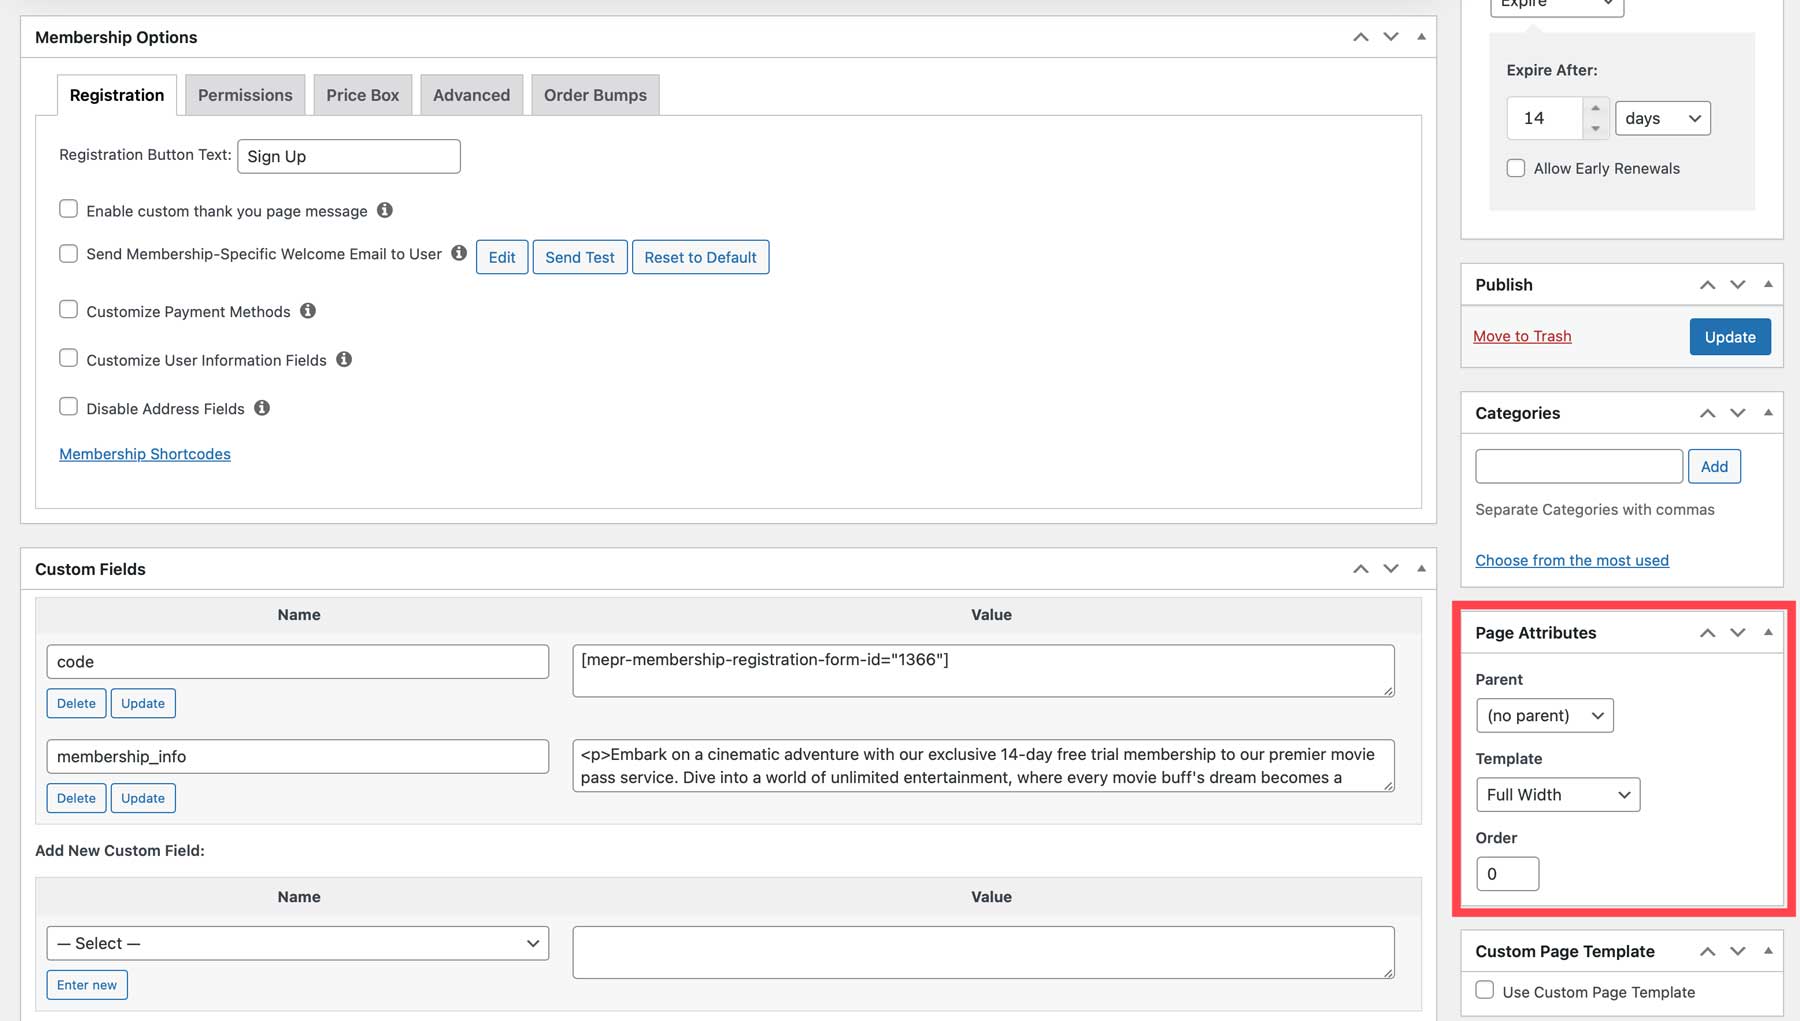
Scroll down and locate the Page Attributes section. Set the Template to Full Width.
Finally, under the Membership Options section, click the Membership Shortcodes link.
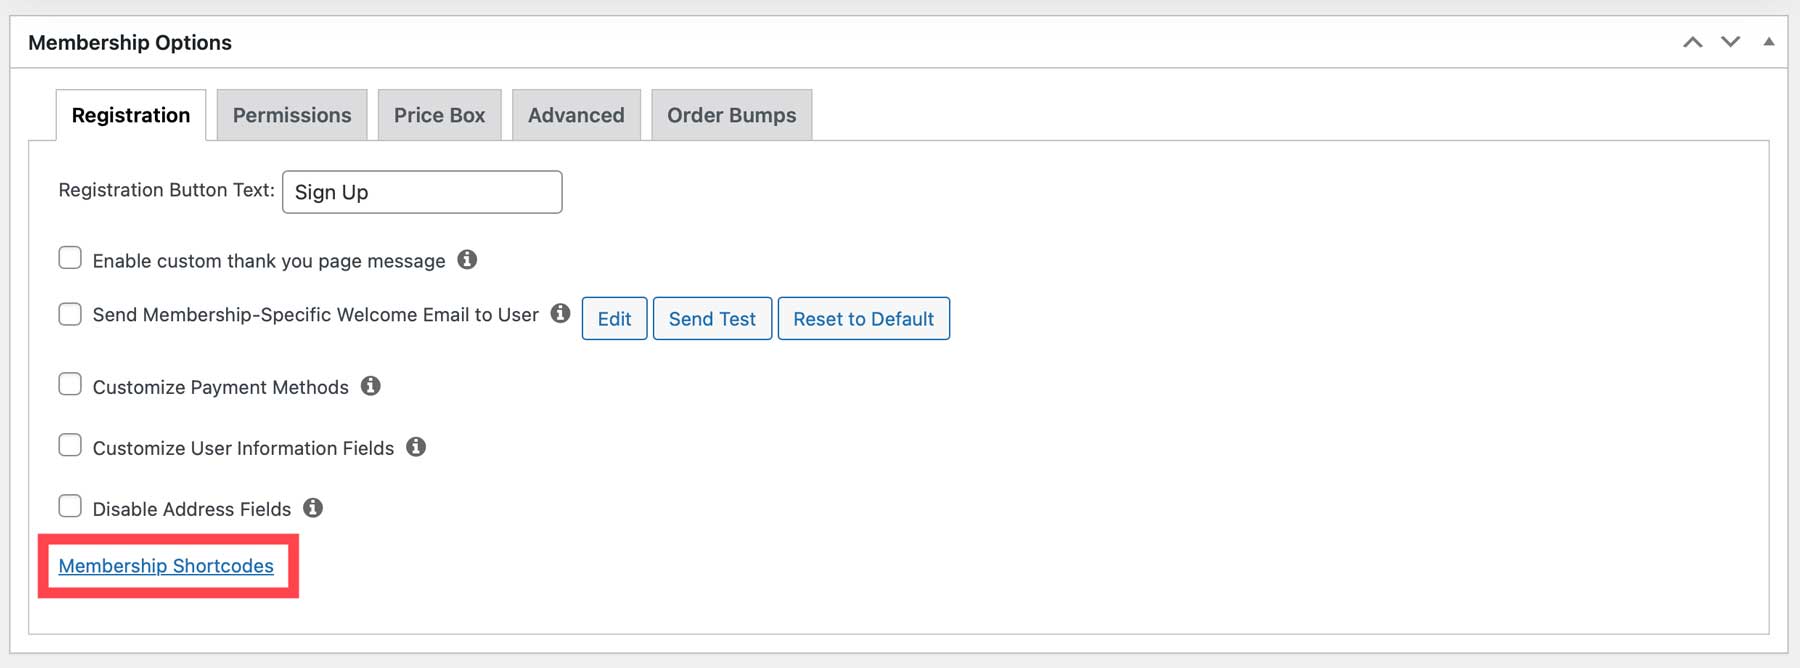
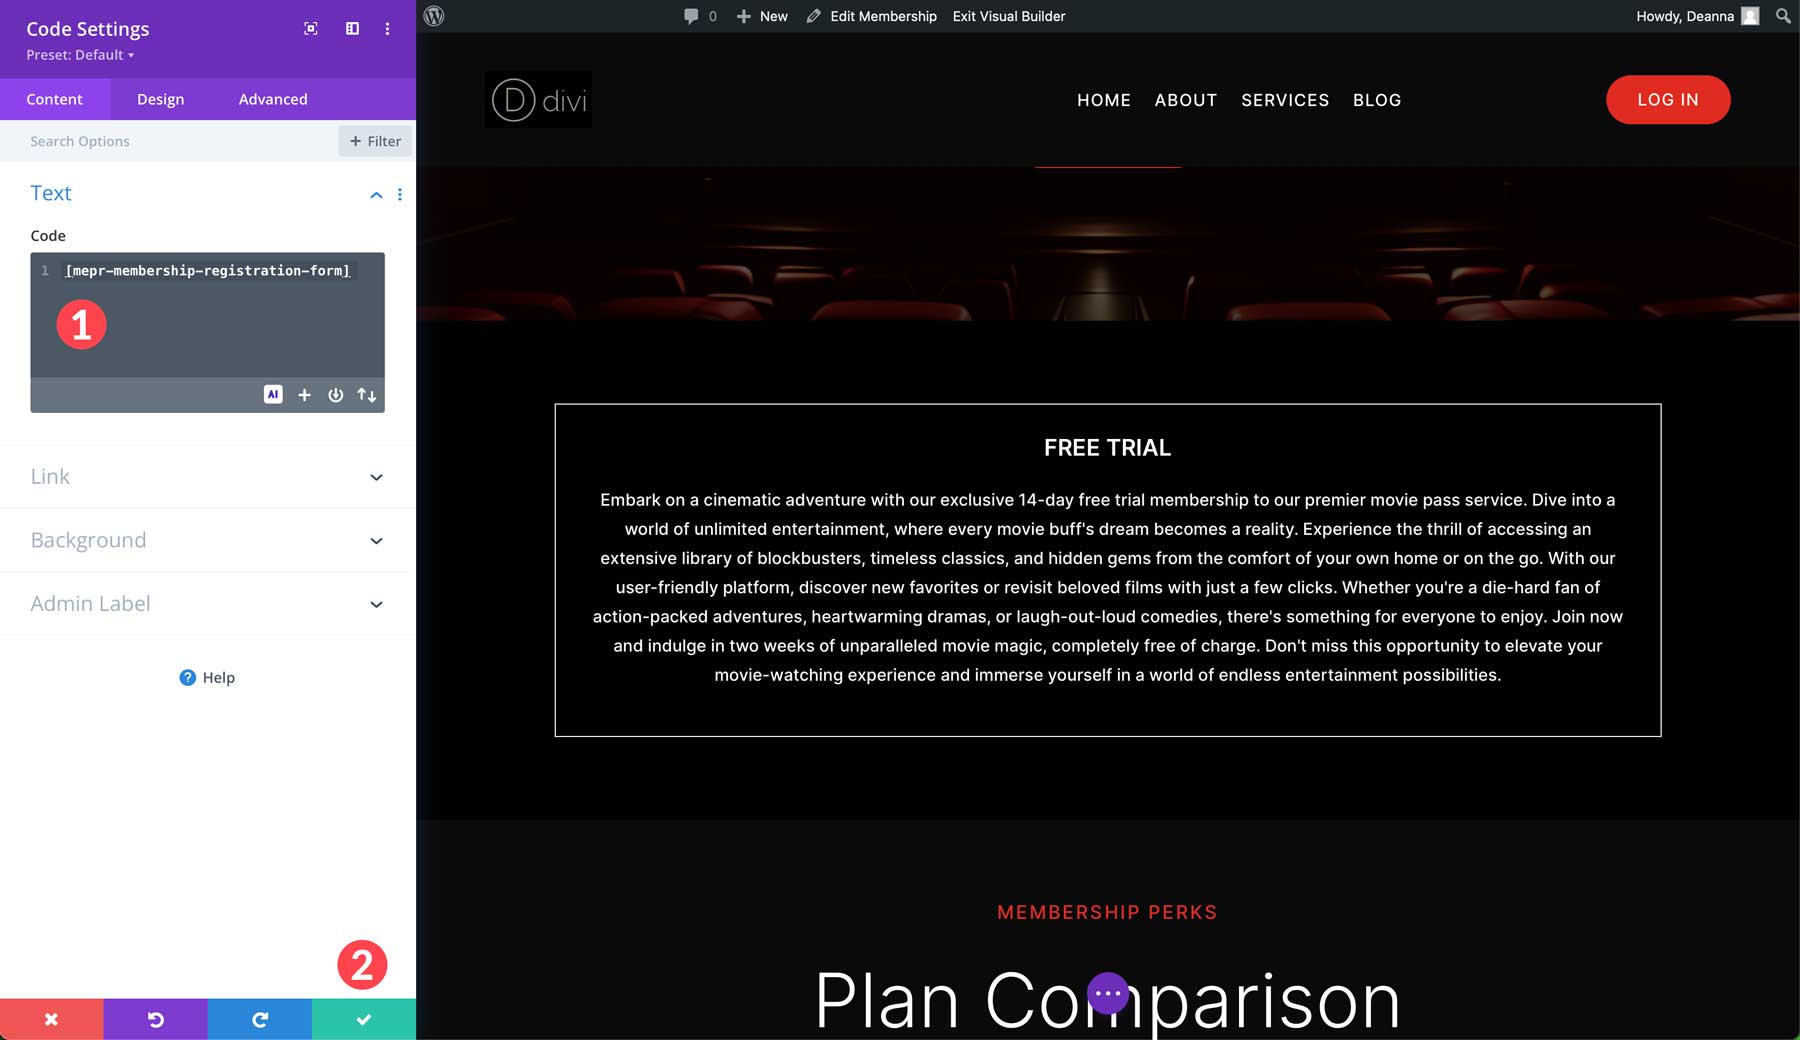
Look for the second shortcode. Copy and paste it to embed it in a Divi Code Module, which will display the registration form on the front end.
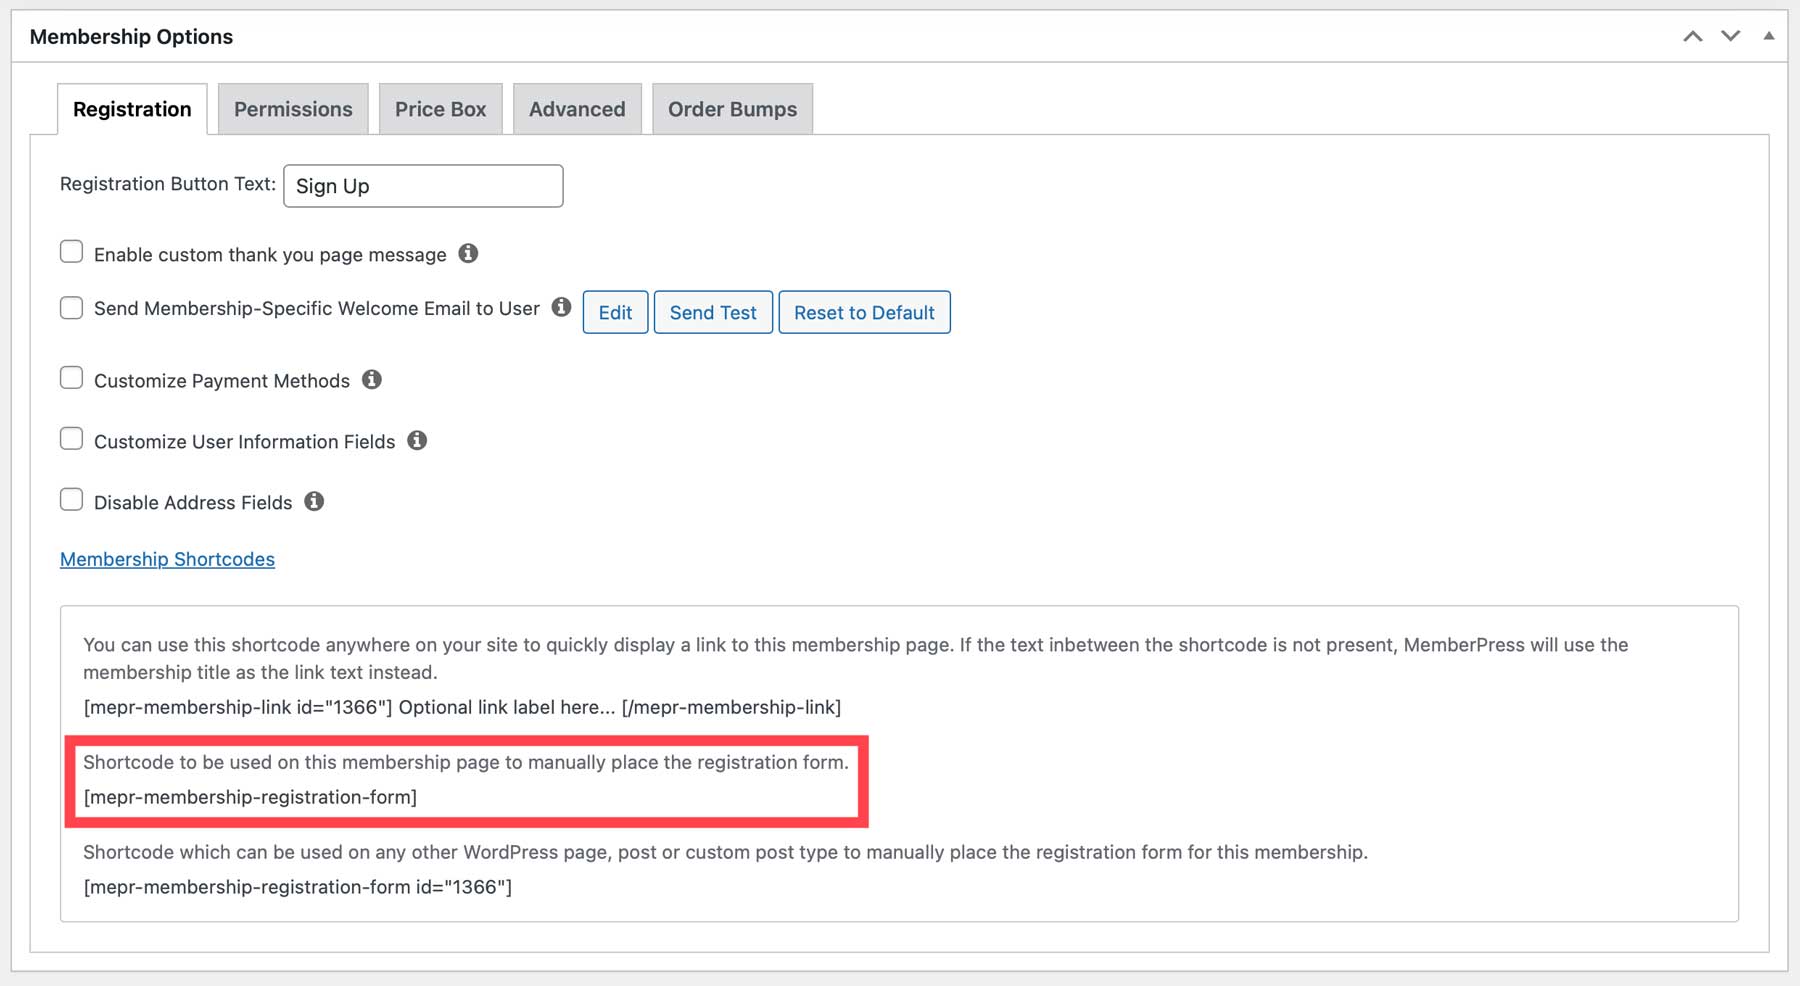
Now, we can use Visual Builder to create the membership page. Click Build On The Front End to continue.
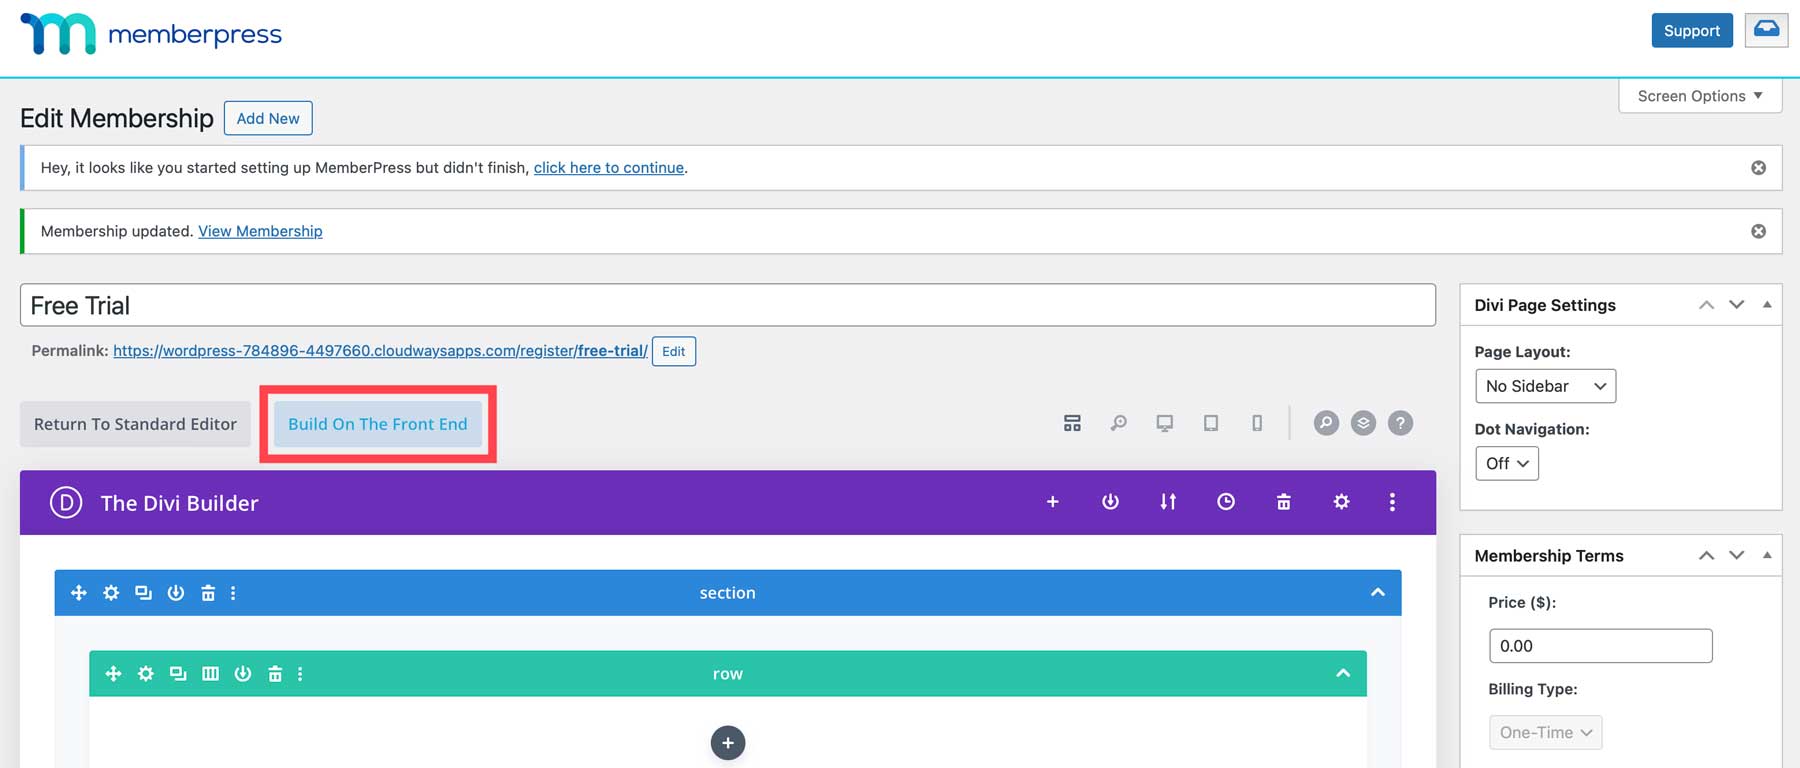
Design Your Membership Website Faster With Divi AI
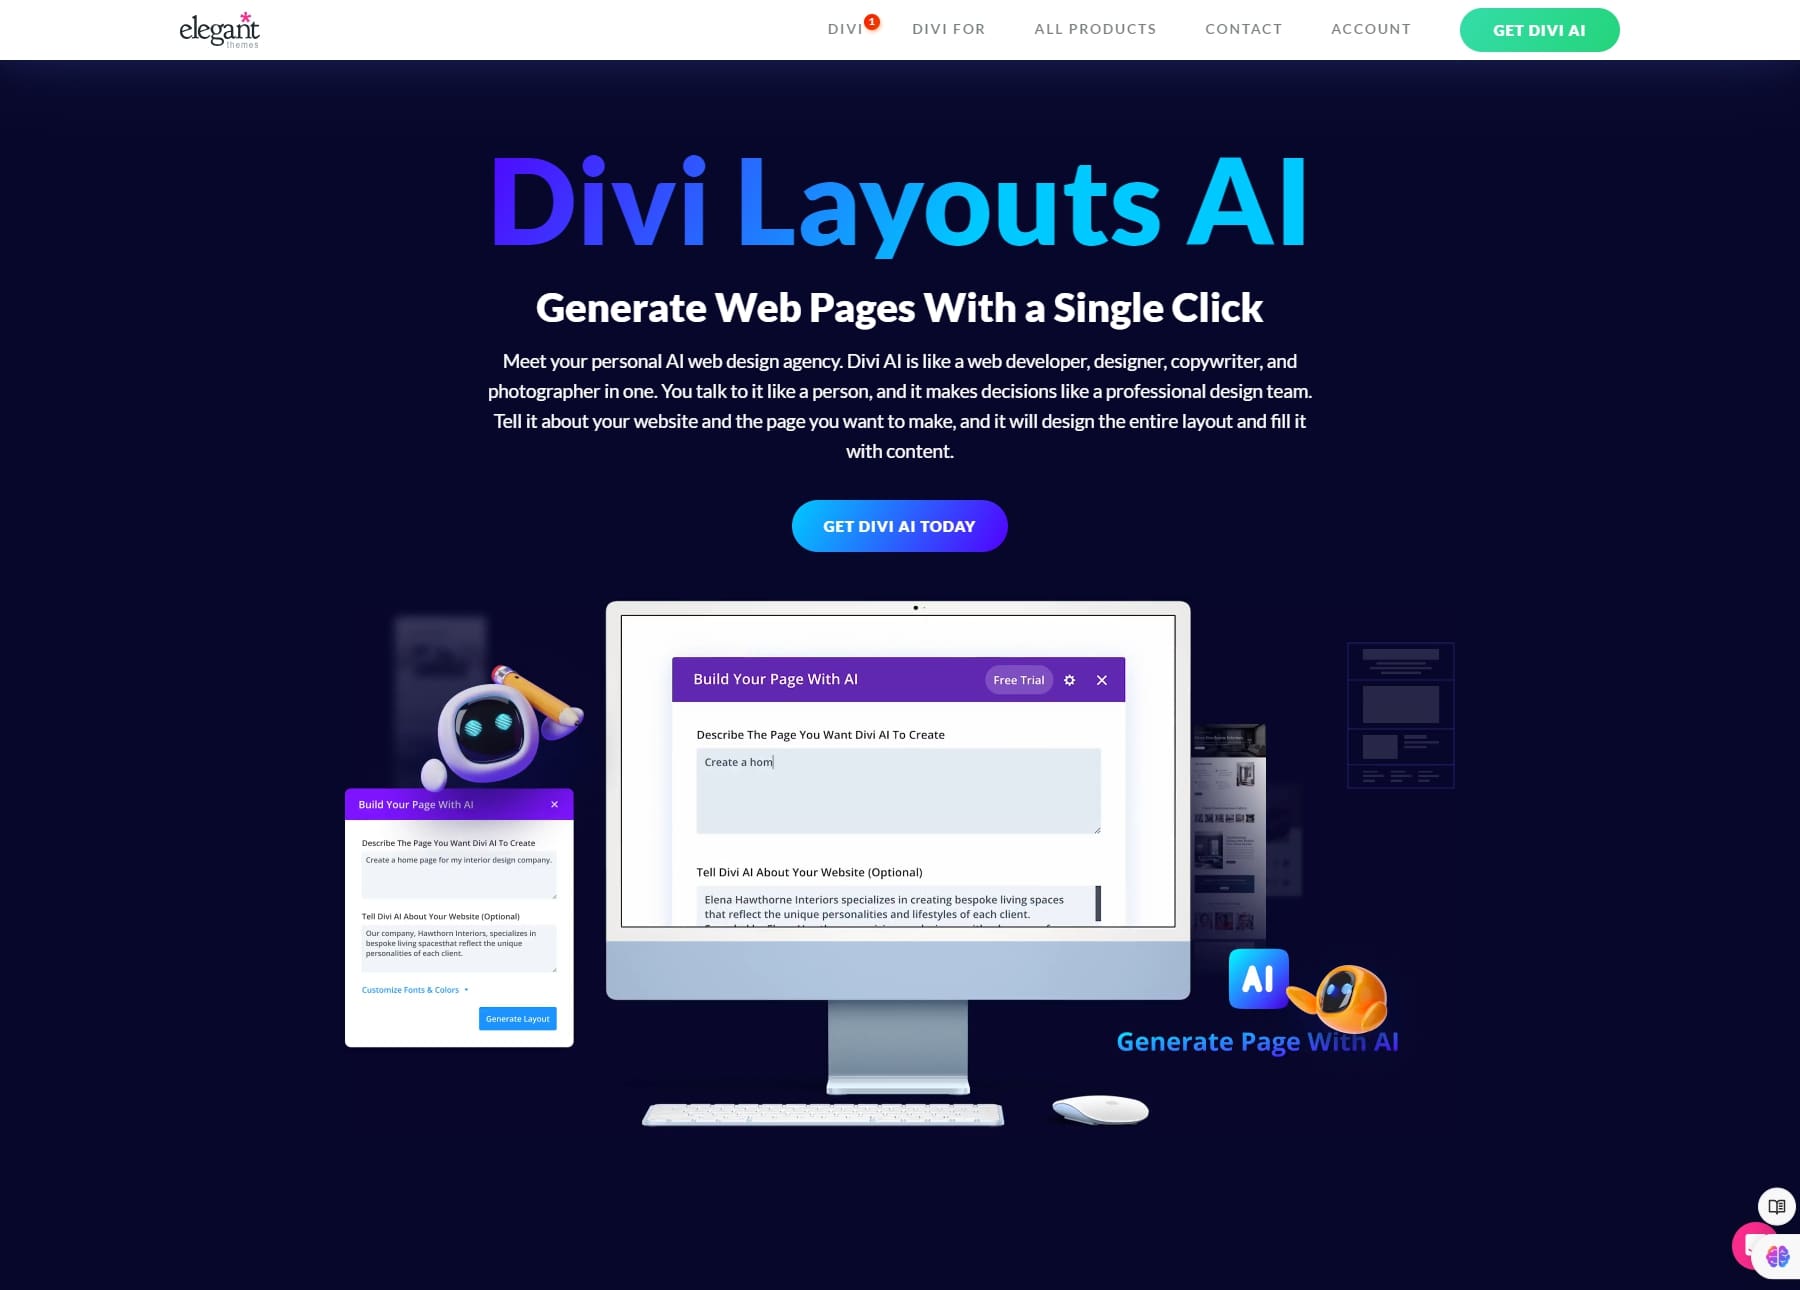
In addition to a premade layout, you can build a page from scratch or use Elegant Themes’ new AI-powered design assistant, Divi AI.
A prompt can generate text, images, code, and full web pages. You can use it to create any type of website you want, including a membership website. The process takes less than two minutes and will include images, text, and a full layout. It’s a great way to jumpstart your membership website, all while saving a great amount of time. Divi AI offers a free trial of 100 generations. You’ll want to sign up once you see how easy it is to use. For $16.08 per month (billed annually), you can generate unlimited text, images, and code, creating as many pages as your website needs.
Designing A Membership Page With Divi AI
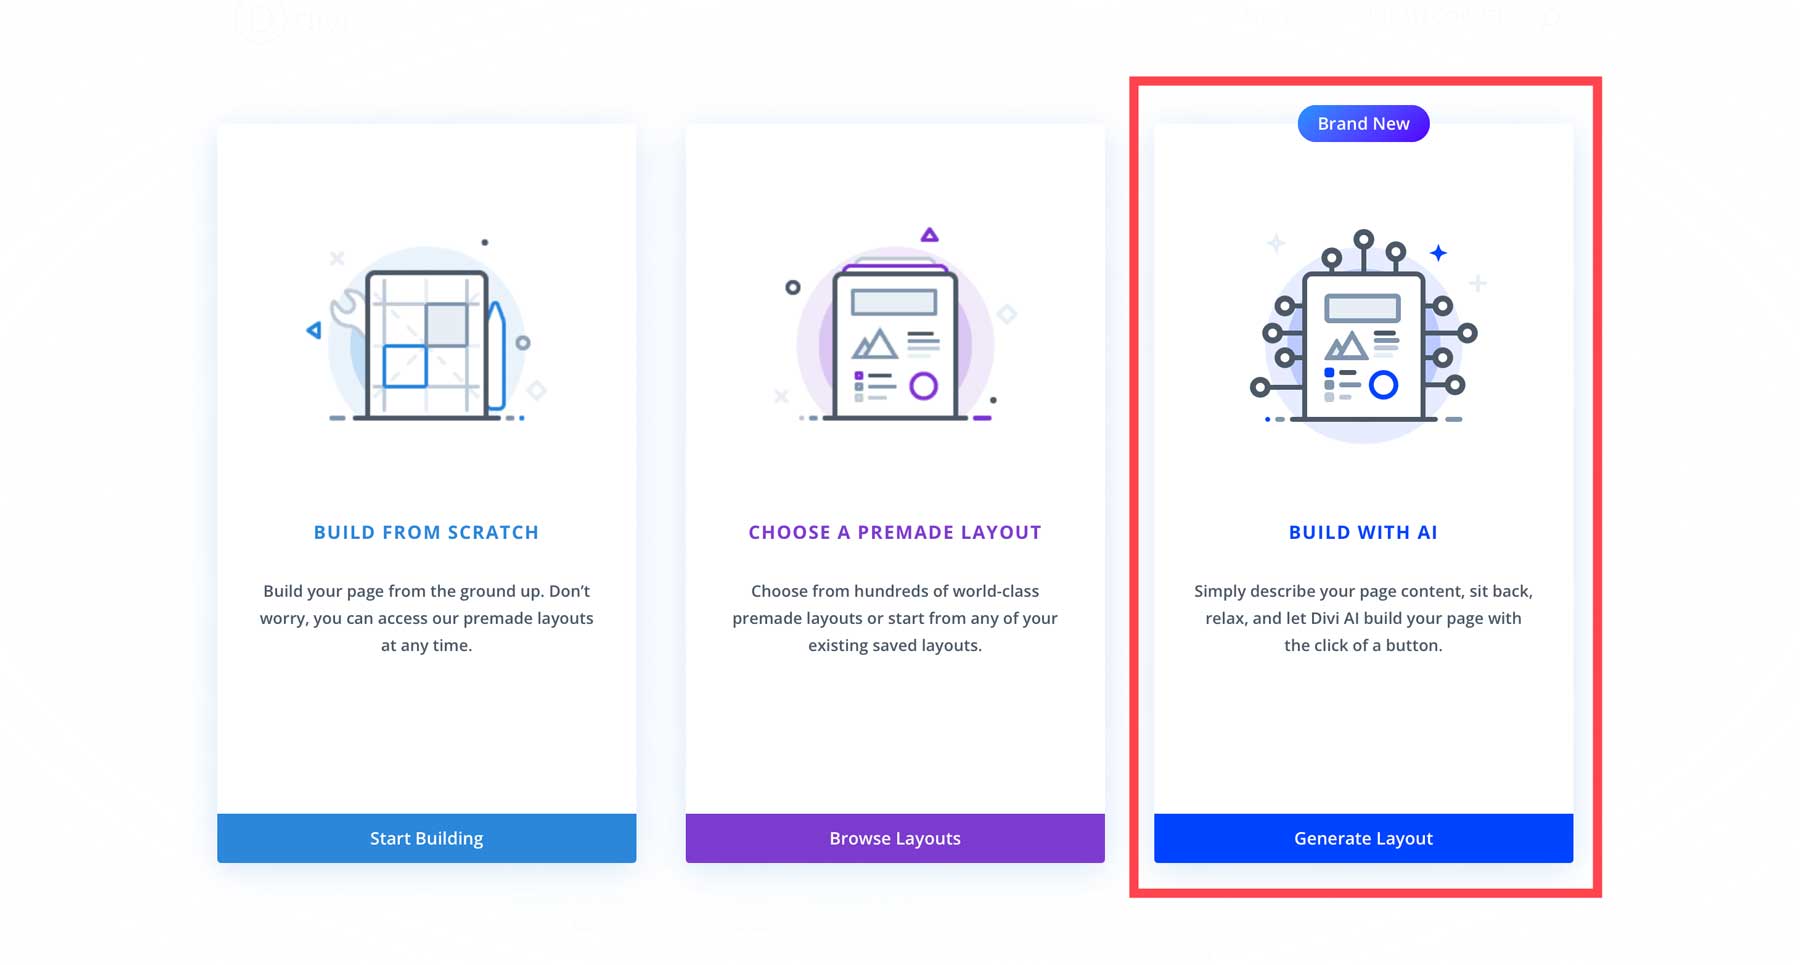
When the Visual Builder launches, you’ll have the same three options. Select Build with AI this time.
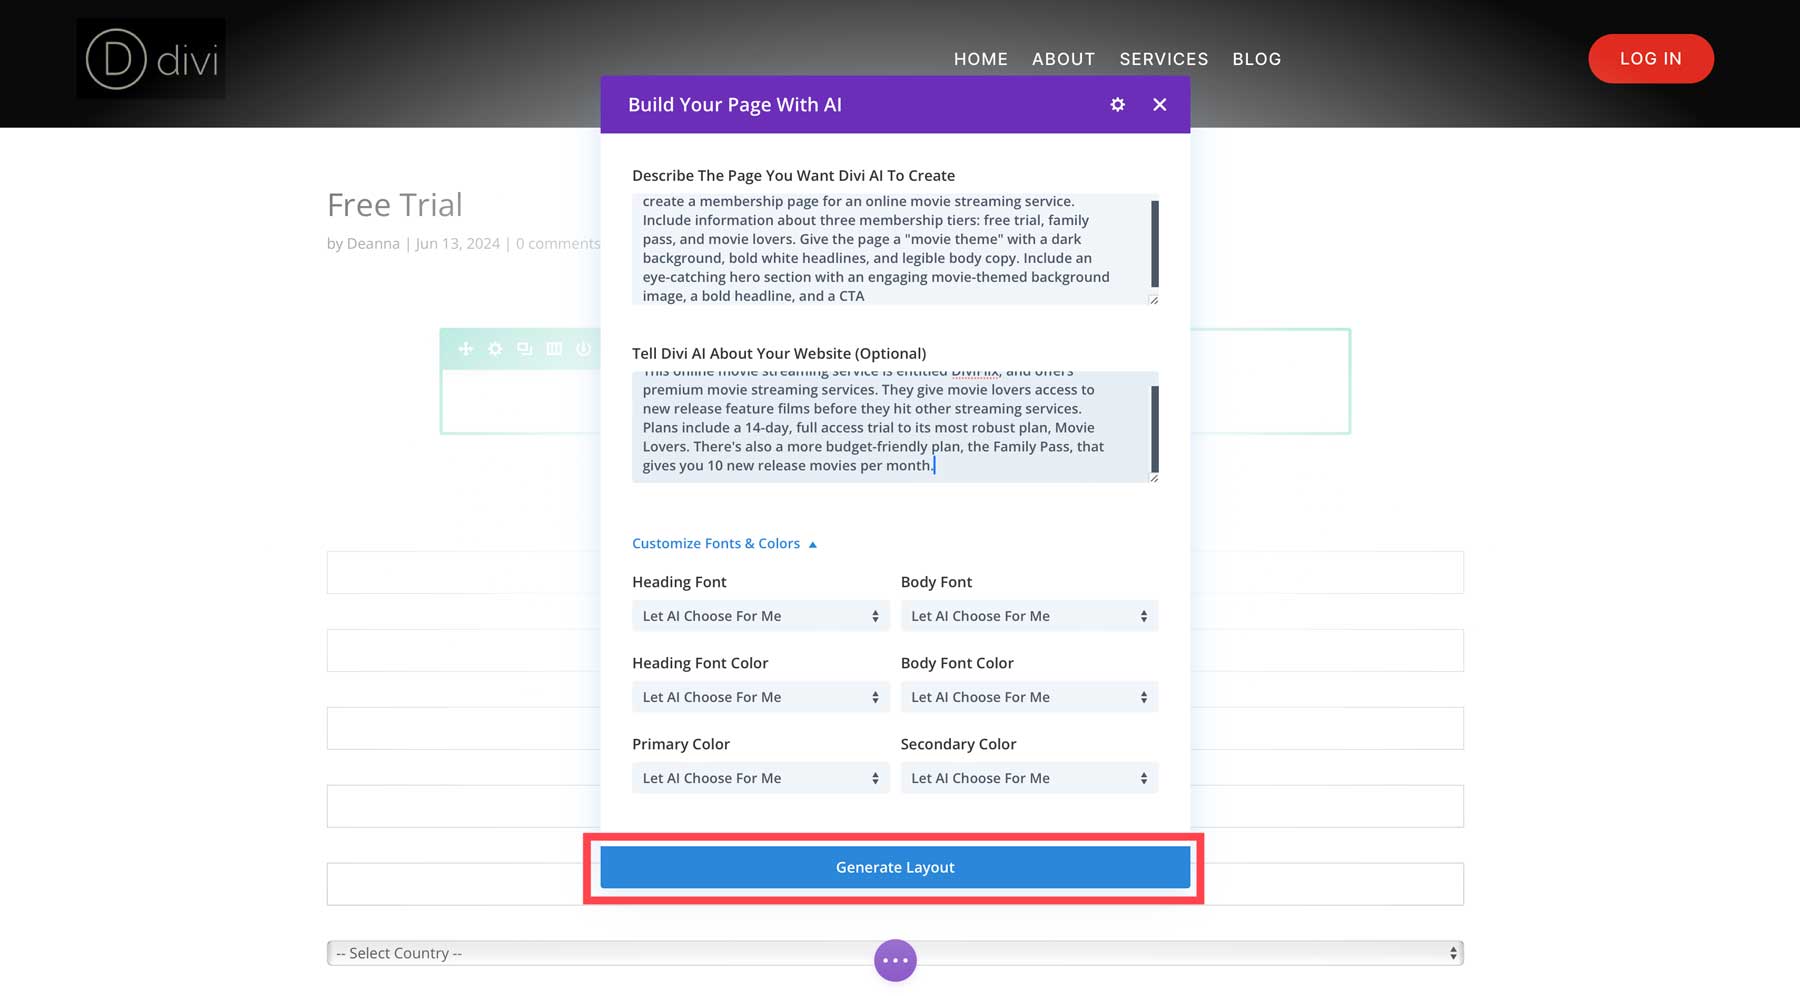
The Divi AI dialog box will appear, revealing a few fields and custom options. First, describe the type of page you’d like the AI to create. Be as descriptive as possible, including what sections you’d like and the look and feel you’re going for. Under the optional text field, Tell Divi AI About Your Website, you can include business information, such as your brand name, a brief bio about the business, and your website’s niche. Finally, you have a few more options under Customize Fonts & Colors.
Under the header and body font, you can choose from one of the hundreds of Google Fonts, select the website’s default fonts, or let the AI choose them for you. You’ll have the same options for heading and body font colors as well as primary and secondary colors.
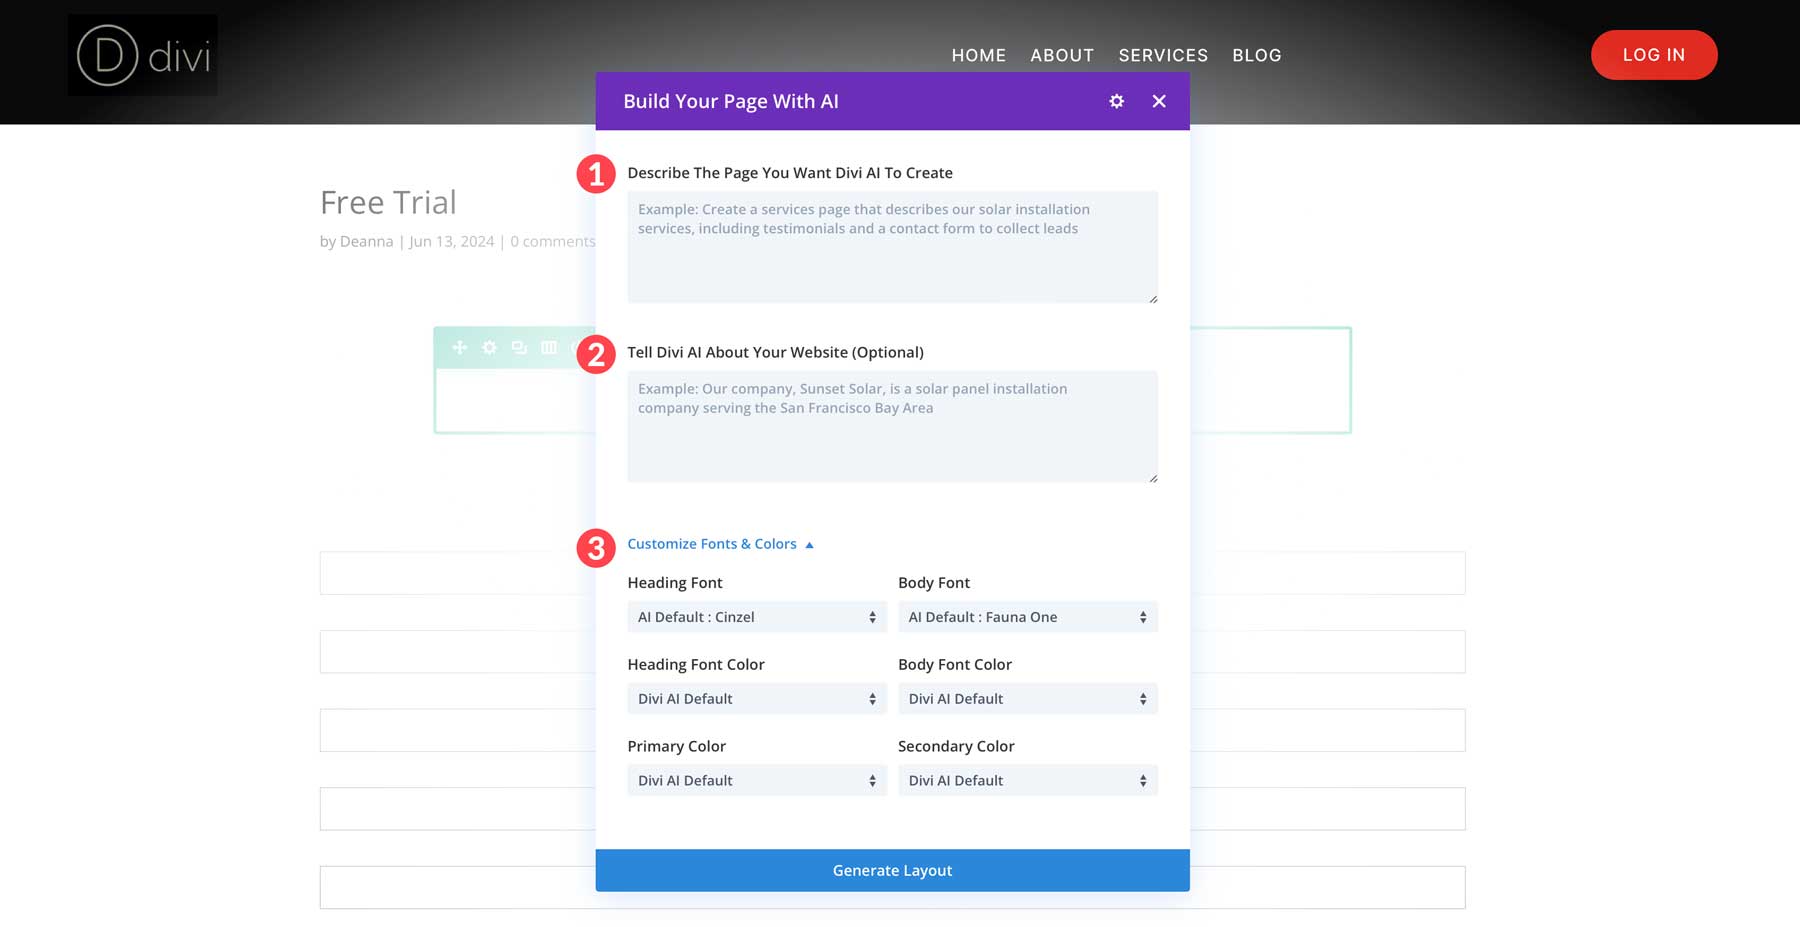
Once you’ve entered your prompts and made font and color selections, click the Generate Layout button.
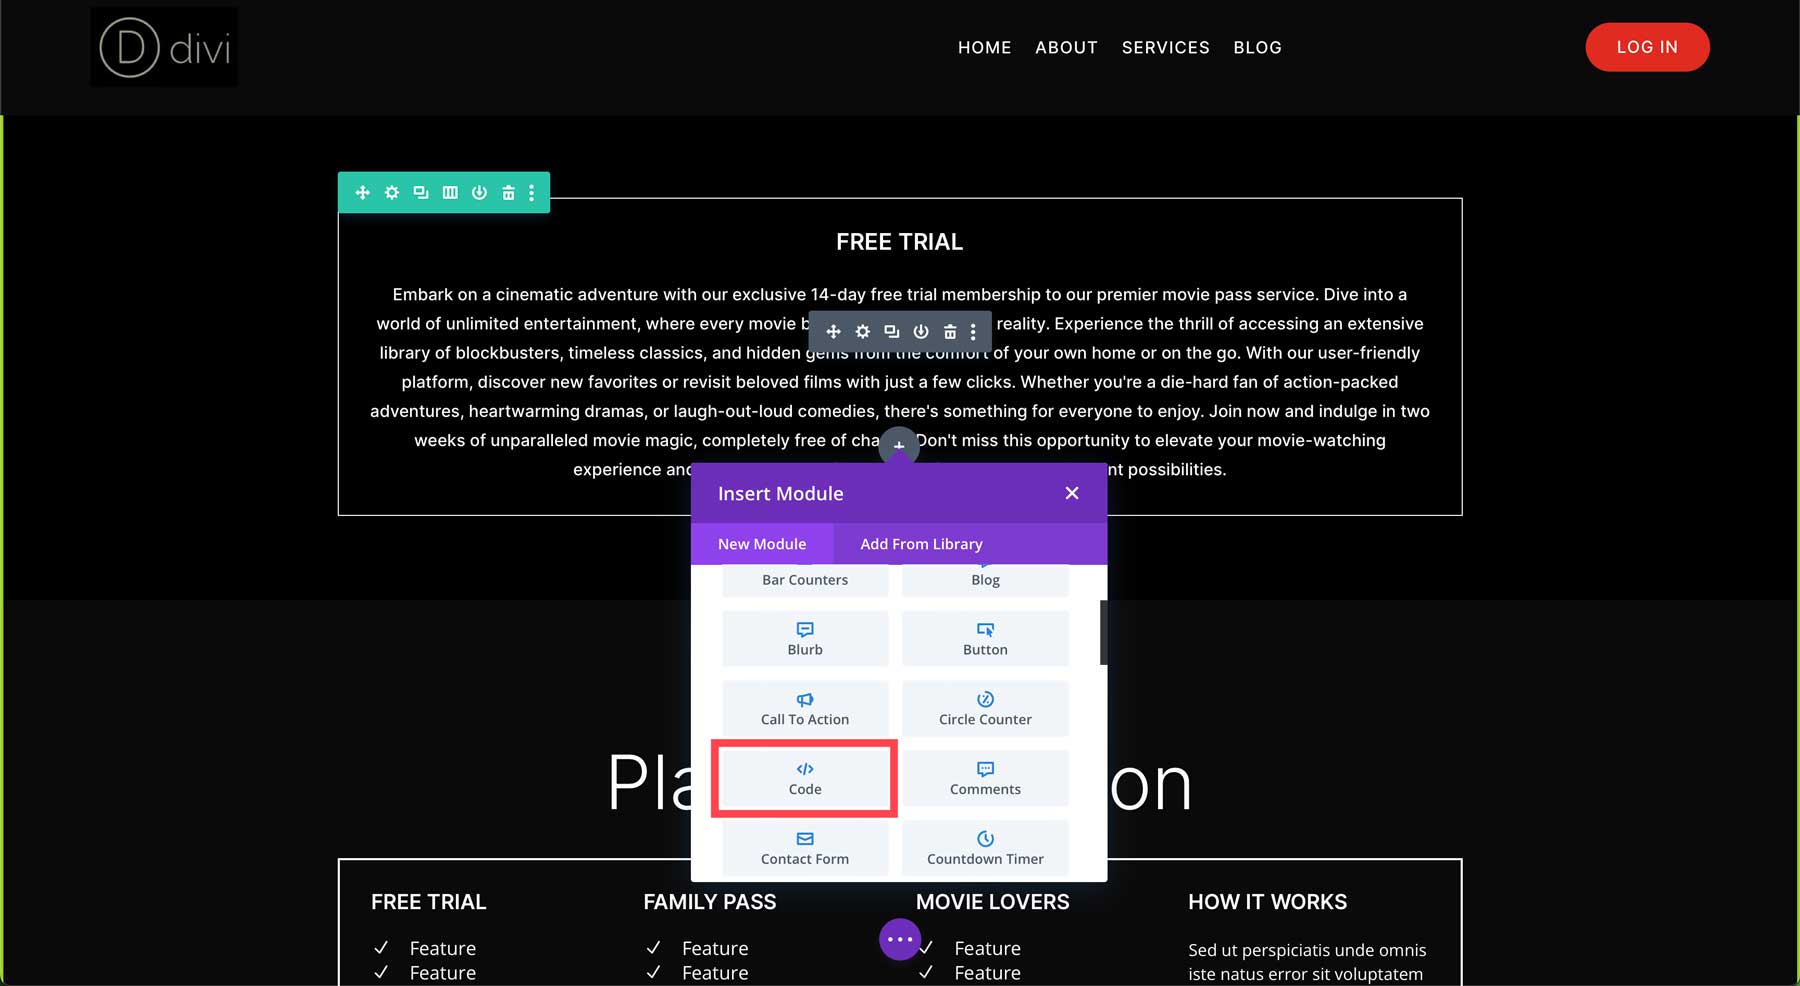
Once the process is complete, we’ll need that shortcode we copied in the last step. Find a spot on your layout to add a Code Module.
Next, paste the MemberPress shortcode into the Code Module and click the green check button to save the changes.
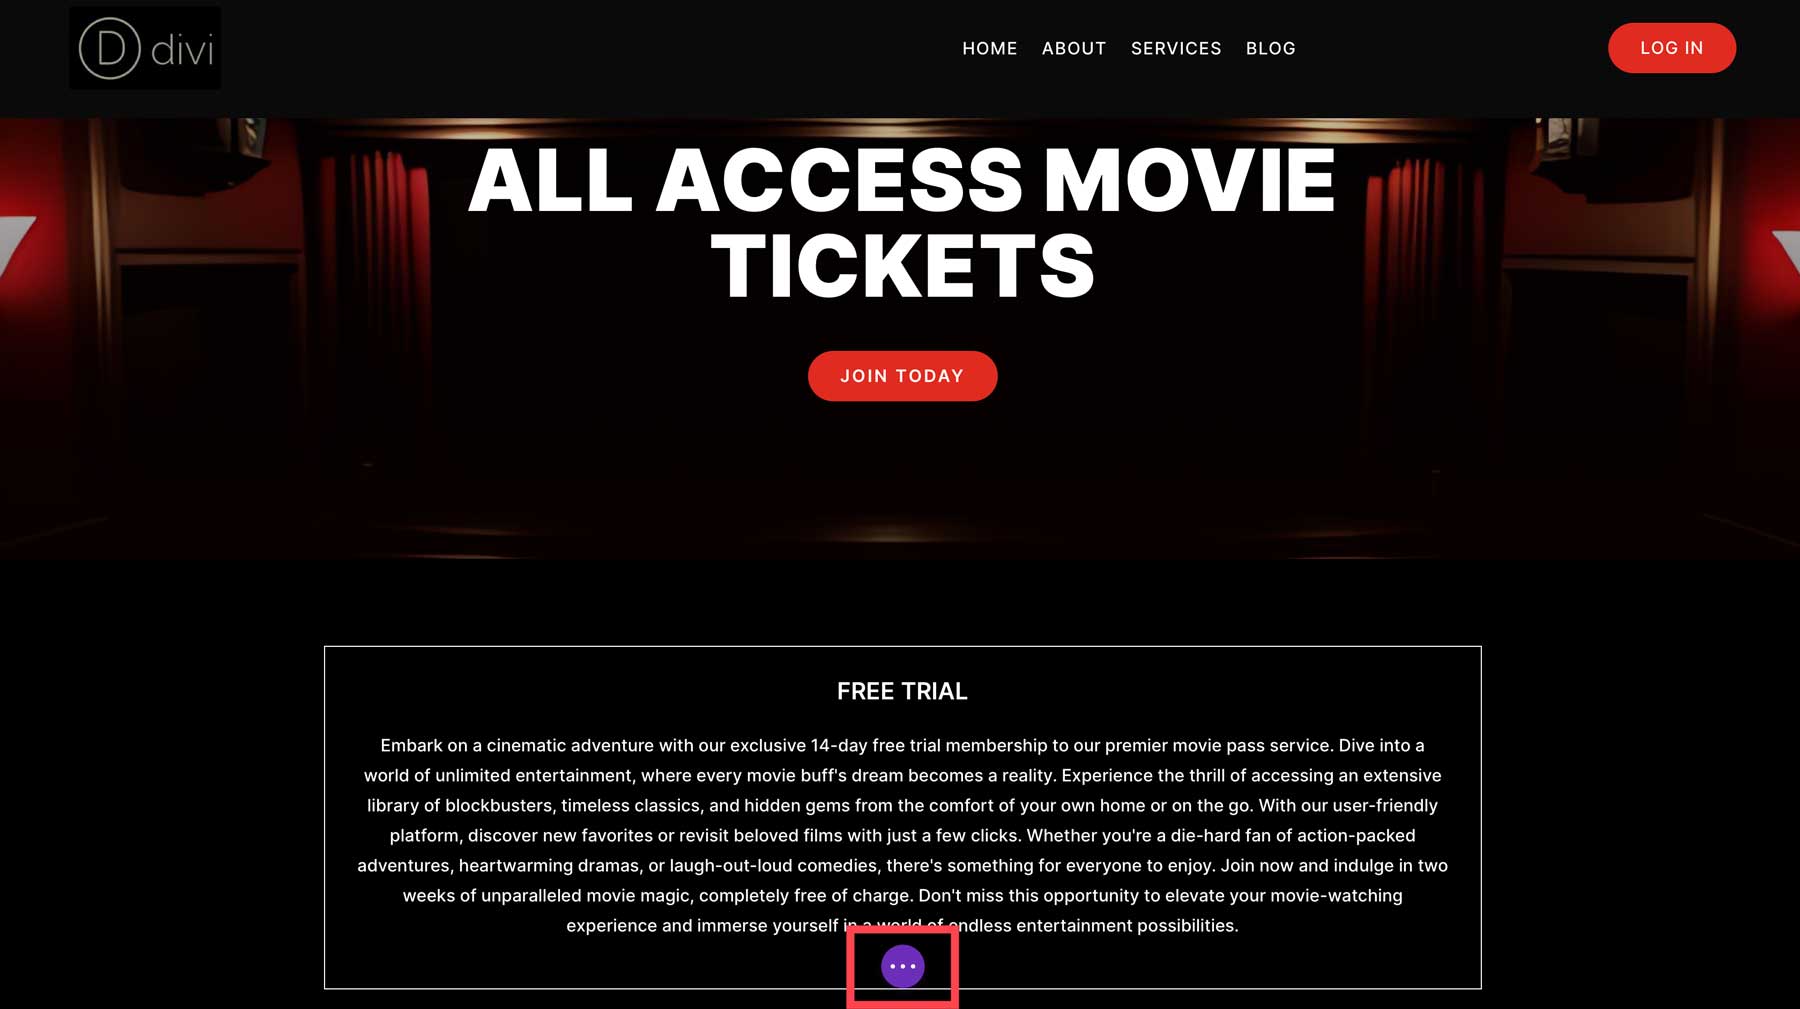
Finally, click the purple ellipsis menu to bring up the page settings.
When the page settings menu appears, click the green save button to save the page.
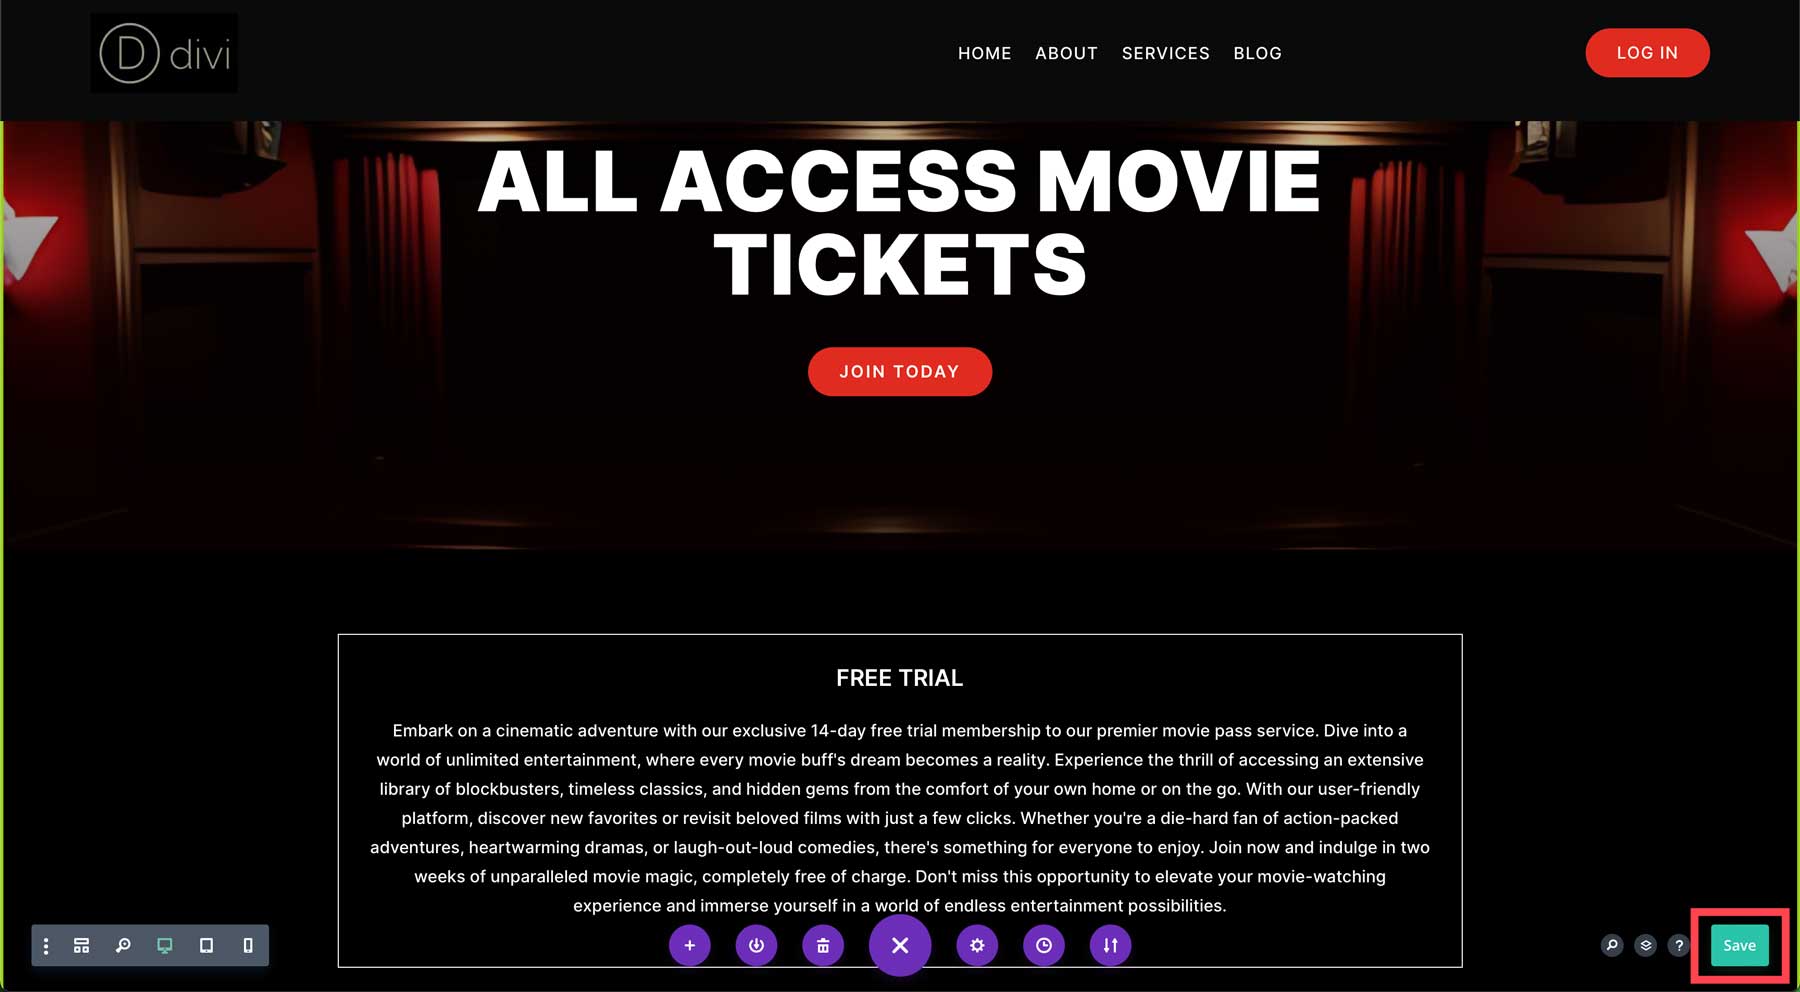
Style The MemberPress Membership Form
When you first view the page, you’ll notice the registration form is present, but it could be prettier. To fix that, we must add some CSS.
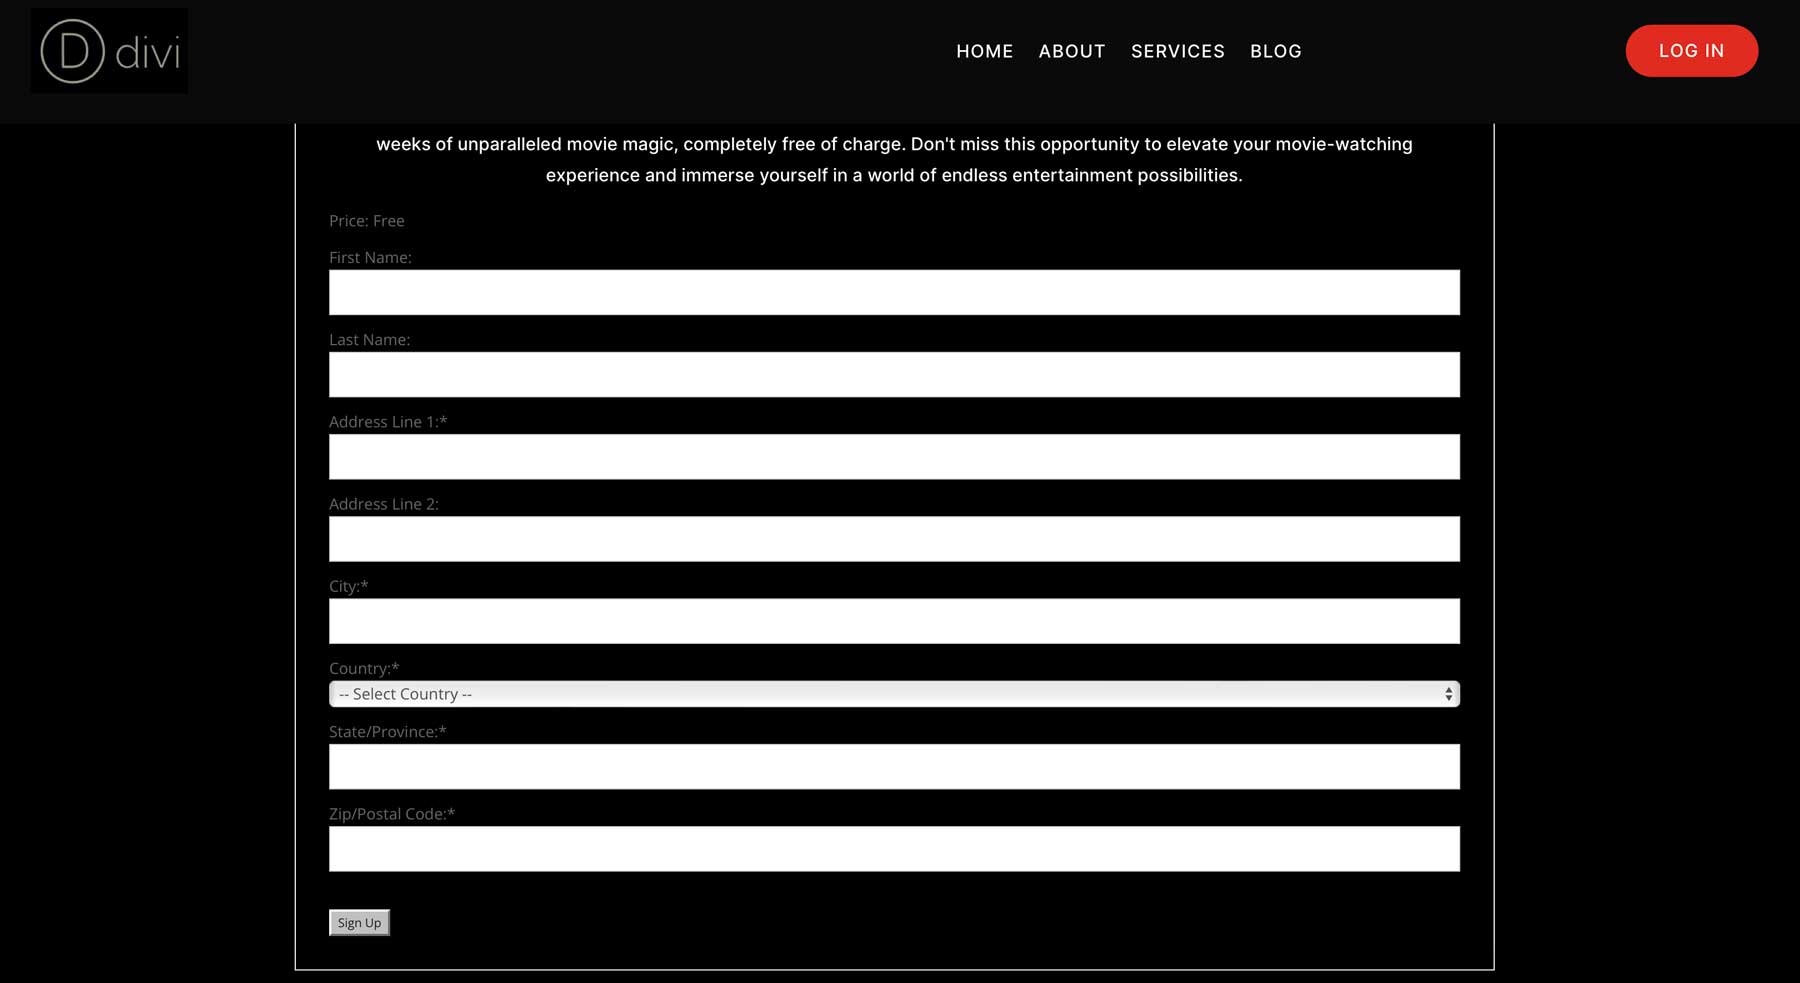
Hover over the site title to reveal a dropdown menu. Choose Theme Customizer to open the Divi Theme Customizer.
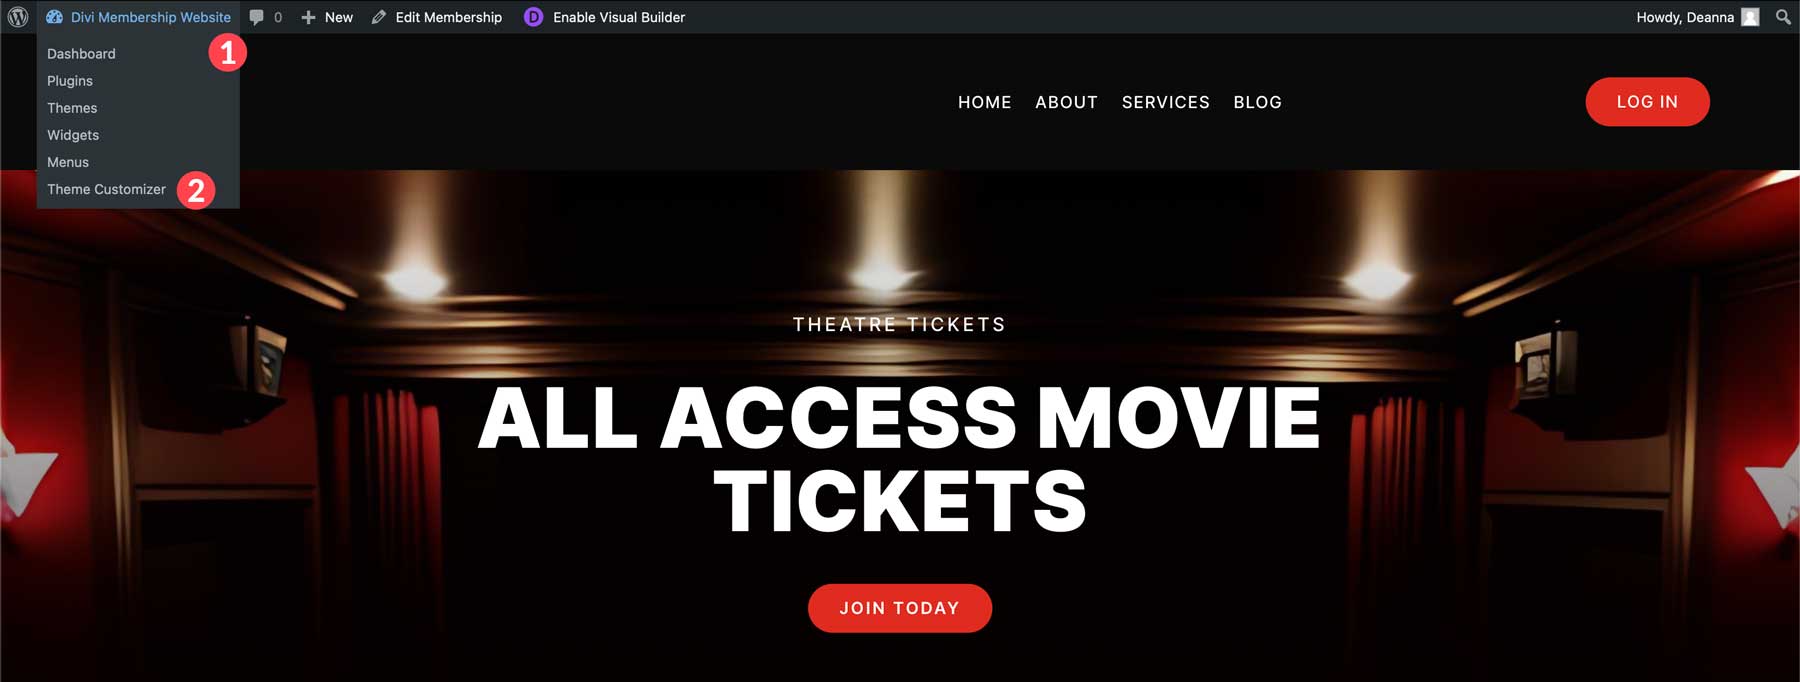
Open the Additional CSS menu item and enter the following CSS code:
/* registration form button*/
input.mepr-submit {
 font-family: inherit;
	background-color:red;
	color:#fff;
	border:none!important;
	font-size:16px;
	letter-spacing:1px;
	text-transform:uppercase;
	font-family:'Inter';
	padding: 10px 30px;
	border-radius:100px;
}

/*Mepr labels */
.mp_wrapper .mp-form-row label {
 color:#fff;
	font-size:16px;
	font-family:'Inter';
	font-weight: 500;
}

/*hide price*/
div.mp-form-row.mepr_bold.mepr_price {
	visibility:hidden;
}
Next, click the Publish button.
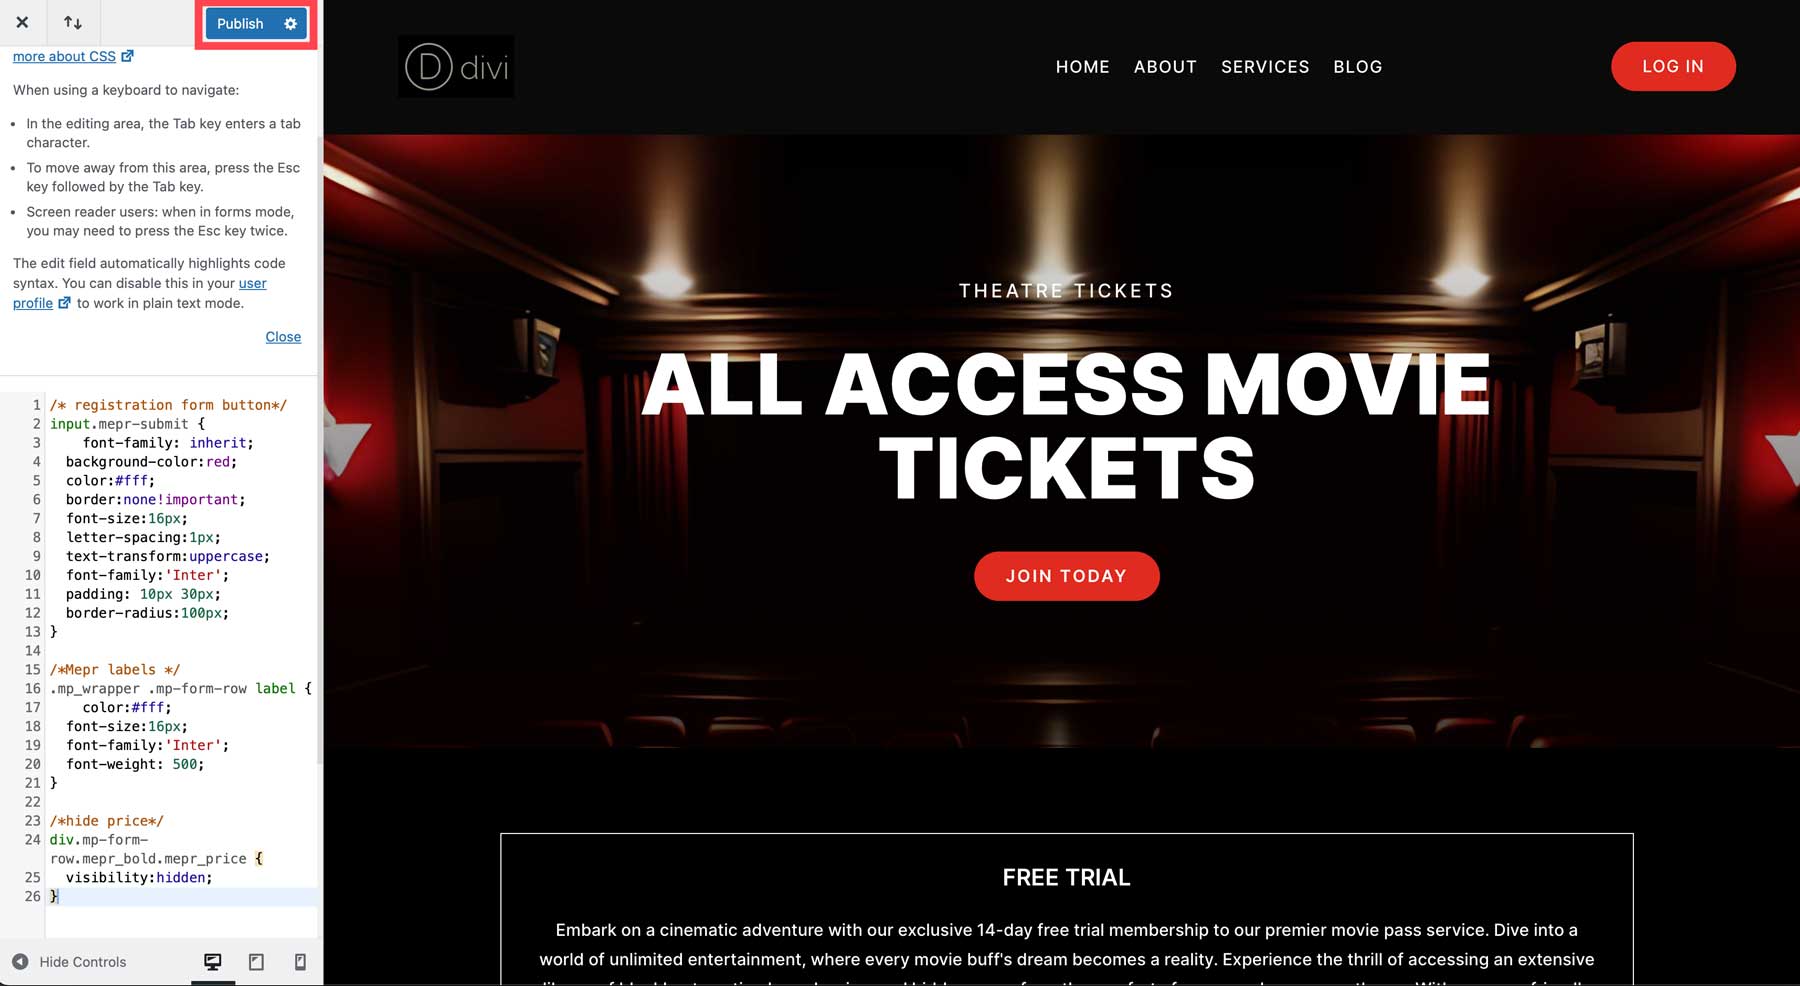
When the page refreshes, your membership form should have the same styling as the rest.
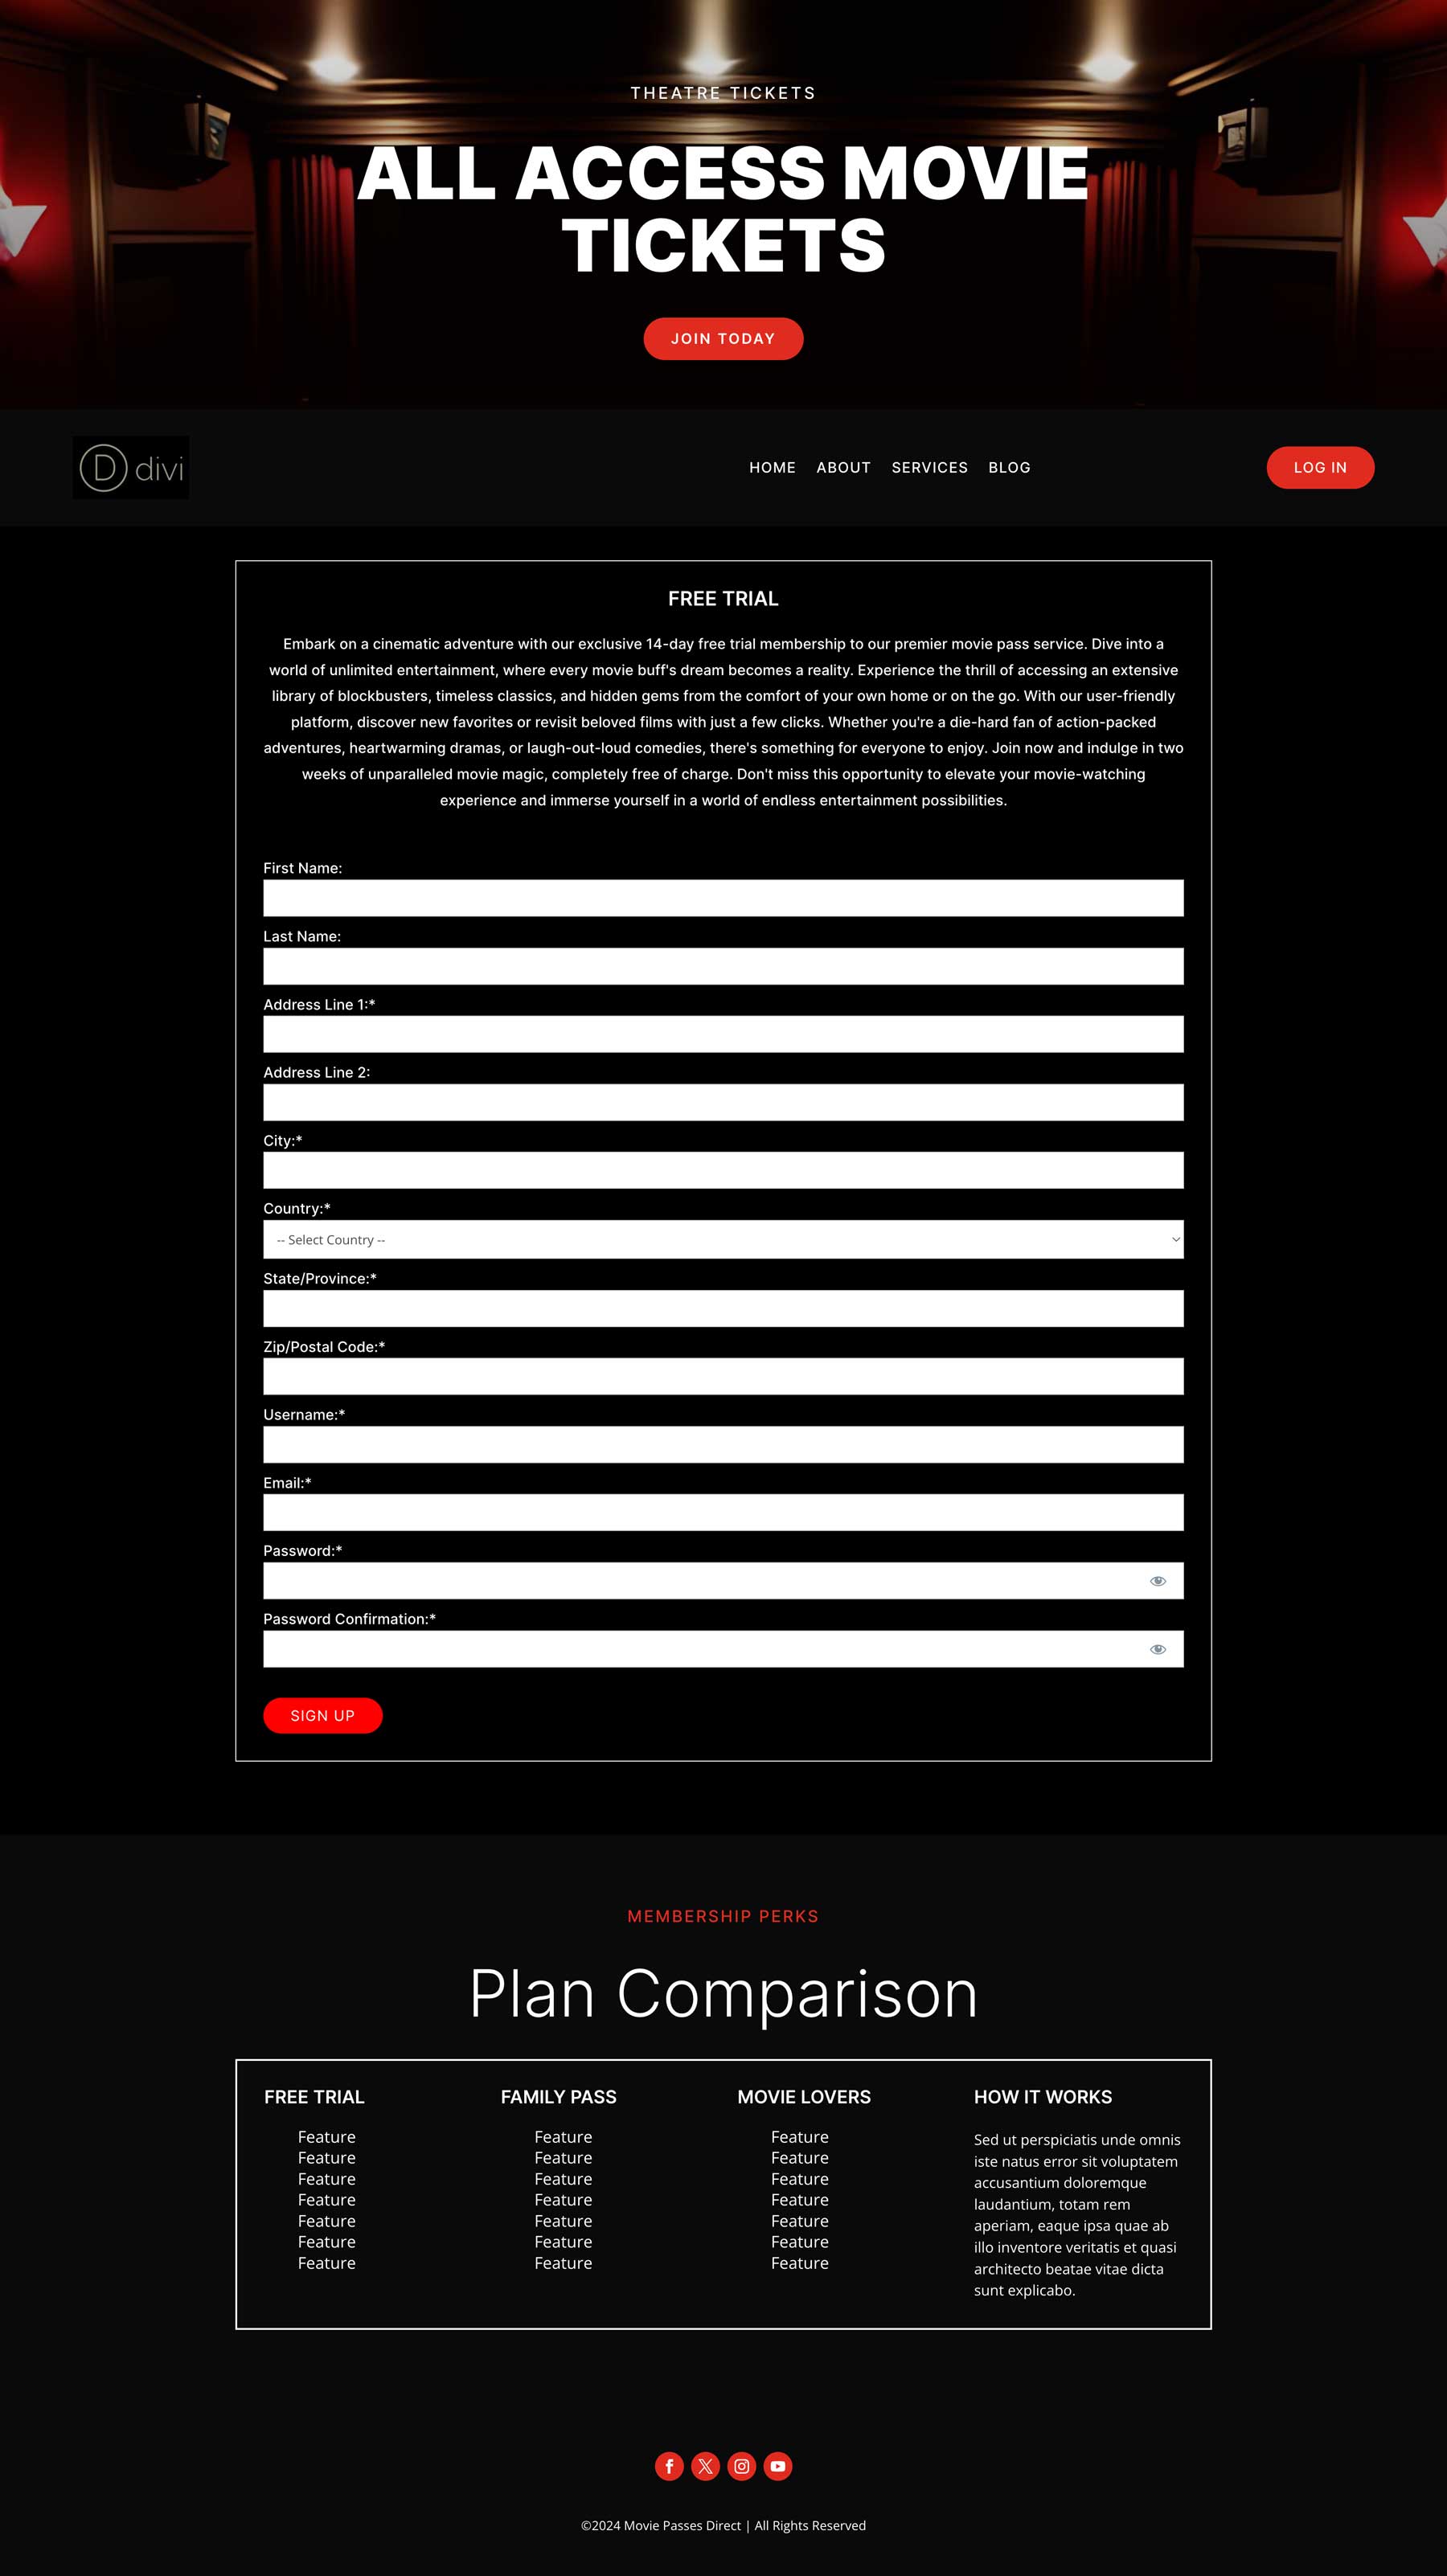
In addition to membership pages, you can create custom layouts for other MemberPress pages, like a custom Account, Login, Pricing, and Thank You pages. Simply repeat the steps above (minus the Theme Builder step) and insert the appropriate shortcode to display registration, login, and logout forms and links.
Step 7: Creating Additional Pages With Divi AI
In addition to core membership pages, you can use Divi AI to build the remaining pages of your membership site. Using an example of an online movie streaming service, we’ll need home, movies, movie, and genre pages. We’ll also restrict logged-out users’ access to streaming movies.
Create a Landing Page With Divi AI
To create a page in WordPress, navigate to Pages > Add New Page.
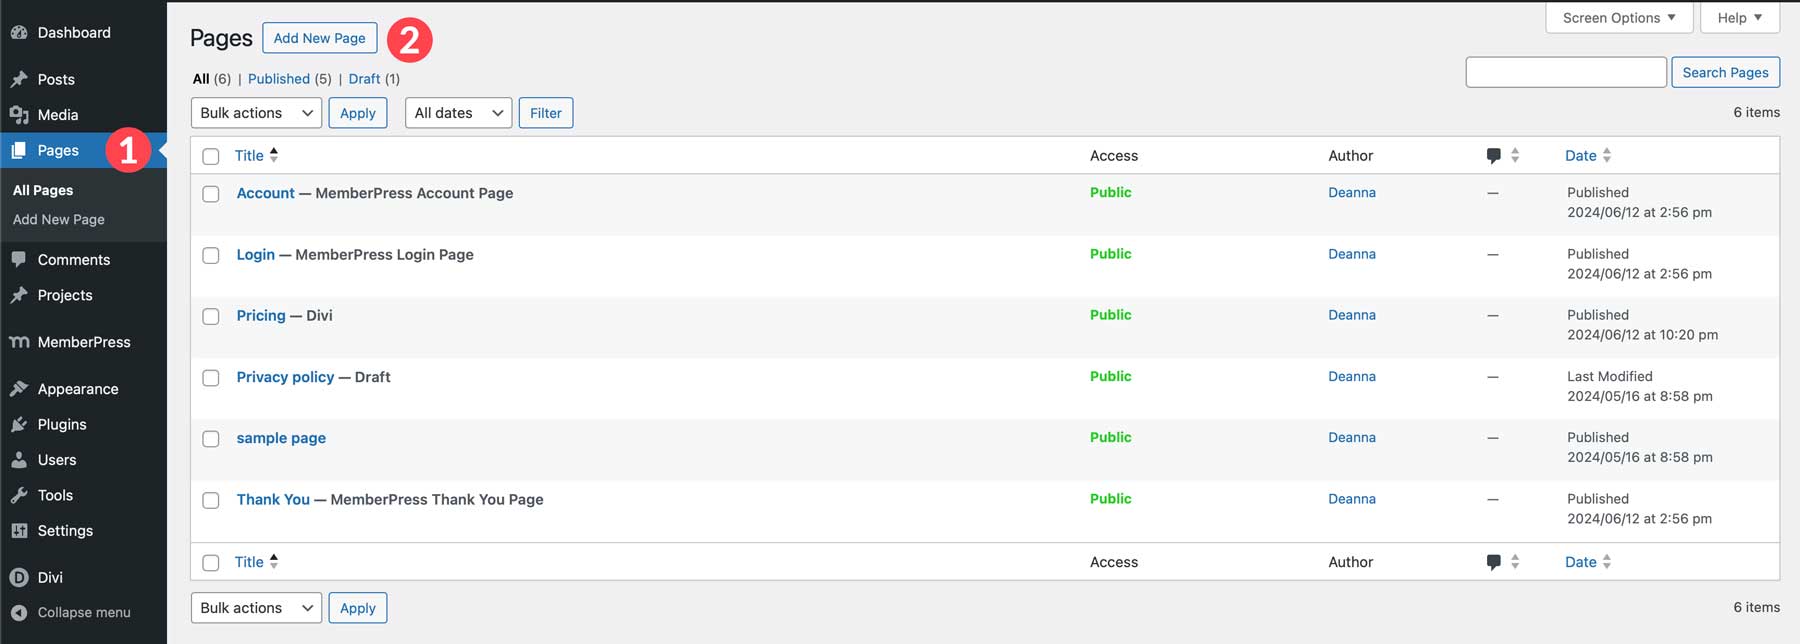
Give the page a name and click the Use Divi Builder button to launch the Visual Builder.

Go through the steps to create a landing page with Divi AI. After generating a page with Divi AI, you can add one of 200 design elements, rearrange, edit, or delete modules, and restrict certain modules, rows, or sections to logged-in users only.
In the next section of our How to Make a Membership Website with WordPress tutorial, we’ll show you how to restrict content using Divi and the MemberPress Divi Add-On.
Restricting Access to Content
One of MemberPress’s best features is its ability to restrict content to paid users. Those using the Divi theme can take things a bit further by restricting content at the section, row, or module level. The MemberPress Divi Add-On adds another tab to Divi’s module settings, allowing you to restrict specific content down to the user level.
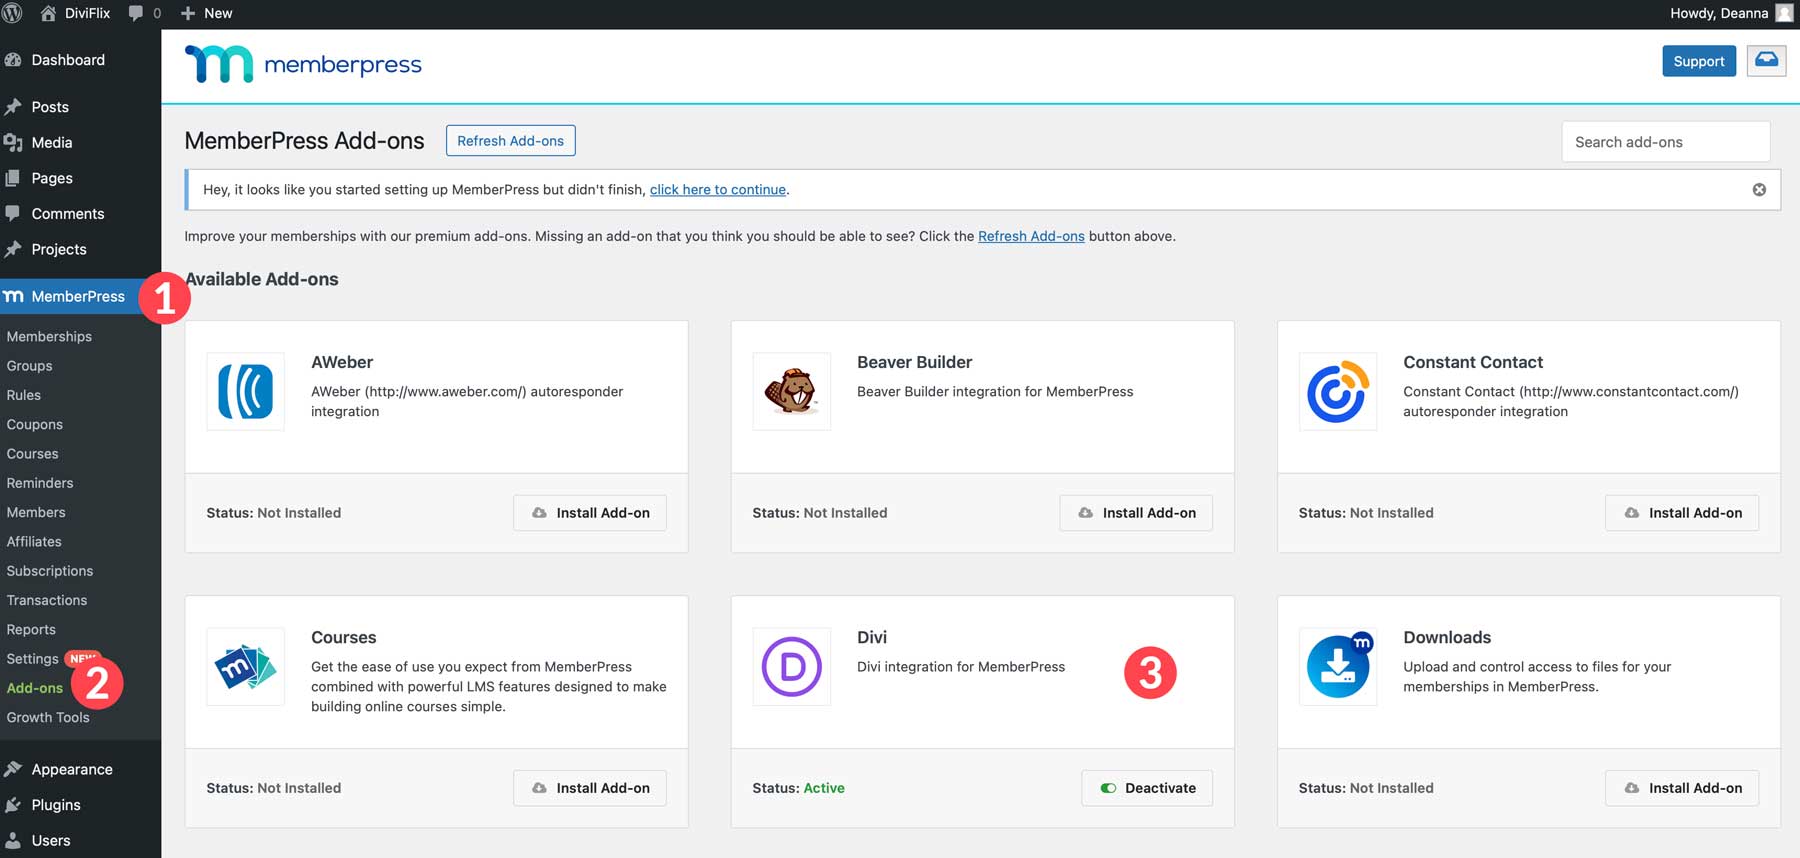
This option must be installed before integrating MemberPress into the Visual Builder. Head to MemberPress > Add-Ons and look for Divi. Click the Install Add-On button to continue.
Create a Content Rule
Before restricting content in Divi, we must create a content rule. Content rules allow you to restrict content in various ways, including full pages, posts, categories, tags, and partial. A partial content rule will allow you to restrict content to a single module, which is useful since we’re building an online streaming service membership website.
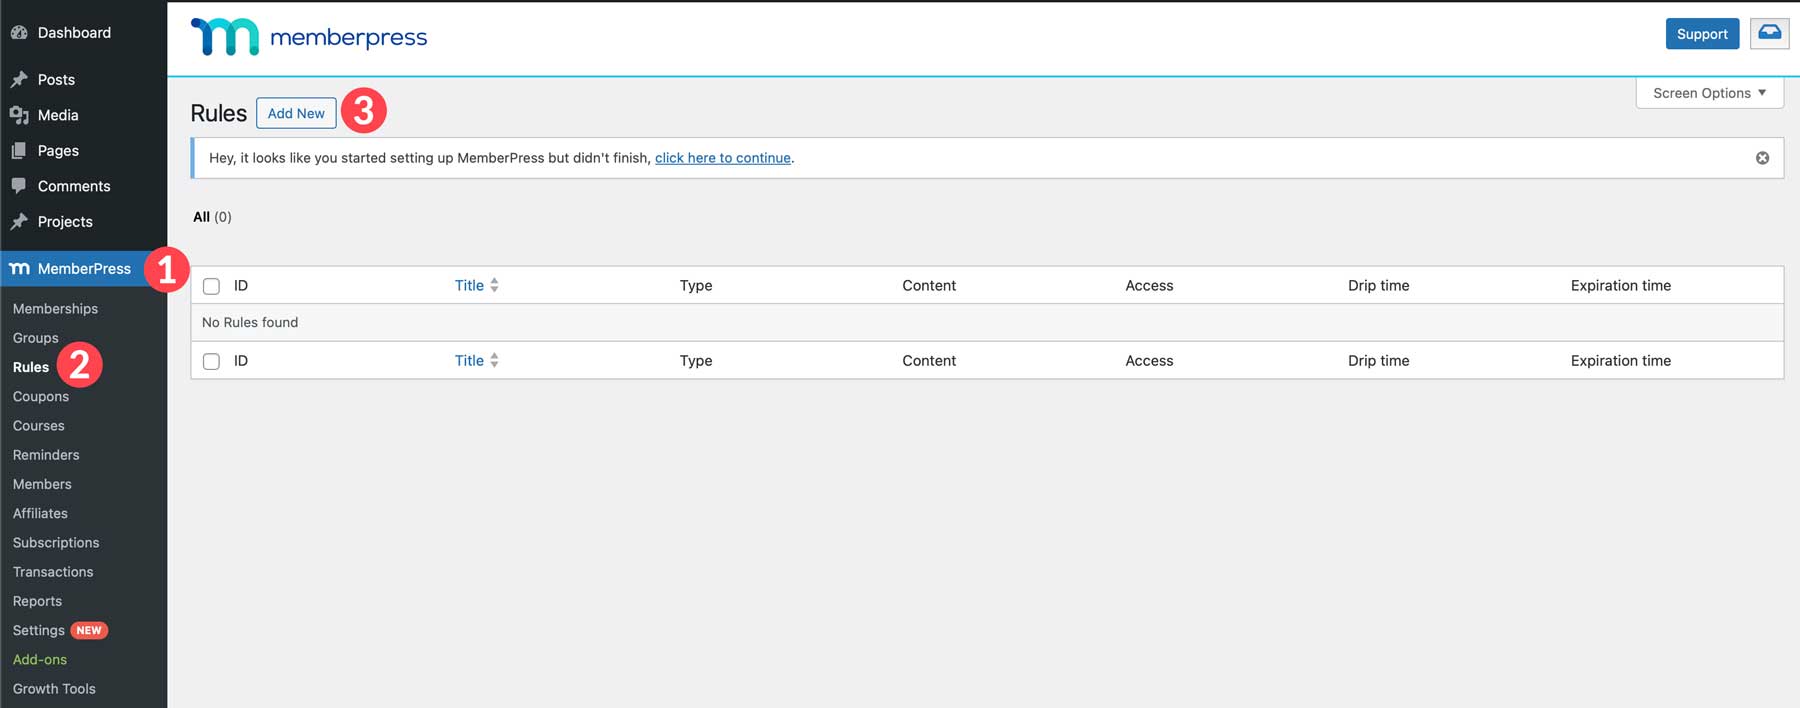
Start by navigating to MemberPress > Rules. Click the Add New Rule button to continue.
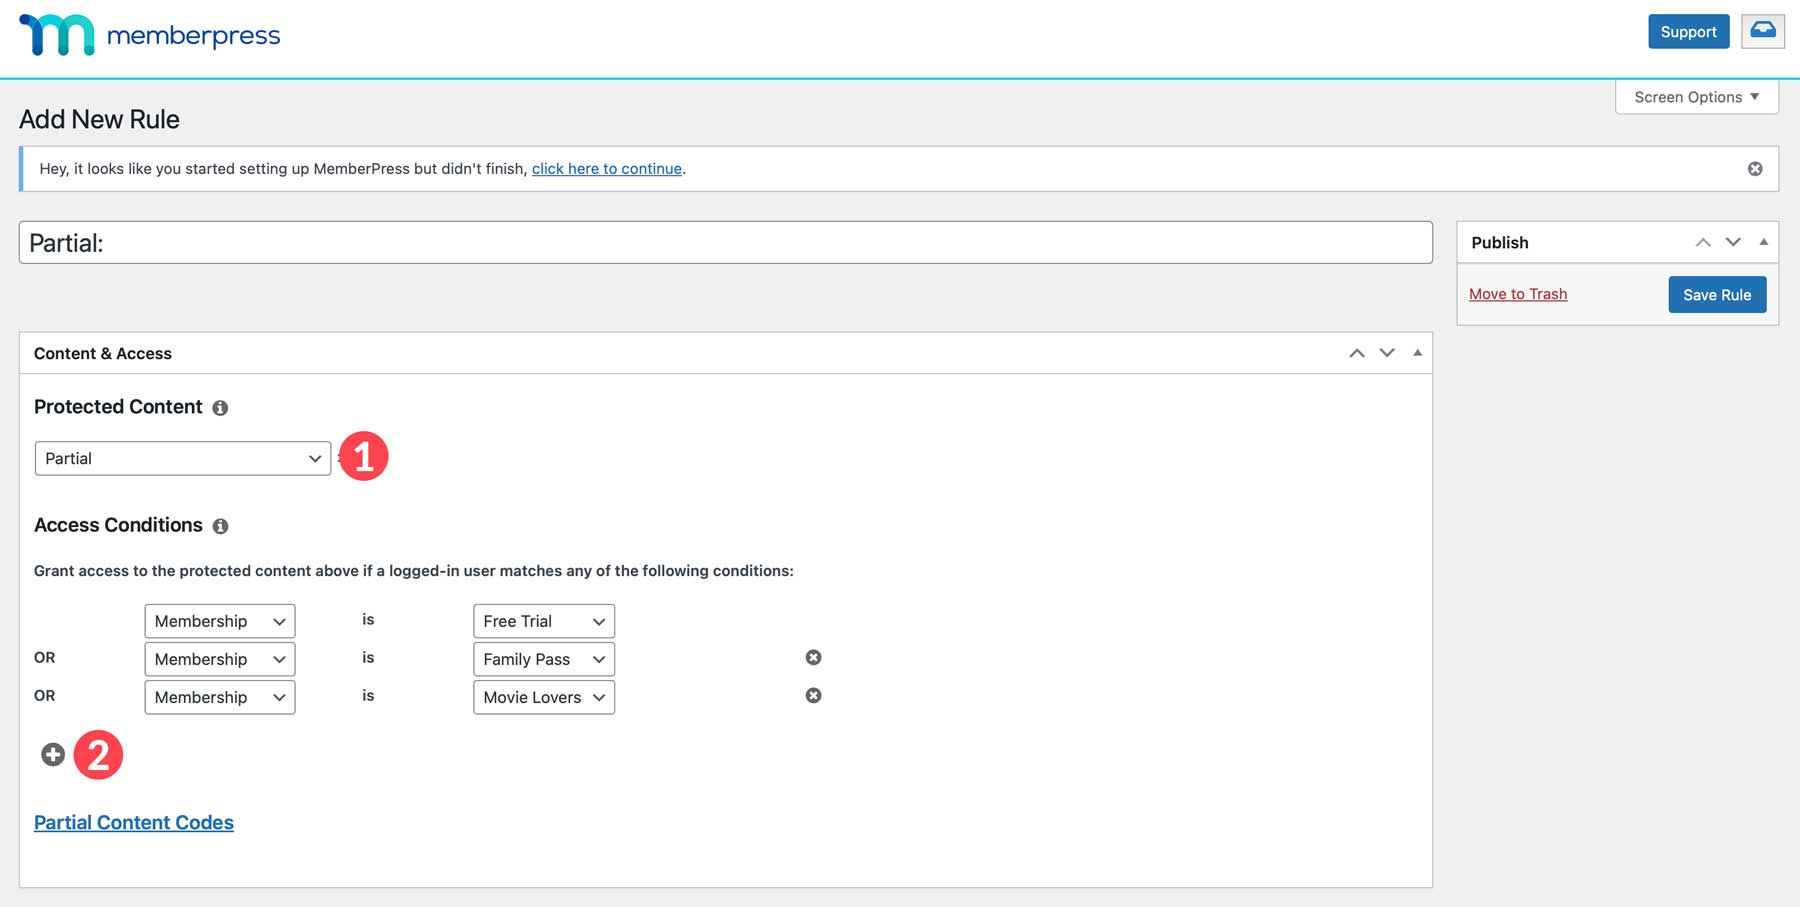
Under protected content, select Partial from the dropdown list. Next, add three access conditions for our three memberships.
Scroll down to the Unauthorized Access section. Hide the excerpt and select custom for the unauthorized message. Enter a message of your choosing.
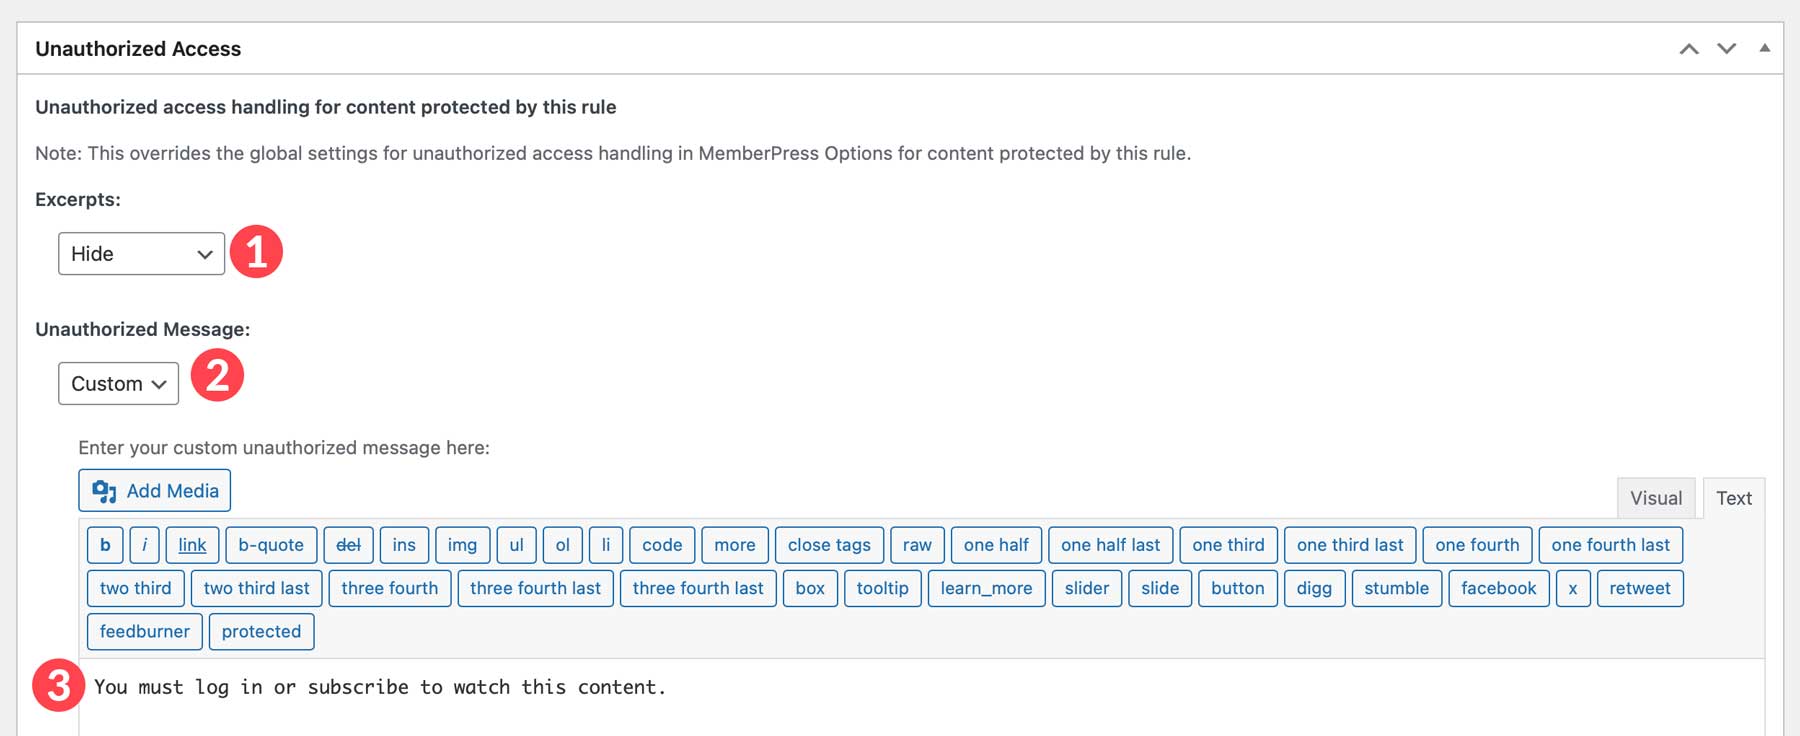
Click the Save Rule button once you’ve entered all the information.
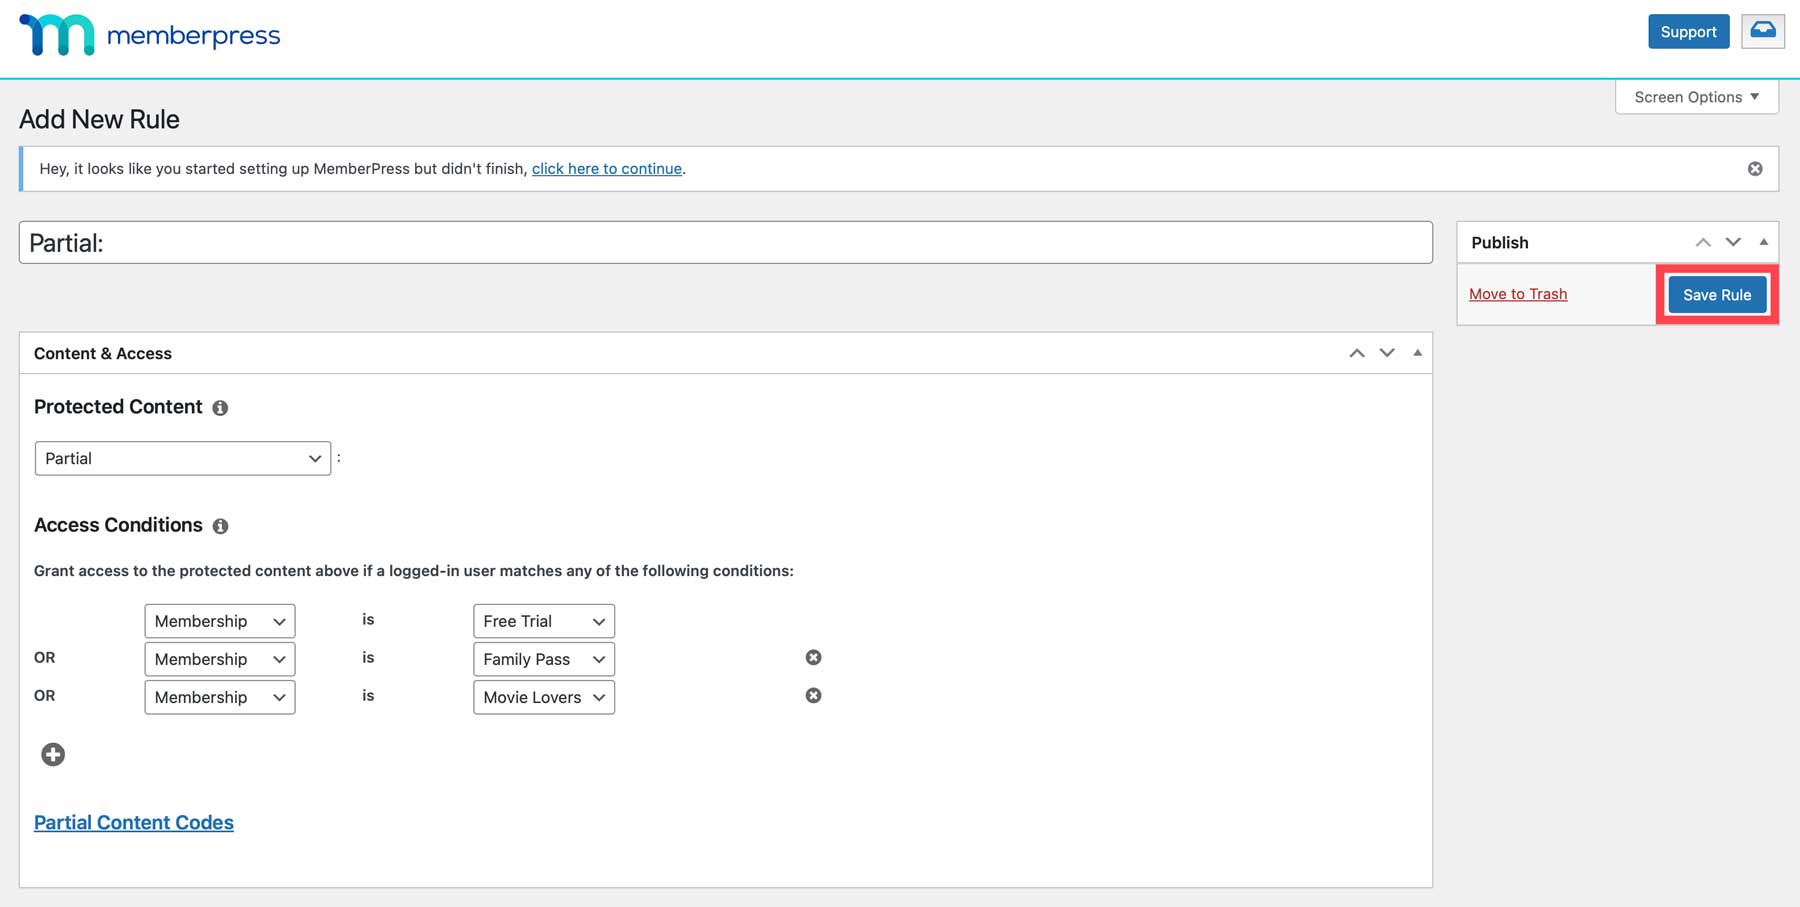
Restrict Content At a Granular Level
With the Divi MemberPress Add-On installed, we can return to our new home page and restrict access to specific content. Although our home page looks great, we want to make some changes. The AI generated a section on our page to feature a particular movie. We added a YouTube trailer to the video module Divi AI generated, but we’d like a video module with a full-length film accessible only to paid, logged-in users.
To do this, add a new section and single column row underneath the teaser section of the layout (or create one if Divi AI didn’t generate one). Next, add the Video Module to the row.

Add a video to the module and click the green check button to save it.
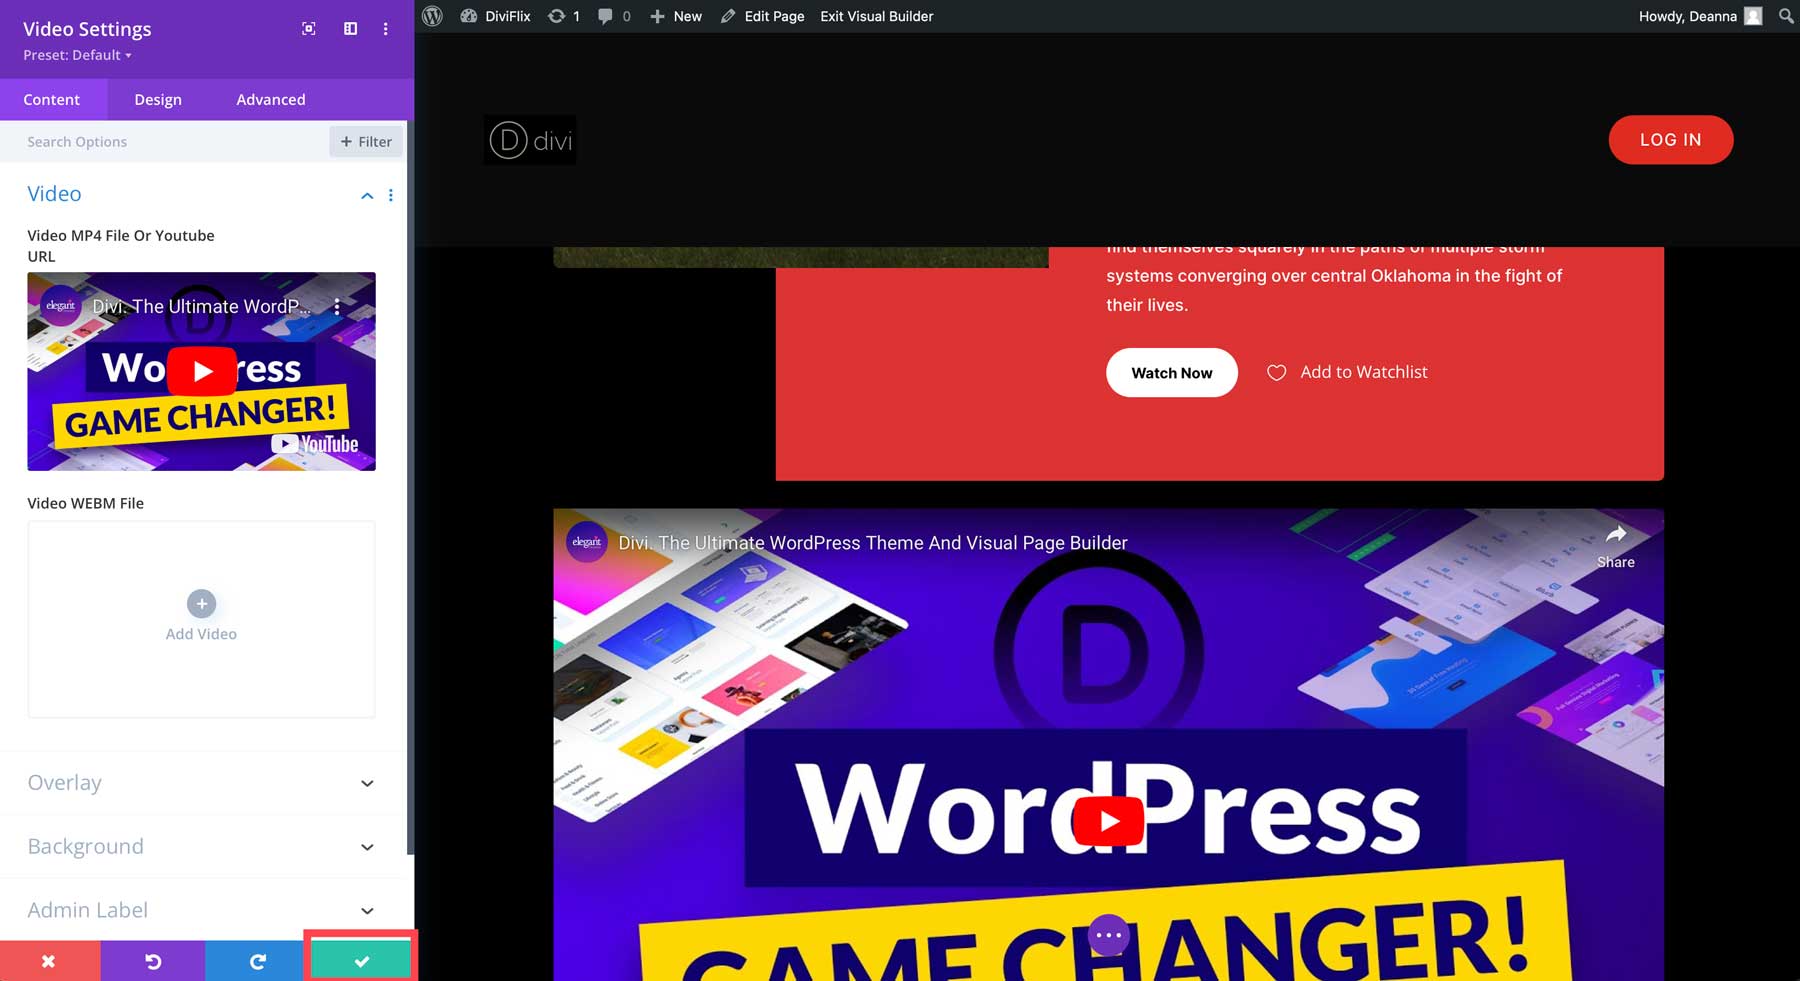
Next, hover over the newly created section to reveal the row settings. Click the settings icon to edit the section.
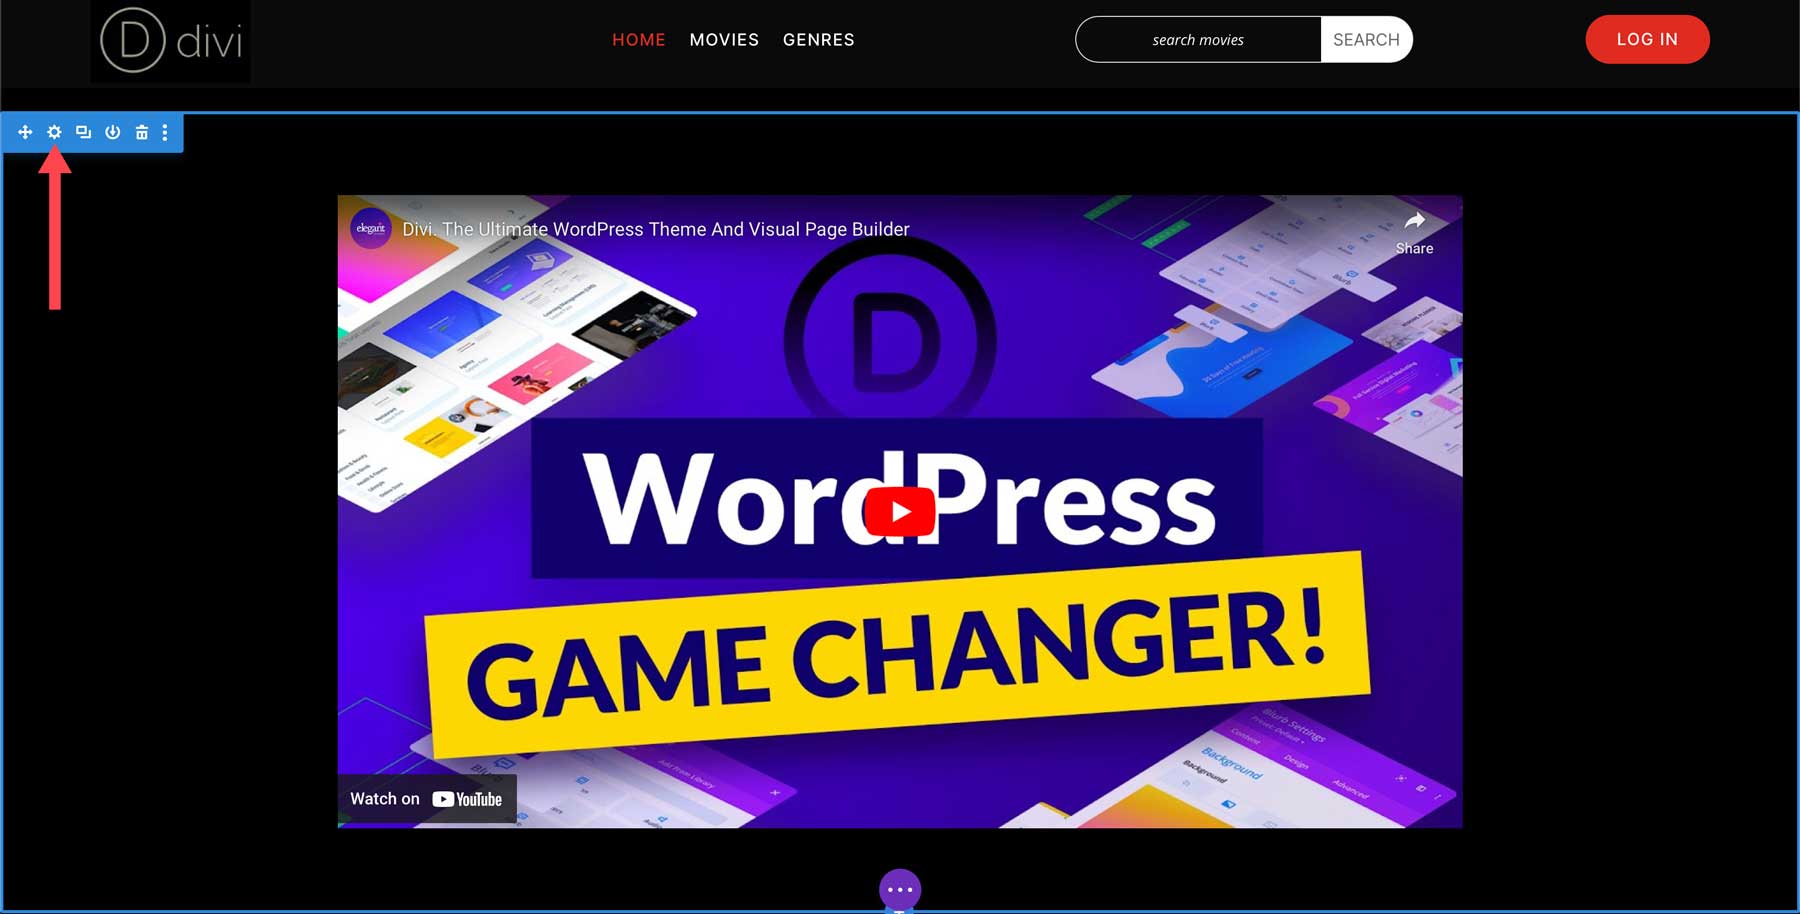
Click the MemberPress tab in the module settings. Next, click the dropdown arrow in the Protect Content section. Under Membership Rule, select partial. Select default for the unauthorized content message. Alternatively, you can select display message and type in a new message. Once the settings are to your liking, click the green check button to save the section.
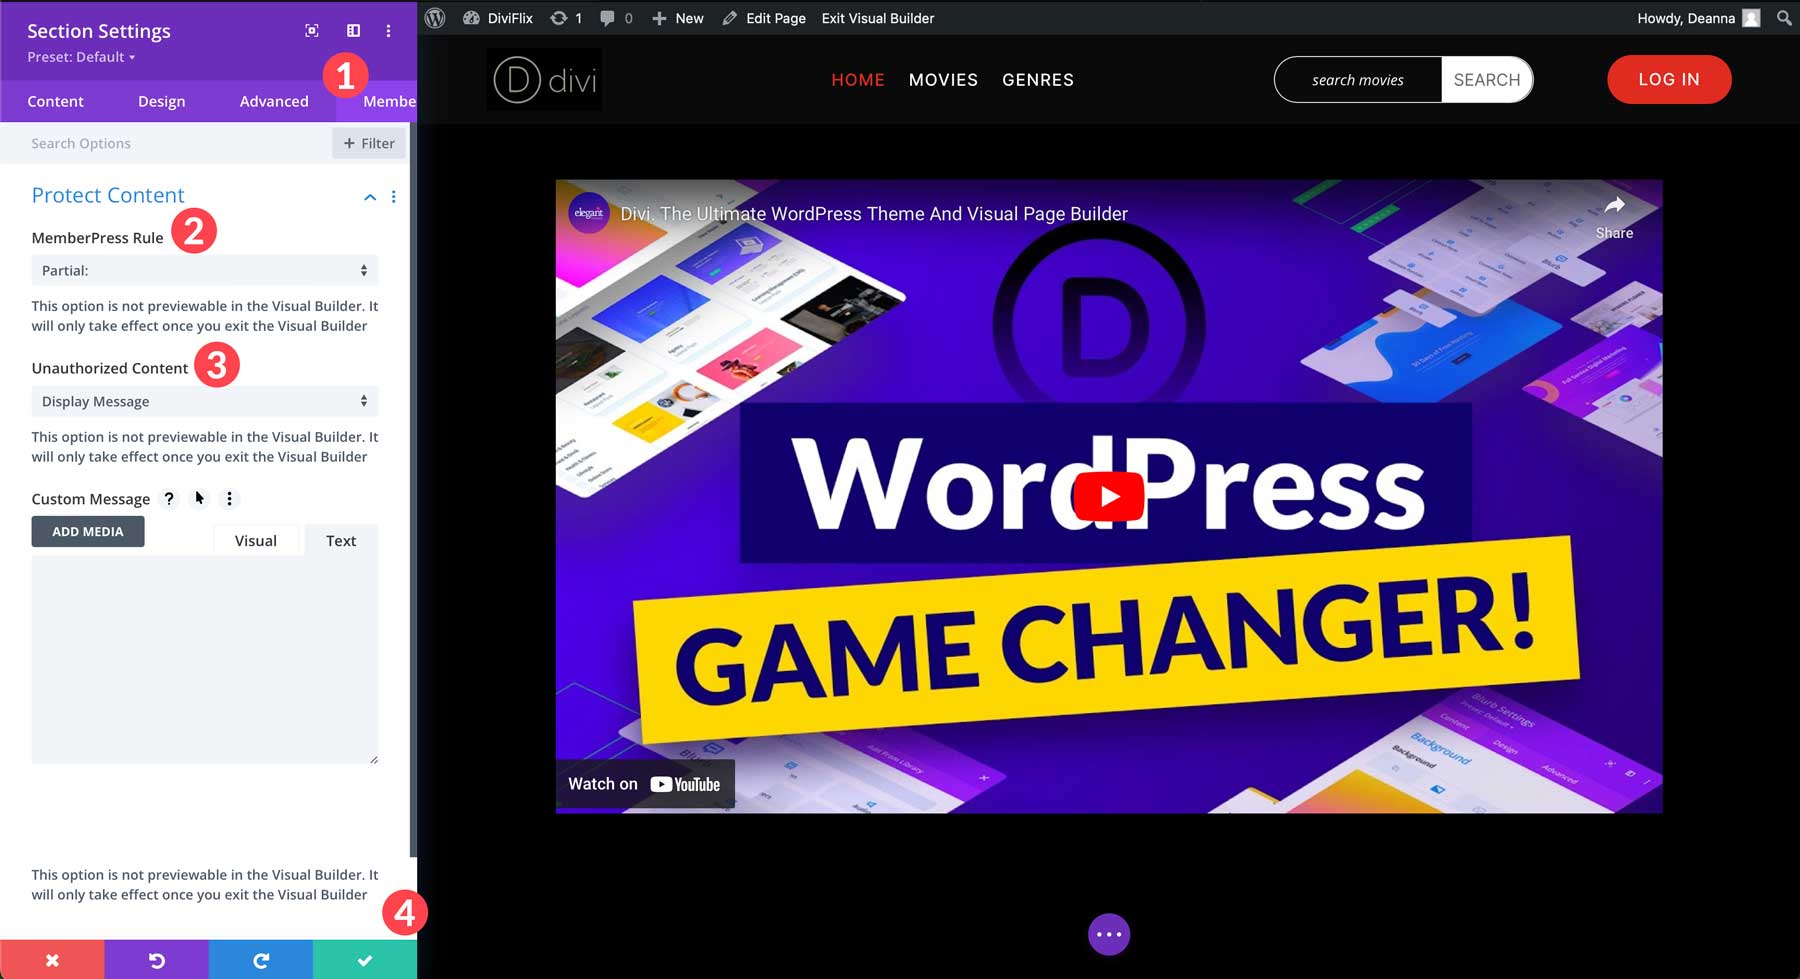
When viewing the page in an incognito window or a different browser, the video module and its entire section will be invisible until you log in.

Repeat the steps above to create any additional pages you’d like for your membership website.
Step 8: Extending Your Membership Website With Plugins
Now that we’ve learned how to create, edit, and restrict content on our membership website, we’ll go over a few must-have plugins you’ll want to install. Some of these are optional, depending on the hosting provider you choose. For example, suppose you go with a SiteGround WordPress hosting plan. In that case, you won’t need security or backup plugins because they are automatically provided with their hosting service.
There are some you’ll want, so let’s discuss a few good ones and what they are useful for.
- LMS Plugins: Although MemberPress does come with a courses add-on, those who want a more robust online learning management system will want a plugin like LifterLMS or LearnDash
- Forum Plugins: If you want to add a community forum to your membership site, bbPress or another forum plugin is a great option
- Ecommerce Plugins: Those who want to sell merchandise or digital downloads can integrate plugins like WooCommerce or Easy Digital Downloads
- Email Optin Plugins: A good way to grow your member list is through email marketing. Plugins like Bloom or Mailchimp allow you to tailor content to your members and attract new ones
- Analytics Plugins: Monitor traffic and sales with a Google Analytics plugin like MonsterInsights
- Podcasting Plugins: Add podcasts to your memberships with direct integration with Blubrry PowerPress and more
- Form Plugins: Create custom registration forms with MemberPress’s integration with WP Forms
Step 9: Enhance Your Membership Website With Divi-Specific Products
In addition to plugins made for WordPress, the Divi Marketplace offers Divi-specific extensions, child themes, and layout packs that will enhance your membership website. Let’s take a closer look at a few of them so you’ll get a better idea of what’s available.
Hide & Show Pro
There are other ways to build a membership website besides membership plugins like MemberPress and Paid Memberships Pro. Hide & Show Pro allows you to show or hide content based on user role, user ID, logged-in status, and more. There are 34 conditional components, making it possible to set up custom display rules for your content. It also offers direct integration with WooCommerce, so you can create custom display rules for products, schedule sales by day, month, or year, and recurring, or set up a customer loyalty program based on the number of total purchases a customer has. Hide & Show Pro is available for $39 per year.
Divi Pixel
Another incredible product is Divi Pixel, a powerful toolkit that provides over 50 design modules, 5 extensions, and 40+ premade layouts to enhance Divi’s already amazing functionality. There are nearly endless customization options for creating custom headers and footers, building a custom login page, maintenance mode, and more. Mobile menu effects allow you to collapse submenus, set a custom hamburger menu icon, or change the site logo on mobile devices. Divi Pixel is available for $169 per year with unlimited website usage.
DiviMade
If you’re looking for a variety of fresh looks for your membership website, then DiviMade is the perfect solution. With over 1250 professionally-designed templates, you’ll always have options. You’ll get hundreds of variations, full layouts, pages, footers, headers, 230+ styled modules, and more. All layouts are 100% responsive, meaning they’ll look amazing on any screen size. DiviMade is available for $28.99 for a lifetime license and can be used on unlimited websites.
Making a Membership Website With WordPress is Easy With Divi
We’ve covered many topics in this guide on how to make a membership website with WordPress. From purchasing a domain name at Namecheap to purchasing the Divi Theme and MemberPress to restricting content using the MemberPress Divi Add-On, you now have the knowledge you need to effectively build a membership website. When set up correctly, Membership websites offer immense potential to connect with your audience, share your expertise, and generate recurring revenue. With the tools and knowledge you’ve gained here, you’re well on your way to building a successful membership website fostering a vibrant community.
Do you want to learn more about the products and services mentioned in this post? The table below provides pricing and links to each product so you can research them and decide which is right for your membership website.
| Products Mentioned | Starting Price | Description | Action | |
|---|---|---|---|---|
| 1 | Namecheap | $5.98/year | Domain Registrar | Get |
| 2 | SiteGround | $2.99/month | Hosting Provider | Get |
| 3 | Flywheel | $13/month | Managed Hosting Provider | Get |
| 4 | Cloudways | $12/month | Managed Hosting Provider | Get |
| 5 | Divi | $89/year | WordPress Theme | Get |
| 6 | Visual Builder | Included with Divi | Page Builder Plugin | Get |
| 7 | Design Elements | Included with Divi | Page Builder Plugin | Get |
| 8 | Theme Builder | Included with Divi | Full Site Editing | Get |
| 9 | Divi AI | $16.08/month (billed annually) | AI Website Builder | Get |
| 10 | Monarch | Included with Divi | Social Media Plugin | Get |
| 11 | Bloom | Included with Divi | Email Optin Plugin | Get |
| 12 | MemberPress | $179.50/year | Membership Plugin | Get |
| 13 | LifterLMS | $149.50/year | LMS Plugin | Get |
| 14 | LearnDash | $199/year | LMS Plugin | Get |
| 15 | WooCommerce | Free, Add-ons Available | Ecommerce Plugin | Get |
| 16 | Easy Digital Downloads | Free, $89.55/year | Ecommerce Plugin | Get |
| 17 | Mailchimp | Free, $27/month | Email Marketing Tool | Get |
| 18 | MonsterInsights | Free, $99.60/year | Analytics Plugin | Get |
| 19 | Blubrry | $12/month | Email Marketing Service | Get |
| 20 | WP Forms | $49.50/year | Contact Form Plugin | Get |
| 21 | Divi Marketplace | Prices Vary | Extensions, Child Themes, and Layouts for Divi | Get |
| 22 | Hide & Show Pro | $39/year | Divi Modules | Get |
| 23 | Divi Pixel | $169/year | Divi Modules | Get |
| 24 | DiviMade | $28.99/year | Divi Modules | Get |
Frequently Asked Questions
Although we’ve tried to be as thorough as possible, you may still have questions about building a membership website. The FAQ section below will provide you with the answers you need.






MemberPress is fantastic. I used it this month to launch an LMS site for a client. The support is probably its best feature. Quick response times and one rep even wrote some custom javascript to perform a function not built into the system. I highly recommend it.
We totally agree! Their support is top notch and you can build just about any type of membership site with it!