How To Install The Divi Theme
Installing our themes can be done using the WP Dashboard.
The Divi Theme is more than just a WordPress theme, it’s the ultimate Visual Builder for WordPress websites. That means you can build custom websites faster than ever before without having to know a single line of code. With its ever-expanding capabilities and community, Divi is the website software you need! In this documentation, we’ll walk you through how to install the Divi theme so that you’re all set up to create the website of your dreams.

How to Install Divi
There are two ways to install Divi: a quick install and a manual install. In this doc, we’ll cover both methods.
Let’s get started!
Method One: Quick Install
The fastest way to get started with Divi is with Divi Hosting.
Install Divi with Divi Hosting
With Divi Hosting, Divi is installed and automatically activated with your unique license key. Plus, you get the benefit of fast WordPress hosting that meets all of Divi’s requirements out of the box! Learn about Divi Hosting here.
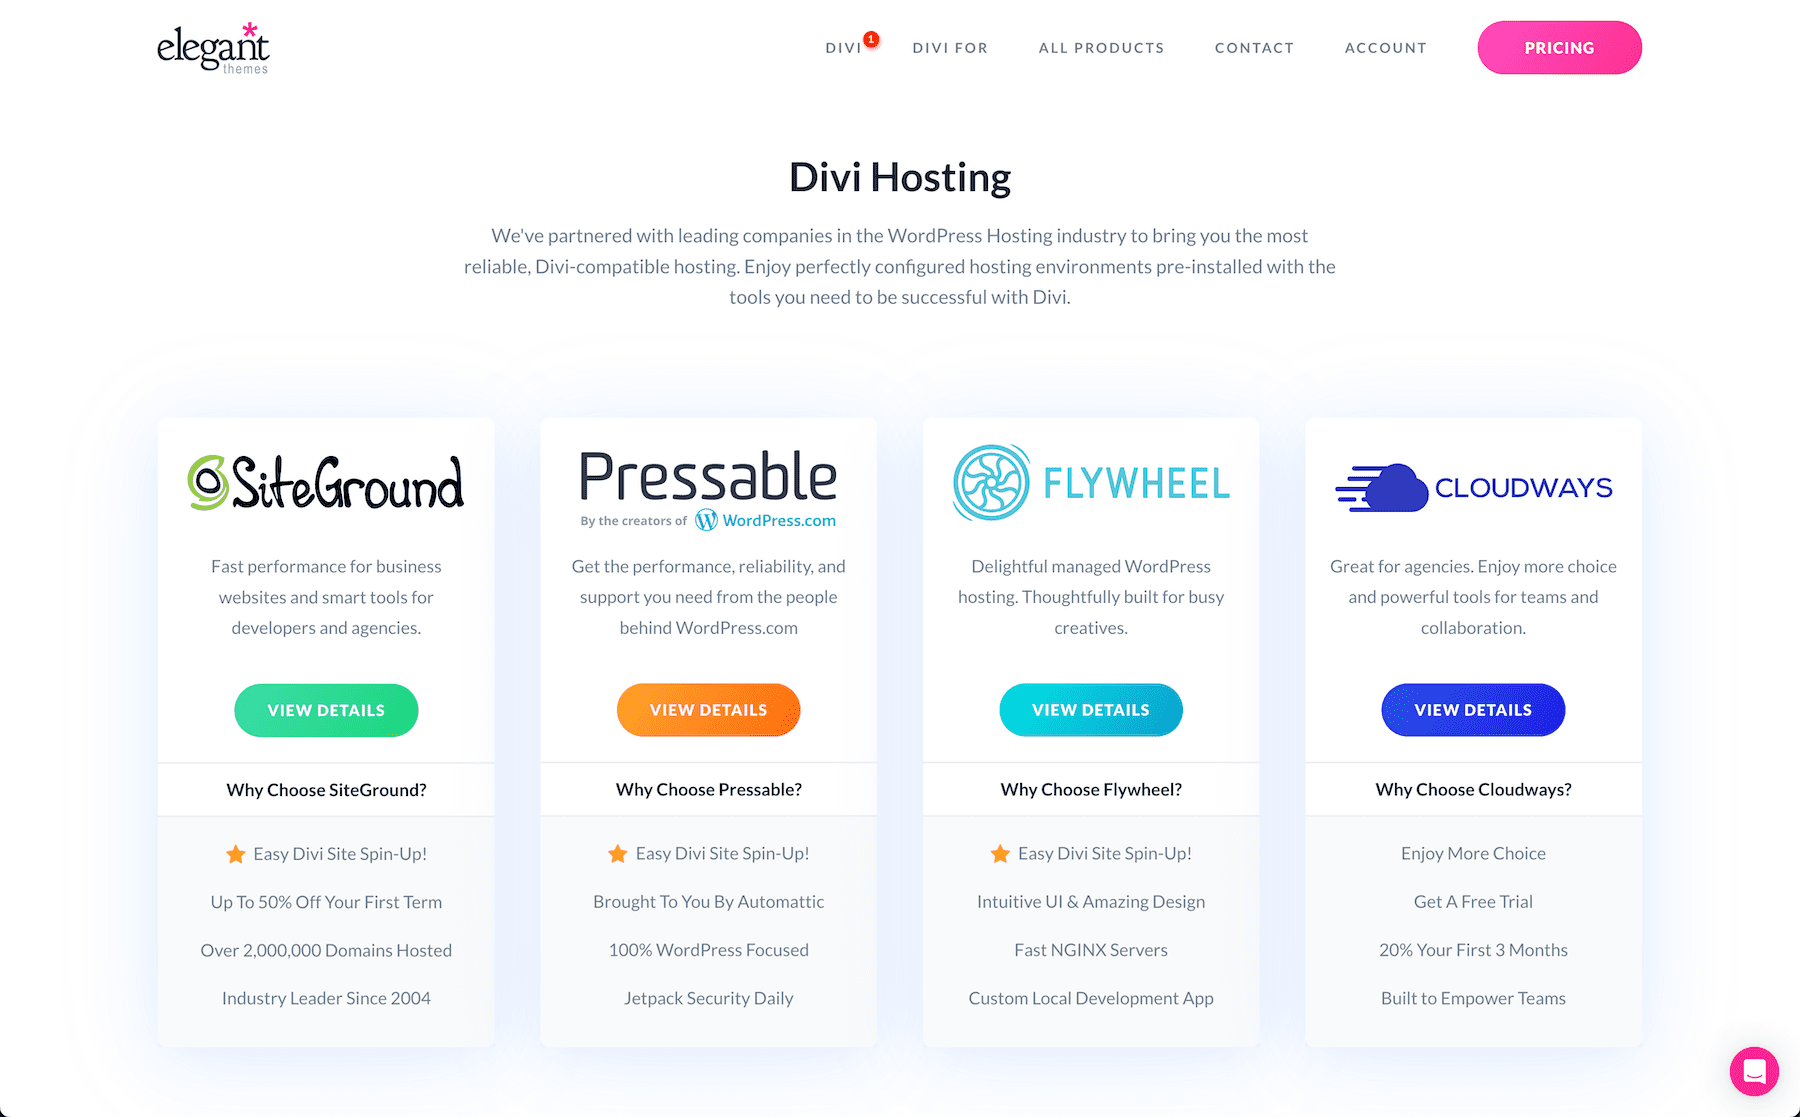
Method Two: Manual Install via the WordPress Dashboard
If you already have a website and hosting, then use this method to manually install Divi onto your WordPress website.
Step 1: Log Into Your ET Account And Download Divi Theme
Before we can install the Divi Theme on your WordPress website, we’ll need the Divi Theme zip file. Log into your Elegant Themes Account and navigate to the Members Area. Click the “Download The Divi Theme” button to save the Divi Theme zip file to your desktop.

Note: If you’re using a Mac with Safari, your zip files will automatically be unzipped. To avoid this you’ll need to adjust your Safari Preferences. Learn how to do that here.
Step 2: Log Into Your WordPress Website
Now that you have the Divi Theme zip file, navigate to your WordPress dashboard. You’ll need to have admin privileges in order to upload a new theme.
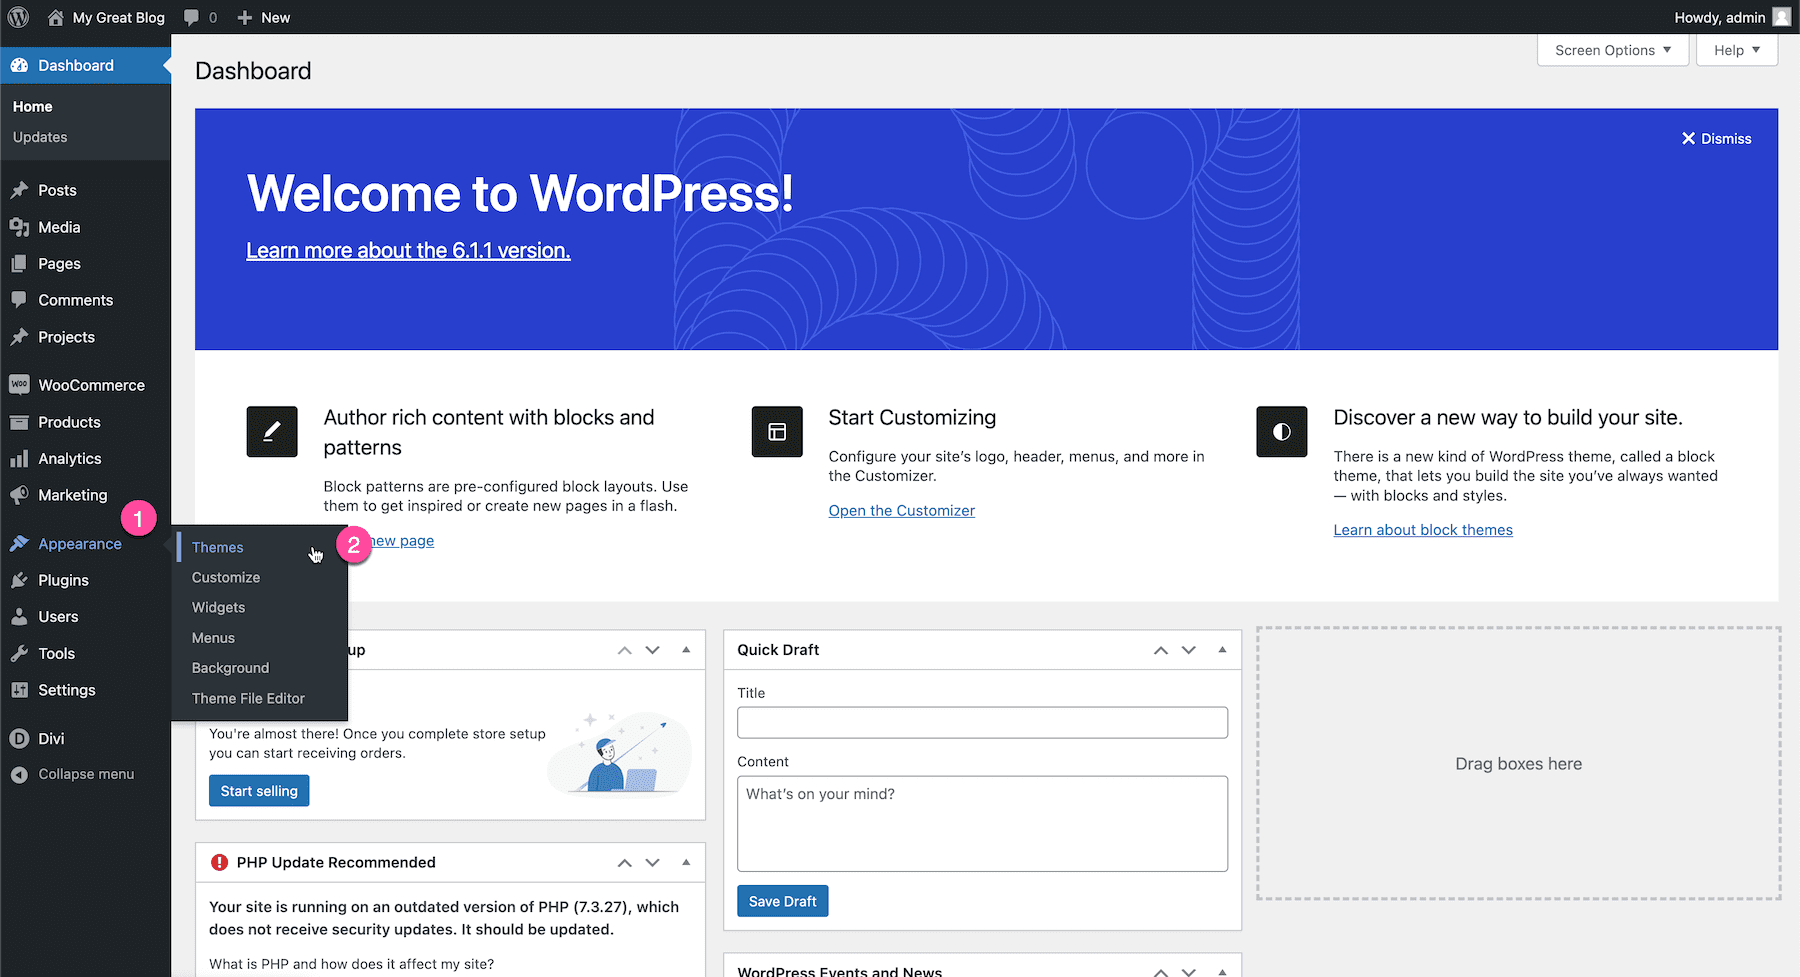
On the WordPress sidebar, hover over “Appearance” and click “Themes”. This is where your website themes live.
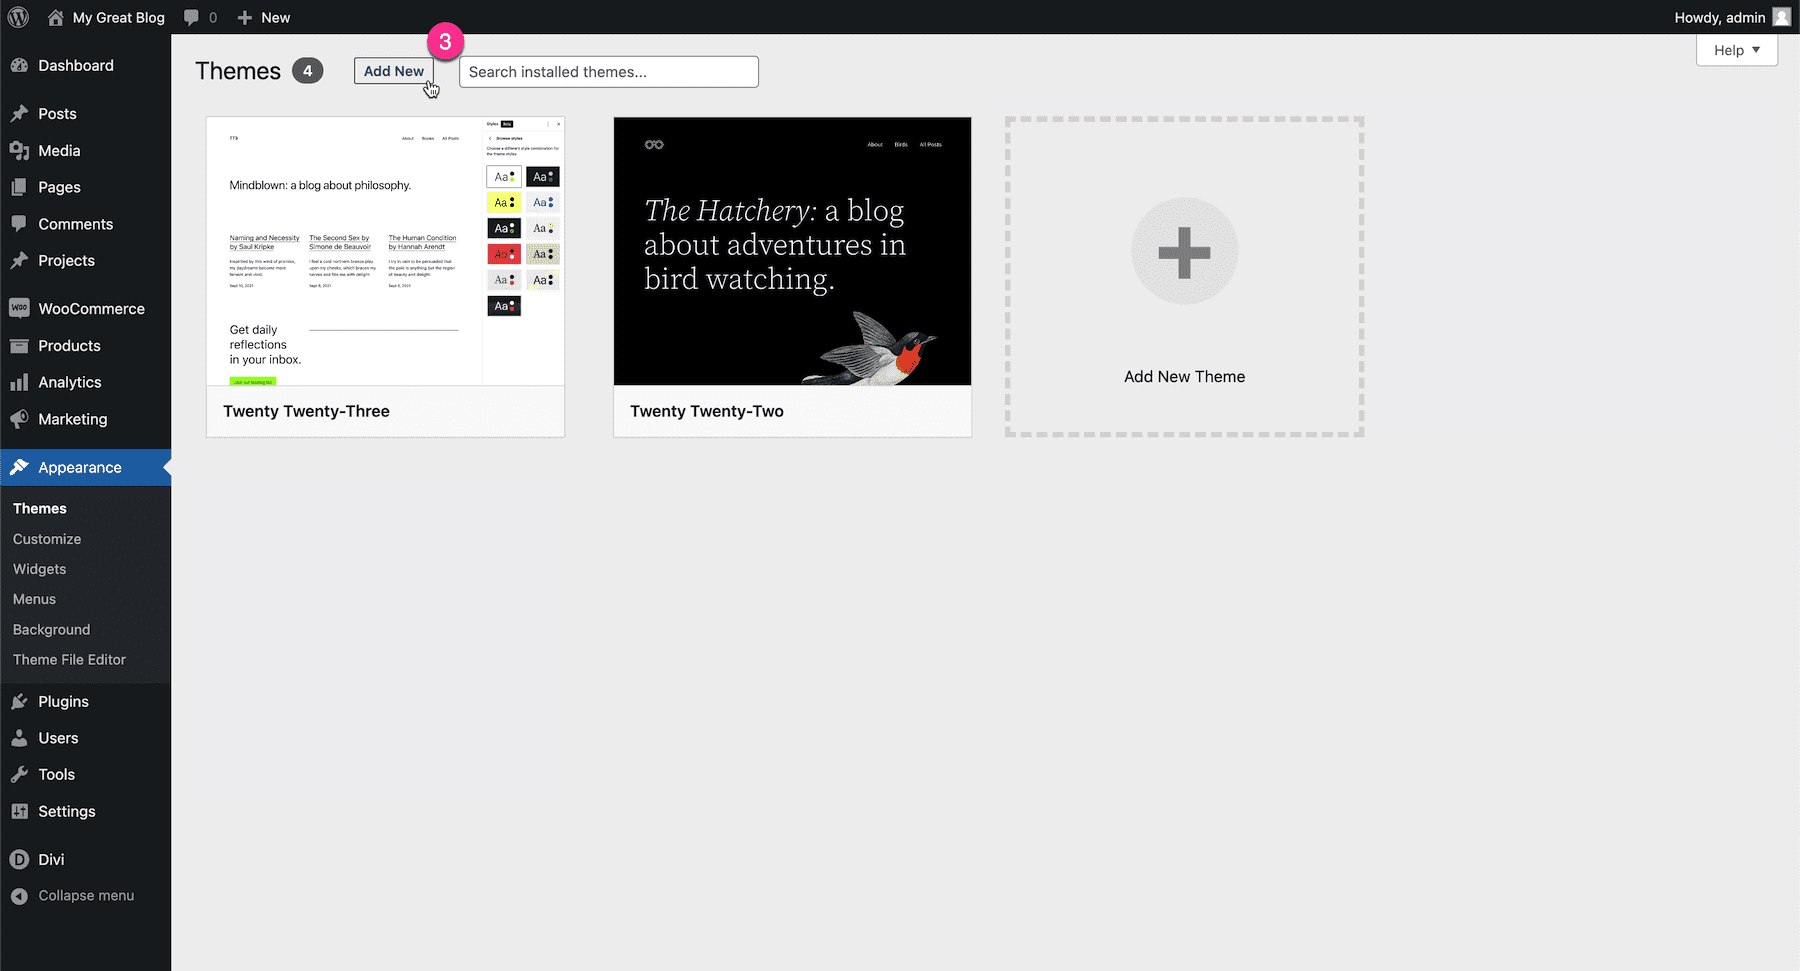
Click the “Add New” button at the top. This will load the WordPress theme library where we can upload our own theme zip file.
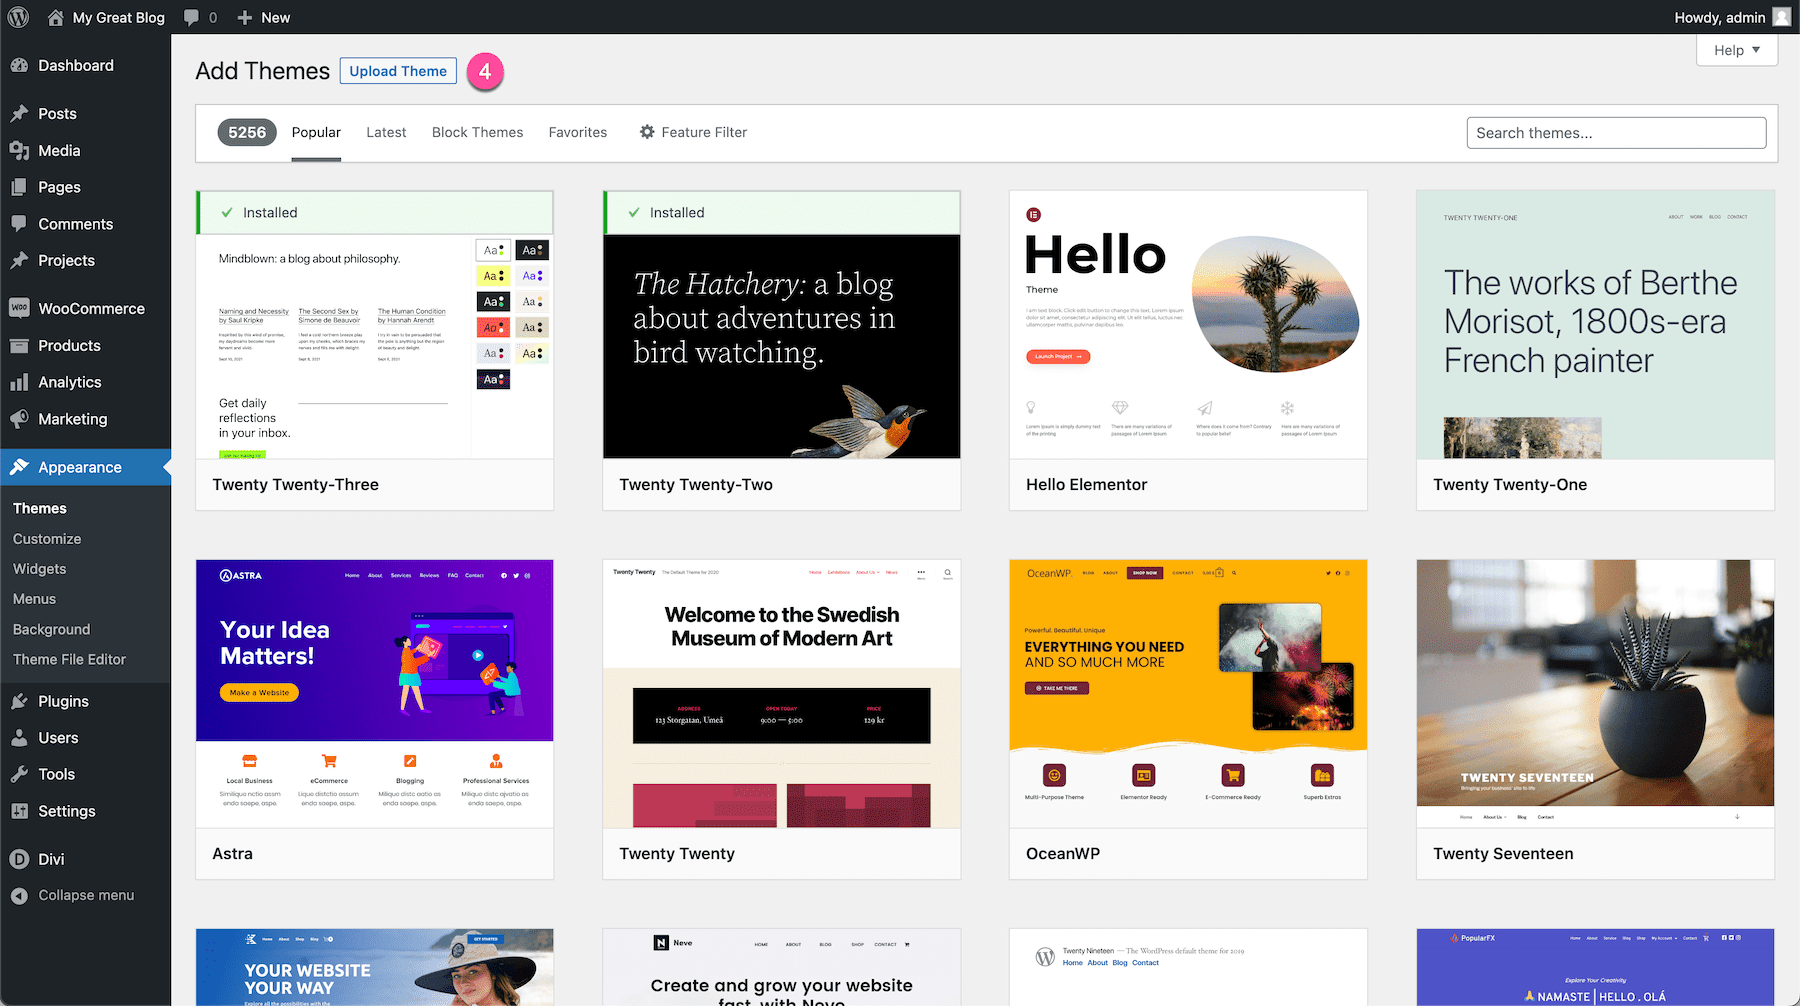
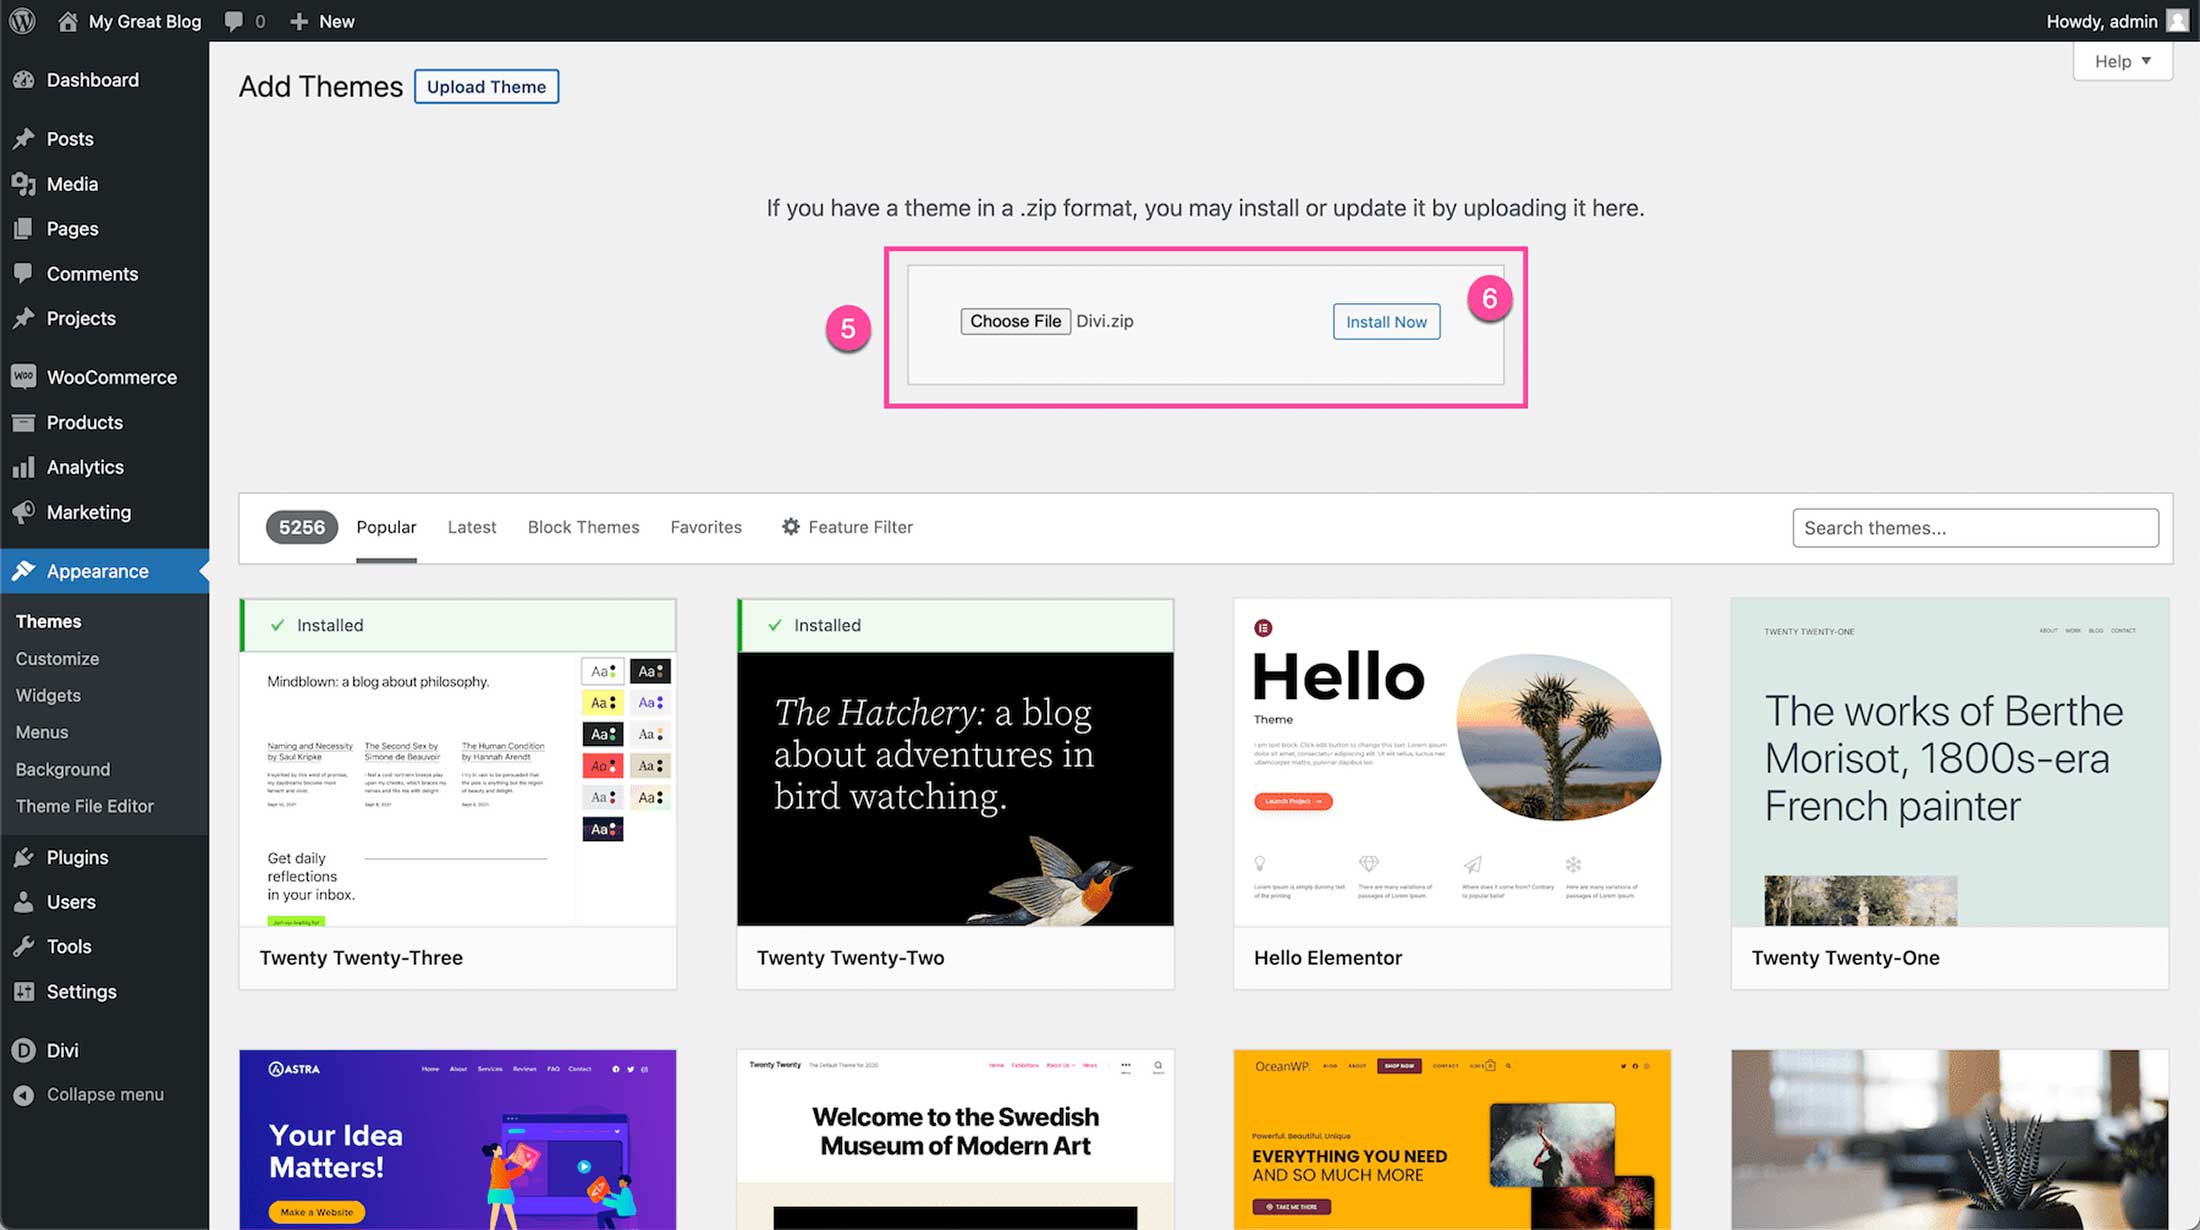
Click the “Upload Theme” button at the top of the page. This will show an upload form.
Drag and drop the divi.zip file you downloaded from your ET Members Area, or click the “Choose File” button to navigate to the downloaded file on your computer. Once you have the divi.zip file added to the upload form, click the “Install Theme” button.
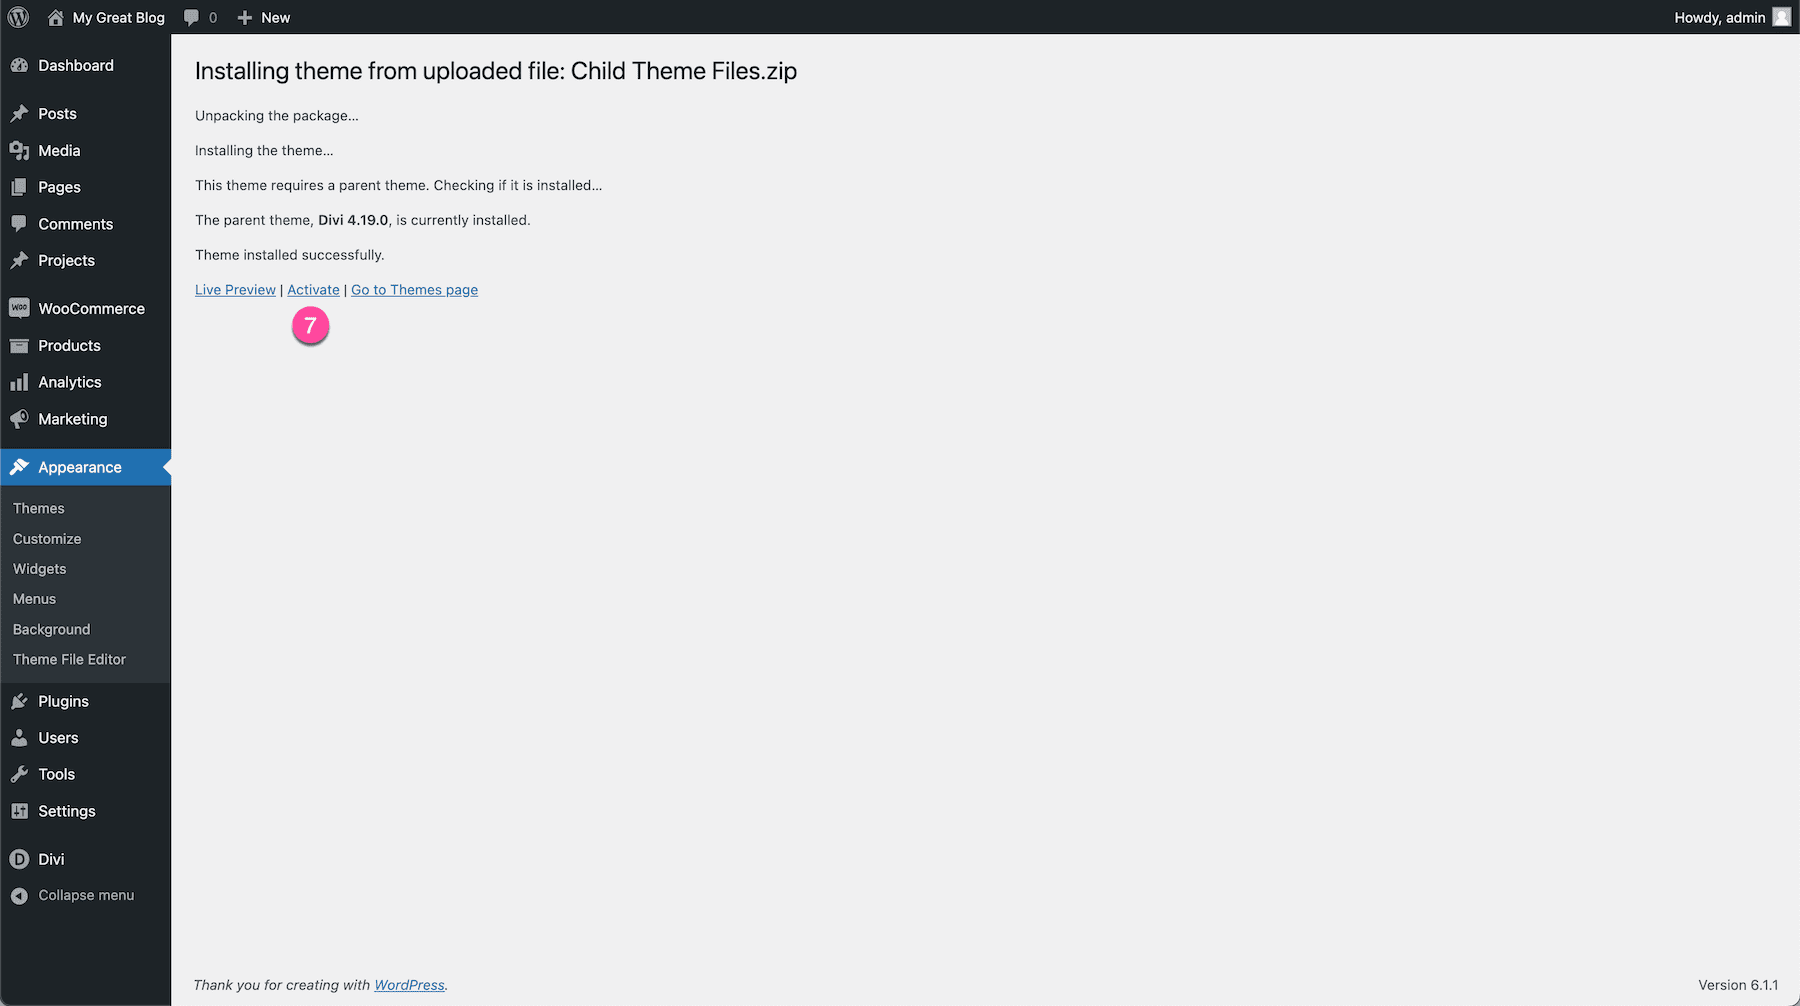
Now that the Divi Theme is installed on your website, you can click “Activate” to activate the Divi theme on your website.
How to Authenticate Your Divi Account
In order to access future Divi updates and Premade Layout Packs, you’ll need to authenticate your Elegant Themes membership and link it with the Divi install on your WordPress website. To do so, you’ll need to add your Elegant Themes username and API Key to the Divi Theme Options.
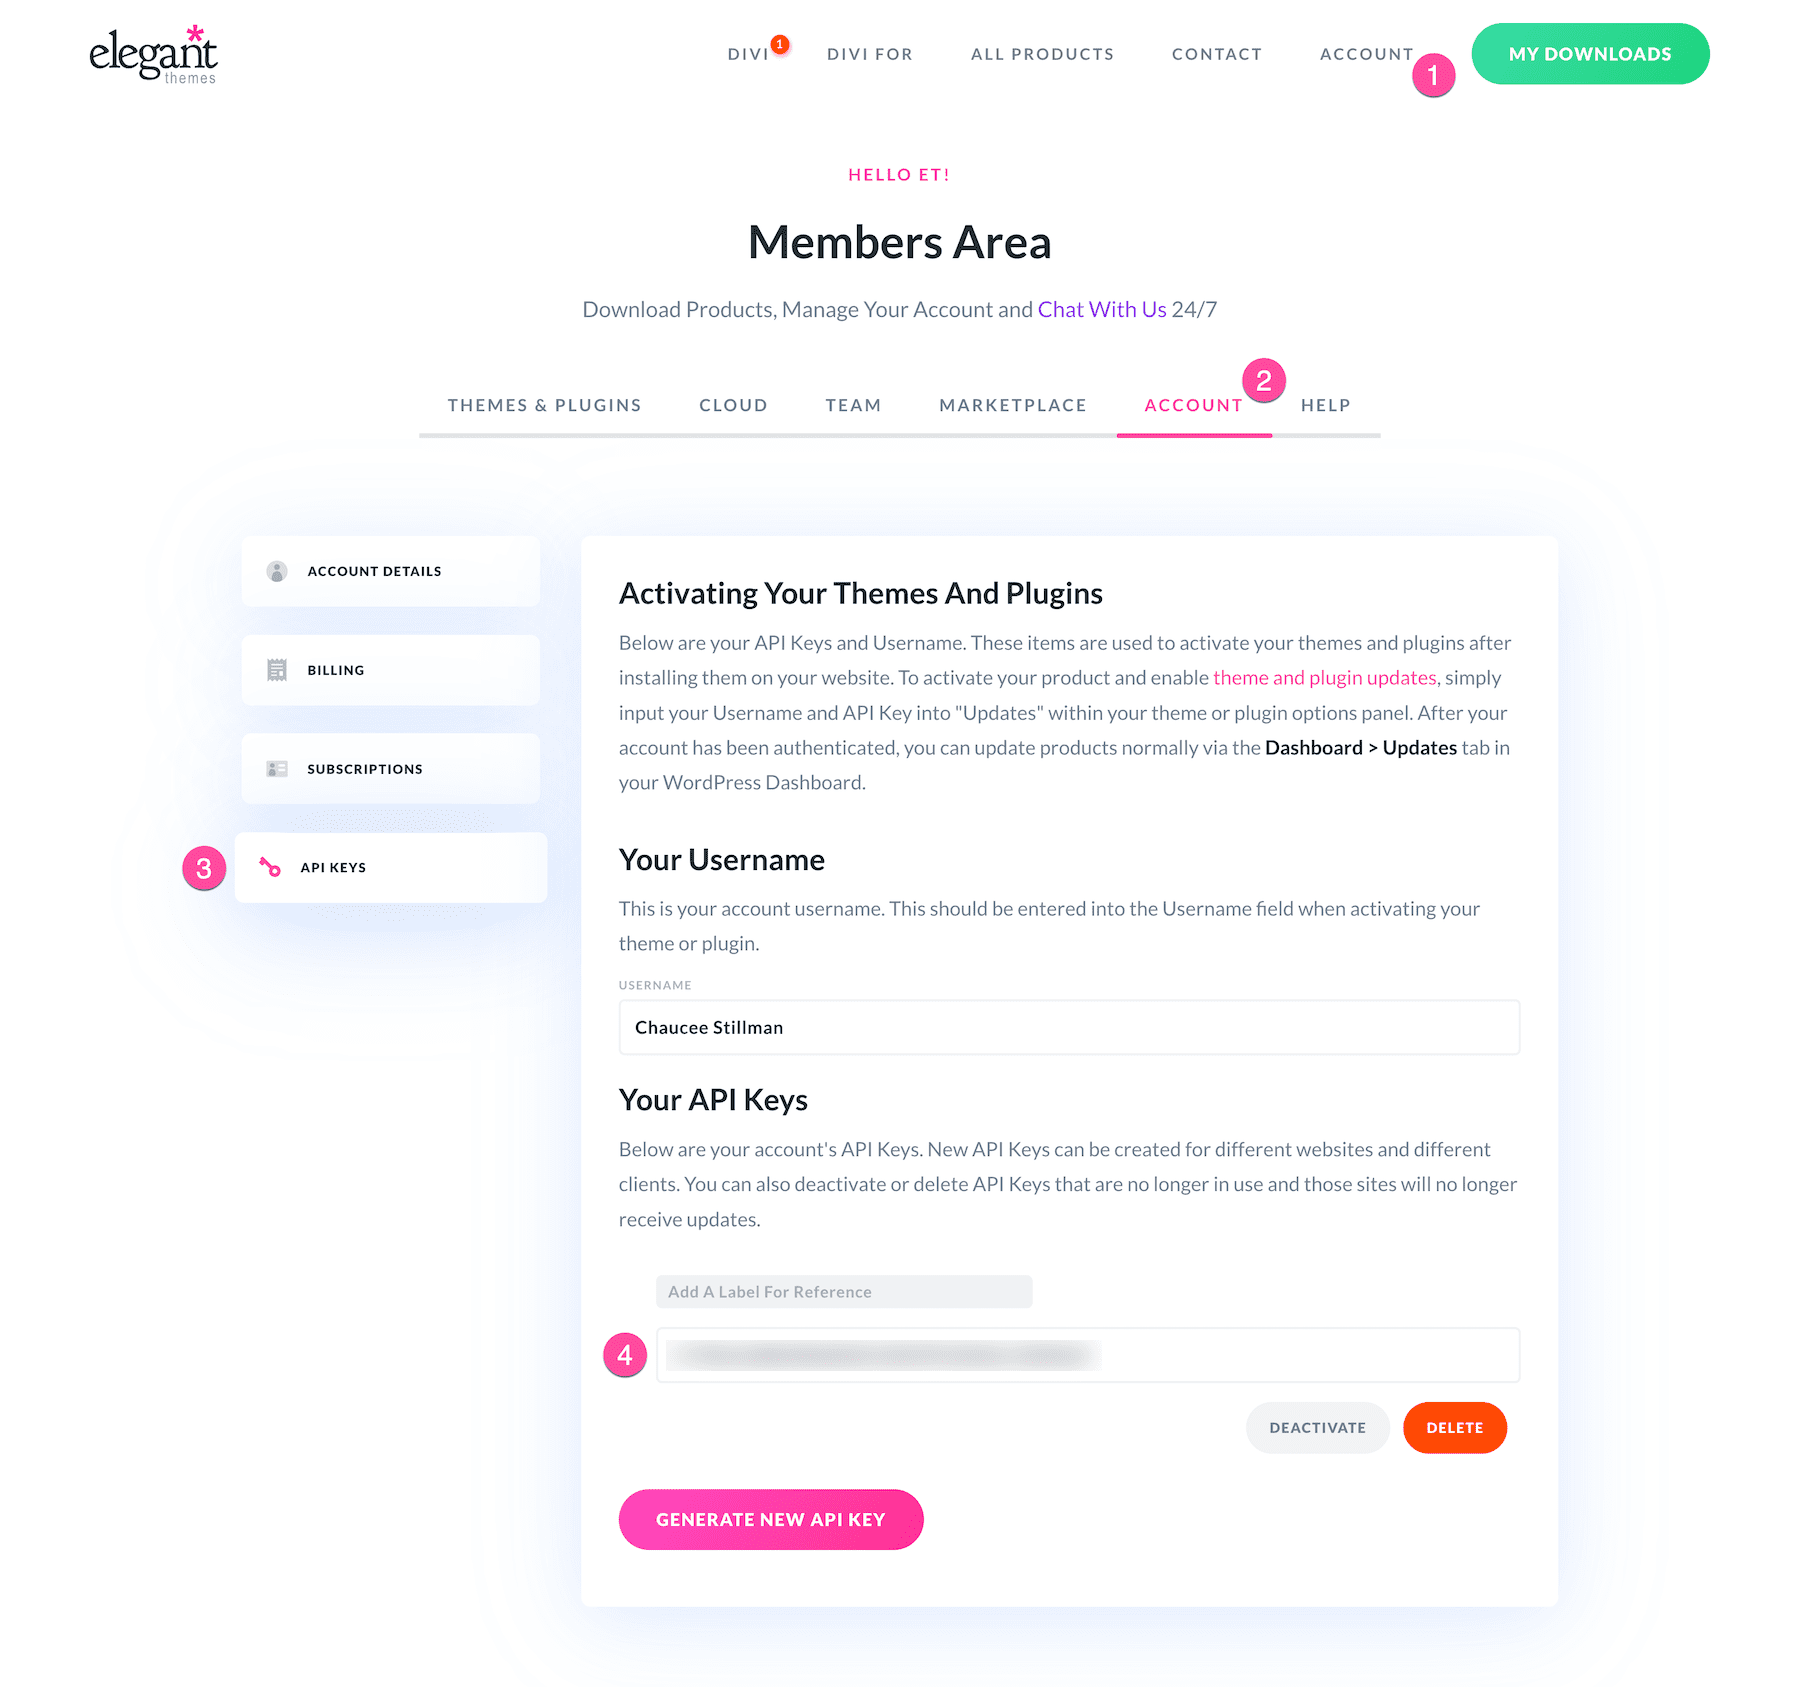
First, log into your Elegant Themes account and navigate to Account > API Keys and copy your API Key. If you do not have any API keys generated, click the “Generate New API Key” button. Above each API key is an input field where you can add a title (like what site you are using the API key on) which is especially handy if you’re using Divi to design and build client websites.
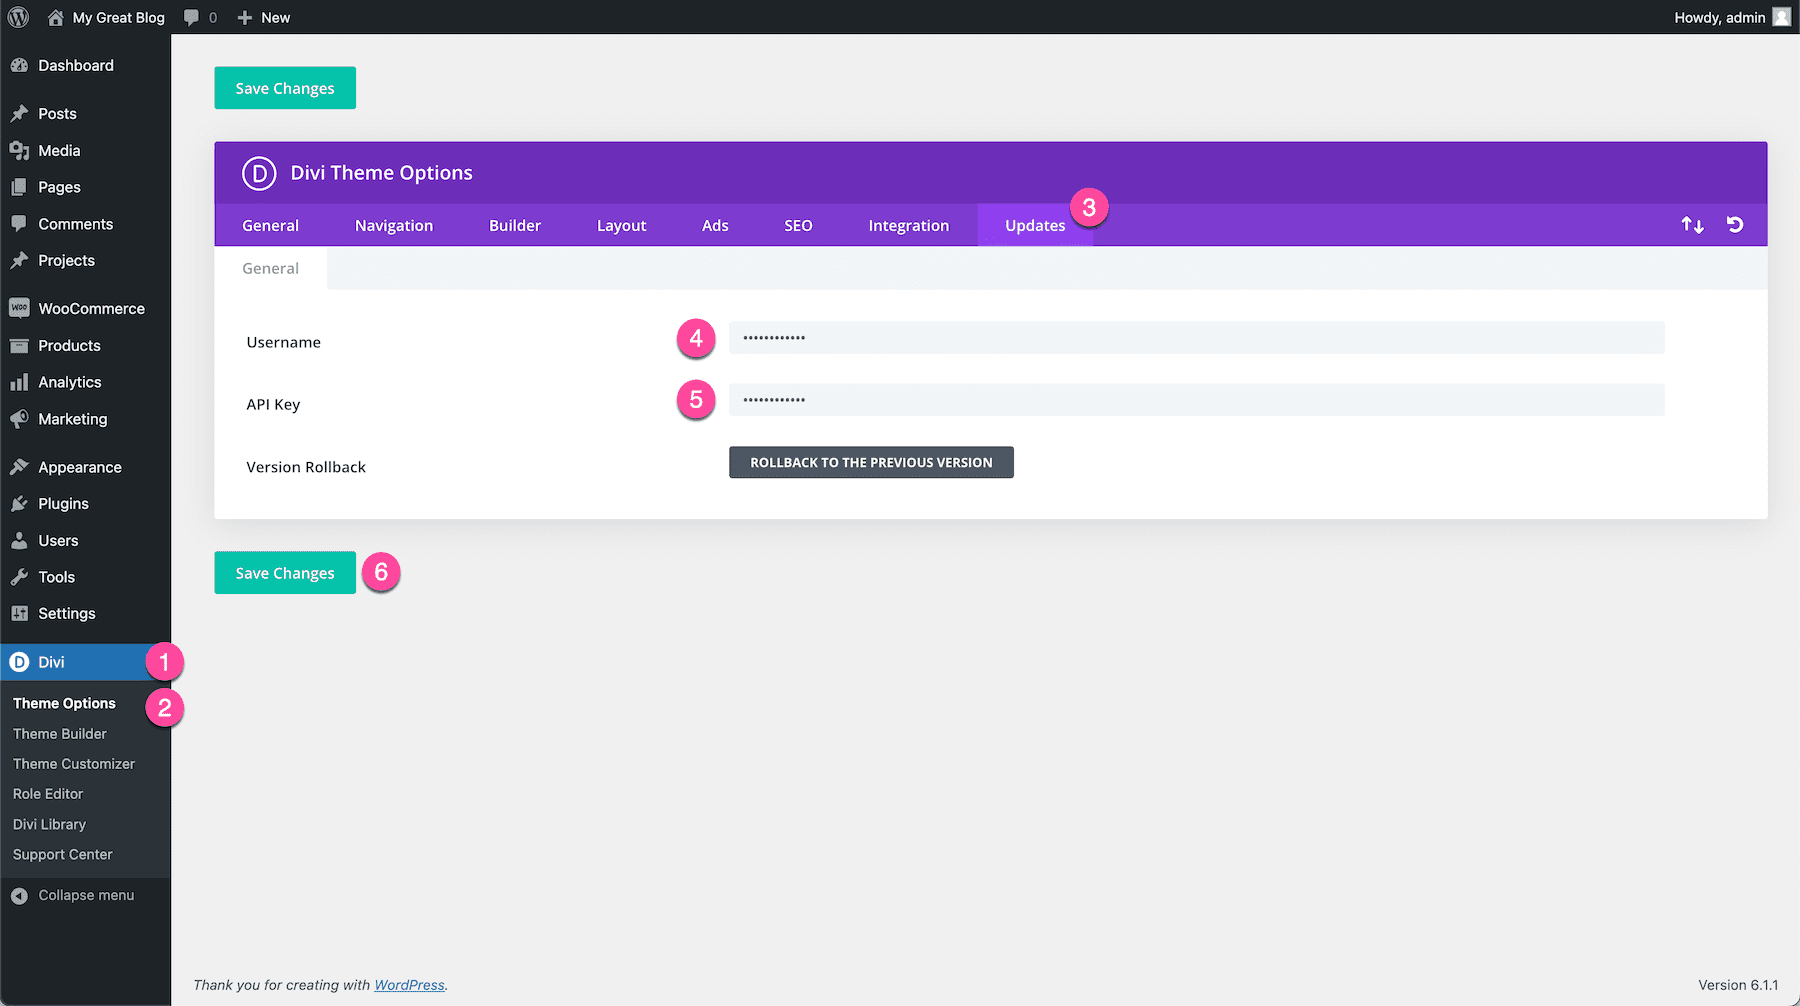
Then, go to your WordPress website dashboard and navigate to Divi > Theme Options > Updates. Enter your username and API key in the appropriate fields and click Save Changes.
Now your Elegant Themes membership has been linked with that Divi install and authenticated your website to receive future Divi updates.
And there you have it! Now you have the Divi Theme installed on your website, which means you can now use all the functionalities and exceptional design capabilities Divi has to offer to build your dream website!
Continue Learning
Continue on your journey of mastering Divi by checking out more documentation:
