
")
Are you planning an entrance into eCommerce? It is highly rewarding and every bit as challenging. Thankfully, WooCommerce is one of the most extendable platforms for creating online stores.
I want to walk you through the steps of starting an online store with WooCommerce. We will cover everything from choosing a platform to setting up and marketing your store. Sound good?
Subscribe To Our Youtube Channel
-
1
How You Can Create an Online Store
- 1.1 1. Pick an Ecommerce Platform
- 1.2 2. Start with a Clear Plan for Your Online Business
- 1.3 3. Get Hosting and Register Your Domain
- 1.4 4. Use Any Starter Site to Build Your Store
- 1.5 5. Setup WooCommerce
- 1.6 6. Add Products to Your Store
- 1.7 7. Extend Your Store with Plugins
- 1.8 8. Launch Your New Online Store
- 2 Tools for Building an Online Store
- 3 Frequently Asked Questions (FAQs)
How You Can Create an Online Store
There’s a lot of empty promises out there. This is not one of them. A basic online store with a premium design can be created in one hour. Now, you’ll want to spend a lot more time than that fully configuring WooCommerce (there’s shipping, taxes, product listing, and more), but for the barebones and the design, 1 hour is possible. I don’t know of a way that you can do this with Shopify, so I’ll show you how to do it with WooCommerce + Divi.
1. Pick an Ecommerce Platform
When it comes to eCommerce platforms, two options often dominate the conversation—WooCommerce and Shopify. Website builder platforms like Shopify offer an all-in-one solution that can be a great option for many online stores. However, with WordPress powering over 40% of all online stores, it’s worth exploring why this platform is a top choice for many.
WordPress, the best content management system (CMS) for building websites, offers one of the most flexible options for building an online store, too. While the platform is free, associated costs include hosting, domain registration, plugins, and a solid theme. The costs aren’t much different with Shopify, where instead of hosting, you’d pay them to host your site—plus, there are all the extensions, themes, and even domain registration with Shopify, too.
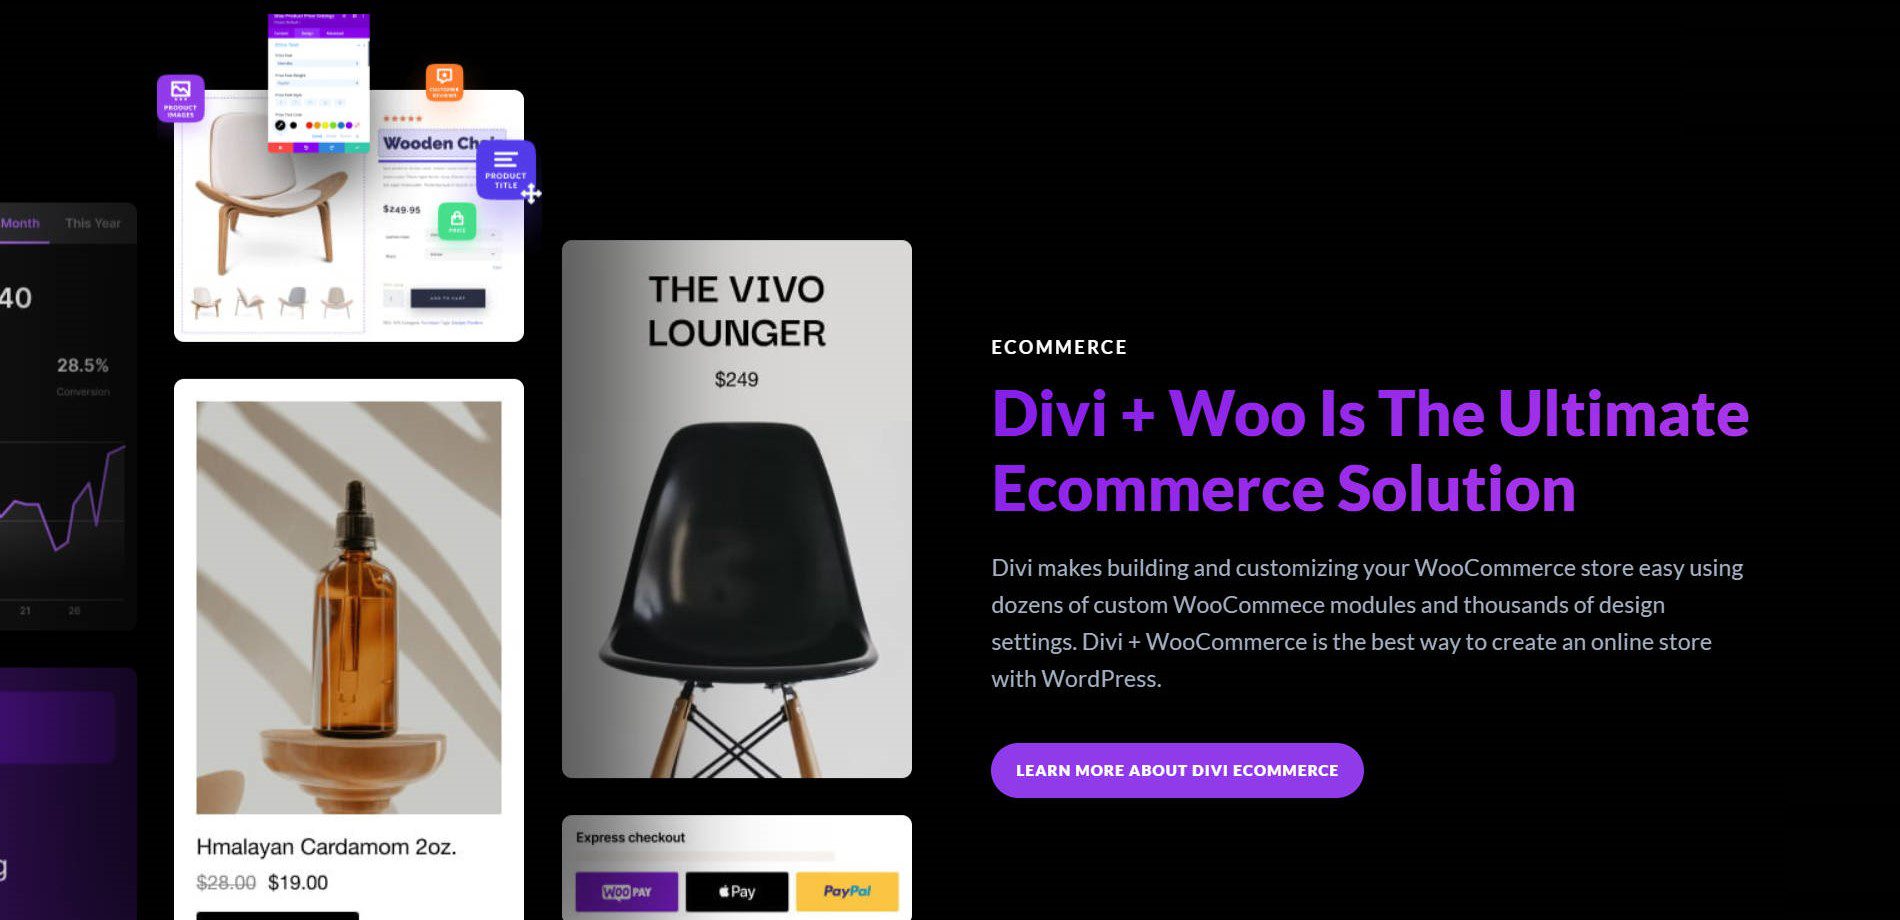
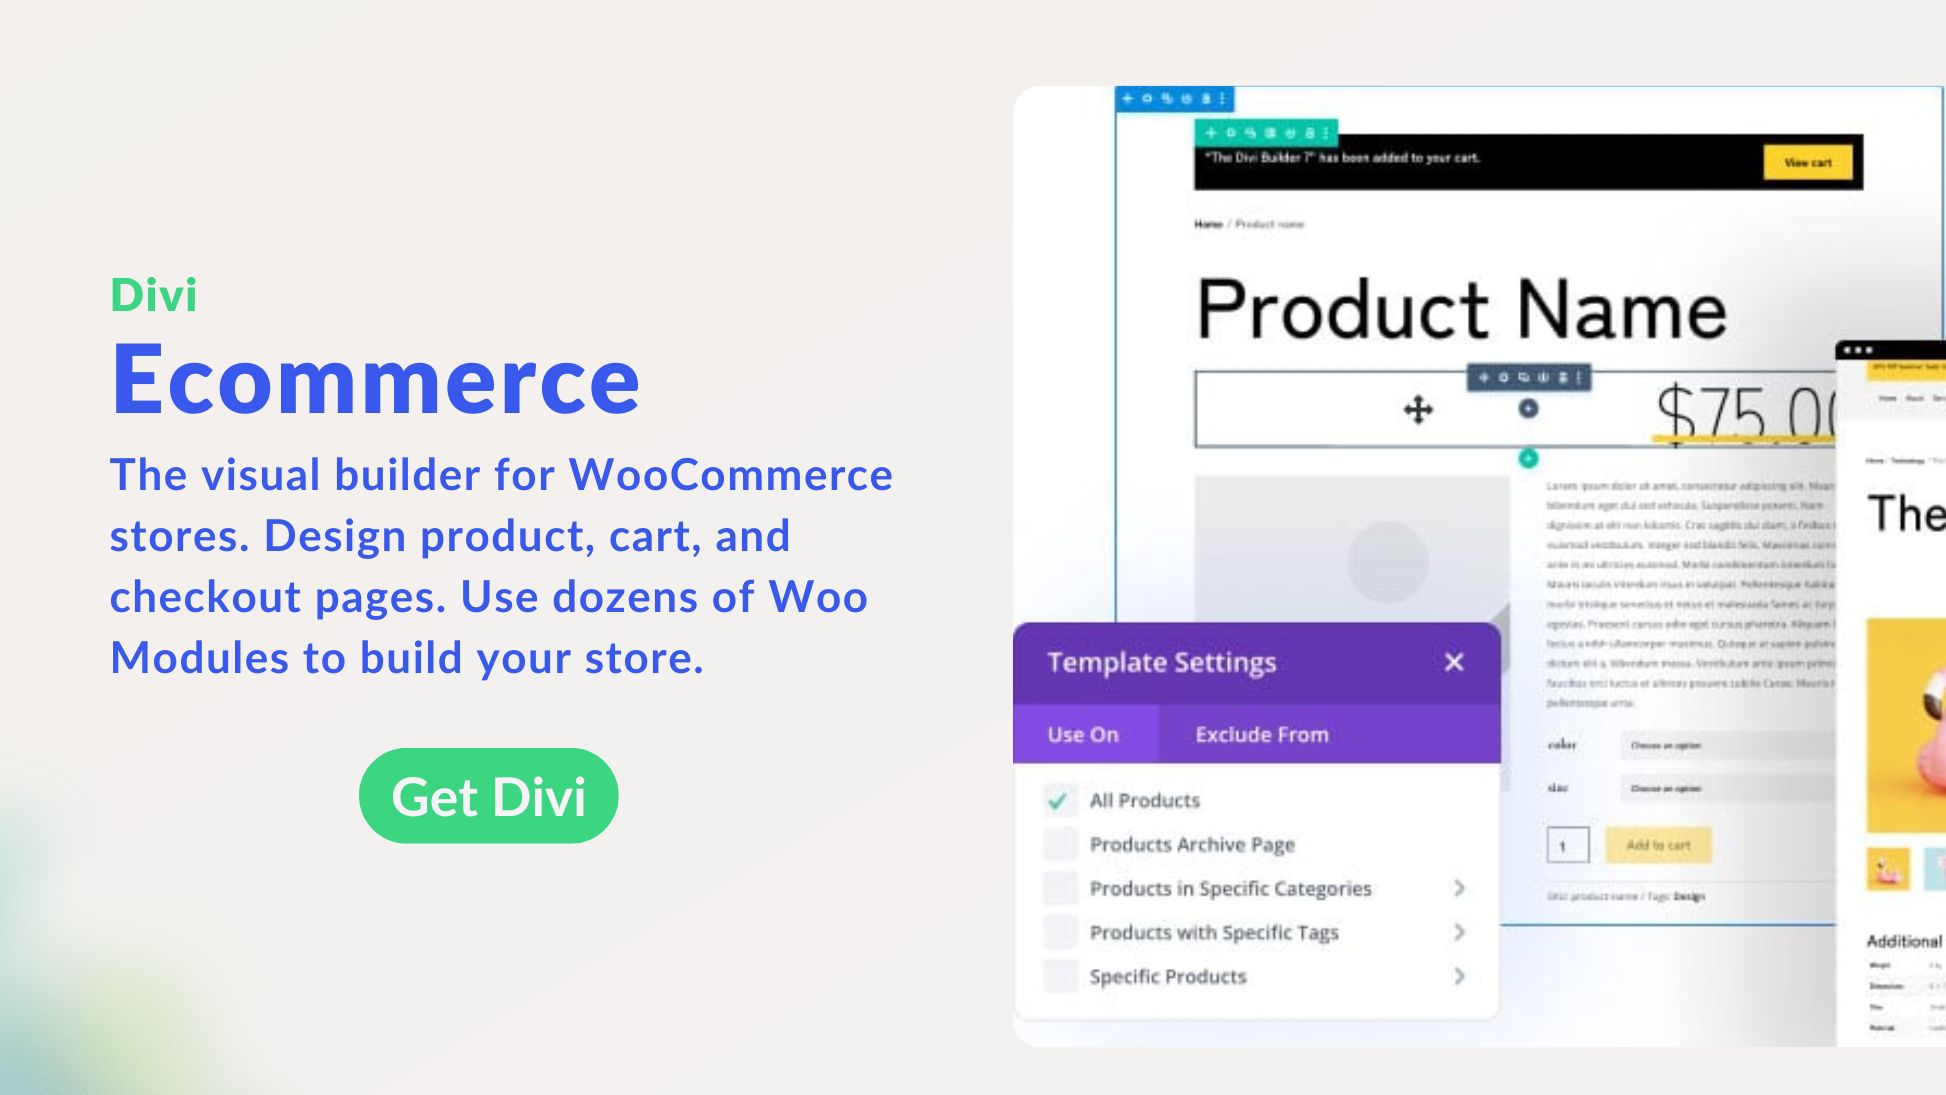
Divi Pro gives you all the tools to reach WooCommerce’s maximum potential. Our advanced design system makes designing any store visually easy. While other solutions force you to assume their design constraints, Divi is built for total creative freedom. Pro is packed with endless features, such as an AI website builder, VIP support in less than 30 minutes, and tons of other confidence-inspiring tools.
Not Convinced?
We couldn’t recommend WooCommerce enough. See why we like it so much and chose to support it inside Divi.
2. Start with a Clear Plan for Your Online Business
Before diving into the technical steps, take the time to develop a clear business plan. This blueprint will guide your decisions and ensure you build a store that aligns with your goals. It’s worth investing the effort now to avoid costly mistakes later.
Here are the essential elements of a solid plan:
Define Your Niche and Target Audience
What do you want to sell, and who do you want to sell it to? These questions are fundamental. Choose a niche that aligns with your passions but also has market demand. A niche that excites you will make marketing and daily operations more enjoyable.
Next, research your target audience. Understand their preferences, challenges, and buying habits. Create detailed customer personas to guide your marketing, product selection, and design choices. For example:
- What problems are they trying to solve?
- How do they typically shop online?
- What motivates them to make a purchase?
Choosing a niche that aligns with your passions can make your journey more enjoyable and sustainable. Your enthusiasm for your products will resonate with your customers, creating a unique and engaging shopping experience.

Image by Dragon Claws / shutterstock.com
Next, understand your target audience and their personas. Identify their needs, preferences, and buying habits. The more you know about your audience, the better you can tailor your products and marketing strategies to them. Remember, choosing a profitable, searchable niche that aligns with your passion is imperative for success. This ensures a return on your investment and that there’s an active audience looking for your products or services.
Select and Test Your Products
Start small. Focus on a curated collection of products to test demand and learn what works. Whether you’re selling physical goods, digital downloads, or services, evaluate these factors:
- Demand: Are people actively searching for your products or problems your products fix?
- Competition: How crowded is the market, and how can you stand out?
- Profitability: Will your pricing allow for sustainable growth?
Start with a limited catalog to test demand. You can always expand your product range later. When selecting your products, consider factors like demand, competition, and profitability. If you’re entering a popular market, consider how to differentiate your offerings. If you’re selling physical products, plan your inventory management strategy. Will you need custom manufacturing, dropshipping, or wholesale purchasing?
Conduct Basic Market and SEO Research
A good marketing plan doesn’t have to be complex. Identify a few key channels where your audience is most active, such as social media, email marketing, or search engine optimization (SEO). Plan to create high-value, original content to attract and engage your audience.
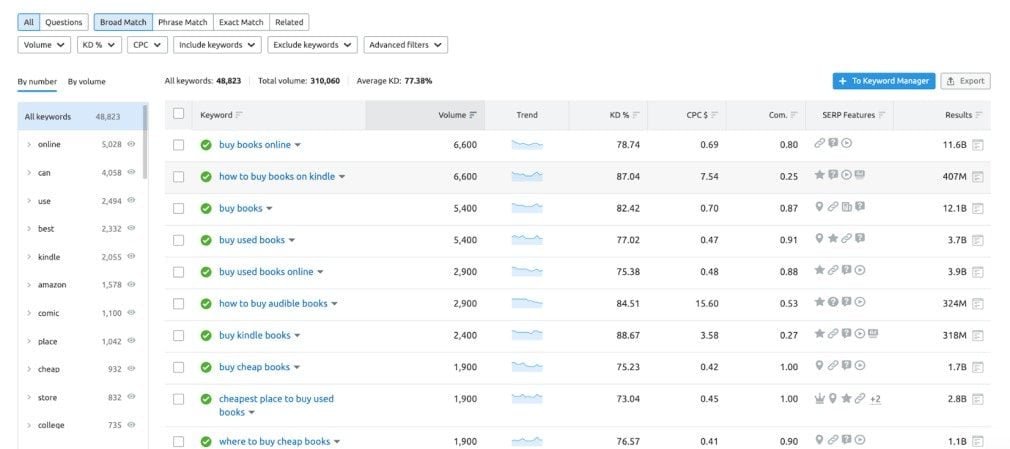
Use keyword research tools like Google Keyword Planner or Semrush to identify what potential customers are searching for. This research will inform your product descriptions, blog content, and overall SEO strategy.
SEO is one of the more complicated aspects of this, so a general strategy would be:
- Find high-traffic keywords relevant to your niche.
- Use these terms in product titles, descriptions, and meta tags.
- Explore AI tools like Divi AI or Surfer SEO to generate optimized content quickly. These can help you create the content you need for your website as you build it.
3. Get Hosting and Register Your Domain
I’d start by getting hosting. It’s the more complex (though fairly easy these days) of these two tasks. And usually, wherever you get hosting, you can also get a domain (making it easy). We highly recommend Siteground. They’ve been reliable for many years. We’ll also reference Siteground in many of the steps below since they make all this easy. They offer free CDN, free SSL, and email account management.
Next comes snagging a domain. Your domain name is your online store’s address on the web. It should be easy to remember and reflect your brand.

Image by Eny Setiyowati / shutterstock.com
You’ll need to buy your domain from a reputable domain registrar. You want reasonable prices and easy-to-manage domain options. You can’t go wrong with Siteground, but Namecheap and Godaddy may offer better prices. Follow along in our dedicated, step-by-step guide for registering a new domain.
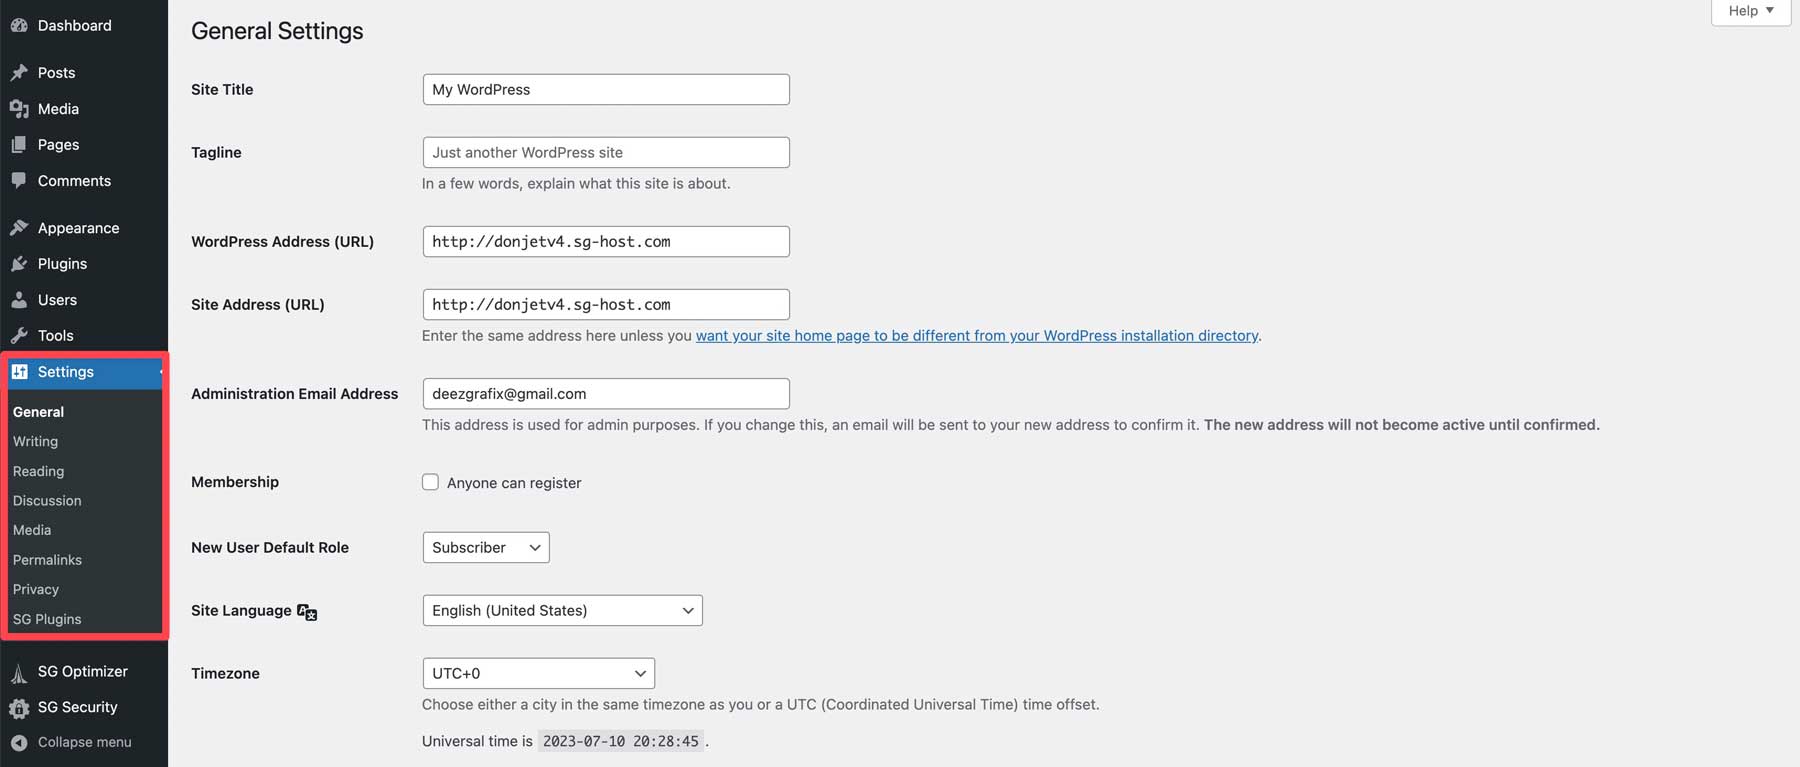
Enter Site Title and Tagline
The WordPress settings section allows you to configure the major settings controlling your WordPress installation. They are found by clicking “Settings” in the admin sidebar. The most essential things you need to do are choose your site title and tagline and set your URL address (both fields should be the same).
More Settings to Adjust Later
These settings are too granular to cover in detail here, but if you have lingering questions, you can consult these helpful mini-guides for WordPress settings:
- How to configure WordPress general settings (where you setup HTTPS)
- How to configure WordPress writing settings
- How to configure WordPress reading settings (where you set a static homepage)
- How to configure WordPress comments settings
- How to configure WordPress media settings
- How to configure WordPress permalinks (Important – how permalinks affect SEO)
- How to configure WordPress privacy settings
Going through all of these settings can take just a few moments, so don’t let all the links scare you.
Install and Set Up Divi
Installing Divi is straightforward. First, after purchasing a subscription, you need to download the Divi theme file from the Elegant Themes membership dashboard. Watch this video to complete this task so you can start designing your store!
Don’t Have It Yet? Get Divi Pro
4. Use Any Starter Site to Build Your Store
With your website newly configured, it’s time to design your online store. I like getting a first draft of the web design before I start adjusting WooCommerce settings—it’s just more satisfying at this stage.
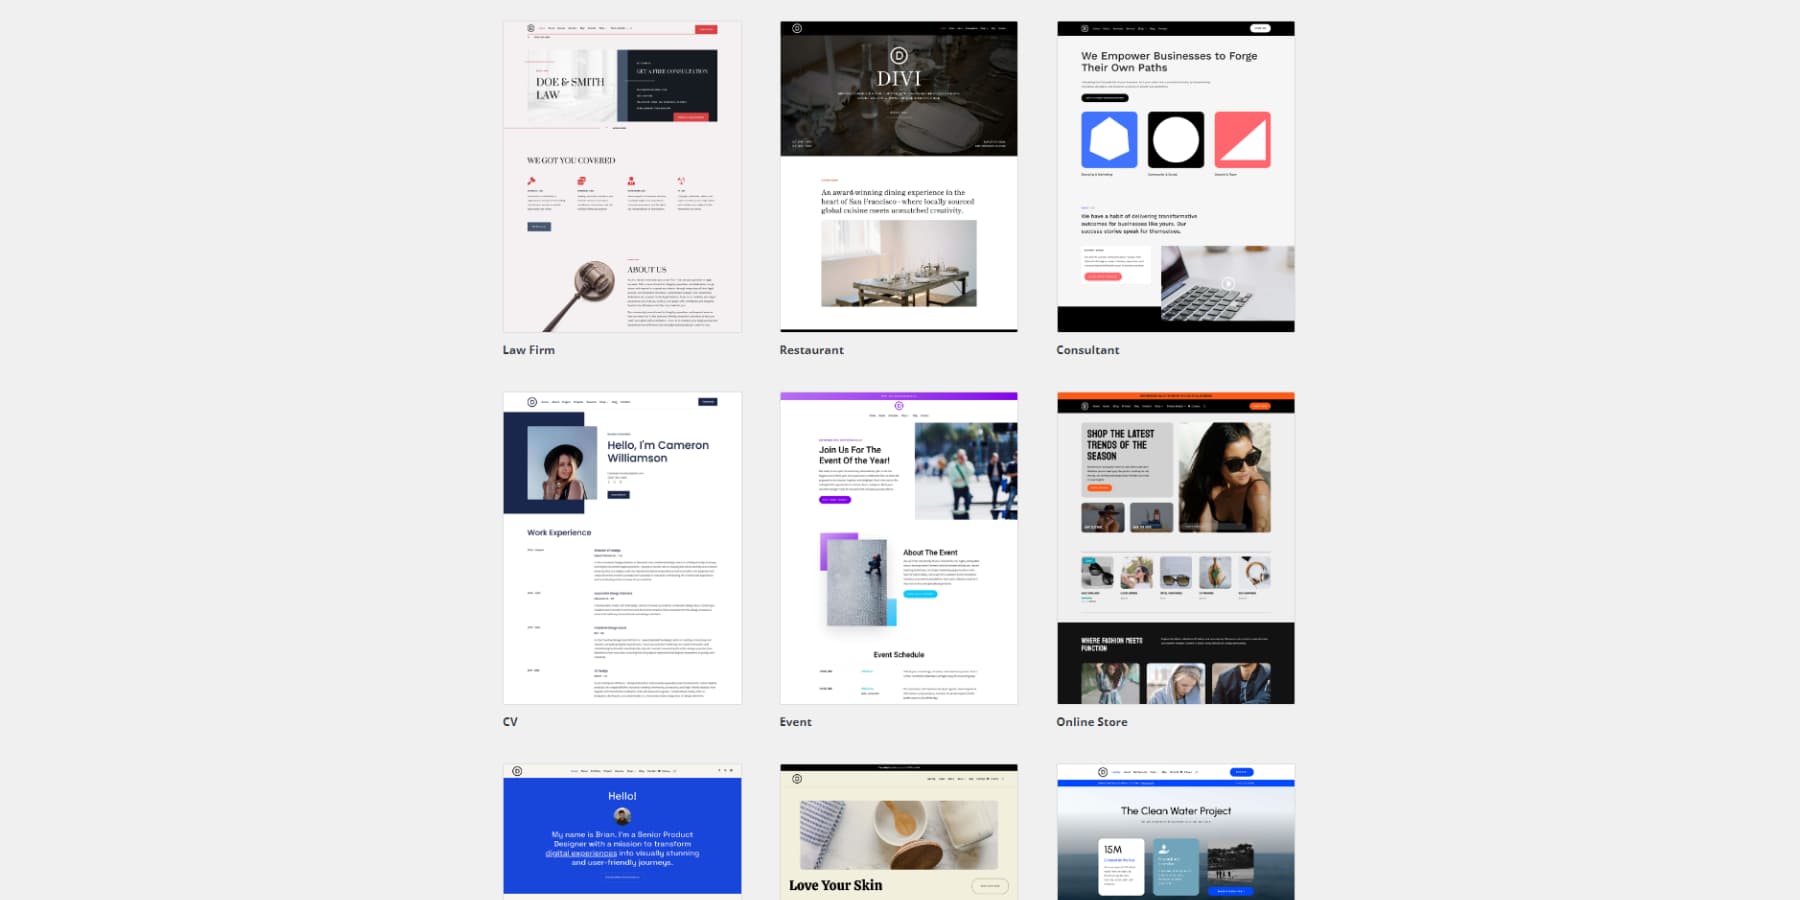
Hands down, the fastest way to design a full online store is by using Divi Quick Sites. If you have Divi Pro, then you can use the AI site builder (or you can try using the free credits). Or, anyone can use Divi Starter Sites, predesigned layouts for pages and Theme Builder templates (headers, footers, and product pages). I love using Starter Sites because they are designed by professional designers on our team, and they are easy to modify. See how those work in the video below 👇
Pretty impressive. Not only are they professionally designed, but they come with everything you need. That means predesigned pages, theme templates, menus, module presets, and global styles. When choosing a Starter Site, look for one that feels closest to what you want your end product to look like. The Starter Content doesn’t matter much since you’ll change out all the images and text. But the text, colors, and spacing presets can easily be carried over and continued with your own twist.
New Starter Sites are added weekly
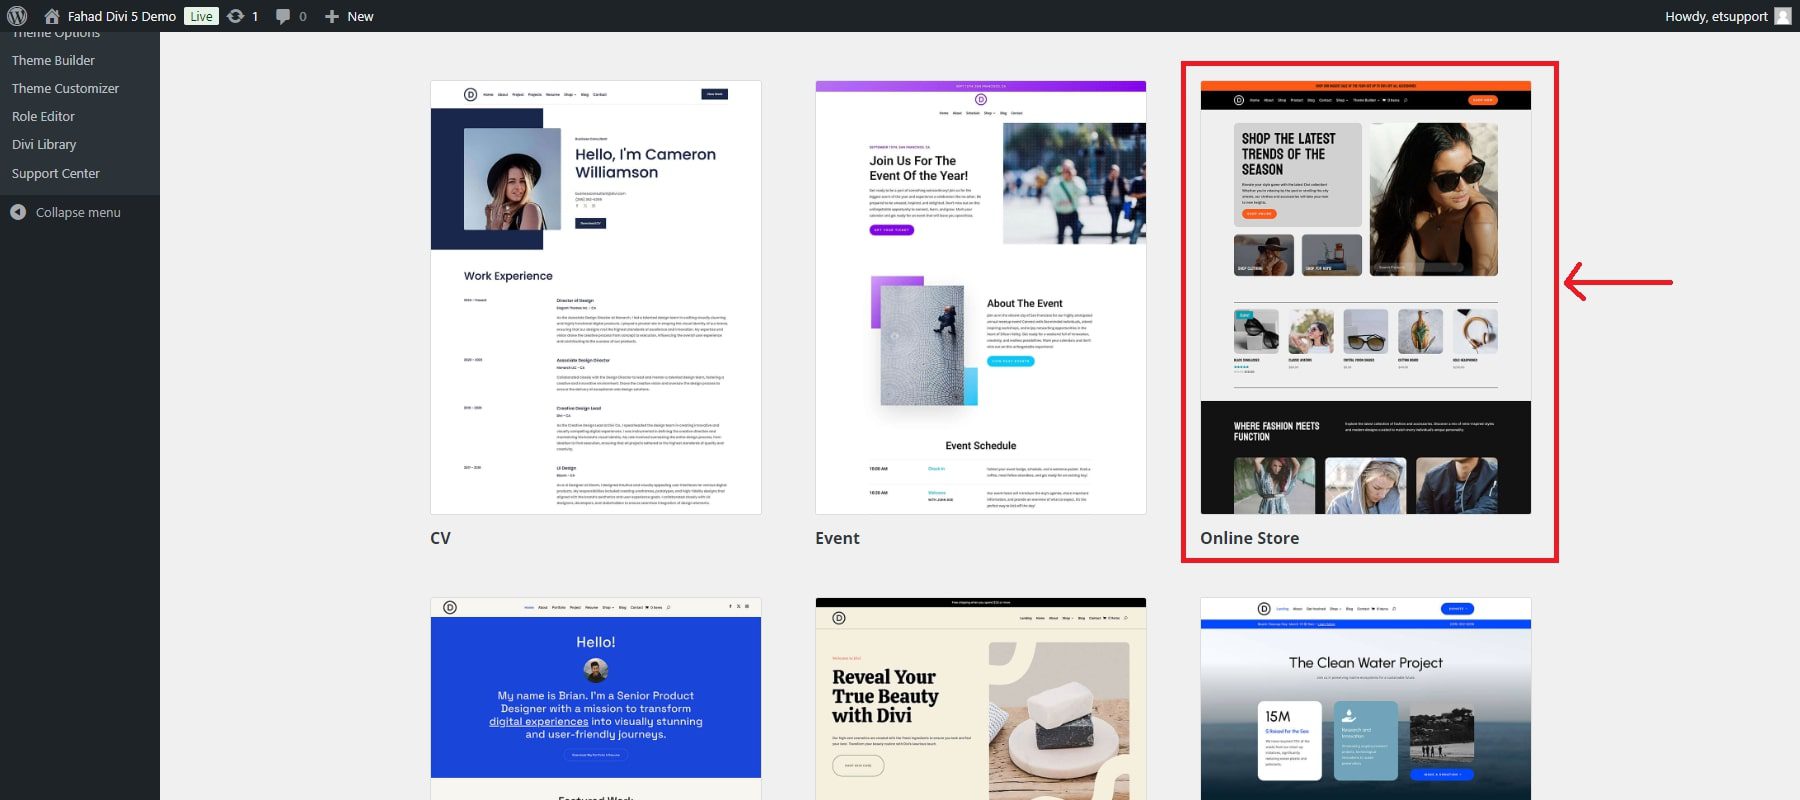
The benefit of Starter Sites is that you know exactly what design you are getting. But the power of Divi is that all of these designs are editable—meaning that you can start with a Starter Site but quickly iterate to something that fits your fancy. Browse our growing selection to see where you want to start off from.
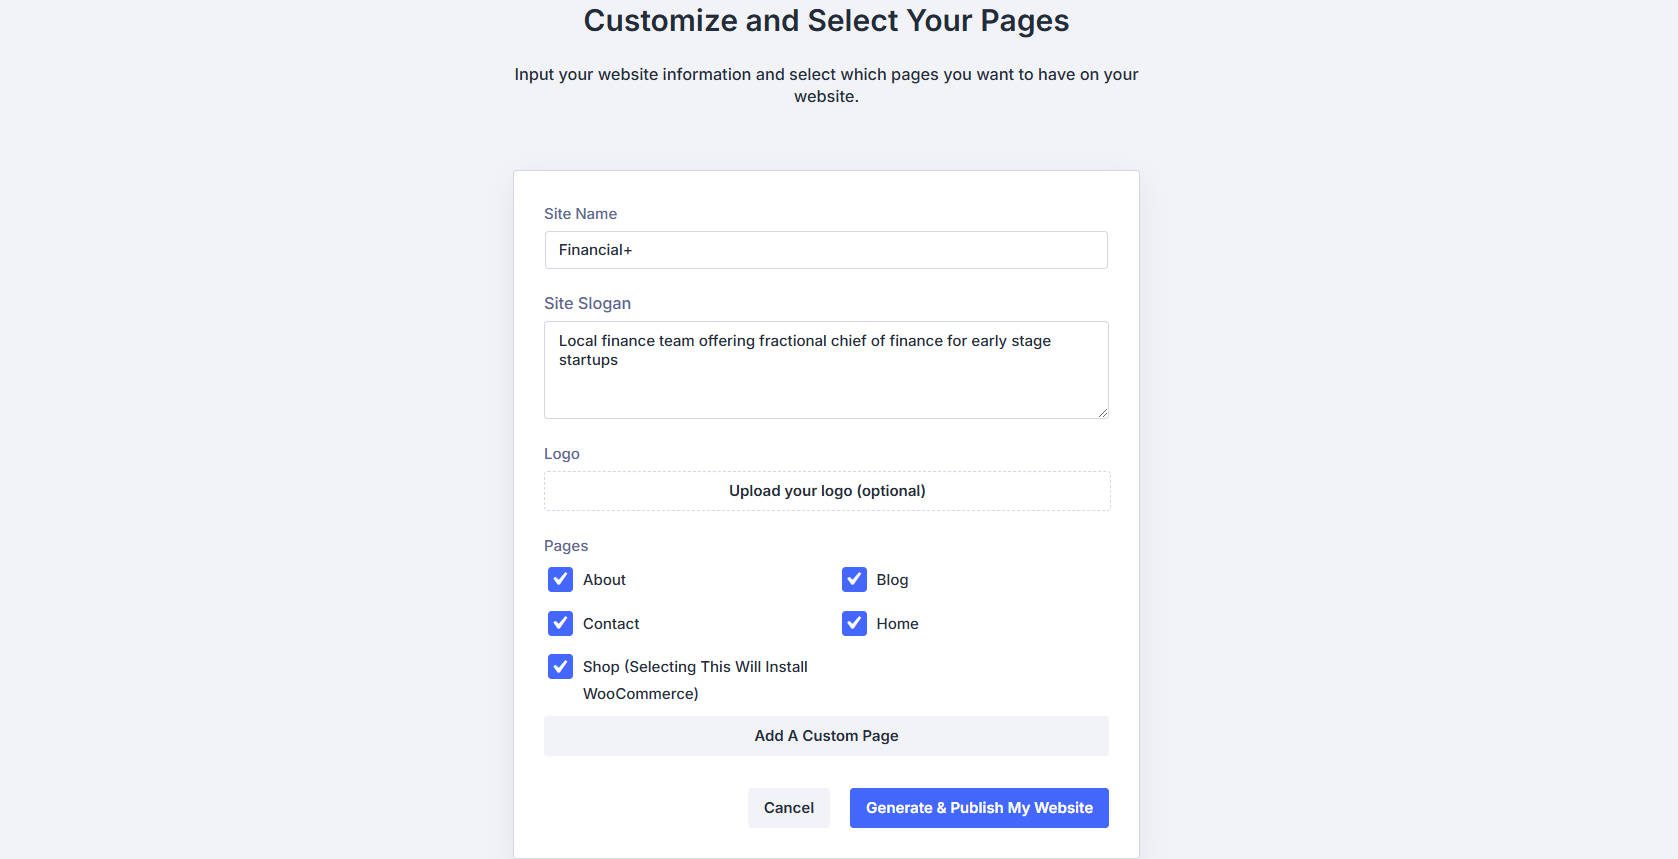
From here, you’ll be taken to a page where you can customize your store. You can enter your site name here if you hadn’t before. Also, select your logo and which of the Starter Site pages you want to use. You can also choose to install WooCommerce at this stage (so simple!).
After some hard work by Divi, you’ll see a list of pages and Theme Templates it created. Each of these is editable. Looking at the Theme Templates, we can see that it also created all our online store pages for WooCommerce.
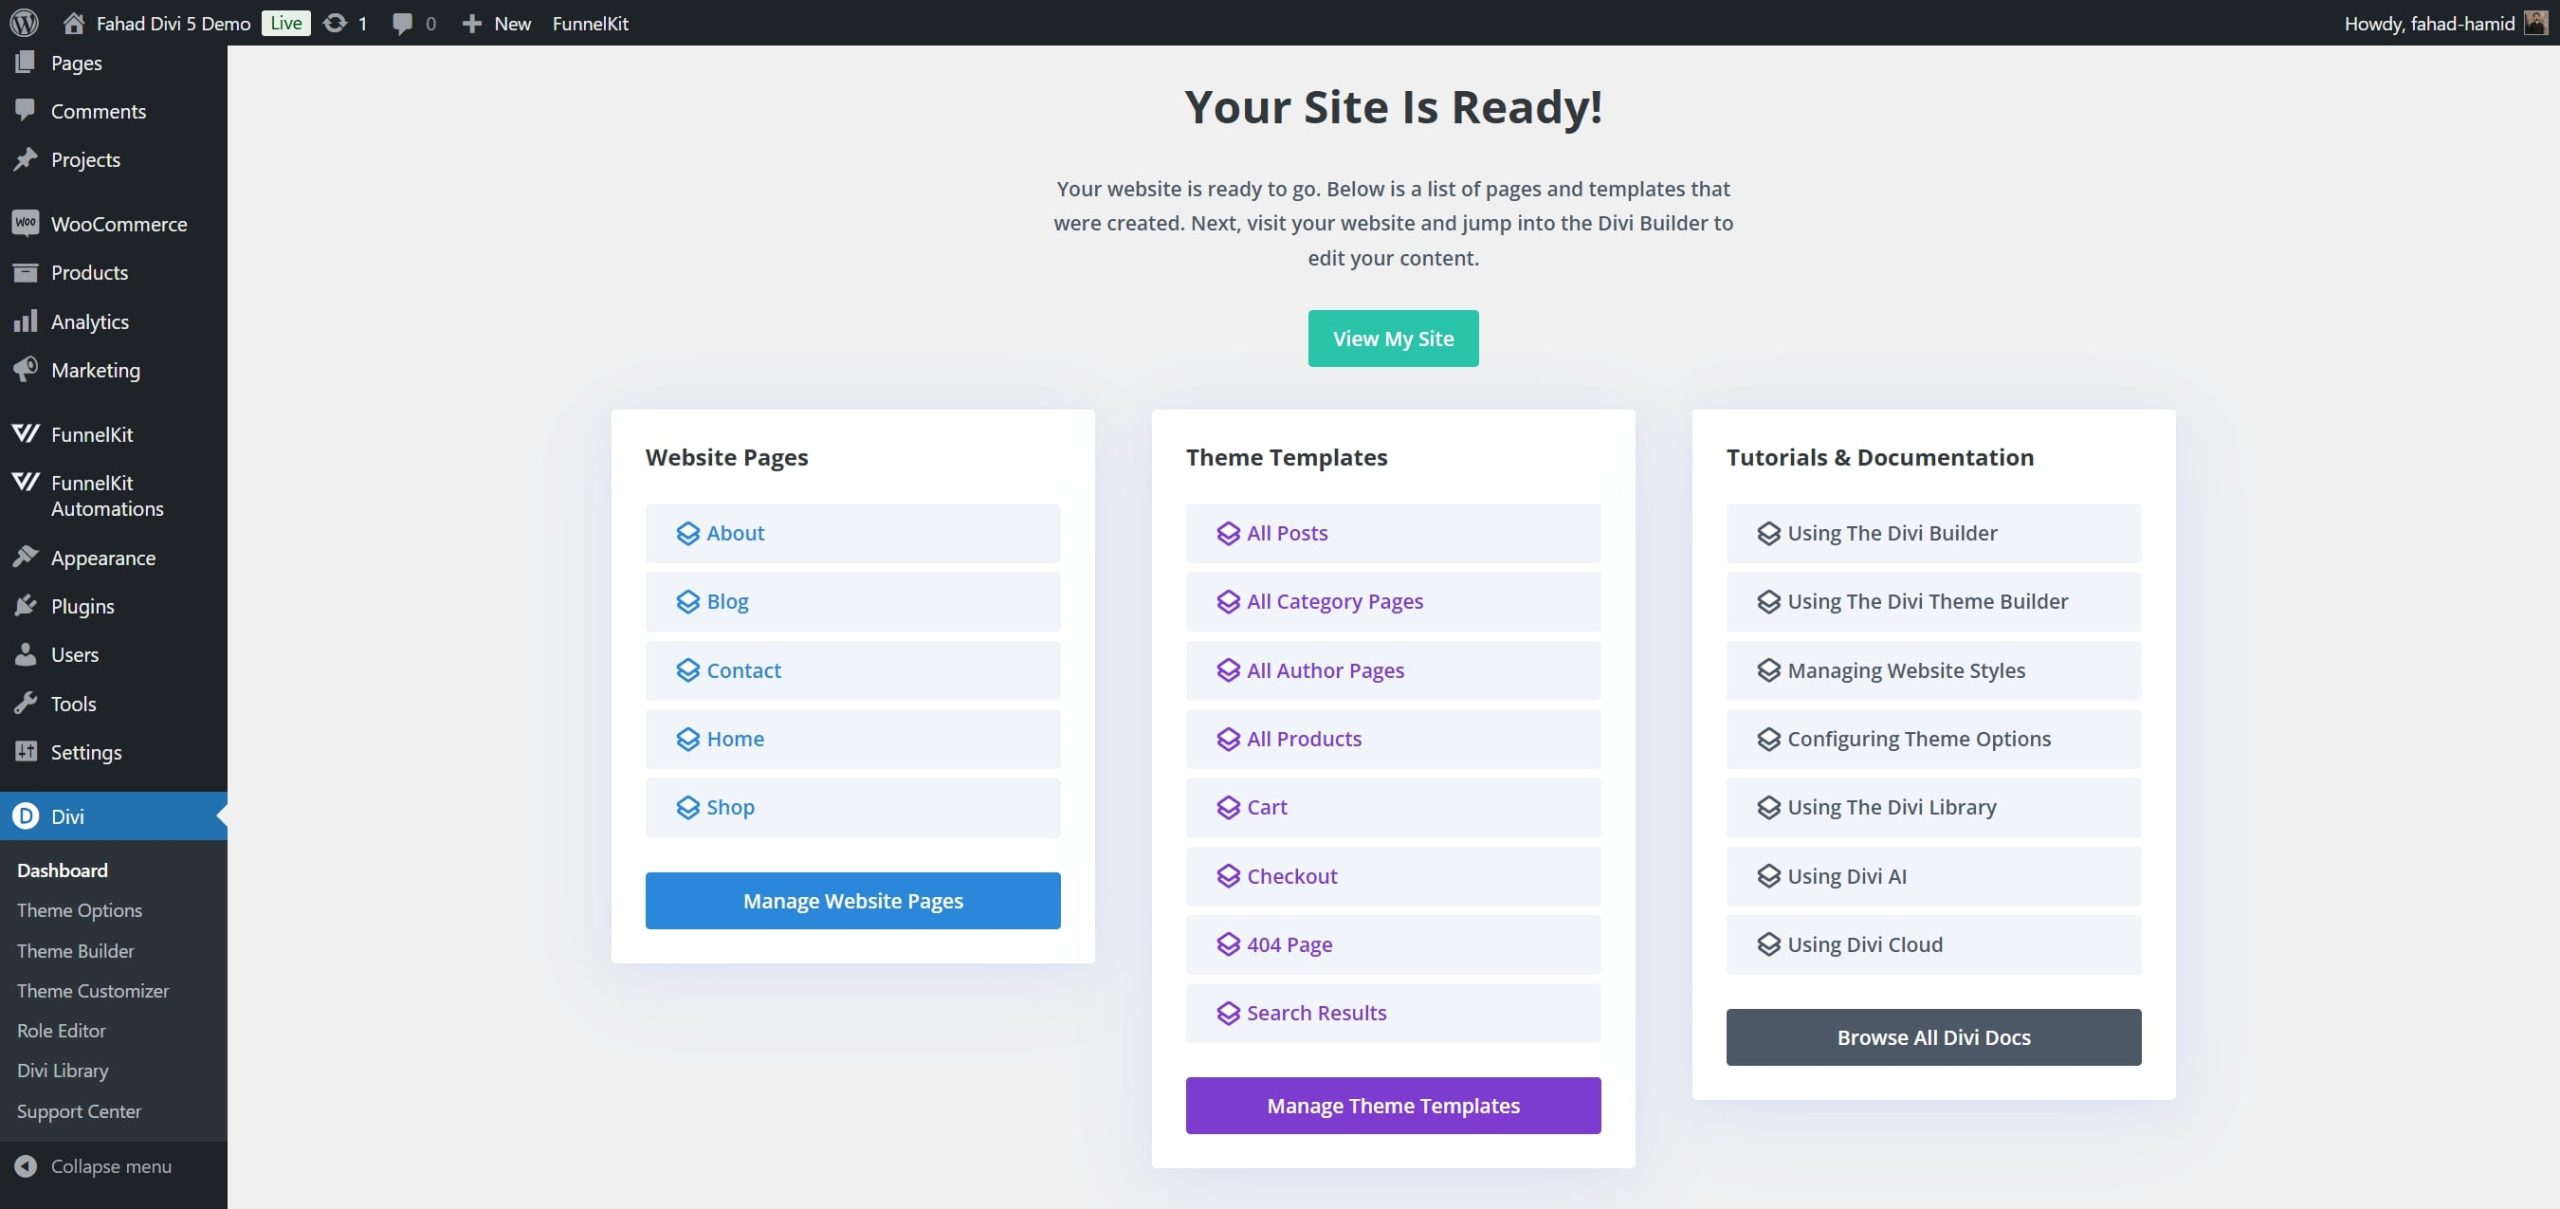
Your homepage, for example, will look exactly like the Starter Site.

For each page created, you can click into and start editing to your desire. Don’t forget about your headers/footers and other Theme Builder Templates.
5. Setup WooCommerce
After configuring WordPress settings and choosing a theme, you can walk through the initial setup wizard to configure key settings for your store in WooCommerce. Remember that we had our host install WooCommerce alongside WordPress, so there is no need to install the WooCommerce plugin. If your host didn’t provide that courtesy, you can view our guide to installing + configuring WooCommerce.
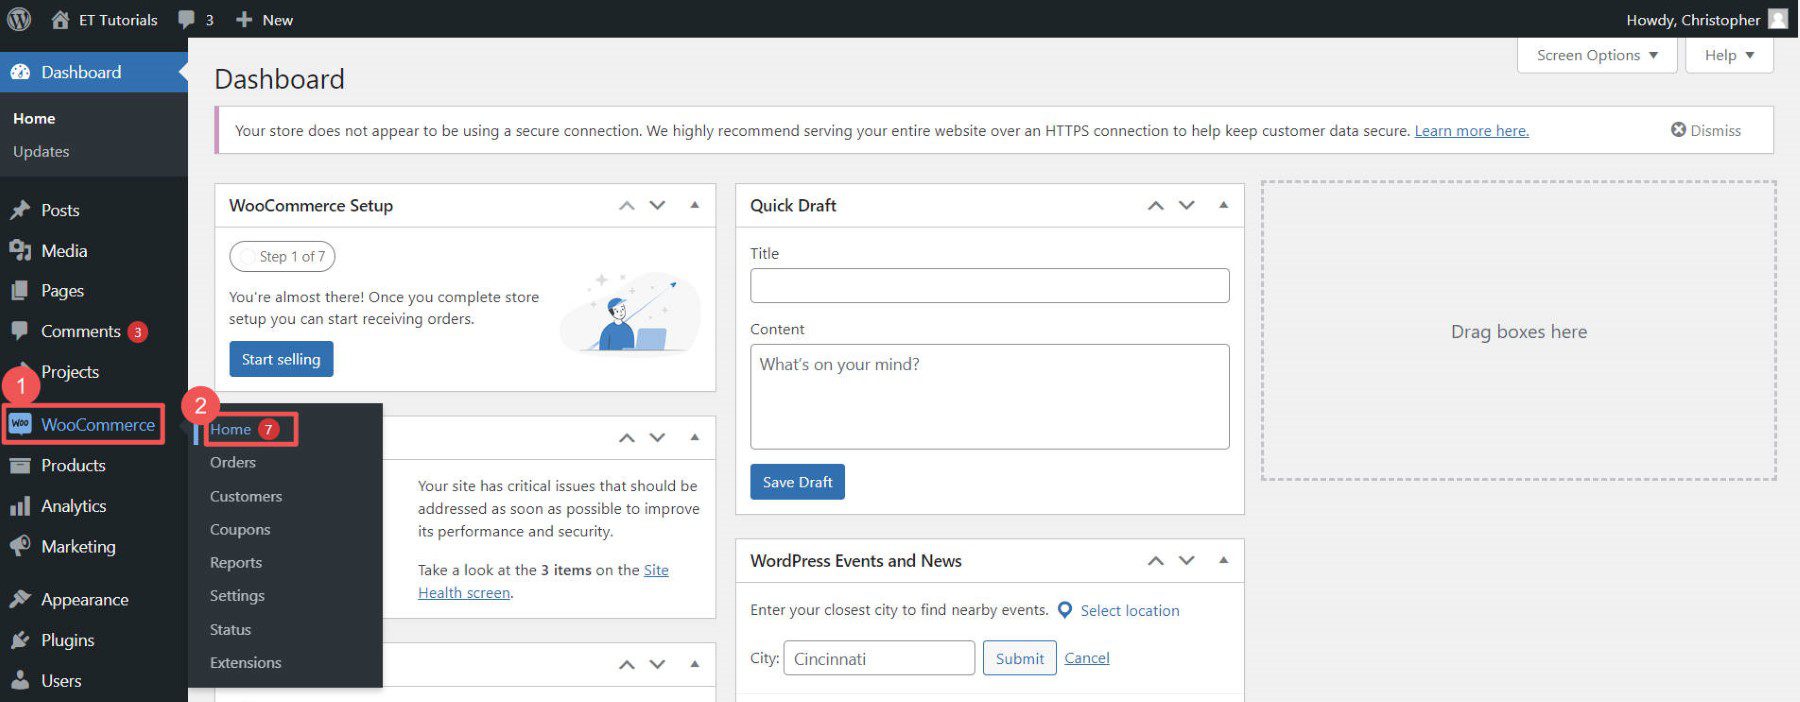
The setup wizard configures your store with basic configurations and additional WooCommerce-specific plugins based on your needs. To get started, under WooCommerce, click “Home.”
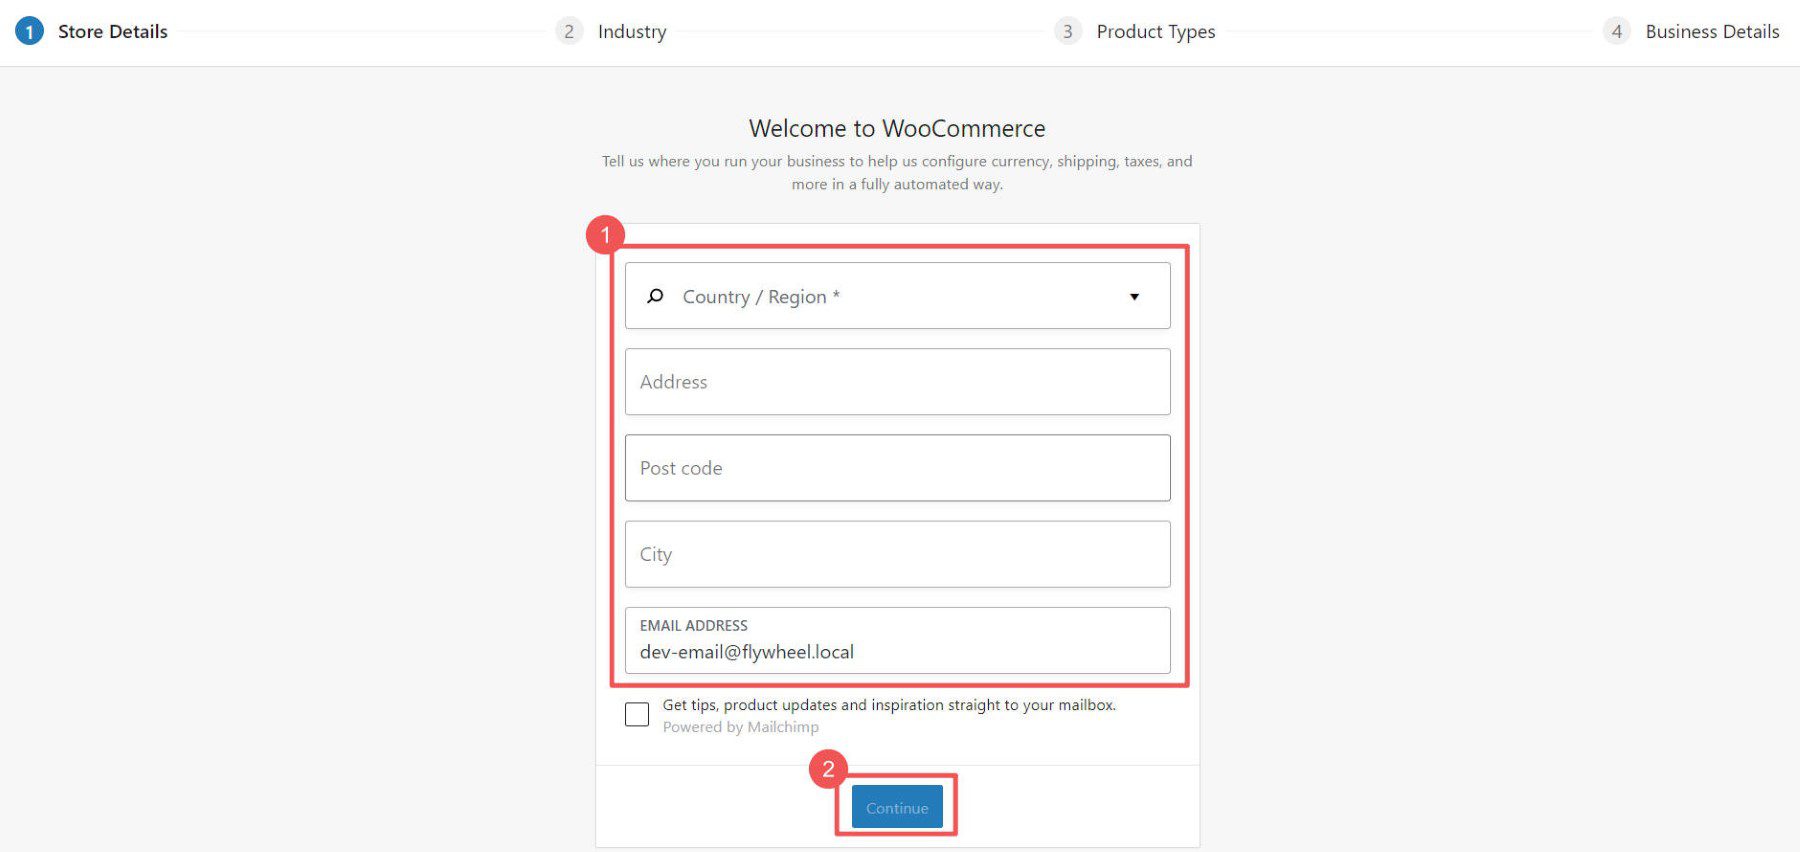
The WooCommerce Onboarding Wizard begins with basic store information (address and email address). This is a good first step because it will help handle your shipping and tax information based on your locality.
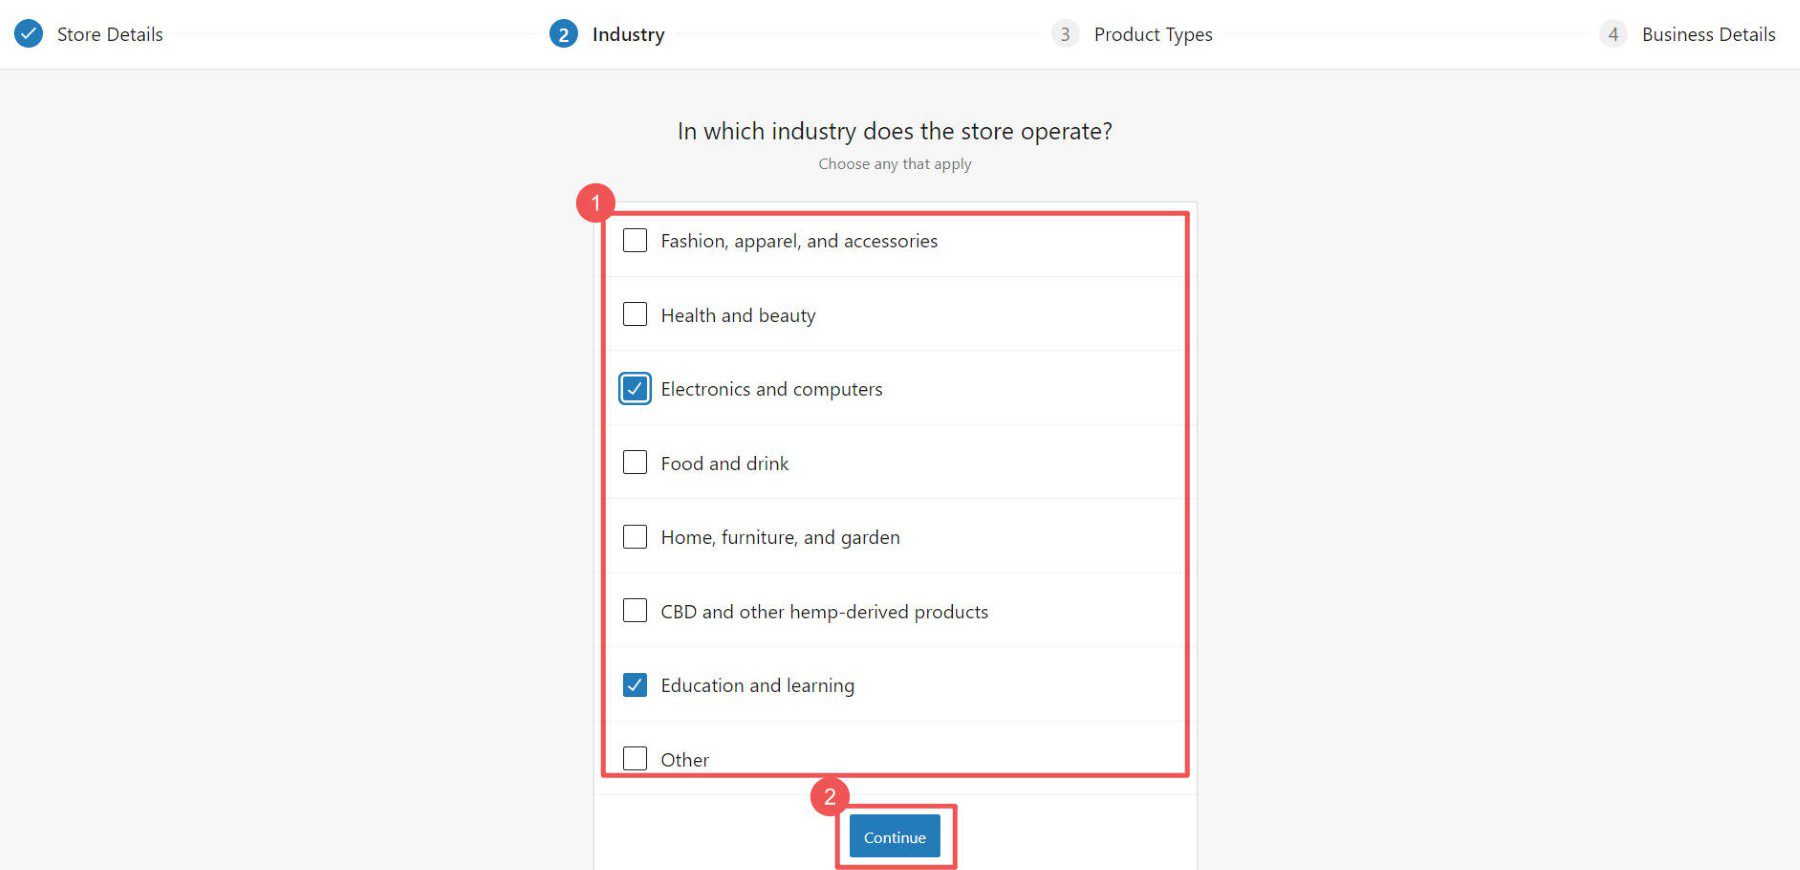
Then, select the industries that your store best fits into.
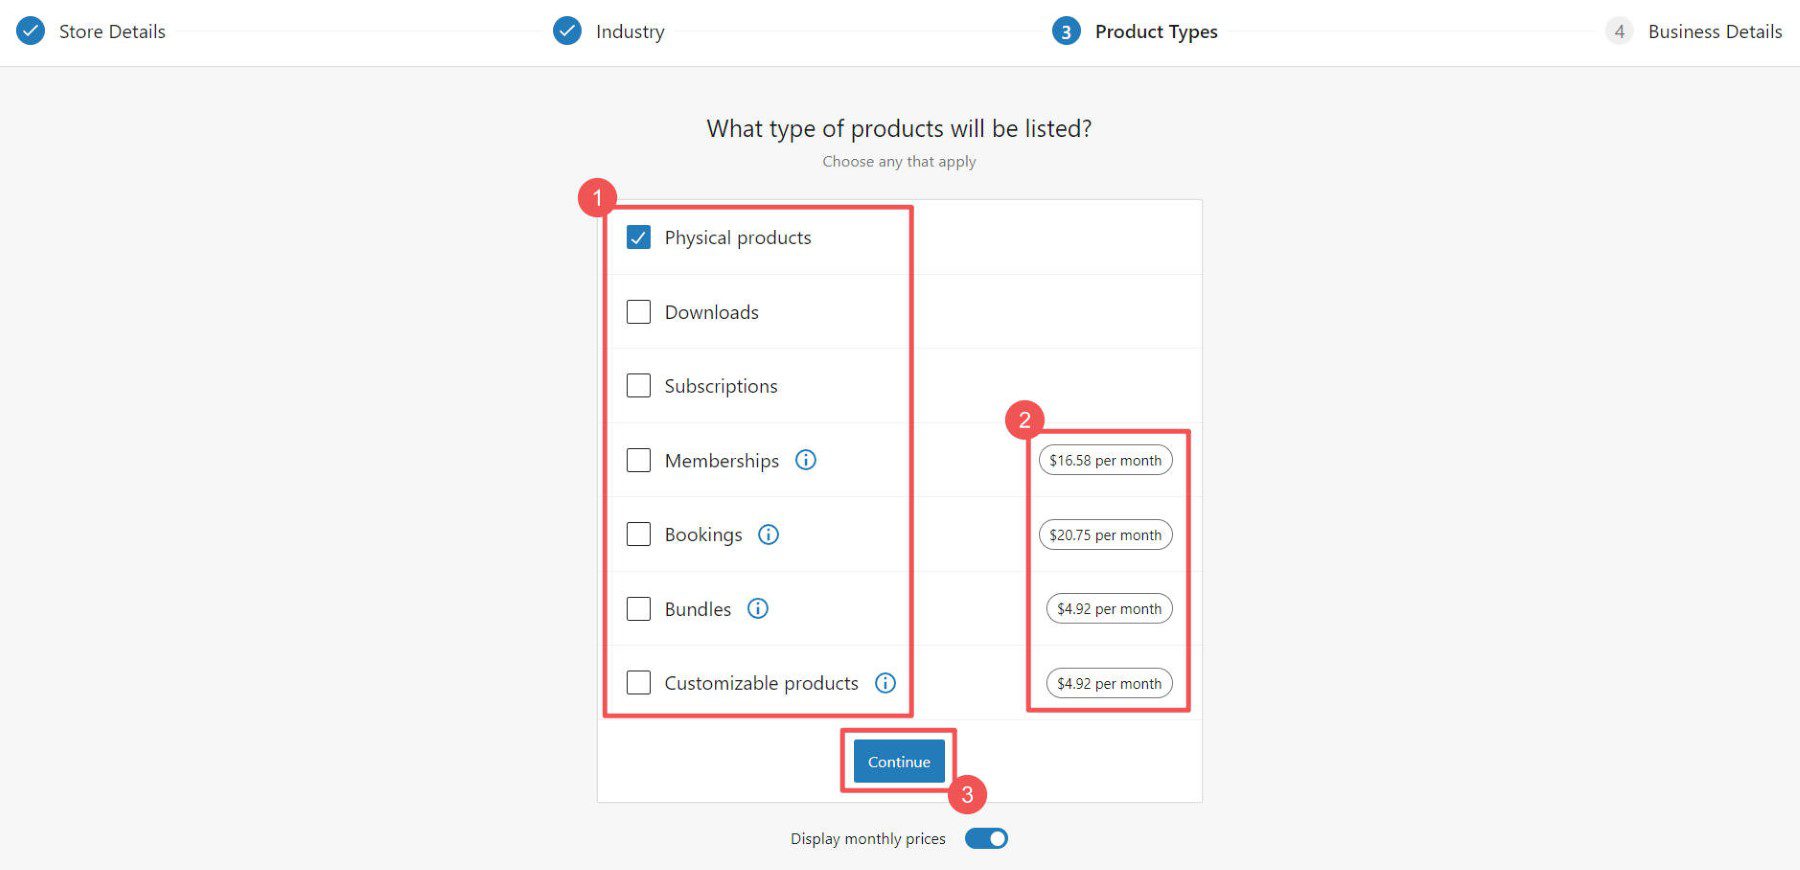
Choose the functionality you want with your store regarding the type of products you wish to sell. Depending on your selection, additional WooCommerce plugins will be installed to give you the necessary functionality.
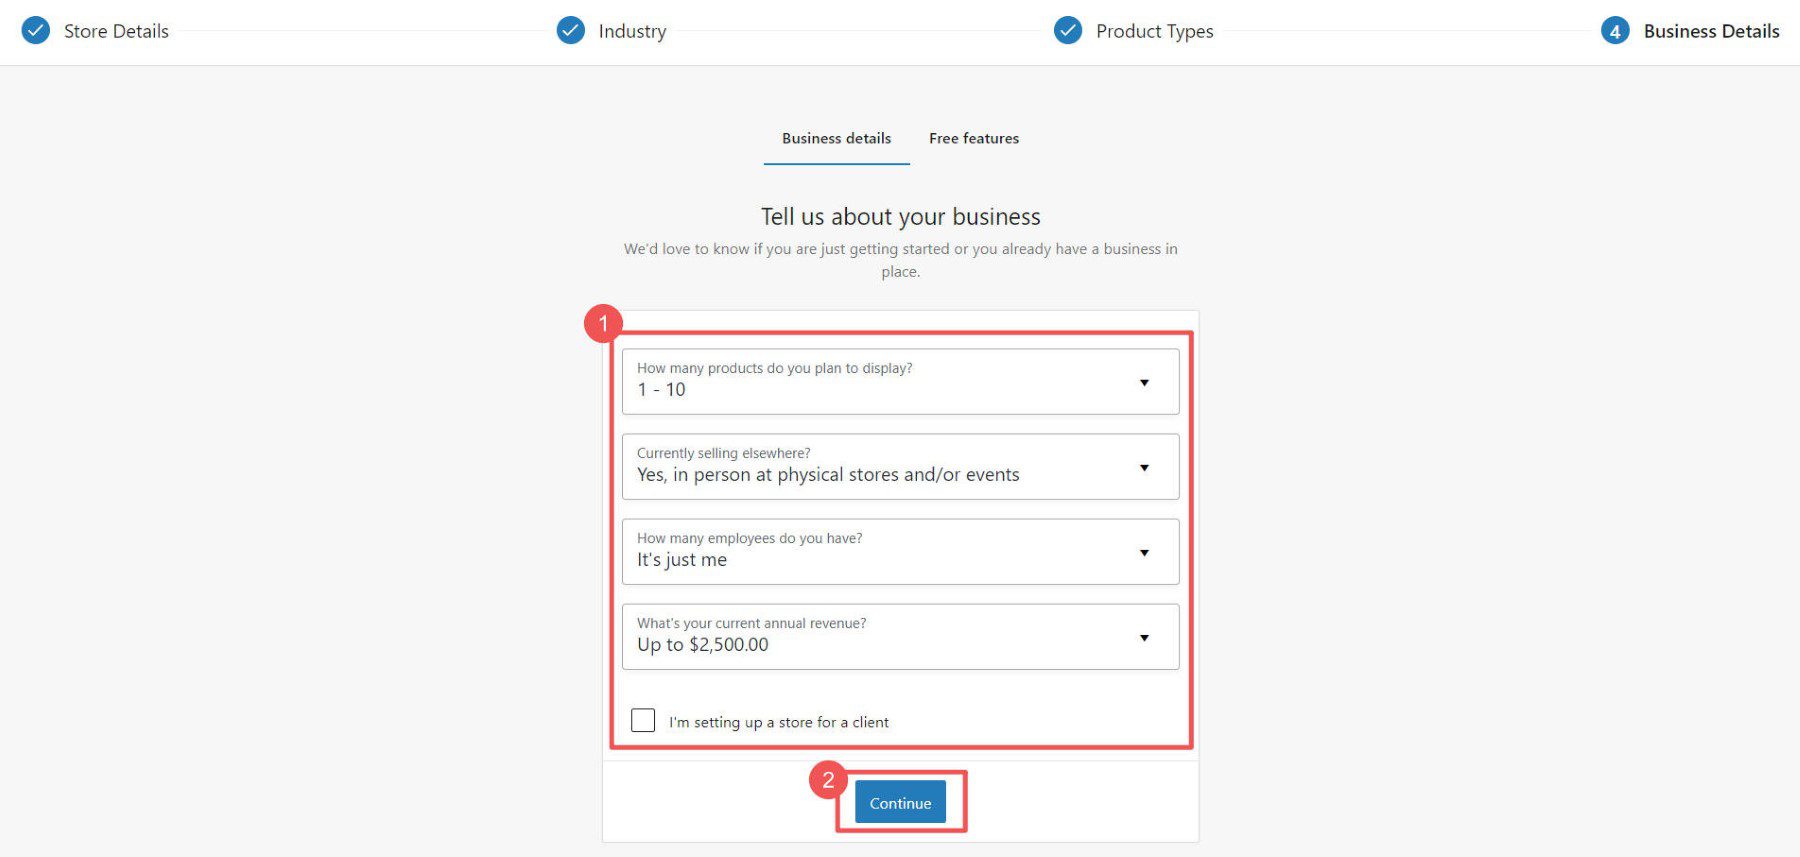
Then, tell WooCommerce a bit more about yourself and your store.
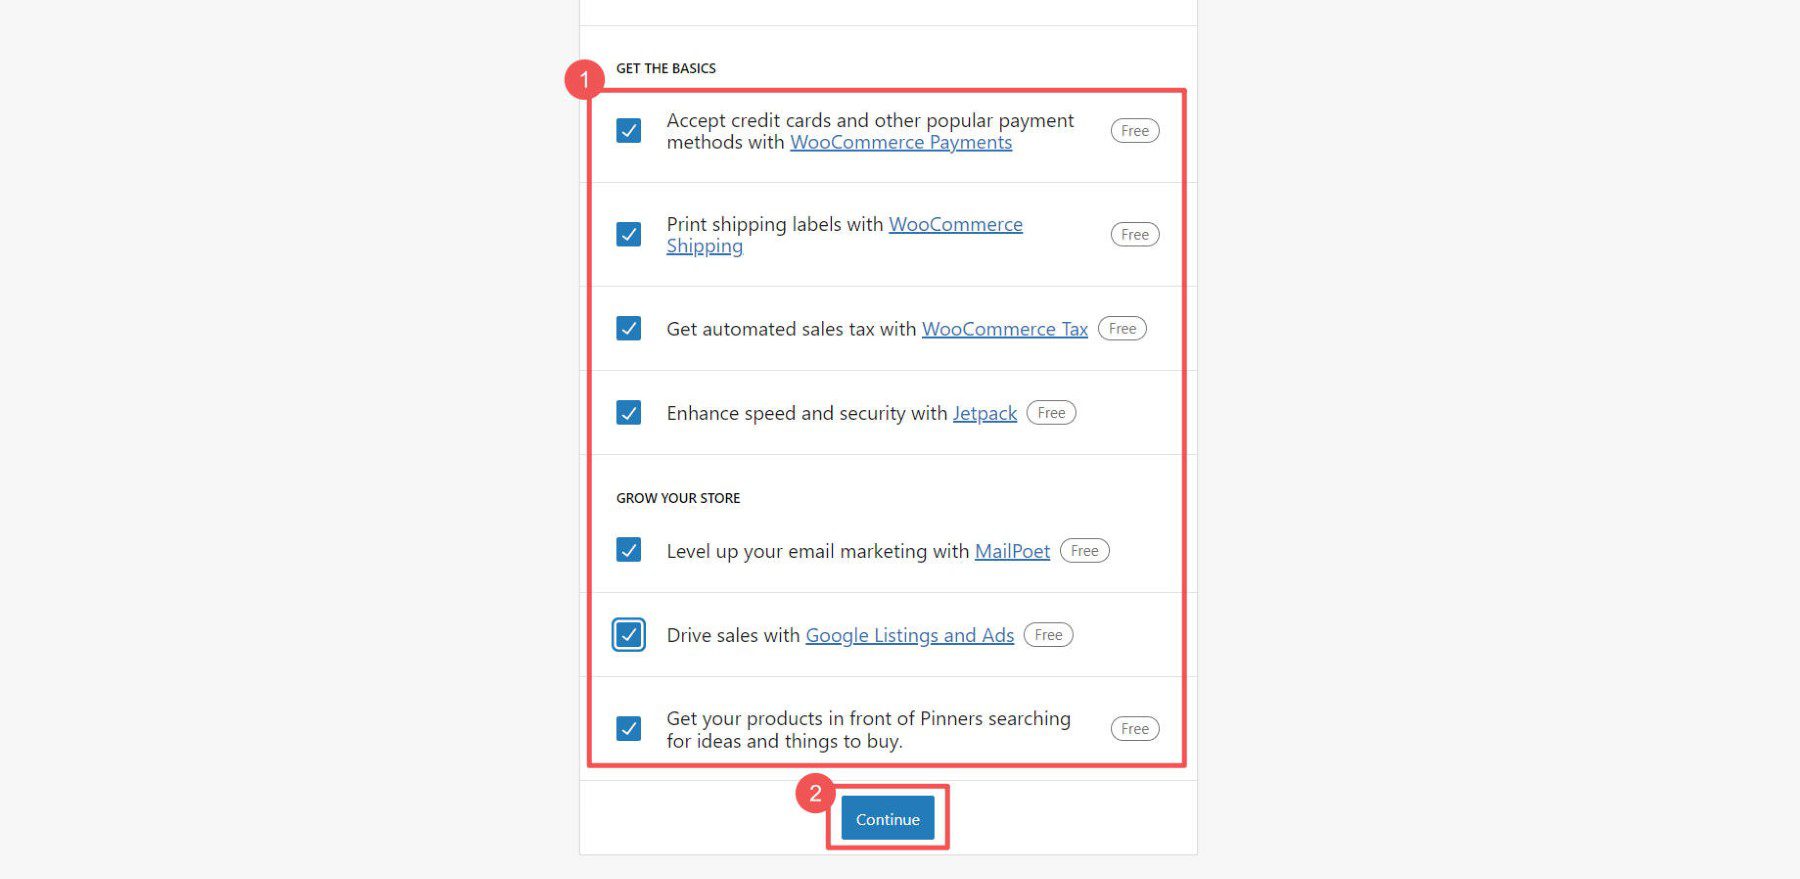
The WooCommerce ecosystem also has plenty of free plugins. The last step is to select which plugins you want to install (each handles a specific and essential task). If you wonder if they are worth it, see our reviews on Jetpack and MailPoet.
WooCommerce Settings
The nitty gritty settings of any platform can be a lot of work when starting an online store. WooCommerce has settings pages to configure and customize your online store for every single detail:
- General Settings control currency, product types, checkout, and catalog
- Product Settings manage options like units, visibility, and inventory
- Shipping Settings configure delivery methods, costs, and other preferences
- Payment Settings set up payment gateways for customer checkout
- Account Settings configure registration, privacy, and data
- Email Settings customize transactional emails from your store
- Advanced Settings fine-tune advanced functions like hooks
These settings are discussed in detail with our guide on configuring WooCommerce settings.
6. Add Products to Your Store
Next, you should add products to your WooCommerce store. This involves creating a new product in your WordPress dashboard and filling in the details, including the title, description, price, and product image. Site owners can add products in bulk to WooCommerce via CSV if they have that information in a spreadsheet. Otherwise, products can be easily added through the dashboard.
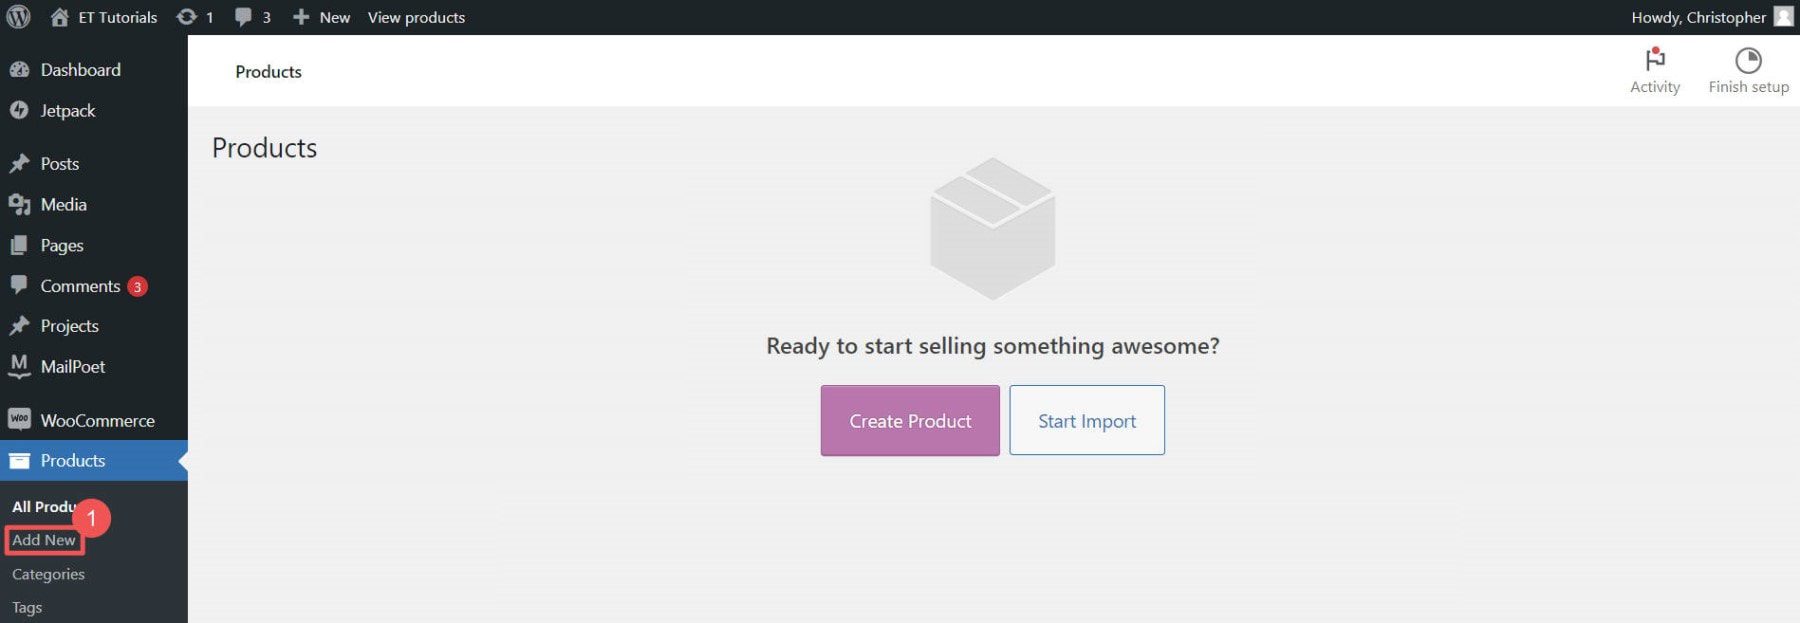
Go to WooCommerce > Products > “Add New” in your WordPress dashboard.
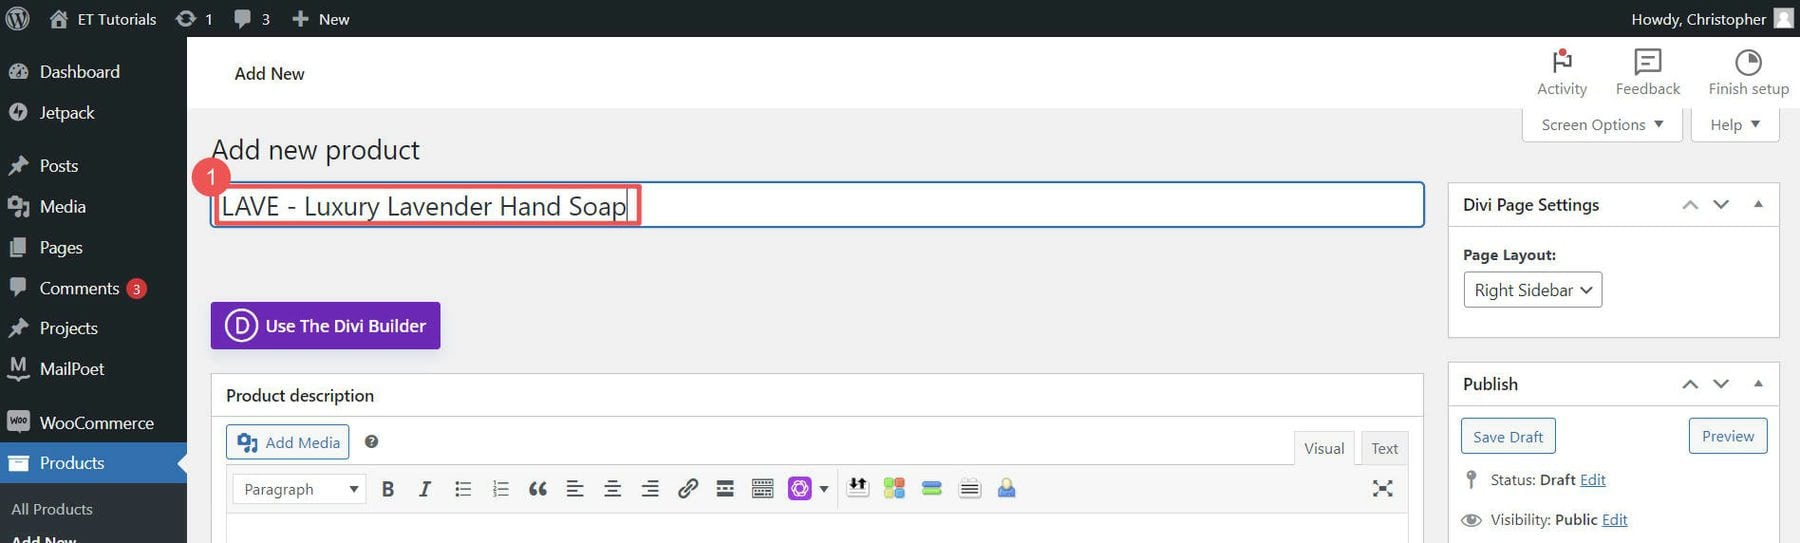
Enter the product name for your product that will be displayed to shoppers.
Add a product description and upload your product image.
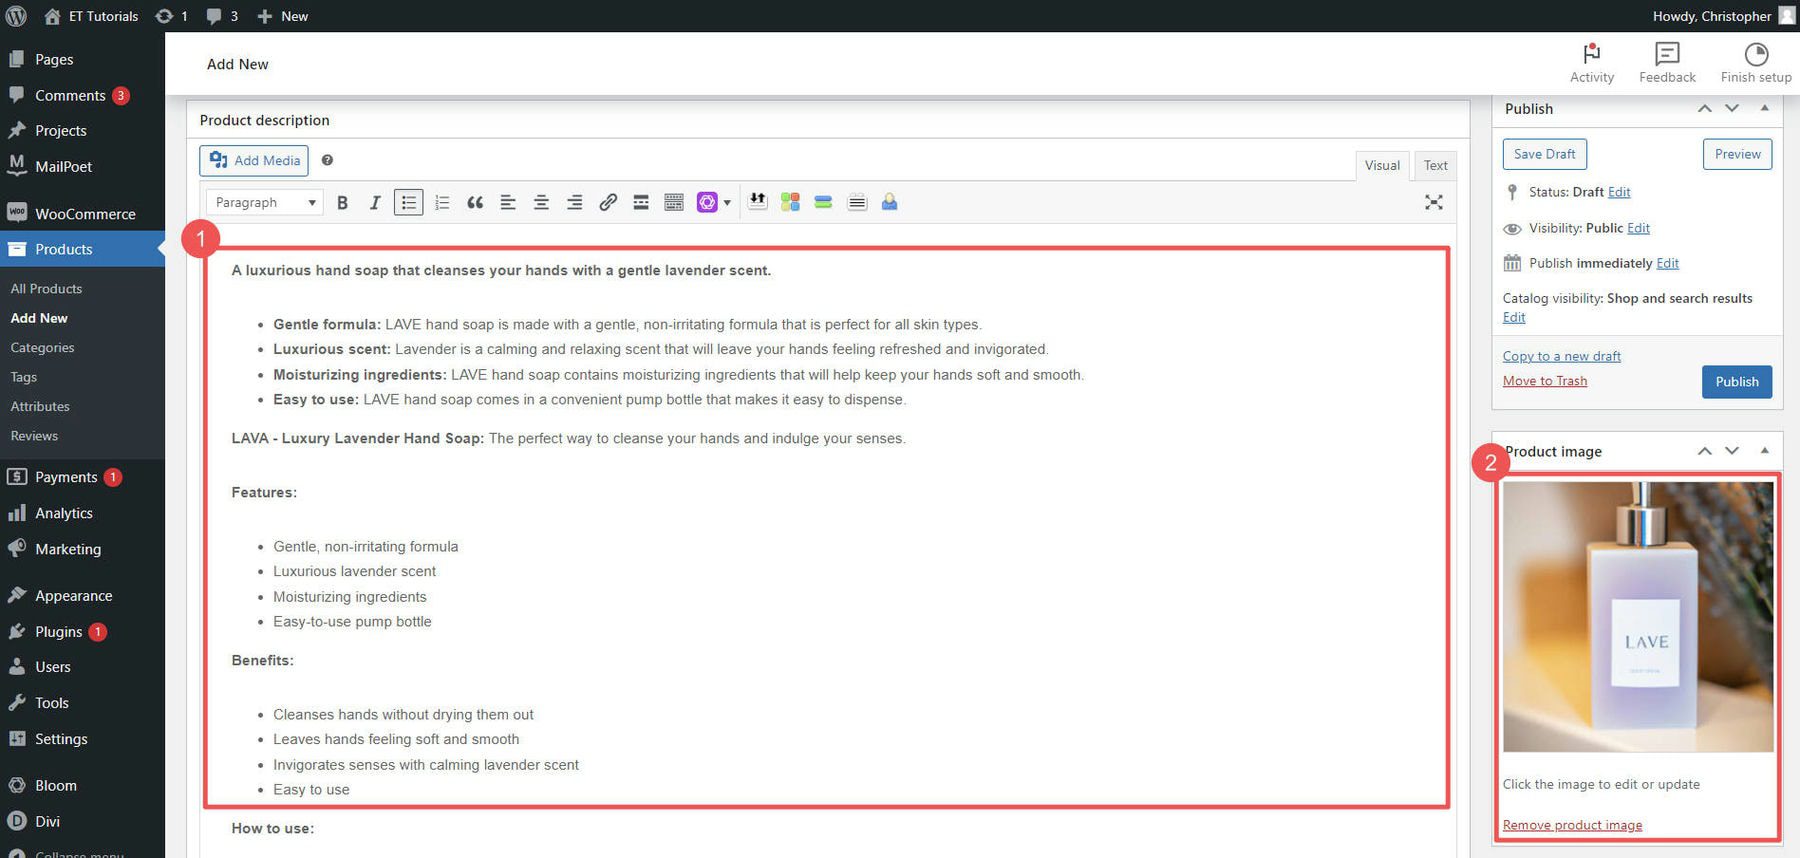
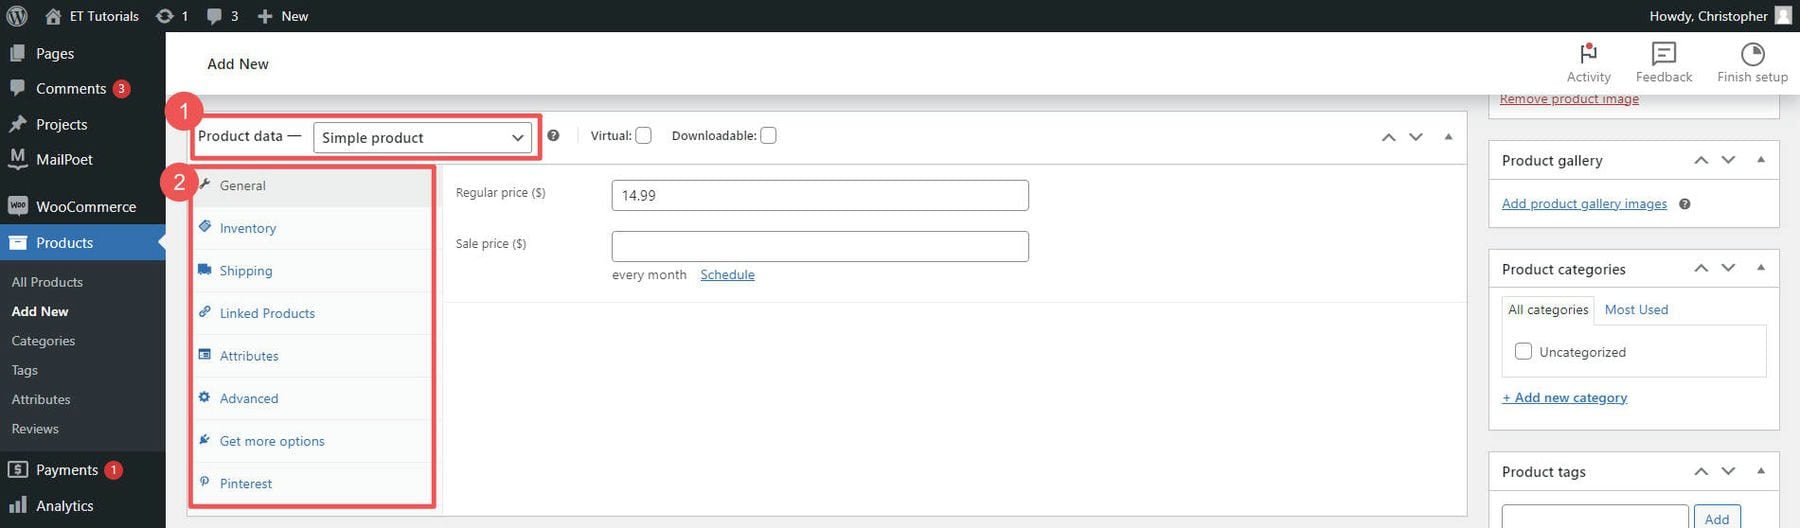
Now you can choose what product type, price, manage inventory, set shipping options, and more from the individual product page.
Once you are happy with your product, you can publish the draft. Add as many products as you have available to sell.
Learn more about WooCommerce inventory management to handle product stock, and visit our guide on setting up shipping in WooCommerce. We also have a great guide on setting up product variations with WooCommerce.
7. Extend Your Store with Plugins
One of the great things about using WordPress and WooCommerce is the ability to extend functionality with plugins. Thousands of free and premium plugins add helpful features to an online store. Here are a few recommendations to get your feet wet.
Caching Plugin
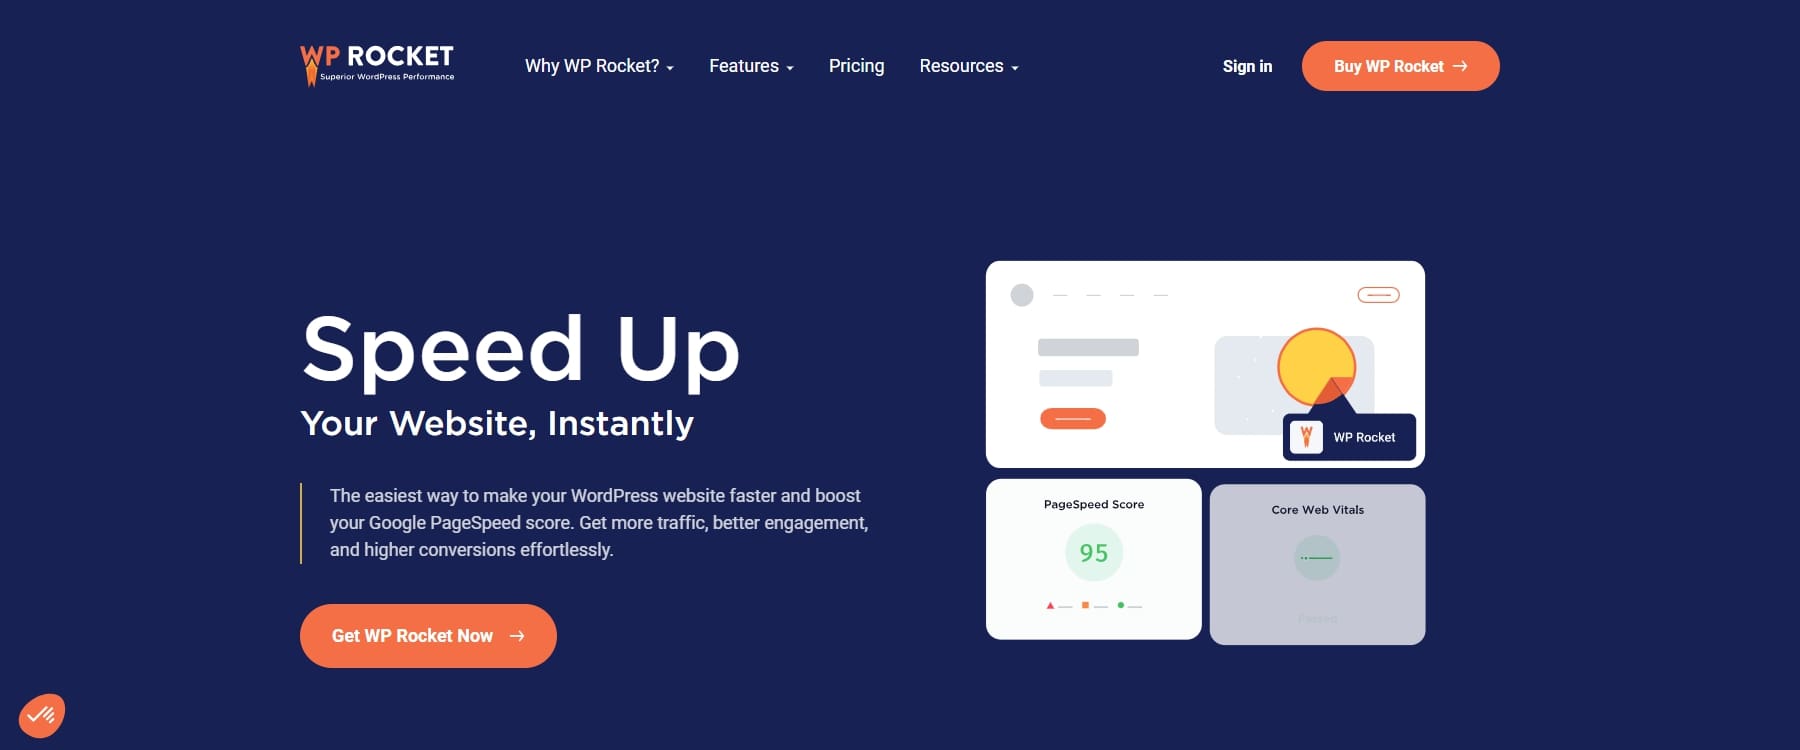
WP Rocket is one of the best caching plugins available. It helps reduce your web page’s load time by creating static copies and serving them to visitors. This includes features like page caching, cache preloading, and GZIP compression. This isn’t your only option—check out these other great caching choices.
SEO Plugin

Rankmath is a great SEO plugin that helps you optimize your content, manage keywords, and improve your site’s visibility on search engines like Google. It offers XML sitemaps, meta tag management, keyword tracking, and detailed SEO analysis. Rankmath also integrates with Divi, making managing your shop’s SEO easy.
Product Filtering and Search Plugins
Plugins that enhance product filtering, search, and navigation result in better customer experiences. The top options are SearchWP and the others referenced on our list of best search plugins.

Barn2 and Yith make some of our favorite WooCommerce plugins. If you want a solution that is guaranteed to work with Divi, there are also dozens of solid WooCommerce options in the Divi Marketplace.
8. Launch Your New Online Store
Once your online store is built, it’s time to get the word out and attract customers. Some key marketing channels to leverage include:
Email Marketing: Email is one of the most effective ways to market to customers. Build your list by offering an incentive to subscribe. Send regular newsletter emails showcasing new products. Use email segmentation to target different groups. Choose one of the best email marketing services, like Mailchimp, or one of its alternatives. Ecommerce businesses have many additional ways to use email marketing, which can be very effective.
Store SEO: Search engine optimization helps customers find your products through search. Carry out on-page optimization across your site. Use advanced SEO techniques to improve rankings.
Social Media: Promote your store through social platforms like Facebook, Instagram, and Twitter. Share products, run giveaways, and advertise through paid social campaigns. Many ways of doing social commerce can help increase exposure and sales.
Affiliate Marketing: Open an affiliate program where other creators can reference, review, and promote your products. This is quickly done with affiliate management plugins. Also, you can consider becoming an Amazon affiliate if your online store is focused on selling others’ products with Amazon. This earns you commissions on resulting sales.
PPC Ads: Paid search ads put your products in front of people as they search on Google and other search engines. Use AI tools to optimize your ads and copywriting to see even more outstanding results.
Site Speed and Optimization: Fast site speed is vital for conversions. To speed up your store, use caching plugins and follow a Divi optimization guide.
Be sure to track metrics with eCommerce analytics to optimize efforts and take an omnichannel approach.
Tools for Building an Online Store
Starting an online store is an ambitious goal that can be intimidating at first. But by following a step-by-step guide, anyone can create a thriving online store. Don’t let technology or self-doubt hold you back. You have what it takes to turn your retail goals into a thriving online store that realizes your entrepreneurial vision. Use our tool recommendations to build confidently—at the very least, you need Siteground, Divi, and a Starter Site.
| Product Name | Purpose | ||
|---|---|---|---|
| 1 | WooCommerce | eCommerce solution for WordPress | Get Now |
| 2 | Shopify | Proprietary eCommerce platform | Get Now |
| 3 | Semrush | SEO keyword research tool | Get Now |
| 4 | Siteground Hosting | Top web hosting provider | Get Now |
| 5 | Siteground Domains | Domain registration | Get Now |
| 6 | Namecheap Domains | Affordable domain registrar | Get Now |
| 7 | Divi Quick Sites | Pre-built Starter Sites or AI-generated sites | Get Now |
| 8 | Divi Theme | The ultimate WordPress theme | Get Now |
| 9 | Divi AI | AI-powered website builder, coder, and image editor | Get Now |
| 10 | Sucuri Security | WordPress security platform | Get Now |
| 11 | Barn2 WooCommerce Plugins | Suite of WooCommerce tools | Get Now |
| 12 | Yith WooCommerce Plugins | Suite of WooCommerce tools | Get Now |
| 13 | Divi Marketplace | Tools and extensions built for Divi | Get Now |
Divi makes installing WooCommerce and designing your store a breeze. Divi Pro is the best of the entire Divi ecosystem and will make your life much easier.
Let us know how your online store plans are shaping up!
Frequently Asked Questions (FAQs)
Before we wrap up, let’s answer some of your most common questions about creating an online store. Did we miss one? Leave a question below, and we will respond!


Leave A Reply