Artificial intelligence (AI) is blazing hot right now, and there are nearly endless tools available to create content and images. Each tool has its own features and benefits, so deciding which to learn can be confusing. We’ve been trailblazers of late, periodically releasing tutorials on how to use the various AI platforms. In this post, we will teach you how to make AI art on three amazing platforms: Jasper, Midjourney, and the new kid on the block, Leonardo AI.
Let’s get started.
What is AI Art?
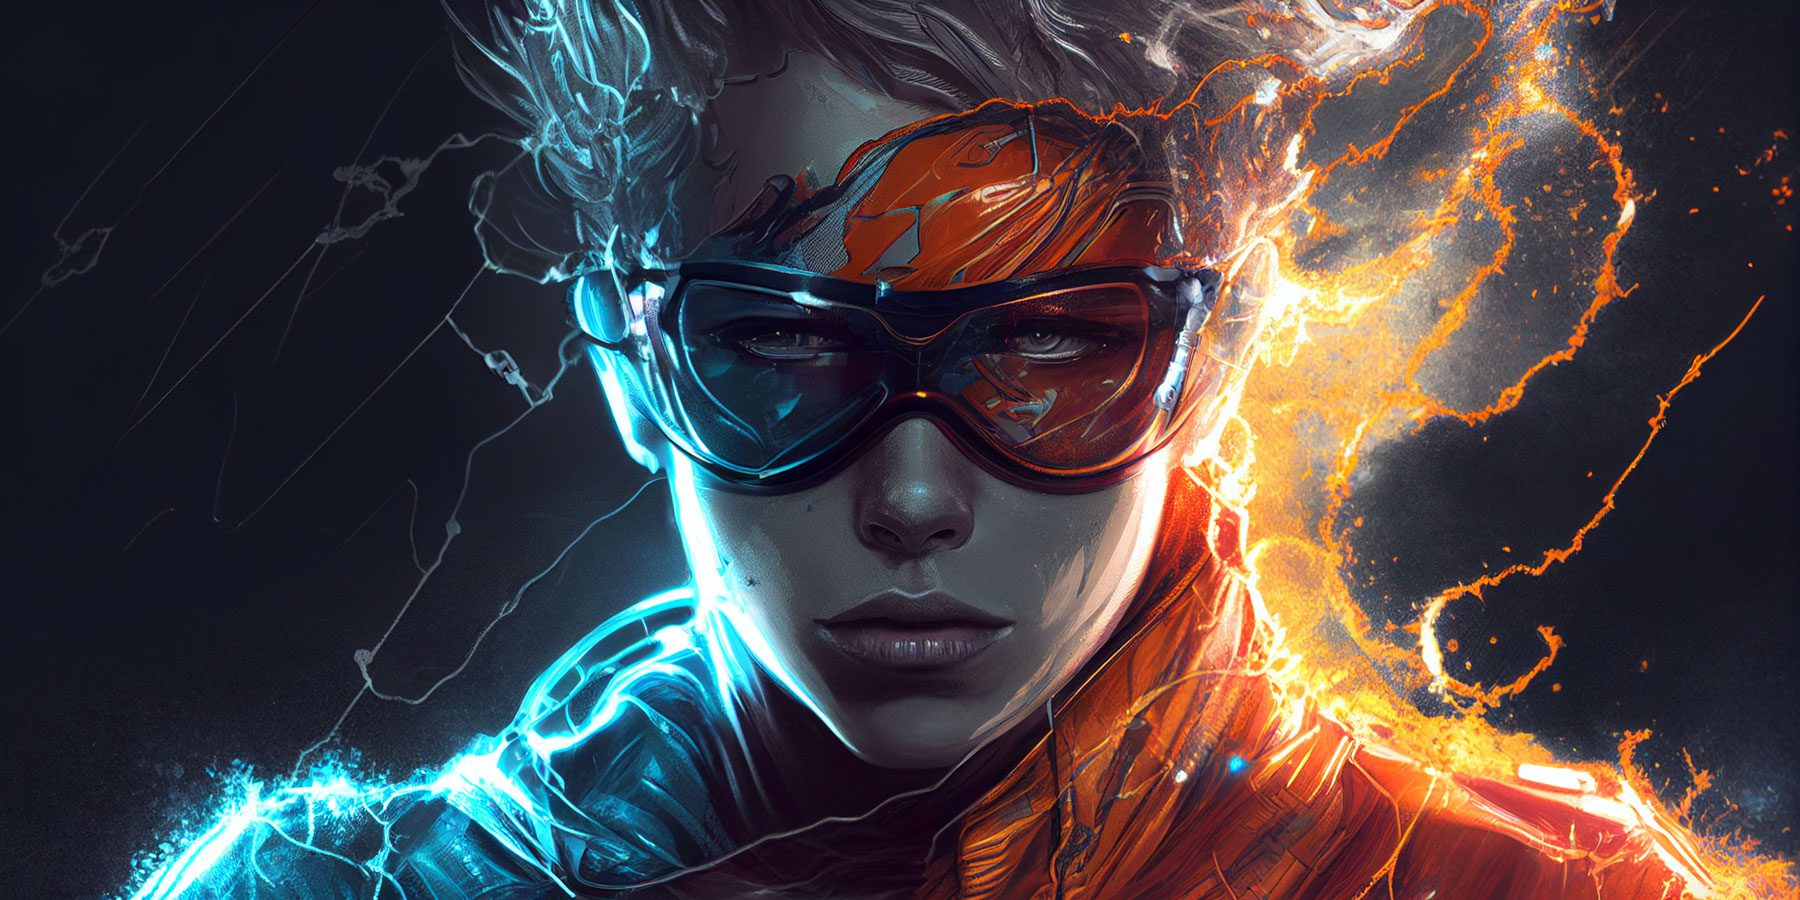
image created with Midjourney
AI art, or generative art, is specifically created using artificial intelligence. Unlike digital art, created by a human with artistic skills, AI art is generated with a text prompt and a series of highly-trained computers. A finished image results from generative AI algorithms trained on huge datasets of images and large language models (LLMs) that can translate your text into a finished piece of art.
How Do AI Art Generators Work?
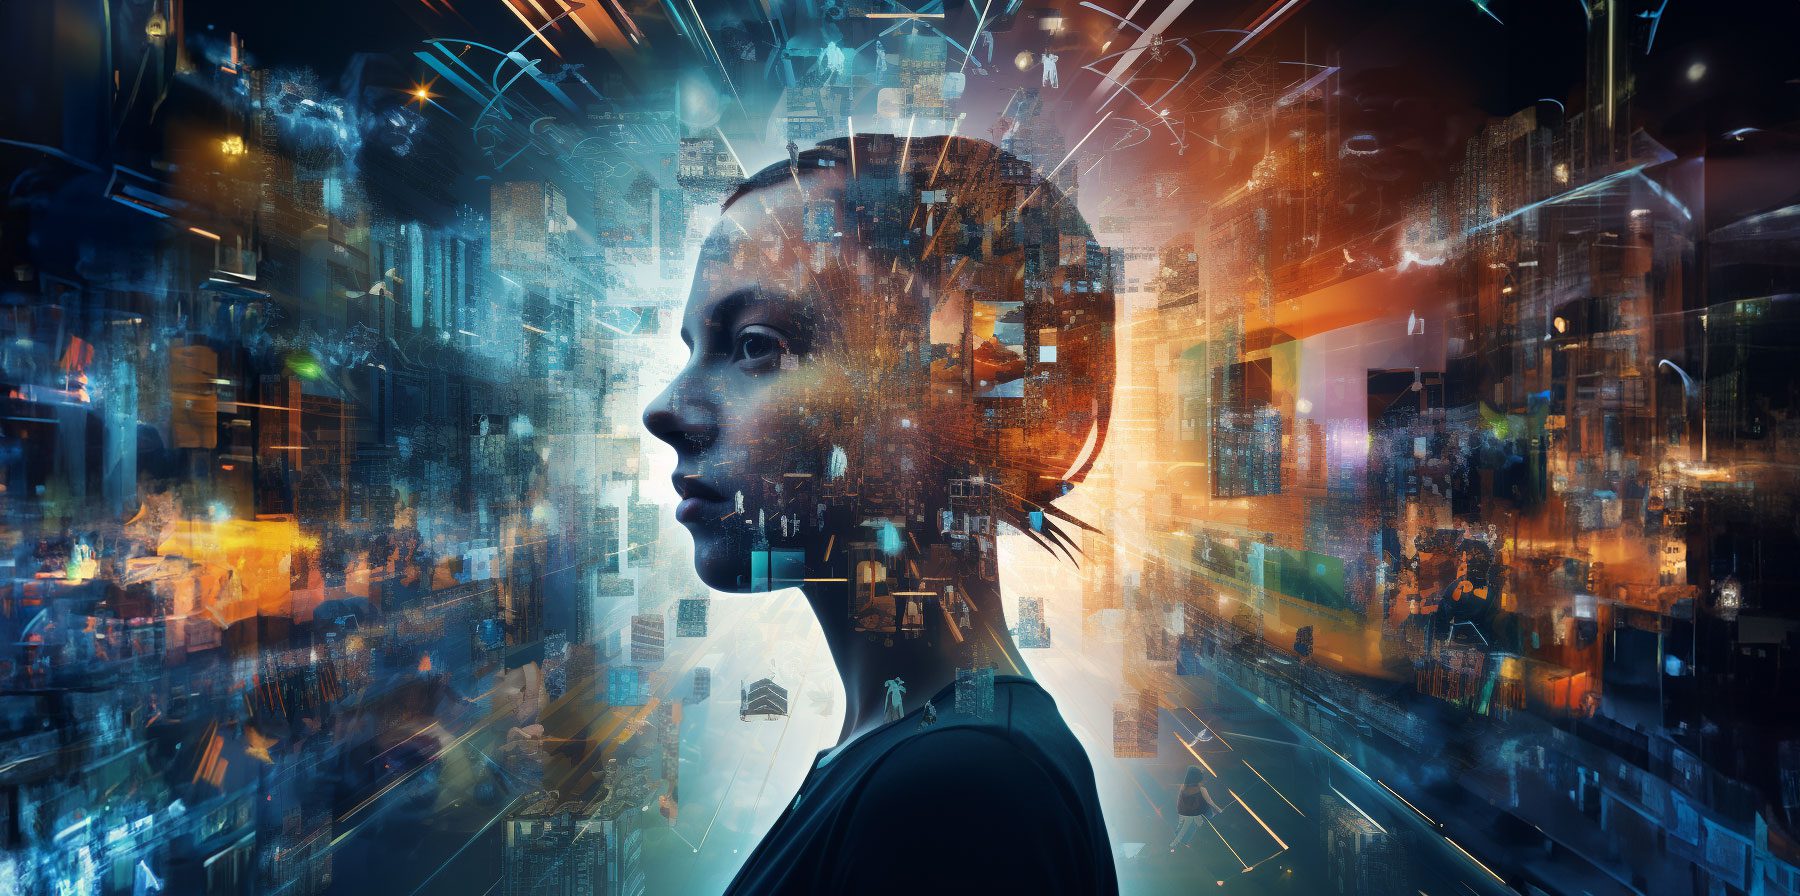
image created with Midjourney / Photoshop AI
AI art generators use technologies such as deep learning algorithms and generative adversarial networks (GANs) to produce images from text. A user will input a series of words, usually descriptive, to create the image. The AI then uses the data it was trained on to generate a picture that matches the user’s description.
During training, neural networks analyze large amounts of photos and learn about their characteristics, including shapes, styles, colors, and other information. As a result of that training, the AI program can copy those colors, textures, subjects, and even famous artist styles. Some AI art generators are better than others primarily because they were trained on a larger data set. Other factors are also considered, such as the type of AI used.
Currently, two primary open-source AI programs exist: DALL-E by OpenAI (the makers of ChatGPT) and Stable Diffusion. However, other programs, like Midjourney or Adobe’s Firefly, utilize a closed-source system.
How to Make AI Art
With the popularity of AI Art generators exploding at the speed of light, there are plenty of ways to create your masterpiece. However, a few offer the best features: Jasper, Midjourney, and Leonardo AI. We’ll walk you through the steps of creating art for each platform, then offer a few best practices that can be applied to any AI program you choose.
Make AI Art with Jasper
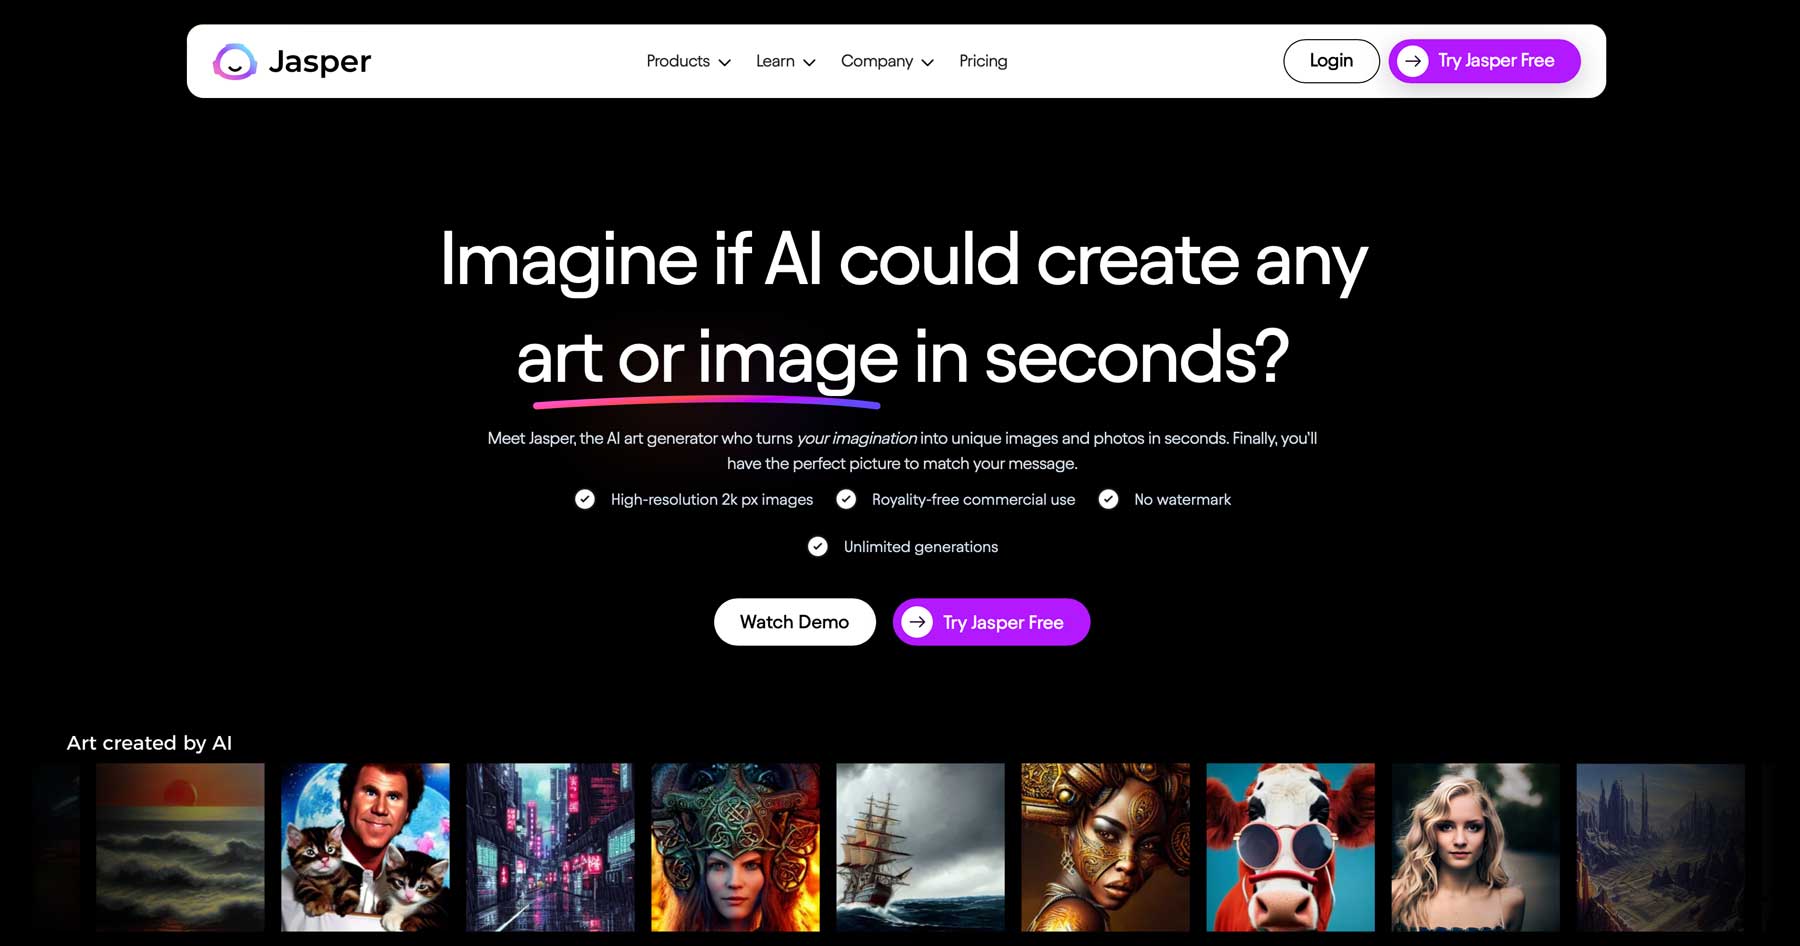
Built on the DALL-E 2 OpenAI model, Jasper is a multi-functional AI software. It’s used to create art or text, including blog posts, templates, and images. It excels at creating landscapes, product shots, and food images, so it’s an excellent tool for bloggers. If you need to create images of vehicles, people, or animals, Midjourney is a better option which we’ll touch on later.
Subscribe To Our Youtube Channel
Understanding the Jasper Interface
One of Jasper’s greatest strengths is its intuitive dashboard. You can easily create images or text in a few clicks without difficulty. When you first log in, you’ll be met with a few tools to get started, including tabs for creating campaigns, browsing your recent content, brand voice, chat, or quick search.
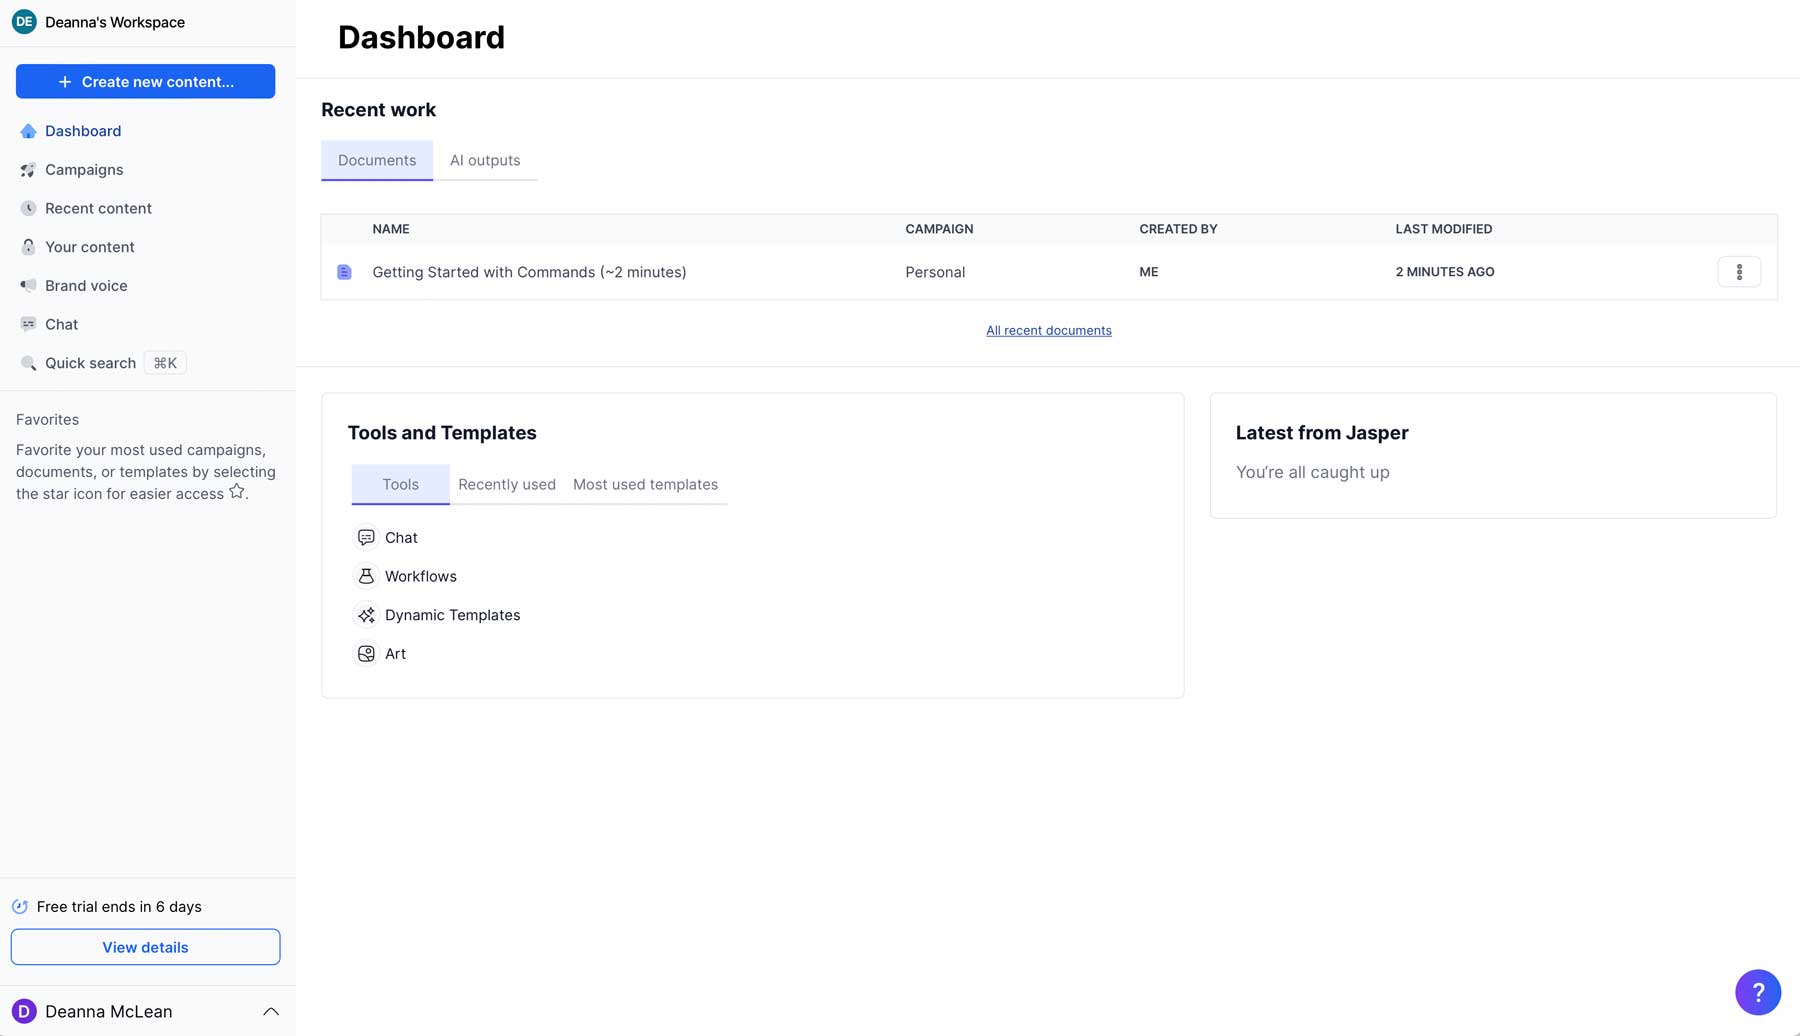
To create your first masterpiece in Jasper, click the Create New Content button at the top left of your screen.
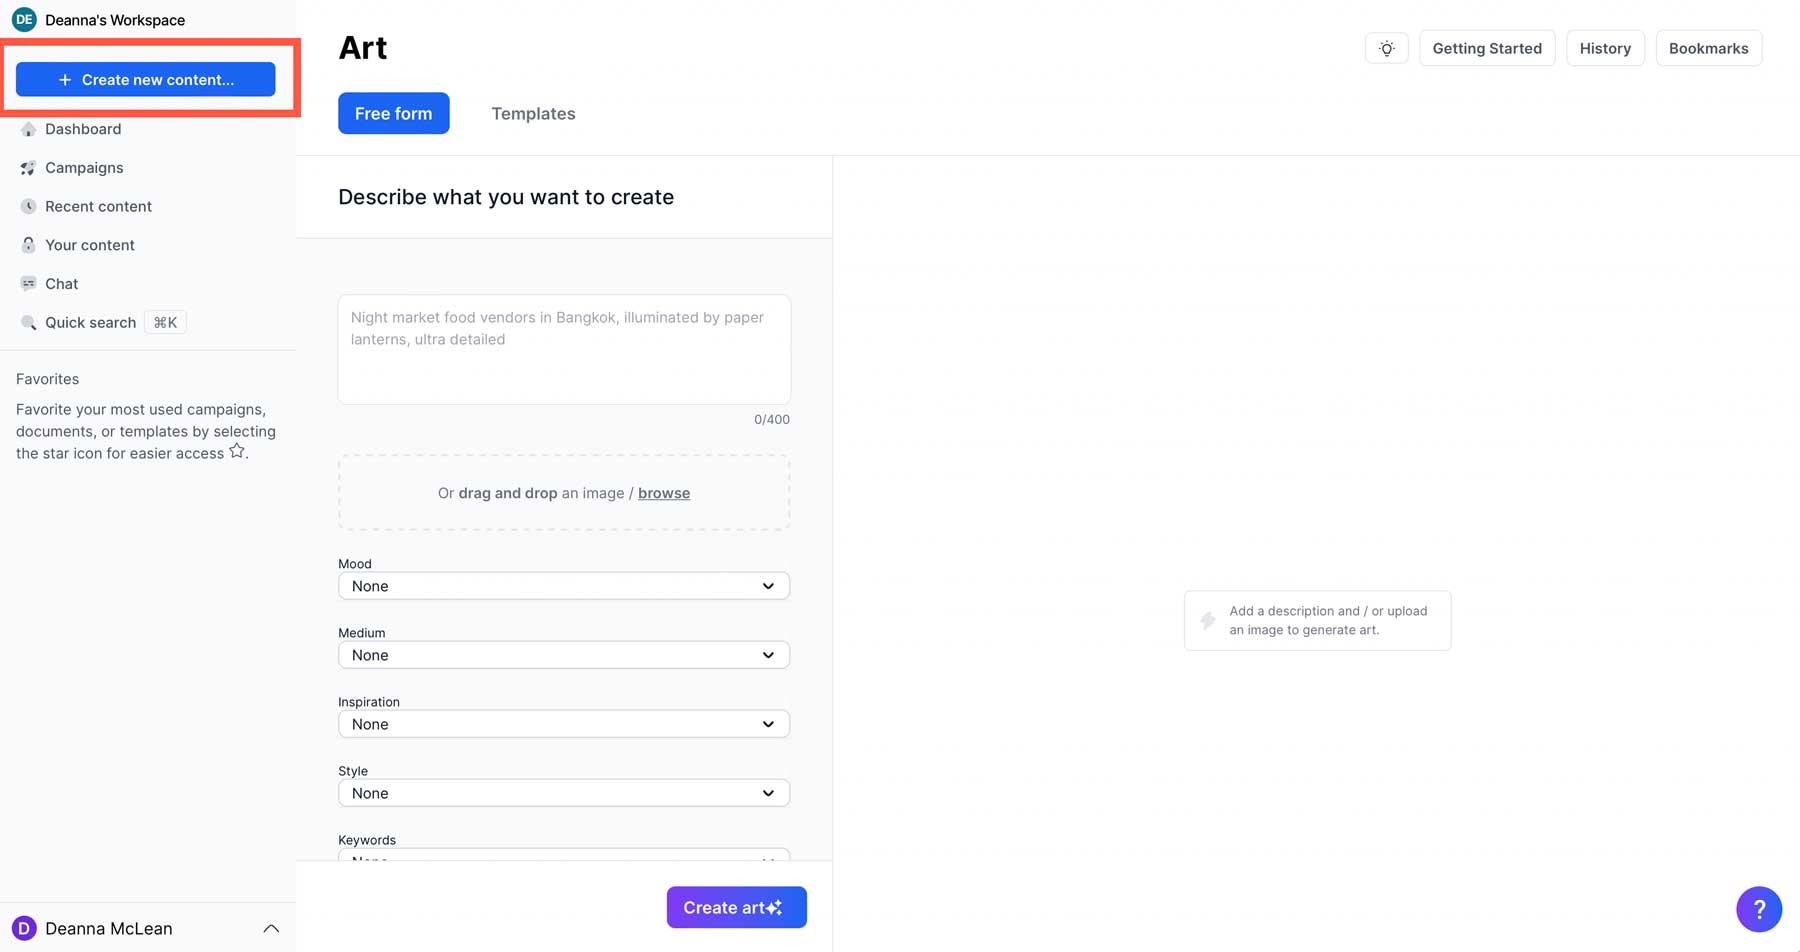
Click New Art when the popup appears.
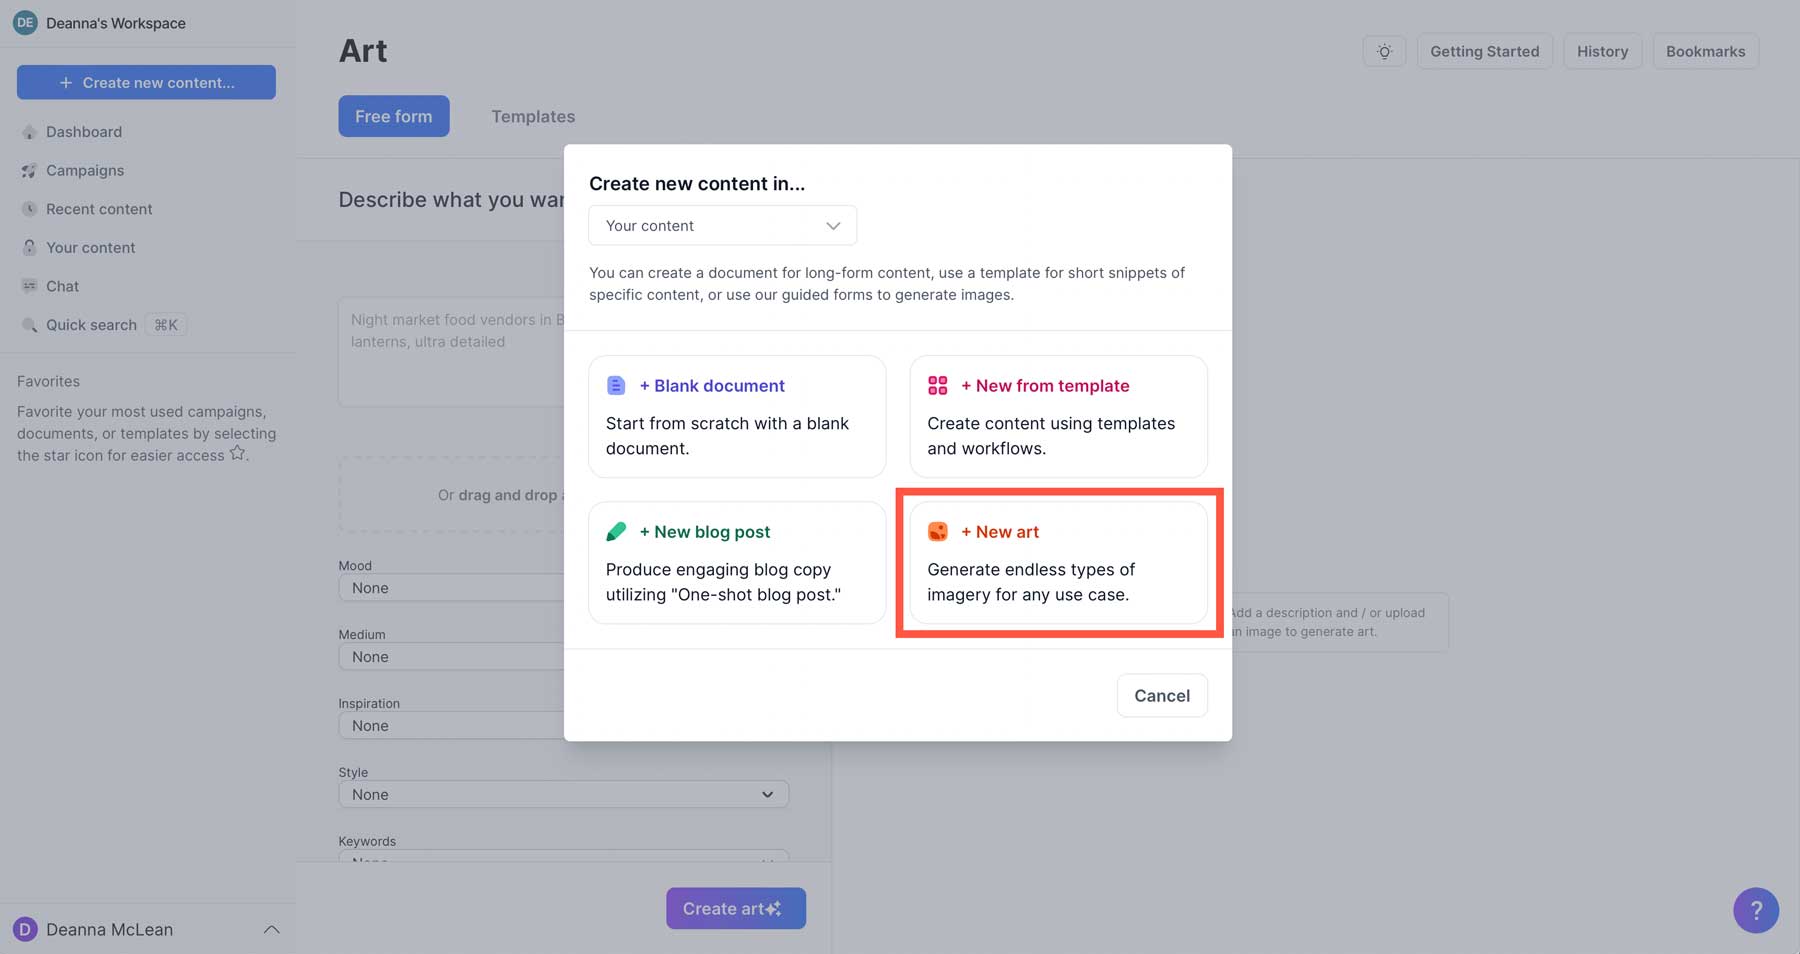
The Free Form Tool
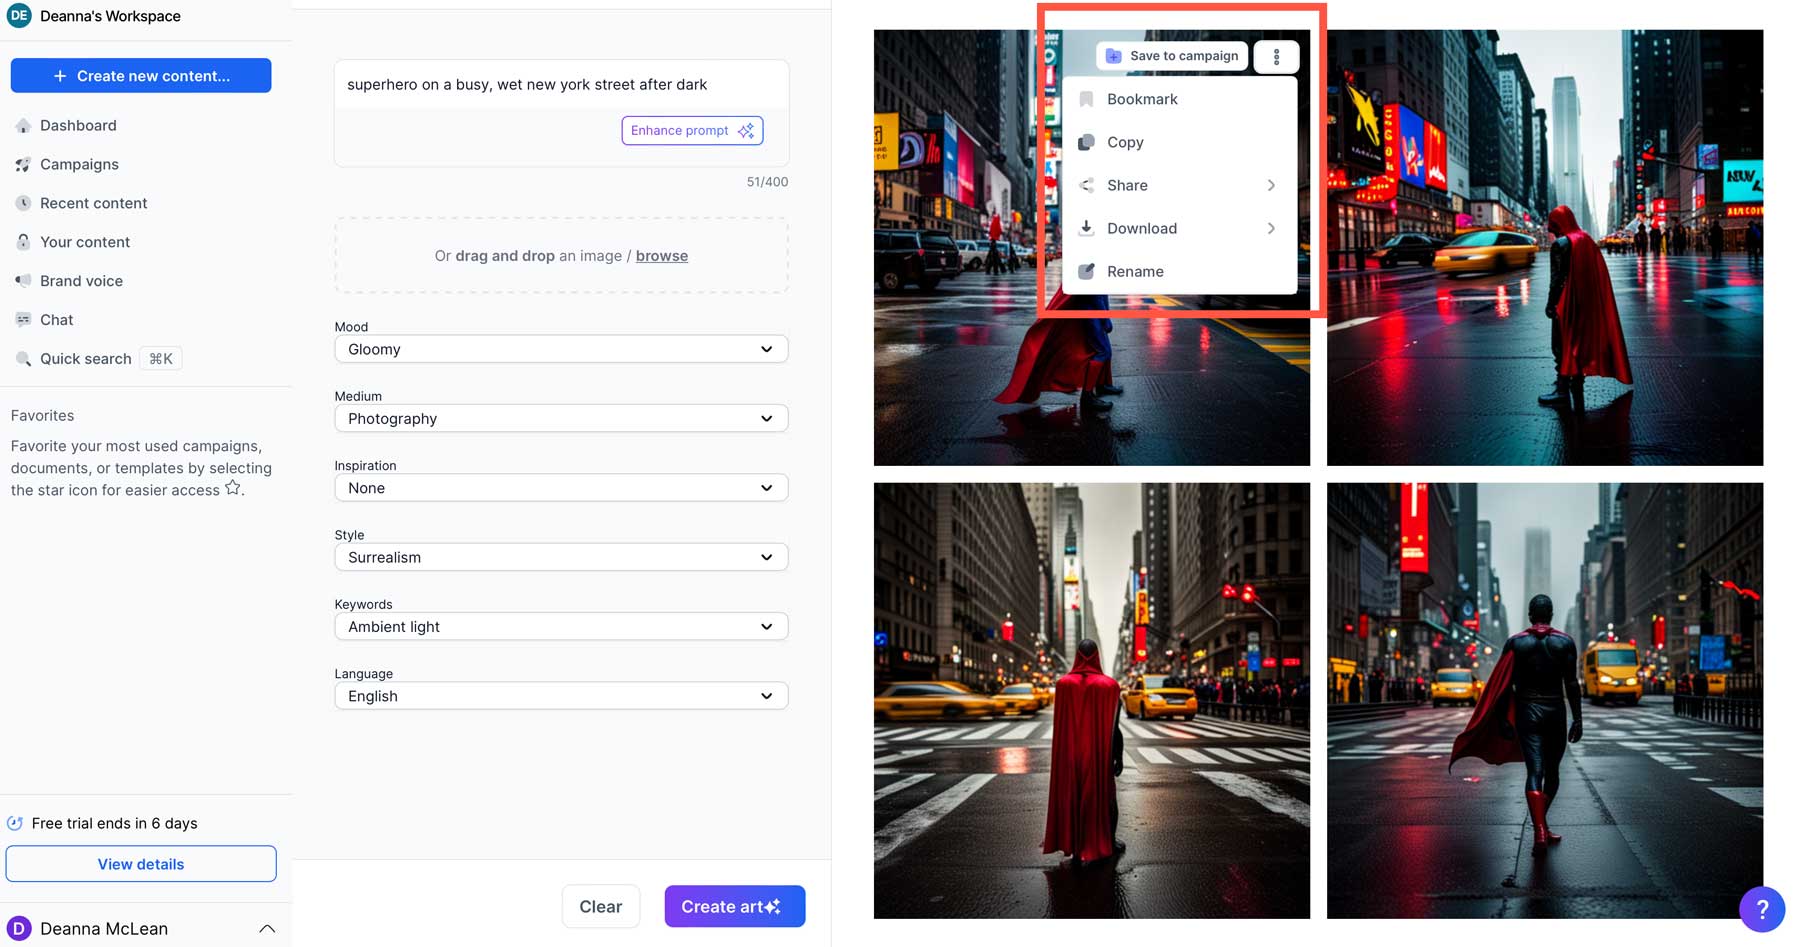
You can use the Free Form tool, which allows you to input text, then select from different parameters, including mood, medium, inspiration, style, and keywords. Most people will use these more common settings, but you can be as descriptive as you’d like in the text input field. Let’s break down the options available with the Free Form option in Jasper.
- Free Form: Allows you to choose your own settings to create AI art.
- Text prompt: Enter your descriptive text here so that Jasper knows the type of image you want to create.
- Mood: Choose from different mood settings, including calm, exciting, fun, gloomy, happy, and whimsical. Alternatively, you can leave this set to “none.”
- Medium: You can choose different artistic mediums, including acrylic paint, collage, ink, mixed media, oil paint, photography, or watercolor.
- Inspiration: If you want to assign a specific artist style, choose this option. Presets include Warhol, Money, Norman Rockwell, Picasso, Dali, and Van Gogh.
- Style: Various art styles, including abstract, anime, art deco, digital, pop art, and surrealism.
- Keywords: These are used to add descriptive words such as 8K resolution, ambient light, black & white, close-up, flat lighting, full face portrait, global illumination, highly-detailed, masterpiece, photorealistic, and realistic.
- Create Art: Once all settings are chosen, click this button to generate your image.
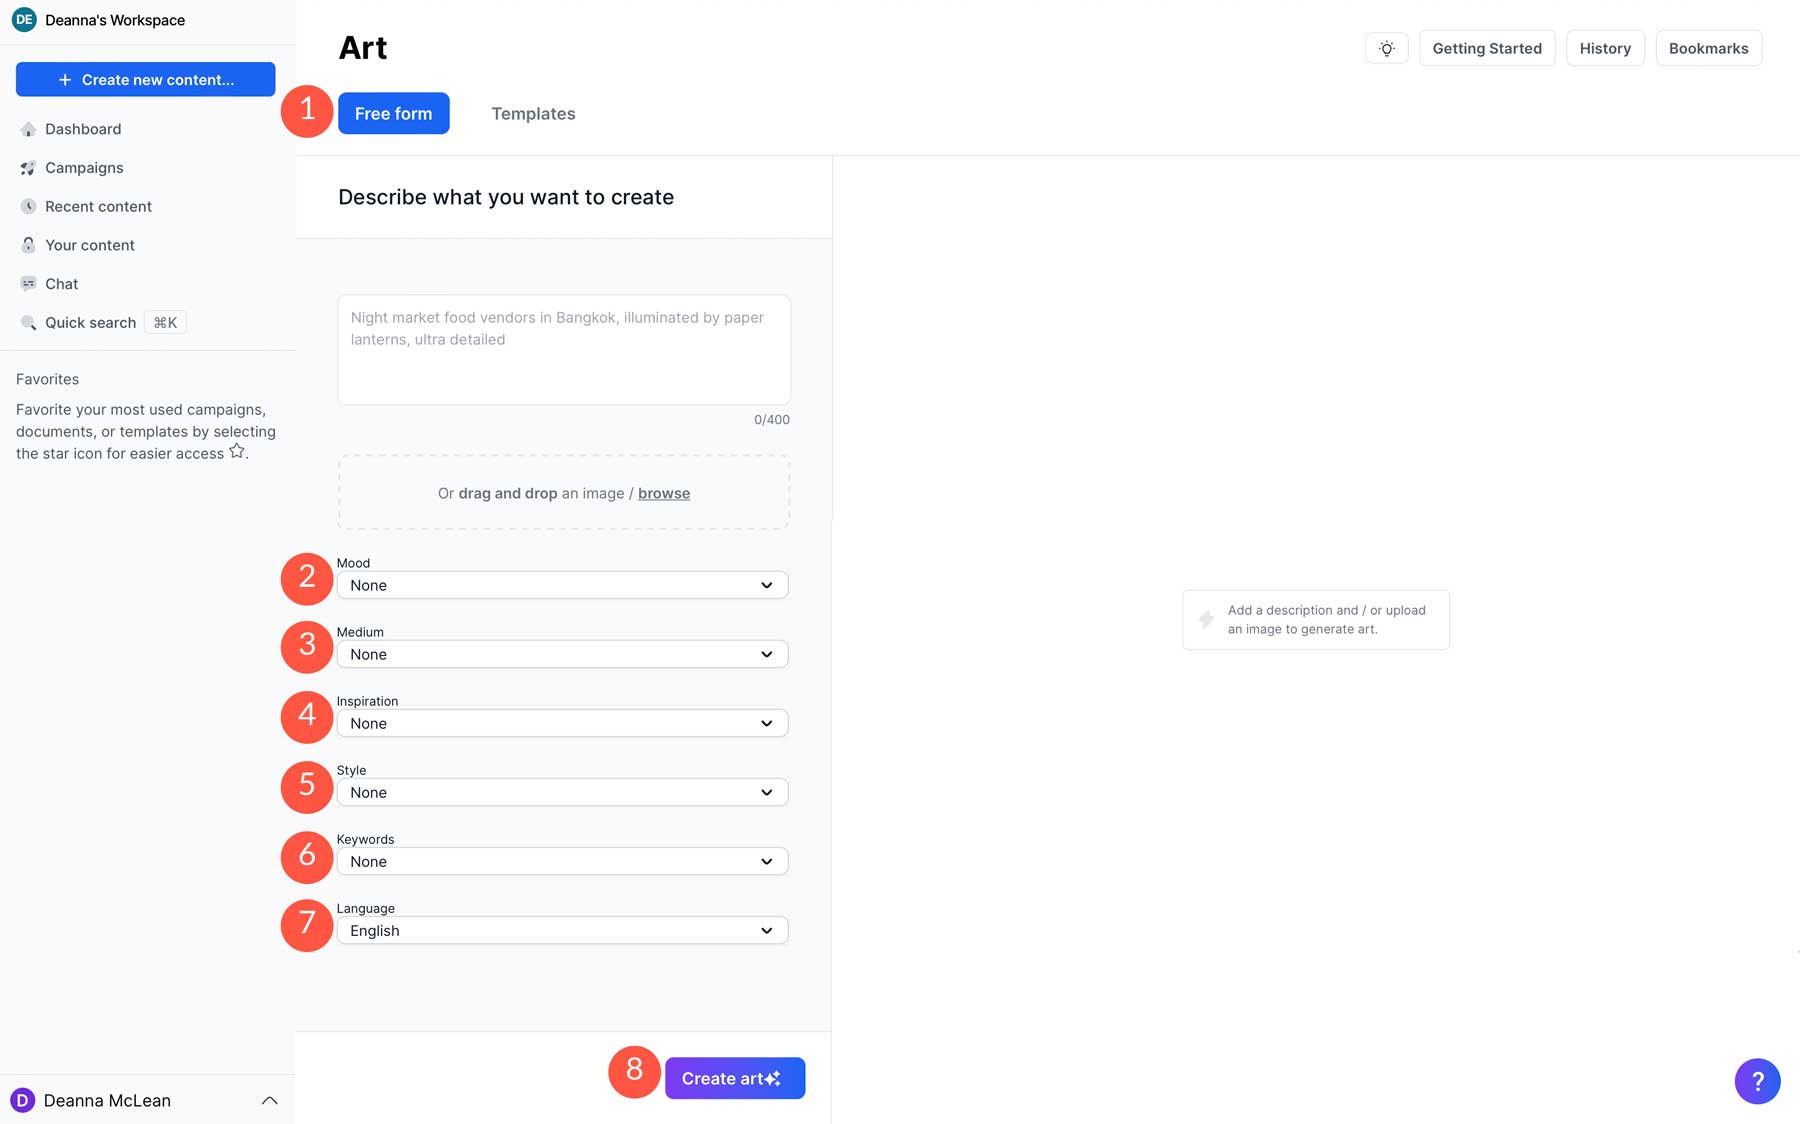
Let’s create our first piece using the Free Form tool. For the text, we’ll use the following prompt: superhero on a busy, wet New York street after dark.
Here are the styling parameters used:
- Mood: Gloomy
- Medium: Photography
- Inspiration: None
- Style: Surrealism
- Keywords: Ambient light
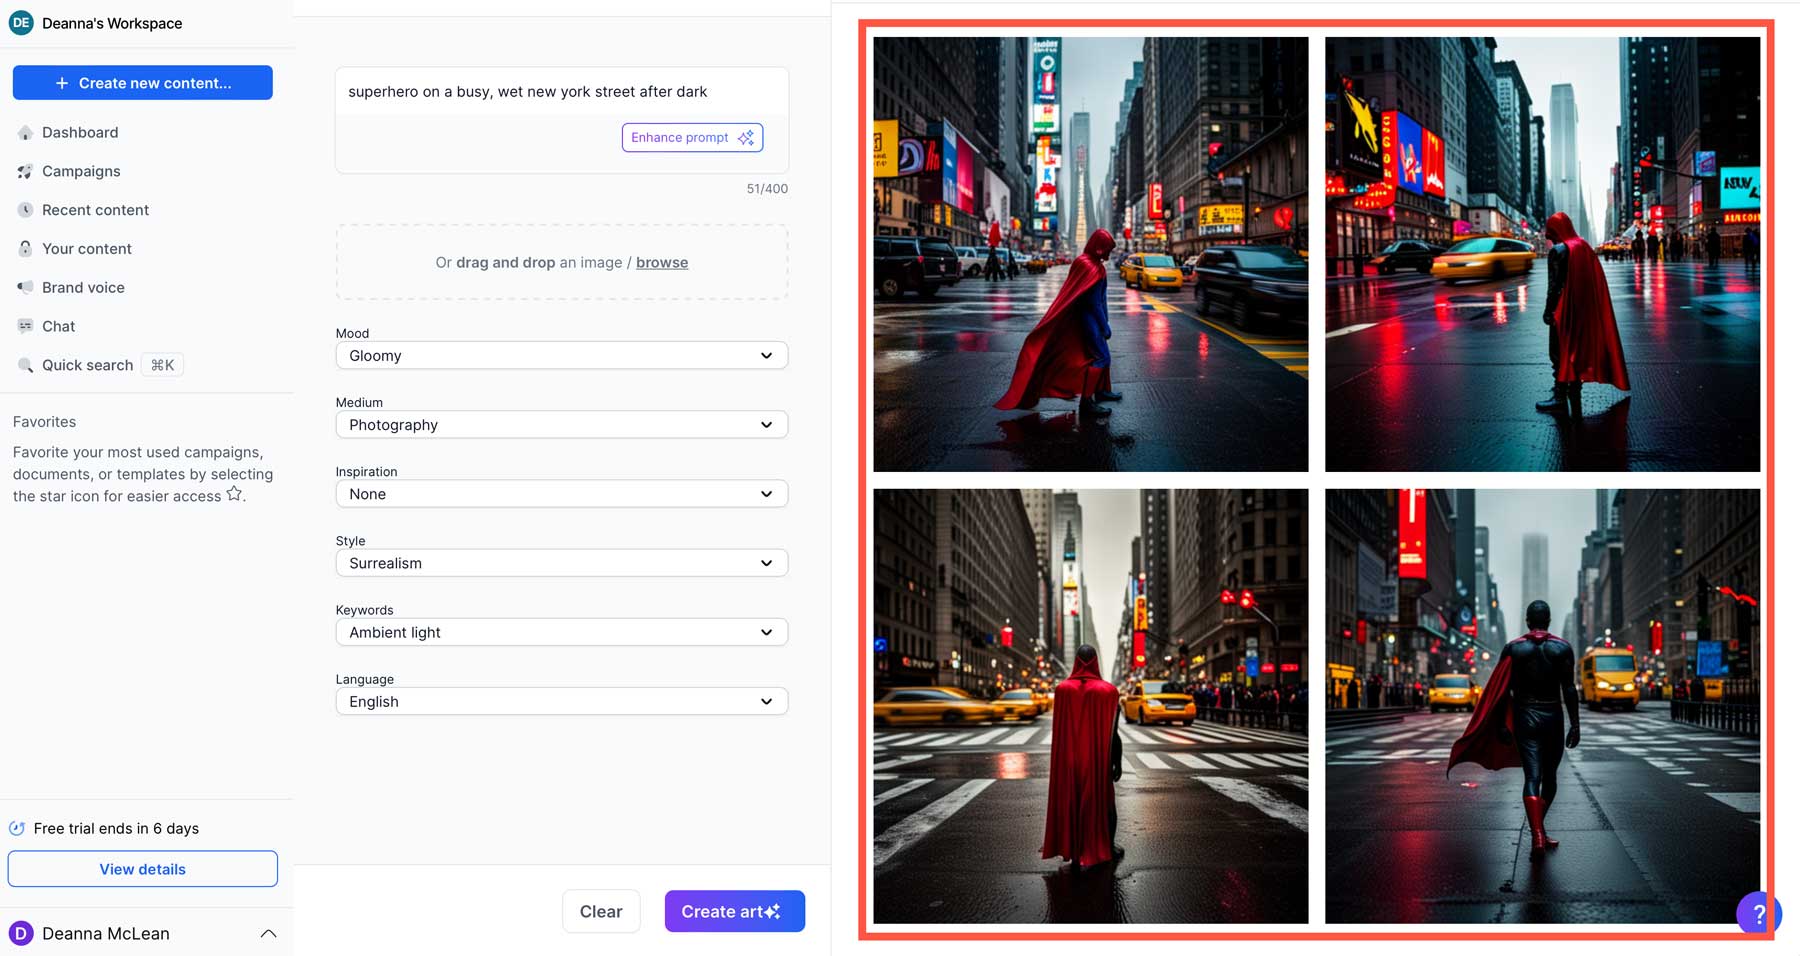
As you can see, Jasper did a pretty good job translating our simple text prompt into an image.
The Templates Tool
The other way to create art in Jasper is by using pre-defined templates. These templates have all pre-configured parameters, so you only need to input a text prompt.
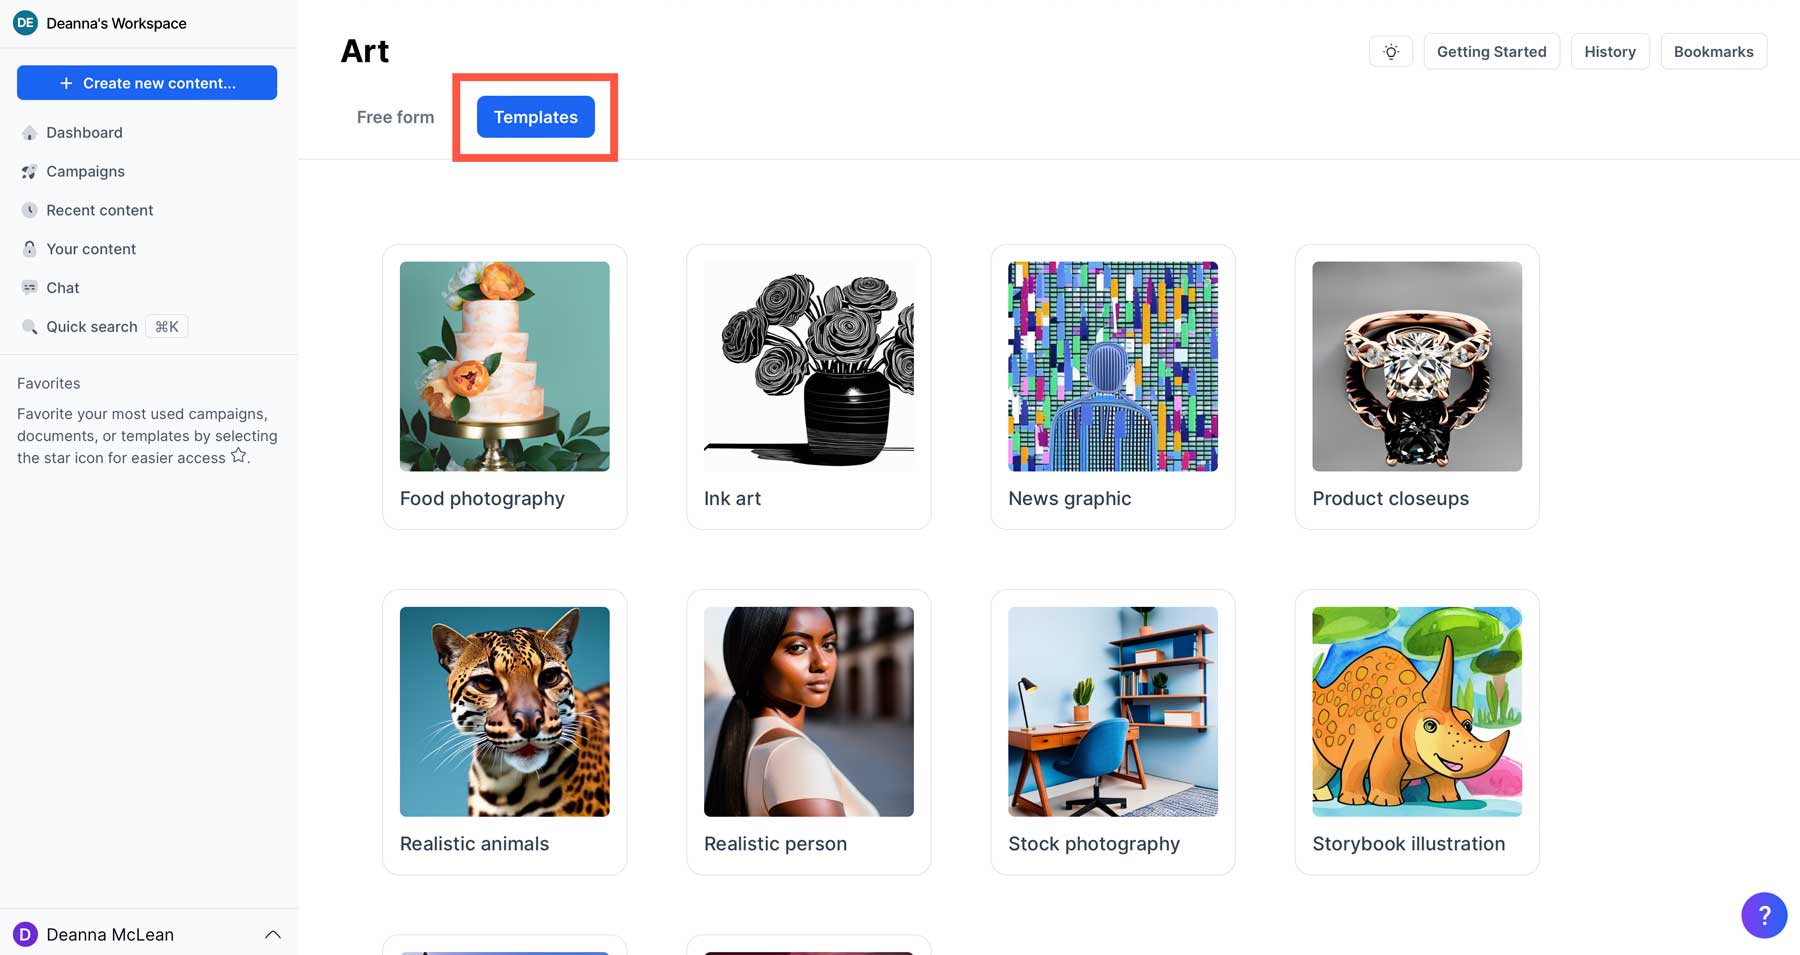
Right now, there are 10 template presets:
- Food Photography
- Ink Art
- News Graphic
- Product Closeups
- Realistic Animals
- Realistic Person
- Stock Photography
- Storybook Illustration
- Travel Photography
- Wallpaper
As mentioned, Jasper struggles with animals and people, so we’ll stick to something simple, such as product close-ups. Click on it to begin.
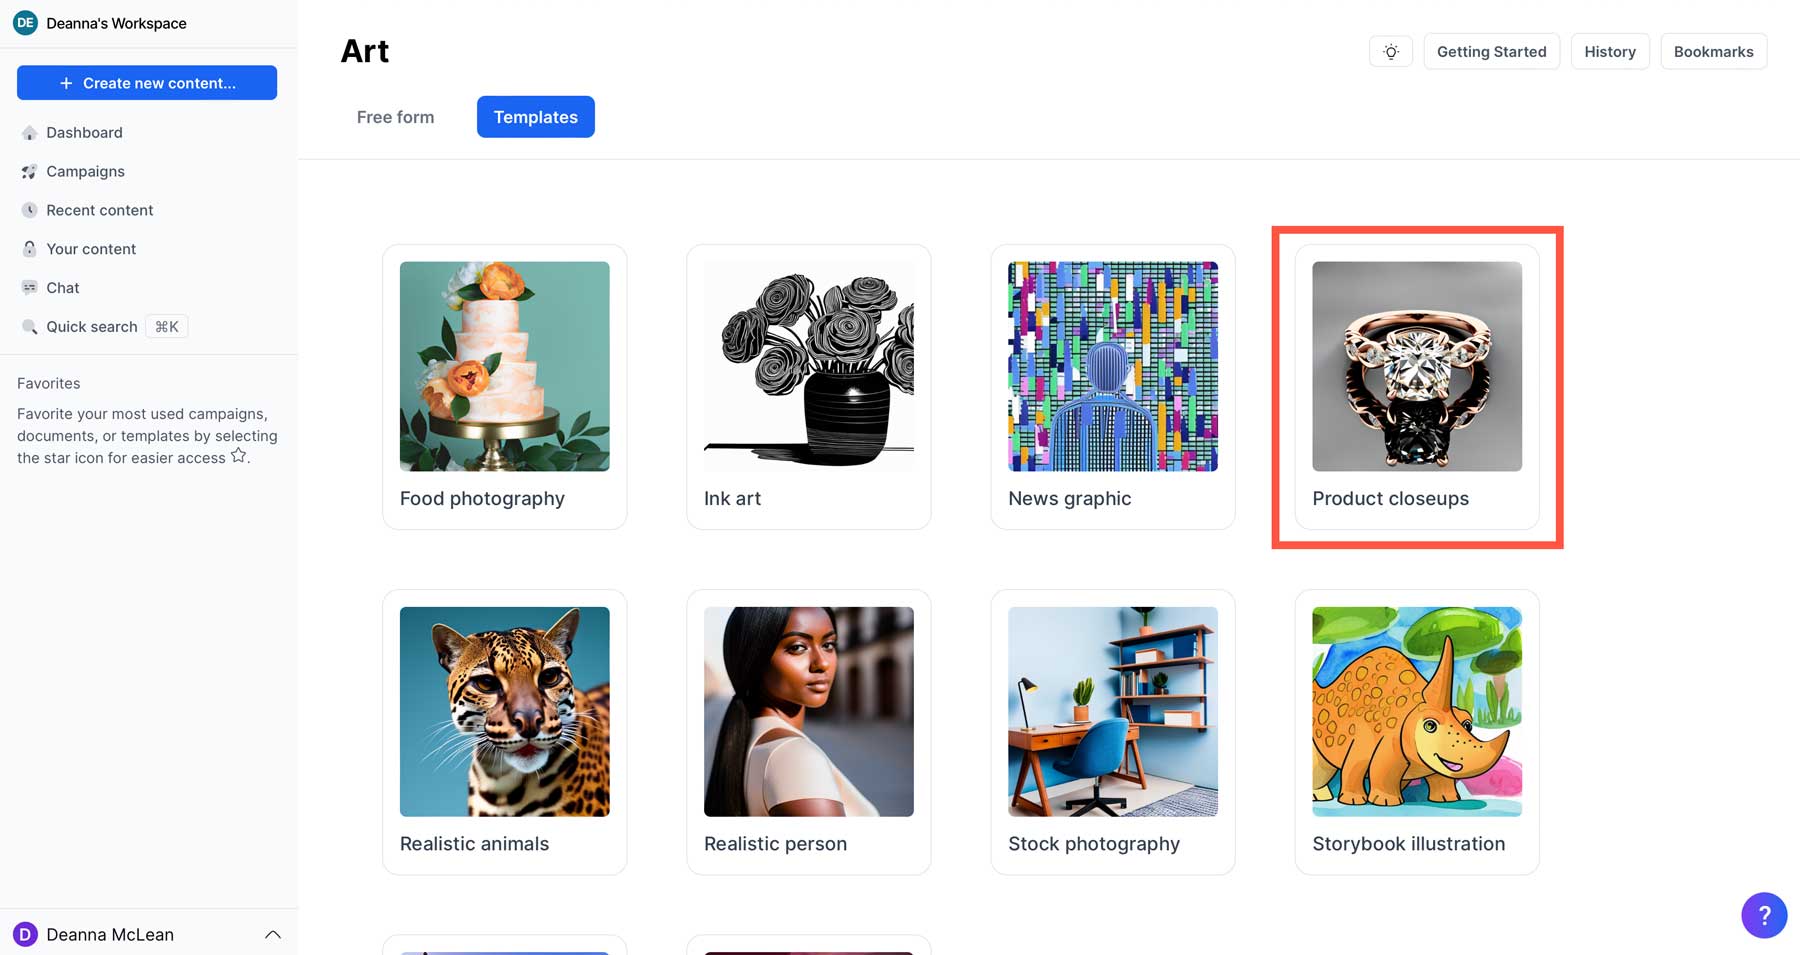
Next, we’ll need to add a text prompt (1) and click the create art button (2).
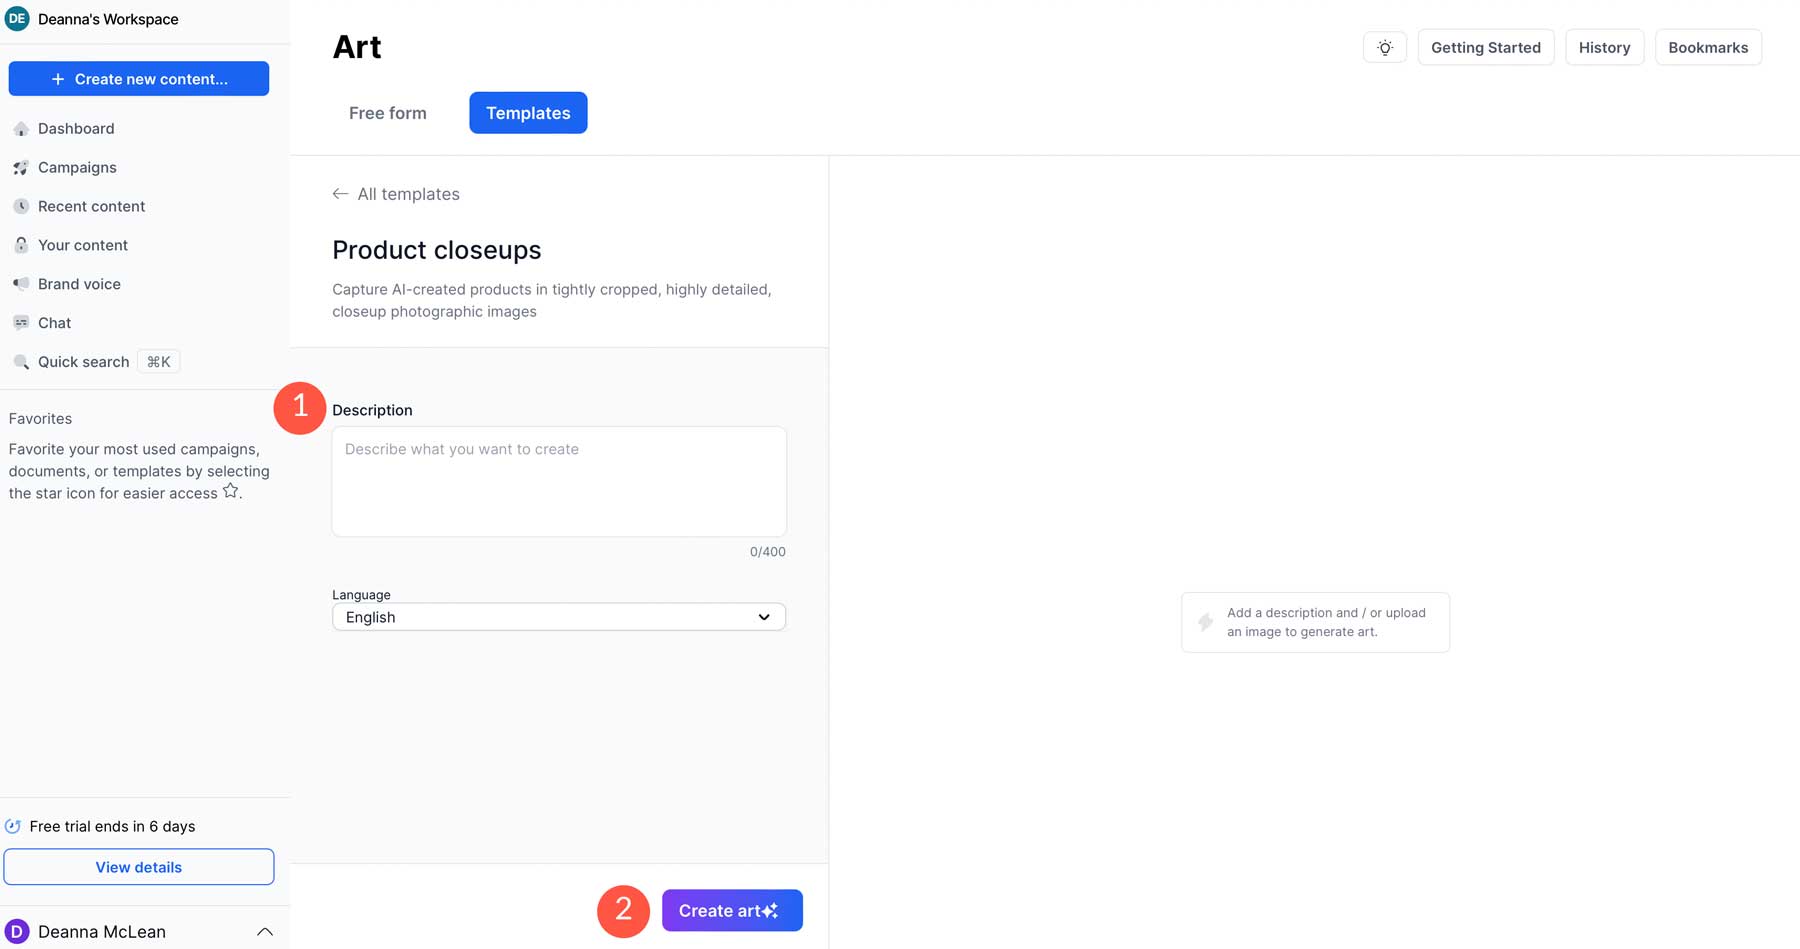
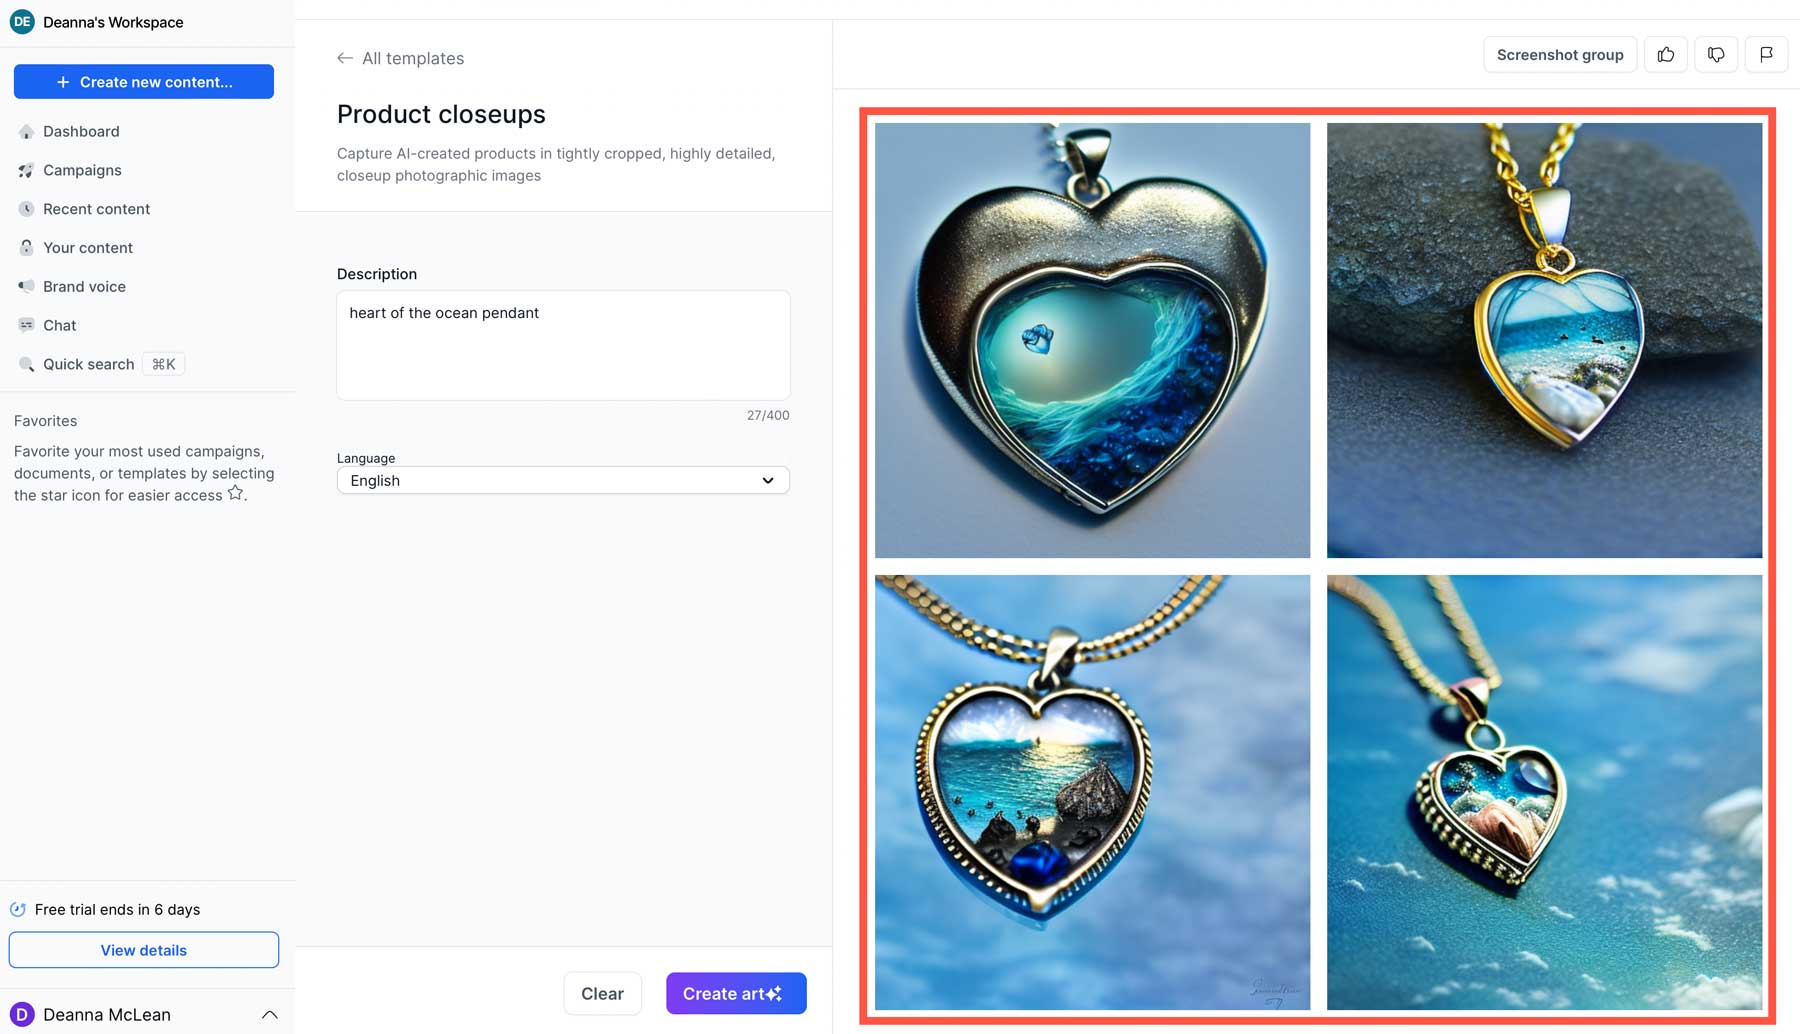
For the prompt, use heart of the ocean pendant. As you can see, Jasper took our simple text prompt and transformed it into 4 images depicting our prompt.
Saving Jasper Images
Once your images are created, you can do a few things, including saving your vision to a campaign, sharing it to Twitter, Facebook, or Reddit, renaming it, or downloading it.
If you choose to download your images, you can choose from three different resolutions:
-
- 512×512 (1x)
- 1024×1024 (2x)
- 2048×2048 (4x)
Currently, Jasper only provides square images for download, but later in this post, we’ll offer a solution to alter the sizes.
Make AI Art with Midjourney
Midjourney has grown to be one of the most popular AI art generators available today. We don’t fully understand how Midjoureny works, primarily because it’s a closed-source software. However, we do know that it uses two machine-learning technologies: large language and diffusion models. The LLM gives Midjoureny insight into what you’re trying to create. The diffusion model works by gradually adding noise through its dataset of images. From there, it generates an image by reversing the noise to reveal a brand-new image based on your text prompt.
The Midjourney Interface
Unlike other AI art generators with proprietary interfaces, Midjourney uses a Discord server as its home base. While this may sound a bit cumbersome, it’s pretty intuitive when you get the hang of it. This tutorial assumes that you know how to sign up and get started. If not, check out our post on how to create art with Midjourney to get you up to speed.
However, we’ll give you a brief overview of the interface:
- Discord channels: The channels you’ve joined will show up here.
- Midjourney Bot: Select the Midjourney icon to enter the channel.
- Image feed: Any images you create will appear here.
- Text prompt: To create a text prompt, type /imagine. To upload a source image, click the + icon.
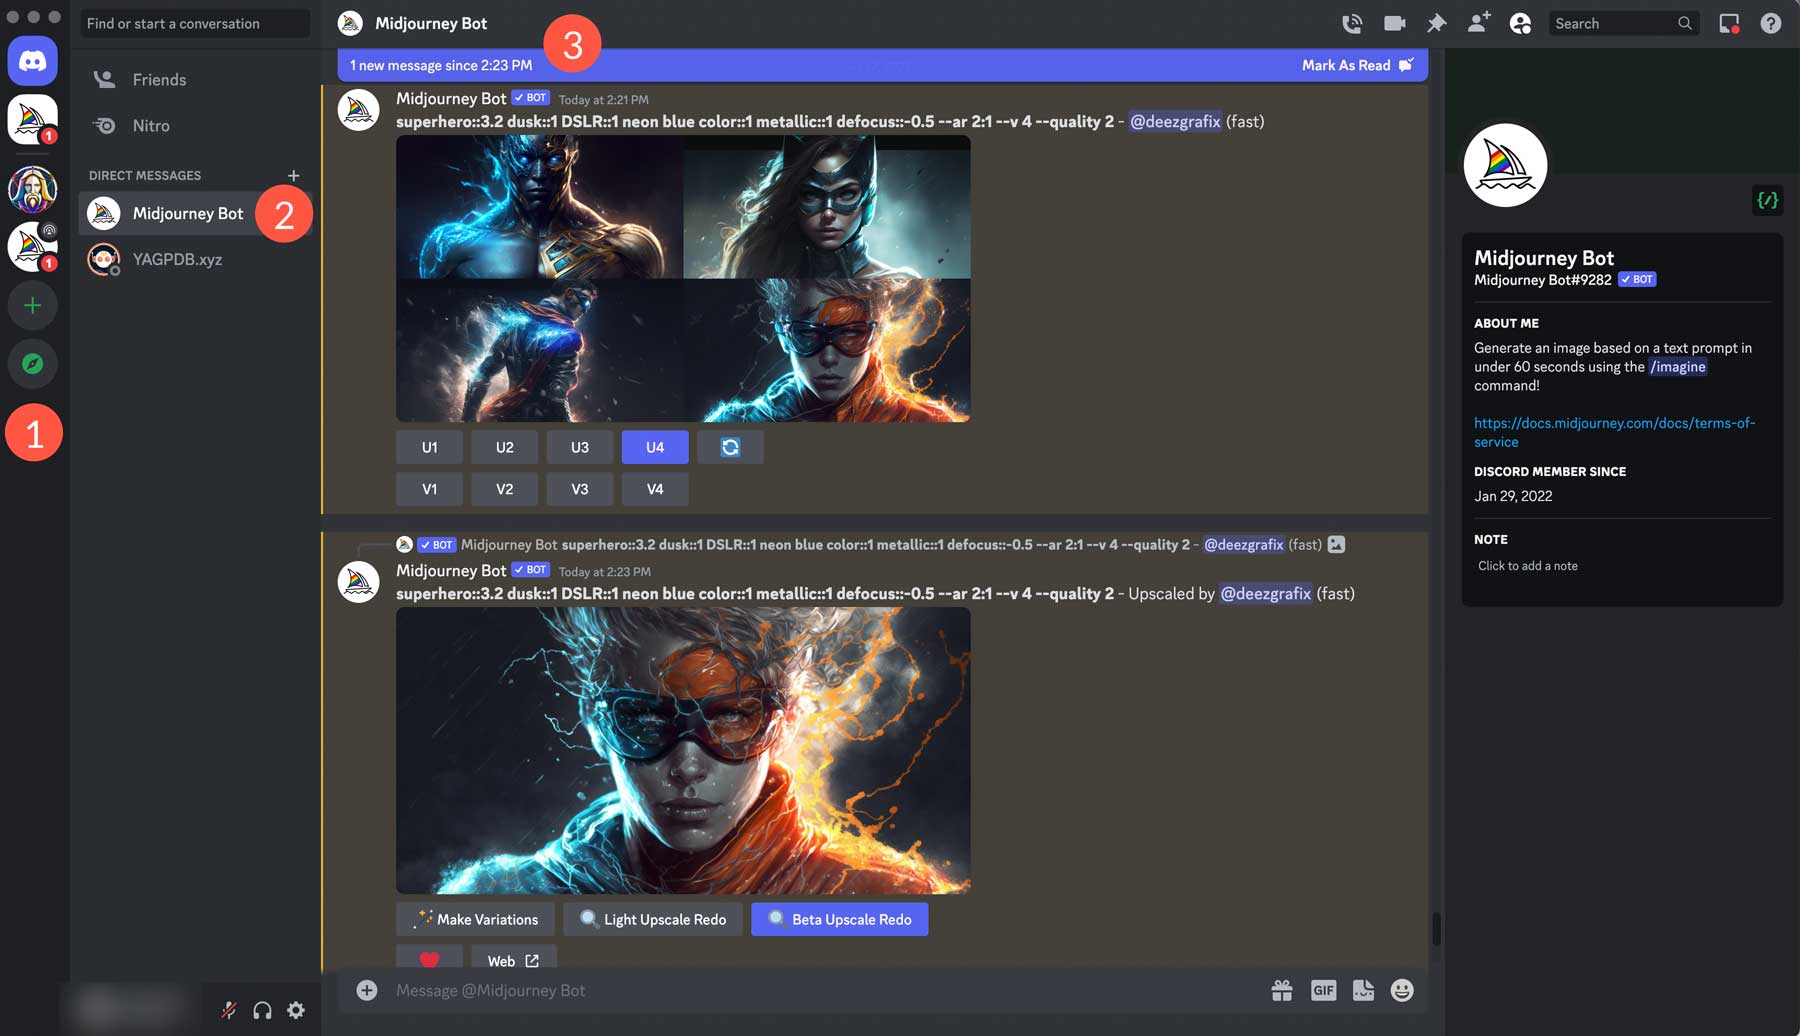
After typing /imagine, click enter on your keyboard. That will bring up the prompt textbox, so you can begin typing in your text.
Creating Your First AI Art Piece in Midjourney
Let’s create a new image. Type /imagine, then press enter. The prompt box will look like this:

Next, we’ll click into the textbox directly after the word prompt. We’ll use the same prompt from our Jasper artwork: superhero on a busy, wet New York street after dark. Now your text box should appear like this:

Click enter on your keyboard to start the image creation process. In under a minute, Midjourney will produce 4 images measuring 1024×1024 each. You’ll notice a series of buttons underneath the images: U1-U4 (1) and V1-V4 (2). These are used to upscale or create variations in the images.
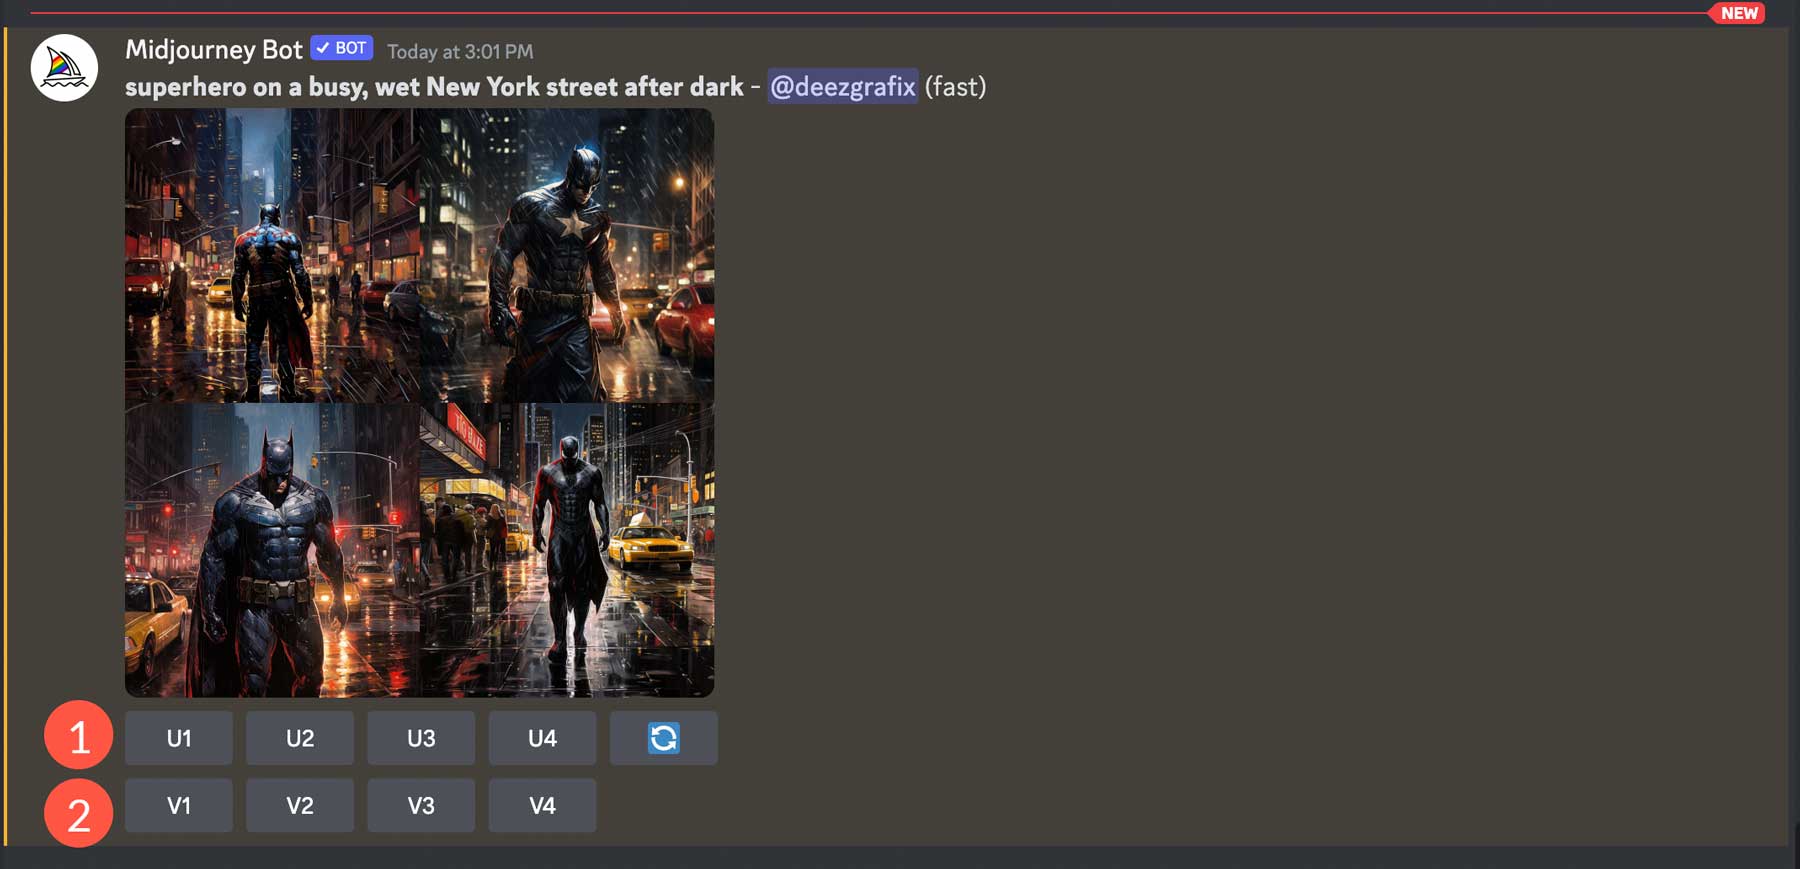
The ordering for the images is as follows: top left (1), top right (2), bottom left (3), and bottom right (4).
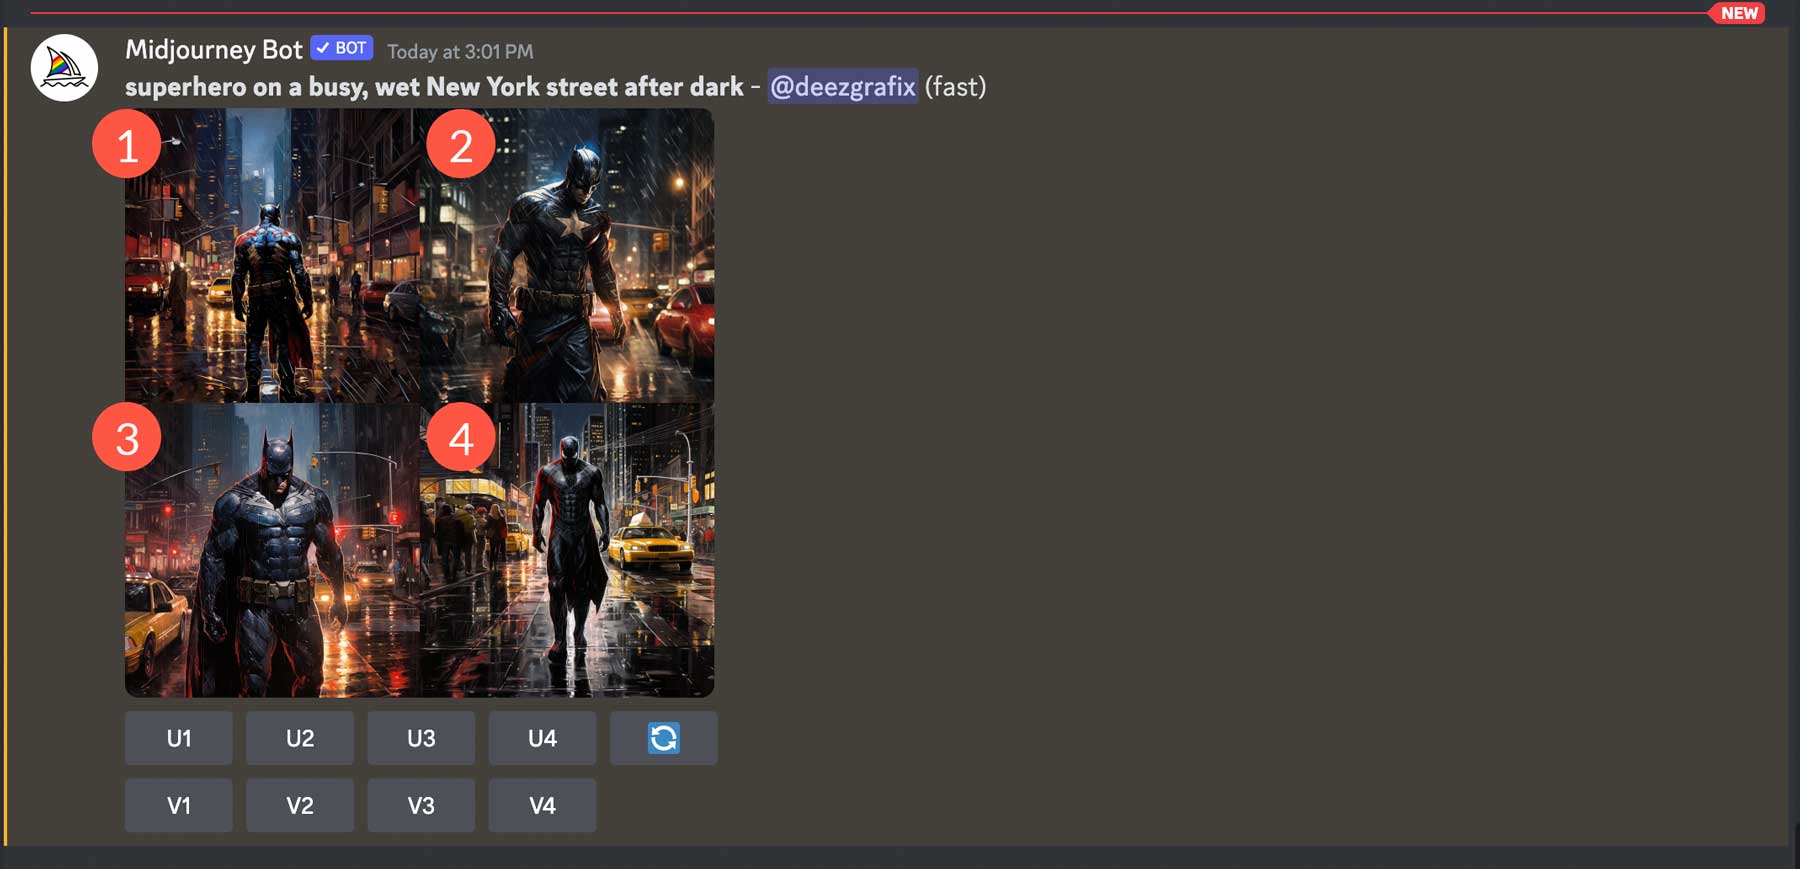
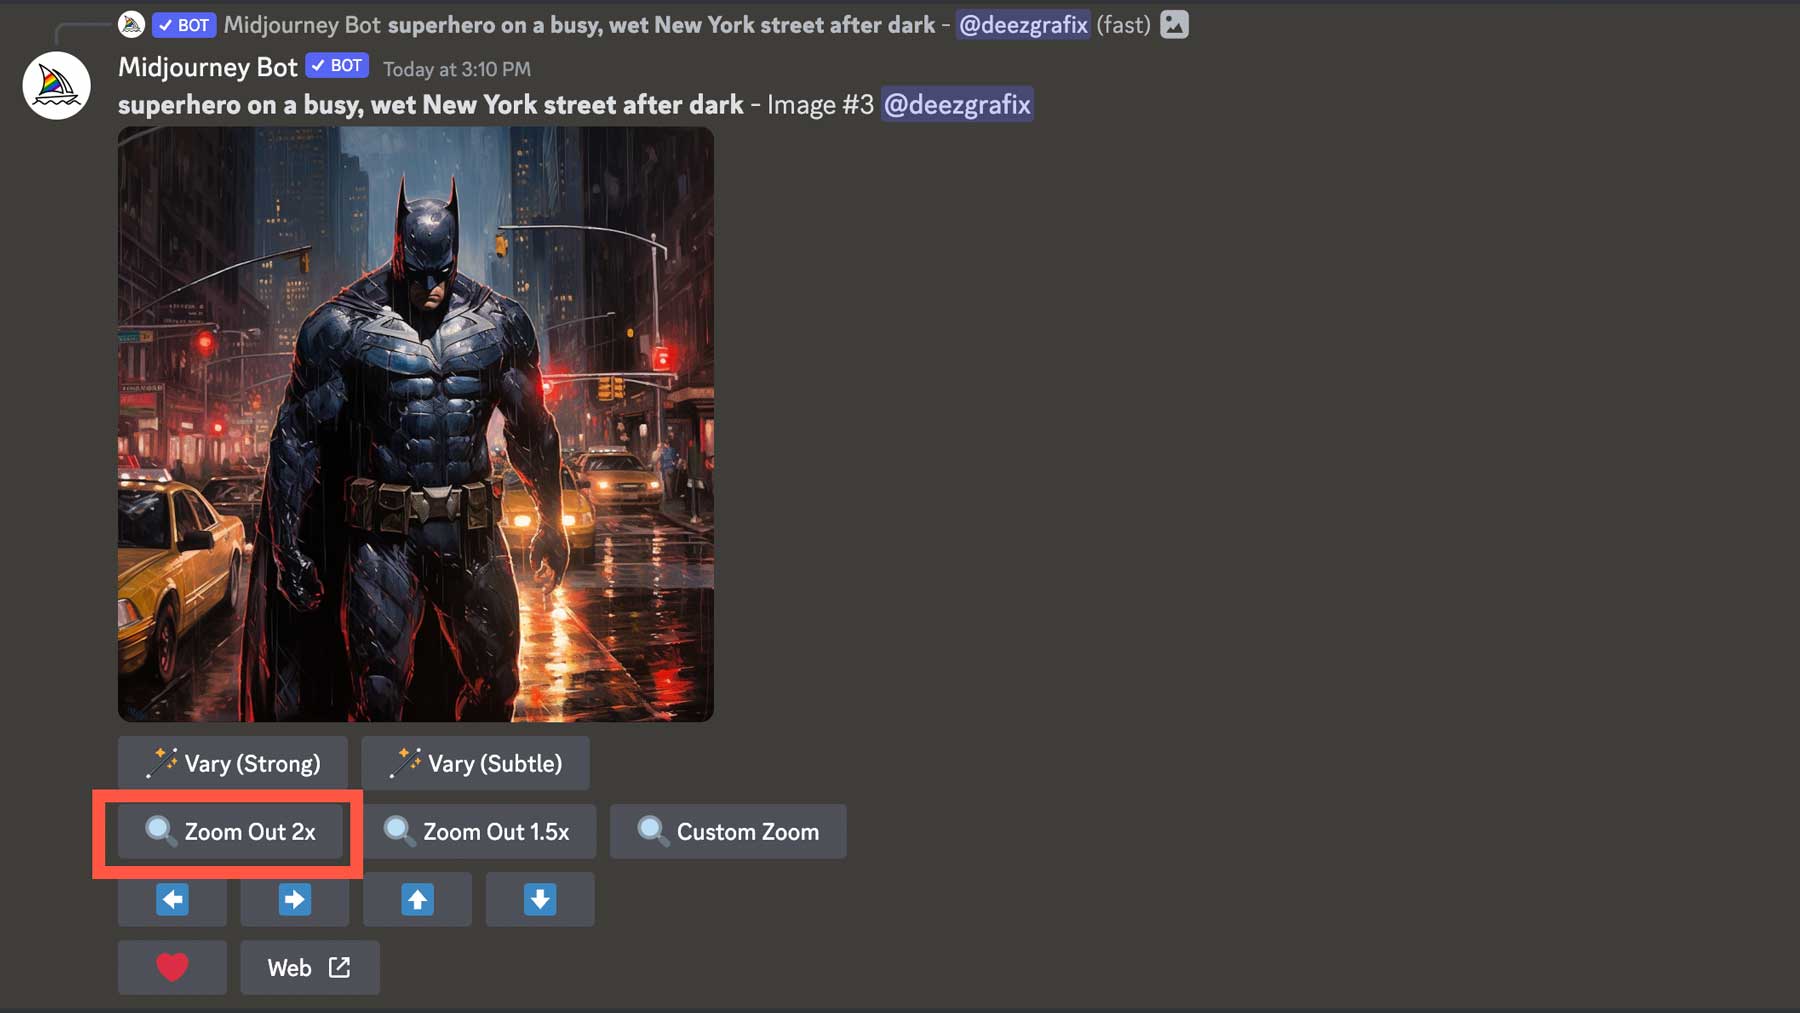
While these images look incredible initially, let’s tweak them a bit. First, click the U3 button to upscale the 3rd image. MJ will start improving the appearance by adding fine details to it. When the process is finished, click the Zoom Out 2x button. This will zoom the image out two times the original and provide four more variations.
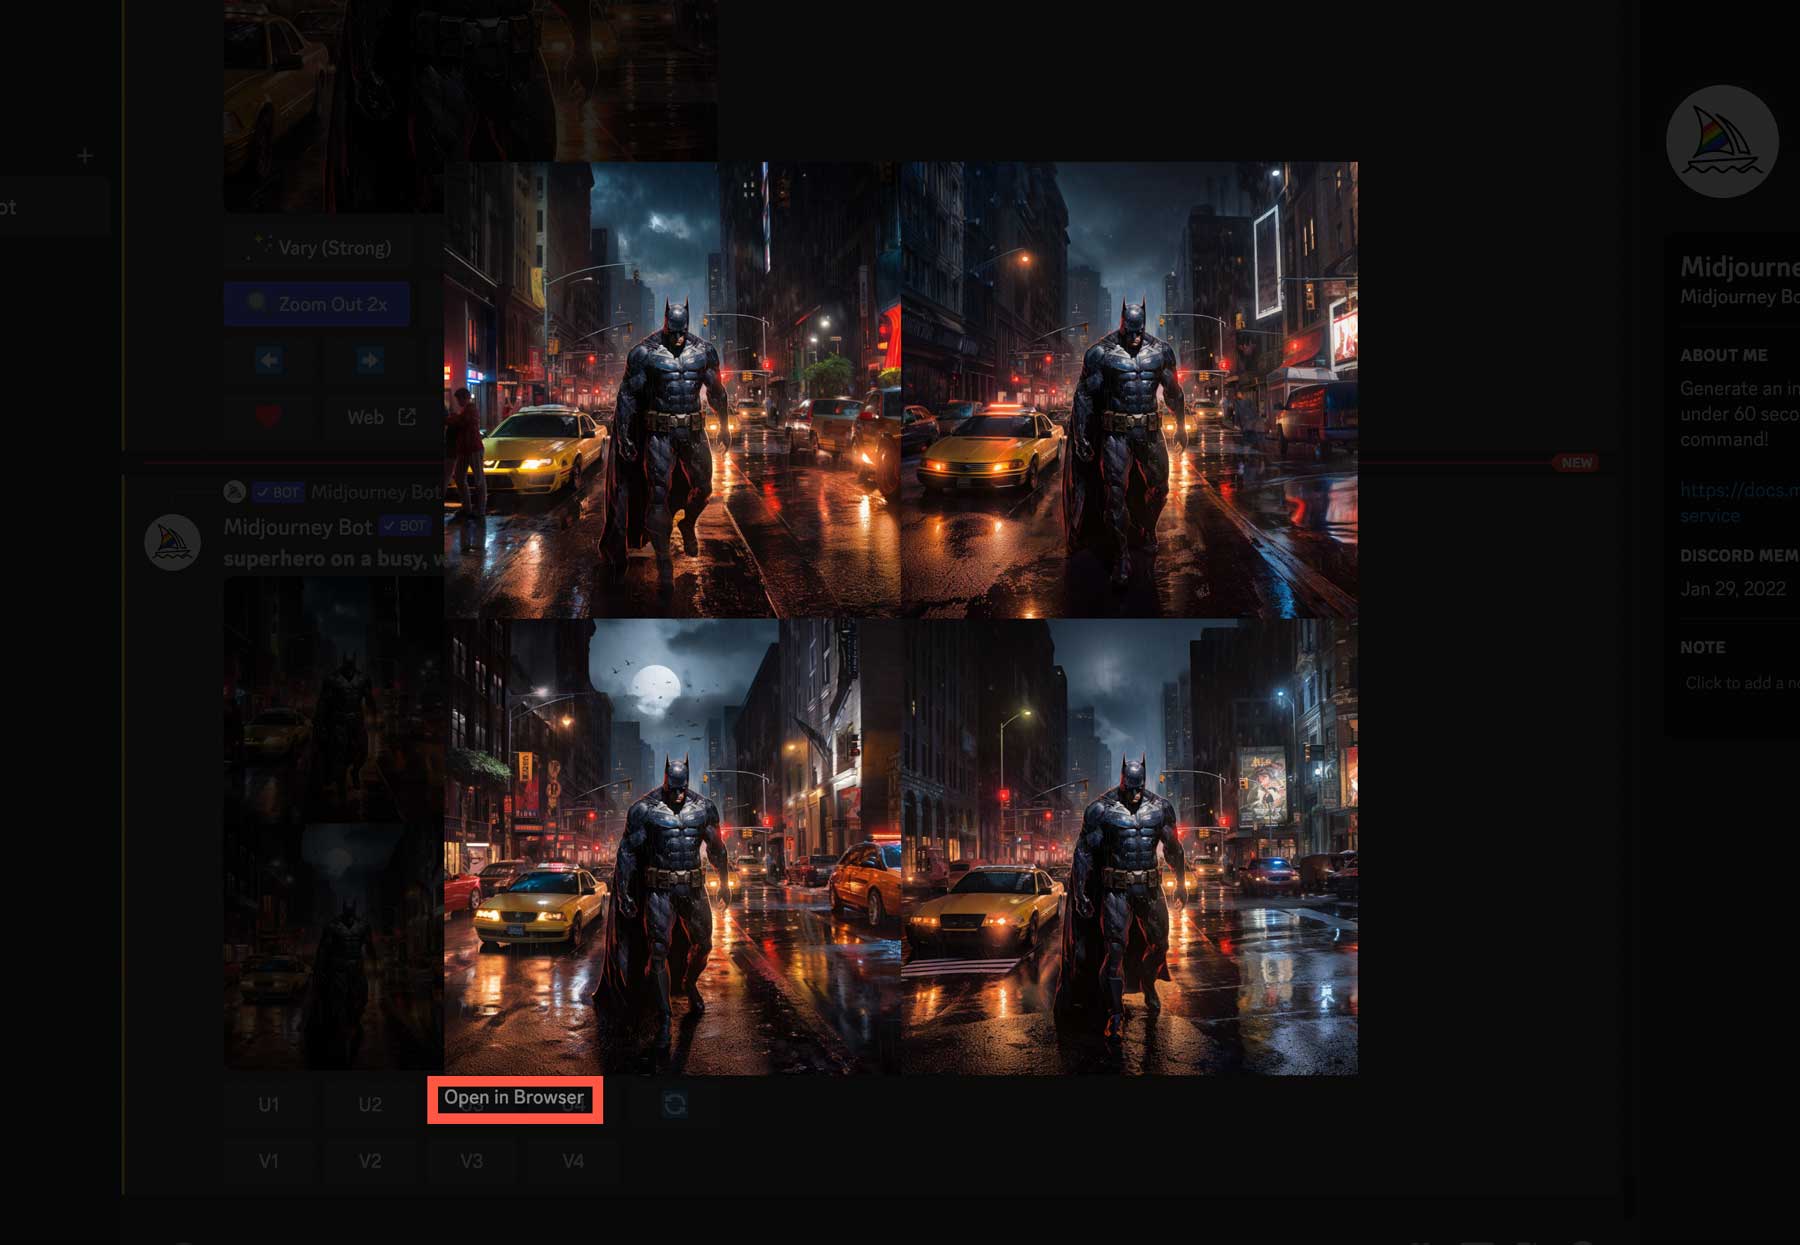
As you can see, while similar to the original, the new images have more details surrounding the superhero. You can click on the images to bring up a closer look, then click the Open in Browser link to view them at full resolution. You can right-click to download them from there or head back to Midjourney to upscale your favorite.
Using Advanced Parameters
Now that you understand the interface and are comfortable making AI art with Midjourney, let’s explore some advanced parameters you can use to enhance your images further. There are a ton of parameters available with Midjourney, so we won’t cover them all here. However, we will show you a few that will definitely up your game.
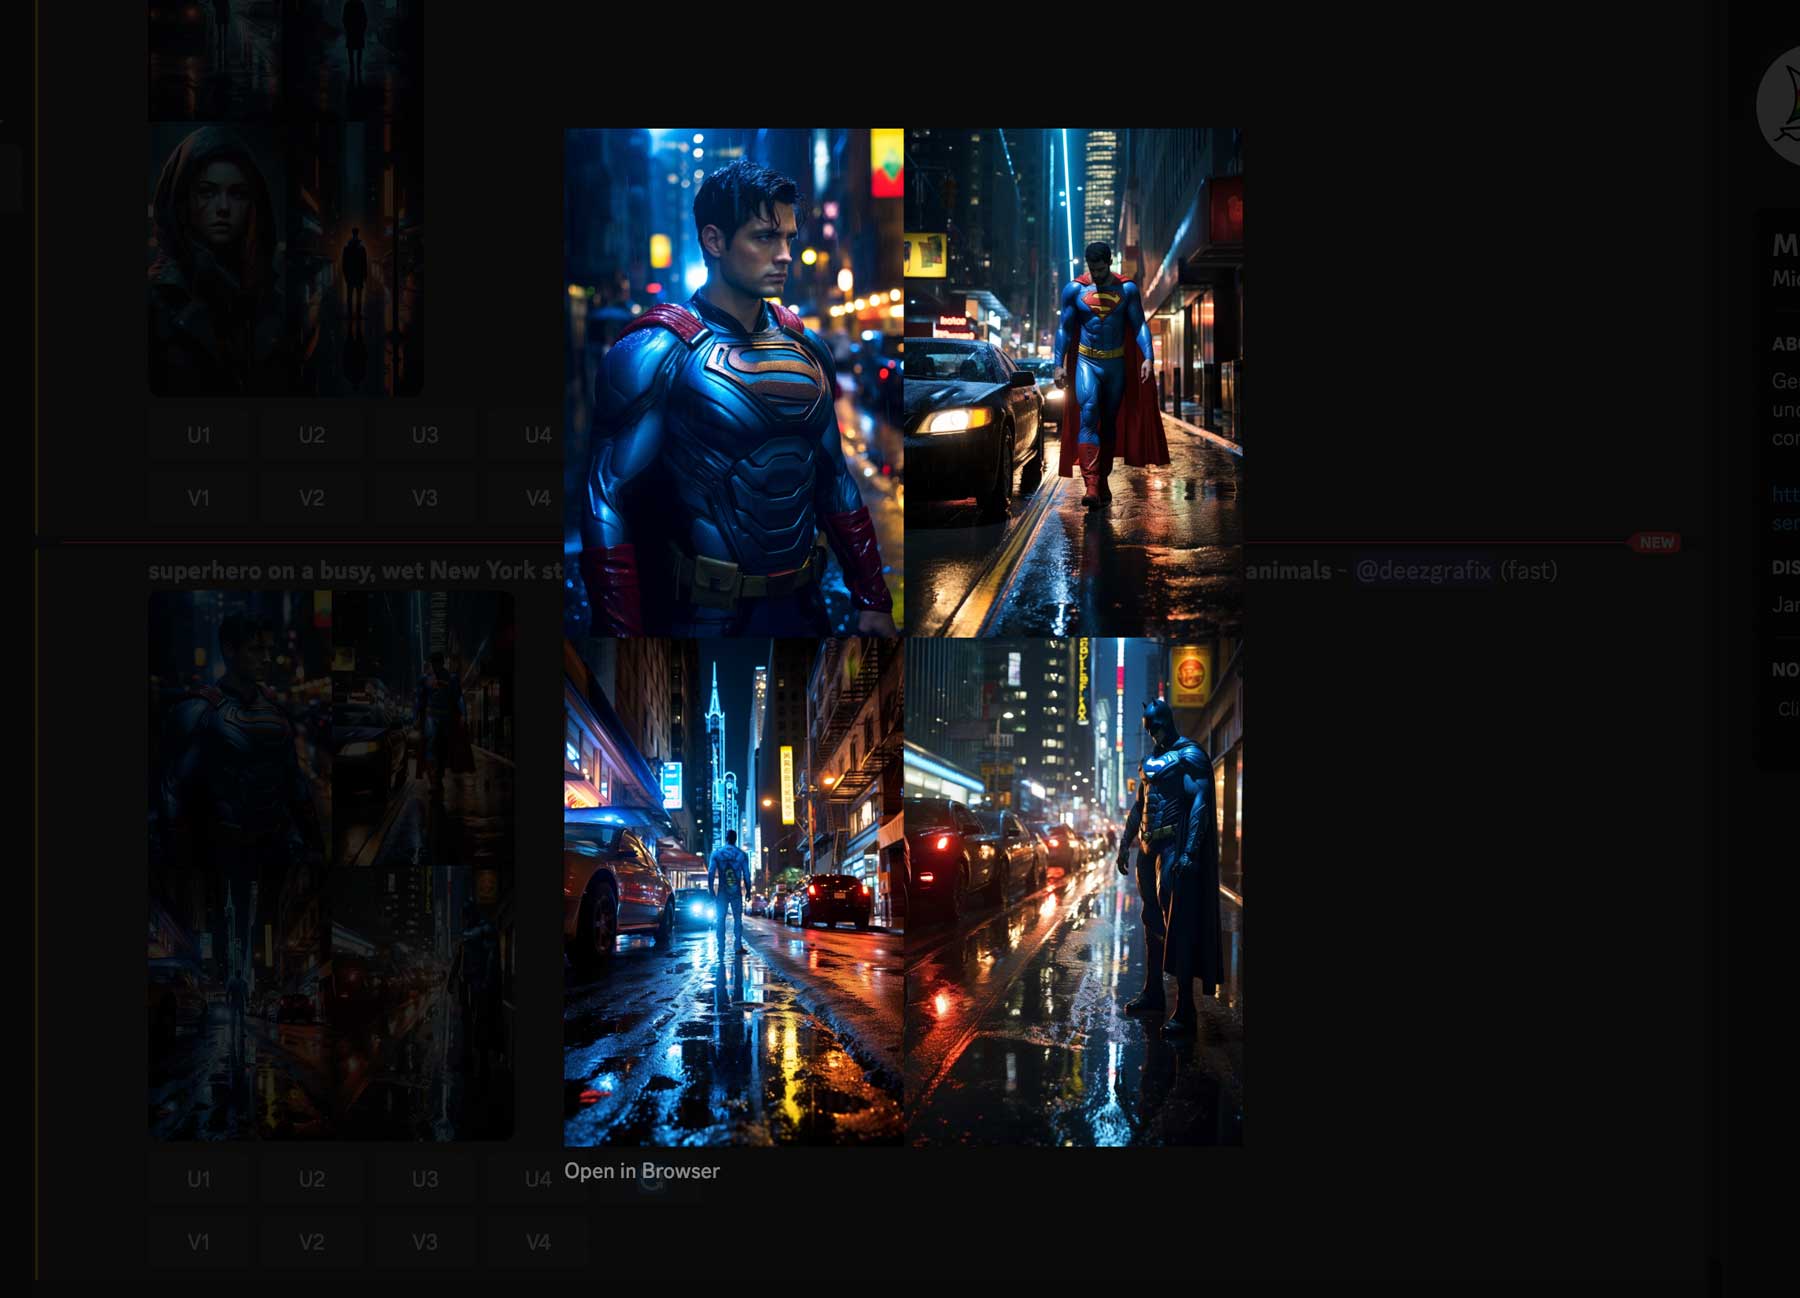
Let’s try our original prompt, but add some details: superhero on a busy, wet New York street after dark, DSLR, blue –ar 2:3 –no people, deformities, animals. We’ve added some descriptors separated with commas, changed the aspect ratio, and a negative prompt to omit any people, deformities, or animals in the photo. Additionally, we’ve told MJ to give our images an aspect ratio of 2:3. Without the –ar command, Midjourney will generate images in a 1:1 ratio. With the latest version of MJ, you can use any aspect ratio you want, which is great when creating images for projects where a square won’t cut it. Alternatively, you can use the zoom and pan feature to achieve similar results.
Here are the images:
Now let’s try the remix feature. Remix allows you to keep the original prompt but alter it by adding more details. This is a great tool for keeping an image you love but expanding on it with additional information. To activate remix mode, type in / to bring up Midjourney’s settings.
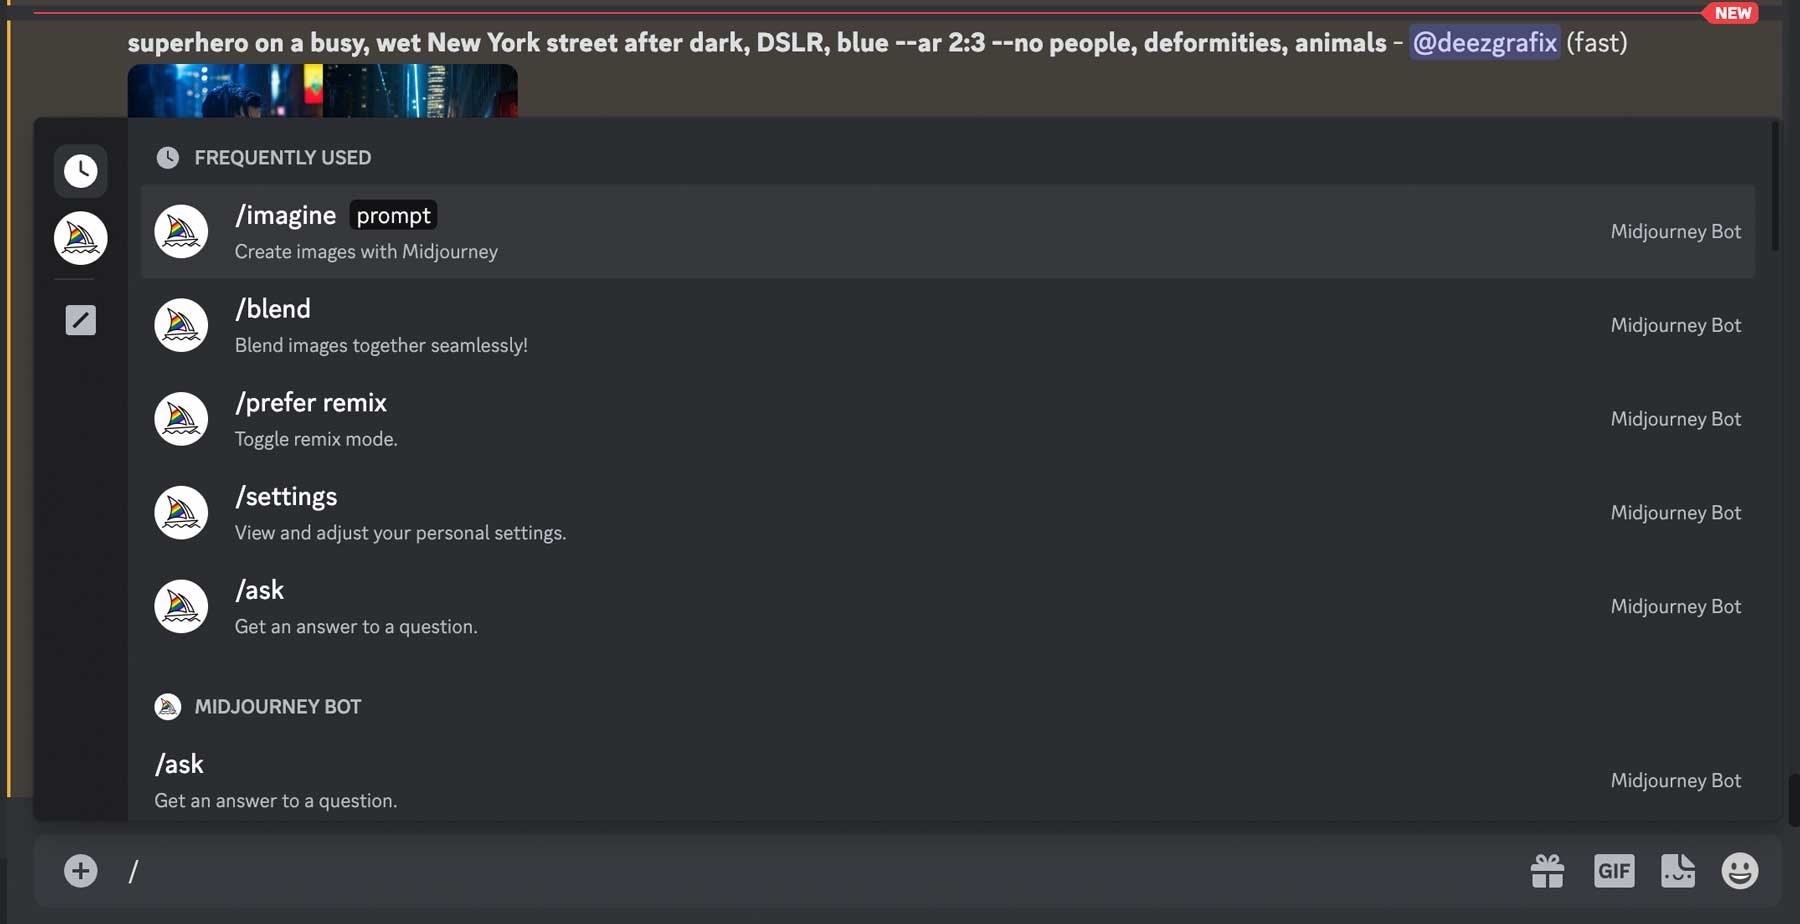
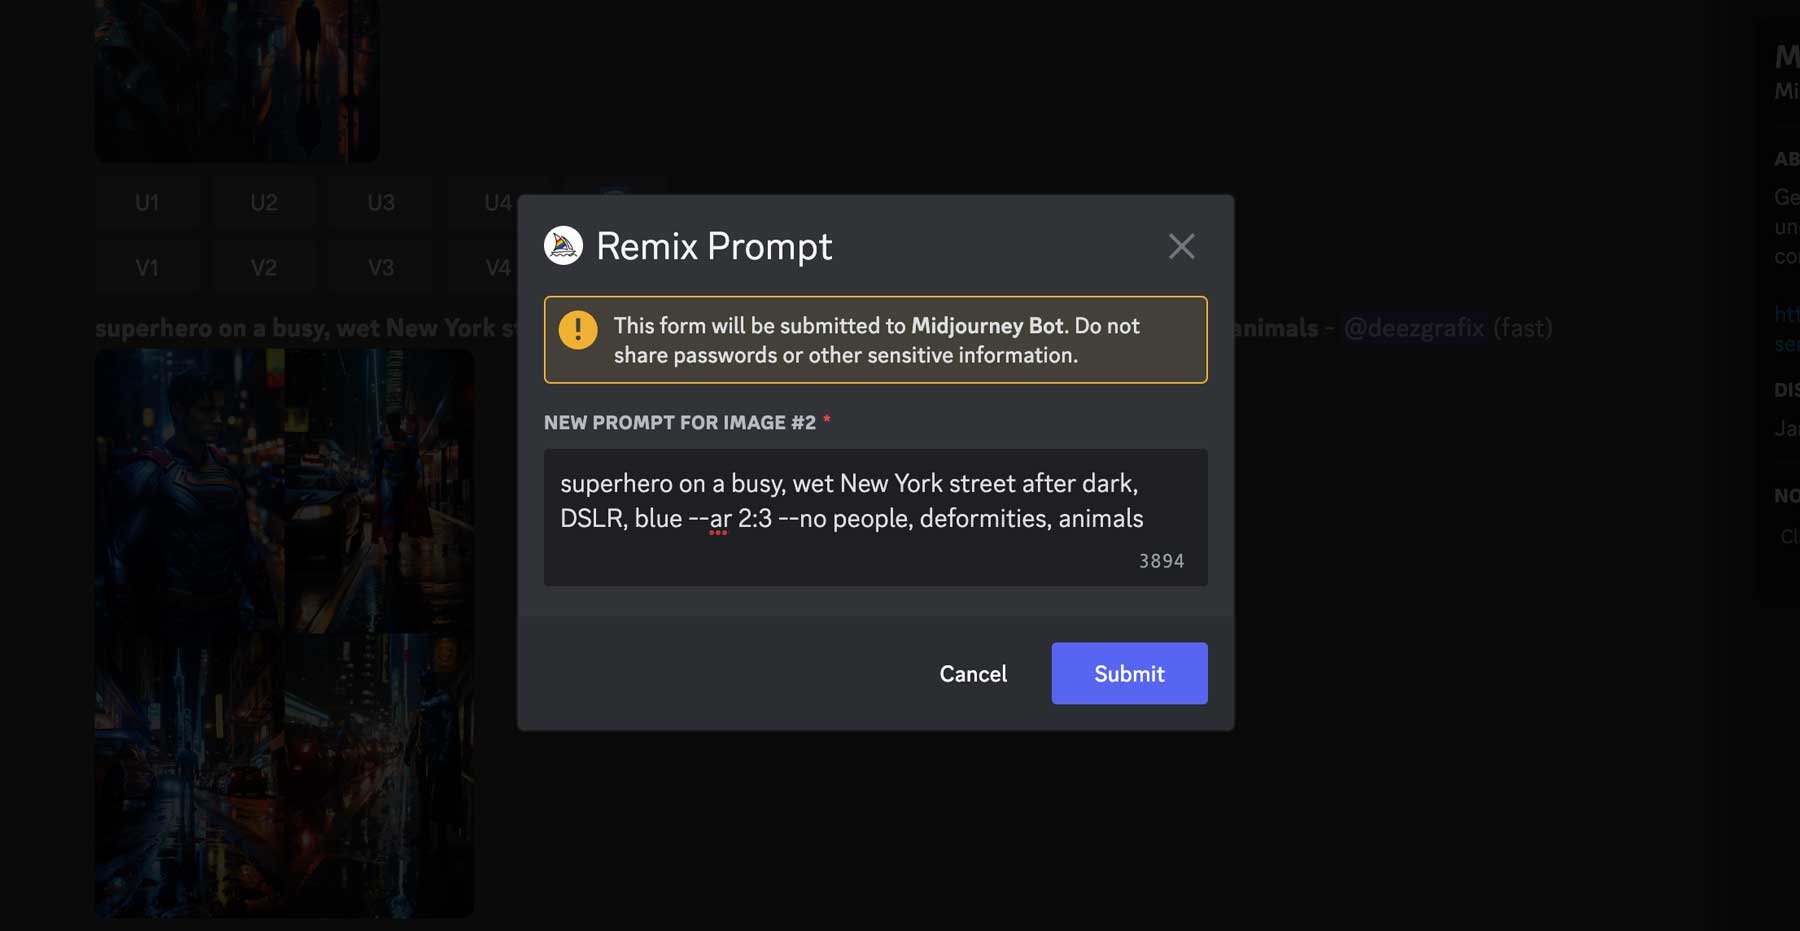
To activate remix, type /prefer remix, then hit enter. Now, when you click one of the variation buttons (V1-4), you can change your original prompt to create four new images.
Make AI Art with Leonardo AI
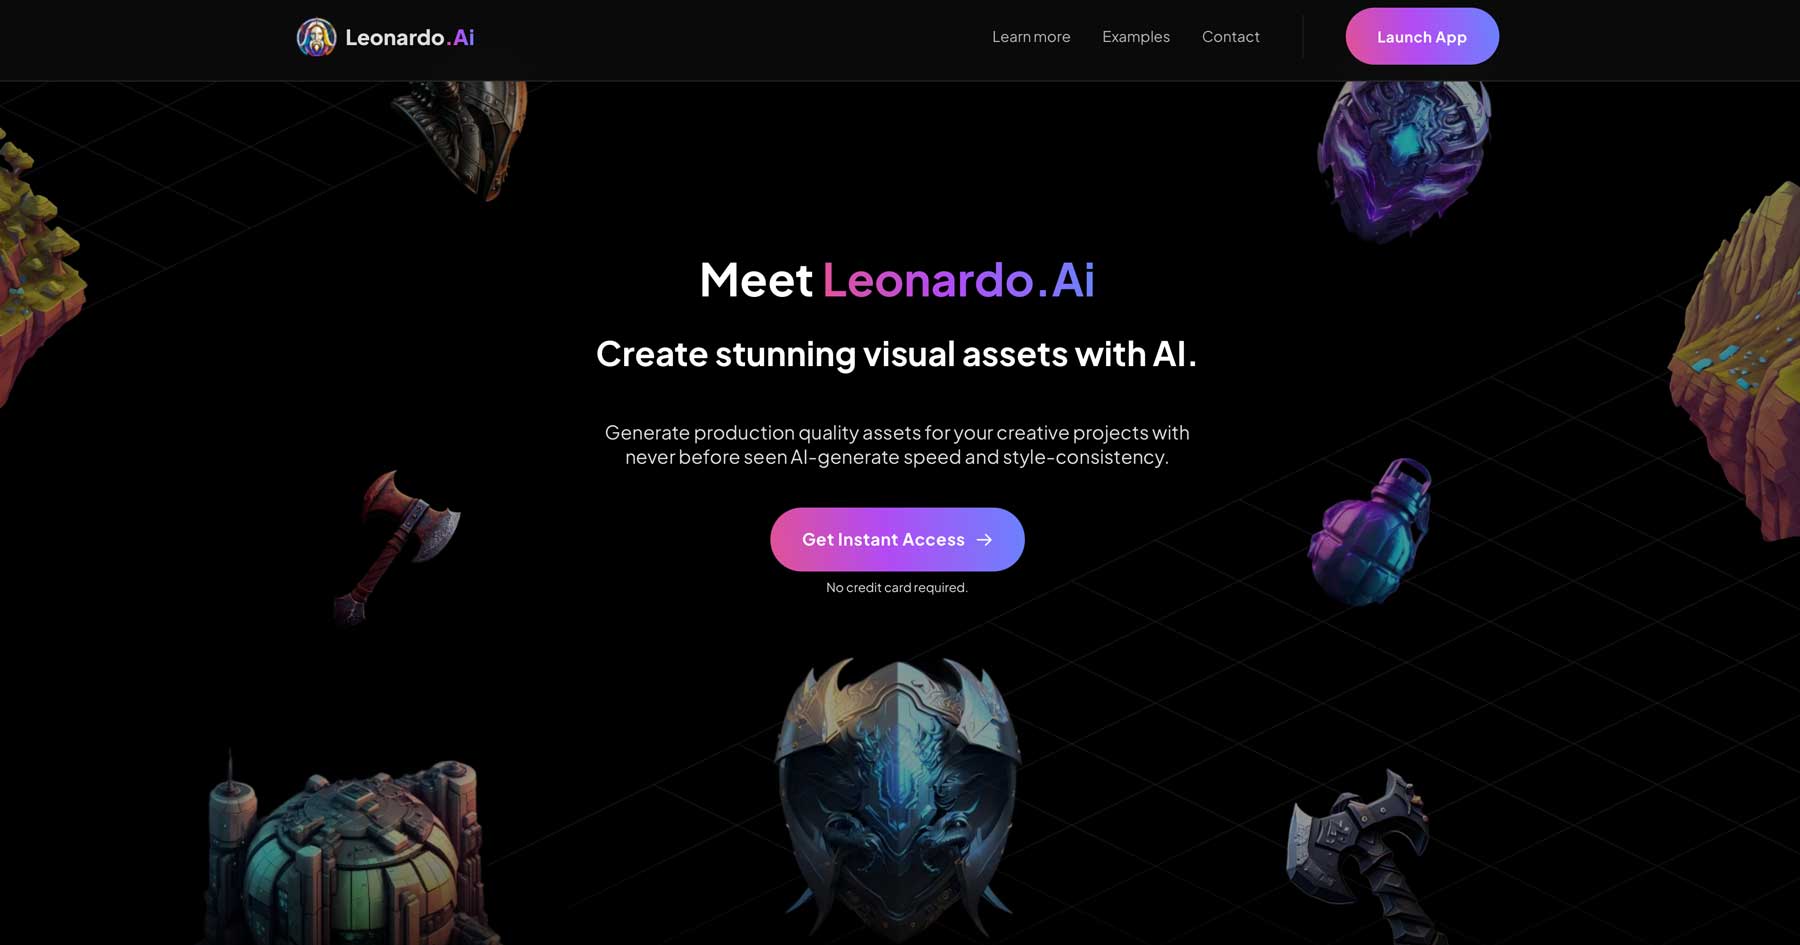
Our next AI art generator, Leonardo AI, is a relative newcomer but is making waves in the AI world thanks to its Stable Diffusion bones. It was originally designed as a tool for game developers to generate game development assets, but it has many more uses. It’s trained on an extensive selection of models, but it allows users to prepare their own AI models, making it a favorite amongst creators.
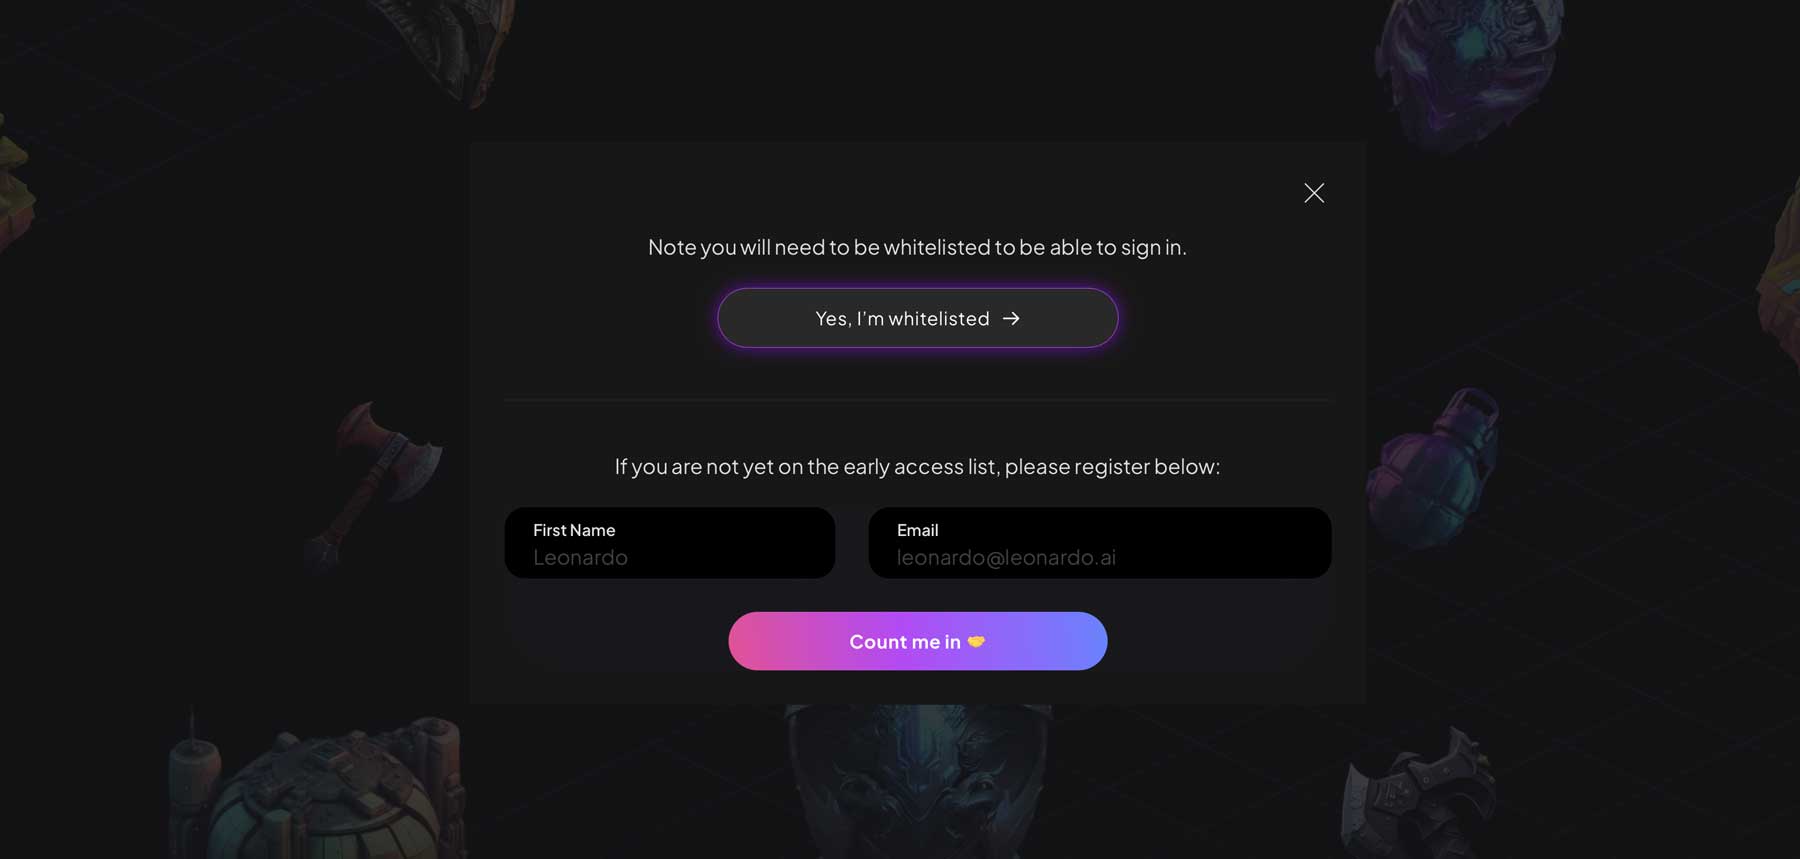
You’ll need to sign up for access to get started with Leonardo. The process is simple and only takes a few minutes to complete. Start by navigating to the Leonardo website, then click Get Instant Access.
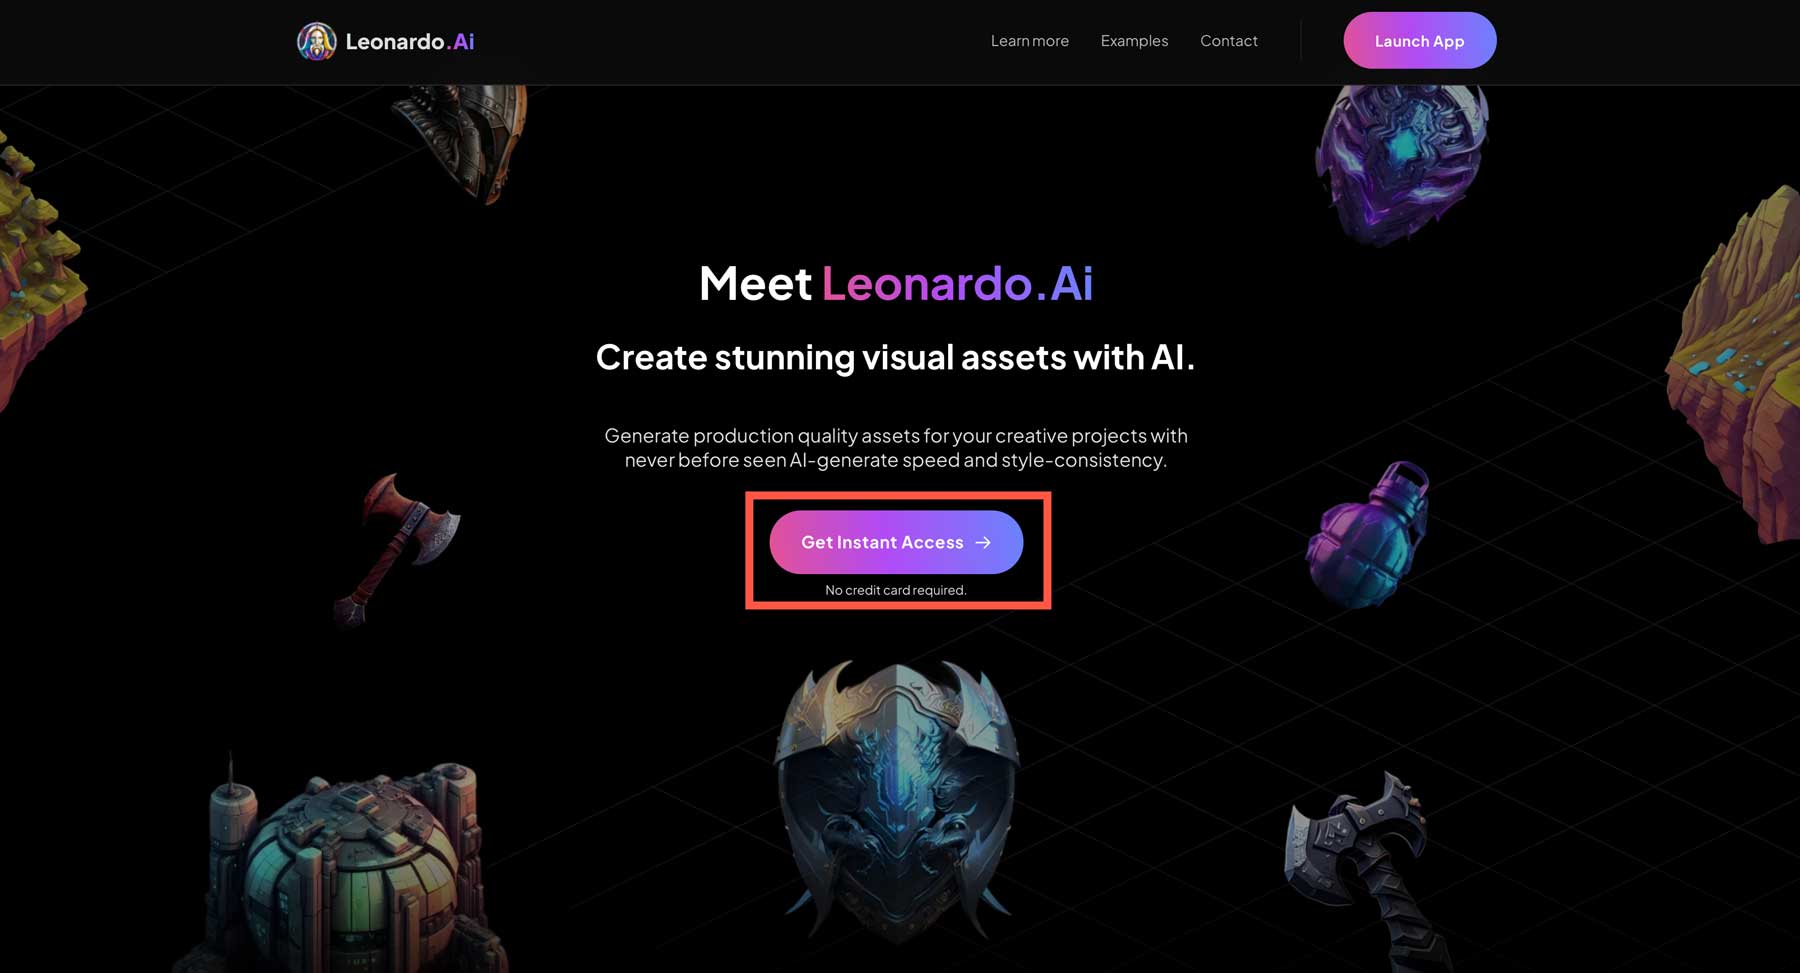
If you haven’t yet signed up for Leonardo, you must be whitelisted. If you have, click the Yes, I’m Whitelisted button to log in. Otherwise, enter your name and email address, then click the count me in button.
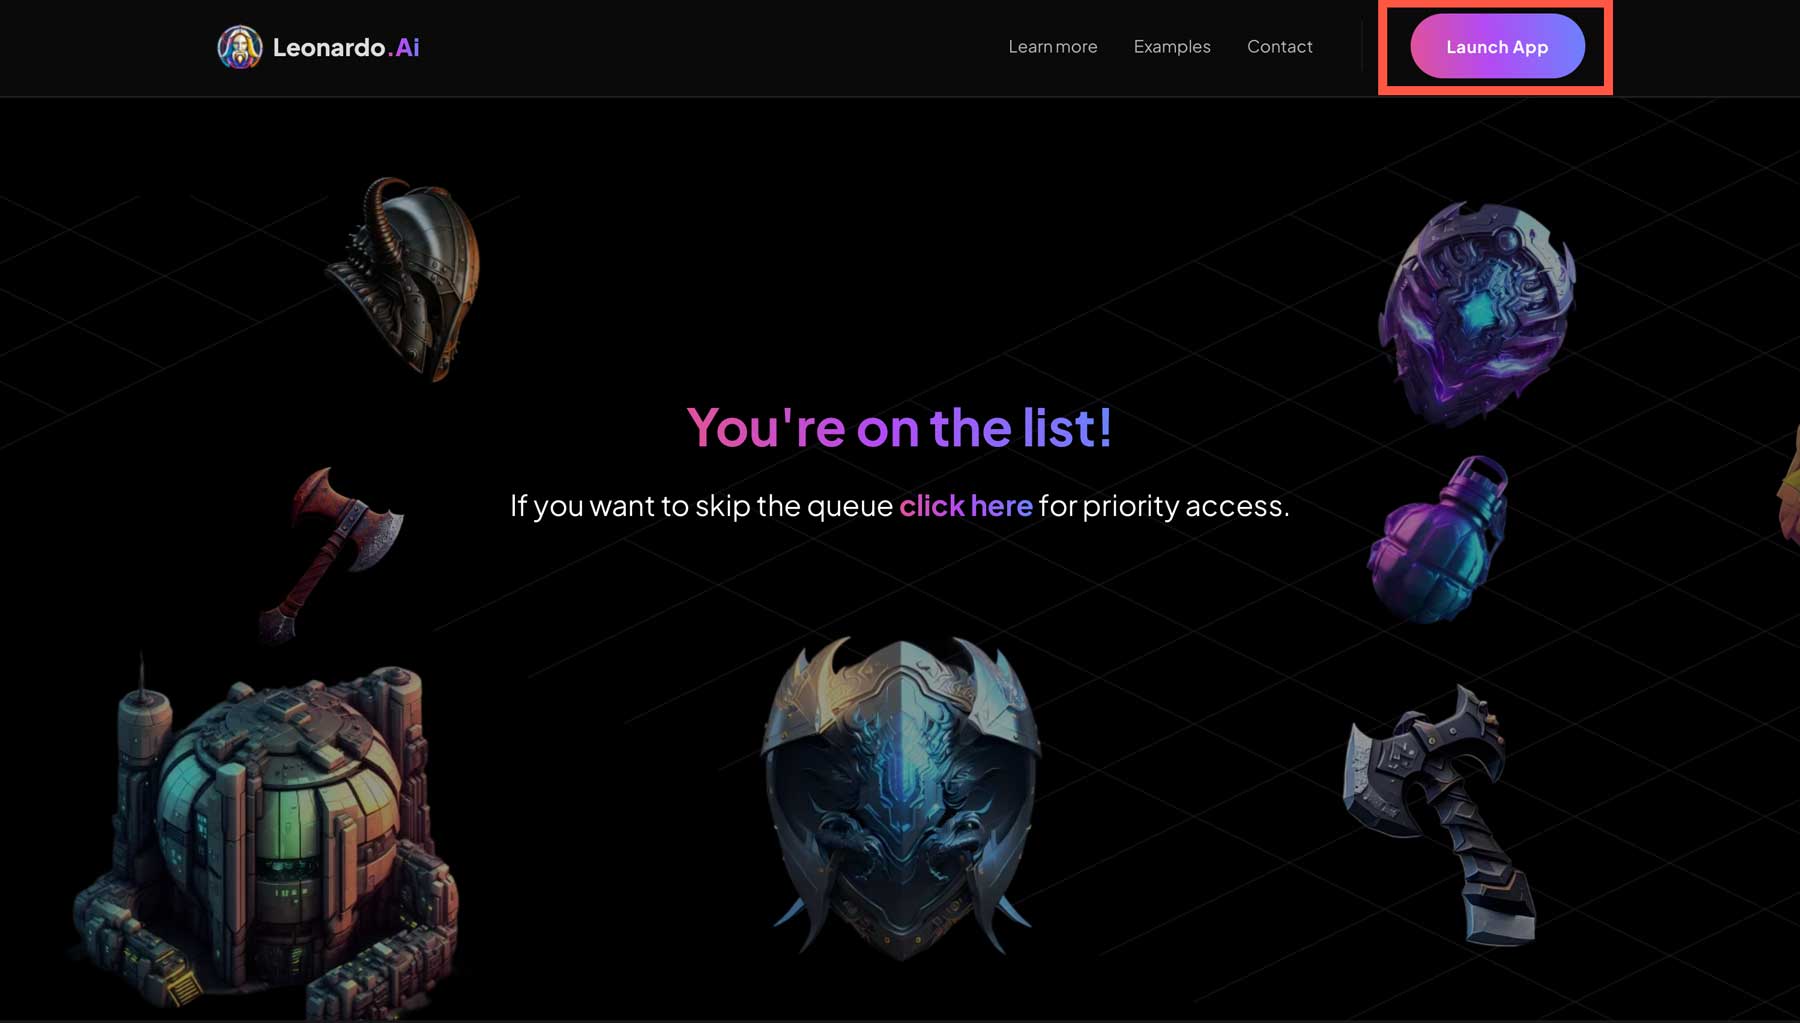
Next, click the Launch App button in the top right corner.
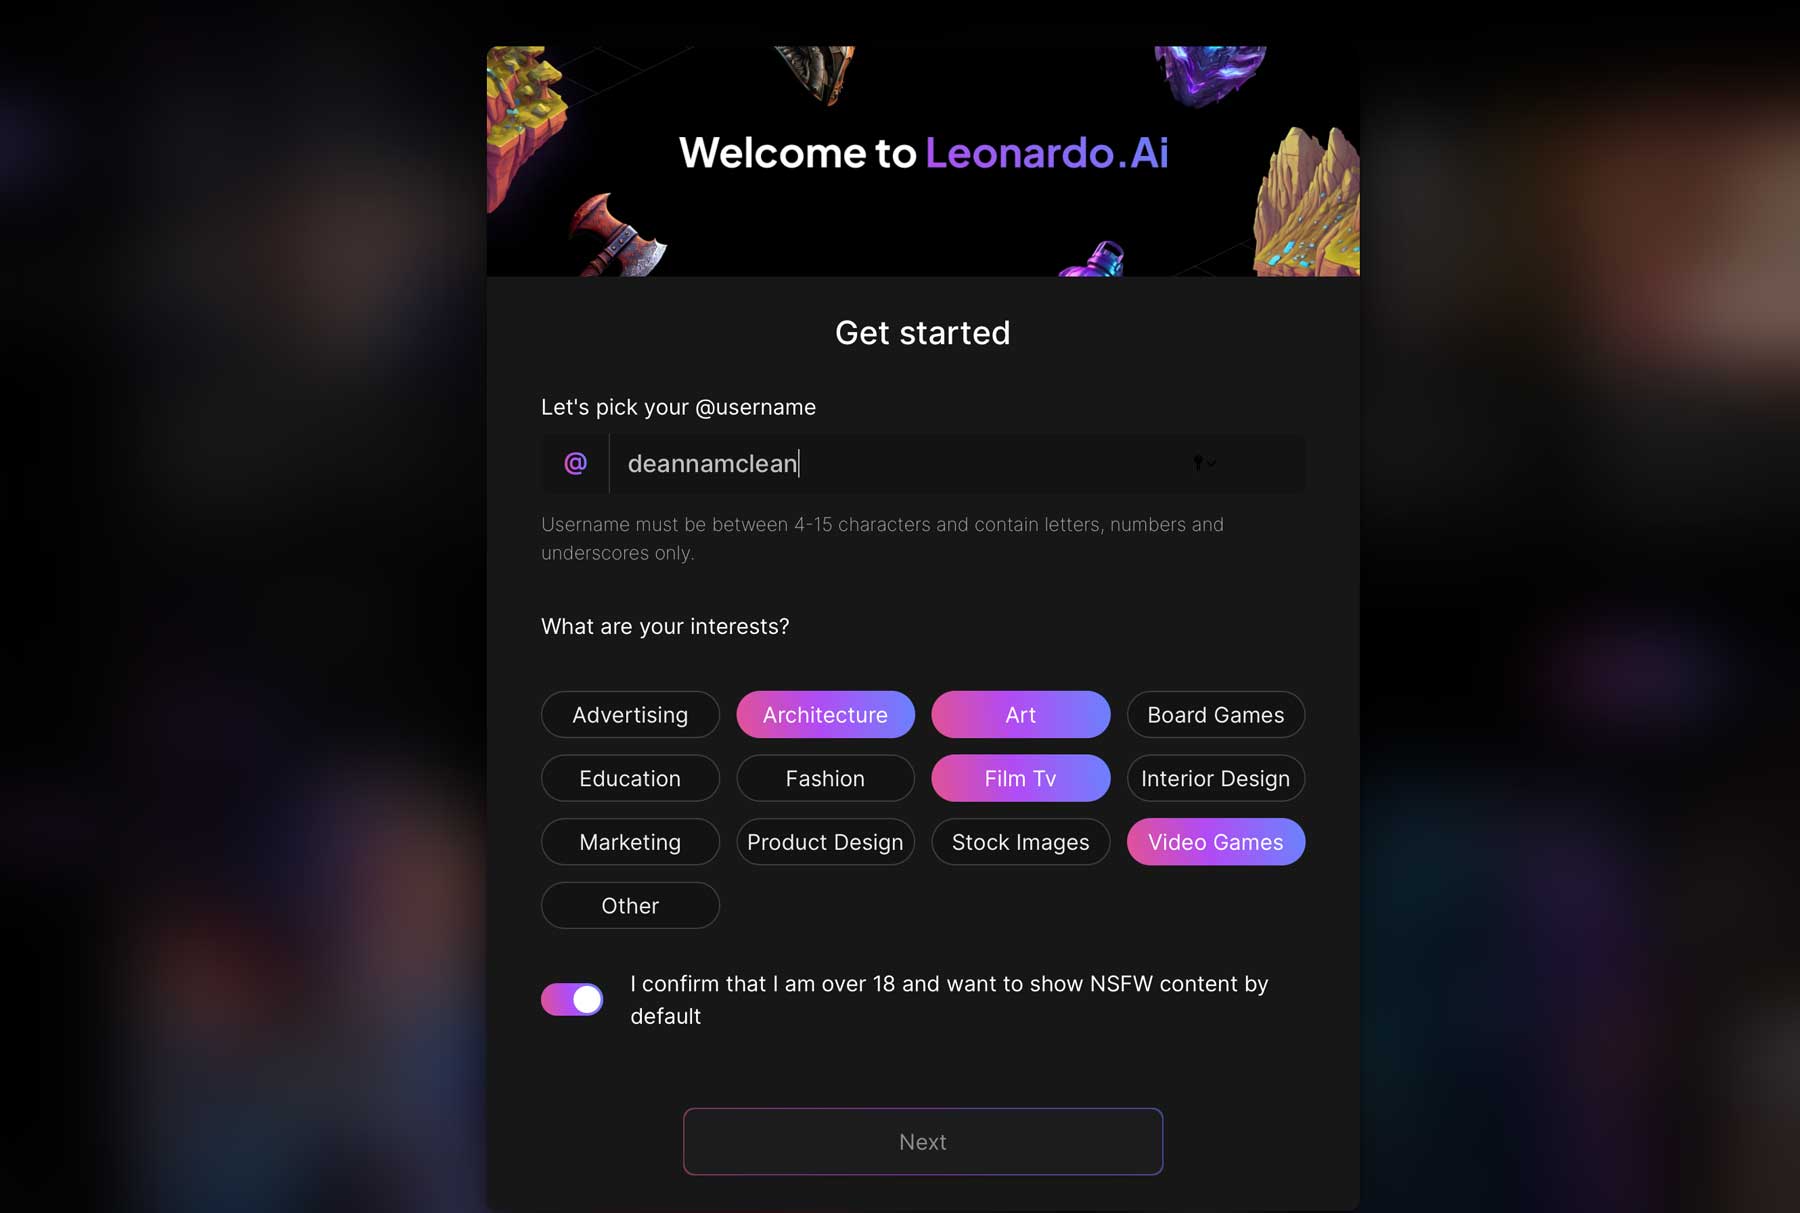
Next, you’ll pick a username, choose your interests, toggle the not safe for work (NSFW) on, and click the next button.
Understanding the Leonardo AI Interface
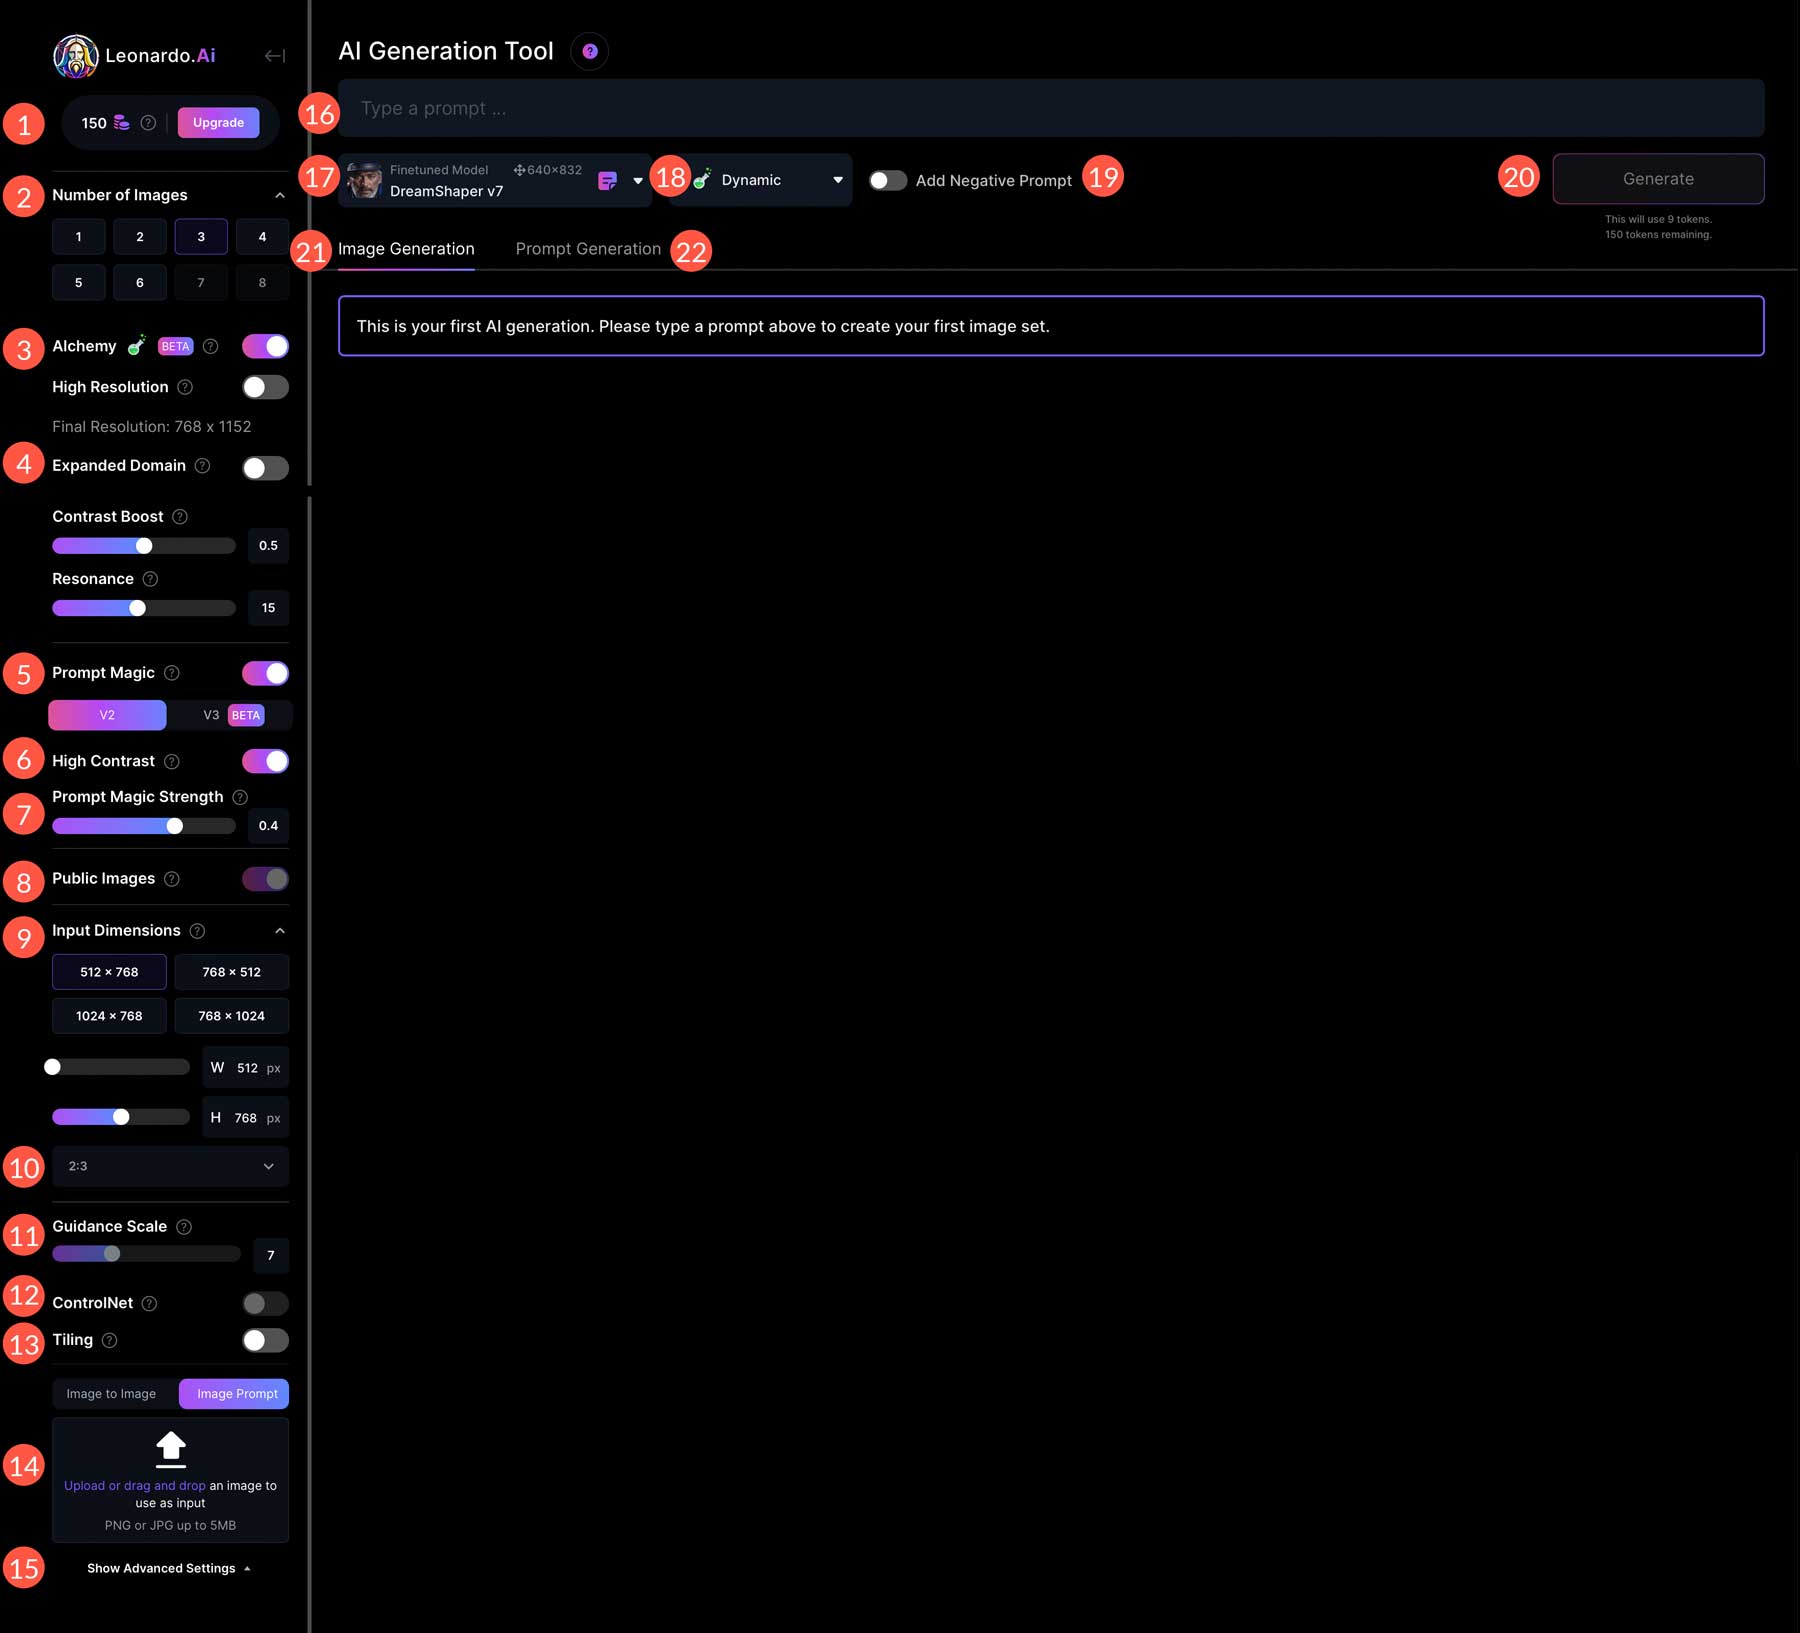
Leonardo offers one of the most slick interfaces of any AI art generator. All tools are accessible and easy to understand. Leonardo is free to use, with 150 credits available per day to create images. As a general rule, one credit = 1 image. So, if you generate four images, it will cost four credits. However, the amount of credit needed to create an image also depends on the image’s dimensions and the model used.
There are several ways to interact with the Leonardo community within the interface, along with three user tools: AI image generation, AI Canvas, and texture generation, with the last two still in testing. However, they are free to try out.
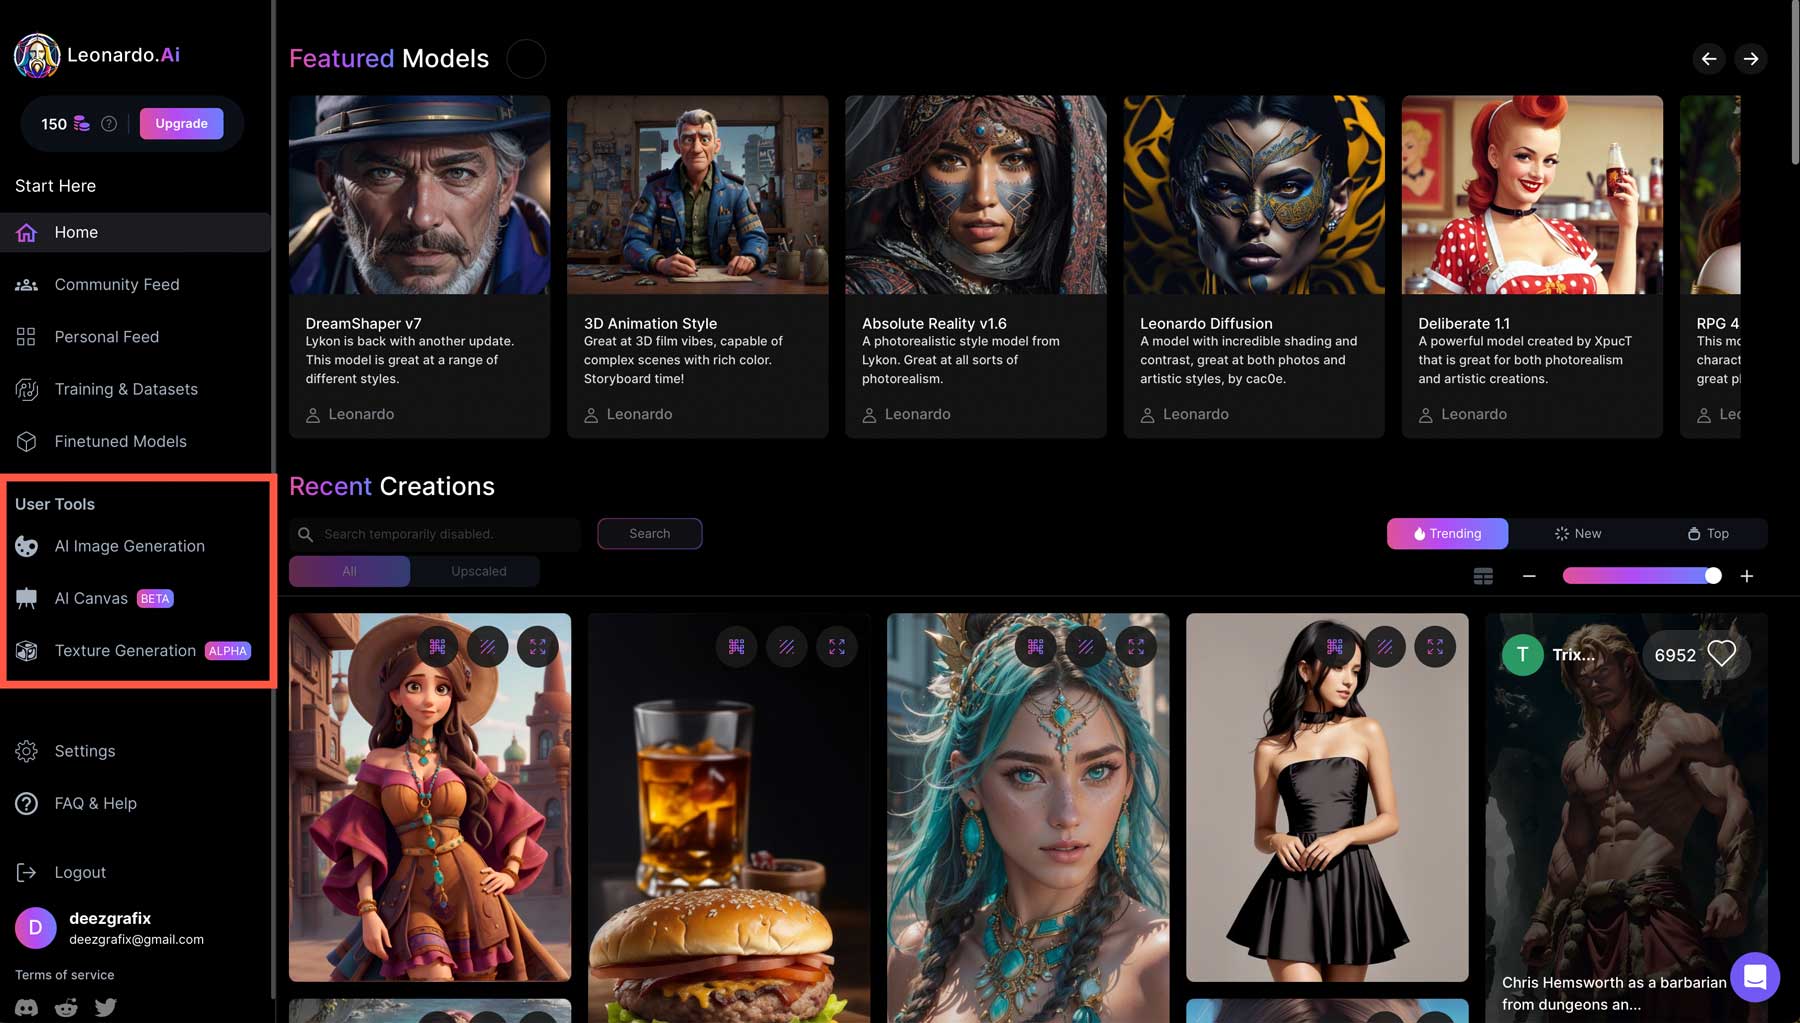
In this tutorial, we will concentrate on images, so start by clicking the AI image generation tab.
Leonardo Tools
There are plenty of settings to get familiar with within Leonardo:
- Credits: Depicts the number of credits remaining for image generation.
- Number of images: Select how many images to generate.
- Alchemy: This is the newest feature of Leonardo. When enabled, you’ll have the option for high-resolution (1.5 to 2x resolution increase), contrast boost, and resonance, which adds detail but can make images quite busy.
- Expanded Domain: When enabled, this tool expands the creative range of the image. When disabled, images are likely to be high quality with reduced prompt adherence.
- Prompt Magic: Available in V2 and V3 (beta), this tool adds prompt adherence and output but requires more credits to create images.
- High Contrast: Adds more contrast but tends to make for more moody images.
- Prompt Magic Strength: Toggle to adjust the strength of Prompt Magic.
- Public Images: Choose where to make images visible to the public. Disabling requires a paid plan.
- Input Dimensions: Choose from 512×768, 768×512,1024×758, or 768×1024.
- Aspect Ratio: 1:1, 2:3, 3:2, 3:4, 4:3, 16:9, and 9:16.
- Guidance Scale: How strongly to weigh the prompt.
- ControlNet: Influence your art with uploaded images (paid plan only).
- Tiling: Create tiled textures or backgrounds.
- Image Prompt: Use an image as input.
- Advanced Settings: Choose to use a fixed seed
- Text prompt: Input text here to generate an image.
- Model Switcher: Choose between DreamShaper v7, Absolute Reality v1.6 Leonardo Diffusion, RPG 4.0, or 3D animation style
- Dynamic Style Selector: Choose from anime, creative, dynamic, environment, general, illustration, photography, raytraced, 3D render, Sketch B/W, Sketch color, and none.
- Negative Prompt: Toggle on or off to omit keywords in image output
- Generate: Use to generate artwork after inserting text.
- Image Generation: Use to type in a prompt for image output.
- Prompt Generation: Reverse prompt for uploading images to turn them into descriptive text.
Creating Your First AI Art Piece in Leonardo
Let’s use the same superhero prompt we’ve used for the other two AI programs to see what Leonardo is made of. Enter superhero on a busy, wet New York street after dark, keep the settings at default, and click the Generate button.

Depending on the settings, Leonardo can take up to several minutes to generate results. That said, the results are amazing.
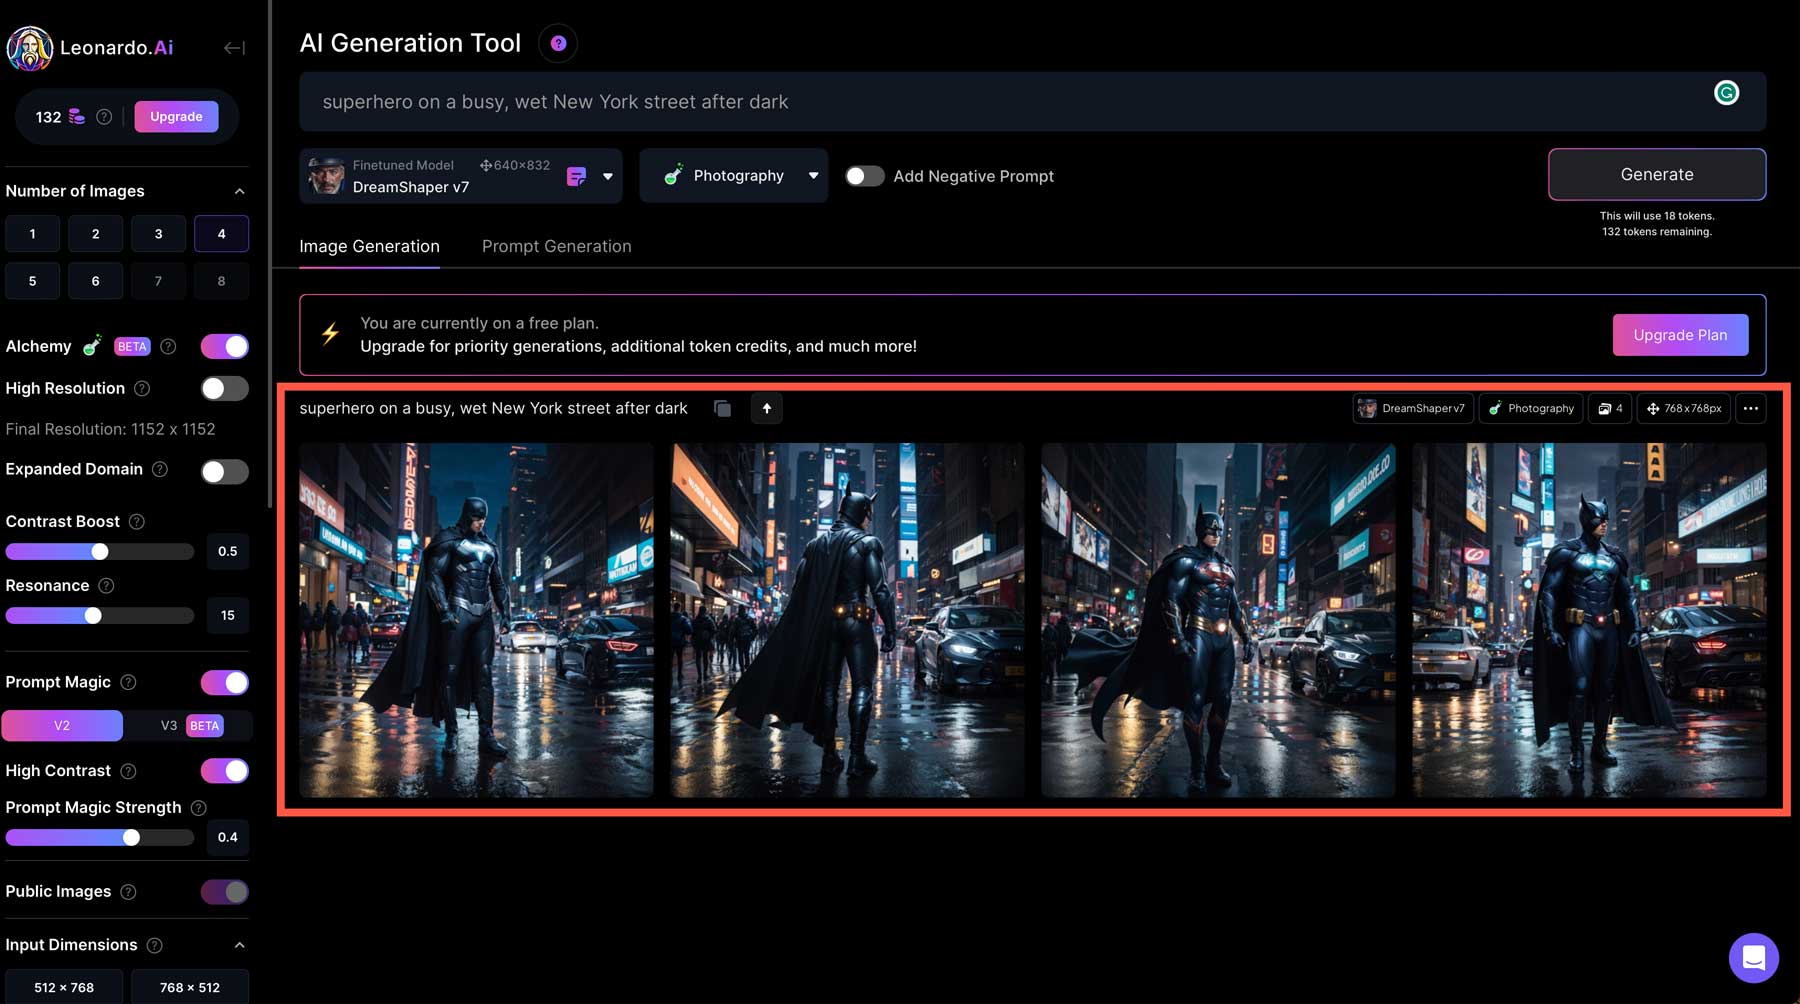
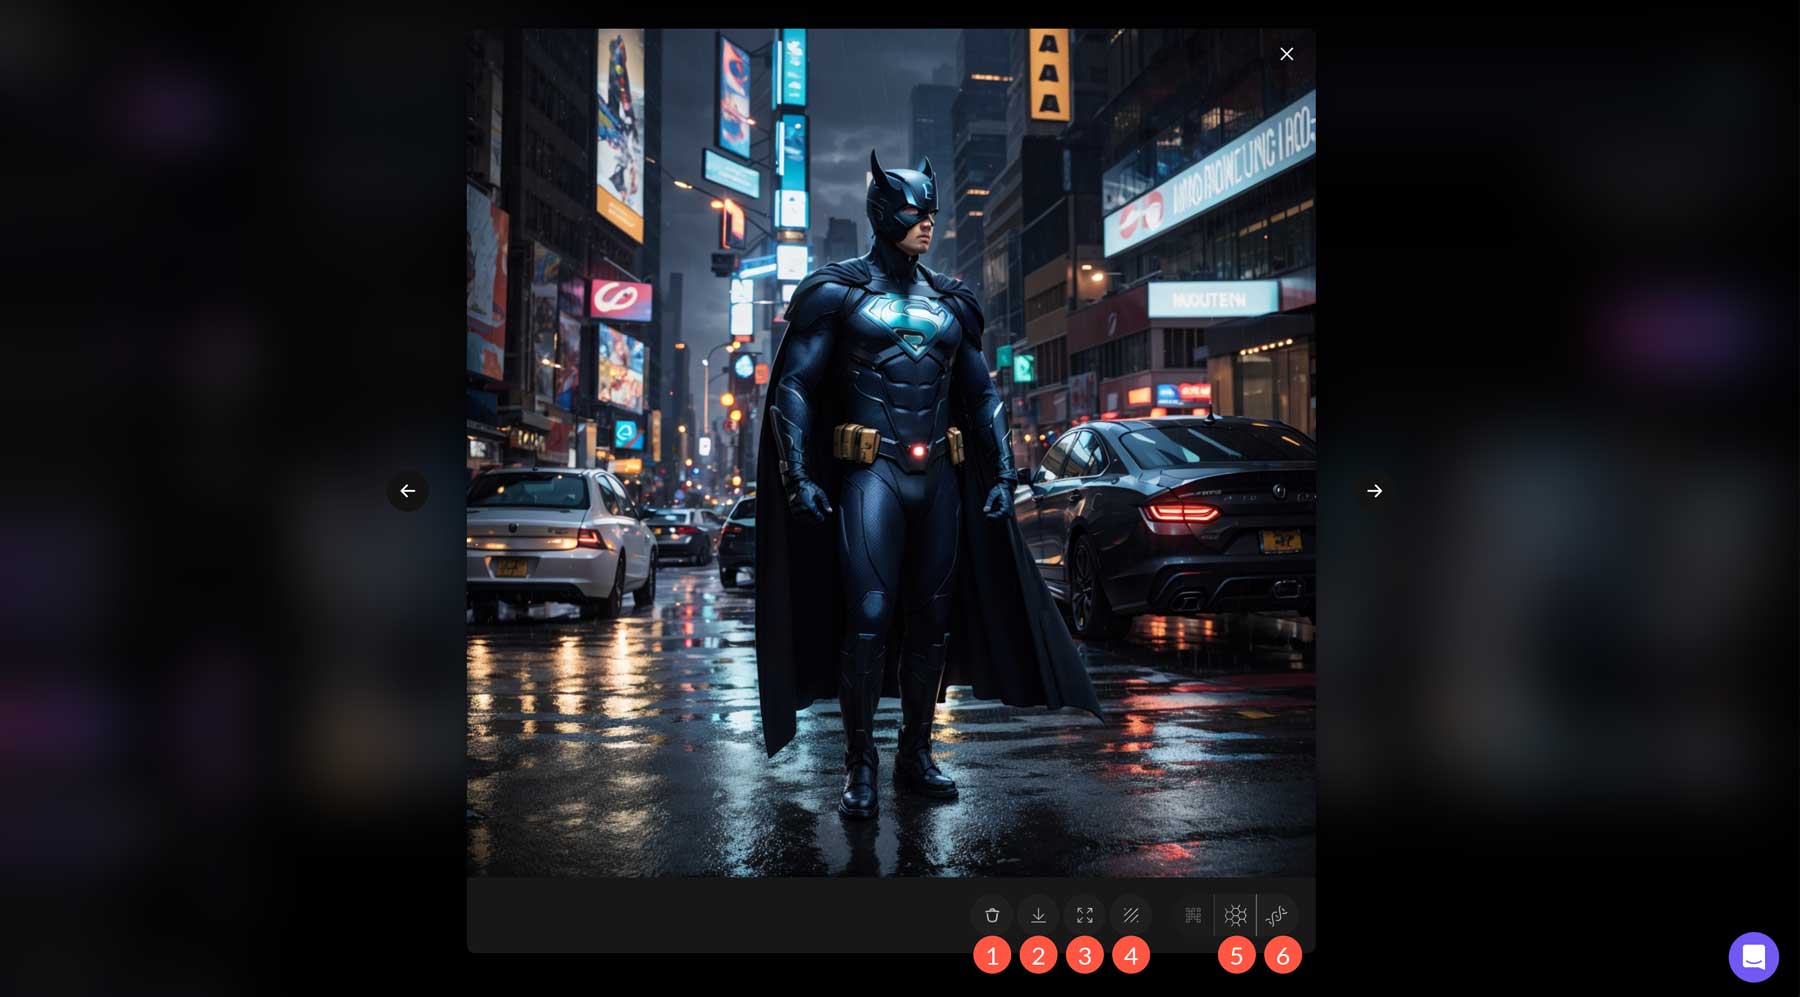
You can click on one of the photos to bring up a lightbox to preview the results. Within the lightbox, you’ll notice a few icons underneath the image. These tools allow you to delete (1), download (2), unzoom (3), remove the background (4), smooth upscale (5), or crisp upscale (6) your image.
The unzoom tool reduces the subject’s size in your image. Select your favorite from the group to test it out on our superhero image, and click the unzoom button in the toolbar.
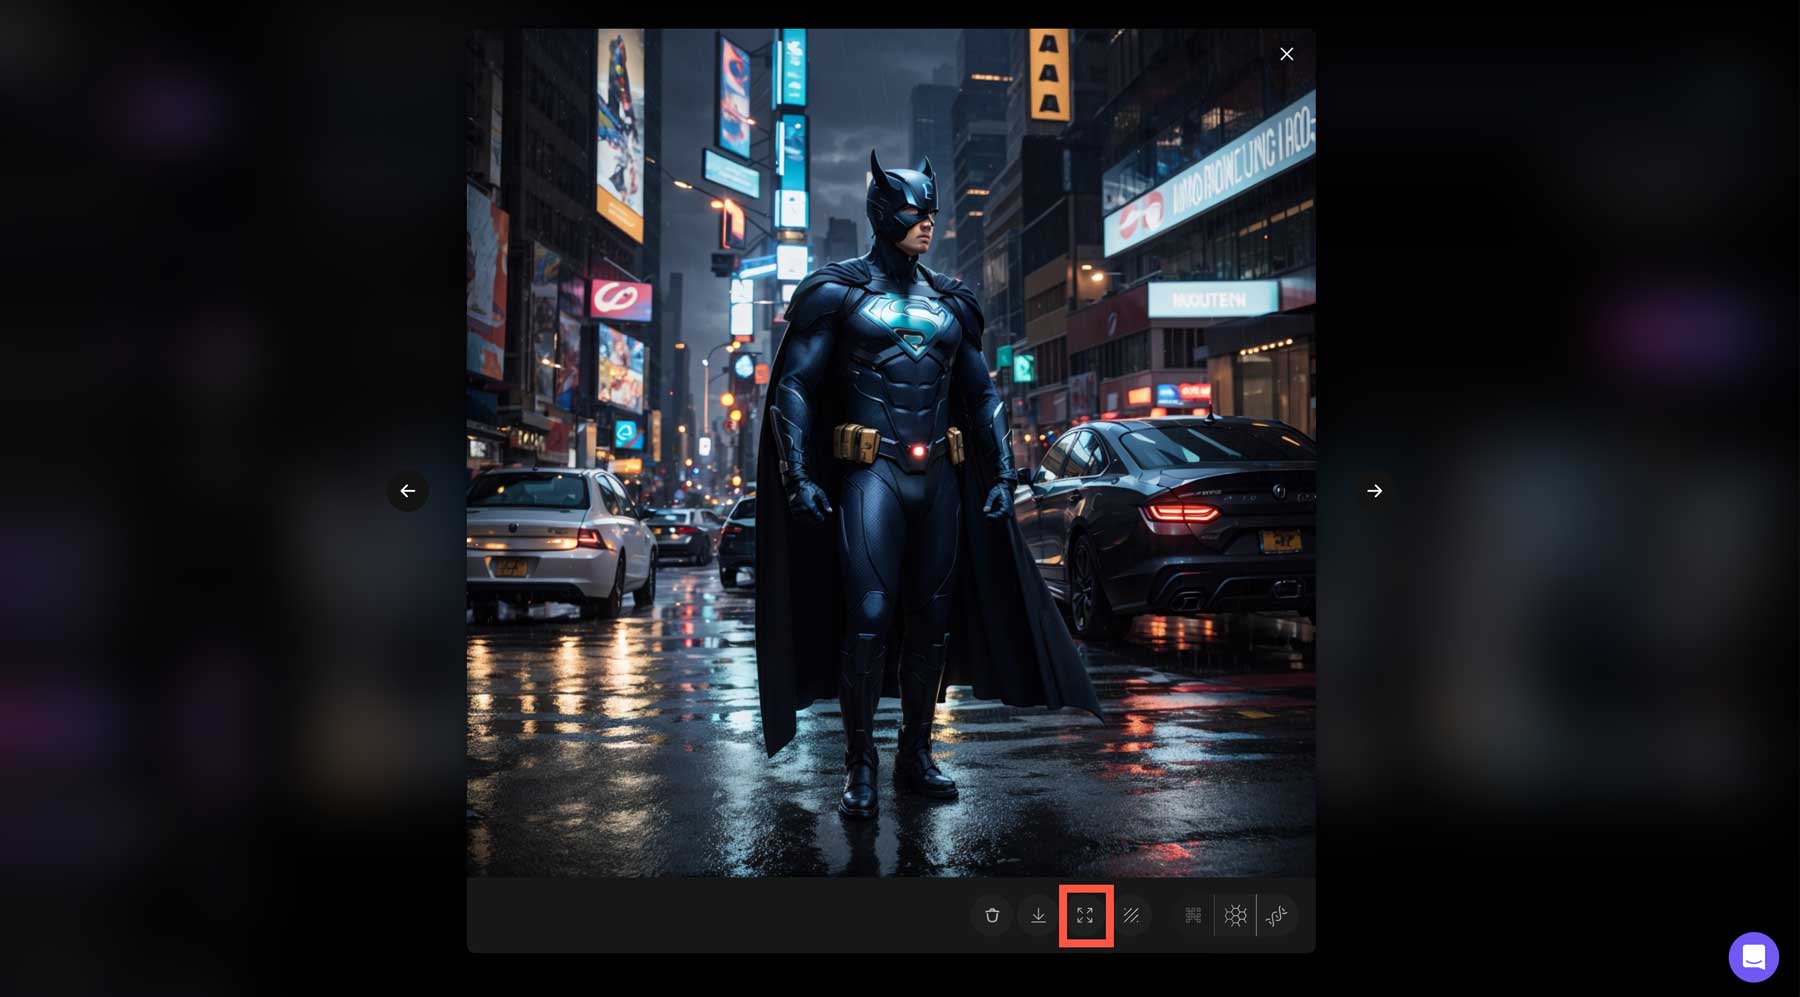
Once complete, click the dropdown menu labeled original image and choose unzoomed image.
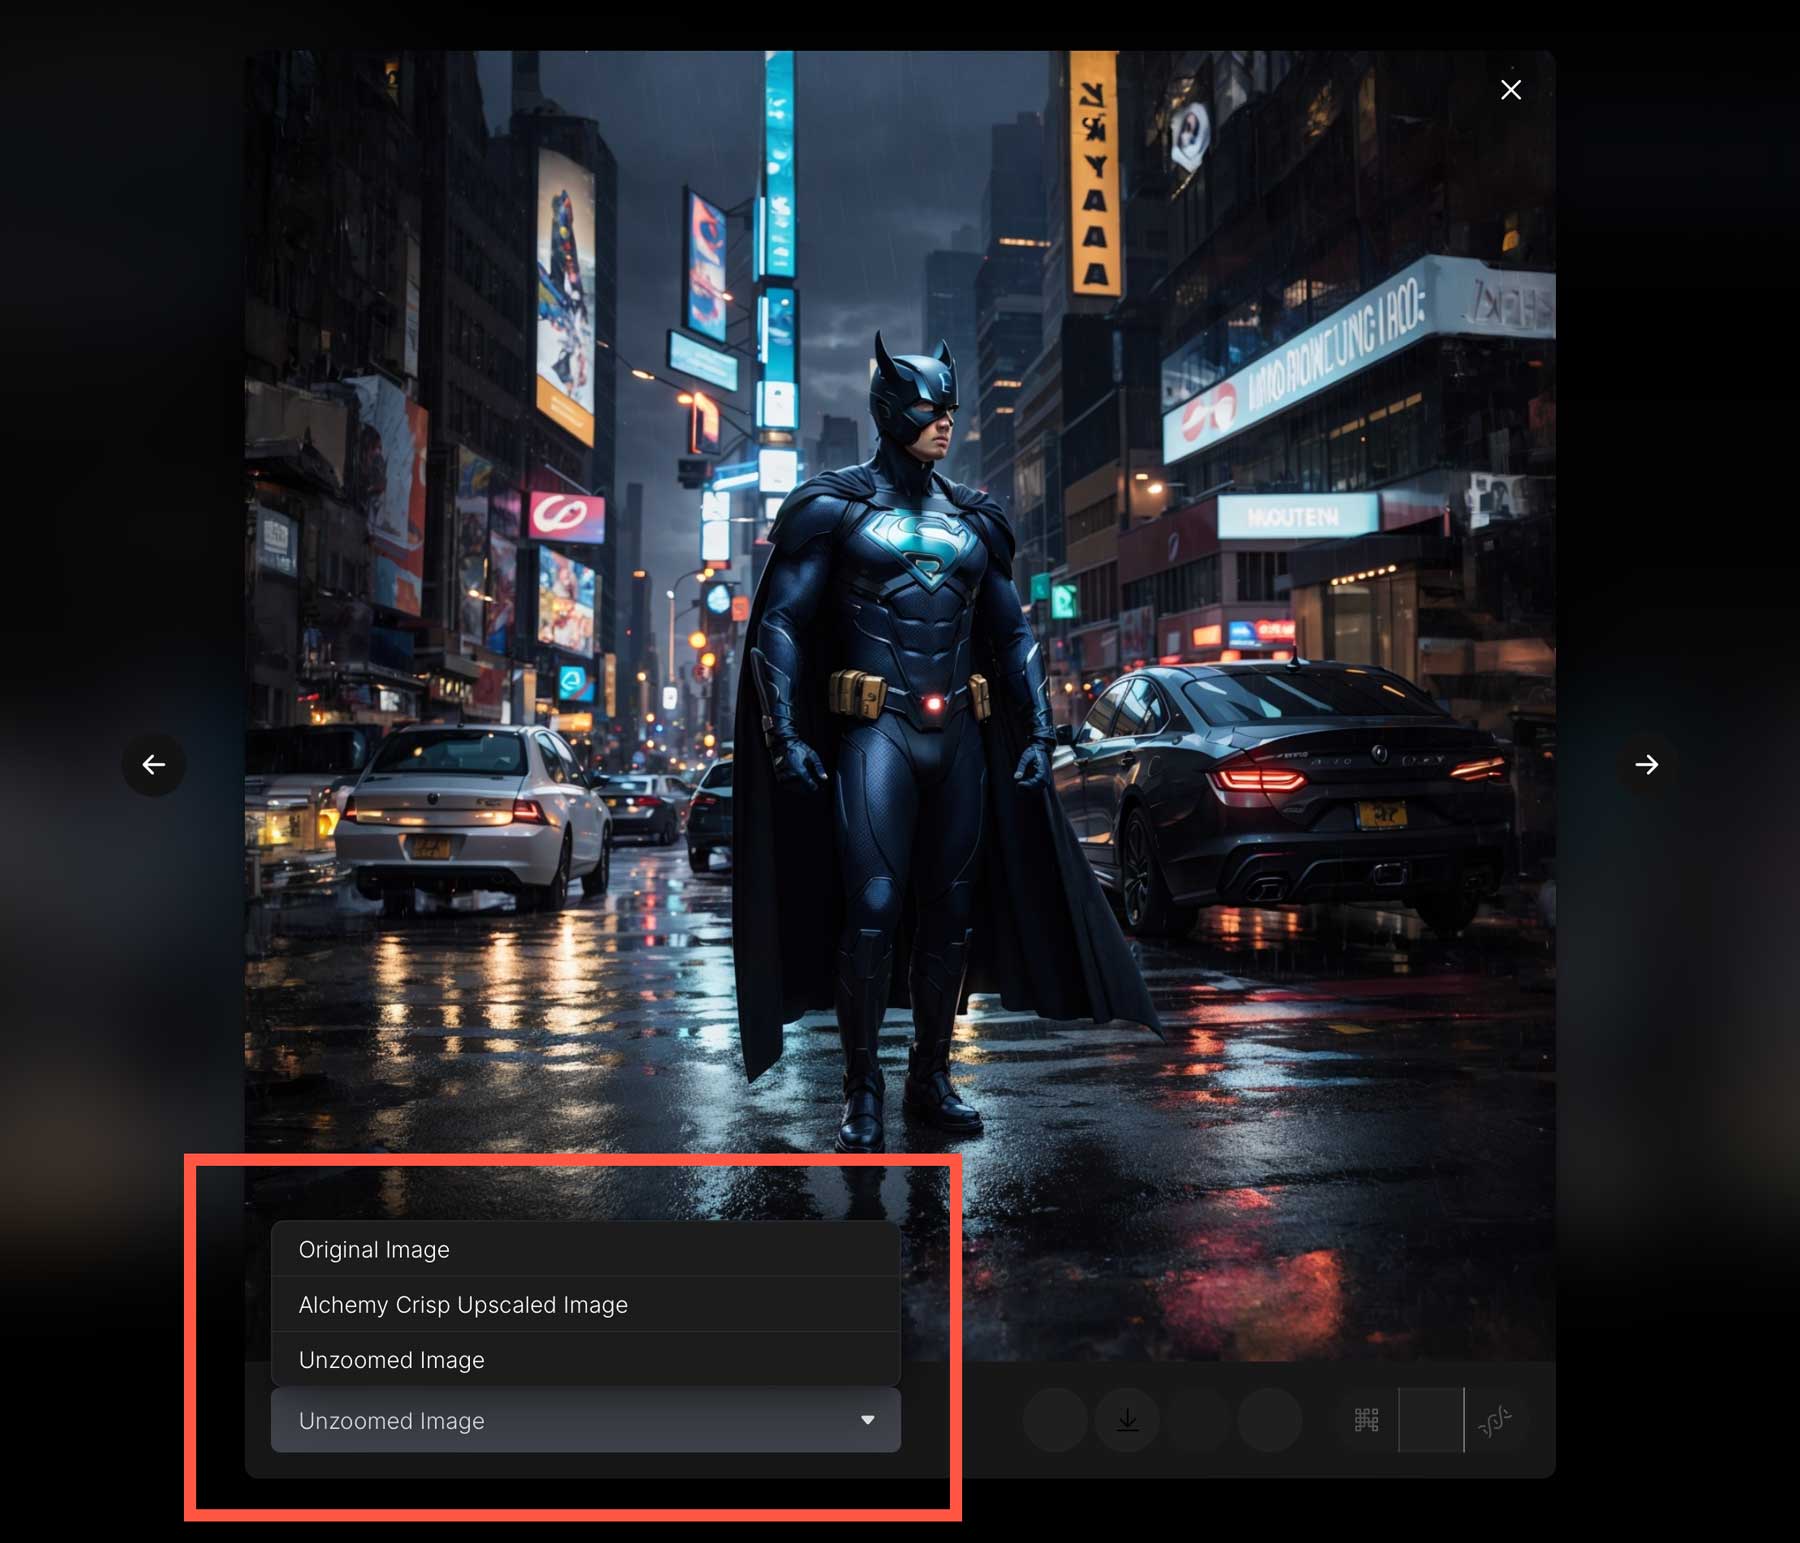
Try using other tools on the same image to enhance it further. Our image is more digital in this example, so we’ll choose crisp upscaling since it’s suited for digital art, 3D renders, and photos. Here’s the result:
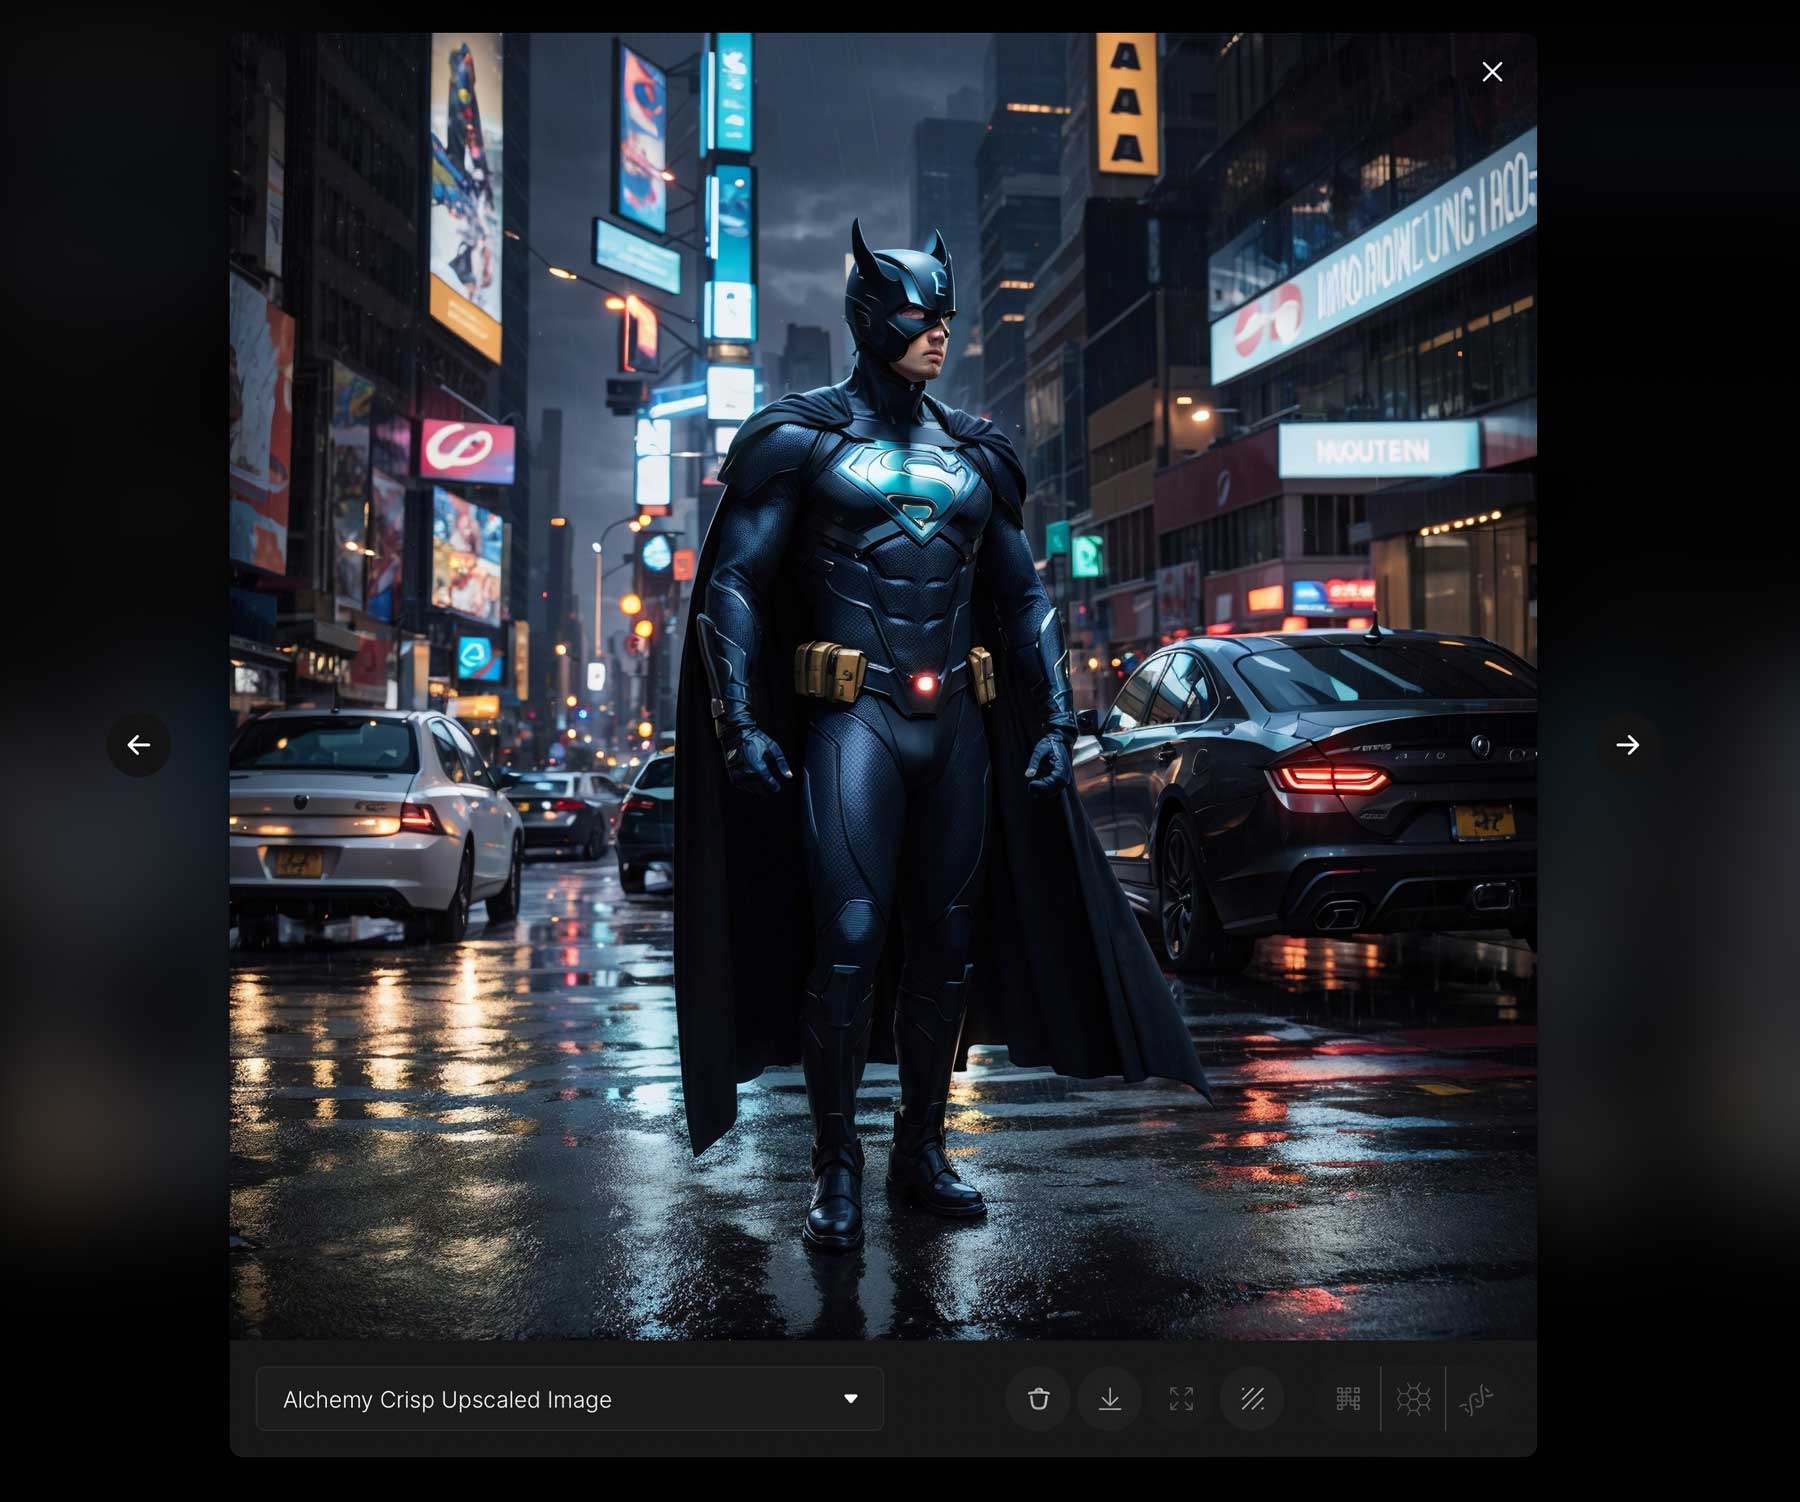
Leonardo does a pretty good job with just a few words. It’ll be interesting to see how it evolves during beta testing, but they are off to a great start.
Best Practices for Making AI Art
Now that we’ve given you a few ways to make AI art, there are a few best practices to follow. These aren’t program specific, so they can be applied to any AI art generator program you use.
Craft a Good Prompt
Writing an AI prompt is very different from writing a book report. In this instance, less is more. Try to be descriptive instead of wordy. AI tends to get overwhelmed when analyzing too many words. Keep your prompts primarily to nouns and adjectives for the best results.
Take a look at the images below. The image on the left was created with this prompt: Assassin’s Creed character. Alternatively, the image on the right was created with this prompt: Assassin’s Creed character, video game style, sharp and detailed, fine grain, blue and green glow, sharp focus, cinematic lighting, studio photography.
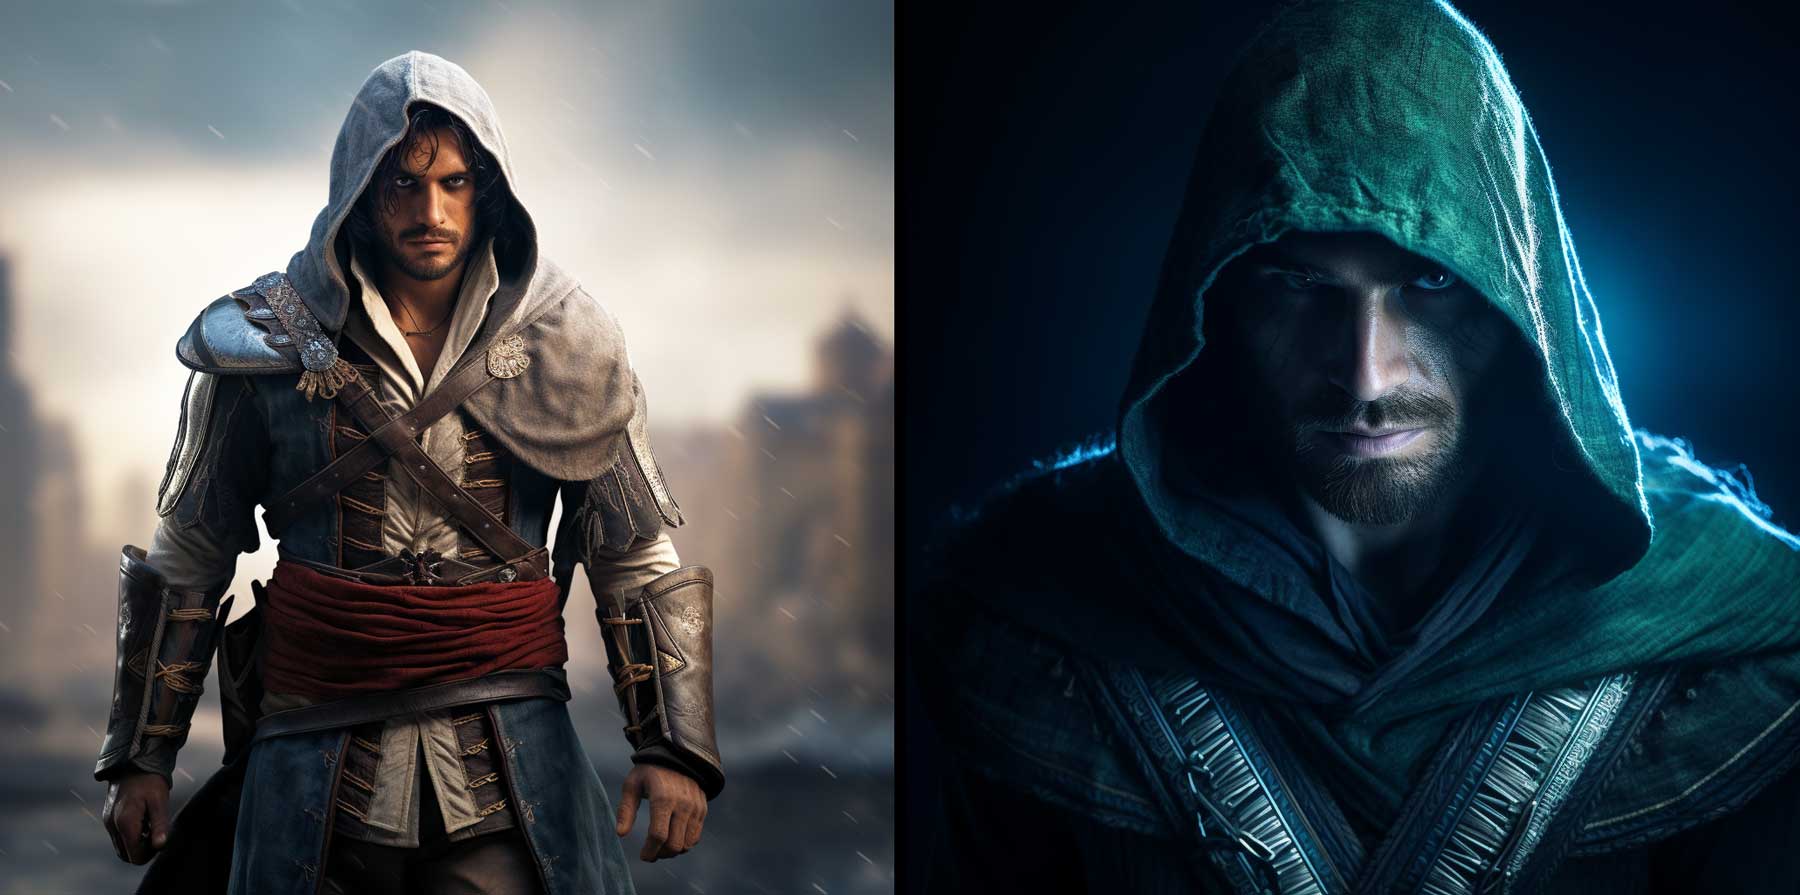
images created with Midjourney
Combine Platforms
A unique way to use AI art generators is by combining them to get better results. Most AI programs create images no larger than 1024 pixels and many outputs at a 1:1 ratio (square). That’s great if you post to Instagram, but what if you want to use your creations as a background or supporting images on your blog? A great way to combat that is by combining two platforms. For example, we created this image in Leonardo AI, then imported it into Photoshop. We extended the image on the left using generative fill to make it wider. If you’d like to learn more about using Photoshop AI, check out our detailed tutorial on the blog.
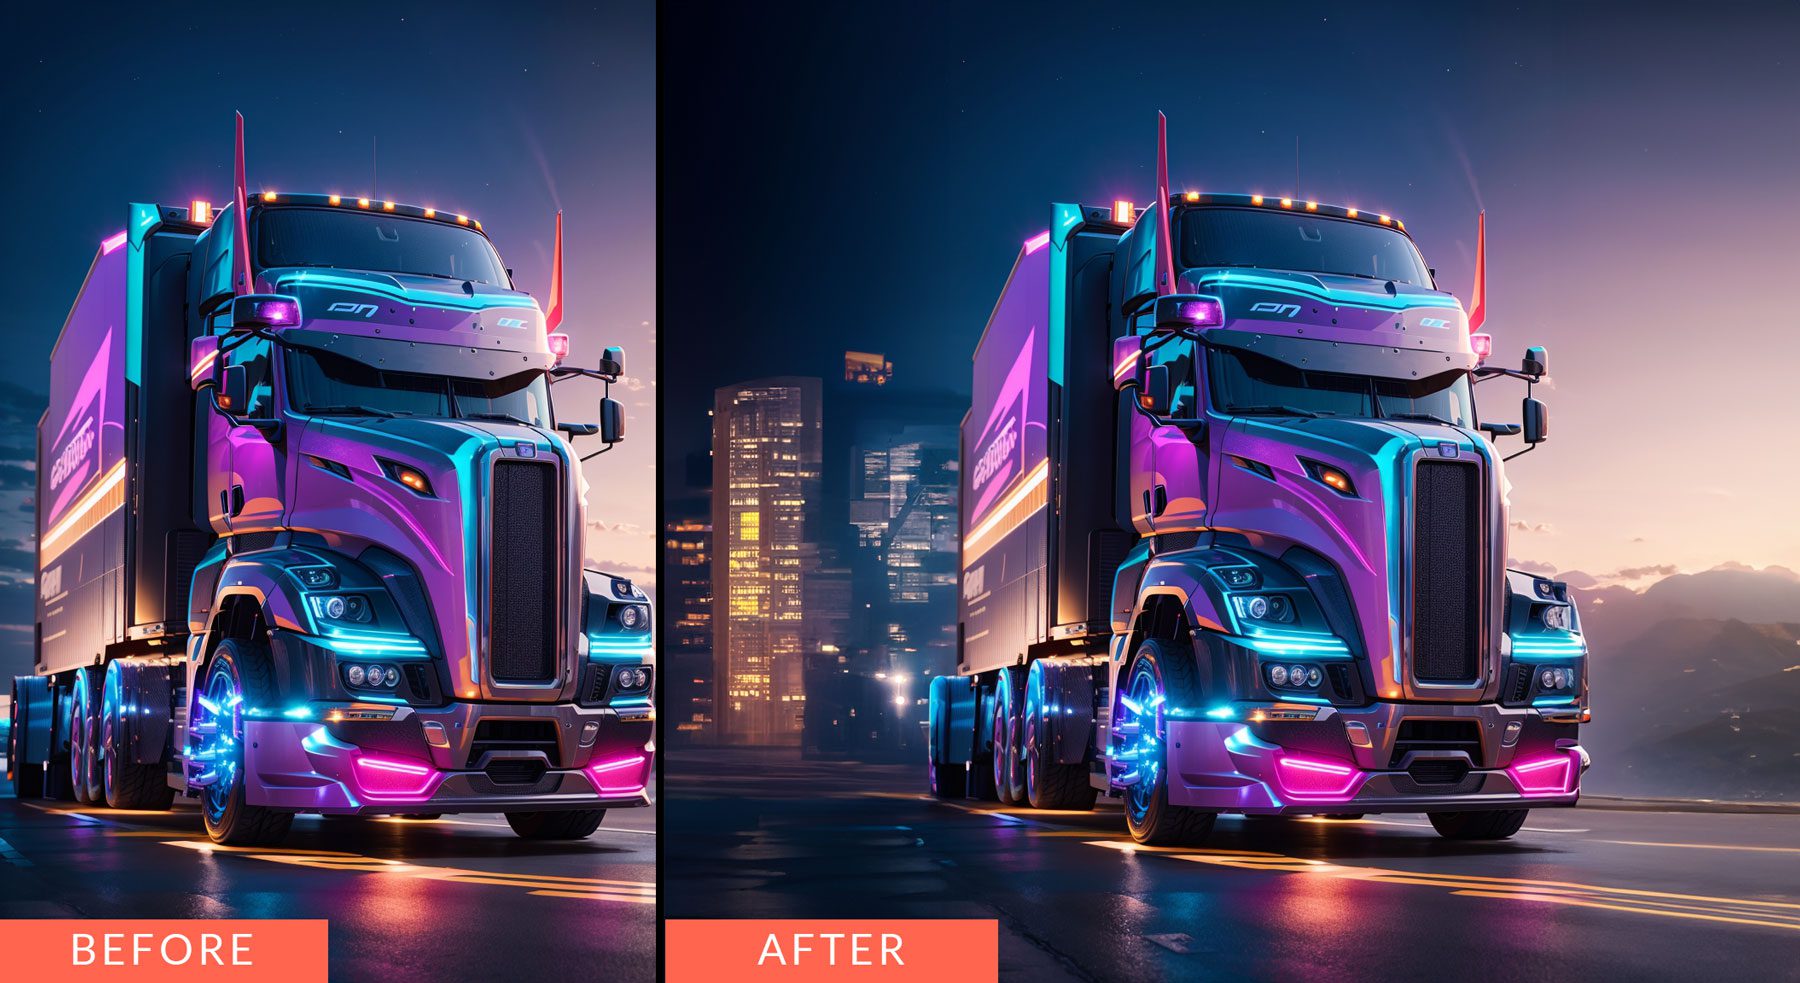
image created with Leonardo AI | Photoshop AI
Experiment with Different Art Styles
Lastly, experimenting with different artistic styles is an excellent way to create interesting output. Try combining artists with mediums, and add color and texture descriptors. If using Midjourney, remember to use the aspect ratio parameter (–ar) to make your art look like a painting.
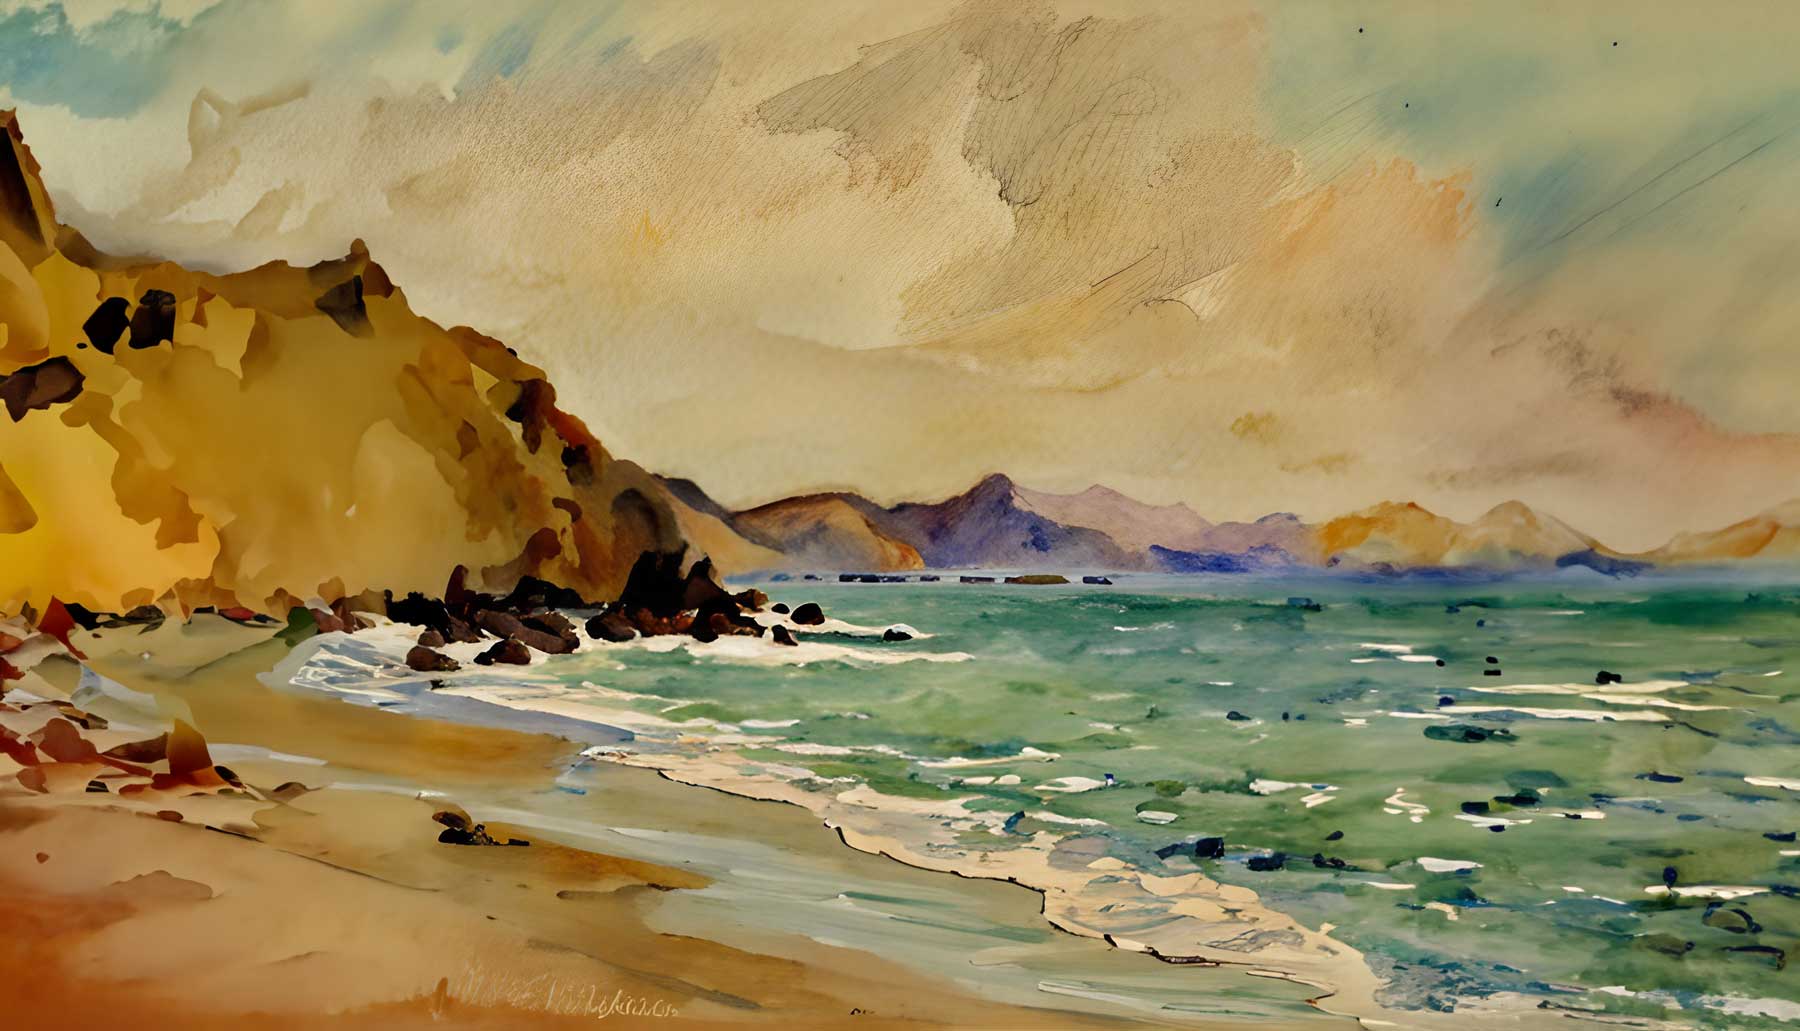
image created with Jasper
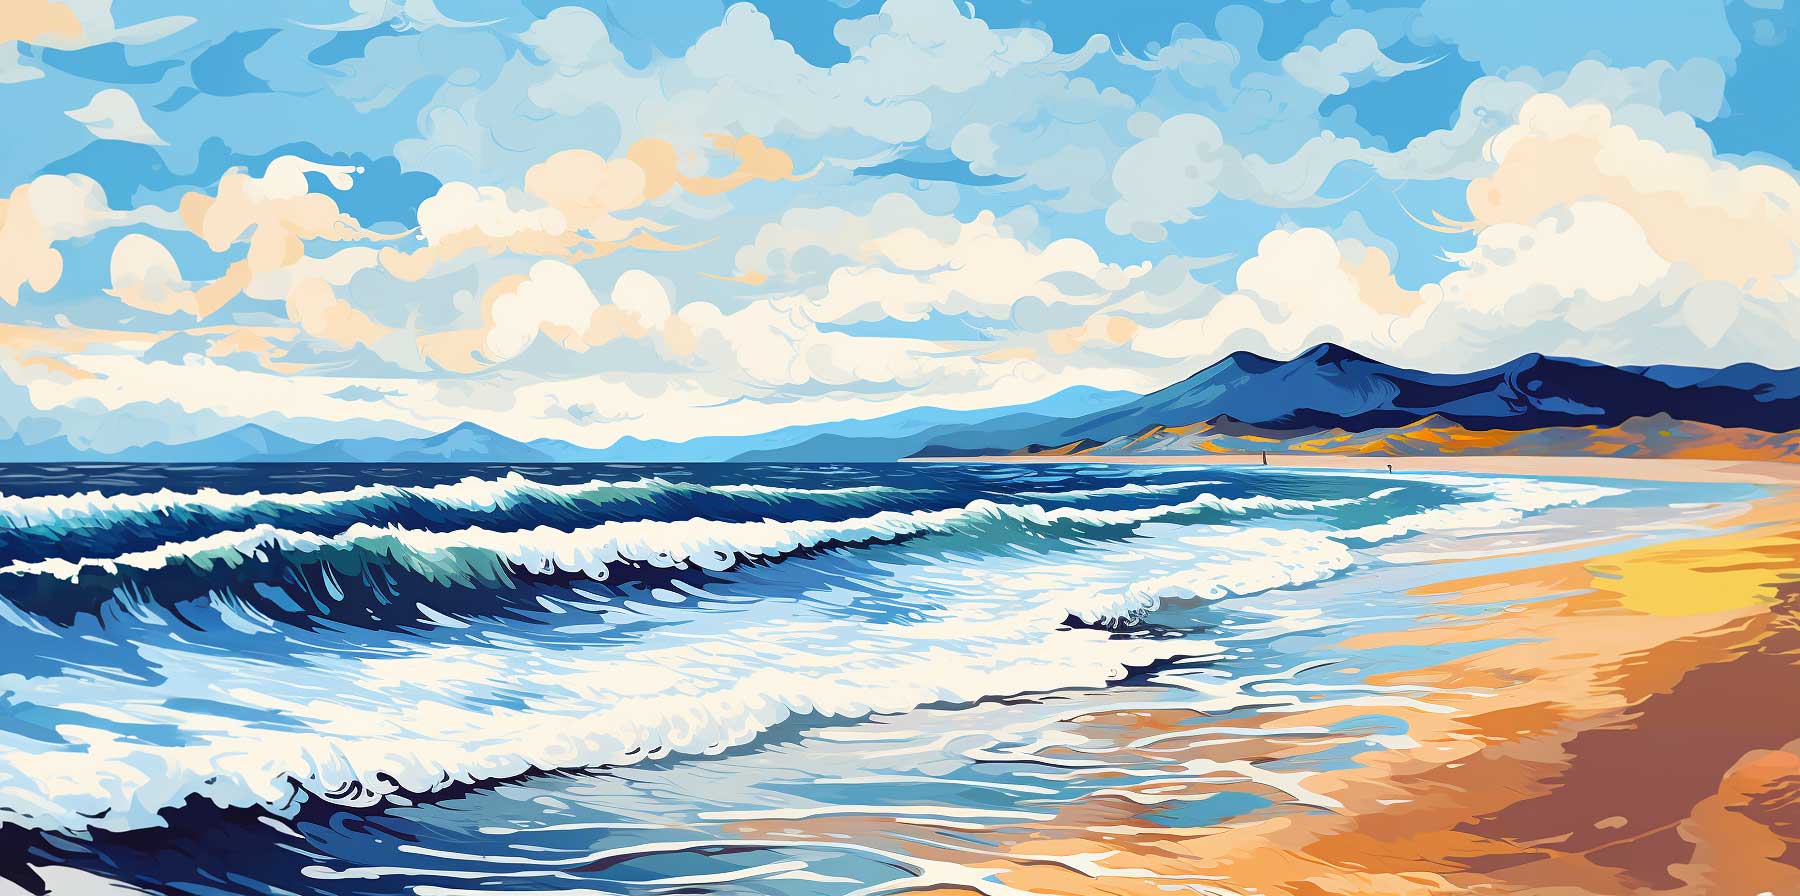
image created with Midjourney
Examples of AI Art
To close things out, we’ve created a few examples of what each platform is capable of, complete with the prompts used to create each image.
Prompt: sports car, black, 2020’s New York, city photoshoot, wet streets, green and blue glowing lights, extreme photorealistic, 8k, hyper-detailed car, soft lighting, automobile photography, reflection
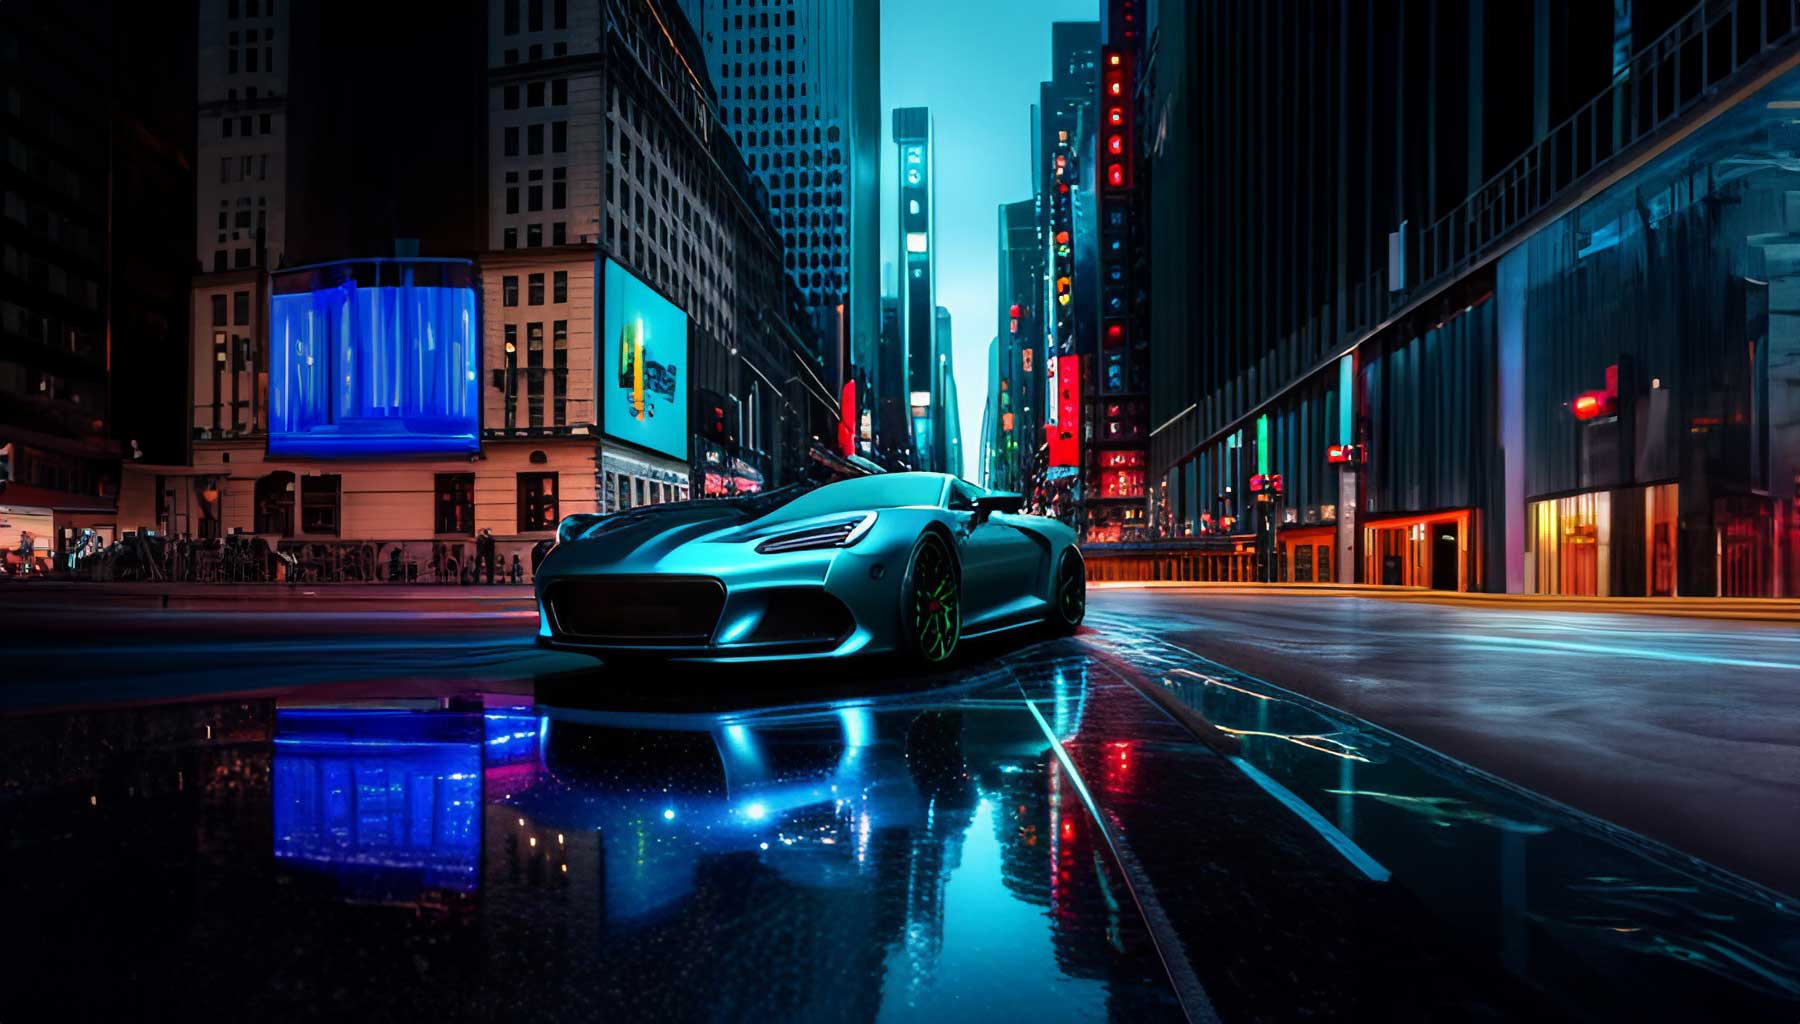
Image created with Jasper
Prompt: raccoon in the Guardians of the Galaxy style, DLSR, neon blue, dusk, studio photography –ar 16:9.
Upscale settings: Zoom Out 2x, Pan left.
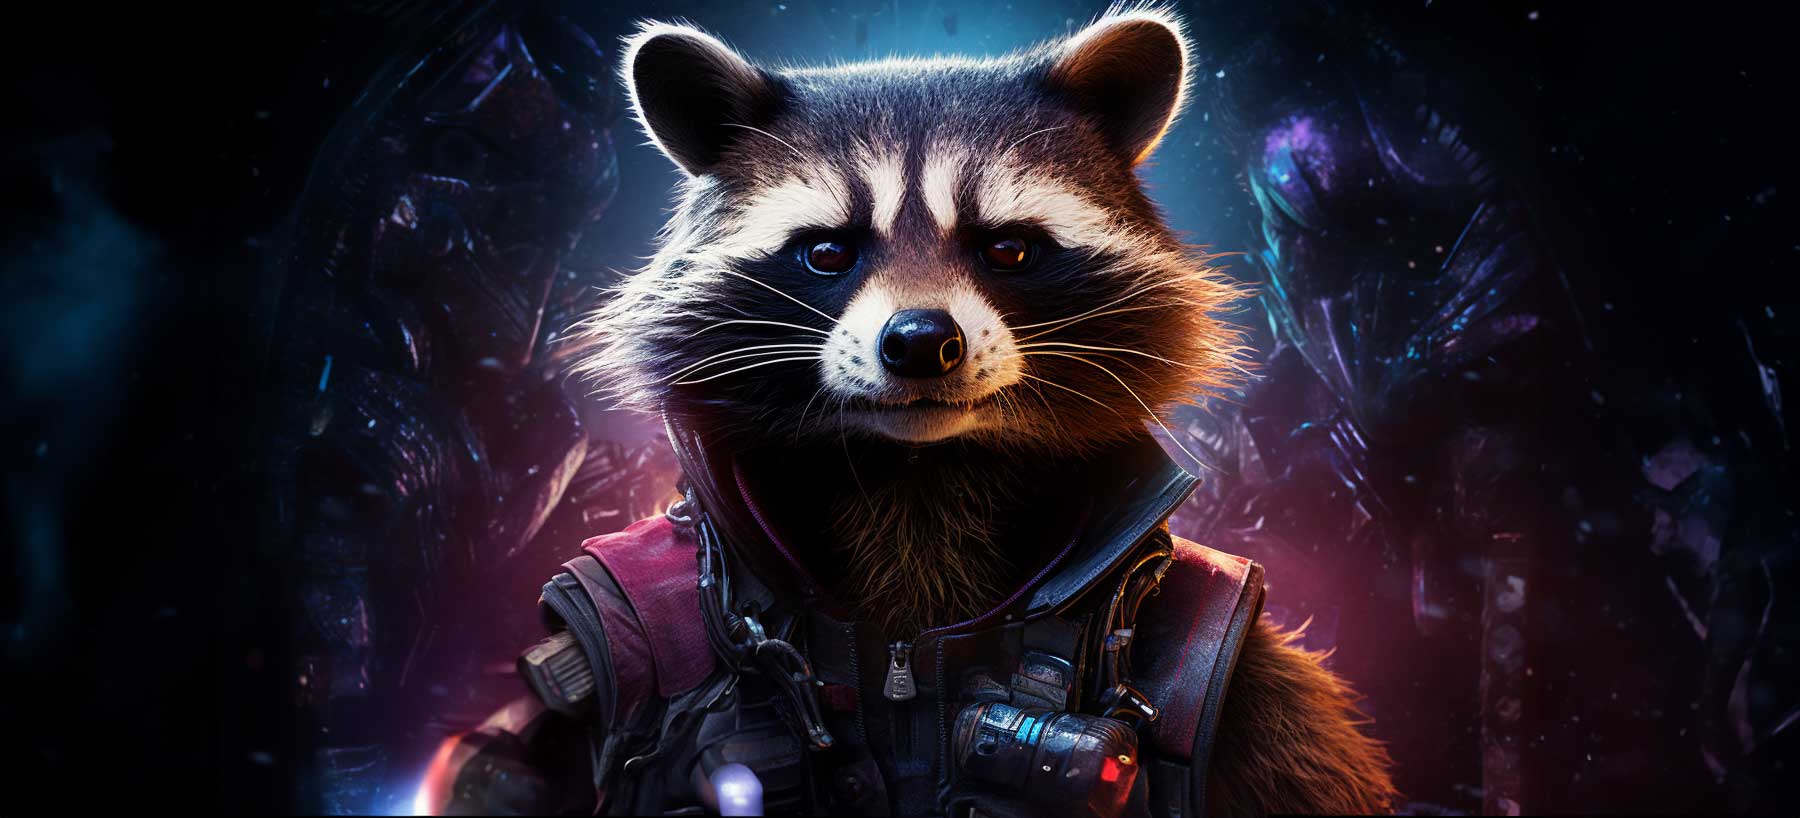
image created with Midjourney
Prompt: A futuristic sports car, black, in the year 2400, city photoshoot, wet streets, green and blue glowing lights, extreme photorealistic, 8k, hyper-detailed car, soft lighting, automobile photography, reflection.
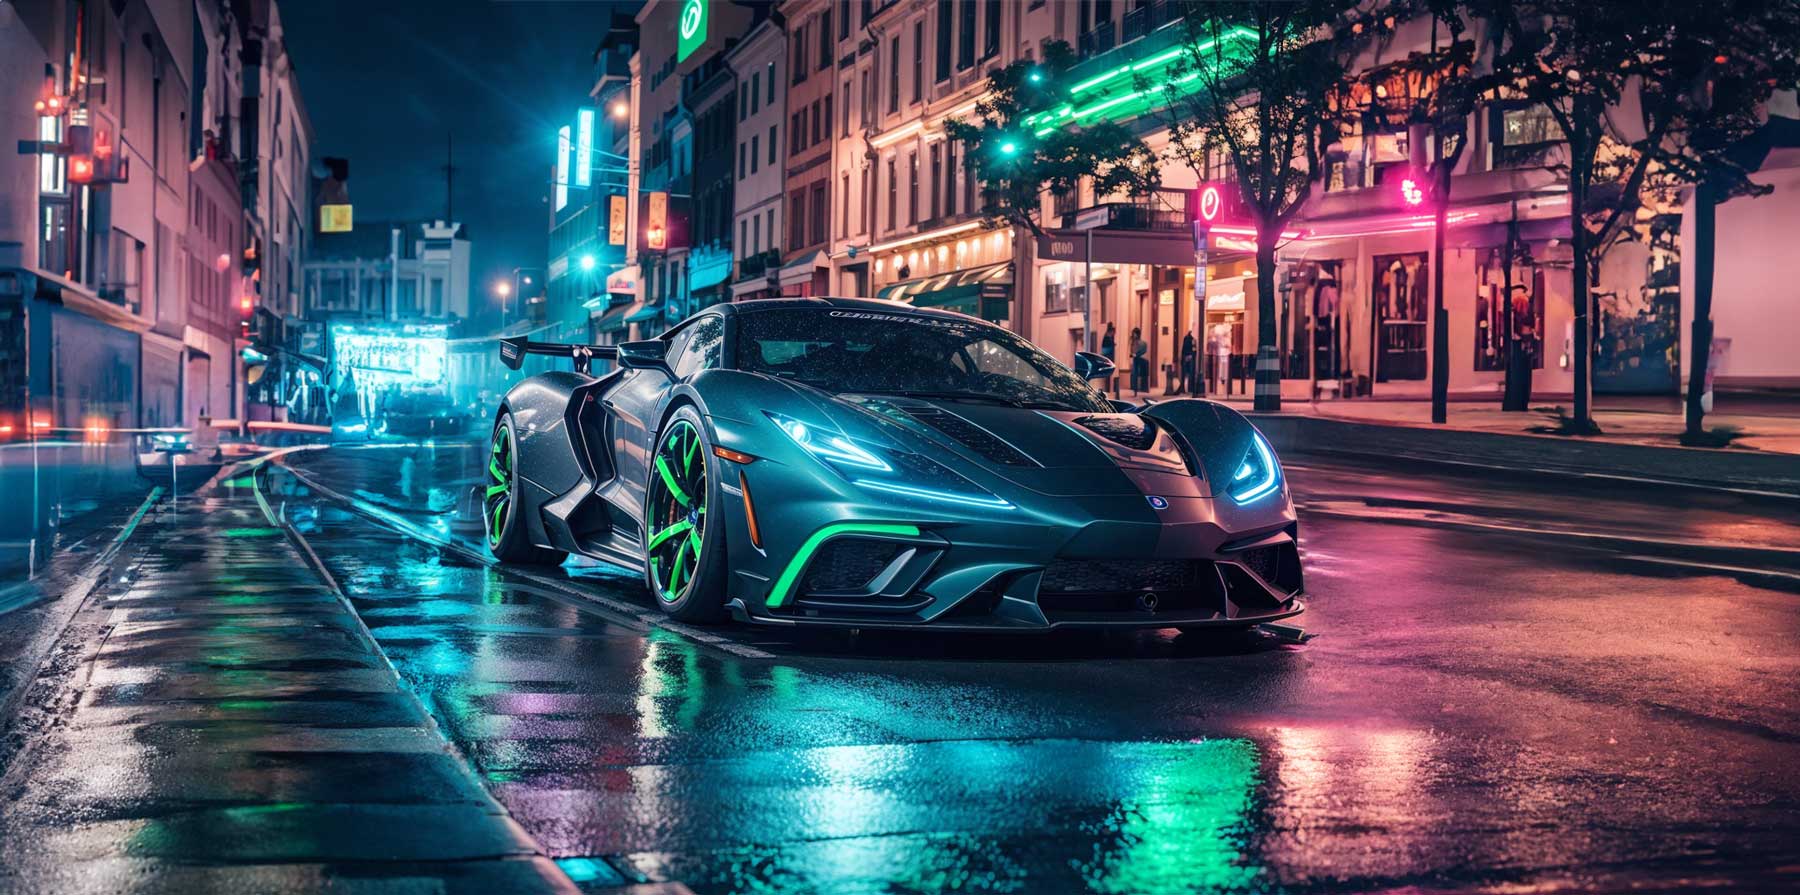
image created with Leonardo AI
Prompt: ultra-realistic render, interior design, open floor plan, kitchen and living room, mid-century modern furniture, dark wood floor, high ceiling, large framed windows overlooking the ocean, cinematic lighting.
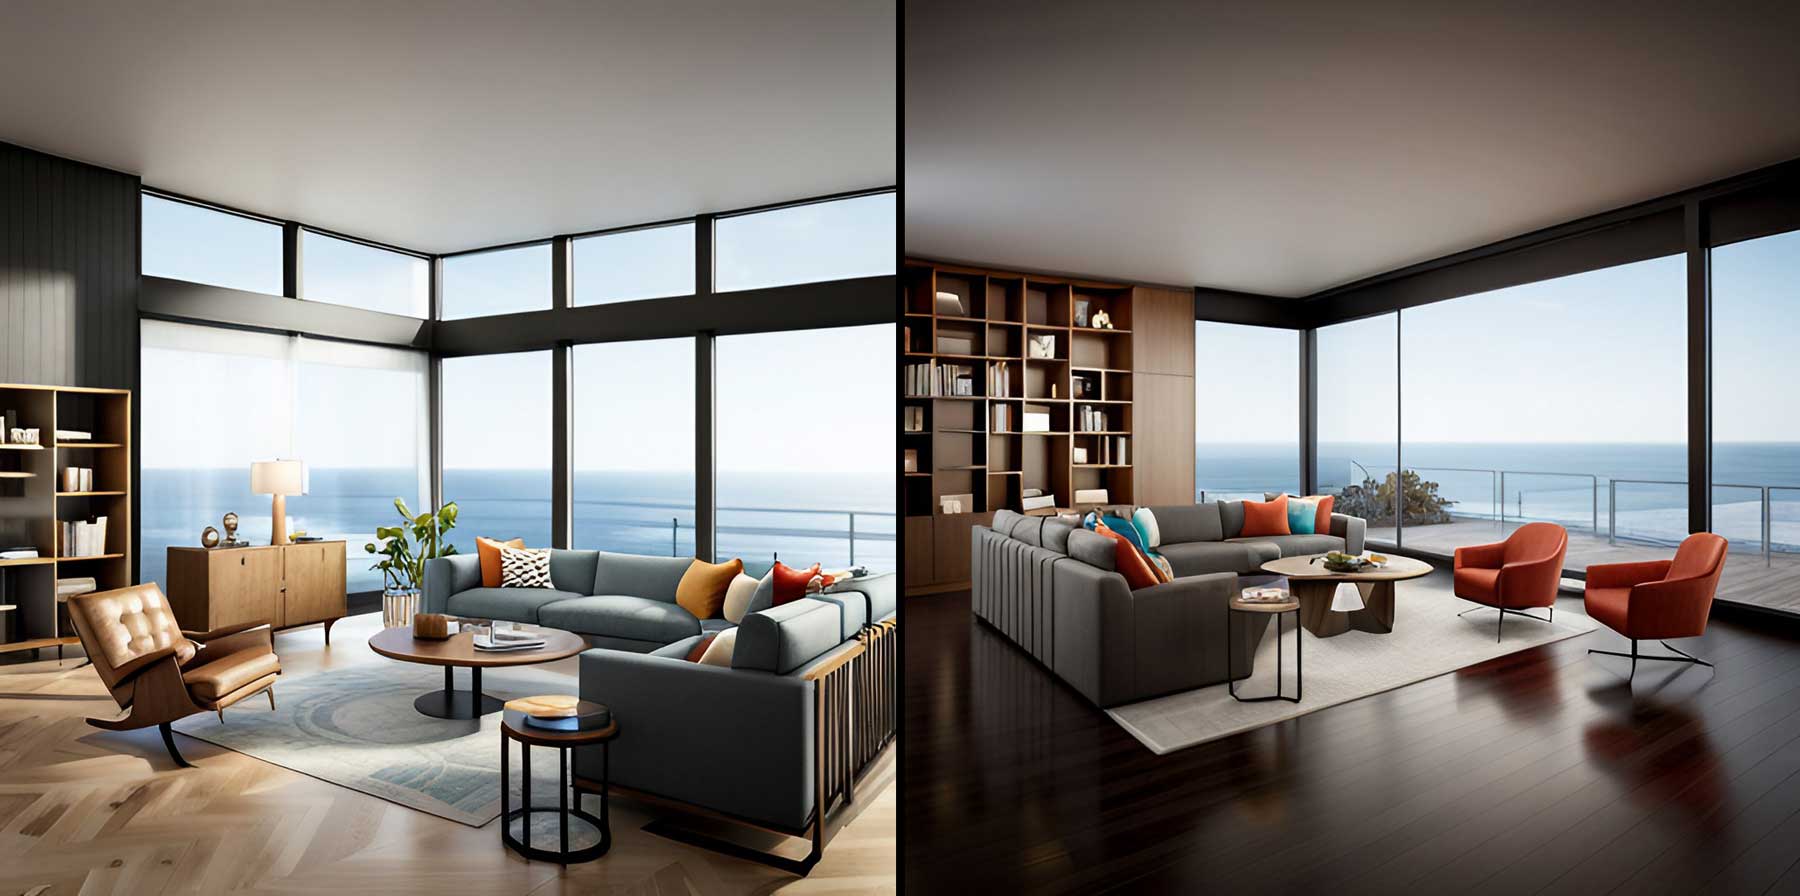
images created with Jasper
Prompt: 3D animated dog wearing an astronaut suit, set on an alien planet, background of stars and moons, hyper-realistic photography, 3D character –ar 16:9.
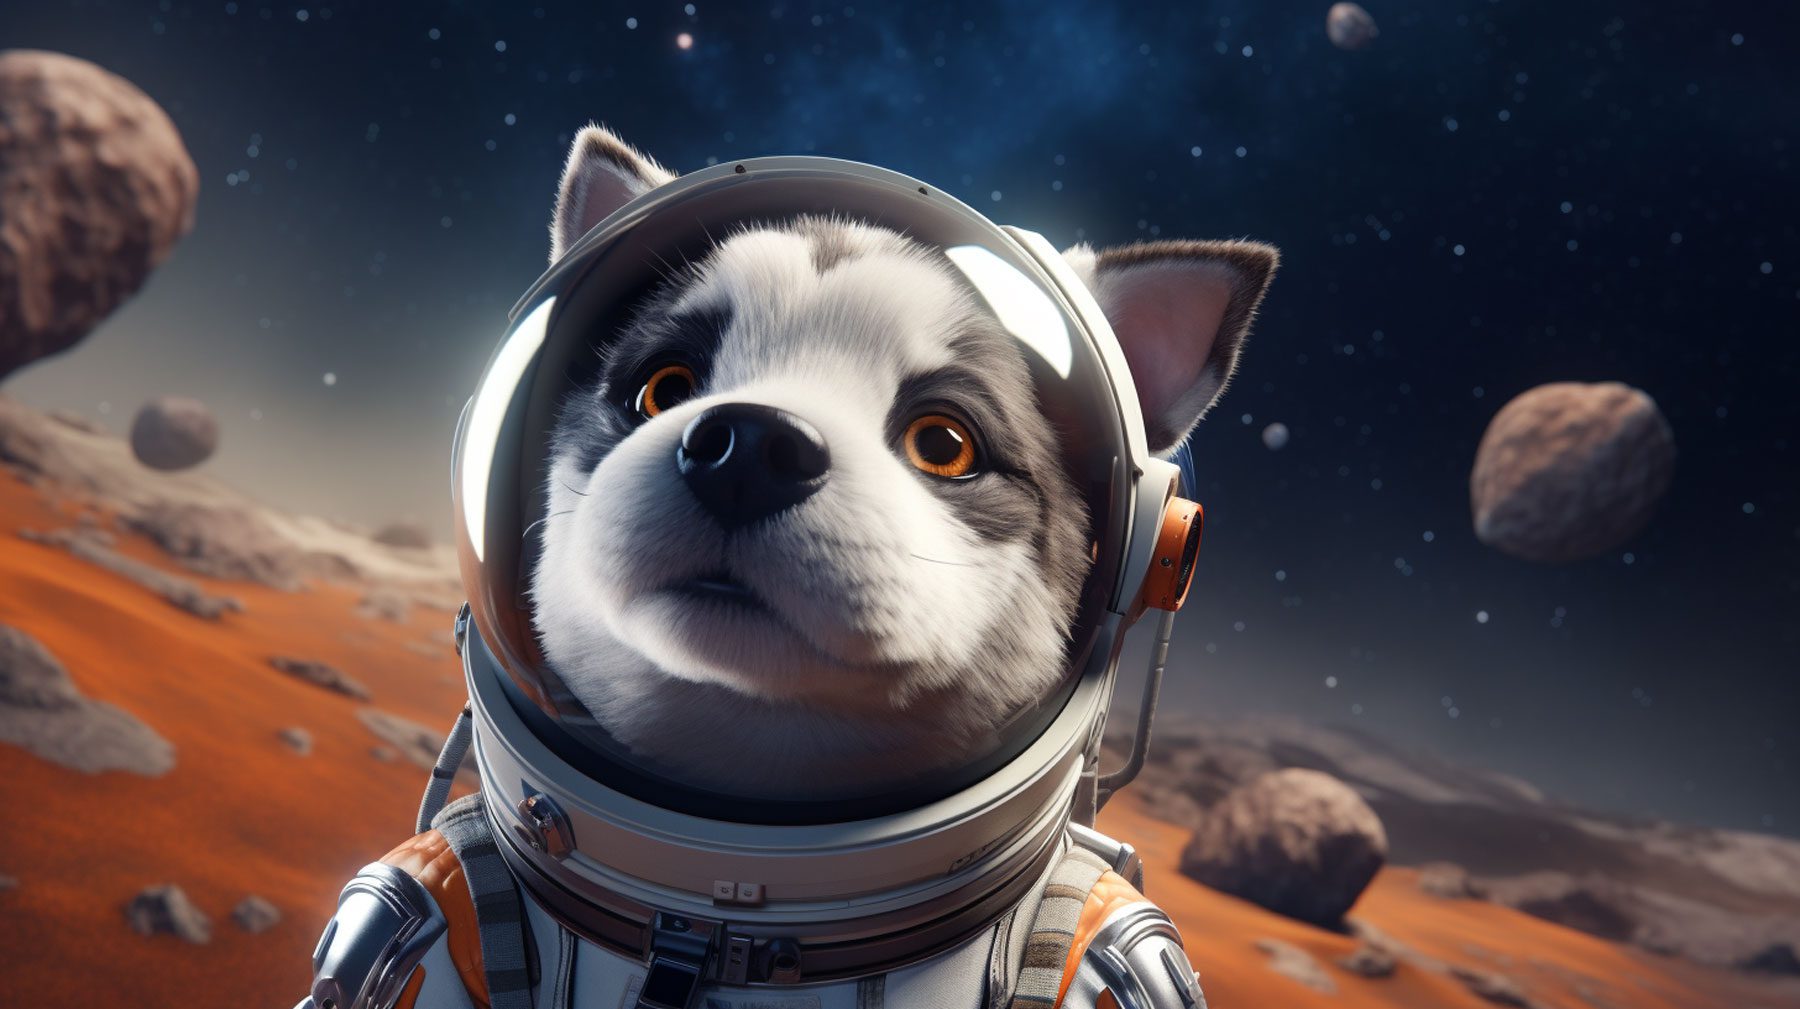
image created with Midjourney
Prompt: underwater ocean floor, shipwreck, ocean blue lighting, ultra view, 8k high resolution, ocean animals, bright colored coral reef, sunbeams, bright sky, cinematic lighting, wide angle.
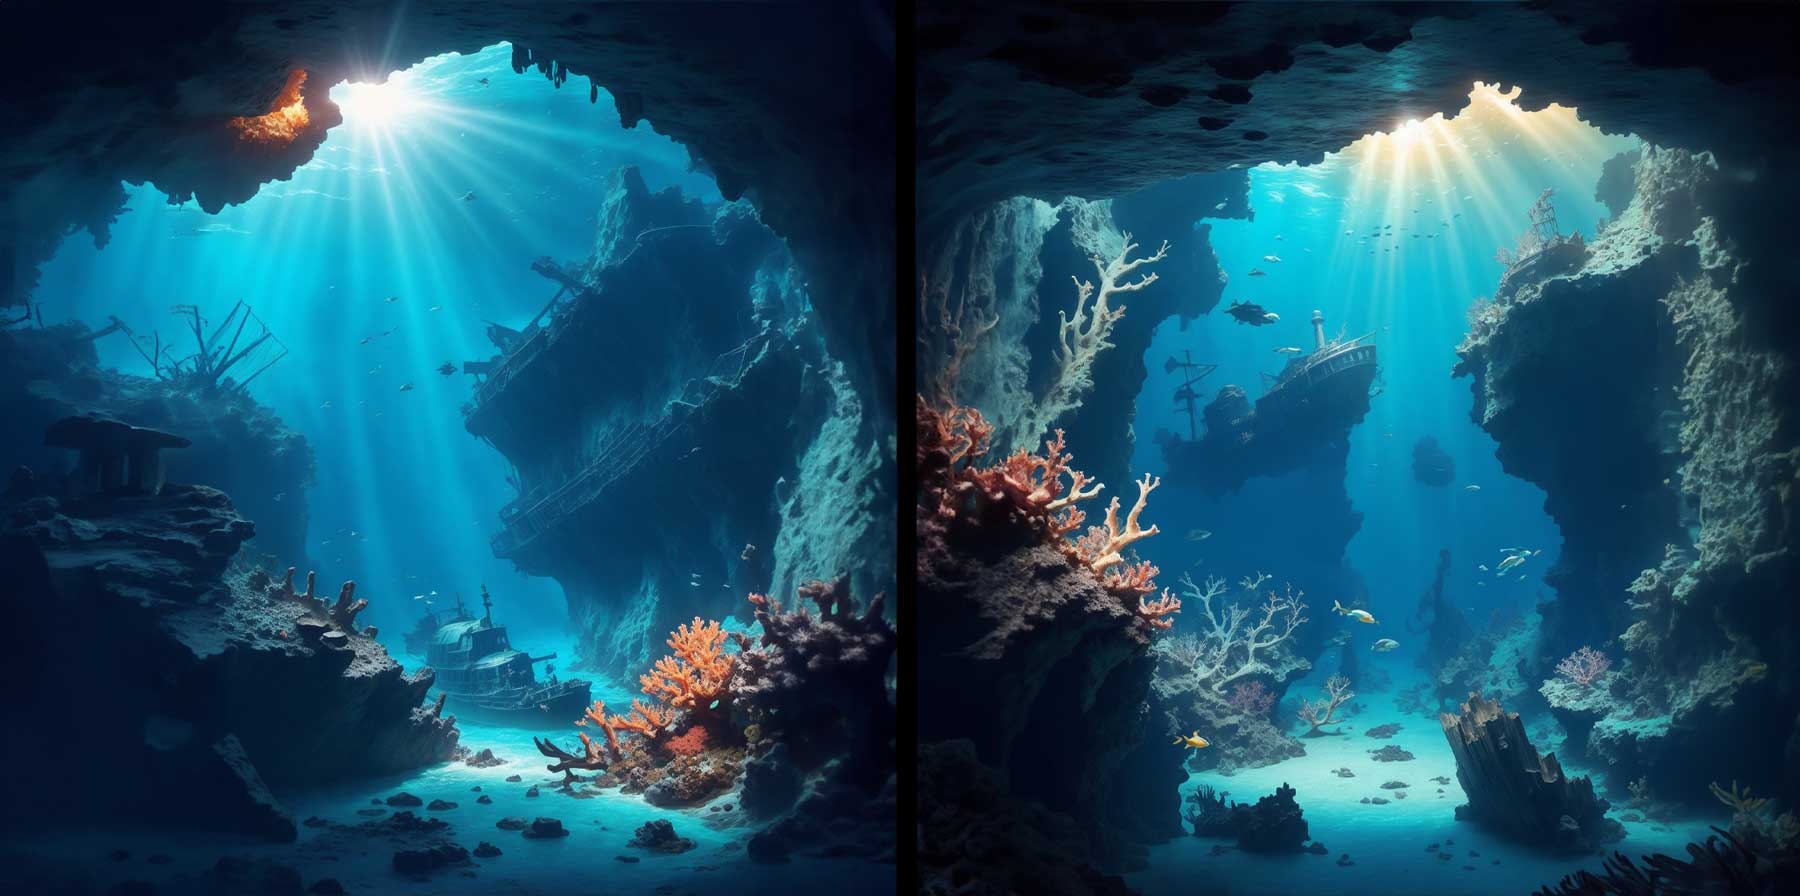
images created with Leonardo AI
Final Thoughts on Making AI Art
Whether you’re using Jasper, Midjourney, or Leonardo, making AI art is a lot of fun. With artificial intelligence evolving and expanding more into our lives daily, it’s good to know how to use it effectively. Incorporating a good AI program into your workflow, whether it’s an AI art generator or something as simple as an AI avatar, is an excellent way to stay on top of the latest trends while expanding on your creativity.
Looking for more AI tutorials or recommendations? Check out some of our other AI-related posts:
- How to Use AI to Create Amazing Web Design with Divi (Using ChatGPT & MidJourney)
- 10 Best AI Logo Generators (Most are Free)
- 10 Best AI Image Upscalers (Free and Paid)
- Character AI: Everything You Need To Know
Frequently Asked Questions (FAQs)
Before we wrap up, let’s answer some of your most common questions regarding the creation of AI art. Did we miss one? Leave a question below and we will respond!
How can I make AI art?
Can I make AI art for free?
What is AI art?
How do AI art generators work?
Is AI art legal?
How can I make AI art with Midjourney?
How can I make money with AI art generators?
How can I use AI art to create a video?
How long does it take for AI to make art?
How can I make AI-generated celebrity images?
Featured Image via sizsus art / Shutterstock.com



Is it possible to merge two paintings in the canvas option. For example, to integrate a boat created in one generation into an image of another generation? And if so, how?