Artificial intelligence (AI) has taken the world by storm. With countless text-to-image generators hitting the market, there are plenty of options to try. However, if you want to create the most realistic images using AI art generators, MidJourney is among the best. In this post, we’ll walk you through the steps you’ll need to take to get started, along with some tips and tricks to get the most out of it. Let’s get started.
What is MidJourney?
Midjourney is an excellent example of generative AI that creates images based on text prompts. It has become one of the most popular tools for creating AI art, along with Dall-E and Stable Diffusion. Unlike its competitors, Midjourney is self-funded and closed-source, so knowing exactly what’s under the hood is cloudy. We know that it relies heavily on machine learning technologies such as large language and diffusion models. The results are sometimes startling, always impressive, and can possess very realistic qualities.
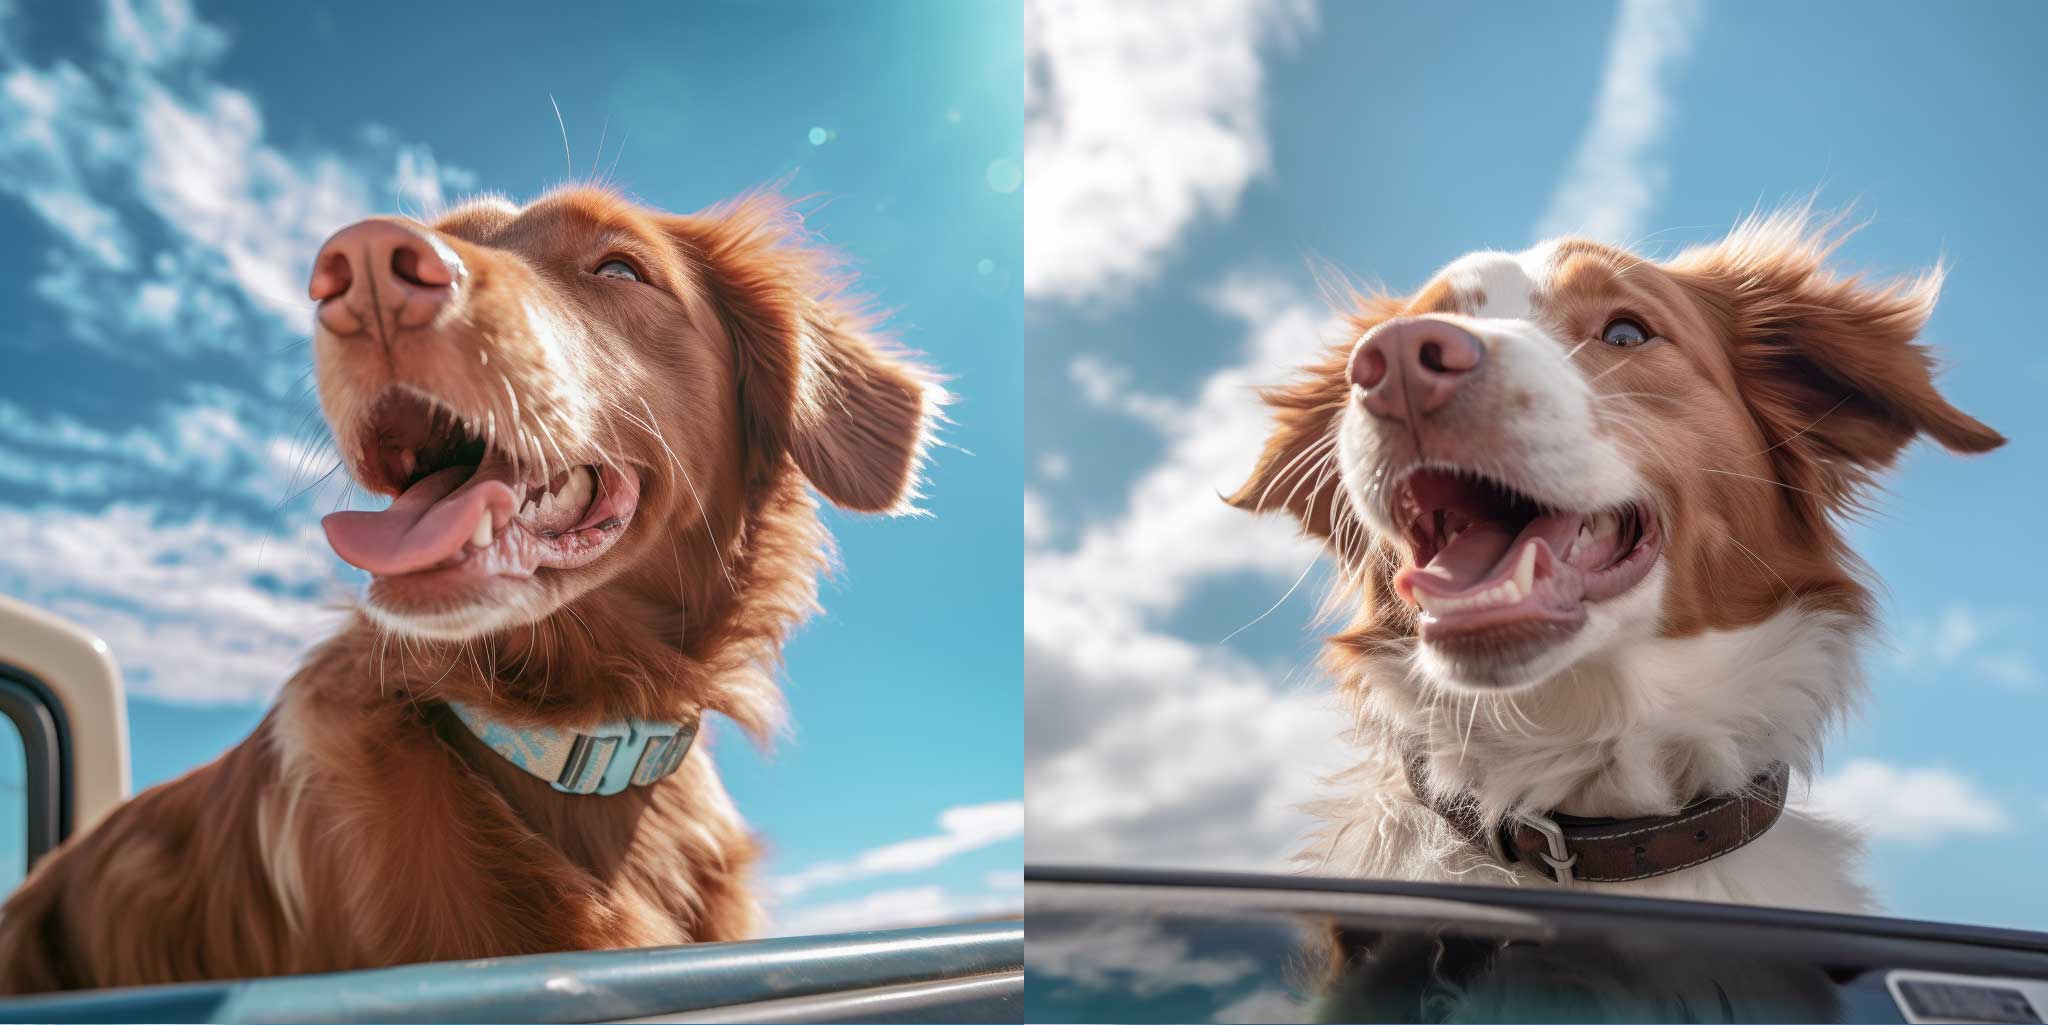
Unlike other AI art generators, it doesn’t have a free trial. It’s become so popular that signing up for a subscription is necessary before using it. That said, their lowest-tiered plan is reasonable at $10 monthly. In our experience, it’s well worth it, considering the level of detail, realism, and creativity it provides. It’s also relatively easy to get started. Within a few minutes, we were able to generate a highly detailed, realistic series of photos of a dog having the time of his life in the bed of a truck just from a simple text prompt.
Getting Started With MidJourney
Subscribe To Our Youtube Channel
As previously mentioned, Midjourney no longer offers a free trial. You’ll need to subscribe to generate AI art to get the most out of it. We’ll walk you through the steps to set up your Discord account and show you how to subscribe to Midjourney.
Step 1: Setting up Discord
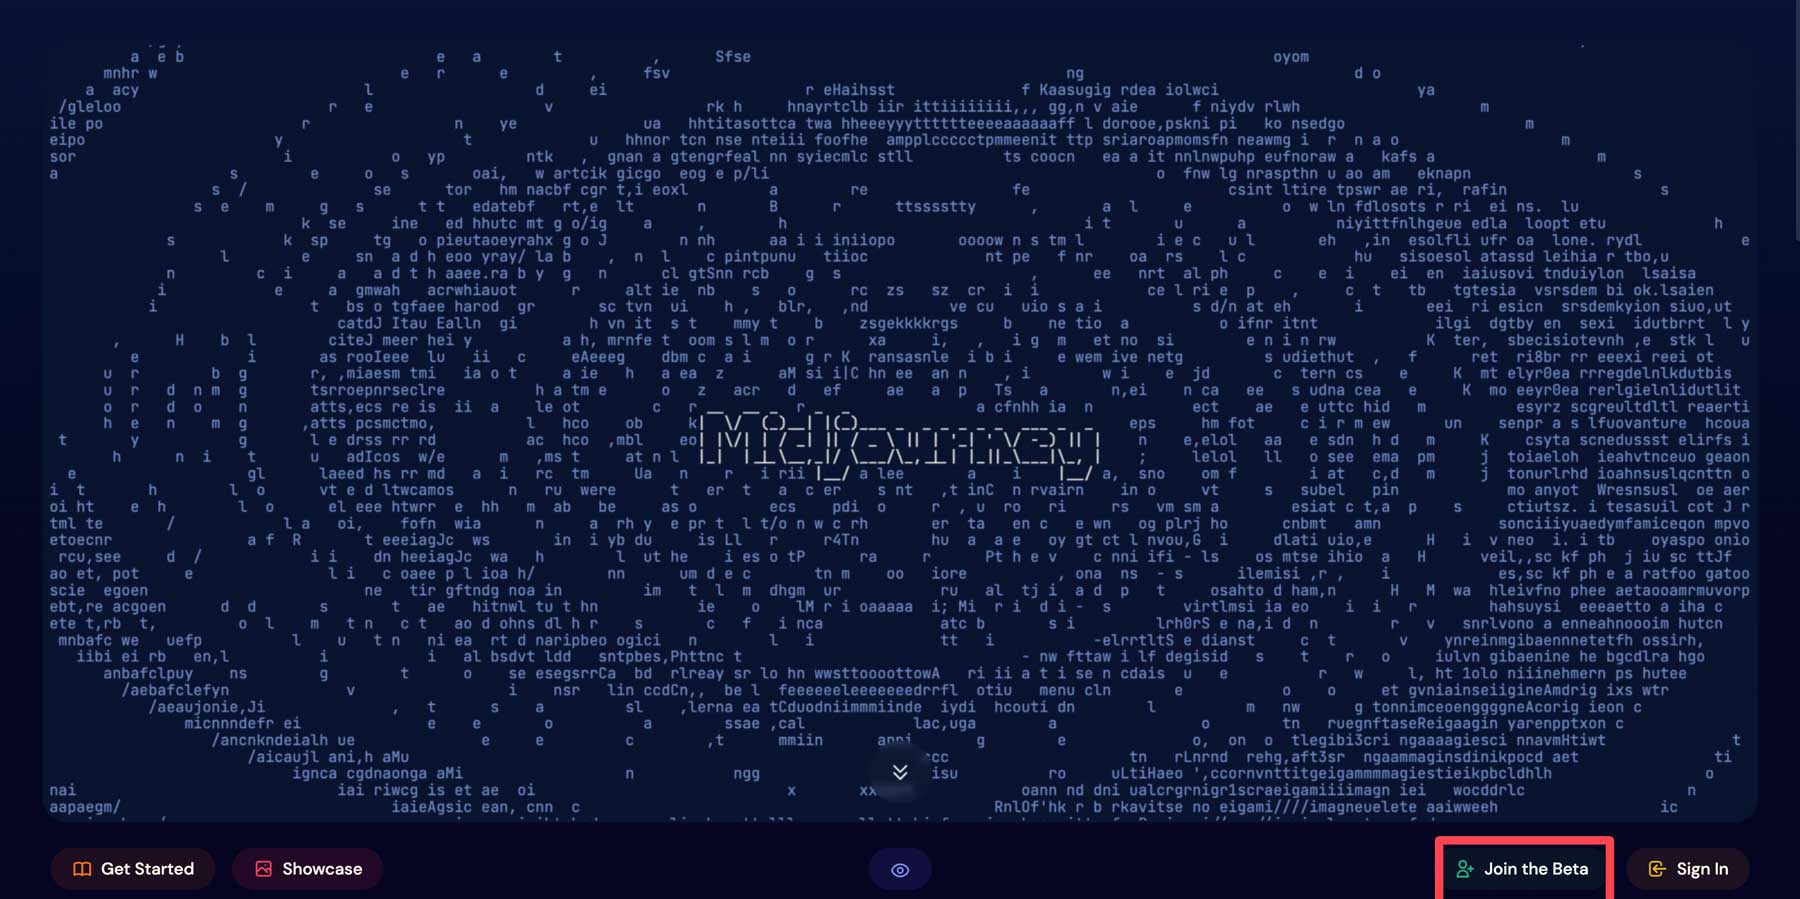
Before you can create amazing AI art with Midjourney, you’ll need to sign up or sign in to your Discord account. If you already have one, you can skip to the next step. Start by navigating to the Midjourney landing page.
Click on Join the Beta.
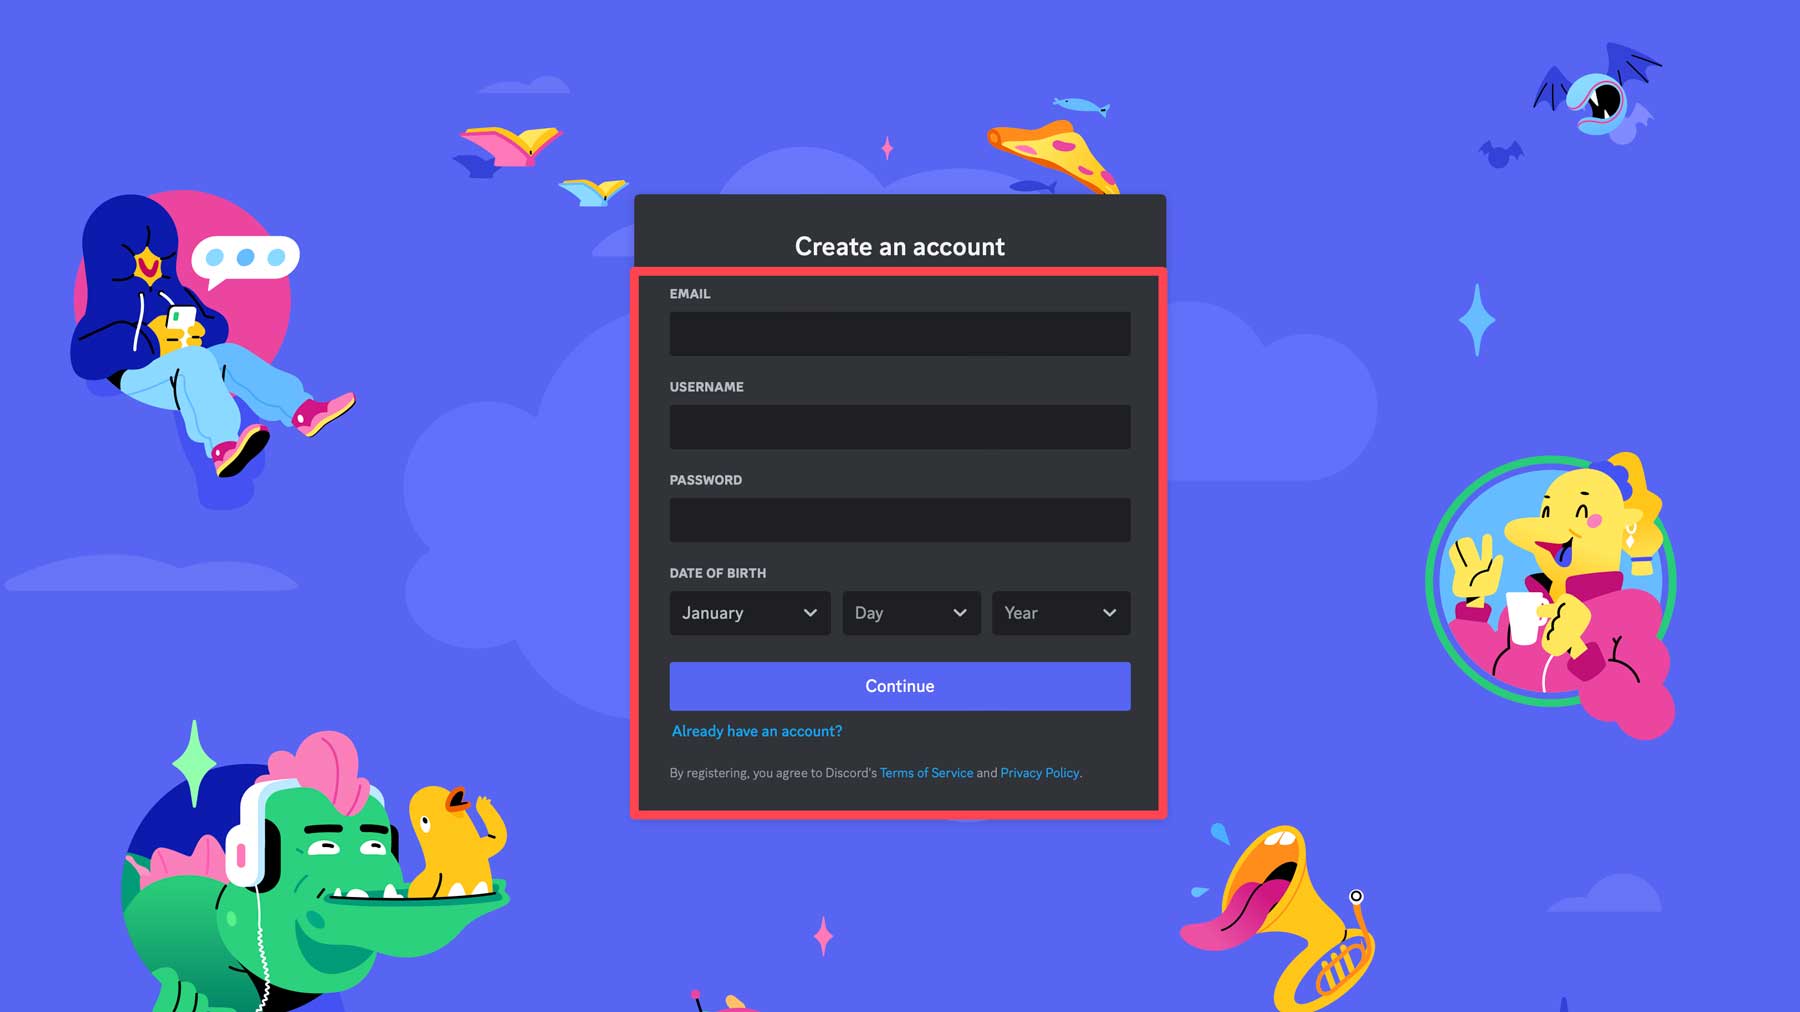
This will bring you to a new screen where you can create a Discord account. Once you’ve filled out the required fields, click the continue button. Alternatively, if you already have Discord, click Already have an account.
Next, click the + button near the top left of the Discord toolbar. This allows you to add the Midjourney server to your Discord account.
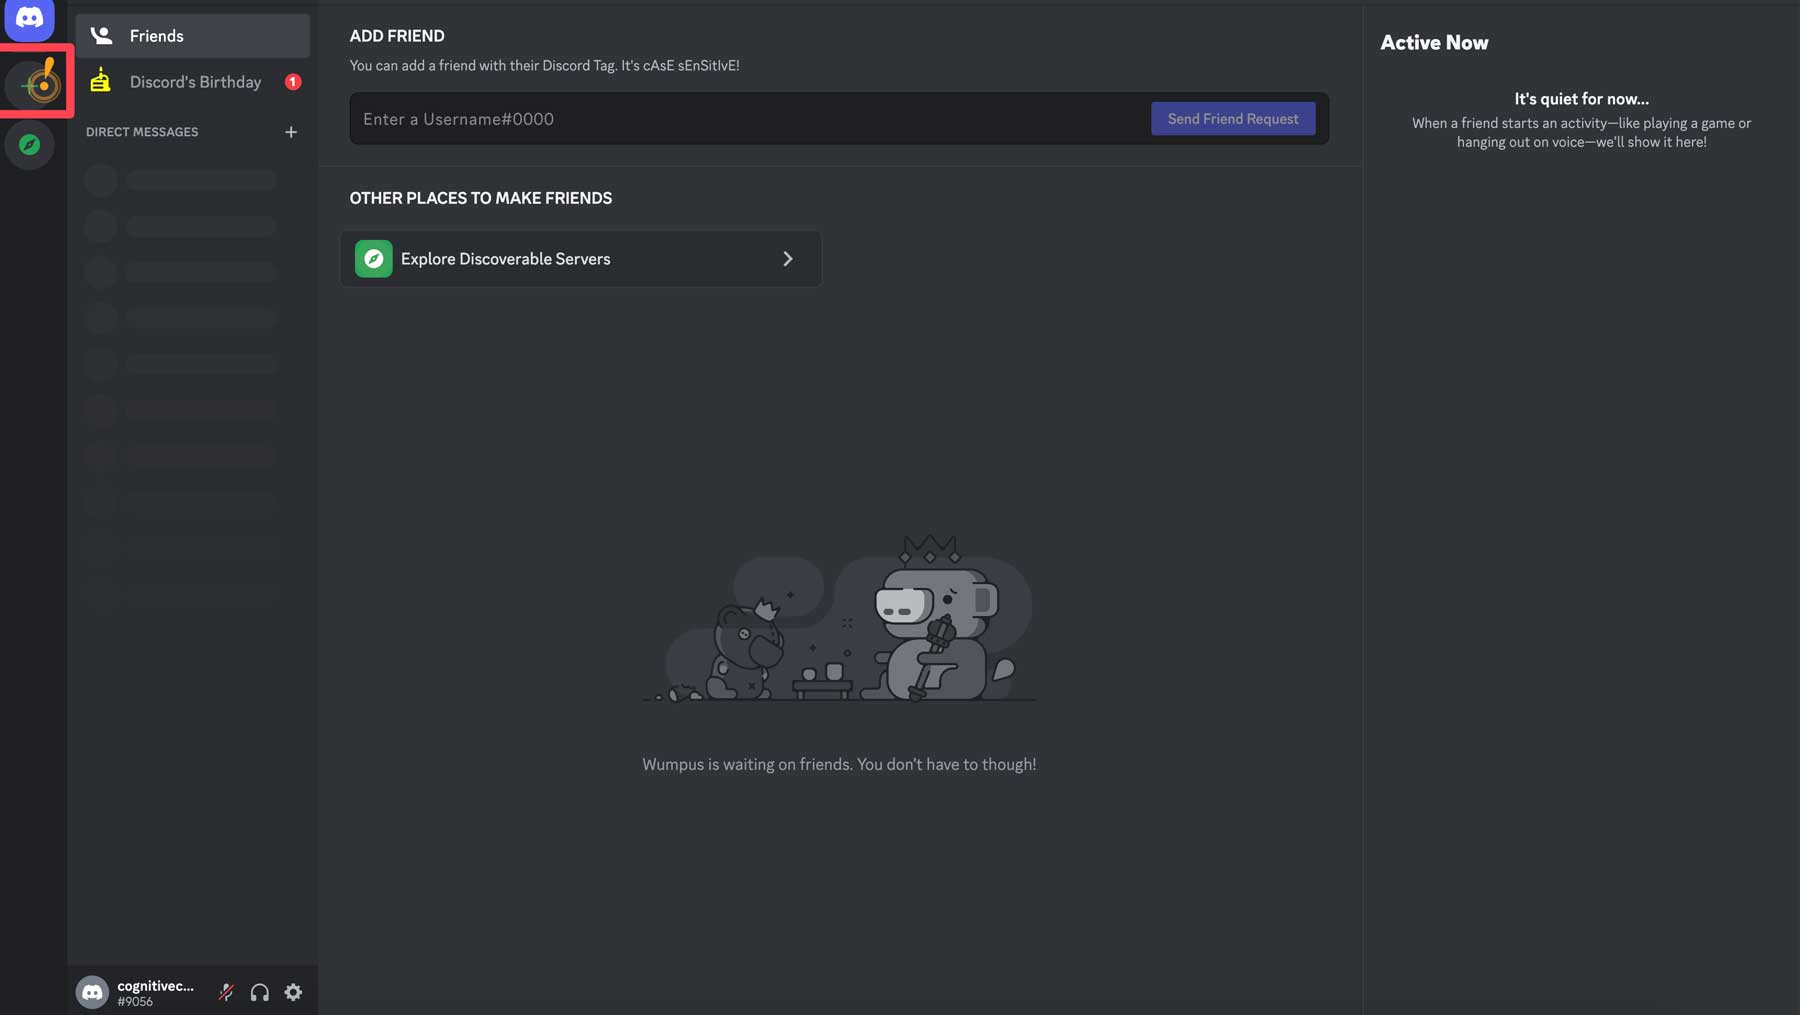
A popup will appear with several options. Click join a server for this tutorial.
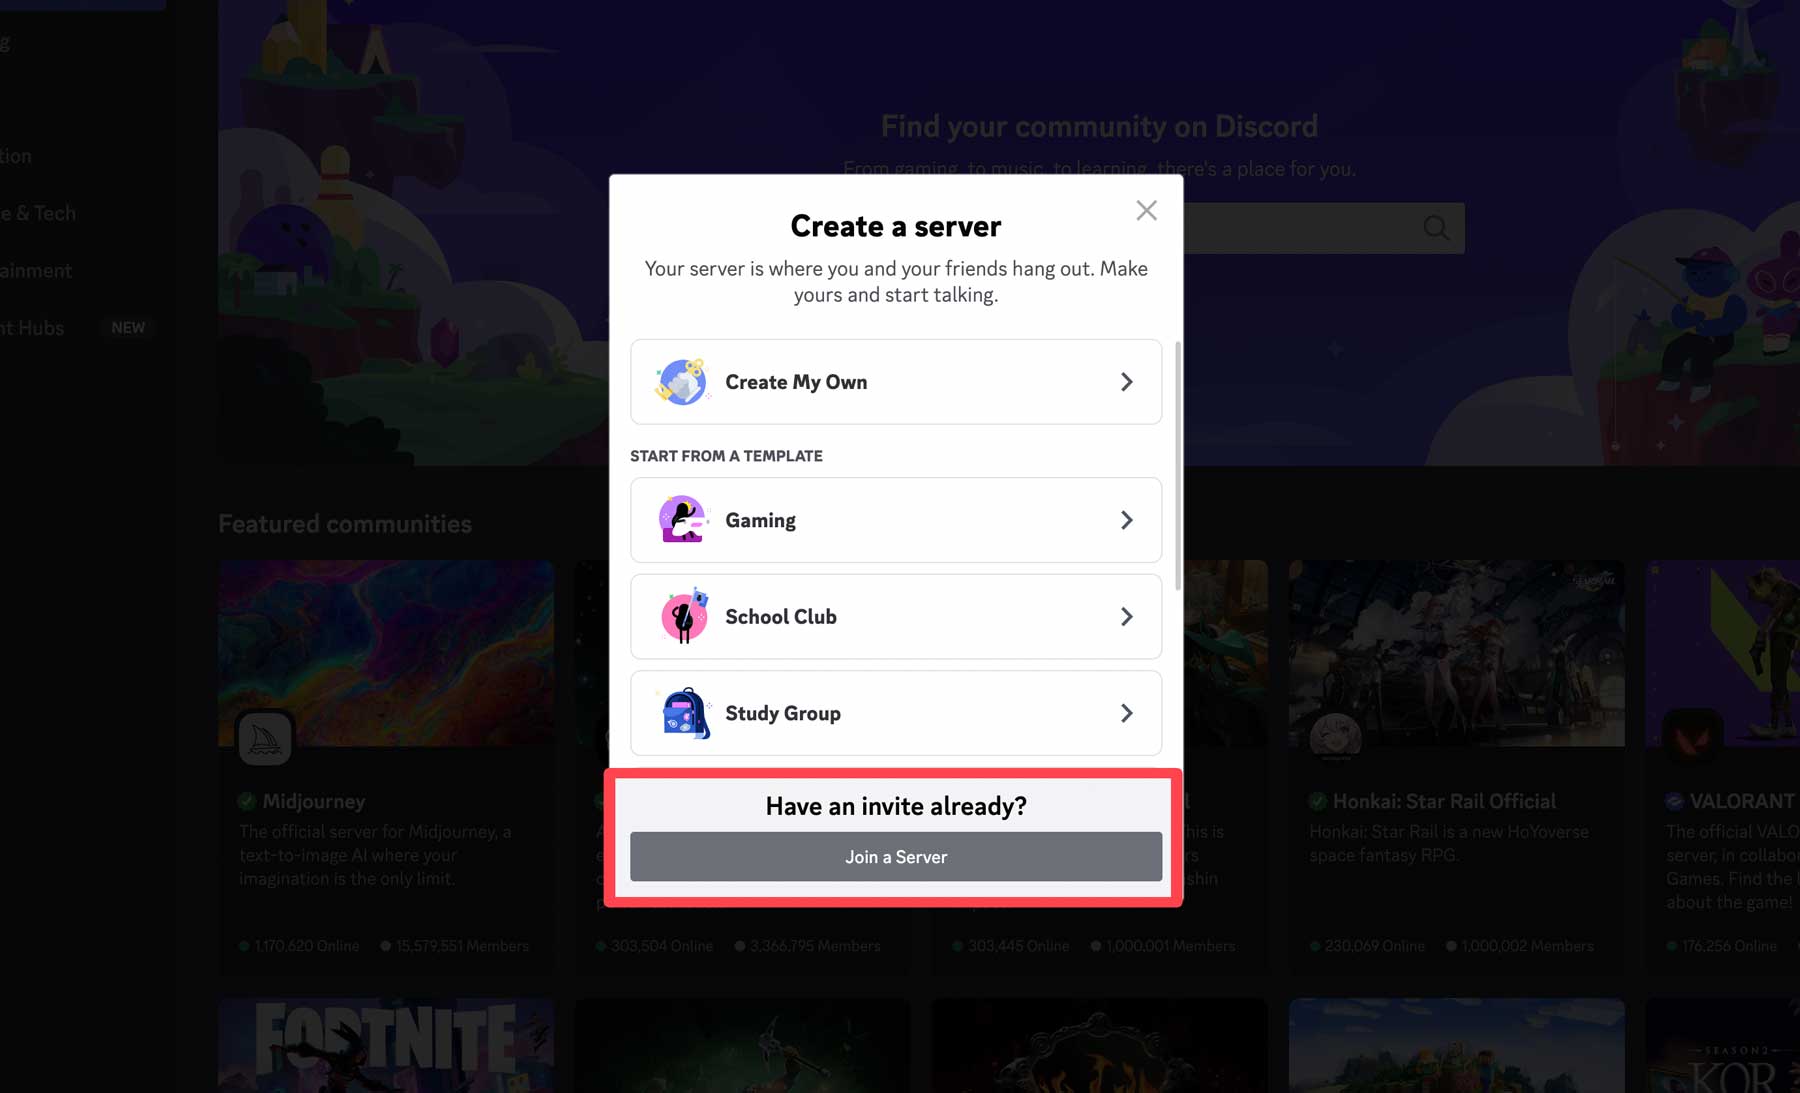
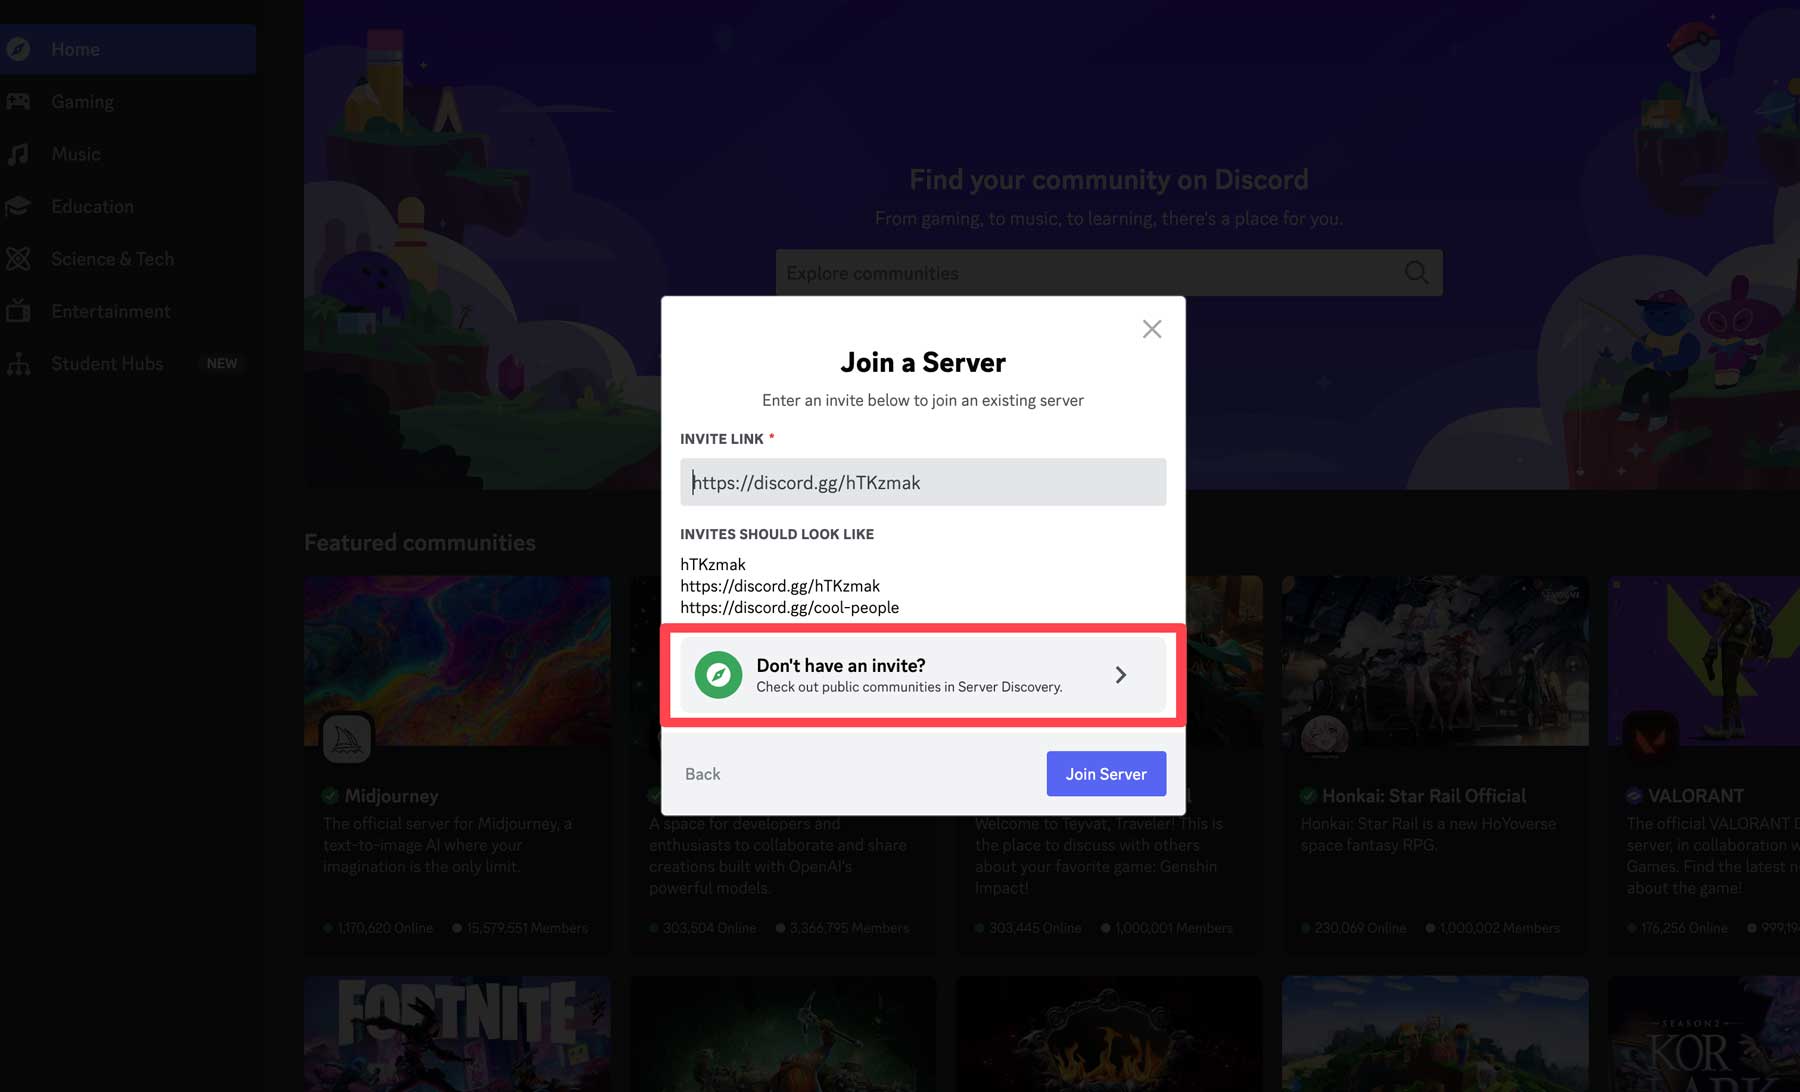
Next, click don’t have an invite. This allows you to browse servers you’d like to join.
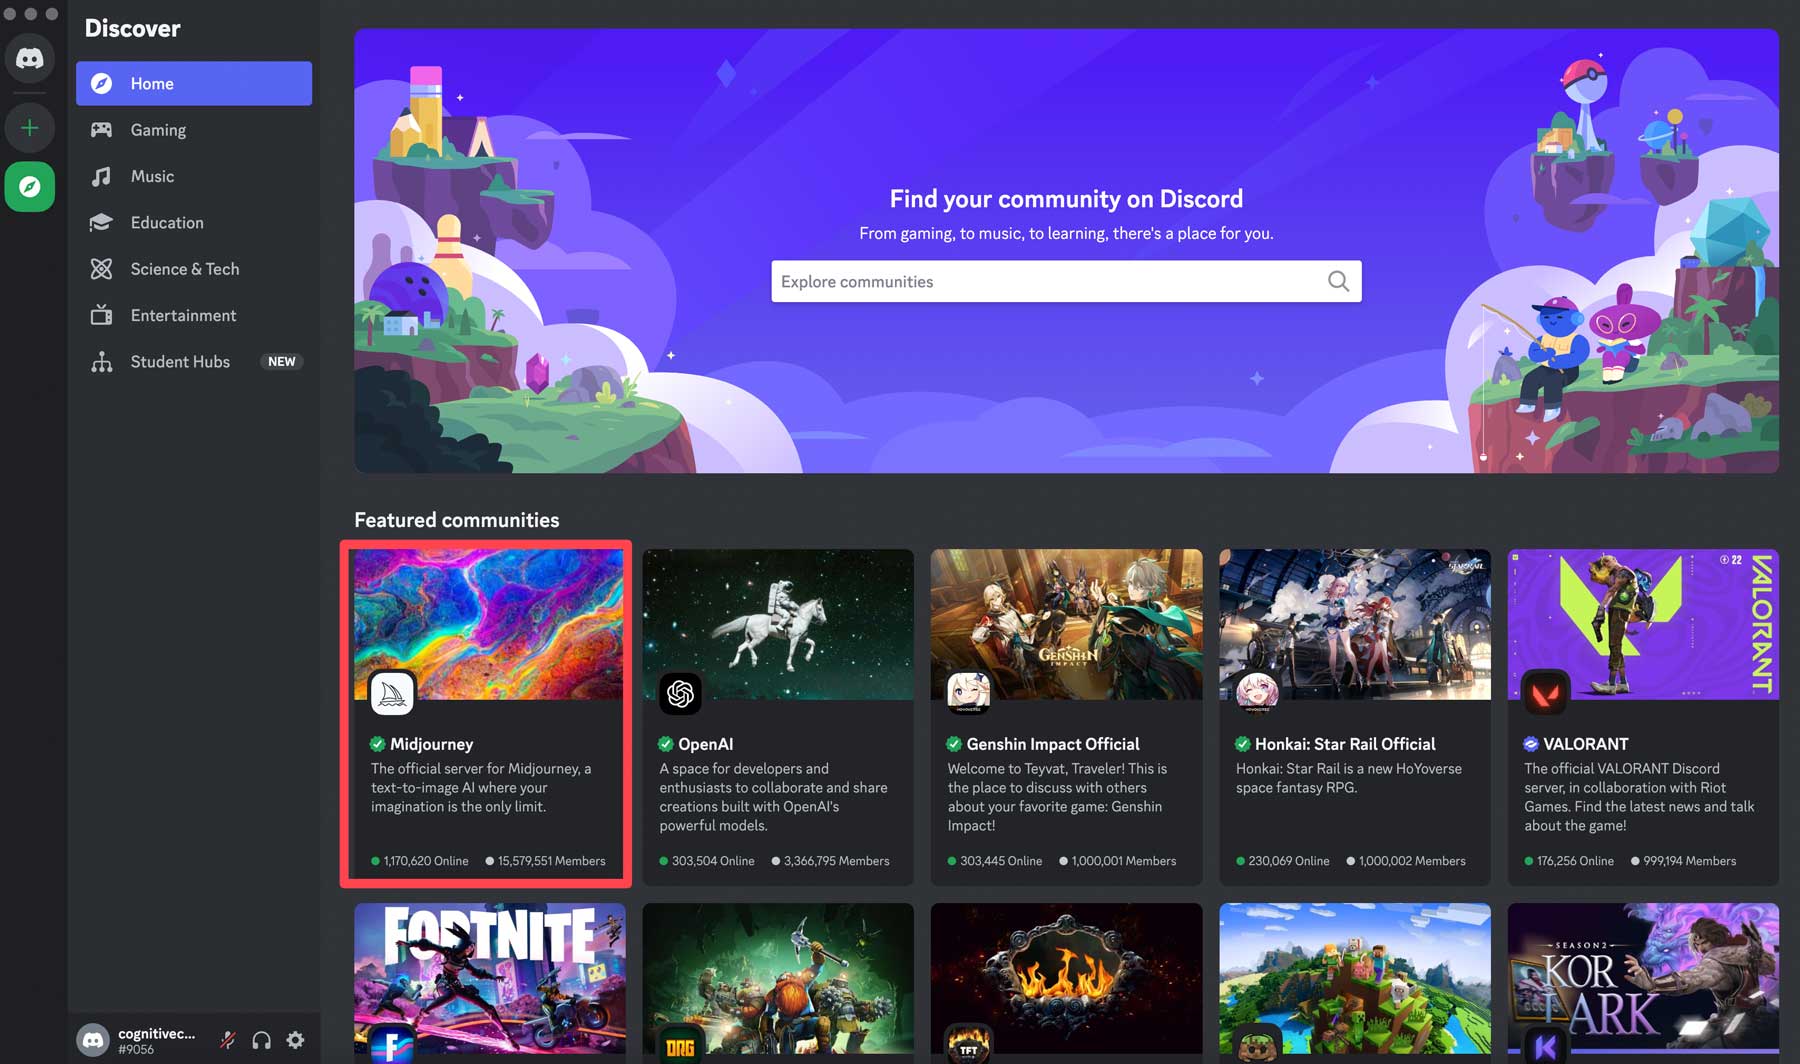
Locate Midjourney under the featured communities, then click on it.
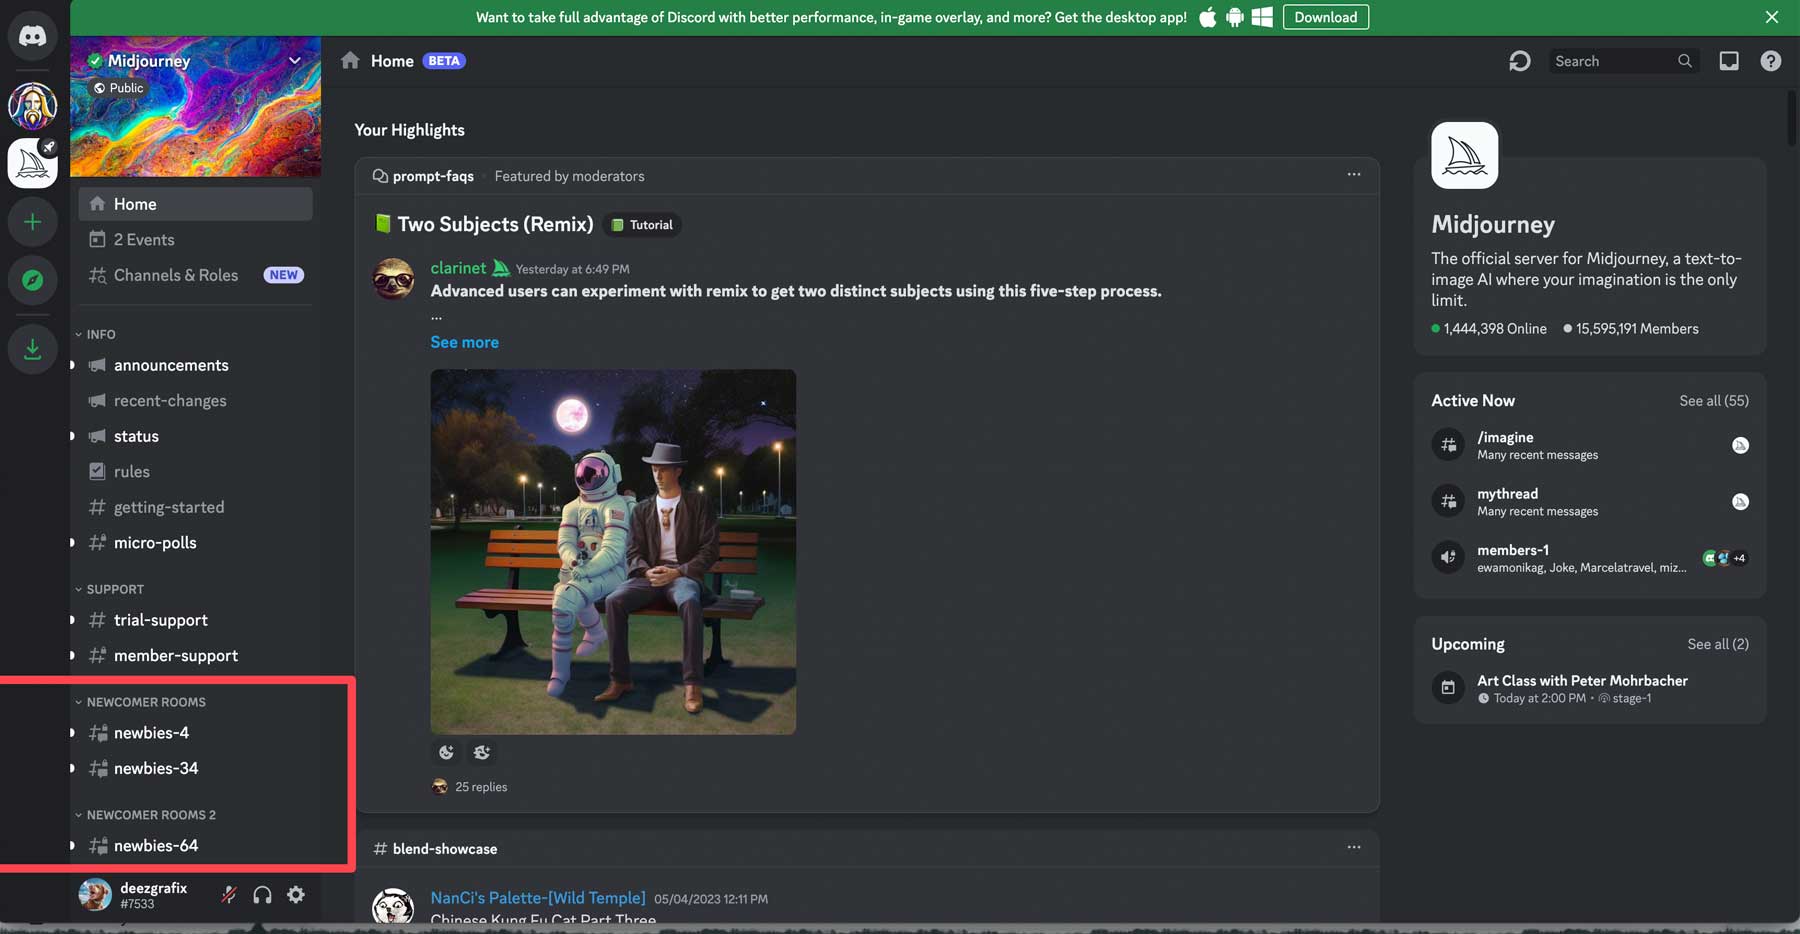
Once logged in, you’ll be redirected to the Midjourney Discord server. As a free member, you won’t have the option to create images, but you can poke around the interface to see what all the fuss is about. You can browse other users’ artwork by visiting different rooms, such as newbies-4, to get a feel for how Midjourney works.
Step 2: Signing up for a Midjourney Subscription
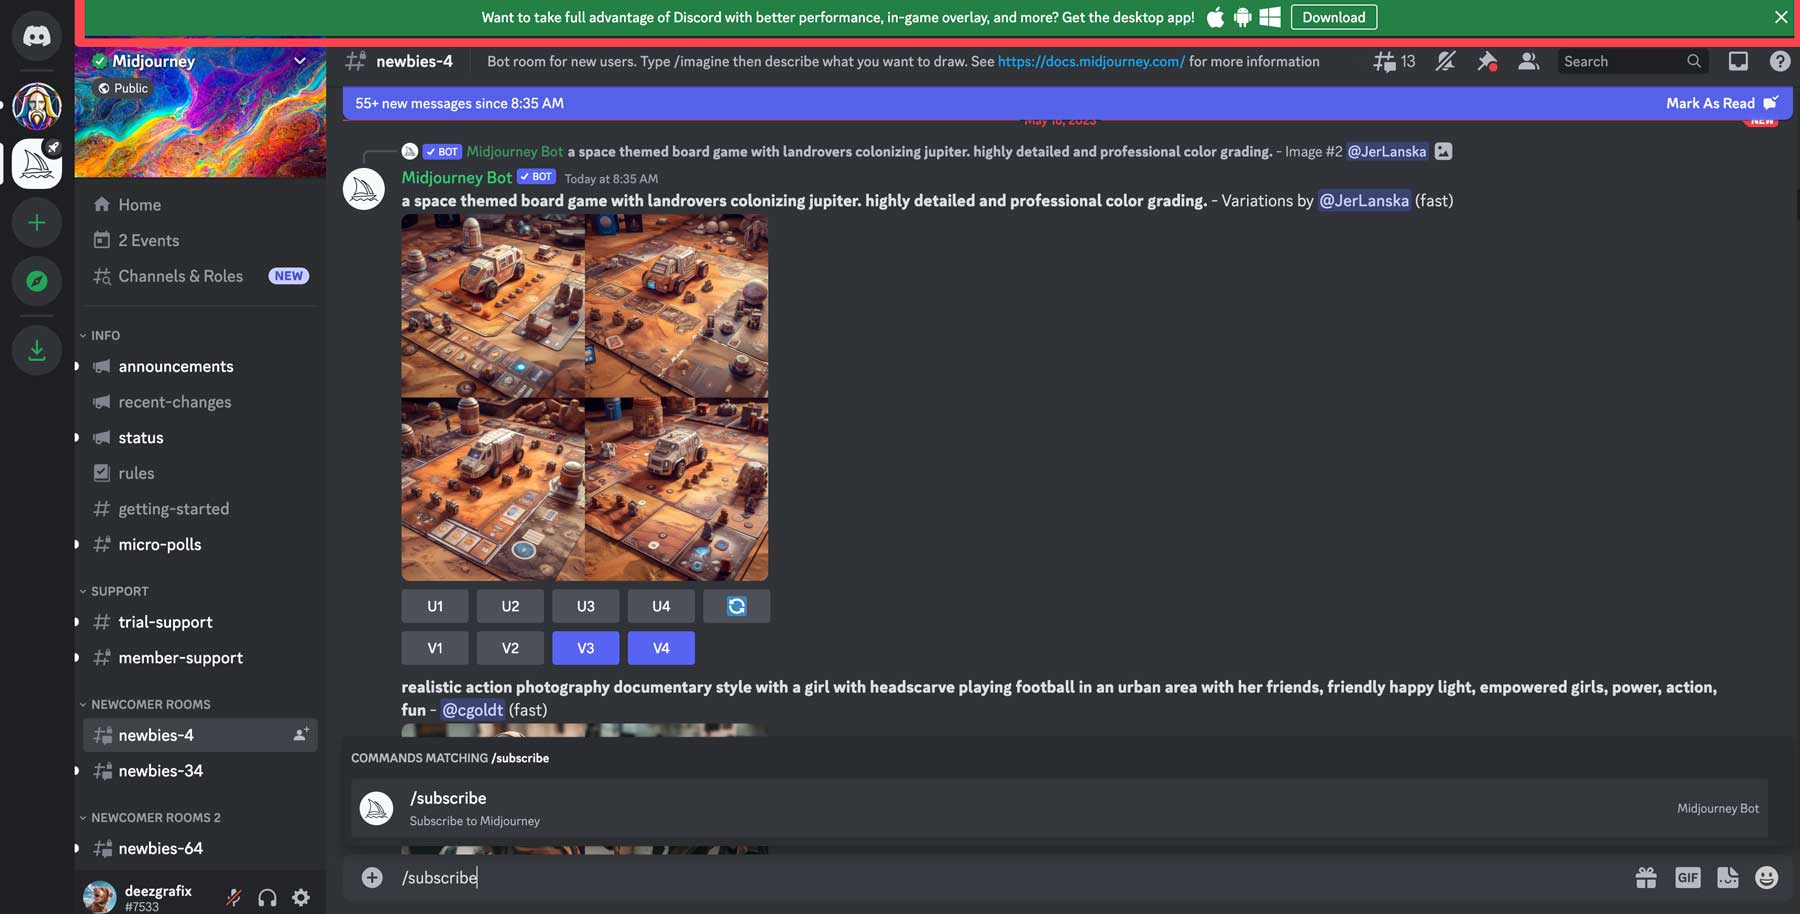
To create artwork, you must sign up for a Midjourney subscription. We’ll walk you through the easiest way to do it. Near the bottom of the screen, you’ll discover a text prompt. Click within it and start typing /subscribe. This will bring up the subscription prompt, allowing you to sign up for one of Midjourney’s paid plans. Click subscribe to Midjourney, then click enter on your keyboard.

The bot will redirect you to the subscription page to choose a plan tier that meets your needs. There are three tiers: Basic, which costs $10 per month, comes with 200 generations a month, and gives you a private chat room to generate images. The next plan, the Standard, gives you 15 hours of image generation, unlimited relaxed (slow) generations, and a private chat room for $30 monthly. Finally, there’s the Pro plan, which costs $60 per month, and provides 30 hours of fast image generation, a free chatroom, and unlimited relaxed image generation at $60 per month.
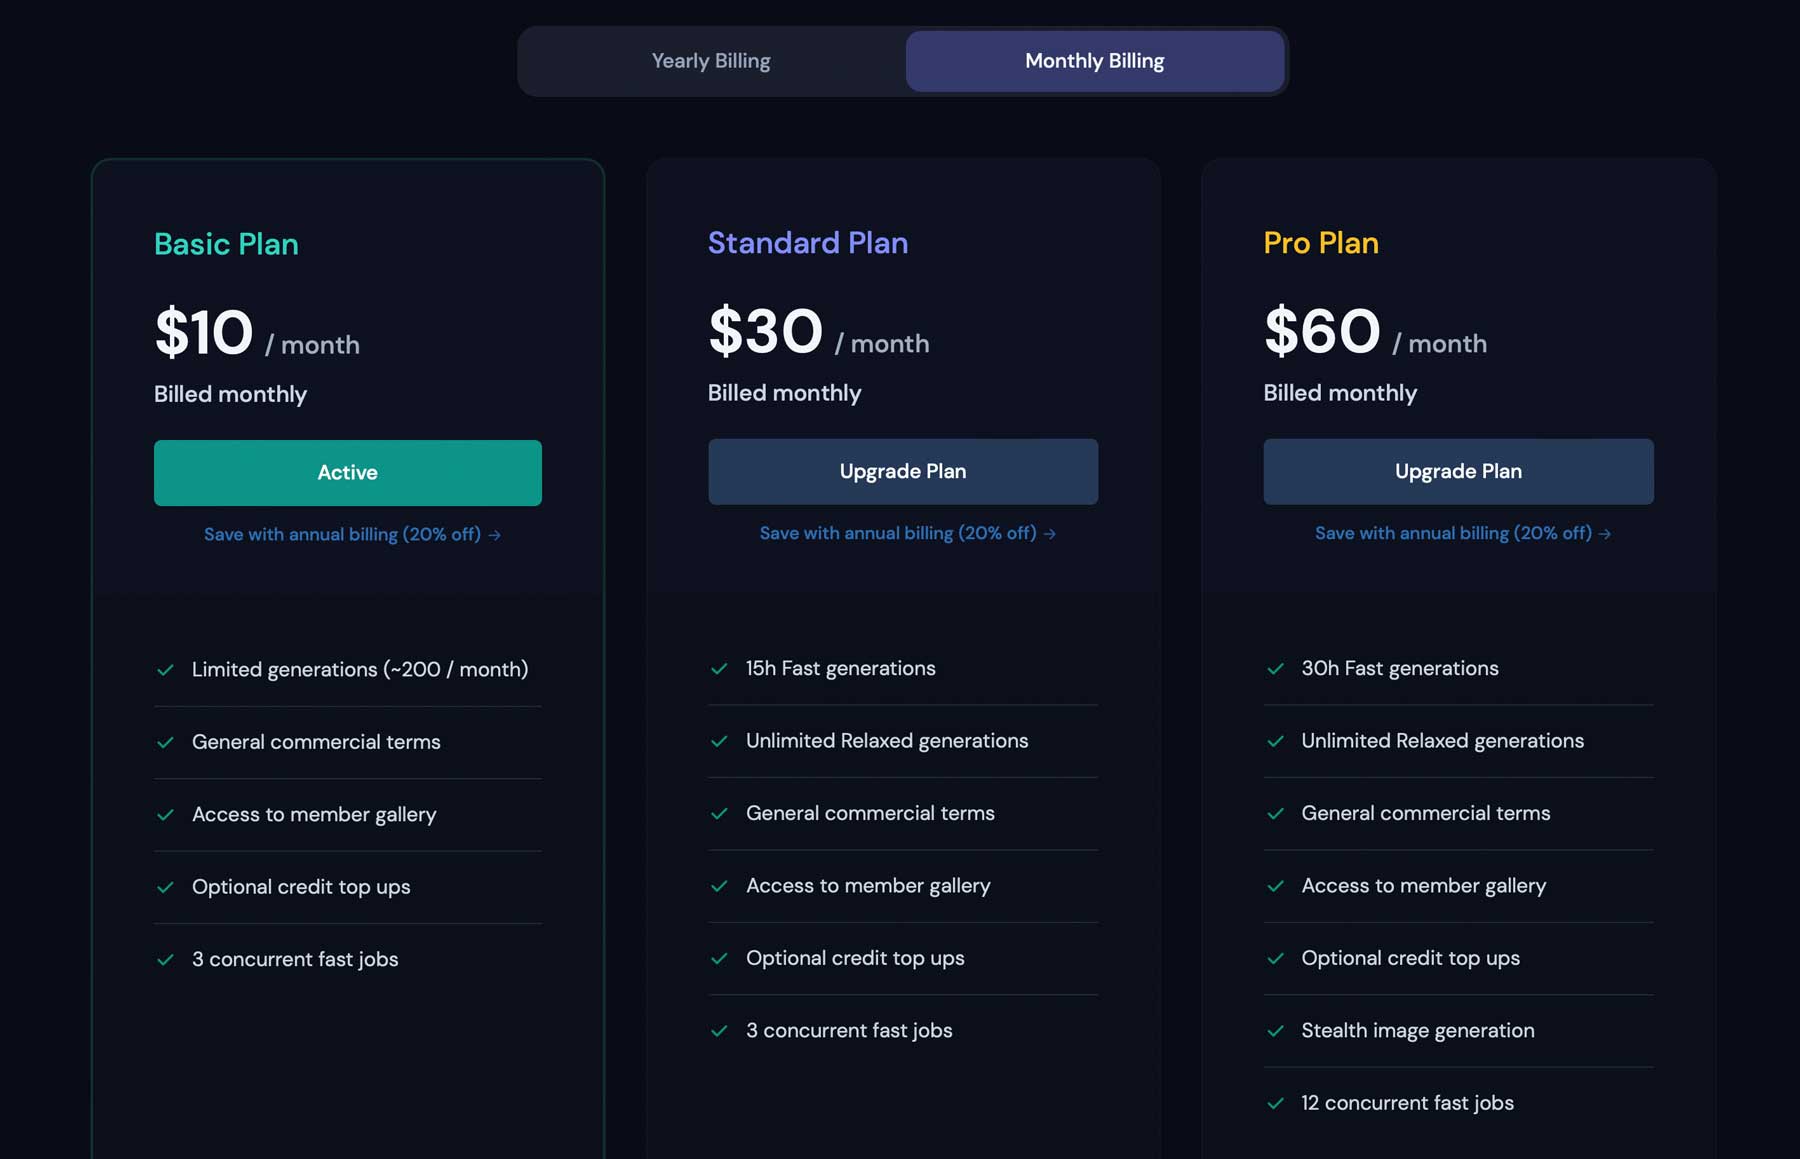
The basic plan is your best option if you’re starting out. It allows you to explore the platform, generate images, and familiarize yourself with the interface and how text prompting works. If you like what you see, you can always upgrade to a higher tier simply by inputting the /subscribe prompt to bring you to your account, where you can easily upgrade.
Understanding MidJourney’s Tools and Features
When first starting out, Midjourney can be hectic. While it is a good idea to check out one of the newcomer rooms to get a feel for how things work, it can be challenging to keep up. Thousands of people are in the newbie rooms at any given time, making it difficult to see your generated images. It’s best to download and install the Discord app, where you can access private messaging with Midjourney, making viewing and altering your images much more straightforward. To download the app, click on the floating green bar at the top of your screen. Discord will sense your operating system and automatically suggest the correct app version.
Once installed, you can click the Discord icon at the top left of the app to access your private chat room.
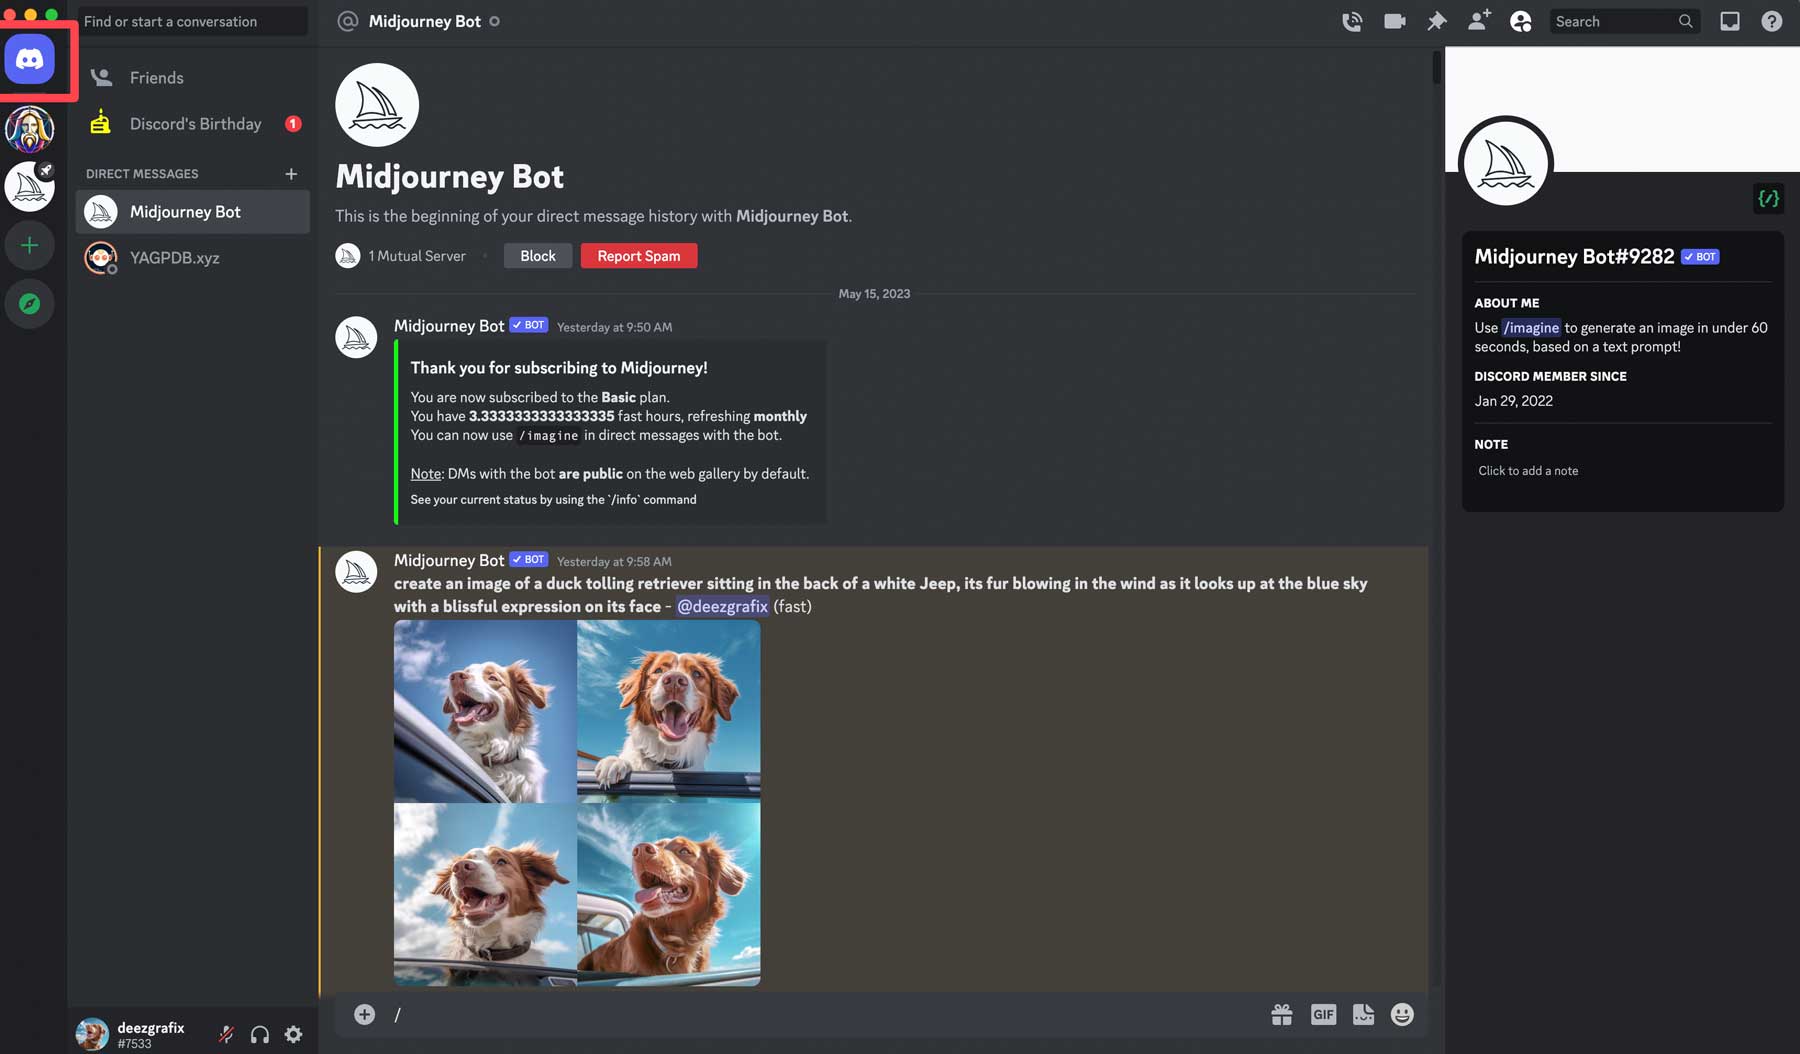
Using private messaging provides a much less hectic interface, where you can generate images and easily see them in a private chat without the distraction of viewing other users’ photos. However, participating in group rooms is a great way to get inspiration and watch what prompts others use to generate gorgeous images.
Creating AI Art with Midjourney
Before beginning your quest to create unique AI art, there are a few basic commands to be aware of. First and foremost, any prompt must start with /. For example, when wanting to create a new image, you’d input something along these lines: /imagine a hyperrealistic image of a dog in the bed of a truck. In less than a minute, your first set of images will appear.
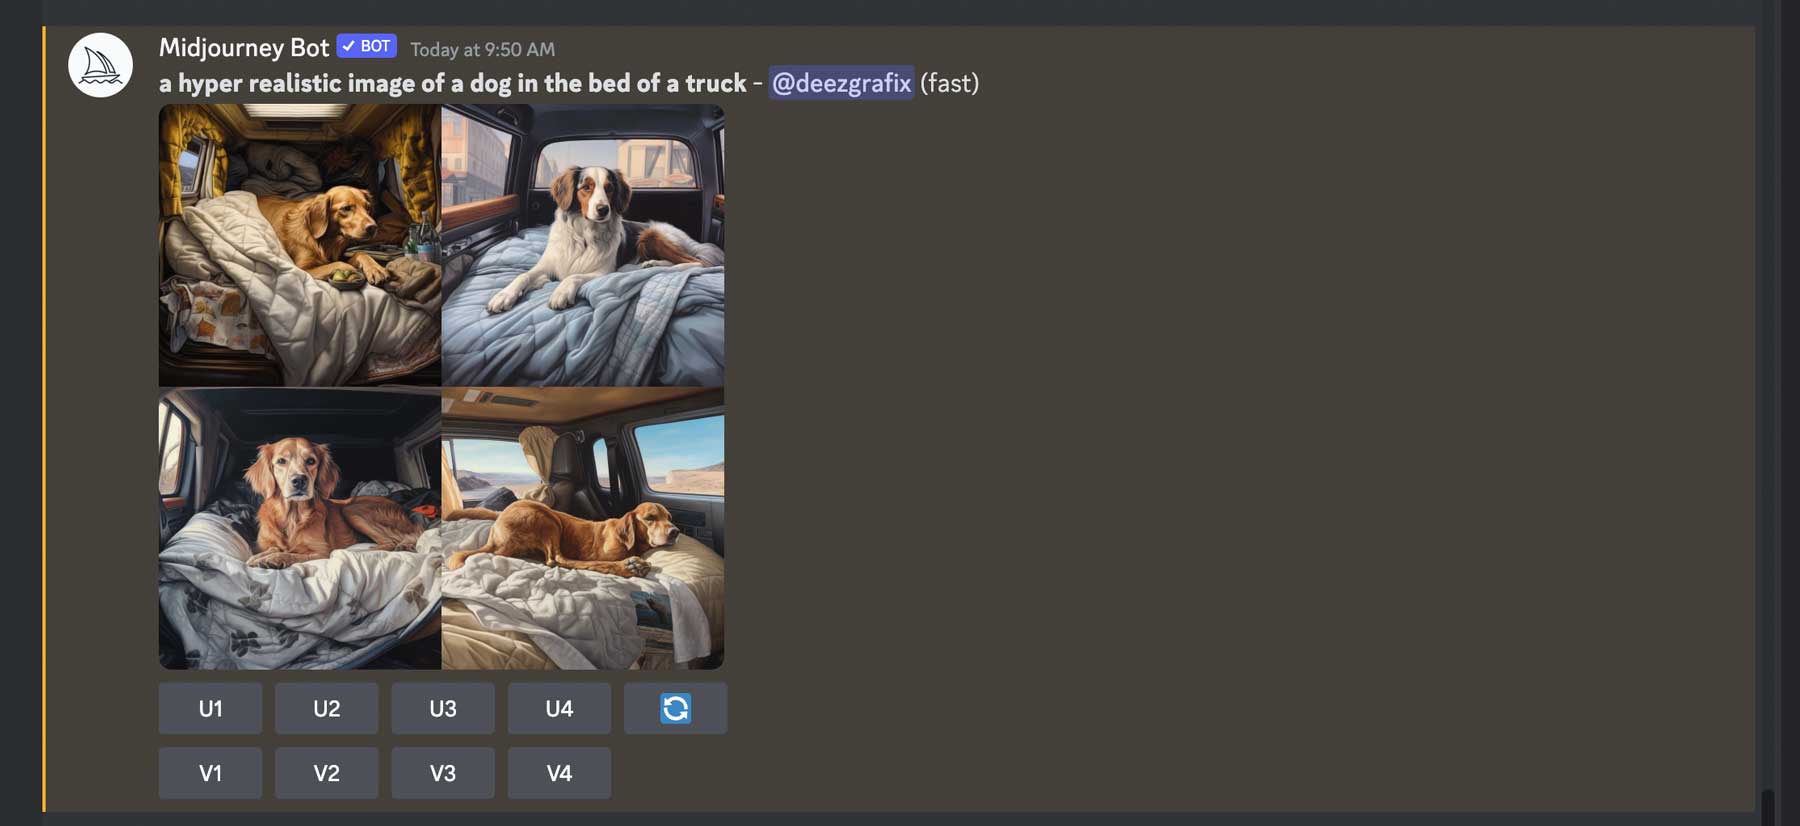
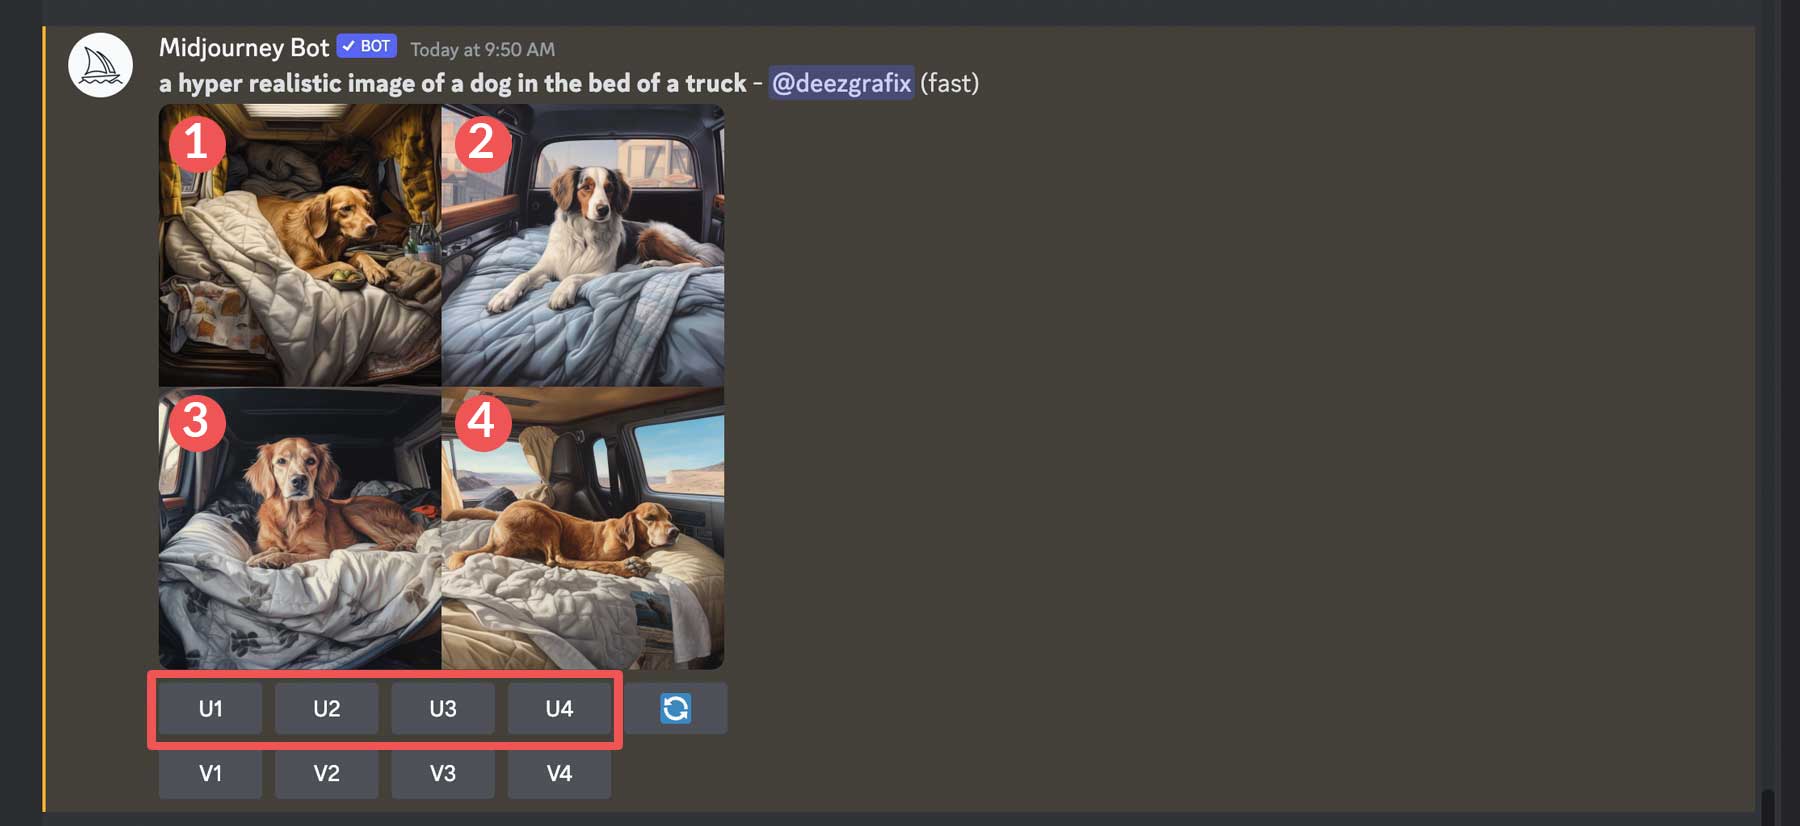
When your first set of images appears, you’ll notice a series of buttons underneath them. The top row of buttons is for upscaling one or more of the generated images. They are numbered U1 – U4, which are used to identify the images in the sequence. So, for instance, if you want to upscale the second image, click the U2 button in the top row.
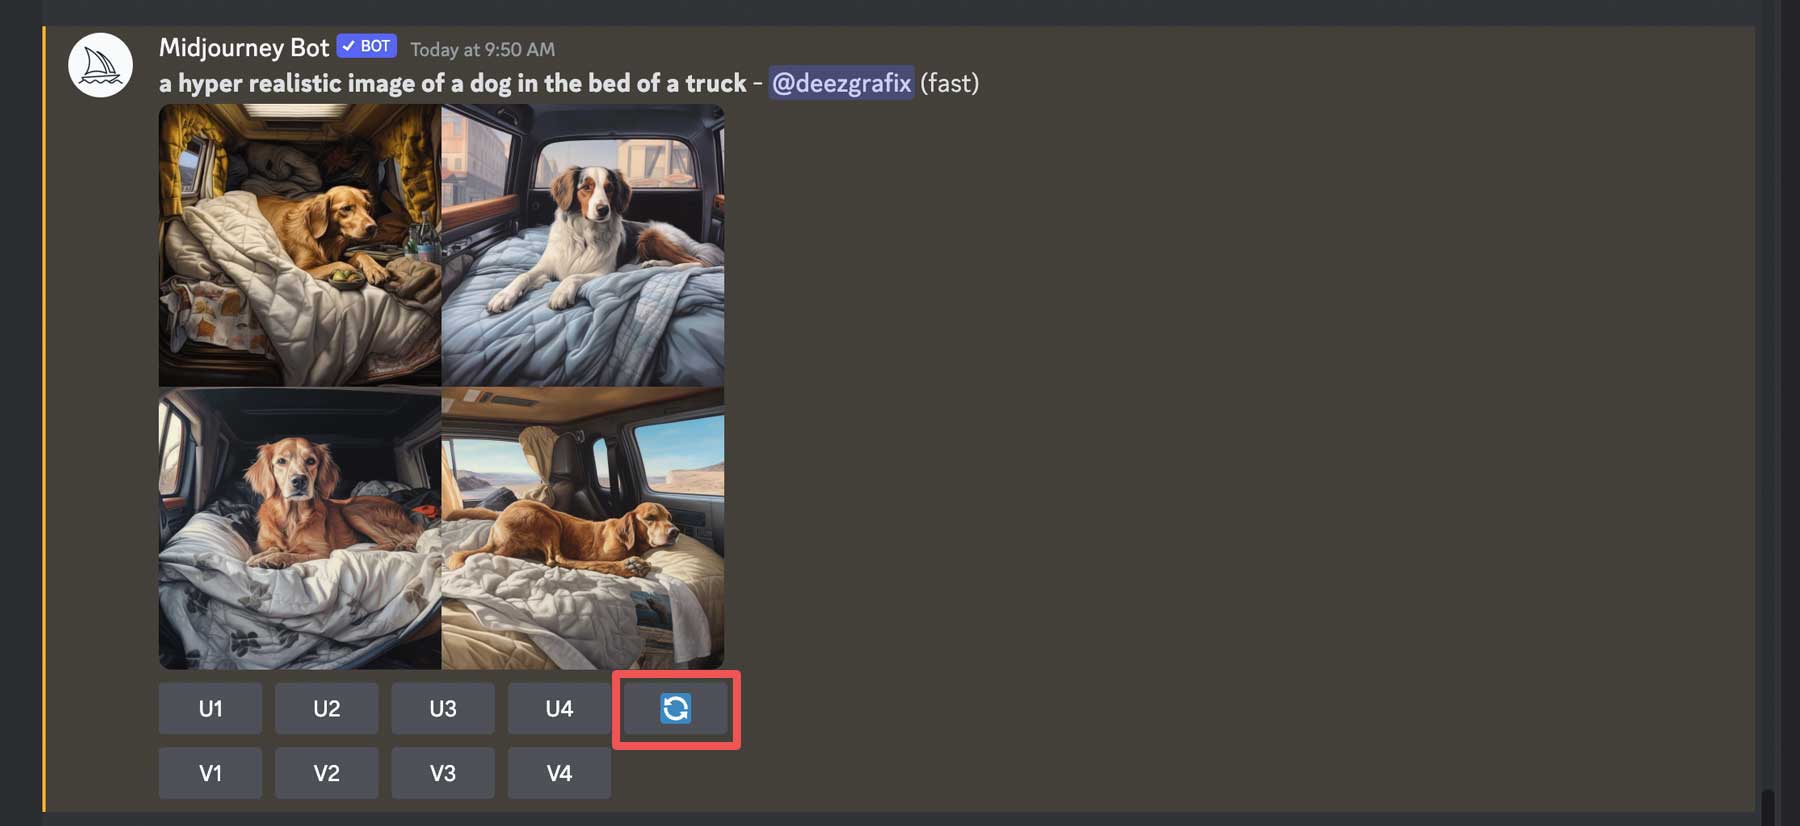
On the right side of the first row is the regenerate button. This is an excellent tool if you aren’t satisfied with the first set of images Midjourney created for you. Click the regenerate button to ask Midjourney to try another concept based on the original prompt.
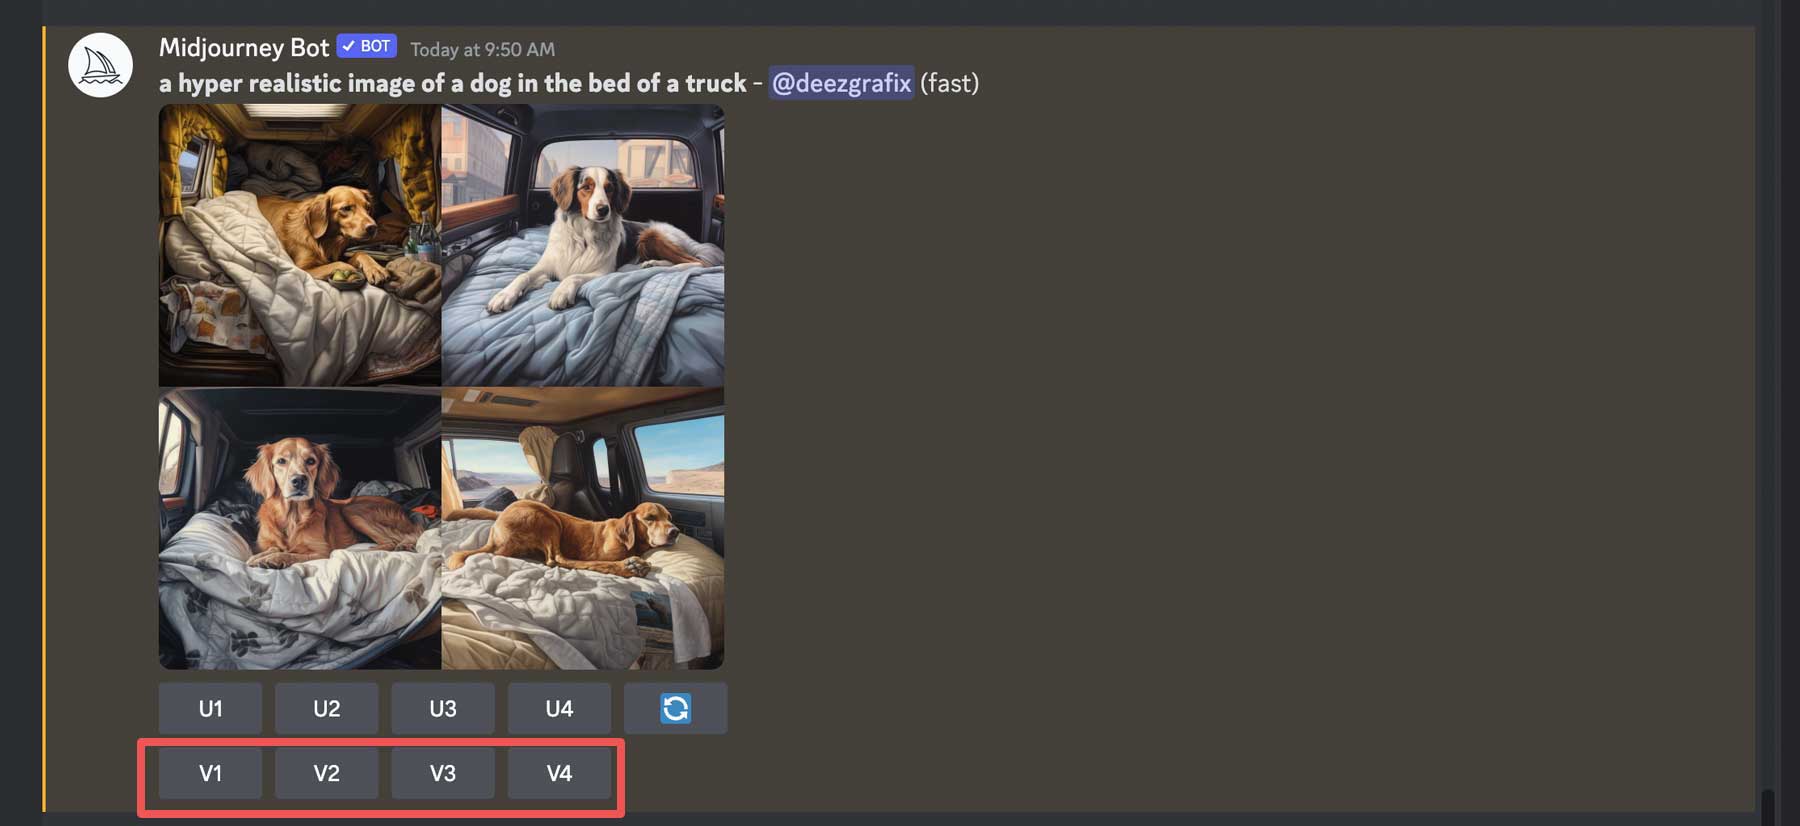
Finally, the second row of buttons is used for variations. Numbering V1 – V4, you can choose the button corresponding to the image you wish to create variations for. Once clicked, Midjourney will take that image and create variations of it.
In addition to the imagine prompt, there are a few other commands to be aware of. Here’s a list of all the basic commands within Midjourney.
Imagine Commands
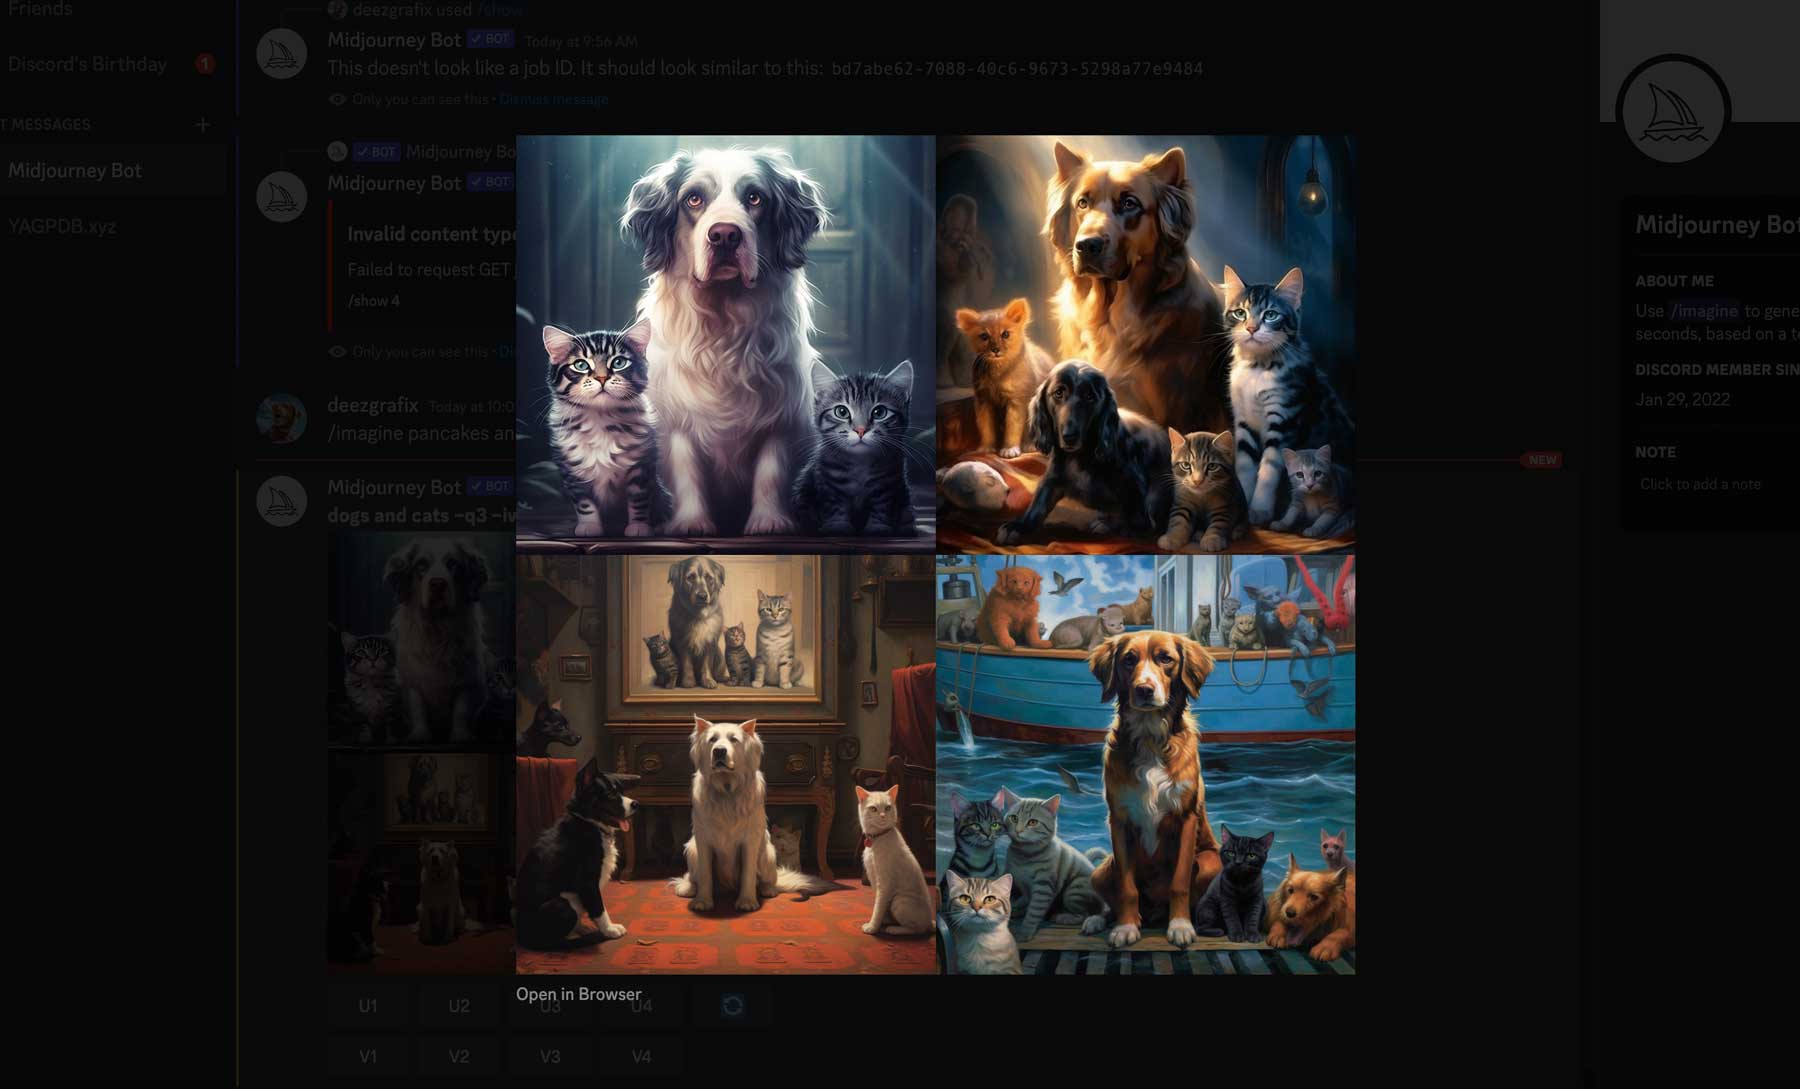
If you want to control the output of your imagine prompts, you can input additional parameters behind /imagine. You can choose things like aspect ratio, level of styling, and more. For example, we input this prompt to generate an image that has an image quality of 3 and an image prompt weight of .25: /imagine cats and dogs –q3 –iw 0.25. We instructed Midjourney to create an image of cats and dogs, give it an image quality of 3, and set the image weight to .25. Image weight lets Midjourney know how closely you want your image to relate to the text prompt. A higher weight will result in images closely related to your prompt. In contrast, a lower one gives the bot more freedom to create the images.
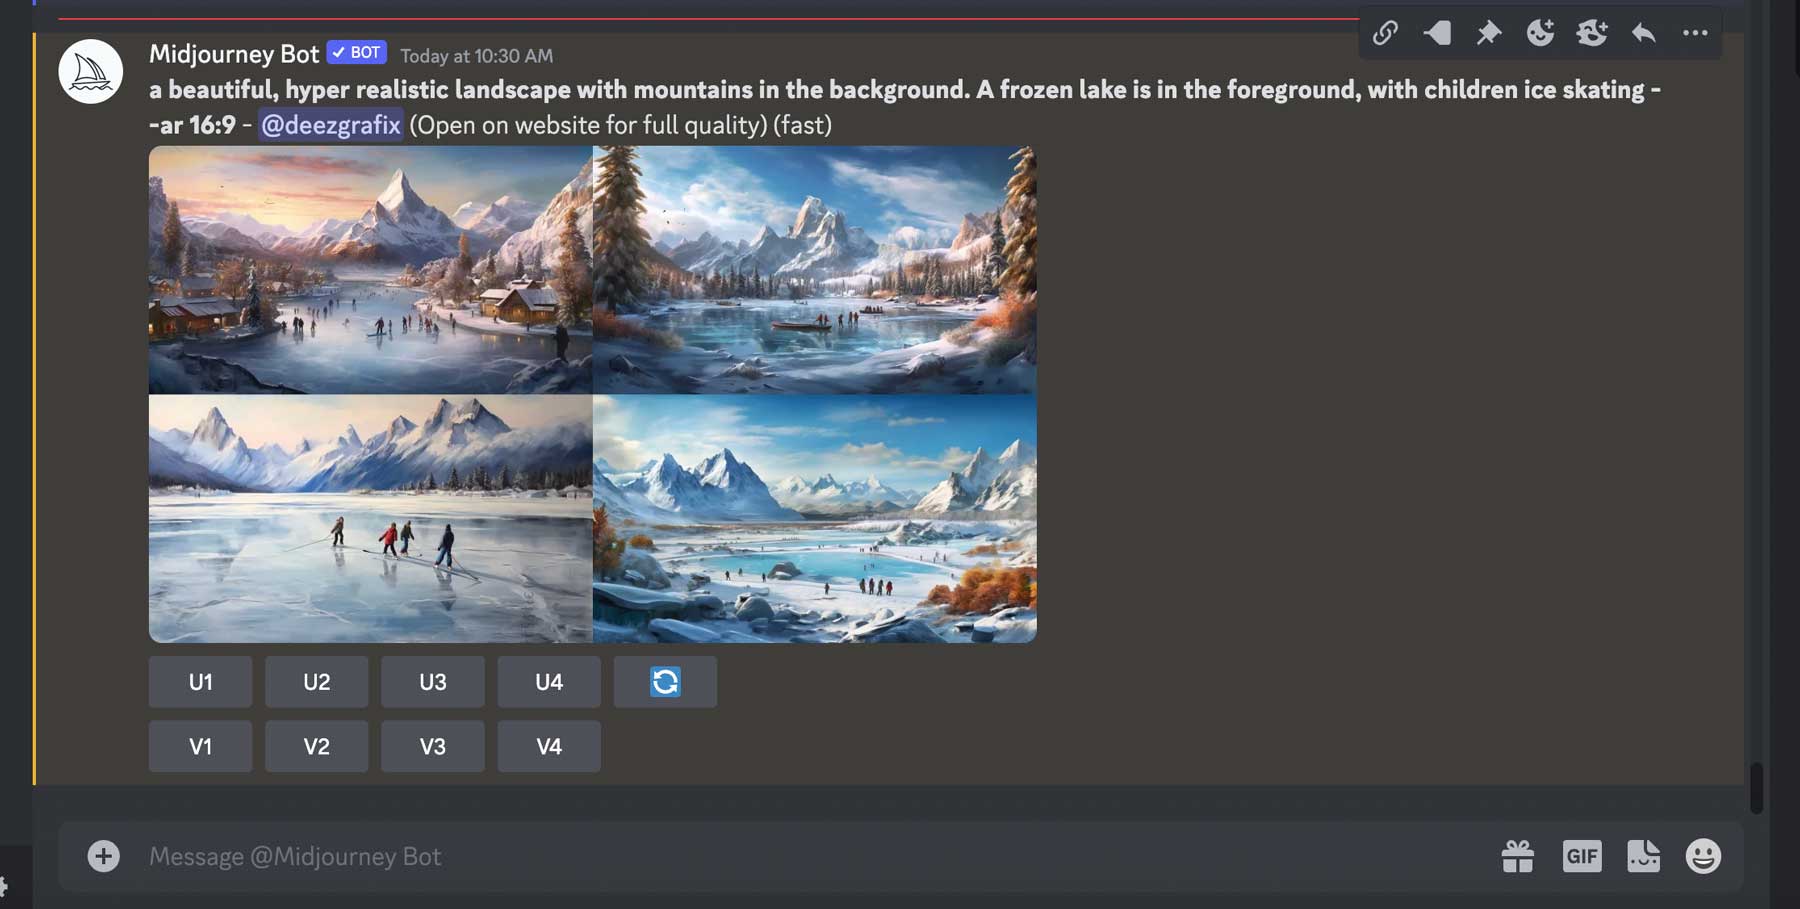
There is also the aspect ratio command, which is useful for changing the width and height of your images. By default, Midjourney creates square images with an output resolution of 1024 x 1024 pixels. If you want to create an image that isn’t square, you’ll need to specify an aspect ratio. For example, we used this prompt to generate a photo with a 16:9 aspect ratio: a beautiful, hyperrealistic landscape with mountains in the background. A frozen lake is in the foreground, with children ice skating –ar 16:9:
Since the release of version 5, some commands no longer work. For example, you can no longer use the width (–w) or height (–h) parameters. Here’s a full list of all parameters you can use with /imagine.
Advanced Prompts
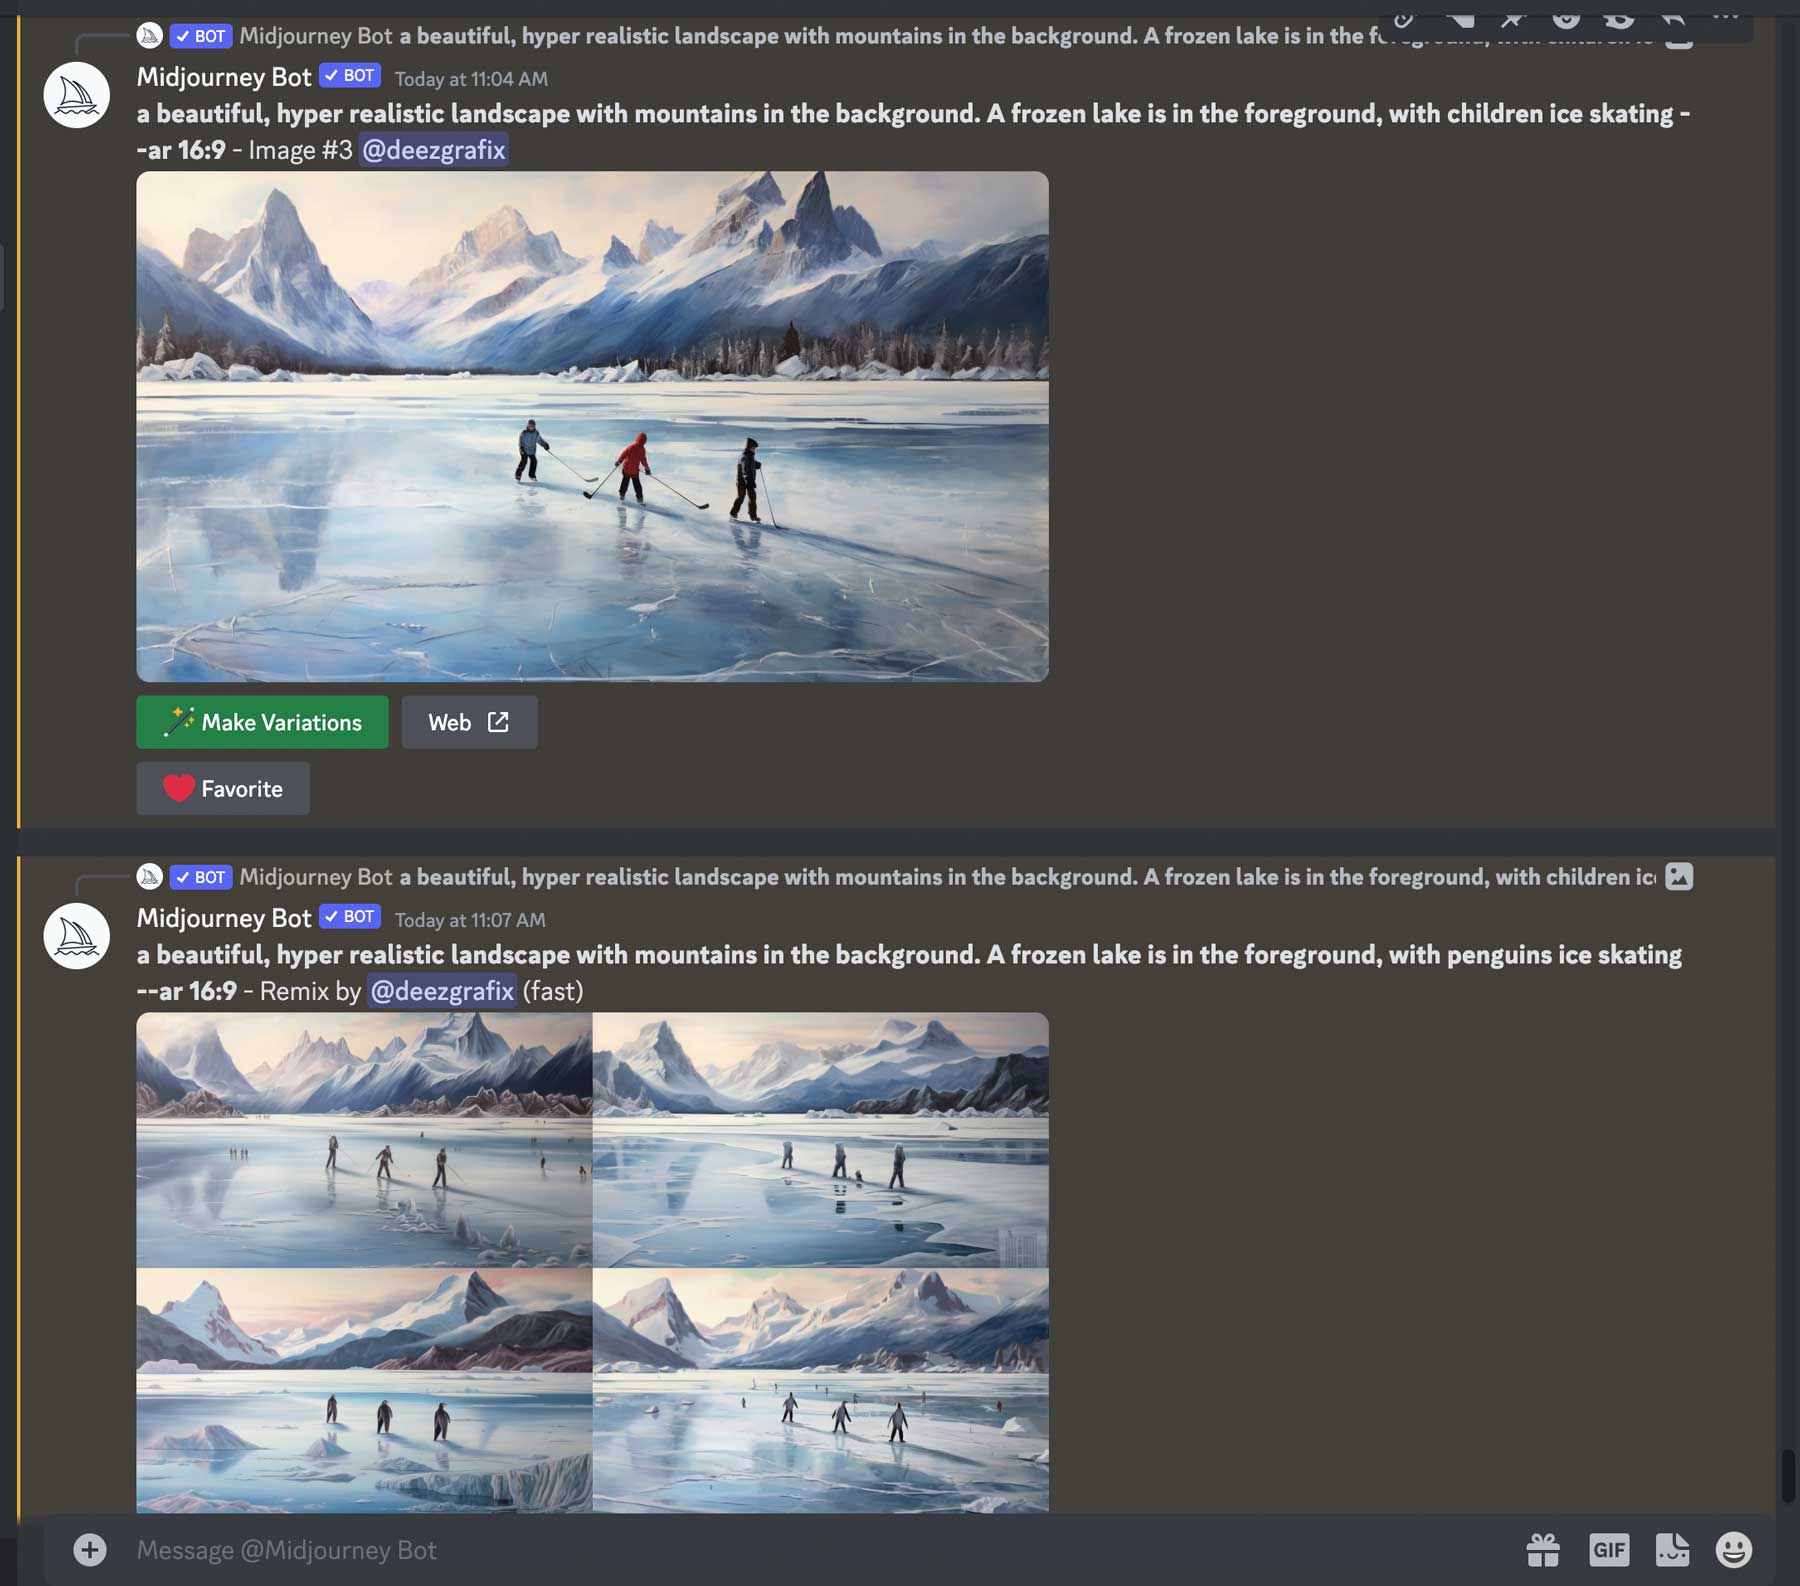
With image prompts, you can upload one of your images to use within Midjourney. You can combine them with image weight (–iw) to adjust the image’s importance in relation to the text portion of your prompt. You can also use Remix, which allows you to change your prompts, parameters, model versions, or aspect ratios. You can use remixing to change the lighting, evolve a focal point, or create cool compositions. To enable remix mode, type in /prefer remix. For example, we’ll take an upscaled image of a frozen lake with children skating and change it to penguins skating.
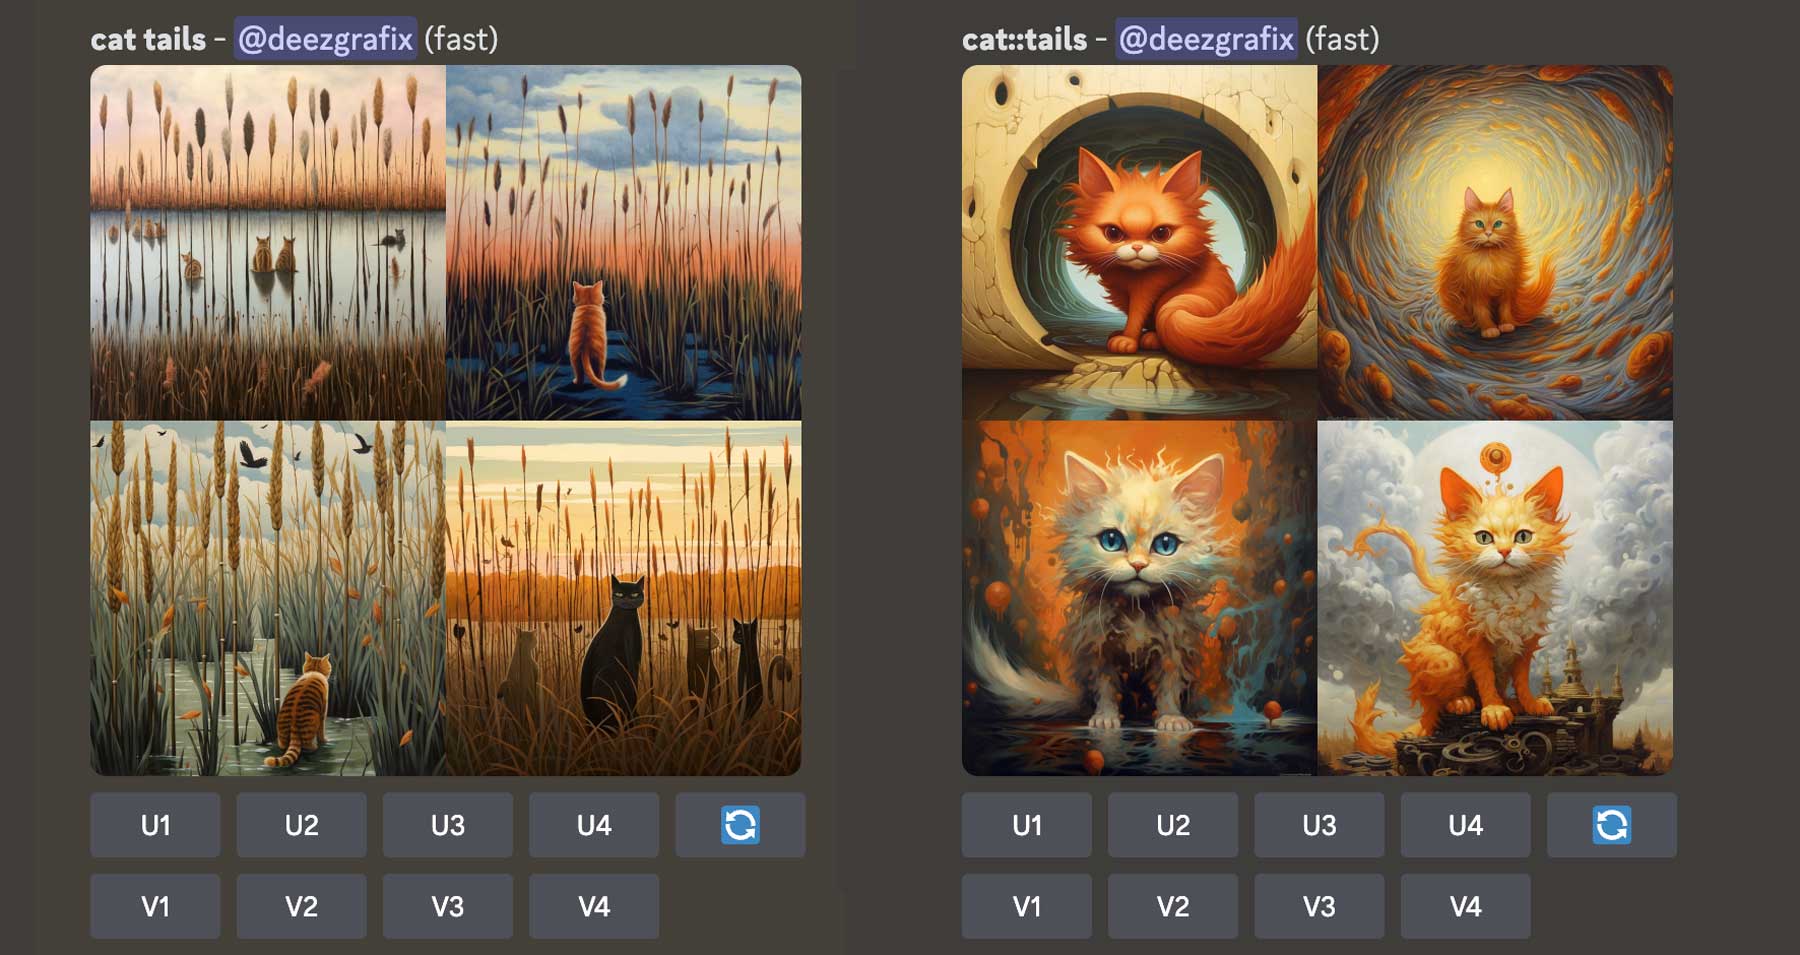
There are also multi prompts, which gives you the ability to define more than one concept during image generation using a double colon (::) within your prompt. For example, typing /imagine cat tails will have a very different result than /imagine cat::tails would:
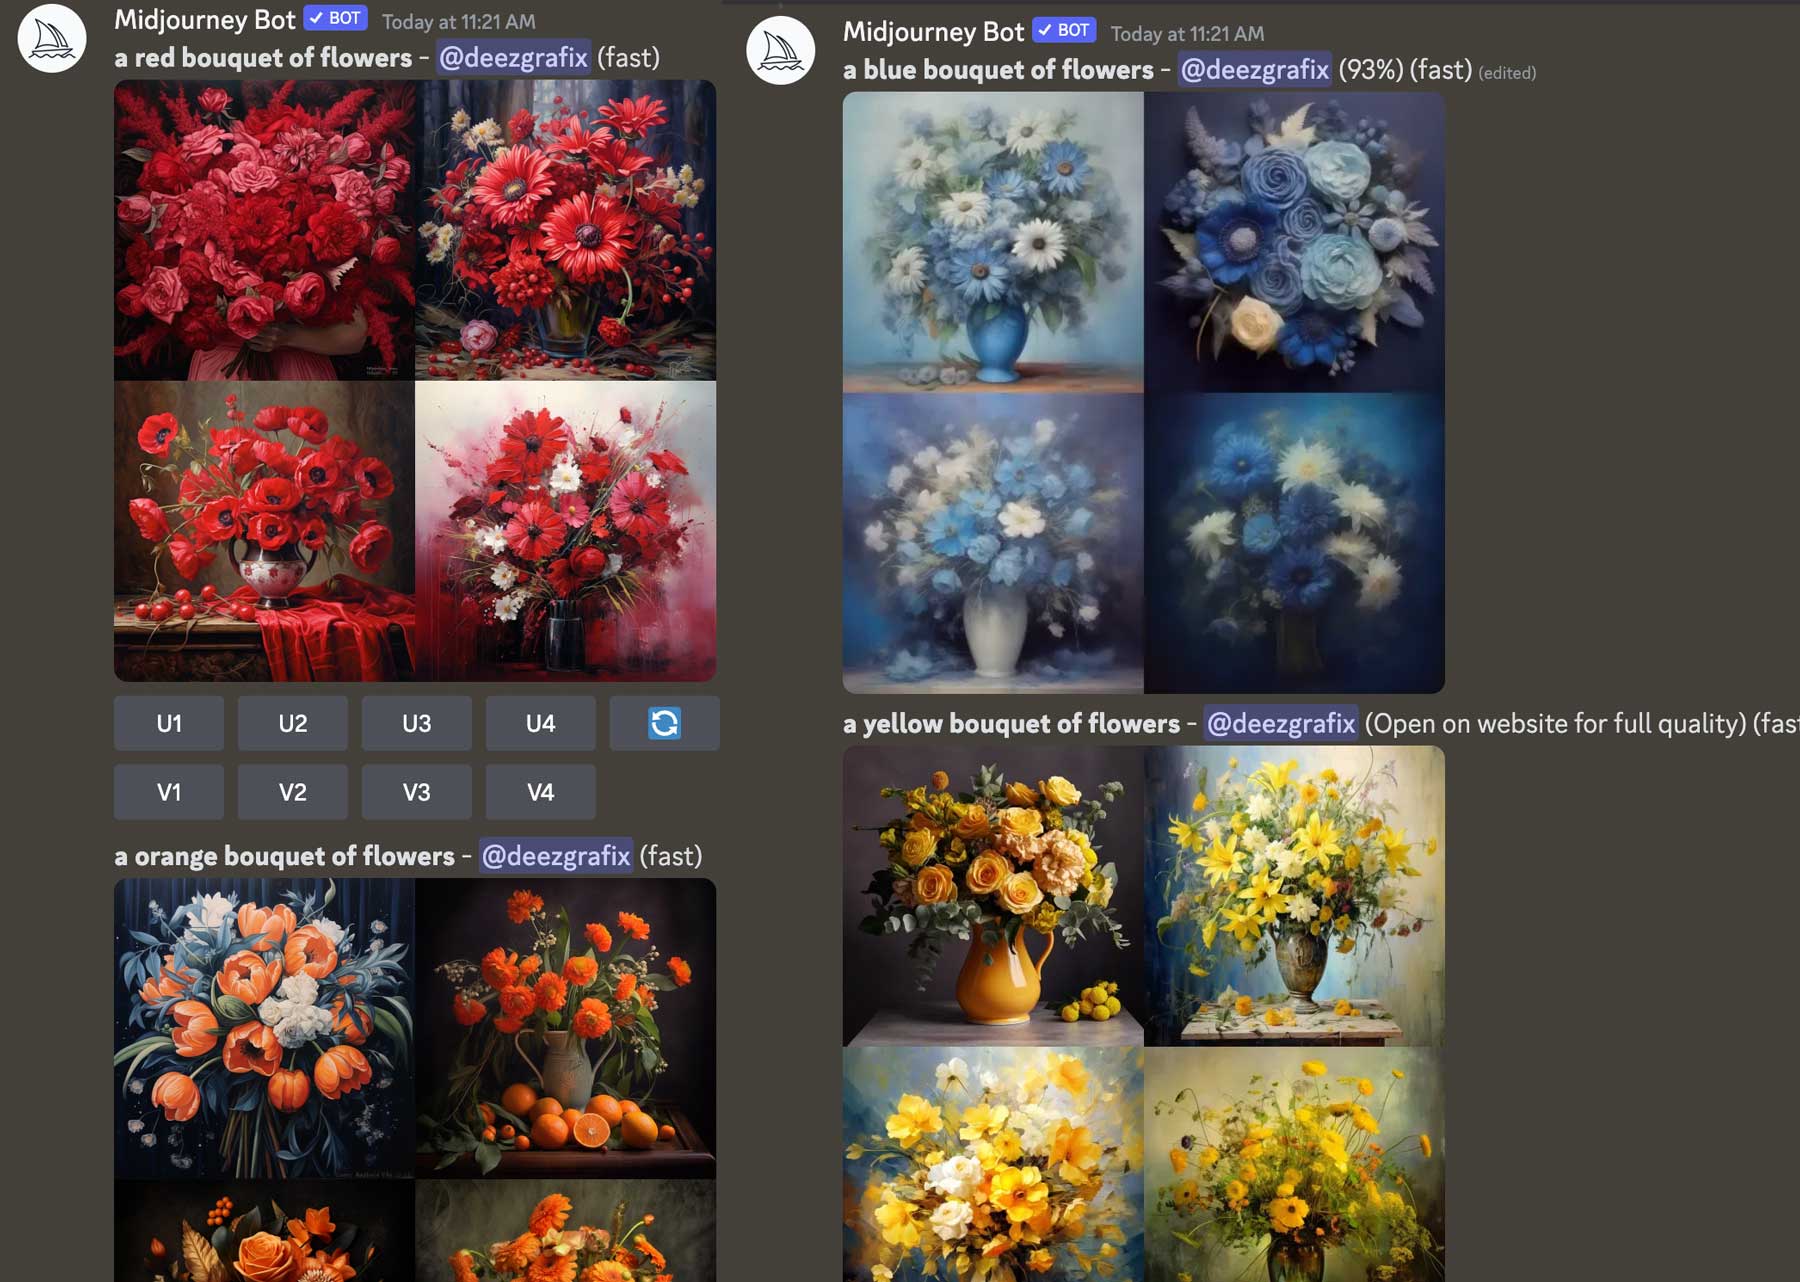
Finally, permutation prompts allow you to generate variations of a single /imagine command. It works by inputting a list of options separated by a comma within curly brackets. For example, if you want to create variations of different colored flowers, you’d use something like this: /imagine a {red, orange, yellow, blue} bouquet of flowers:
Tips for Using Midjourney
Knowing a few tips is important to successfully use any AI generative software. Although a relatively new concept, AI art generators like Midjourney are becoming mainstream. Because of this, learning how to get the most out of it is important. Here are a few tips and tricks to start you on your quest for digital art creation.
Be Concise
While that might sound counterproductive, generating AI art follows the same concept as writing a good blog post. It’s always better to be descriptive but concise when constructing prompts in Midjourney. Giving it too much to go on can either overwhelm it or, at the very least, result in undesirable images.
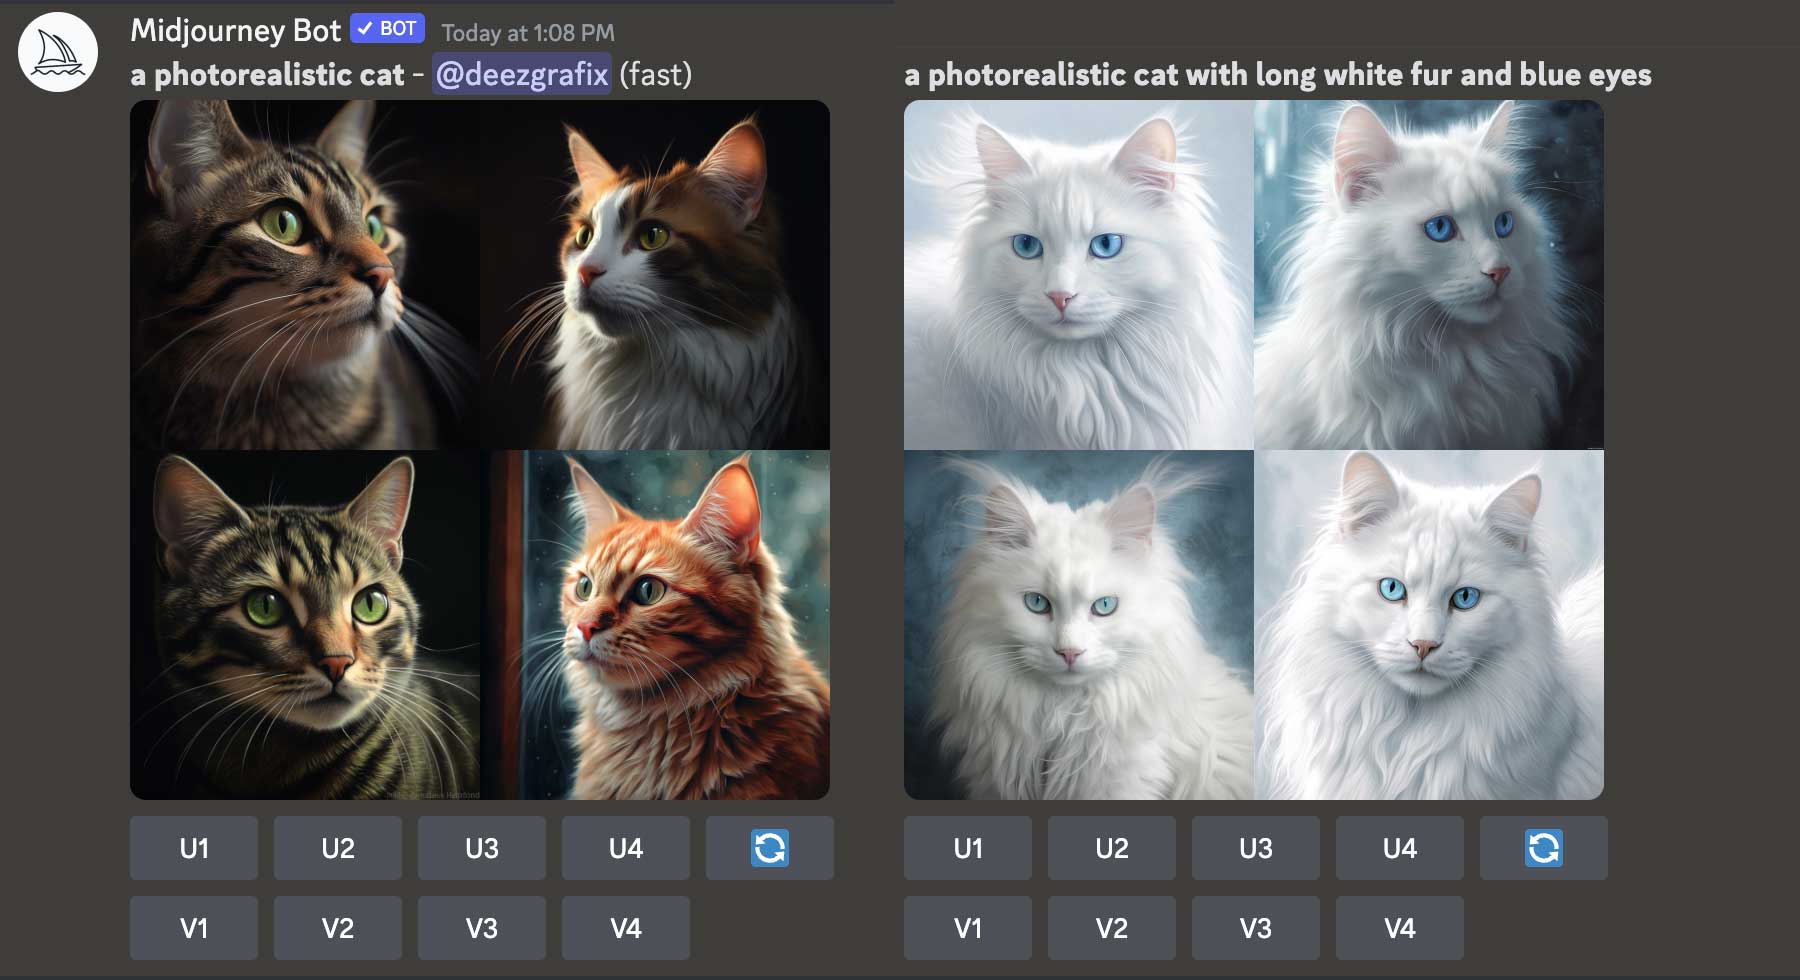
For example, check out the differences in these prompts. The first one /imagine a photorealistic cat will produce a set of cat images, but a more specific prompt, such as /imagine a photorealistic cat with long white fur and blue eyes, will produce a more detailed output.
Use Styles and Mediums
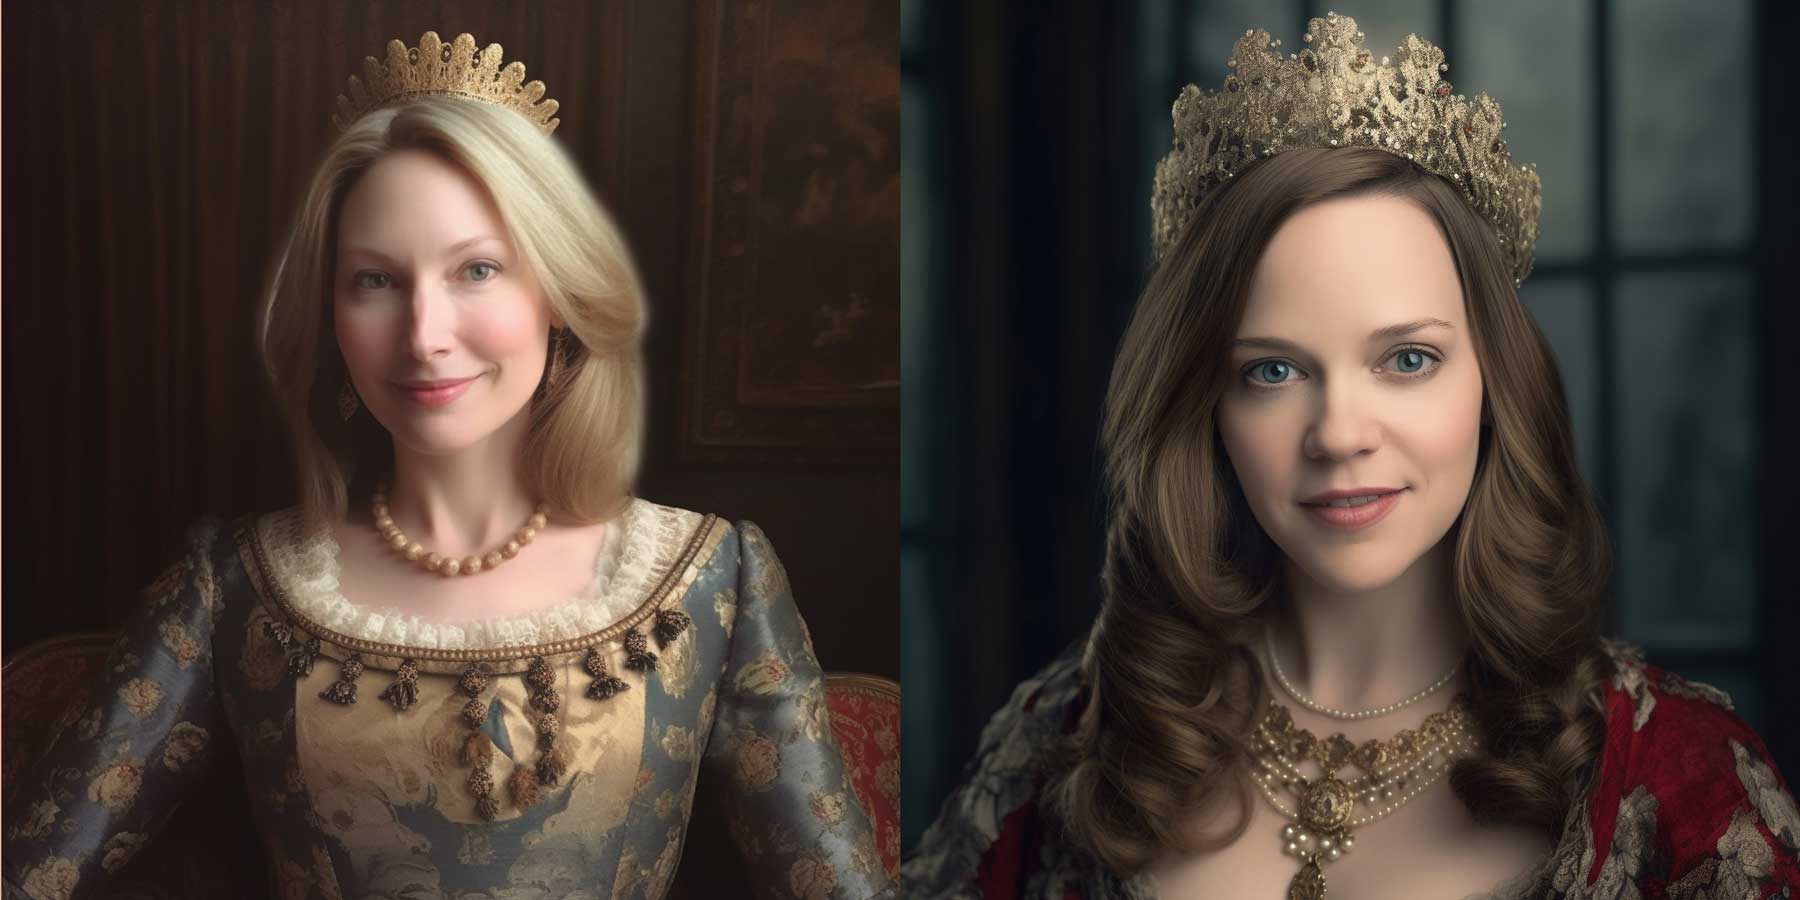
One of the best aspects of Midjourney is its ease of use. Literally, anyone can create a prompt that produces beautiful artwork. If you want to improve your game, use styles and mediums in your prompts. For example, we uploaded images of ourselves to turn us into Victorian queens simply by telling Midjourney to imagine this woman as a 1700’s era Victorian queen. Using the descriptors Victorian and queen, Midjourney understood what we wanted. The results were interesting.
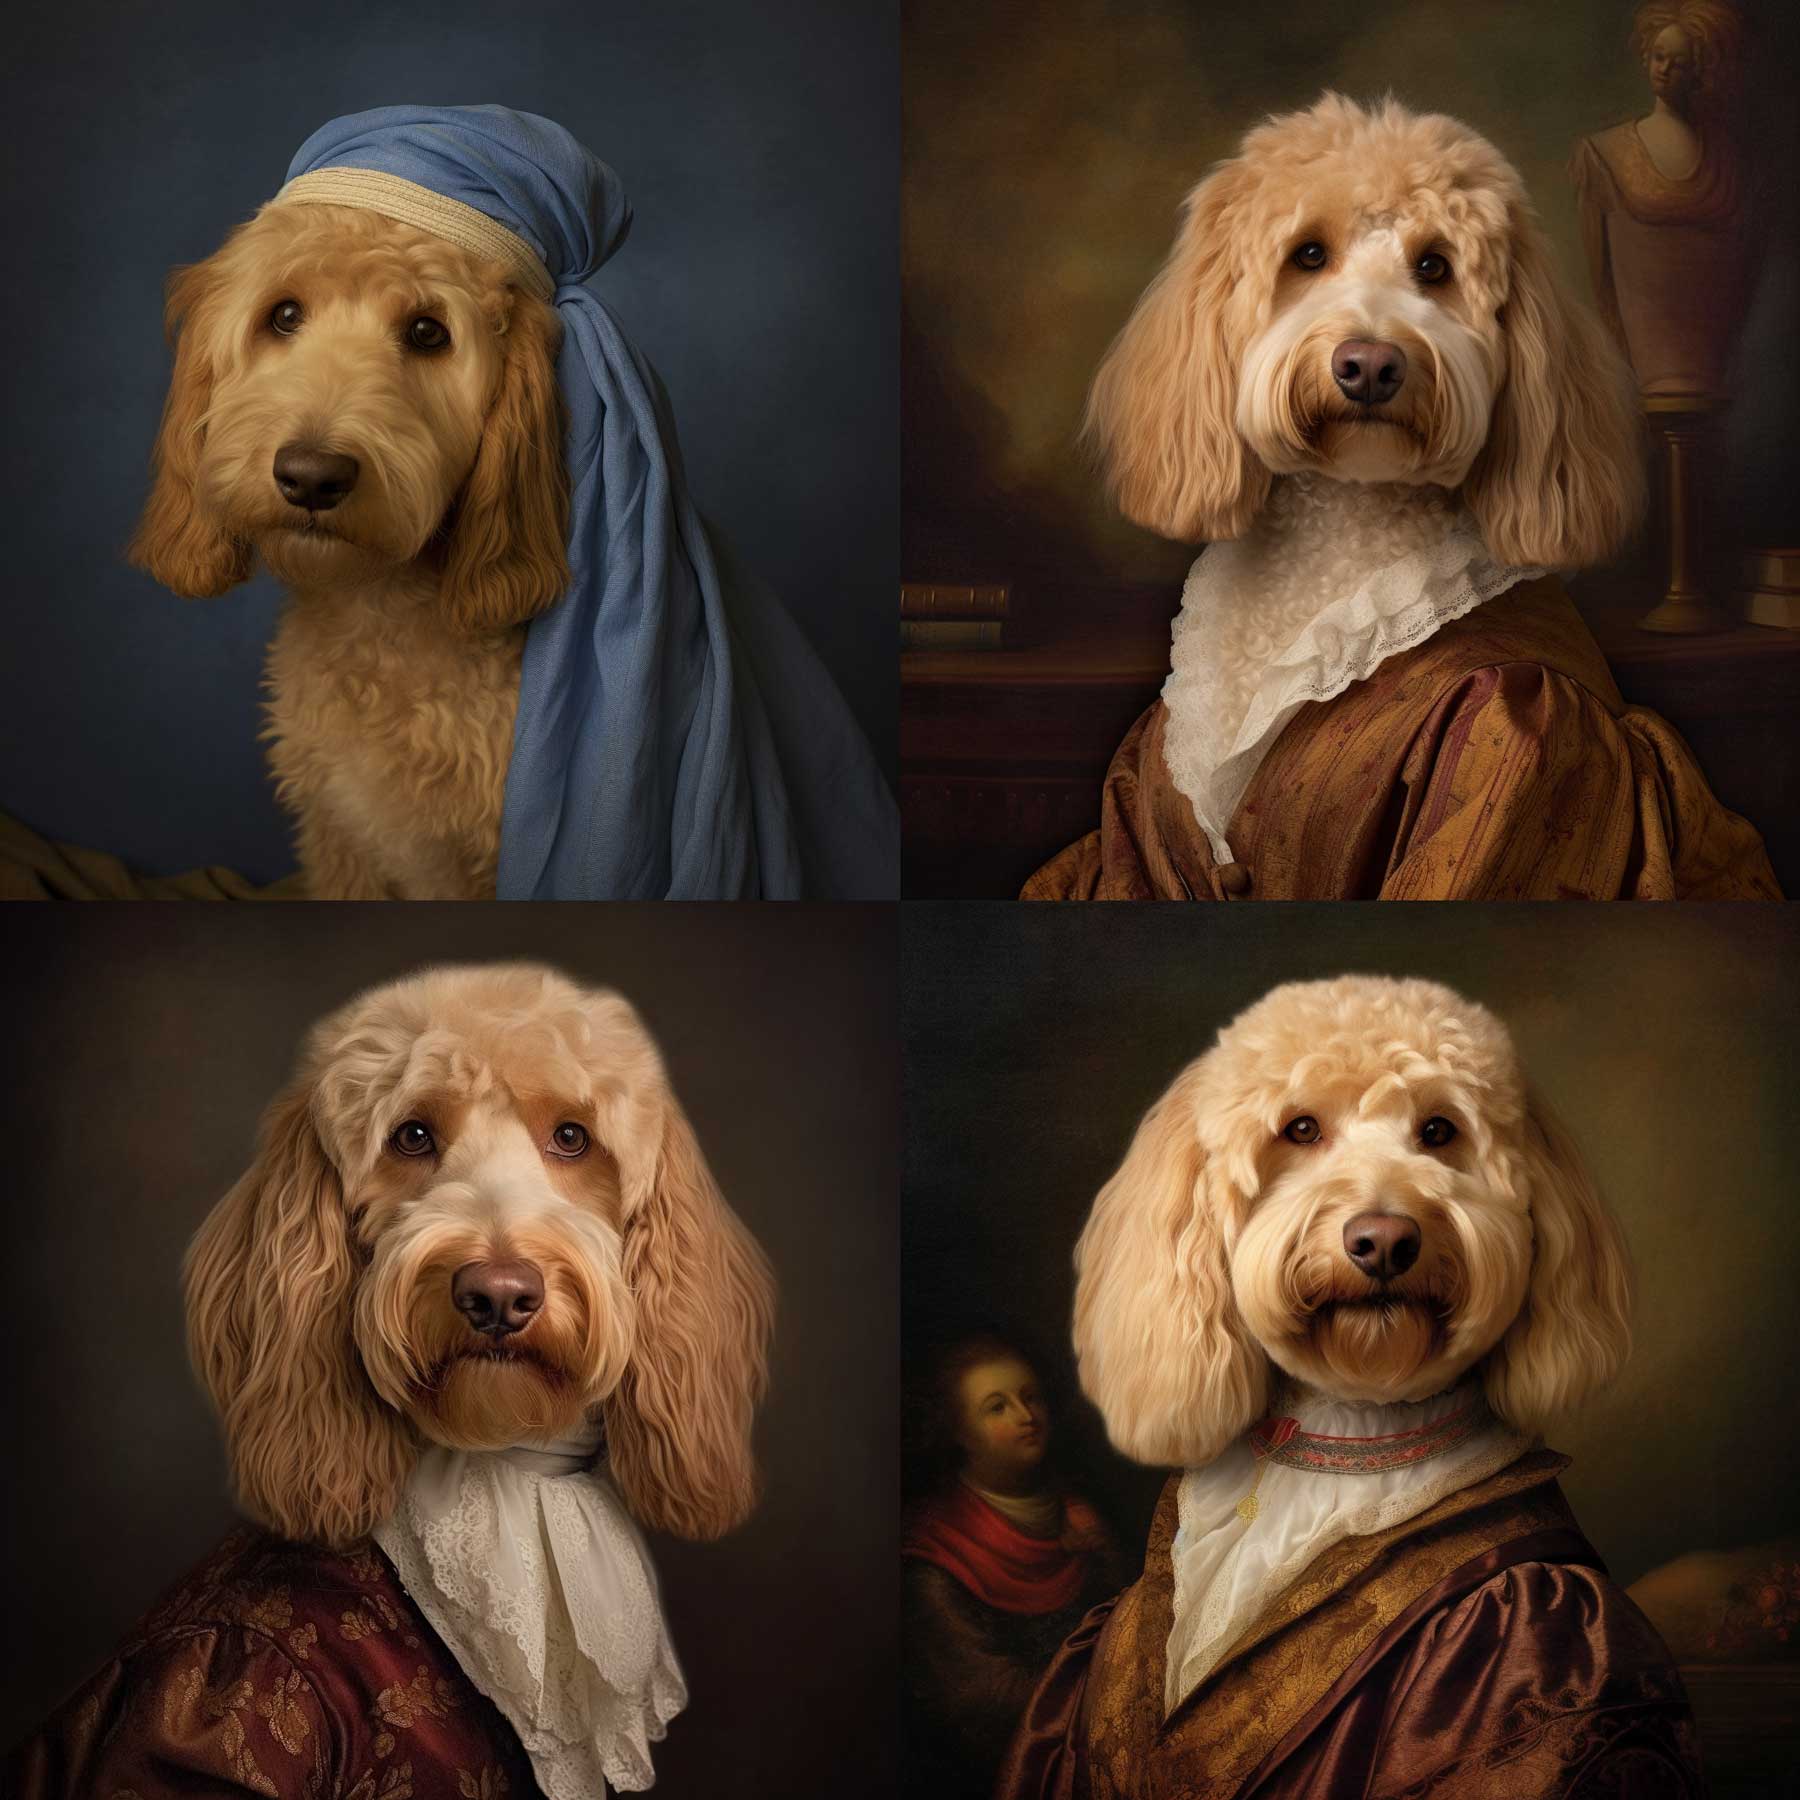
You can also have Midjourney create images based on different artistic styles. In this example, we asked it to /imagine a photo of a Goldendoodle created in the style of Leonardo da Vinci, with the following result:
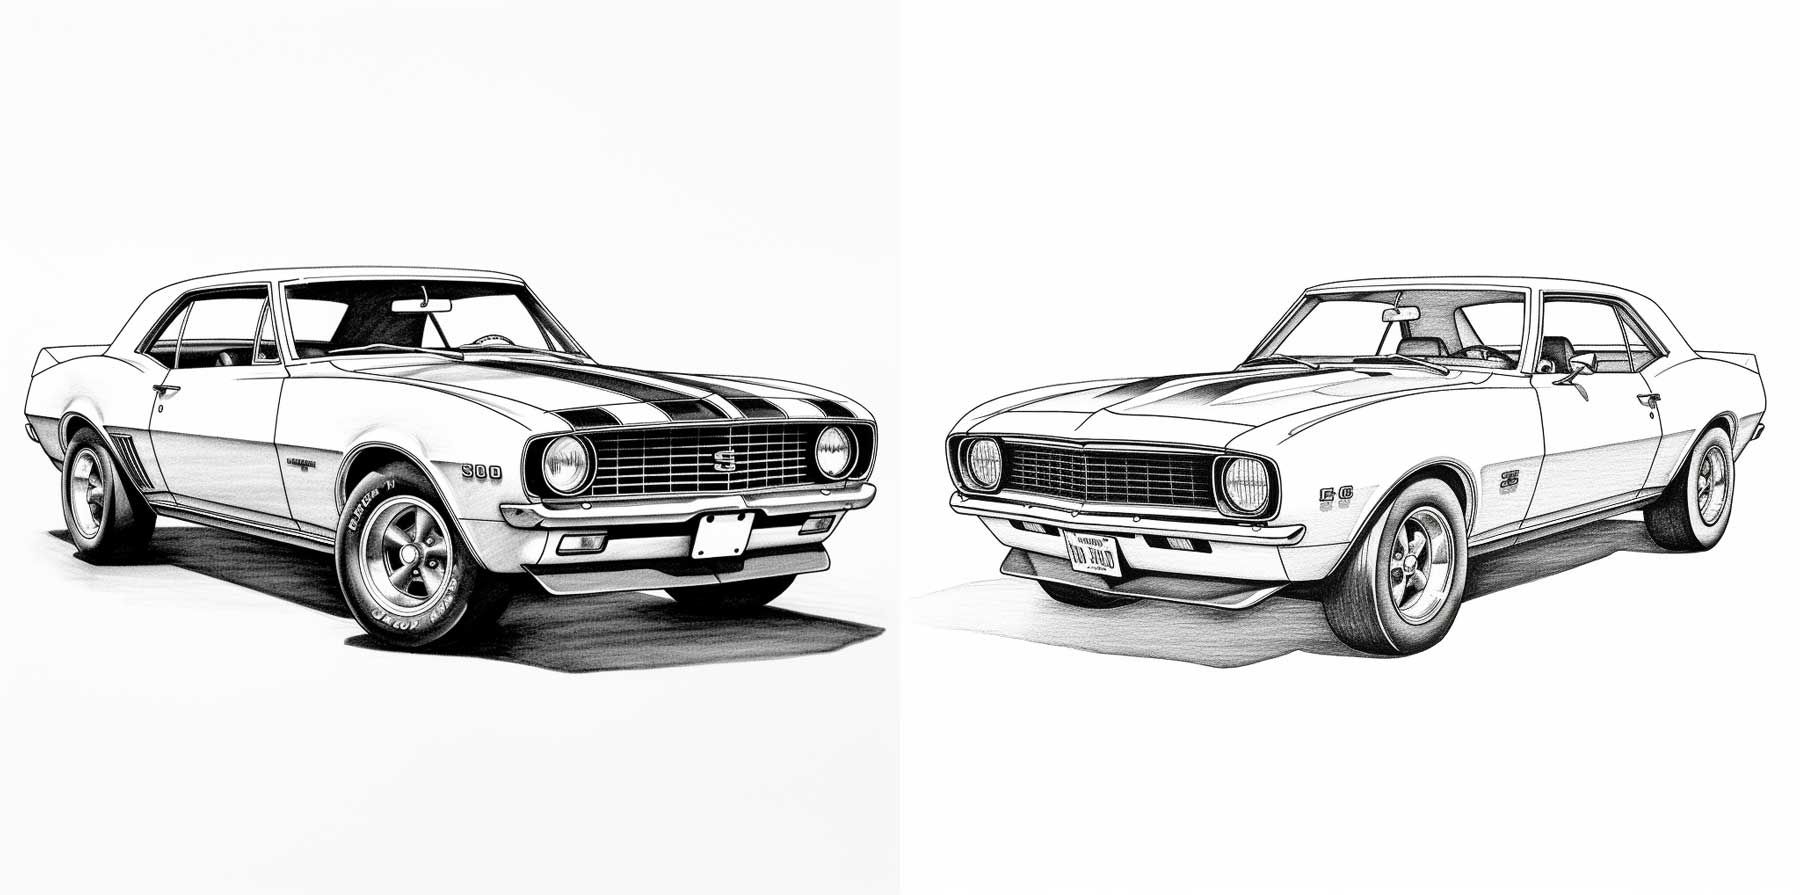
Additionally, you can use mediums such as line art, sketch, oil painting, or similar to create images that have a unique artistic appearance. For example, /imagine a black-and-white line drawing of a 1968 Chevrolet Camaro:
Combine Concepts
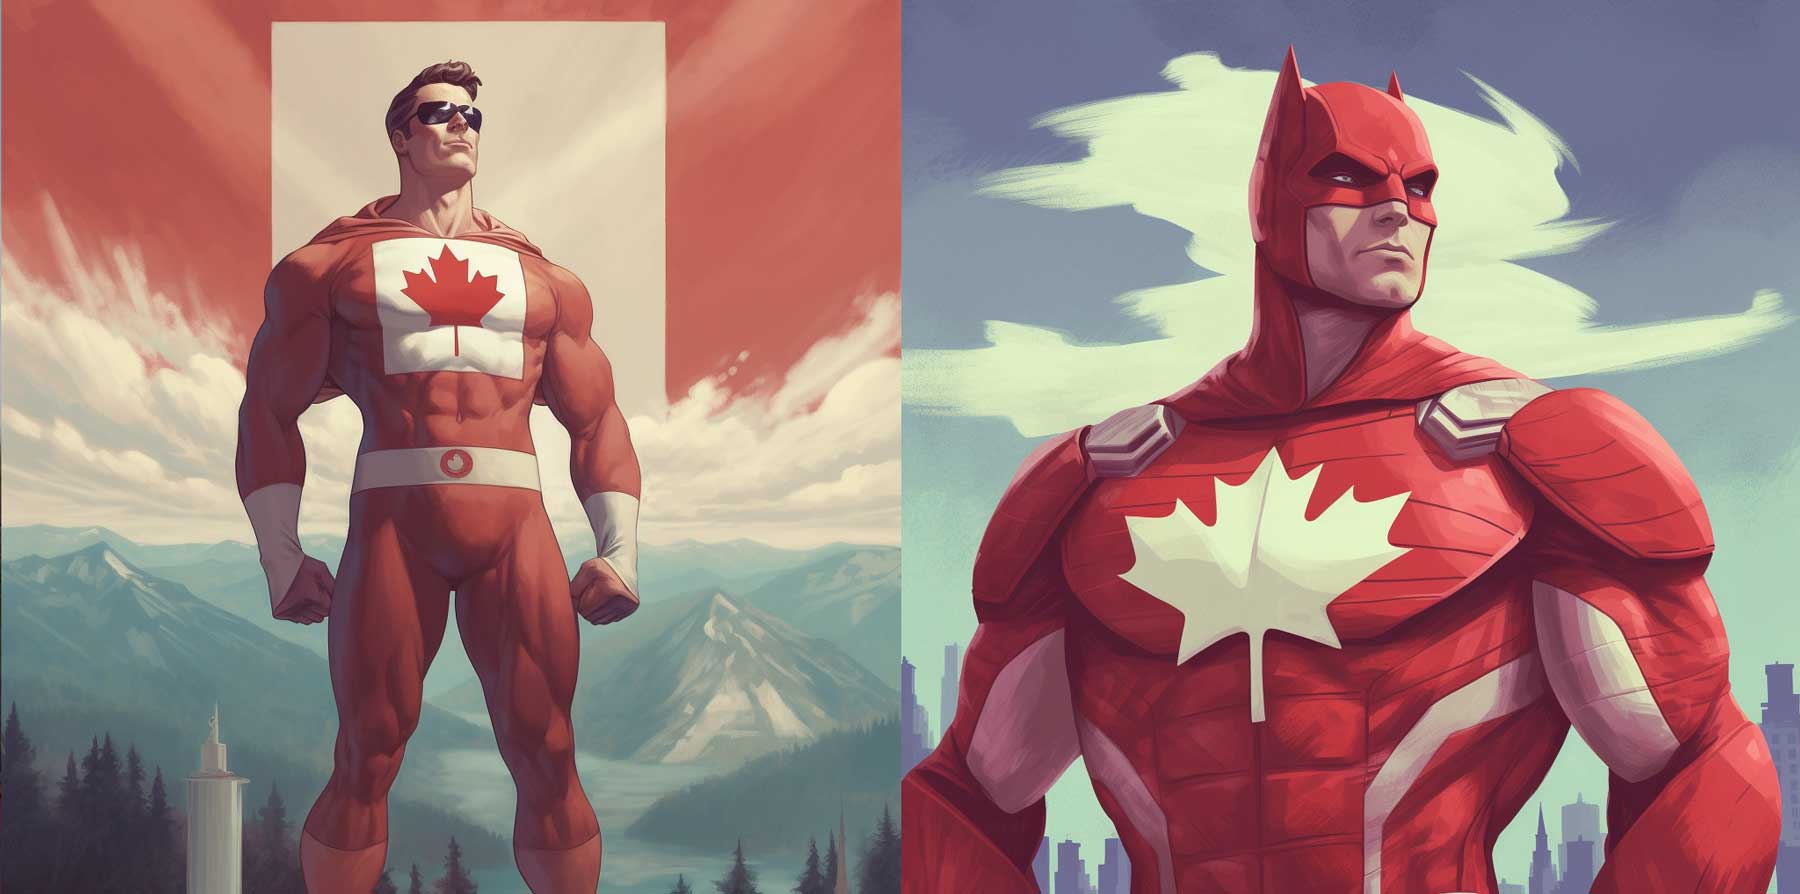
Another thing to try is combining concepts to create interesting pieces. Rather than prompting Midjourney to create a superhero, add another theme to get more targeted results. For example, we used /imagine a Canadian superhero, which resulted in a series of images of a superhero clad in the colors of the Canadian flag:
Use Lighting for More Dynamic Output
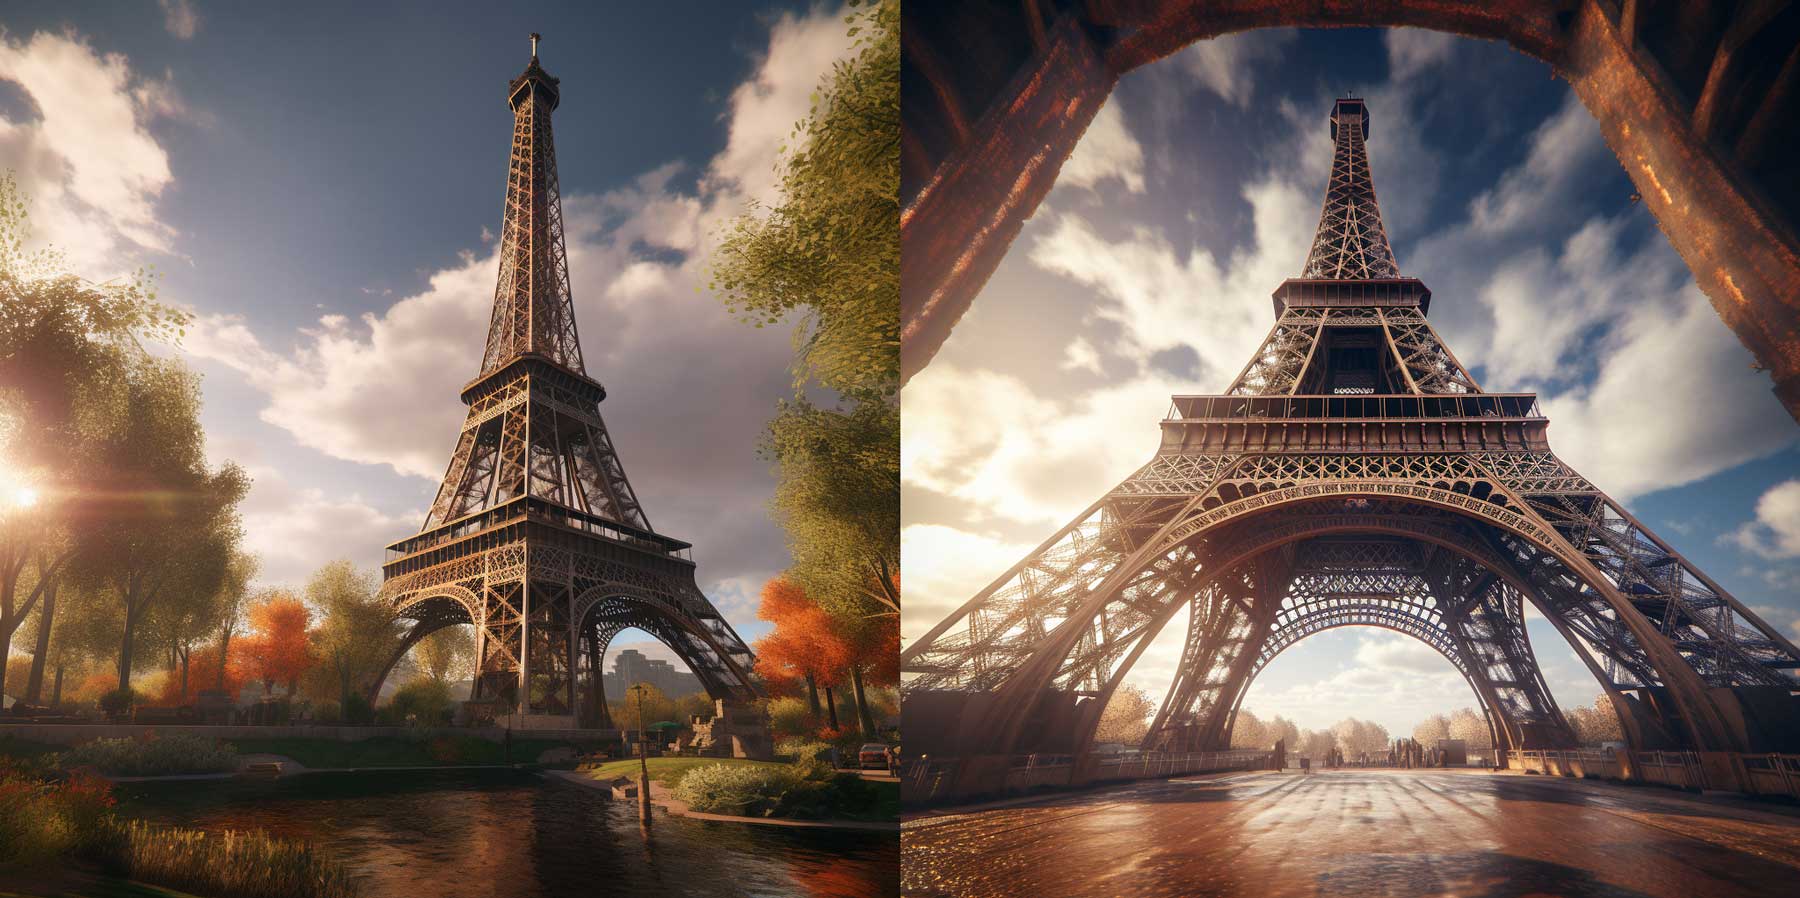
One of the most important aspects of artistic expression is using lighting effectively. By default, Midjourney will add some lighting to the output. However, if you want to see improvement, one of the best places is to start by adding a bit of lighting to your prompt. For example, we used the following prompt to incorporate beautiful lighting effects: /imagine an image of the Eiffel Tower at midday, complete with cinematic lighting.
Examples of Midjourney AI Art With Prompts
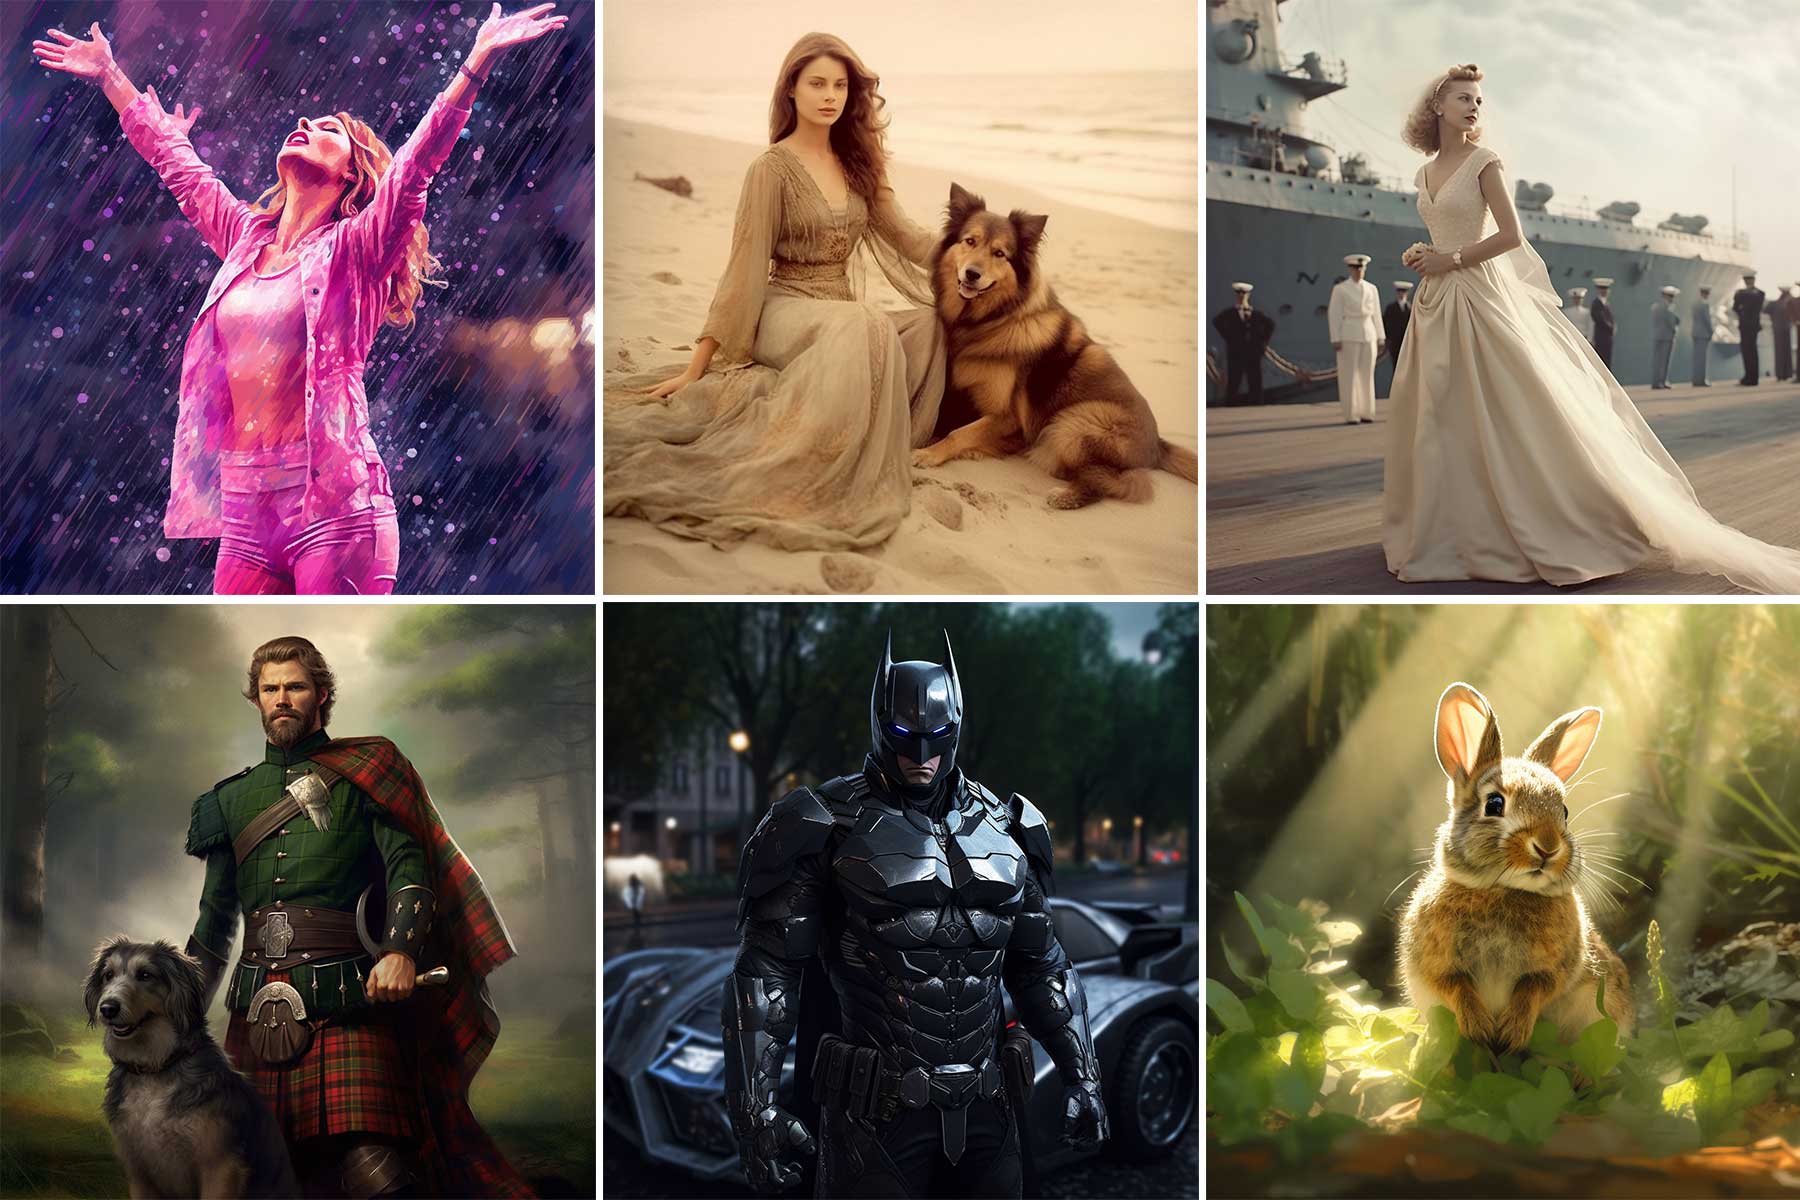
One of the best ways to learn Midjourney is to play with it as much as possible. Use it to generate images with different styles, learn better ways to enter prompts, and gain inspiration from other AI artists. To show you the massive capabilities of Midjourney, here are a few examples of what can be achieved after a few hours of image generation.
Using Your Images
If you want to turn yourself into a member of the Royal family or just a cool superhero, try using one of your photos with Midjourney. To do this, click the plus next to the text prompt box at the bottom of your screen.
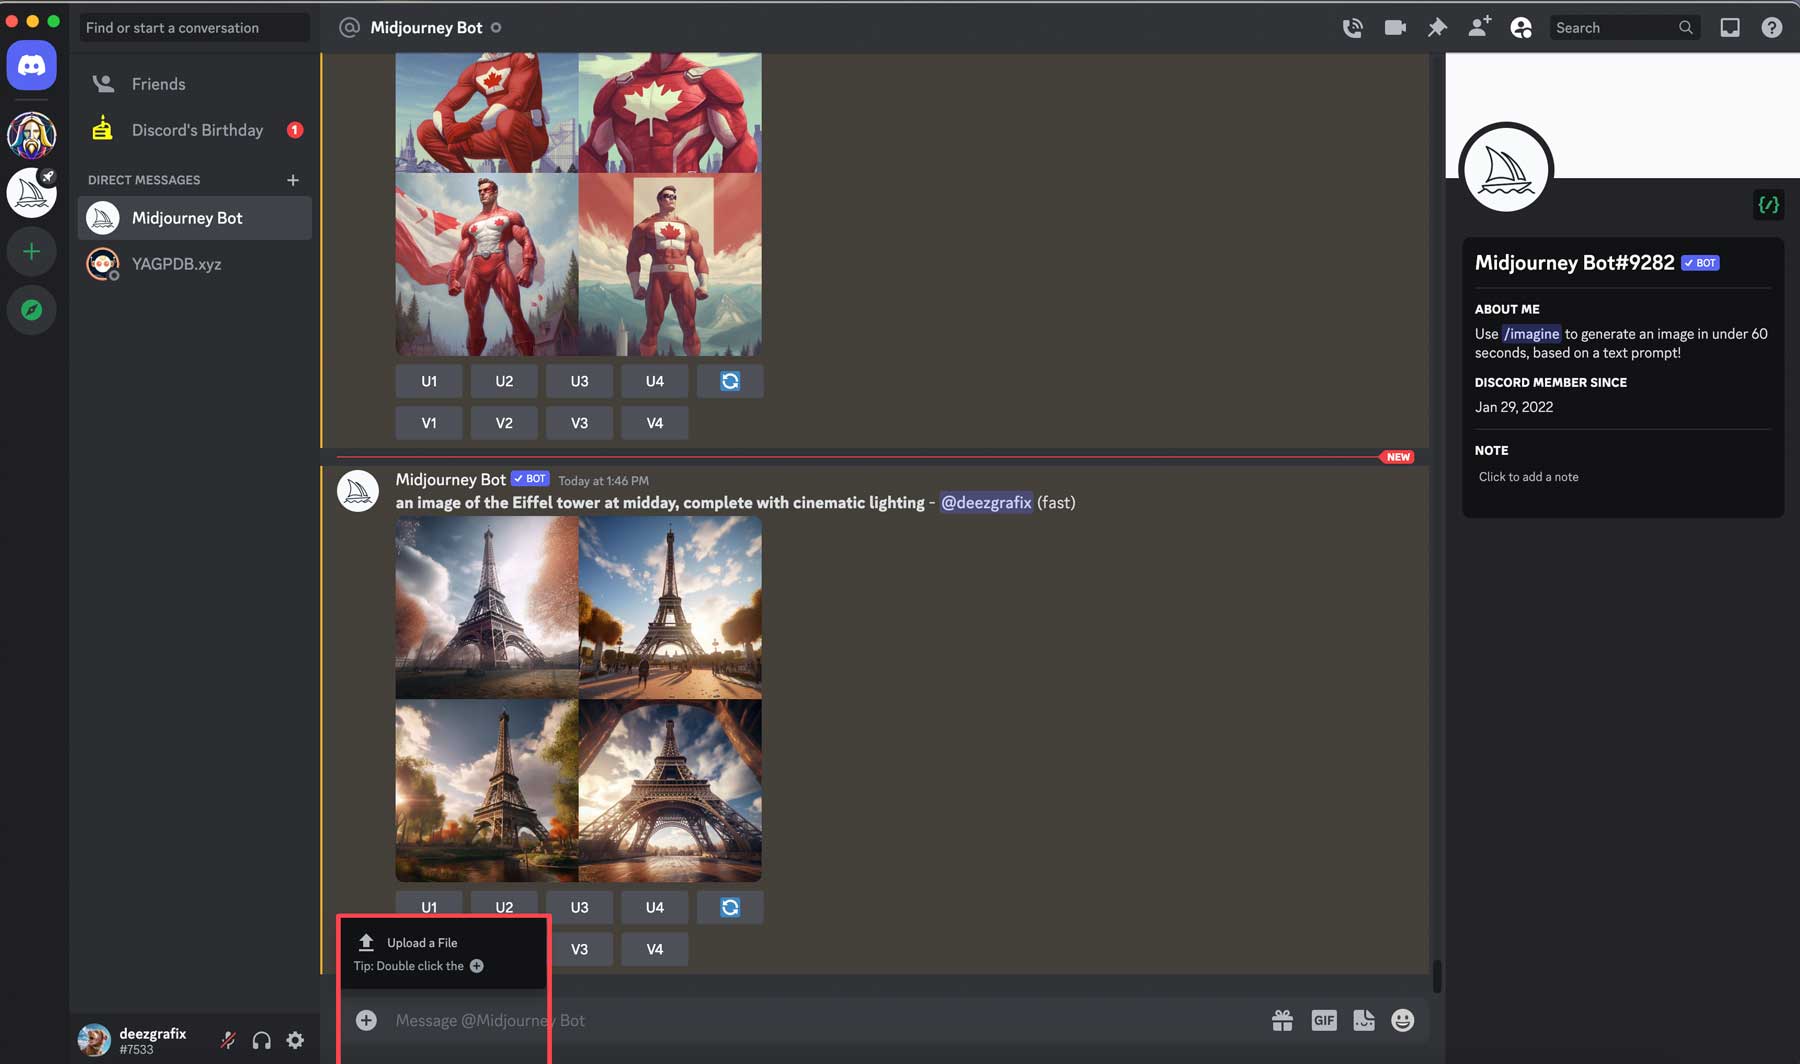
Once uploaded, click the image, then select open in browser. In the next step, you’ll need to copy the image URL to use alongside /imagine.
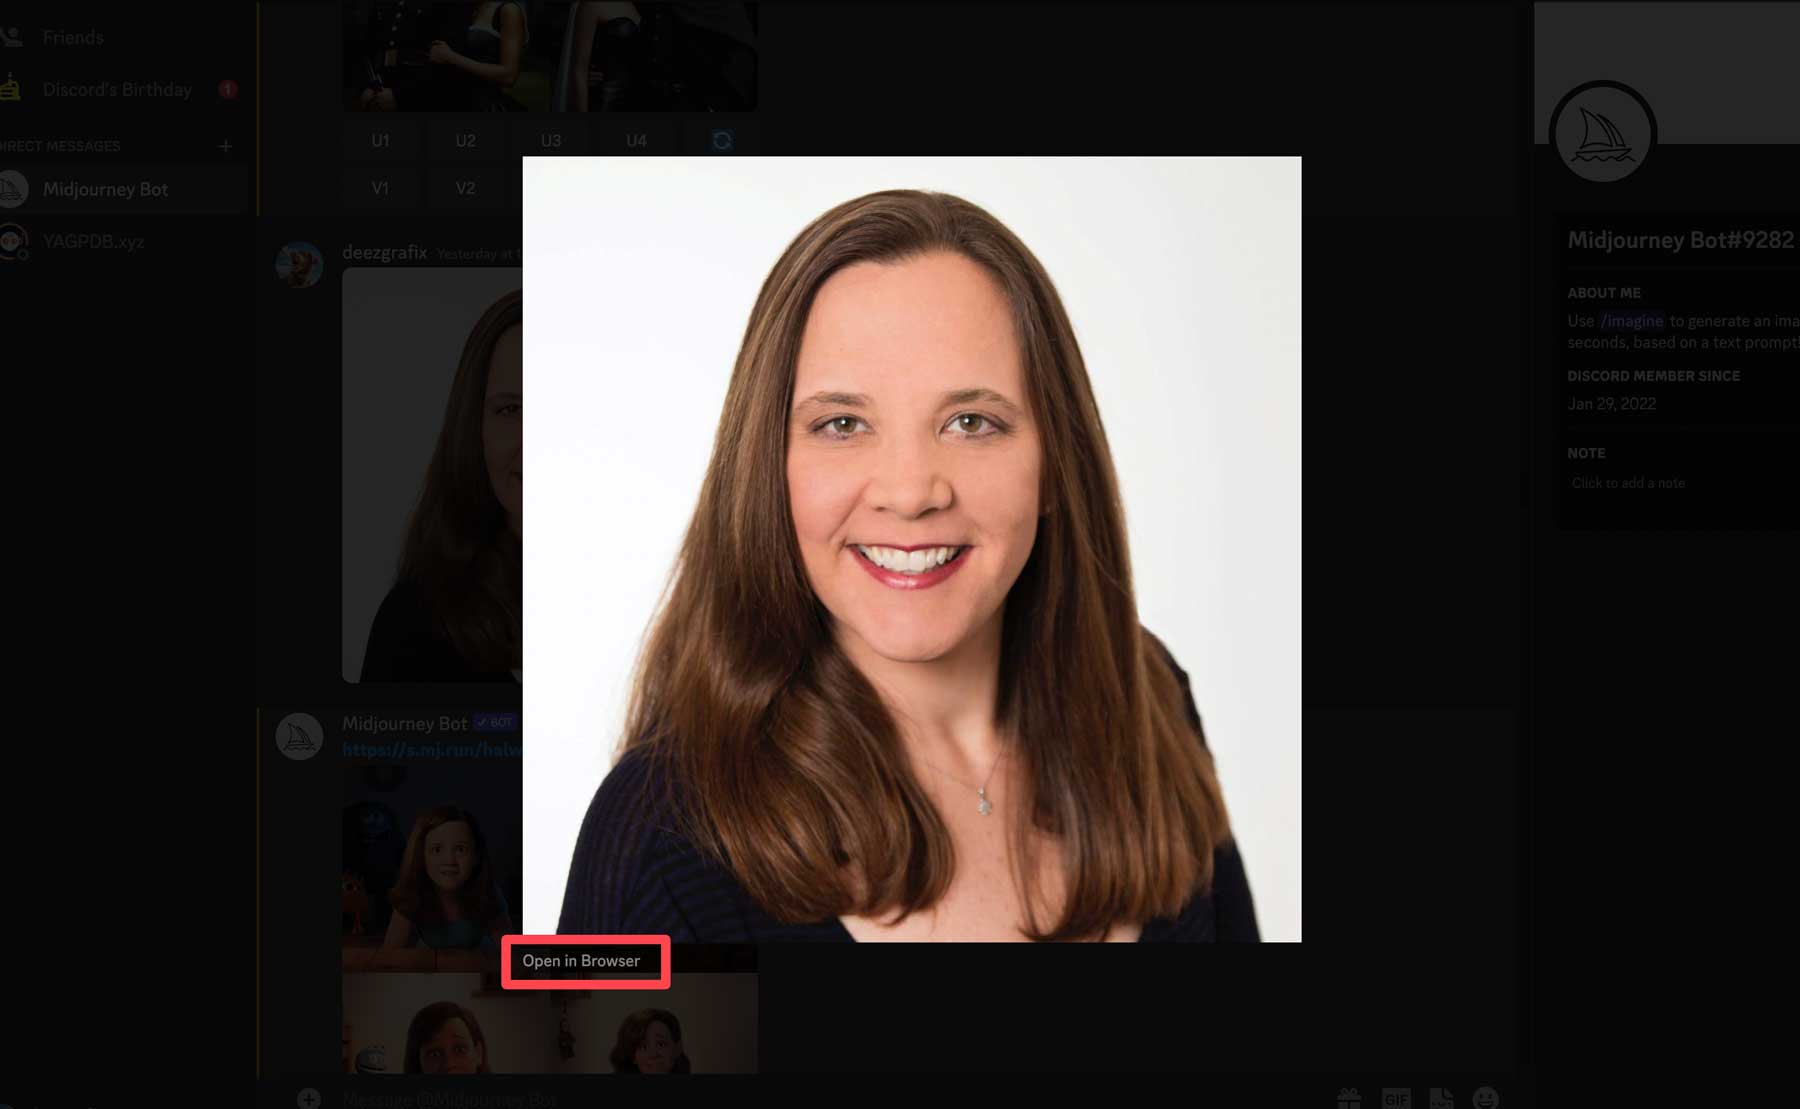
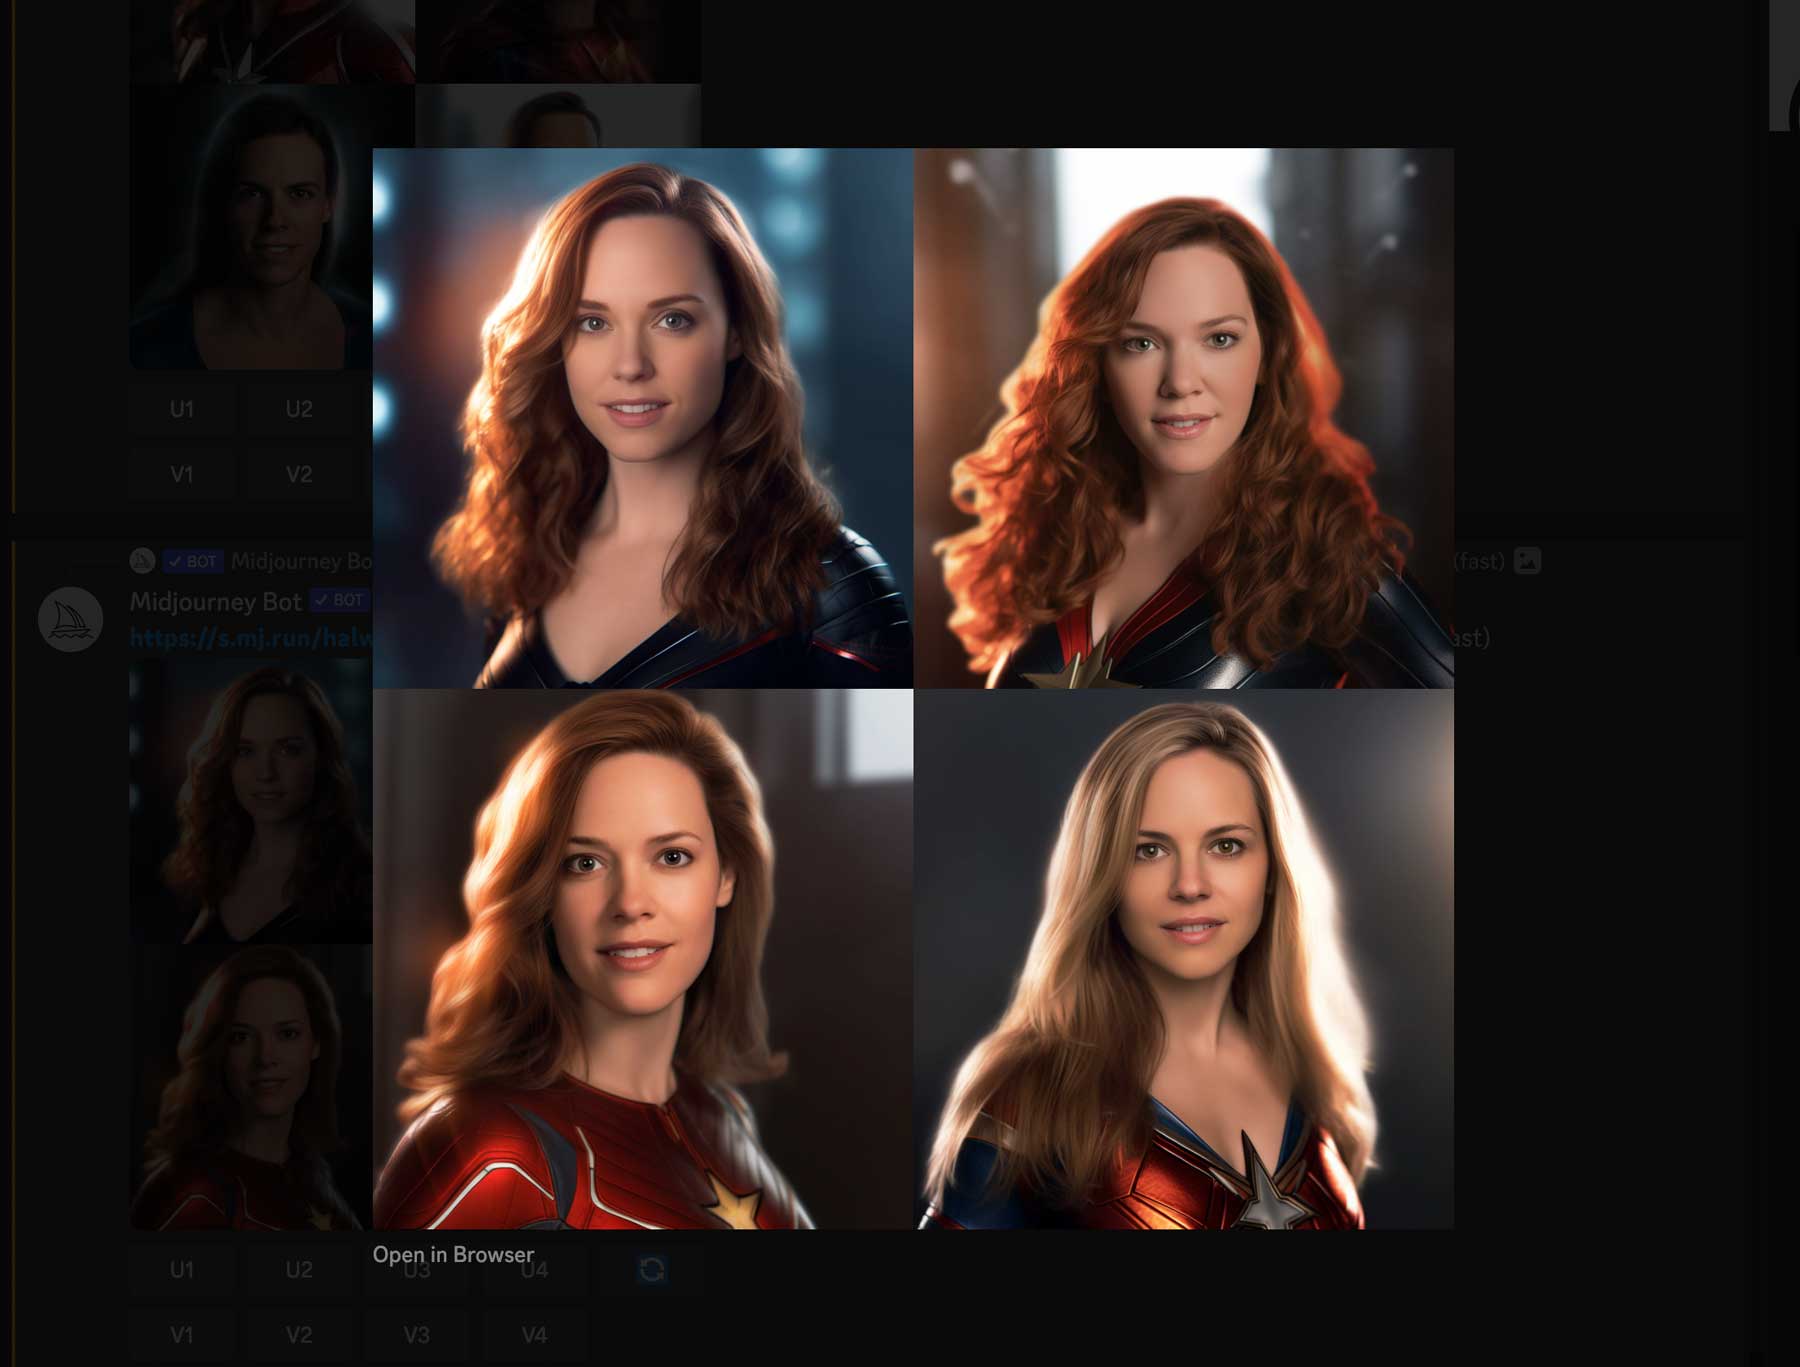
Next, type /imagine into the text field, then paste the URL of your uploaded image. Follow up with the image you’d like to create. In our case, we want an image of a superhero with cinematic lighting.

Midjourney will do its best to create your desired image, but remember to be specific. If you want the photos to be female, specify that. Just because you upload an image of a woman doesn’t mean you’ll receive female superheroes. For example, we used the prompt /imagine a hyperrealistic image of a female superhero. Omitting the word female might cause Midjourney to create male photos, which may or may not work for you.
Using Blending Effects
Try using the /blend command to create stunning effects.
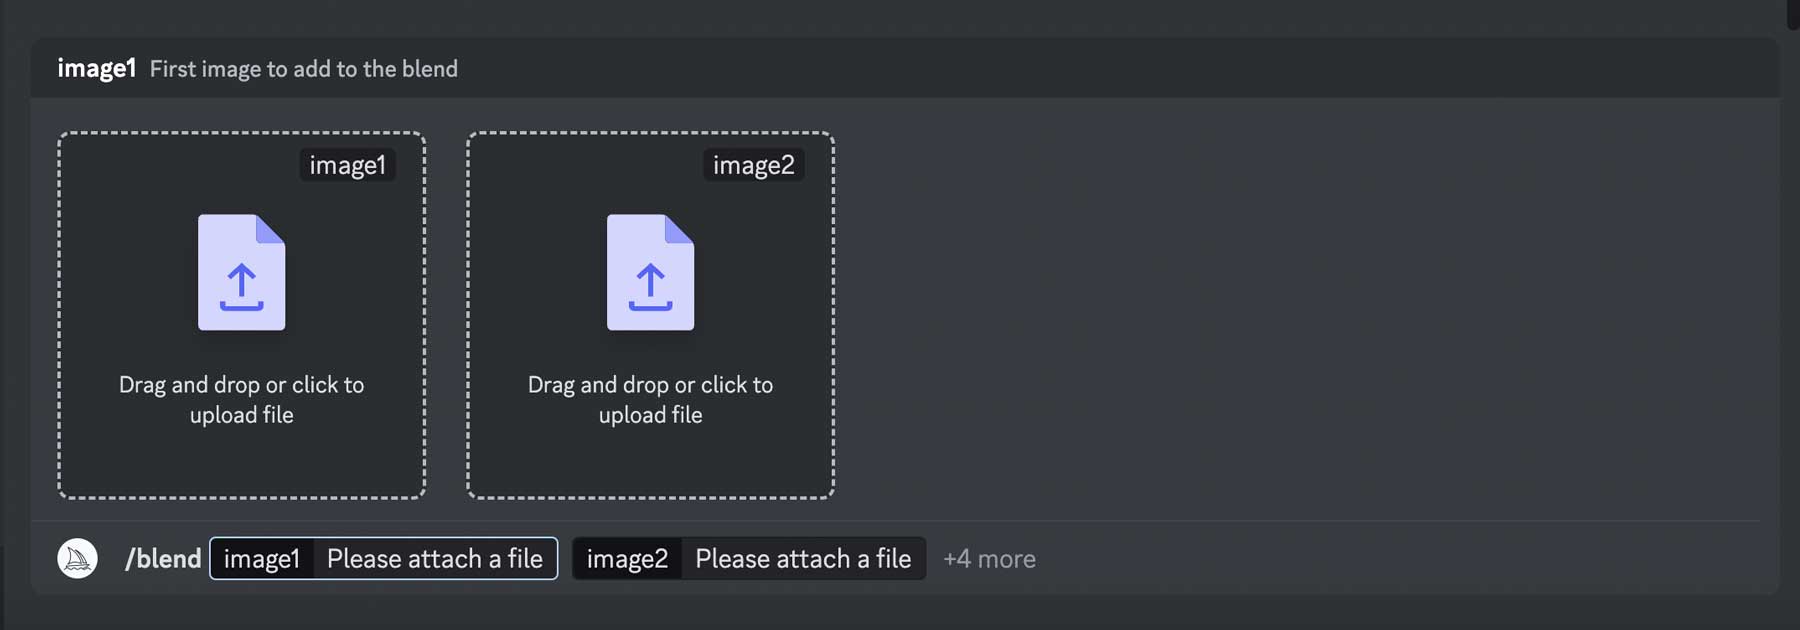
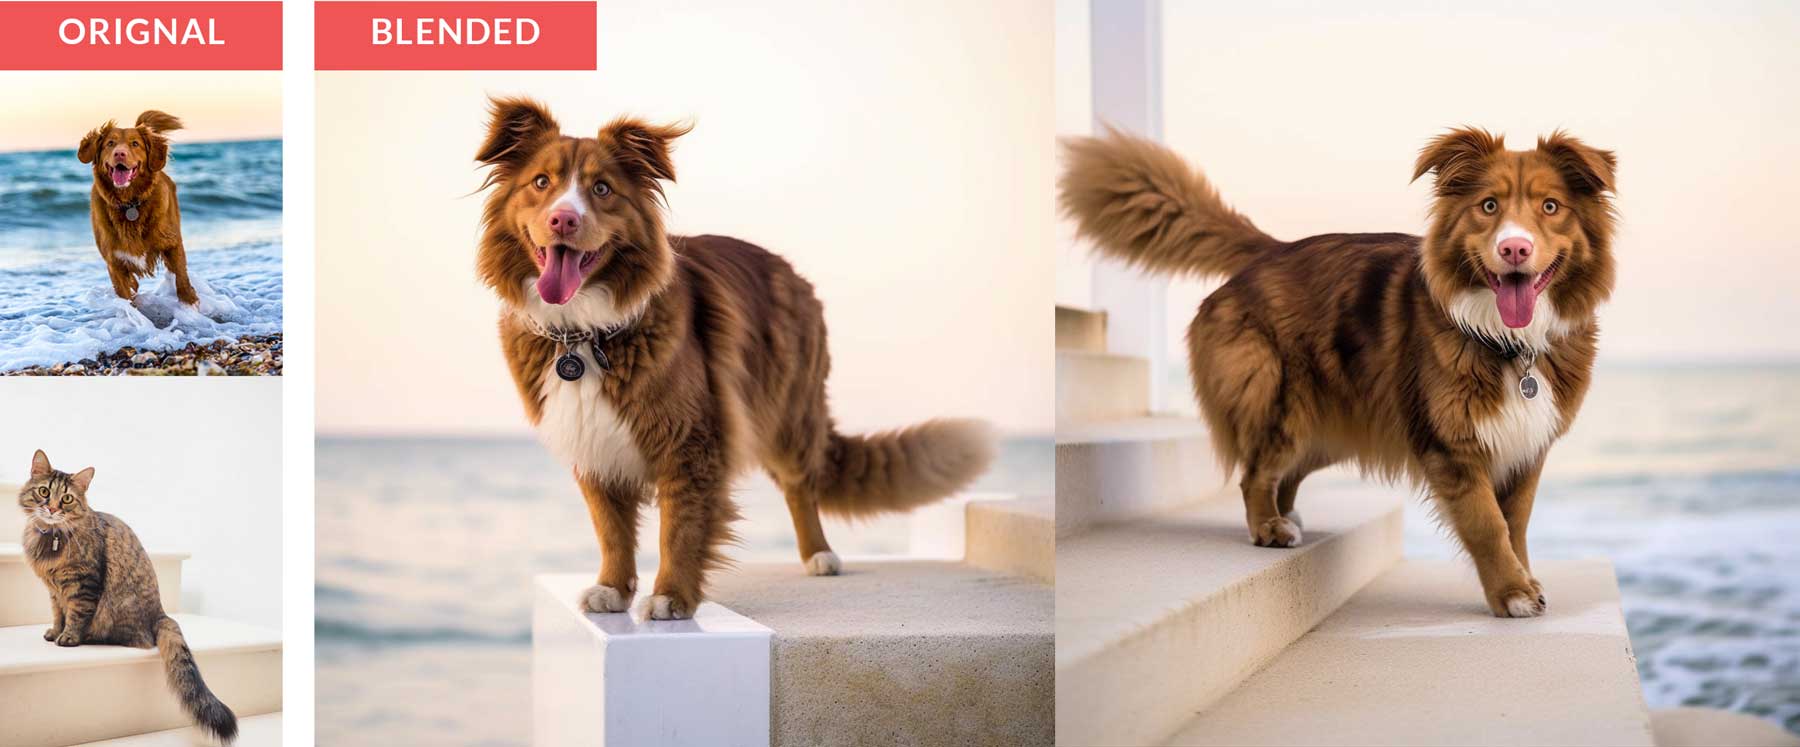
It works much like the /imagine command, except you can upload anywhere from 2-5 images, then ask Midjourney to blend them with a text prompt. That said, ensure that both images have the same dimensions for the best results. You can even specify the aspect ratio you’d like. For example, we used the /blend command to combine a photo of a cat and dog, resulting in the image of the dog taking on the same feel as the photo of the cat.
Final Thoughts on MidJourney
No matter what type of AI art you create, Midjourney can do it. One of the best things about generating AI art is not having to be able to draw or paint to be creative. Using pre-defined tools such as blend or custom parameters for aspect ratio, styling, or image weight, you can create one-of-a-kind pieces of artwork that will blow you away.
Are you looking for more AI tutorials? Check out our post using Midjourney and Divi to design a website: How to Use AI to Create Amazing Web Design with Divi (Using ChatGPT & MidJourney).
Frequently Asked Questions (FAQs)
Before we wrap up, let’s answer some of your most common questions regarding Midjourney. Did we miss one? Leave a question below and we will respond!




Is the image quality of the images generated sufficiently high for printing on paper or is it only good enough for screen images?
What is the pixel per inch count?
Doesn’t work because the URLs created by Midjourney end in .webp. This is using the Discord app.
.webp Images are easily able to be converted to other supported formats.
Hi,
Is it possible to create a seed image, one that I can continue to use in a multitude of different scenarios. In other words, I don’t want to generate a new character every time I use the same parameters, I want to create one character and change his/her environment/clothing, etc for the purpose of producing thousands of images of the same character. Is this possible with Midjourney?
Thanks
The video is much too fast People with impaired hearing, like myself will find it impossible to watch and gain information form this video purely because of the speed.
Hi Jan, you can slow down the playback speed in the video option. Check this screenshot: https://prnt.sc/q1hjsqxQ8KGr
This article provides a fresh perspective on the topic. I appreciate the depth of research and the clear explanations. It’s always a pleasure to read well-informed content like this.
Any copy right issue if we use the image generated by mid journey?
The copyright status of images generated by Midjourney is still being debated. Some people argue that the images are not copyrightable because they are created by an algorithm and not by a human. Others argue that the images are copyrightable because they are the product of creative expression. The Midjourney Terms of Service state that you own all assets you create with the service, but this only applies if you have a paid account. If you are using a free or trial account, you are only allowed to use the images for personal use and must give credit to Midjourney. You are not allowed to sell the images or make money off them.
After receiving the desired outputs in midjourney, Can we give any corrections on generated images to better the quality or make some changes?