The WordPress dashboard is a great place to put useful tools and information. Many plugins add things in this space, giving you quick access to their information. What if you wanted to create your own dashboard page using the Divi Builder? That’s what Divi Dashboard Welcome, from Tim Strifler of DiviLife.com, does.
Divi Dashboard Welcome adds a new area to your current dashboard that displays a page you make using the Divi Builder. The dashboard welcome page is added above all of the other dashboard information in the most prominent area of the screen.
There are lots of ways to use this plugin. In this article I highlight its features and I’ll build a few dashboard welcome screens of my own.
Who it’s For
This is ideal for:
- Developers who want to provide links and information for their clients, up-sale products, provide videos for training, affiliate links, insert blog content, etc.
- Admins of sites with multiple users that want to supply links and information for their contributors, a to-do list, create an FAQ, a troubleshooting list for users to follow for support, etc.
- Anyone that wants to create a welcome screen that’s customized for their own needs, such as notes for image sizes, links to download resources, calendar, to-do list, etc.
Tim provides tutorials for using the plugin at his website. Tutorials include:
It also works with Extra or any theme using the Divi Builder plugin, so Divi isn’t required for you, your team, or your clients to benefit from it.
Installation
The download is a zipped file that includes several files within it. Files include:
- Start Here – an HTML link to the installation instructions. I recommend reading the installation instructions. You can read the PDF or watch the video.
- Install this first – XML document. This uses the WordPress import plugin.
- Divi Dashboard Welcome Layouts – JSON file. Import this into your Divi Layouts.
- Plugin – zipped file
Unzip the download package and import the files before uploading the plugin. Divi Dashboard Welcome includes some Divi theme files. Import the files according to the instructions. If you’ve ever imported Divi theme files you’ll be familiar with this process.
Layouts
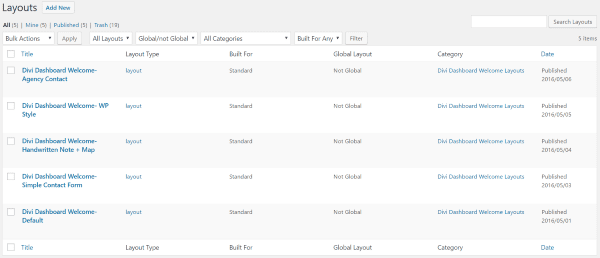
The plugin includes five layouts that can be loaded into the Divi Builder. Layouts include:
- Agency Contact
- WP Style
- Handwritten Note + Map
- Simple Contact Form
- Default
The layouts are uploaded the same way any Divi theme files are uploaded. This means it’s possible to share your layouts with others.
Dashboard

Once the plugin and theme files are installed you’ll see a dashboard screen that looks like the one above. This is a private page called Divi Dashboard Welcome Screen. The dashboard screen itself is a window that maintains its size. The content of the page will fit horizontally within the window. If your content is larger vertically then the window will be scrollable.
The Divi Dashboard Welcome Page
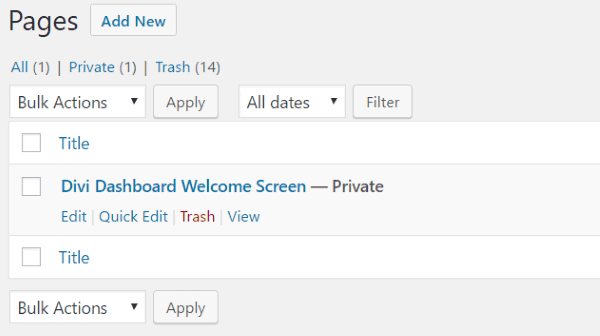
The dashboard welcome screen is actually a private page made with the Divi builder that can be edited just like any page. Since it’s a private page it won’t be indexed by search engines and can’t be viewed by your readers. Tim has even protected the page against being deleted. Users have to uninstall the plugin before the page can be deleted. To create your own dashboard screen you’ll need to edit this page.
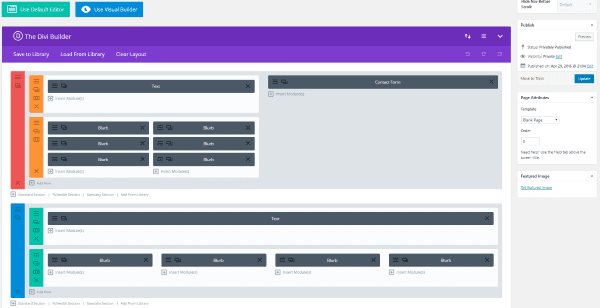
Use the Divi Builder to create any layout you want including modules, rows, sections, styles, code, layouts, shortcodes, etc. Everything you place in this page will display in your dashboard screen. Select Preview to see the page. The page was created using the Blank Page template, so it won’t show the header or footer of your website.
Visual Builder
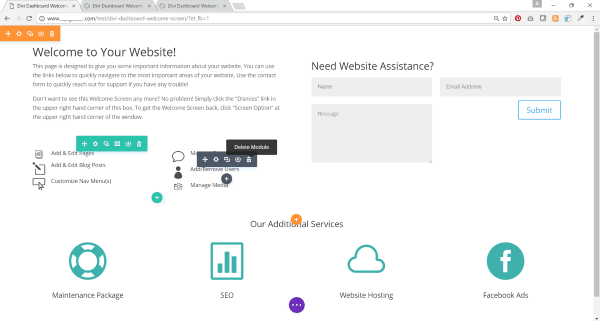
The dashboard page can also be edited using the Visual Builder. All of the elements work as they normally do except it doesn’t display the WordPress menu across the top of the screen. Once I made my changes and saved them I clicked the back arrow to return to the back end. The changes appeared in the Divi Builder and had no issues.
The Included Layouts
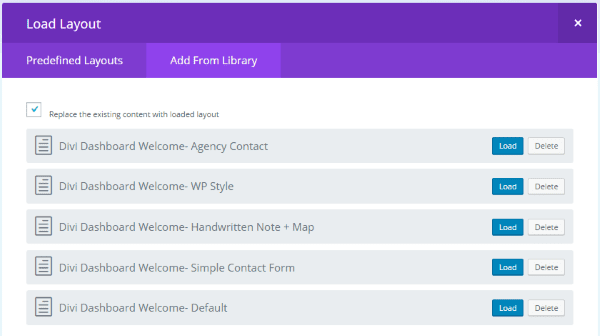
To load the layouts into the Divi Dashboard Welcome Screen page click Load From Library in the Divi Builder and then select Add From Library. Here you’ll see the five layouts that come with the plugin. You can also create or upload your own.
Here’s a look at each layout.
Agency Contact
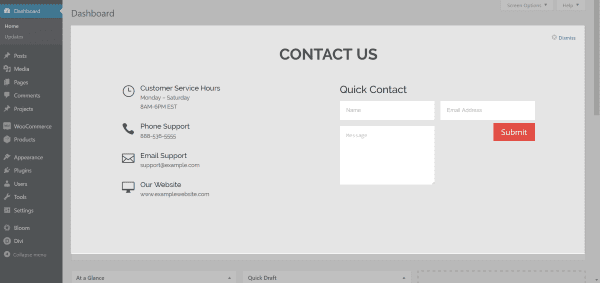
Agency Contact includes all of the contact information that your clients need to contact you including your opening hours, phone number, email, website, and a simply contact form. In this form only the submit button is clickable (which will send the message to your email) but you can make the others clickable if you want.
WP Style
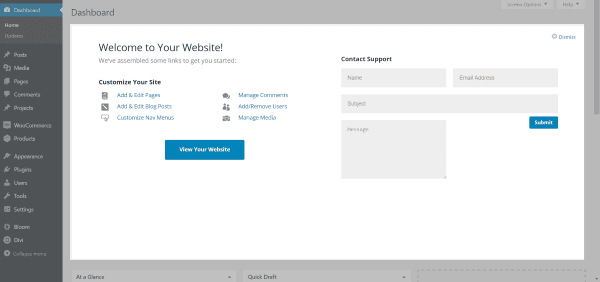
WP Style is a simple screen that uses the WordPress styling to blend in. It includes clickable links to create new or edit pages and posts, customize menus, manage comments, add or remove users, and manage media. Easily view your website by clicking a button. It also includes a support contact form.
These clickable links are internal, meaning they keep you inside your WordPress back end. You can have them link to somewhere else in the admin panel by using the parent link attribute (target=”_parent”). Leave off the link attribute if you want to open the link within the dashboard window. If you want external links simply supply the link as normal.
Handwritten Note + Map
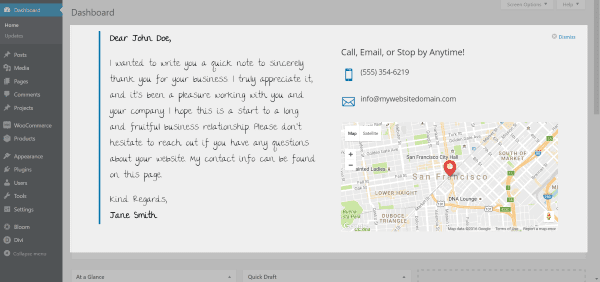
Handwritten Note + Map includes a note area with a handwritten font (The Girl Next Door, in case you’re wondering) so you can leave a special note to your clients. There’s also a contact area that includes your phone number, email address, and a Google Map with pin in case you want to give them directions to your office or event. This can also be used to tell your team about an event and provide them with the time and location.
Simple Contact Form
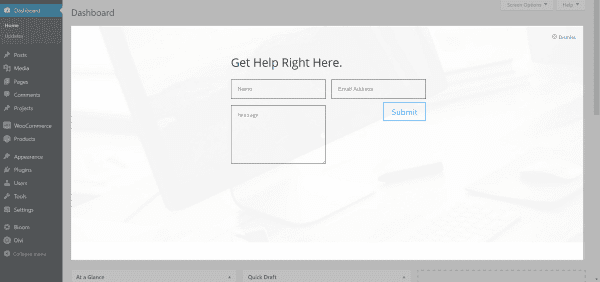
Simple Contact Form is exactly that – just a simple contact form so your clients or team can send a message. This one clears out the clutter, providing just this one tool with nothing else getting in the way.
Default
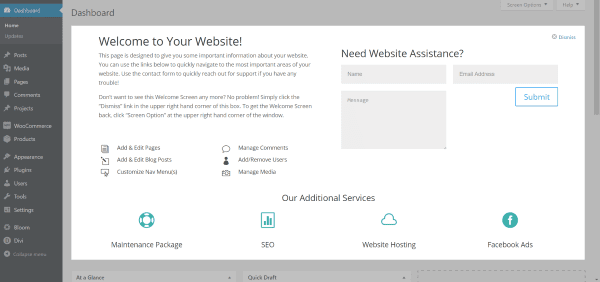
The default dashboard provides a welcome message, internal links to create pages, posts, and manage menus, comments, users, and media, a contact form, and links to additional services that you provide for your clients. This is a clean layout with usable tools to ensure users will actually use it while at the same time providing simple links to up-sale your services.
Dismissing the Screen
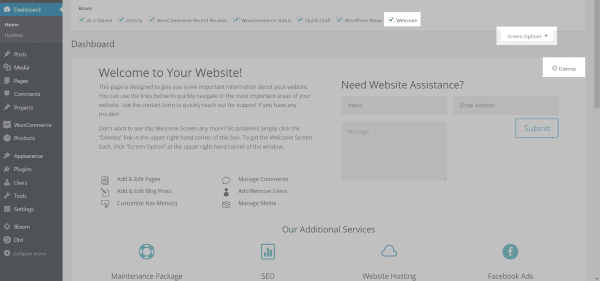
If you or your clients want to dismiss the welcome screen click the x Dismiss in the upper right corner. If you want it back just click Screen Options and select Welcome from your choices. This is helpful if you use a welcome screen that only has a thank you message or a contact form that clients won’t need to see all the time.
Creating My Own Custom Dashboard Welcome Screen
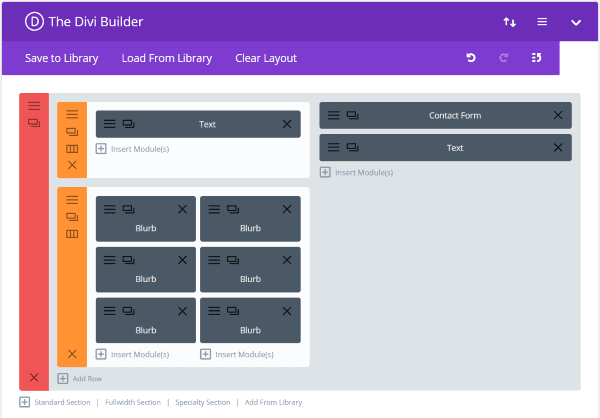
Rather than create a welcome screen for clients I wanted to create a welcome screen for contributors to my website. When contributors log in they will see this screen and they’ll have the information they need for creating and publishing content for the website.
I wanted to include information and links such as:
- Guideline overview with information such as word counts, image sizes, file types, etc.
- PDF download link to writer’s guidelines
- Links to sources for images
- Pre-publishing checklist
- Approved titles and topic ideas
- Link to team discussion group
- Contact form
I wanted to keep the form simple and clean, but still provide the information I needed. For this I started with the Default layout and created my own layout. The WP Style layout would have also worked as a template.
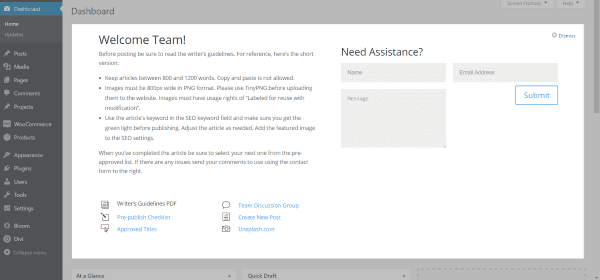
Here’s the first version of the welcome screen. This just took a few minutes to create using the layout.
Using the Visual Builder
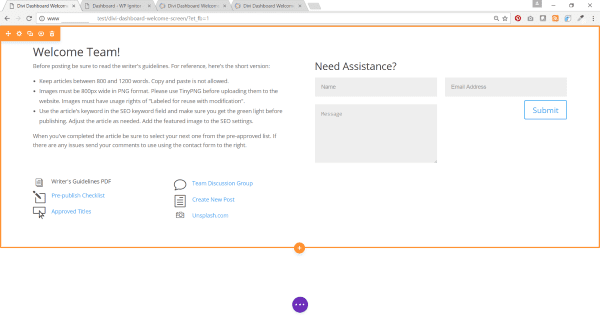
I wanted to give it a little more visual pizazz so I loaded the page with the Visual Builder to make my changes.
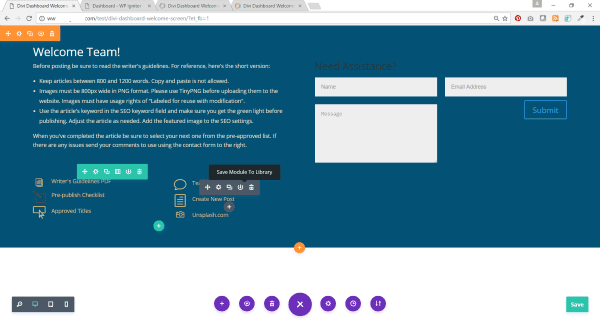
I mostly changed colors. I also added a new text module to include a motivational saying in the empty space below the contact form.
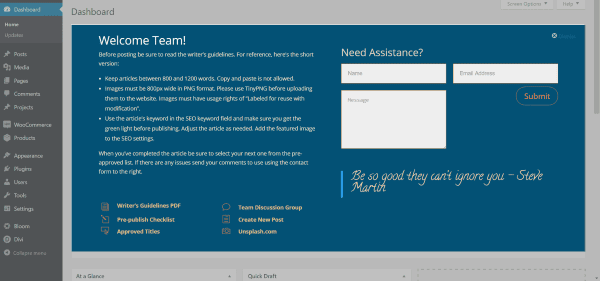
Now my dashboard is customized with my branded colors. Almost all of the styling was done from the front end. I saved this one to my library so I can reuse it.
A Personalized Custom Dashboard
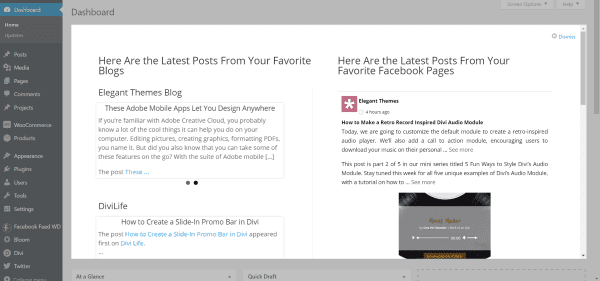
For the next one I wanted to create a dashboard where all of the latest posts of my favorite websites, YouTube channels, and Facebook pages would appear – essentially creating my own personal network right into my dashboard so I can see their content when I log into my website without having to go anywhere else.
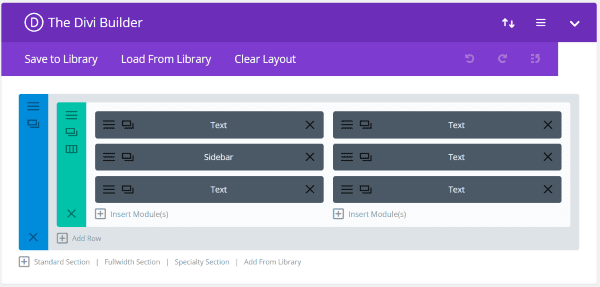
To create this I used three free plugins:
For the blog posts I created a new widget area called Dashboard RSS, placed an RSS Feed Widget for each blog feed I wanted to display the dashboard, and pasted in the URL’s of the feeds I wanted into the widget. In the Divi Builder I placed a sidebar module and selected my new widget area. If I wanted to display them side-by-side I would use multiple widget areas and multiple sidebar modules. Clicking on the RSS feeds within the dashboard brings the article to my dashboard where I can read it without leaving my website.
For the YouTube videos I wanted to show the latest videos from both Elegant Themes and Divi Life. The YouTube Embed plugin makes it easy to add Elegant Theme’s and Divi Life’s YouTube channels into a textbox as embedded links, which then displays the videos. I can place the feeds from the channel as a gallery or as a playlist. I selected playlist. I can watch the videos directly from the dashboard without having to leave my website.
For the Facebook feeds I created the links in the plugin and then placed the shortcodes in text modules. I could have created a single module, but this way I can easily drag and drop them if I want to modify the layout. I can see the latest Facebook posts in my dashboard without having to go to Facebook first and risk getting sucked into the void.
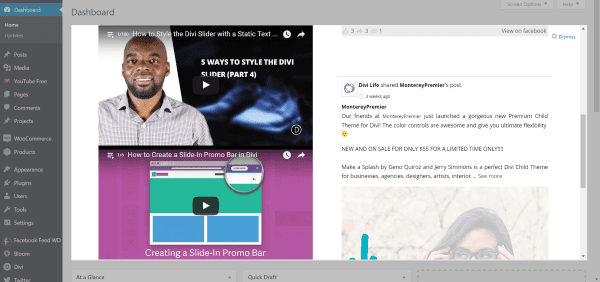
All of this content will refresh and update all on its own (according to the settings within each plugin) with no further input from me. Some plugins may require refreshing the screen.
License
Divi Dashboard Welcome has unlimited usage for life for your own sites as well as sites for clients.
Final Thoughts
Divi Dashboard Welcome is an excellent tool for creating custom dashboard screens using the Divi Builder. Developers can supply information and up-sale for clients, and admins can create tools for their team, and bloggers can provide themselves an easy access point for their tools. There are lots of ways to use this plugin and you’re only limited by the Divi Builder and your imagination. Just like anything created in Divi, the layouts can be saved, reused, and shared.
Have you tried Divi Dashboard Welcome? If so, we’d love to read your thoughts below.
Featured Image by print10 / shutterstock.com


Nice review and creative ideas how to use it in the comments! Thanks
Interesting.
Is it possible to have a welcome screen per user?
In other words: every client has it’s own welcome screen and links to customer specific pages??
Hi Mars,
I’m not entirely sure by what you mean. Most clients will be on their own site, and therefore will have their own unique dashboard that you can custom tailor to them. So in that sense, yes you can have a dashboard that’s different for each user. If you’re referring to a single WordPress install where lots of different users will be logging in (contributors, vendors, etc) then you can’t necessarily have an entirely different dashboard for each user, but what I think would be better is to have one dashboard but with dynamic content that is different for each user. Something like this is absolutely possible with my plugin, but it may take some custom plugins to pull in the content that is unique to each user. It would depend on what you’re trying to do though.
Has DIVI officially taken over AVADA as the number one theme? The visual builder looks like a game changer
Hi Randy
This Plugin is exactly what I needed.
I would like multiple clients to access a specific home page related to their content. So when they login they get directed to their Welcome page and content that relates to them.
Is this possible with this plugin, if not, are there other plugins that you could recommend to achieve this.
– Redirection
– content restricted to a specific client or different users
Thks
I think it is generally for Anyone that wants to create a welcome screen that’s customized for their own needs, such as notes for image sizes, links to download resources, calendar, to-do list, etc.
Looks like a very useful plugin.
I’ll definitely give it a try
This plugin looks fantastic! Any reason that this couldn’t be used on a WP Multi Site network to change all dashboards on the network at once? I’m hoping that will work.
Hi John,
Yes you can absolutely use it on multisite. In order to have a “master dashboard” though that will change all dashboards across the network at once, there is a few small extra steps you must do. I have the instructions written out already though, as this has already been done by a few customers. 🙂
Looks like a very useful plugin. One thing I find useful for clients in the dashboard area is a list of all pages and posts right there, so that all they have to do is to click on one to then be taken to the edit screen for that page/post.
I normally do that with a plugin – cms tree page view from the depository.
Is it possible to set something up that is similar with your plugin?
Hi Neal,
Yes, you could definitely do that. It would require an extra plugin though to pull in the posts. But from the looks of it, there’s several in the repository that should do the trick.
In addition to RSS/FB feeds, you can also embed scrapes from a centralized site if you don’t want to have to login and update client sites all the time with special offers or whatnot, using something like this:
https://wordpress.org/plugins/wp-web-scrapper/
(Hasn’t been updated in a _long time_, but still seems to work fine. Only reason I’m using this one is because it was the first I saw that allows you to target scrapes based on CSS selector and I quit looking once I found one that worked)
Setup a page somewhere that has the different info you’d want to present on your clients’ dashboards with different sections and assign CSS IDs, however you want to differentiate them, like #nomaintenanceplan, #maintenanceplan, #ecommsites, #allsites whatever.
Then when you build your dashboard page, you can drop in the scraper plugin shortcode
and set the query to target whatever section you want to display for that client.
You just edit the 1 central page, and the clients get relevant updated dashboard info.
Quick sample and some screencaps here: https://oneofmydomains.com/dashboard-sample
Very slick Wilk! This could come in handy for sure.
Awesome idea Wilk! Thanks for sharing.
Looks really good Randy! Is there a way that you can make this a standalone plugin? Something like this would be truly useful regardless of using Divi or anything else.
Looks good, I may give it a try!
Thank you for the excellent review of my plugin, Randy! 🙂 I absolutely love the second custom dashboard you created with the RSS, YouTube, & Facebook feeds! Very creative! 🙂
Thanks Tim!
Hey Tim! Awesome plugin. I just posted this below, but since you commented, wanted to ask directly: Is there a way that you can make this a standalone plugin? Something like this would be truly useful regardless of using Divi or anything else.
Hi Sasha,
It technically will work without Divi. However, the power is really in being able to use it with the Divi builder. Without using Divi (or Extra, or Divi builder plugin) you’re basically just using the default WordPress text editor to create the custom dashboard, which is extremely limiting. And why would anyone NOT want to use Divi anyways?! 😉
Use only a Default text editor?? We have way more than the DIVI page builder though we can use though??
Awesome to hear that, so does that mean it would have also worked with other plugins too like BeaverBuilder plugin or Visual Composer if the person doesn’t use Divi Builder?
Hi Sasha-Shae,
Yes, it should work with other builders, however I have not tested it. I’m all Divi, all the way 🙂