Divi Contact Form Helper is a plugin that works with Divi to expand the functionality of the built-in contact form system. It adds settings to the contact form module, an interface to the WordPress dashboard where you can manage your form entries, and additional settings to the Divi theme options. The plugin adds new design and customization options as well as new functionality such as a date picker, a file upload field, the ability to save submissions to a database, and more.
In this plugin highlight, we’ll take a look at the features and settings for Divi Contact Form Helper and help you determine if it’s the right product for you.
Let’s get started!
Installing Divi Contact Form Helper
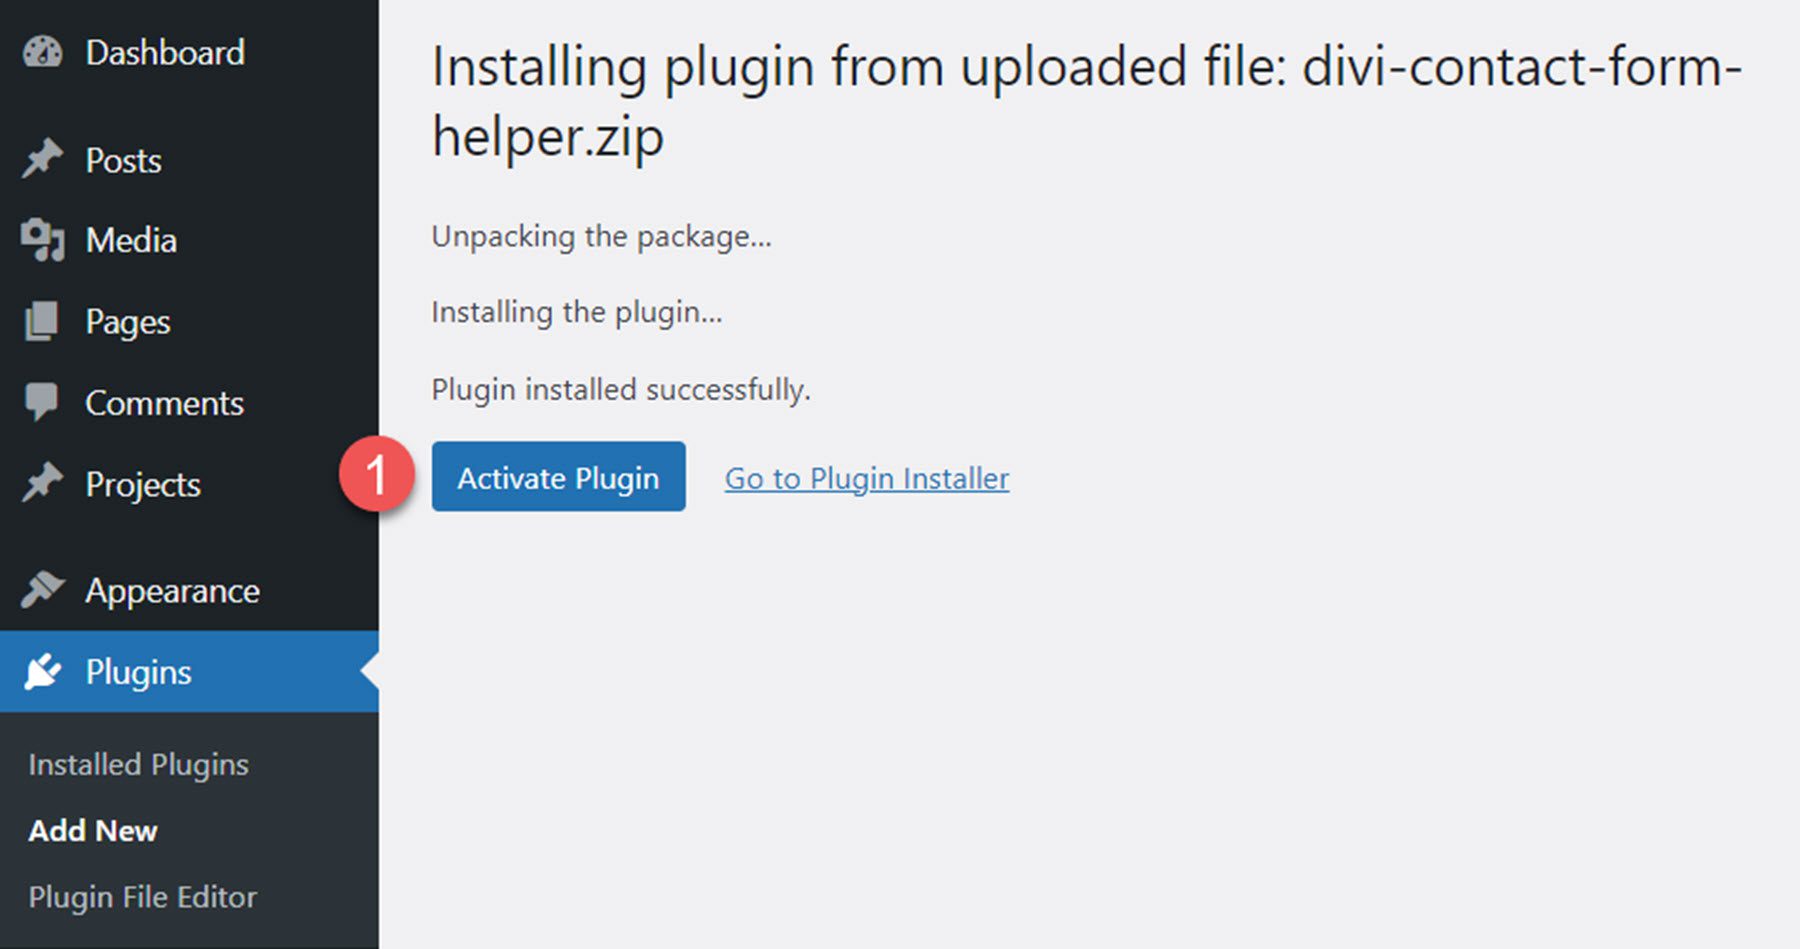
You can install Divi Contact Form Helper just like any other WordPress plugin. Open the plugins page in the WordPress dashboard and click Add New. Click Upload Plugin at the top, then select the .zip plugin file from your computer.

Once the plugin is installed, activate the plugin.
Divi Contact Form Helper
Divi Contact Form Helper is an extension to Divi’s existing contact form module. It adds functionality such as file uploads, field text options, the ability to save submissions to a database, a date/time picker, additional design settings, and more. The plugin settings are spread across the contact form module, a new WordPress dashboard page, and additional Divi Theme Options settings. We’ll take a look at all of these settings to give you an idea of what can be accomplished with this plugin.
Contact Form Module
As we go through this plugin highlight, we note that the changes made using the Divi Builder Contact Form Helper settings will not display automatically in the Visual Builder. To view the changes made, you will need to open the page in a new tab and refresh to get the updated design.
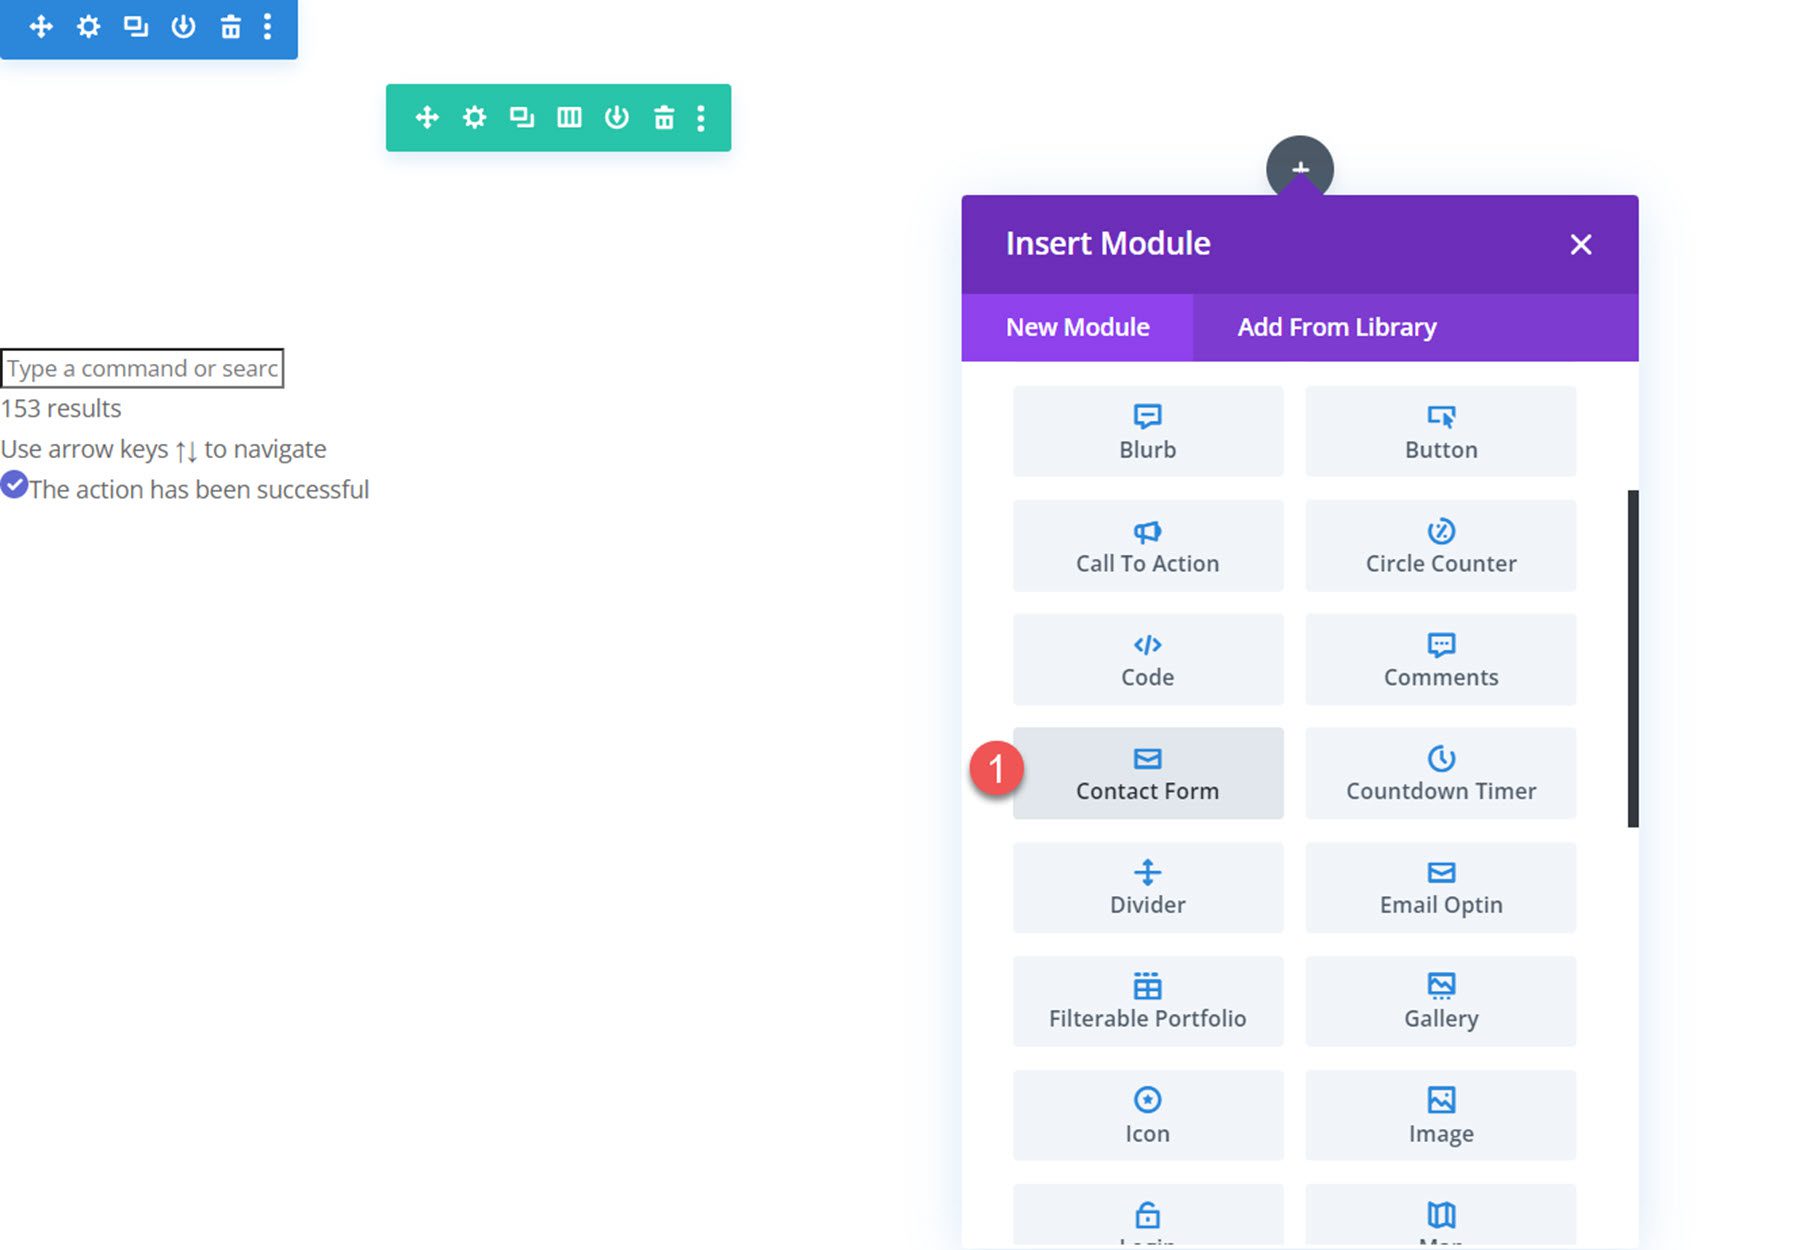
To access the new contact form module settings, add a new contact form to your page in the Divi Builder.
Field Content Settings
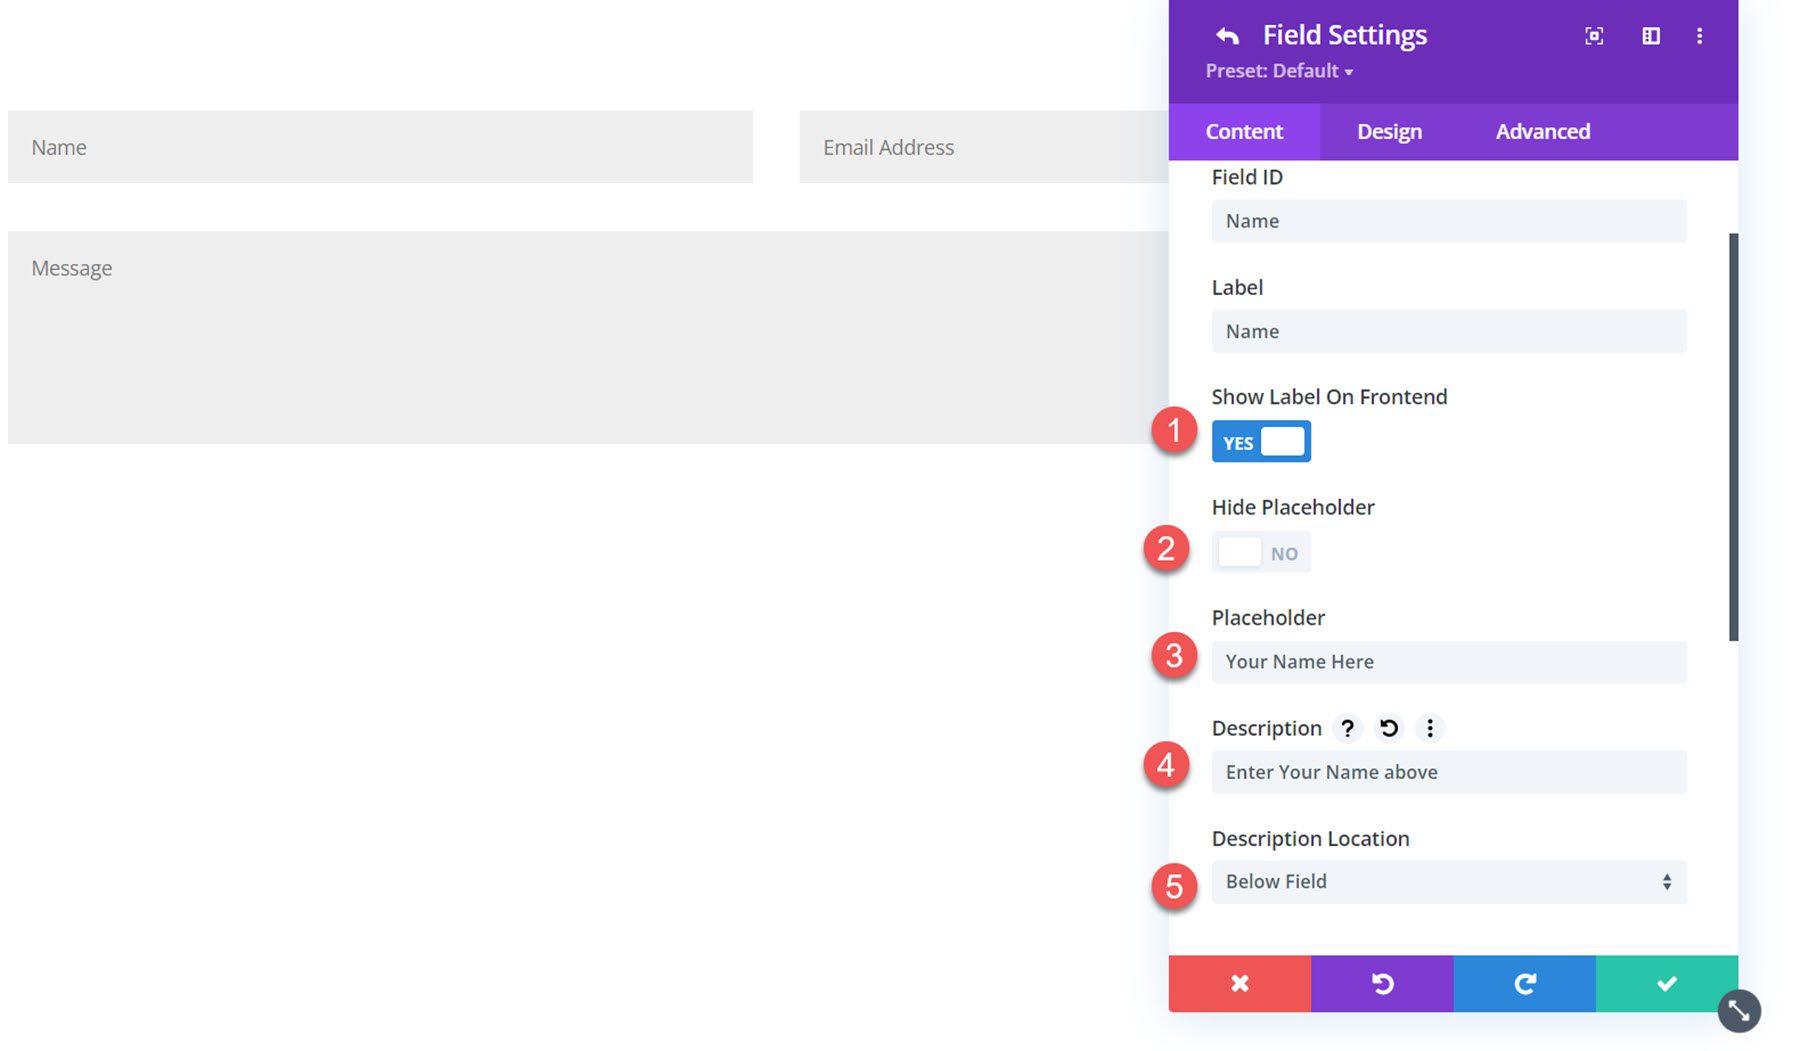
The following settings are located within the content tab of the individual field setting of the contact form module.
Text Settings
Under the Text settings tab, you can show or hide the field label, show or hide the placeholder, enter custom placeholder text, enter custom description text, and choose the description location.
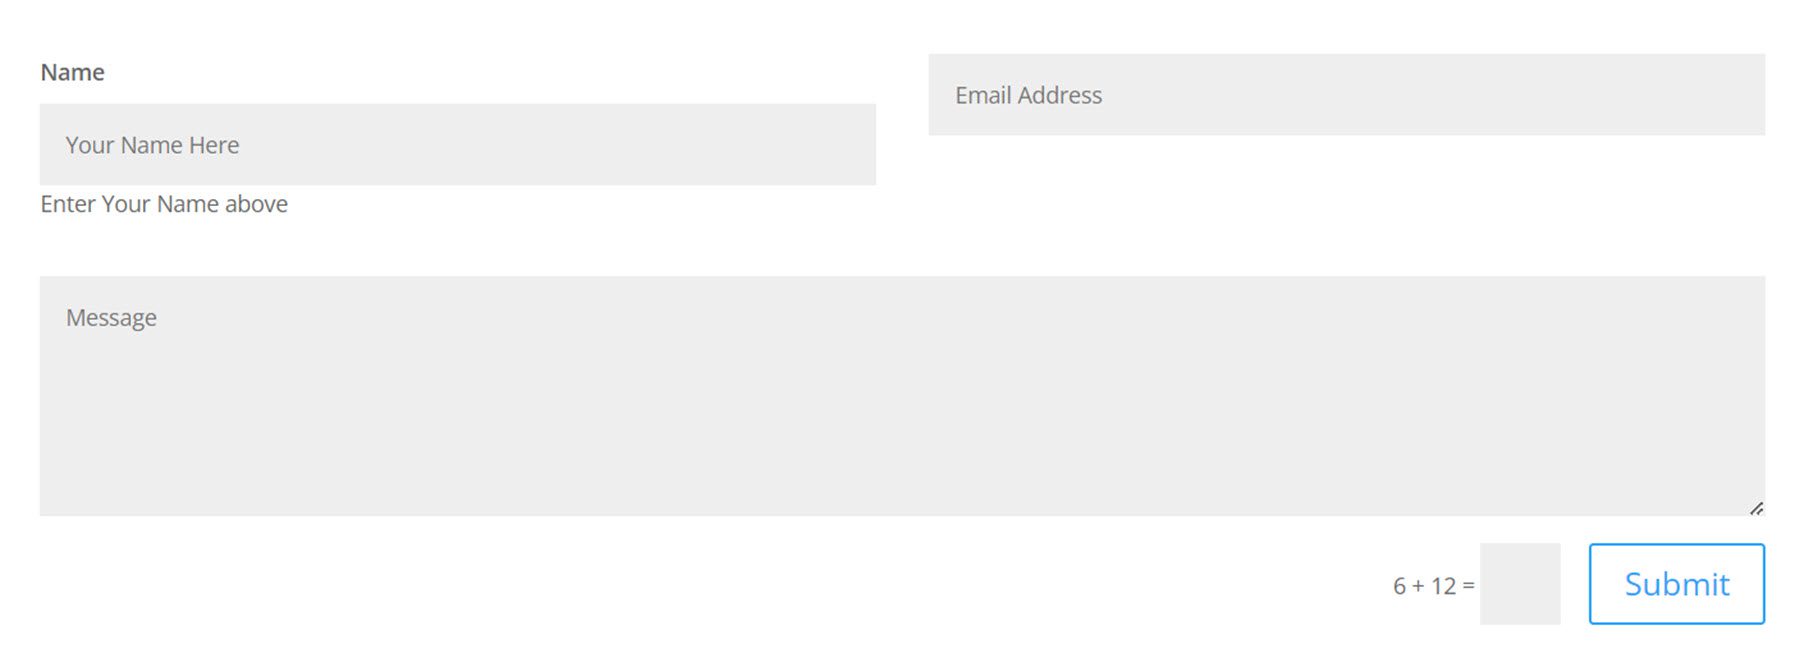
Here is the result on the front end. In this example, I added a label, a placeholder, and a description to the Name field.
Field Options Settings
Next, you can find the Field Options settings. The settings change depending on what type of field is selected.
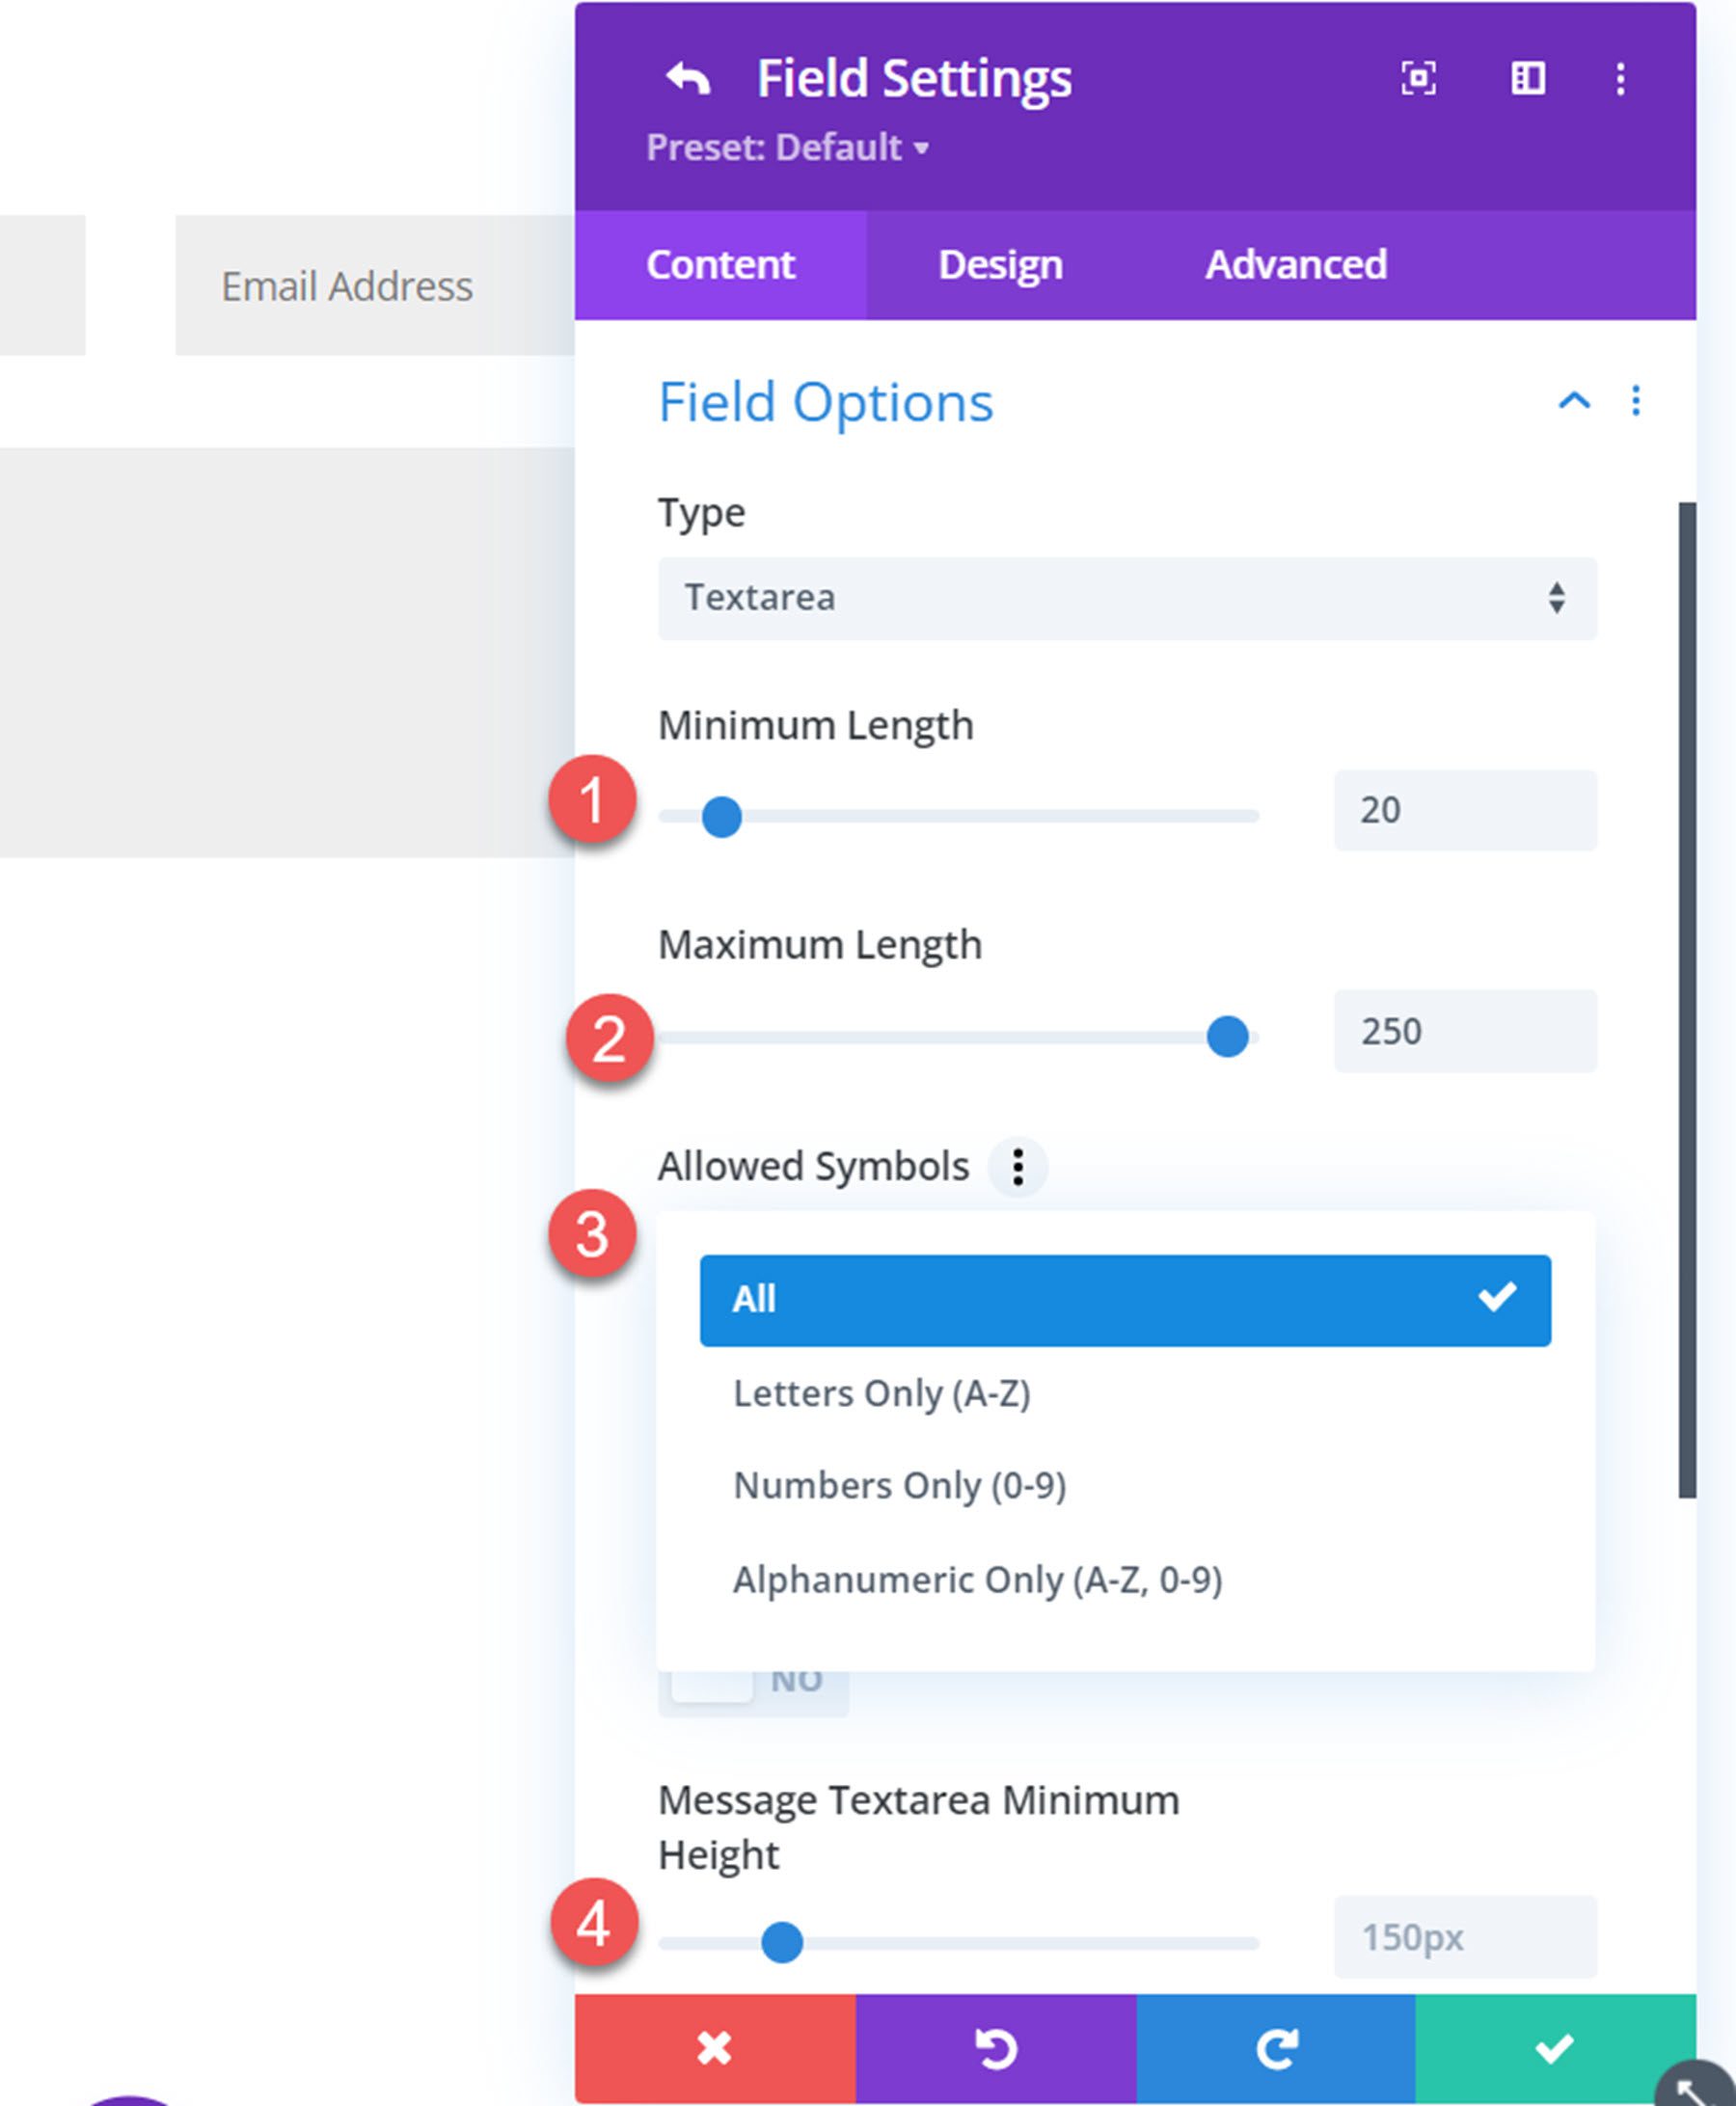
If the textarea type is selected, there will be an option to set a minimum and maximum length for the message, select allowed symbols, and change the text area minimum height.
Each field type also has the option to add an icon and change its color.
![]()
Here is the icon on the front end, within the Message field.
![]()
If the Select Dropdown field type is selected, there will be an option to use dropdown search.
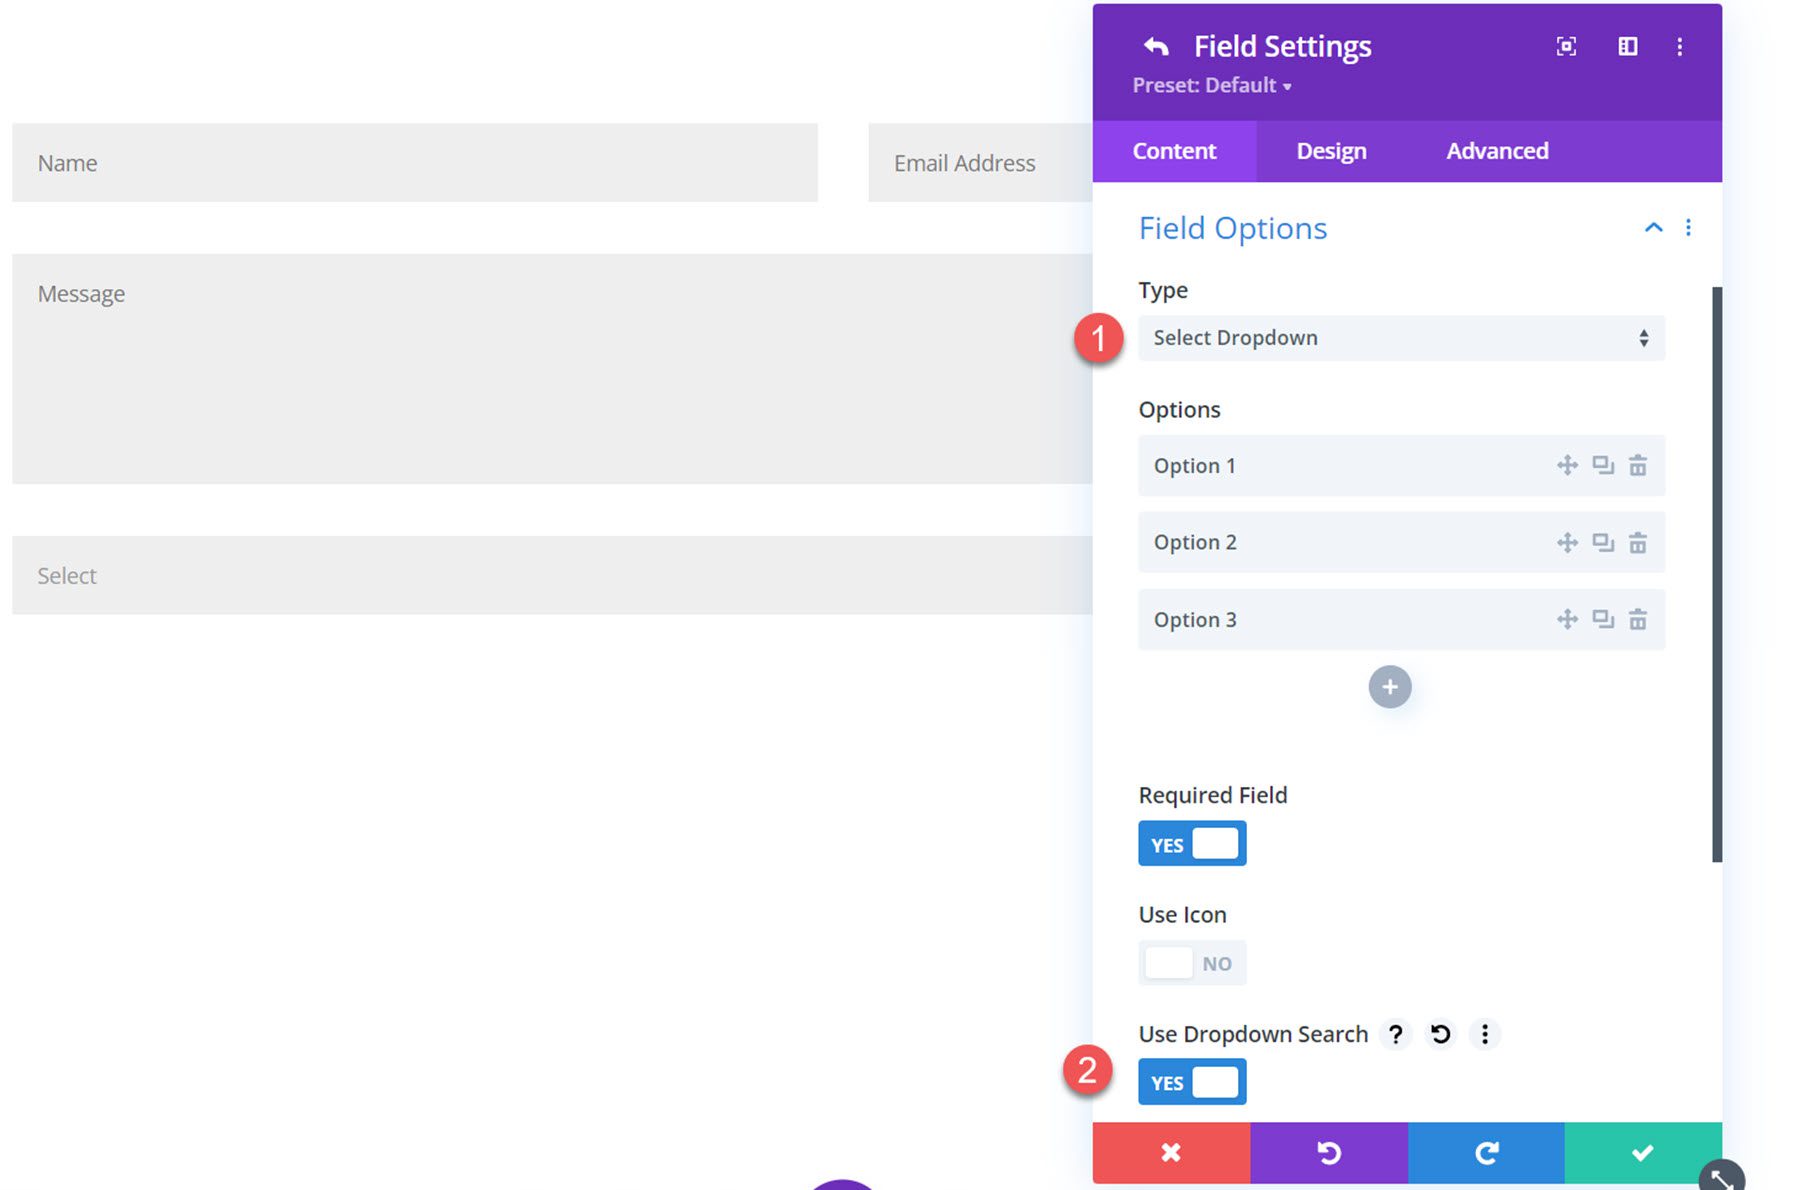
Here is the dropdown search on the front end. Dropdown results are filtered as you type in the search bar above.

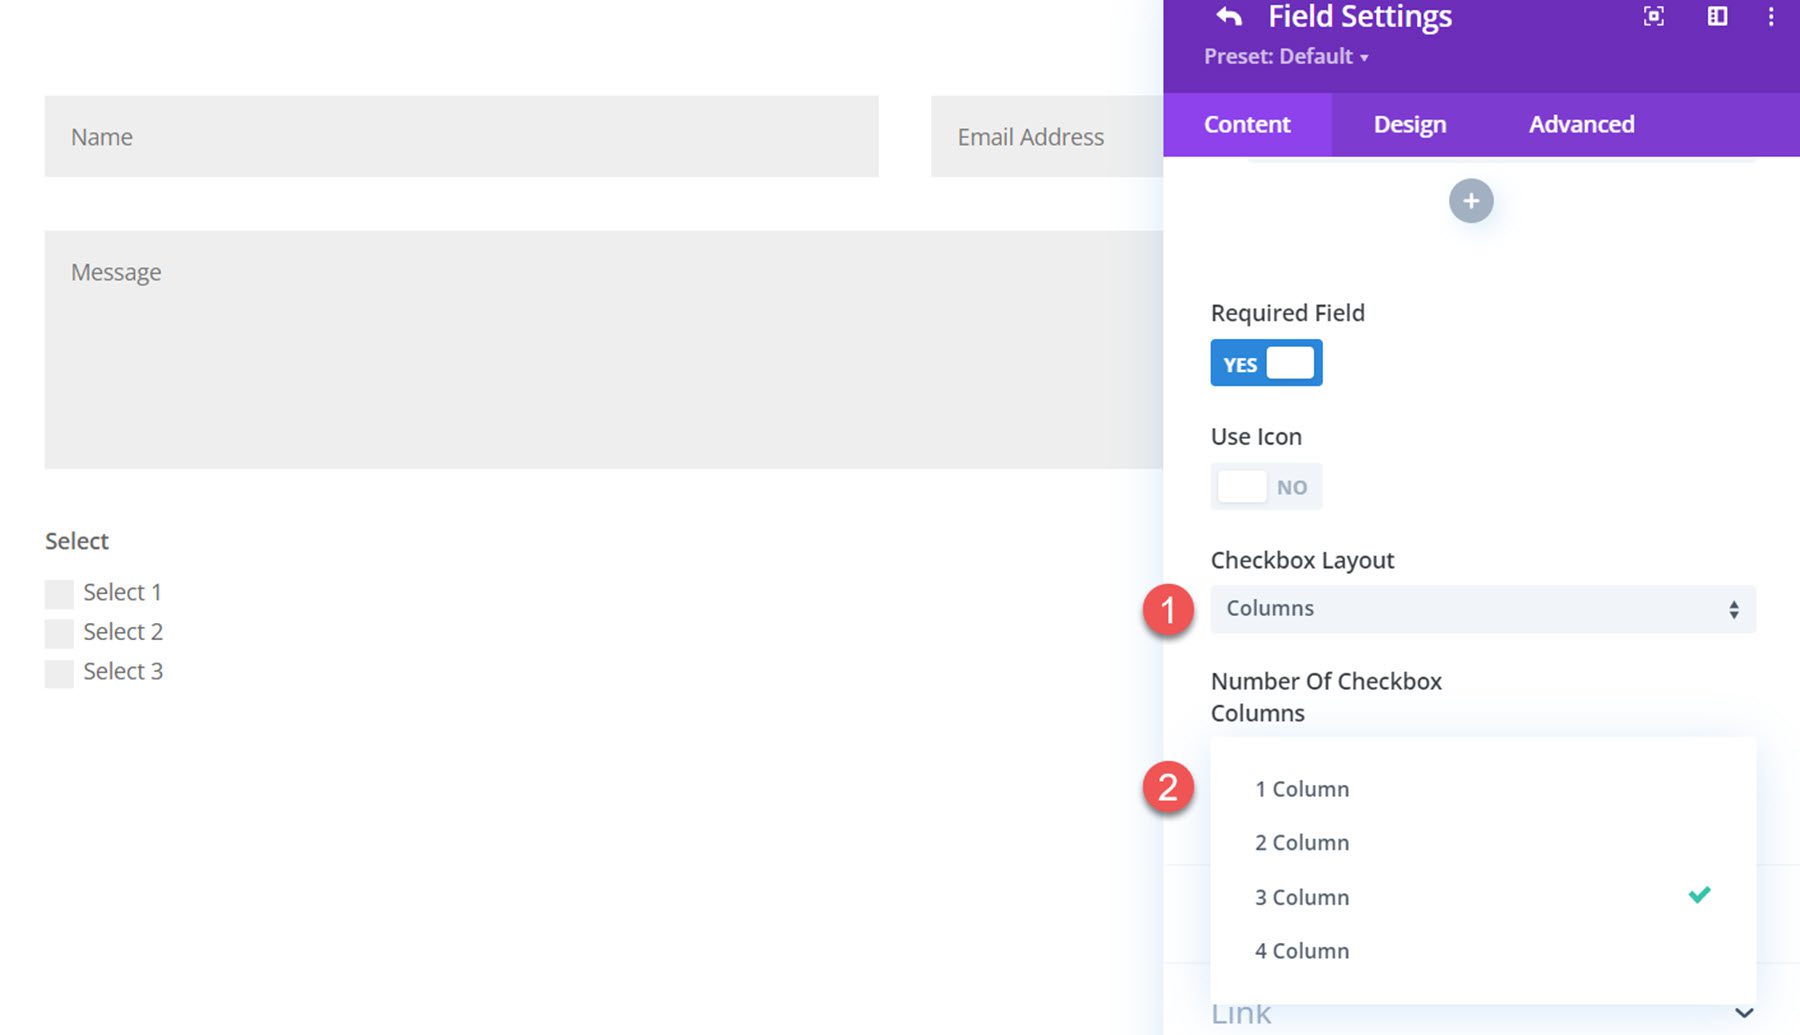
If the Checkbox field option is selected, you will see two layout options: Columns or Inline. If columns is selected, you can set the number of columns (up to 4 columns).
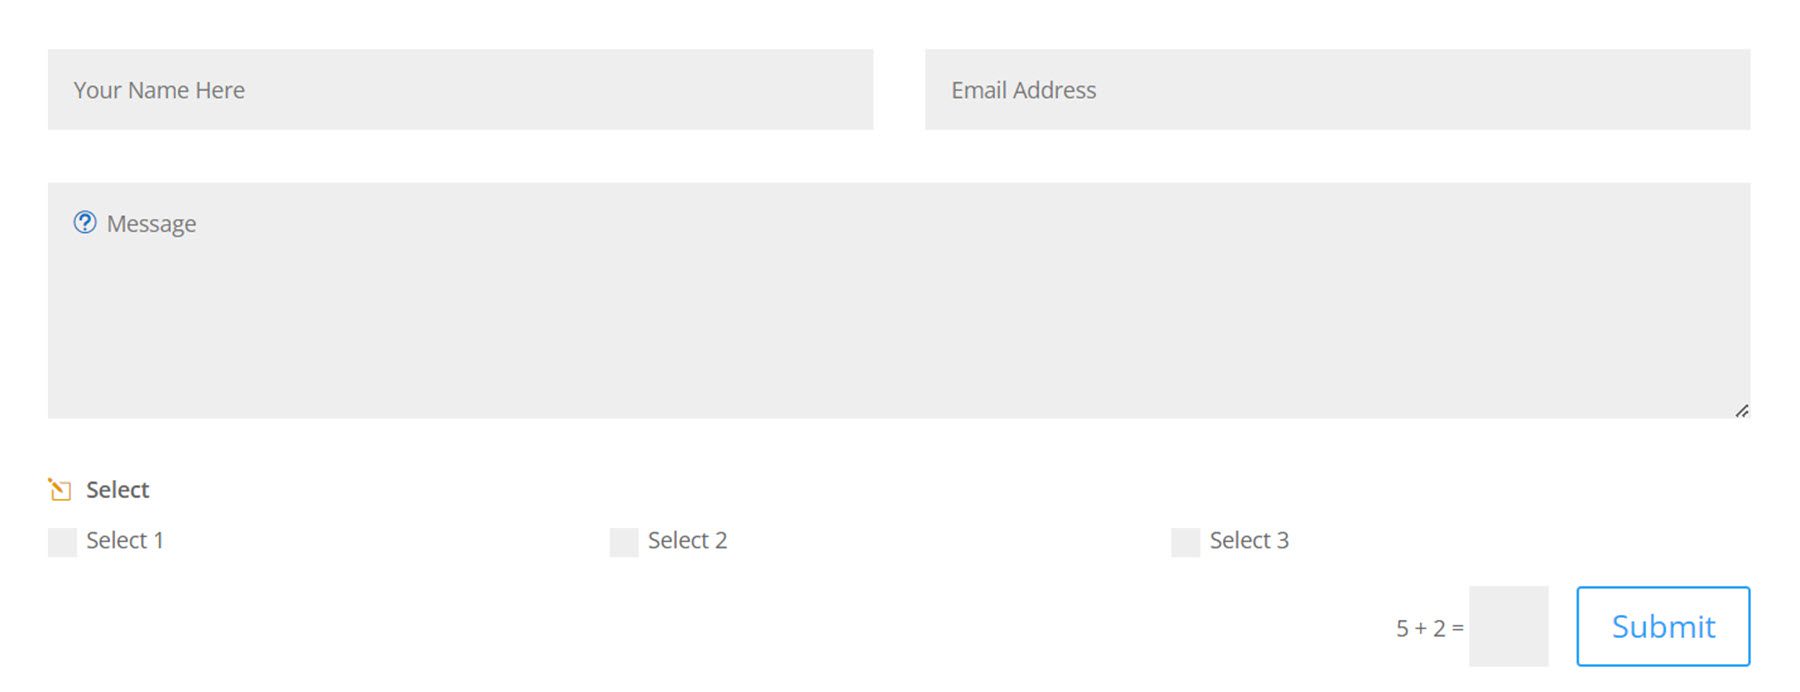
Here is the columns layout with 3 columns and an icon.
And here is the alternative inline layout.
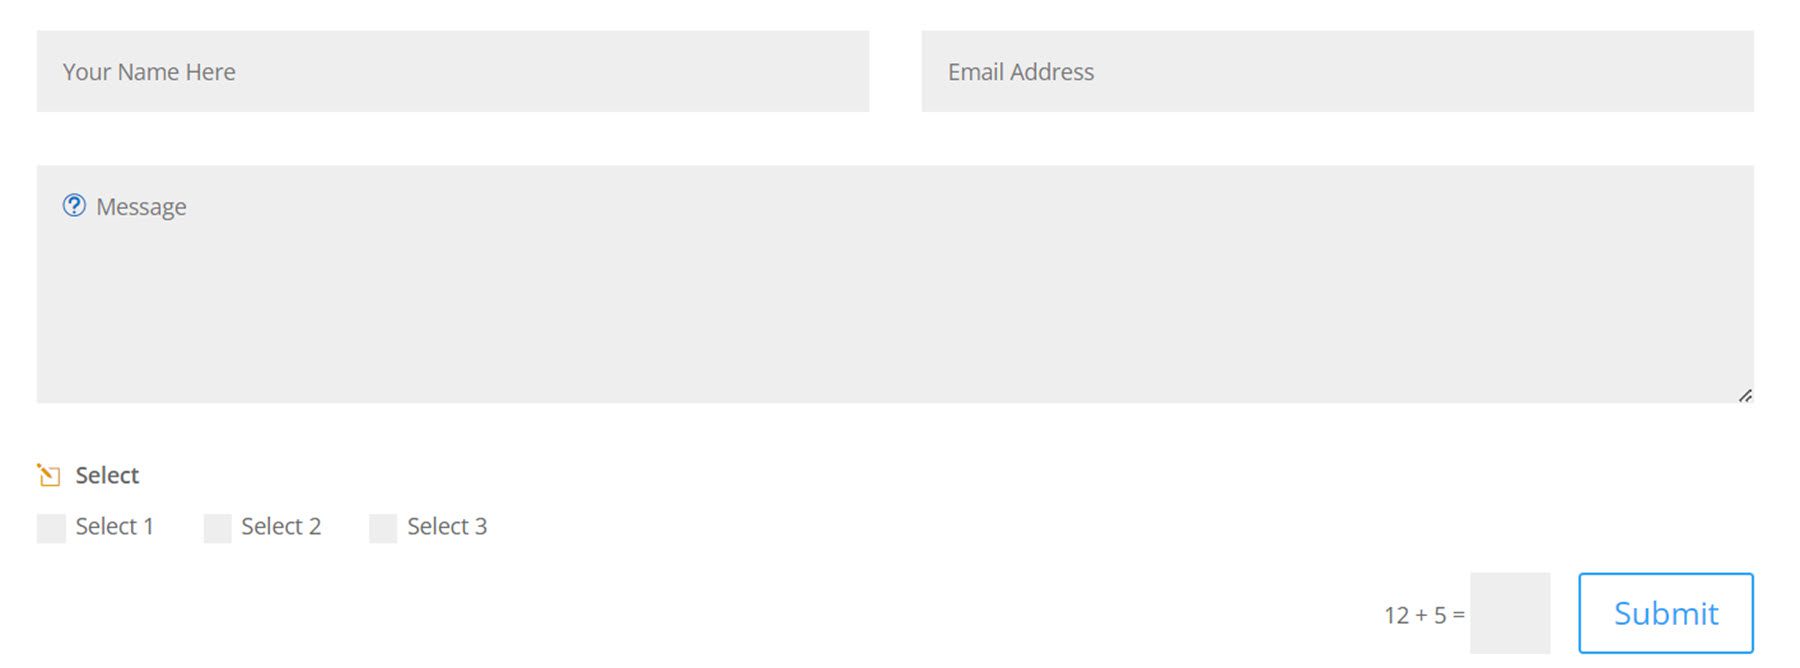
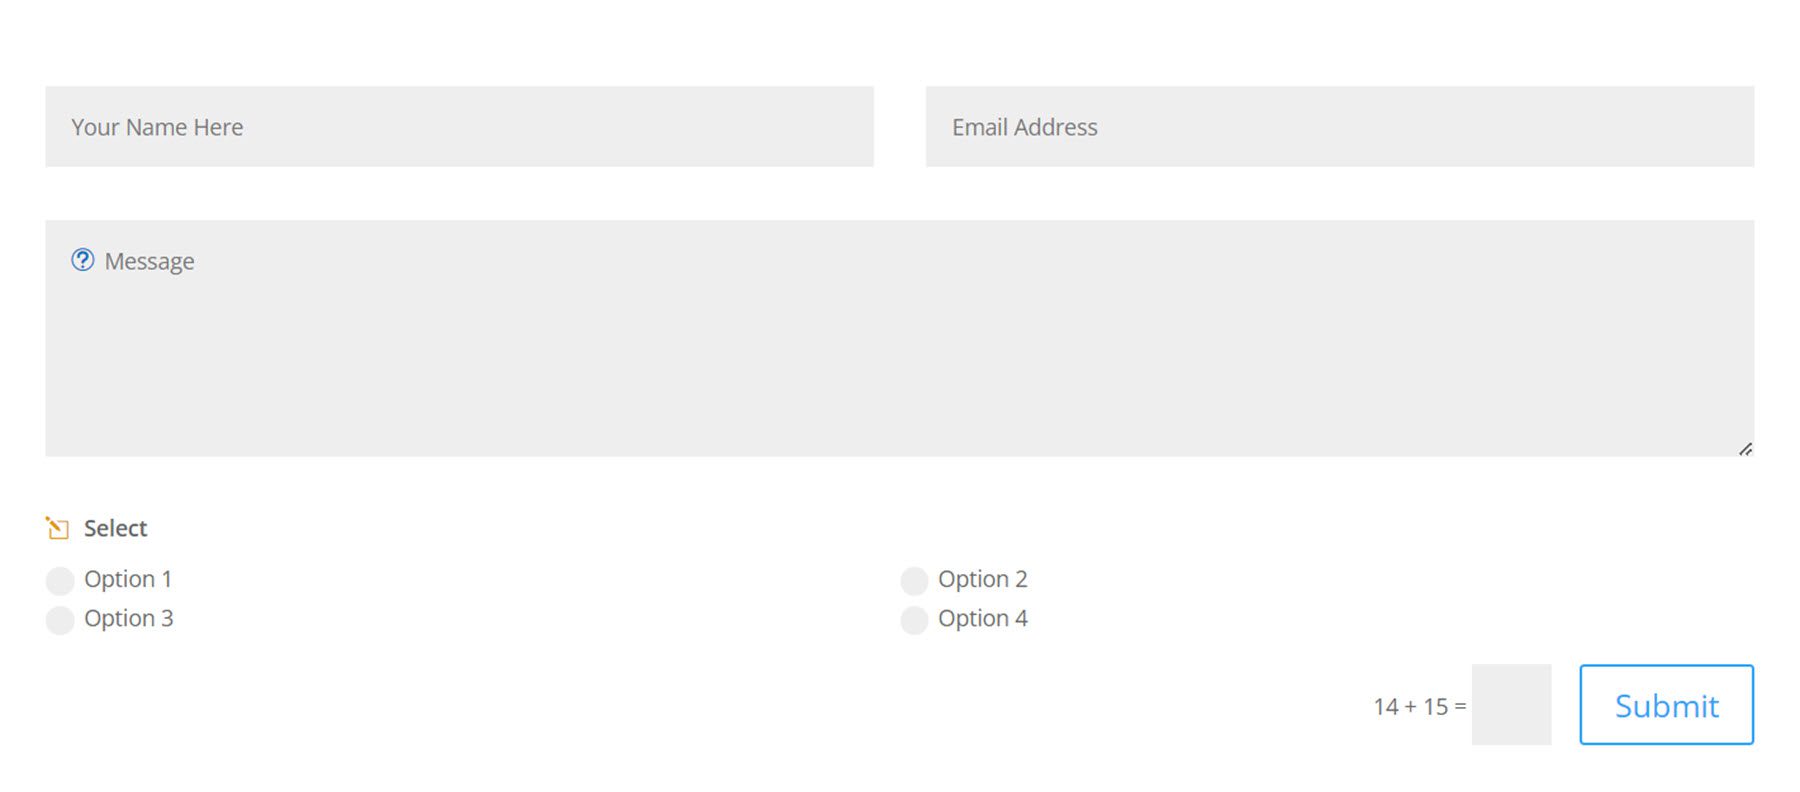
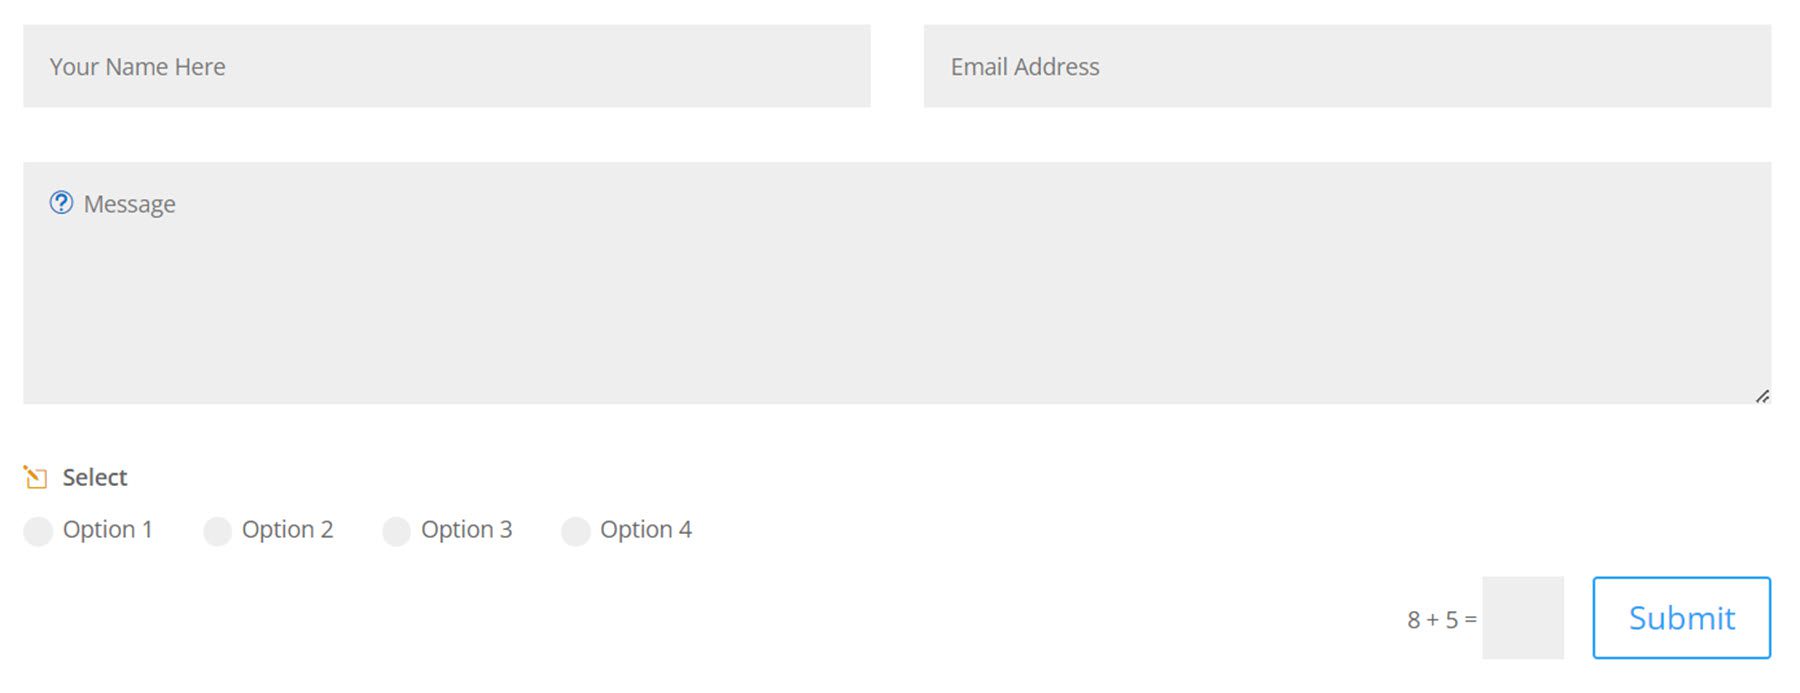
The radio button field layout also has an option for a column or inline layout, with an option for up to 4 different columns.
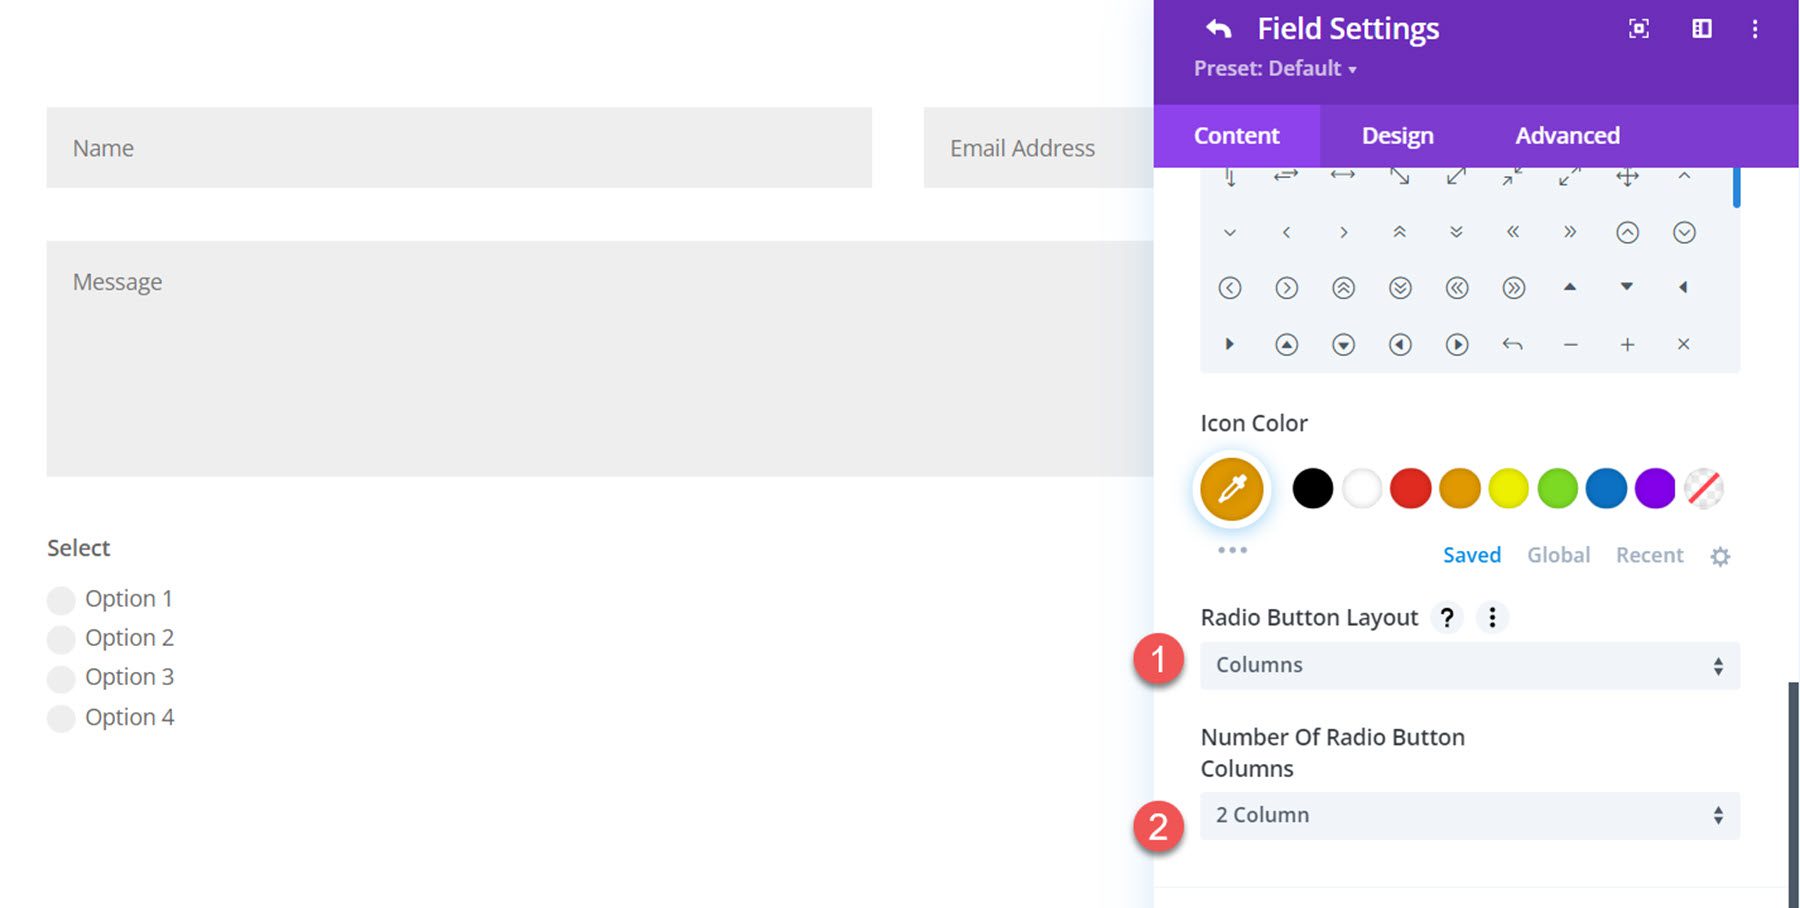
Here is the column layout with 2 columns.
And here is the inline layout.
File Upload Settings
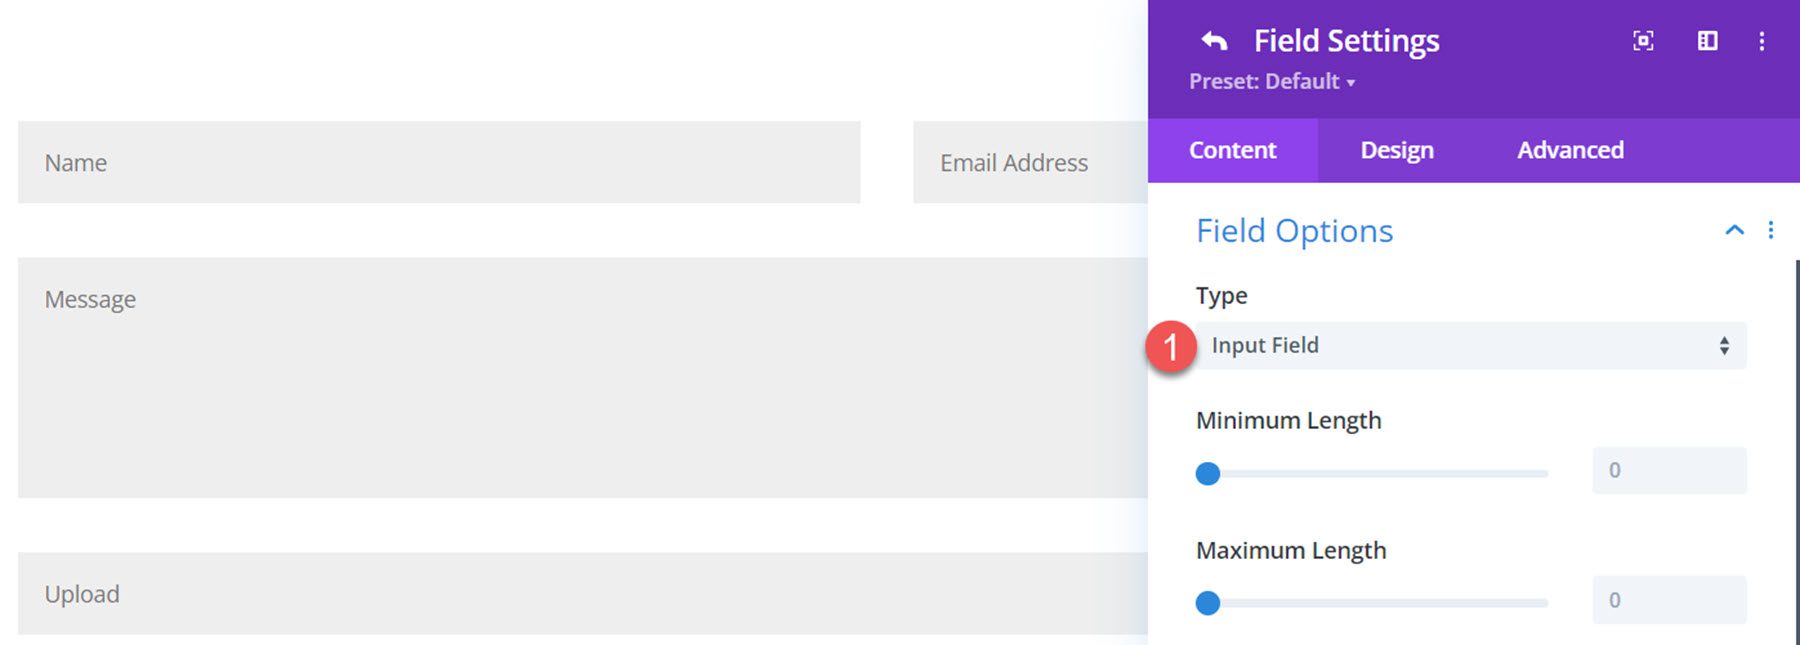
To access the file upload settings, you must first set the Field Type to Input Field within the Field Options settings. Then the file upload settings will appear.
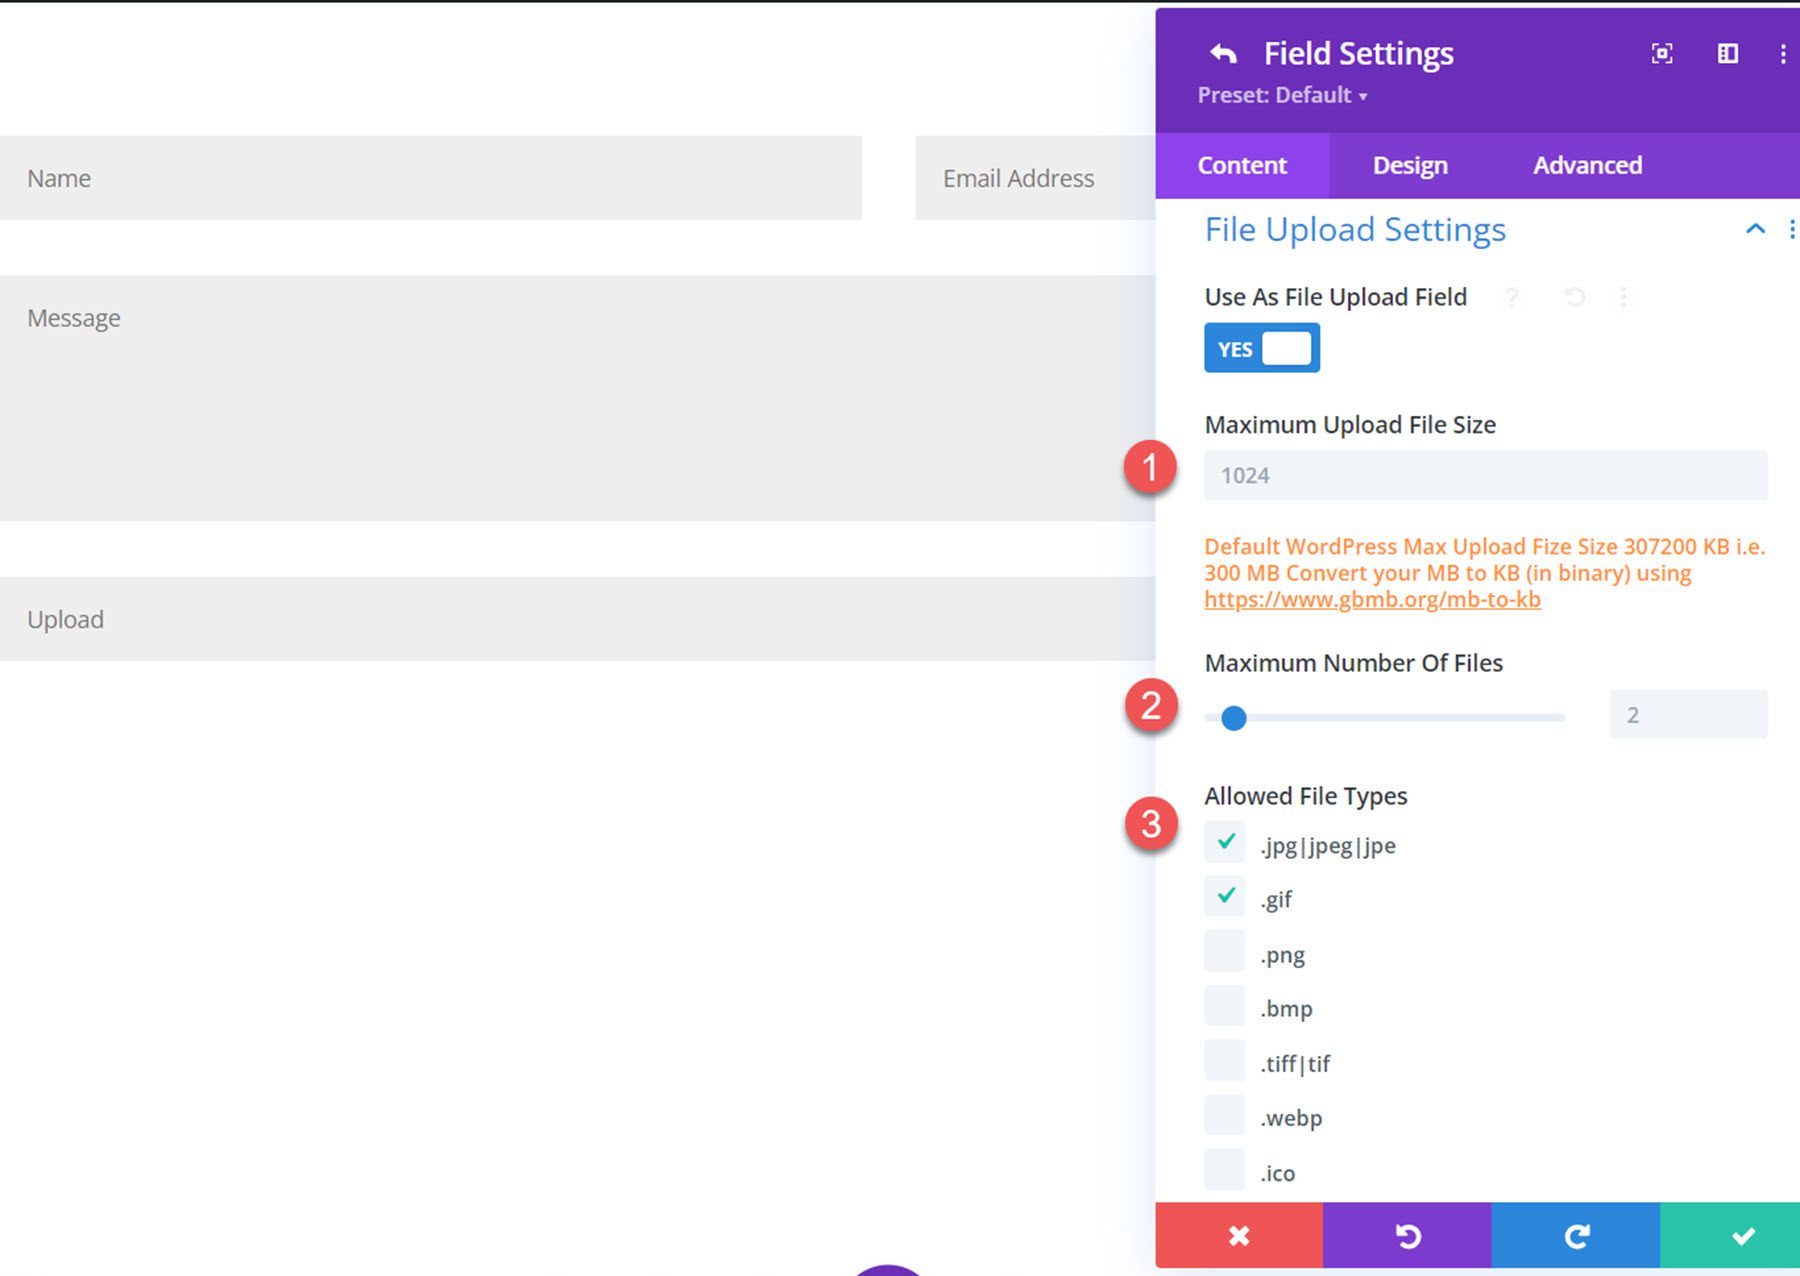
Under the File Upload Settings tab, select the button to enable the field to be used as a file upload field.

Once enabled, you can set the maximum upload file size, maximum number of files, and allowed file types.
Date Time Settings
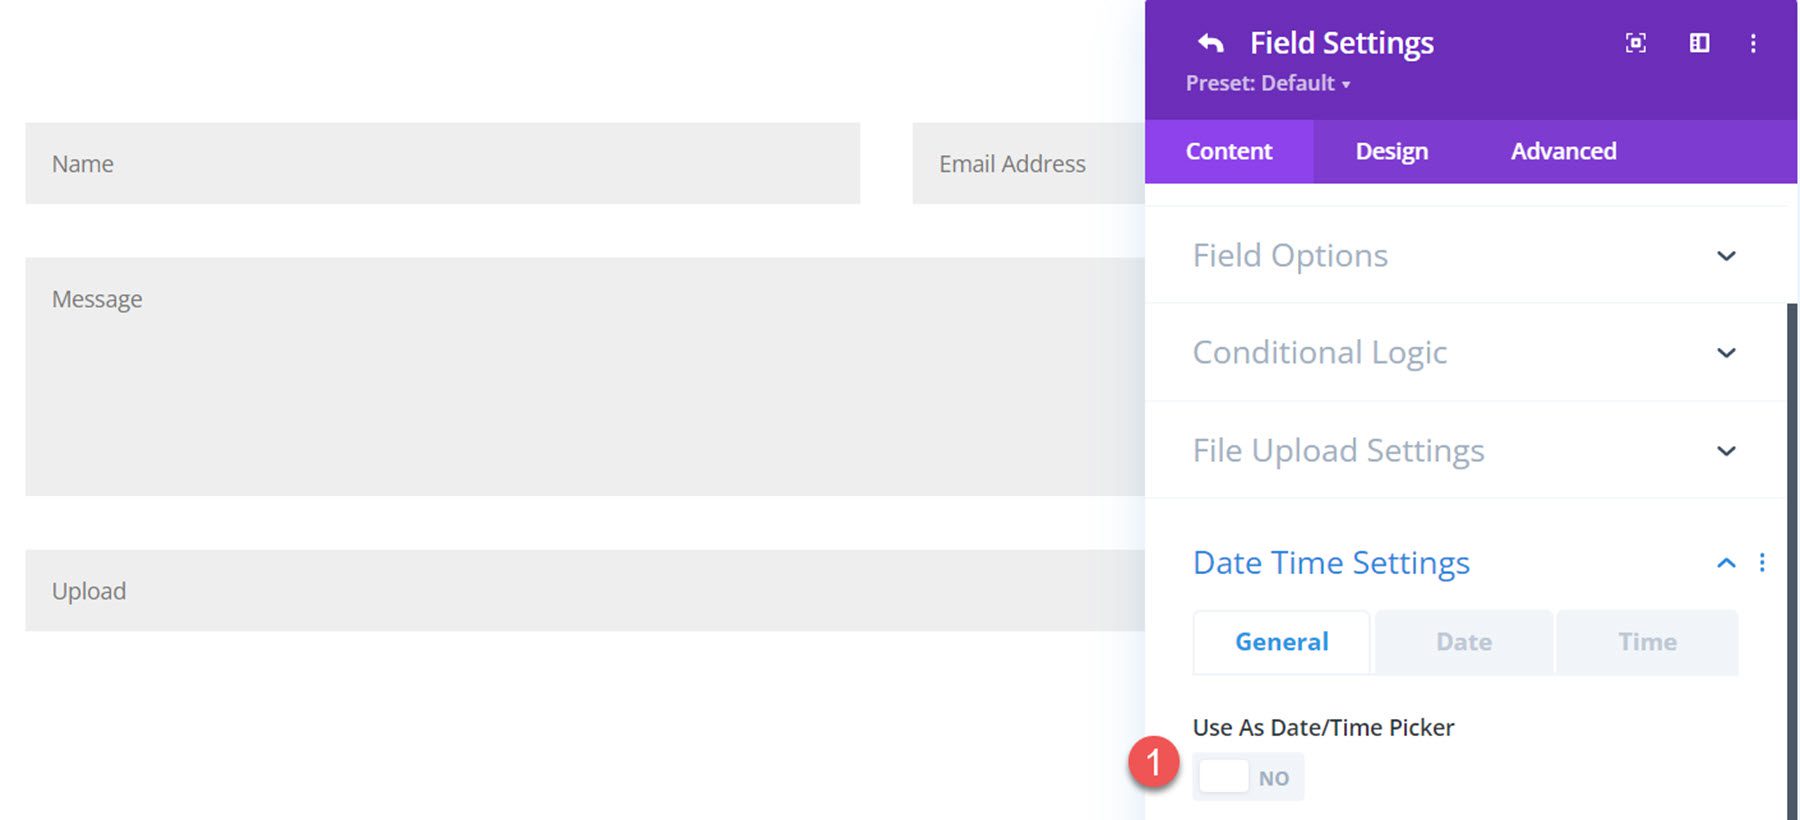
The date/time settings only appear when the field type is set to input field. Toggle the button to use the input field as a date/time picker.
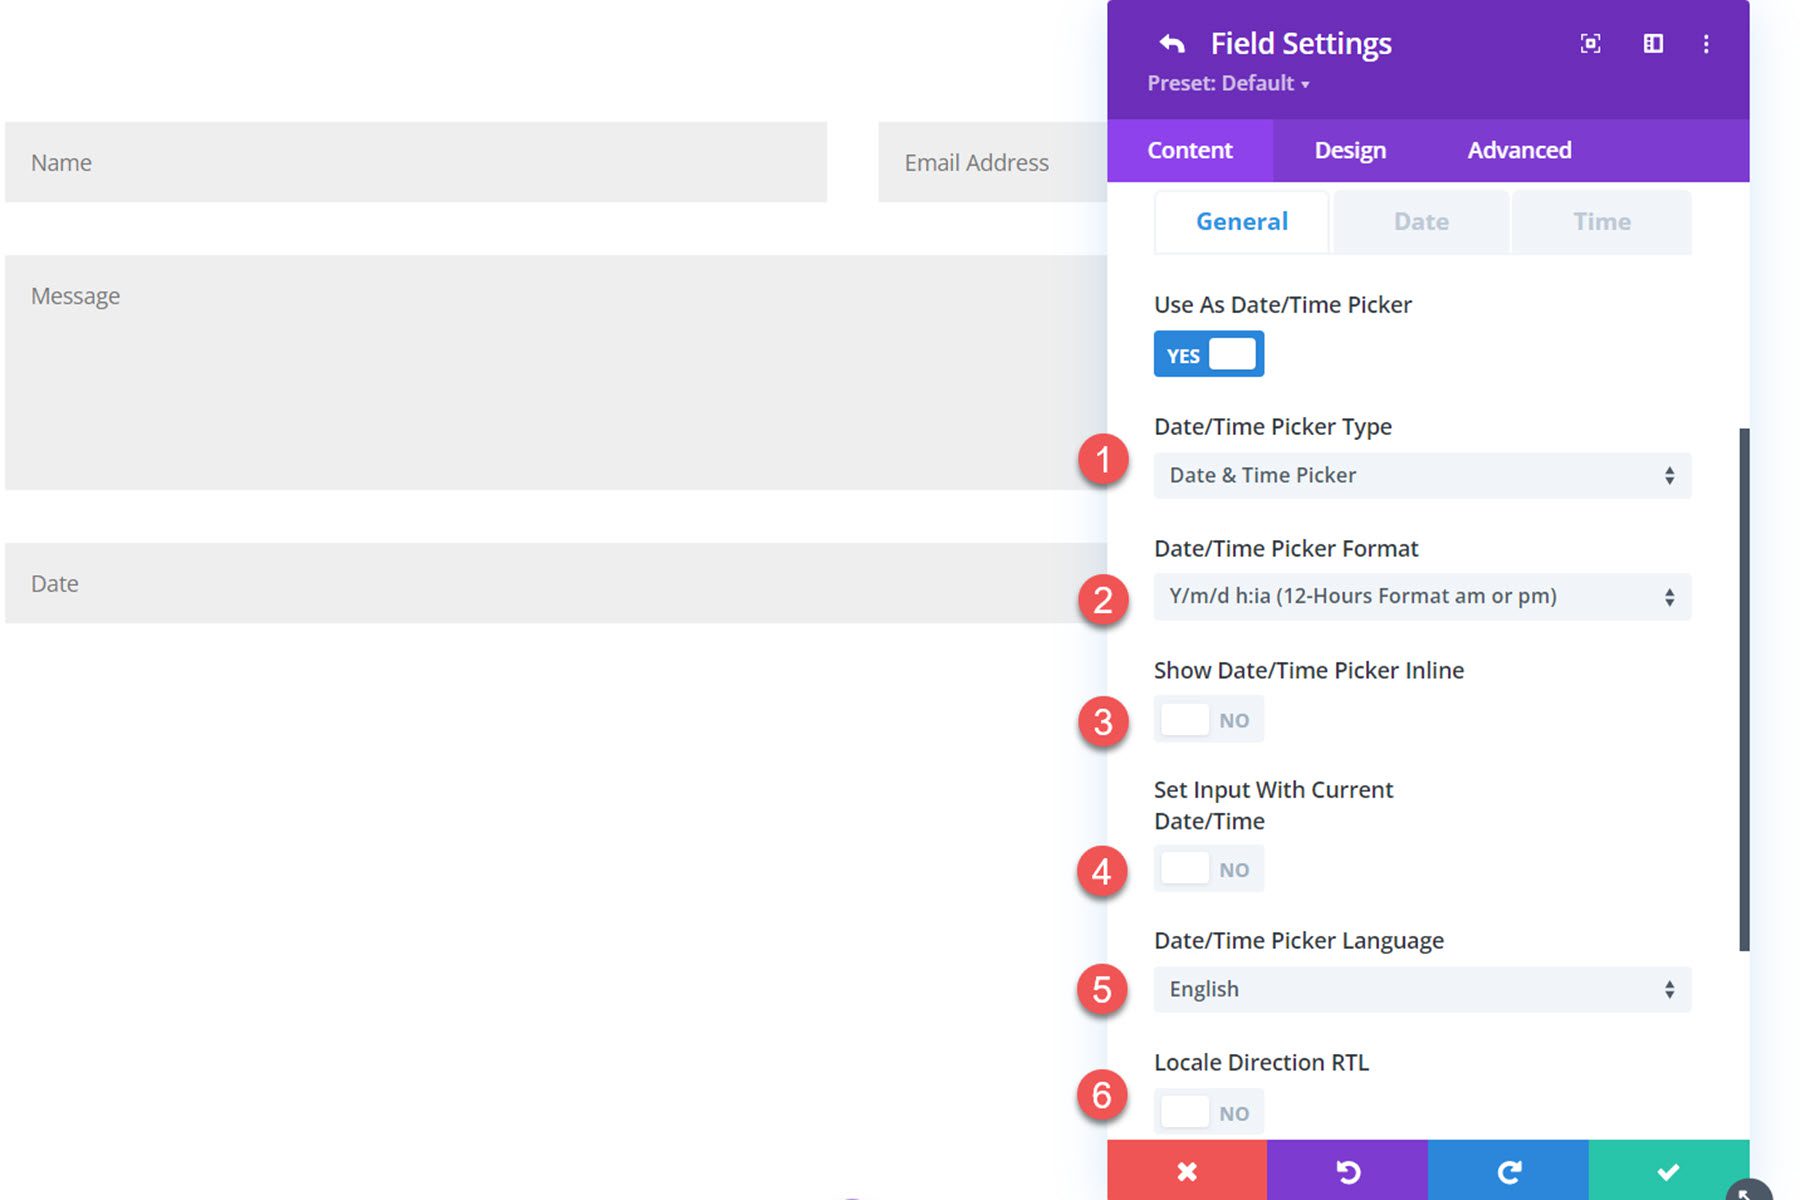
When the option is enabled, three settings tabs appear. Under the General tab, you can set the type (date and time picker, date picker, or time picker), the date/time format, choose to show the picker inline, set the input with the current date/time, change the language, or change the locale direction to RTL.
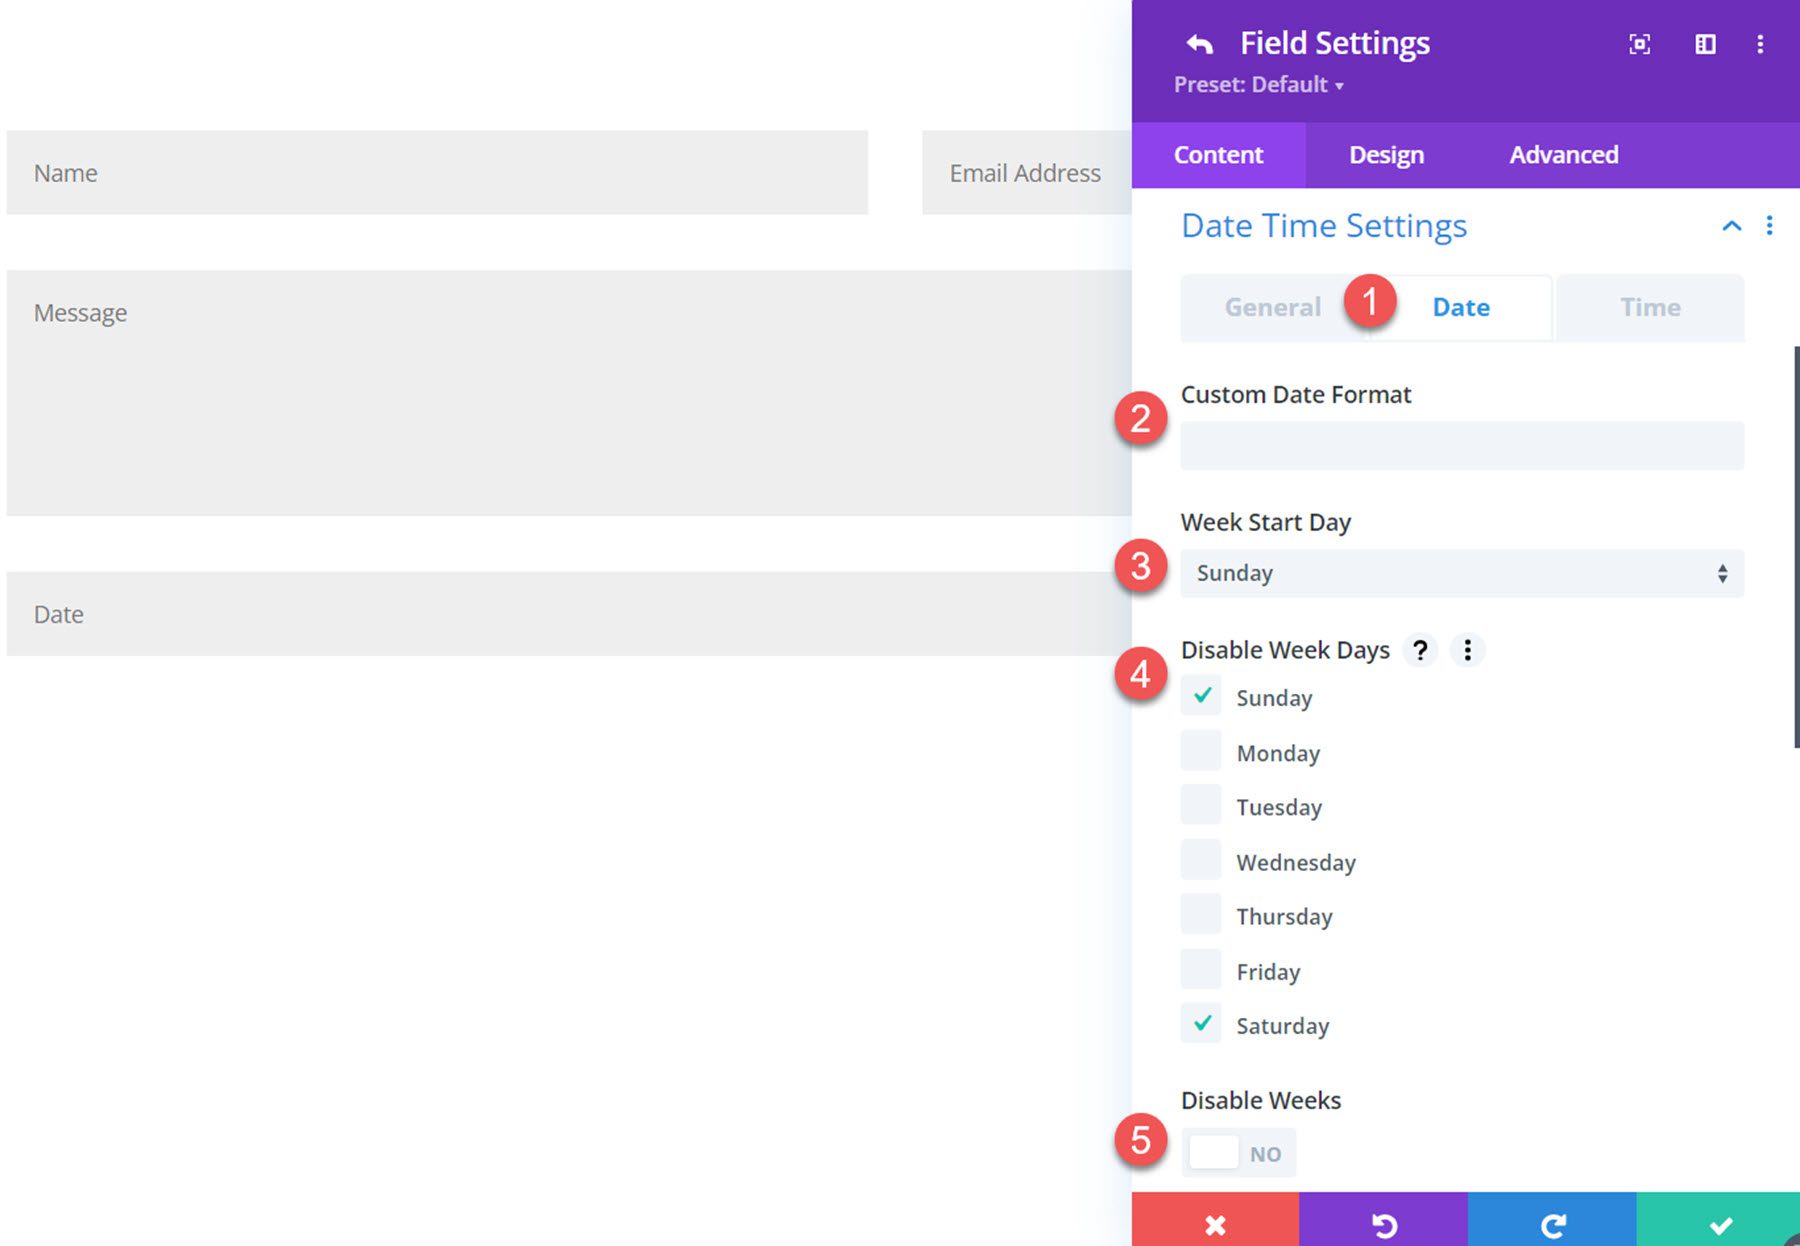
Under the date settings tab, you can set a custom date format, set the week start day, select days of the week to disable, and disable weeks.
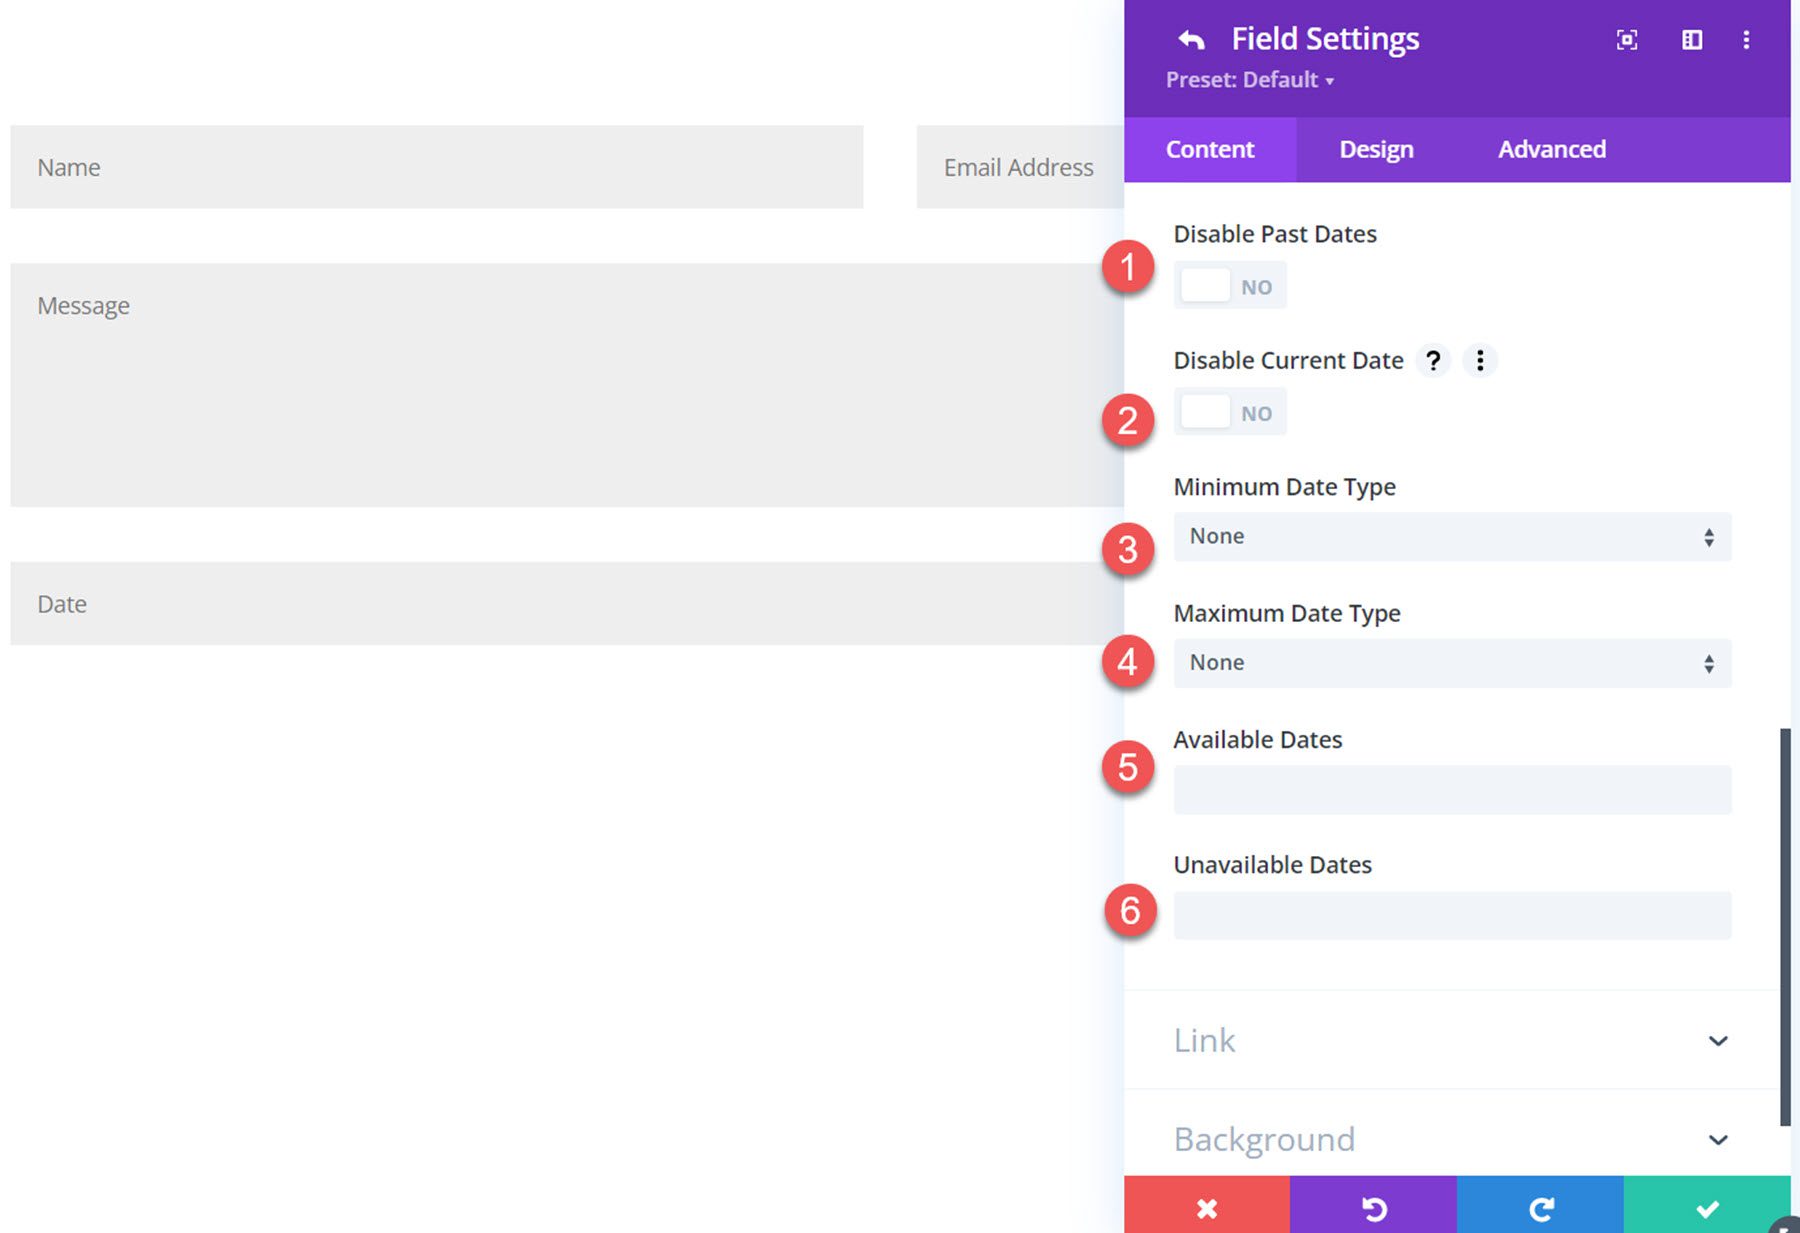
You can also disable past dates, disable the current date, set a fixed or relative minimum date, set a fixed or relative maximum date type, and set available and unavailable dates.
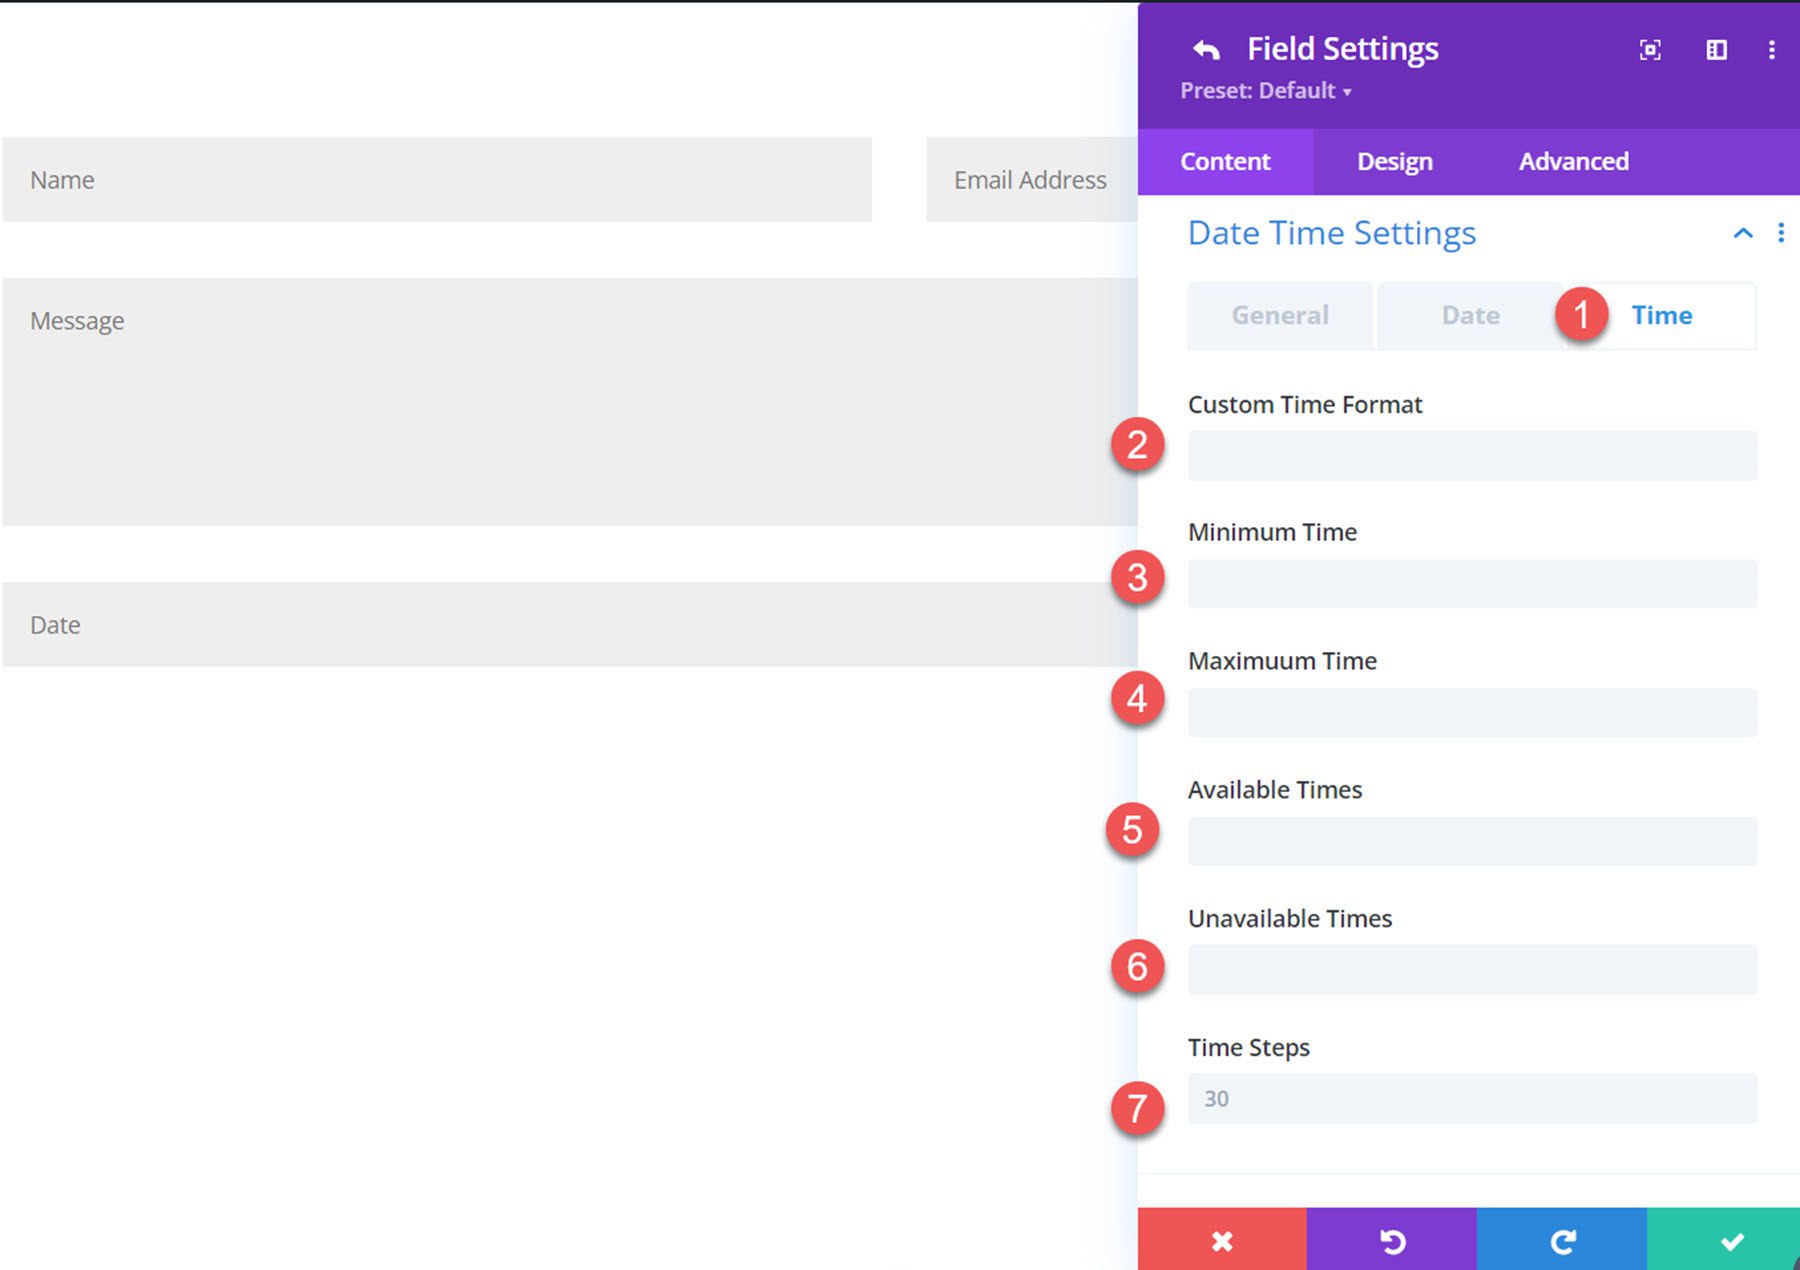
Under the time tab, you can set a custom time format, minimum and maximum time, available and unavailable times, and time steps interval.
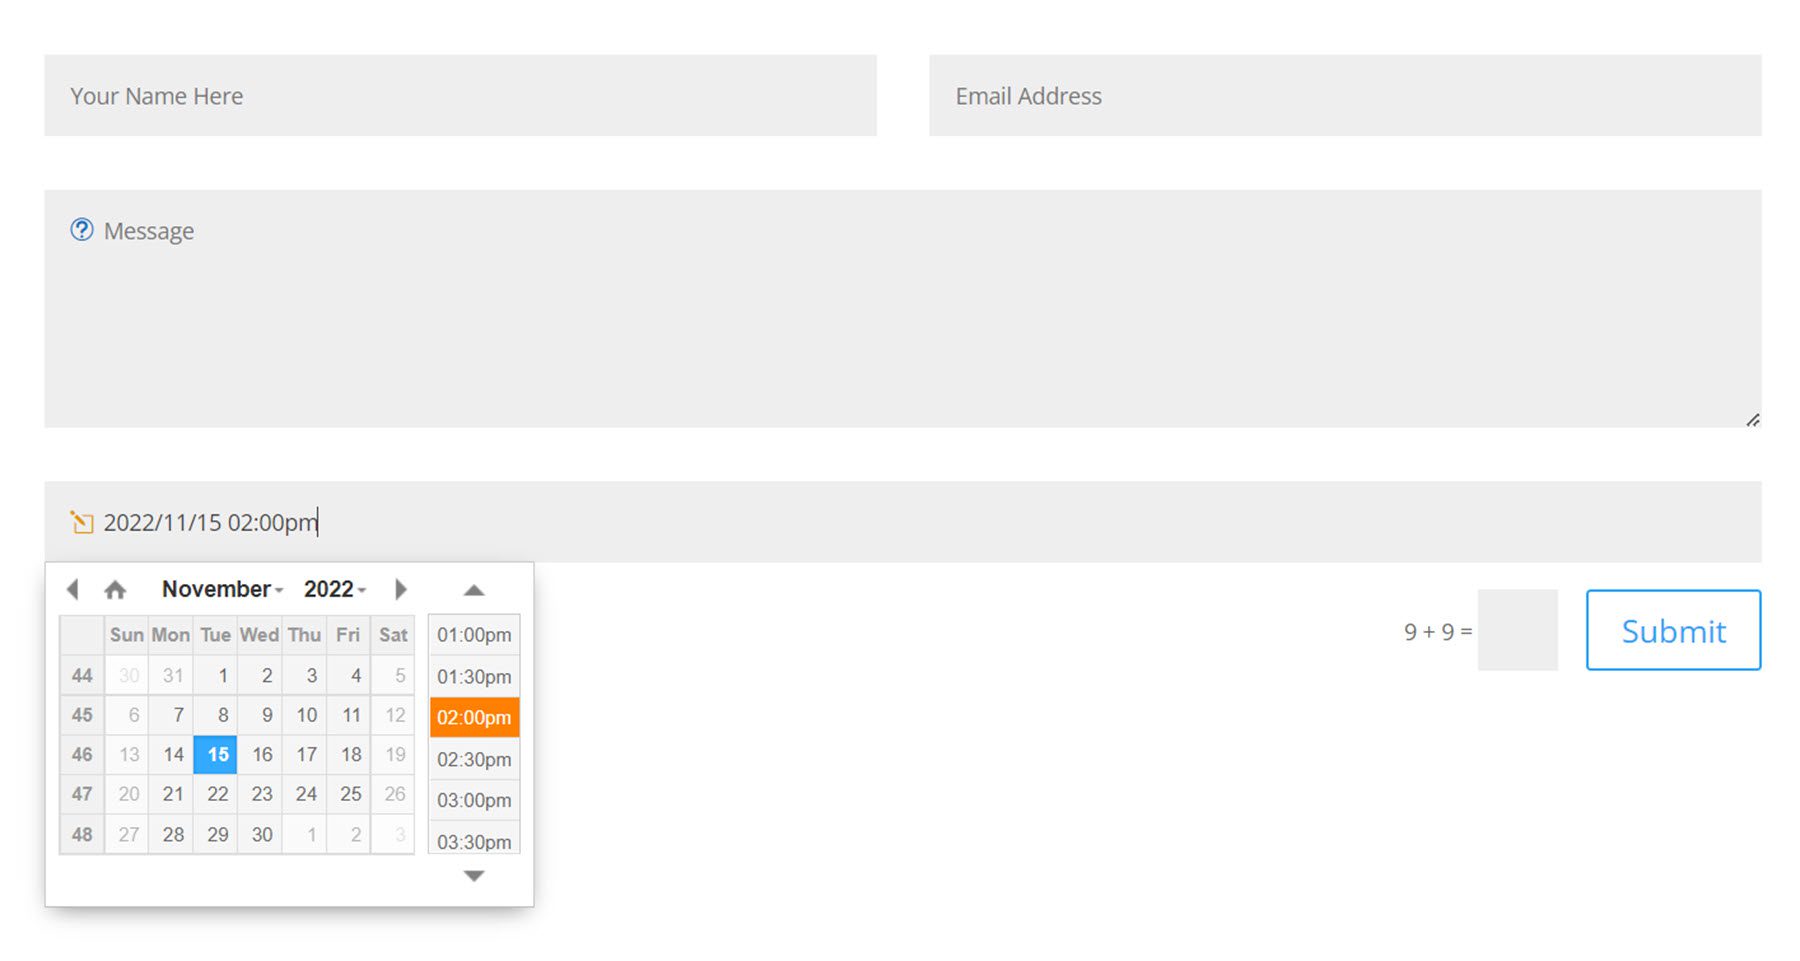
Here is the date/time picker on the front end.
Form Content Settings
The following settings are located within the content tab of the contact form settings.
Admin Email Settings
Under the admin email settings, you can enter a custom message for the admin and use rich text to format the admin message. You can add an admin email or enable conditional email address routing with custom logic using these settings (don’t worry, the plugin author has documentation to help you set this up!).
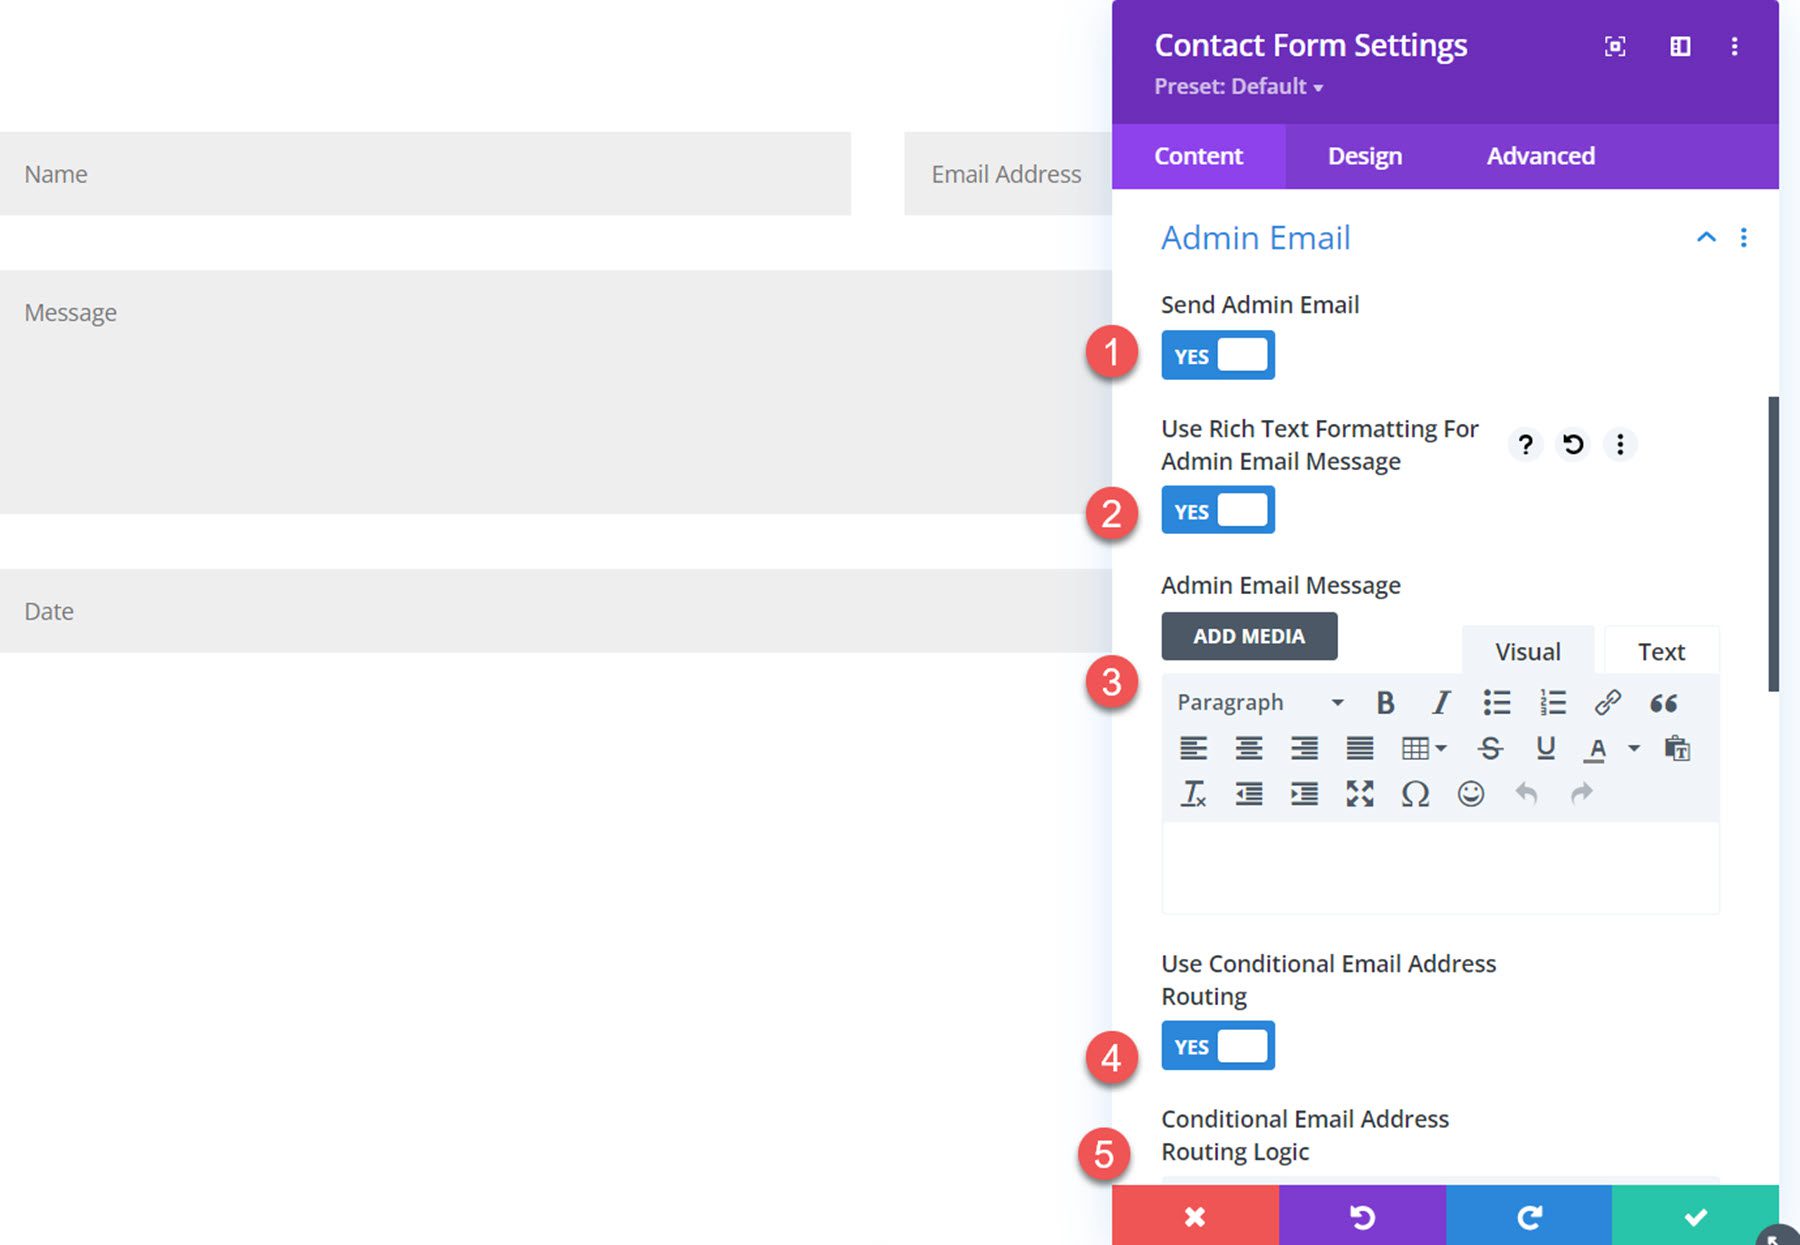
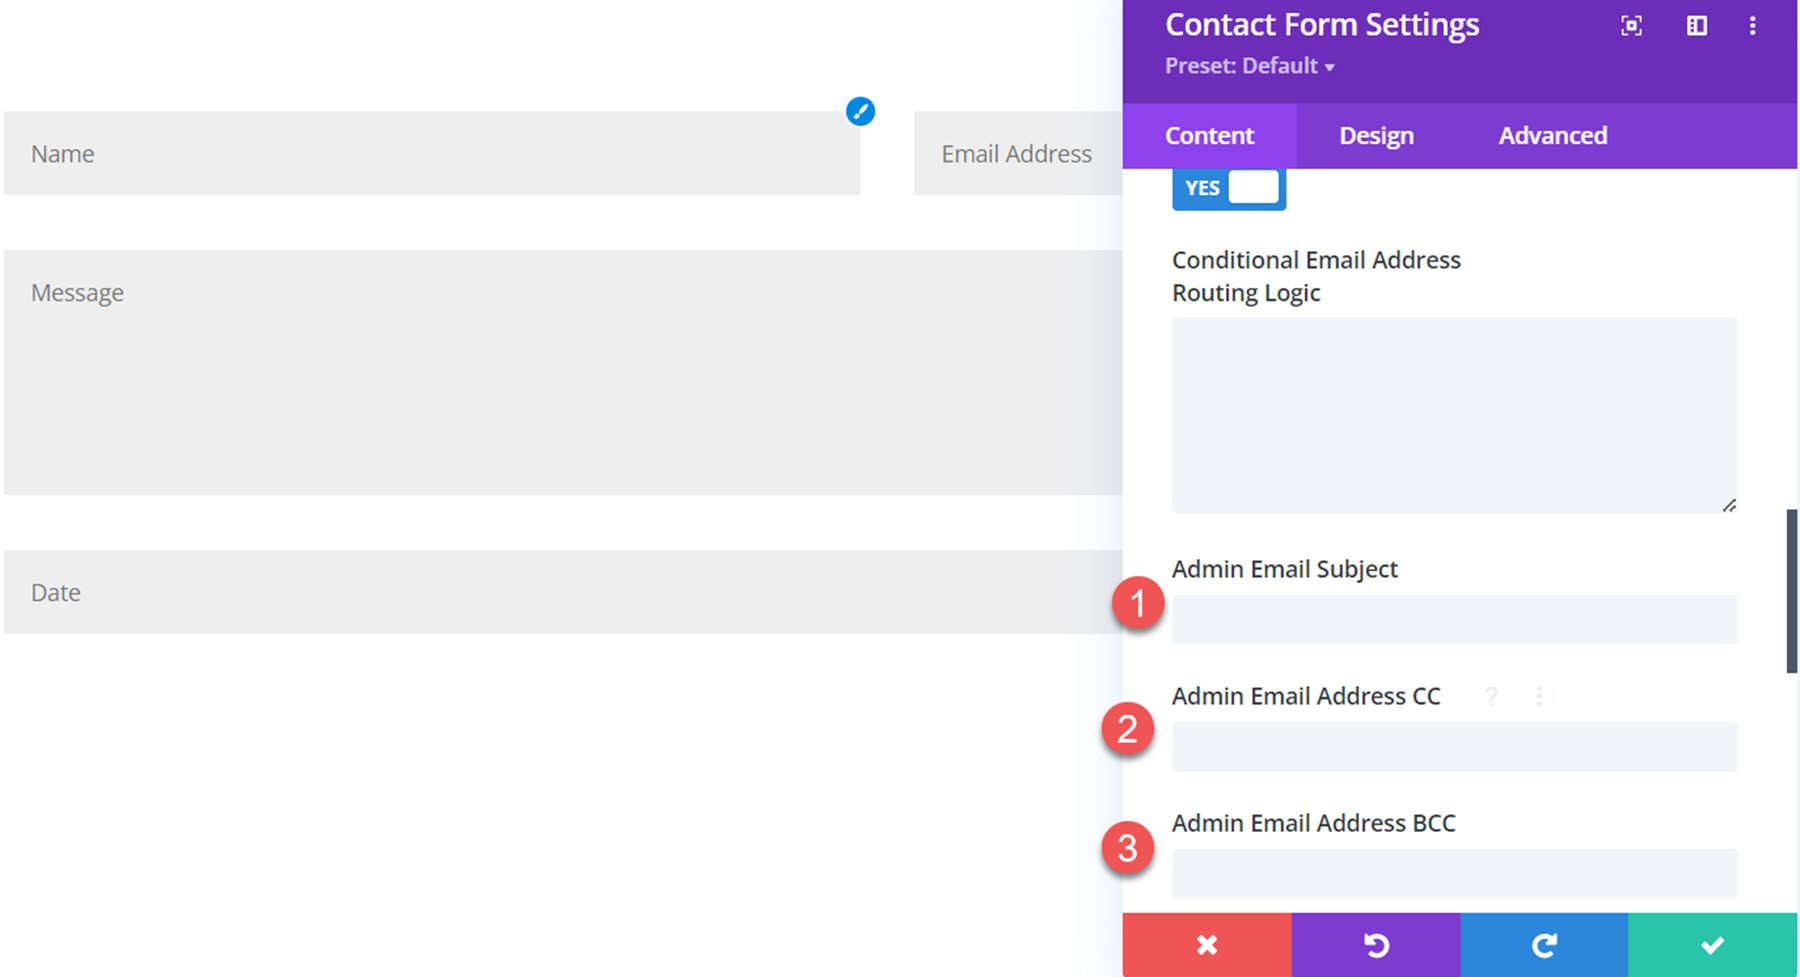
Additionally, you can set the admin email subject, email address CC, and email address BCC.
Confirmation Email Settings
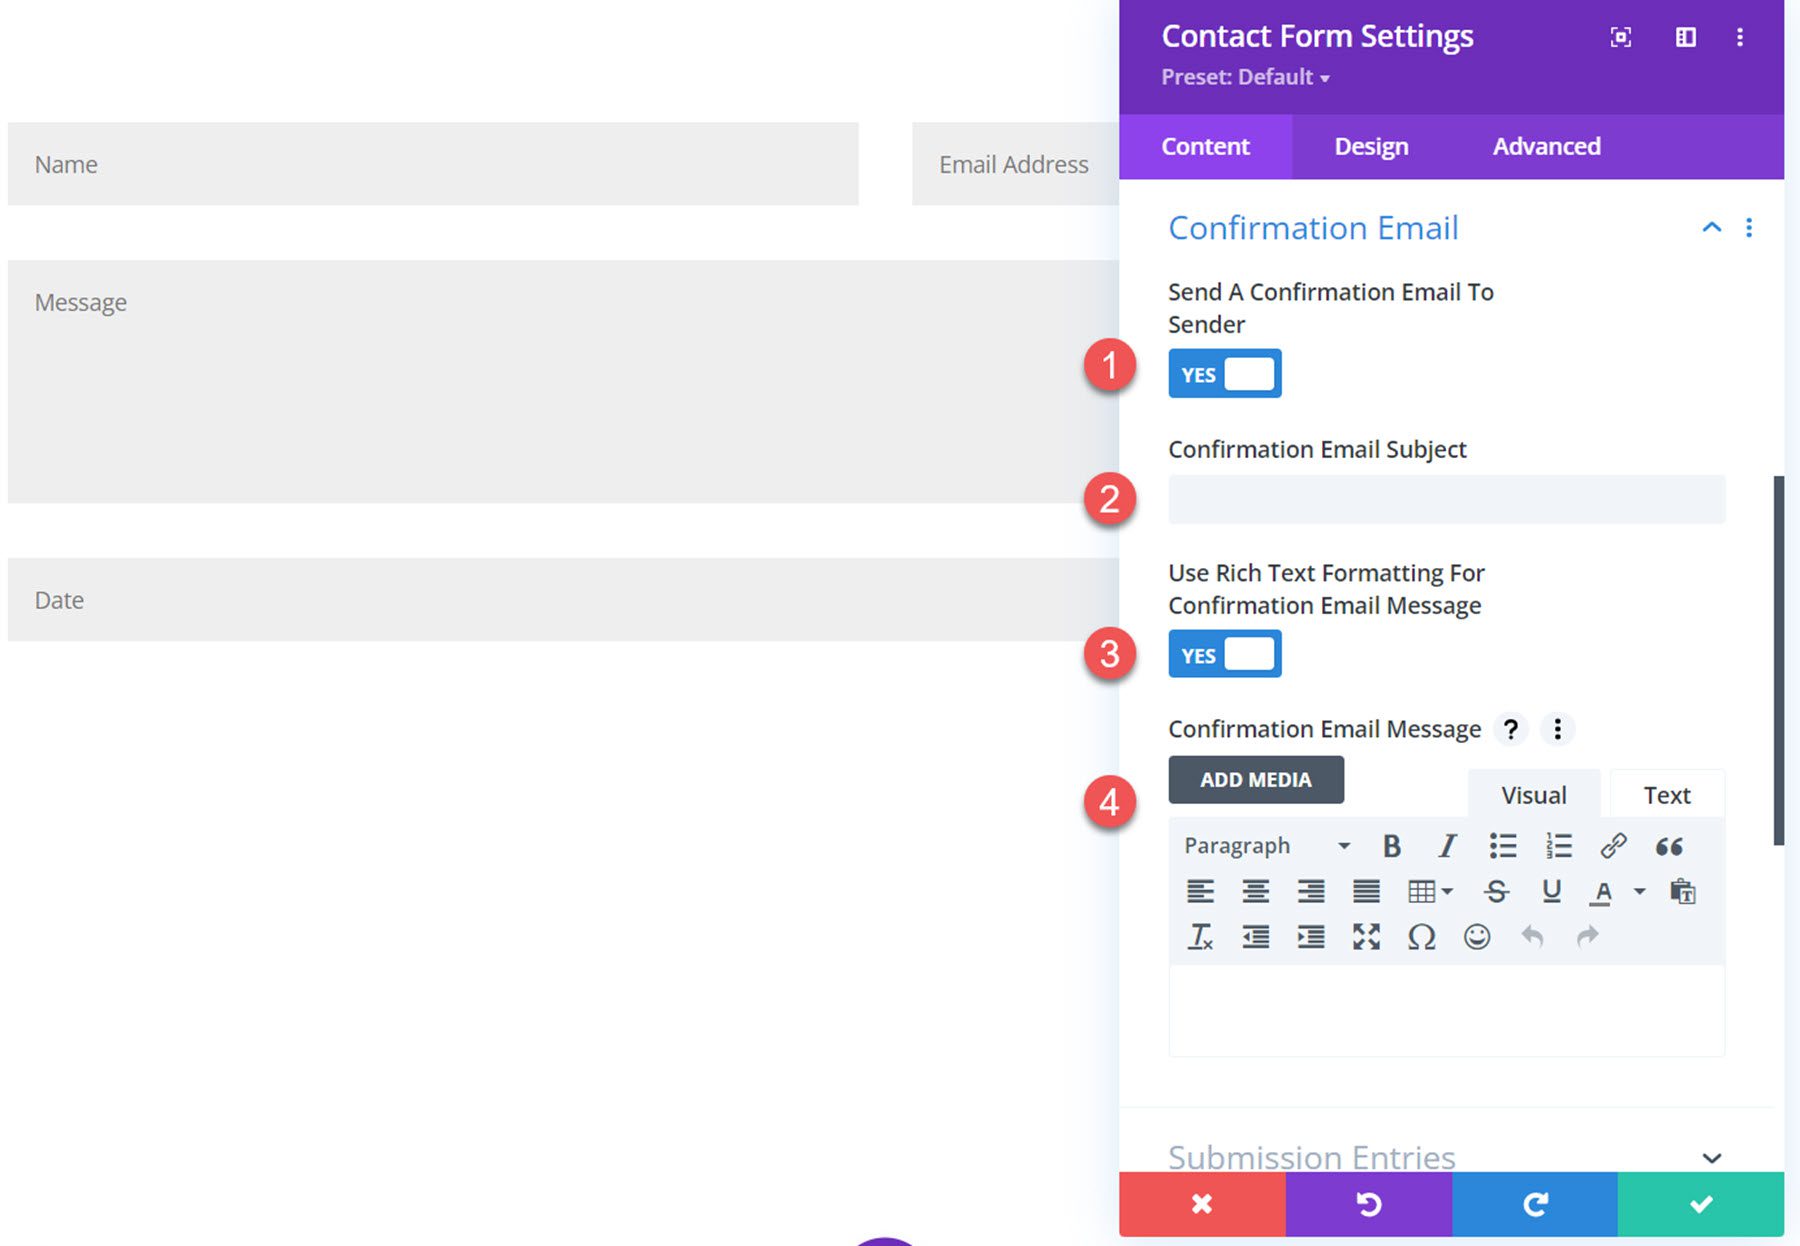
The confirmation email settings can also be customized. You can enable the confirmation email to be sent, enter a custom subject line, and enter a custom message. You can enable rich text formatting to use for the message as well.
Submission Entries
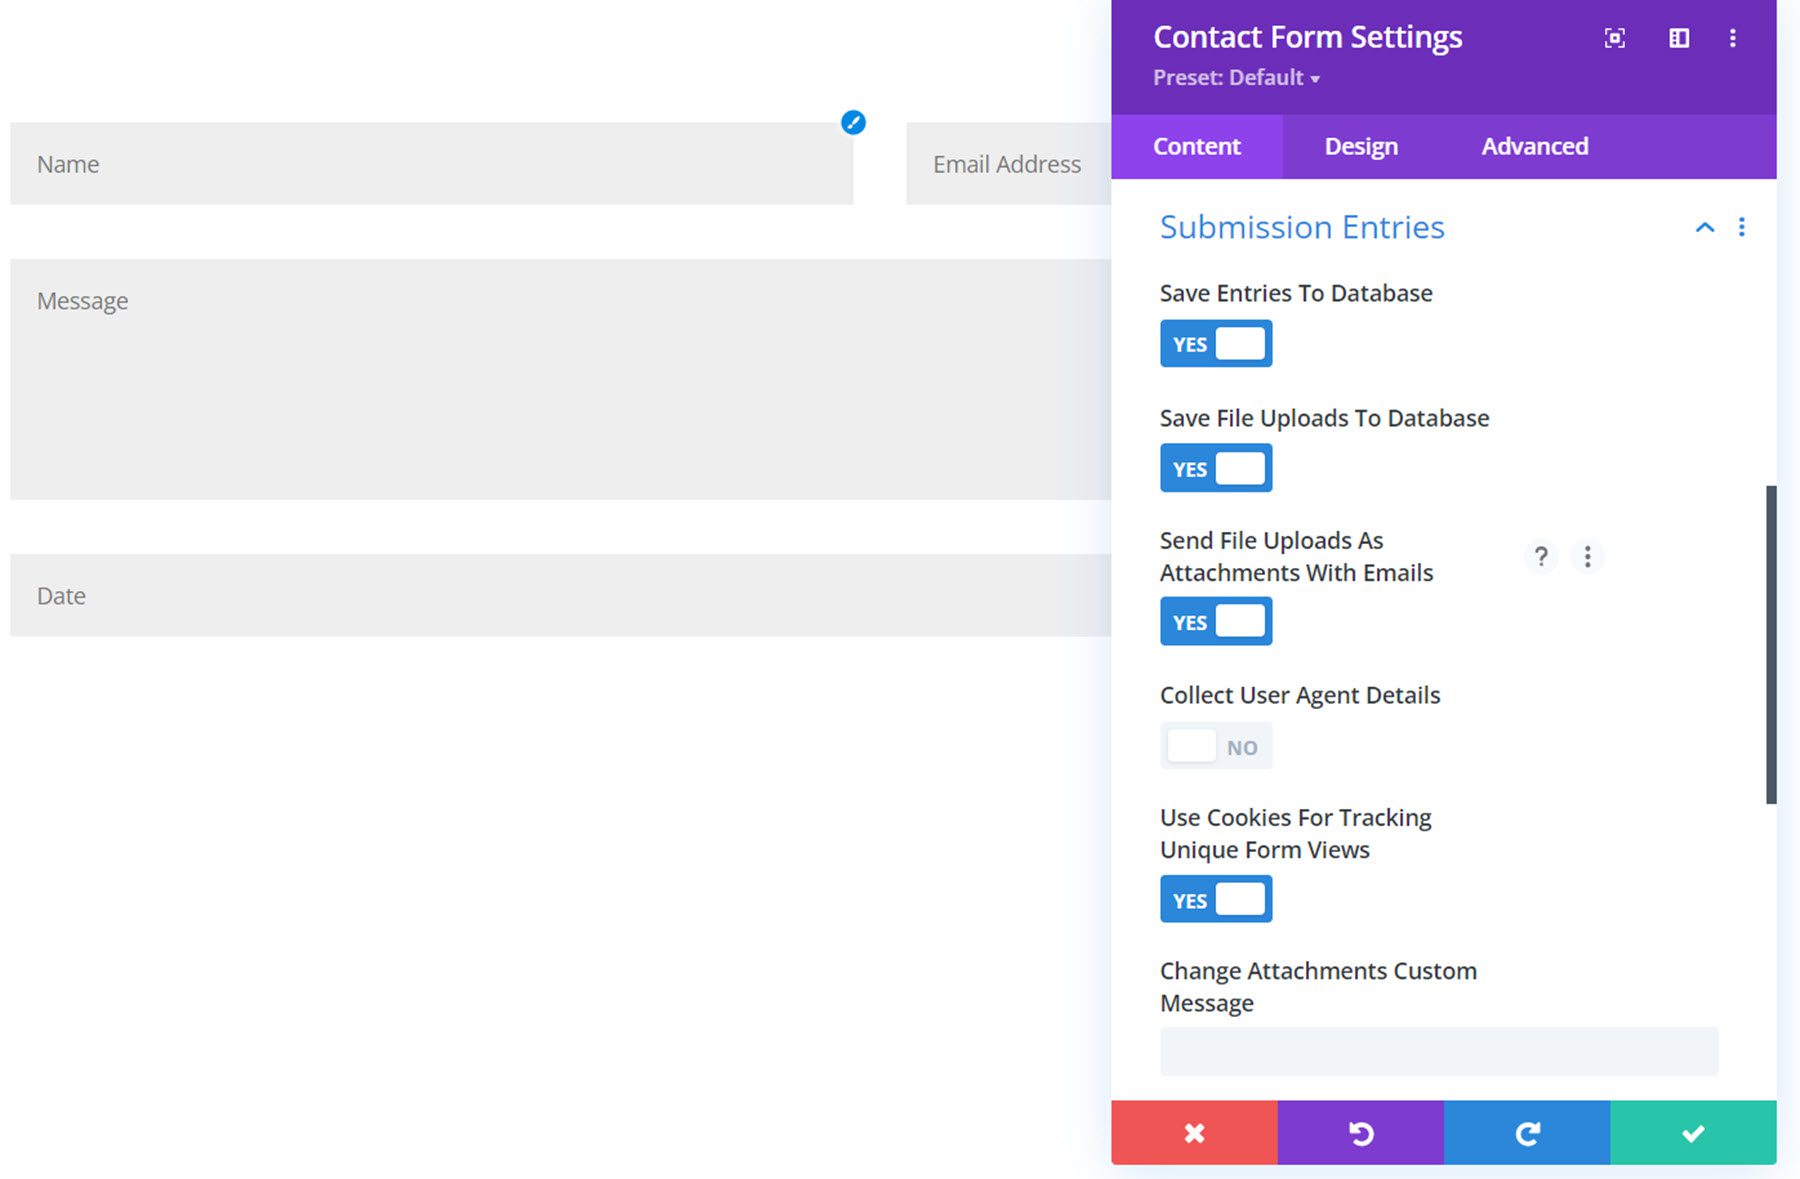
Under the submission entries settings, you can save entries to a database, save file uploads to a database, send file uploads as attachments with emails, collect user agent details, use cookies for tracking unique form views, and change the custom message that is added to emails with files.
Submit Button
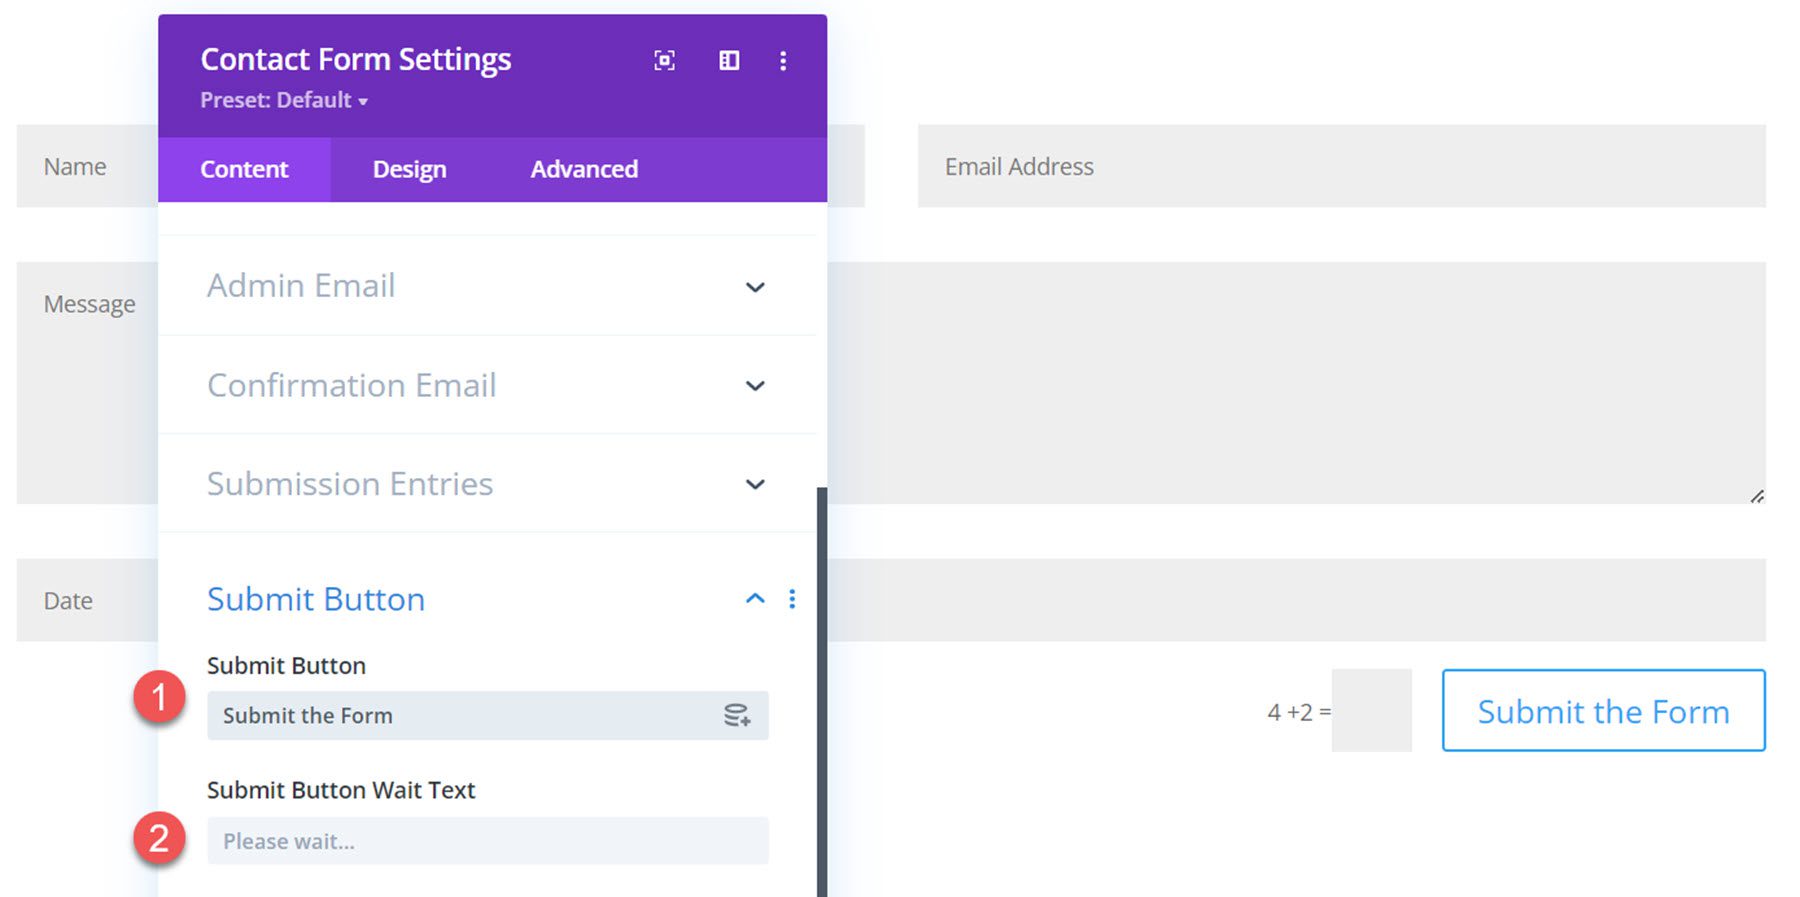
Under the submit button settings, you can change the submit button text and the wait text.
Integrations
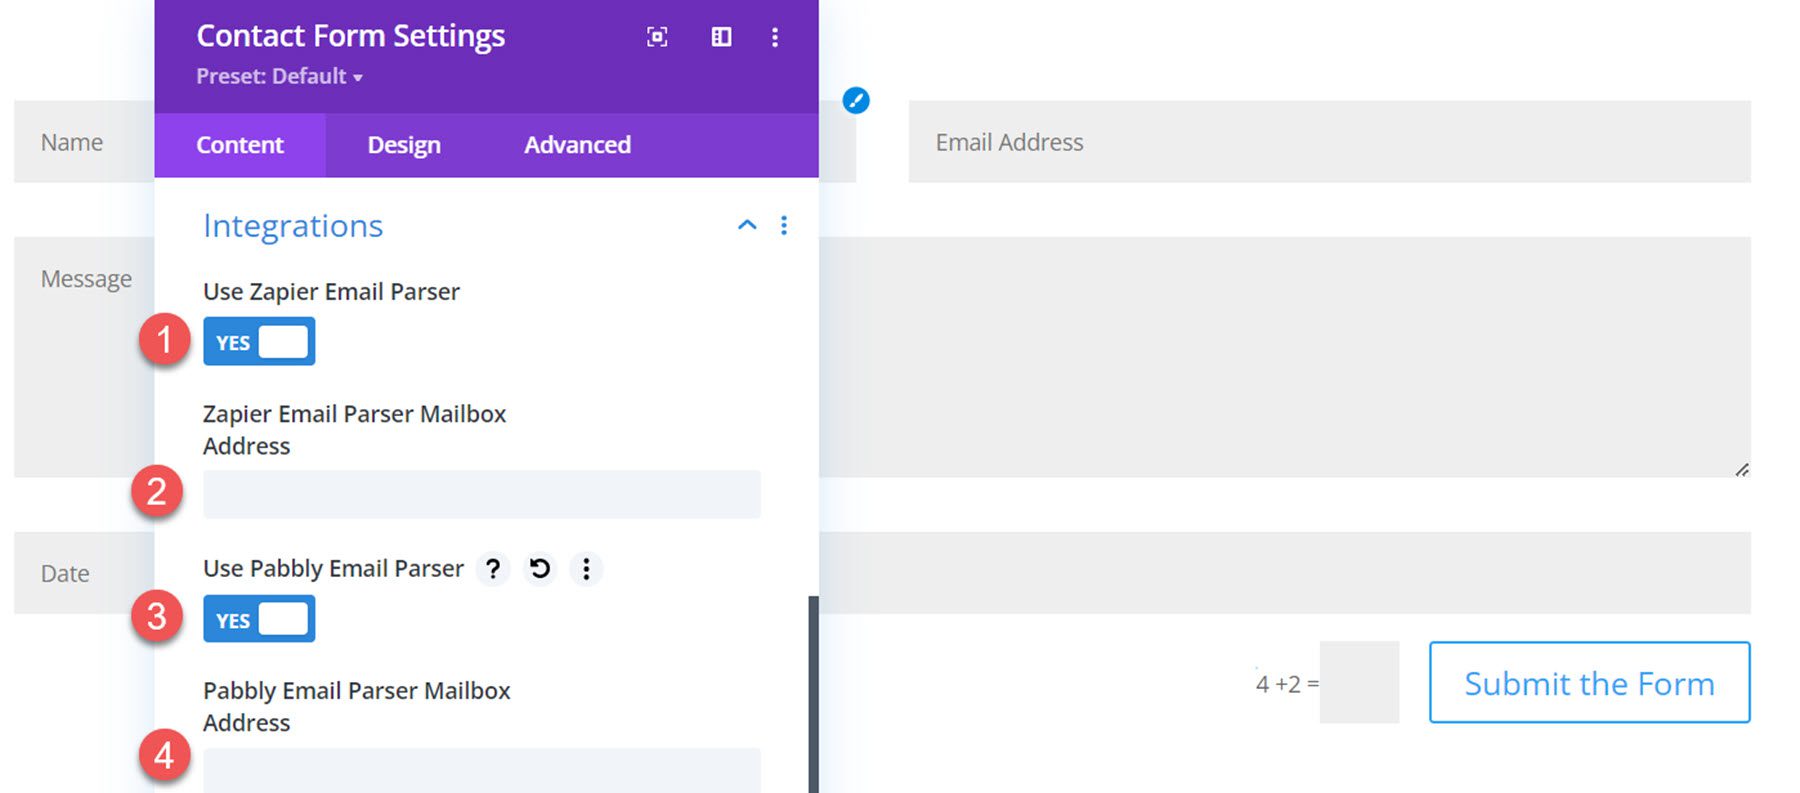
There are two integration options, Zapier and Pabbly. You can enable either option and add the mailbox address to send emails to.
After Submission Behavior
The after submission behavior includes a space to add a custom success message as well as an option to hide the form title, display a success button with custom text and a link, or enable a redirect URL.
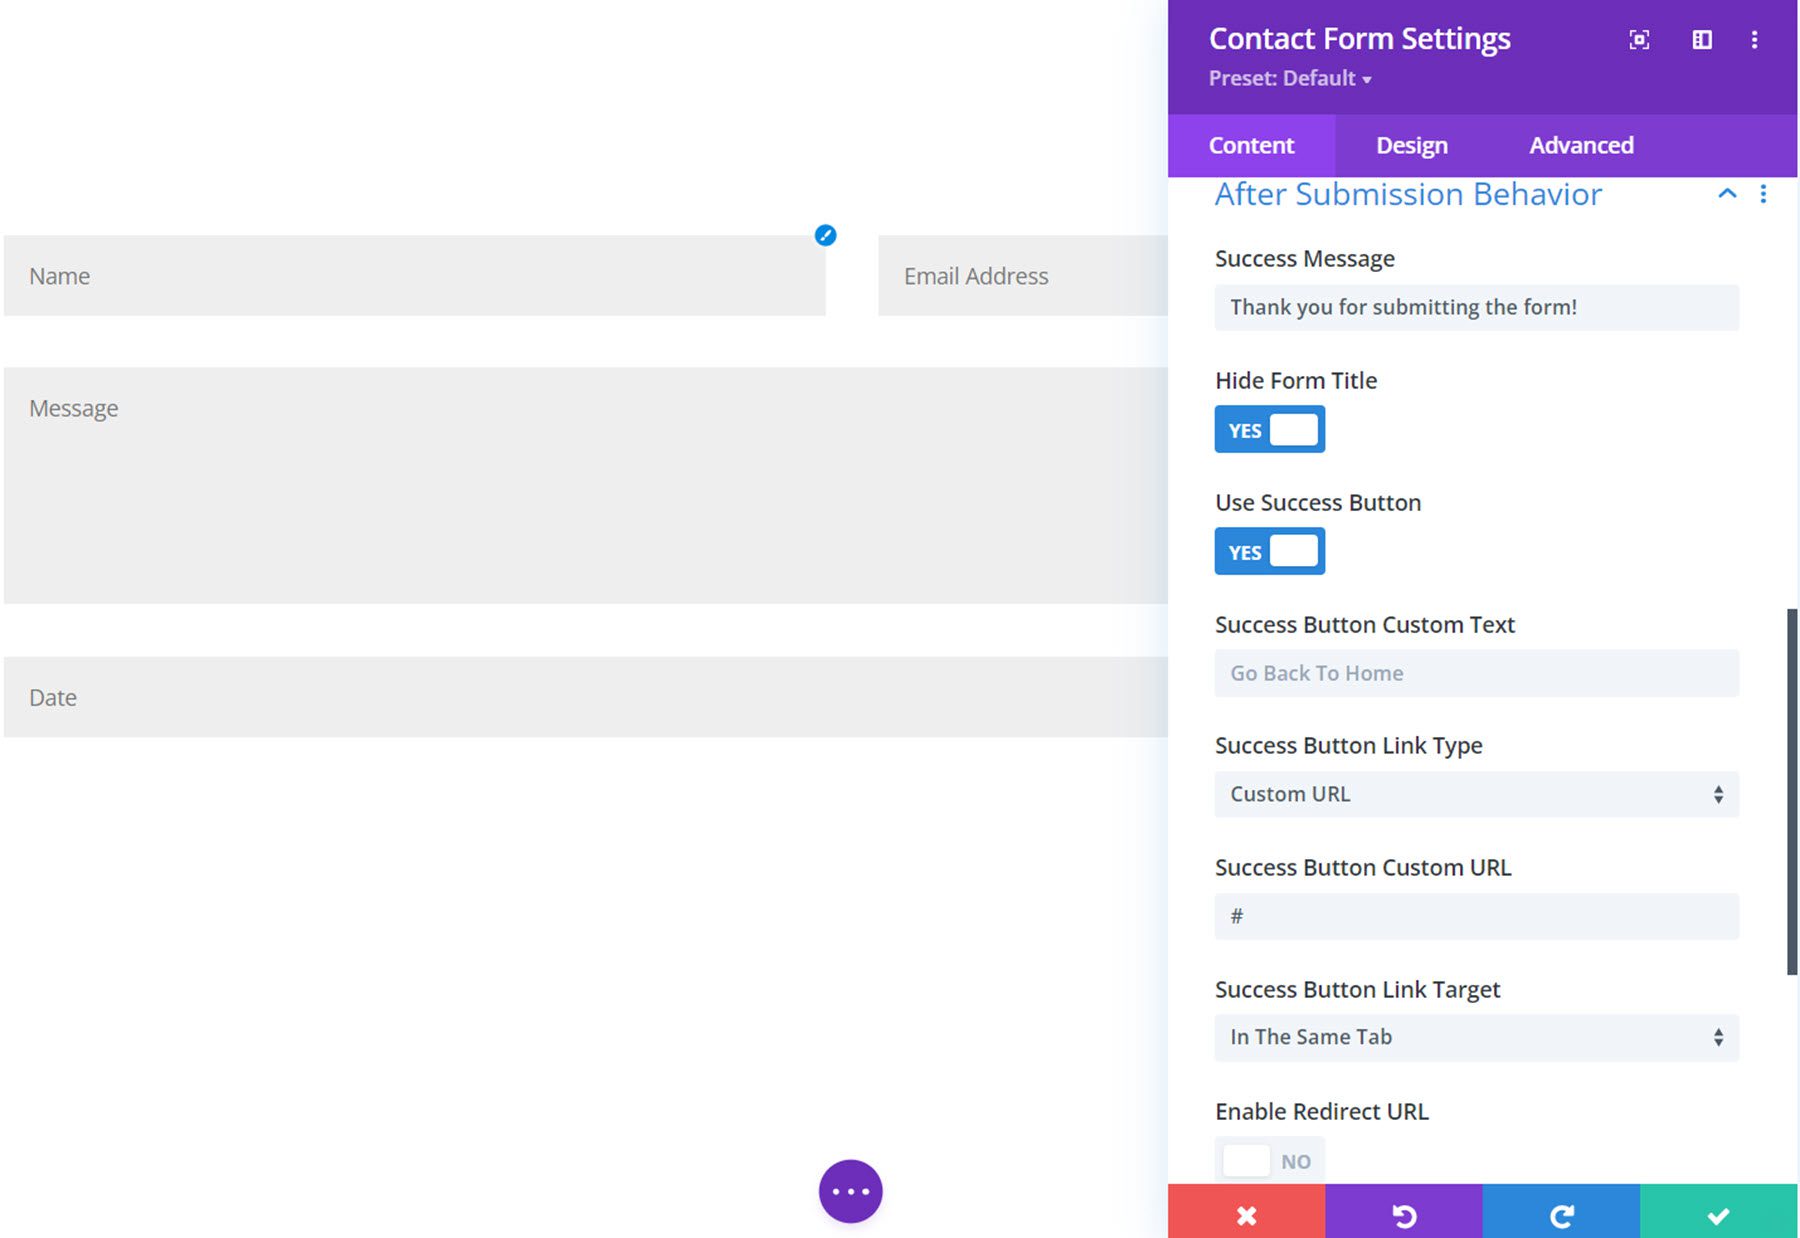
Here is the after submission behavior in action, showing the success message, hiding the form title, and displaying the success button.

Admin Label
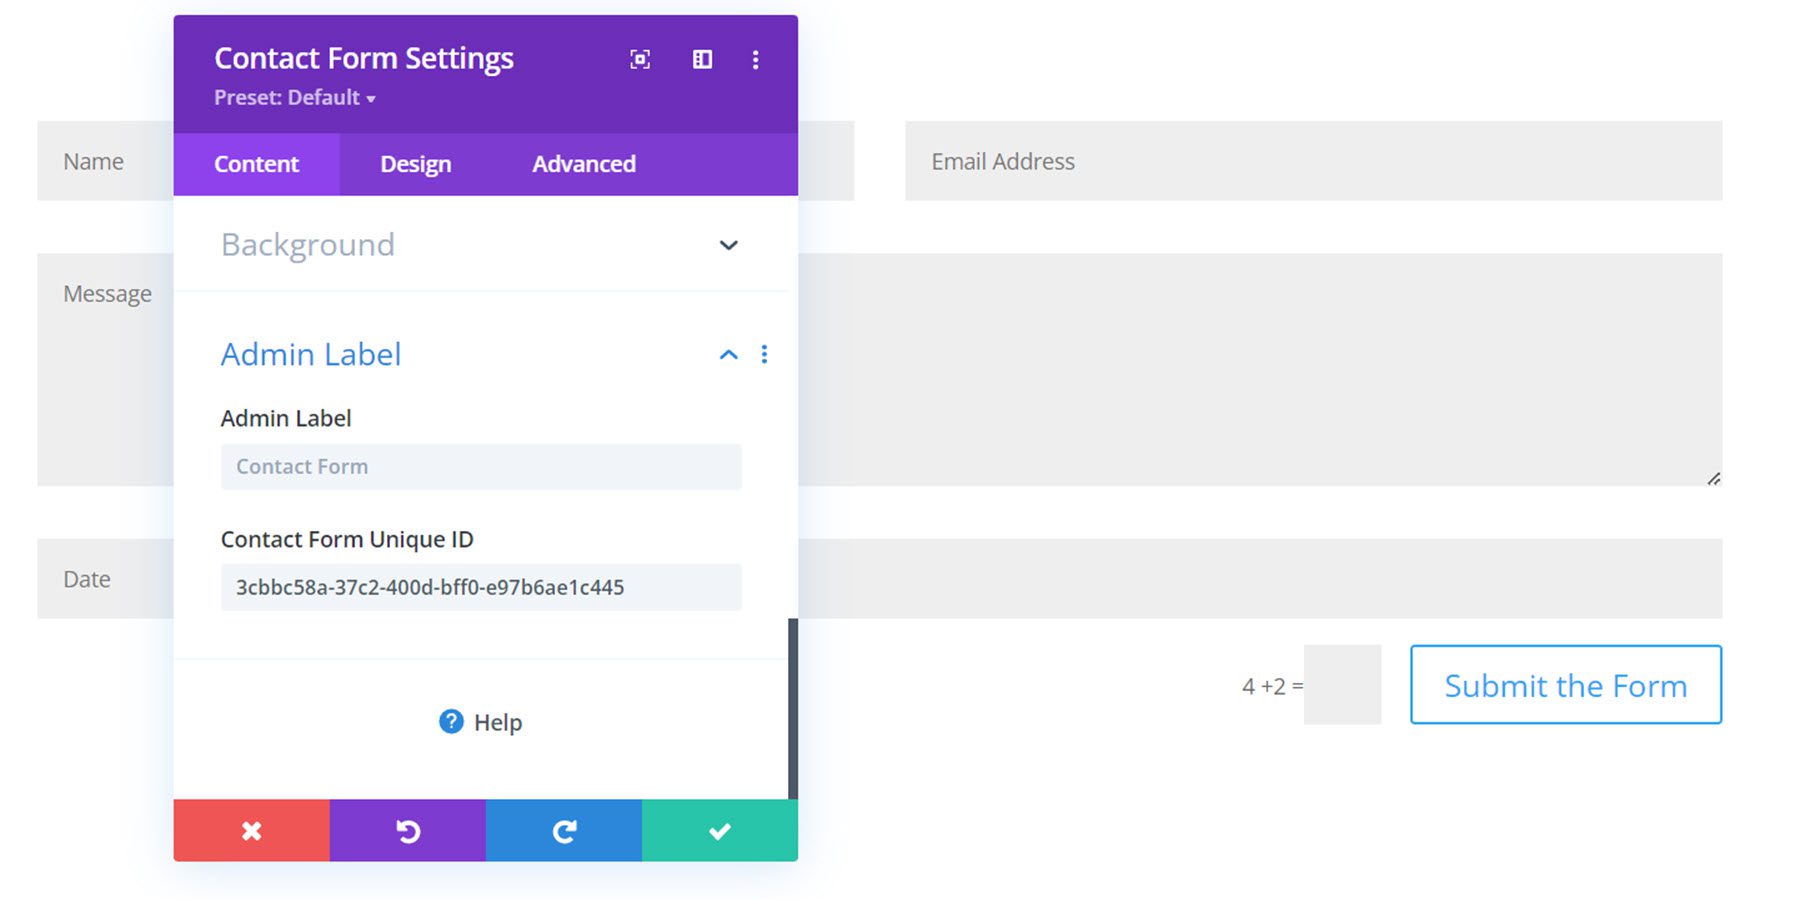
Here you can add your own admin label (form ID) that will be shown in the database. You can also add a unique identification number that will appear in the database and other admin areas.
Design Settings
Let’s move over to the design tab of the contact form settings. You’ll notice some new settings here as well.
Field Label, Field Description, Success Message Text Settings
The field label text settings, the field description text settings, and the success message text settings sections feature all of the default font and text design settings, such as font, text color, size, spacing, alignment, etc.
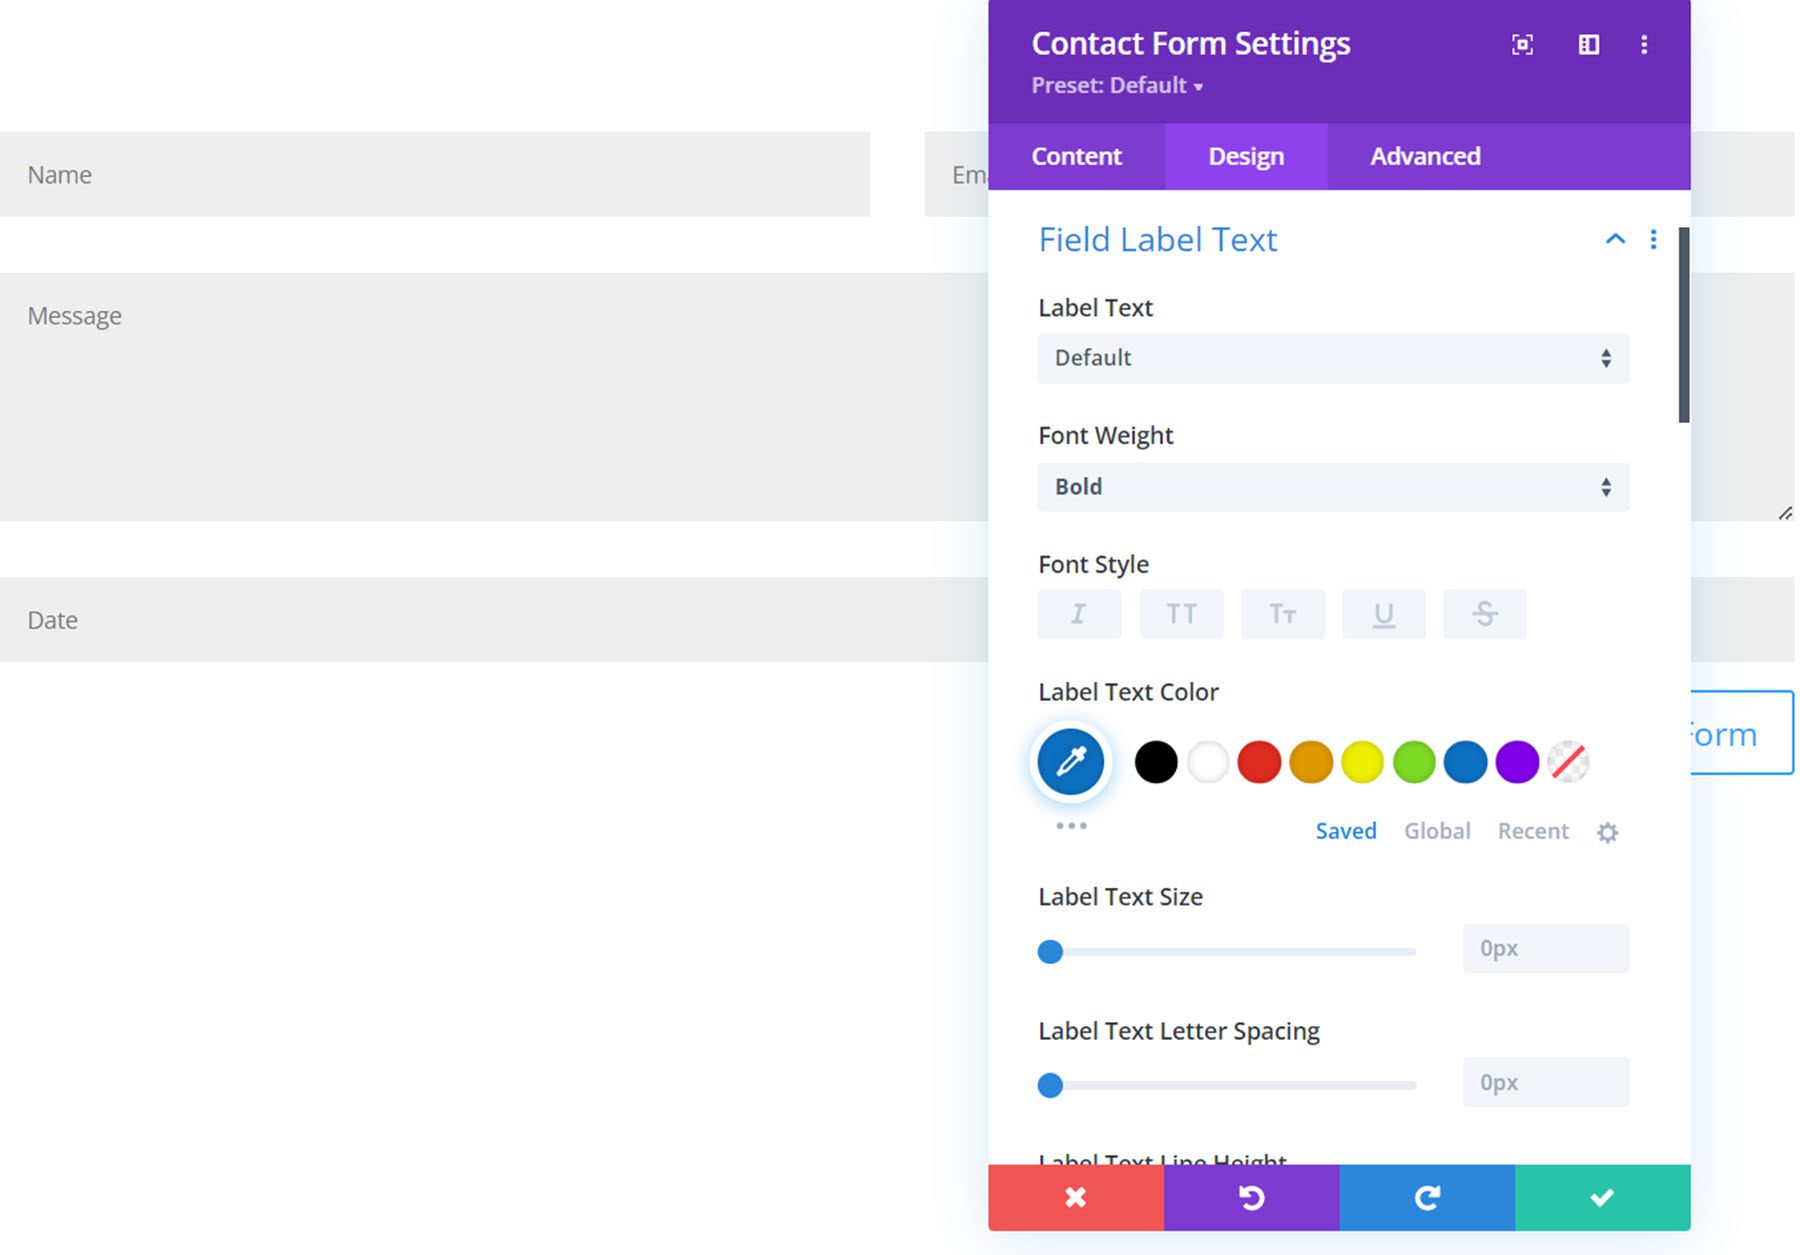
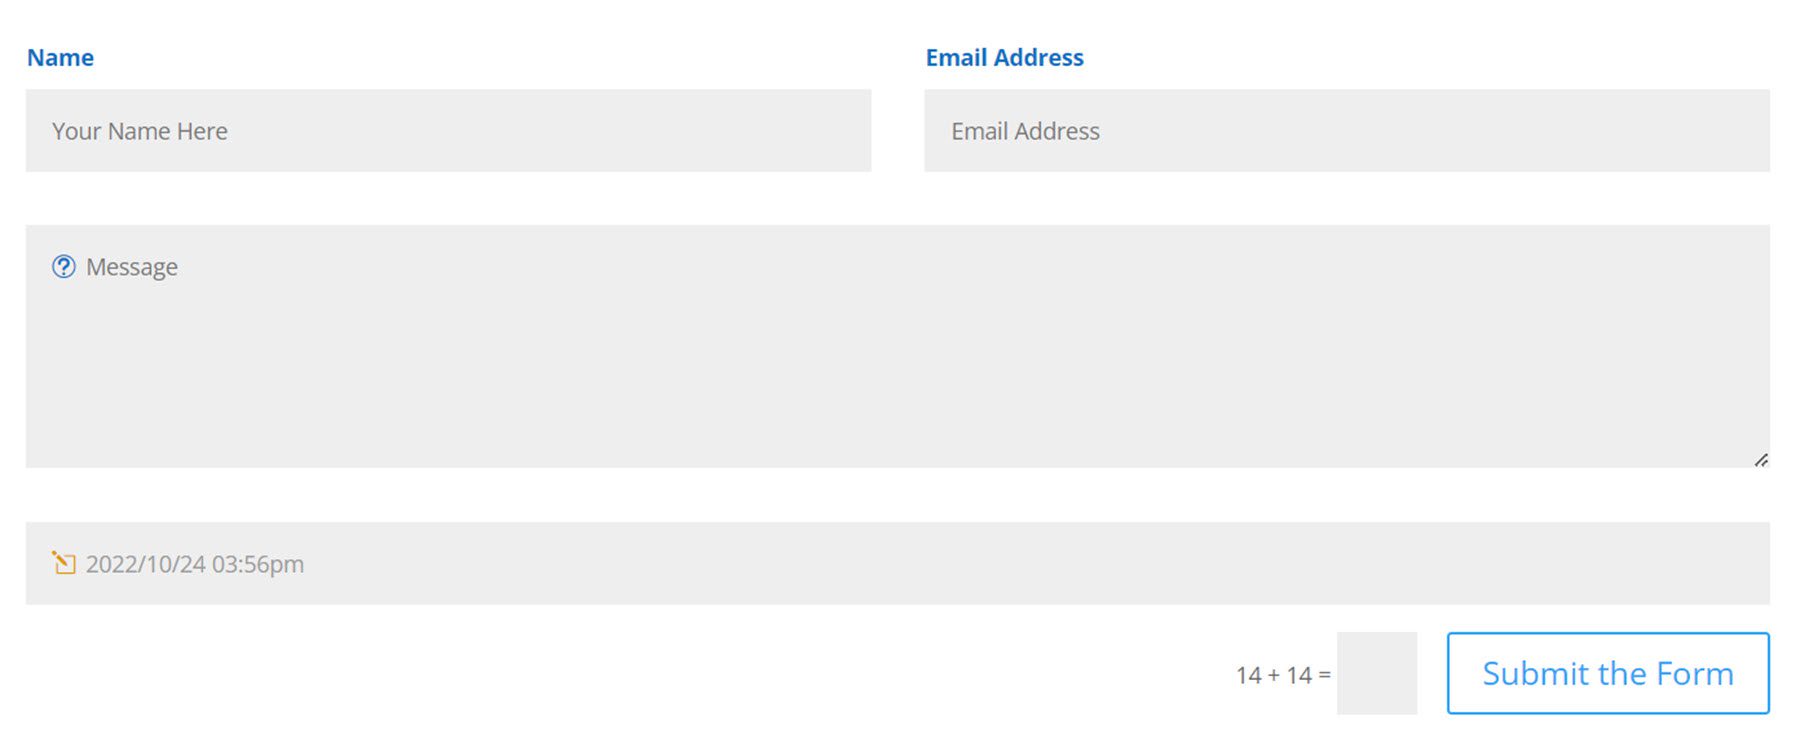
Here you can see the labels for the name and email fields have been displayed, and the field label text design was customized to be displayed on the front end.
Success Button Settings
The success button settings allow you to customize the design of the success button using the default button design settings, such as font, text size, button spacing, button colors, etc.
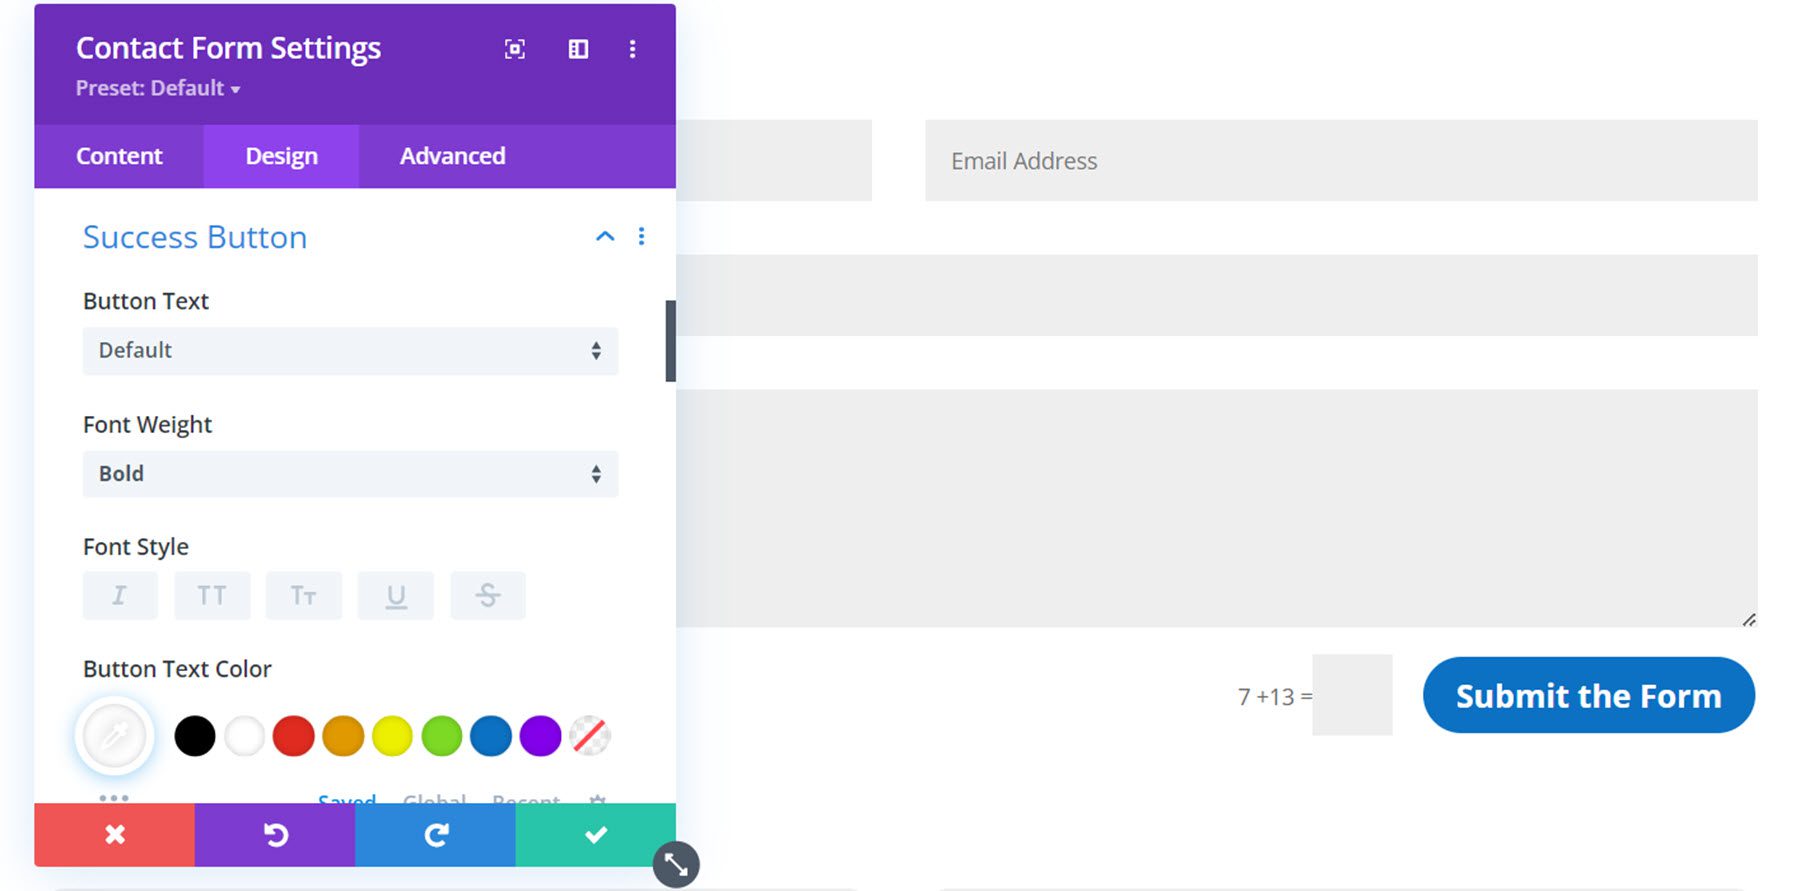
Here is the customized success button on the front end.

Date/Time Picker Settings
Within the general tab of the date/time picker design settings, you can customize the background color, margin, padding, border, and shadow settings.
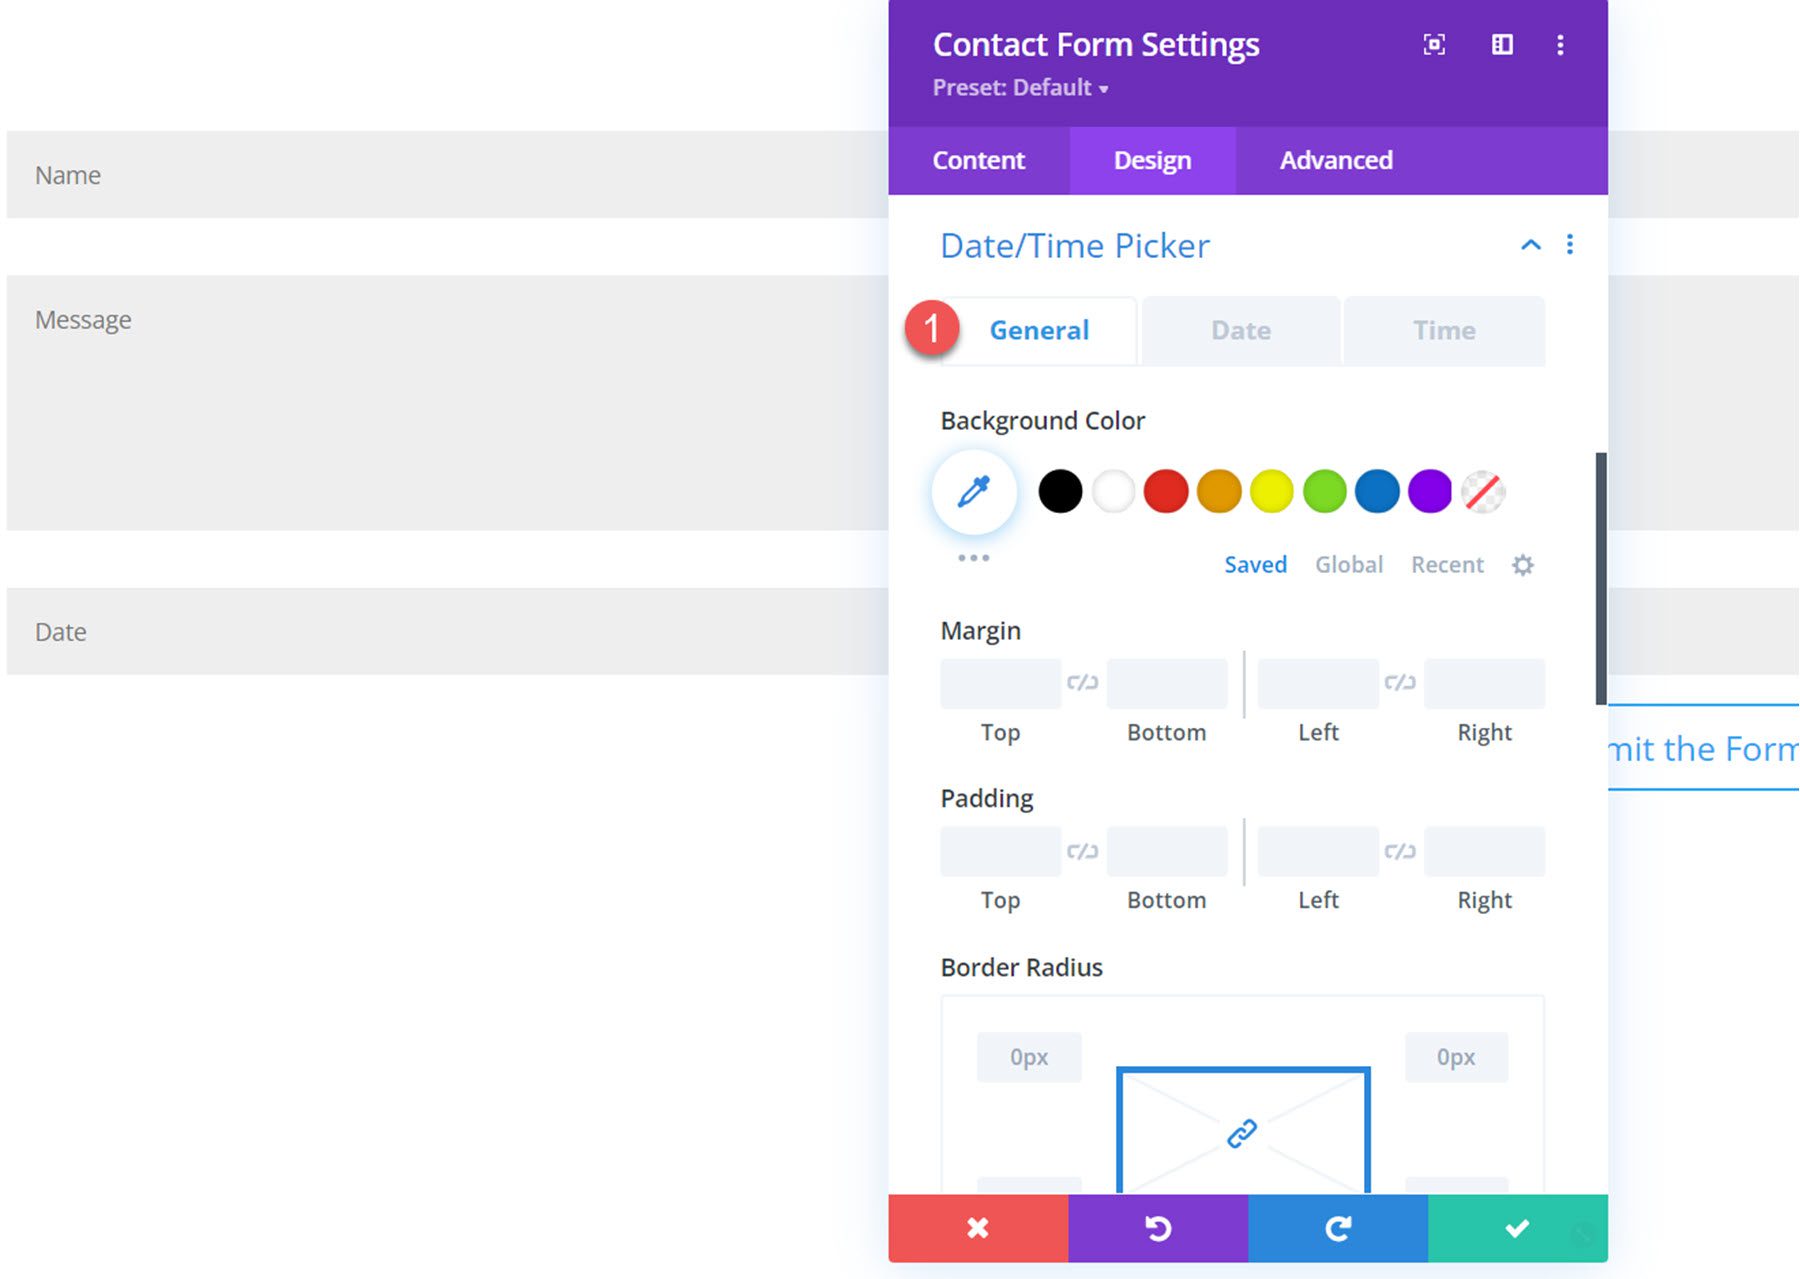
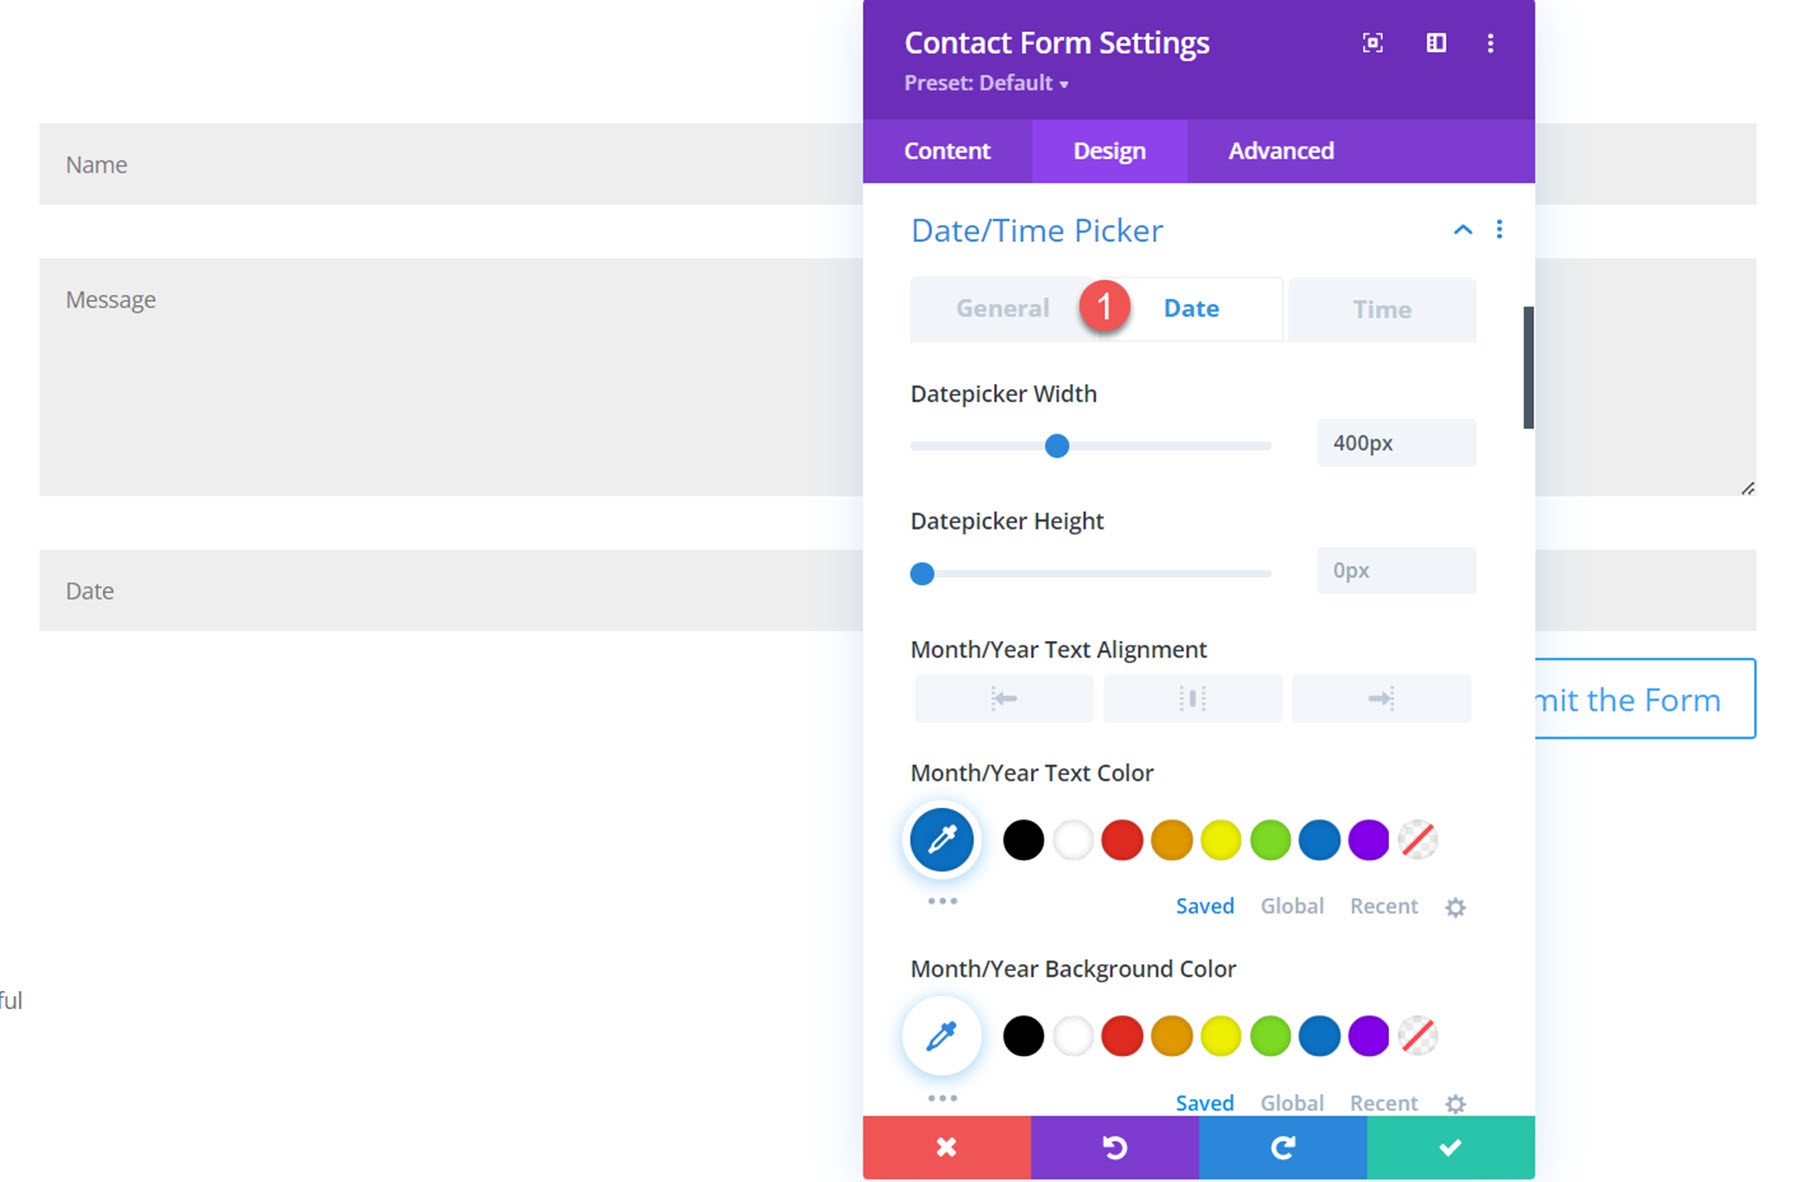
Moving over to the date tab, you can change the date picker width and height, customize the month/year text settings, the days of the week text settings, the calendar dates text settings, the current date background and text color, the selected date background and text color, the available dates background and text color, and the unavailable dates background and text color.
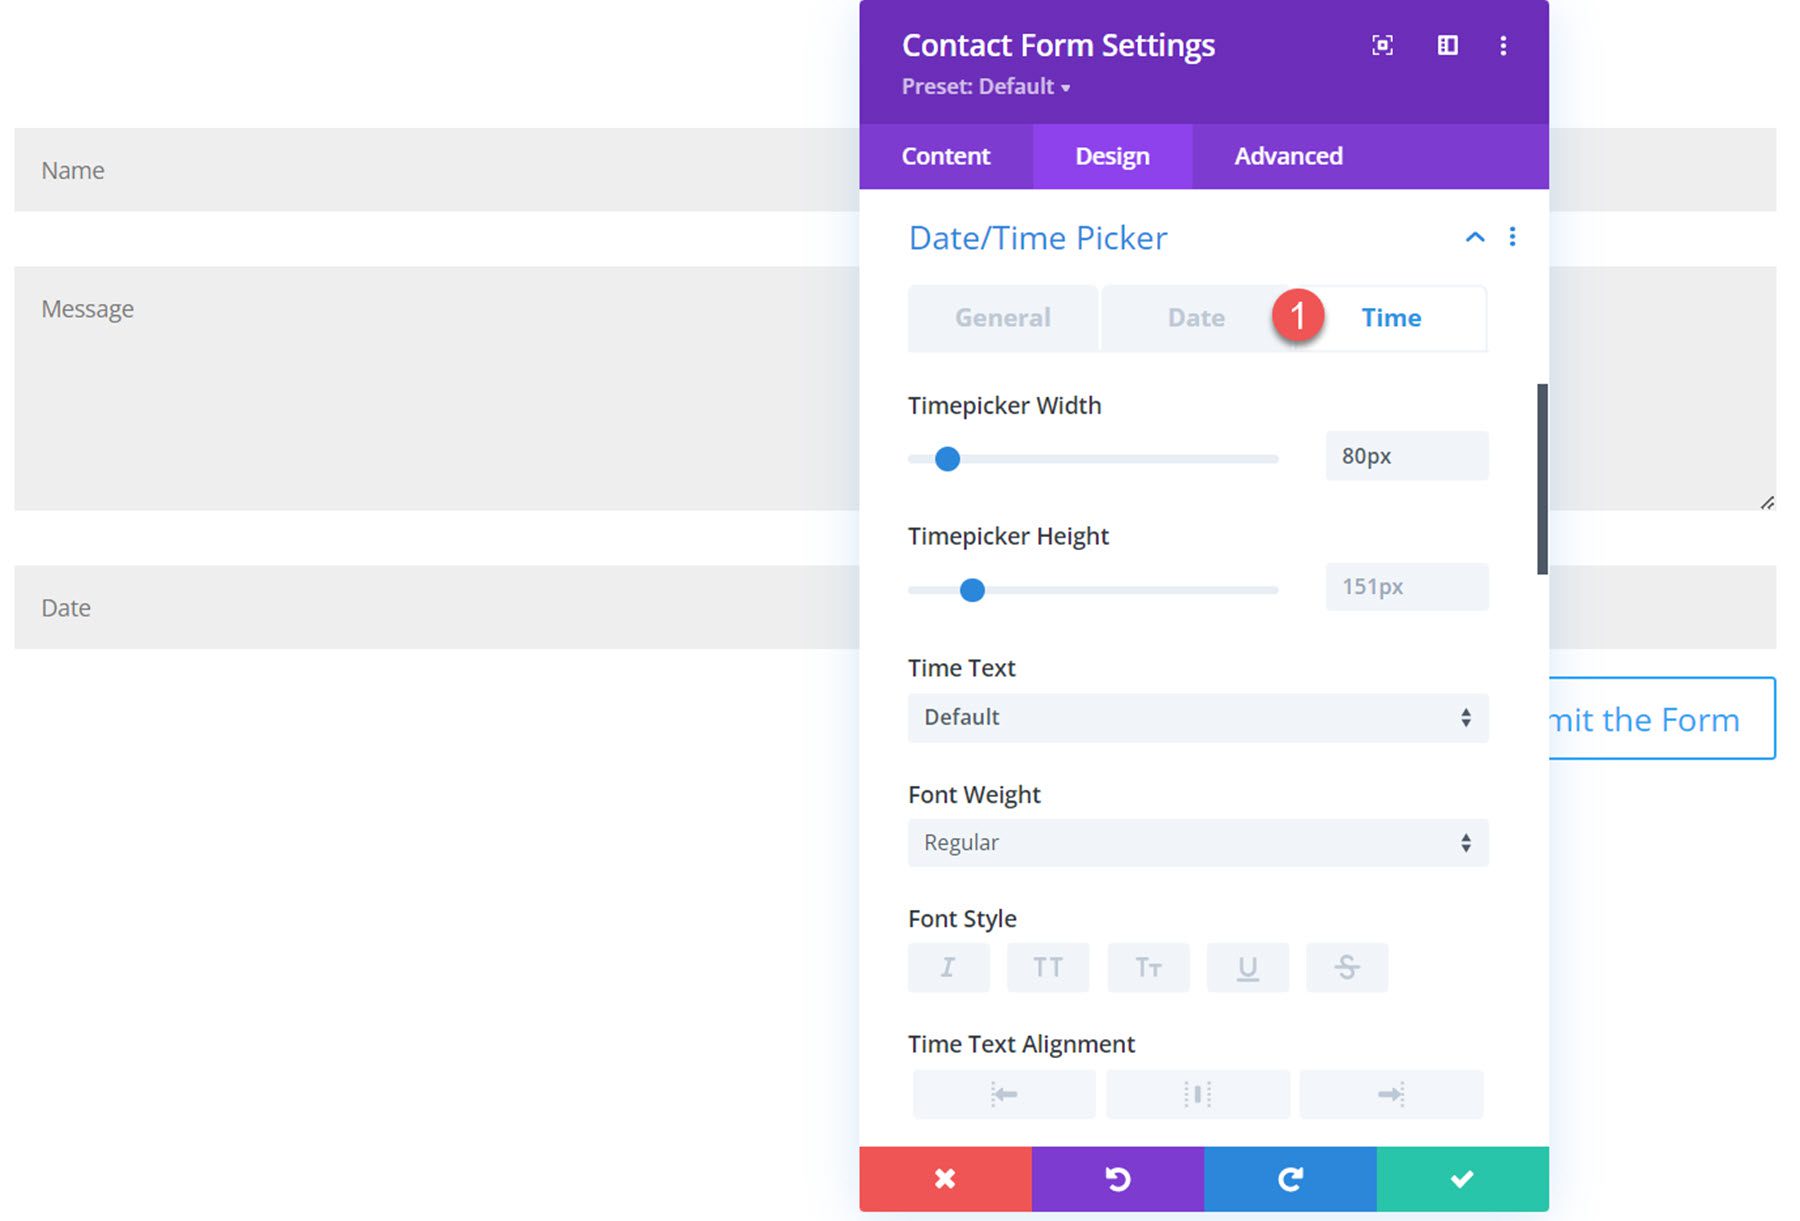
Under the time tab, you can customize the time picker width and height, the time text settings, the current time background and text color, the selected date background and text color, the available time’s background and text color, and the unavailable time’s background and text color.
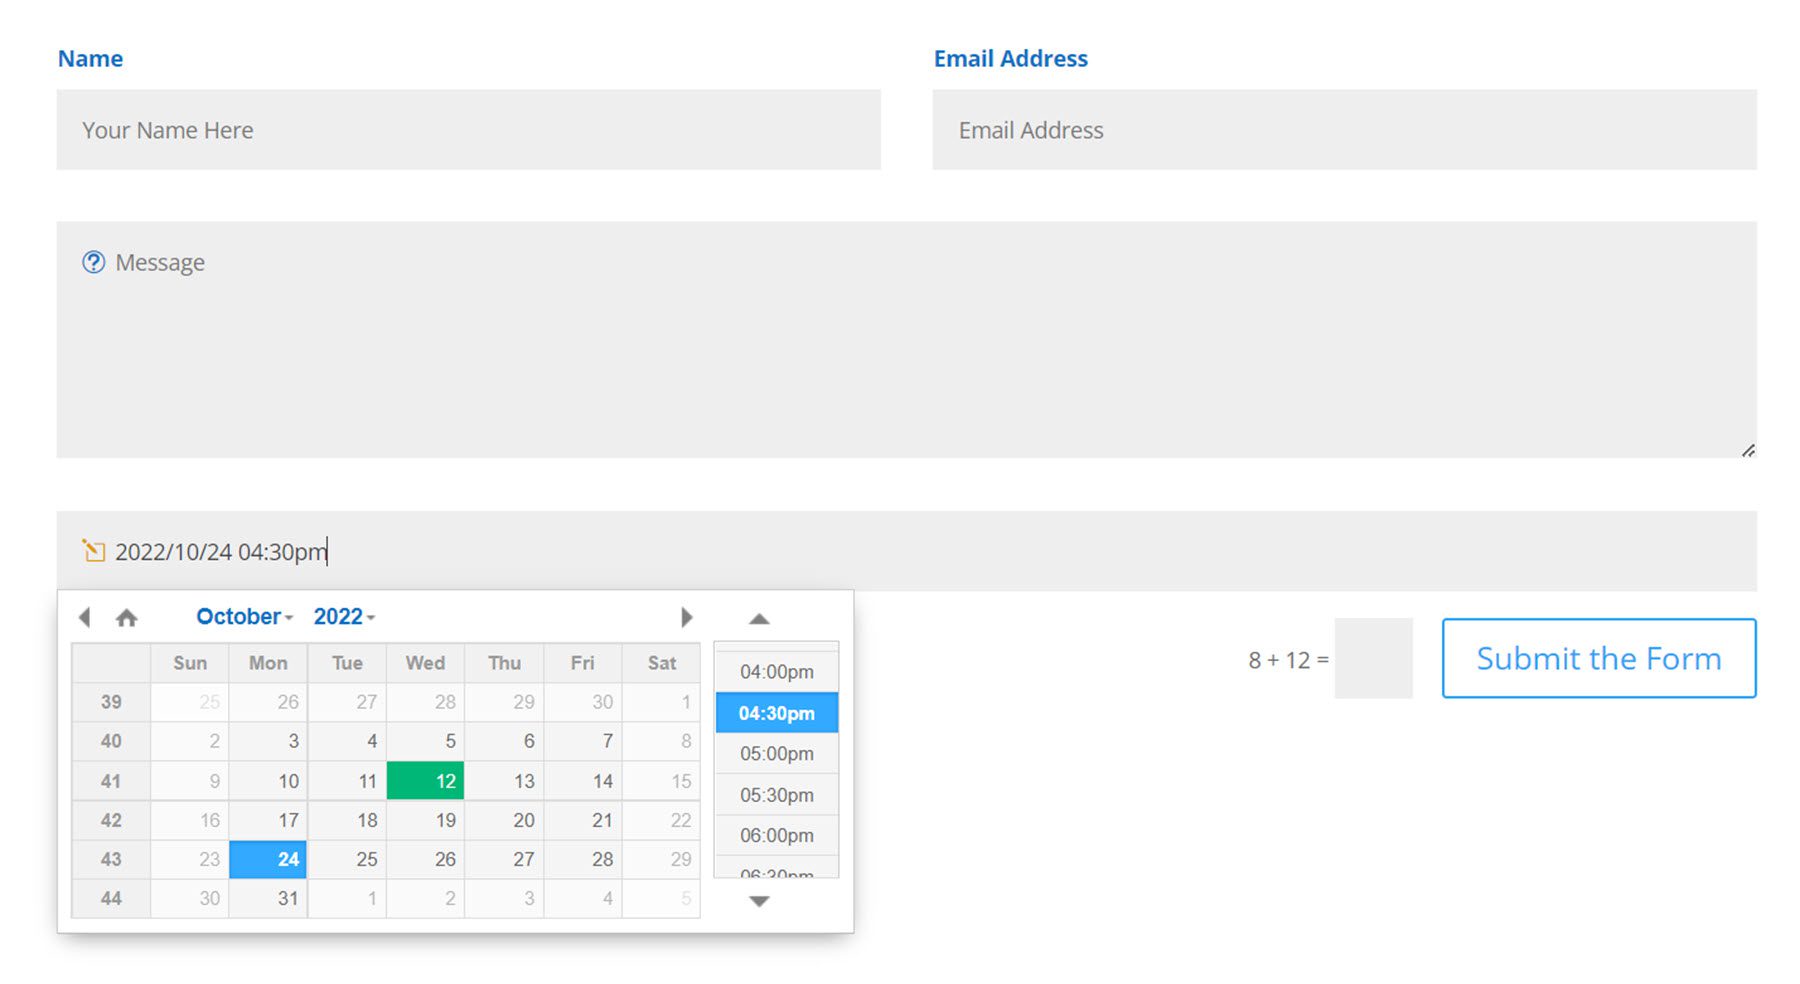
With all of these customization options, you can completely customize the look of your date/time picker. Here is the date/time picker on the front end with some customized design settings.
Submit Button
Two new settings have appeared under the submit button section. You can change the button alignment and make the button full-width.
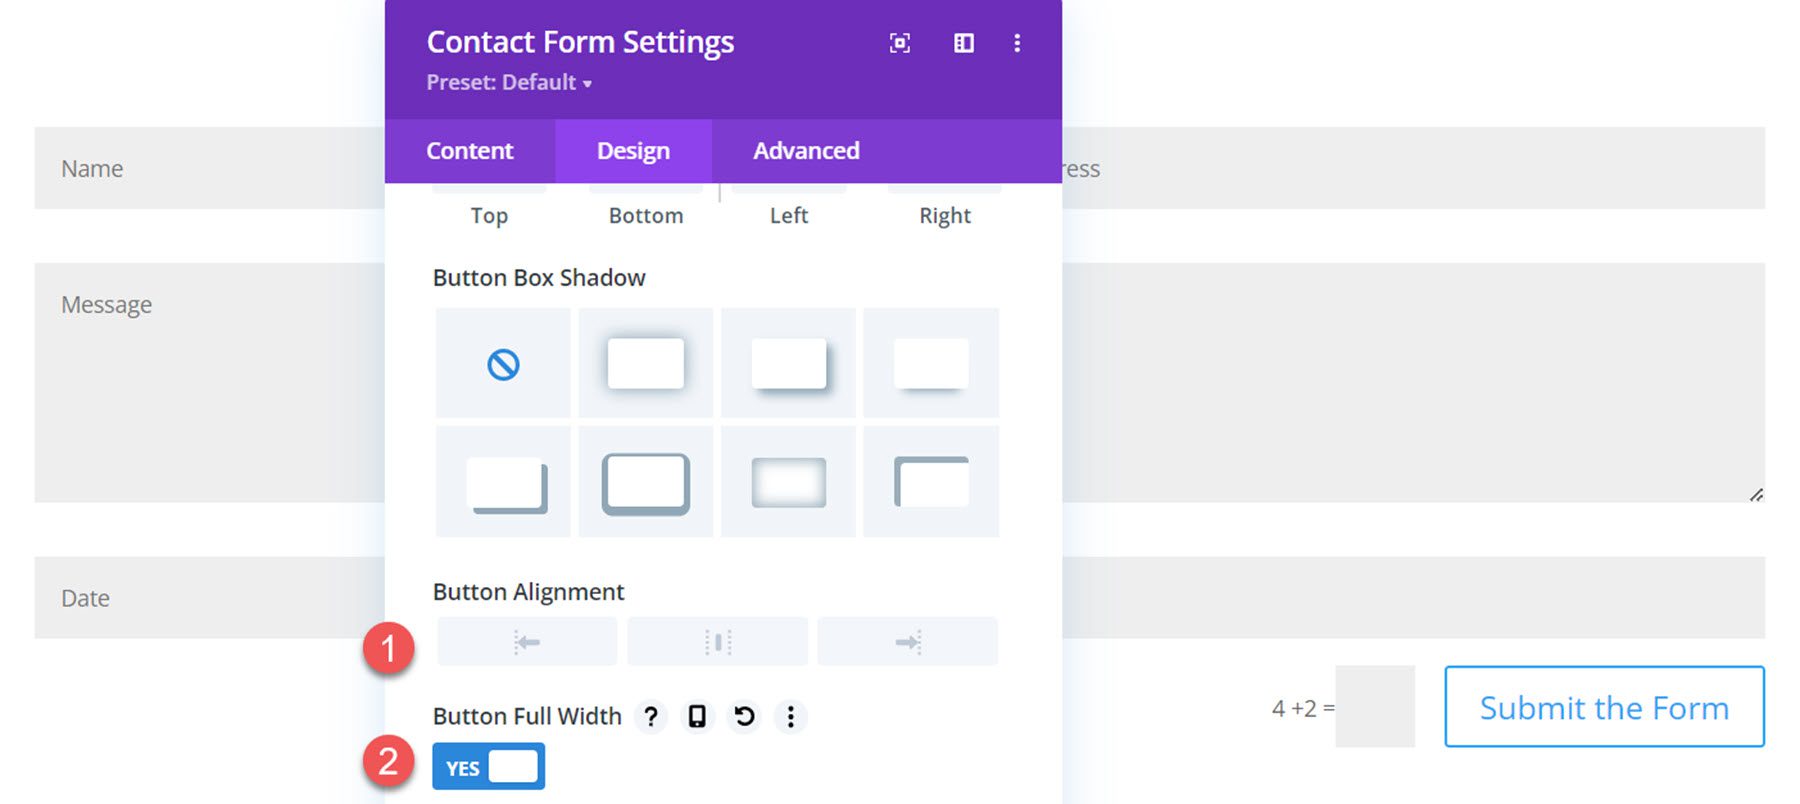
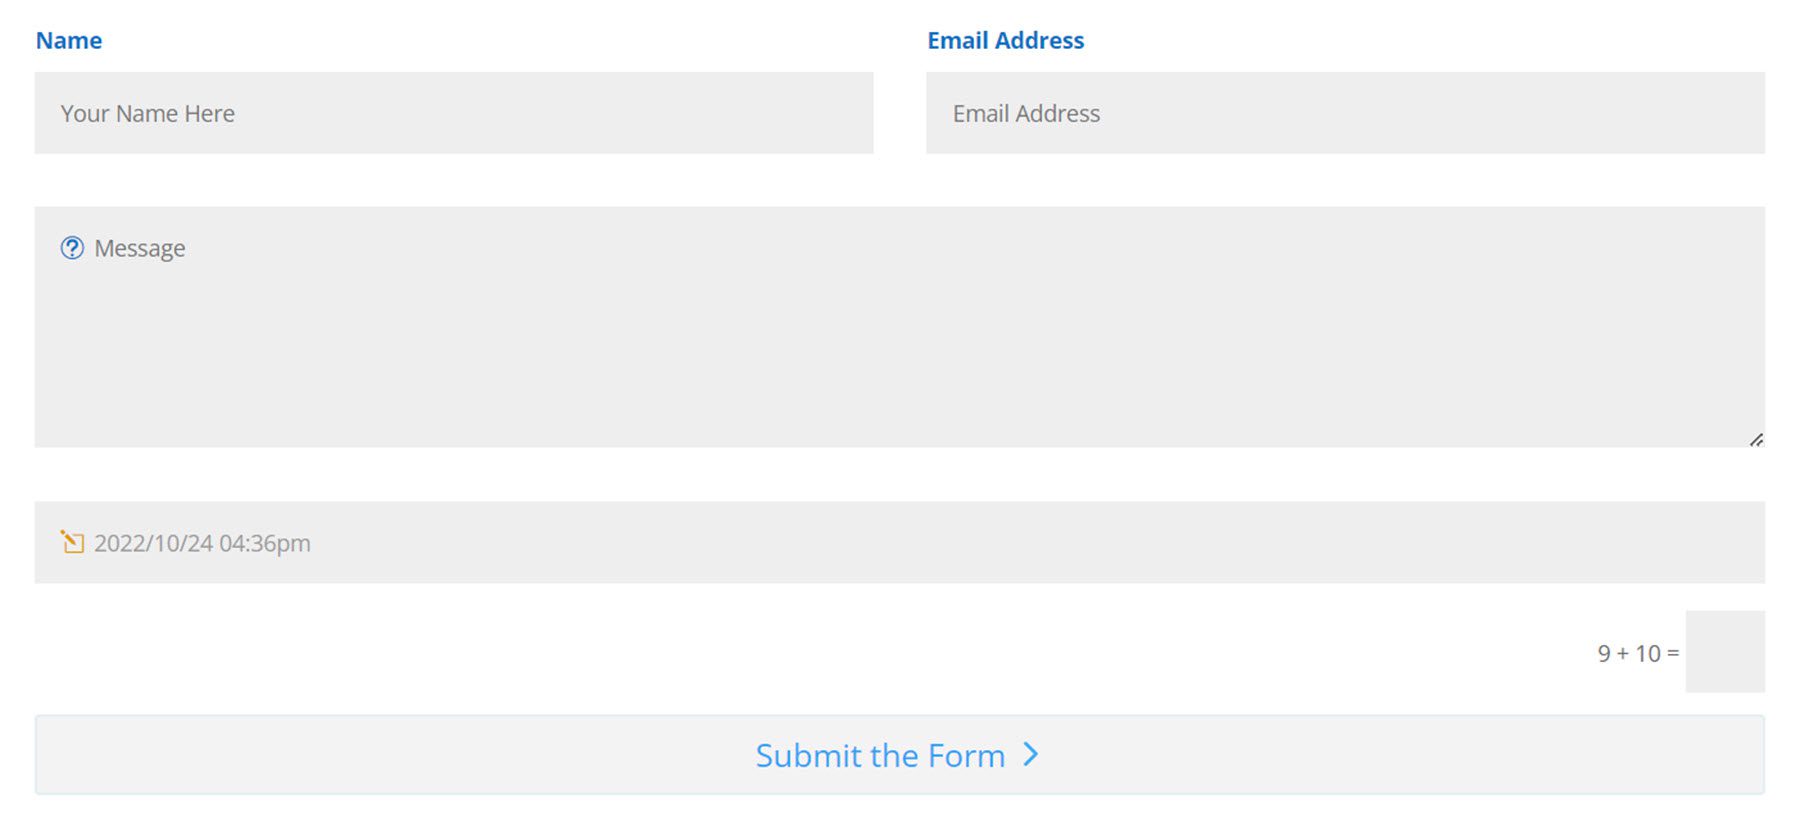
Here is the full-width button on the front end.
Border
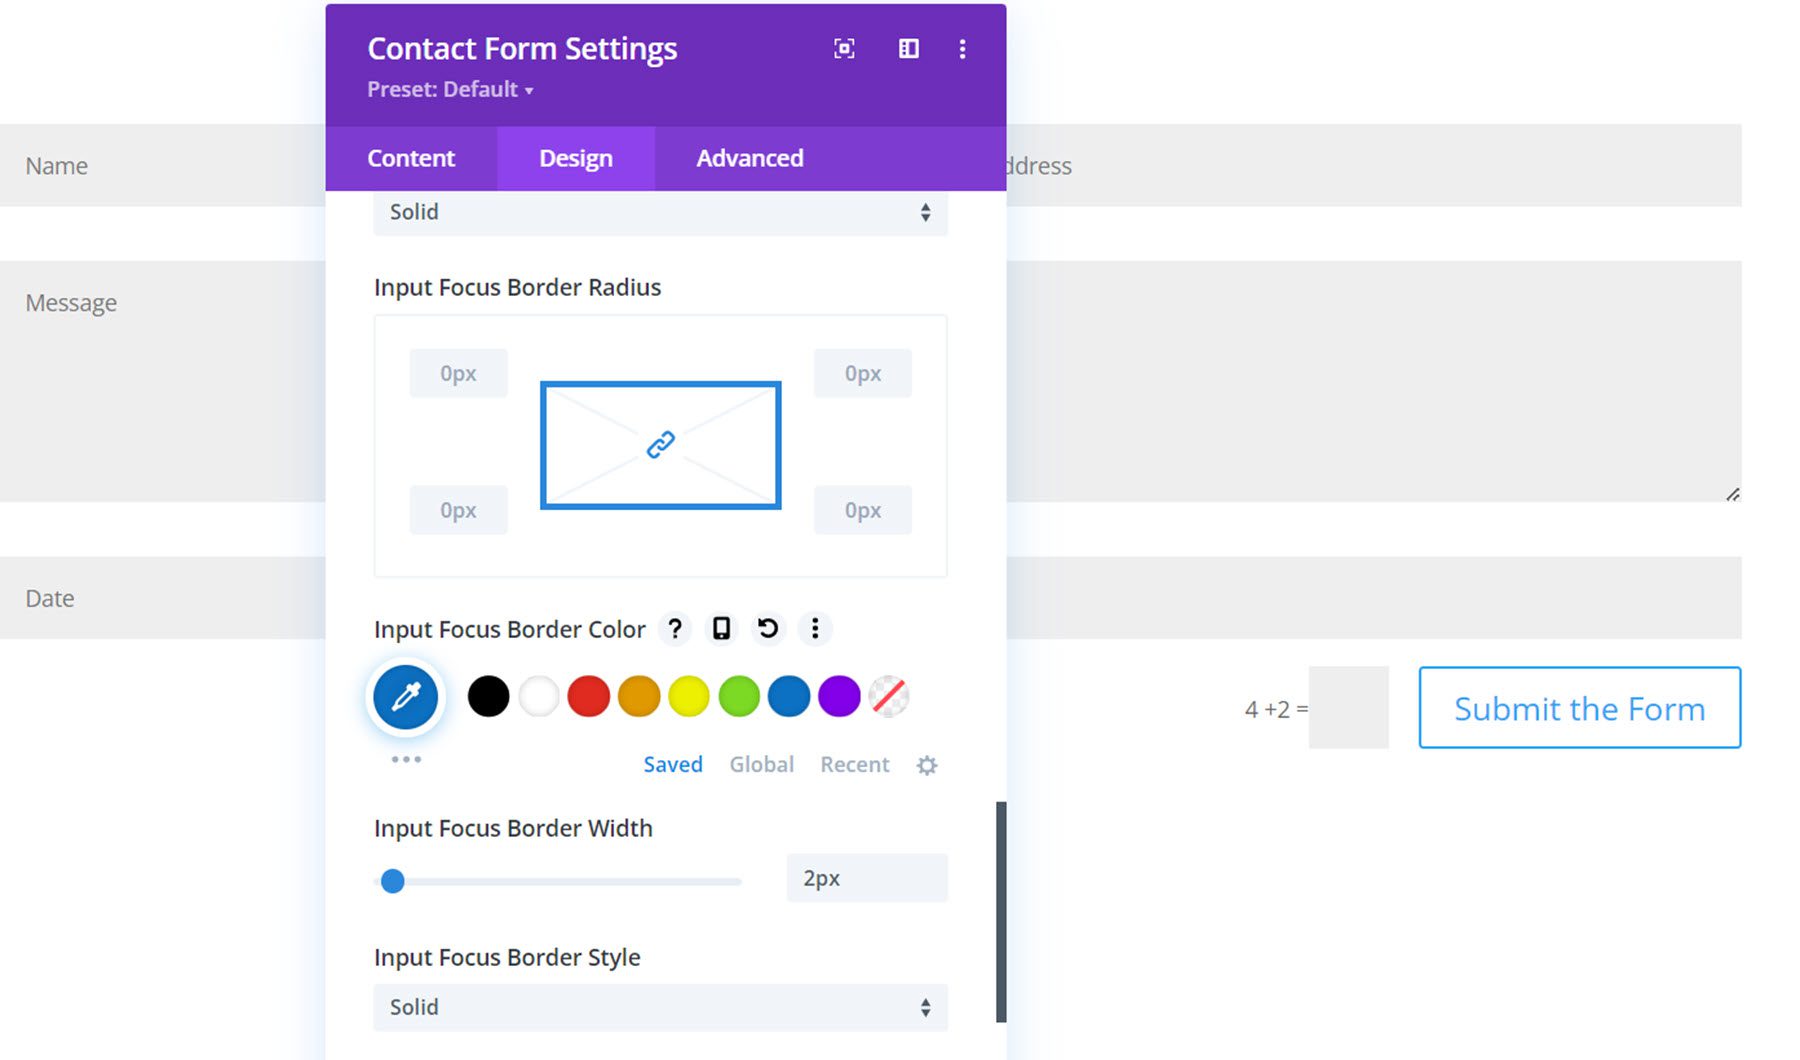
Here you can style the focus input border with color, style, radius, width, and style settings. This border will appear around the individual field when selected.
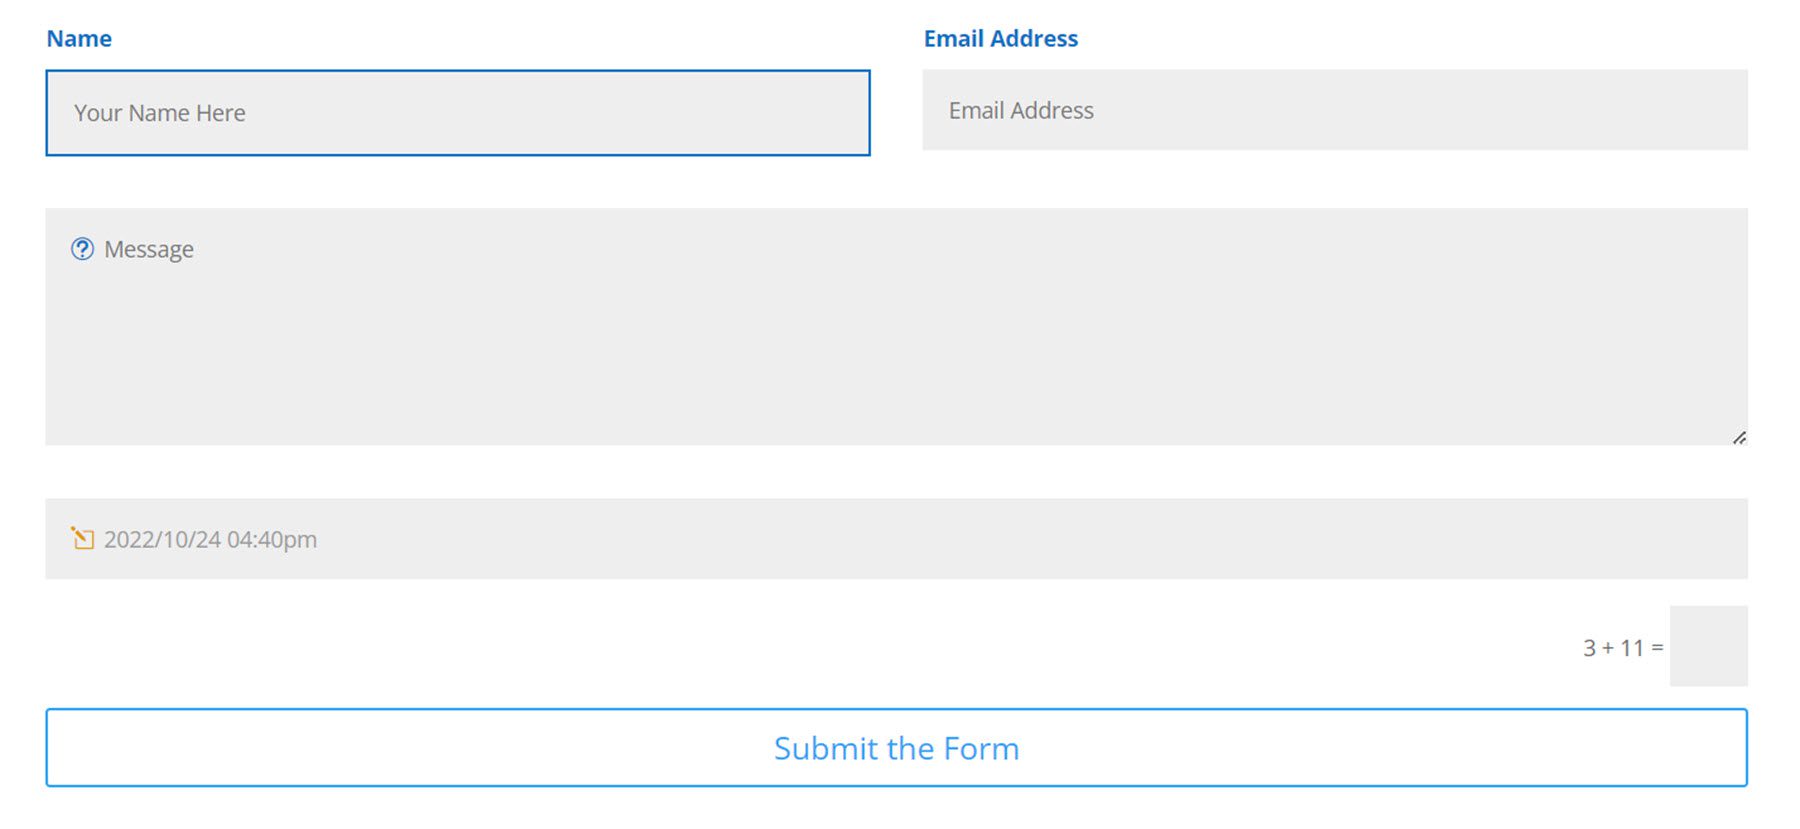
Here is the focus input border highlighting the name field.
Dashboard
Now that we’ve explored the new Contact Form module settings, let’s take a look at the Contact Form page in the WordPress dashboard.
Entries
You can see all the form submissions you have received on the Entries page. For each entry, you will see the entry number, the email address, its read status (including the user who read the entry and the exact time and date it was read), the form ID, the date, and the IP. The entries page can be sorted by unread and read at the very top. You can also use bulk actions on entries and filter the table by month or by a specific form. Finally, you can export a CSV of your entries with the button at the top and search your entries with the search bar.

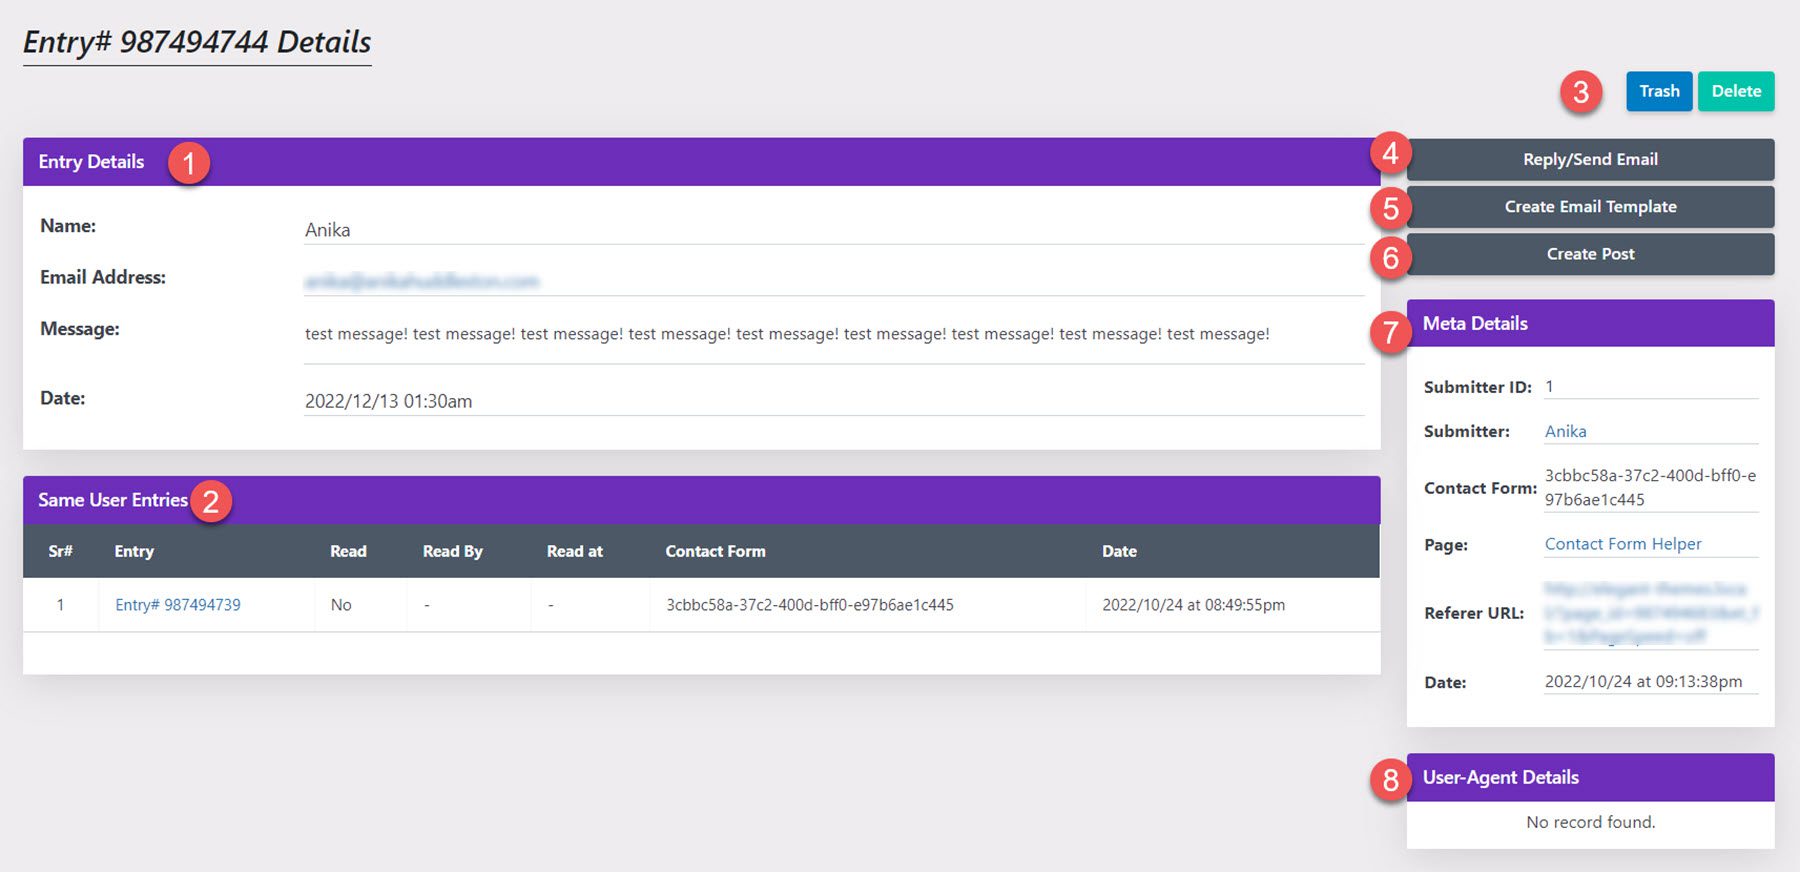
When you click to view an individual entry, you will see the field content in the entry details section. Below this are other entries by the same user, which is a very helpful feature. On the right, you have a trash and delete button, a reply/send email button, a create email template button, and a create post button. Below are meta details such as the submitter ID, submitter, contact form ID, page, referrer URL, and date, followed by user-agent details.
Send Email
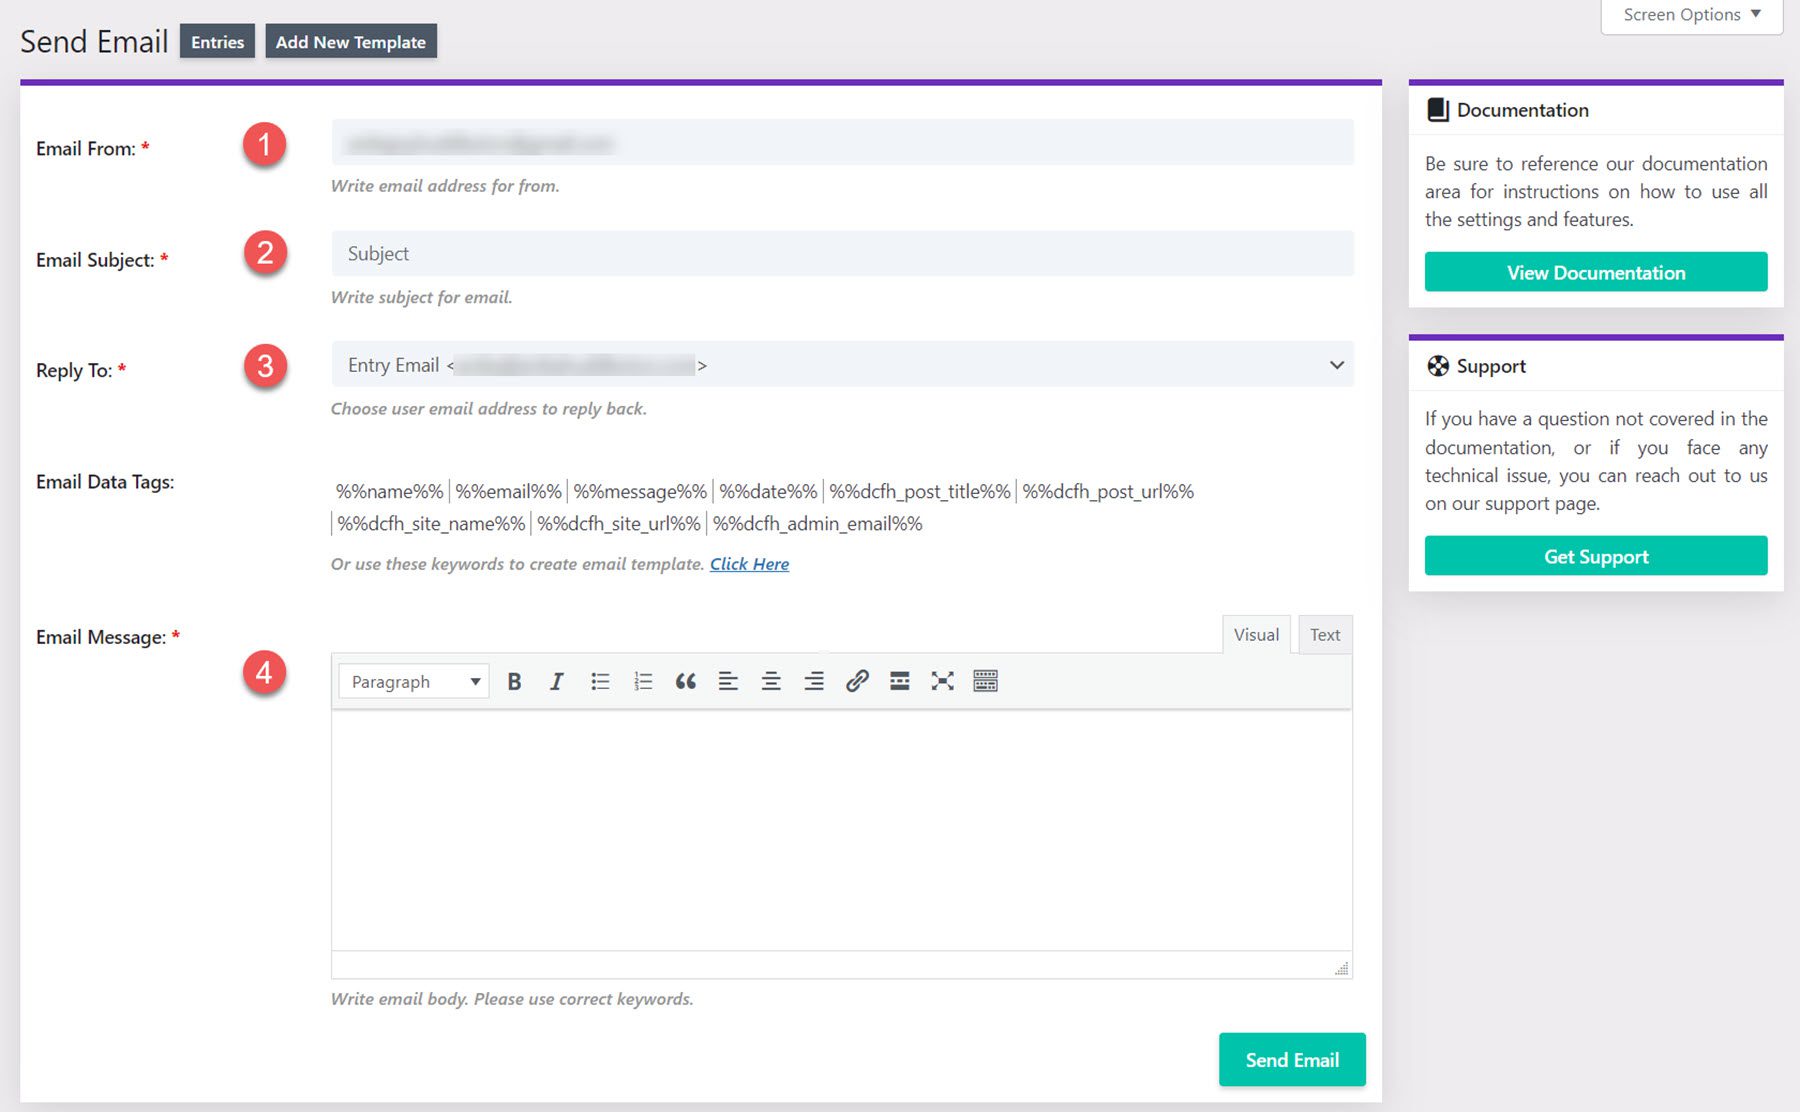
When you select the send email button, you will see this interface. You can add the email from address, the email subject, the reply to email address, and the message. You can use the email data tags listed in your message as well.
Create Template
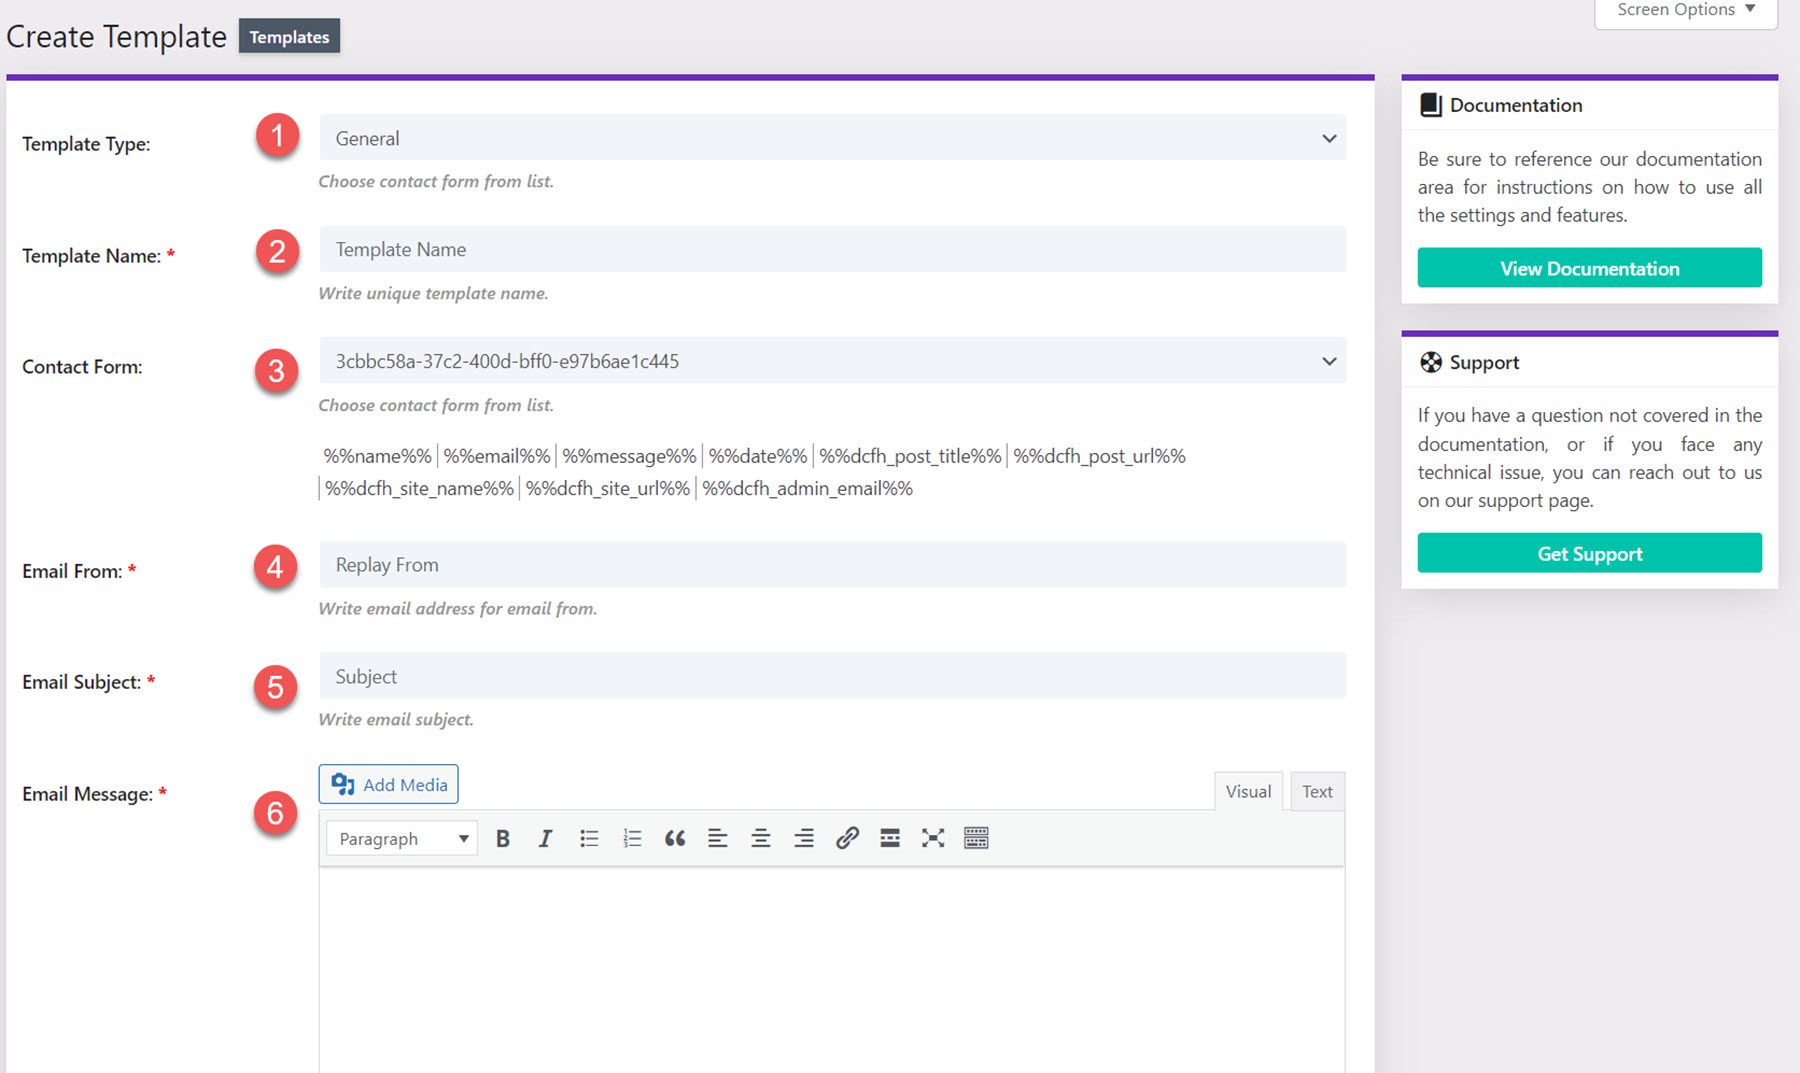
You can also create email templates to quickly respond to entries. You can set the template type, template name, select a contact form, set an email from address, the email subject, and the email message.
Create Post
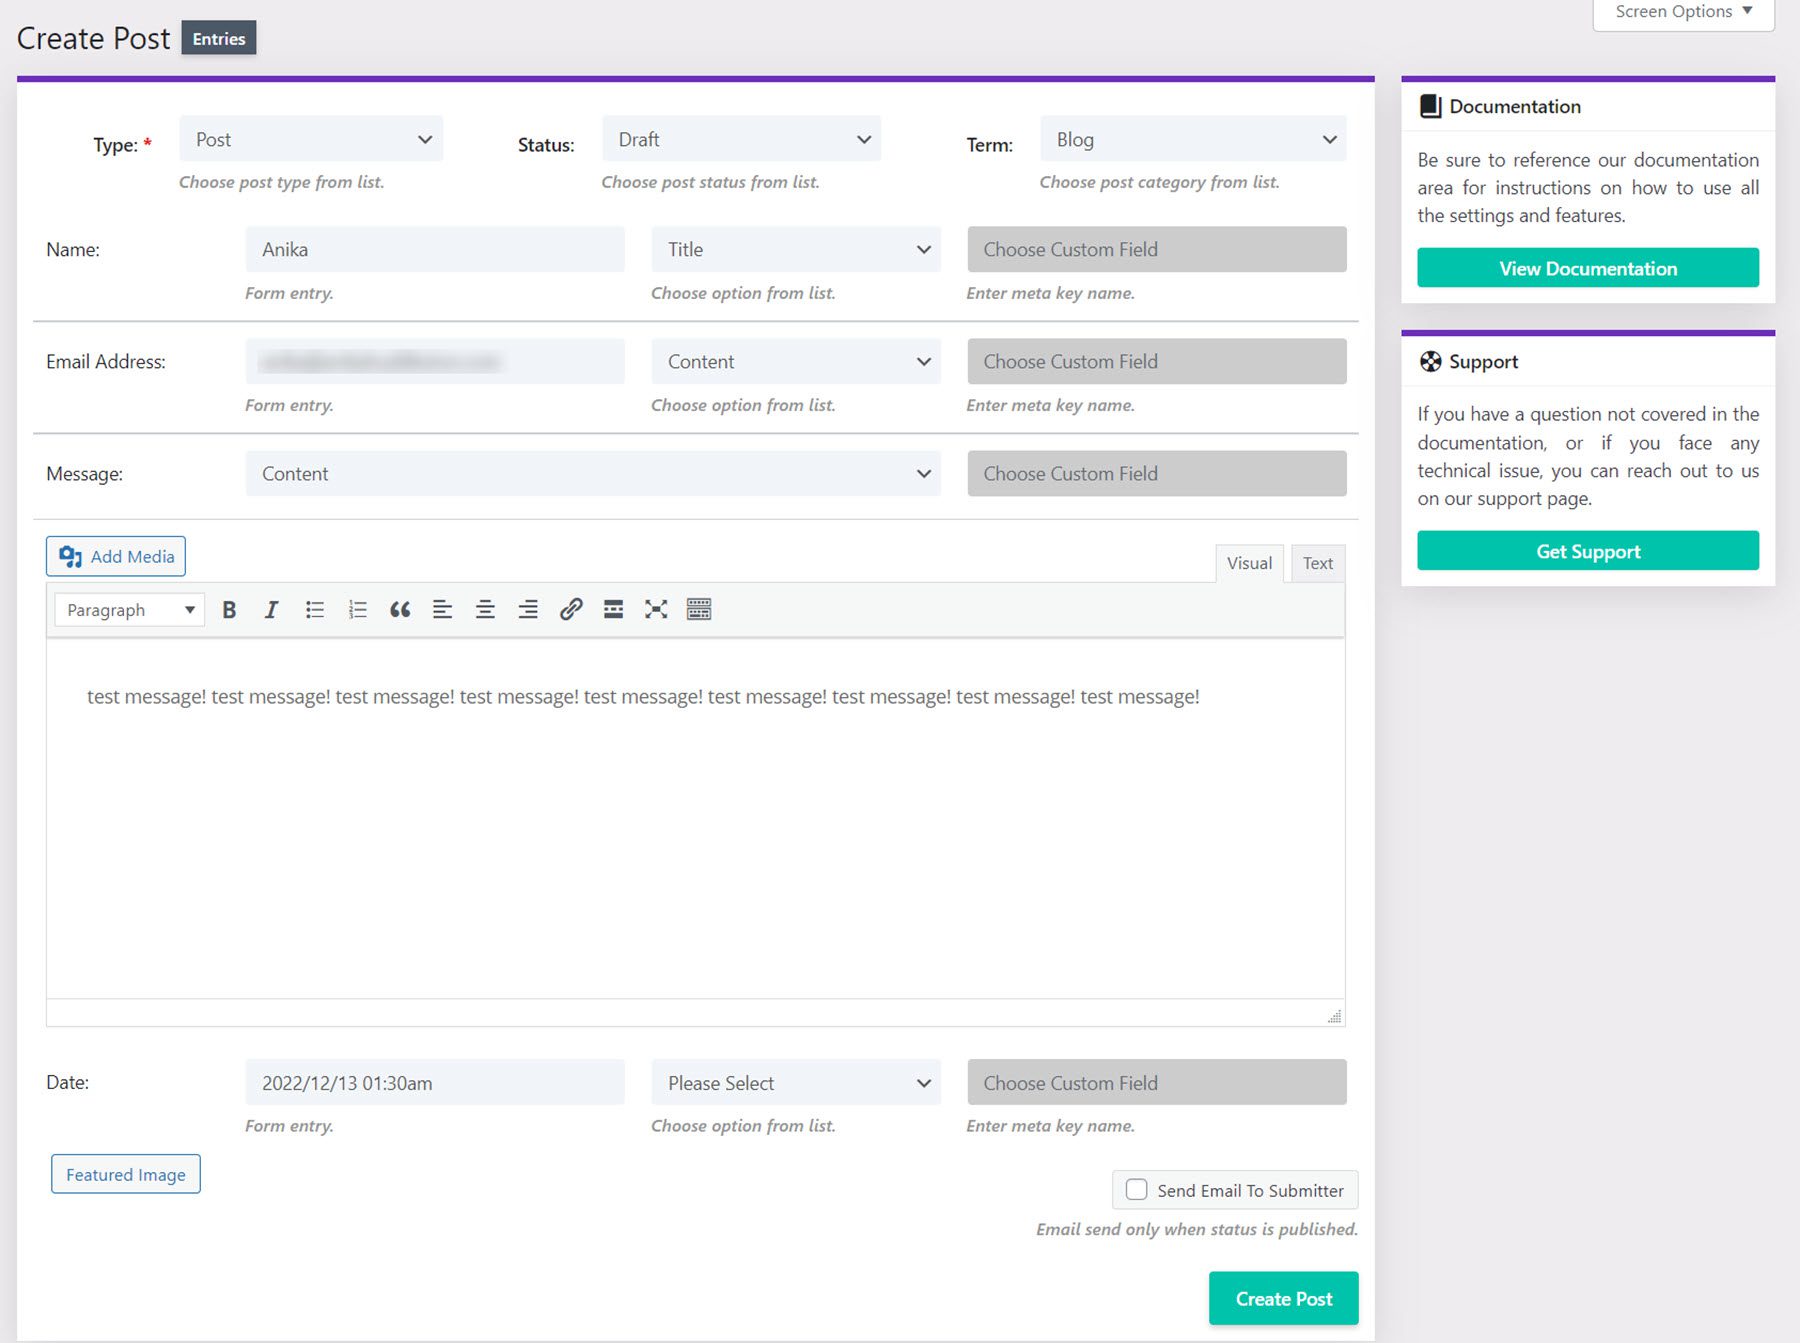
With the create post option, you can create a new blog post or page by mapping fields in the contact form.
Export CSV
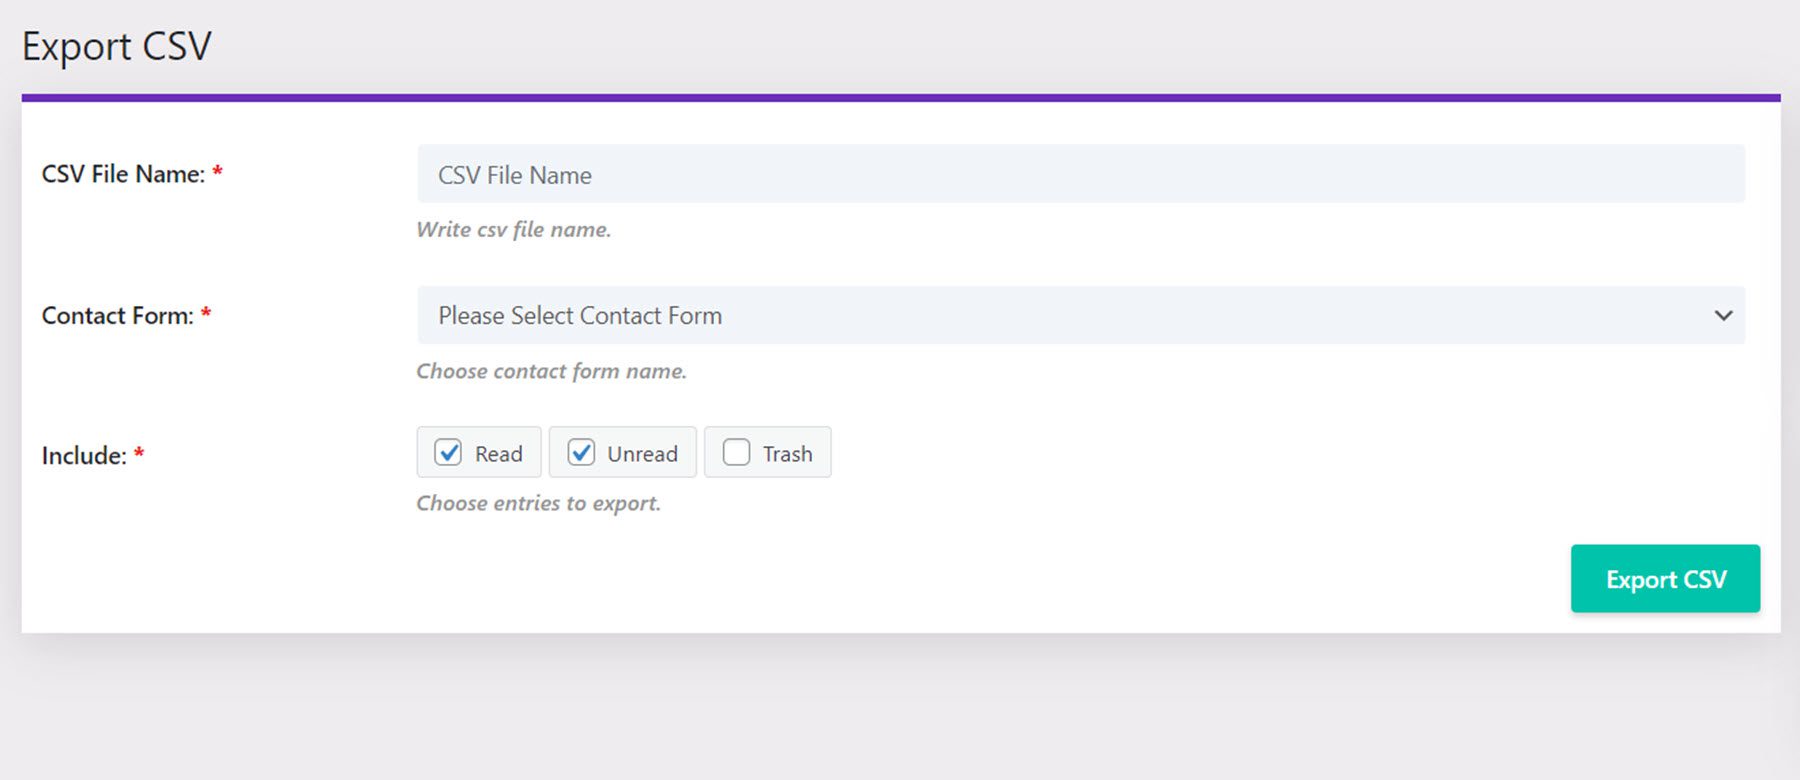
On the export CSV page, you can change the CSV file name, select the contact form, and select what type of entries to include in the export.
Forms
From the forms page, you can see a list of all of the forms on your site with information such as entries, views, unique views, conversion rate, unique conversion rate, last entry, and links to view entries, export CSV, and view the form.

Theme Options
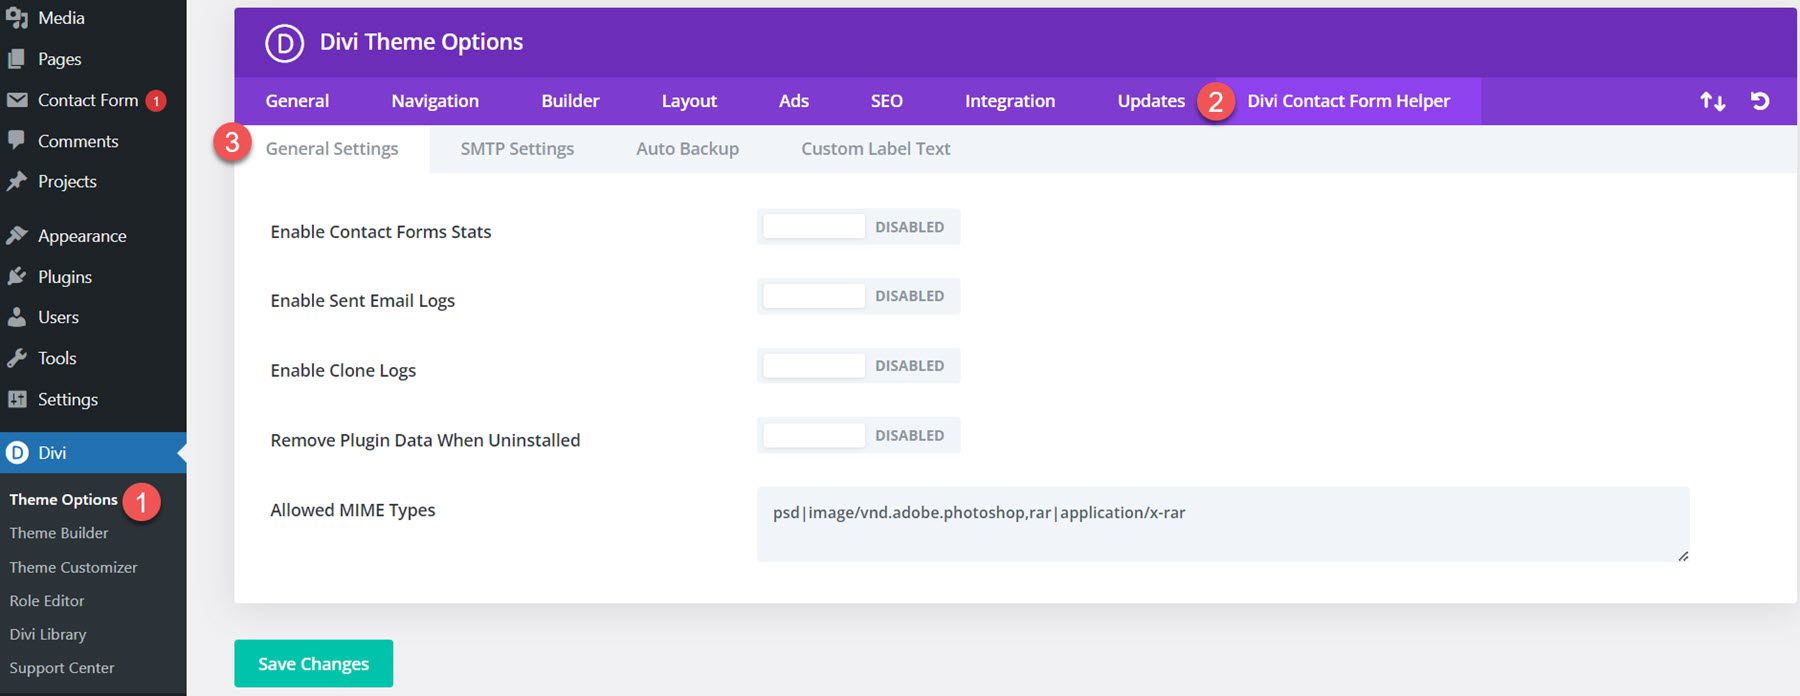
Now let’s navigate to the Divi Theme Options within the WordPress dashboard. You’ll see a new tab titled Divi Contact Form Helper here.
General Settings
Under the general settings, you can enable contact form stats, enable sent email logs, enable clone logs, choose to remove plugin data when uninstalled, and edit the allowed MIME types.
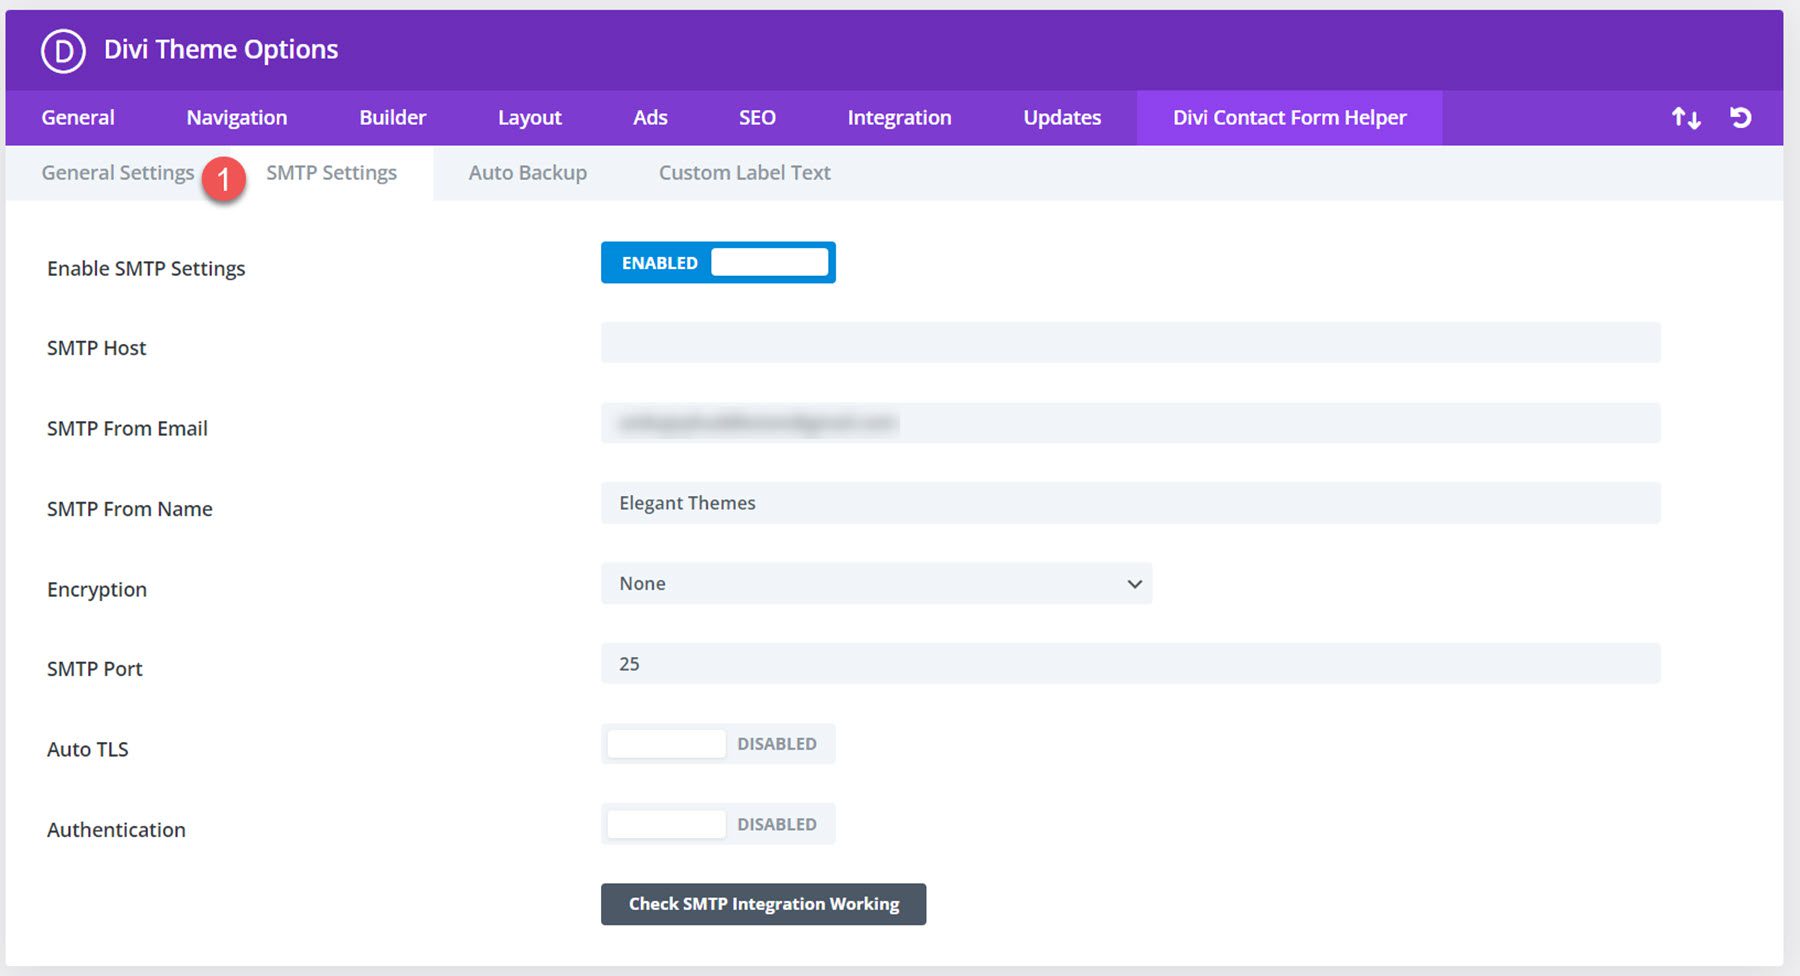
SMTP Settings
The SMTP settings tab has a button to enable SMTP settings. Once enabled, you will see settings for the SMTP host, SMTP from email, SMTP from name, Encryption, SMTP port, Auto TLS, and Authentication. There is a button to check if the SMTP integration is also working.
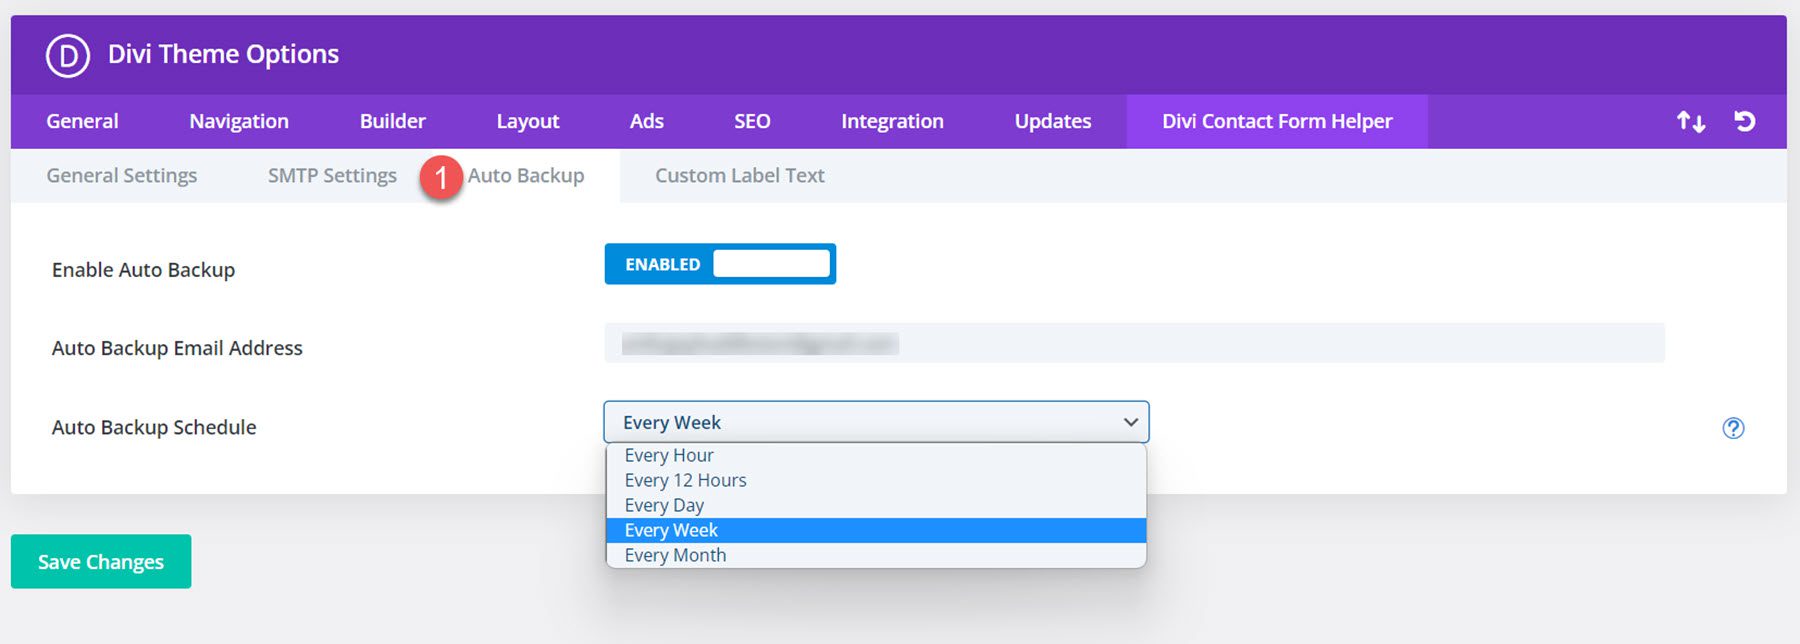
Auto Backup Settings
Divi Contact Form Helper comes with an auto backup setting you can enable. You can enable this feature, add a backup email address, and set the backup schedule.
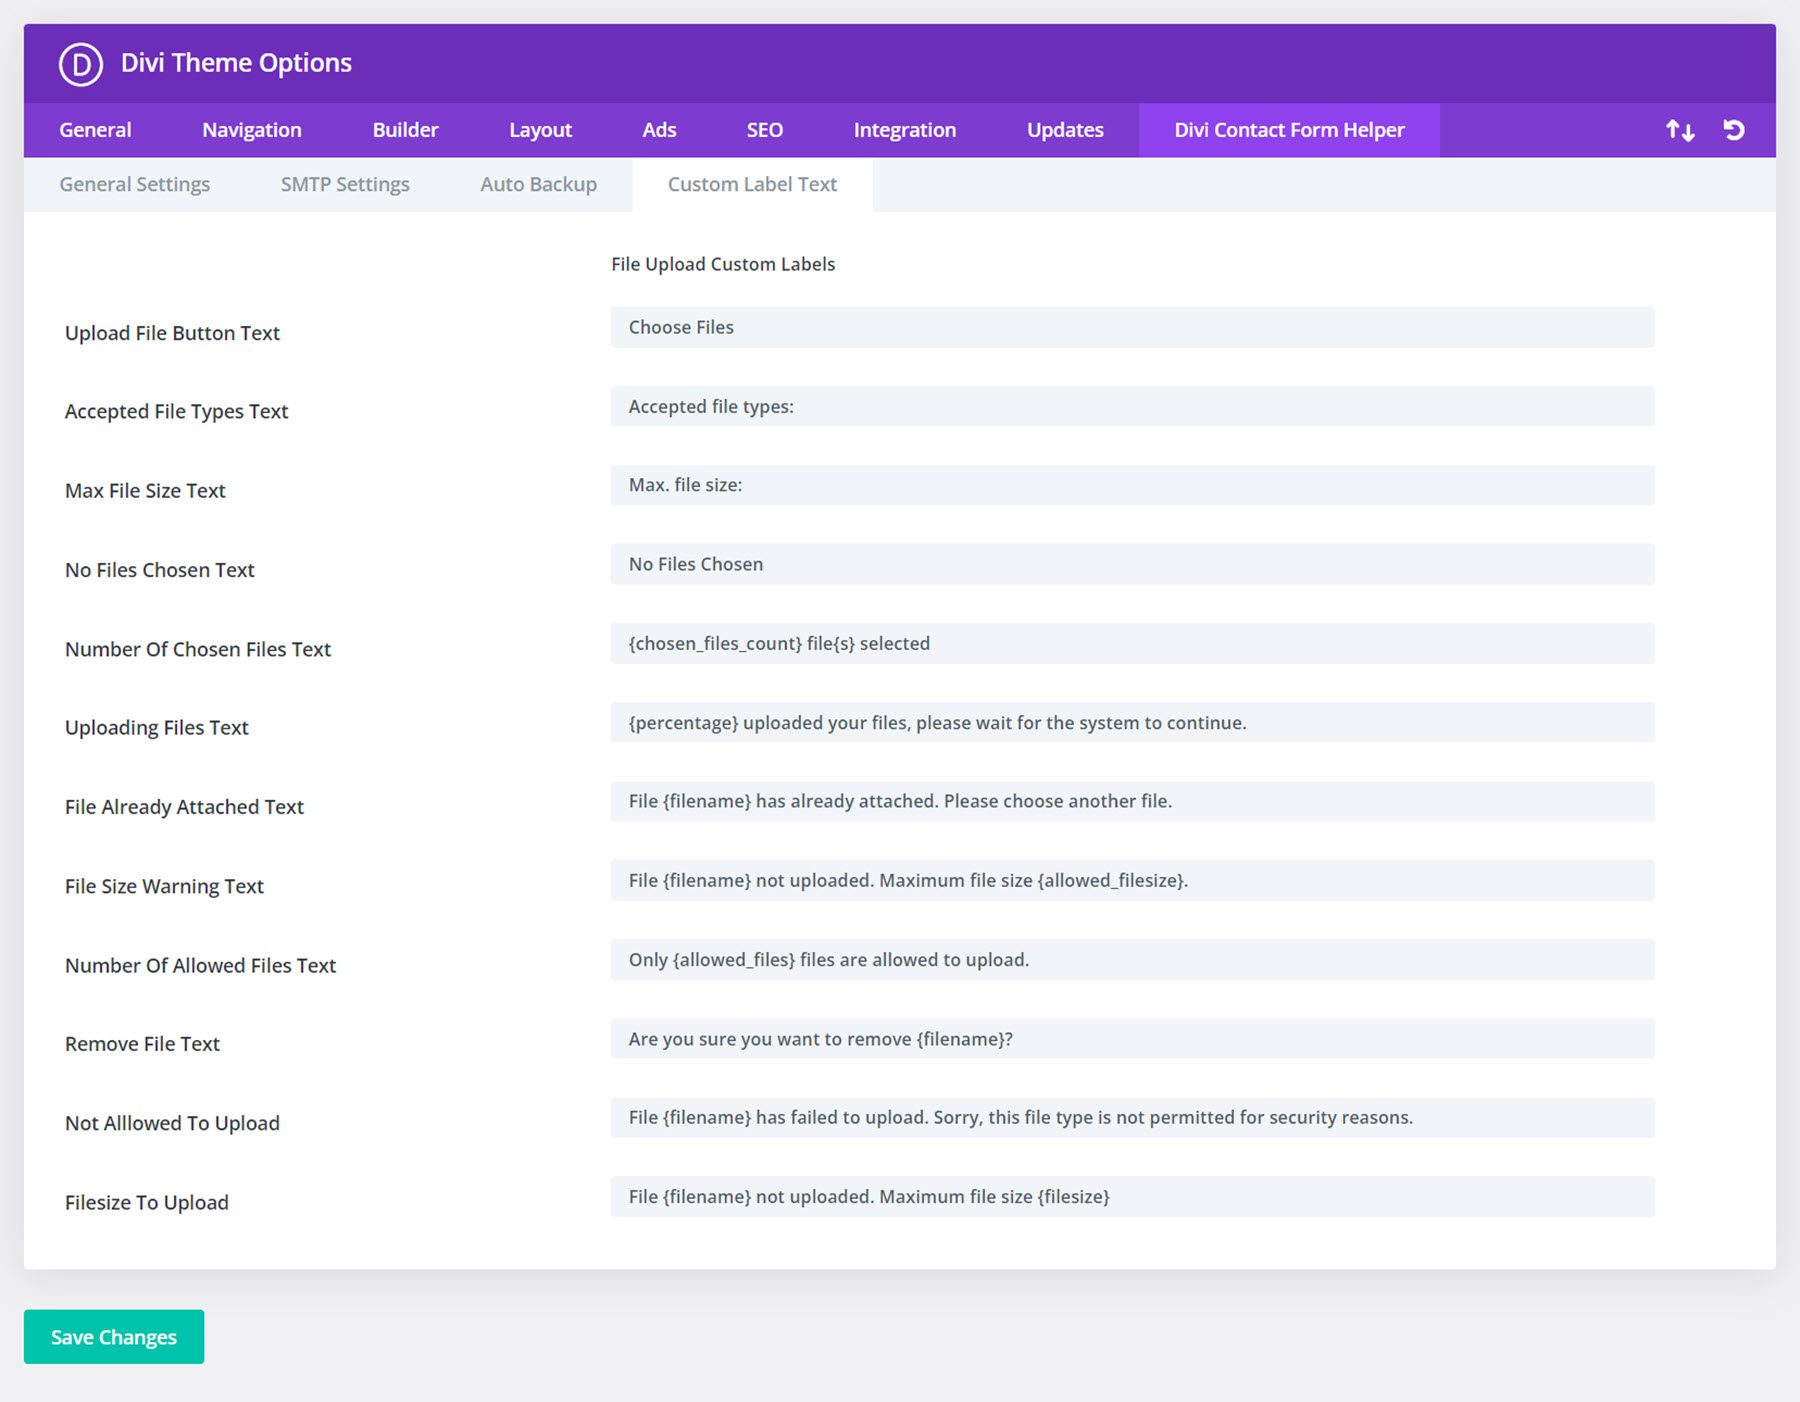
Custom Label Text
Finally, here you can customize the contact form label text.
Divi Contact Form Helper Examples
Example 1
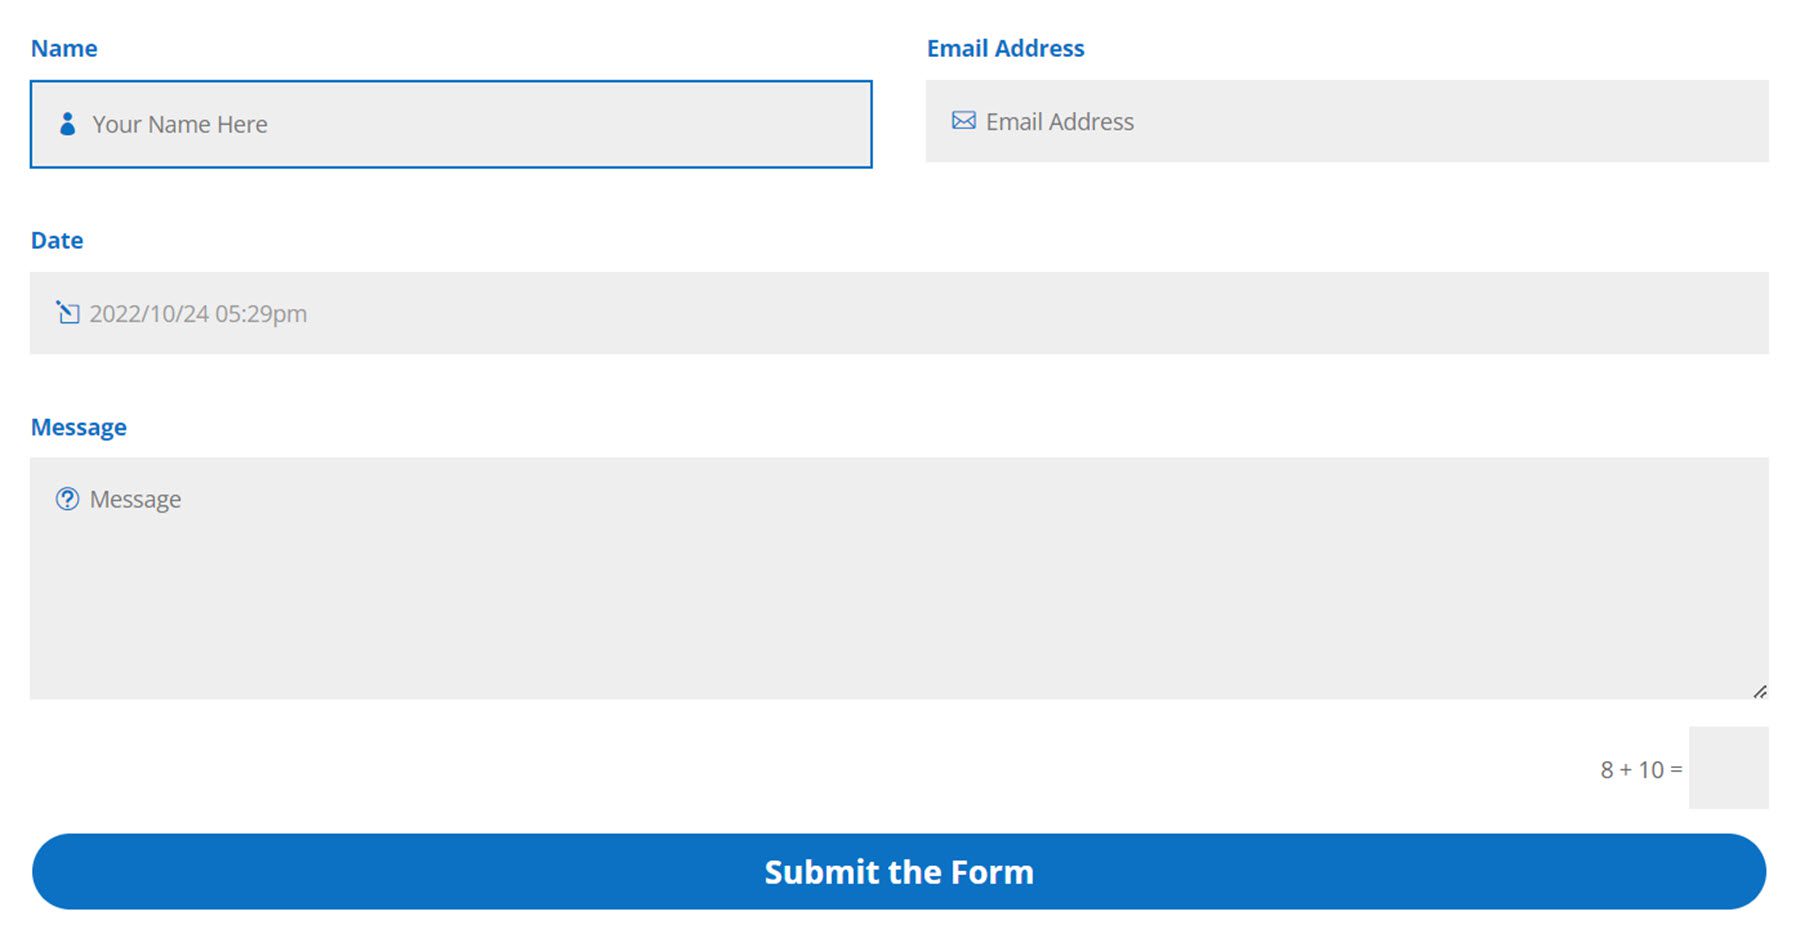
The first example features a name field, an email address field, a date picker, and a message field. It features a blue color scheme with a full-width button.
Example 2
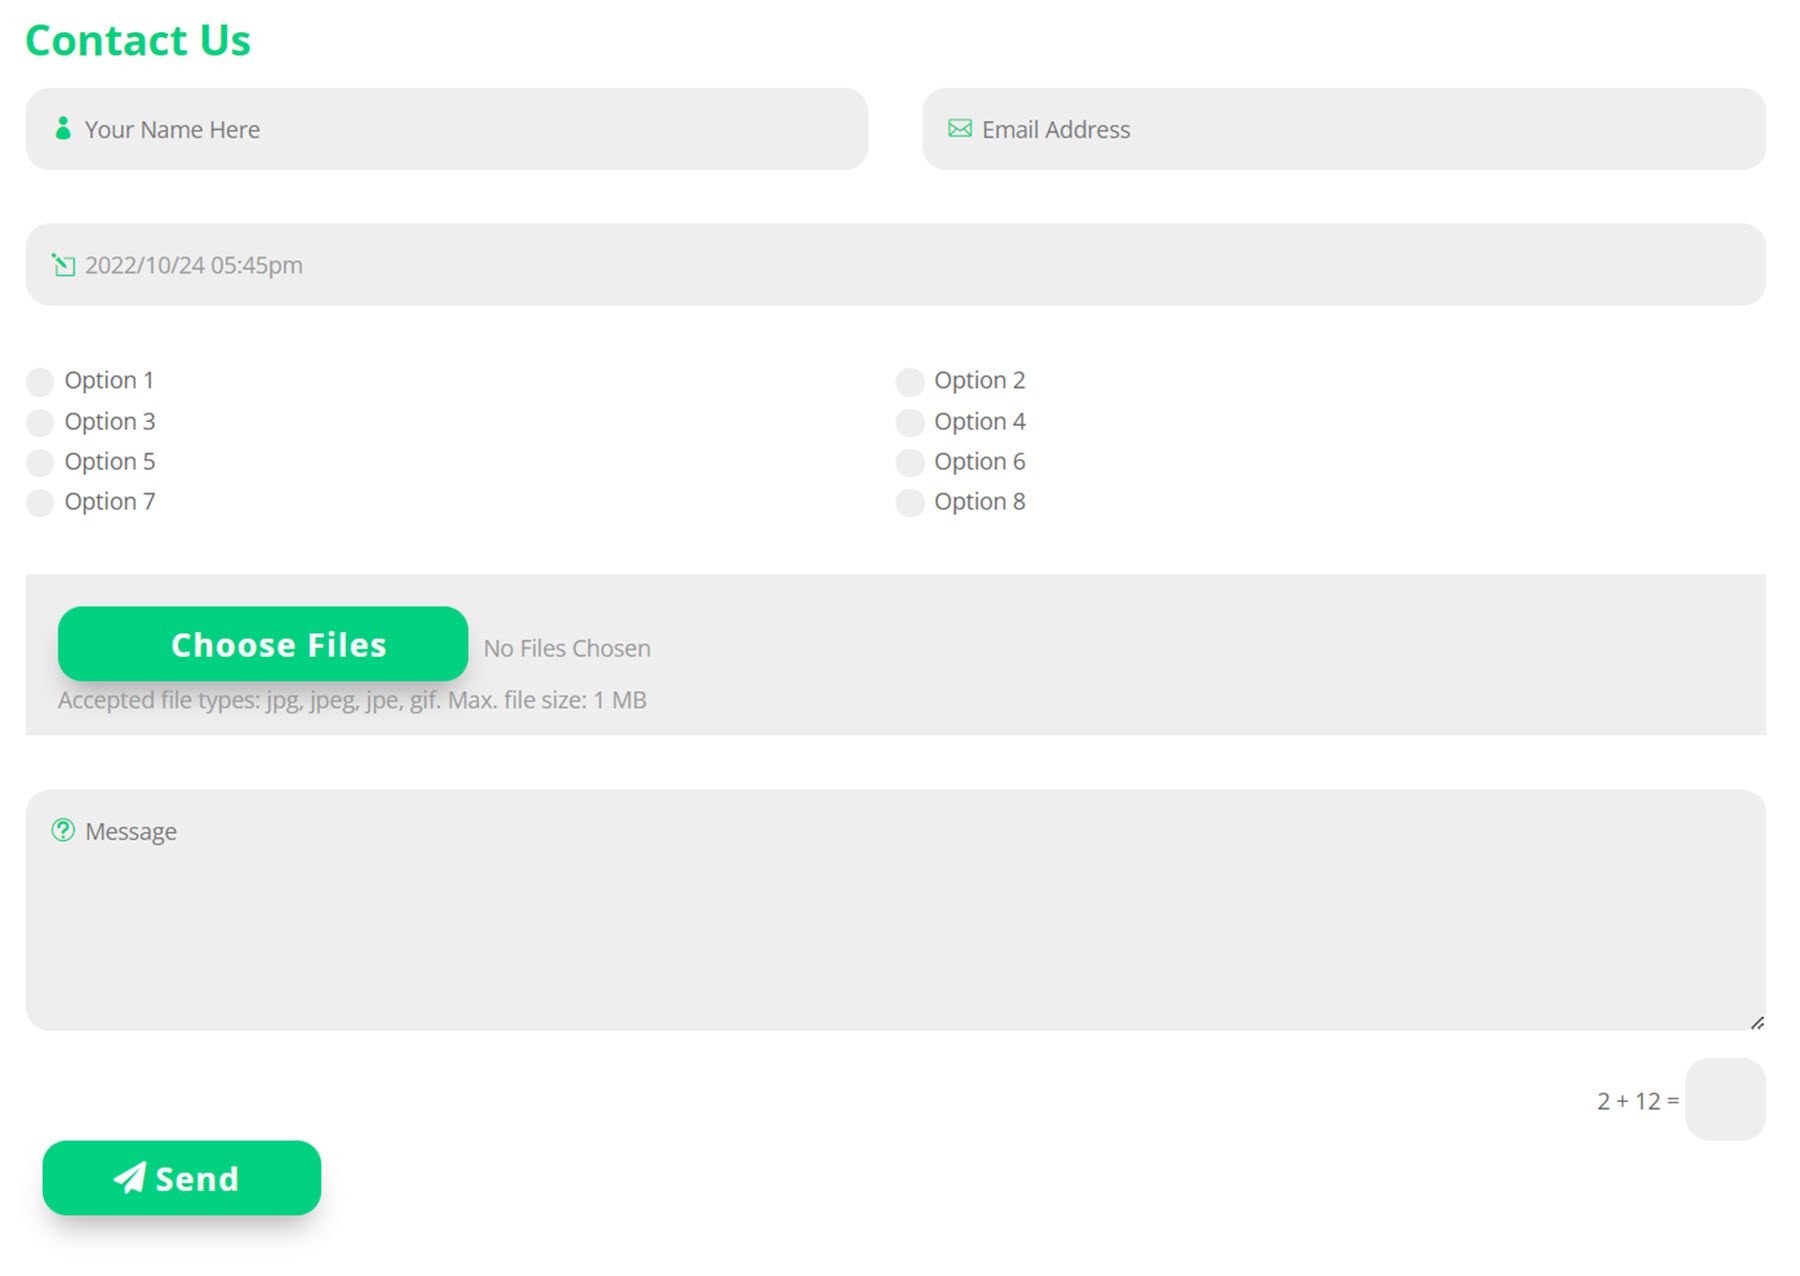
The second example has a green color scheme and features the same name, email address, date picker, and message fields, along with a radio select field and a file upload field.
Purchase Divi Contact Form Helper
Divi Contact Form Helper is available in the Divi Marketplace. It costs $25 for unlimited website usage and one year of support and updates. The price also includes a 30-day money-back guarantee.
Final Thoughts
Divi Contact Form Helper adds some major functionality to the Divi Contact Form module. You can completely customize every aspect of the contact form and create a unique design because of this plugin’s additional design options. And thanks to the functionality Divi Contact Form Helper adds, you can even accept files, schedule events, and so much more. The entries interface is convenient to have, allowing you to easily respond to messages and keep track of entries from the WordPress dashboard. If you’re looking to take your contact form to the next level or need functionality beyond what the default contact form can offer, this might be a great product for you.
We would love to hear from you! Have you tried Divi Contact Form Helper? Let us know what you think about it in the comments!



The contact form helper looks great. I hope they add a signature field into it as well, that would be awesome to make it a fully usable “contract form”.
Sad to see though that simple things like file upload and confirmation mail settings are not in the regular module already. I wonder if they ever gonna extend any of the current modules or if they just let marketplace creators do this from now on…
I’m not even kidding when I say I use this on every site I build. It adds so much more functionality to the Divi form and if you have support questions, Nelson is on it, answering very quickly. It’s one I recommend to everyone…. no kickback, I just fully support this plugin.
I love this plugin! Forms that don’t require extra fancy things—like collecting money or registering—can work with the native Divi Contact Module when you add this magnificent plugin. It’s already amazing and they seem to keep enhancing it. Highly recommended.