Hide & Show Pro is a third-party plugin for Divi that lets you show or hide content based on criteria that you set. Control who sees every section, row, column, and module based on location, status, purchases, and more. In this post, we’ll look at Hide & Show Pro to see what it can do and how easy it is to hide or show your Divi content based on the conditions you choose.
How Hide & Show Works
Hide & Show Pro adds options to the Divi Builder’s Sections, Rows, and Modules to either hide or show the element and choose a preset that determines the actions that will take place. The actions are based on the conditions within the preset that’s selected for that element. The preset can be used to hide and show the elements. This means you can swap the content based on the conditions you choose, such as the user role, date, language, etc.
Presets are created separately in the Preset settings editor, and can be used in any Divi element. The preset can be selected within any Divi element, so they can be reused as many times as you want and anywhere you want. To create one, simply go to the preset editor and make your selections.
Once you’ve created the preset, you can use it in any Divi element. Go to the Advanced tab, choose Hide & Show, and select Hide or Show. Then, select the preset you want to use. The element will then show or hide based on your selection and act according to the selections in the preset.
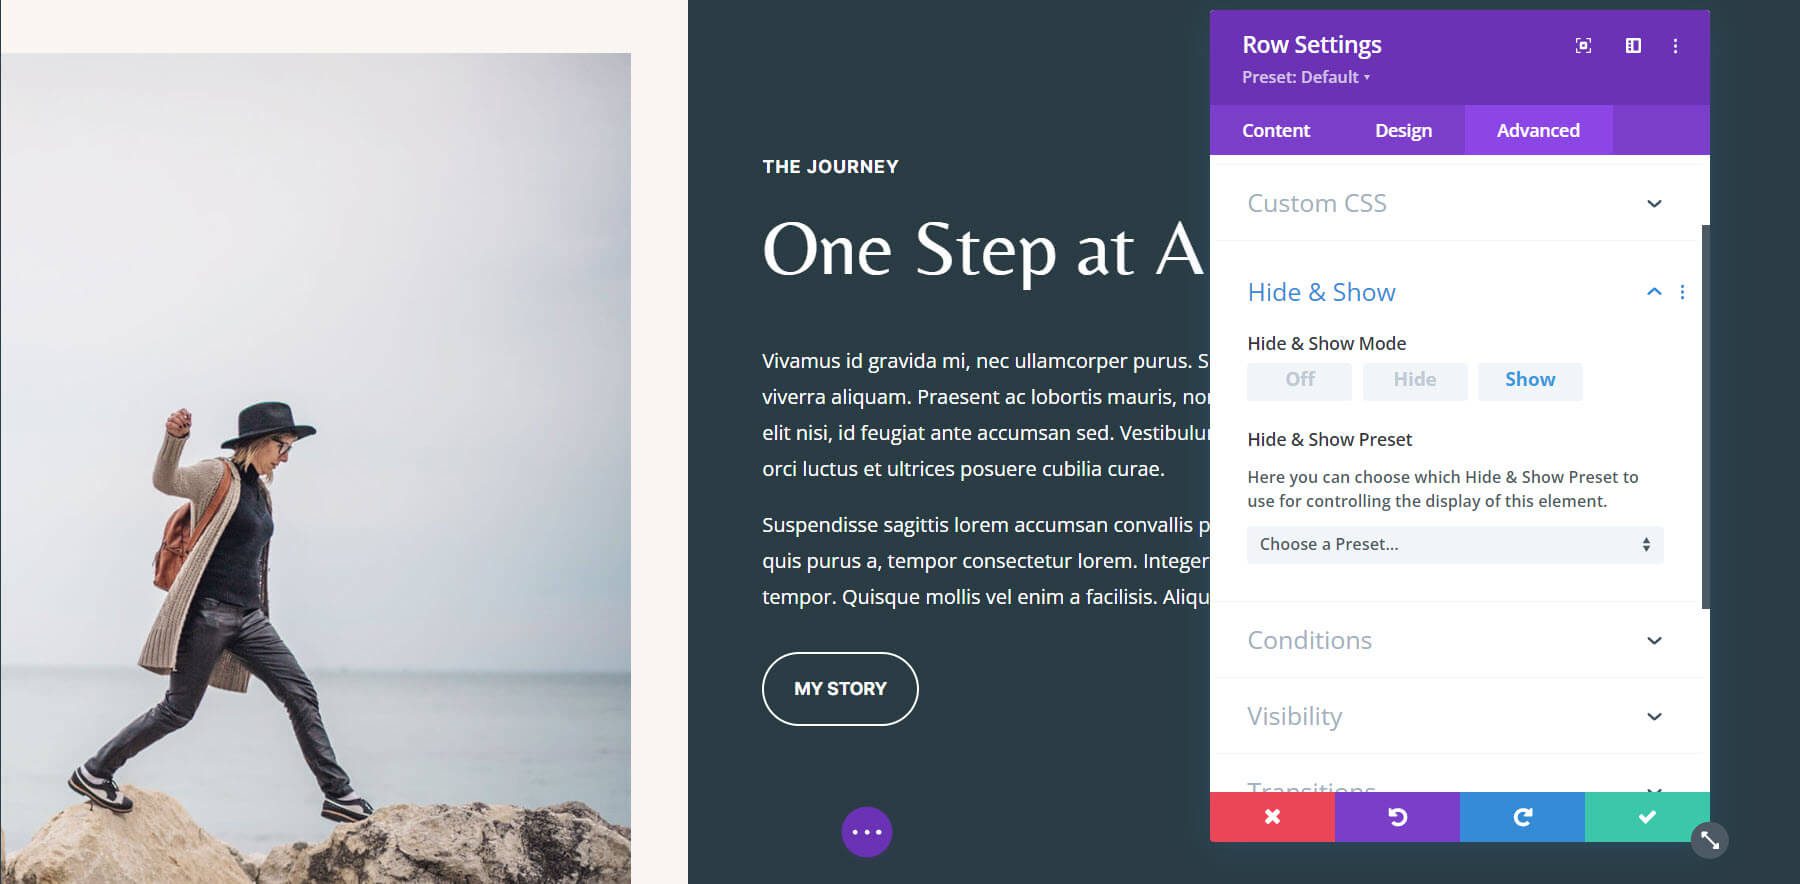
This allows you to create a preset and apply it anywhere you want, and when you make changes to the preset, those changes automatically apply everywhere that preset is used. So, you can make a change in the preset editor, and that change is reflected across your website.
Now that we’ve seen the basics of what Hide and Show Pro does, let’s take a closer look at the presets.
Hide & Show Pro Presets
Presets determine the action of the Divi element. It determines who the action is for (who the element is shown to or hidden from), when the action takes place, where the action takes place, etc., all based on conditions that you choose. You can mix and match them to create some interesting and powerful combinations.
The presets give you a lot of control over who sees which content. You could create content that only logged-in visitors see, or only logged-out visitors see. This is great for creating banners for sales based on the date. You could also create content that shows based on the visitor’s location, site language, what they’ve purchased from your store, their user role, and lots more. To use Hide & Show within your Divi layouts, you’ll need to build presets.
New Preset
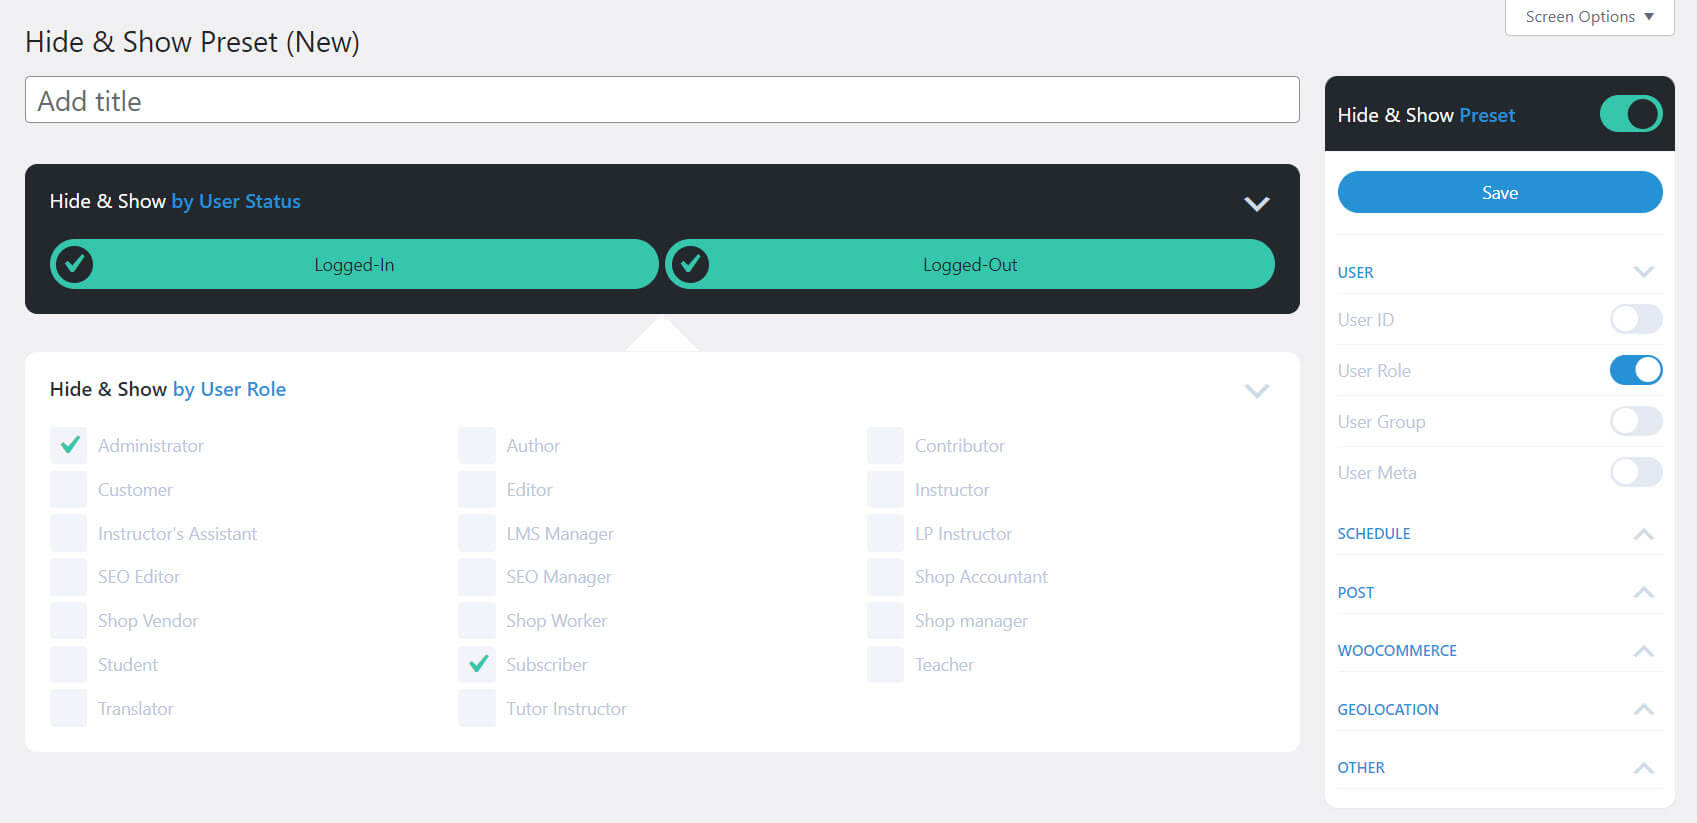
You can create your presets in the Options screen. To add a new preset, go to Dashboard > Hide & Show > New Preset. Give the preset a title and then make your choices in the panel on the right and adjust them in the main editor.
We’ll take a closer look at this panel and its settings in the next section. By default, the new preset includes the user status option with logged-in and logged-out preselected. You can disable one by clicking on its checkmark. You can also disable both by clicking on the toggle in the right sidebar. This is a common status, so it makes sense to include it by default.
All Presets
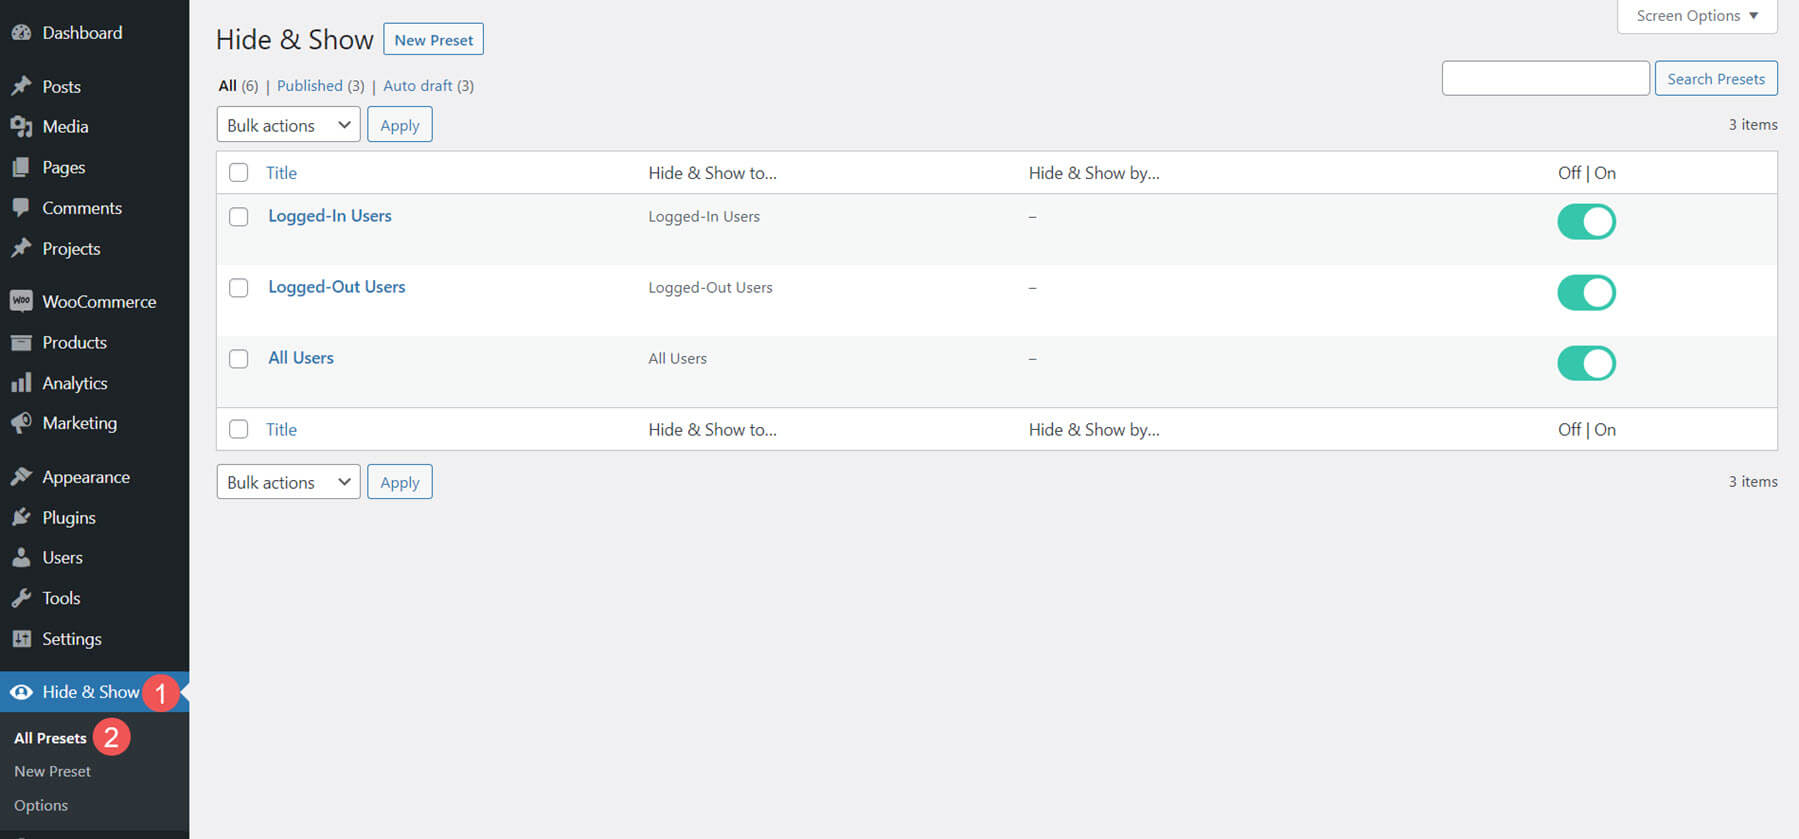
The All Presets screen shows a list of every preset you have available. You can edit them, delete them, and enable or disable them from this screen. It has three presets to get you started.
Hide & Show Pro Preset Options
The options panel includes 6 sections with options for each section. The sections include User, Schedule, Post, WooCommerce, Geolocation, and Other.
All include logic conditions, and you can define the logic, add multiple conditions, and enable any options you want for each one. Geolocation is the newest option. We’ll look at that one first and in greater detail.
You can choose options from one section, each section, or mix and match as many as you want. You can make your presets as simple or complex as you want. Use one, a few, or all of them. The possibilities are astounding.
Hide & Show Geolocation
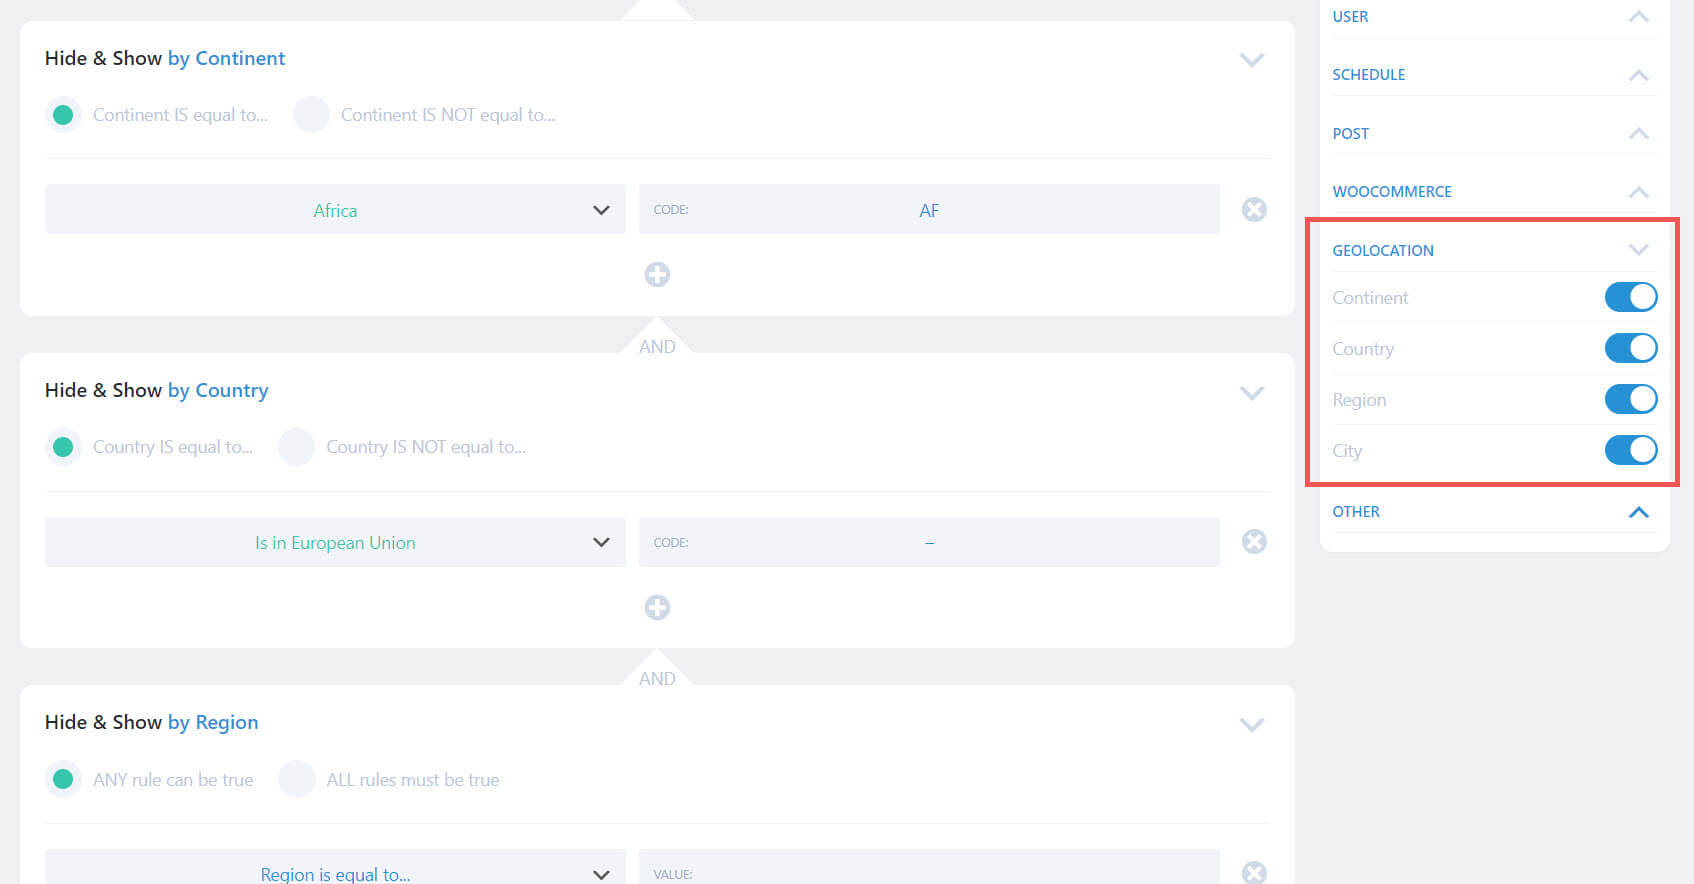
Hide & Show Pro 3.0 added Geolocation. This requires a free or paid service, and you have several to choose from. It adds a geolocation option to the presets with four selections. Select Continent, Country, Region, and City. Enable one, all, or any combination you want. When you enable multiple options, they’re added as an AND statement, but you can click on the statement to change it to an OR statement.
This gives you a lot of control over the rules and allows you to include or exclude visitors from certain parts of the world. This is especially helpful if you ship to certain continents, have classes for local students, have multiple locations and want to present different content for each location, and lots more.
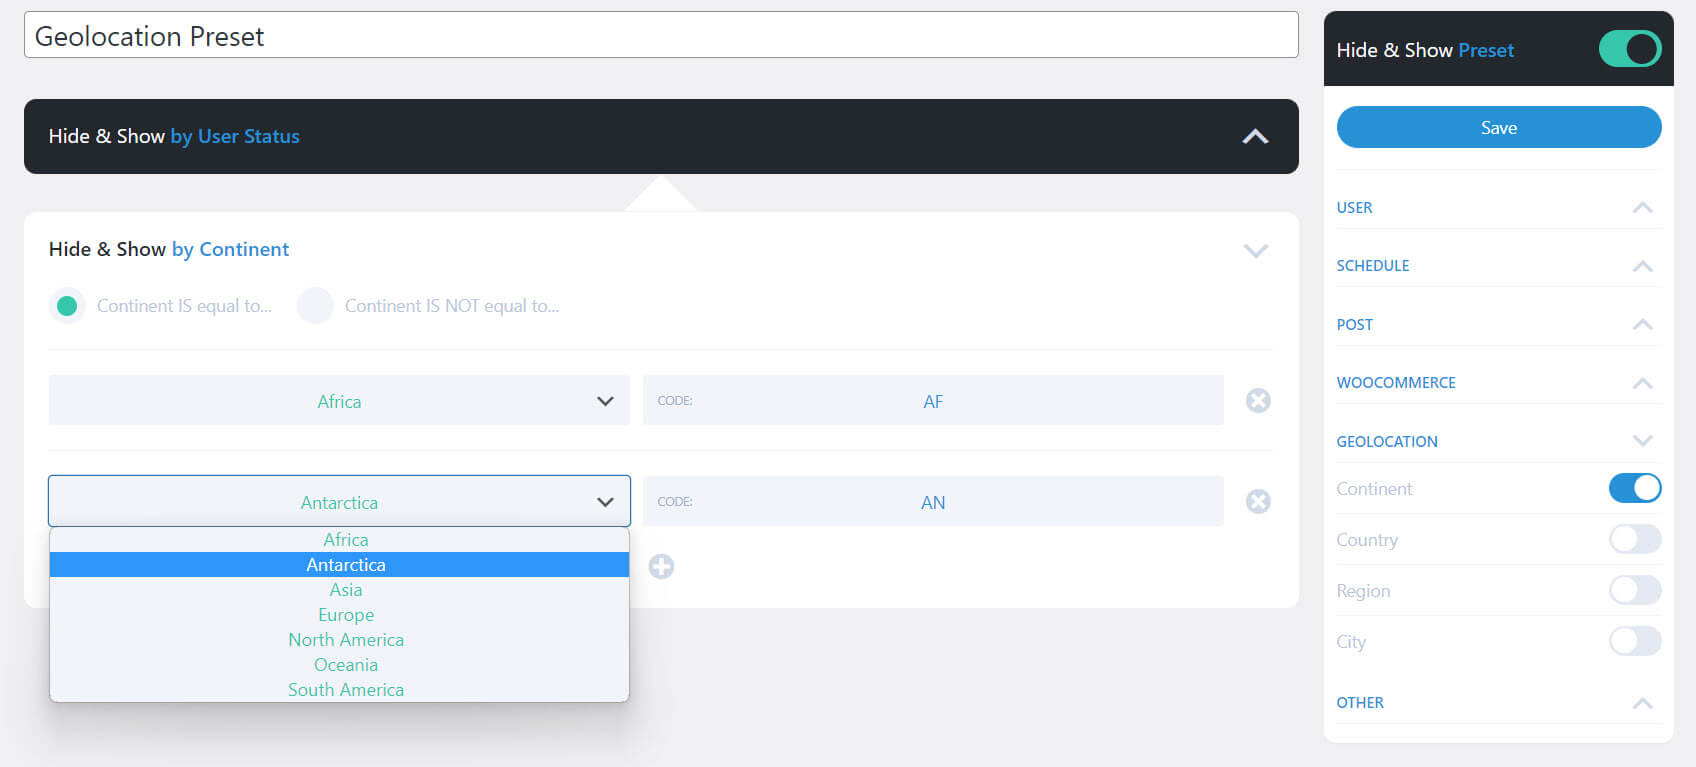
Hide & Show Geolocation by Continent
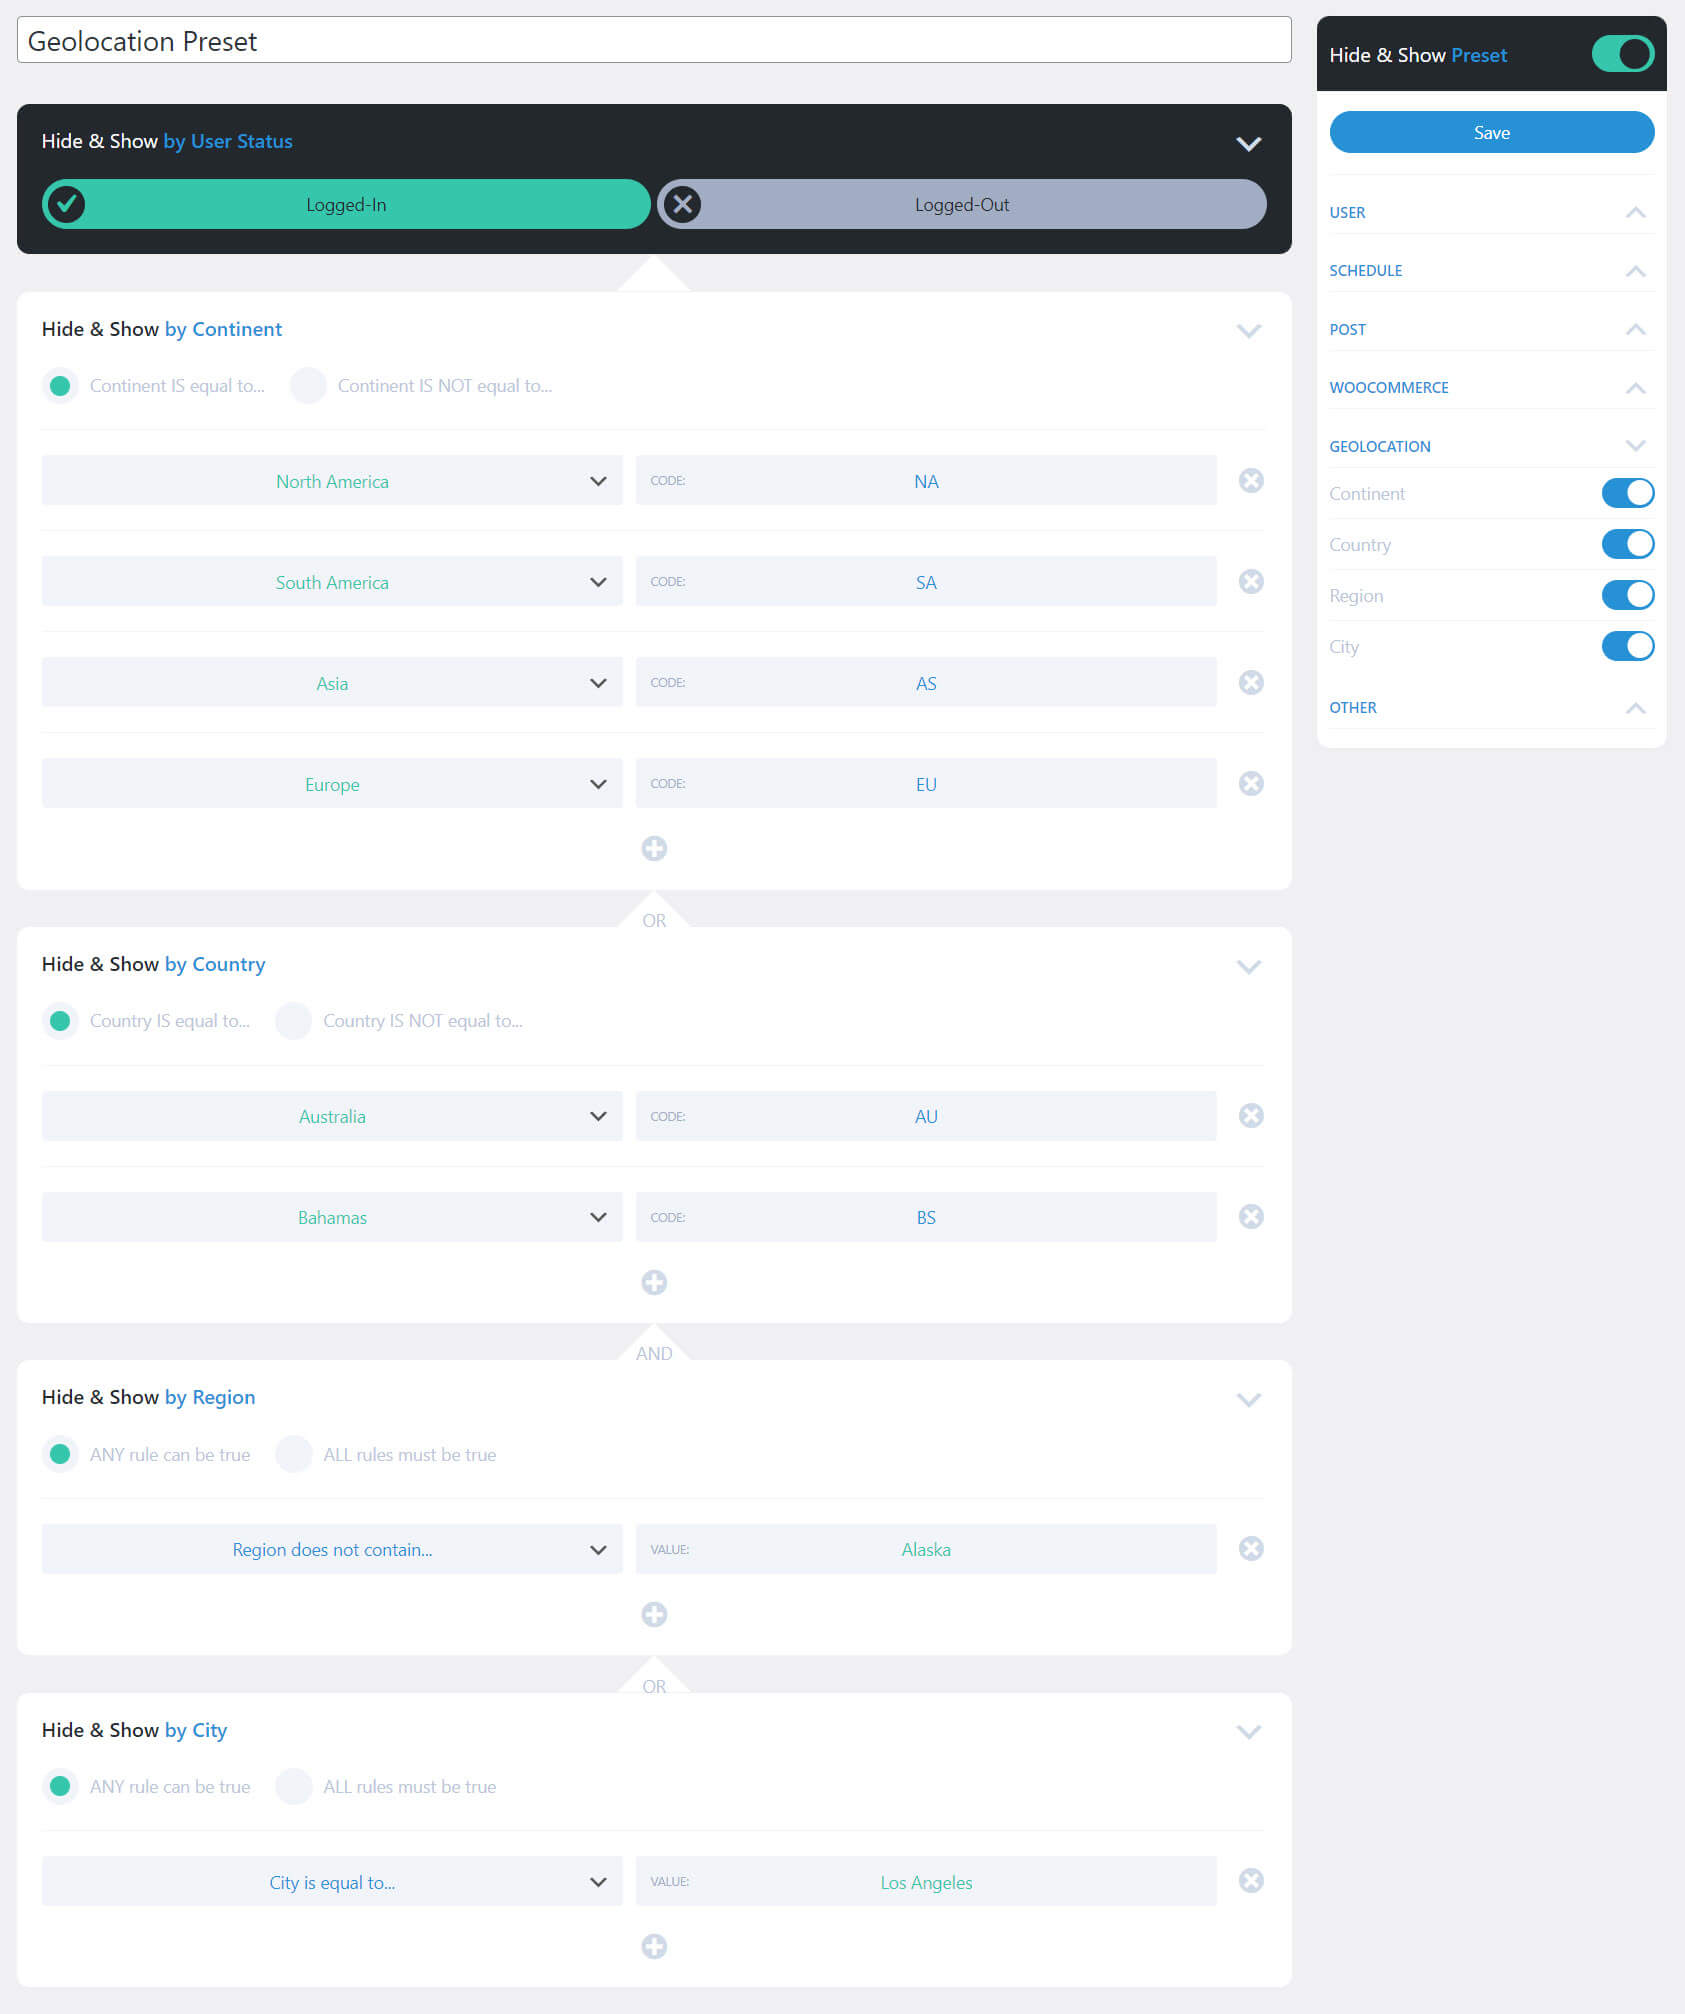
Selecting Continent adds the option to select the continent is or is not equal to, a dropdown box for the continent to choose, and a label that shows the continent’s code. Add more continents by clicking the plus icon under the fields. Remove one by clicking the x icon to the right of the field you want to remove.
I’ve added two continents in the example below. The dropdown box shows the 7 continents you can choose from.
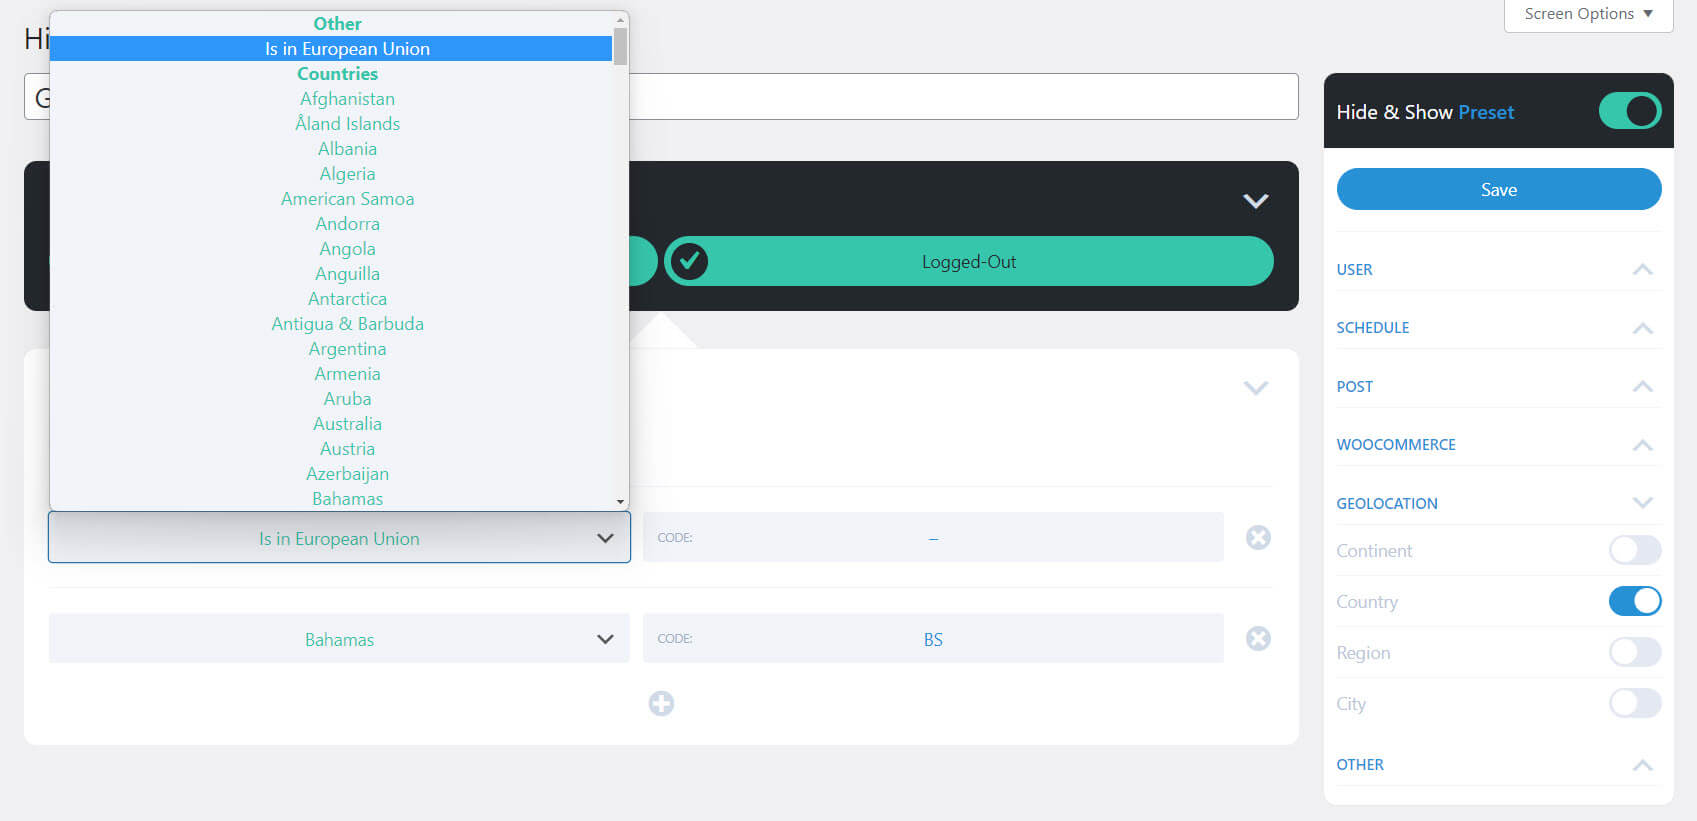
Hide & Show Geolocation by Country
Selecting Country adds the option to select the country is or is not equal to, a dropdown box for the country to choose, and a label that shows the continent’s code. Add more countries by clicking the plus icon under the fields. Remove one by clicking the x icon to the right of the field you want to remove.
In the example below, I’ve selected Is in European Union in the section called Other, and selected Bahamas under Countries.
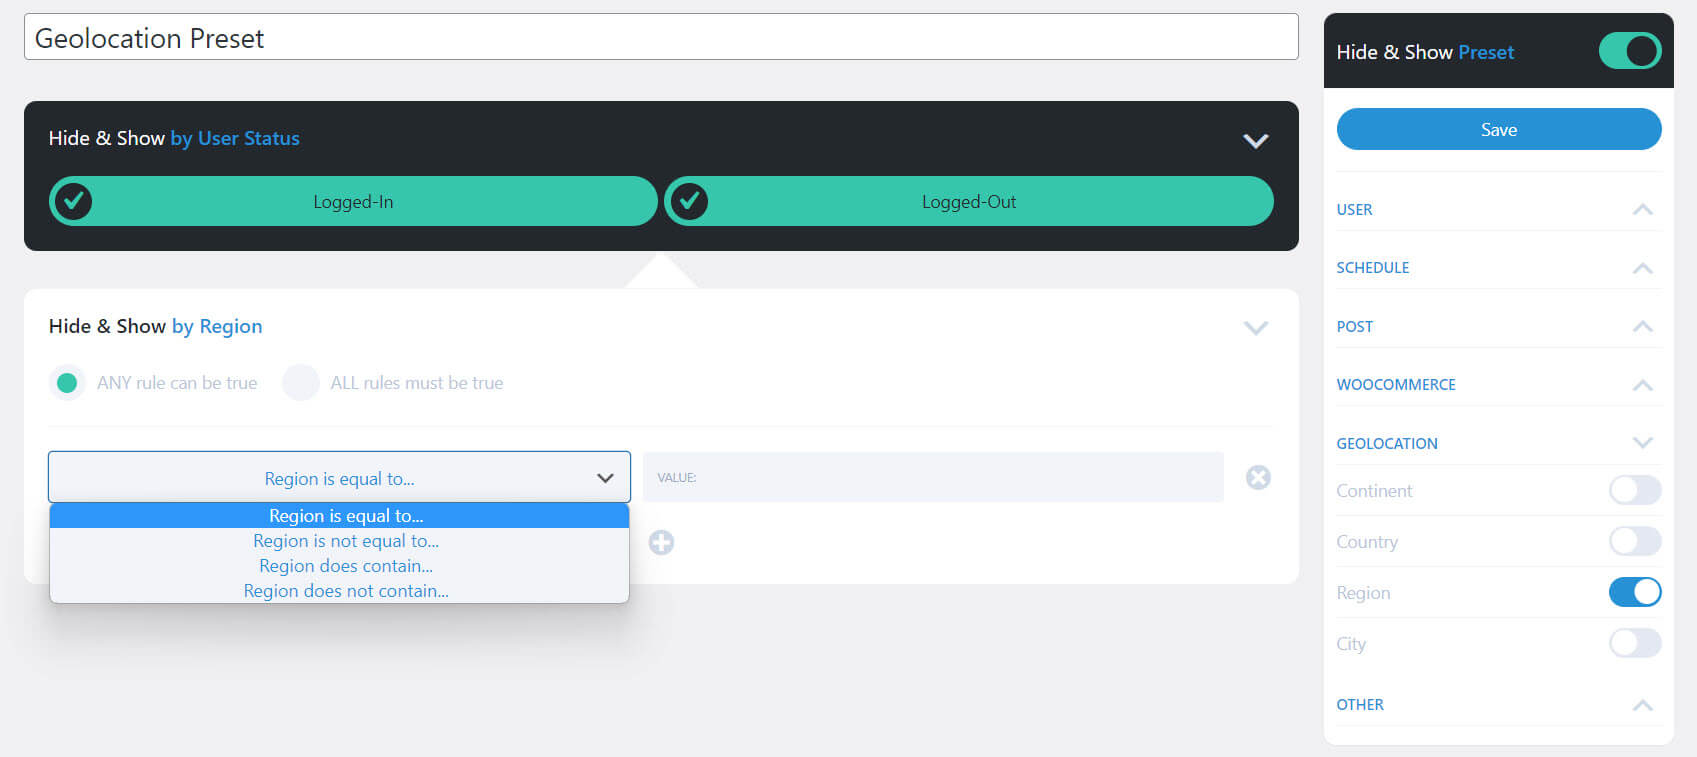
Hide & Show Geolocation by Region
Selecting Region lets you create rules. It adds the option to select that ANY rule can be true, or ALL rules must be true. It adds a dropdown box for the rule to choose from. Select that the region is equal to, is not equal to, does contain, or does not contain. The second field lets you enter the value that your selection will compare. Add more regions by clicking the plus icon under the fields. Remove one by clicking the x icon to the right of the field you want to remove.
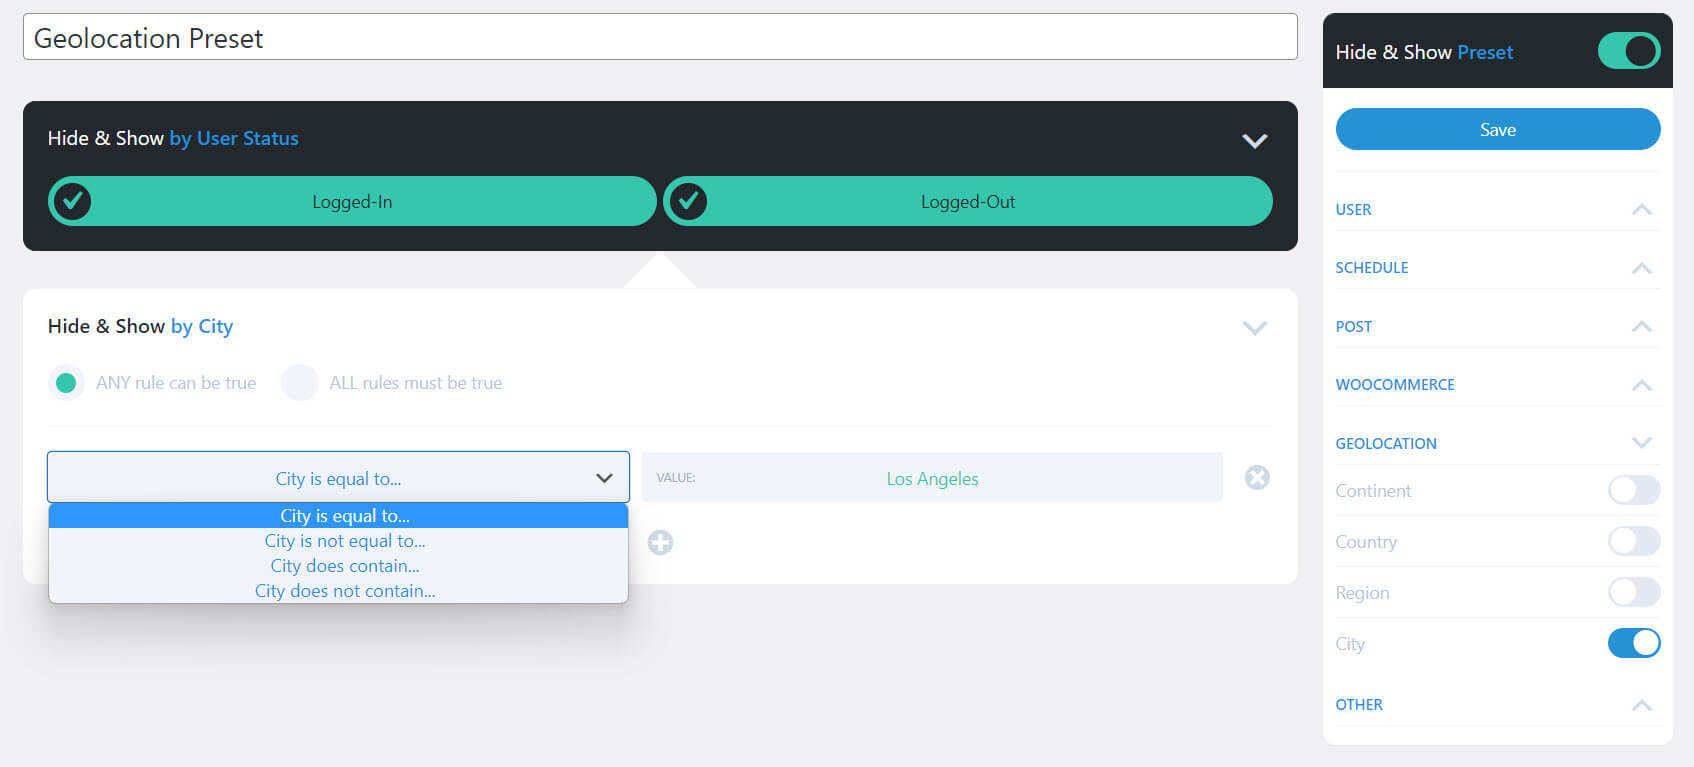
Hide & Show Geolocation by City
Selecting City also includes rules. Select that ANY rule can be true, or ALL rules must be true. Choose the rule in the dropdown box. Select that the city is equal to, is not equal to, does contain, or does not contain. The second field lets you enter the value that your selection will compare. Add more cities by clicking the plus icon under the fields. Remove one by clicking the x icon to the right of the field you want to remove.
Hide & Show Geolocation Example
This example shows all four options. I’ve selected:
Continent is Equal To:
- North America
- South America
- Asia
- Europe
OR Country is equal to:
- Australia
- Bahamas
AND the Region does not contain:
- Alaska
OR the city is equal to Los Angeles.
Hide & Show User
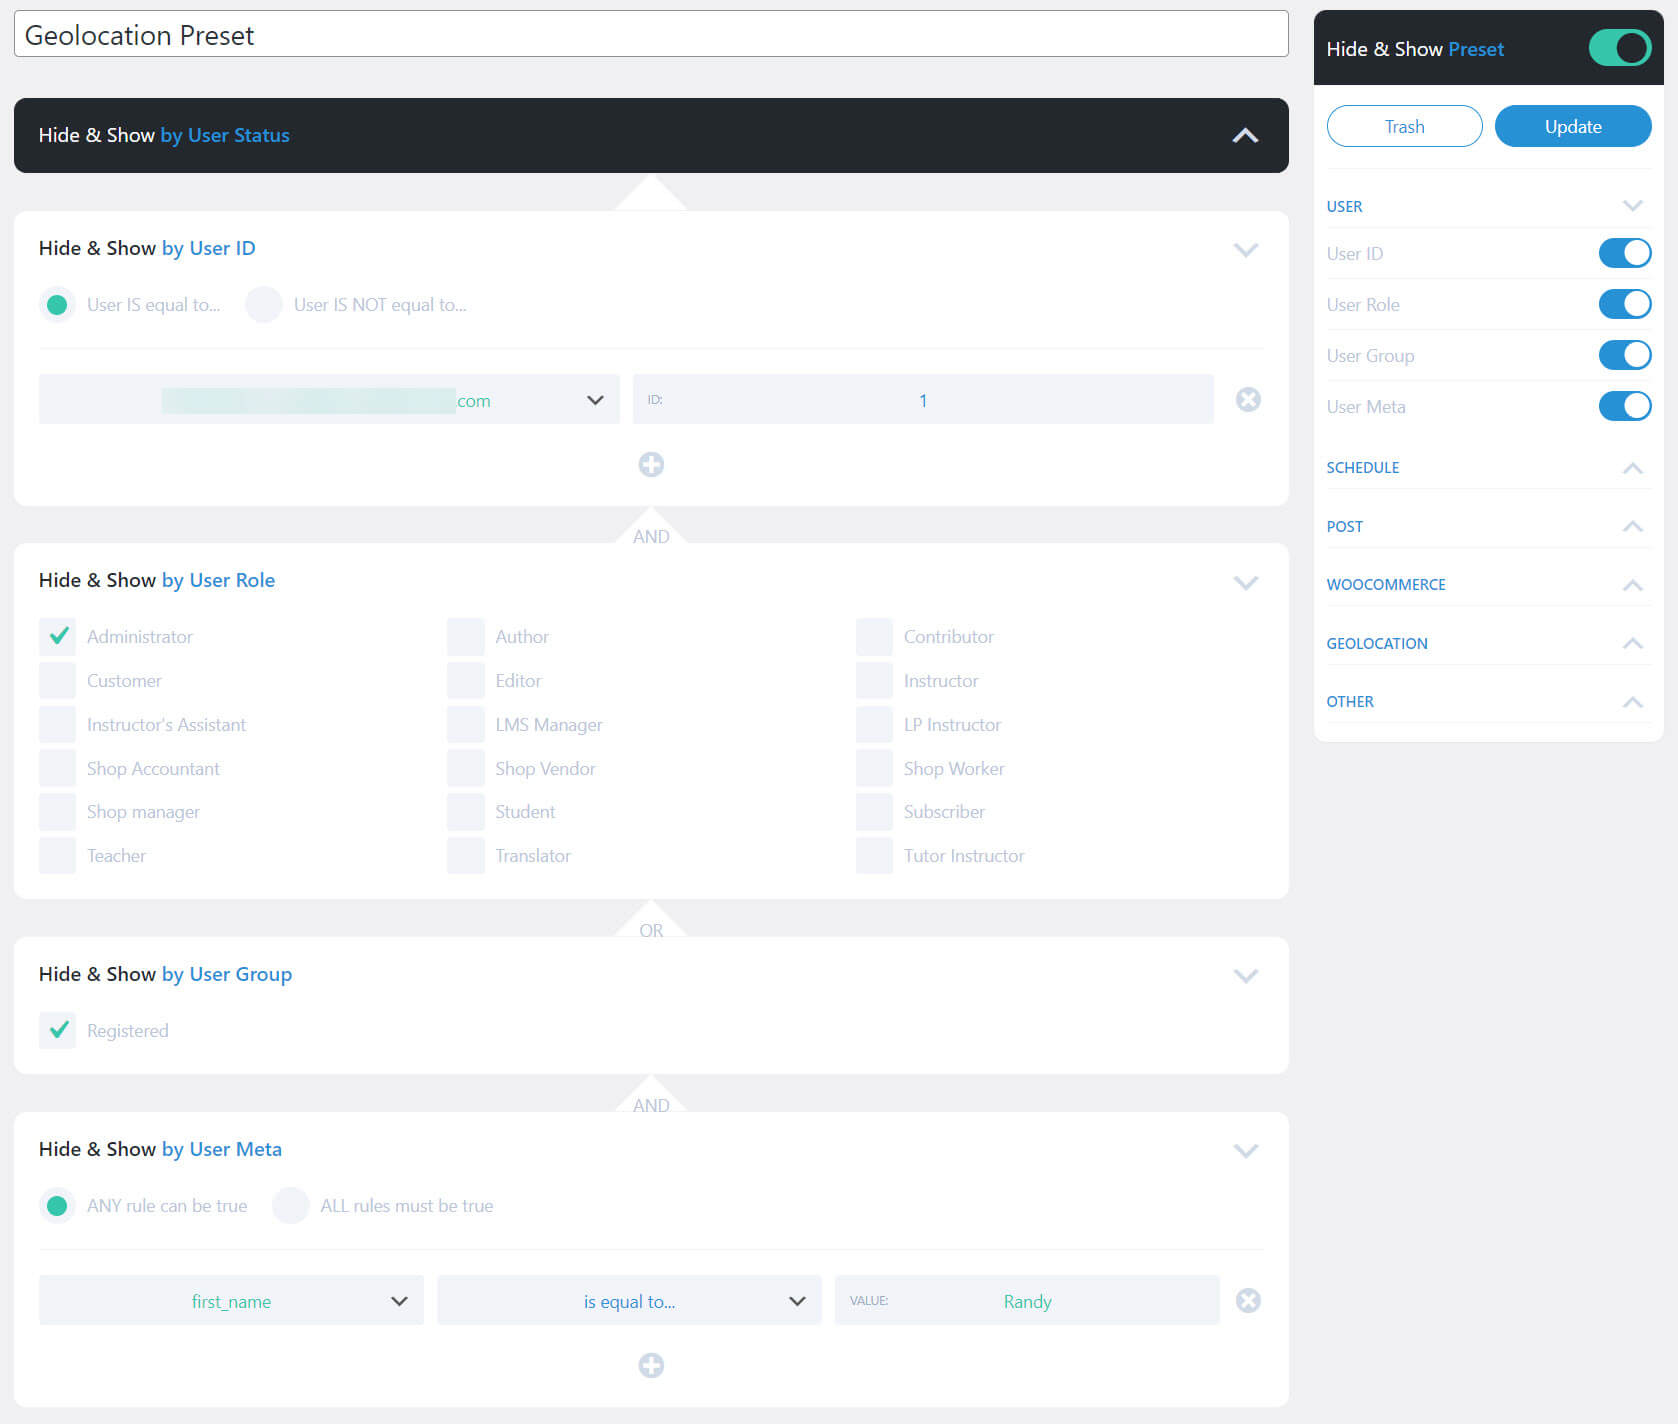
Set the logic for the user ID based on what the user ID is or is not equal to. Hide or show the content based on user roles. You can also hide or show the content based on the user group. This one requires a free plugin. You can also hide or show the content based on the user metadata. All these can be used together with AND/OR logic. This is excellent for showing specific content to specific users.
Hide & Show Schedule
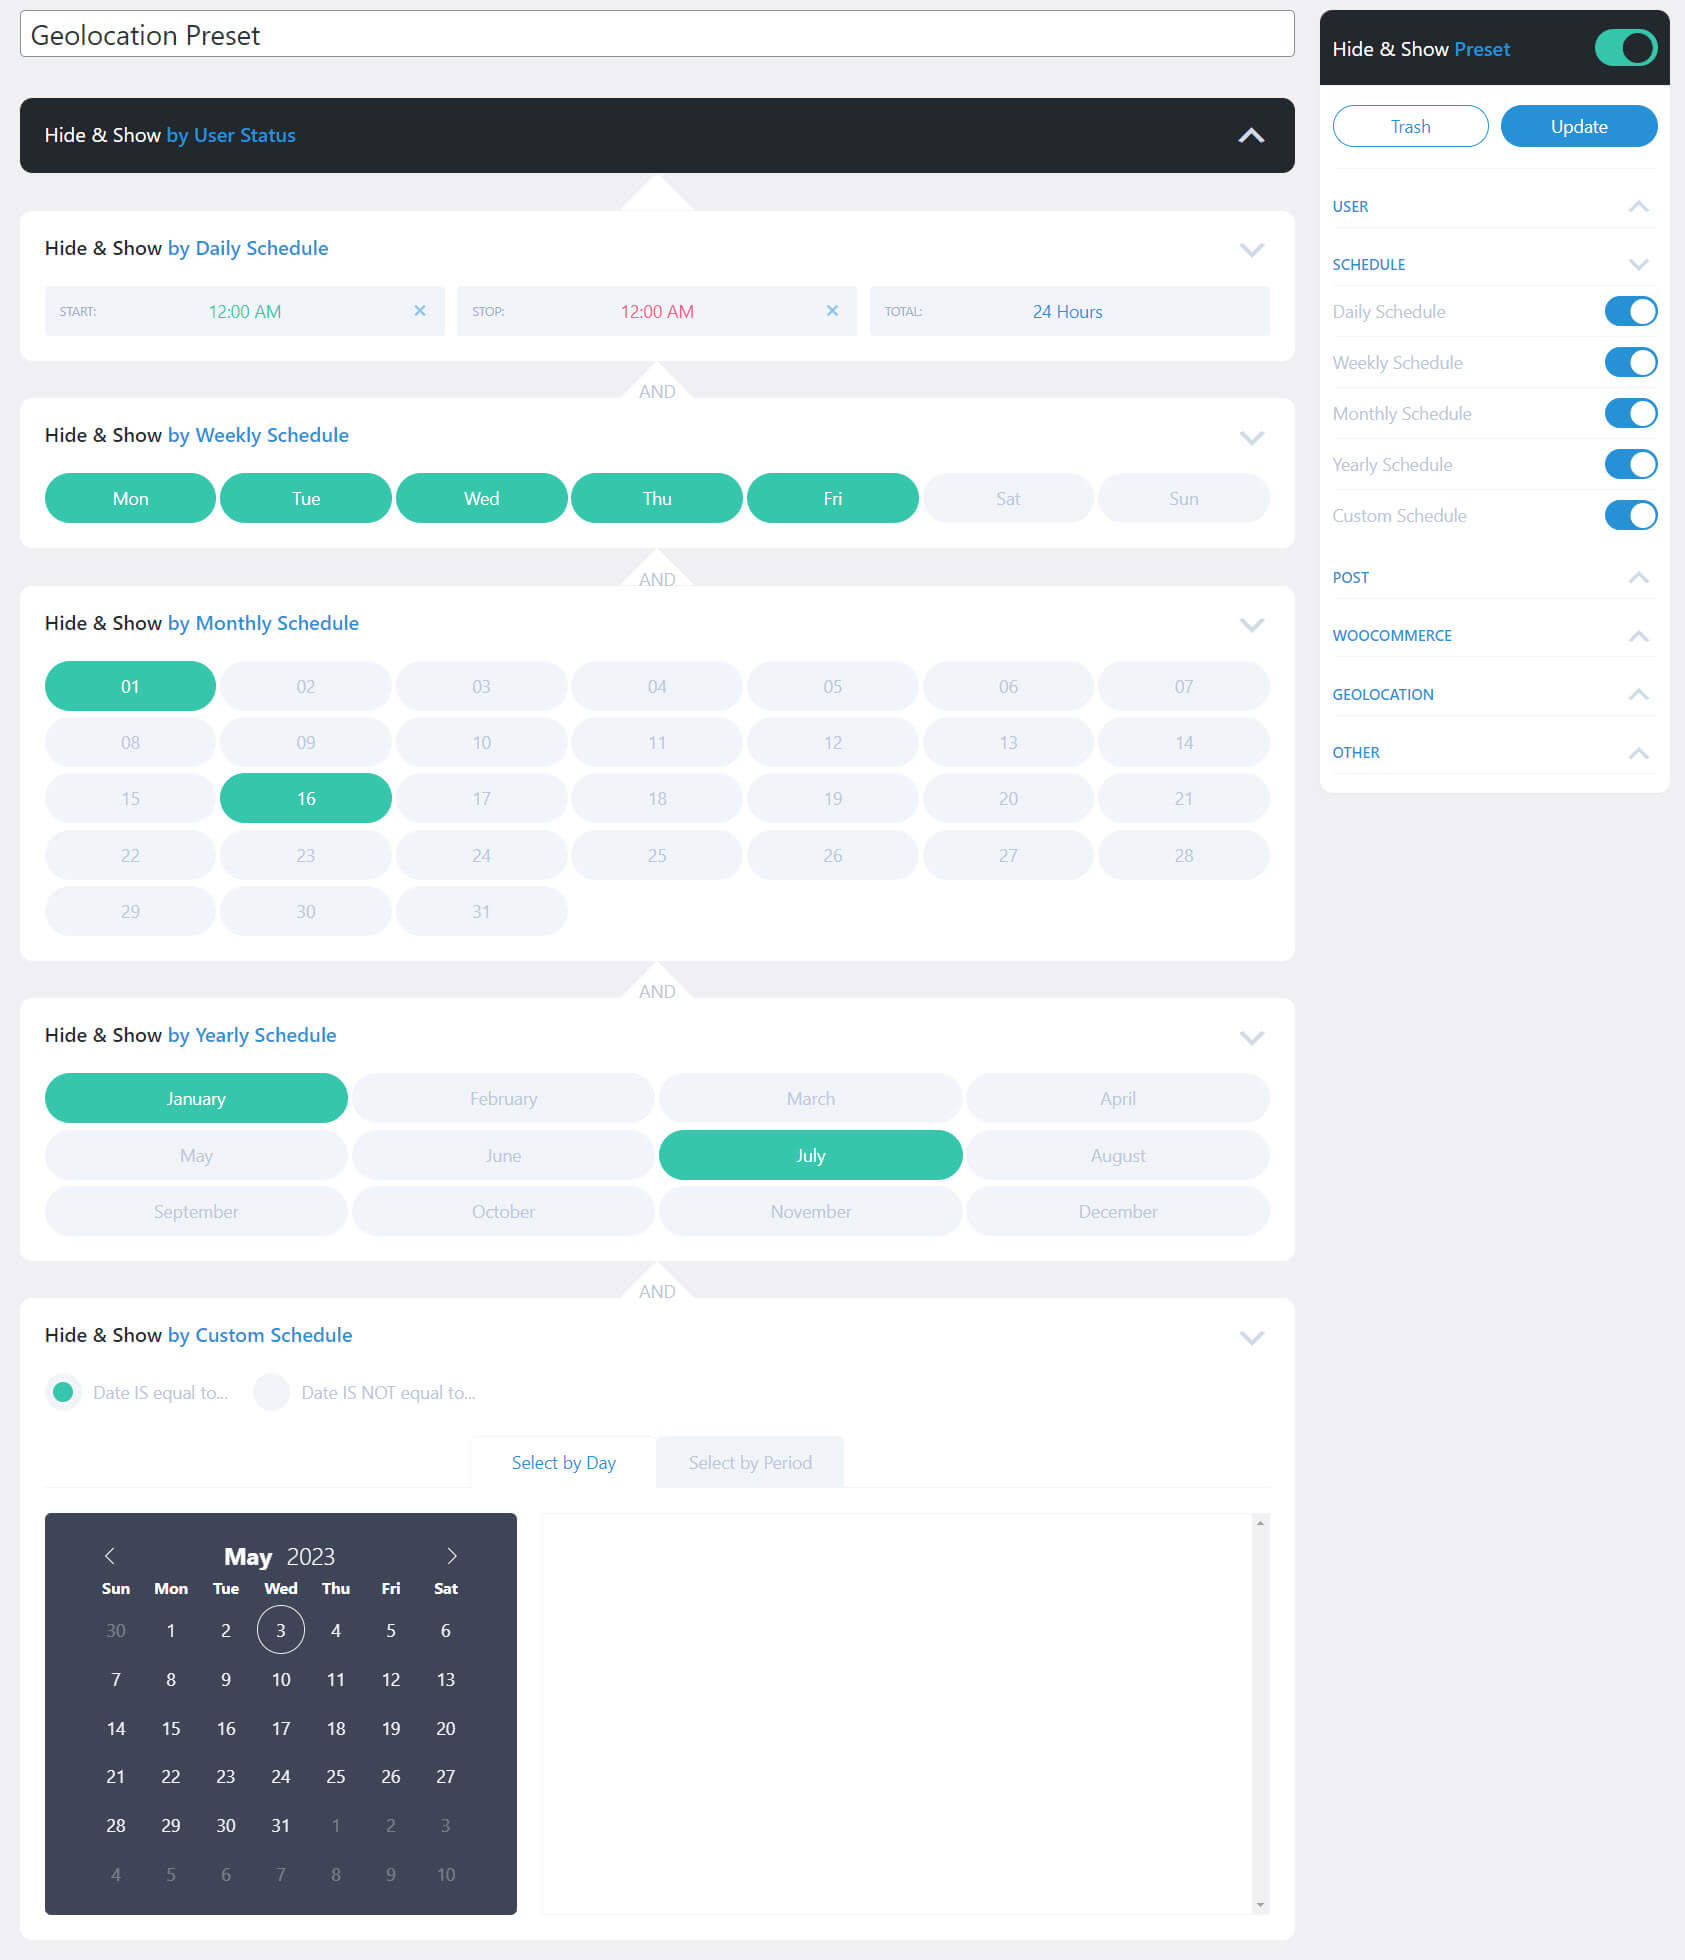
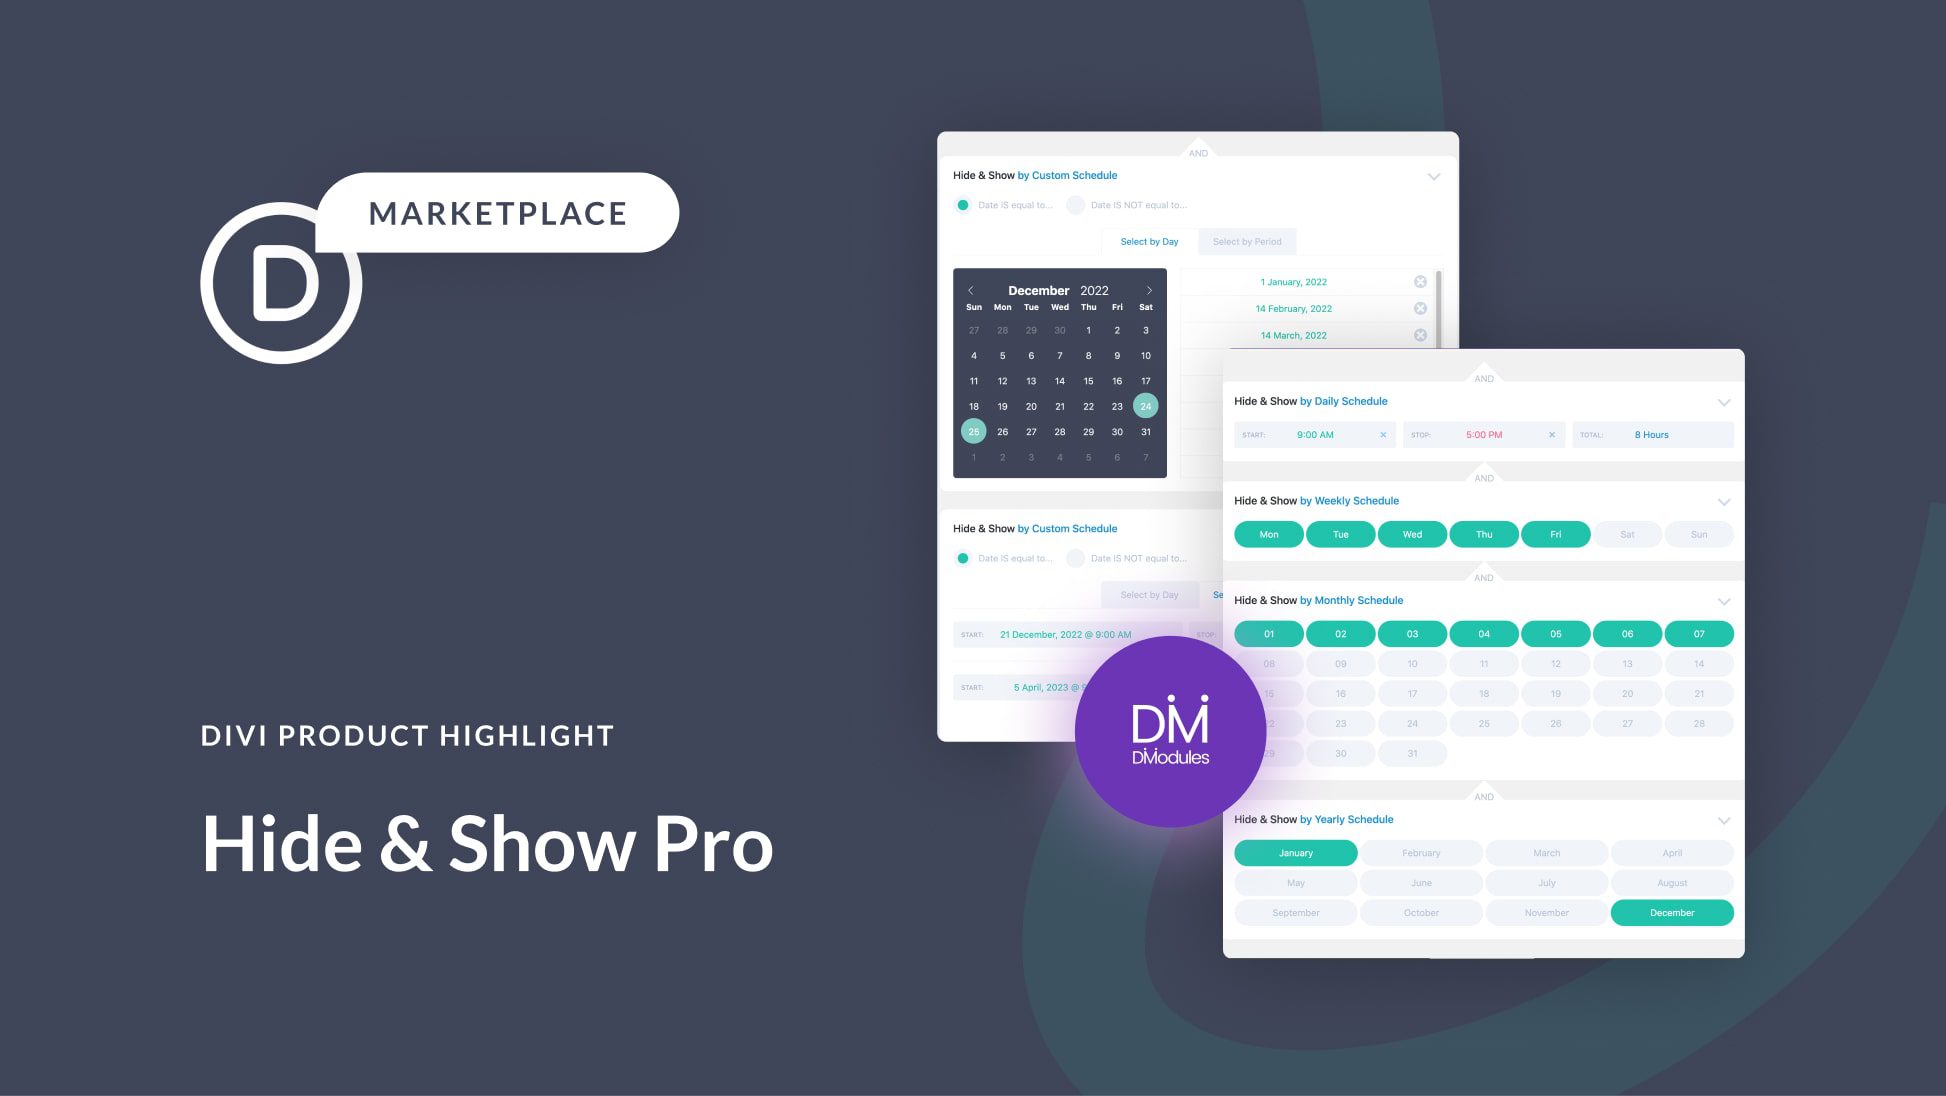
Set a daily, weekly, monthly, yearly, or custom schedule. They can work together with AND/OR logic. Select or deselect any time, day, month, etc., just by clicking. The custom schedule includes the option to choose a single day or a range of days. This is a great way to automatically show posts based on a schedule.
Hide & Show Post
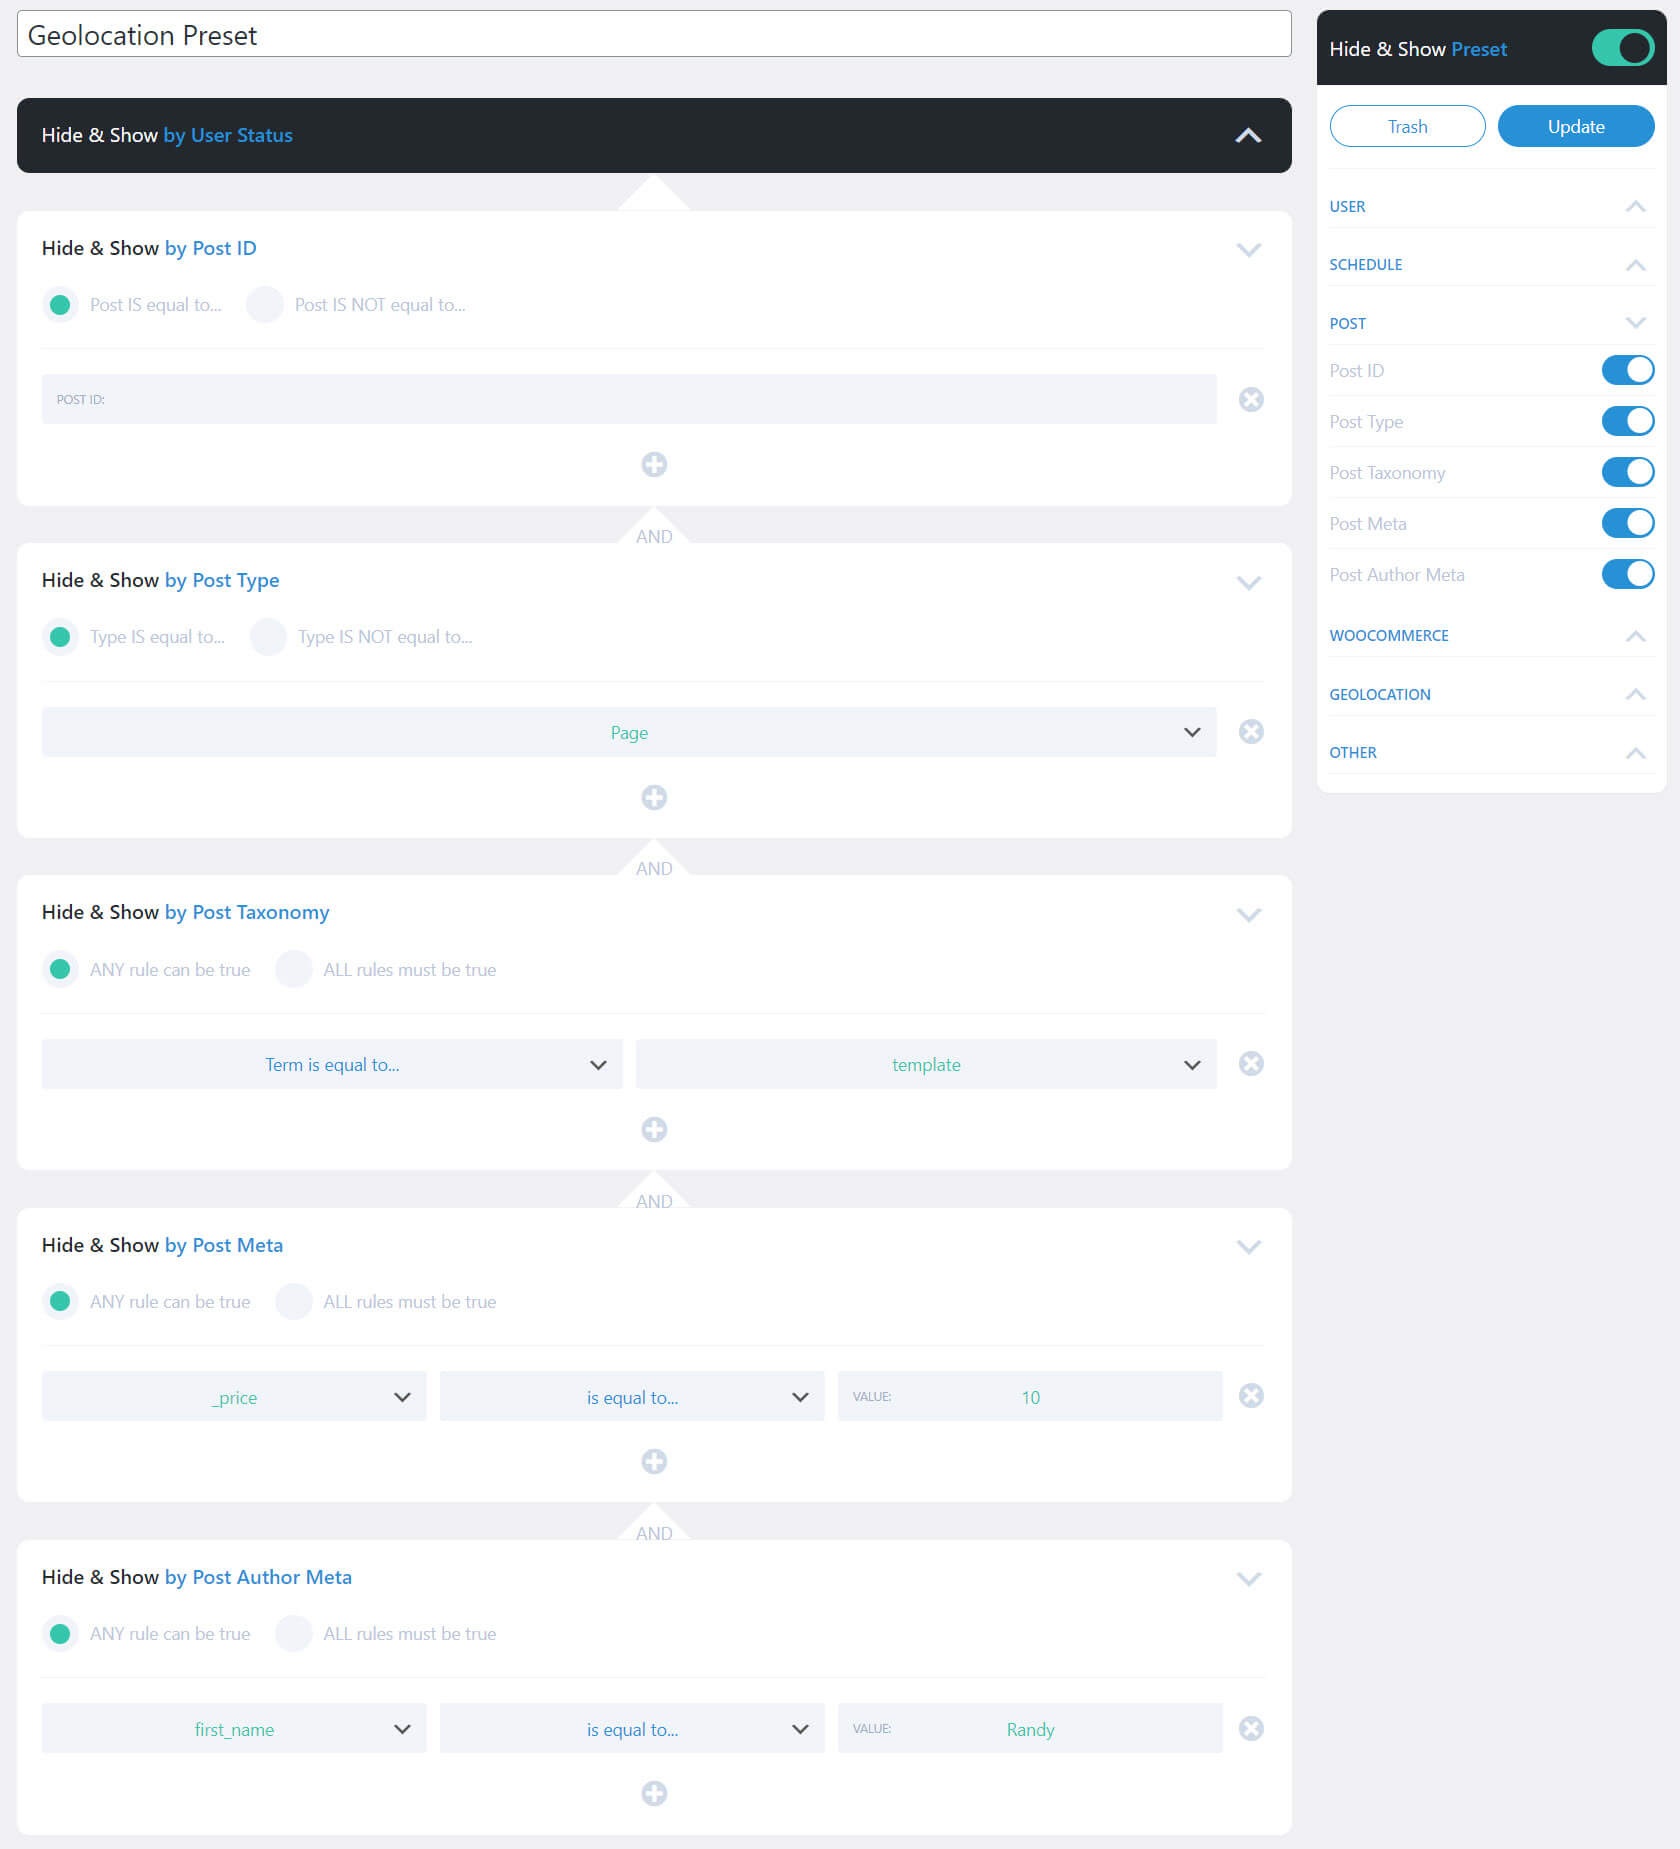
For posts, you can select post ID, type, taxonomy, meta, or author meta. This lets you manually control individual access to posts. Add as many as you want. Specify if the is or is not equal to a certain ID. Choose if the page is or is not equal to a specific page or pages. The rest of the settings let you specify if any rule is true and lets you choose the rules. This is excellent if you want to show specific posts to certain visitors.
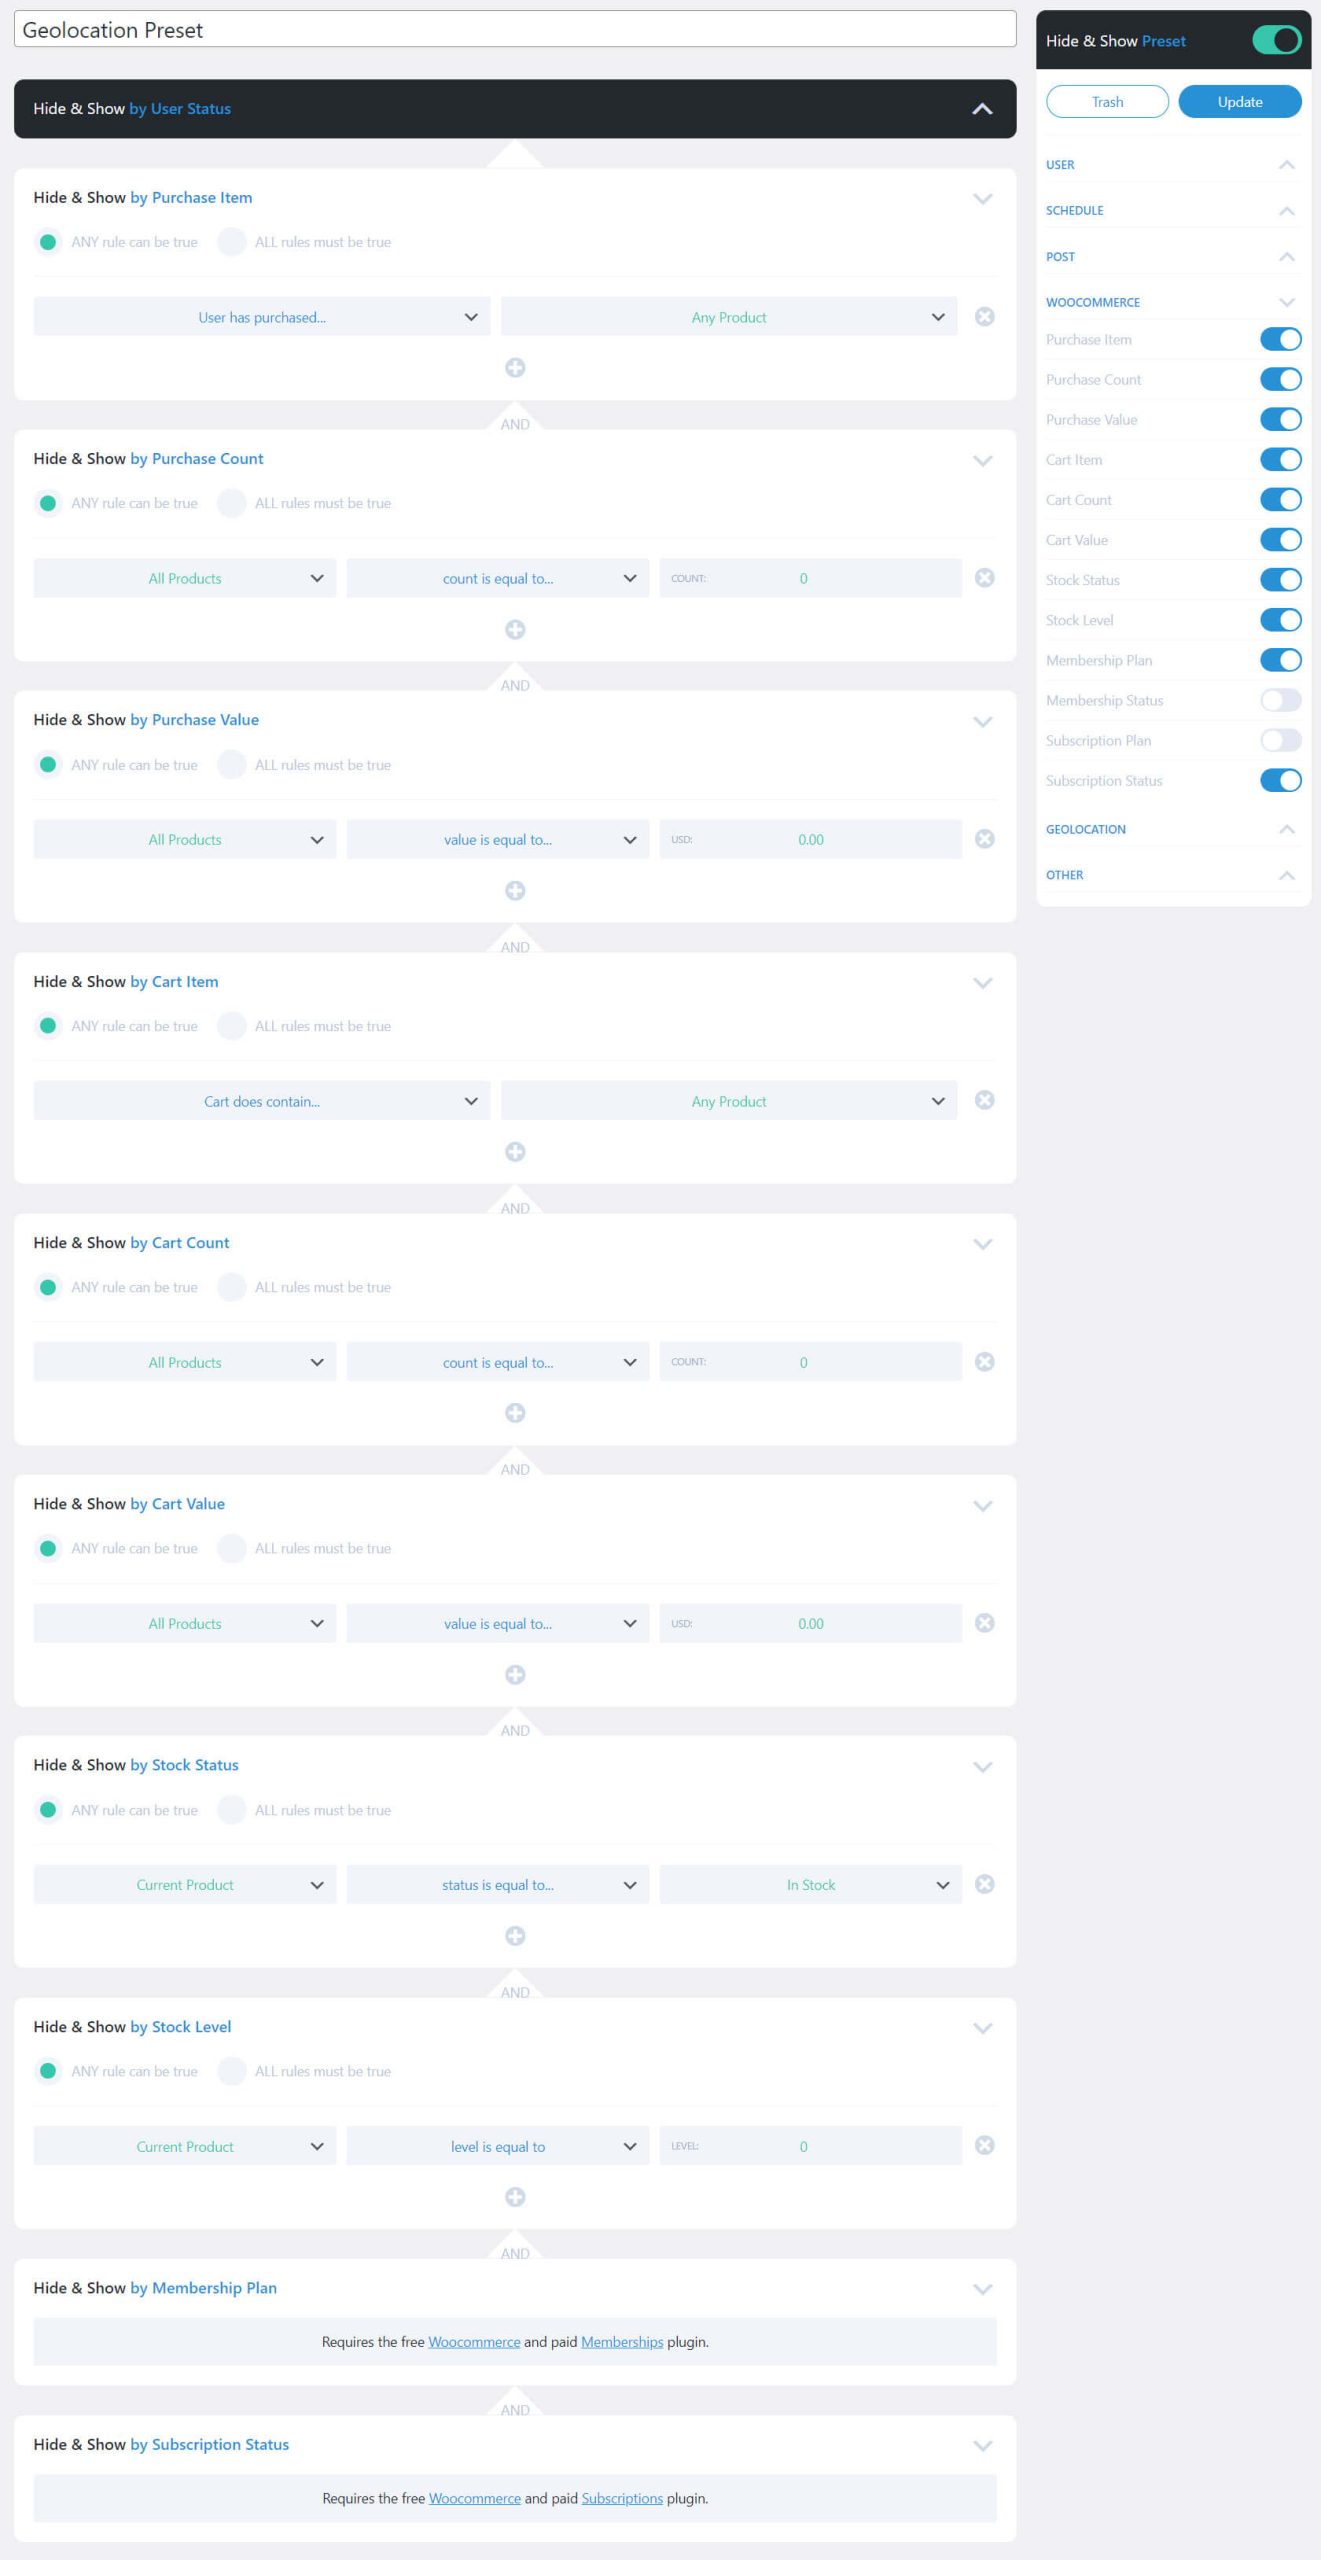
Hide & Show WooCommerce
WooCommerce gives you the most settings to choose from. They include the purchased item, count, and value, the cart item, count, and value, the stock status and level, the membership plan and status, and the subscription plan and status. The membership and subscription options require premium plugins from WooCommerce. The settings let you choose if any rule is true and allow you to choose the products or status.
This is a great way to show the stock status, create a sale based on inventory, create a sale based on purchases, show a monthly or annual sale, and lots more.
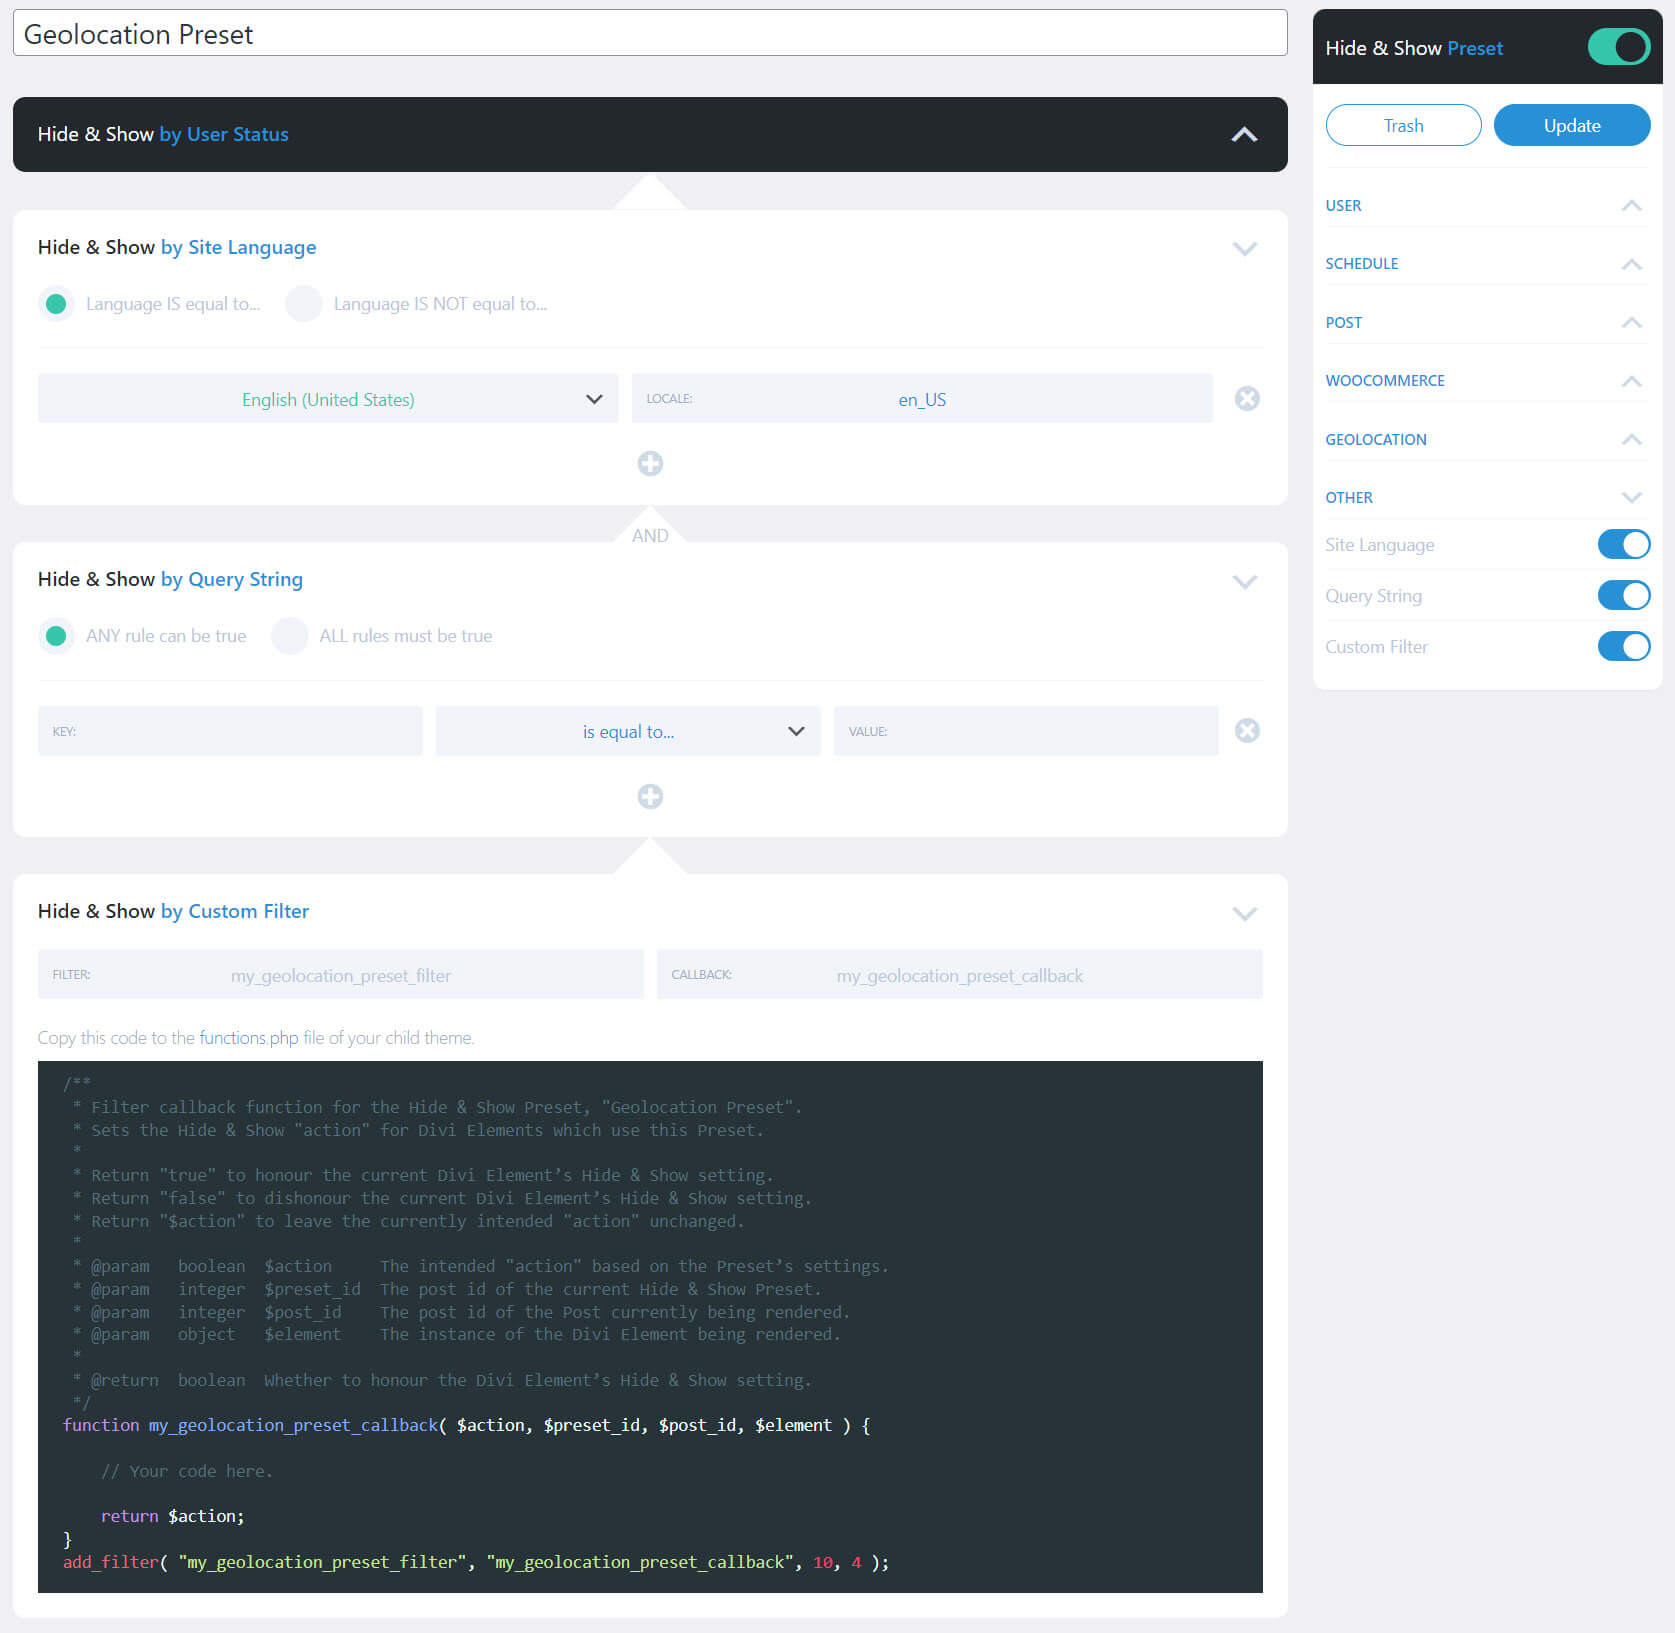
Hide & Show Pro Other
Other settings include the site language, query string, and custom filter. For the site language, choose if the language is or is not equal to the selections you make. For the query string, you build the query by adding the key, choosing the logic from a large list of options, and specifying the value. The custom filter lets you build a filter using code that you’ll add to your theme’s PHP file.
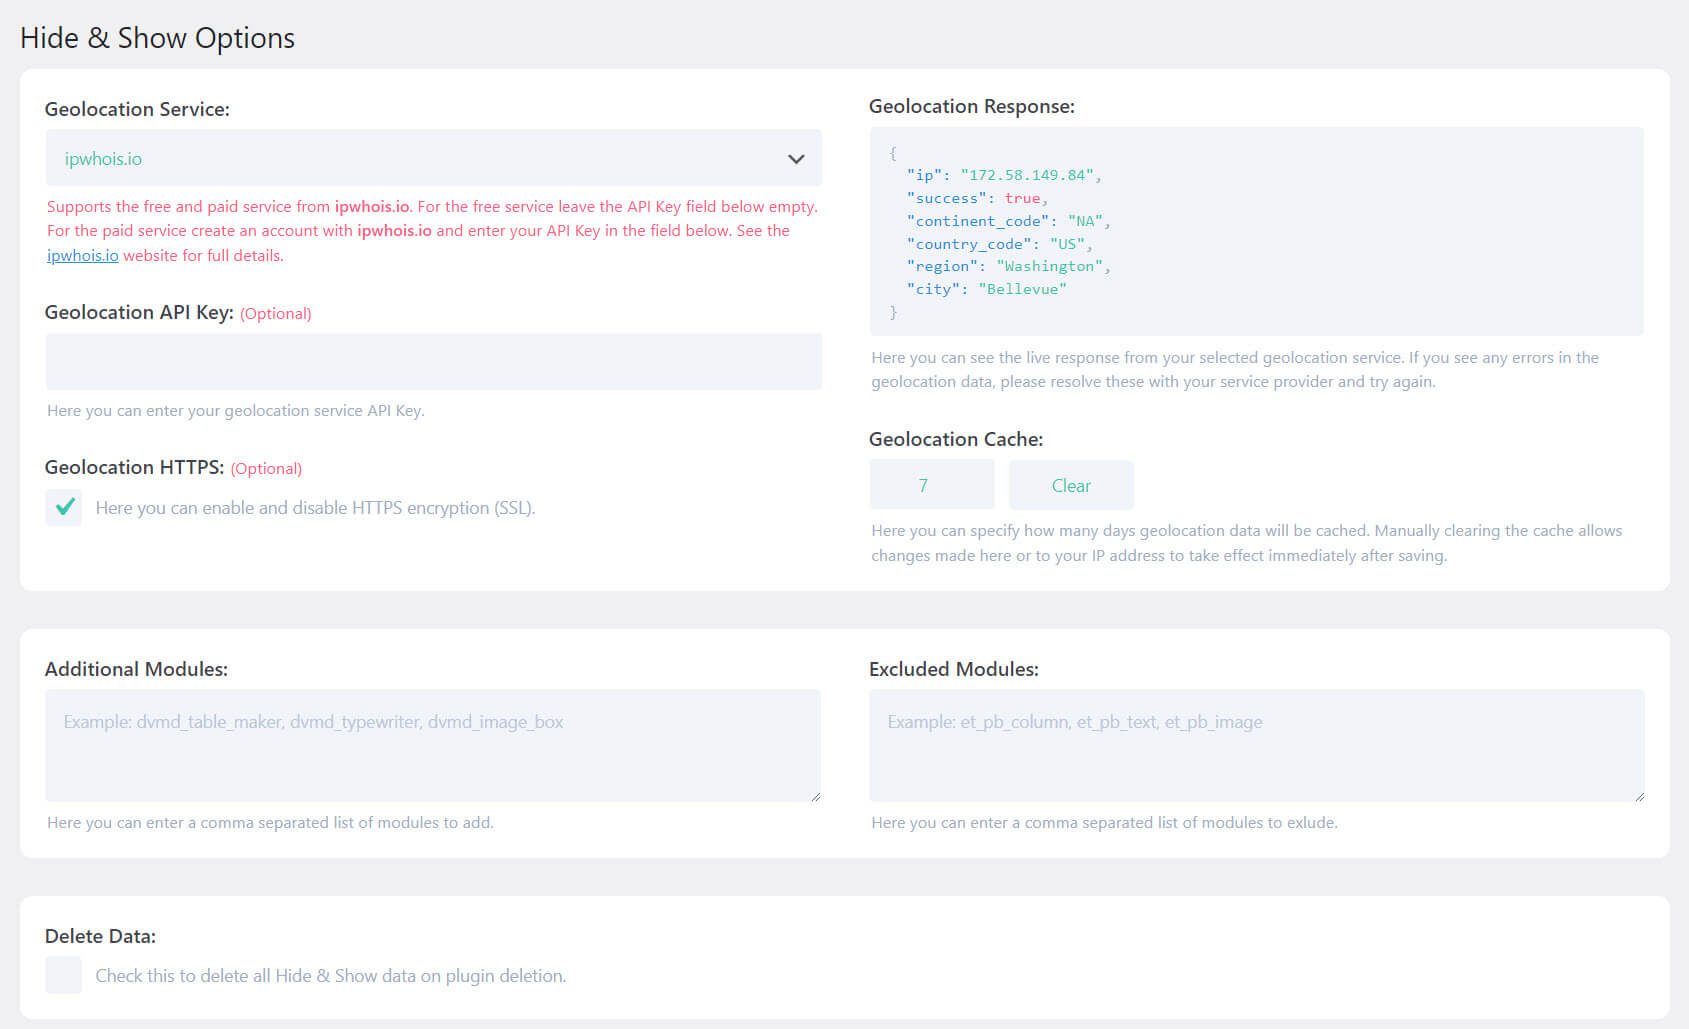
Hide & Show Pro Options
The Hide & Show options let you choose from 7 different geolocation providers. The free service from ipwhois.io is selected by default. Use the free service or enter the key for the premium service. You can customize the geolocation response using the code provided. You can also choose HTTPS encryption, set the number of days to keep the cache and clear the cache. Other settings let you add additional modules, exclude modules, and delete data.

Hide & Show Pro Divi Module Settings
A new option is added to the Advanced tab of Divi Sections, Rows, Columns, and Modules. The option allows you to disable, hide, or show Hide & Show mode. If you choose Hide or Show, you’ll see a dropdown box where you can choose the preset you want to use. Hide & Show mode is off by default. Enabling Hide & Show mode gives you a lot of design control over all the Divi Builder elements.
In the example below, I’ve selected a blurb from the free Coaching Layout Pack for Divi. This section of the layout shows services. The website owner might choose to offer most of these services online but decided to only have workshops onsite. In this case, they could restrict the blurb about workshops to only show to visitors in a certain geolocation.
I’ve opened the Blurb Module, selected the Advanced tab, and opened the Hide & Show settings. I selected Show and chose my Geolocation Preset for that module. Now, this module will only display to visitors that match the geolocation I chose in my preset.

Hide & Show Pro Example
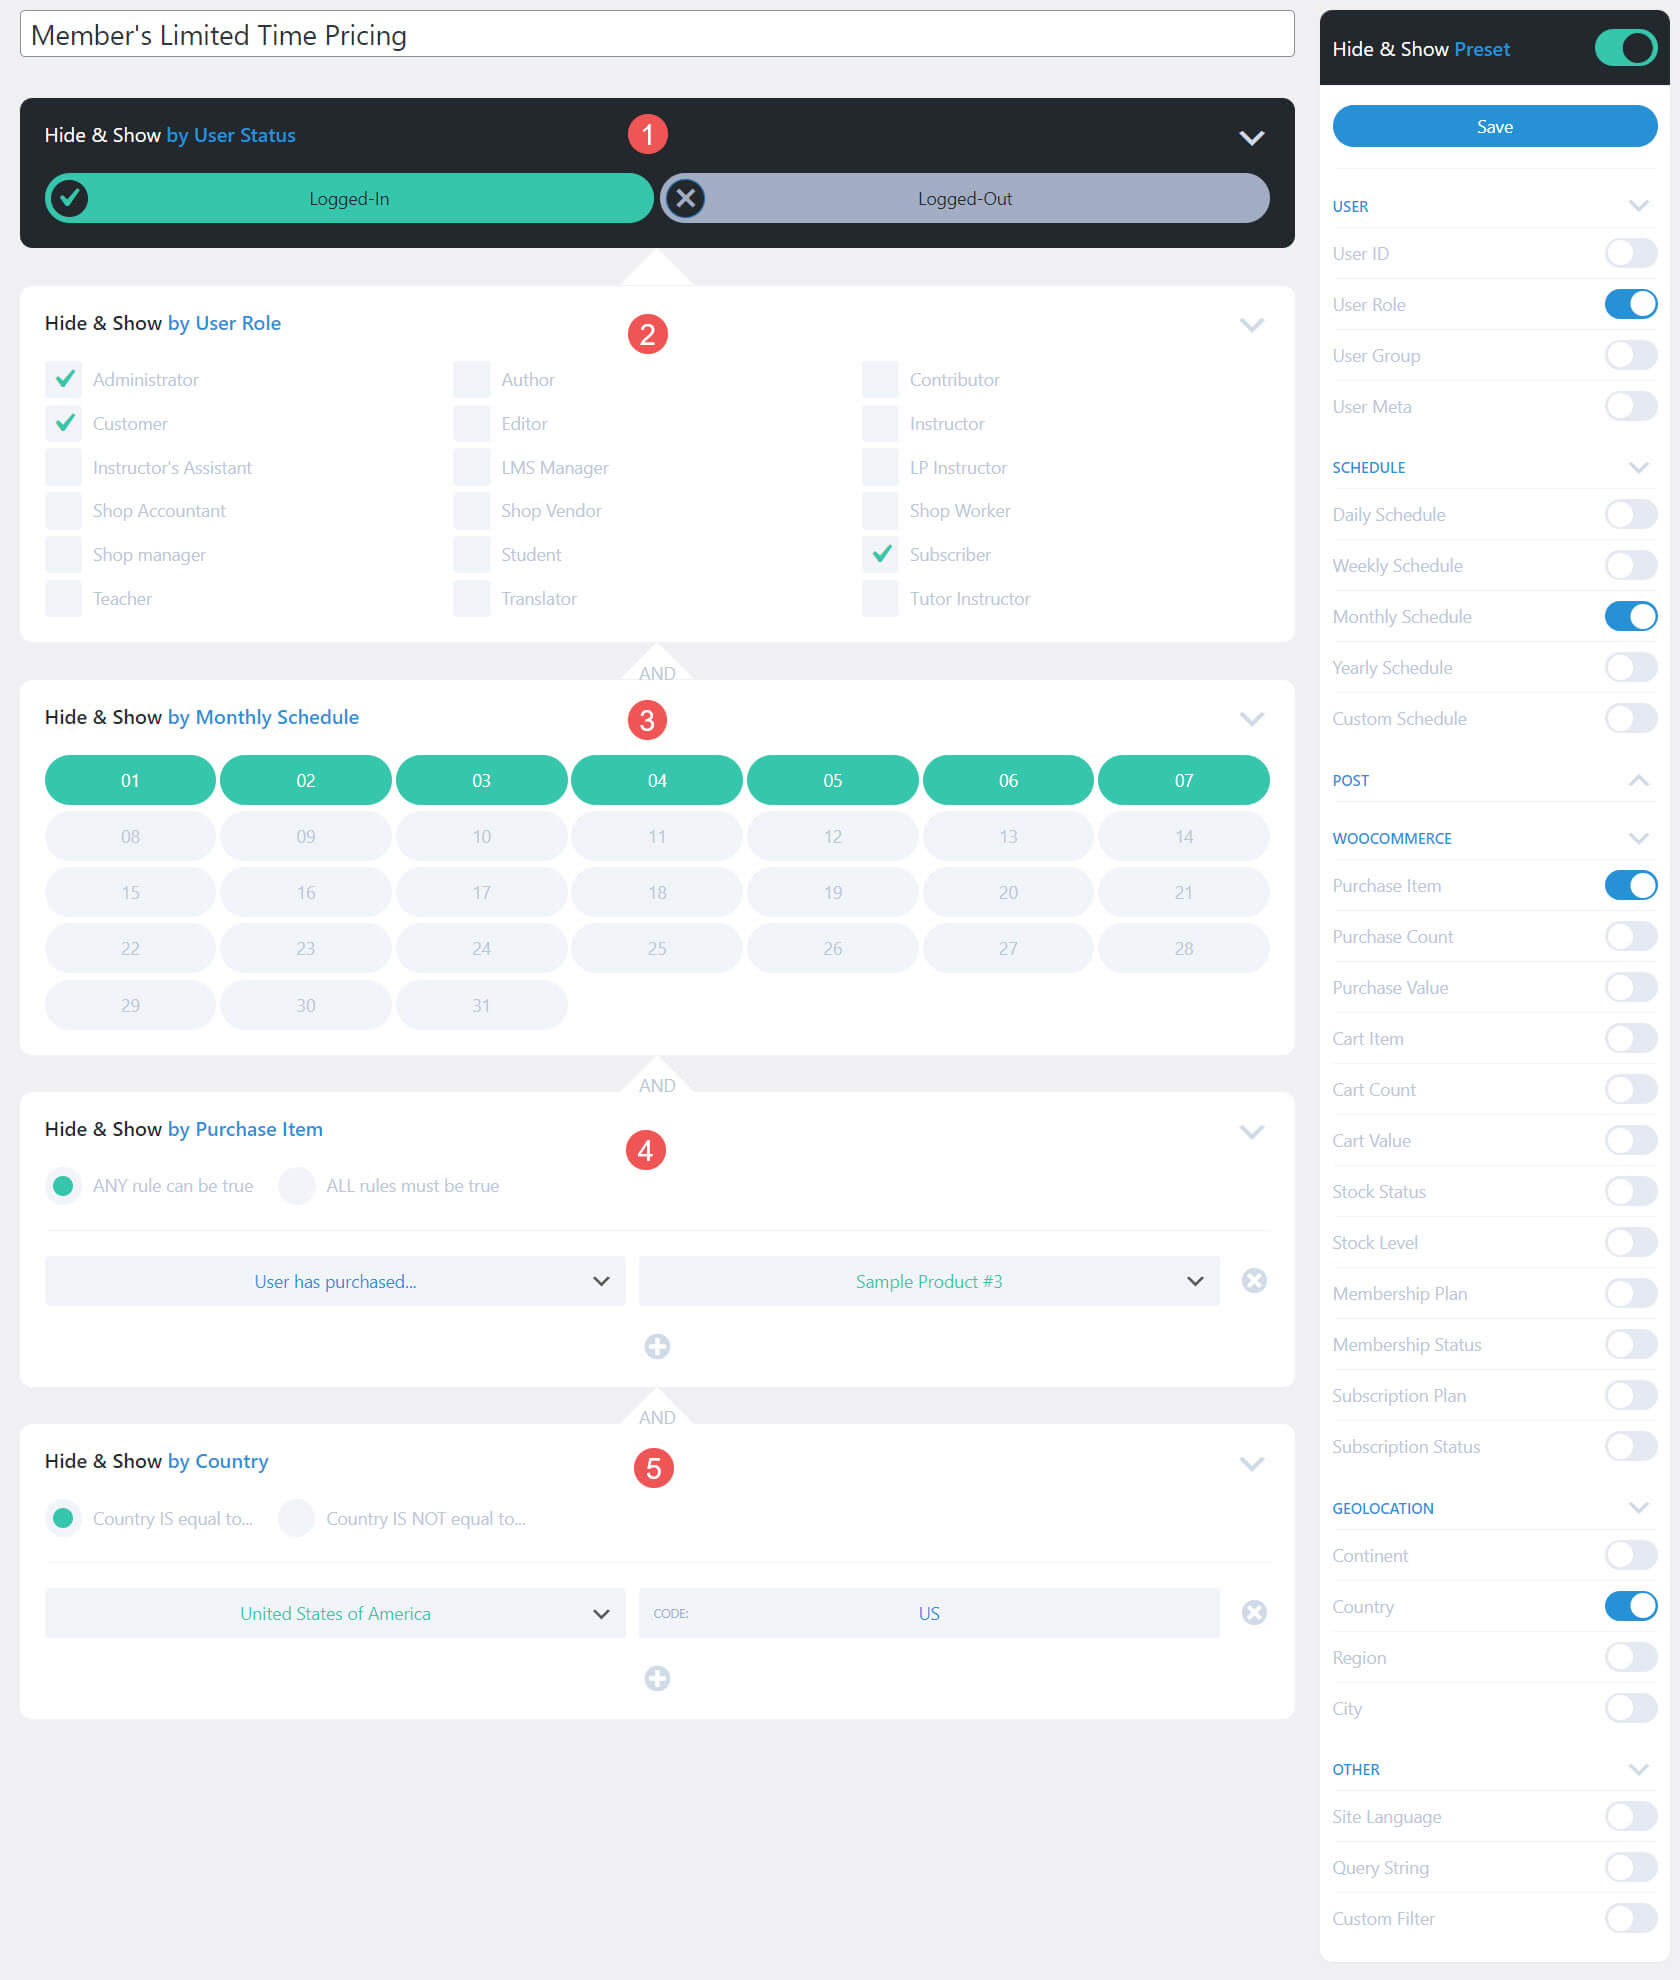
As an example, I want to build a section that will show custom pricing for existing customers. I want the pricing to show for the first week of every month, to only show to those that have purchased a specific product, and they must live in the United States.
The example below builds that query with AND statements. The preset settings include:
- The User Status will only show to visitors that are logged in.
- Check the User Role to show only to the administrator, customer, and subscribers user roles.
- Use Monthly Schedule to display for the first 7 days of every month.
- Check Purchase Item Only show to customers that have purchased a certain product.
- Use Country to show only to customers that live in the United States.
All of these criteria must be met before the visitor sees the section with special pricing.
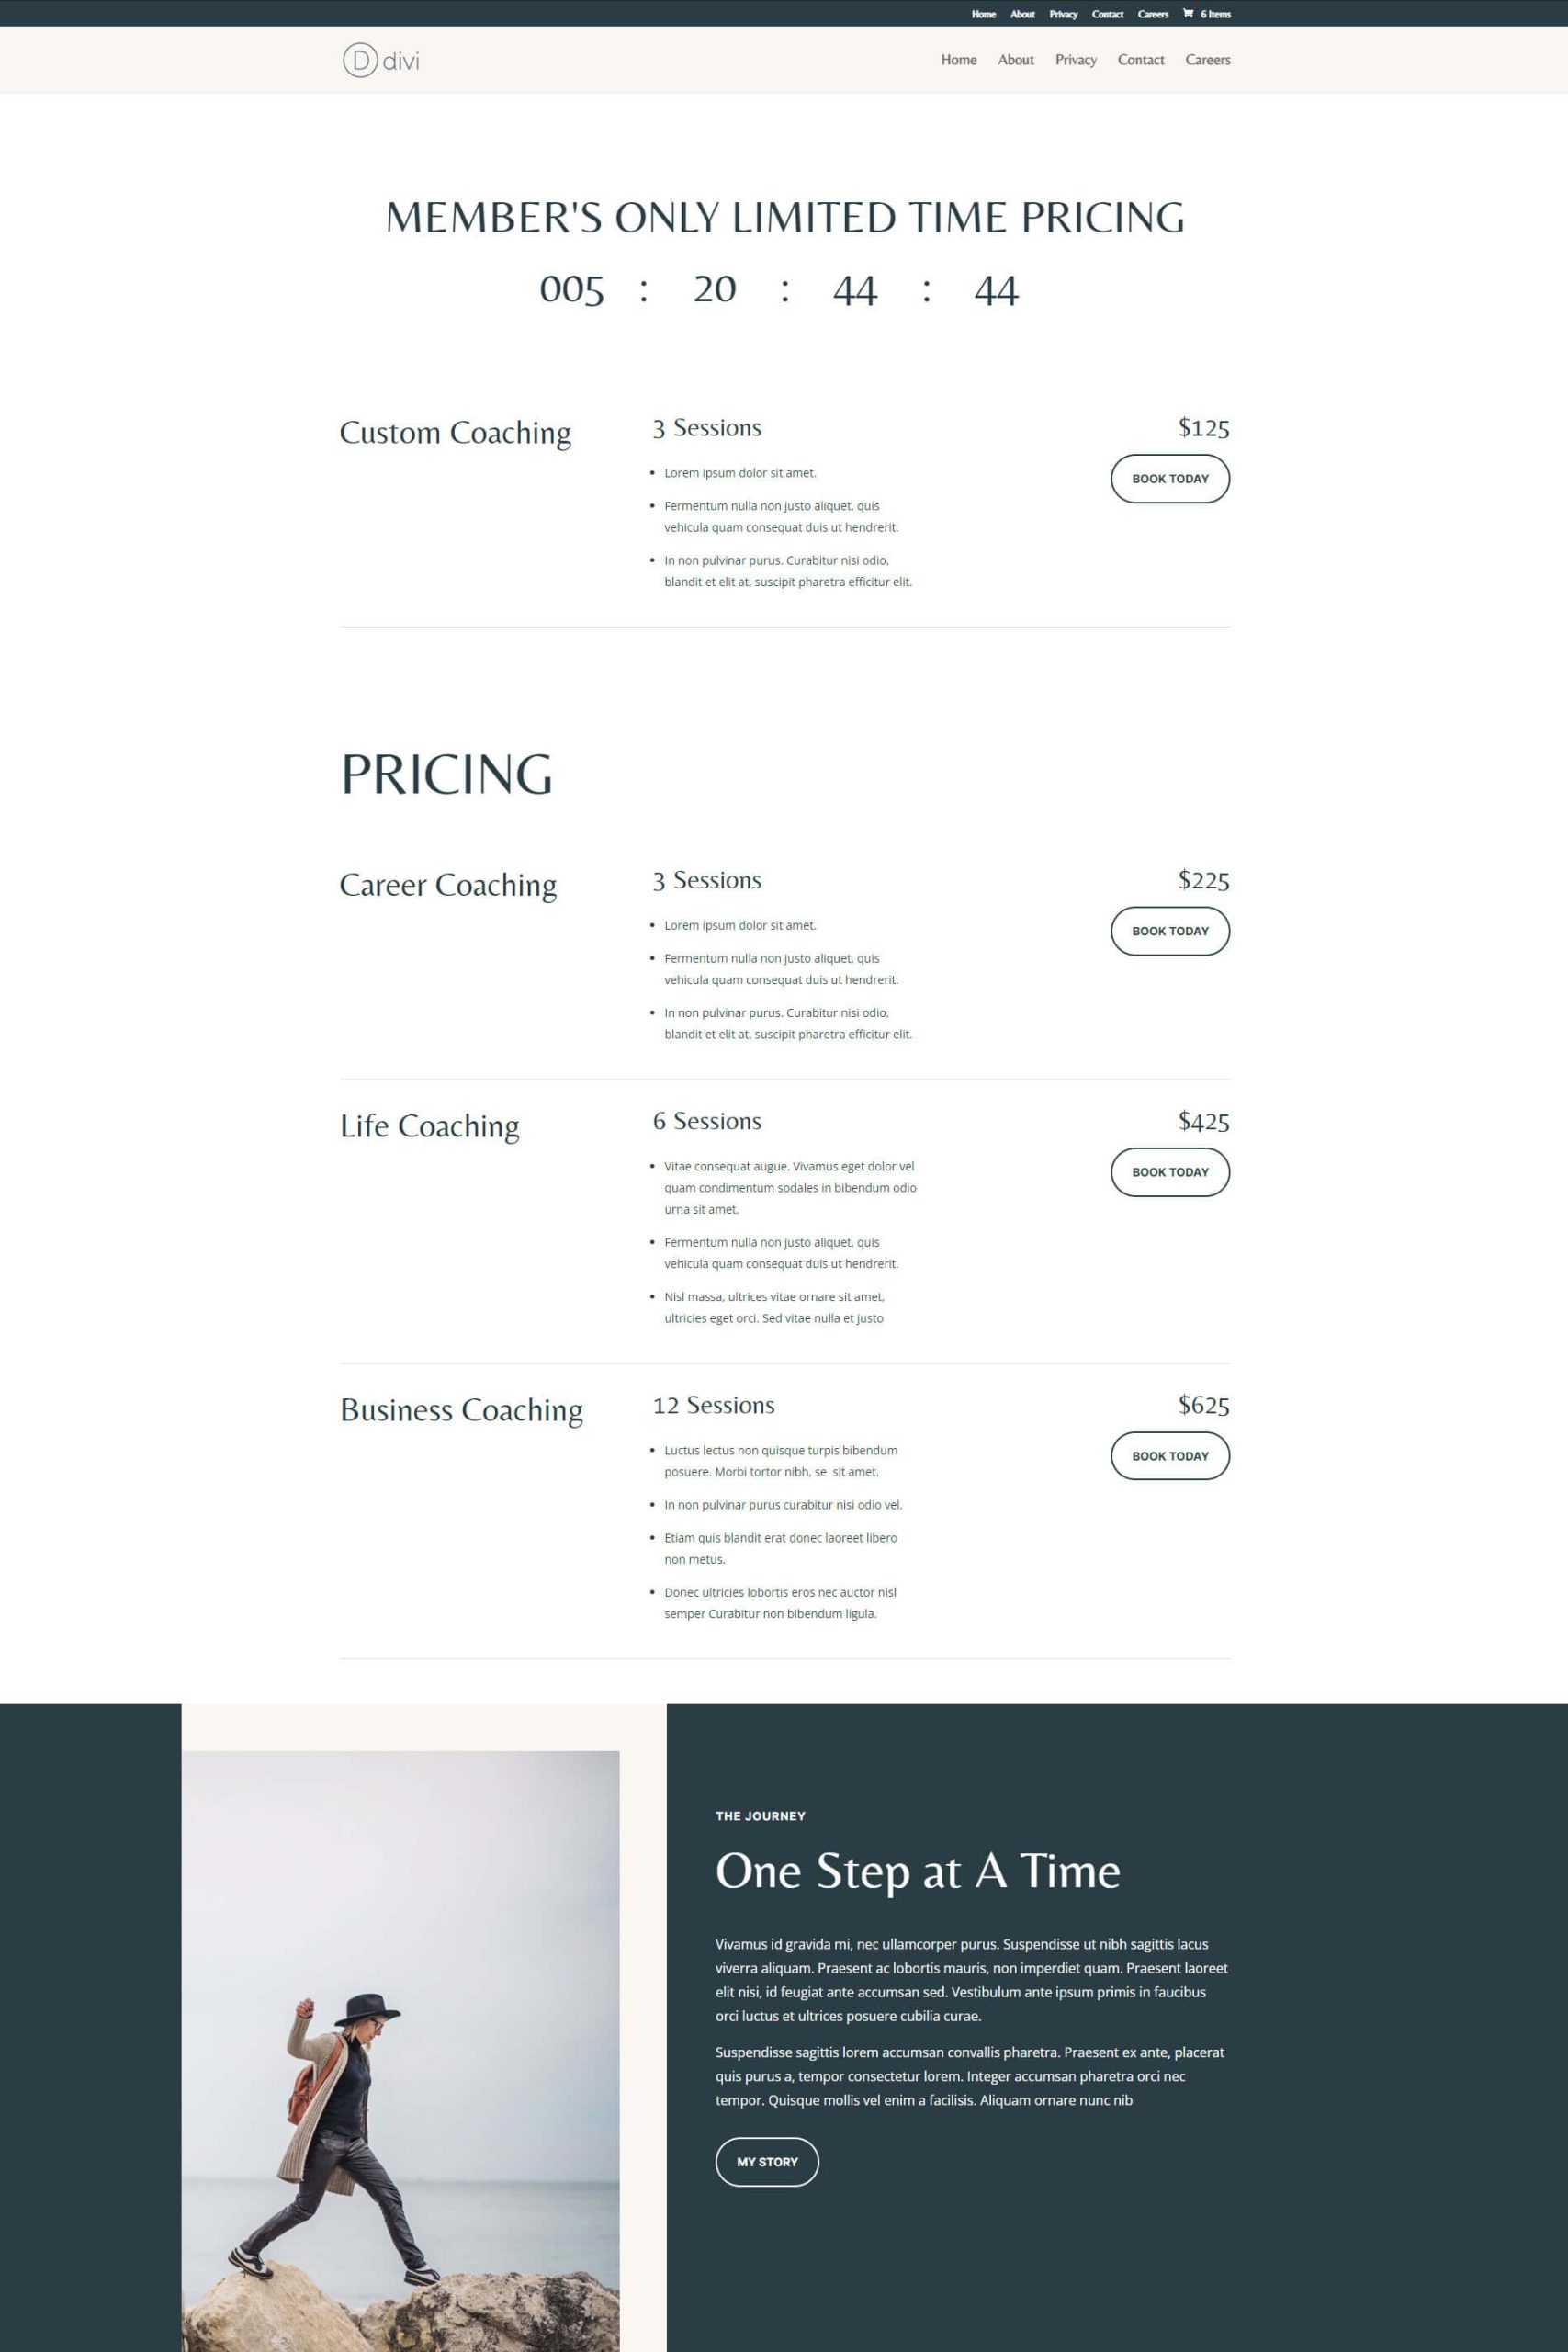
Next, I created a new section for the Pricing Page of the free Coaching Layout Pack for Divi. This section will show the special pricing for a custom service that only those that meet the criteria will see. I’ve opened the section’s settings and selected my preset in the Show & Hide settings in the Advanced tab.
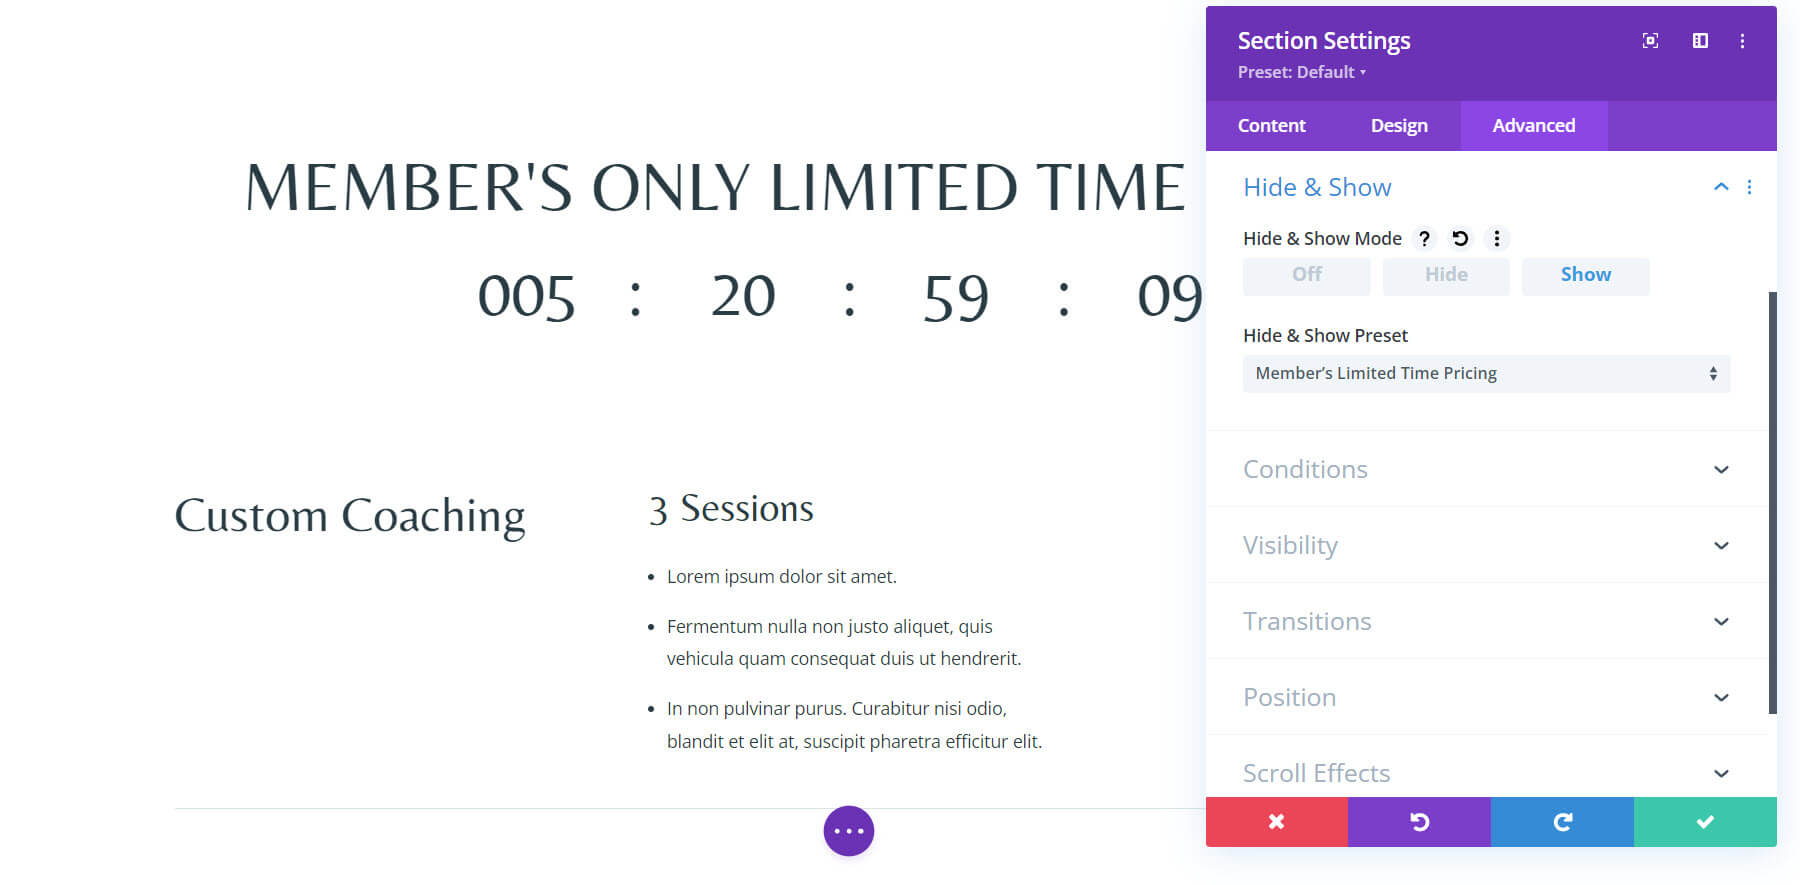
Now, every visitor that meets the criteria sees this new section above the original section.
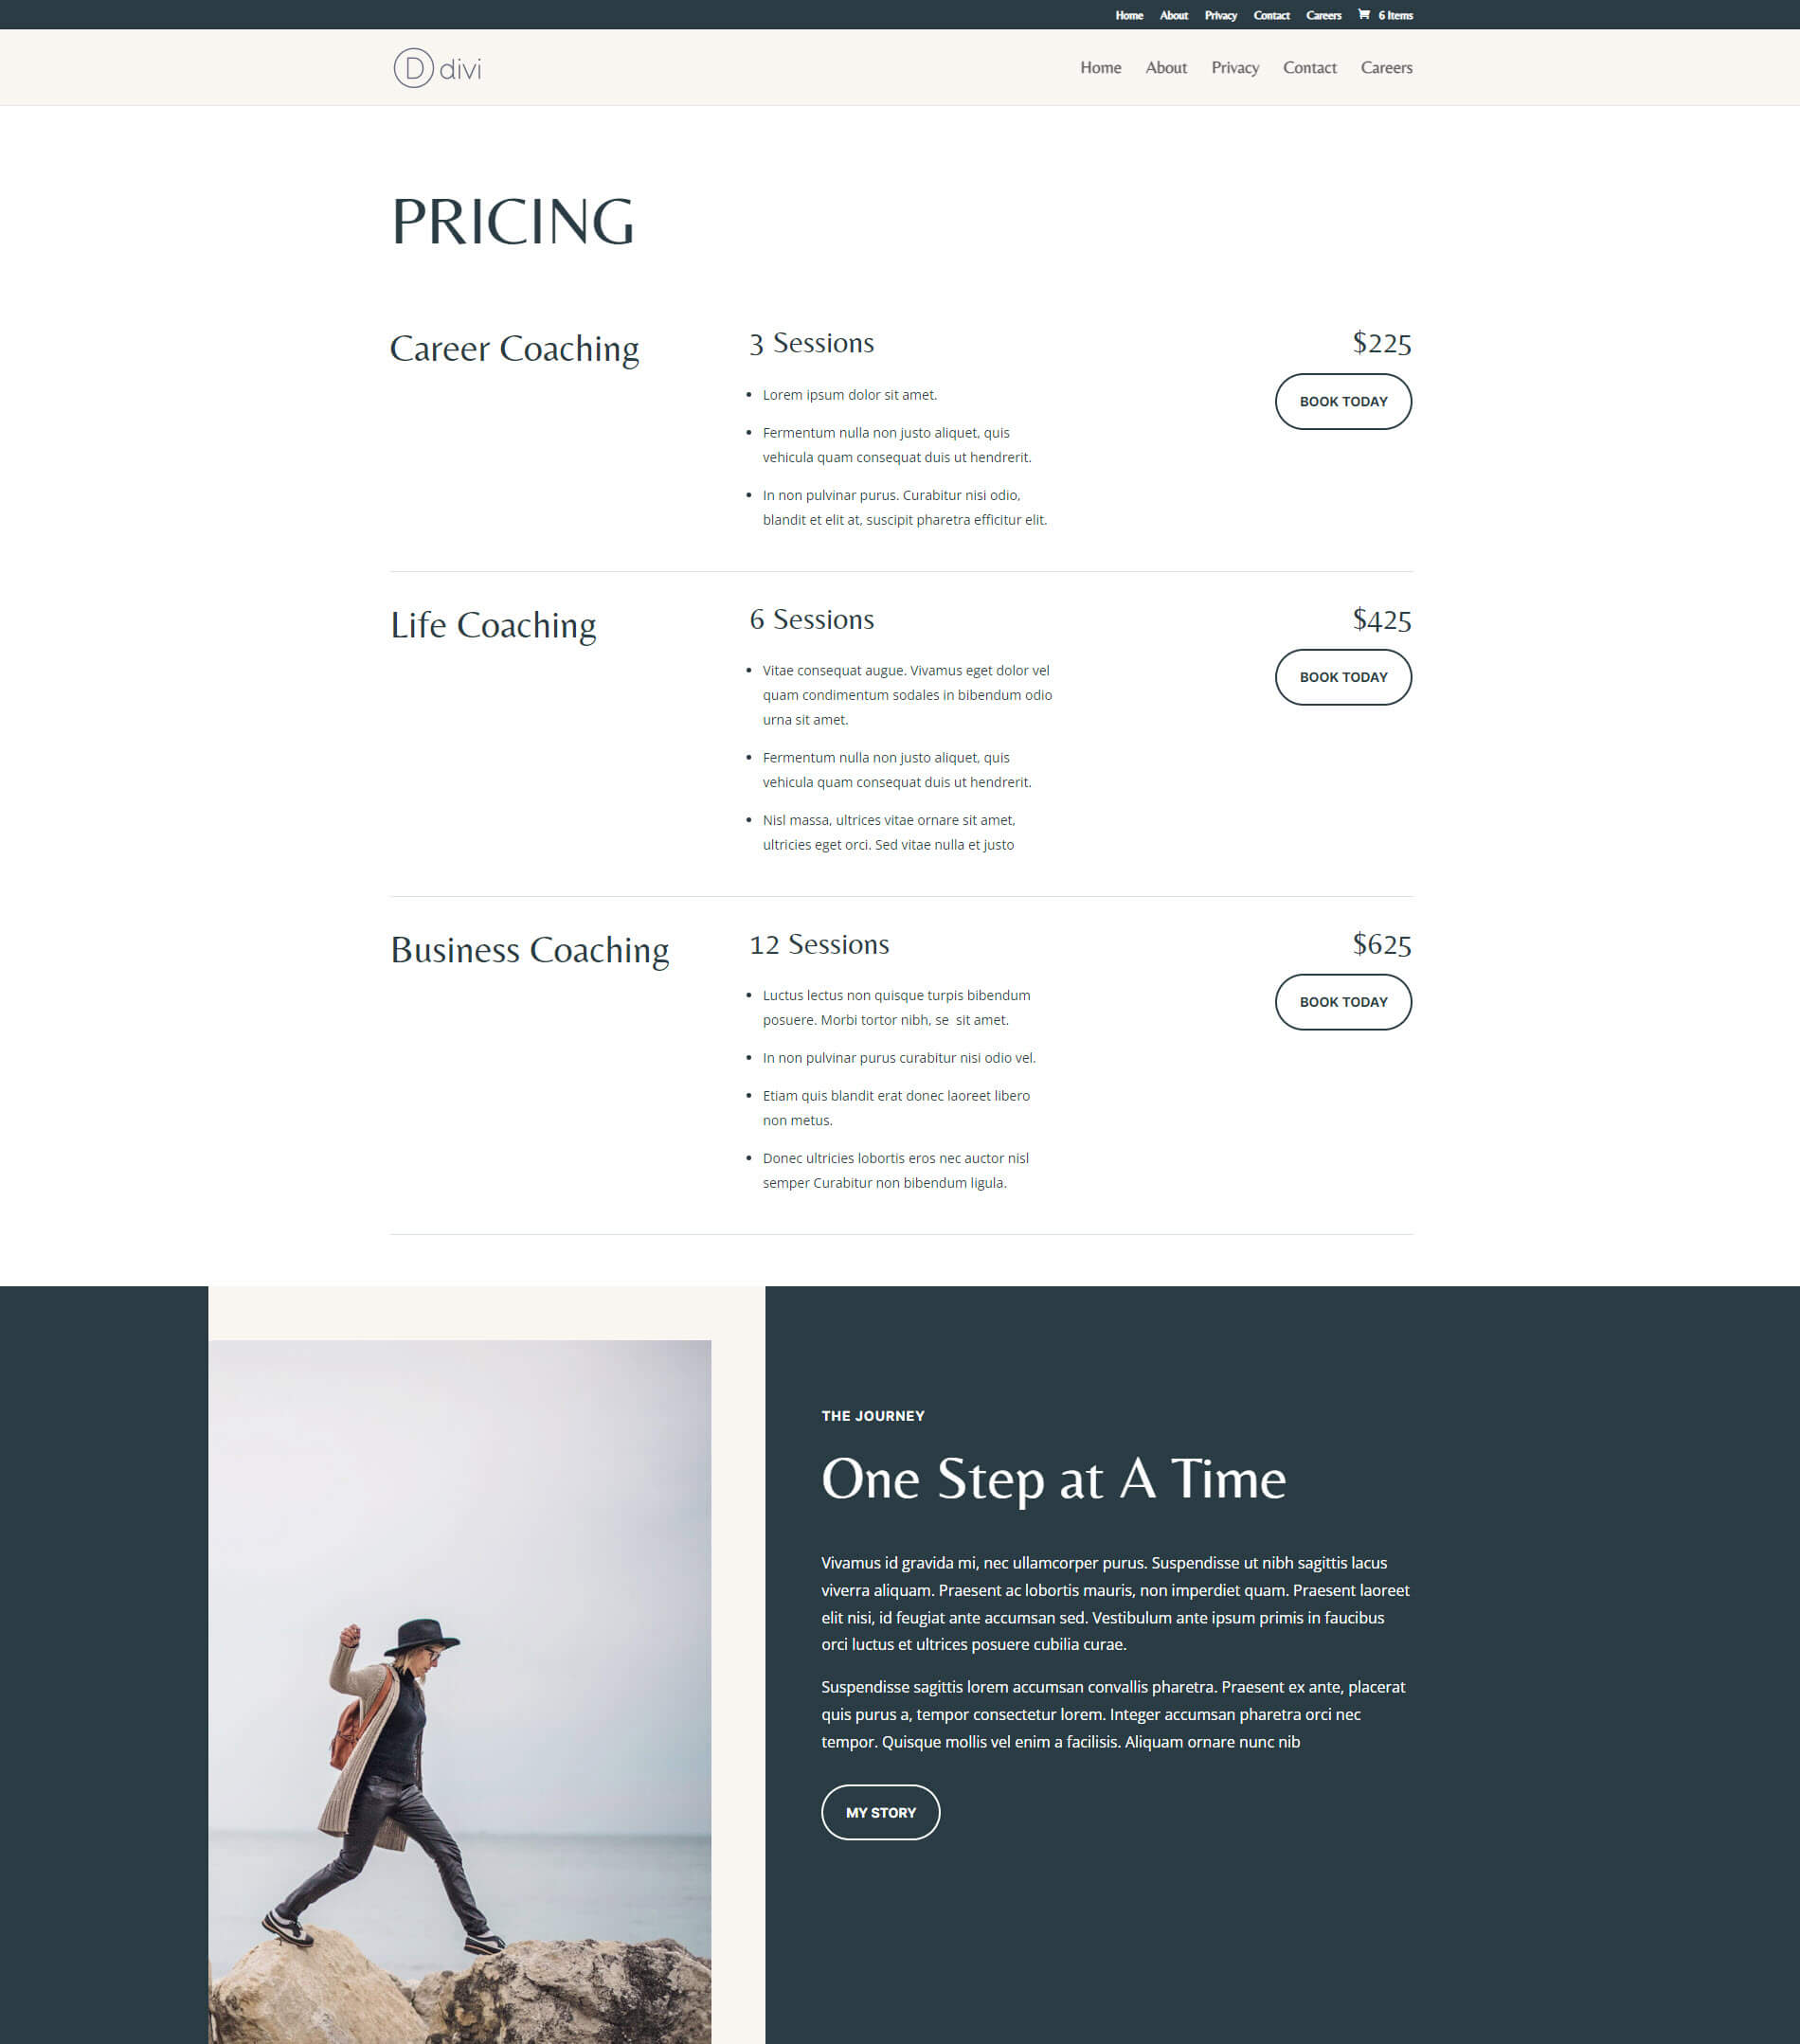
All other visitors do not see the first section. Instead, they’ll only see the regular pricing section.
Where to Purchase
Hide & Show Pro is available in the Divi Marketplace for $39. It includes unlimited website usage, one year of support and updates, and a 30-day money-back guarantee.
Ending Thoughts
That’s our look at Hide & Show Pro for Divi. I found the plugin easy to use. I like that the settings are separate from the Divi Builder. This lets you build a preset and use it anywhere you want. Hide & Show Pro is an excellent choice if you’re interested in gaining control over who can see specific content.
We want to hear from you. Have you used Hide & Show Pro for Divi? Let us know about your experience in the comments.




Leave A Reply