With all of the fine-tuning and specific details you can add to your site using the Divi Theme Builder, few may be as high-impact/low-effort as adding a background image to your Divi header. Using the theme builder, you can add this flourish with very little fuss and create a visua experience for your visitors that will make you and your brand stand out from the competition. We are going to walk you through the steps to add a background image to your Divi header, so let’s get to it!
How to Add a Background Image to Your Divi Header
To achieve this effect, we are going to be using the Divi Theme Builder. You can find this in your WordPress dashboard under Divi – Theme Builder.
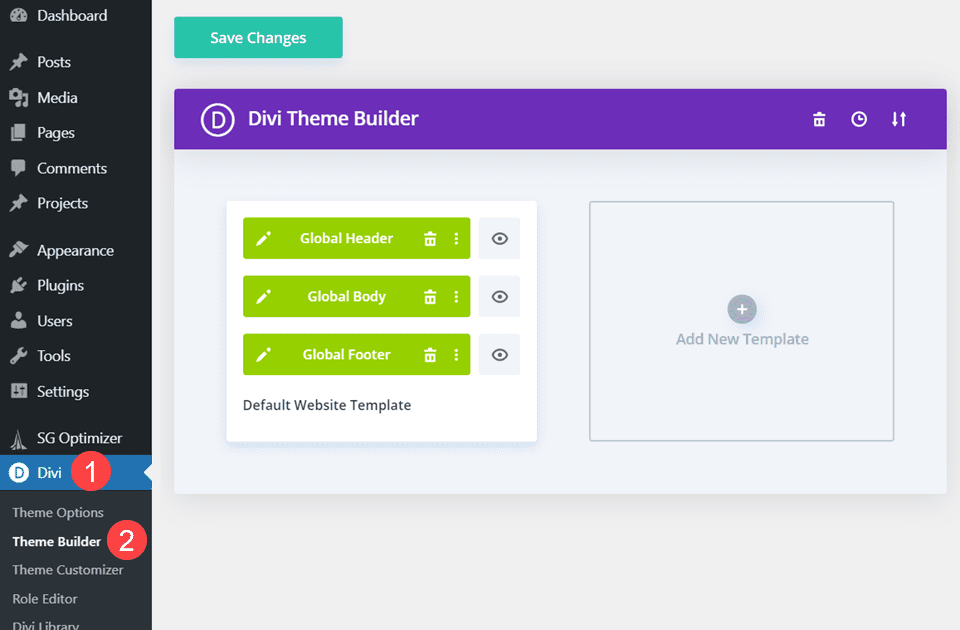
Also, we’re going to be using our free pre-made header for the Data Science layout pack for this tutorial. You can either download the JSON file from the post itself or use a header template in the theme builder you’ve already designed and created. It’s up to you.
Upload the Header
If you’re using a header that isn’t already inside the Divi Theme Builder, you will want to find the double-arrow icon in the upper-right of the dashboard. Click it to bring up the Portability options.
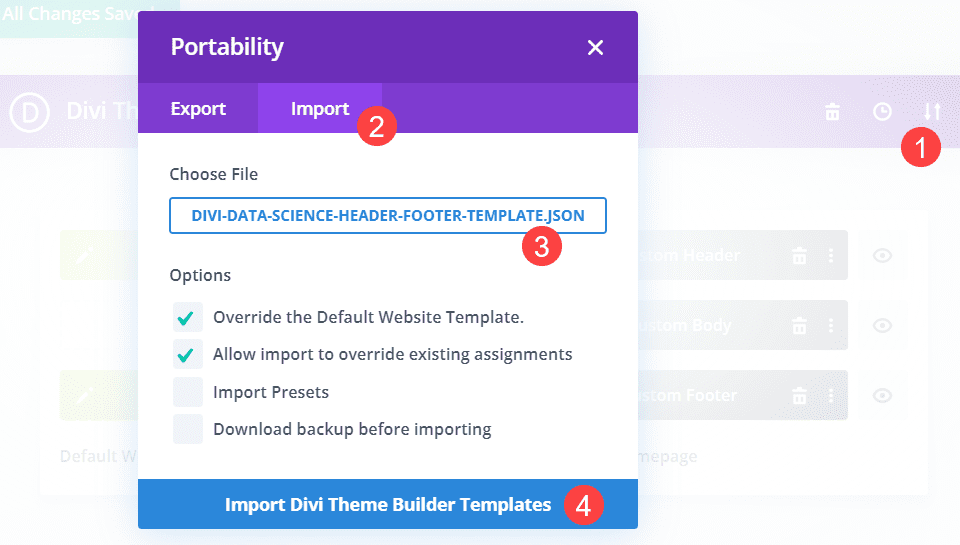
Go into the Import tab, find the JSON file for the header template, and then click the blue Import Divi Theme Builder Templates button at the bottom.
Edit the Header Layout
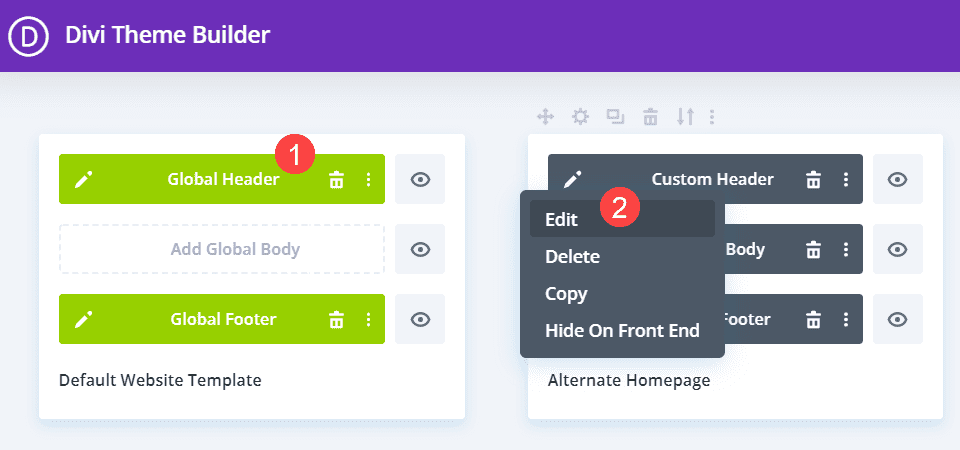
You will then want to enter the Divi builder itself for the layout. We are going to use this header as the Global Header for the site, but you might be doing this to any header you have assigned to a template. Either is fine. You can double-click the layout section or right-click and select Edit from the context menu to enter the builder.
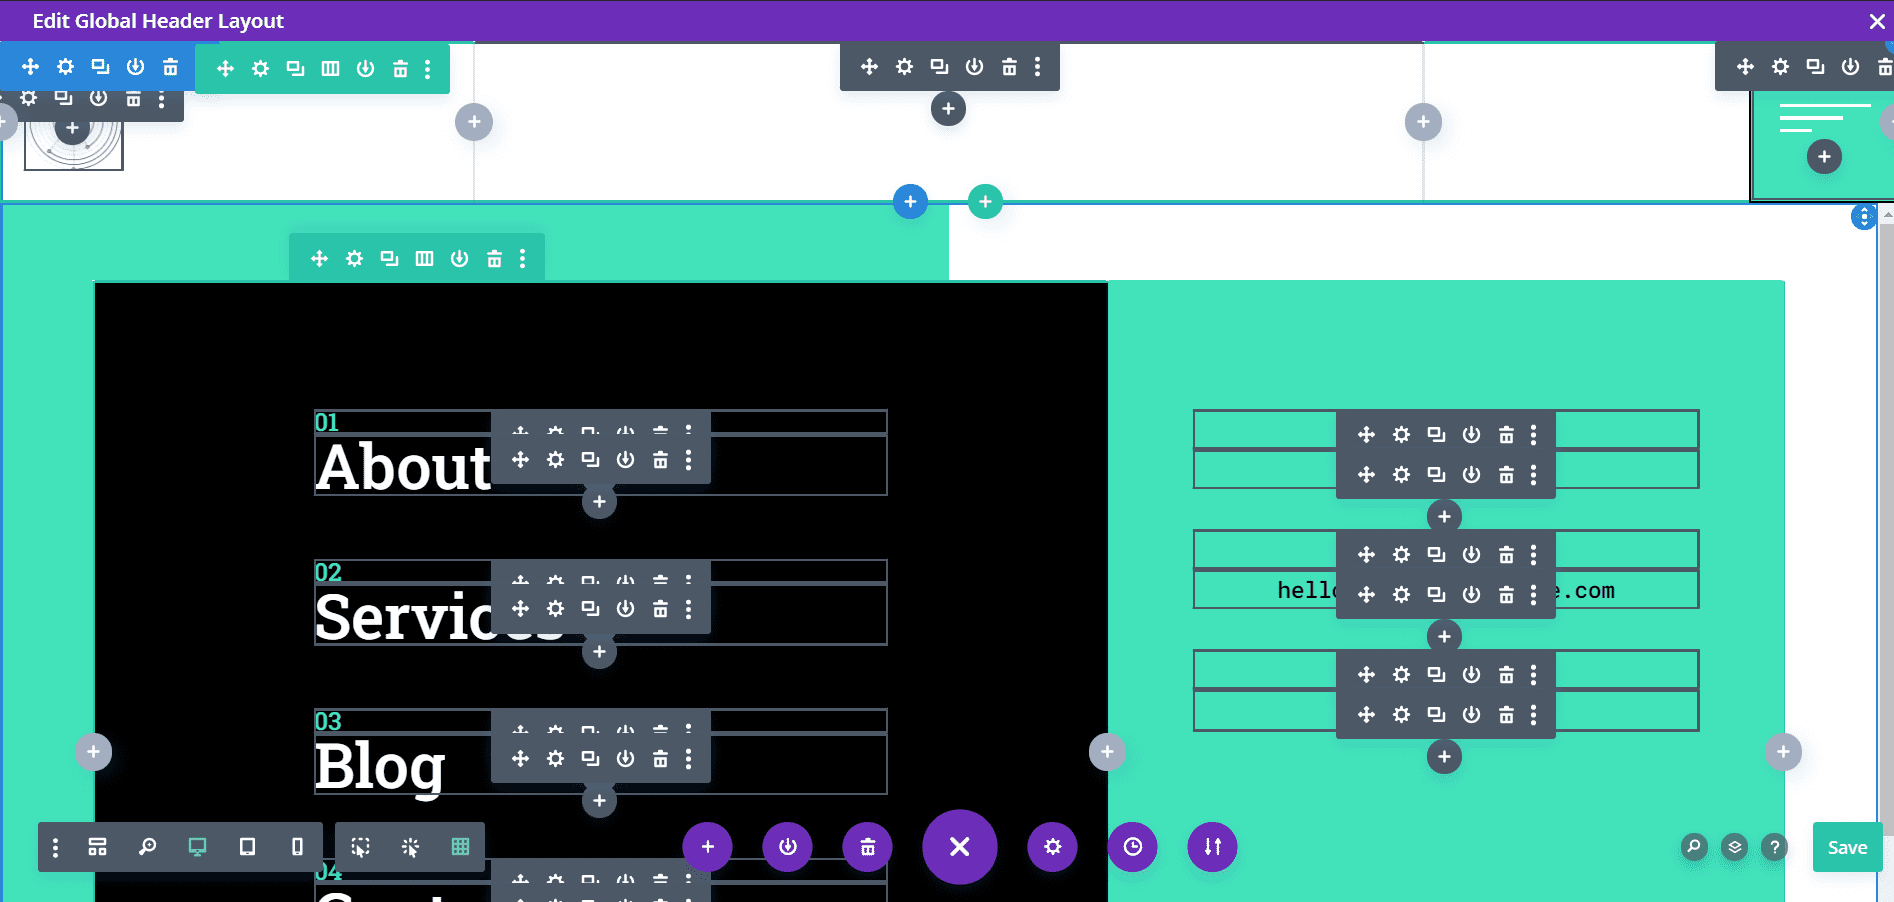
You should see a similar screen to the image below when things load up.
Choose Background Location
With most headers, you will have multiple sections, rows, and columns. Any and/or all of these can have a background image attached, but in general, it’s a good practice to keep it limited to 1. Not only does that keep your design cleaner, it also keeps your page loading times lower.
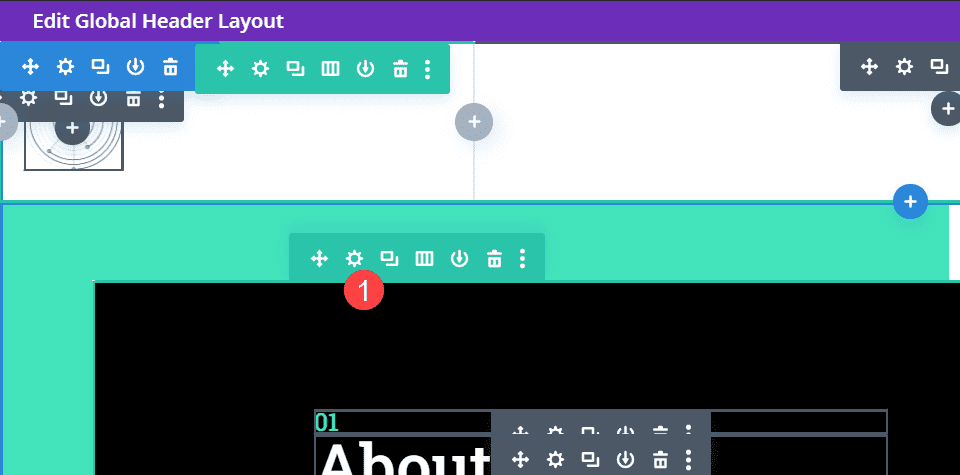
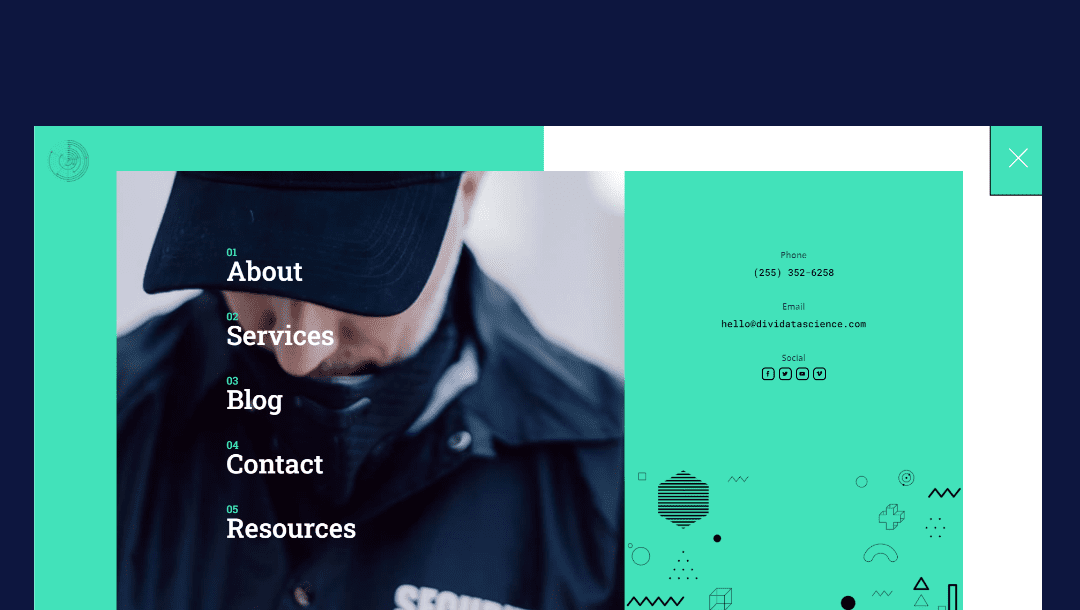
With this layout pack, we are going to add a background design to the left column in the second section of the header layout, where it is just a solid black color to begin with.
Enter the Location’s Settings
Once you’ve decided where you want a background image in the header, go into the settings. Since we’re adding it to a single column, we have to find the containing Row settings first.
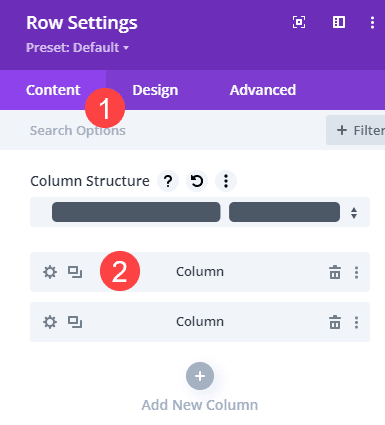
Under the Content tab, you will find a list of all the columns in the row. These are in descending order, meaning the top column is the left-most column and so on.
Find the Background Options
Once you’re inside the column’s settings, you will scroll down until you find the Background options.
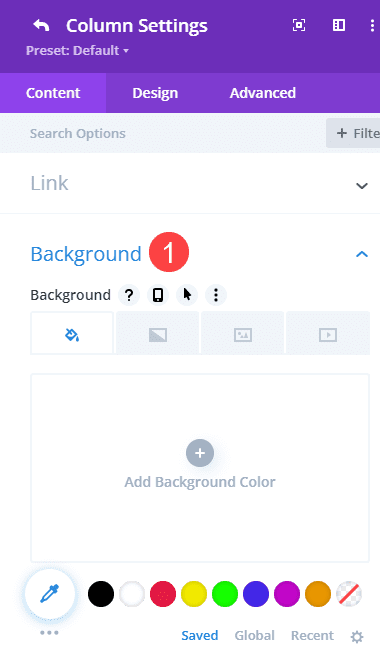
Under that heading, you will see four different tabs. They are for, from left to right, adding a single background color, adding a gradient background, adding a background image, and adding a background video. Click into the third tab to add a background image.
Choose a Static or Dynamic Image
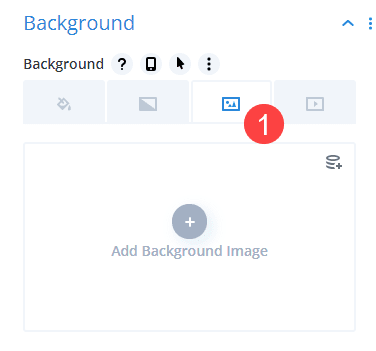
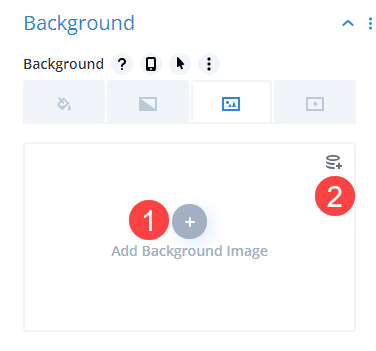
The Divi Theme Builder gives you the choice of setting either a static or dynamic background image for any module or section. To use a static image (one that does not change based on certain criteria), click the Add New Background image button in the center of the section.
To use a dynamic image, click the stacked-circles icon in the upper-right of the field.
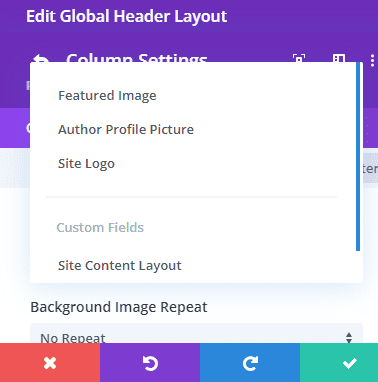
Choosing to use a dynamic background image is great if you’re making these edits on a global header (or a header that is used in more than one location on your site). That way, you can set what shows up to the user based on whatever page they see. You can choose from options like the post/page’s Featured Image or the author’s Profile Picture. You can even have it pull the site logo or from any custom field that you’ve set anywhere on the site.
However, for this article, we’re going the more traditional path of choosing a static background image for the header by clicking the Add Background Image button. This will make sure that every instance of this global header has the same background image.
Choose Your Background Image
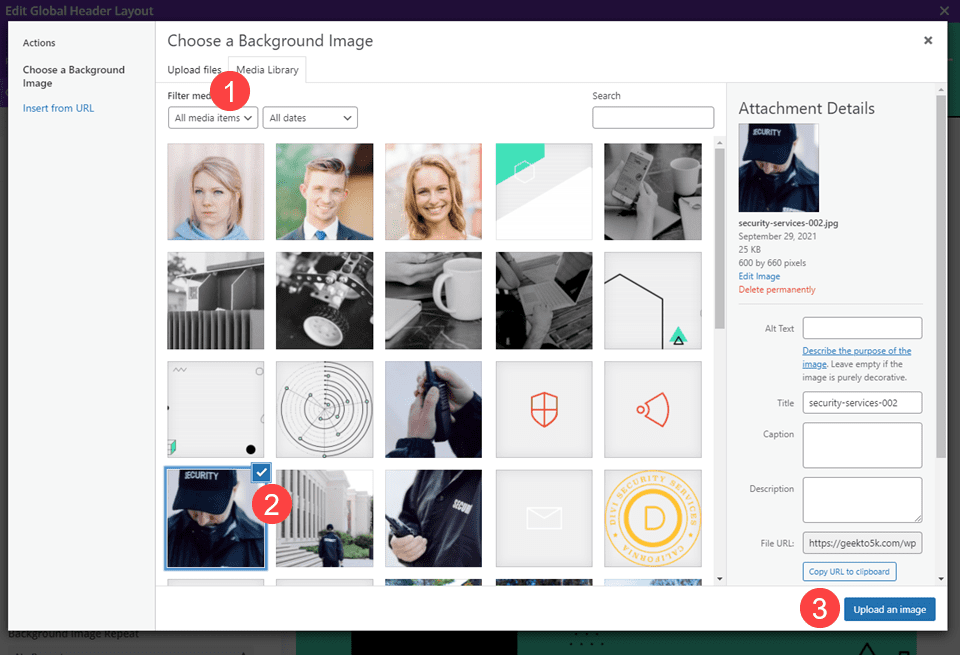
Clicking the Add Background Image button brings up your media library. You can either upload a new file for the background, or you can choose from the existing items on your site. Neither will change the outcome.
Adjust the Background Image
If you want to use the untouched image, this step is optional. However, you can add effects like Parallax Scrolling and image blending. You can even set where you want the image positioned in relation to the column so that it will focus on different areas instead of defaulting to the center.
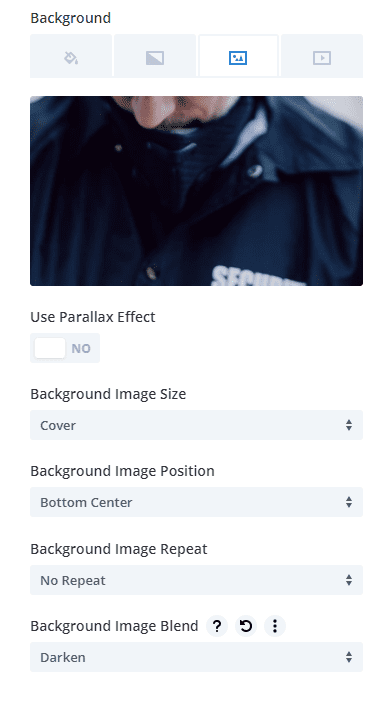
Again, these are optional, but can help make the background image merge with the surrounding design by Divi being able to darken it just slightly, for instance.
Save Your Work!
Next, make sure that you save all of your work. You will want to click the green checkmark in the column settings and the row settings. Then the green save button in the lower-right of the page. Then you’re safe to X out the builder to return to the dashboard.
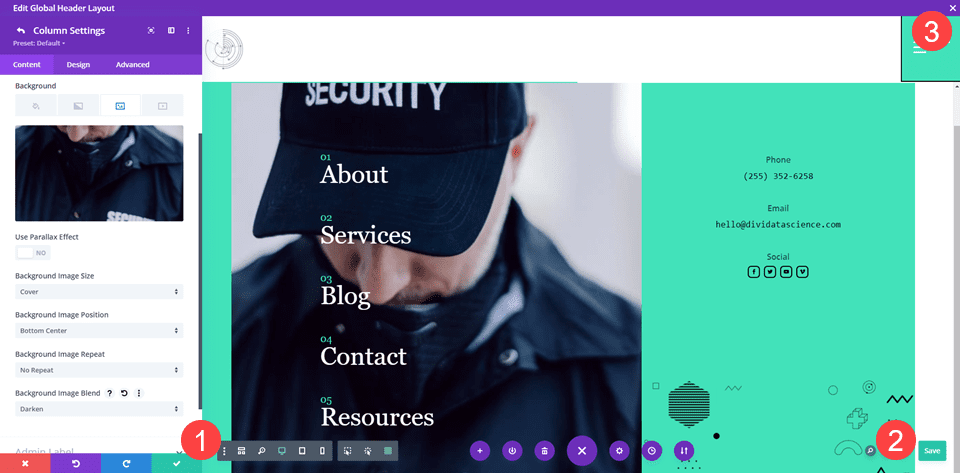
We also want to note that your Divi Theme Builder should show All Changes Saved in the upper-left. If the button reads Save Changes, your background image in the header is not live.
We want to note this specifically because there are a lot of places to save in the theme builder, and we don’t want you to miss the one that pushes the new designs live.
Wrapping Up
Adding a background image to your Divi header is one of the easiest ways to bring life to any design by using a static image or even through our dynamic content feature. Whether you use one of our free, pre-made designs or add to your own, you can take a simple design and make it more advanced and eye-catching by adding an image to your header with just a few clicks.
Do you prefer a dynamic or static background image in your Divi Header?




Divi is great except the Custom CSS…
“Gutenberg” has better Custom CSS