The Divi Layout Block opens the door for many convenient ways to bring the powerful design features of the Divi Builder to WordPress’s default block editor (Gutenberg). This allows you to write the bulk of your blog post content using the familiar Gutenberg block interface and then inject Divi Layouts where custom design or functionality is needed. A Divi Layout Block can include anything you can build within the Divi Builder, but it is also great for including something as simple and essential as an Email Optin.
In this tutorial, we will cover how to add a beautiful Divi Email Optin to a Gutenberg Blog Post using the Divi Layout Block.
Let’s get started!
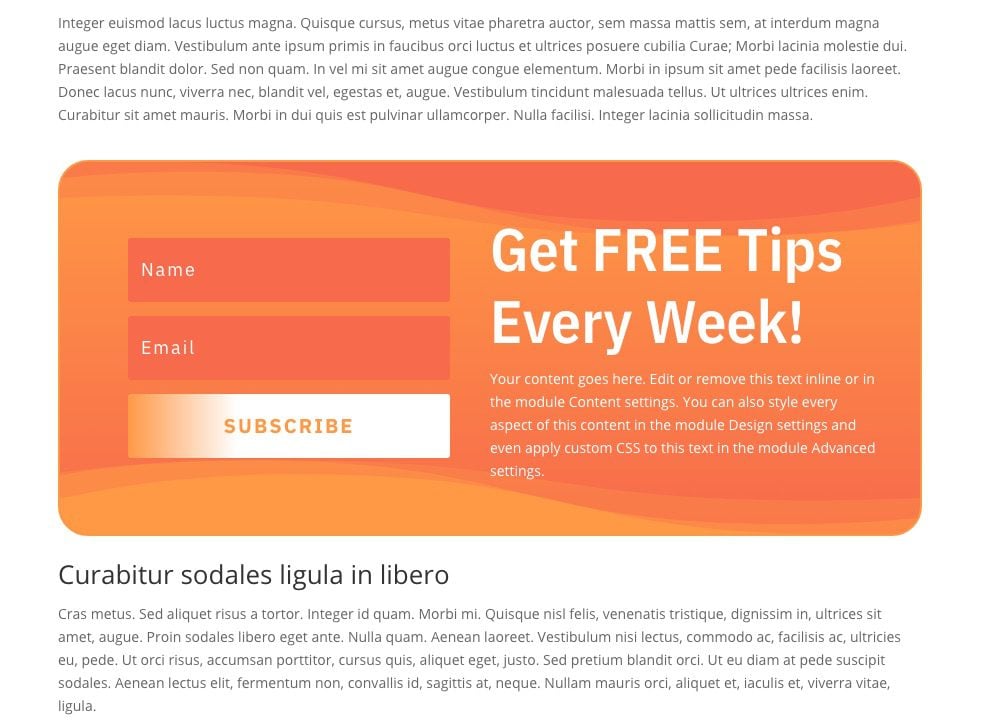
Sneak Peek

Download the Layout for FREE
To lay your hands on the designs from this tutorial, you will first need to download it using the button below. To gain access to the download you will need to subscribe to our newsletter by using the form below. As a new subscriber, you will receive even more Divi goodness and a free Divi Layout pack every Monday! If you’re already on the list, simply enter your email address below and click download. You will not be “resubscribed” or receive extra emails.
Importing The Layout Block JSON
Upload Layout to Divi Library
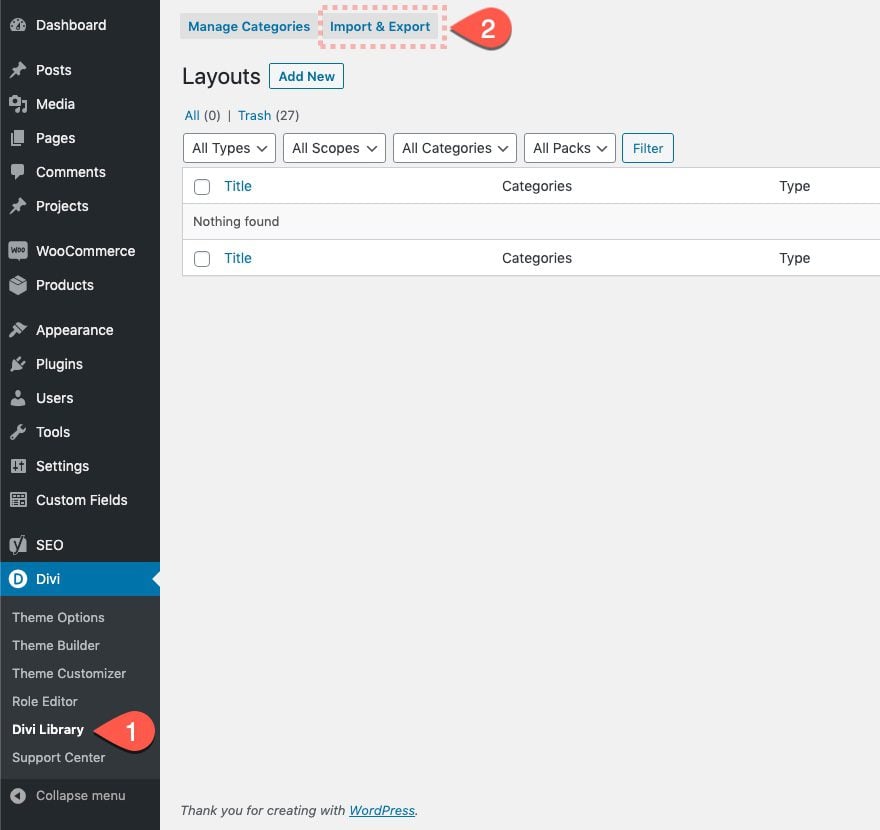
To import the JSON file you were able to download above, go to your Divi Library in the backend of your WordPress dashboard and click on ‘Import & Export’.
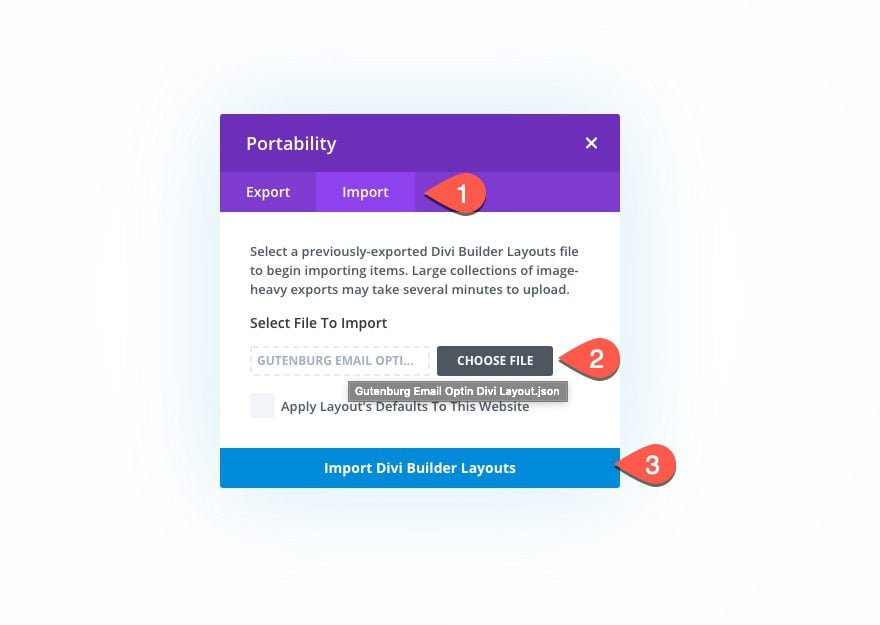
Then, select the JSON file inside your download folder and click on ‘Import Divi Builder Layouts’.
Add New Divi Block Block Inside Gutenberg Post
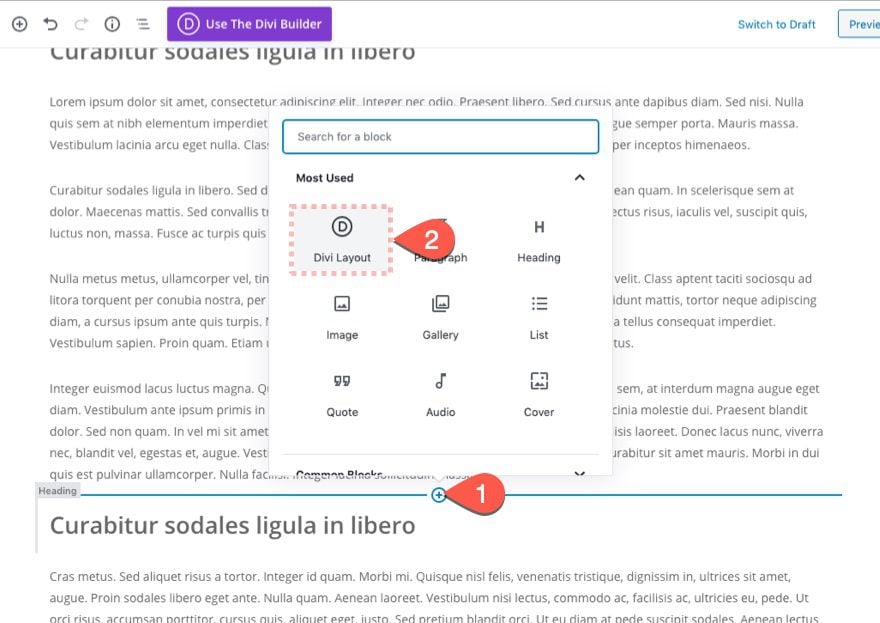
Once your layout has been imported, you can go to your Gutenberg post and add a new Divi layout block.
Import JSON File From Saved Layouts
Then, click on ‘Load From Library’, navigate to ‘Your Saved Layouts’ and select the layout to import the Divi CTA Layout Block to your blog post. That’s it!
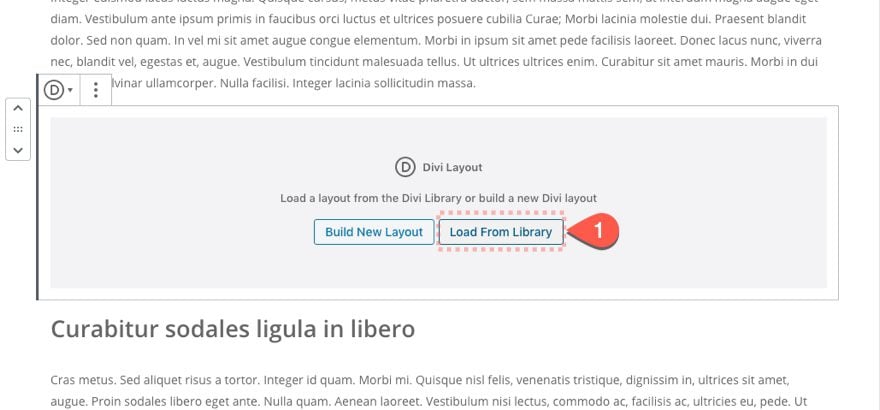
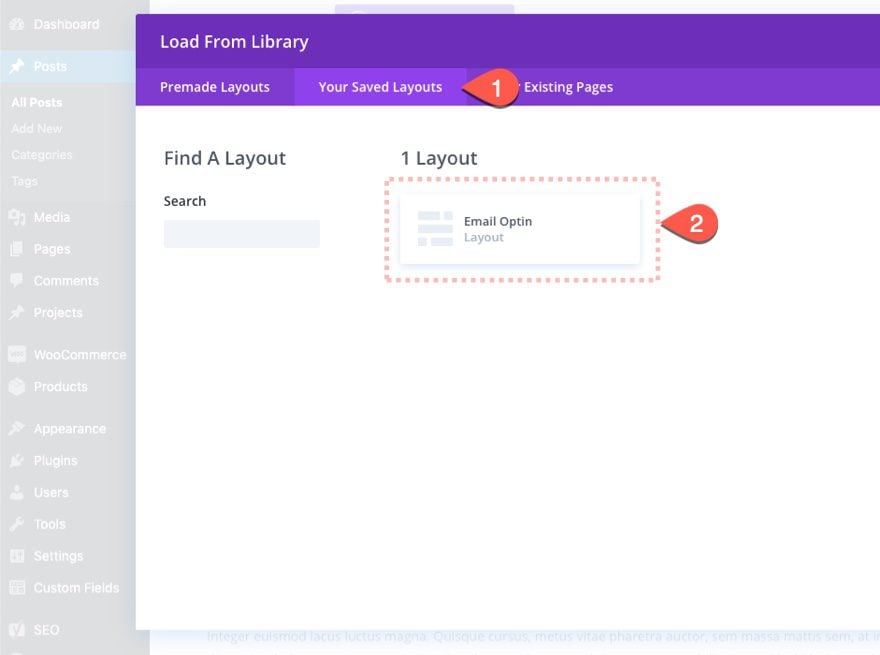
And that’s it!
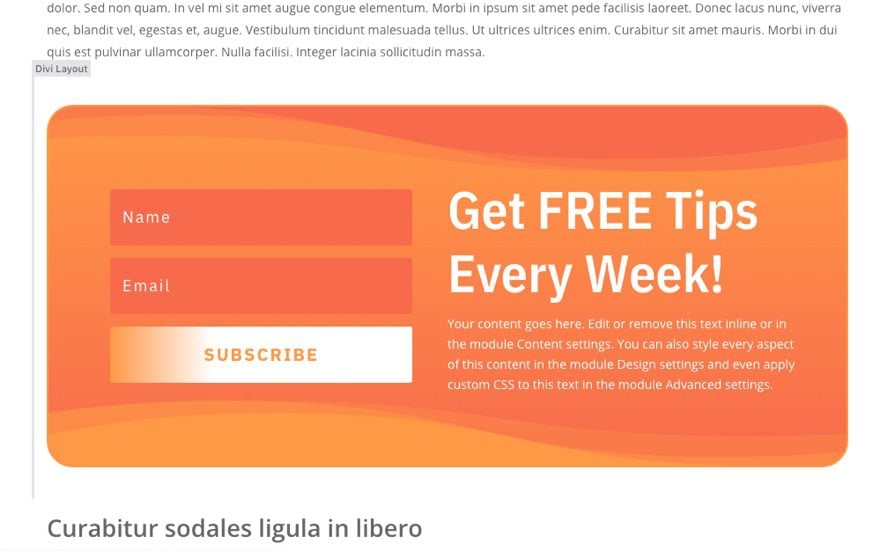
Let’s get to the tutorial, shall we?
Adding a Divi Email Optin to Your Gutenberg Blog Post
Create or Edit a Blog Post
To start, we need to create a new blog post or edit an existing one. For this example, let’s add some mock content to the post title and body using a few Heading and Paragraph Blocks. Then add a featured image and choose “No Sidebar” for the Page Layout under the Divi Page Settings.
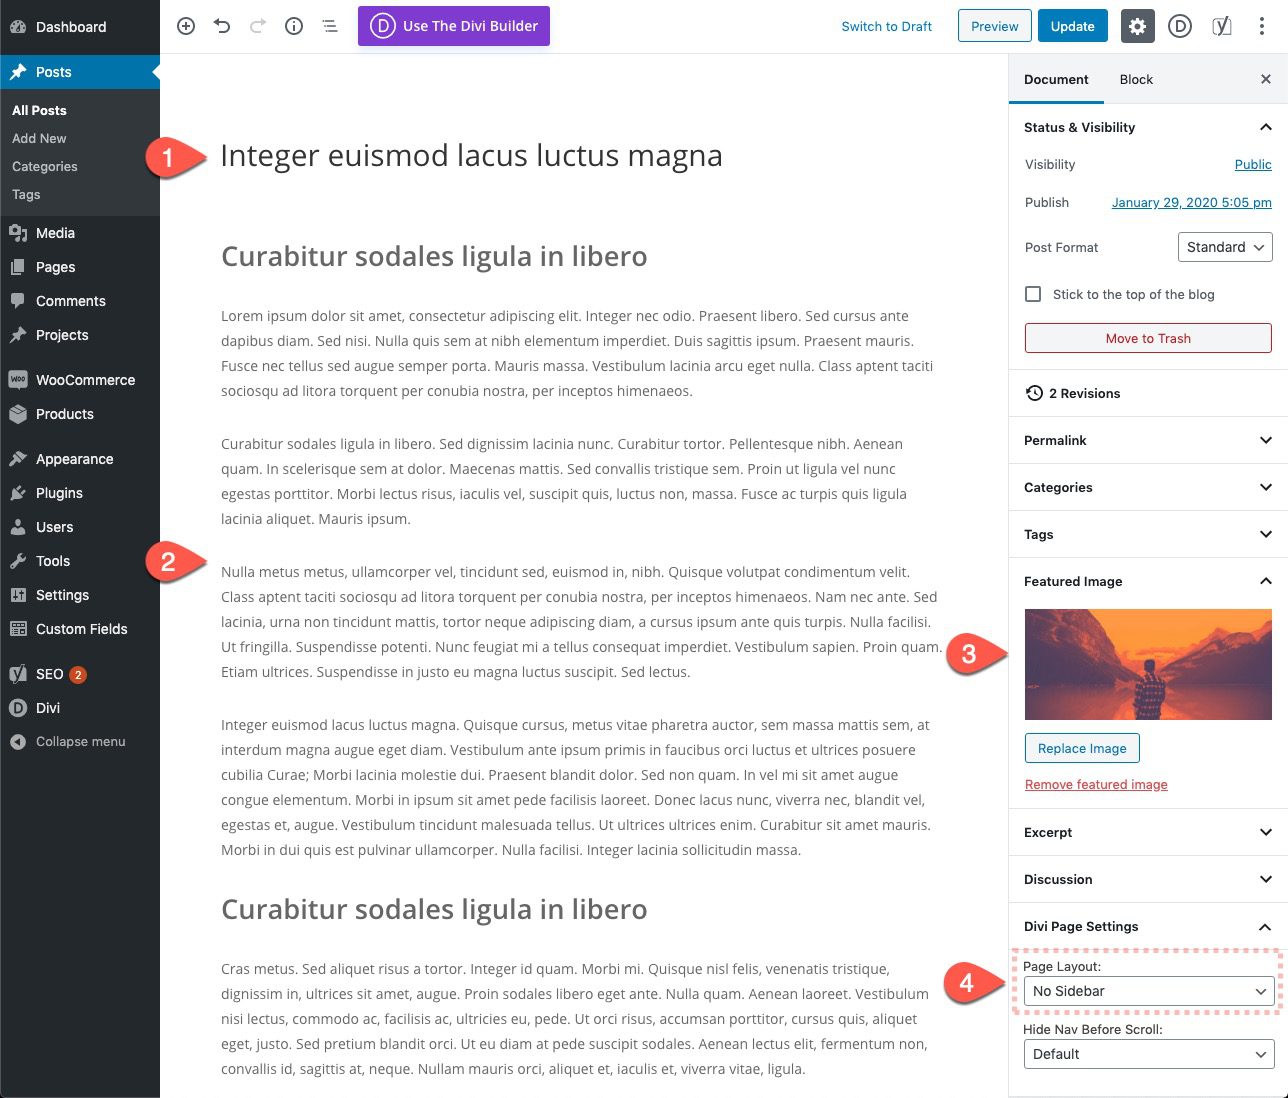
Add Inline Divi Layout Block
Once you have the bulk of the post created, all we need to do is add a new Divi Layout Block anywhere we want within the post content area. We could add it somewhere closer to the end of the post to capture a qualified lead that is obviously interested in the content of the post.
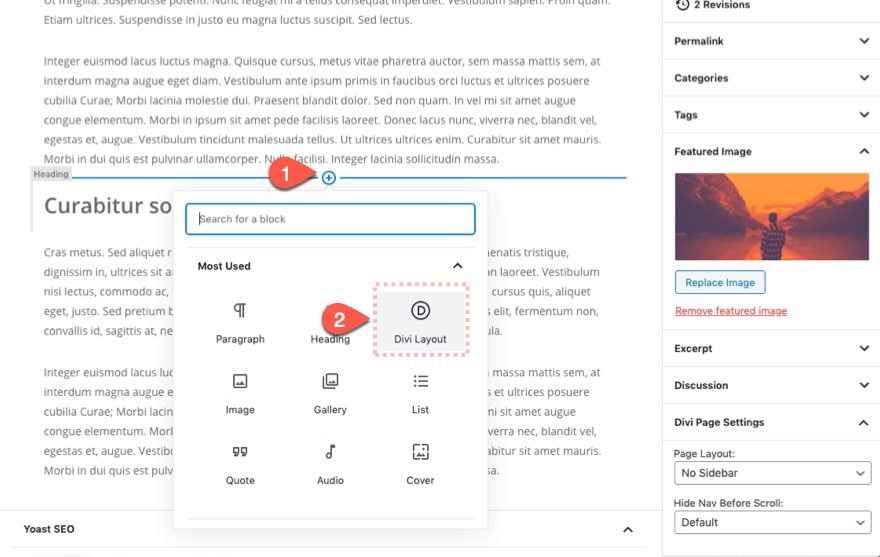
To add it, hover over the area you want to add the email optin and then click the blue plus icon to add a new block. In the popup block list, select the Divi Layout block.
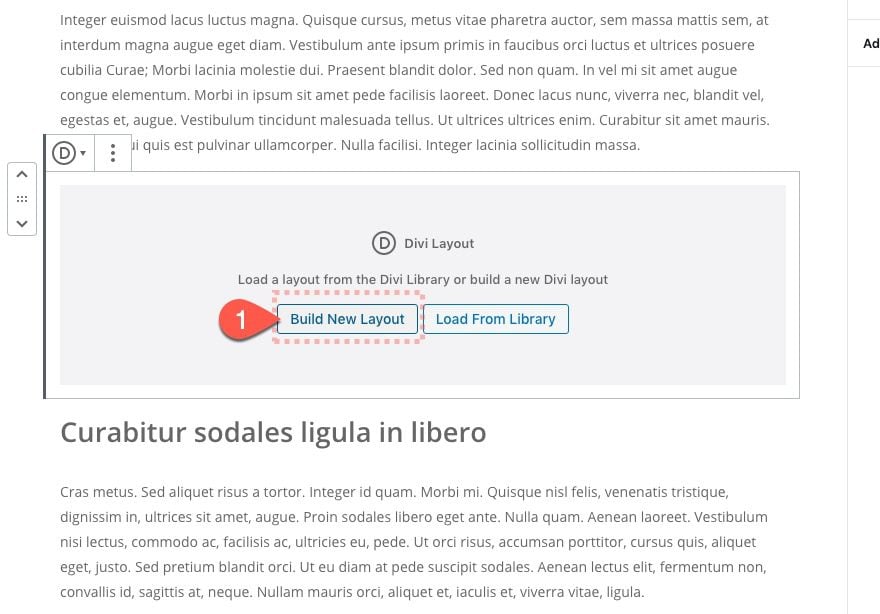
Build New Layout Within the Divi Layout Block
Once the Divi Layout Block has been selected, we will have the option to either “Build New Layout” or “Load from Library”. Since we need to build the email optin from scratch, choose the option, “Build New Layout”.
Section Design
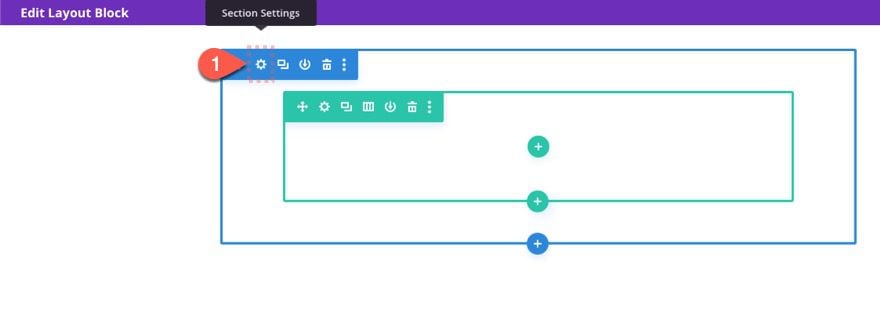
Inside the Layout Block editor, we can begin designing the email optin to be included in our post. Anything we design in this editor will be displayed in the Divi Layout Block area of the post.
To begin, open the section settings of the default section already there.
Background Gradient
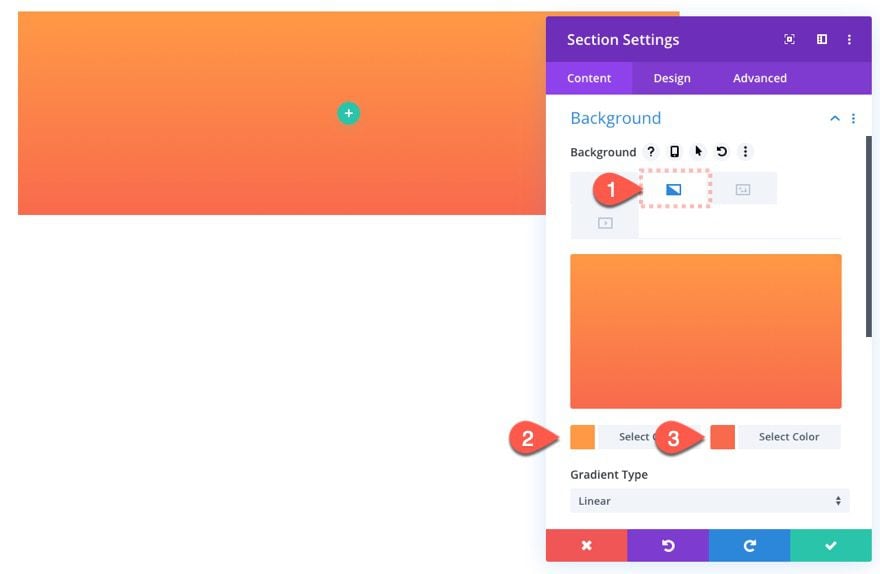
Then add a background gradient as follows:
- Background Gradient Left Color: #ff9945
- Background Gradient Right Color: #f86a4c
Dividers
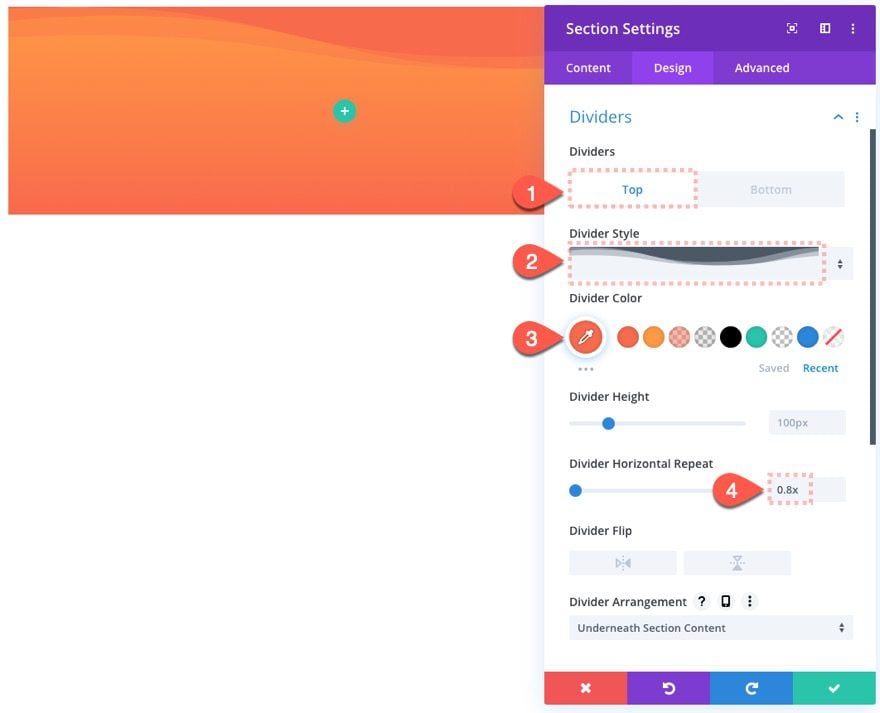
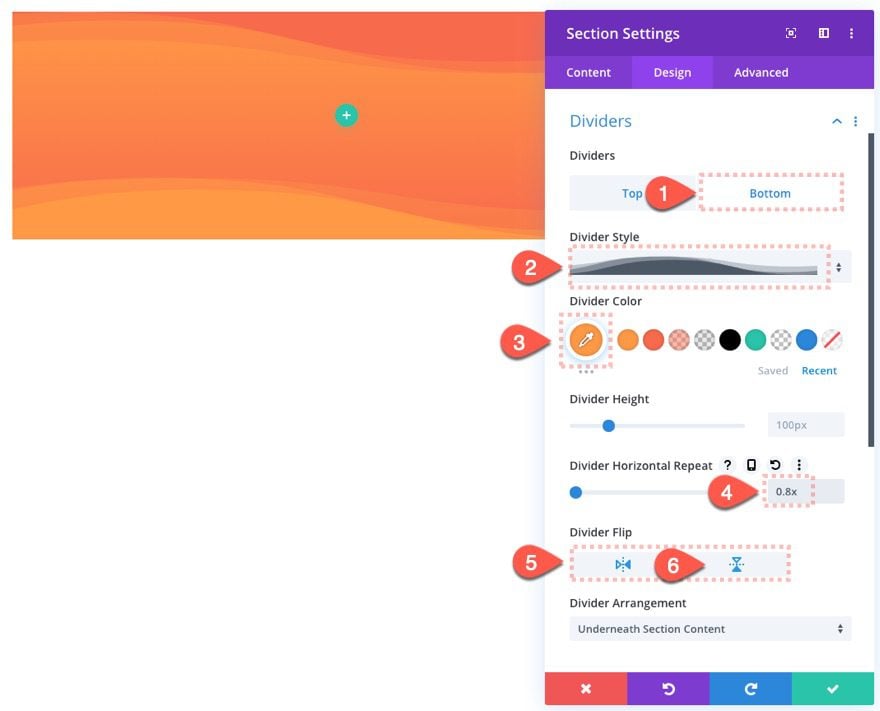
Next, go to the design tab and a top and bottom section divider as follows:
- Top Divider Style: see screenshot
- Top Divider Color: #f86a4c
- Top Divider Horizontal Repeat: 0.8x
- Bottom Divider Style: see screenshot
- Bottom Divider Color: #ff9945
- Bottom Divider Horizontal Repeat: 0.8x
- Bottom Divider Flip: horizontal and vertical
Margin and Border
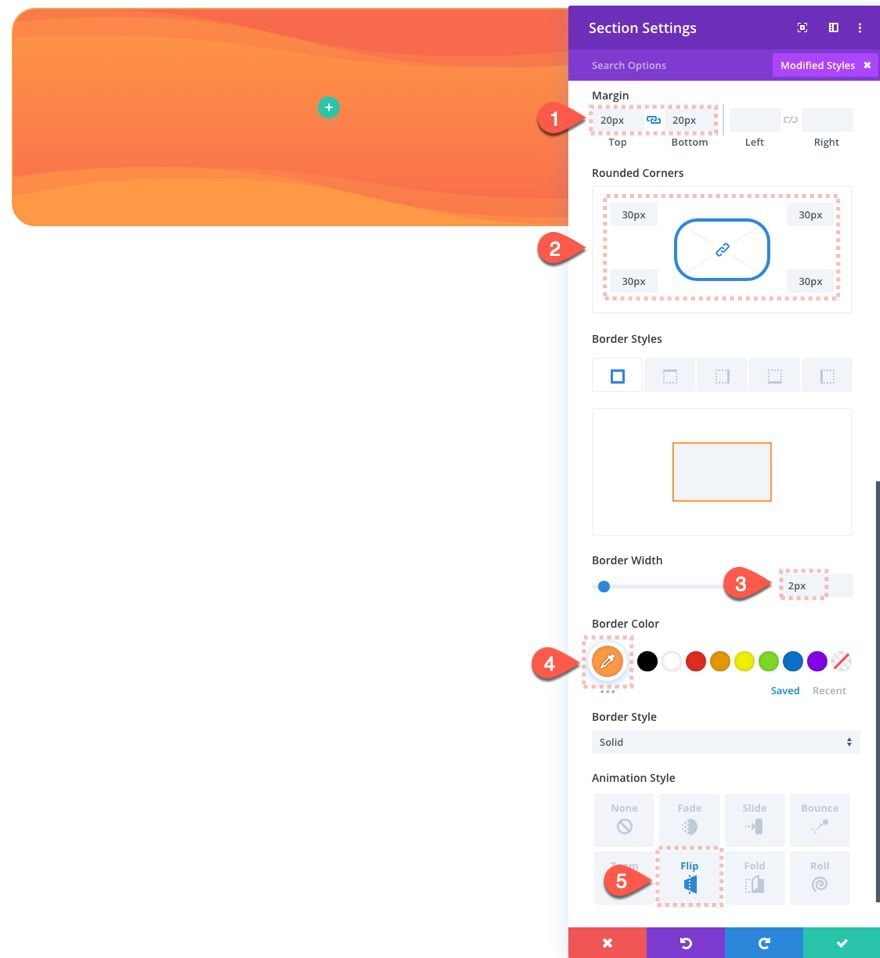
After the dividers are in place, give the section a little margin above and below and then finish it off with a border and an animation as follows:
- Margin: 20px top, 20px bottom
- Rounded Corners: 30px
- Border Width: 2px
- Border Color: #ff9945
- Animation Style: Flip
Add Column and Set Row Width
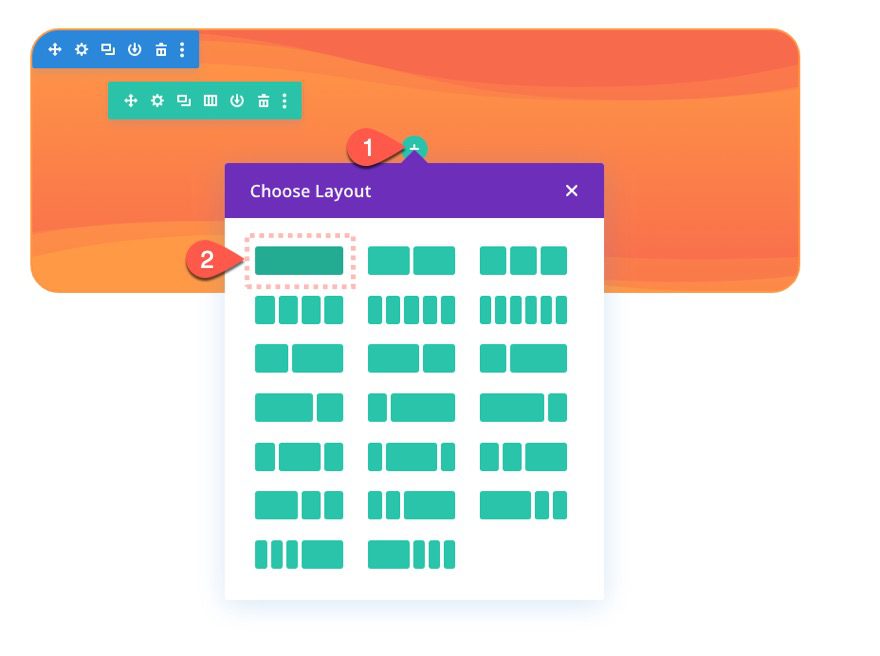
Now that the section is complete, add a one-column structure to the row.
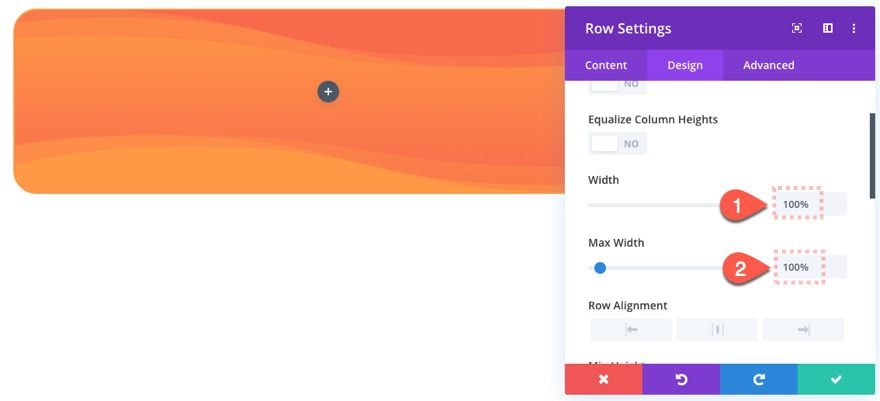
Then update the row settings as follows:
- Width: 100%
- Max Width: 100%
Build the Email Optin
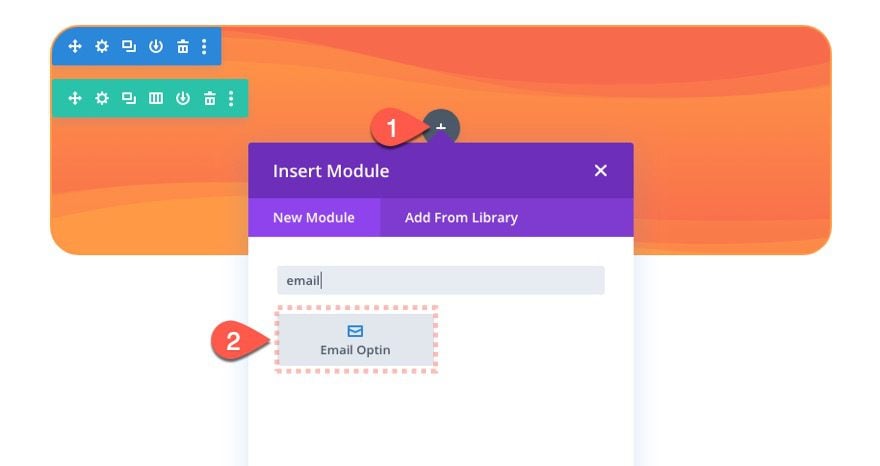
Add Email Optin Module
Next, add an email optin module to the row.
Email Optin Content
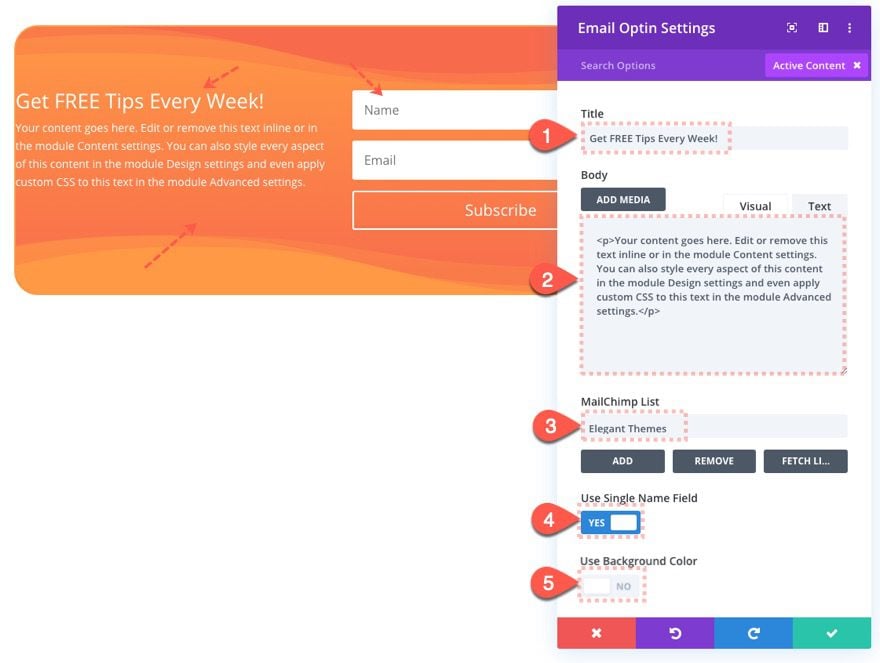
For the email optin content settings, update the following:
- Title: “Get FREE Tips Every Week!”
- Body: [keep default mock content]
- Mailchimp List: [add a list]
- Use Single Name Field: YES
- Use Background Color: NO
Email Optin Design
Fields
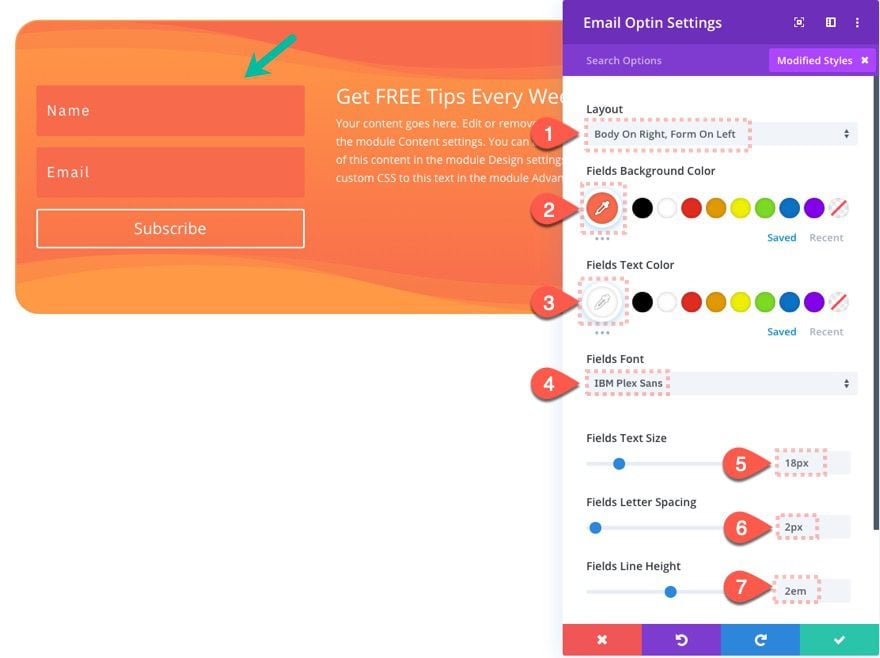
Jump over to the design tab and design the email optin fields by updating the following:
- Layout: Body on Right, Form on Left
- Fields Background Color: #f86a4c
- Fields Text Color: #ffffff
- Fields Font: IBM Plex Sans
- Fields Text Size: 18px
- Fields Letters Spacing: 2px
- Fields Line Height: 2em
Title
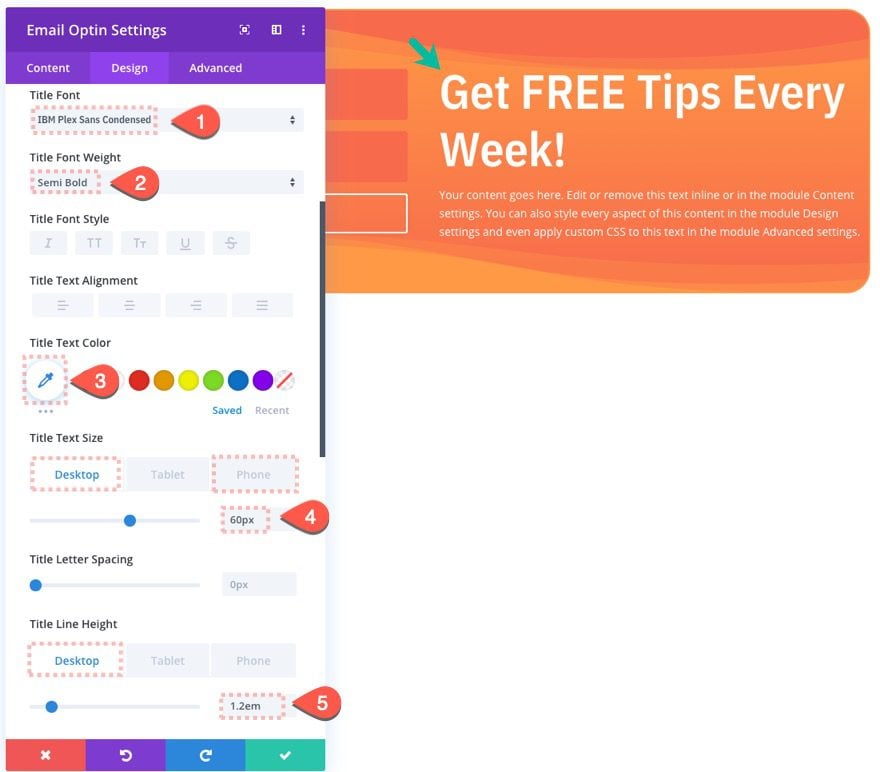
Update the title text settings as follows:
- Title Font: IBM Plex Sans Condensed
- Title Font Weight: Semi Bold
- Title Text Color: #ffffff
- Title Text Size: 60px (desktop), 30px (phone)
- Title Line Height: 1.2em (desktop), 1.6 (phone)
Button
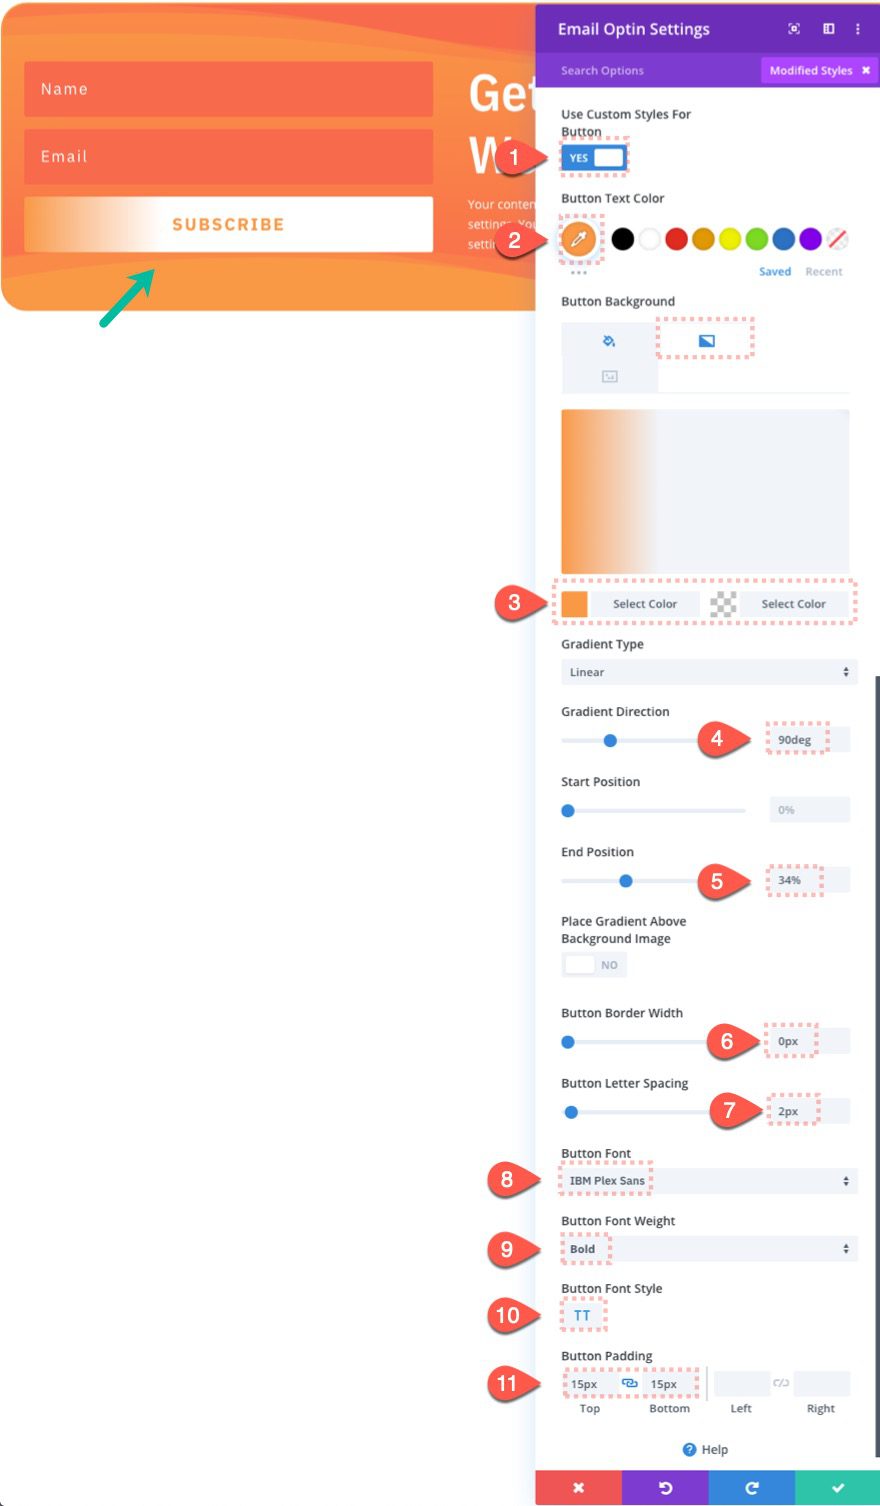
For the button, update the following:
- Use Custom Styles for Button: YES
- Button Text Color: #ff9945
- Button Background Gradient Left Color: #ff9945
- Button Background Gradient Right Color: #ffffff
- Gradient Direction: 90deg
- End Position: 34%
- Button Border Width: 0px
- Button Letter Spacing: 2px
- Button Font: IBM Plex Sans
- Button Font Weight: Bold
- Button Font Style: TT
- Button Padding: 15px top, 15px bottom
Padding
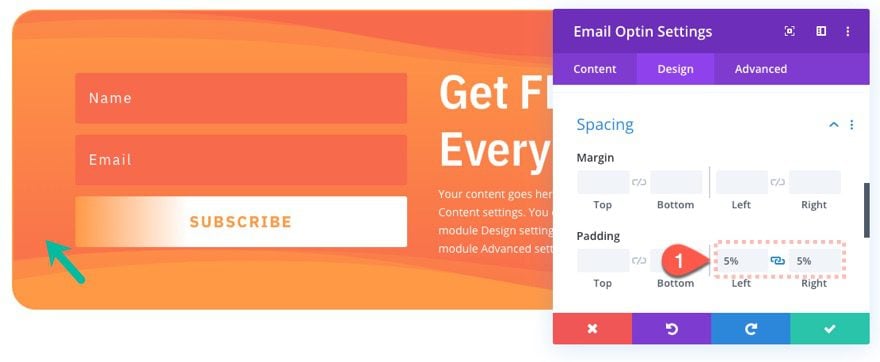
And for one last touch, add the following padding:
- Padding: 5% left, 5% right
Final Result
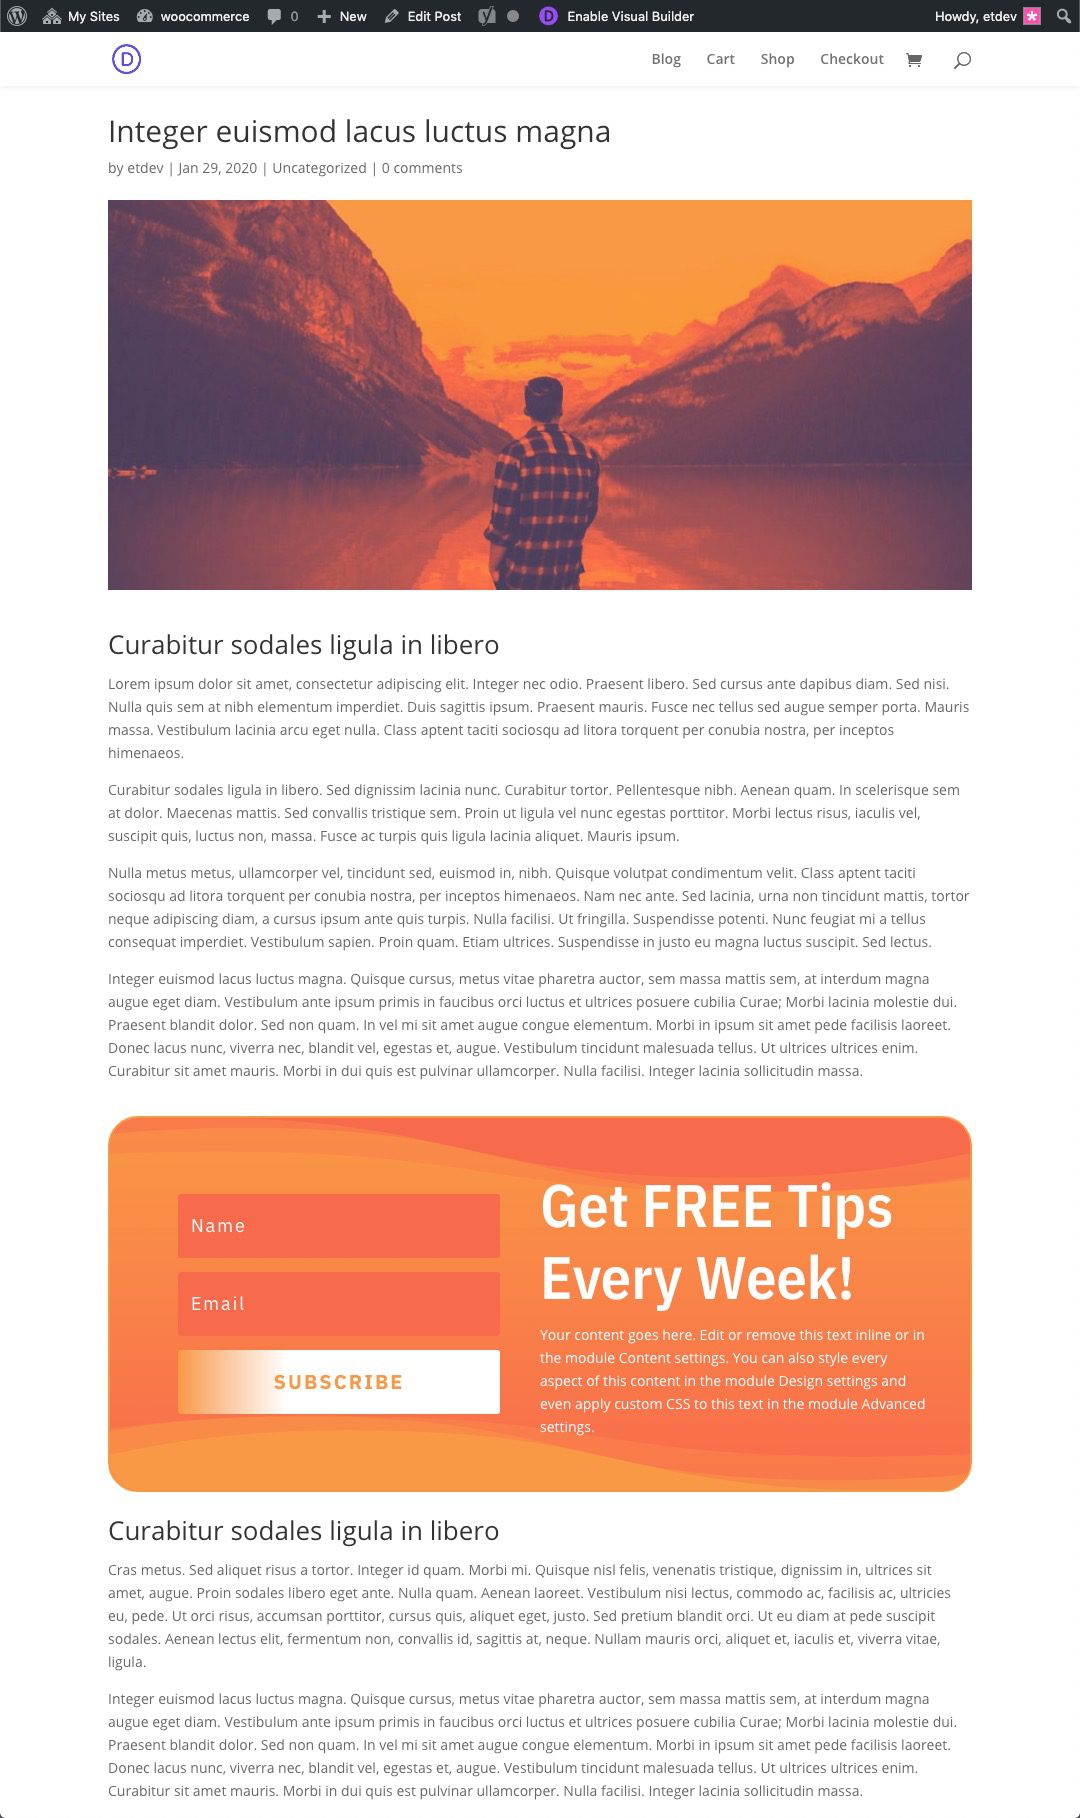
Once we are finished designing the layout within the Divi Layout editor, make sure and save the layout. Then save the post so you can see a preview of the email optin on a live page. Here is what it looks like.

Here is the slight animation of the email optin as you scroll down the post.

Final Thoughts
Adding an email optin to your Gutenberg post just got amazingly simple with the Divi Layout Block. Not only can you add a fully functional ( and easy to use) email optin in seconds, but you also can use the Divi Builder to add custom design, hover effects, and animation. All this without having to use a plugin!
I look forward to hearing from you in the comments.
Cheers!


I using this theme it’s amazing themes
Glad to hear that. Thanks for commenting.
Good Information, But most of the designers now a days shifting to elementor .
Yes, But innovation is very important in every design element.
Thanks for this Information
You’re welcome.
Thanks for sharing such good information with us. i hope you will share more information. Please keep sharing!
You’re welcome. Will do!
Hi,
Very great strategy you shared sir. Thanks to posting such kind of useful info and keep posting.
Thanks! Will do.