If you have multiple store locations, adding a store locator to your website can drastically improve the user experience. I’m sure you have used them before when visiting a store’s website to help you find that store nearest to you. And I personally appreciate the sites that have an interactive map to show nearby locations and information. A simple google search for a store location will give you an idea of just how useful this functionality can be.
For this use case tutorial, I’m going to be showing you how to add a searchable map store locator to your site with Divi’s Handyman Layout Pack. The plugin I’ll be using is called WP Store Locator. This free plugin has some powerful customizable features including auto-generated driving directions and custom map styles. After I show you how to add stores and use the shortcode to deploy your store locator on the page, I’ll show you how to customize the style of the store locator with Divi to match the Handyman Layout. I’ll even throw in a custom Google map style to match the layout even more.
Let’s get to it.
Sneak Peek
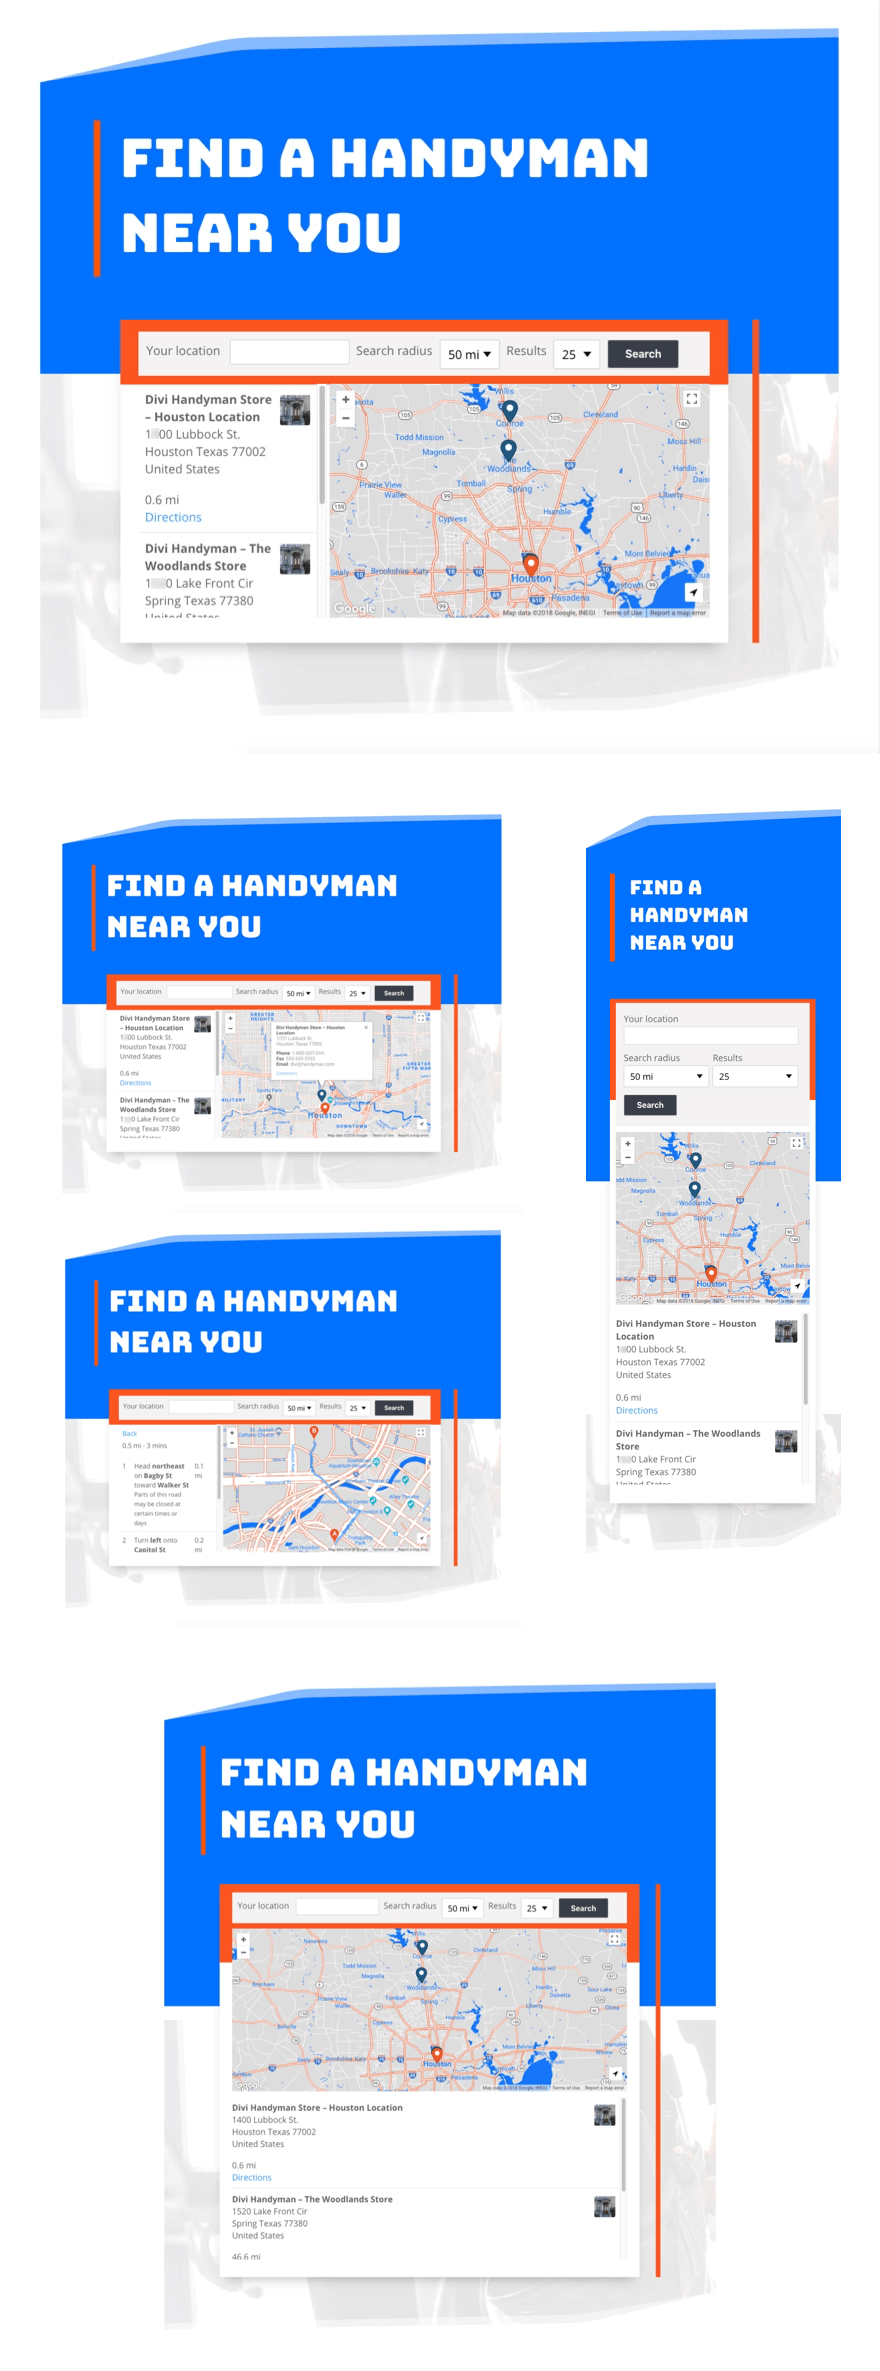
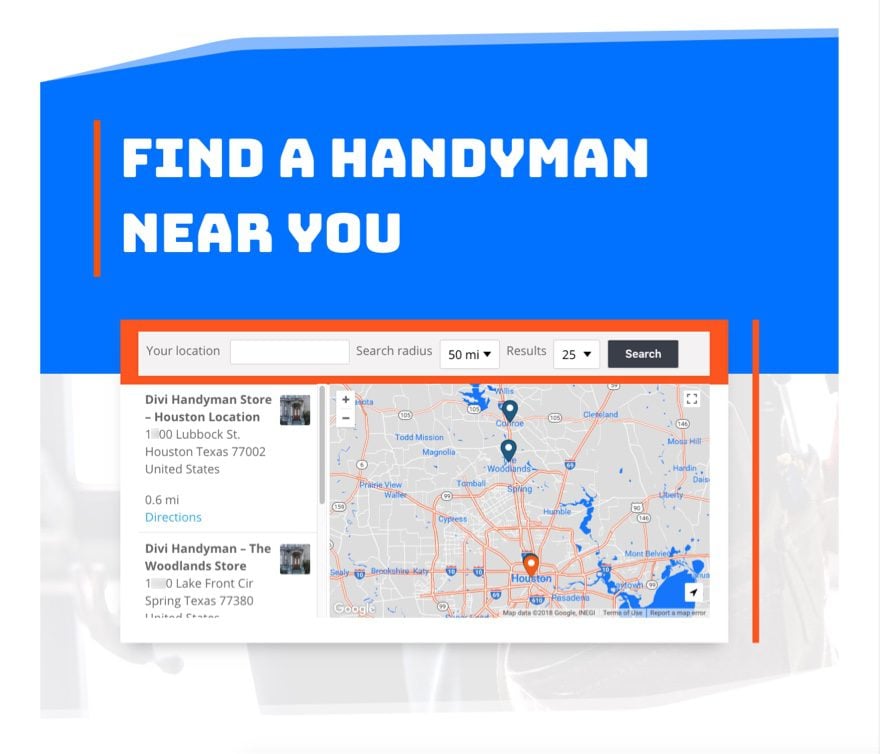
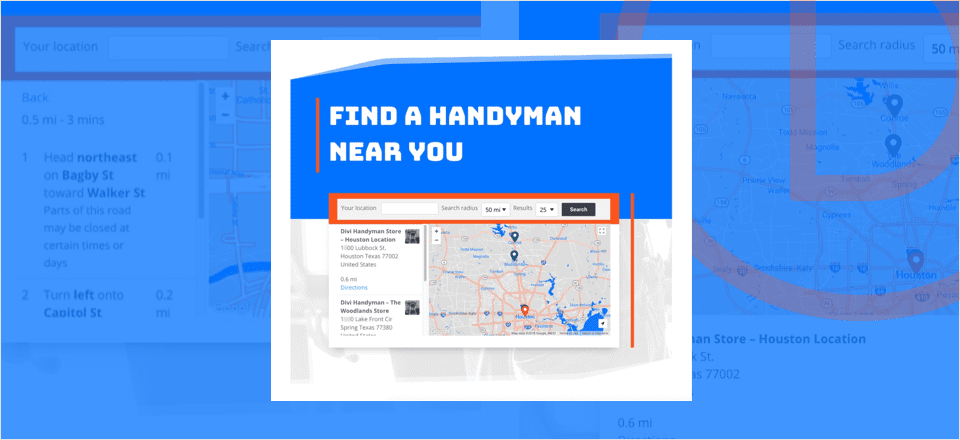
Here is a sneak peek of what we will be building today.
What You Need for This Use Case Tutorial
- Divi Theme (installed and active)
- The Handyman Layout Pack (not the whole pack, just the home page layout). This will be accessible from the Divi builder.
- The WP Store Locator Plugin (installed and active)
Setting up the WP Store Locator Plugin
WP Store Locator is a recommended plugin beyond this tutorial as well. It’s made our list of the best interactive map plugins for WordPress websites.
To set up the WP Store Locator plugin, navigate to Store Locator > Settings. You should take some time to look through those settings to make adjustments for your own site, but for now, you can get things up and running with the following:
Google Maps API Keys: Create and paste a server and browser key to allow google maps to work with the plugin.
Under the Map section
Attempt to auto-locate the user: check
Start Point: Houston, TX, USA (this will be the starting point if auto-locate fails; you can enter your own location if you know what it is)
Map Style: Here you can add a custom map style by pasting in the code (see below for more info)
Under the User Experience Section
Search and radius label width: 115px
Store Locator template: default (you can also choose the option to show the store locations under the map)
Markers
Start Location Marker: dark orange
Store Location Marker: dark blue
Save Changes

Style Your Google Map
If you decide you want to create a custom style for your Google map, there are some helpful links on the settings page that will get you started under the Map Style section of the settings page.
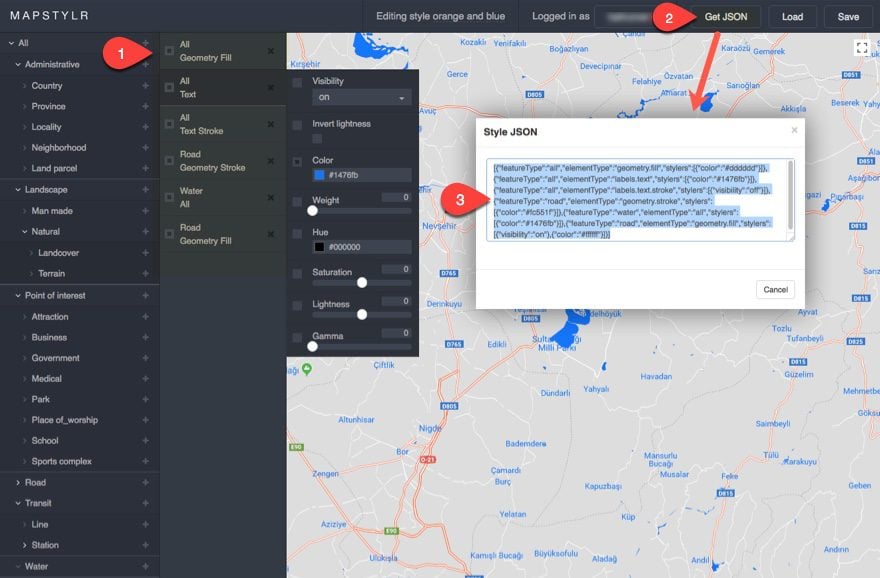
I used Mapstylr to generate the following code that you can paste into the map style input box on the settings page (use it if you like):
[{"featureType":"all","elementType":"geometry.fill","stylers":[{"color":"#dddddd"}]},{"featureType":"all","elementType":"labels.text","stylers":[{"color":"#1476fb"}]},{"featureType":"all","elementType":"labels.text.stroke","stylers":[{"visibility":"off"}]},{"featureType":"road","elementType":"geometry.stroke","stylers":[{"color":"#fc551f"}]},{"featureType":"water","elementType":"all","stylers":[{"color":"#1476fb"}]},{"featureType":"road","elementType":"geometry.fill","stylers":[{"visibility":"on"},{"color":"#ffffff"}]}]
Add New Stores
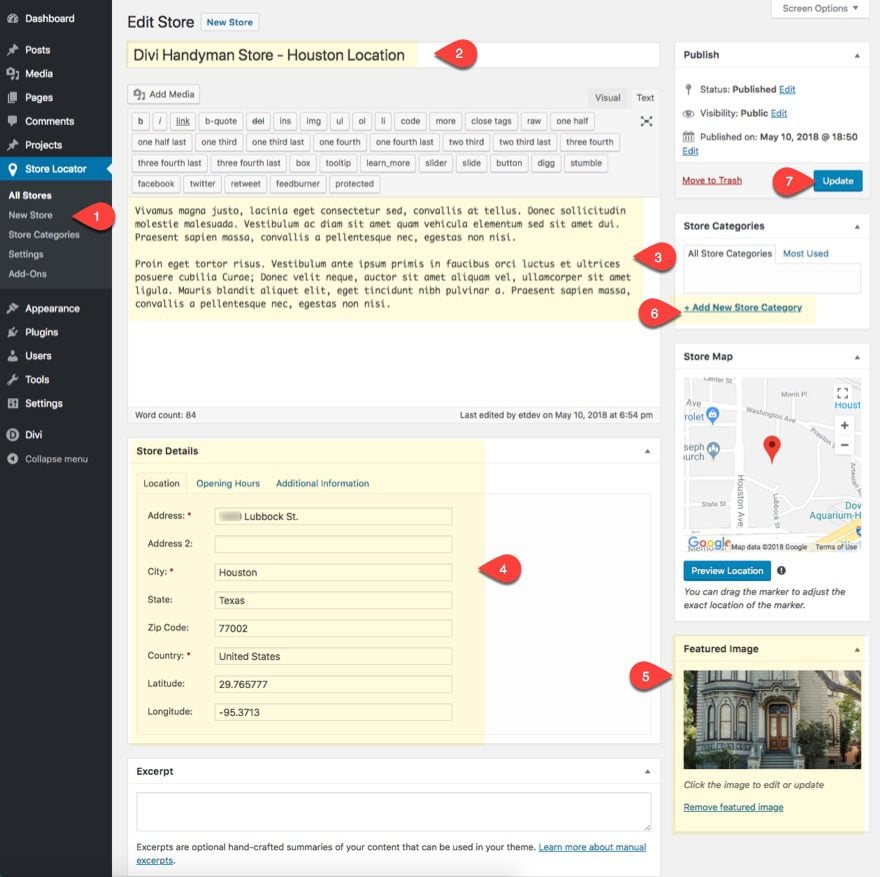
After you have updated the settings, you will need to start adding your stores. To add a new store, navigate to Store Locator > New Store and update the following:
Enter Title for your Store
Add Description/Content – This content will only be displayed if you select to show a “More info” link in the store listings on the settings page. And this really works better if you also choose the Store Locator template that shows the store list below the map.
Store Details – Here you can add the location information (necessary showing the store on the map), opening hours, and any additional info (like phone number and email).
Featured Image – add a featured image to display a thumbnail on the store listing.
Store Category – If you want, you can add a category to better organize your stores.
Publish your Store.
Once you have entered your new stores, you are ready to add the store locator to you page.
Create Store Locator Page
You actually don’t have to create an entirely new page for this store locator. The plugin uses a shortcode to display the store locator anywhere on your site. But for this example, I’m going to show you how to create a new page for the store locator using the Handyman Home page layout.
Use the Handyman Home Page Layout on a New Page
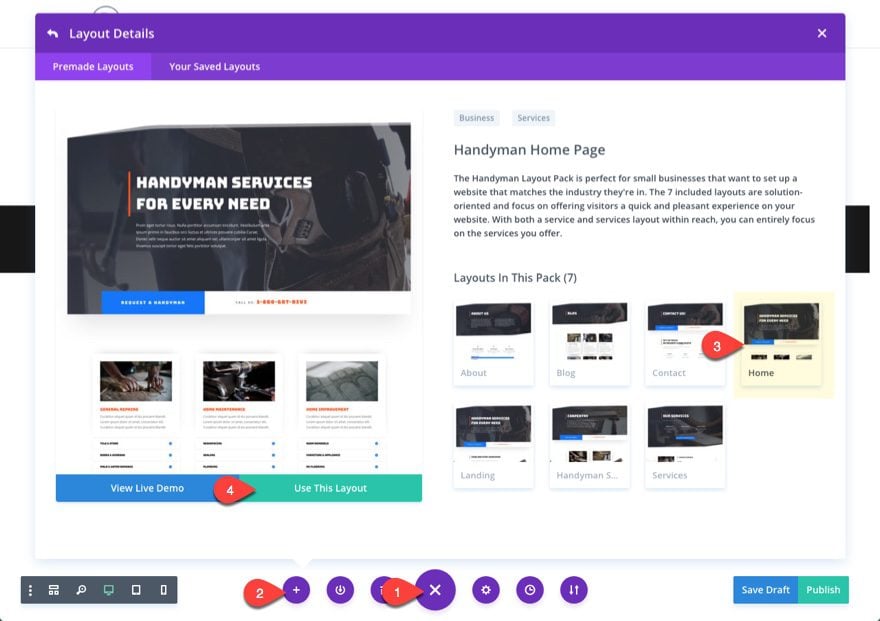
Create a new page and deploy the visual builder. Then add the Handyman Home Page layout to the page by opening the settings menu, clicking the load from library icon, and selecting the layout under the premade layouts tab in the popup box.
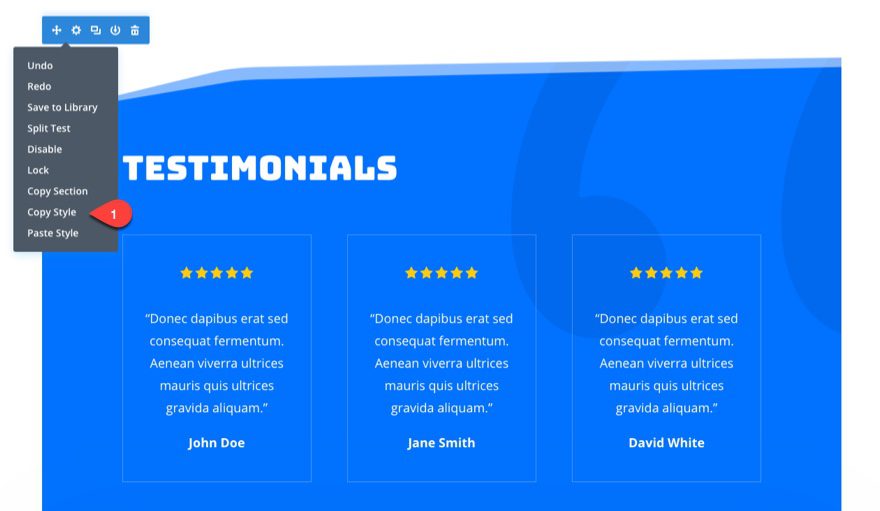
Copy the style of the testimonial section.
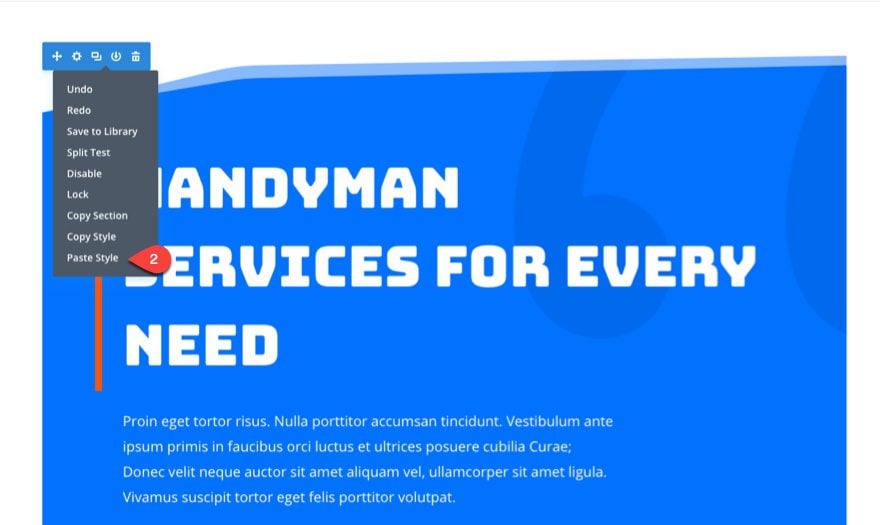
Then paste the style to the top section with the main header content.
Delete Everything You Don’t Need From the Layout
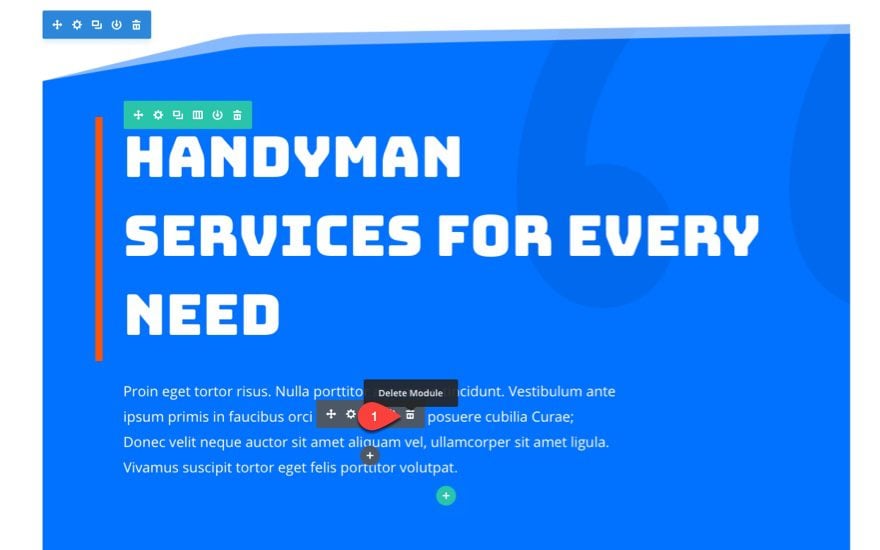
In the top section, delete the module in the first row containing the mock paragraph content.
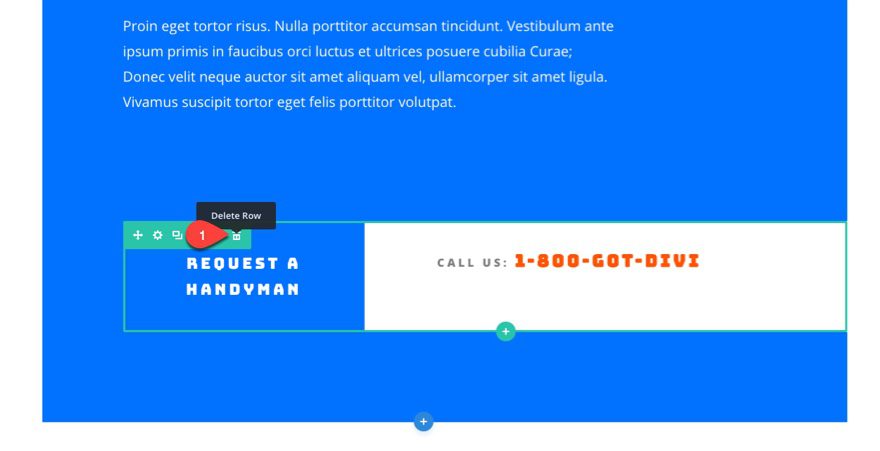
Then delete the second row in that section containing the CTA.
Now delete every section below the top section so that only that one header section remains.
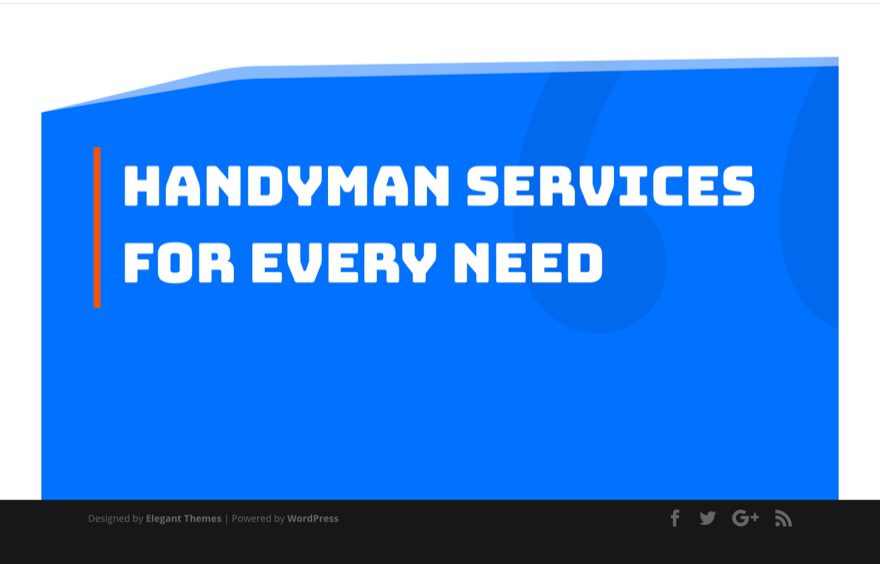
Update Settings for Section
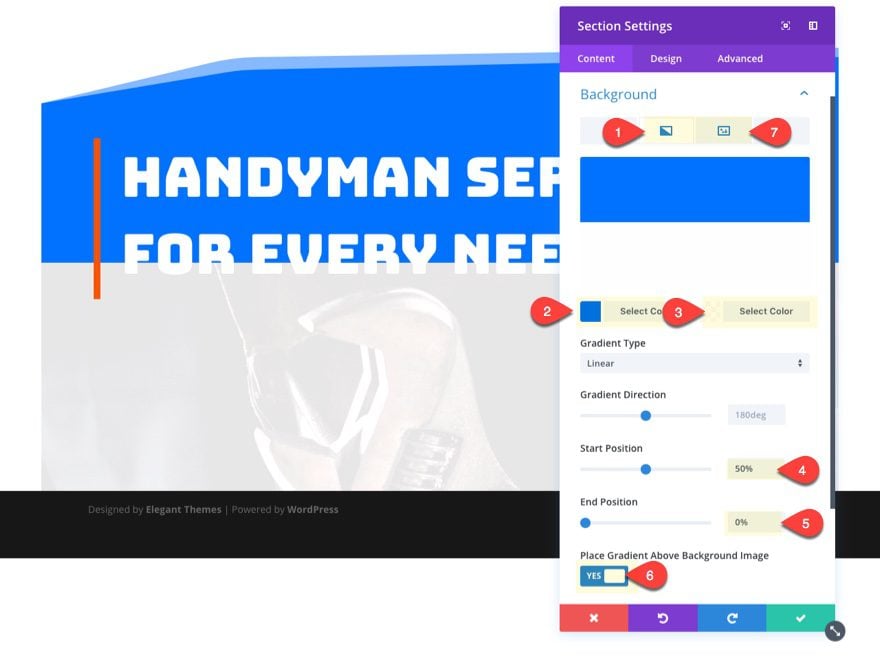
Now open the section settings and update the following:
Delete Background Color
Background Gradient Left Color: #0072ff
Background Gradient Right Color: rgba(255,255,255,0.89)
Start Position: 50%
End Position: 0%
Place Gradient Above Background Image: YES
Add a new background image (around 1920px by 1100px)
Background Image Size: fit
Background Image Position: Bottom Center
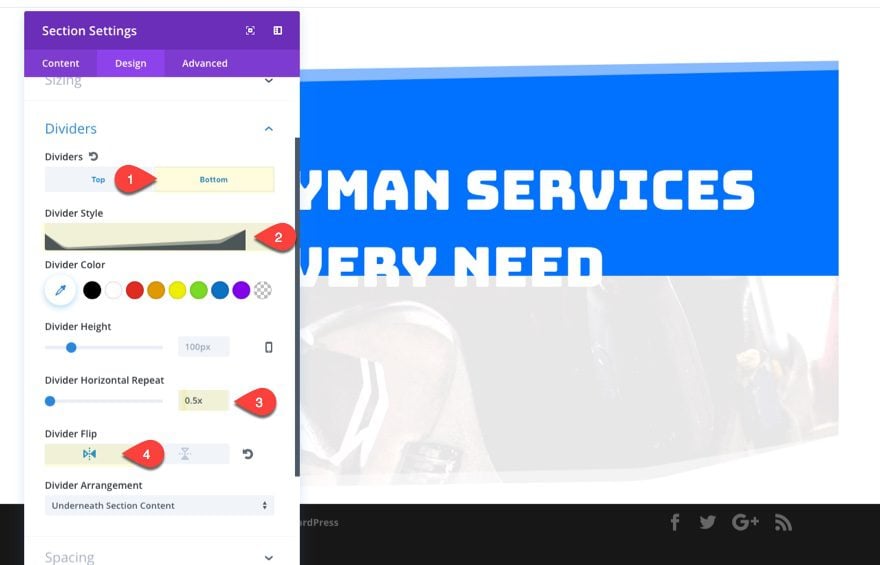
Under the design tab, update the following:
Give your section a bottom divider.
Dividers: Bottom
Divider Style: see screenshot
Divider Horizontal Repeat: 0.5x
Divider Flip: horizontal
Custom Margin: 60px Bottom
Save Settings
Update Title
For the text module that contains the title of the page, use the inline editor to change the text to say “Find a Handyman Near You”.
Create New Row and Text Module for Store Locator Shortcode
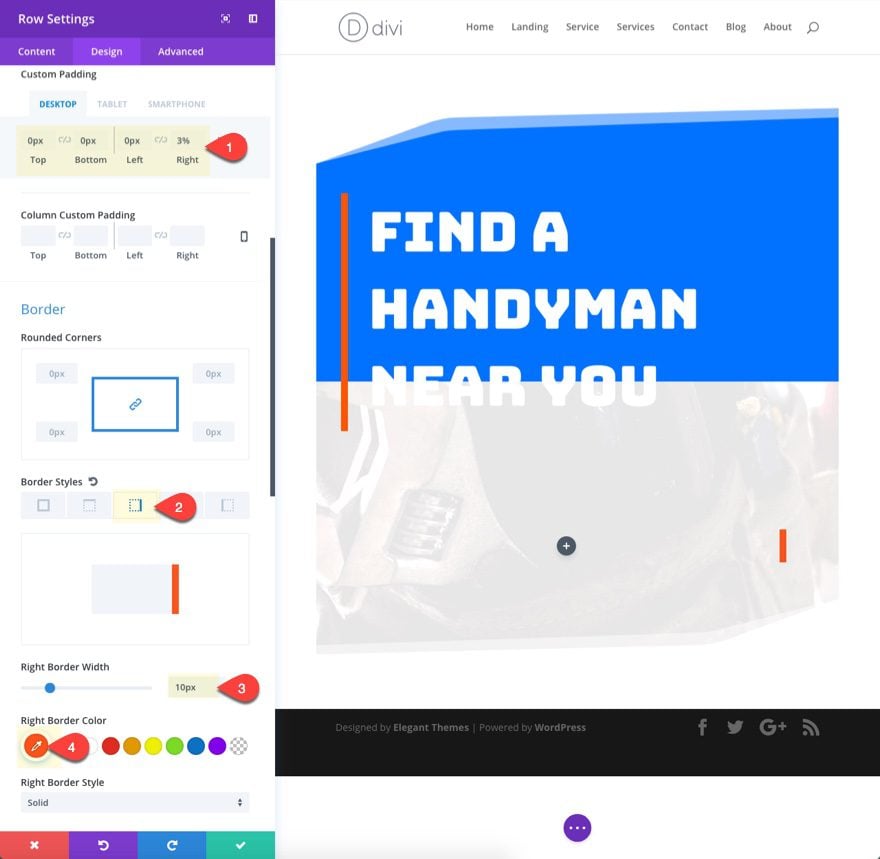
Create a new one column row in the section give it some custom spacing as follows:
Custom Padding (desktop): 0px Top, 0px Bottom, 0px Left, 3% Right
Custom Padding (tablet): 0% Right
The right padding creates spacing for the right border design.
Then add a right border to match the design of the left border in the title above.
Select the right border tab.
Right border width: 10px
Right Border Color: #fc551f
Save settings.
Next create a text module and enter the following shortcode in the content box:
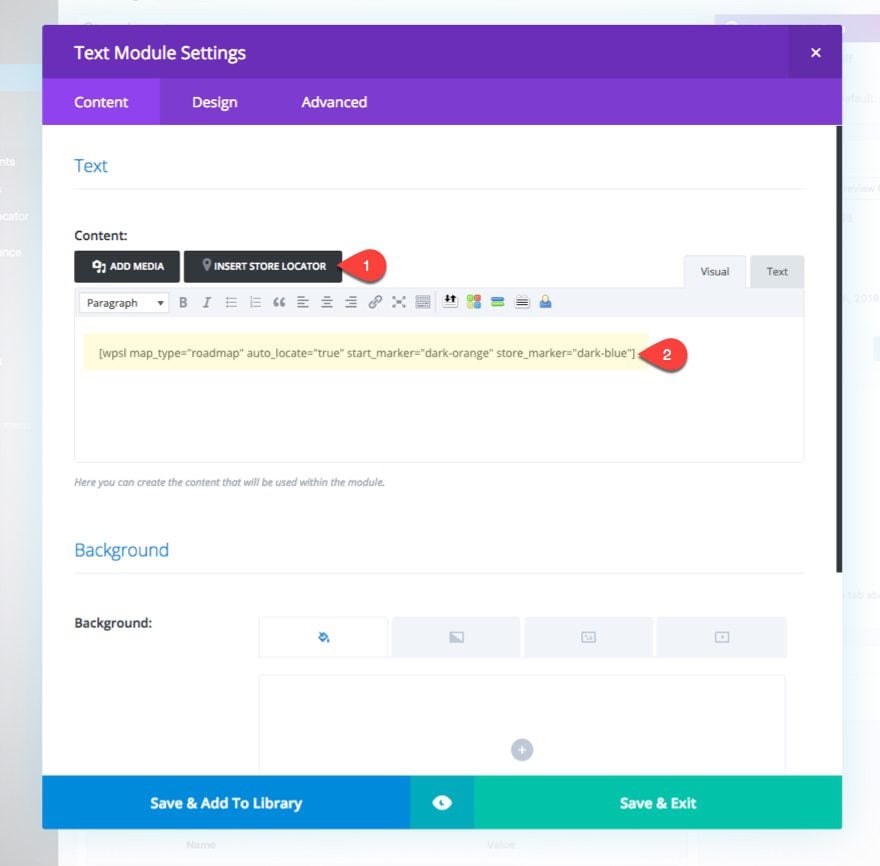
[wpsl map_type="roadmap" auto_locate="true" start_marker="dark-orange" store_marker="dark-blue"]
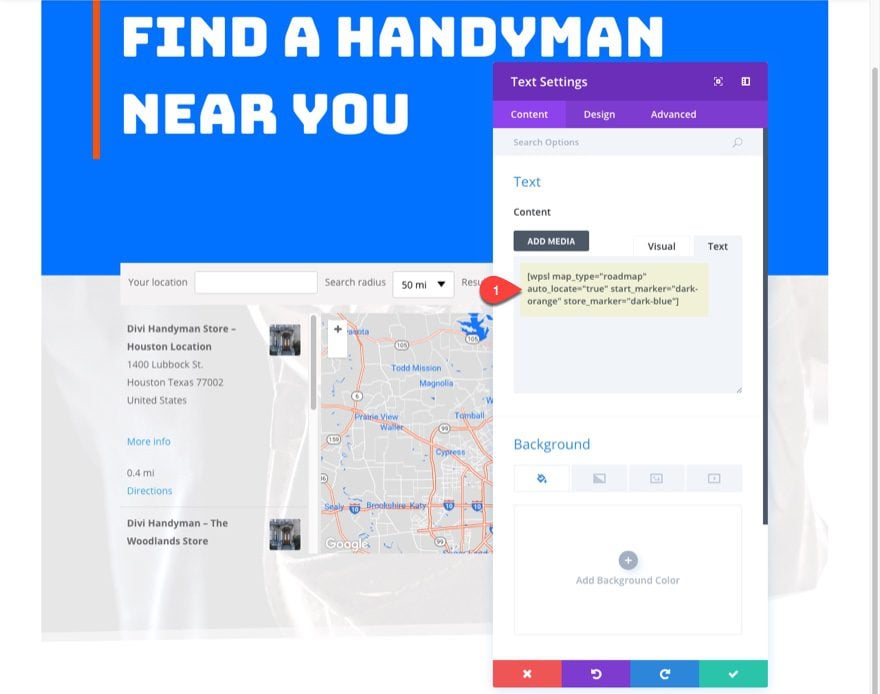
You can also use the plugin’s shortcode generator from within the backend builder if you like.
Then give the text module a background.
Background Gradient Left Color: #fc551f
Background Gradient Right Color: #ffffff
Start Position: 20%
End Position: 0%
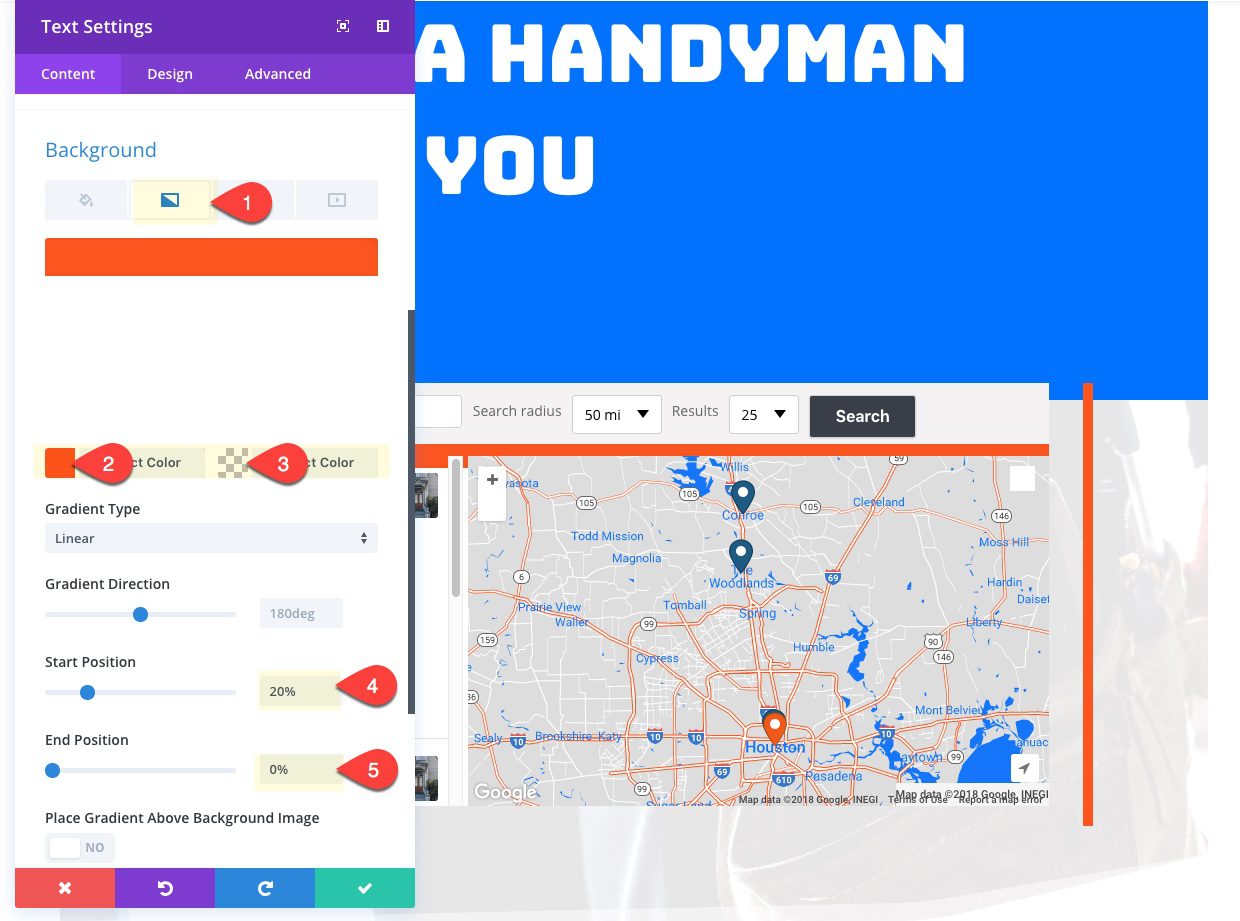
This gradient will serve as a custom design to give the search bar (generated by the plugin) an orange background.
Now we update the design settings for the text module.
Text Text Size: 18px
Custom Padding: 2% Top, 2% Bottom, 3% Left, 3% Right
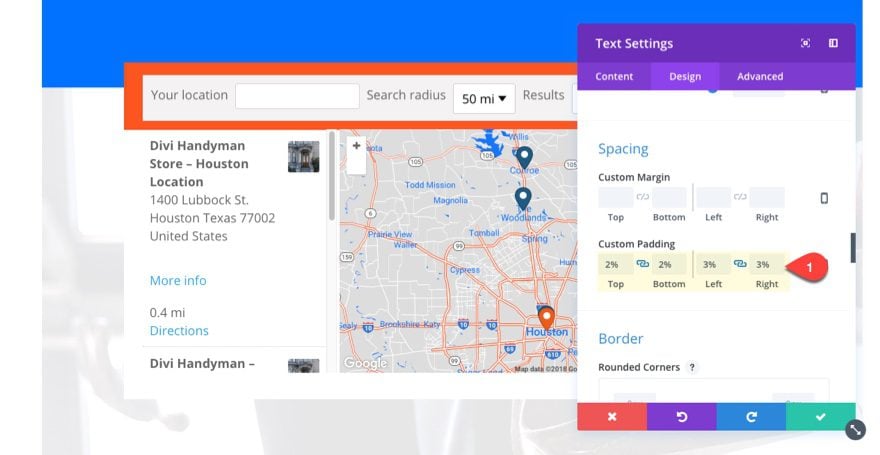
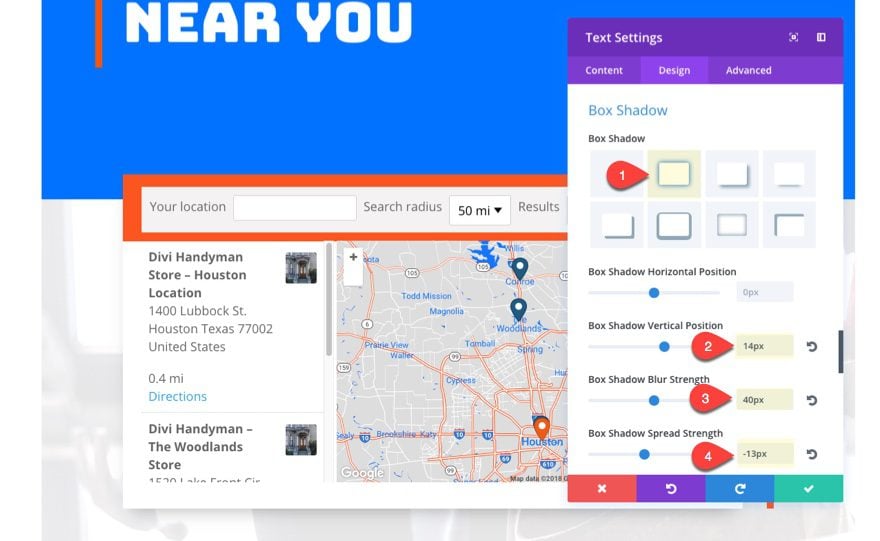
Box Shadow: see screenshot
Box Shadow Vertical Position: 14px
Box Shadow Blur Strength: 40px
Box Shadow Spread Strength: -13px
Save Settings.
If you want to change the default style of the search button to match the design of your layout, you can add the following custom CSS to Page Settings under the Advanced Tab.
#wpsl-search-btn {background: #393e4a; color: #fff; font-size: 16px; font-weight: bold; padding: 0.6em 1.6em; }
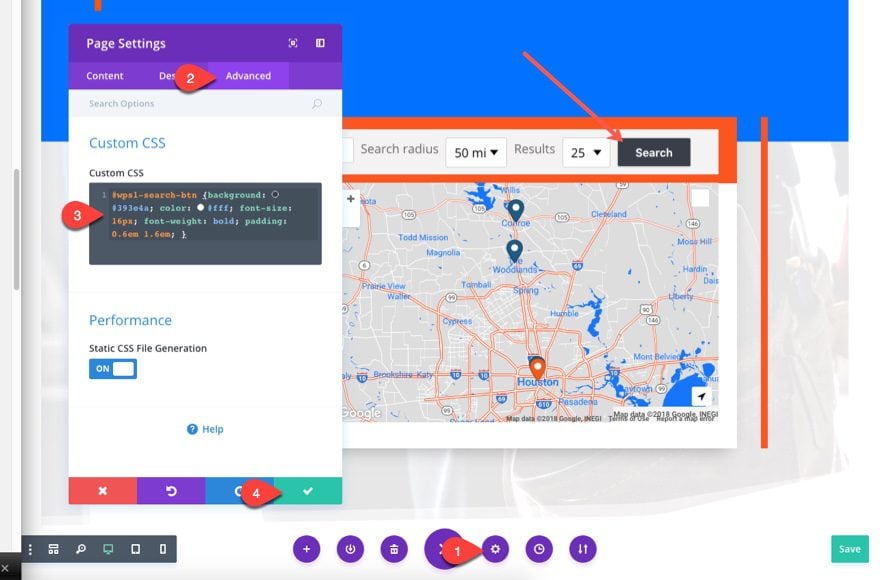
If you want the CSS to be applied to all pages on your site, you can add the code to the Additional CSS section within the theme customizer.
Final Result
Now let’s check out the final result.
Here is what the store locator will look like if you change the template to “show the store locations under the map” under the plugin settings.
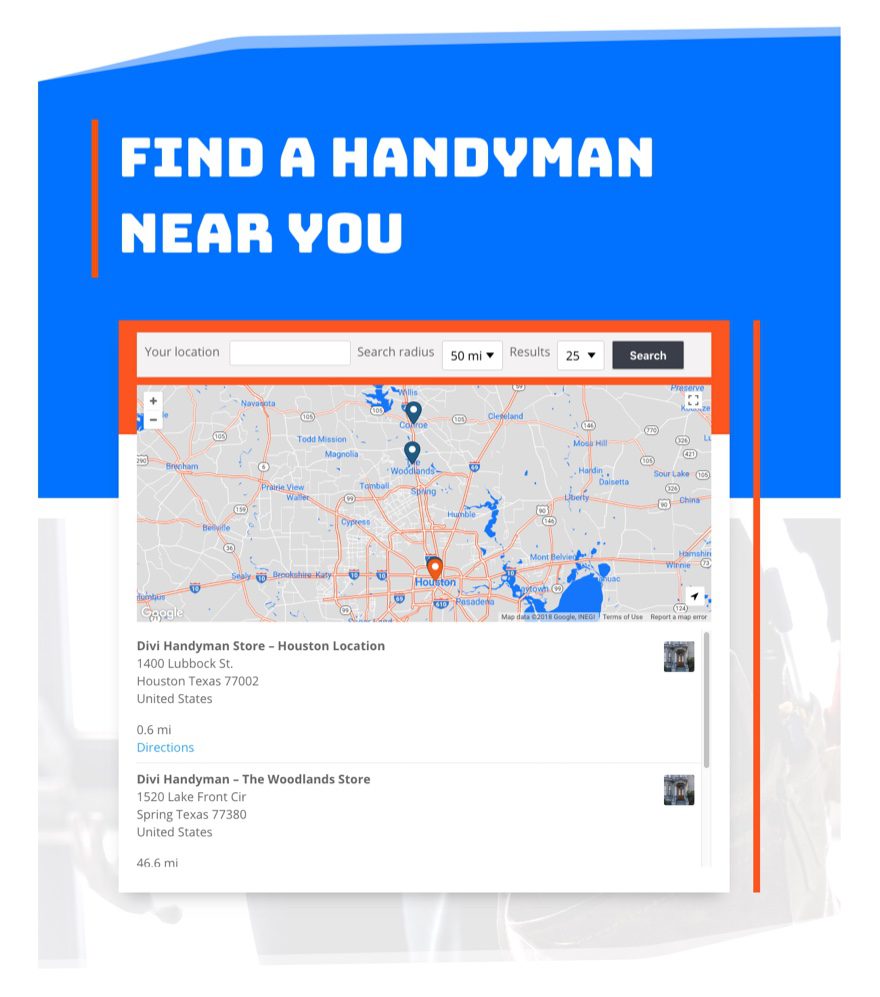
Here is what the page looks like on mobile.

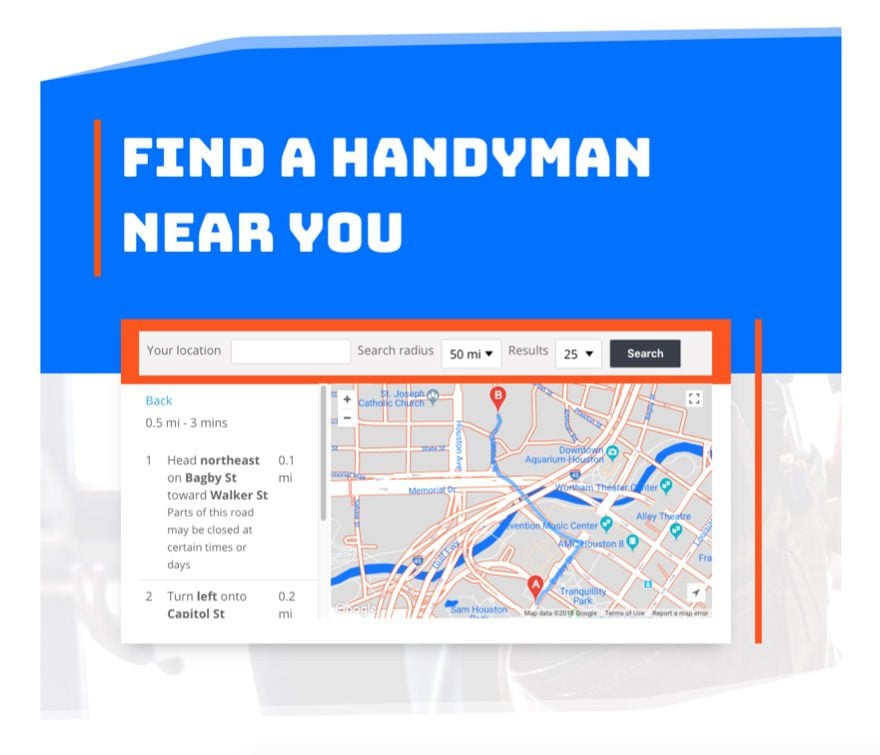
If you click the directions link next to a listing you will see the directions appear.
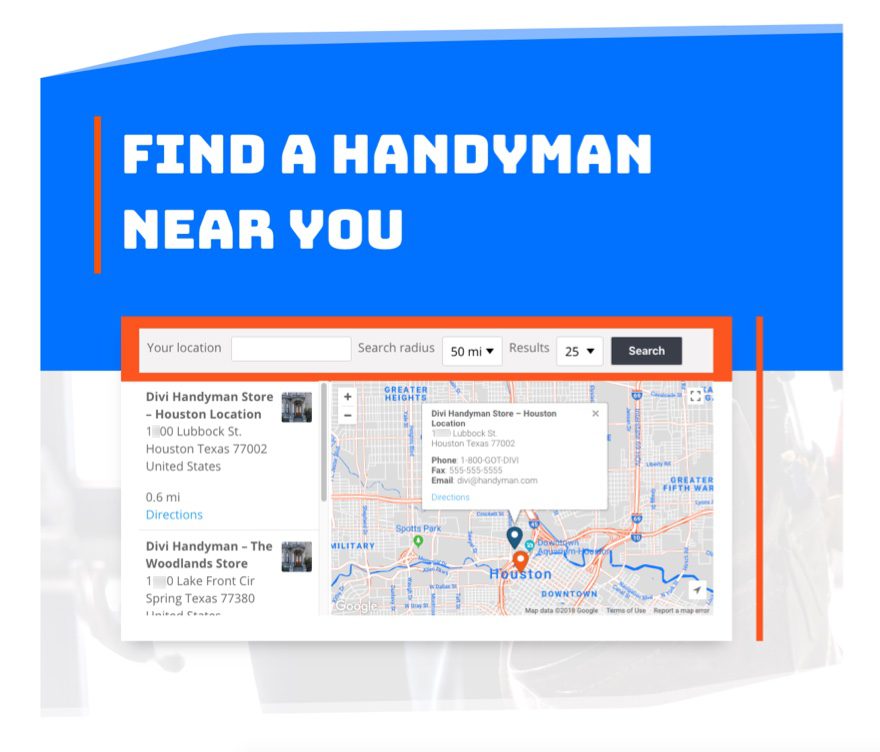
And if you click a store location icon on the map, more info will appear.
Final Thoughts
I was pleasantly surprised at how quickly and easily I was able to get store locator functionality using Divi and the WP Store Locator Plugin. The settings are pretty straightforward, making customization easy and logical. I also appreciate the additional features like the custom map styles, the store directions, and the smart map markers that popup and show more info on the store.
Divi seems to work well with this plugin and the Handyman Layout pack makes it easy to give your store locator the design adjustments it needs.
Also, this plugin will work for just about any website, not just those in the Handyman niche.
If you interested in adding premium add-ons to the plugin (like the search widget), feel free to check out their website.
I look forward to hearing from you in the comments below.
Cheers!




It would be great if the Map Module would let you highlight an area, say: custommer service area.
This would be a game changing feature for the Map module. Please consider introducing it 🙂
Fantastic, it’s just what I’ve been looking for one of my networks and applications for a long time Thanks
Great!
This is such a great resource… so happy to see this! Thanks Jason. 🙂
You are very welcome, Janet. So glad it will be useful.
I love your tutorials and maybe this is not the place, but I’ve noticed with your last update that submenus keep open when you click them.
I don’t remember this happen before and it’s a bit annoying in onepage webs. Thank you for your great work.
Thanks Eli. I’m not sure I understand the issue. What do you mean by “submenus keep open”?
Nice one. Thanks. Do you have a demo site that I can show a possible client, they have 16 clinics and this would be a game changer for me.
Hi Johan.
You’ve asked not me but there is a demo page of WP Store Locator here – https://wpstorelocator.co/demo/ (type Amsterdam for example – in “Your location” field – and hit Enter to see the result).
Wish you success with your possible client 🙂
Thanks Johan. I forgot to add that link to the post. So glad you did.
Great resource, Jason! Thanks for all the details!
You’re welcome Elisandro. Hope it helps.