When you’re streamlining the way you create blog posts on your website, chances are high you’ll want to include an attractive CTA somewhere inside your post. Now, with Divi and its new Gutenberg layout block integration, you can easily add a new Divi-built block anywhere inside your Gutenberg blog post. This allows you to keep the overall blog post content inside the Gutenberg environment, while still building a custom Divi CTA using Divi-s built-in options. Best of both worlds! In this tutorial, we’ll show you how to add an inline & animated Divi CTA layout block to your Gutenberg post. We’ll share the Divi CTA layout block’s JSON file for free as well!
Let’s get to it.
- 1 Preview
- 2 Download The Inline & Animated Divi CTA Layout Block for FREE
- 3 Download For Free
-
4
Let’s Start Recreating!
- 4.1 Use Third Theme Builder Pack Post Template
- 4.2 Open Existing Gutenberg Post or Create New One
- 4.3 Add New Inline Divi Block
- 4.4 Build New Layout Inside Divi Block
- 4.5 Section Settings
- 4.6 Add Row #1
- 4.7 Add Divider #1 to Column
- 4.8 Add Divider #2 to Column
- 4.9 Add Divider #3 to Column
- 4.10 Add Row #2
- 4.11 Add Text Module #1 to Column
- 4.12 Add Text Module #2 to Column
- 4.13 Add Button Module to Column
- 4.14 Clone Row #1 & Place at Bottom of Section
- 5 Preview
- 6 Final Thoughts
Preview
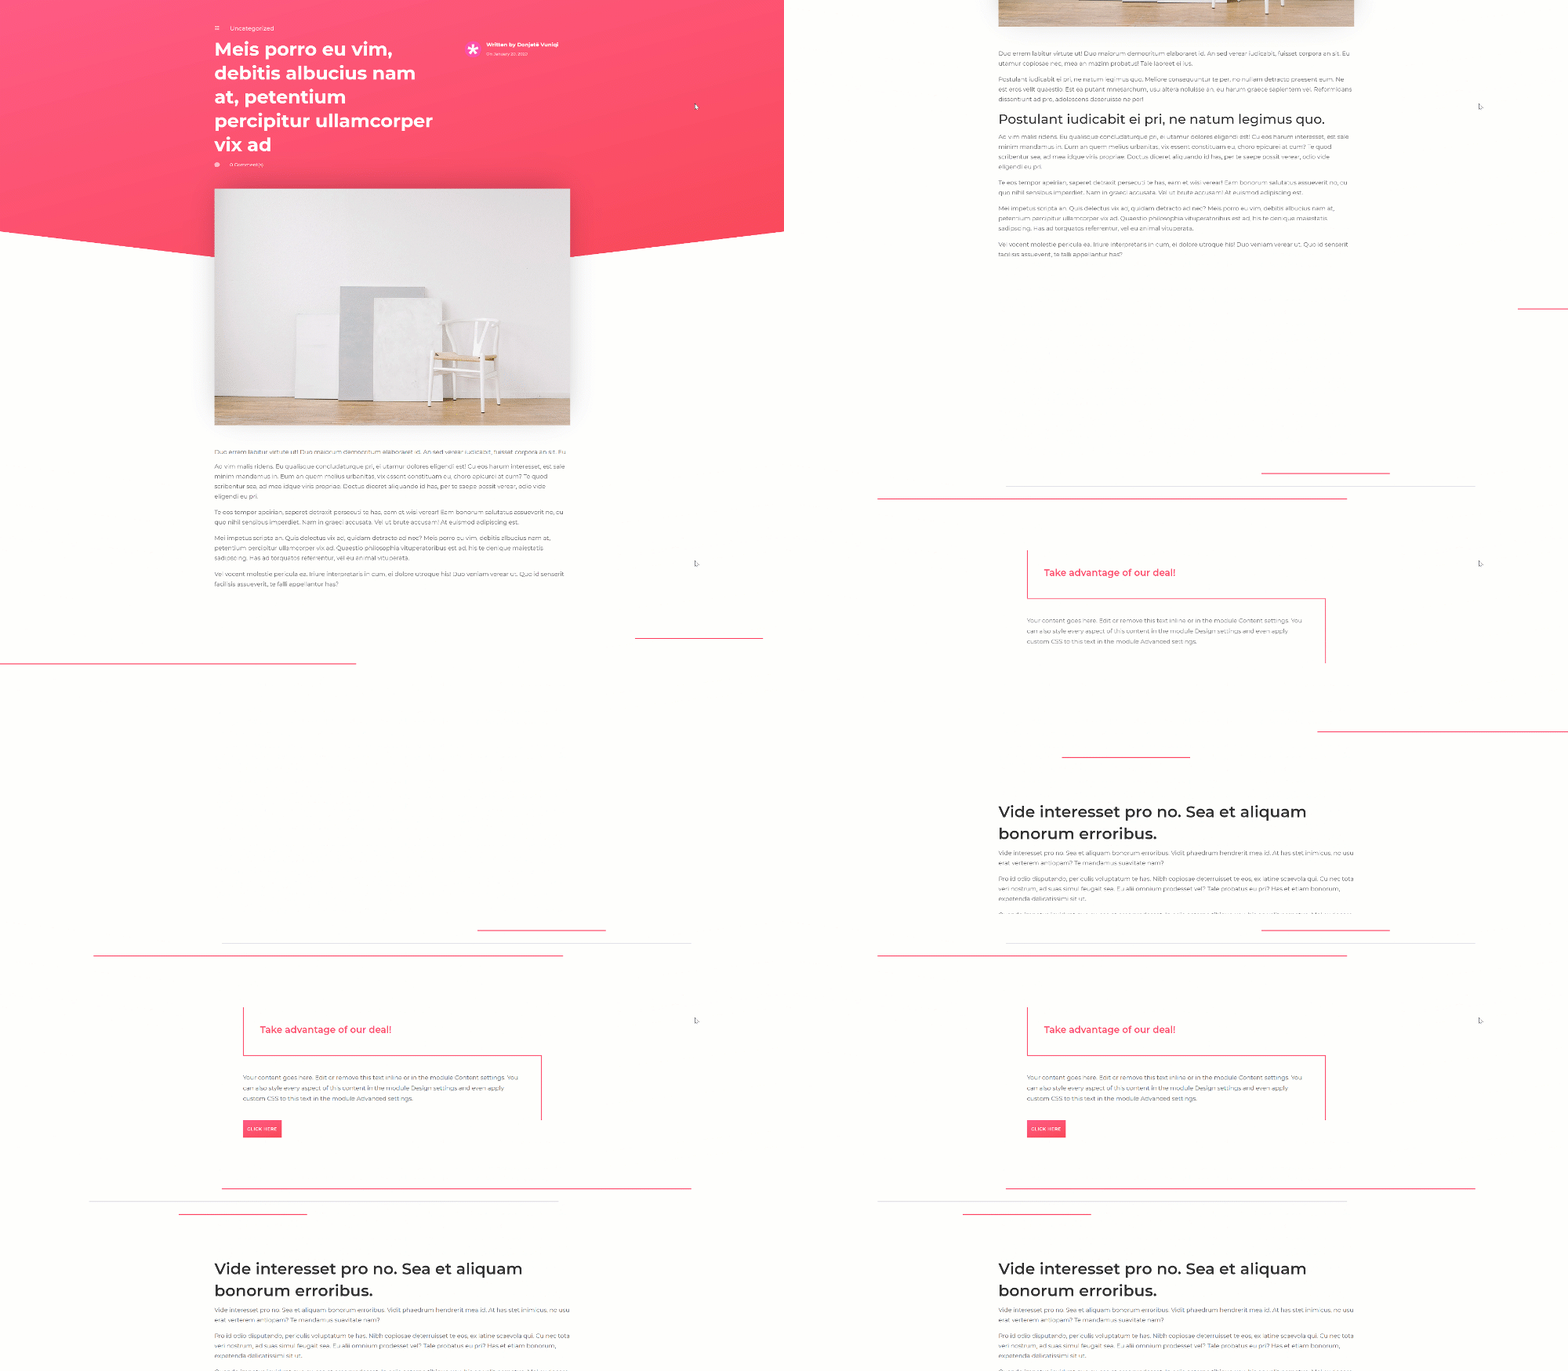
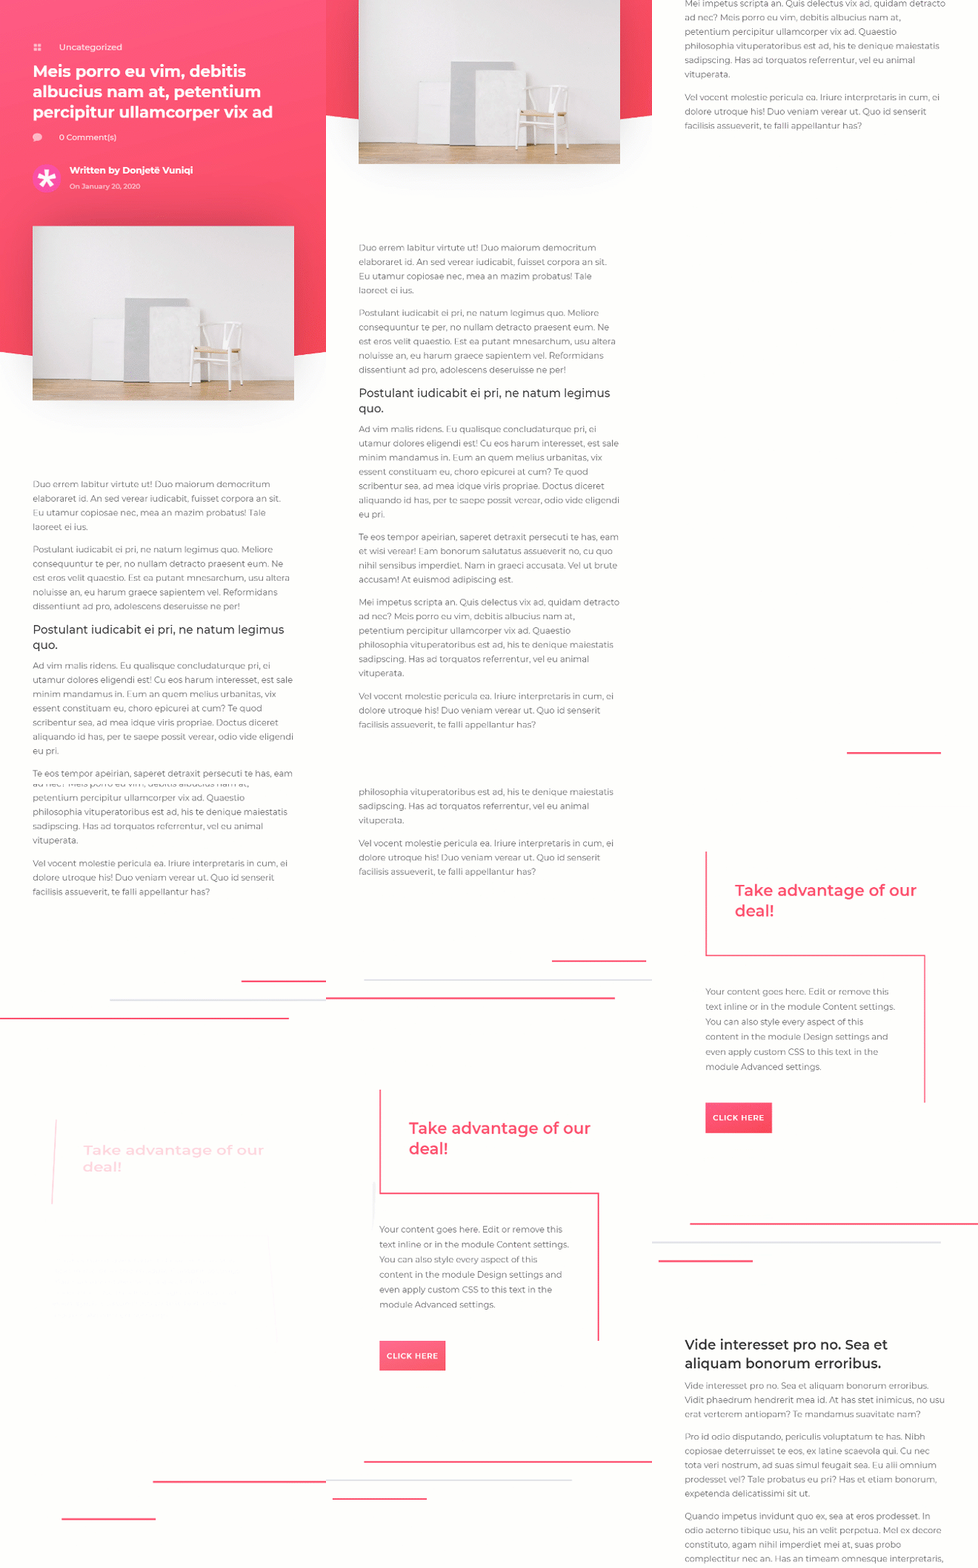
Before we dive into the tutorial, let’s take a quick look at the outcome across different screen sizes.
Desktop
Mobile
Download The Inline & Animated Divi CTA Layout Block for FREE
To lay your hands on the free hero sections, you will first need to download them using the button below. To gain access to the download you will need to subscribe to our newsletter by using the form below. As a new subscriber, you will receive even more Divi goodness and a free Divi Layout pack every Monday! If you’re already on the list, simply enter your email address below and click download. You will not be “resubscribed” or receive extra emails.
Importing The Layout Block JSON
Upload Layout to Divi Library
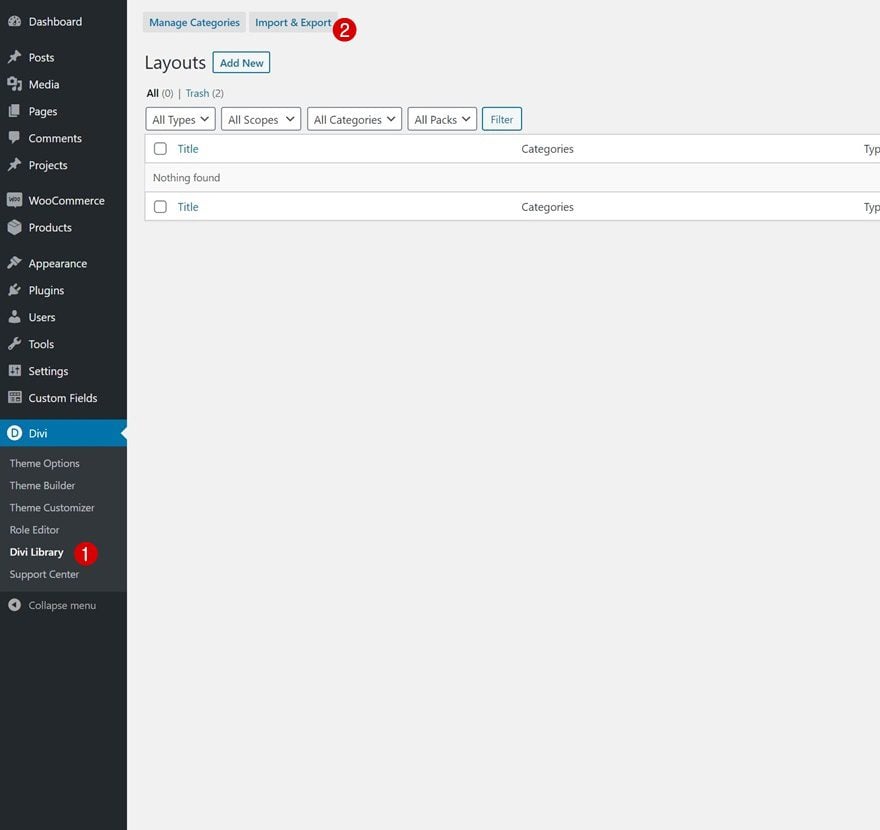
To import the JSON file you were able to download above, go to your Divi Library in the backend of your WordPress dashboard and click on ‘Import & Export’.
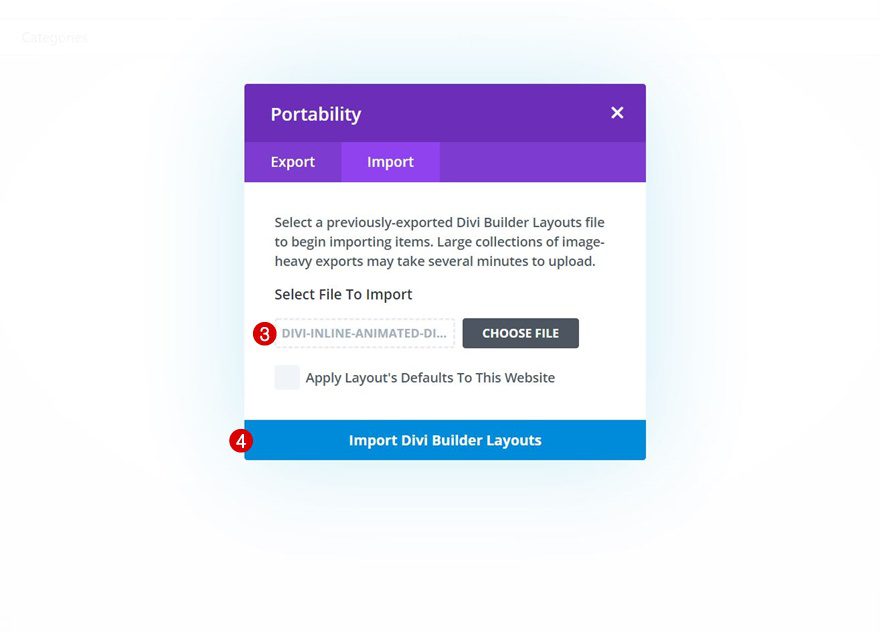
Then, select the JSON file inside your download folder and click on ‘Import Divi Builder Layouts’.
Add New Divi Block Block Inside Gutenberg Post
Once your layout has been imported, you can go to your Gutenberg post and add a new Divi layout block.
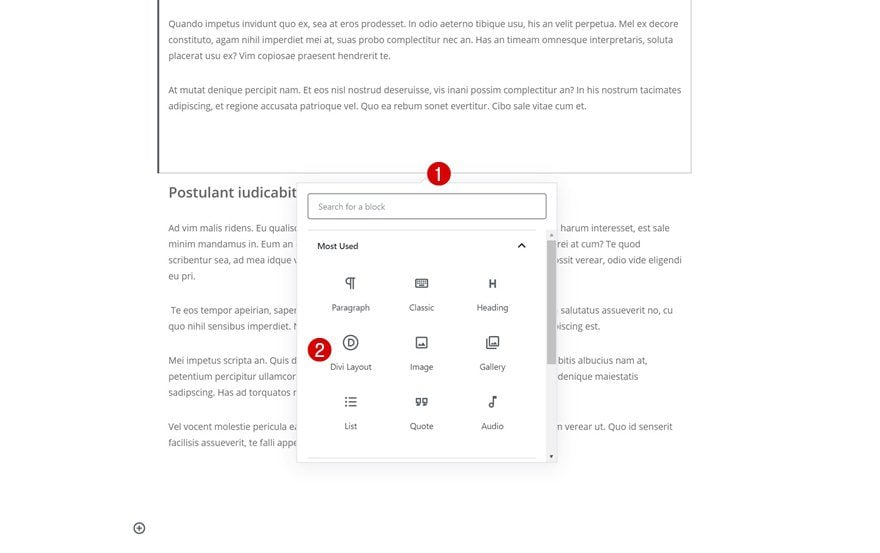
Import JSON File From Saved Layouts
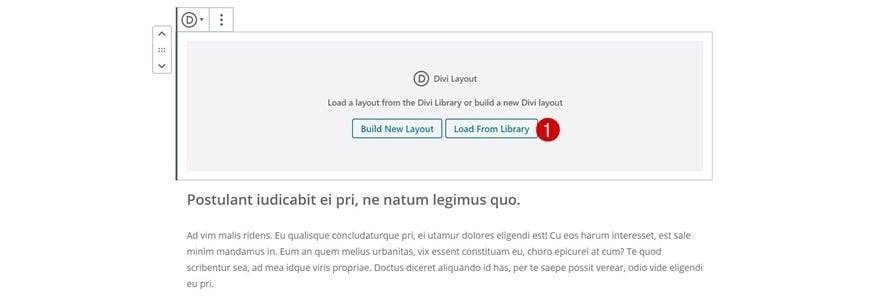
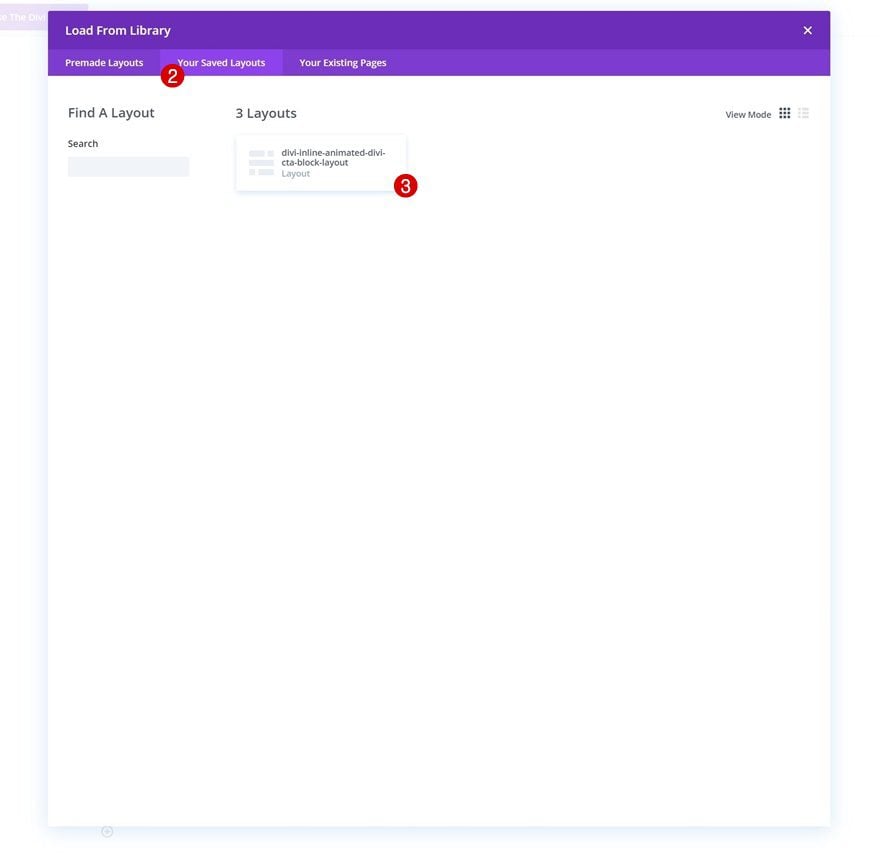
Then, click on ‘Load From Library’, navigate to ‘Your Saved Layouts’ and select the layout to import the Divi CTA Layout Block to your blog post. That’s it!
Let’s Start Recreating!
Use Third Theme Builder Pack Post Template
Download Third Theme Builder Pack
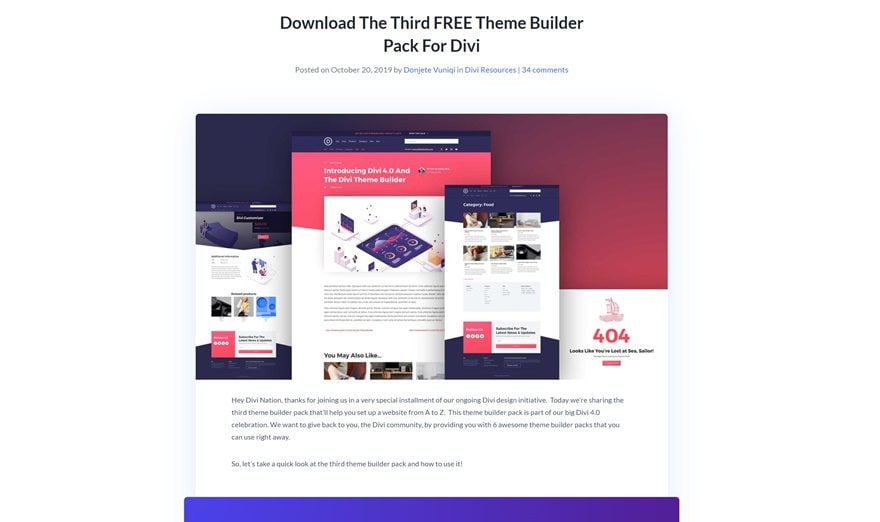
Time to start creating from scratch! First of all, the design we’re recreating matches the third theme builder pack that was released on the Divi blog. Go to the post and download the JSON files of this theme builder pack.
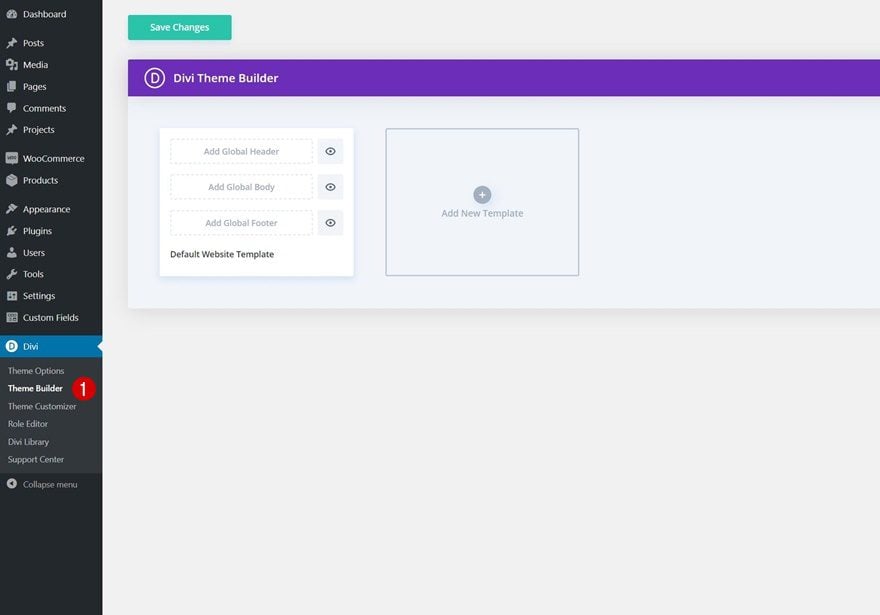
Go to Divi Theme Builder
Once you’ve downloaded the third theme builder pack, you can go to the Divi Theme Builder.
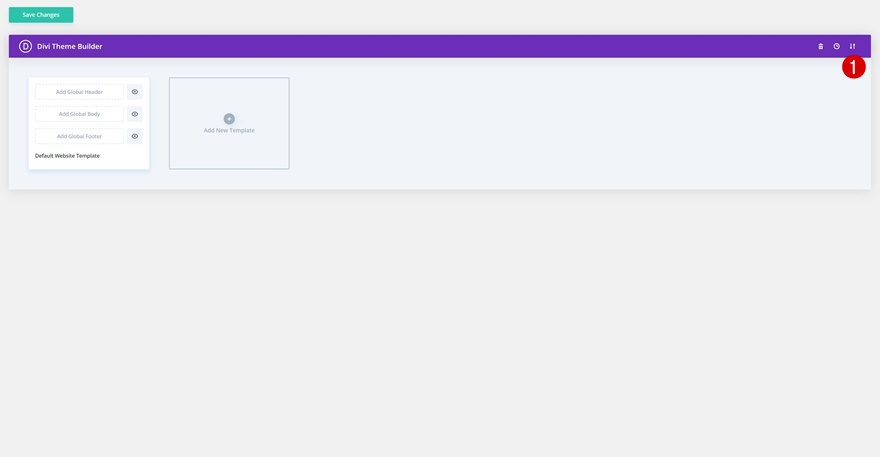
Upload Post Template
Upload the theme builder pack’s post template by clicking on the icon in the top right corner.
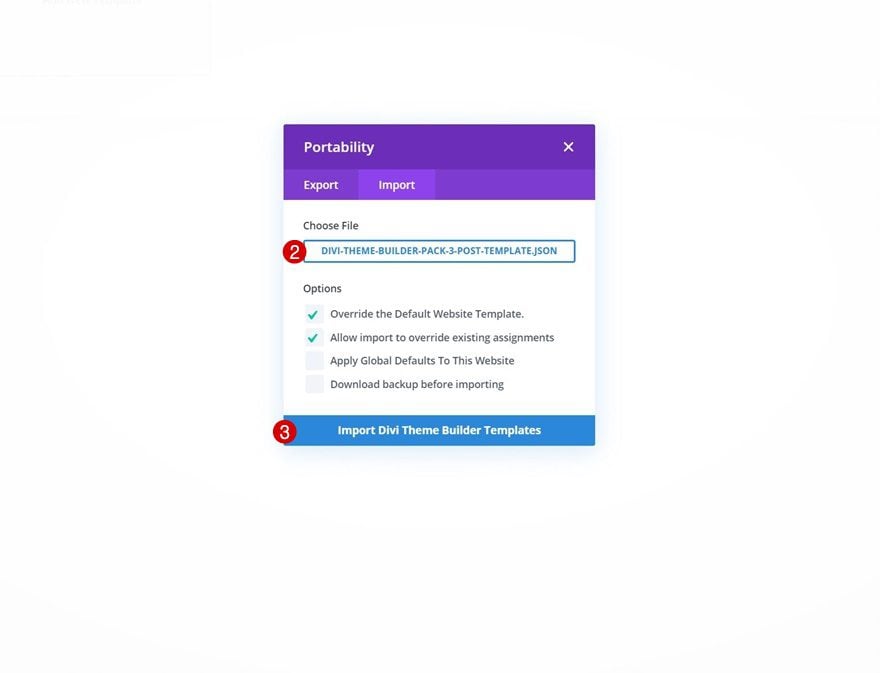
Then, select the post template and click on ‘Import Divi Theme Builder Templates‘. Make sure you save the theme builder changes as well. At this point, we’ve assigned the theme builder pack’s blog post template to all our posts.
Open Existing Gutenberg Post or Create New One
The next step is adding the Divi CTA layout block to our Gutenberg post. To do that, open an existing post or create a new one.
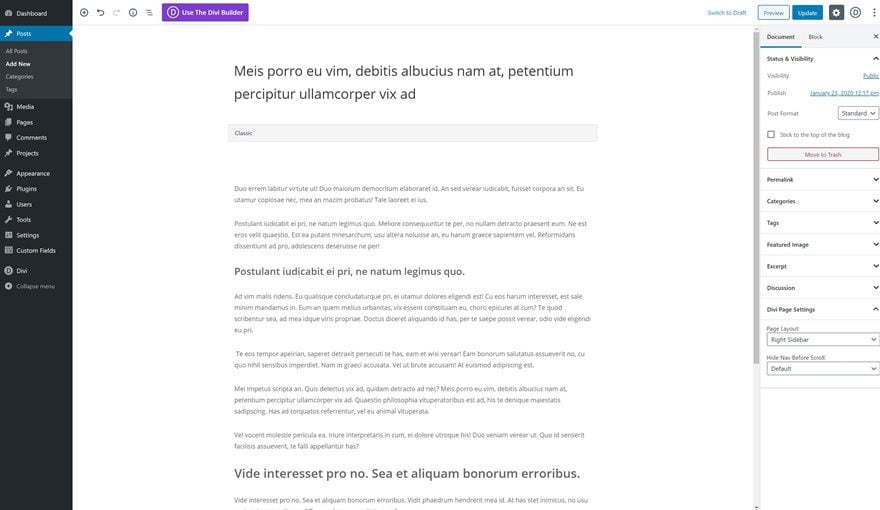
Add New Inline Divi Block
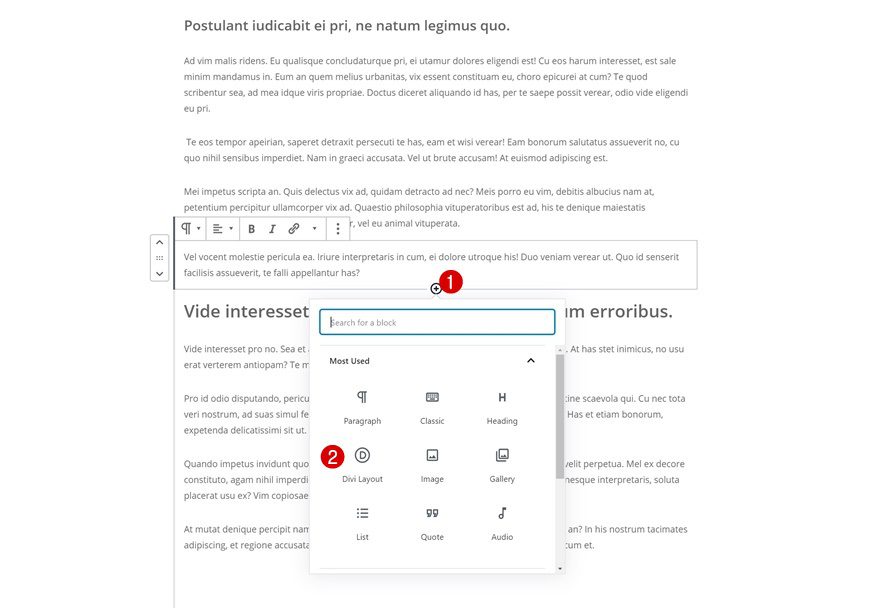
Once inside the post, you’ll be able to add a new Divi layout block.
Build New Layout Inside Divi Block
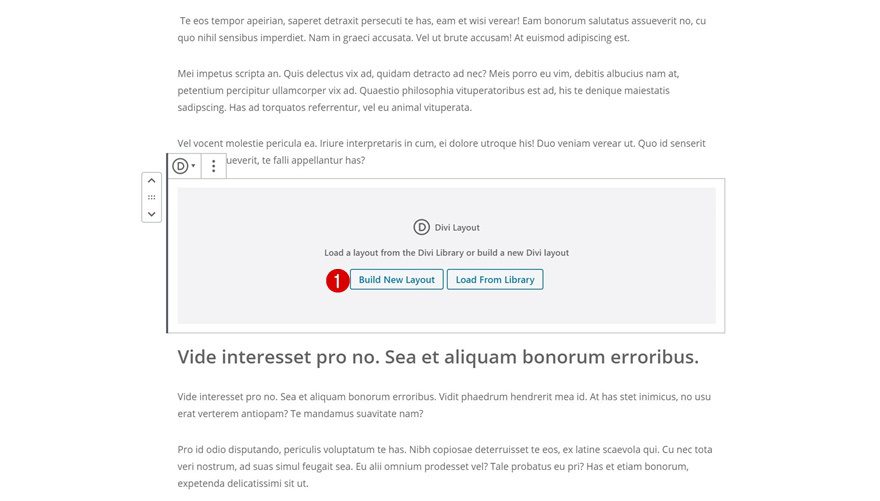
Then, you’ll get two options. Select the ‘Build New Layout’ option.
Section Settings
Spacing
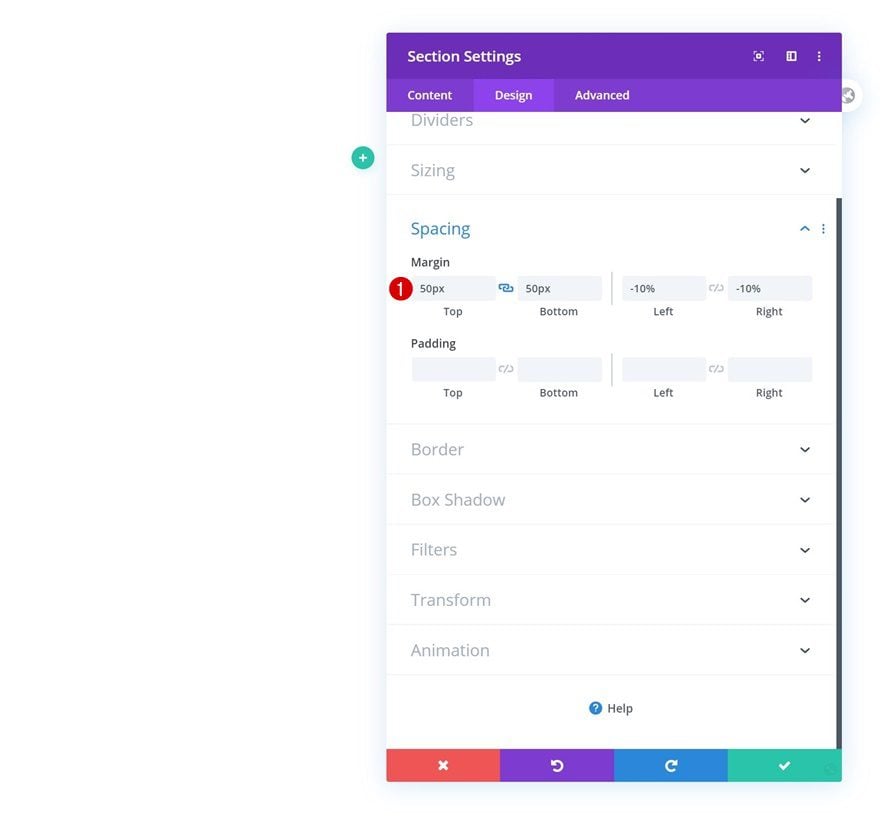
Once inside the Divi layout block editor, you’ll notice a section. Open that section and add some custom margin values to create space around the section container.
- Top Margin: 50px
- Bottom Margin: 50px
- Left Margin: -10%
- Right Margin: -10%
Add Row #1
Column Structure
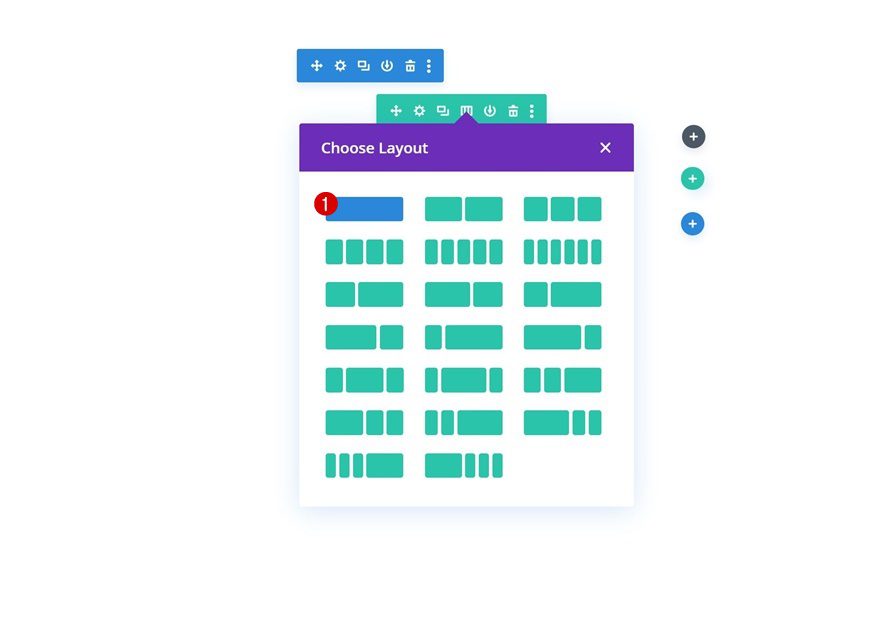
Continue by adding a new row using the following column structure:
Sizing
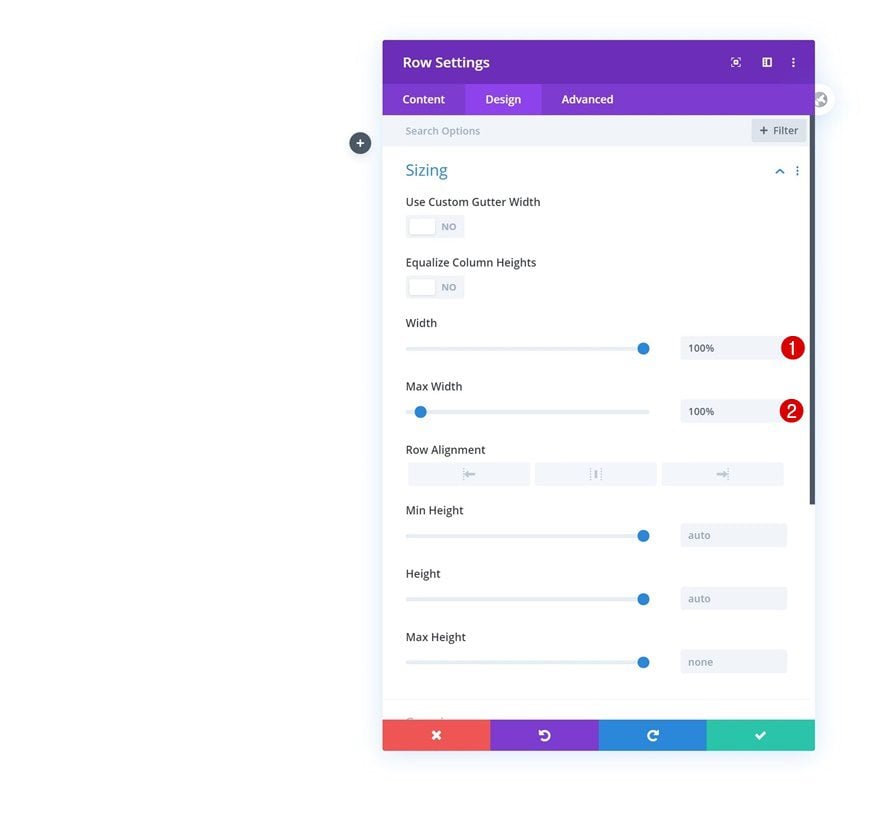
Without adding any modules yet, open the row settings and increase the width and max width.
- Width: 100%
- Max Width: 100%
Add Divider #1 to Column
Visibility
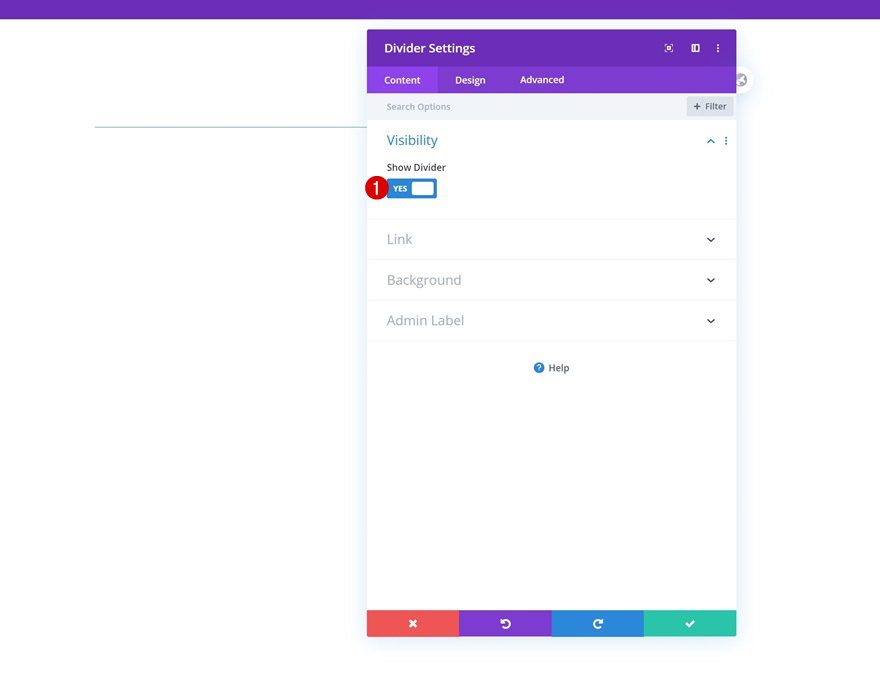
Time to add modules, starting with a Divider Module. Make sure the ‘Show Divider’ option is enabled.
- Show Divider: Yes
Line
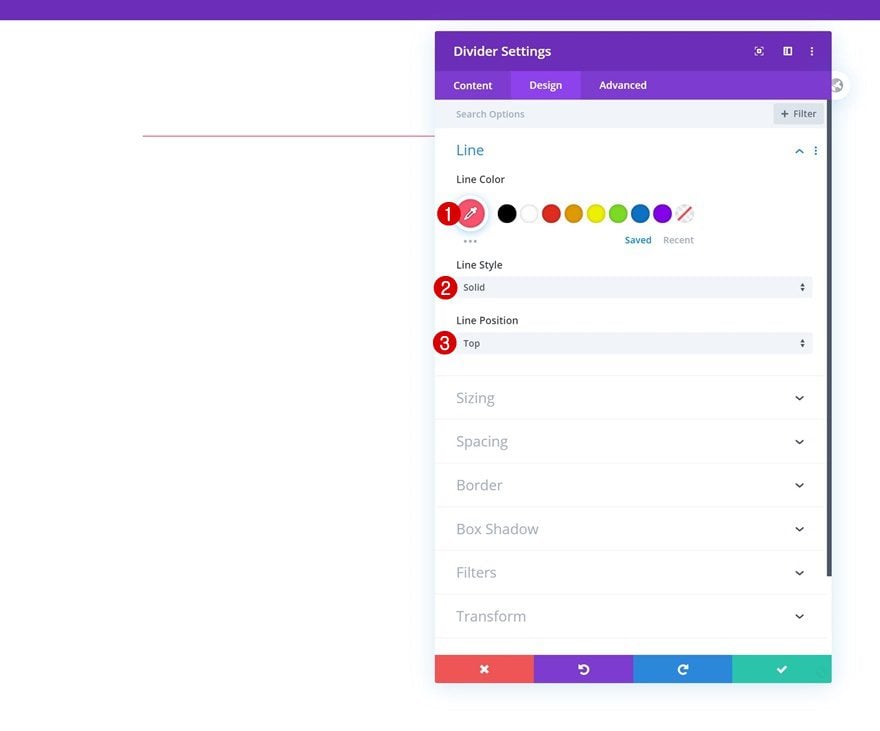
Move on to the module’s design tab and change the line settings as follows:
- Line Color: #fc526e
- Line Style: Solid
- Line Position: Top
Sizing
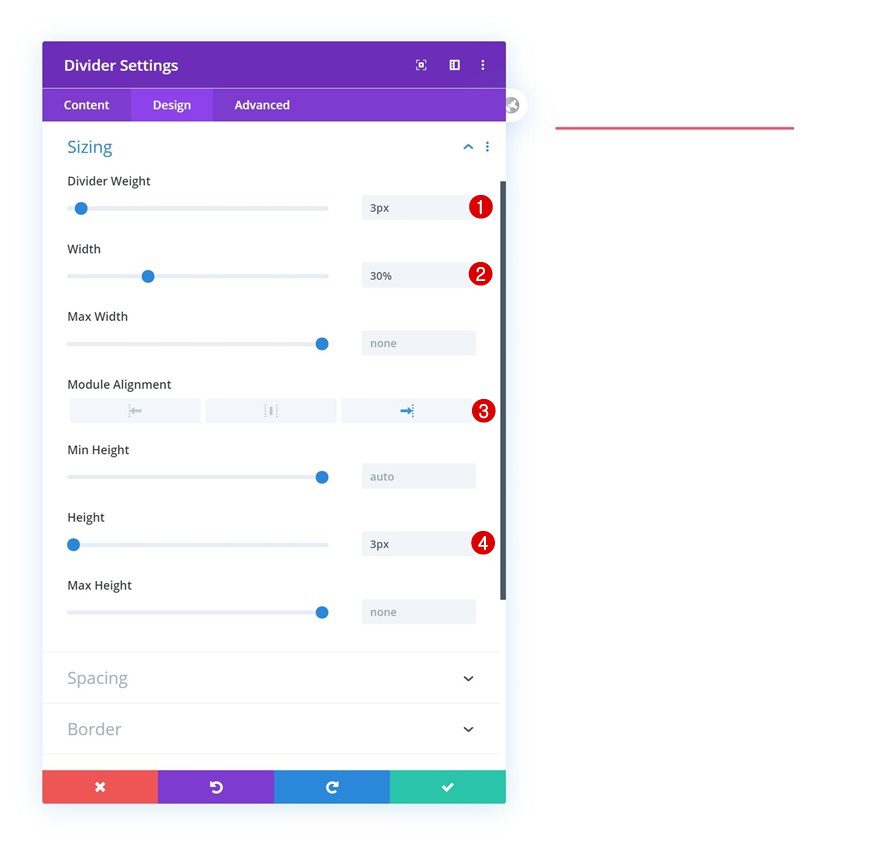
Modify the sizing settings too.
- Divider Weight: 3px
- Width: 30%
- Module Alignment: Right
- Height: 3px
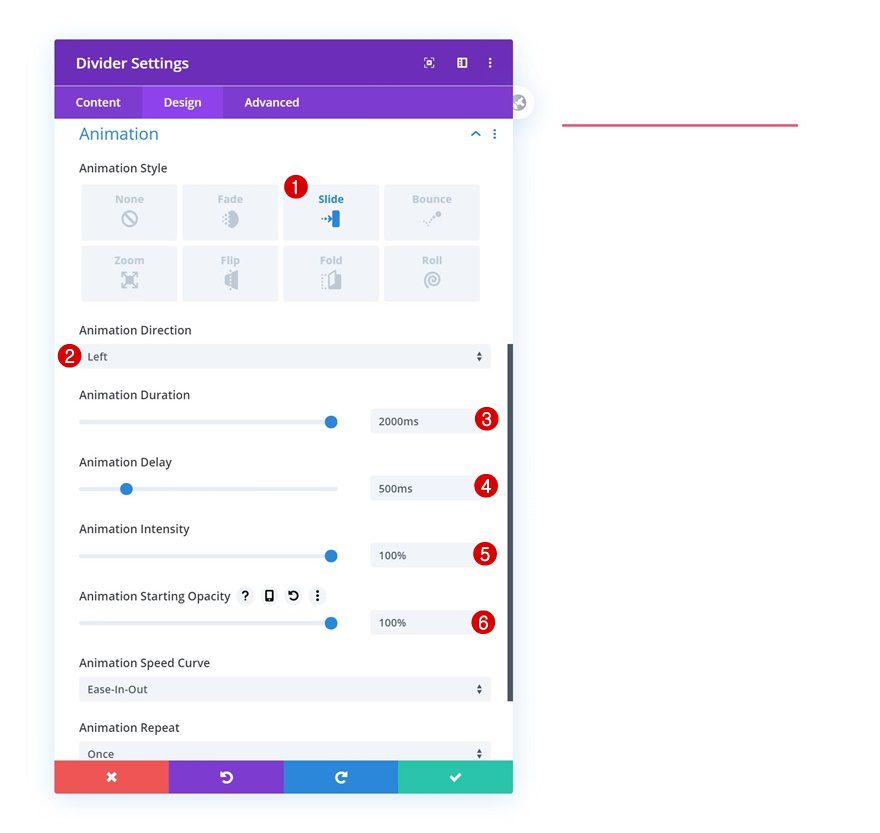
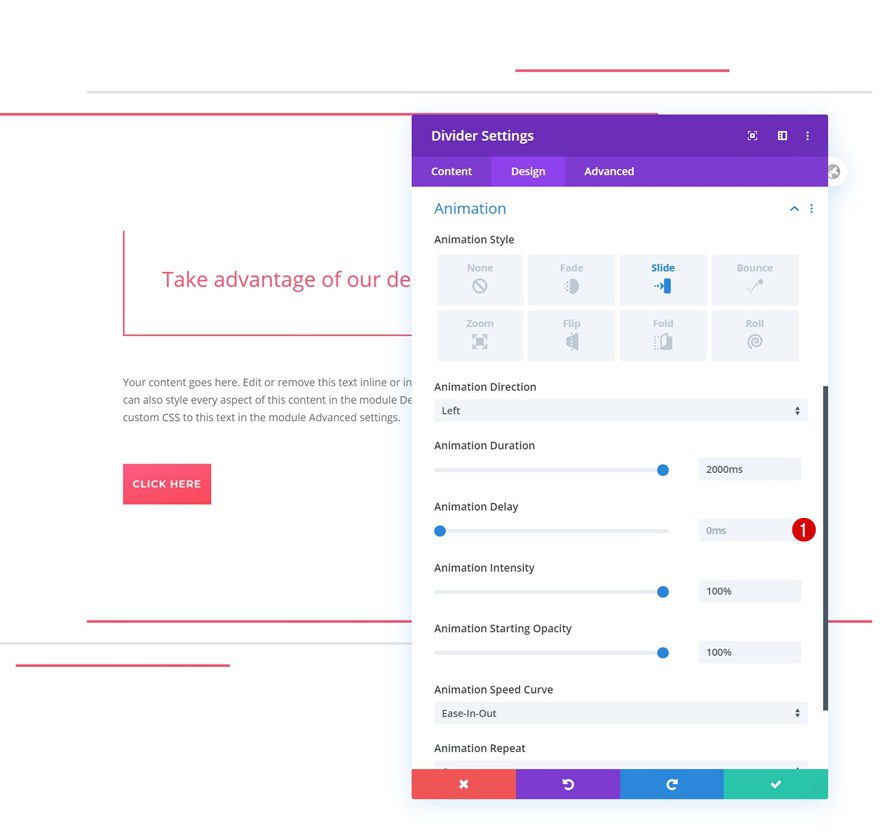
Animation
And modify the animation settings accordingly:
- Animation Style: Slide
- Animation Direction: Left
- Animation Duration: 2000ms
- Animation Delay: 500ms
- Animation Intensity: 100%
- Animation Starting Opacity: 100%
Add Divider #2 to Column
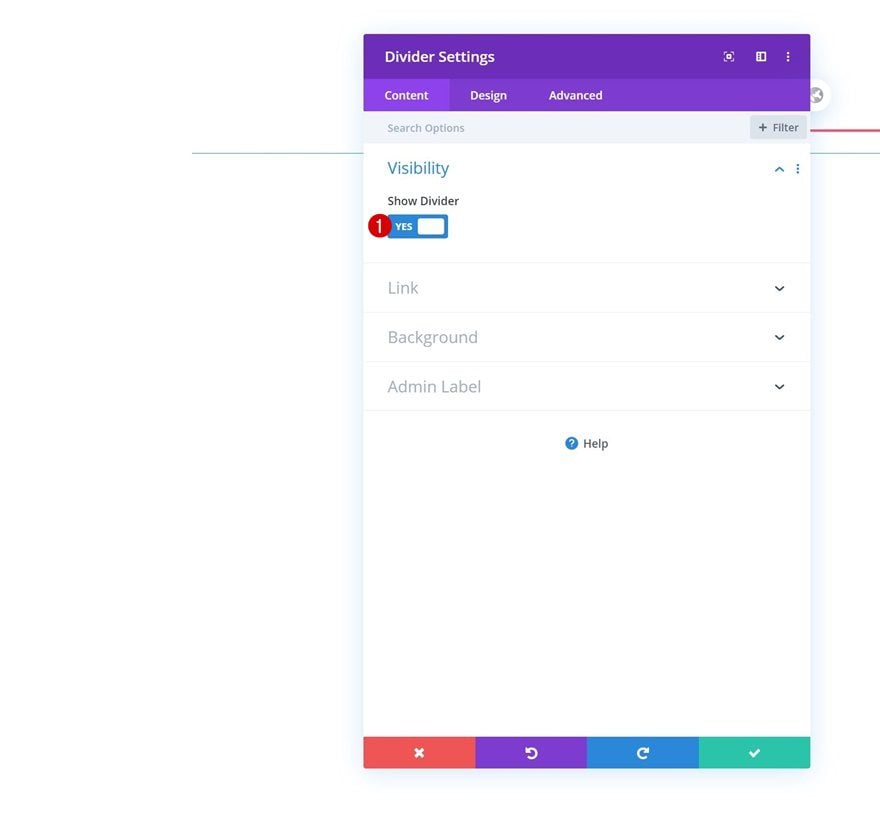
Visibility
On to the next Divider Module. Again, make sure the ‘Show Divider’ option is enabled.
- Show Divider: Yes
Line
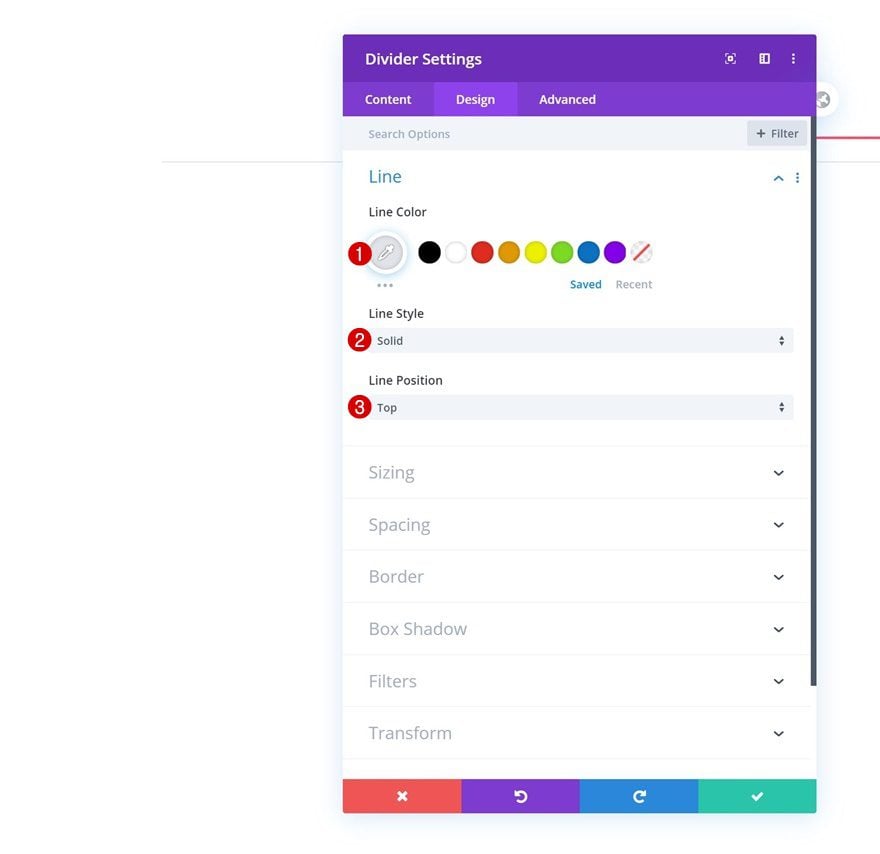
Then, go to the module’s design tab and change the line settings as follows:
- Line Color: #e1e3e8
- Line Style: Solid
- Line Position: Top
Sizing
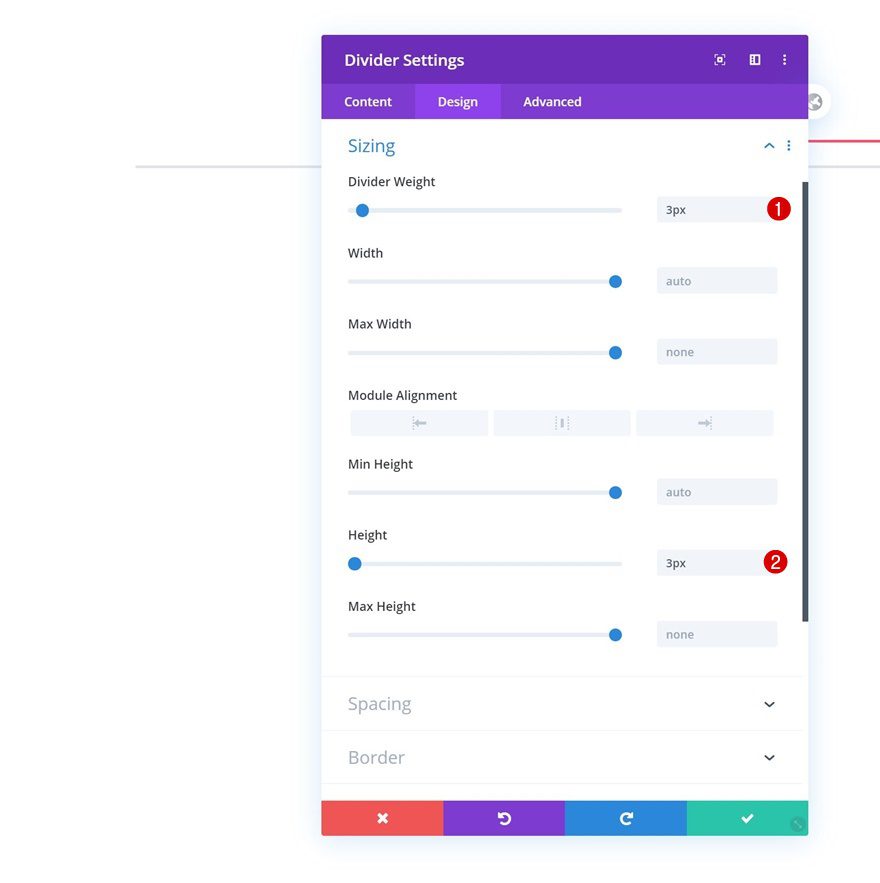
Modify the module’s sizing settings next.
- Divider Weight: 3px
- Height: 3px
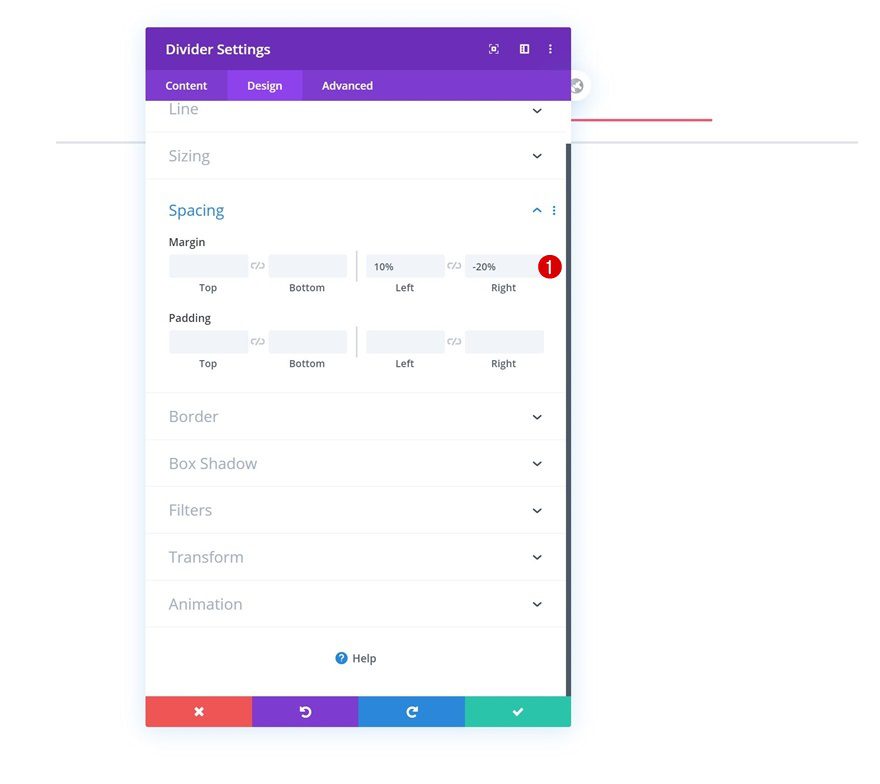
Spacing
Add some custom spacing values too.
- Left Margin: 10%
- Right Margin: -20%
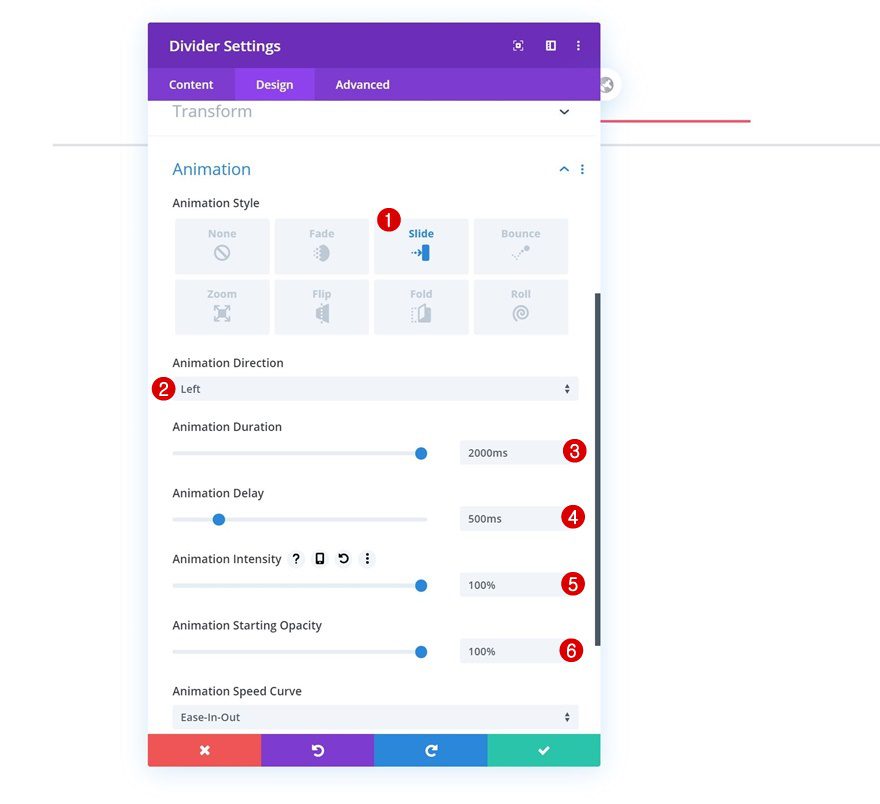
Animation
And complete the module’s settings by modifying the animation settings as follows:
- Animation Style: Slide
- Animation Direction: Left
- Animation Duration: 2000ms
- Animation Delay: 500ms
- Animation Intensity: 100%
- Animation Starting Opacity: 100%
Add Divider #3 to Column
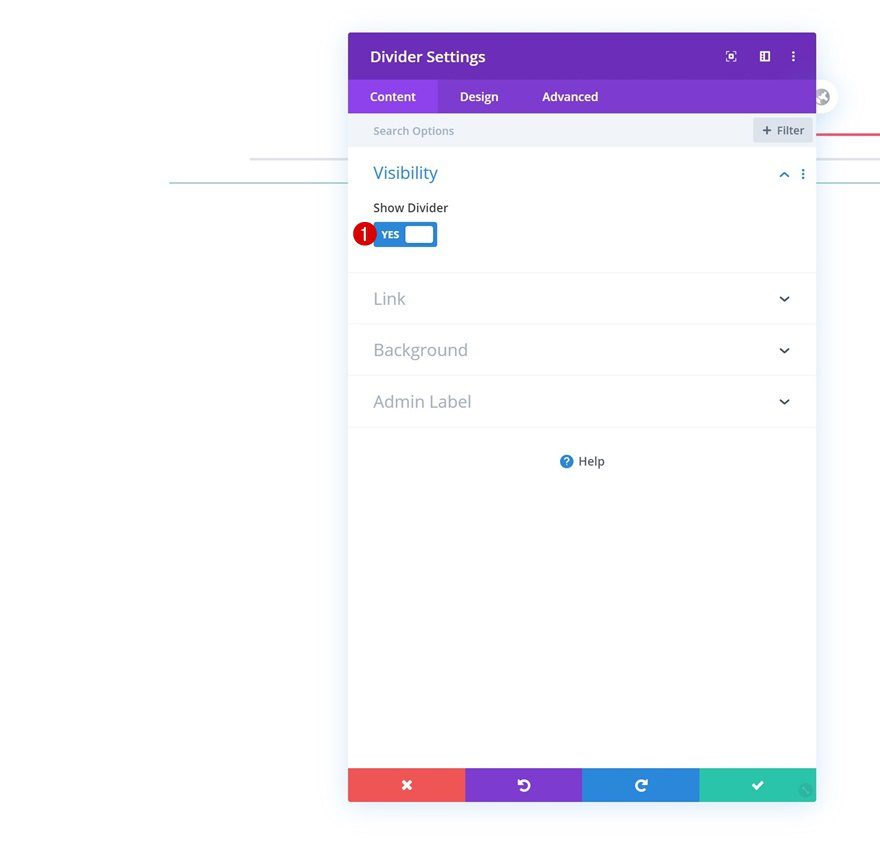
Visibility
On to the next and last Divider Module we need in this row. Make sure the ‘Show Divider’ option is enabled.
- Show Divider: Yes
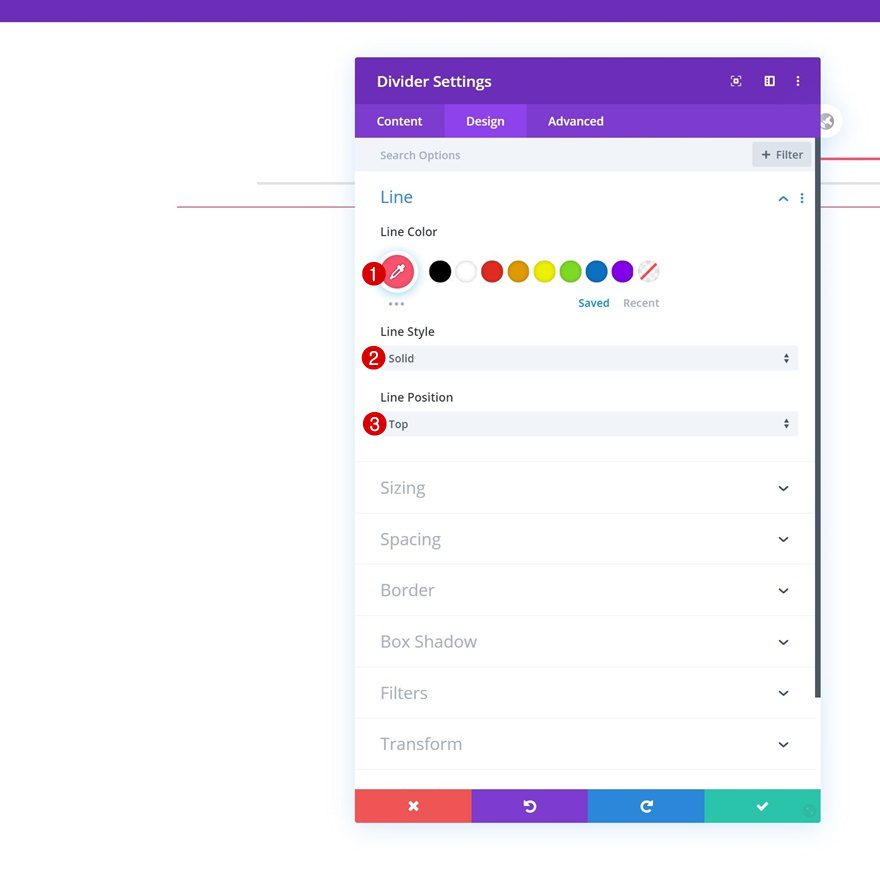
Line
Then, go to the design tab and change the line settings as follows:
- Line Color: #fc526e
- Line Style: Solid
- Line Position: Top
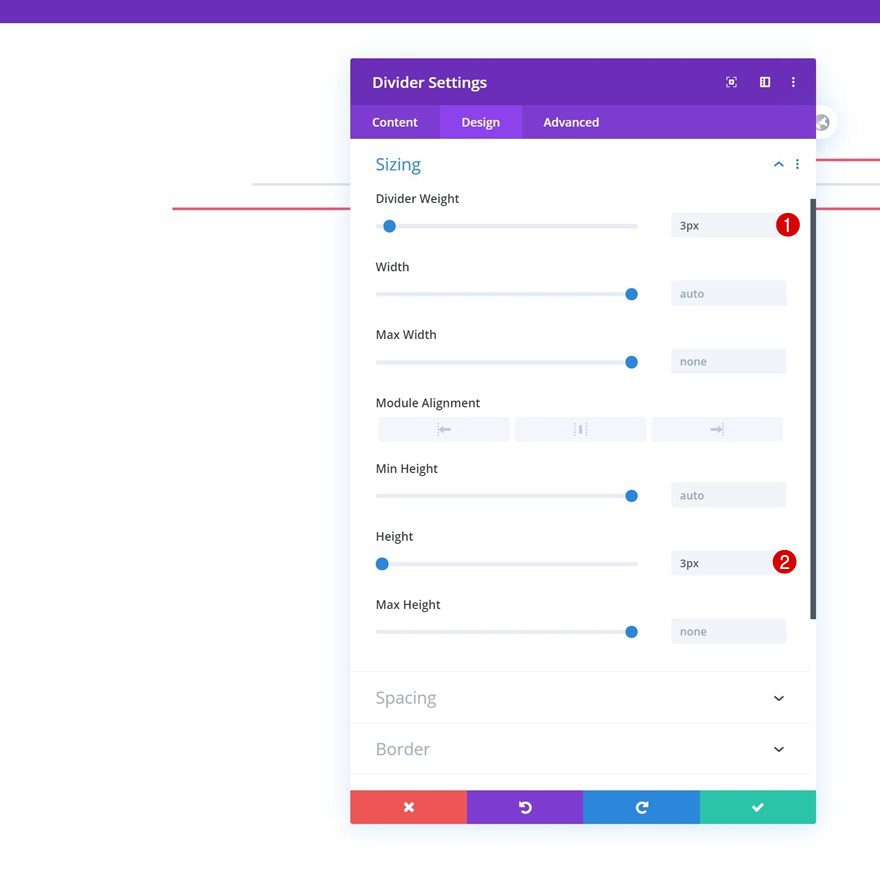
Sizing
Modify the module’s sizing too.
- Divider Weight: 3px
- Height: 3px
Spacing
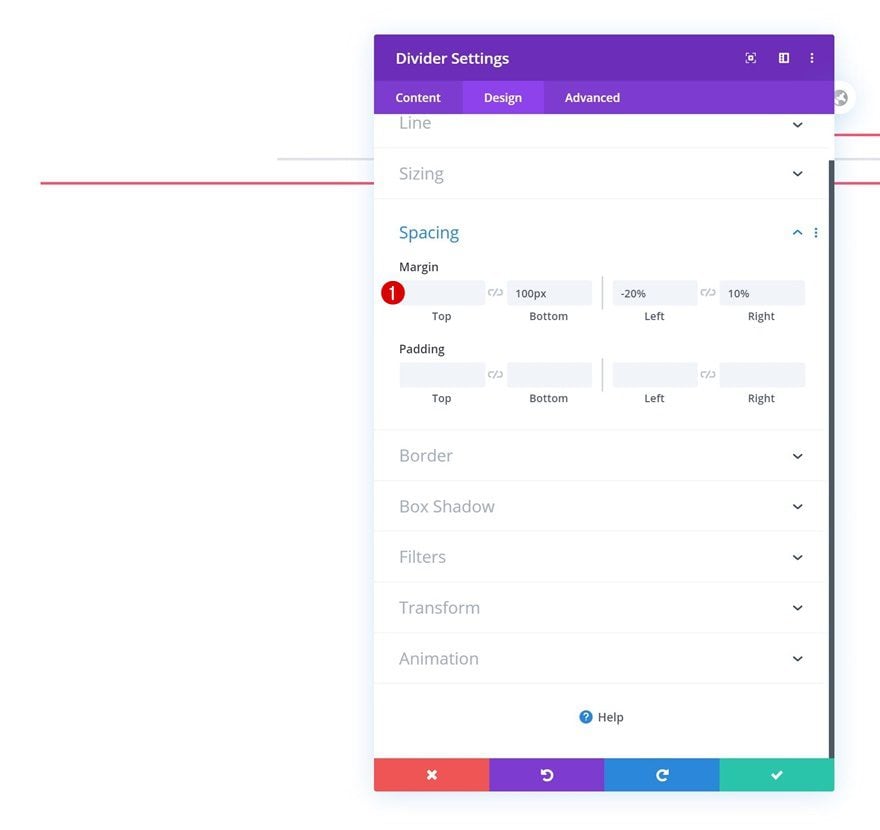
Along with the spacing settings.
- Bottom Margin: 100px
- Left Margin: -20%
- Right Margin: 10%
Animation
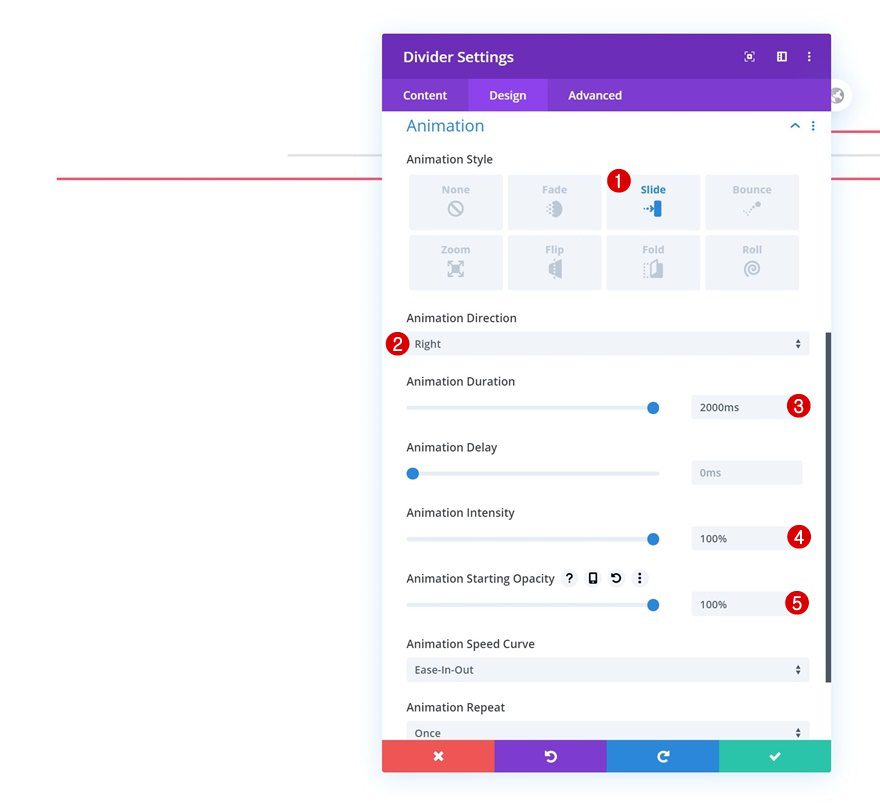
And complete the module’s settings by changing the animation settings.
- Animation Style: Slide
- Animation Direction: Right
- Animation Duration: 2000ms
- Animation Intensity: 100%
- Animation Starting Opacity: 100%
Add Row #2
Column Structure
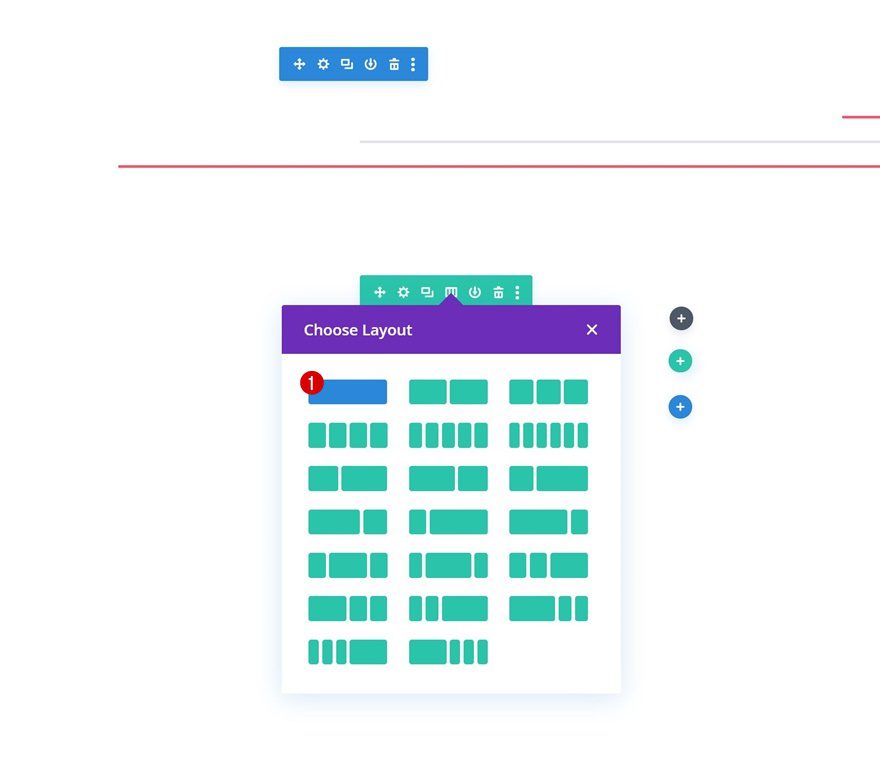
Add another row to the section using the following column structure:
Sizing
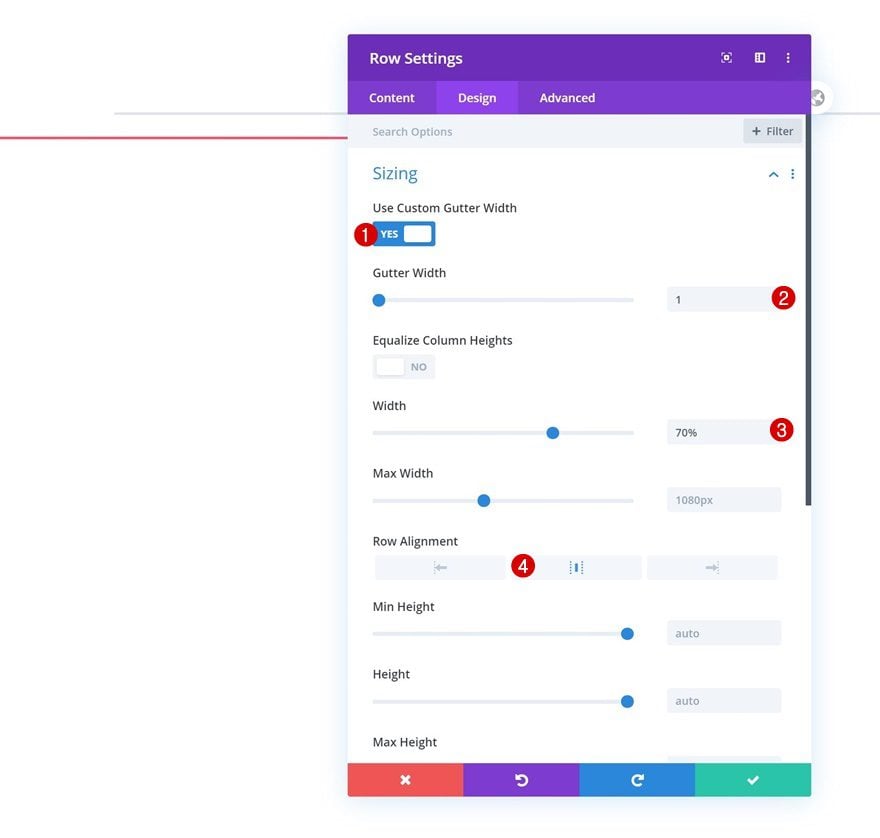
Without adding any modules yet, open the row settings and change the sizing settings as follows:
- Use Custom Gutter Width: Yes
- Gutter Width: 1
- Width: 70%
- Row Alignment: Center
Add Text Module #1 to Column
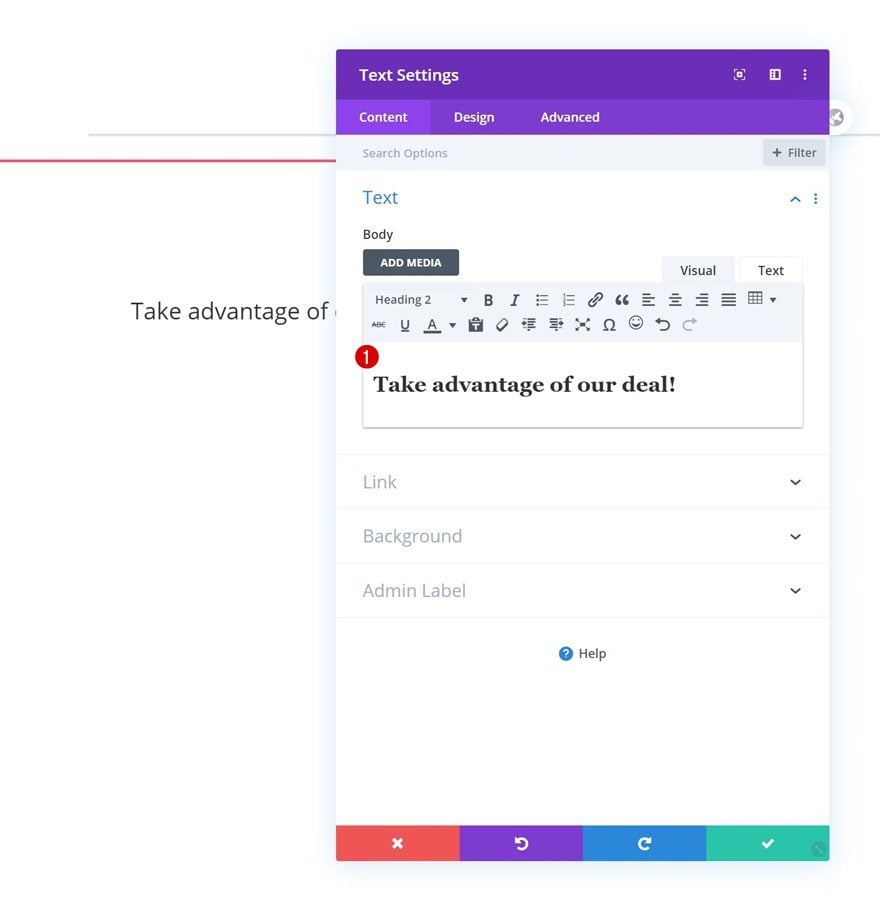
Add H2 Content
Then, add a first Text Module to the row’s column with some H2 content of your choice.
H2 Text Settings
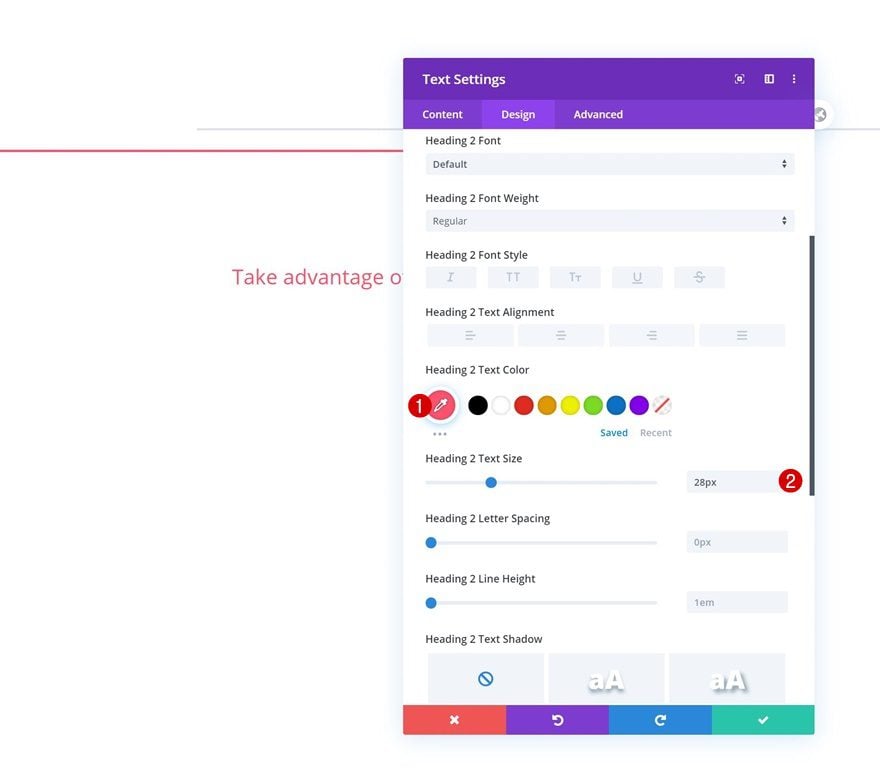
Move on to the design tab and modify the H2 text settings accordingly:
- Heading 2 Text Color: #fc526e
- Heading 2 Text Size: 28px
Spacing
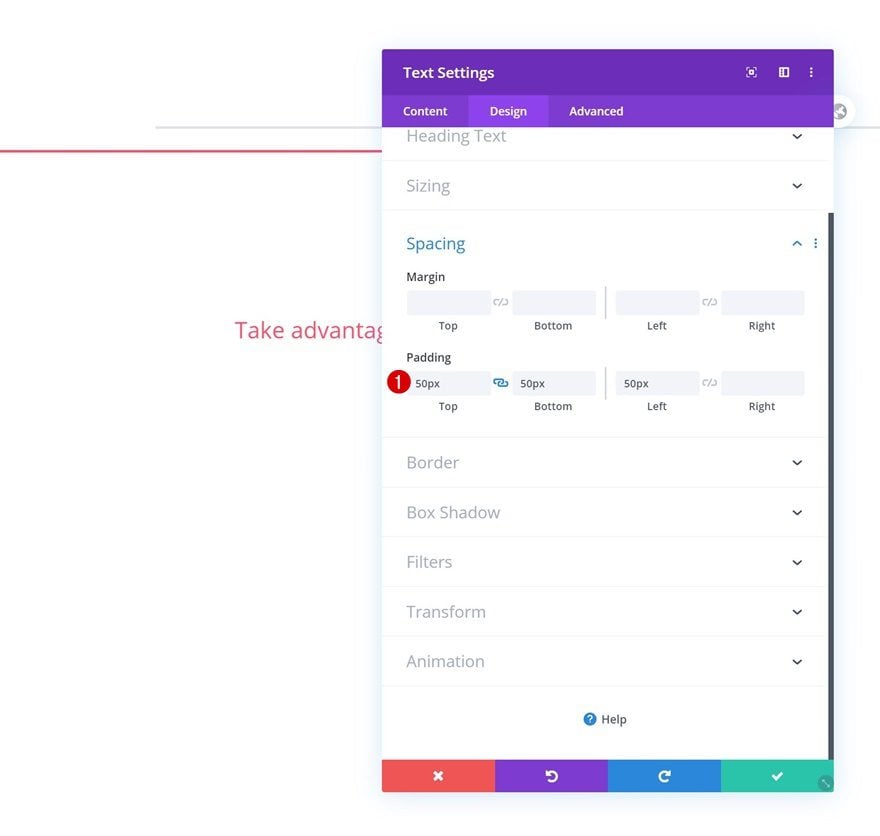
Add some custom padding values next.
- Top Padding: 50px
- Bottom Padding: 50px
- Left Padding: 50px
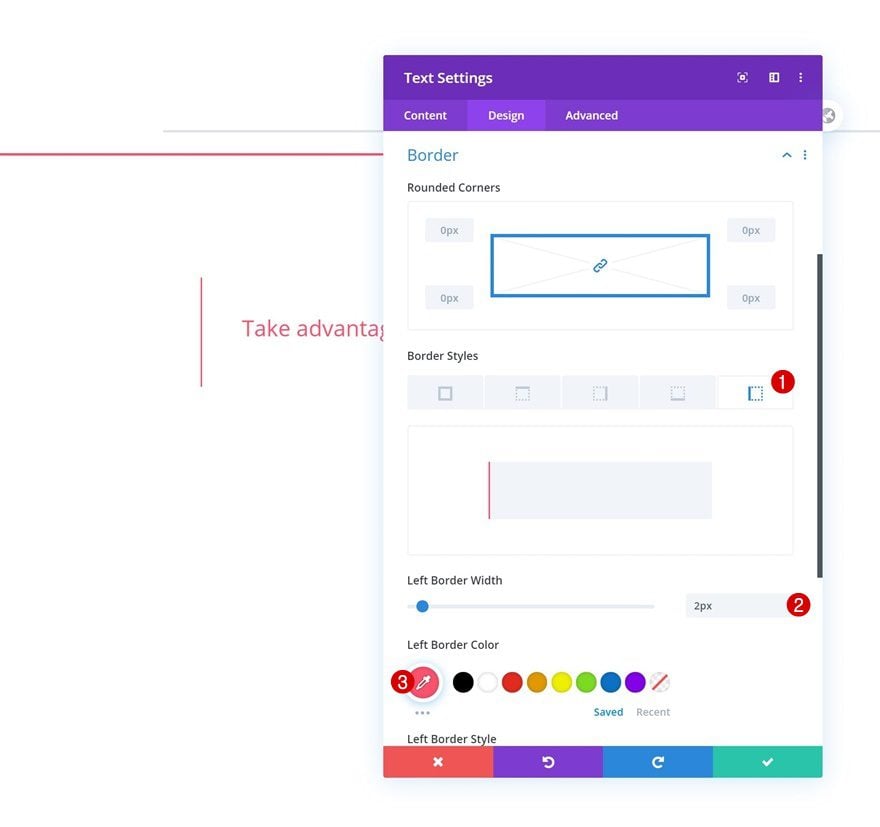
Border
We’re using a left border too.
- Left Border Width: 2px
- Left Border Color: #fc526e
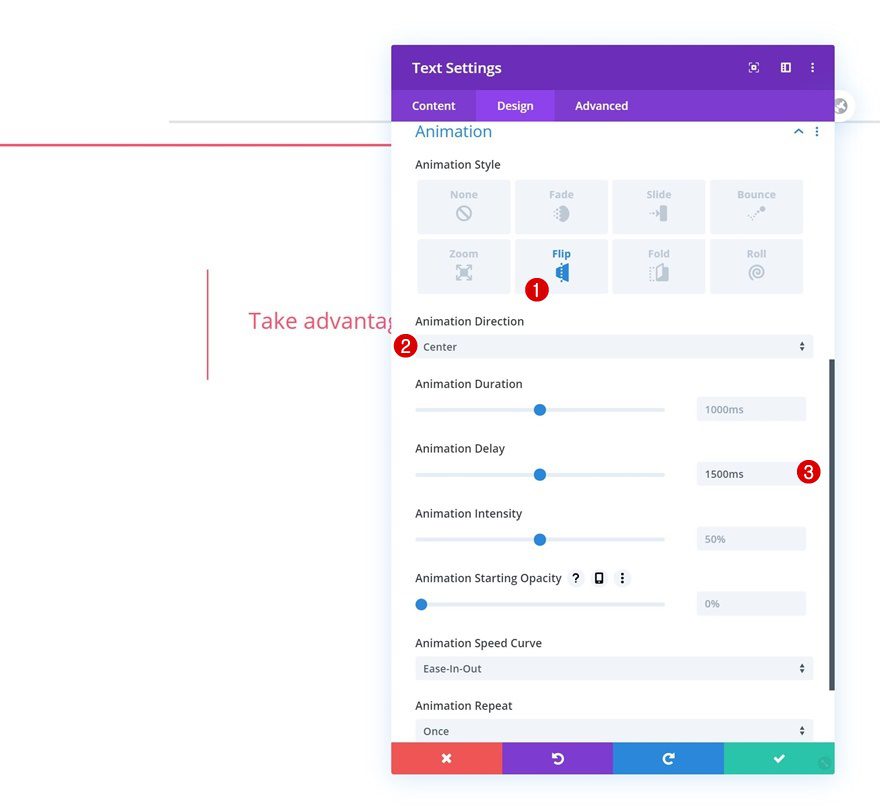
Animation
And complete the module’s settings by adding a custom animation.
- Animation Style: Flip
- Animation Direction: Center
- Animation Delay: 1500ms
Add Text Module #2 to Column
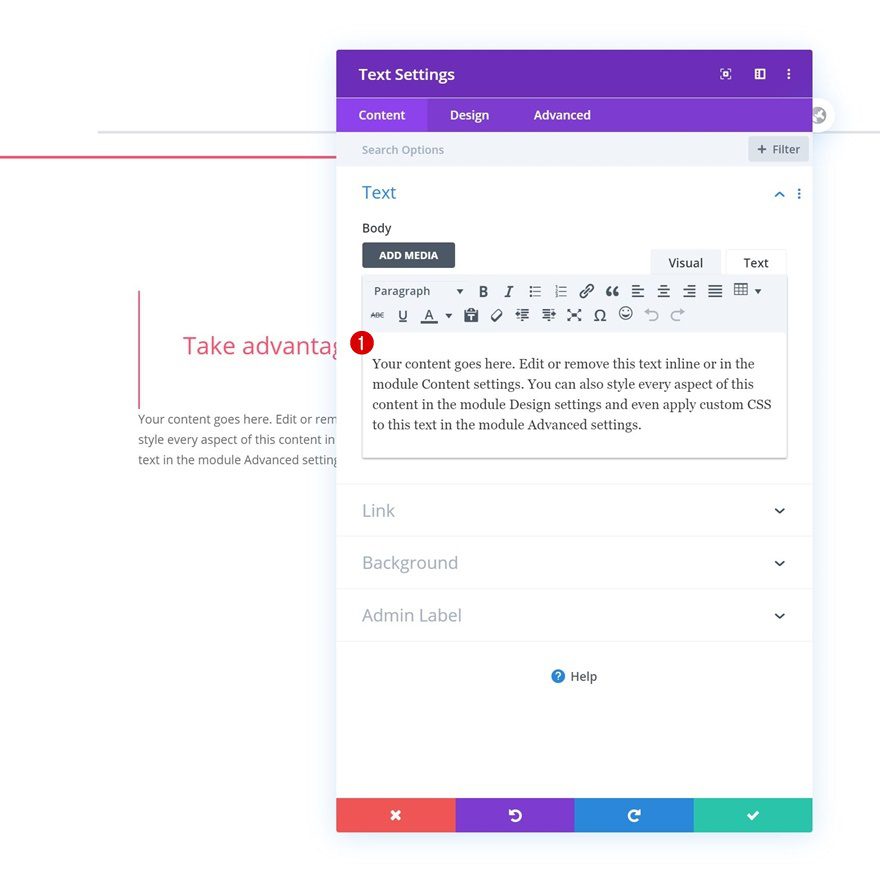
Add Content
Add another Text Module right below the previous one with some content of your choice.
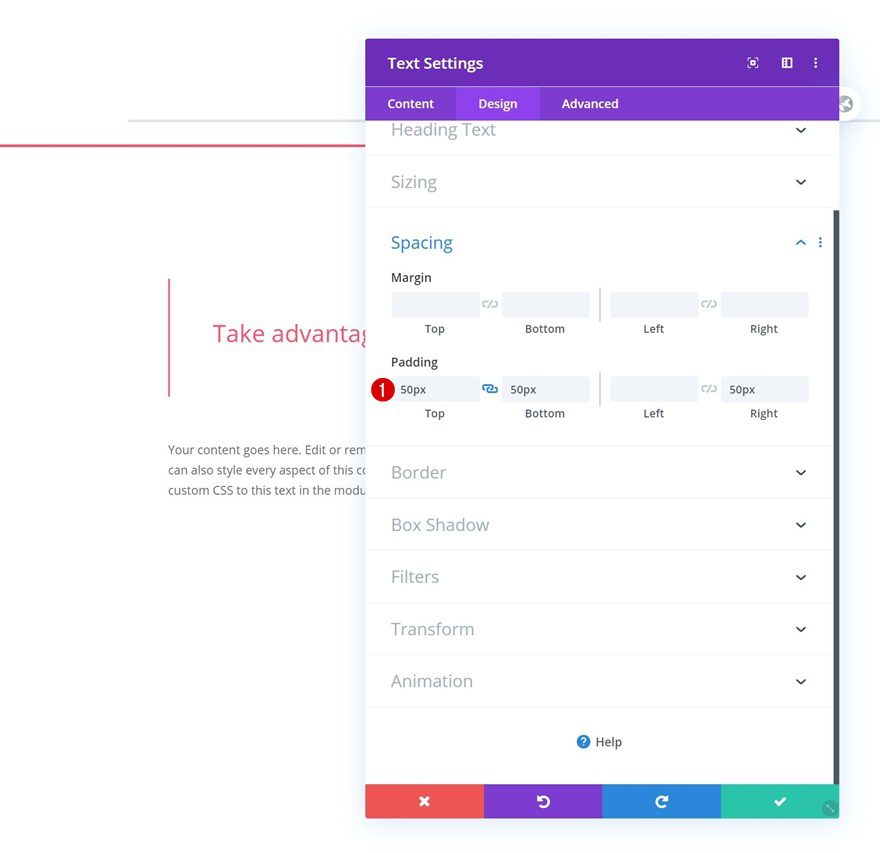
Spacing
Move on the module’s design tab and modify the padding values accordingly:
- Top Padding: 50px
- Bottom Padding: 50px
- Right Padding: 50px
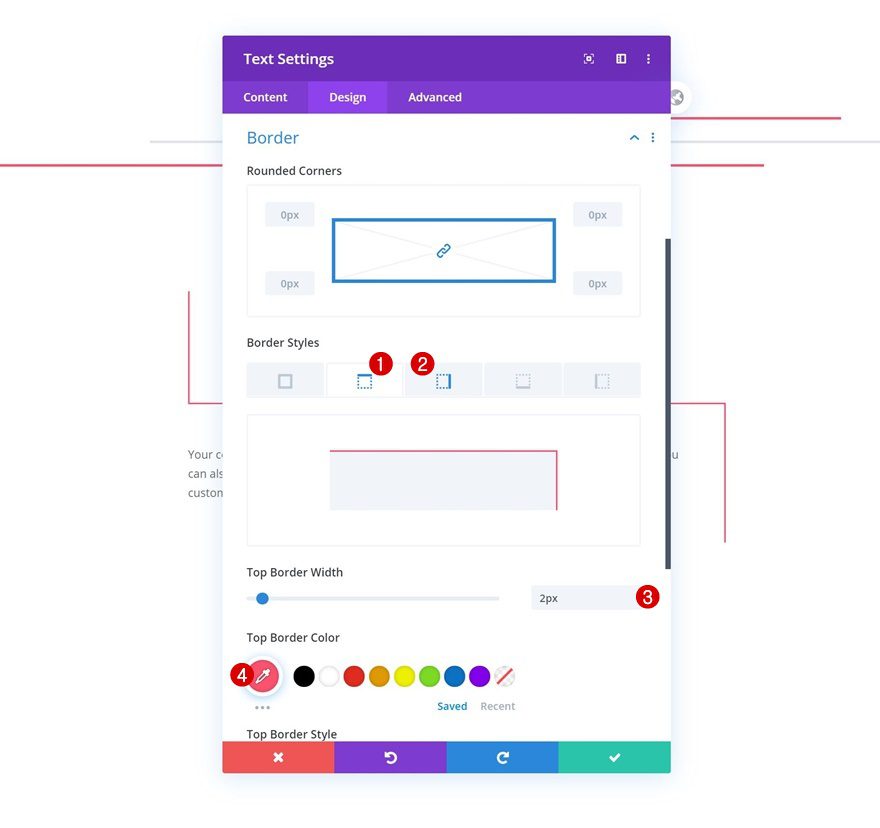
Border
Add a top and right border next.
- Top & Right Border: 2px
- Top & Right Border Color: #fc526e
Animation
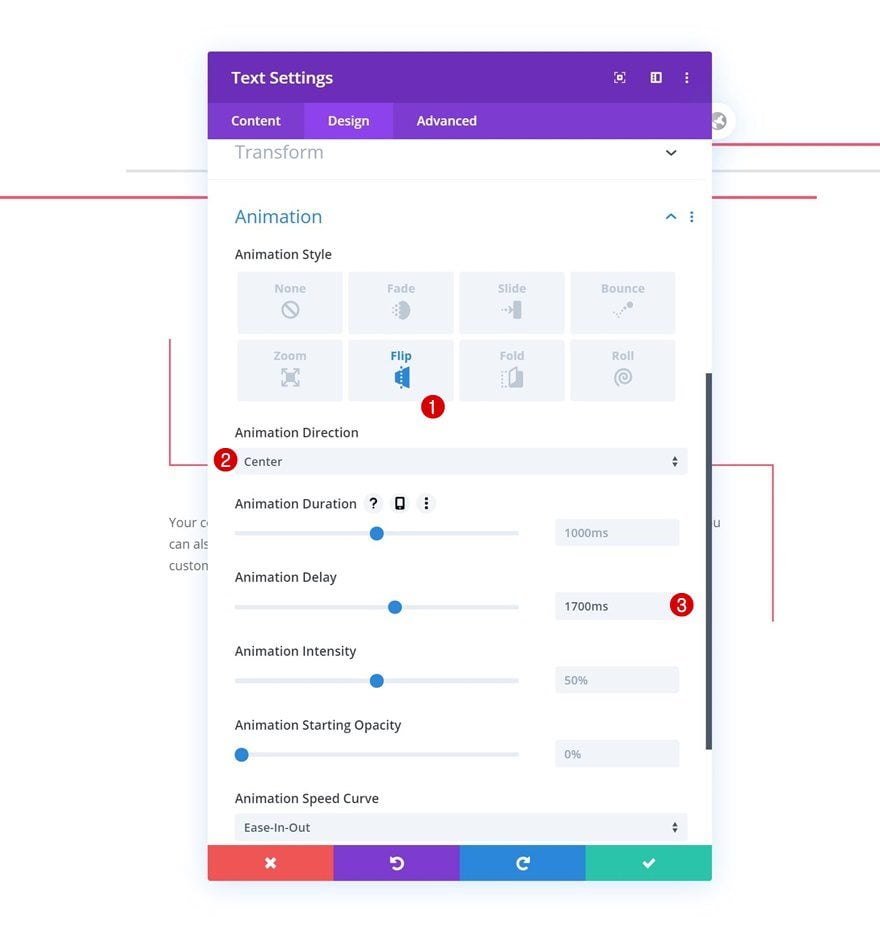
And complete the module’s settings by modifying the animation settings as follows:
- Animation Style: Flip
- Animation Direction: Center
- Animation Delay: 1700ms
Add Copy
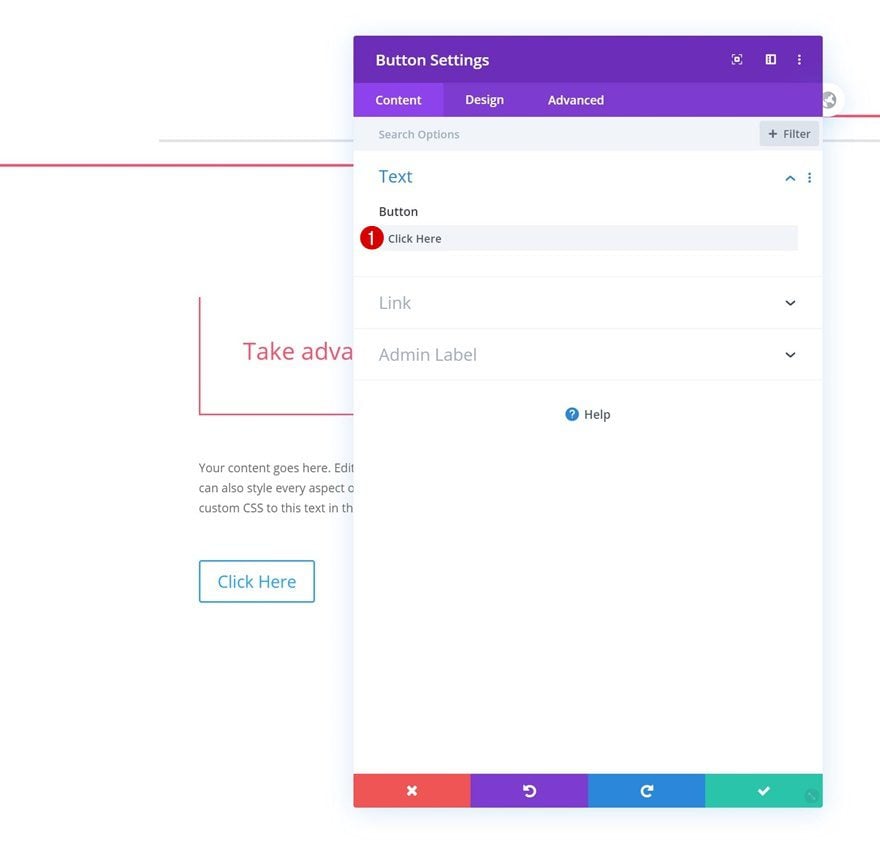
The next and last module we need in this row is a Button Module. Add some copy of your choice.
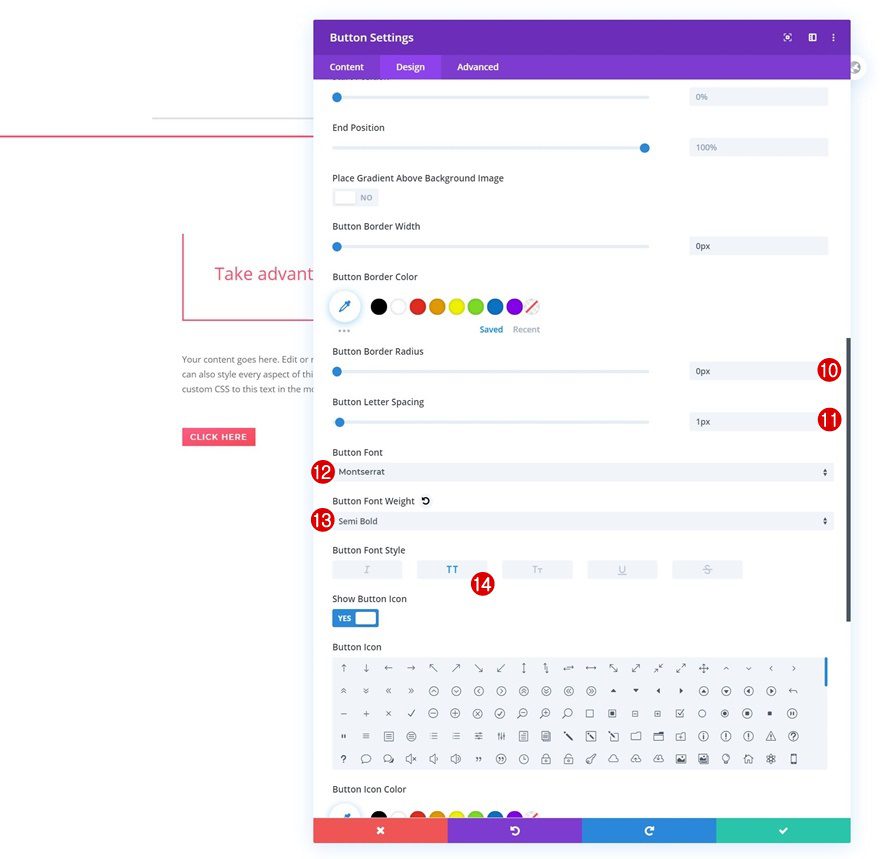
Button Settings
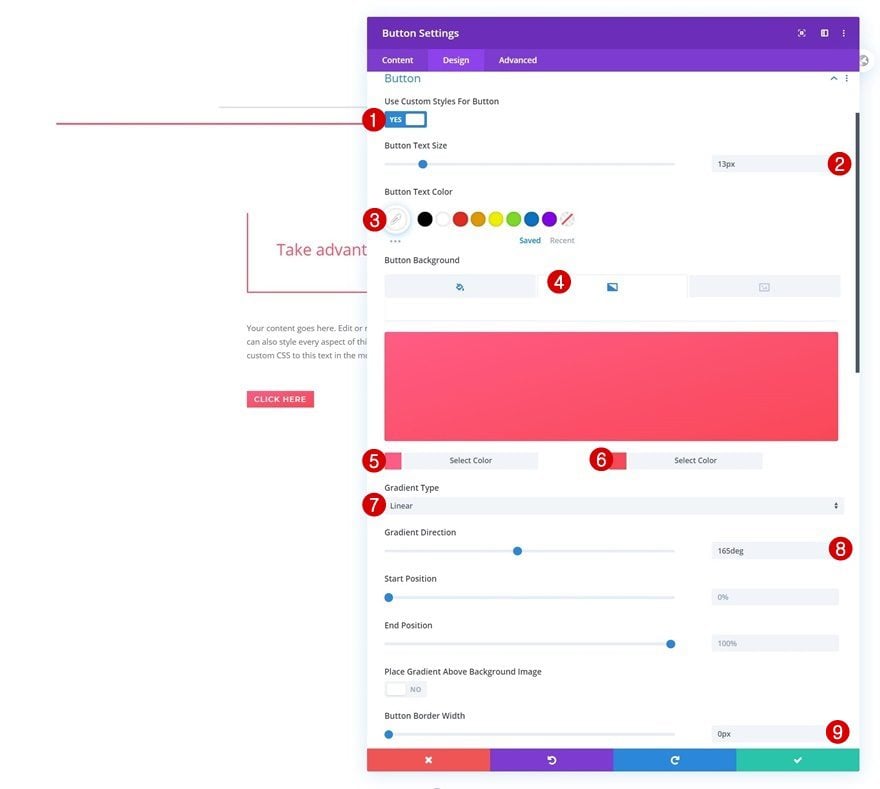
Move on to the module’s design tab and modify the button settings as follows:
- Use Custom Styles For Button: Yes
- Button Text Size: 13px
- Button Text Color: #ffffff
- Gradient Color 1: #ff5b84
- Gradient Color 2: #f94857
- Gradient Type: Linear
- Gradient Direction: 165deg
- Button Border Width: 0px
- Button Border Radius: 0px
- Button Letter Spacing: 1px
- Button Font: Montserrat
- Button Font Weight: Semi Bold
- Button Font Style: Uppercase
Spacing
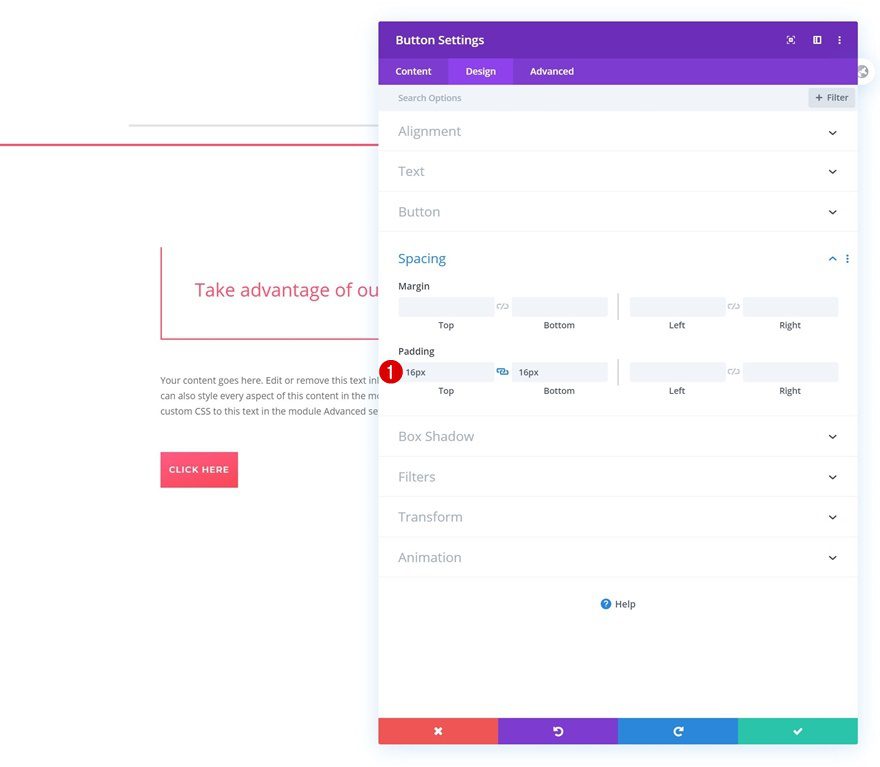
Add some custom top and bottom padding next.
- Top Padding: 16px
- Bottom Padding: 16px
Animation
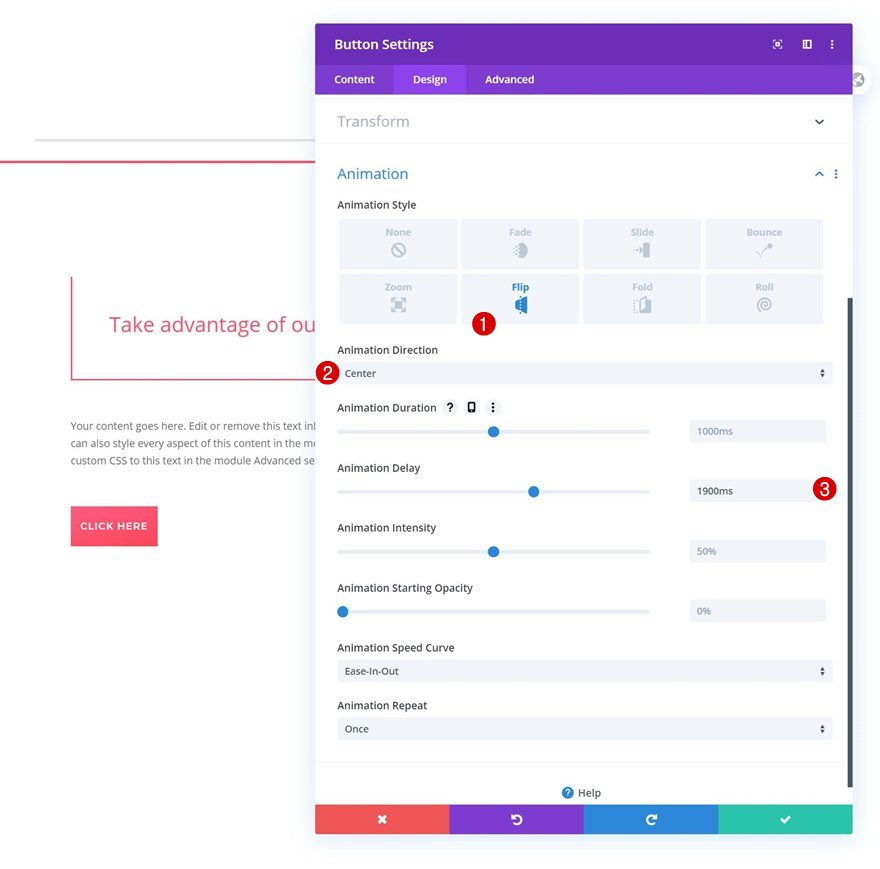
And complete the module’s settings by adding the following animation:
- Animation Style: Flip
- Animation Delay: 1900ms
Clone Row #1 & Place at Bottom of Section
Once you’ve completed the first and second row, you can clone the first row and place the duplicate at the bottom of the section.
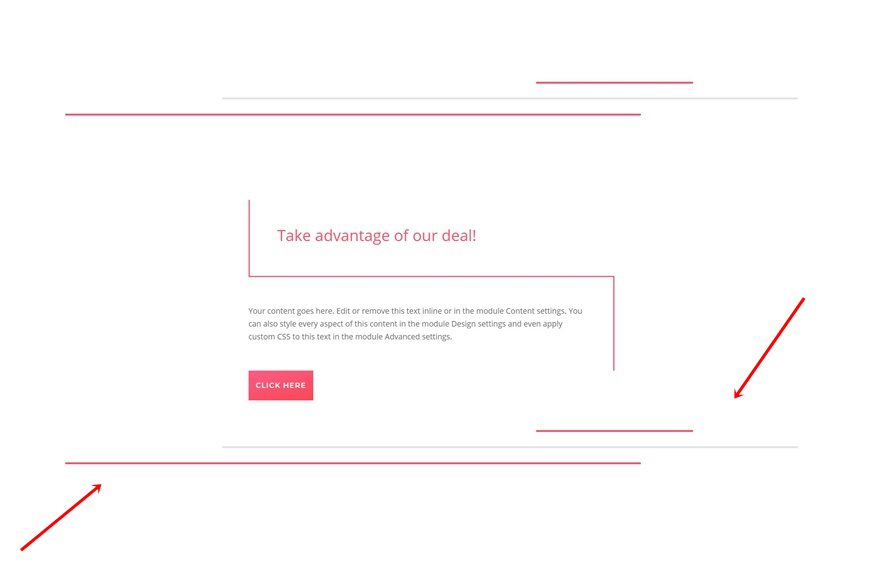
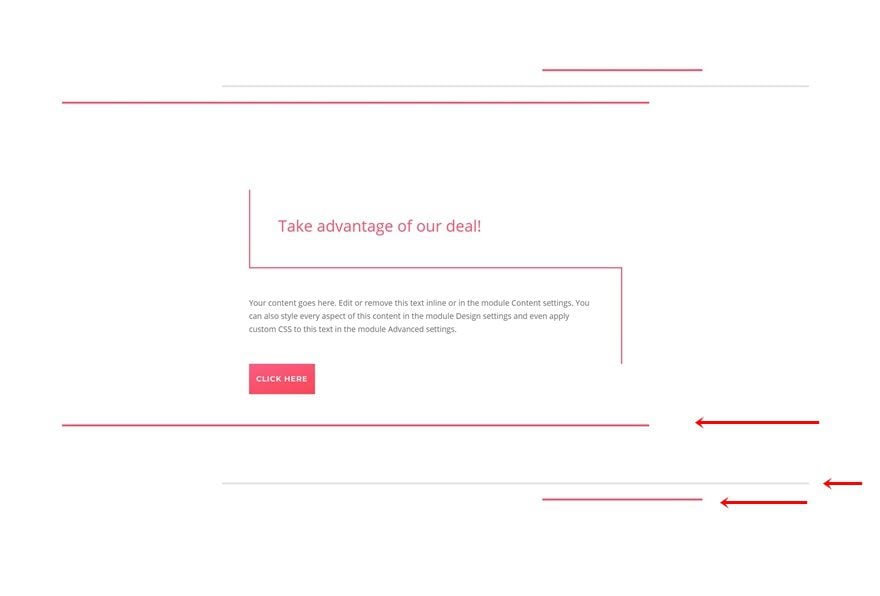
Change Divider Order
Switch places for the first and last Divider Modules.
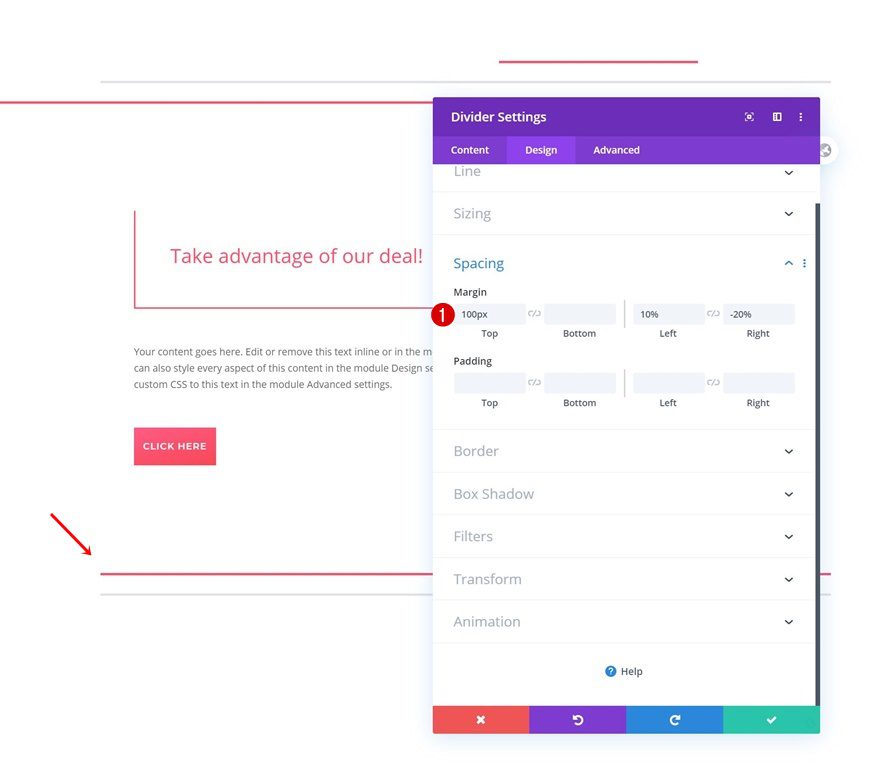
Change Divider #1 Spacing
Then, open the first Divider Module in your row and modify the spacing settings.
- Top Margin: 100px
- Left Margin: 10%
- Right Margin: -20%
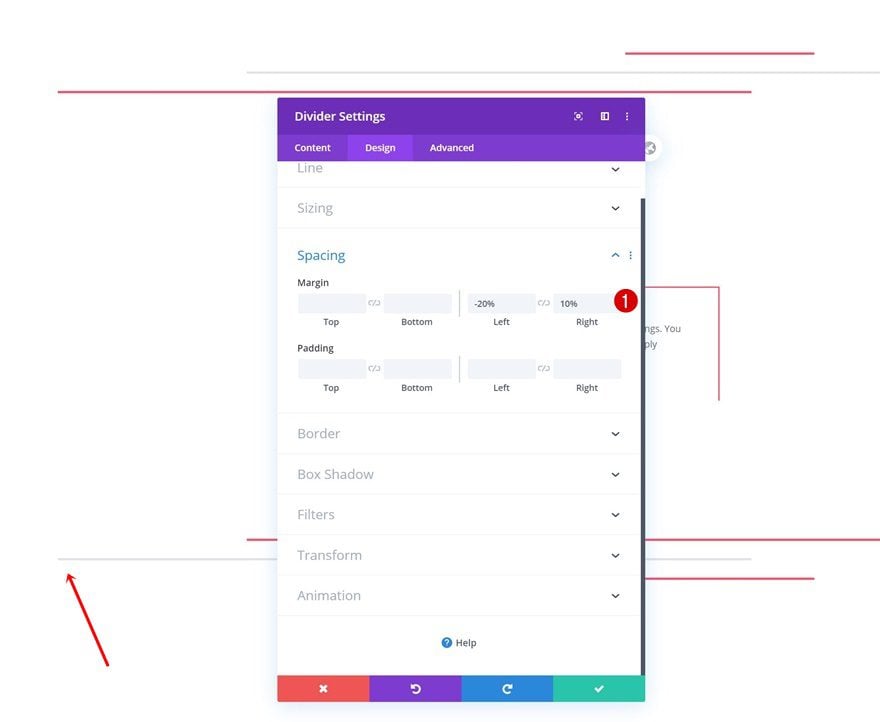
Change Divider #2 Spacing
Change the second Divider Module’s spacing settings too.
- Left Margin: -20%
- Right Margin: 10%
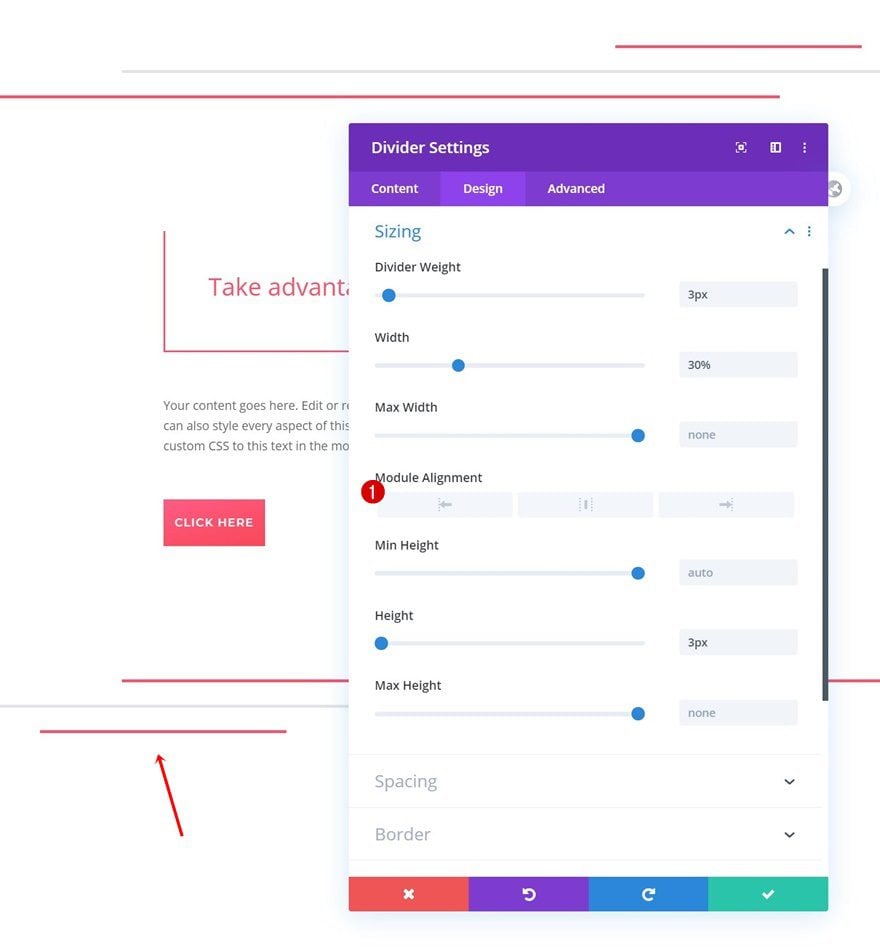
Change Divider #3 Sizing
Then, open the third Divider Module and use left module alignment in the sizing settings.
- Module Alignment: Left
Remove Divider #3 Animation Delay
Remove the third Divider Module’s animation delay as well and you’re set! Once you’ve completed the Divi CTA layout block, make sure you save the changes and update your post.
- Animation Delay: 0ms
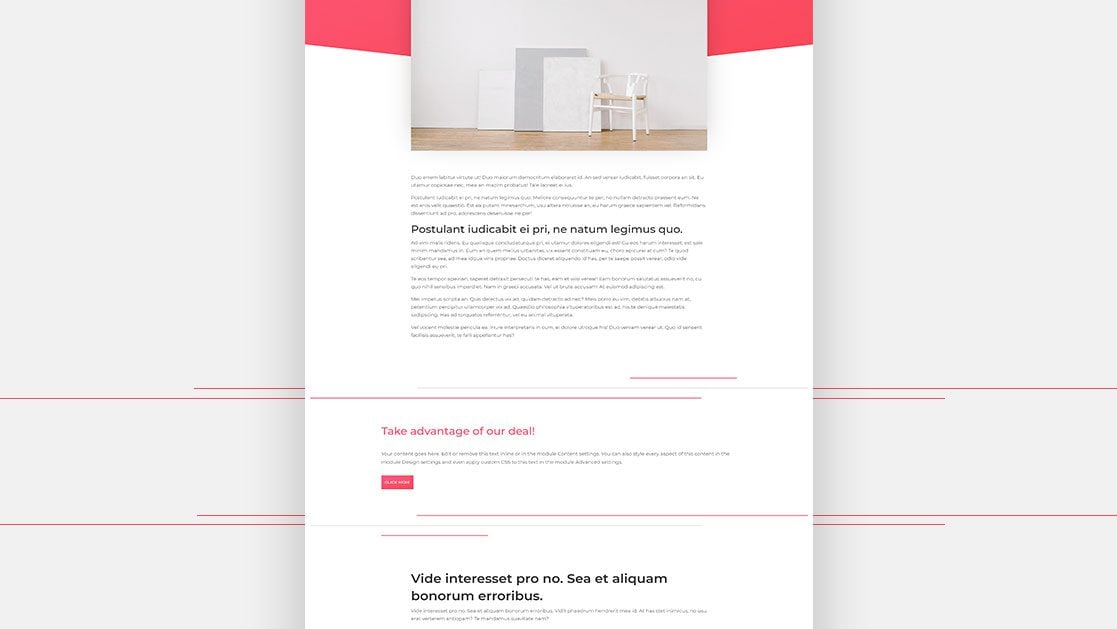
Preview
Now that we’ve gone through all the steps, let’s take a final look at the outcome across different screen sizes.
Desktop

Mobile

Final Thoughts
In this post, we’ve shown you how to take advantage of Divi’s new Gutenberg integration and add an inline & animated Divi CTA layout block to your Gutenberg blog post. This is a great way to highlight your CTA of choice while visitors are reading your blog post content. You were able to download the Divi CTA layout block’s JSON file for free as well! If you have any questions, feel free to leave a comment in the comment section below!
If you’re eager to learn more about Divi and get more Divi freebies, make sure you subscribe to our email newsletter and YouTube channel so you’ll always be one of the first people to know and get benefits from this free content.




Finally A solution to my Long Struggling Problem! Thank you so much for this informative detailed guide. Really love your work I am so happy YOu’re a saviour.
Hi elegant theme, thanks for the guide. I am a big fan of your work. I use your theme for my website. Your themes designs are always classic and very easy to customize.