Every week, we provide you with new and free Divi layout packs which you can use for your next project. For one of the layout packs, we also share a use case that’ll help you take your website to the next level.
This week, as part of our ongoing Divi design initiative, we’re going to show you how to add an interactive map to Divi’s Travel Blog Layout Pack‘s blog layout. This interactive map will contain all the continents and on click, the visitors will be redirected to the category page of that specific continent.
- 1 Preview
- 2 Part 1: Download & Install the Free HTML 5 Maps Plugin
- 3 Part 2: Create Post Categories & Assign Travel Posts to Categories
- 4 Part 2: Create World Map
-
5
Part 3: Add World Map to Blog Page
- 5.1 Step 1: Go to Blog Page & Enable the Visual Builder
- 5.2 Step 2: Add New Section Below Hero Section
- 5.3 Step 3: Remove Bottom Padding of Section
- 5.4 Step 4: Hide Section on Tablet & Phone
- 5.5 Step 5: Add One-Column Row
- 5.6 Step 6: Add Text Module with Shortcode
- 5.7 Step 7: Save Page & Exit Visual Builder
- 6 Preview
- 7 Final Thoughts
Preview
Before we dive into this use case tutorial, let’s take a quick look at the design that you can expect once you finish all the steps.

Part 1: Download & Install the Free HTML 5 Maps Plugin
Step 1: Download the Plugin
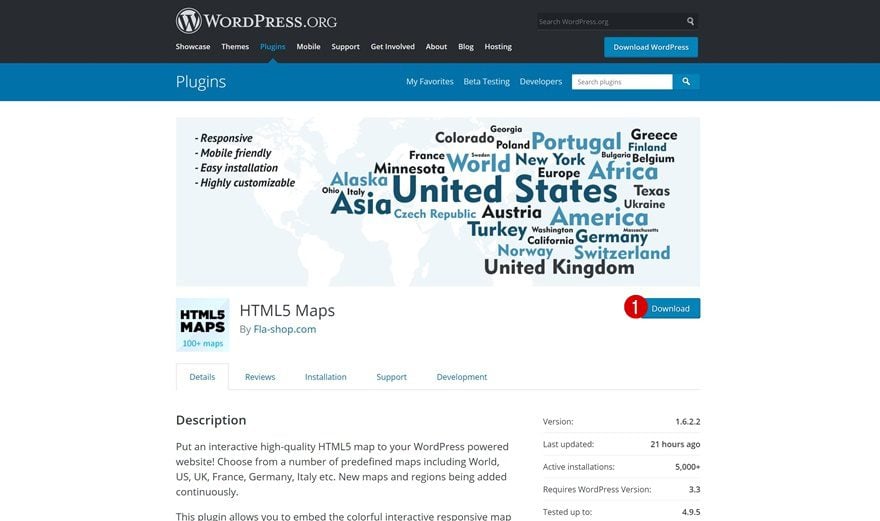
Let’s start by downloading the free version of the HTML5 Maps plugin. This is just one of many interactive maps plugins on the market. Download HTML5 Maps by going to the following page and clicking on the download button.
Step 2: Upload it to Your WordPress Website & Activate it
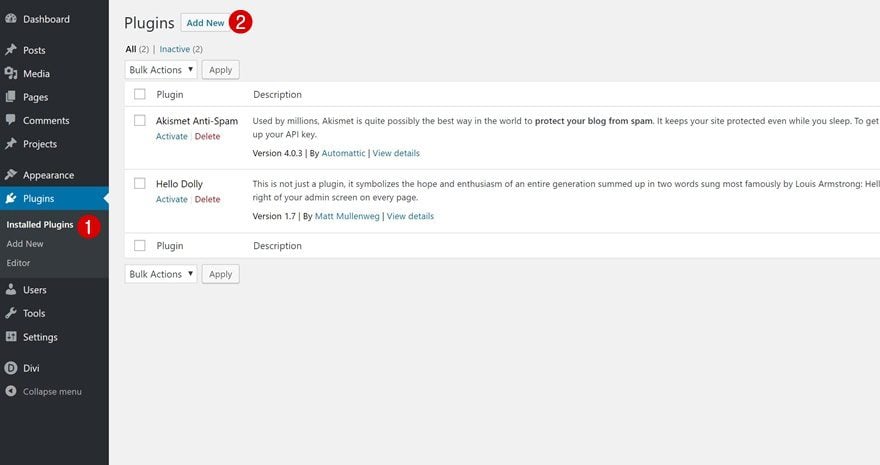
Once you’ve downloaded it, go ahead and upload it to your plugins. Make sure you activate the plugin as well.
Part 2: Create Post Categories & Assign Travel Posts to Categories
Step 1: Go to Post Categories
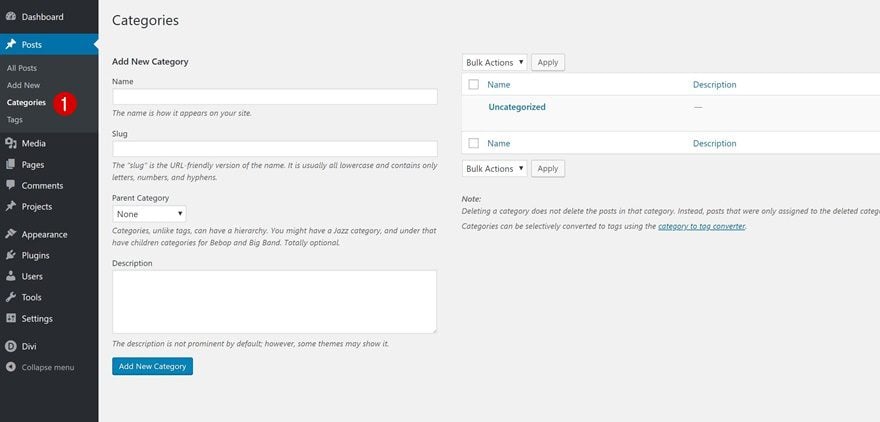
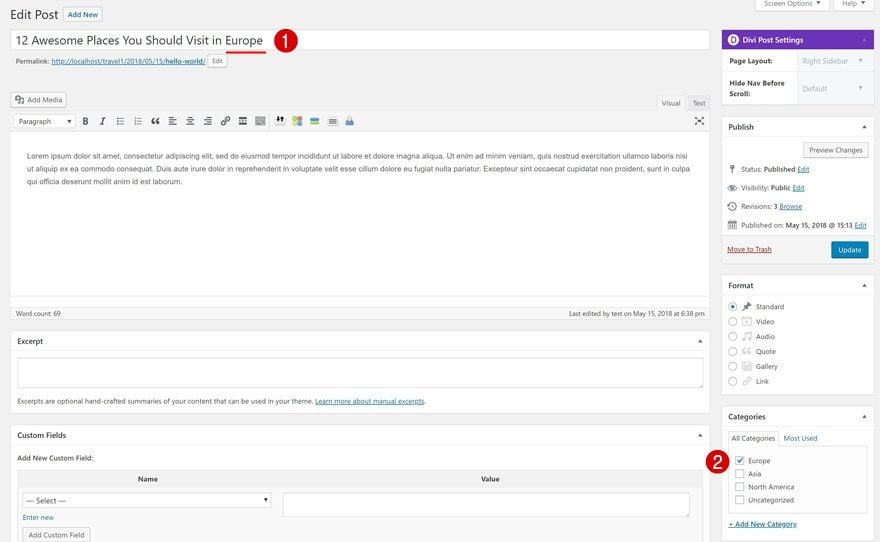
In the next part of this post, we’ll create a world map with all continents. By clicking on one of these continents, visitors will be redirected to the category page of the continent they’ve clicked on. There, they will be able to see all the blog posts you’ve created that are relevant to that continent. But first, we’ll need to create the categories and their pages at the same time. To do that, start by going to your Posts > Categories.
Step 2: Create a Category for Each Continent
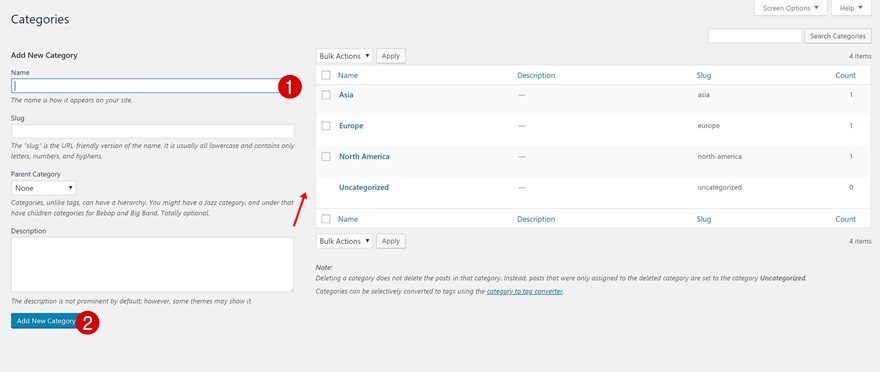
Now, create a category for each one of the relevant continents as you can see in the print screen below.
Step 3: Assign Posts to Relevant Categories
You’ll need to assign each one of your existing and future posts to one of the continents. This will, of course, depend on the content of your blog post. A blog post can be assigned to multiple continents as well if the content of your blog post allows it.
Part 2: Create World Map
Step 1: Go to HTML Maps
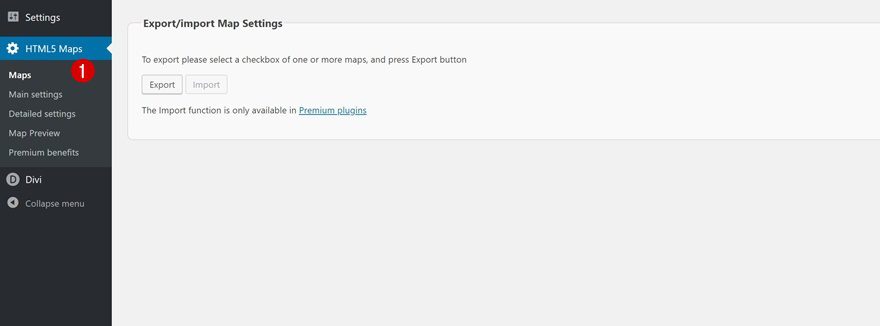
Now, we’ll move on to the fun part! We’ll create an interactive map by going to our HTML5 Maps plugin > Maps.
Step 2: Add a New Map
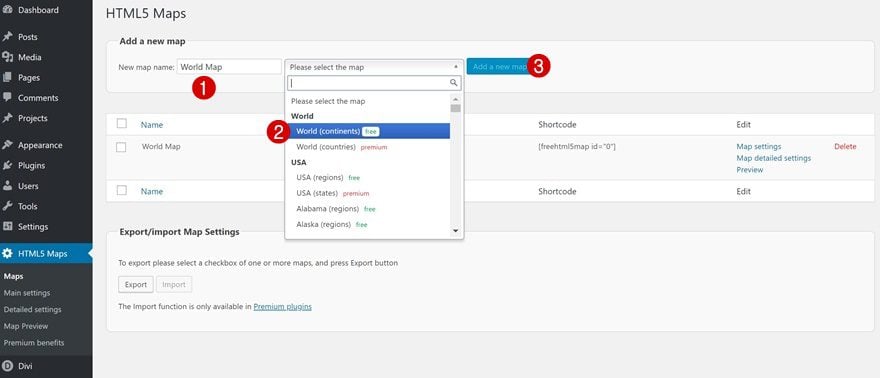
There both free maps and premium maps available. The world map containing continents is free so that’s the one we’ll go with. The world map showing countries is part of the premium plugin. Give your map a name, select the right map and click on ‘Add a new map.’
Step 3: Go to Map Settings
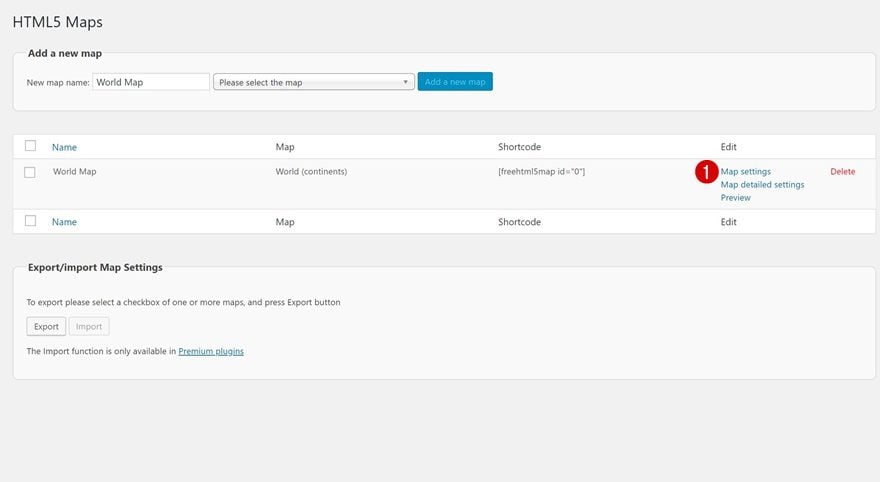
We’ve, now, created the map. We’ll need to make some modifications to it to make it match with our layout pack. Go to the Map Settings of the map you’ve created.
Step 4: Modify General Settings
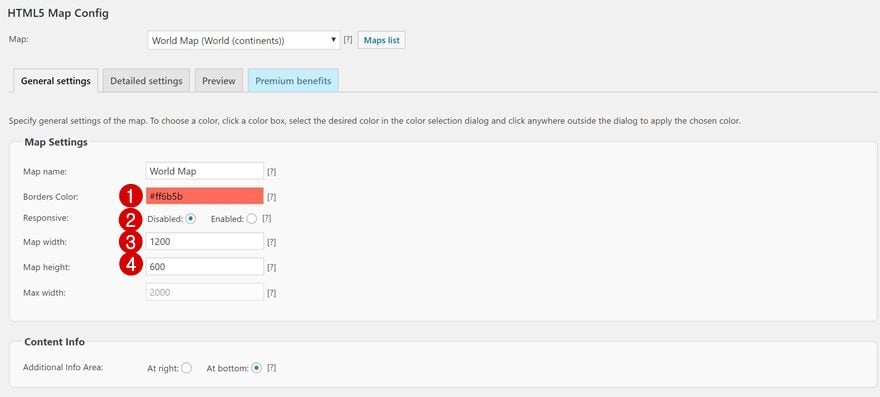
Although you can choose to make the map responsive, we’re going to use this map on desktop only. Navigating on mobile differs from navigating on desktop and I personally don’t think adding a map to the mobile version is the best way to go. The map would be scaled down because of the screen size which would make clicking on a continent pretty difficult. In the general settings, apply the following changes:
- Borders Color: #ff6b5b
- Responsive: Disabled
- Map Width: 1200
- Map Height: 600
Step 5: Modify Detailed Settings for Each Continent
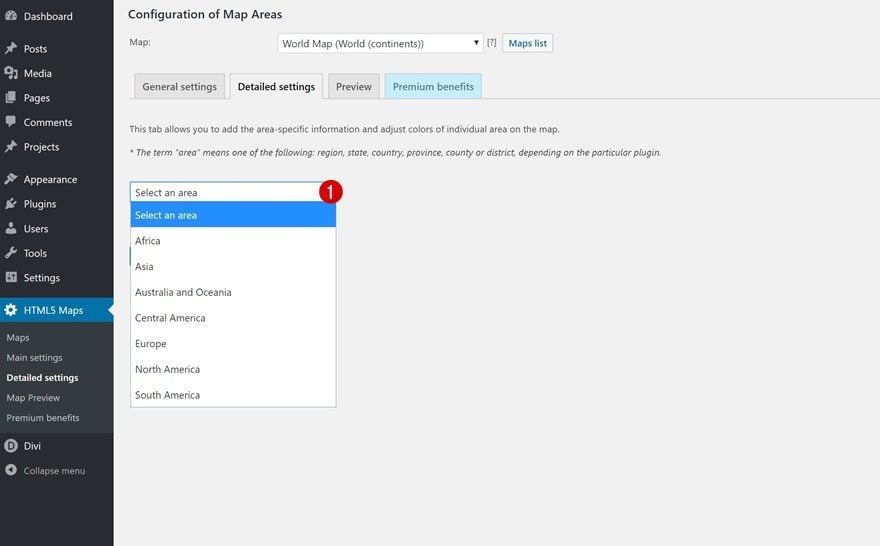
In the Detailed Settings tab, you modify each one of the continents individually. This is where you’ll need to add the URL you want users to be redirected to. The URL for each continent will need to match the slug of your category and will look like this:
- yourwebsite.com/category/continent
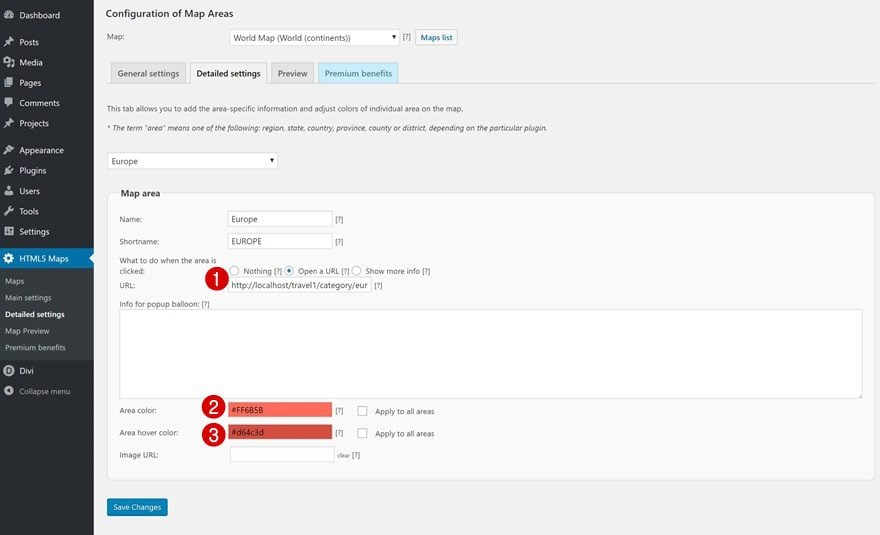
Open each one of the continents individually and apply the following settings to them:
- What to do when the area is clicked: Open a URL
- Url: yourwebsite.com/category/continent (change to the relevant continent)
- Area Color: #FF6B5B
- Area Hover Color: #d64c3d
Step 6: Copy Shortcode
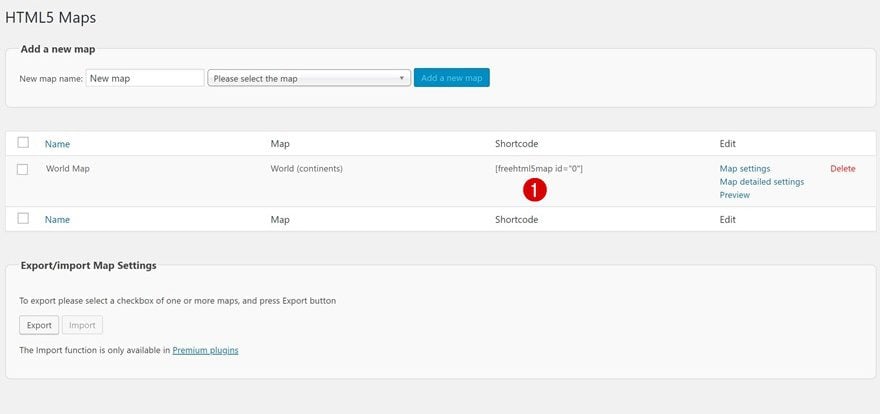
Save all the changes you made and copy the shortcode of the map you’ve created:
Part 3: Add World Map to Blog Page
Step 1: Go to Blog Page & Enable the Visual Builder
In the last part of this use case blog post, we’ll add the map to our blog page. You could place the map on other pages as well but since it’ll open category pages, it makes the most sense to place it on the blog page. Start by going to your blog page and enabling the Visual Builder.
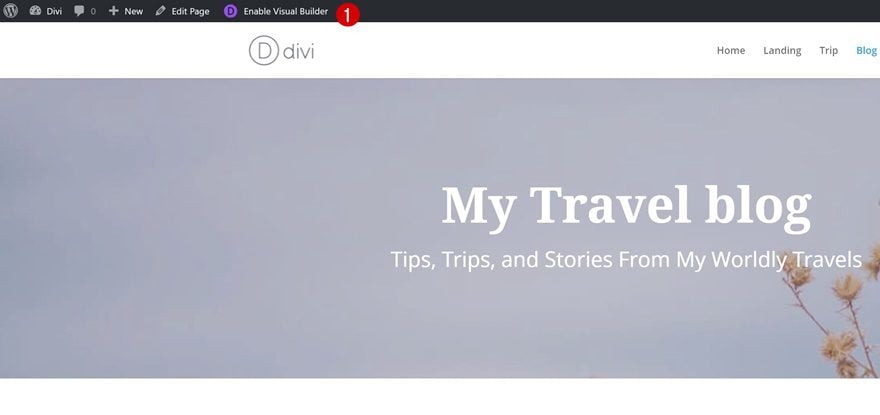
Step 2: Add New Section Below Hero Section
Then, add a new section right below your hero section.
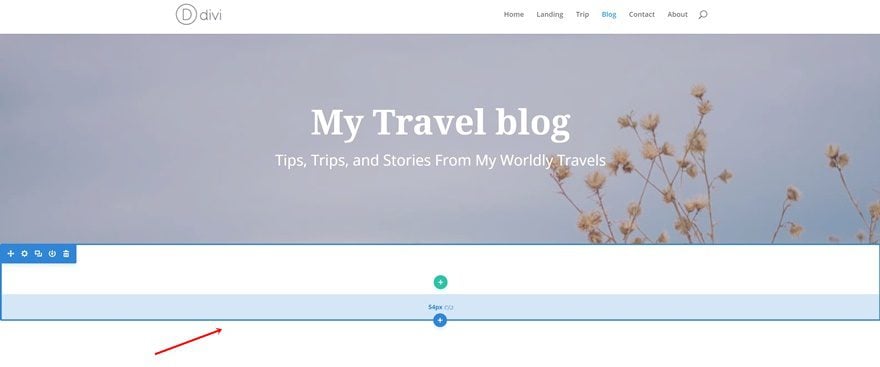
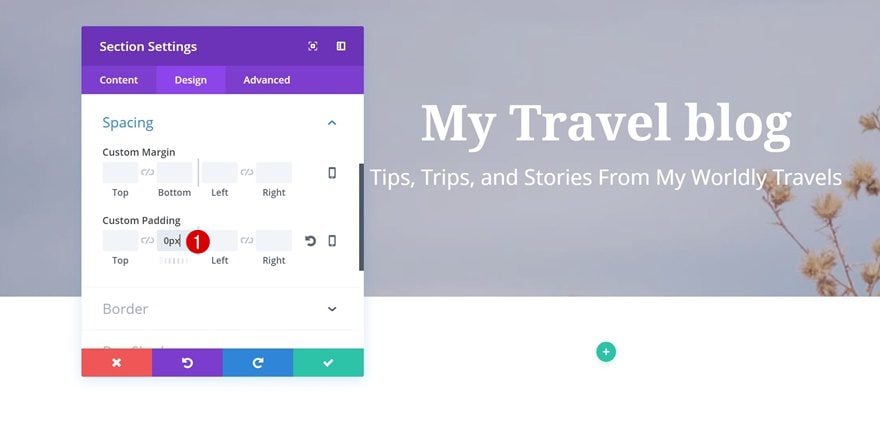
Step 3: Remove Bottom Padding of Section
To reduce some of the space between this section and the next one, we’ll remove all of the default bottom padding of this section by adding ‘0px.’
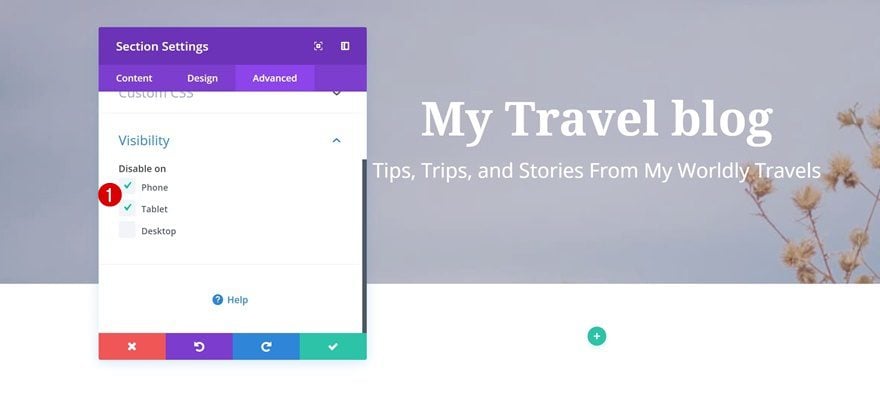
Step 4: Hide Section on Tablet & Phone
As mentioned before, we’ll only make this map appear on desktop for UX reasons. Go to the Visibility settings of your section and disable the entire section on phone and tablet.
Step 5: Add One-Column Row
Once you’re done with your section settings, go ahead and add a row with one column.
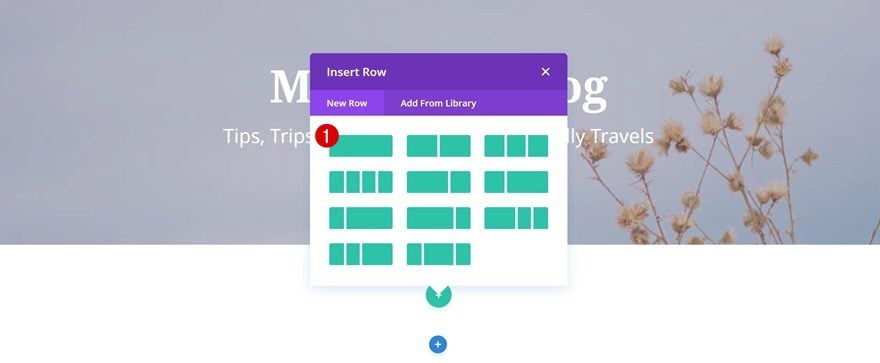
Step 6: Add Text Module with Shortcode
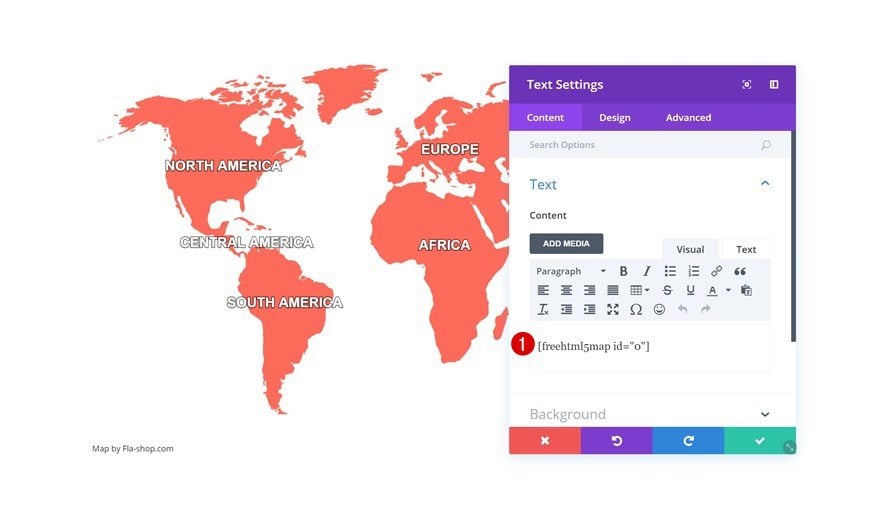
The only module we’ll need to add is a Text Module containing the shortcode we’ve generated in the previous part of this post.
Step 7: Save Page & Exit Visual Builder
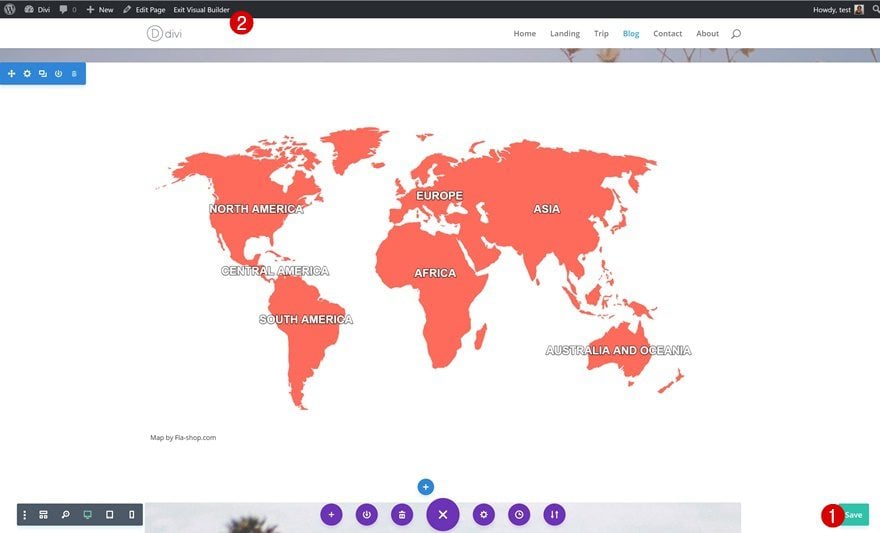
That’s it! The only things left to do are saving your page and exiting the Visual Builder. Your interactive map is ready to be used!
Preview
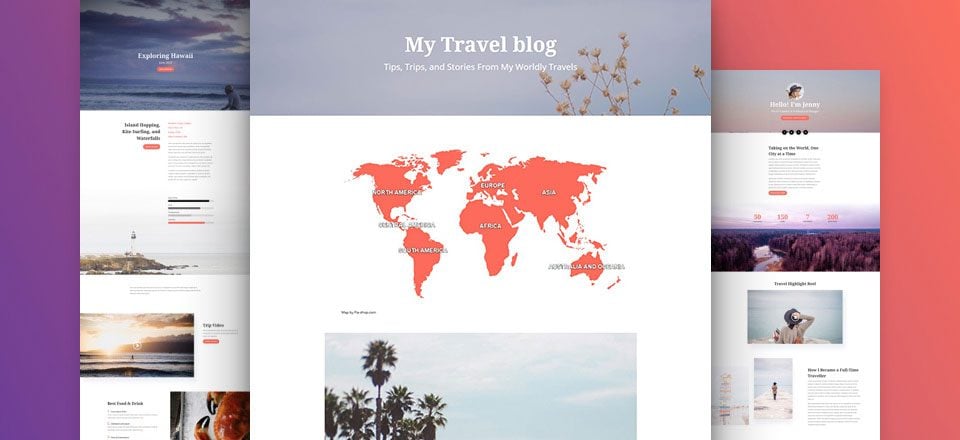
Now that we’ve gone through all the steps, let’s take a final look at the result we’ve achieved.

Final Thoughts
In this use case blog post, we have shown you how to add an interactive map to Divi’s Travel Blog Layout Pack. For this, we’ve used a world map with all the continents. By clicking on one of the continents, the visitors will be redirected to the category page of that particular continent. If you have any questions, make sure you leave a comment in the comment section below!



Where is a working example?
Nice Tutorial. Could come in handy later on.
Thanks
Nice!! Thank you!
How cool, thanks for sharing this plugin Donjete. I think I will have a play around with it.
Looks great! Is there a way to see the live version?
https://www.elegantthemes.com/layouts/outdoors-travel/travel-blog-landing-page/live-demo
🙂
… oh, it seems the map is missing in the demo.