Every week, we provide you with a new and free Divi layout pack which you can use for your next project. Along with every layout pack, we also provide you with a use case that’ll help you take your website to the next level. This week, as part of our ongoing Divi design initiative, we’re showing you how to ticket support to Divi’s free SaaS layout pack. With ticket support, you can easily follow up on all the questions your customers have about the software services you offer.
- 1 Use Case Sneak Peek
- 2 The Setup
- 3 Part 1: Download & Install the uCare Plugin
- 4 Part 2: Add Support Page to Menu
- 5 Part 3: Change Support Page Logo
- 6 Part 4: Change Appearance
- 7 Part 5: Change or Keep Email Templates
- 8 Part 5: Add Ticket Categories
- 9 Part 6: Enter Support Page
- 10 Part 7: View & Modify Ticket Information
- 11 Final Thoughts
Use Case Sneak Peek
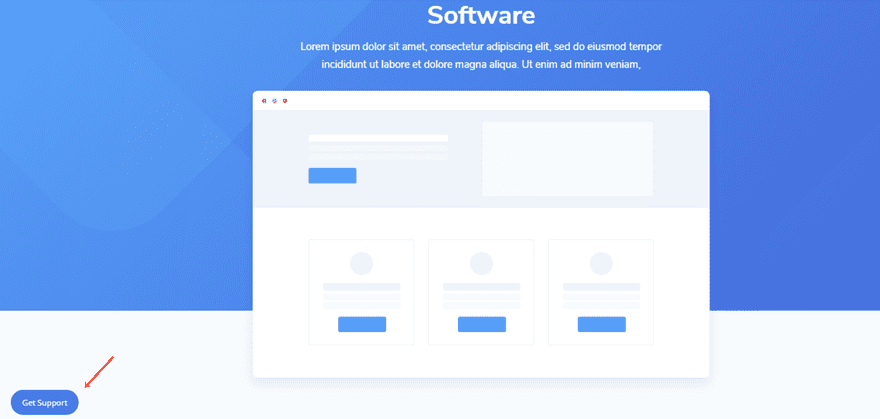
Before we dive into the tutorial, let’s take a quick look at the result we’ll be showing you how to recreate, step by step. The first thing that’ll be added to the website is a support button in the bottom left corner of your screen. This button follows your visitors throughout the entire site so they can get support at any time.
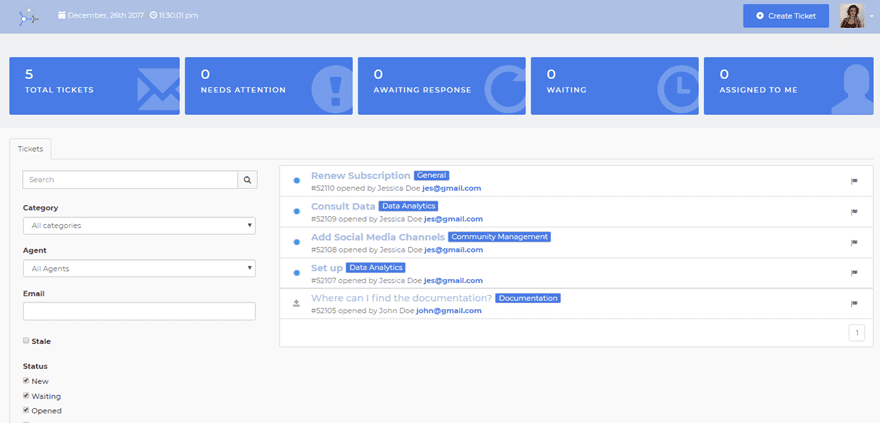
Another thing that’ll be added is the support page which allows people to search for existing tickets or create a new ticket that matches a certain category. The support page looks like this for admins of the website:
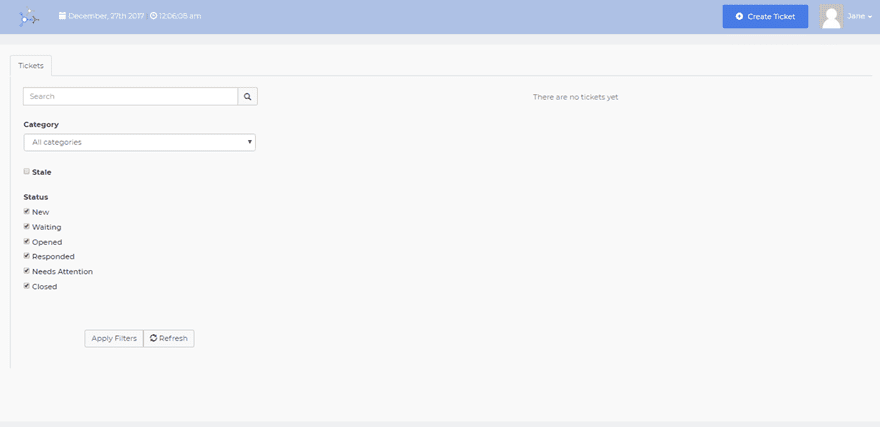
And like this for visitors:
The Setup
1. Install and activate the Divi Theme
2. Install Plugins
3. Download the Layout Pack and Import the SaaS_All.json file to your Divi Theme Library.
4. Create new pages for each layout.
5. Create your primary menu.
If you are confused by the setup listed above, you can find more detailed instructions on how to setup your layout properly by checking out these 10 steps for using a layout pack for your new project.
Part 1: Download & Install the uCare Plugin
Step 1: Download Plugin
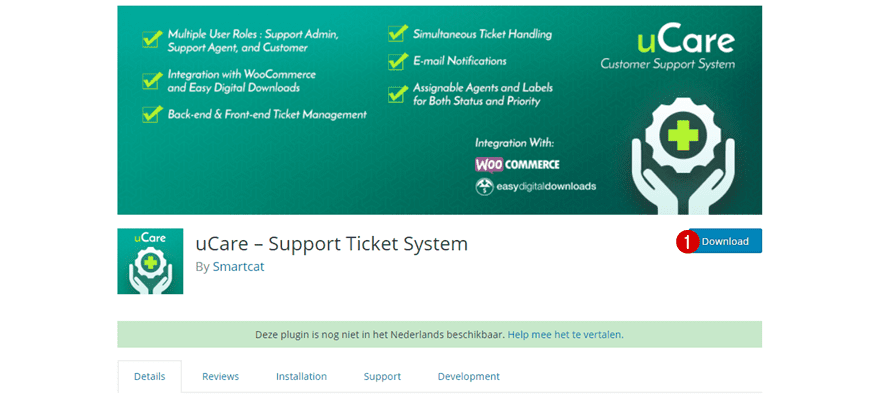
The first thing you will need to do is download the free uCare plugin which you can find on the following page. Click on the download button and the zipped plugin folder will automatically be added to your downloads folder.
Step 2: Install Plugin
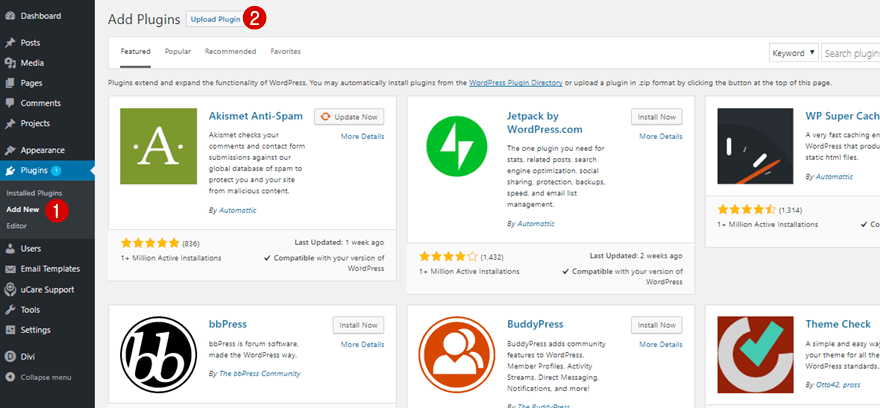
Once you’ve downloaded the uCare plugin, go to your WordPress website > Plugins > Add New and upload the plugin. Once you’ve uploaded the plugin, make sure that you activate the plugin as well.
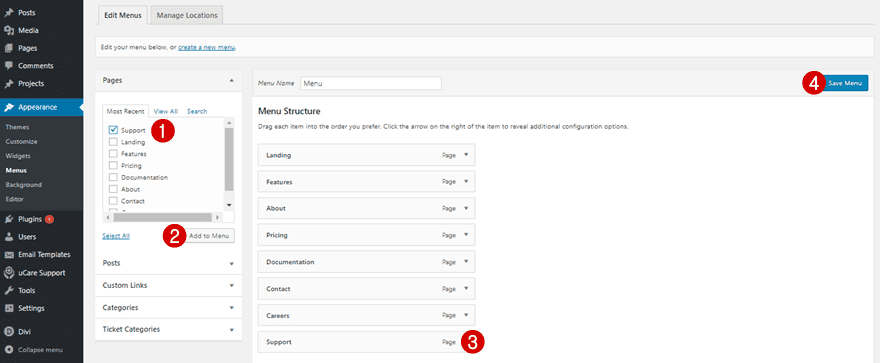
Once you’ve added and activated the free uCare plugin, a support page containing the plugin’s content will automatically be created. Although this page is already accessible through the support button in the bottom left corner of each page, adding the support page to the primary menu as well is highly recommended. To add the support page to your primary menu, go to Appearance > Menus.
Then, select the support page and add it to your menu. Don’t forget to save your menu as well.
Part 3: Change Support Page Logo
Step 1: Go to Plugin Settings
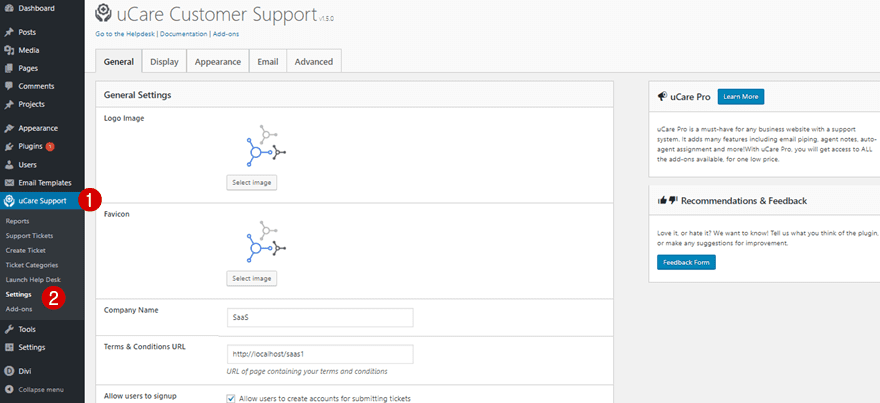
Now, you can start modifying the plugin to your needs. Start by adding your logo to the settings of the uCare plugin by going to uCare Support > Settings. Preferably, the logo you’re using is going to be the same logo you use on your website.
Step 2: Change Logo
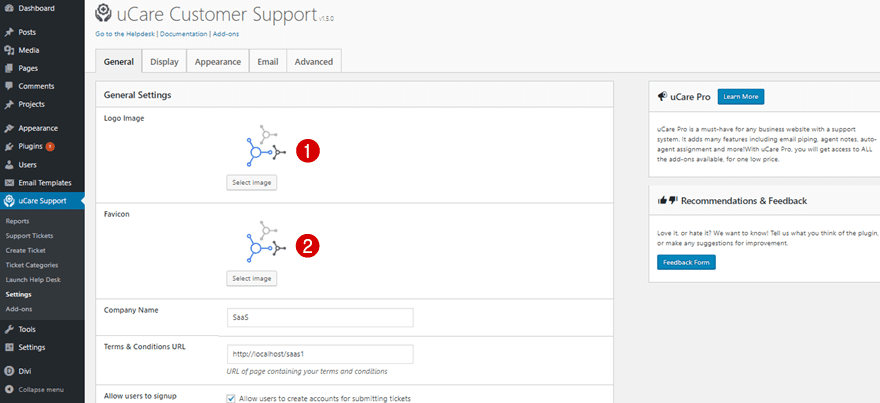
Then, simply add your logo image file as the Logo Image and Favicon.
Part 4: Change Appearance
Step 1: Change Font if Needed
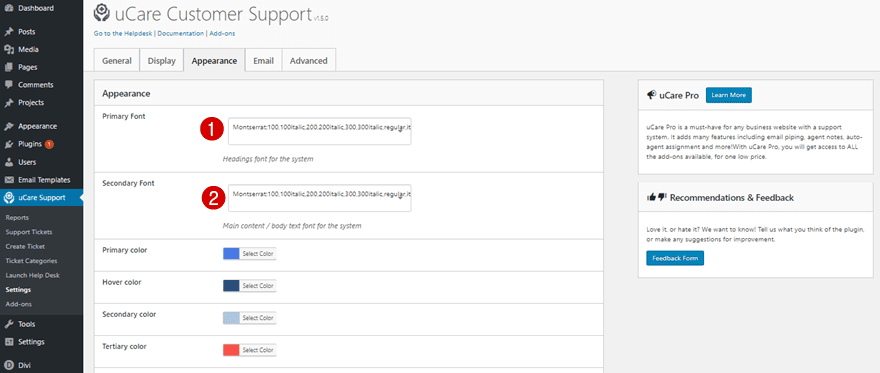
Most settings of the plugin are not possible to edit without additional CSS code. However, you can change a few things. One of those things is the font. If you prefer using another font family and font style, you can modify the Primary Font and Secondary Font within the content boxes that are marked in the print screen below.
Step 2: Change Color Palette to Match the SaaS Layout Pack
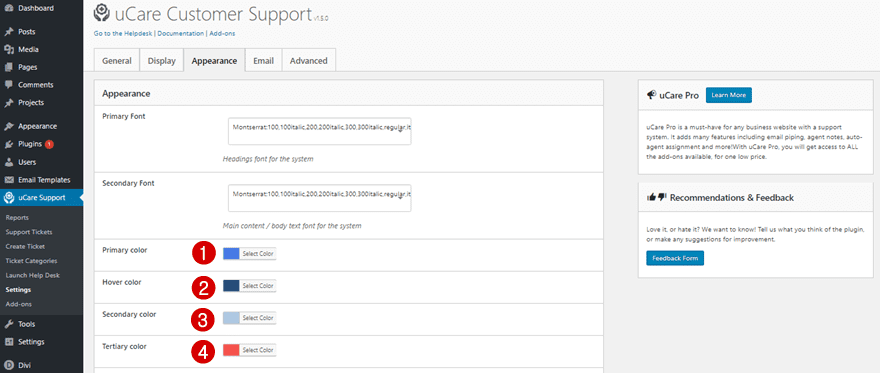
Another thing you can do is change the color palette of your plugin to match the style of your website. You can choose the colors yourself by using a color picker on your website or use the following colors below that match the layout pack:
- Primary color: #487be5
- Hover color: #254b7c
- Secondary color: #aec1e5
- Tertiary color: #f8534b
Step 3: Upload Login Background Image
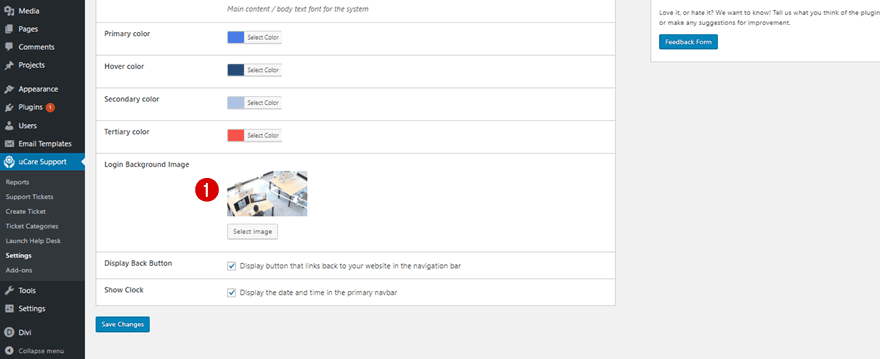
Make sure you change the Login Background Image as well. This is the background image that’ll appear once visitors login or register on the support page. The image I’ve chosen in the example below is part of the SaaS layout pack. After adding the SaaS layout pack to your Divi website, this image will automatically be added to your Media Library.
Part 5: Change or Keep Email Templates
Step 1: Change Email Templates if Needed
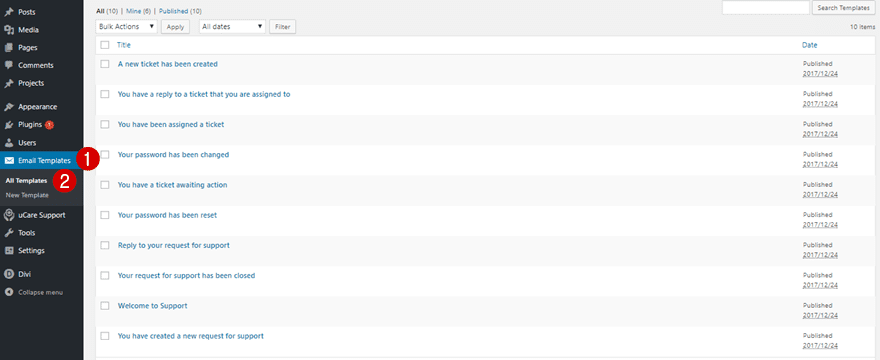
To access the support page, each one of your visitors will need an account. There are some default email templates available that send out all the information your visitors need. However, you can change all of these email templates or add new ones if you prefer by going to Email Templates > All Templates.
Step 2: Change User Notification Templates if Needed
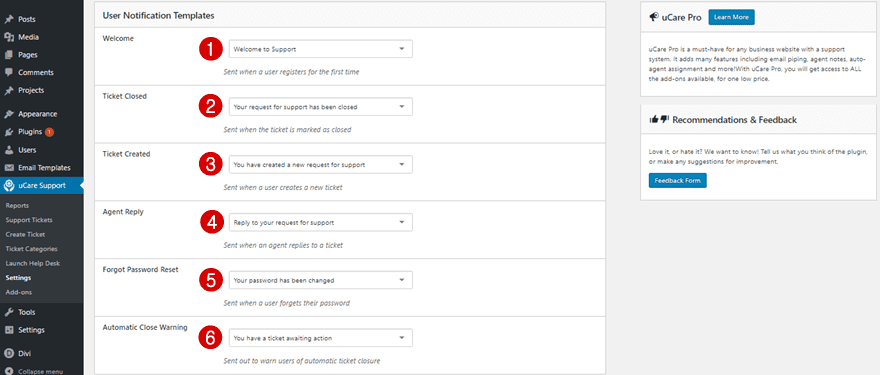
If you were to create new email templates, you could change the User Notification Templates within your plugin by going to uCare Support > Settings > Email.
Part 5: Add Ticket Categories
Step 1: Choose Main Features as Categories
The next part of setting up ticket support for your SaaS layout pack is choosing the ticket categories. There is a general category present, but you’ll want to add other categories that match your software services as well. This allows you to be more organized and your visitors to be more precise with the questions they have.
Step 2: Add Them to Your Categories
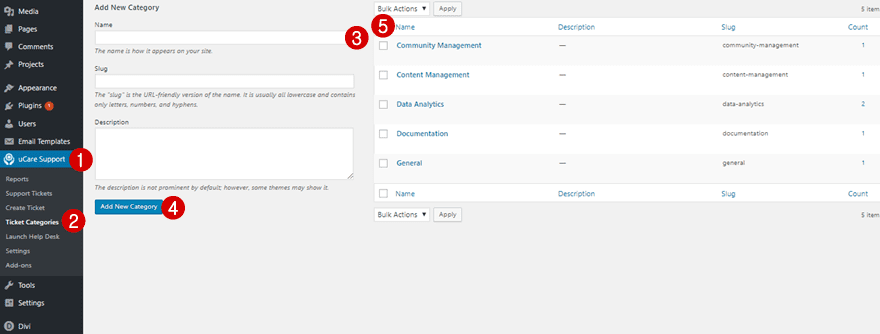
Once you’ve chosen the categories, you can add them by going to uCare Support > Ticket Categories > Adding each one of the ticket categories individually.
Part 6: Enter Support Page
Step 1: Support Page for Admins
If you access the support page with an admin account, you’ll be able to see all of the tickets and their status as you can see on the print screen below. 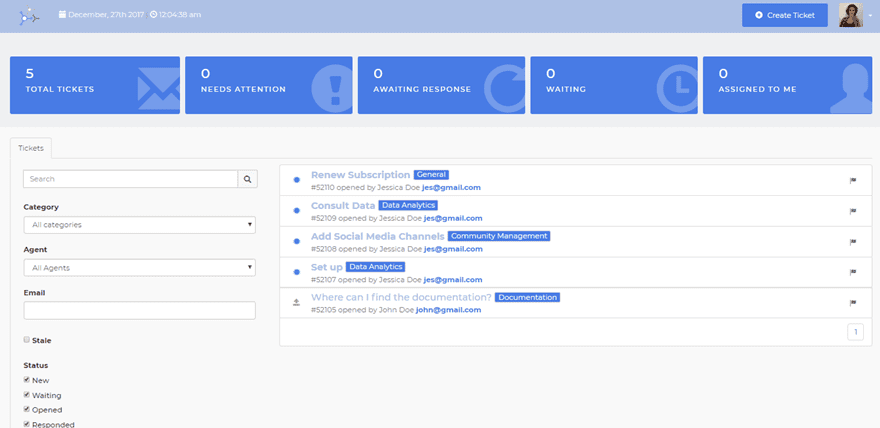
Step 2: Register/Log in Page for visitors
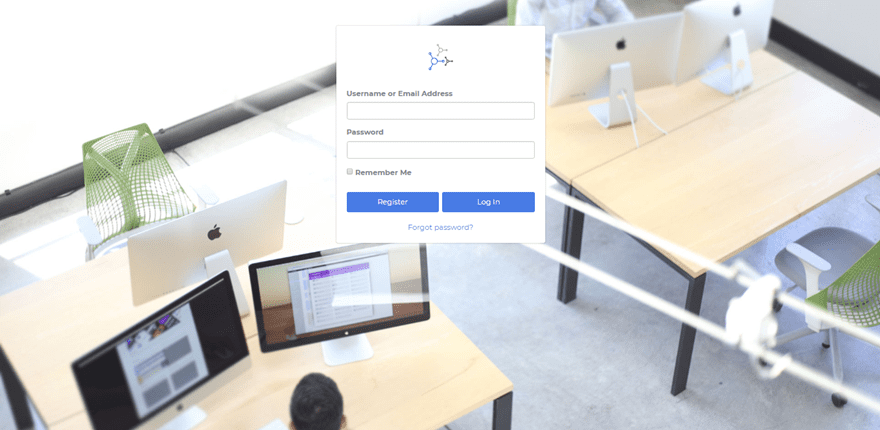
However, if a visitor is visiting your website, they’ll either have to create a new account or log in with an existing account.
Step 3: Support Page for Visitors
Once they’ve logged in, they’ll see the following support page show up:

Step 4: Create New Ticket as Visitor
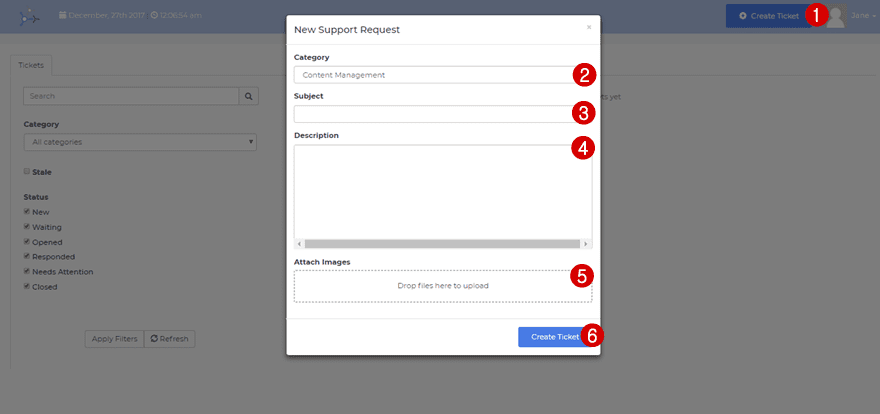
They can easily create a new ticket by clicking on ‘Create Ticket’ in the right top corner. A ticket needs a category, subject, description and can contain images as well.
Part 7: View & Modify Ticket Information
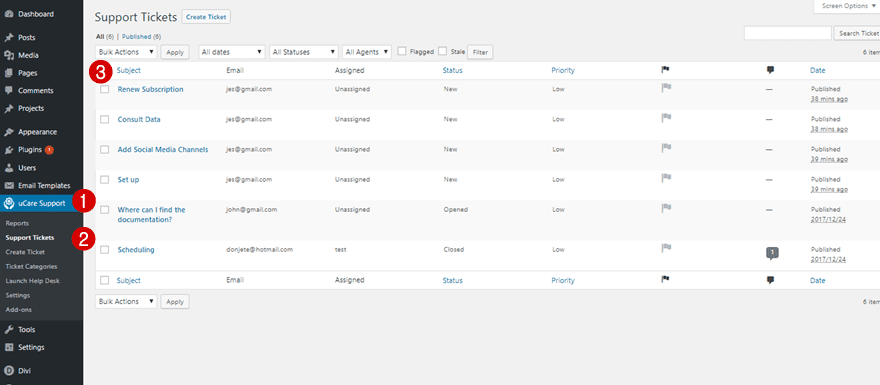
Step 1: View All Tickets
To view all the tickets on your WordPress dashboard, go to uCare Support > Support Tickets.
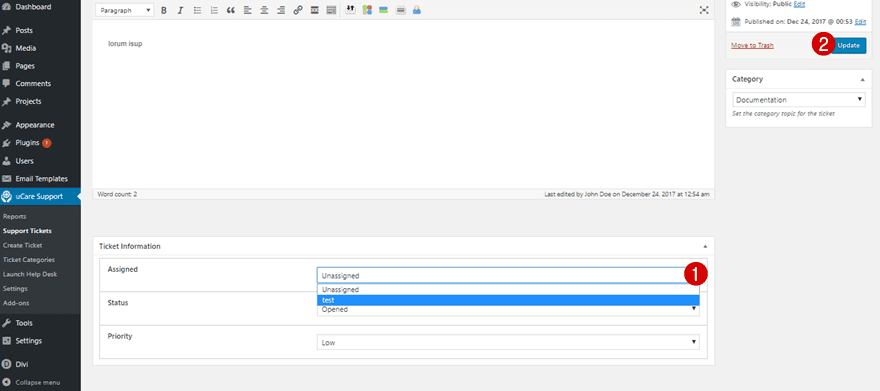
Step 1: Assign Agent to Ticket
Once you open a ticket, you can assign it to one of your agents, or to yourself.
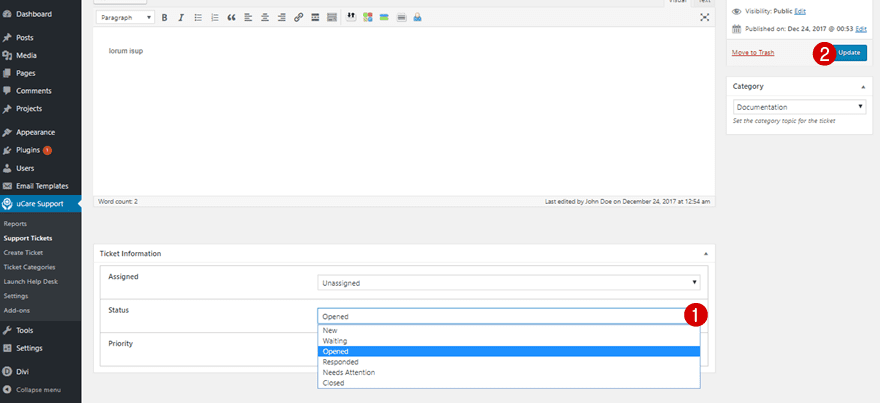
Step 2: Change Status of Ticket
Another thing you can do is change the status of your ticket.
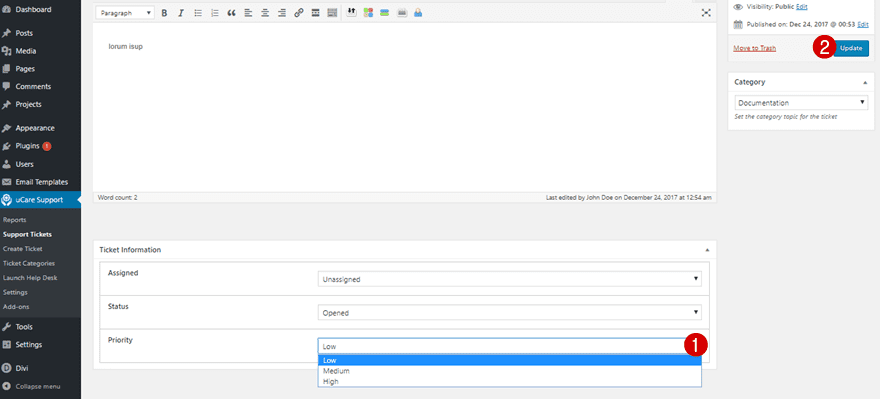
Step 3: Change Priority of Ticket
And if the ticket needs special attention, you can also change the priority of your ticket.
Final Thoughts
In this post, we’ve shown you how you can add ticket support to the website you built with the free Divi SaaS layout pack. Adding ticket supports to your website helps you increase customer satisfaction by allowing your customers to ask questions at any time on your website. If you have any questions or suggestions; make sure you leave a comment in the comment section below!
Featured Image by AldanNi / shutterstock.com



I’m filming a tutorial on how to edit text using the Visual Builder in wordpress and for Marketing Success the visual builder isn’t loading when I click it. Is there a way to fix this?
If you’re experiencing an infinite loading of Visual Builder, it could be due to a conflict with a plugin or a custom code added to the site.
Great read. Any future posts on integration with Awesome Support?
Hi Donjete!
Thank you for this great post. Really informative and unleashes a slew of ideas. My question is specific to the choice of uCare as a plugin for the helpdesk/support system. Could you elaborate a little bit on the choice for using uCare as opposed to another system, such as Help Scout, Zendesk, Awesome Support, etc.?
I have no problem with uCare, but I have little to no experience with any of these systems and I’m trying to decide which one to use for support on a client site. If you have specific reasons one would better than another, I would greatly appreciate the feedback. Or does uCare specifically just work better with the layout pack than the other systems?
Again, thank you for the great post! I always enjoy your content. 🙂
Have a great day!
-Buki
Great post! thank you for creating this. I downloaded both and i’ve been using and i noticed that it’s actually better for support agents and admins reply to tickets from the helpdesk page instead of the daskboard. There are a lot more details for the support agent, like customer details and purchase information on the helpdesk page ( yourdomain.com/support/ )
Hi! Thanks for the post!
Is user has to create new account to use the ticket service or if user is already registered on the website he/she has the same login and password for the ticket service?
Sou iniciante, mas com DIVI estou aprendendo que posso ir mais longe, é maravilhoso saber que posso contar com informações tão preciosas.
DIVI foi o melhor investimento que fiz em 2017.
Parabéns pelo excelente trabalho que vocês estão fazendo, permitindo a tantos outros que como eu, embora pequeno e sem recursos financeiros para investir mais, possam se sentir GRANDES e CONFIANTES.
Que venha 2018!
_____________________________________________________________________________
I am a beginner, but with DIVI I am learning that I can go further, it is wonderful to know that I can count on such precious information.
DIVI was the best investment I made in 2017.
Congratulations on the excellent work you are doing, allowing so many others that like me, although small and without the financial resources to invest more, to feel GREAT and CONFIDENT.
Come on 2018!
It looks like a few links in the article are missing – to the plugin you recommended, and also to the SaaS layout pack. Thanks.
Hey Skip, sorry about that! Here you have them:
https://www.elegantthemes.com/blog/divi-resources/download-a-free-results-driven-saas-layout-pack-for-divi
https://wordpress.org/plugins/ucare-support-system/
I get this when activating the plugin
Parse error: syntax error, unexpected T_USE, expecting T_FUNCTION in /hermes/walnaweb02a/b1869/antiageing/saas/wp-content/plugins/ucare-support-system/plugin.php on line 53
🙁
If you get this kind of error, it’s probably because you are using an old version of PHP. The plugin needs at least version 5.6
Thanks for the post. The functionality and sharp design both rate full stars.
Can someone please post favorite links to a basic explanation of: 1) what is SaaS and 2) how does SaaS integrate with Divi. I would appreciate the understanding very much.
Mike
SaaS means Software as a Service, and means that you don’t buy a license, just hire it for a period of time
Hi, Excelent Article,
But, if i aldready have a membership plugin?¿ can i use this plugin without the registration
Great tip, thank you. Adding this support functionality to the SaaS layout pack is a great touch and covers something which is an essential.