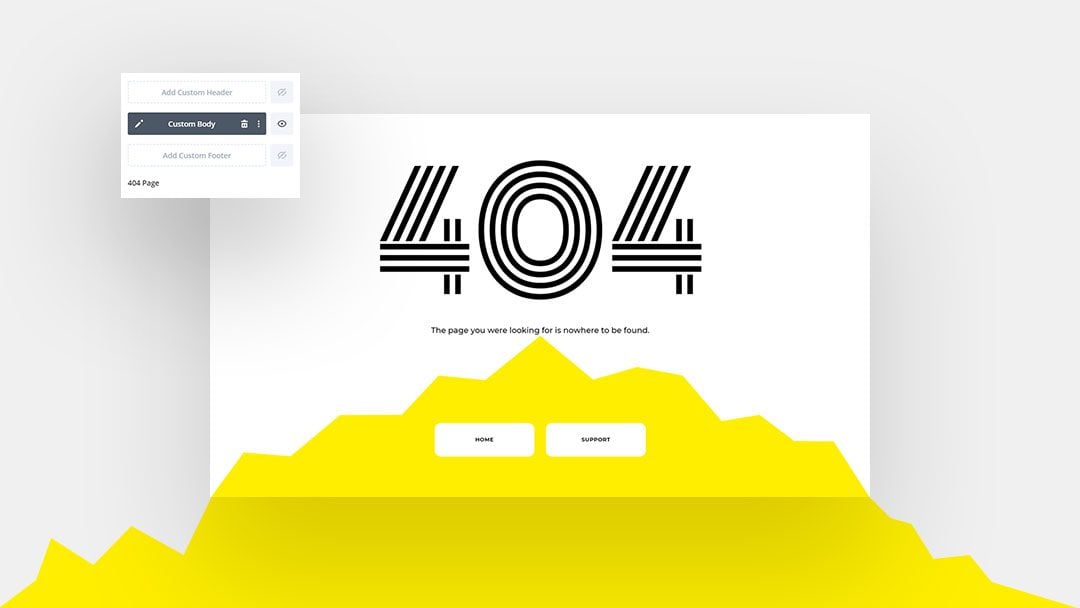
Divi, it’s Theme Builder and the built-in design options have opened a ton of new doors. More than ever before, you’re now able to customize every single page your customers land on. This includes setting up a 404 page. In this tutorial, we’ll show you how to create a beautiful 404 page template and have it apply to your website right away. We’ll only use Divi’s built-in options and you’ll be able to download the template JSON file for free as well. We hope this tutorial inspires to get creative with your next 404 page design.
Let’s get to it!
- 1 Preview
- 2 Download The 404 Page Template for FREE
- 3 Download For Free
- 4 You have successfully subscribed. Please check your email address to confirm your subscription and get access to free weekly Divi layout packs!
- 5 1. Go to Divi Theme Builder & Create New Template
- 6 2. Start Building 404 Page Body
- 7 3. Save Theme Builder Changes
- 8 Preview
- 9 Final Thoughts
Preview
Before we dive into the tutorial, let’s take a quick look at the outcome across different screen sizes.
Desktop
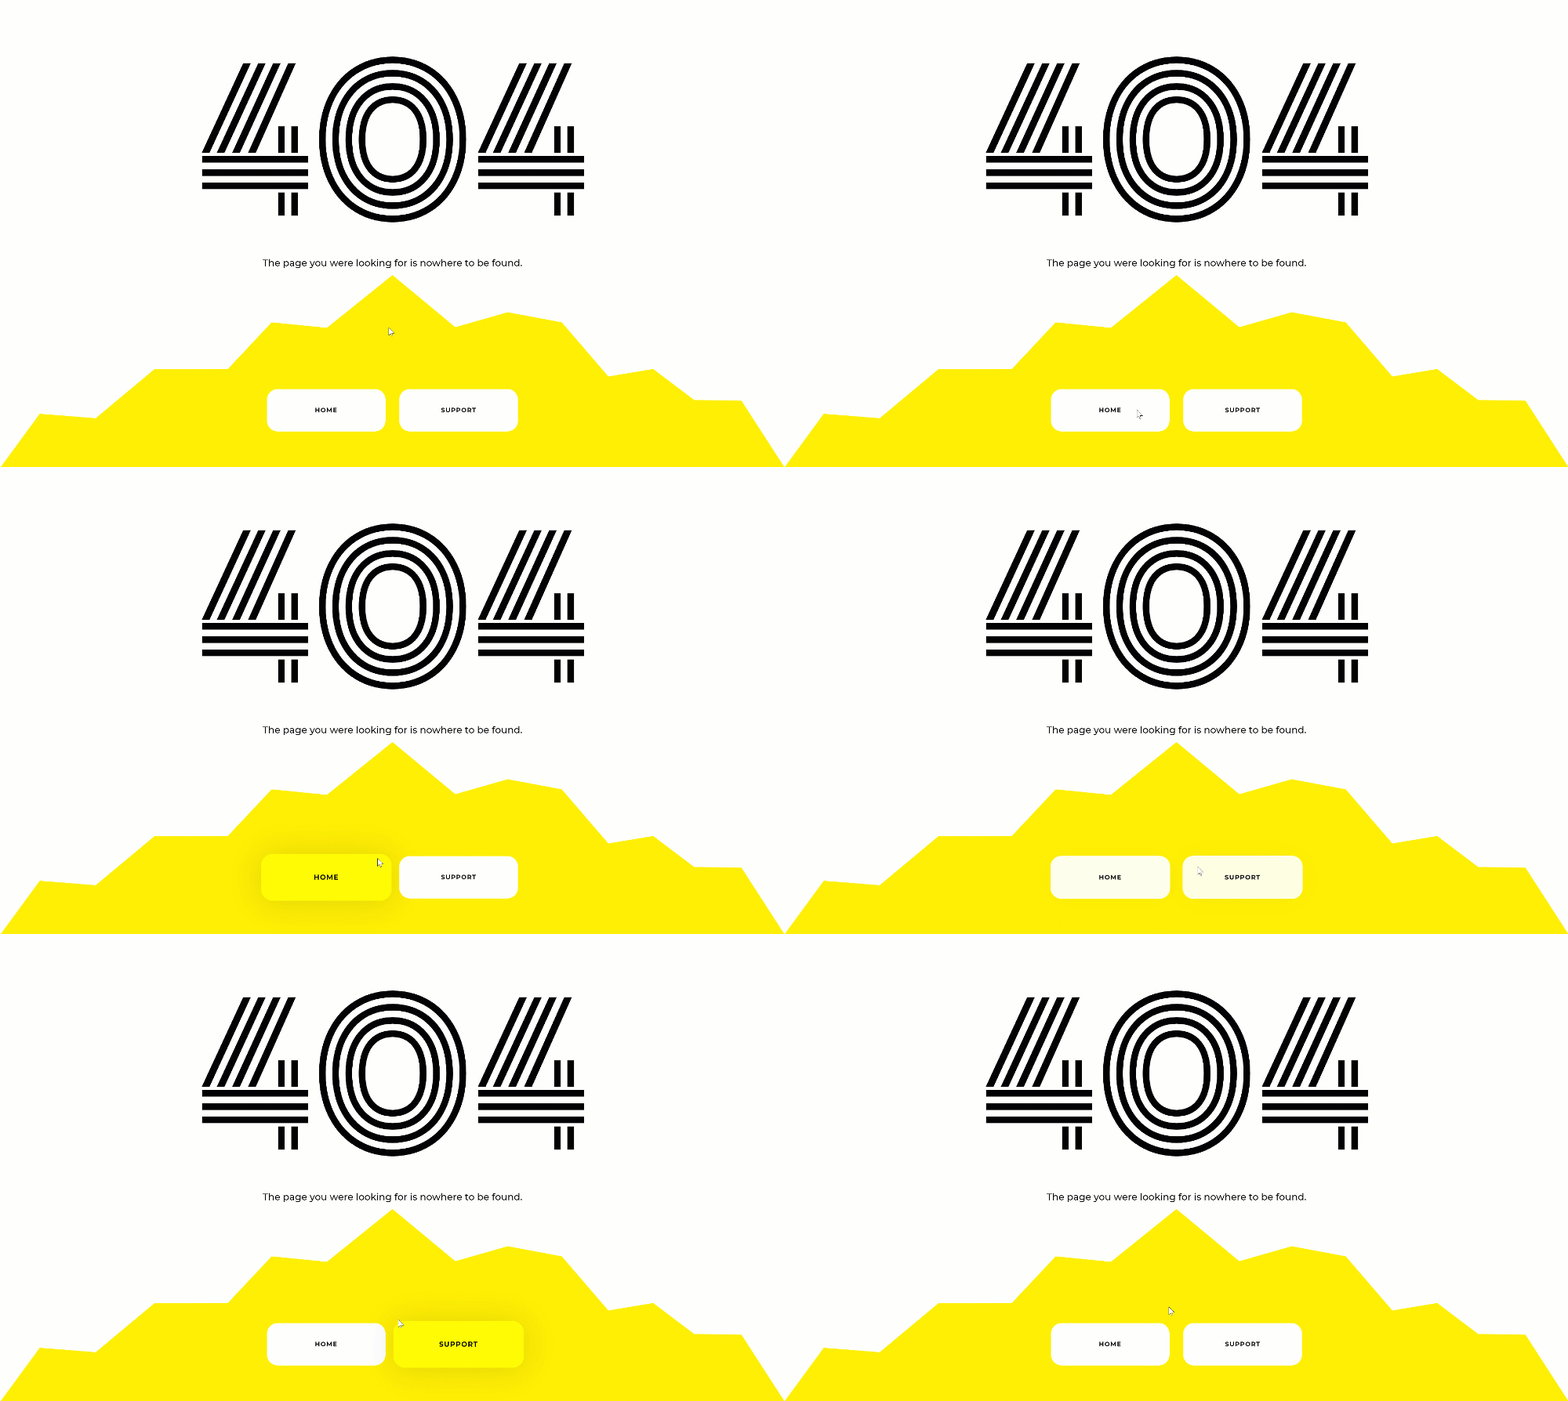
Mobile

Download The 404 Page Template for FREE
To lay your hands on the free 404 page template, you will first need to download it using the button below. To gain access to the download you will need to subscribe to our newsletter by using the form below. As a new subscriber, you will receive even more Divi goodness and a free Divi Layout pack every Monday! If you’re already on the list, simply enter your email address below and click download. You will not be “resubscribed” or receive extra emails.
Subscribe To Our Youtube Channel
1. Go to Divi Theme Builder & Create New Template
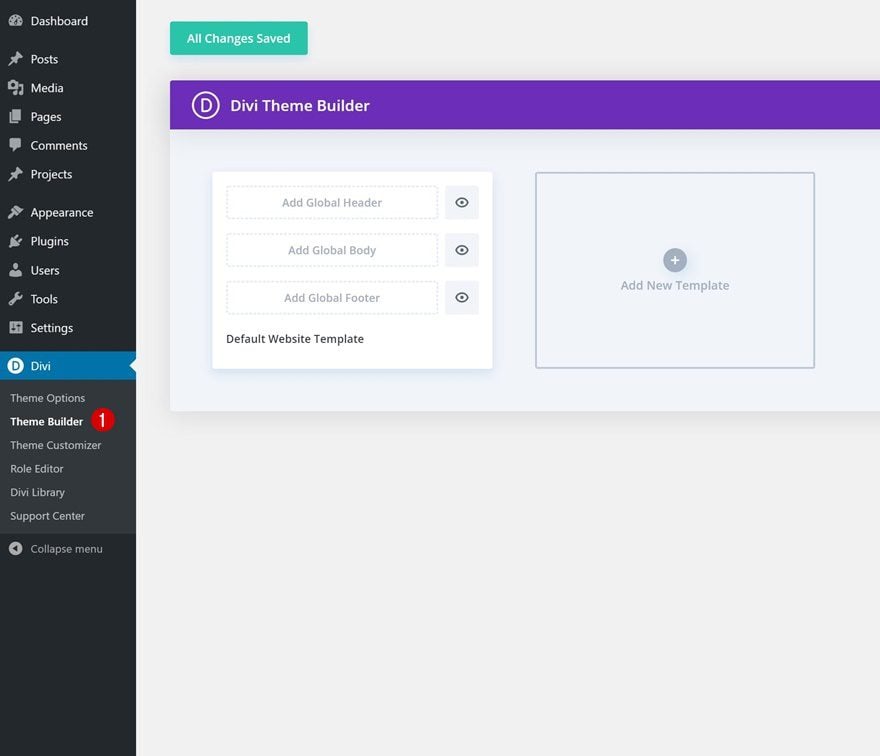
Go to Divi Theme Builder
To start creating the 404 page template, go to the Divi Theme Builder in your Divi settings.
Create New Template
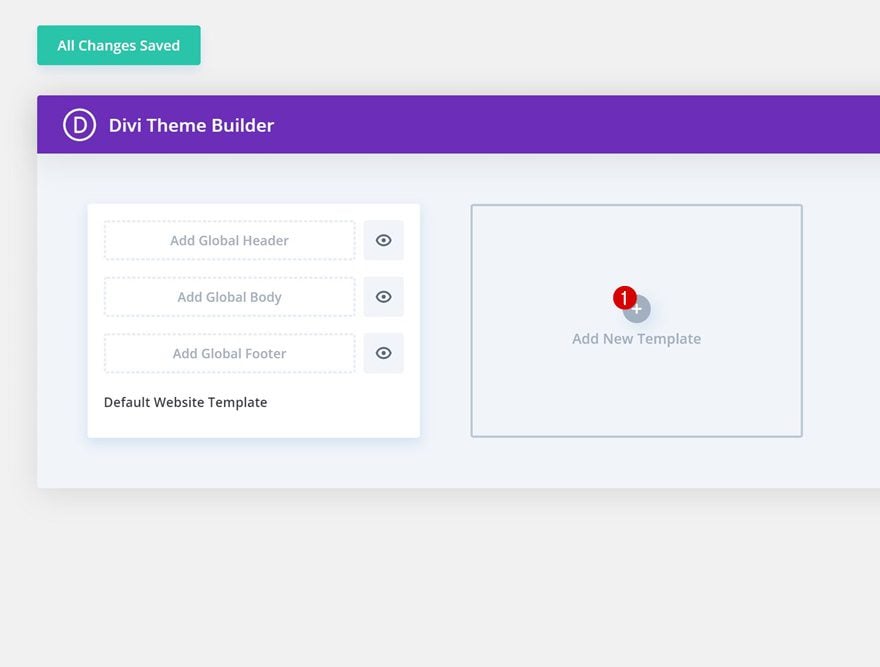
Click on ‘Add New Template’ and set up a new template for your 404 page.
- Use On: 404 Page
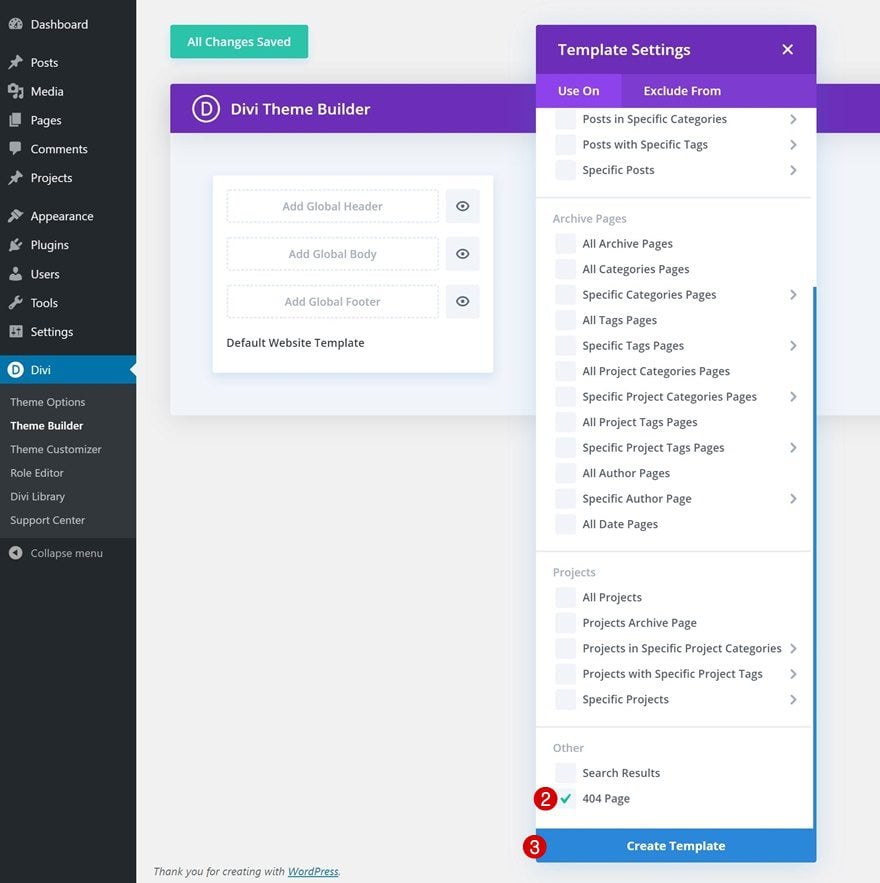
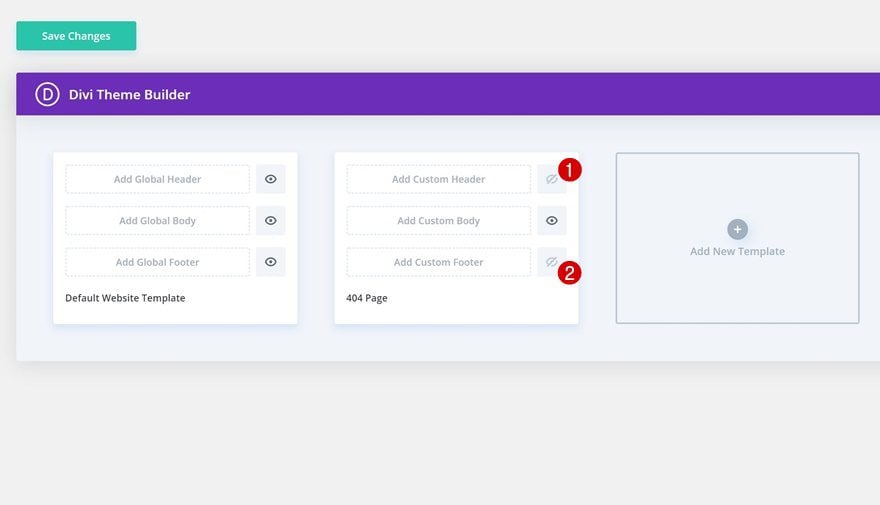
Continue by hiding the custom header and footer of your 404 page by clicking on the eye icon.
Build Global Body
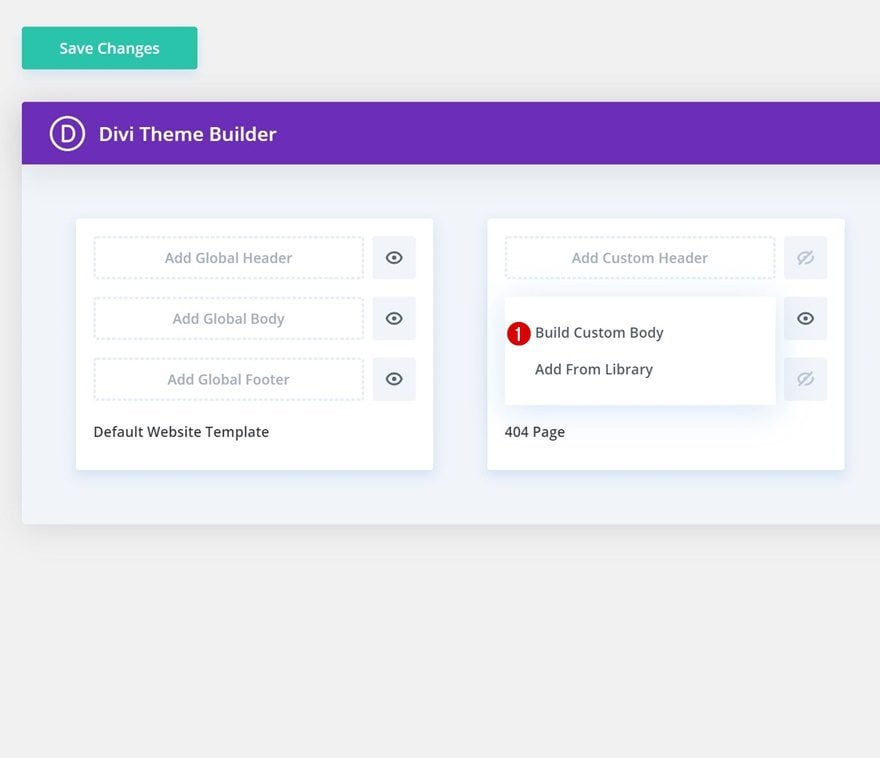
Once you’ve gone through all previous steps, you can start building the 404 page body by selecting ‘Build Custom Body’.
2. Start Building 404 Page Body
Add New Section
Background Color
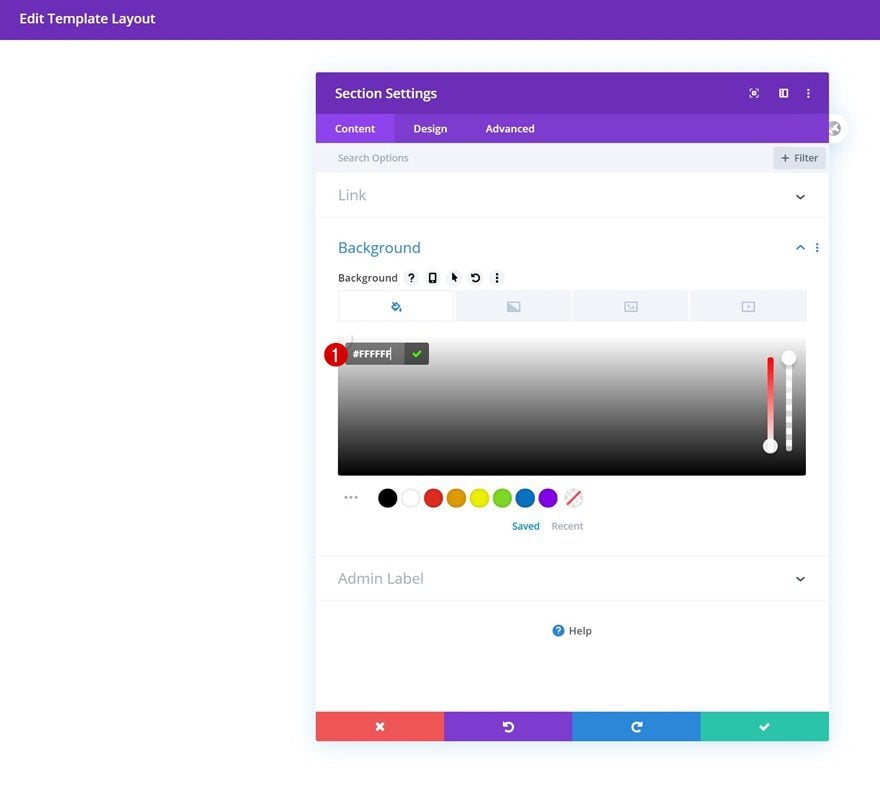
Once you’re inside the template editor, you’ll notice a section on your page. Open this section and add a white background color.
- Background Color: #FFFFFF
Bottom Divider
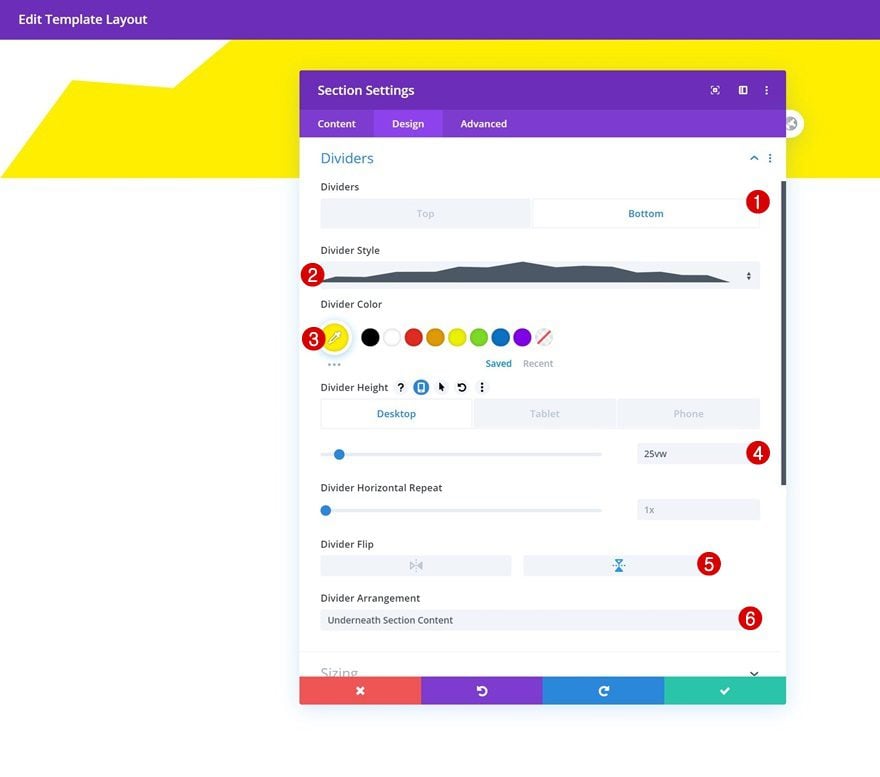
Move on to the section’s design tab and add a bottom divider:
- Divider Style: Find in List
- Divider Color: #ffee00
- Divider Height: 25vw (Desktop), 77vw (Tablet), 90vw (Phone)
- Divider Flip: Vertical
- Divider Arrangement: Underneath Section Content
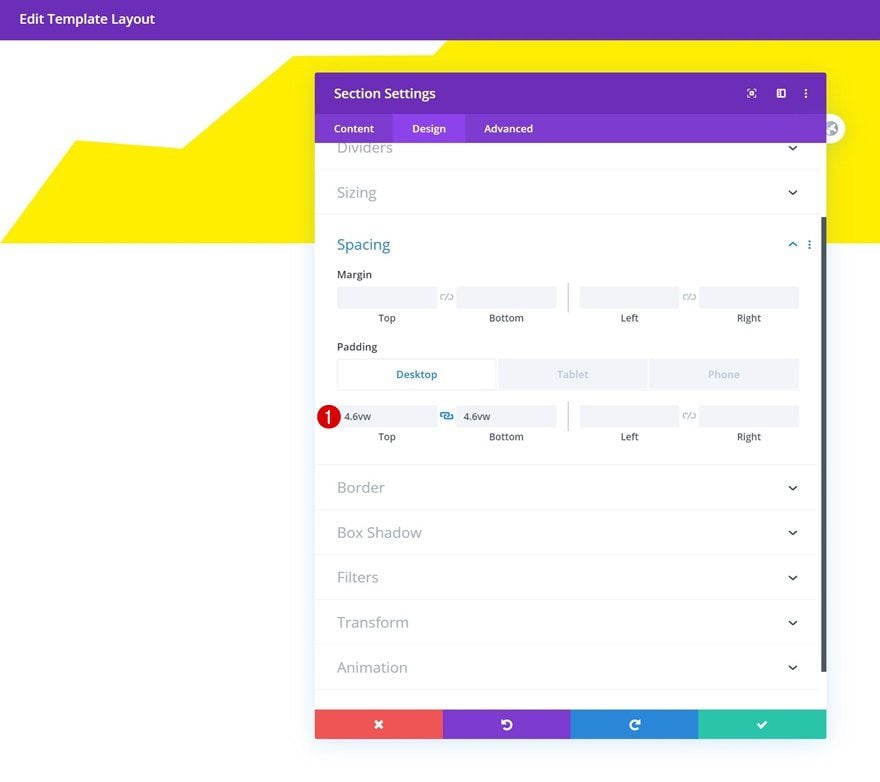
Spacing
Add some custom padding values across different screen sizes next.
- Top Padding: 4.6vw (Desktop), 23vw (Tablet), 25vw (Phone)
- Bottom Padding: 4.6vw (Desktop), 13vw (Tablet), 11vw (Phone)
Add Row #1
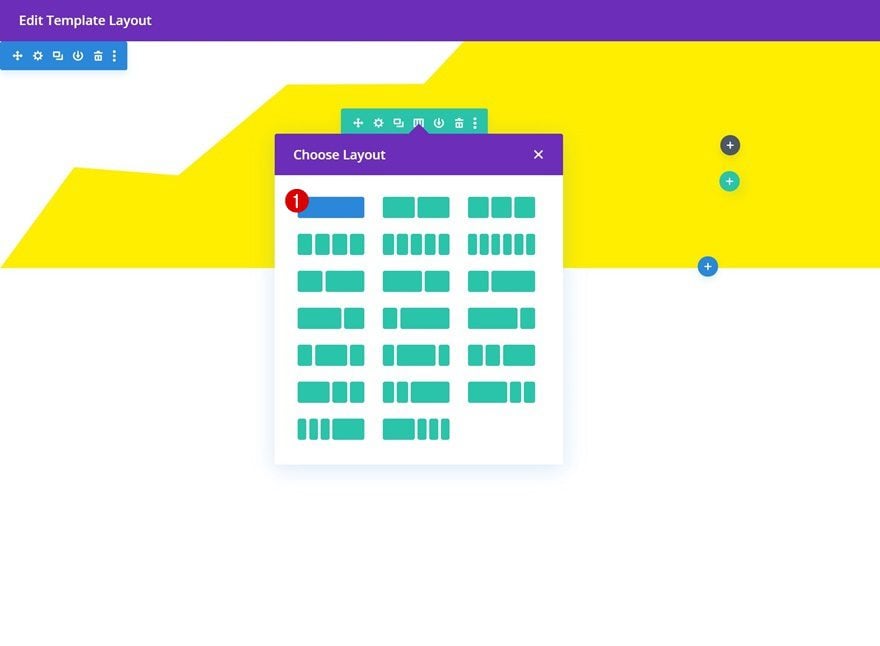
Column Structure
Once you’ve completed the section settings, you can add the first row. Choose the following column structure:
Sizing
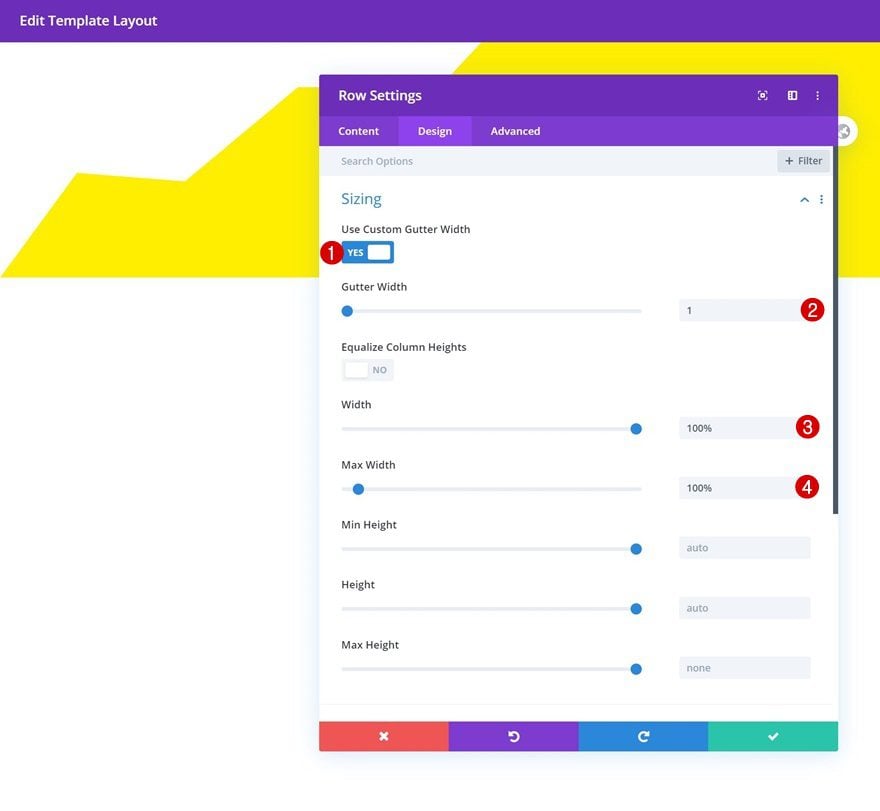
Without adding any modules yet, open the row settings and allow the row to take up the entire width of the screen.
- Use Custom Gutter Width: Yes
- Gutter Width: 1
- Width: 100%
- Max Width: 100%
Spacing
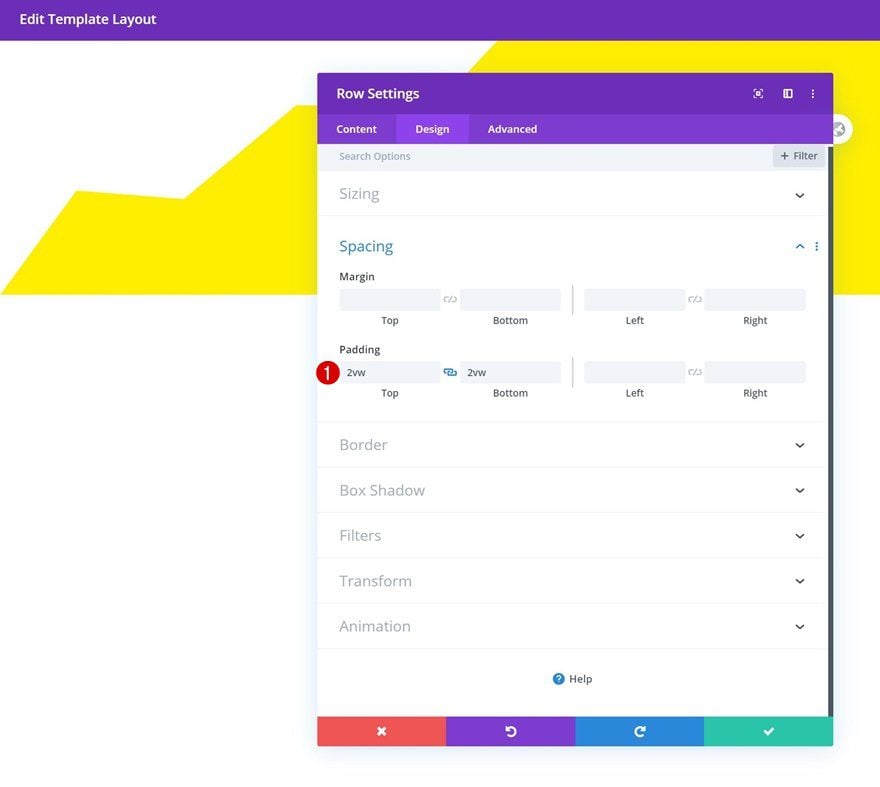
Modify the row’s top and bottom padding values next.
- Top Padding: 2vw
- Bottom Padding: 2vw
Add Text Module 1 to Column
Add Content
Time to start adding modules! The first module we’ll need is a Text Module. Insert some paragraph content of your choice.
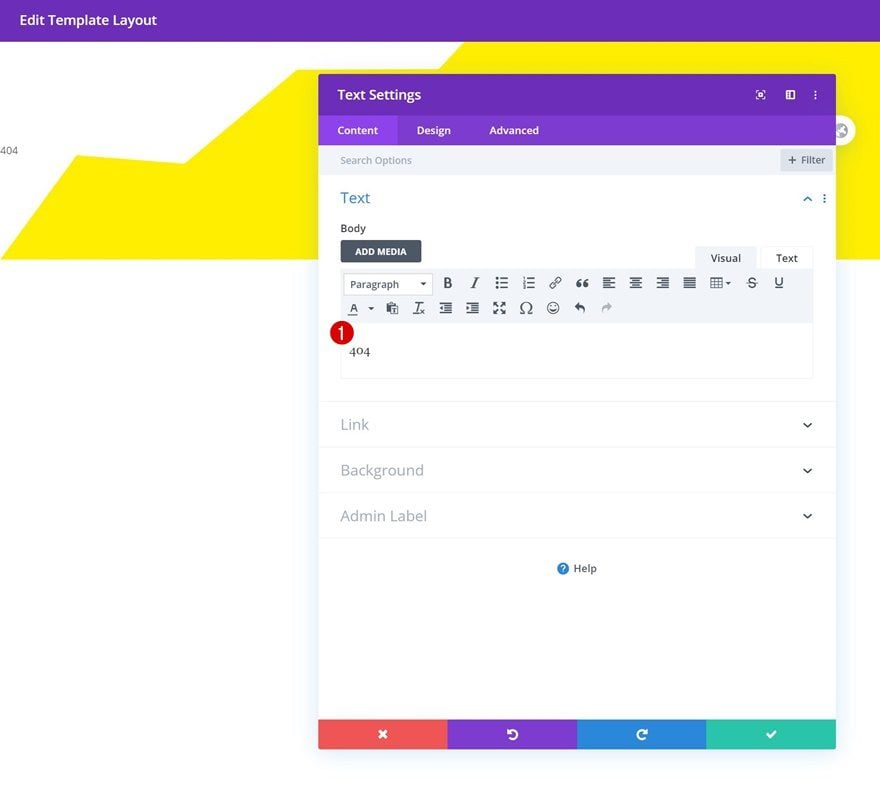
Text Settings
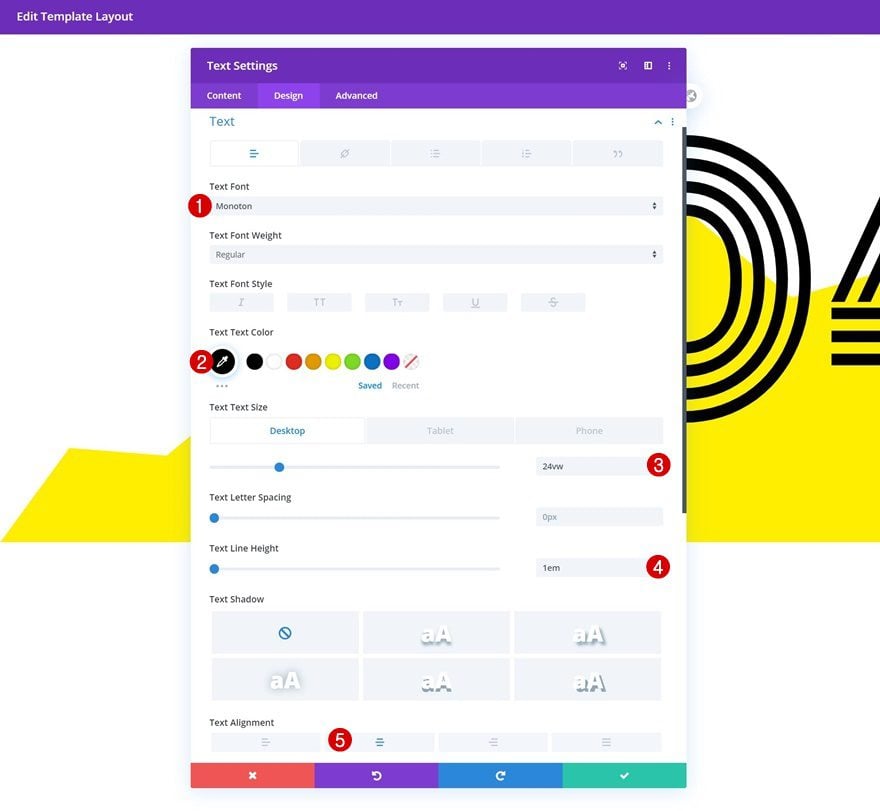
Move on to the module’s design tab and change the text settings as follows:
- Text Font: Monoton
- Text Color: #000000
- Text Size: 24vw (Desktop), 35vw (Tablet & Phone)
- Text Line Height: 1em
- Text Alignment: Center
Add Text Module #2 to Column
Add Content
On to the next module, which is another Text Module. Add some content of your choice.
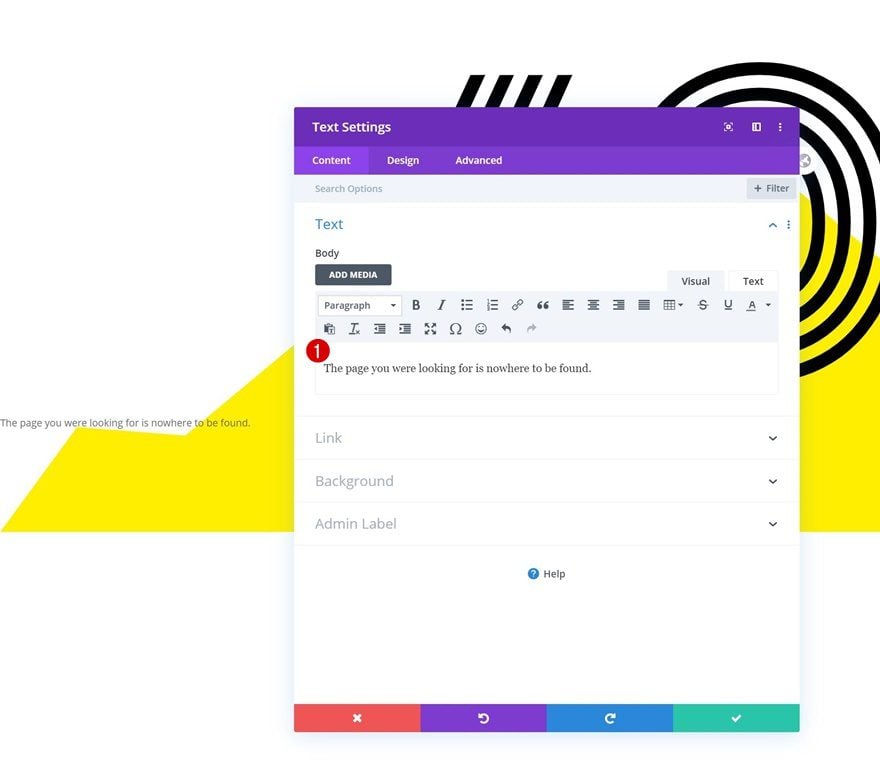
Text Settings
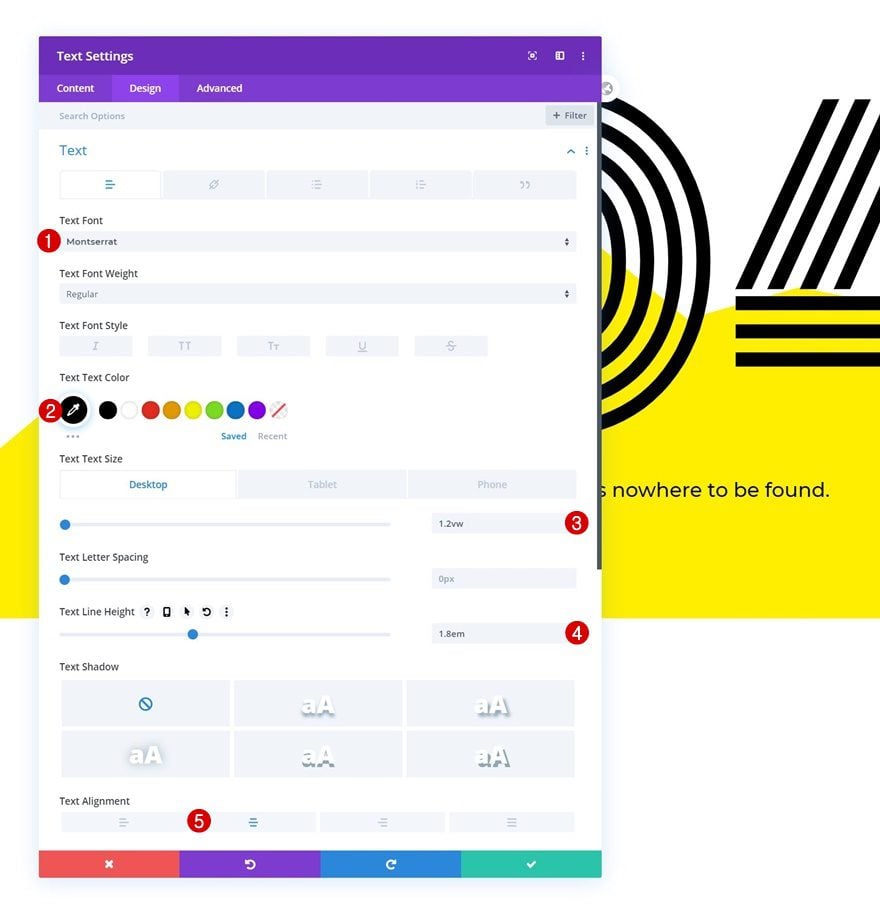
Change the module’s text settings accordingly:
- Text Font: Montserrat
- Text Color: #000000
- Text Size: 1.2vw (Desktop), 2.6vw (Tablet), 3vw (Phone)
- Text Line Height: 1.8em
- Text Alignment: Center
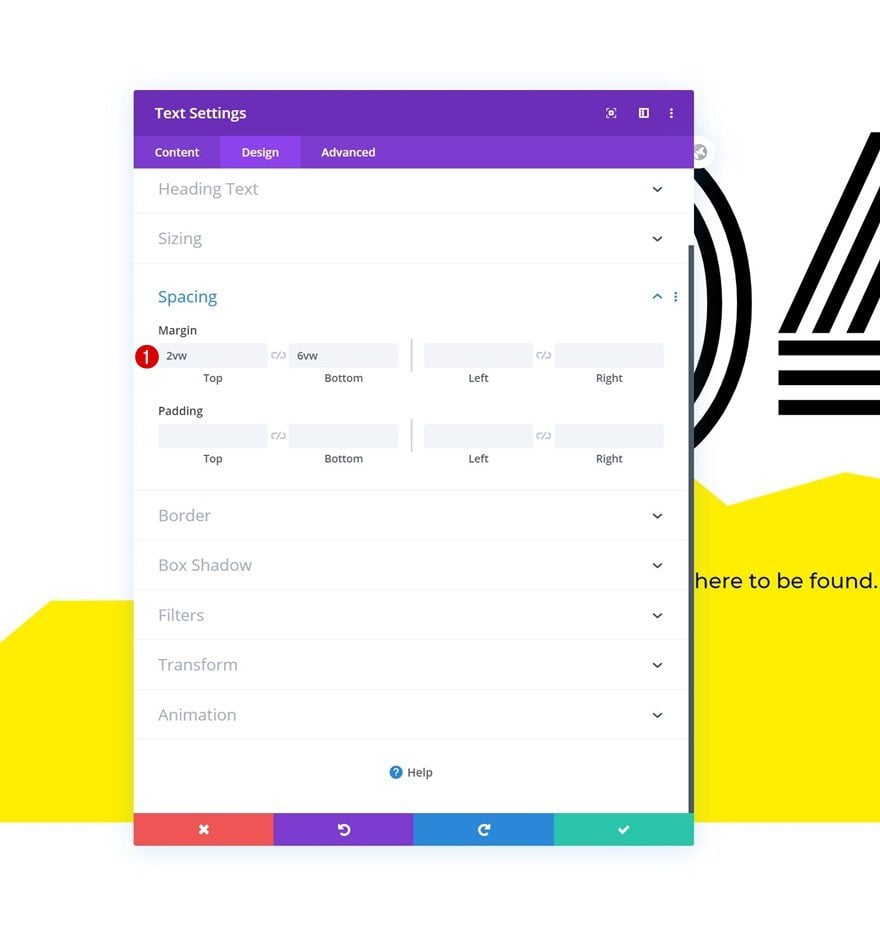
Spacing
Complete the module’s settings by adding some custom top and bottom margin.
- Top Margin: 2vw
- Bottom Margin: 6vw
Add Row #2
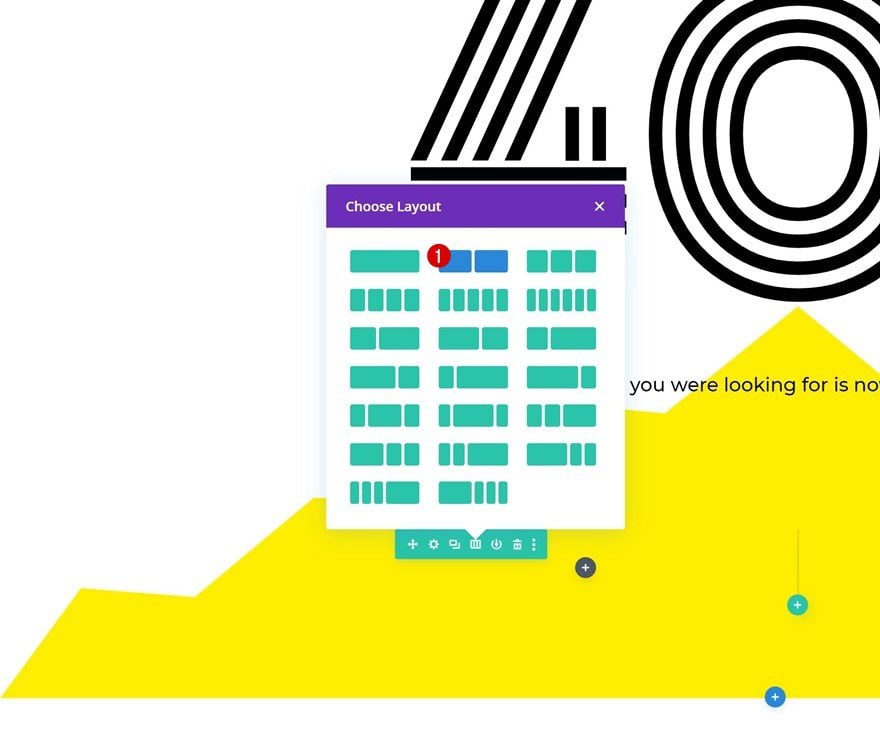
Column Structure
Continue by adding a new row using the following column structure:
Sizing
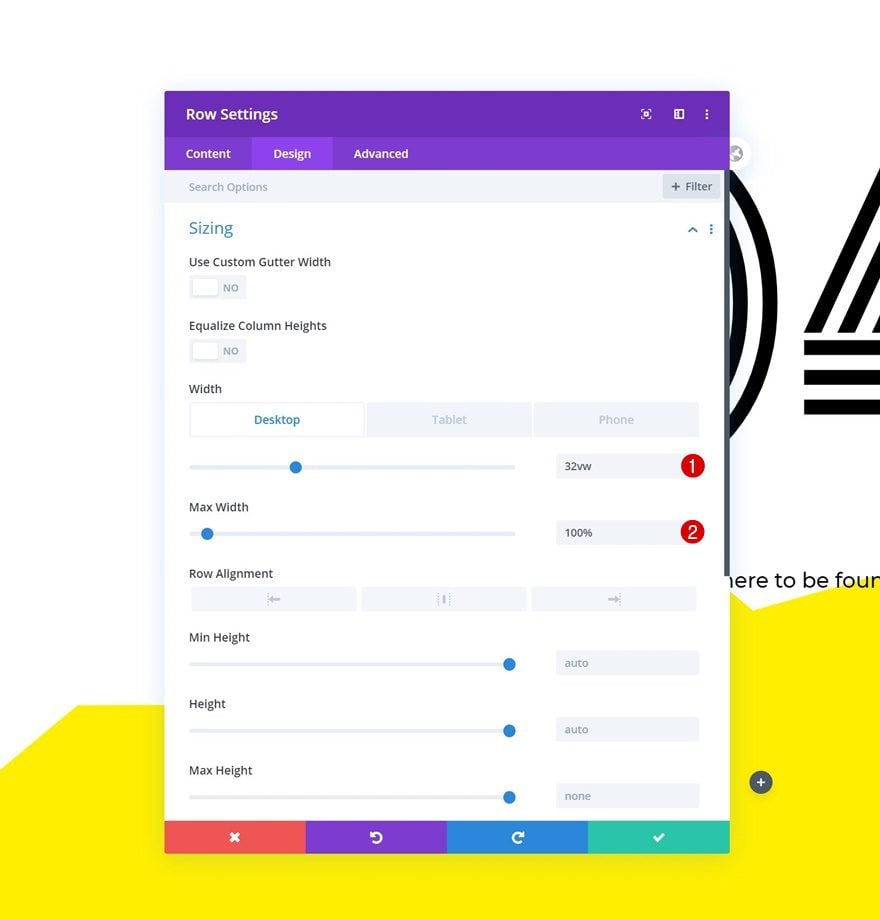
Open the row settings and adjust the sizing settings as follows:
- Width: 32vw (Desktop), 50vw (Tablet & Phone)
- Max Width: 100%
Spacing
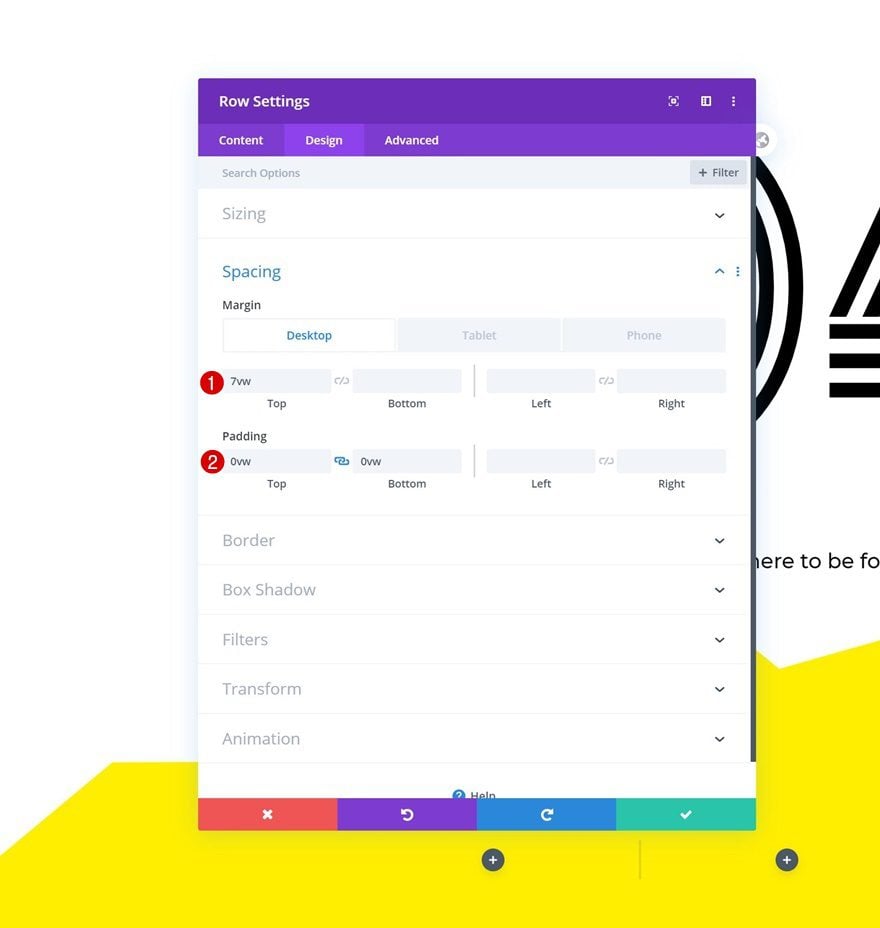
Modify the spacing settings too.
- Top Margin: 7vw (Desktop), 22vw (Tablet), 59vw (Phone)
- Top Padding: 0vw
- Bottom Padding: 0vw
Column 1 & 2 Settings
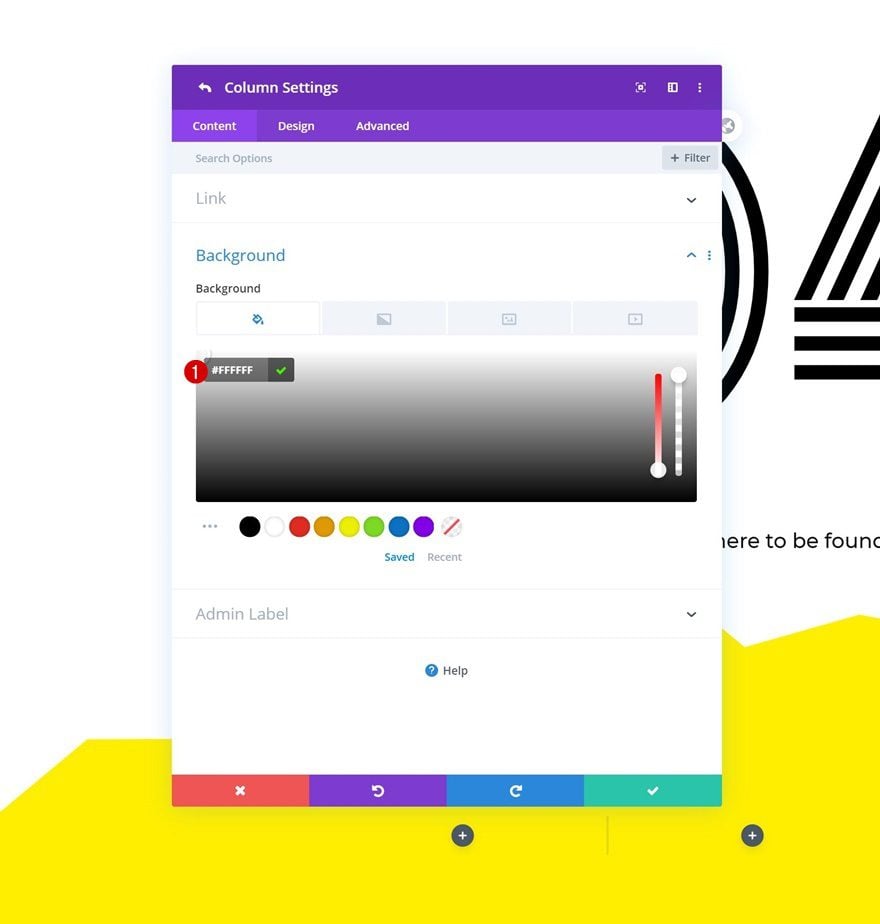
Default Background Color
Once you’ve completed the general row settings, you can open each column individually and make some changes, starting with the background color.
- Background Color: #FFFFFF
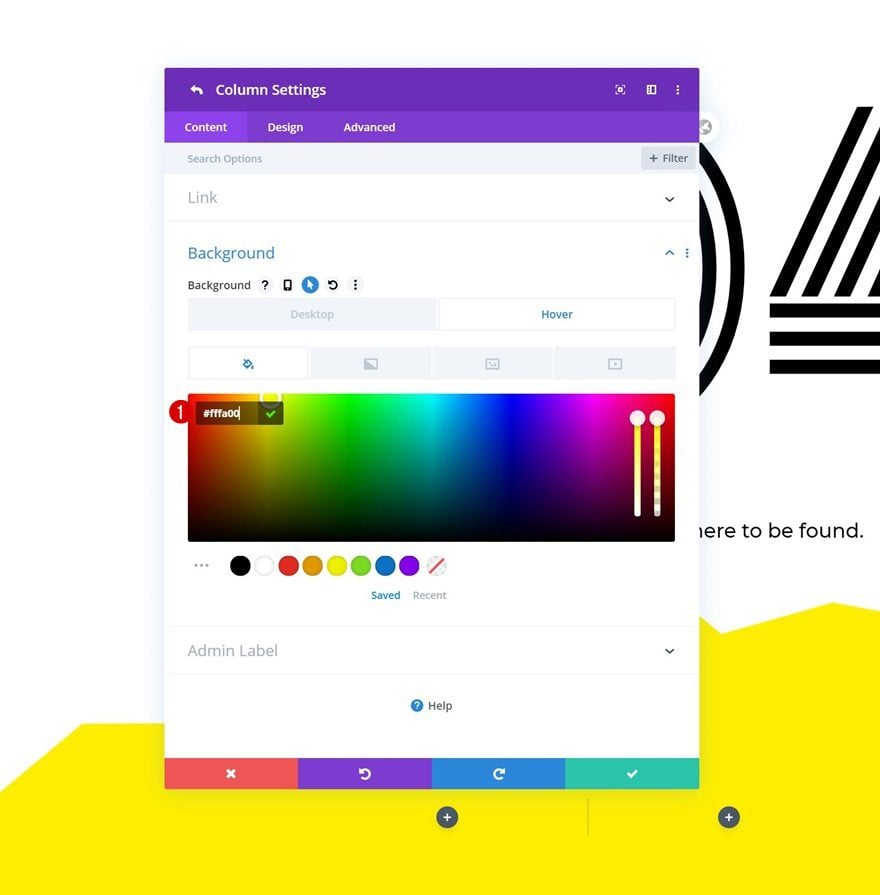
Hover Background Color
Modify the background color on hover.
- Background Color: #fffa00
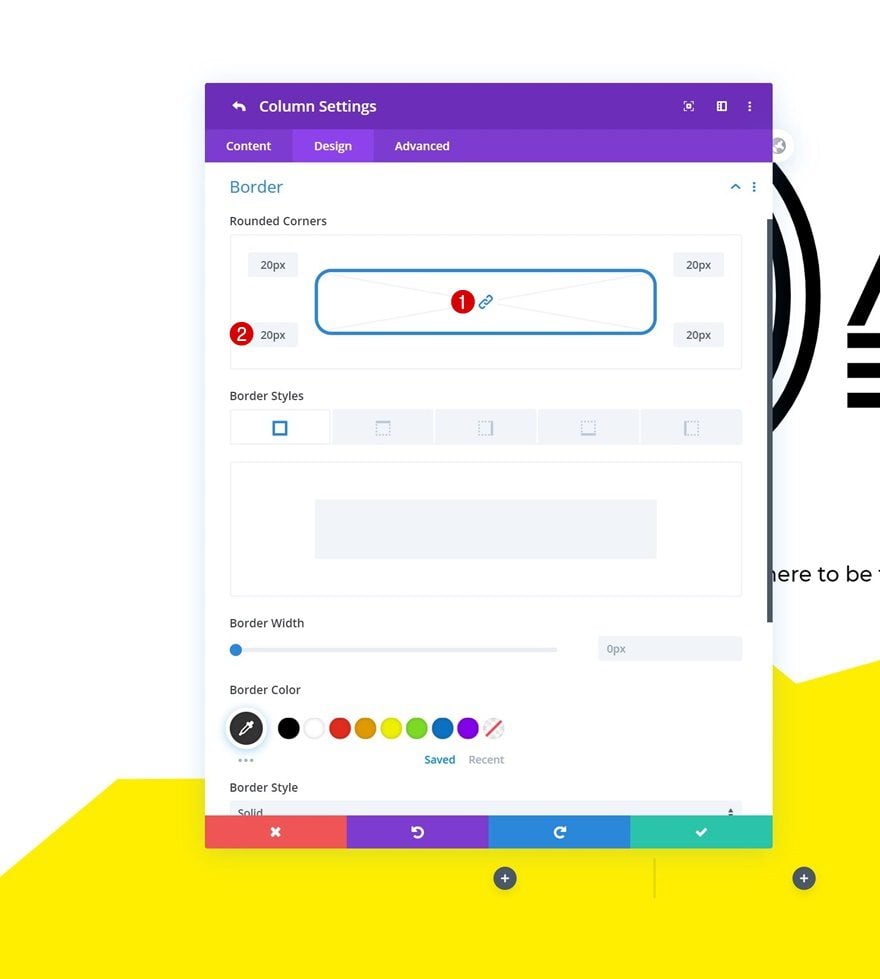
Border
Add some rounded corners too.
- Rounded Corners: 20px (All Corners)
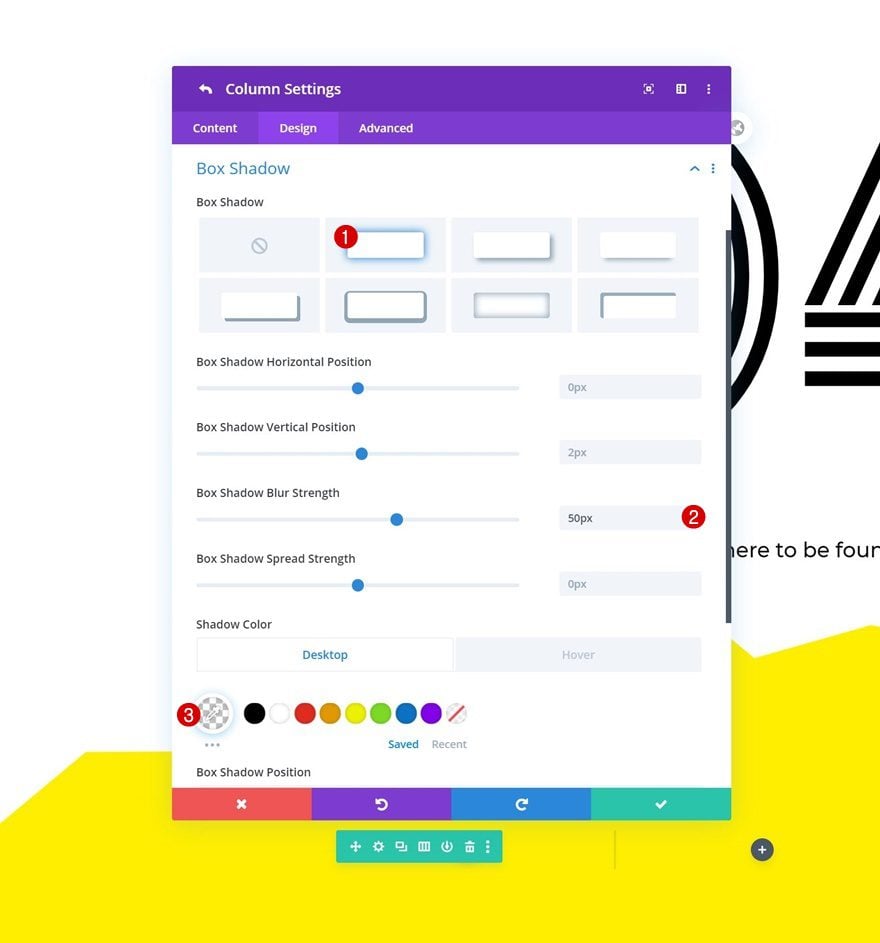
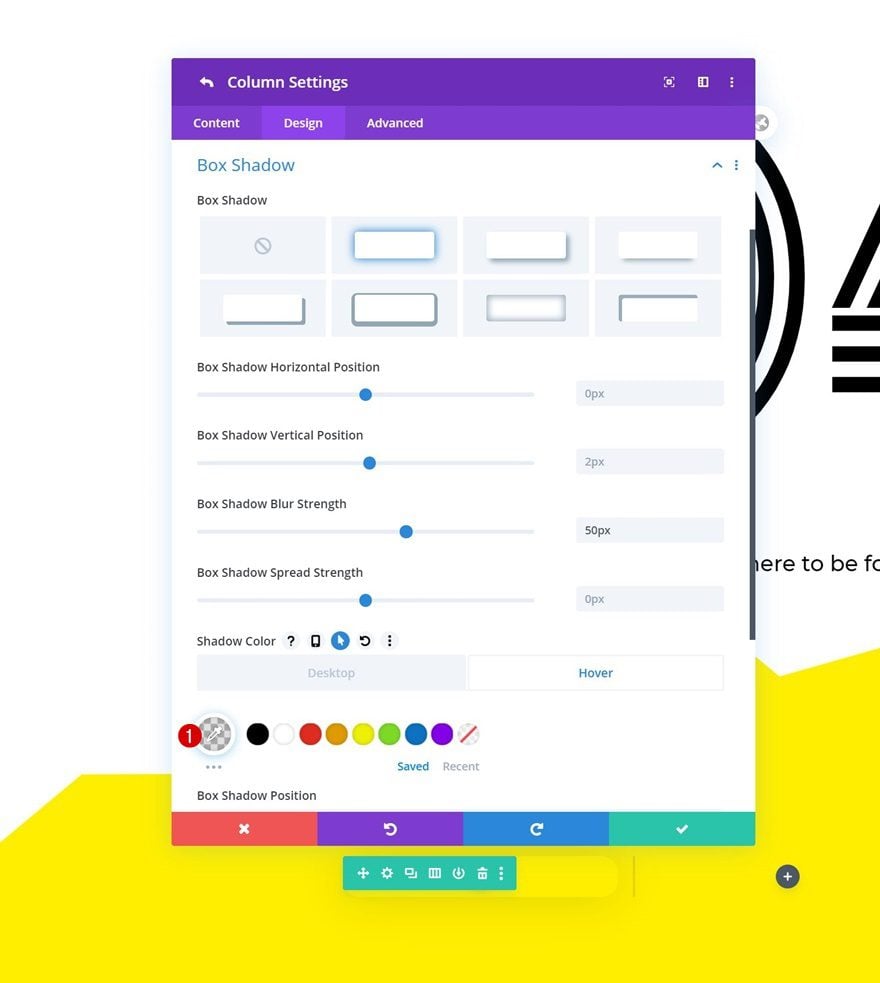
Default Box Shadow
Move on to the box shadow settings and apply the following changes:
- Box Shadow Blur Strength: 50px
- Shadow Color: rgba(0,0,0,0)
Hover Box Shadow
Modify the shadow color on hover.
- Shadow Color: rgba(0,0,0,0.12)
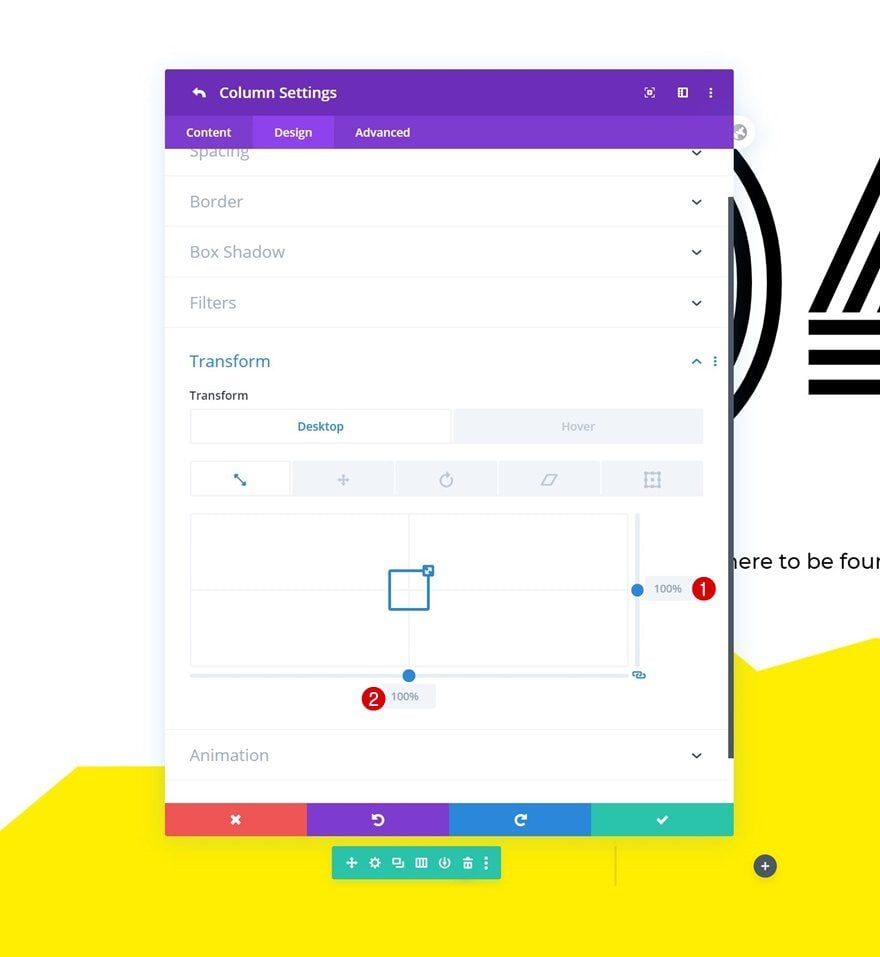
Default Transform Scale
Then, go to the transform scale settings and make sure the default values remain ‘100%’.
- Right: 100%
- Bottom: 100%
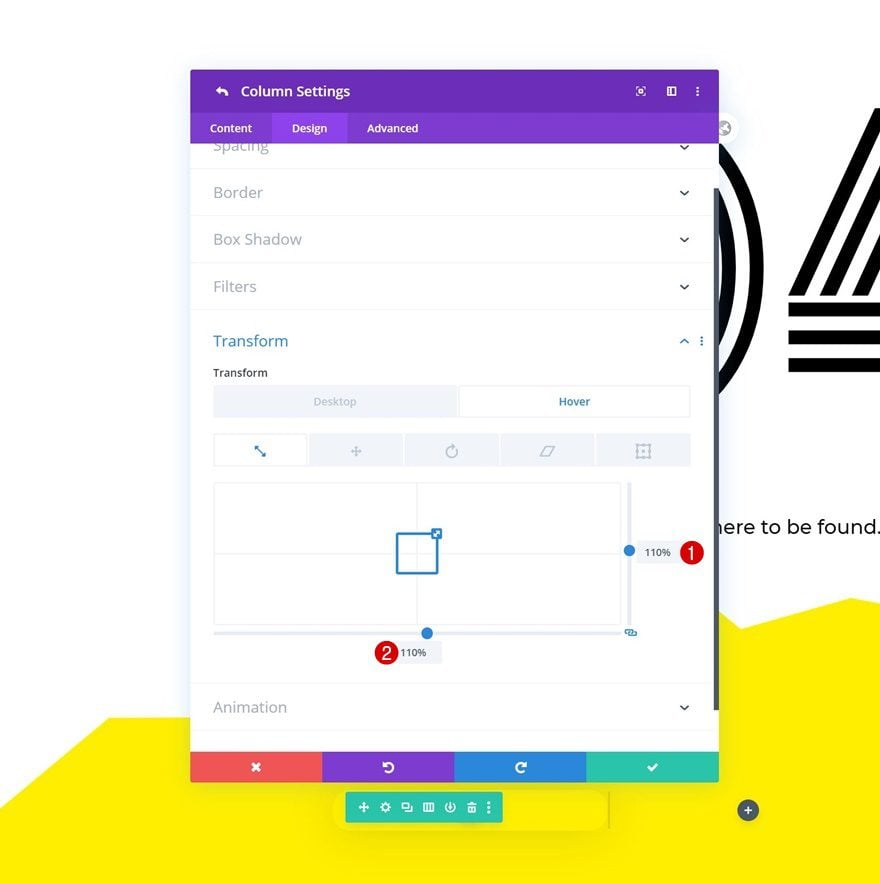
Hover Transform Scale
Change the transform scale values on hover:
- Right: 110%
- Bottom: 110%
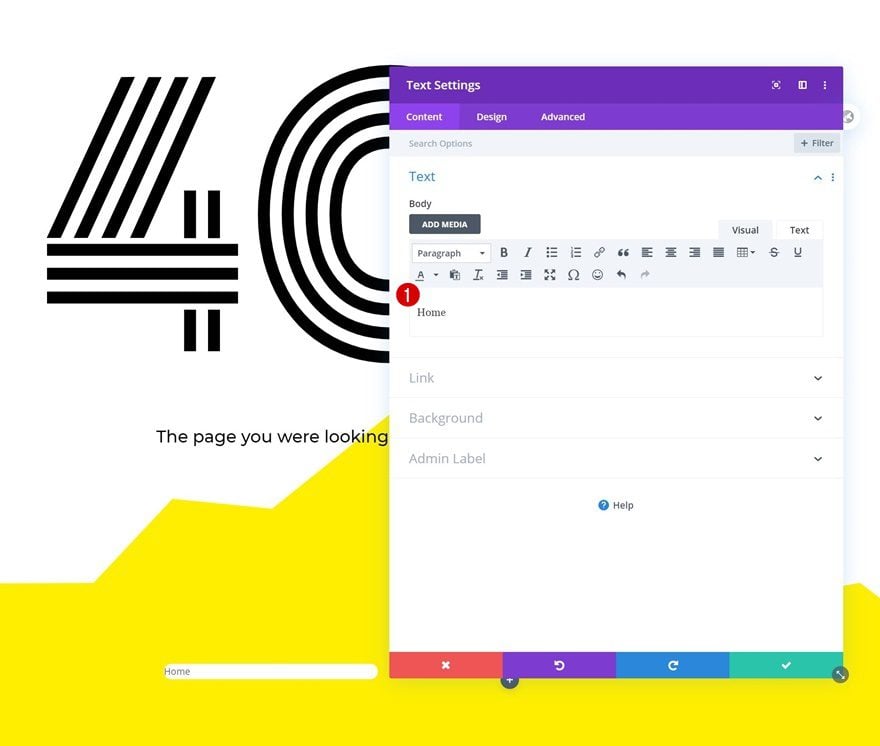
Add Text Module to Column 1
Add Content
Once you’ve completed the row and column settings, add a Text Module to column 1 with some paragraph content of your choice.
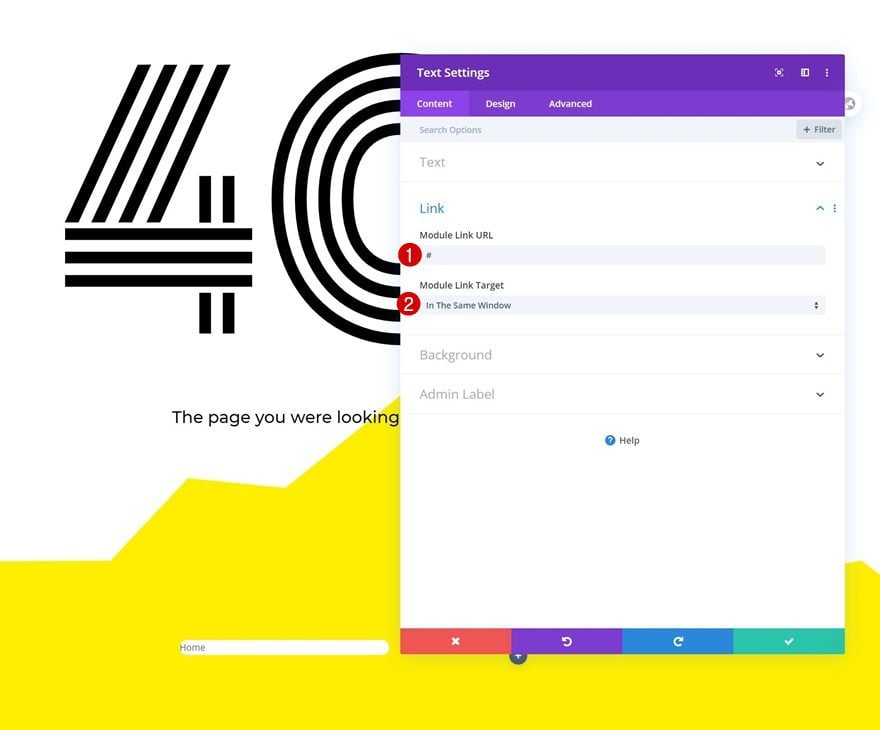
Add Link
Add a link to the module next.
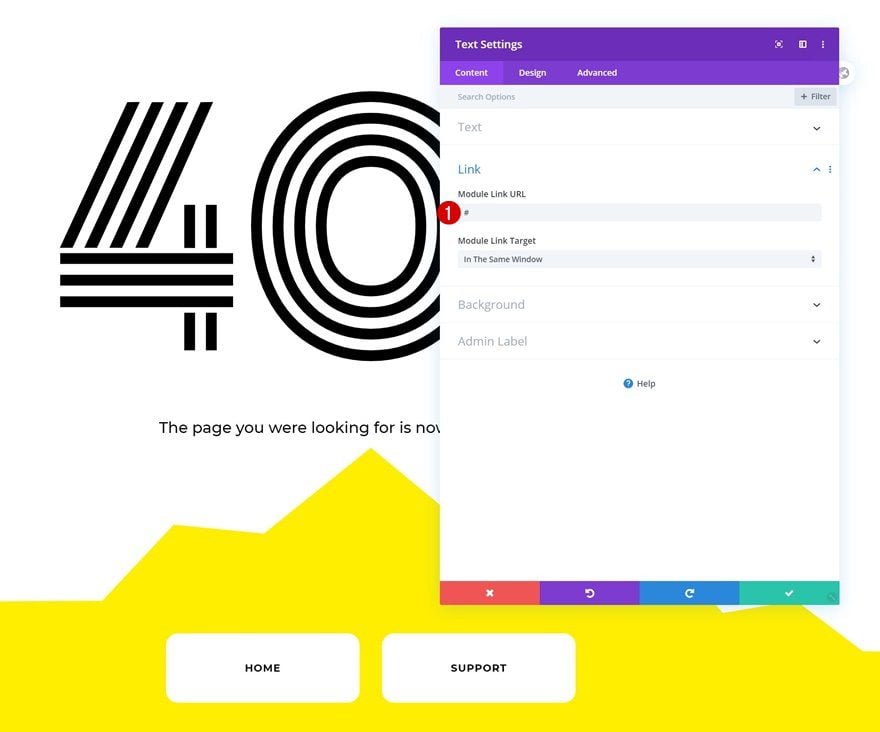
- Module Link URL: #
- Module Link Target: In The Same Window
Text Settings
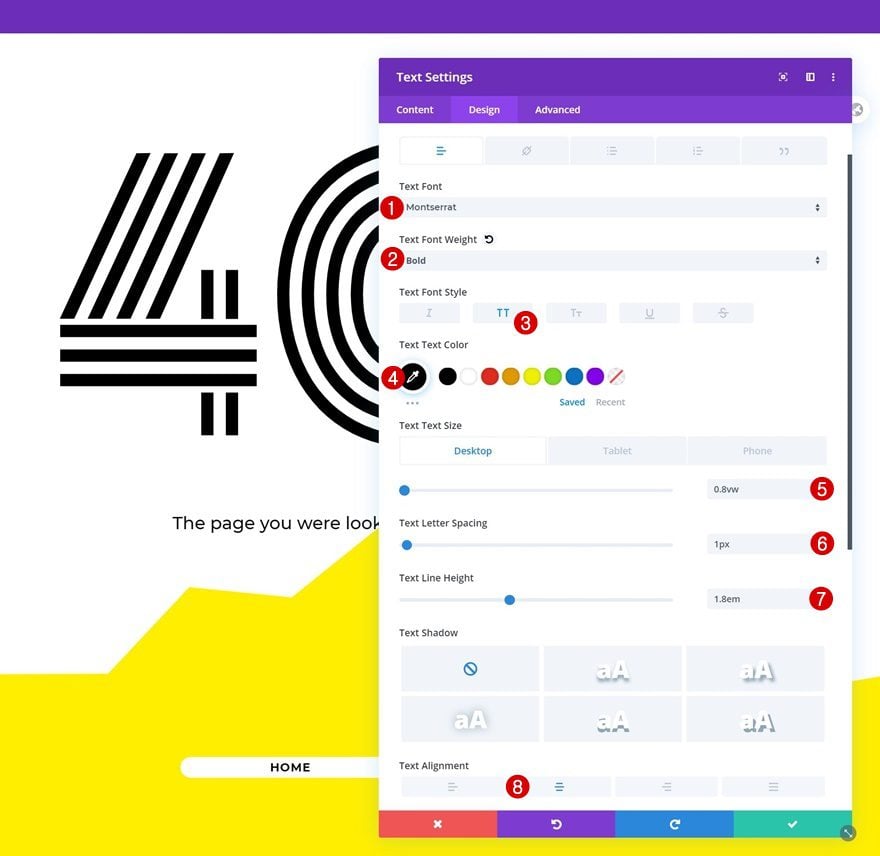
Move on to the module’s design tab and change the text settings as follows:
- Text Font: Montserrat
- Text Font Weight: Bold
- Text Font Style: Uppercase
- Text Color: #000000
- Text Size: 0.8vw (Desktop), 2vw (Tablet), 3vw (Phone)
- Text Letter Spacing: 1px
- Text Line Height: 1.8em
- Text Alignment: Center
Spacing
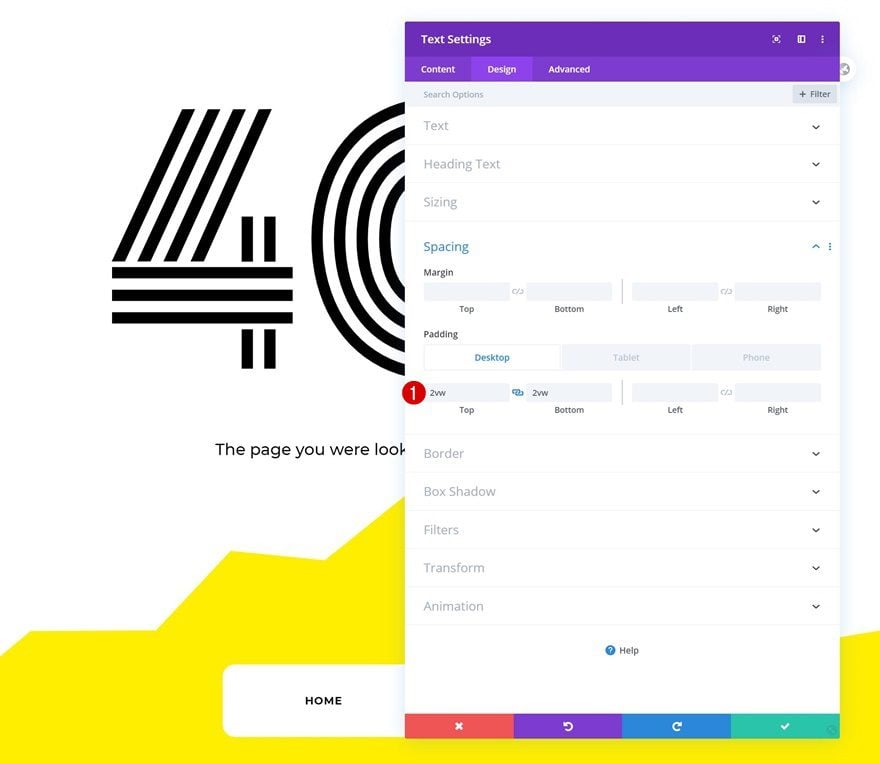
Then, go to the spacing settings and apply some custom top and bottom padding values across different screen sizes.
- Top Padding: 2vw (Desktop), 3vw (Tablet), 4vw (Phone)
- Bottom Padding: 2vw (Desktop), 3vw (Tablet), 4vw (Phone)
Clone Text Module & Place Duplicate in Column 2
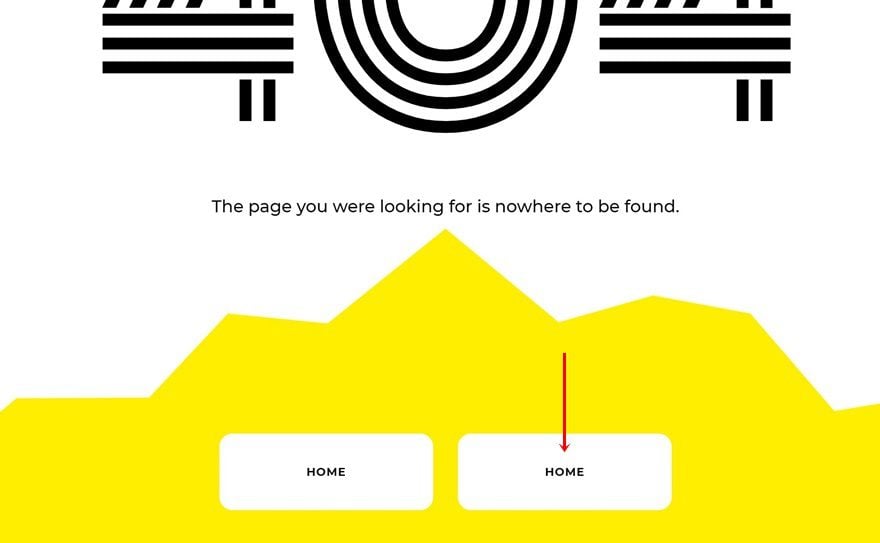
Once you’ve completed the Text Module and all its settings, you can clone the entire module and place the duplicate in column 2.
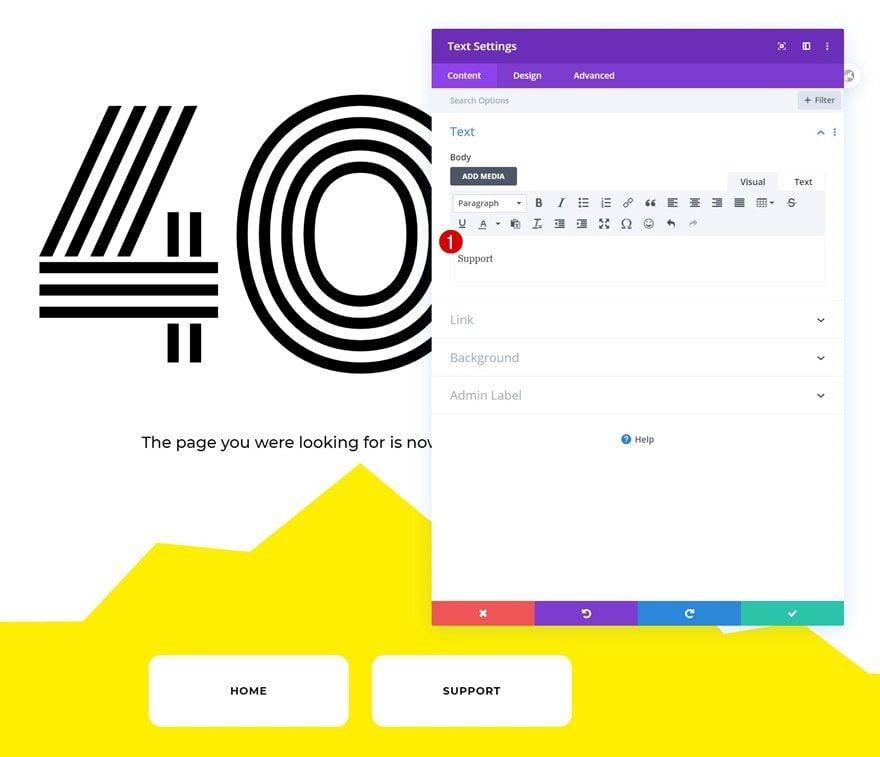
Change Content
Make sure you change the duplicate module’s content.
Change Link
Change the link too.
3. Save Theme Builder Changes
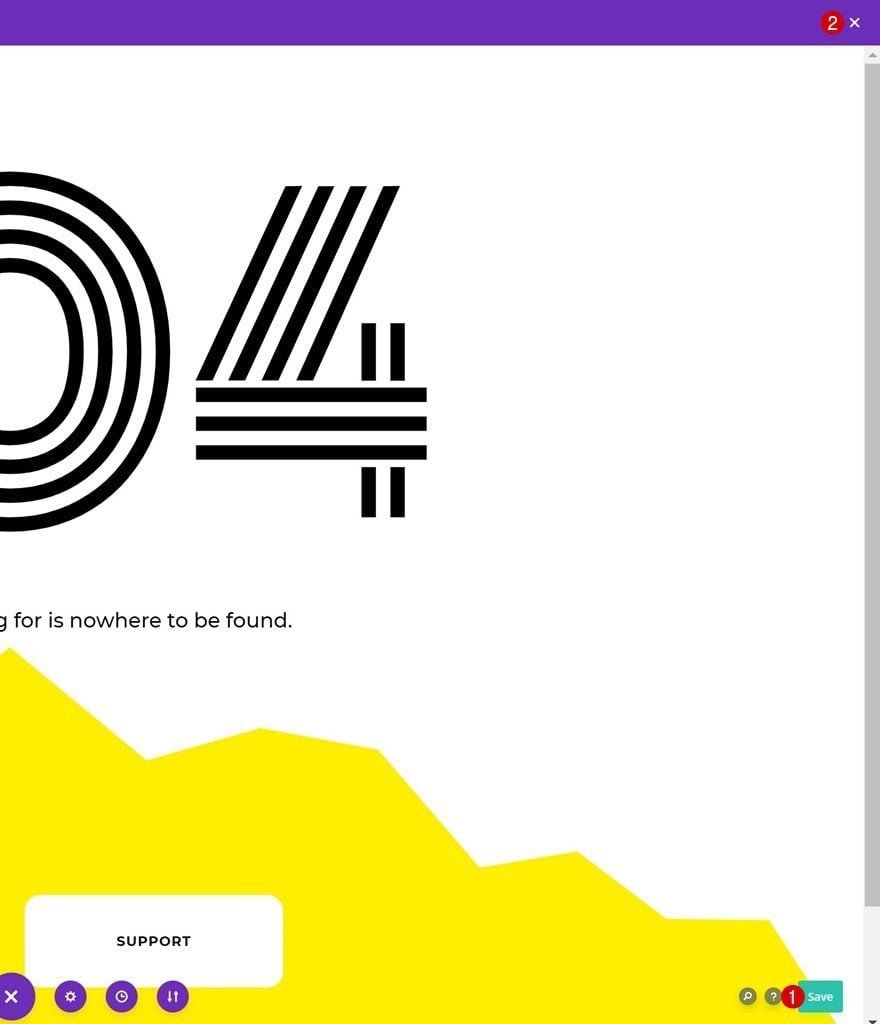
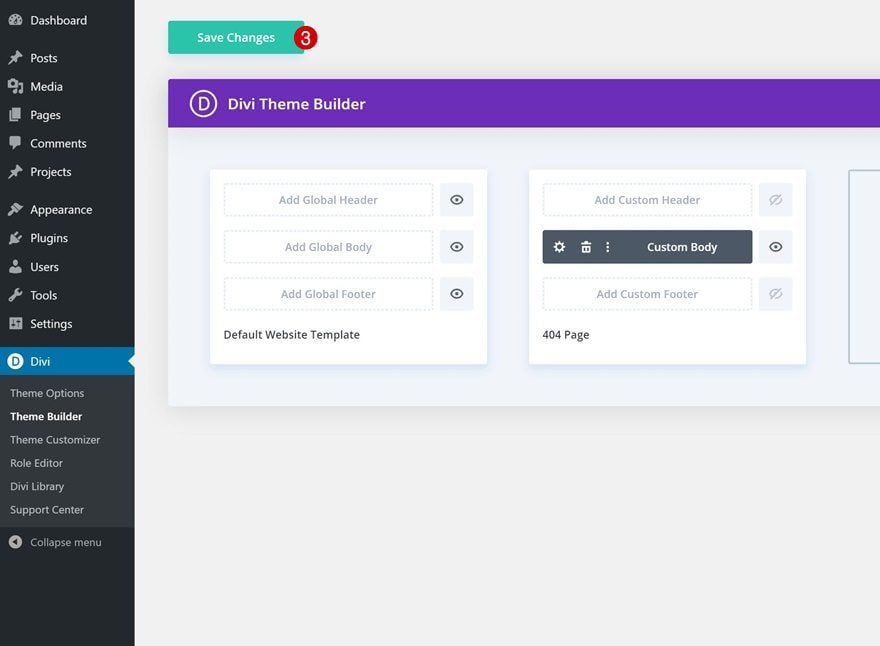
Once your design is done, you can save all the template’s settings. That’s it!
Preview
Now that we’ve gone through all the steps, let’s take a final look at the outcome across different screen sizes.
Desktop

Mobile

Final Thoughts
In this post, we’ve shown you how to set up and create a 404 page template. Divi’s theme builder and built-in design options allow you to touch every page of your website using customized templates. We hope you’re enjoying all the Divi Theme Builder tutorials! If you have any questions or suggestions, feel free to leave a comment in the comment section below.
If you’re eager to learn more about Divi and get more Divi freebies, make sure you subscribe to our email newsletter and YouTube channel so you’ll always be one of the first people to know and get benefits from this free content.




How to create a multi language 404 site? I use polylang pro on our site, but cant find a option to bring the translation to the divi theme builder options. any suggentions on that? Thanks in advance.
Hi
Even though I build my own 404, your guide was a great starter! Thank you.
I am trying to import json file but I get “This file should not be imported in this context.” errore message
It is the simplest way of doing 404 page. Thx
My Monoton text does not look like this. The spaces between the lines are not as wide, in fact they are very close together. Any idea why?
Is there any easy way how to display global top menu with logo on this 404 site? Thanx, Tom 🙂
When i try to import the .json file it say that “this file should not be imported in this context”. Have you seen this before?
Asking this question again here since there was no response and I have never once been able to get anyone at your “24×7” HAHAHAHAH tech support to answer since it doesn’t exist. So I’ll ask again…does one have to build their whole site using the theme builder in order to utilize a page like this? Another way of saying it…can I simply add this one custom page to an existing Divi site with an older child theme or do I need convert the whole site to the new theme builder first? Many thanks.
Hi Jenn, no, you don’t have to rebuild your entire site. You can choose to assign a template to your 404 pages only, and leave the rest as is.
I downloaded an imported this 404 page and i’m having an issue on desktop with its height being larger than screen so showing vertical scrollbars
how do I make the section auto size to screen?
Unless I’m missing something you don’t say how to import the file…
I’m getting this error “This file should not be imported in this context.”
I’ve tried on the Page and in the Divi library.
Hi Kieran, you can upload the template to your Divi Theme Builder by going to your WordPress dashboard > Divi > Theme Builder > Clicking on the icon in the top right corner > Import > Selecting your file and uploading it! 🙂
I’m doing the same thing, but nothing, fails all the thime with many of the black friday and blog give aways templates 🙁
Hi Donjete, I am having the same error although i followed all steps carefully. Please advise.
I think it’s very useful that Divi has inserted the possibility of creating Headers, footers and other pages personalized like 404. My team and I immediately built ours. 🙂
I think it’s a very bad practice to only tell people on a 404 that the page they visited is gone and nothing else. A good 404 should also tell people what you do have that does match their interest.
So I use a custom 404 file containing a piece of php code I got from the Yoast blog. It gives useful suggestions based on the slug slug that resulted in a 404.
For example, someone ends up on a 404 page with the slug \how-to-make-a-website\
Then the 404 shows a search box with the query ‘how to make a-website’ pre-populated.
And of course the results for that query.
It doesn’t look very nice though.
Would be awesome if this code could be used with Divi.
Hello – Does one have to build their whole site using the theme builder in order to utilize a page like this? Another way of saying it…can I simply add this one custom page to an existing Divi site with an older child theme or do I need convert the whole site to the new theme builder first? Many thanks.
Awesome tutorial! Just one question: my website is bilingual, is there a way to adapt this 404 page to different languages?
I was just about to ask the same question!
last week, I “played” with the new theme builder and I was surprised that it was not yet compatible with WPML. Is this a feature the ET team is planning to implement in a next future? For now, I am keeping the good old method for my 404 pages on multilingual websites: child theme with a 404.php file calling a layout in the Divi Library.
Here is an overview of compatibility issues with WPML
https://wpml.org/2019/10/update-on-divi-4-0-and-wpml-compatibility/
One of the best 404 page theme which i have seen. Really lovely theme builder.
Happy to hear you’re enjoying the theme builder, Krishna! 🙂
I just got my new 404 page set up. There was a short learning curve because I am new to Divi, bit now I LOVE IT. I am getting faster being able to build the pages exactly how I want them. Great work Divi team.
Love to hear that, Jeremy! 🙂
i have not this feature – but I have my license active (from 16′)
Go to the Theme Builder on Divi. Select ‘Add a new template’. A list will then appear of pages and posts that you want to create the template for. Scroll down to bottom and select 404 and now set it up.
I just made my 404 page today. Really loving the Theme Builder. I added a search box to my 404 page.
Great idea! Happy to see you’re enjoying the theme builder, Jamie! 🙂
Really smart idea. I may do that with mine too. Thanks!
Wow! Thanks for sharing such a detailed post with all the screenshots(That will make my work a little easy).
I will go right away and try that out on my site. Let’s see how it goes.
You’re welcome, Sunil! 🙂