Creating a multilingual website with Divi and Extra is easy. Both WPML ready, meaning you can create a multi-lingual website with Divi and Extra. WPML has made changes that improve compatibility with Divi and Extra and has added features that make it even easier to translate your website. In this article, we’ll see how to create a multilingual website with Divi or Extra and WPML.
- 1 What is WPML
- 2 Setting up WPML
- 3 Performing a Translation from the WordPress Editor
- 4 The Advanced Translation Editor
- 5 Performing a Translation from the Translation Management Screen
- 6 Editing Posts
- 7 Translating Divi and Extra Custom Layouts
- 8 String Translation
- 9 Menus
- 10 WooCommerce Multilingual
- 11 Ending Thoughts
What is WPML
WPML, or WordPress Multilingual, is a WordPress translation plugin that lets you create multiple versions of the same content with each version being a different language. It then automatically delivers the version with the correct language for each reader. The website, as well as the individual posts, also include language links so the reader can choose the language they want.
WPML was already a powerful translation platform, but it now has the Advanced Translation Editor which will perform translations automatically.
Setting up WPML

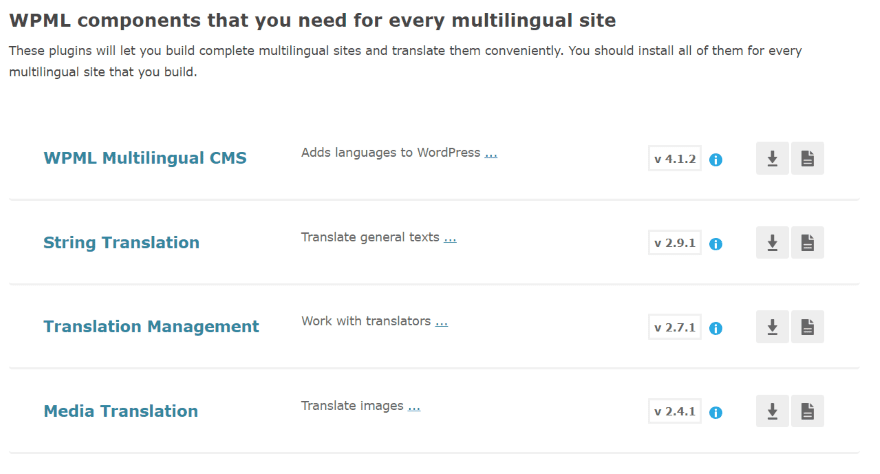
First, purchase the version of the WPML plugin that works best for your needs. Multilingual CMS and Multilingual Agency support page builders.
Subscribe To Our Youtube Channel
Download and install all of the required plugins.
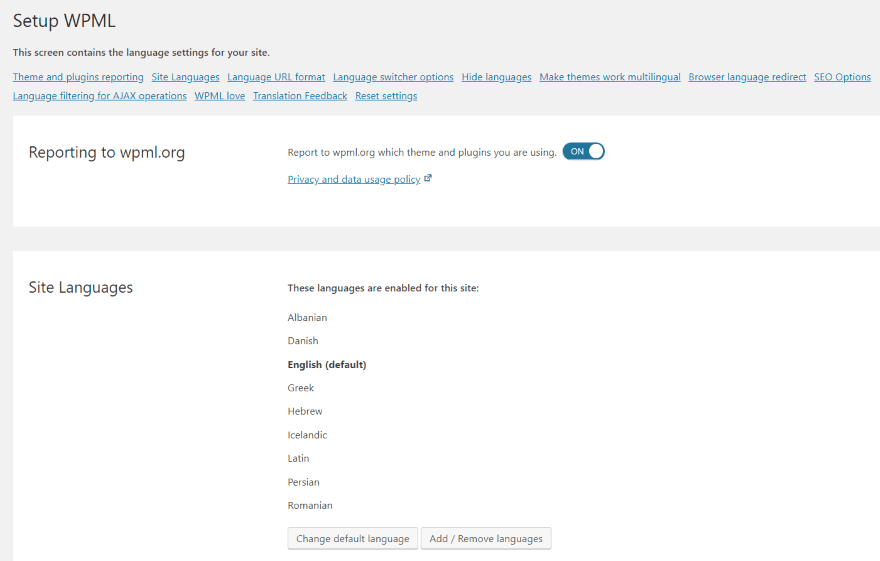
Go through the settings, setting up your site language, translation languages, menu switcher locations for the menu, footer, and widgets, links to translation of posts, etc. Each of these settings can be edited later. Come back to this settings screen for even more settings.
Additional Required Plugins

To easily translate Divi, you’ll need two additional WPML addons:
- Translation Management – creates an interface so you can interact with translators and translation services.
- String Translation – translates strings such as tagline, widgets, etc.
Click to install each addon. String Translation needs no setup, but you’ll need to setup Translation Management.
Setting up Translation Management
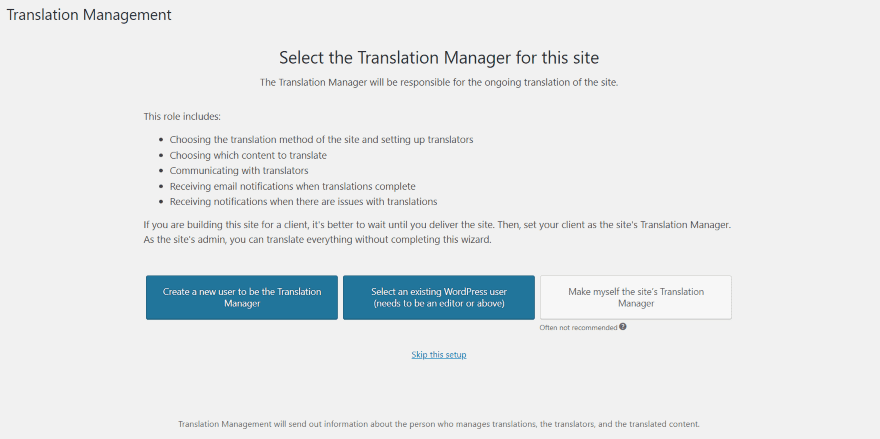
Go to WPML > Translation Management in the dashboard menu. Here, you’ll choose who will be the translation manager. This can be a new user, current user, or you.

Choose the translation method. Use your own translators or see the available services.
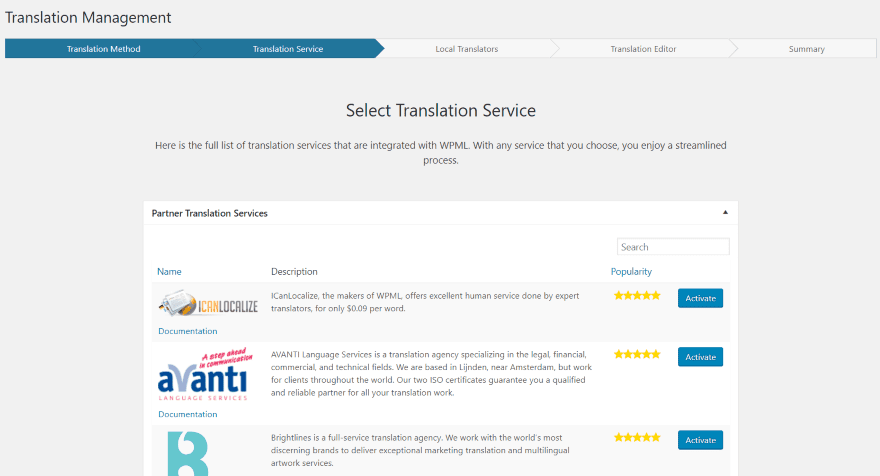
This shows a list of services with a description, rating, and a button to activate them. It also includes a couple of tabs for other translation services and add-ons for the translation management system.

If you don’t use a translation service you can add your local translators.
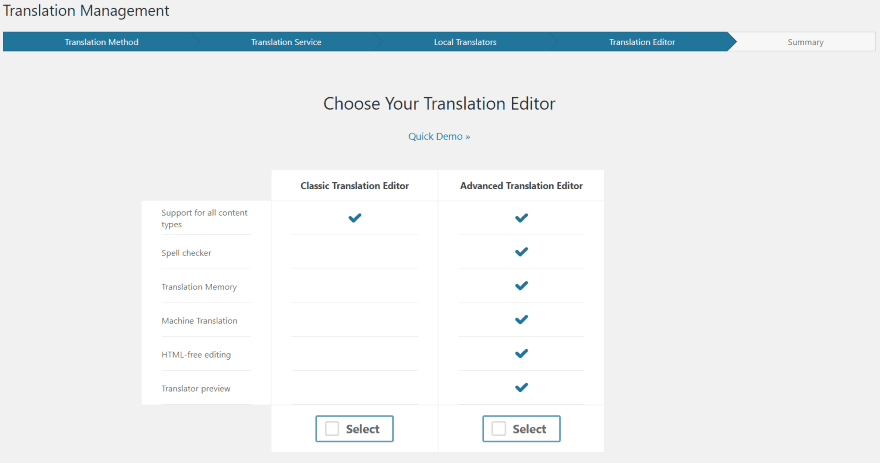
Choose your translation editor. I recommend selecting the Advanced Translation Editor because it has automatic translation options.
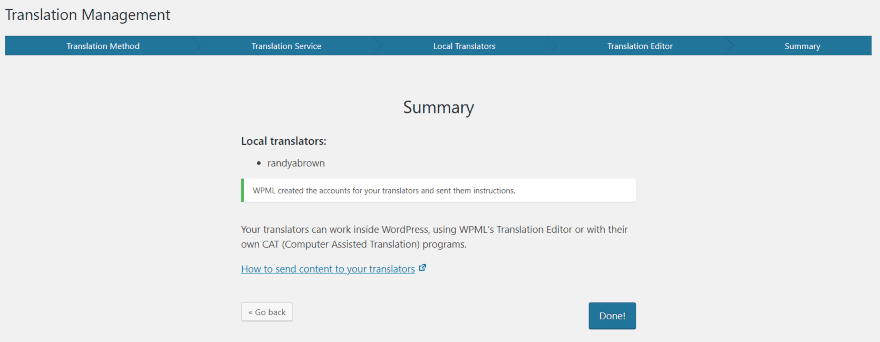
Review the summary and click Done.
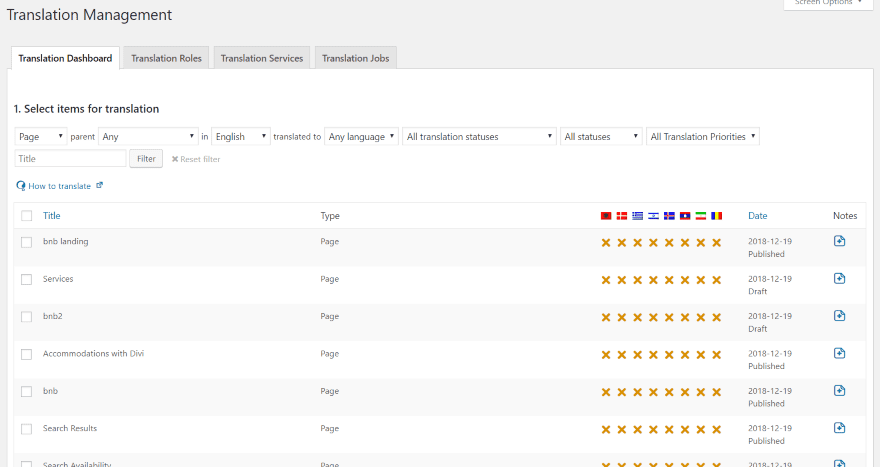
The Translation Management screen will now provide a list of items to translation. You can also adjust roles, services, and translation jobs using the tabs.
Performing a Translation from the WordPress Editor
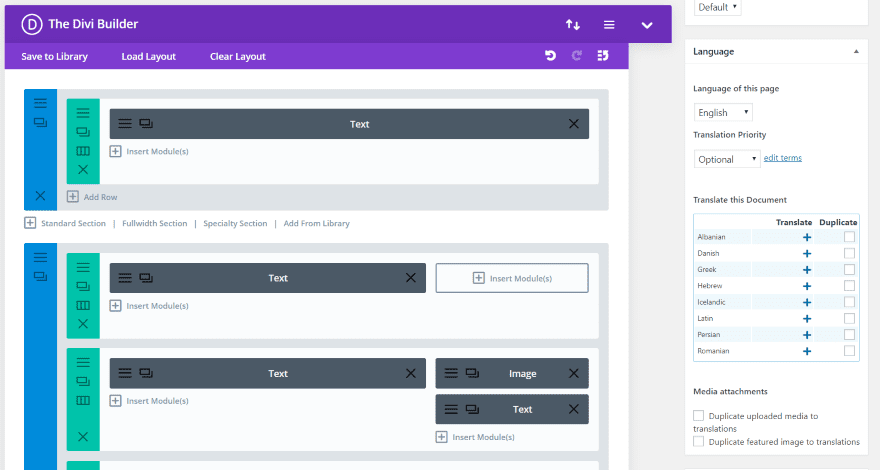
You’ll see the translation options in the sidebar of the post editor. This is the Classic Editor. To translate the post, click the + next to the language you want to translate it into. It shows the languages you chose during setup. You can also duplicate the post if you want.
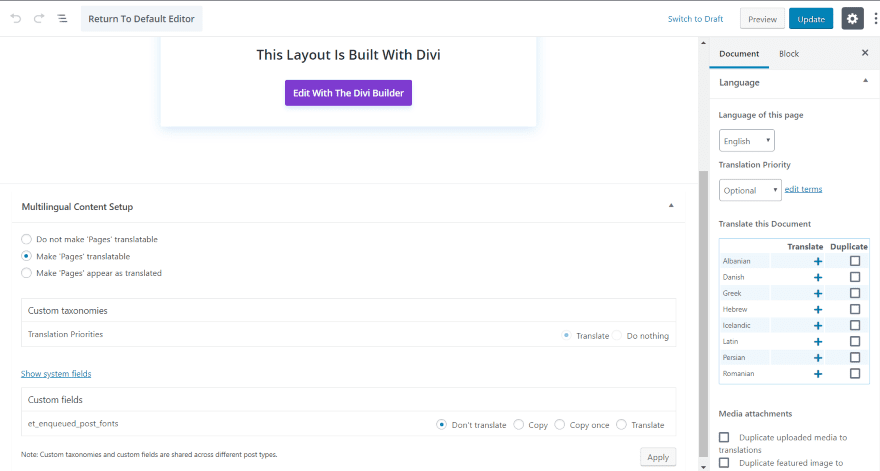
It’s in the same location if you’re using Gutenberg.
The Advanced Translation Editor
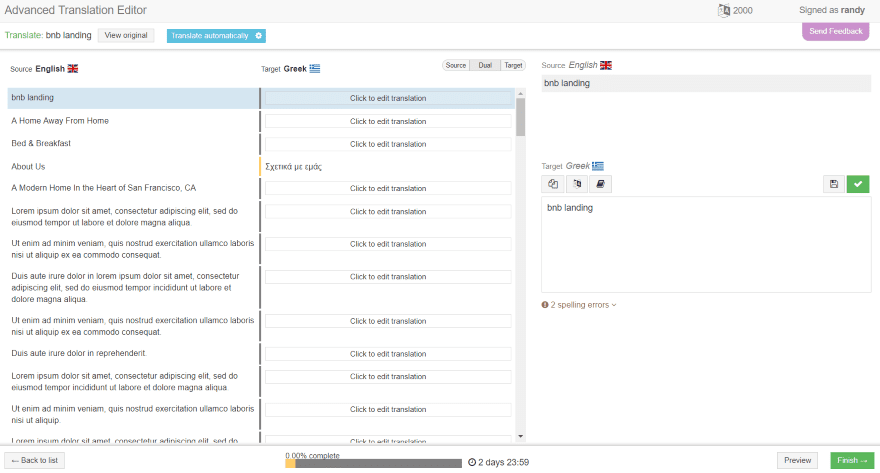
Selecting a language takes you away from your website to the Advanced Translation Editor. Click the light blue button close to the center of the header labeled Translate Automatically.
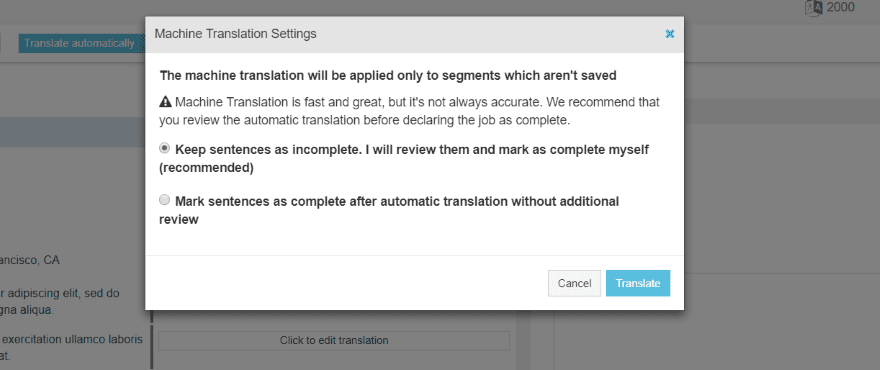
Select whether to keep the sentences as incomplete so you can review them yourself, or to mark them as complete without reviewing them. Click Translate.
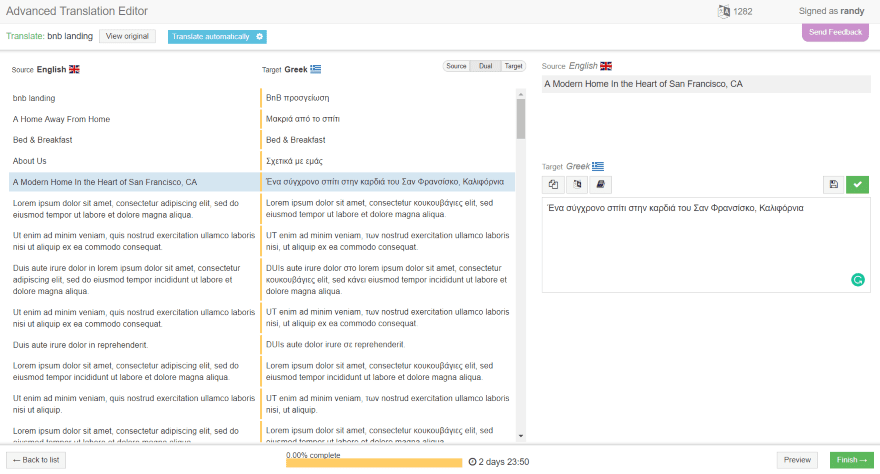
Once the translation is complete, you’ll see the translated text in the center field. The content is broken into sentences so you can see and edit them independently. Click on any text you want to edit and it will show in the editor in the right. Here, you can copy and paste in the original text, select to perform a machine translation, open a glossary, use spell-check save as draft, and save and complete.
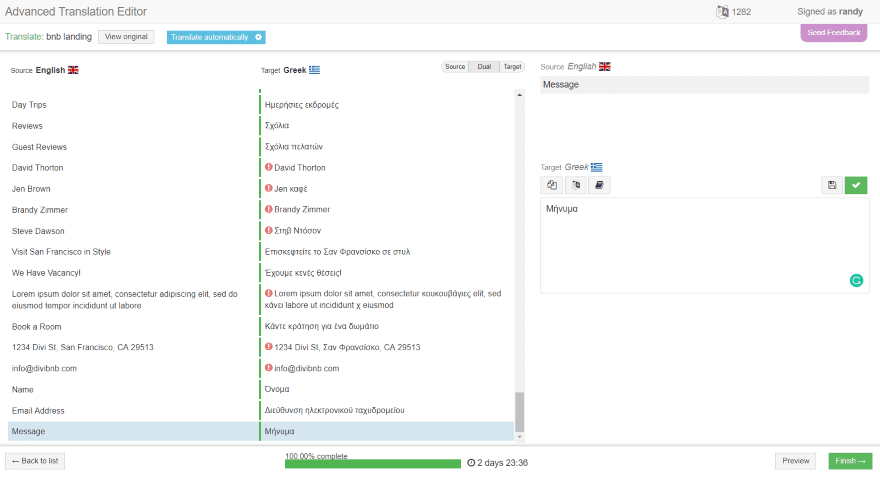
Clicking the green check marks that section of text as complete, highlights errors, and loads the next section. Approved each translation and click Finish in the bottom right corner.
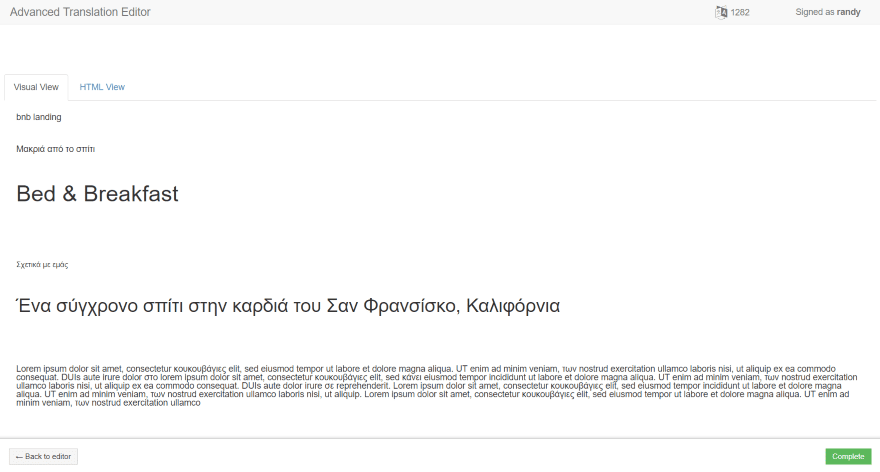
Next, it shows a preview of the text in a visual view and in HTML view.
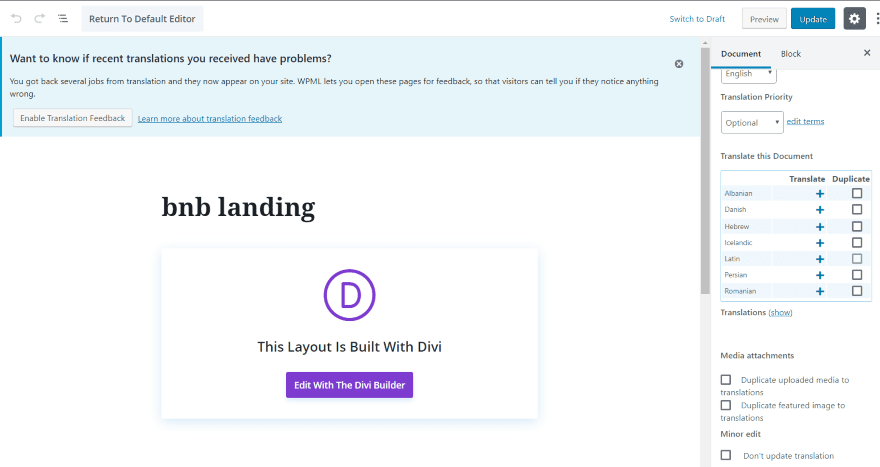
Clicking Complete in the bottom right will declare the work as done and take you back to your post editor where you can make other translation choices. The language you chose will no longer be available in the list for this post. Under the list is the word Translation and a link labeled ‘show’.

Clicking the link displays the translations you’ve translated this post into with an edit button. If an update is available it will show a circle or arrows. Clicking opens the Advanced Translation Editor where the translations for you to approve will be highlighted in yellow.
I returned and edited the phrase ‘Bed & Breakfast’ to ‘Bed and Breakfast’ so it would translate. If you update the page but don’t update the translation, the original will still show in the languages that you haven’t updated.

It now shows a message in the upper left corner that the page is available in Greek.
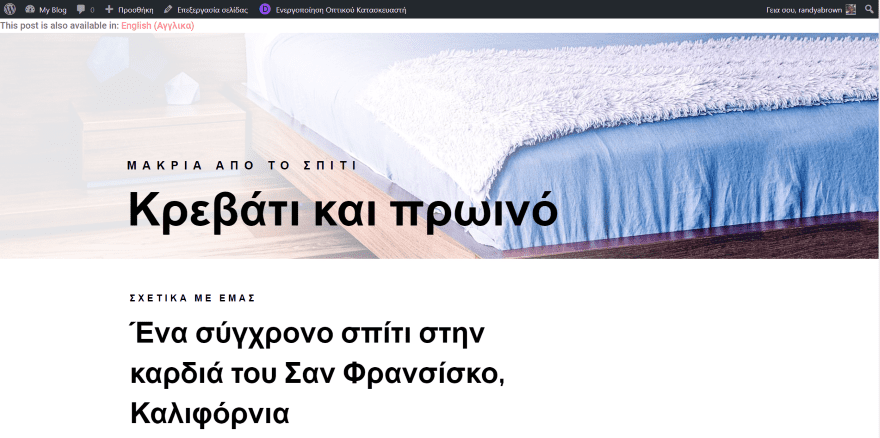
Clicking the text reopens the page in the new translation. It evens shows my WordPress menu in Greek. The clickable text now shows that English is available.
Performing a Translation from the Translation Management Screen
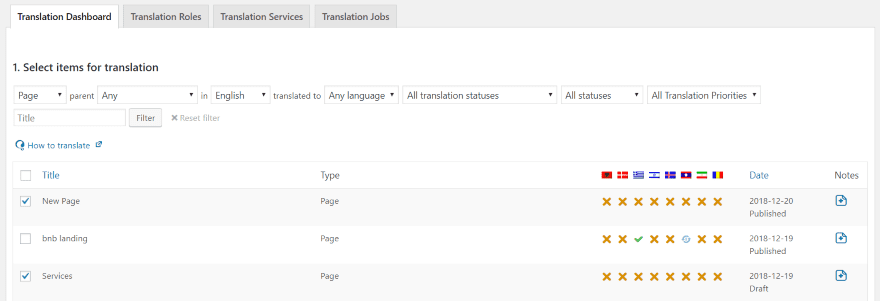
The Translation Dashboard shows a list of articles and the translations. Select the article that you want to mark as ready to translate and scroll to the bottom of the list.
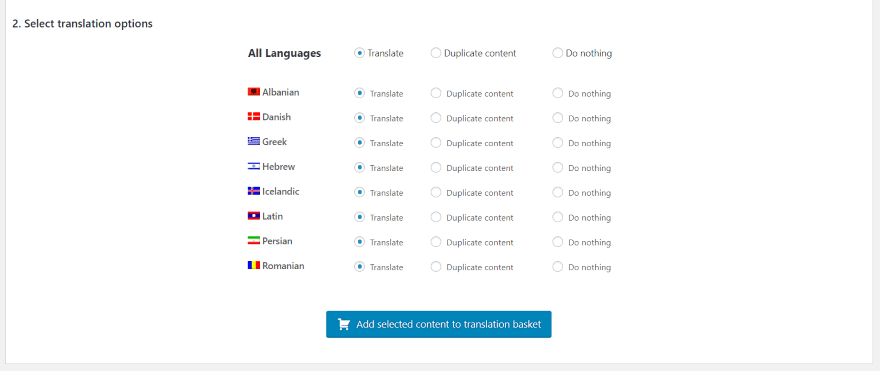
Select the languages you want the article translated into and click the button to add the selected articles to the translation basket.
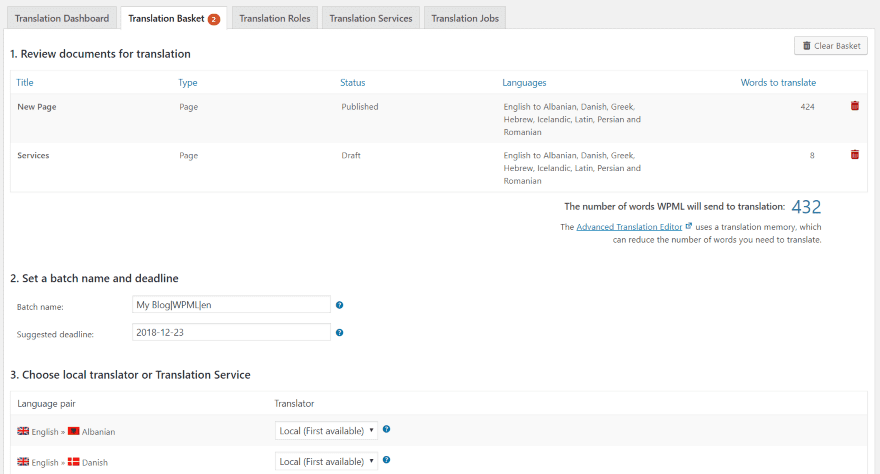
A new tab is added called Translation Basket. It shows the articles to be translated, the languages it’s to be translated into, the batch name, suggested deadline, and dropdown boxes where you can assign translators or services.
Editing Posts
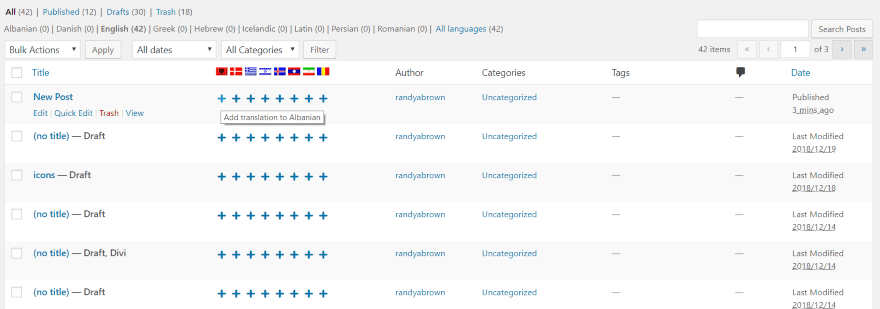
Translations can also be added to the posts from the post list. A list of flags is added to the list with a + under each flag. Simply select the + for the language you want to translate into. This opens the Advanced Translation Editor.
Translating Divi and Extra Custom Layouts

The Divi Library lets you translate layouts like the pages and posts. Translate individual modules, rows, sections, and complete layouts. Flags are added to the list. The layouts include + symbols that you can click on for the translation you want. Clicking a + symbol opens the Advanced Translation Editor.
Translating Divi and Extra Global Modules
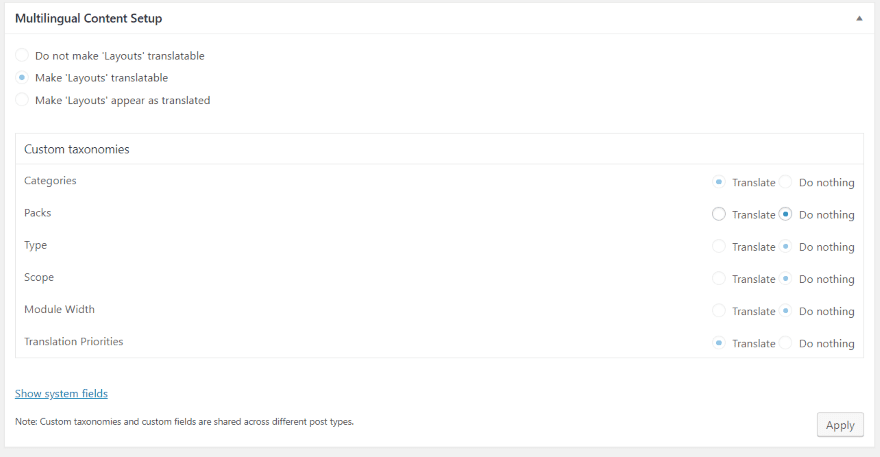
You can translate standard and global sections, rows, and modules. When you create layouts, make sure the Multilingual Content Setup at the bottom of the page has Make ‘Layouts’ Translatable selected. You can also choose the custom taxonomies from here.
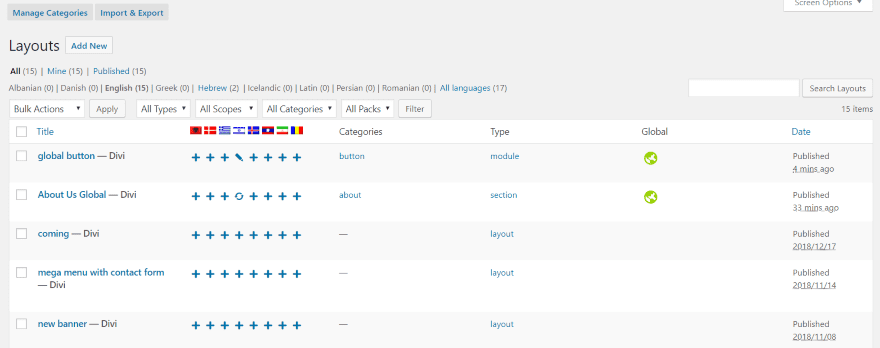
I’ve saved entire section as global in my Divi Library. Global layouts can be selected for translation from the Divi Library. You can update any of the translations by clicking the spinning arrows.
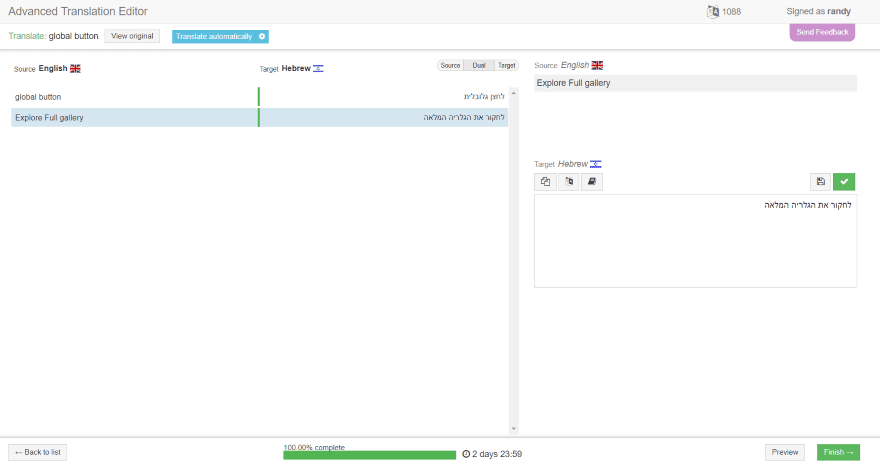
Perform the translation as normal. Now when you translate a page that uses the global module, only the other elements of the page will need to be translated. The translated content of the global module is preloaded into the translator.
String Translation
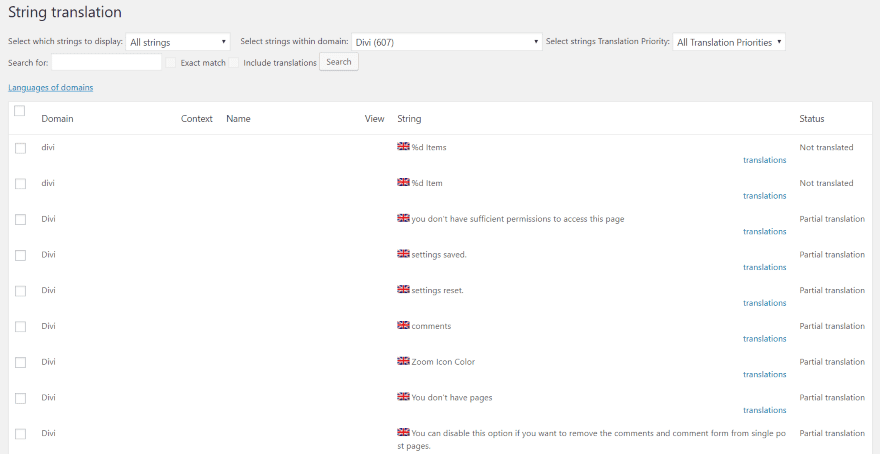
String Translation will translate your Divi theme strings such as widgets, taglines, etc. Go to WPML > String Translation in the dashboard menu and select Divi for the domain.
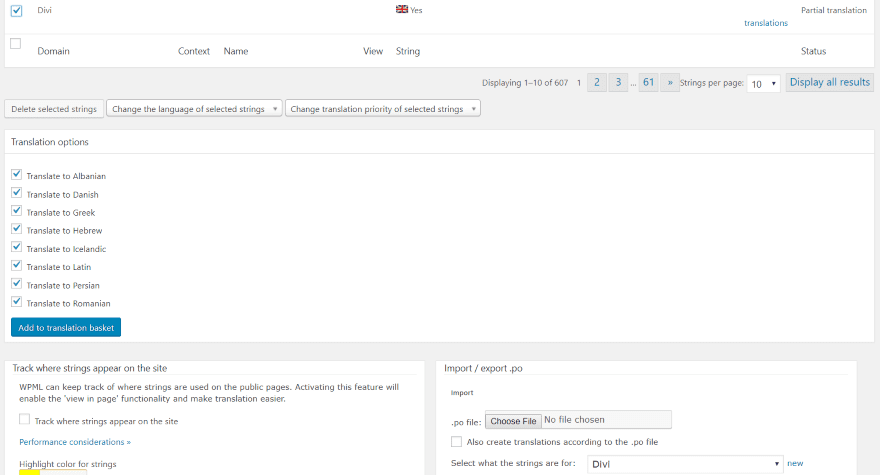
Select the strings you’d like to translate, scroll down to Translation Options, select the translations you want, and click Add to Translation Basket. It will appear in the Translation Management list just like pages or posts.

Menus also include translation links. Click on the language you want and it opens a new menu editor.
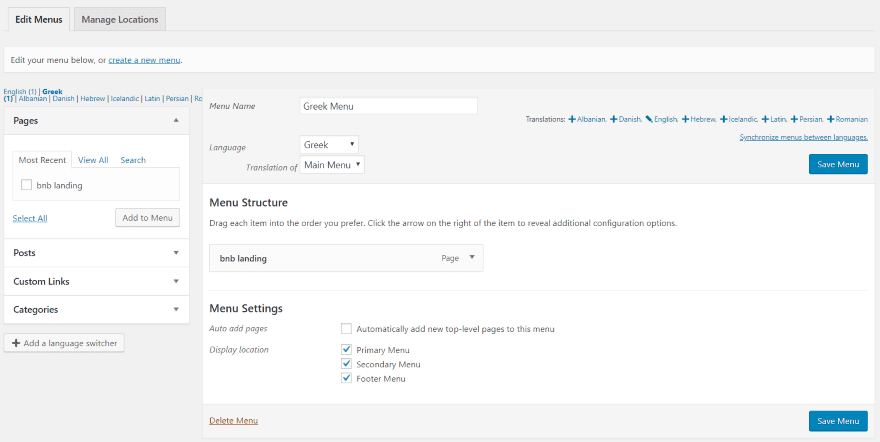
Here, you can see any pages that you’ve translated. Create the new menu and select what menu it’s a translation of. This menu will now be used when the visitor chooses that language.
WooCommerce Multilingual

WooCommerce Multilingual is an addon for WPML that lets you translate every aspect of WooCommerce. Using WCML with WooCommerce can help increase sales and traffic from multiple international markets. It can help improve your multilingual SEO by translating the products, shopping cart content, shipping, URLs, images, etc. It lets you provide multiple payment options with multiple currencies.

Once you install it, it asks if you want to run the setup wizard.
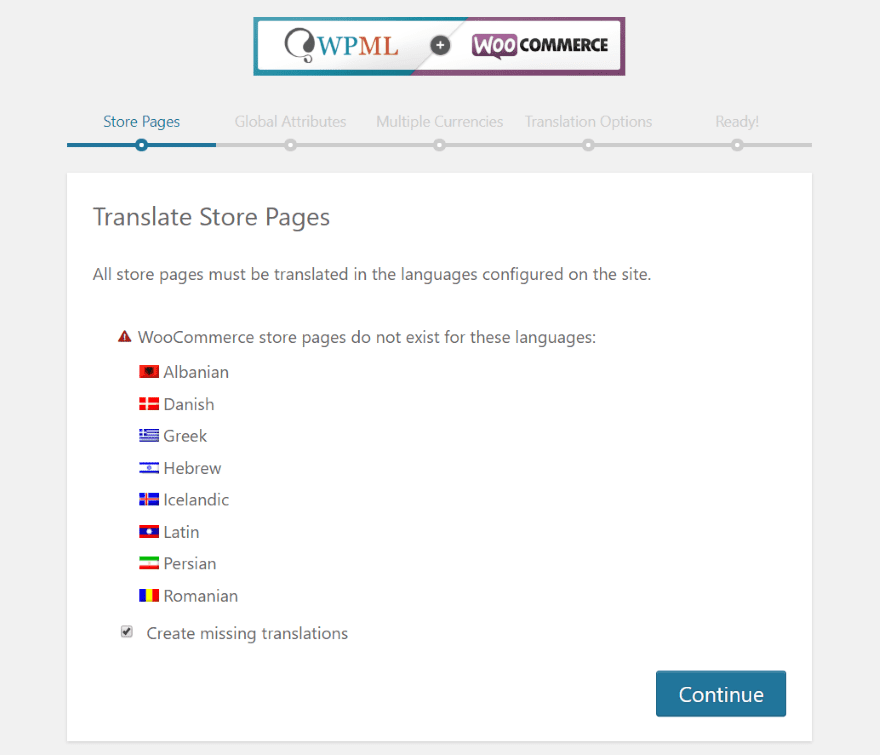
Choose the languages for your store pages. The pages will be created automatically. These are the languages that I chose when I set up WPML initially.
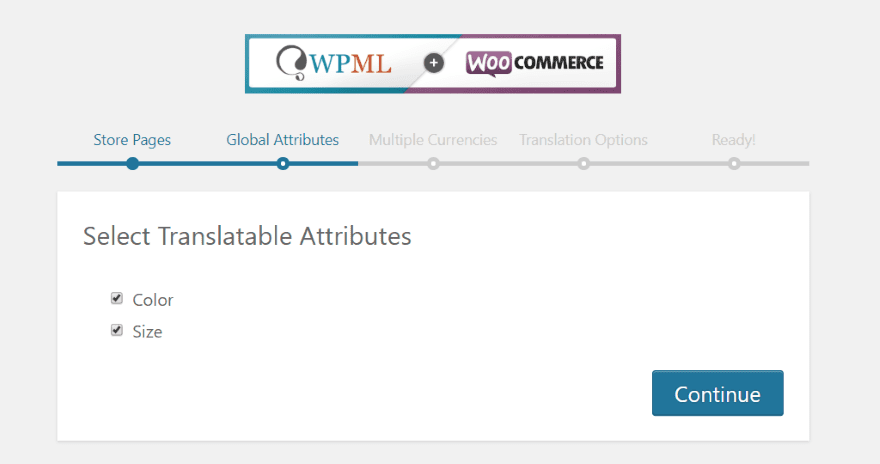
Choose your global attributes (color and size).
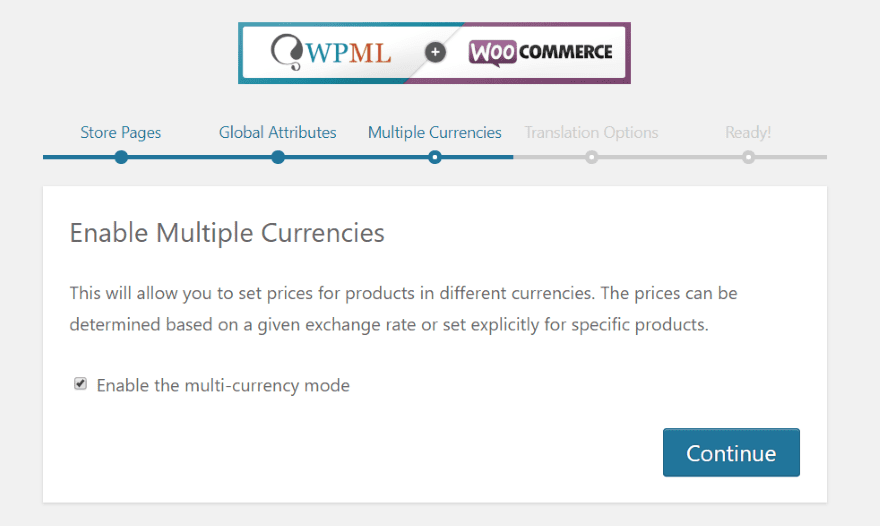
Enable the multi-currency mode in order to set prices for different currencies.
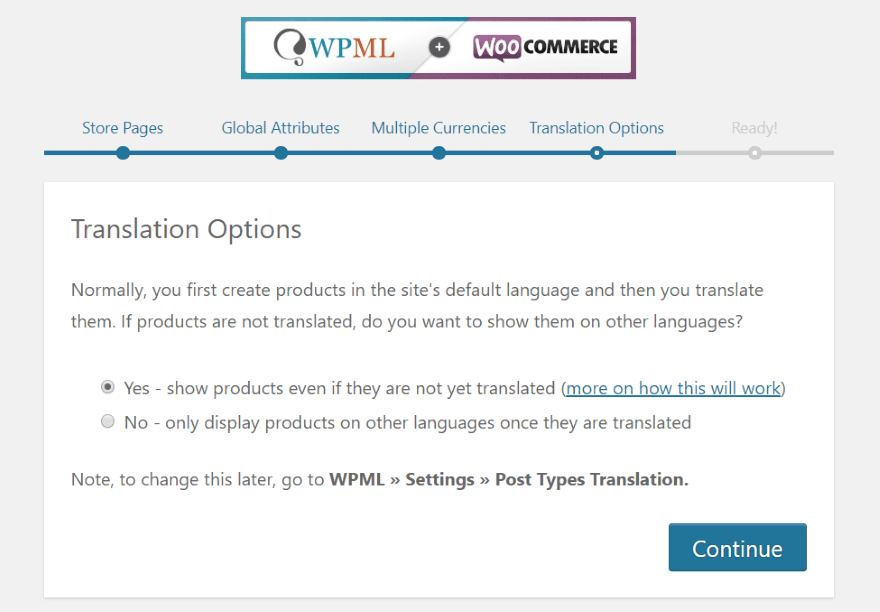
Choose if the products will show even if they haven’t been translated yet.
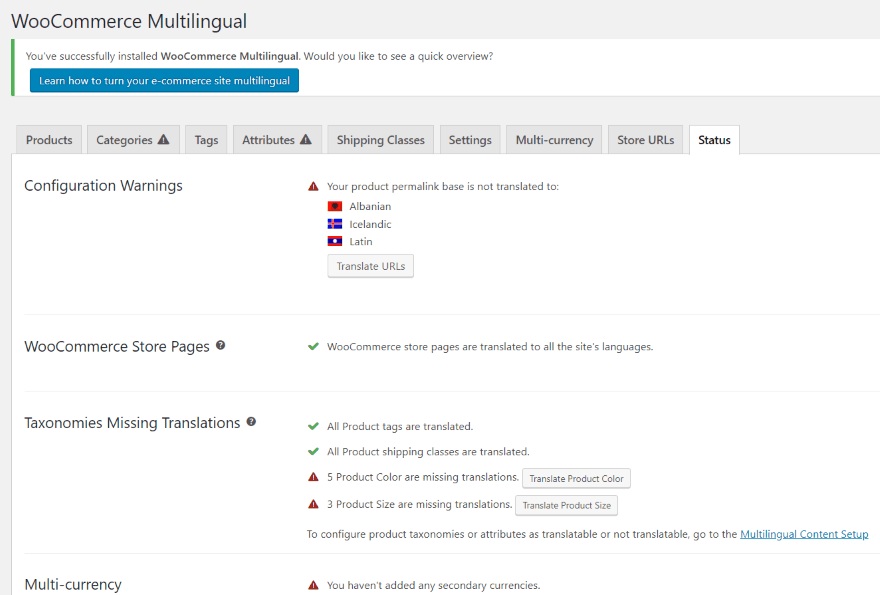
Multilingual features are now integrated with WooCommerce. You can make even more adjustments in the settings.

A translation button is added to the products list.

This opens WooCommerce Multilingual, where you can choose to translate products in the same way you would pages or posts.
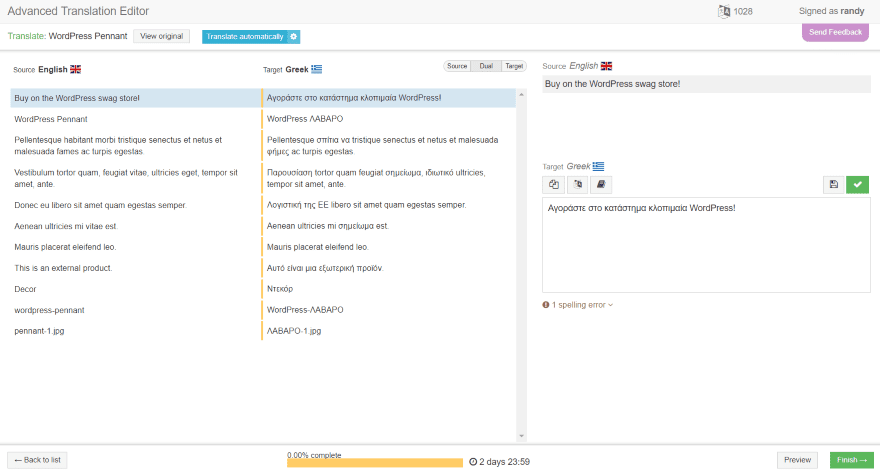
Clicking on a + opens the Advanced Translation Editor where you can perform an automatic translation.
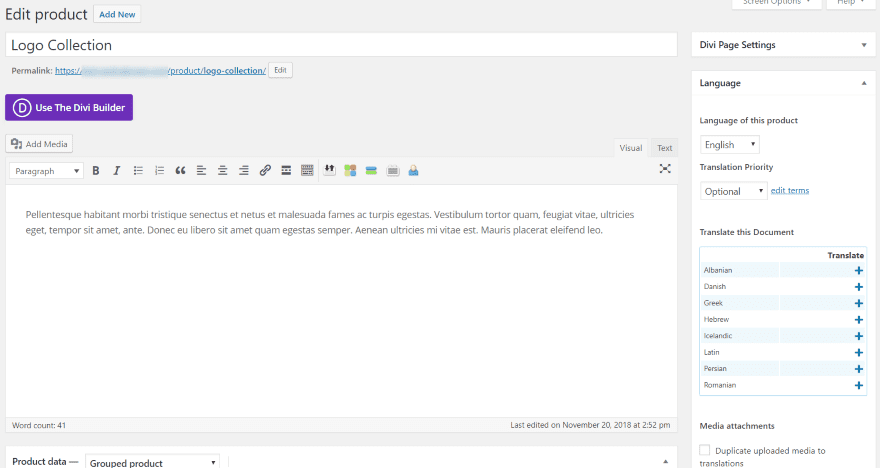
Translation features are also added to the product editor. As expected, it works exactly the same as pages and posts.
Ending Thoughts
WPML has added a lot of new features to improve how it works with Divi and Extra. The automatic translation feature of the Advanced Translation Editor alone does wonders for creating a multilingual website. WPML also includes lots of integrations, such as WooCommerce, to help you build a global presence. If you want to provide your Divi or Extra website in multiple languages, WPML is a great choice.
We want to hear from you. Have you tried WPML with Divi or Extra? Let us know about your experience in the comments.
Featured Image via TarikVision / shutterstock.com



You can have a look to Falang for Divi and translate the content in each module
There is actually an easier way to translate your website. A couple of months ago, I installed a plugin called ‘Divi Auto Translate’. It does automatic translations in over 100 languages and has 3 divi modules that let used change the language. Takes about 3 minutes to set up, I use it for every client site I develop.
Just Google ‘Divi Auto Translate’ to download the plugin.
Good callout Frank. Here’s Divi Auto Translate in the marketplace.
I’m curious, any tips on how to set font styles to the translated pages? I have a project requiring the use of a specific Chinese font.
WPML is simply the best plugin for Divi, I have an e-commerce site and you can even setup different currencies! The support is really fast too. Great tutorial.
I’m using WPML since a while also and like it. There is only one problem on all my sites built with Divi, which concernes the string translations. Every time I update any kind of plugin, it resets itself and I have to change it back manually again. :/
Hi Ada, did you open a ticket in the support about this issue? The supporters are usually very helpful. Let me know?
Hi Ada, did you open a ticket for this issue? The supporters are great and can help you to fix this. Let me know?
I use WPML exclusively. I think it’s the best translation tool out there although it has a very complicated approach.
By the way, there is a much easier way to translate the menu’s then described in this article. All you need to do is go the WPML menu » WP Menus Sync. Click the sync options, tick all boxes and apply changes.
Also, you don’t need the media translation addon anymore.
And you might need some custom XML configuration for buttons, blurbs and images otherwise you can’t translate text and internal links won’t automatically translate. I have an open ticket with them to fix their Divi integration configuration.
After translating you will want to go to WPML » Settings » Translate Link Targets. That’s to update internal links so they point to their translated equivalent.
Why pay for wpml, when you can embed google translate into your website for free? With google translate,
your website is also automatically translated into the users language.
Because Google translate only works on the fly, so your translated pages are not indexed by Google.
Well done! I’ve used WPML exclusively now for nearly two years. It is exceptional and makes my job SO much easier. The ‘Advanced Translation Editor’ is a breeze to use and the repeating text being translated automatically really helps, especially with a WooCommerce site.
I did have a hard time figuring out how to use WPML and Bloom so that my pop-ups were language-aware. A quick chat with Support held the key and it was easy cheesy after that. Here is what ET Support advised:
“In order to achieve this result, please follow the steps below:
1. Visit WPML>>String Translation
2. Click on the blue link at the bottom of the page: “Translate texts in admin screens »”
3. Look for an option similar to “et_bloom” or *theme_mod*, or something like that. Here you should find all strings associated with your theme options.
4. Check the checkbox for your strings of interest.
5. Click on the button “Apply”(on the bottom of the page)
6. Now, all your selected strings should appear in the String Translation panel and you can translate those strings”
The solution above worked great! WPML is very flexible and they have excellent support with a chat feature now too.
Thanks for the comprehensive article!
hmm seems like a paid article, i prefer polylang
I agree, polylang does a fantastic job and it’s free!
Yes I have used WPML a while ago (and not with Divi). It looks way better than before! It seems that there are a lot of great improvements! And the possibility to translate Divi global layers is really nice.
Does the link in the upper left corner “This post also exists in…” show for everyone or just for admins?
Excellent article Randy.-
I had been studying this plugin especially for automatic translations, I know it is the best and most powerful and perfect to maintain SEO, the good news is the compatibility with DIVI and EXTRA, this gives me more security to buy it. However, I have done tests and I would recommend that you have a basic knowledge of the language “Destination” because some writings are in the form of regional languages or “Slang” that could confuse the translator or the public if he reads an abstract translation. In short, the website to be translated should be in the best language quality, syntax and free of errors so that “WPML” can translate correctly. Thanks for your publication, excellent!