The comments section of a blog post allows readers to engage with others. It also allows users to be able to create conversations with people who are ingesting your comment. For those special posts that drum up a lot of noise, the comments section can get pretty hectic! You may want to find a way to make a long comments section easier to navigate. Consider creating scrollable comments in Divi!
By creating a scroll container for your Divi Comments Module, you can minimize the amount of scrolling readers of your blog need to undergo. Thus, they have a better experience with your site. It’s important to consider factors of user experience when you are building your site, and by adding a scrollable comment in Divi you’re making your readers have an easier time enjoying your site which is always a good thing.
Subscribe To Our Youtube Channel
- 1 Why Comments Are a Good Thing
- 2 Scrollable Comments in Divi: An Overview
-
3
Scrollable Comments in Divi: The Tutorial
- 3.1 Enter the Comments Row Settings
- 3.2 Set Row Max Height
- 3.3 Enter Row Advanced Settings
- 3.4 Activate the Vertical Scrollbar with Vertical Overflow
- 3.5 Adding Padding to Prevent Overlap
- 3.6 Add a CSS ID to the Row
- 3.7 Add Custom CSS to Style Scrollbars
- 3.8 Add Custom CSS to Style Scrollable Comments in Divi
- 3.9 Save Your Blog Post Template
- 4 Scrollable Comments in Divi: The Conclusion
Why Comments Are a Good Thing
Before we head into the tutorial, let’s take a quick look at comments in general. In Divi, we have a Comments Module. This module allows users of your site to leave a comment on a page or post. The module also allows people to read past comments that have been left behind on a post by other readers of your site. When a post is engaging, it can encourage people to want to leave their thoughts, opinions, and questions with the author (a.k.a you) under the post. This is an example of what that looks like from the Elegant Themes blog:

This is the comments section on the 3 Best Voice Search Plugins for WordPress post on our blog. In it, you can see that several readers have left feedback, thanks, and more. The post’s author has also taken the time to respond to readers. This kind of engagement is good for your blog and website because it shows that you are providing value to you readers. In addition, it helps you build a stronger bond with those who use and visit your site. Now that we’ve seen comments in the wild, let’s see how we can manage the comments section in our own blog posts using Divi’s Comments Module.
Scrollable Comments in Divi: An Overview
For this tutorial, we’ll be using the Blog Post Template from Divi’s Software Layout Pack. Here’s a quick overview of the template:

Notice how there are a few comments on this post? We can make this part of our blog page easier to navigate by adding a vertical scrollbar. For this tutorial, we’ll be adding a vertical scrollbar to the row that is holding the Comment Module. Then, we’ll use a little bit of CSS to style said scrollbar so it looks different than the main scrollbar for the page. Ready? Let’s get into it!
Scrollable Comments in Divi: The Tutorial
Before we get started on creating scrollable comments in Divi with the Comments Module, you’re going to need to install the Software Blog Post Template. Follow the instructions within that blog post to install your Blog Post Template.
Enter the Comments Row Settings
Once your template is installed and edited to your satisfaction, we’re going to enter into the row that is holding the Comments Module. Scroll down to the section that contains the Comments Module. Hover over the row (green outline), and click on the gear icon. This will open up the settings module for the row.
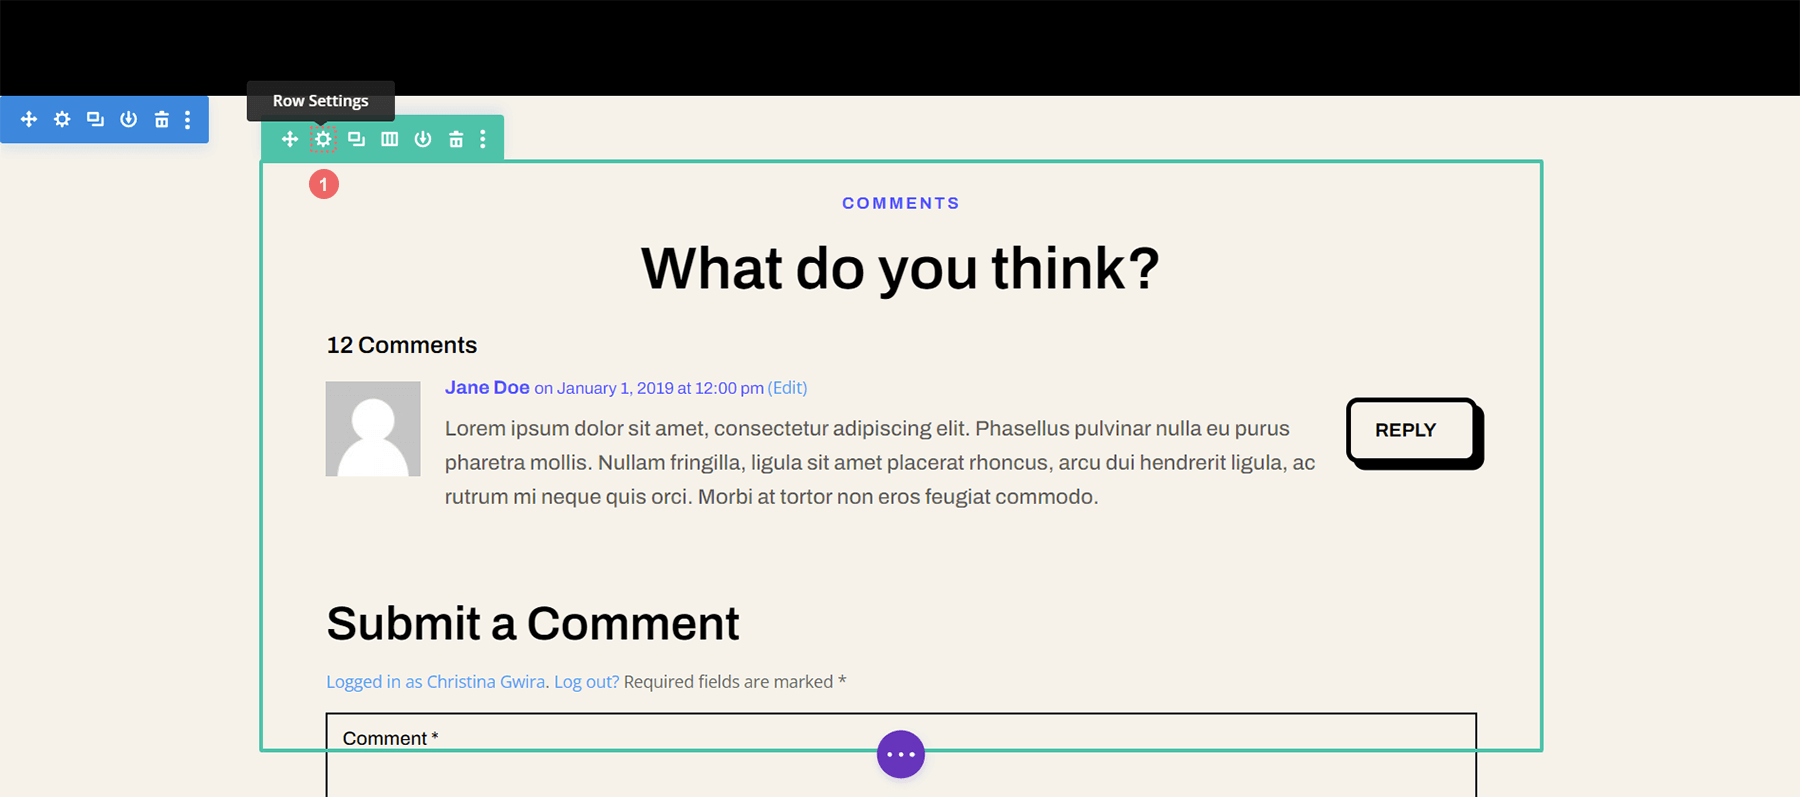
Set Row Max Height
Before we begin styling or activating the scrolling, we need to adjust the max height for the row. To do this, we click on the Design tab. Next, we click on the Sizing tab. We then enter a Max Height of 550px to the Max Height option.
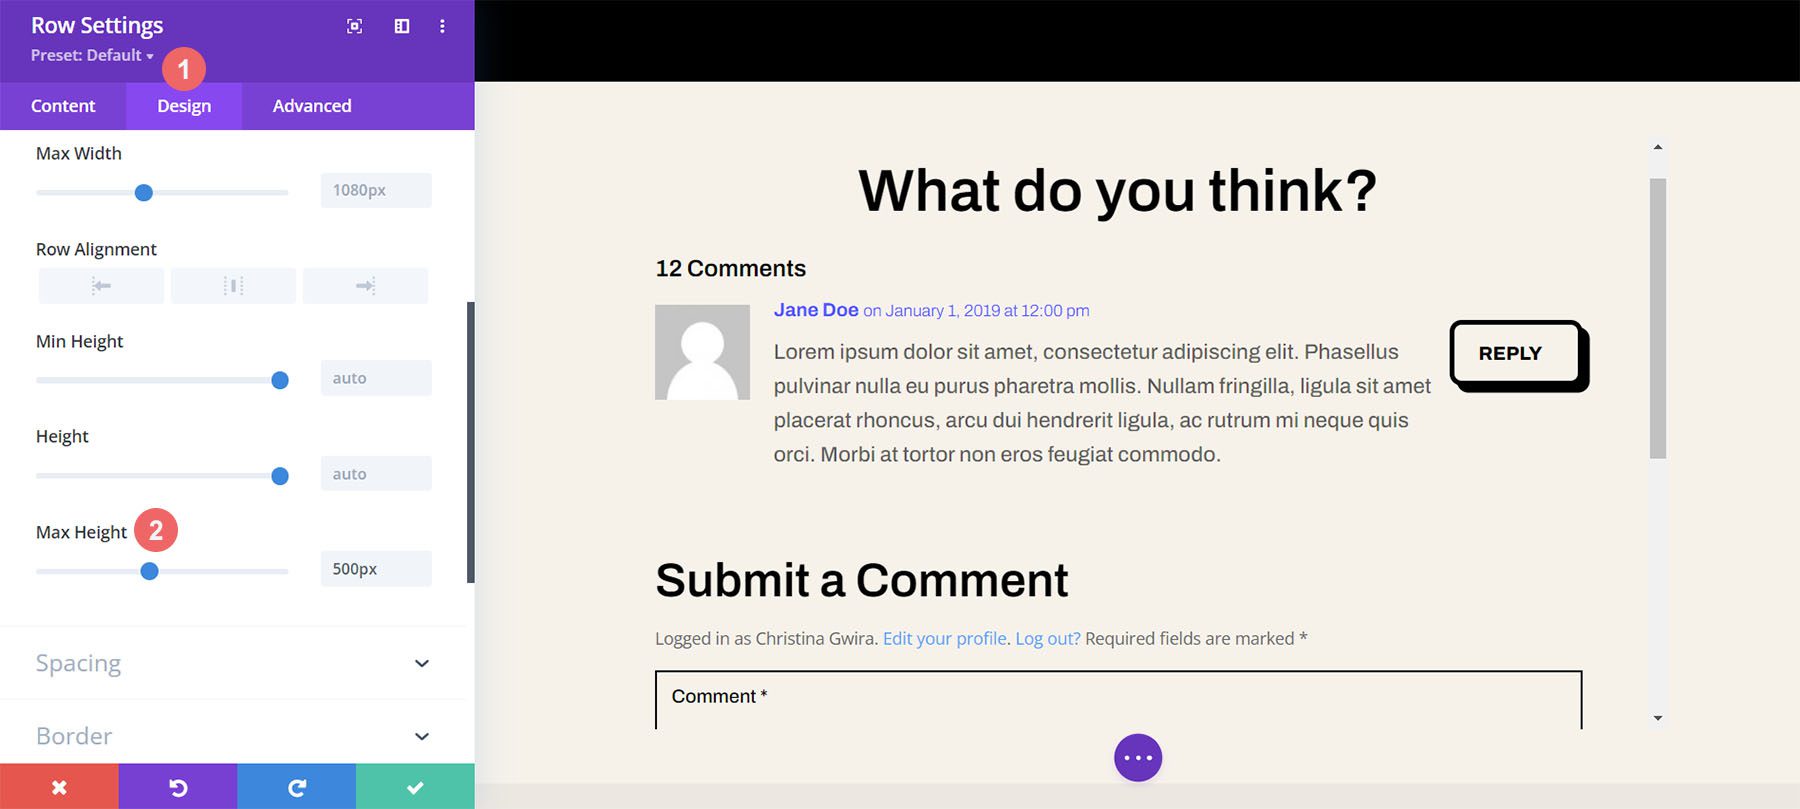
Enter Row Advanced Settings
After setting the max height of the row, we’re going to click on the Advanced tab within the modal box. It is here that the scrolling magic happens! Take note of the Vertical Overflow option which is further down the Advanced tab. We’ll be coming back to that soon.
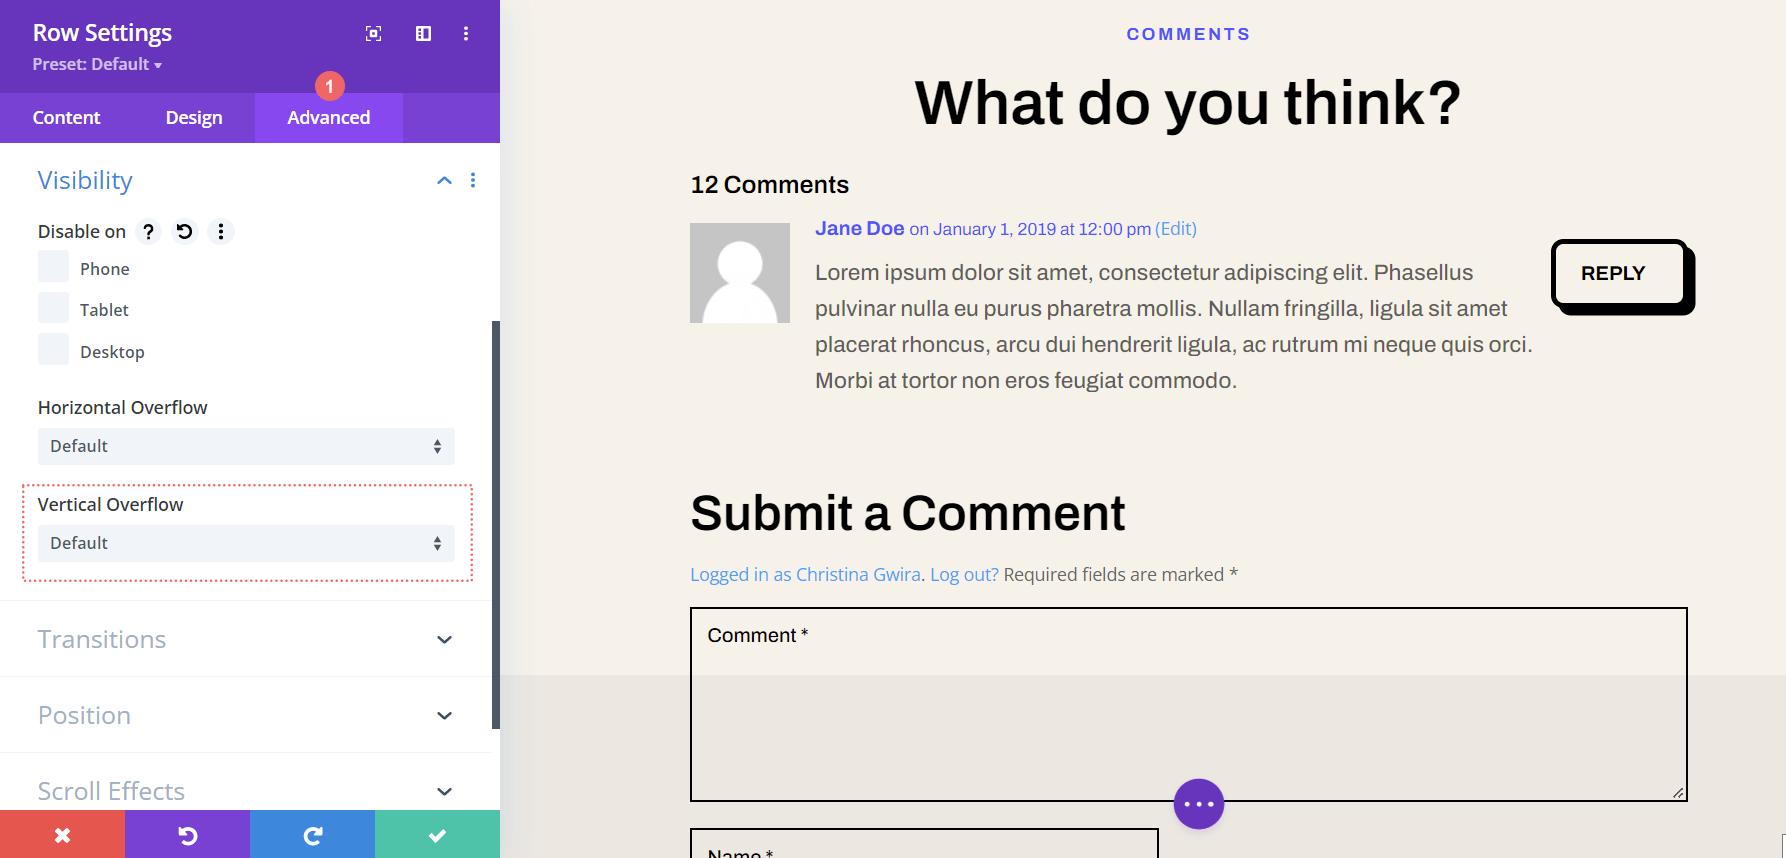
Activate the Vertical Scrollbar with Vertical Overflow
Scroll down util you arrive at Vertical Overflow. Click on the dropdown and select Scroll.
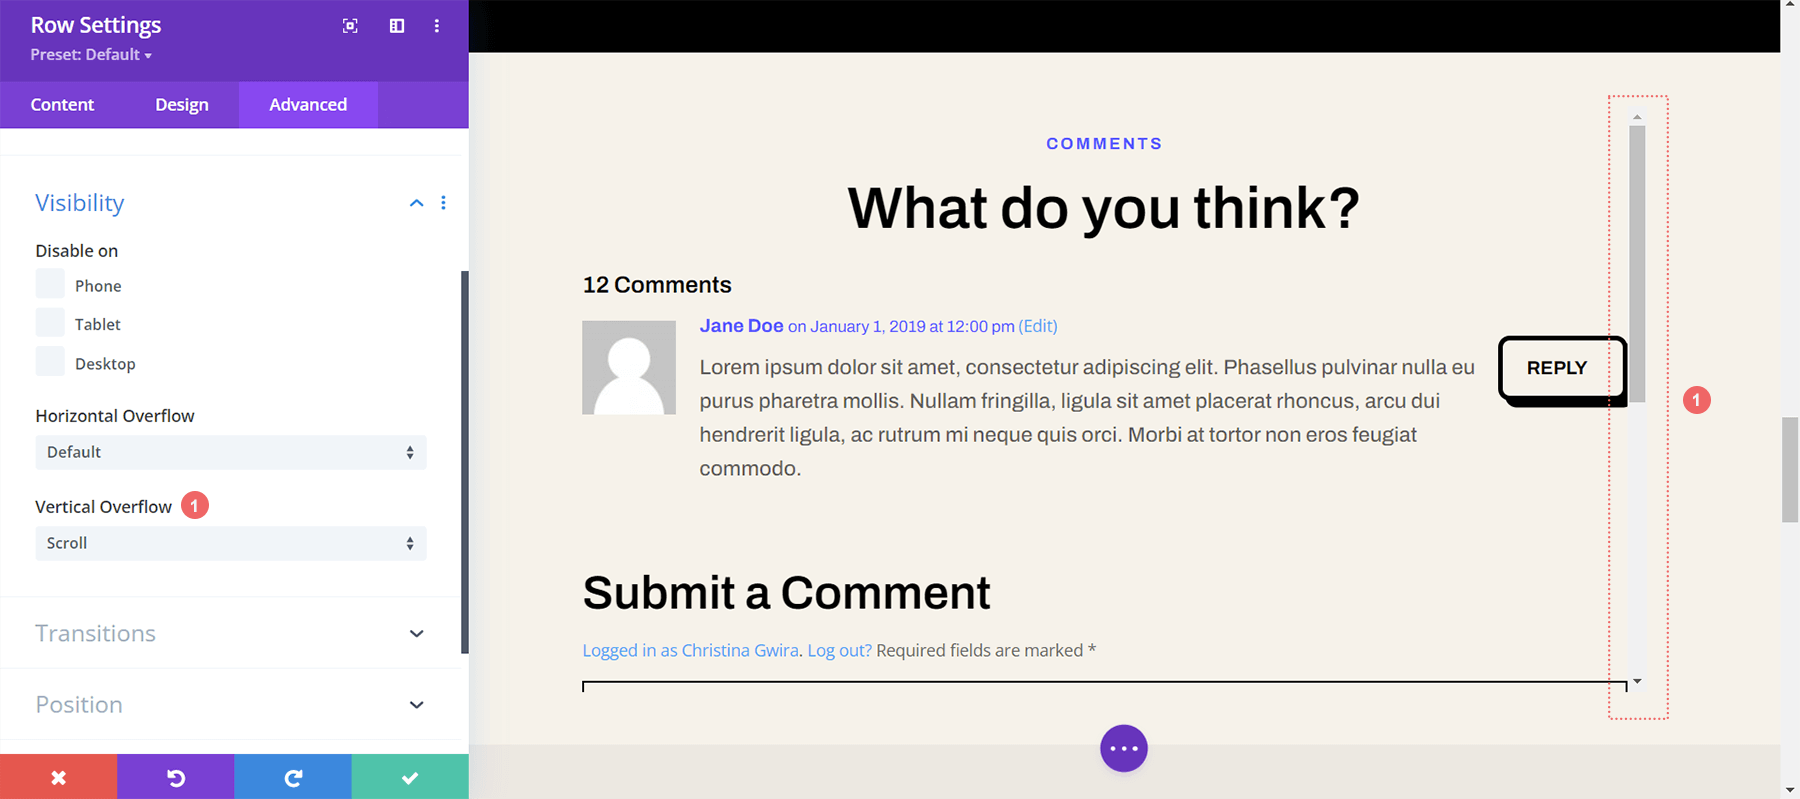
While we have our vertical scrollbar, we can spruce it up a bit with some almighty CSS and padding.
Adding Padding to Prevent Overlap
To prevent our newly added scrollbar from overlapping with our buttons within our comments section, we’re going to add some padding to the right and left-hand sides of our row. To do this, navigate to the Design tab of the Row Settings modal. Next, scroll down to Spacing. Click the link icon between the Left and Right Padding text boxes. We’re going to add a padding of 55px to each side of the row.
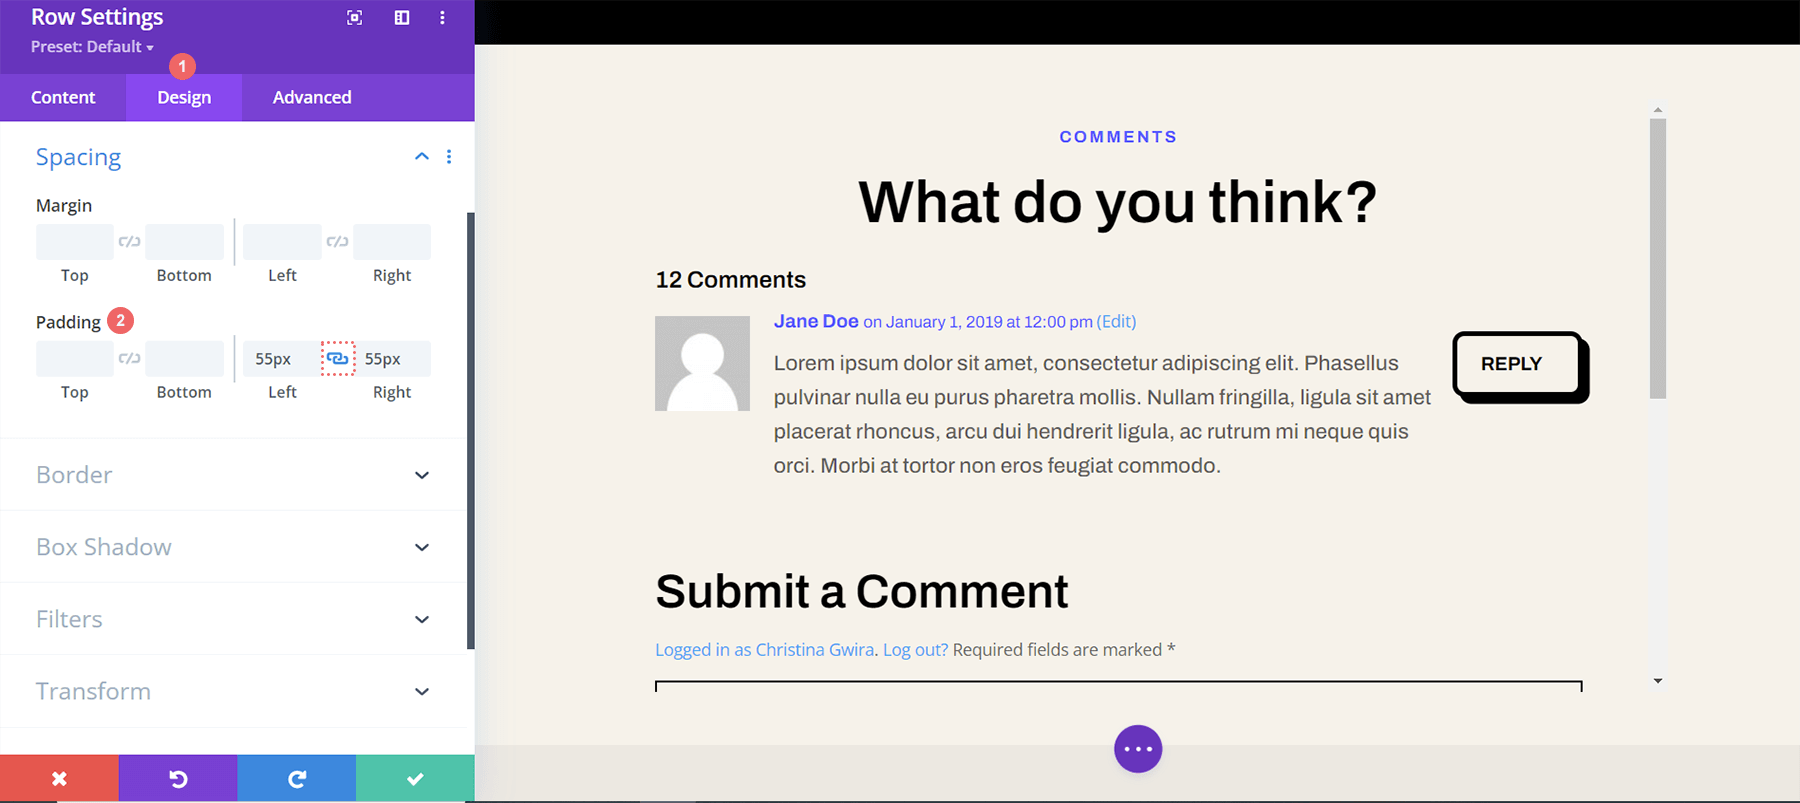
Since we’ve added some breathing space to our scrollbar, let’s now make it pretty with some custom CSS.
Add a CSS ID to the Row
Moving back to the Advanced tab of the row, scroll to the top. Add your CSS ID – for this tutorial, we’ll be using scrollie – that we’ll be calling within the Custom CSS section in the Body Template Settings.
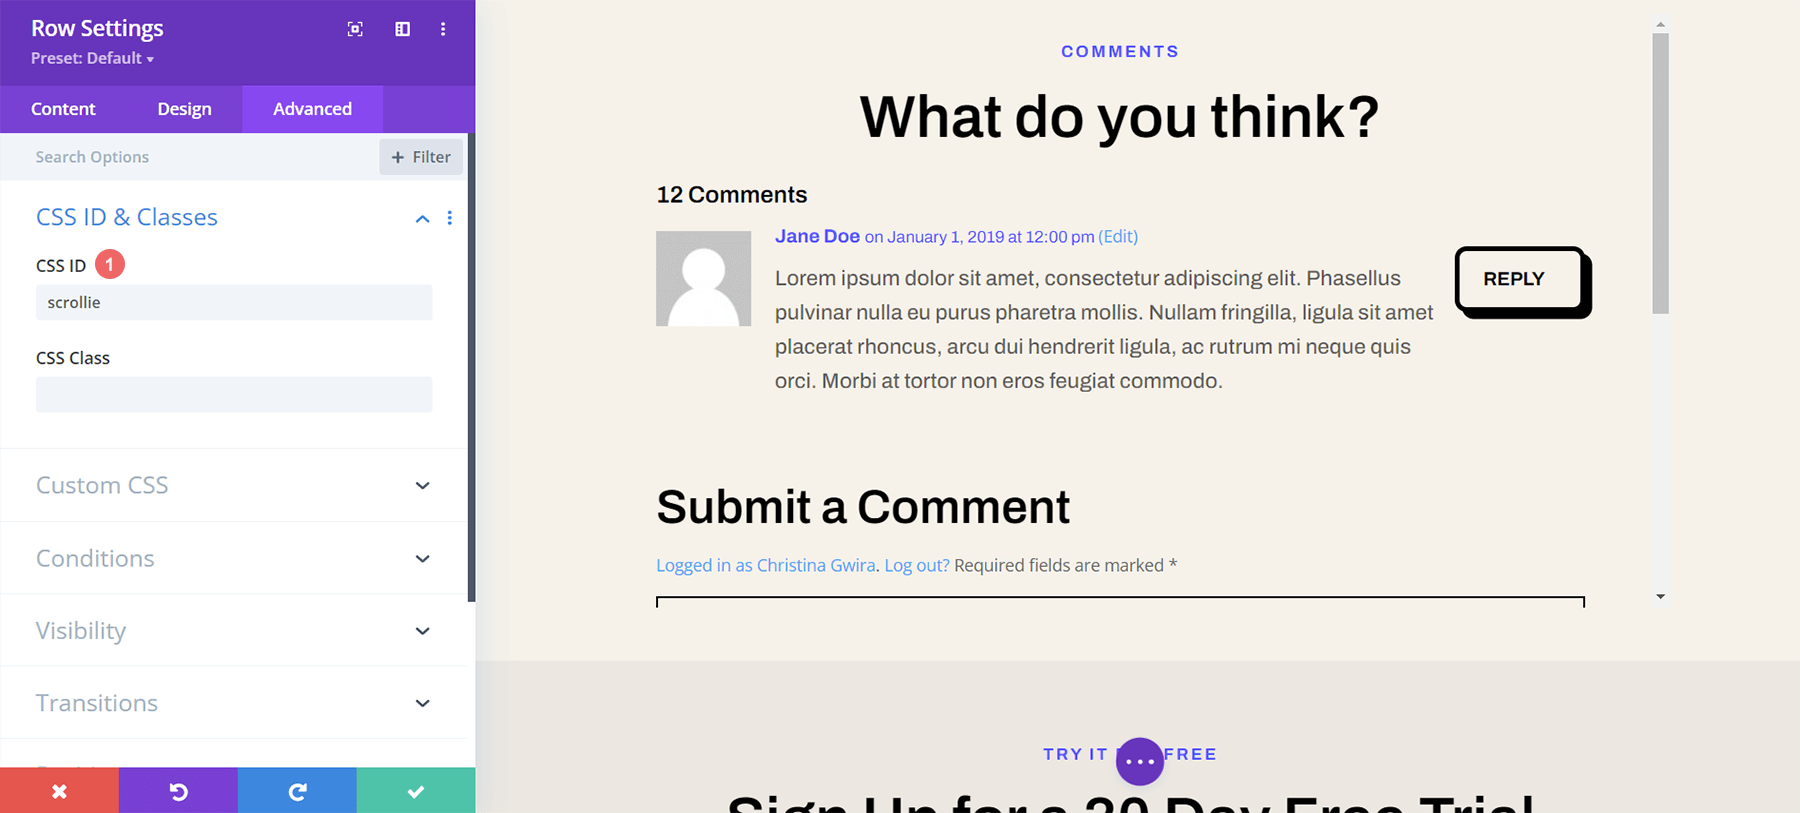
Add Custom CSS to Style Scrollbars
Now, we’ll be entering into the Custom CSS for our Blog Post Template. This will ensure that our CSS will be active on each blog post within our website as this template is applied to All Blog Posts within the Divi Theme Builder. To enter the Custom CSS setting for our body template, click on the three dots within the purple button in the bottom center of the builder. Next, select the gear icon.
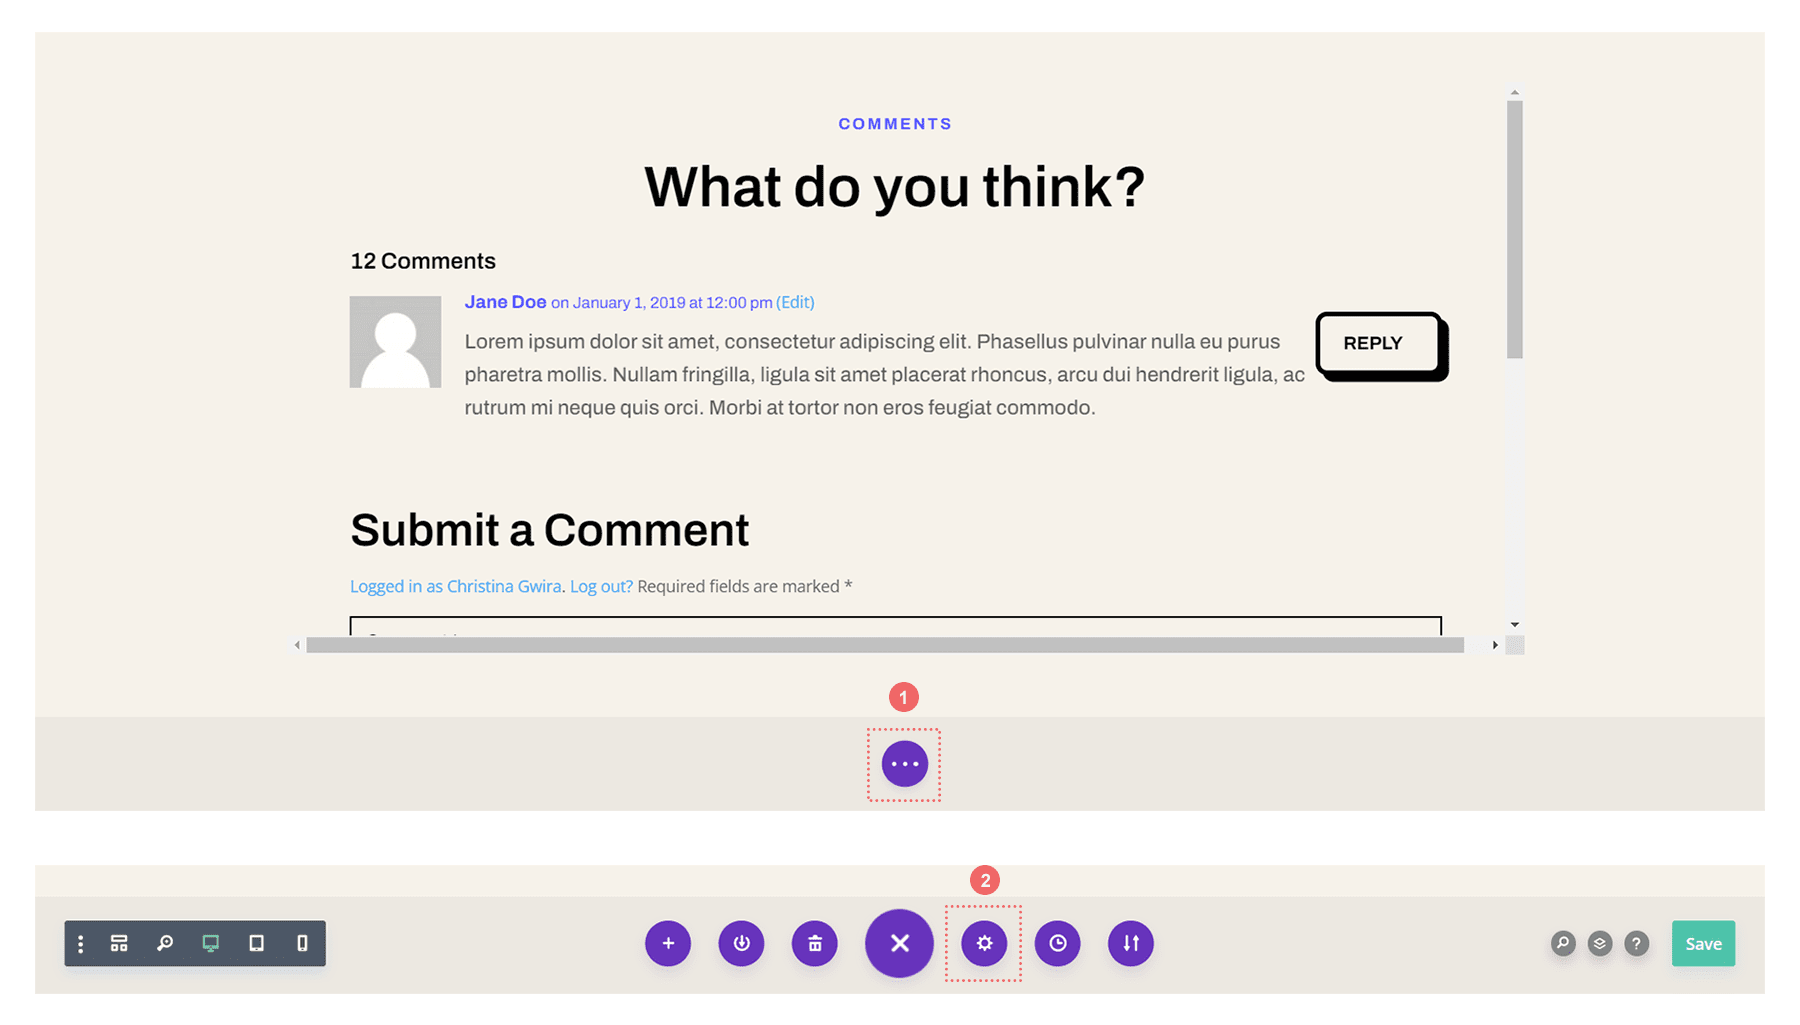
Add Custom CSS to Style Scrollable Comments in Divi
We want to style the scrollbar for our scroll container to differentiate it’s use from the main scrollbars of our browsers window. To do this, we’ll be using some CSS. Once you are within the Body Template Settings, select the Advanced Tab. Next, scroll down to the Custom CSS tab.
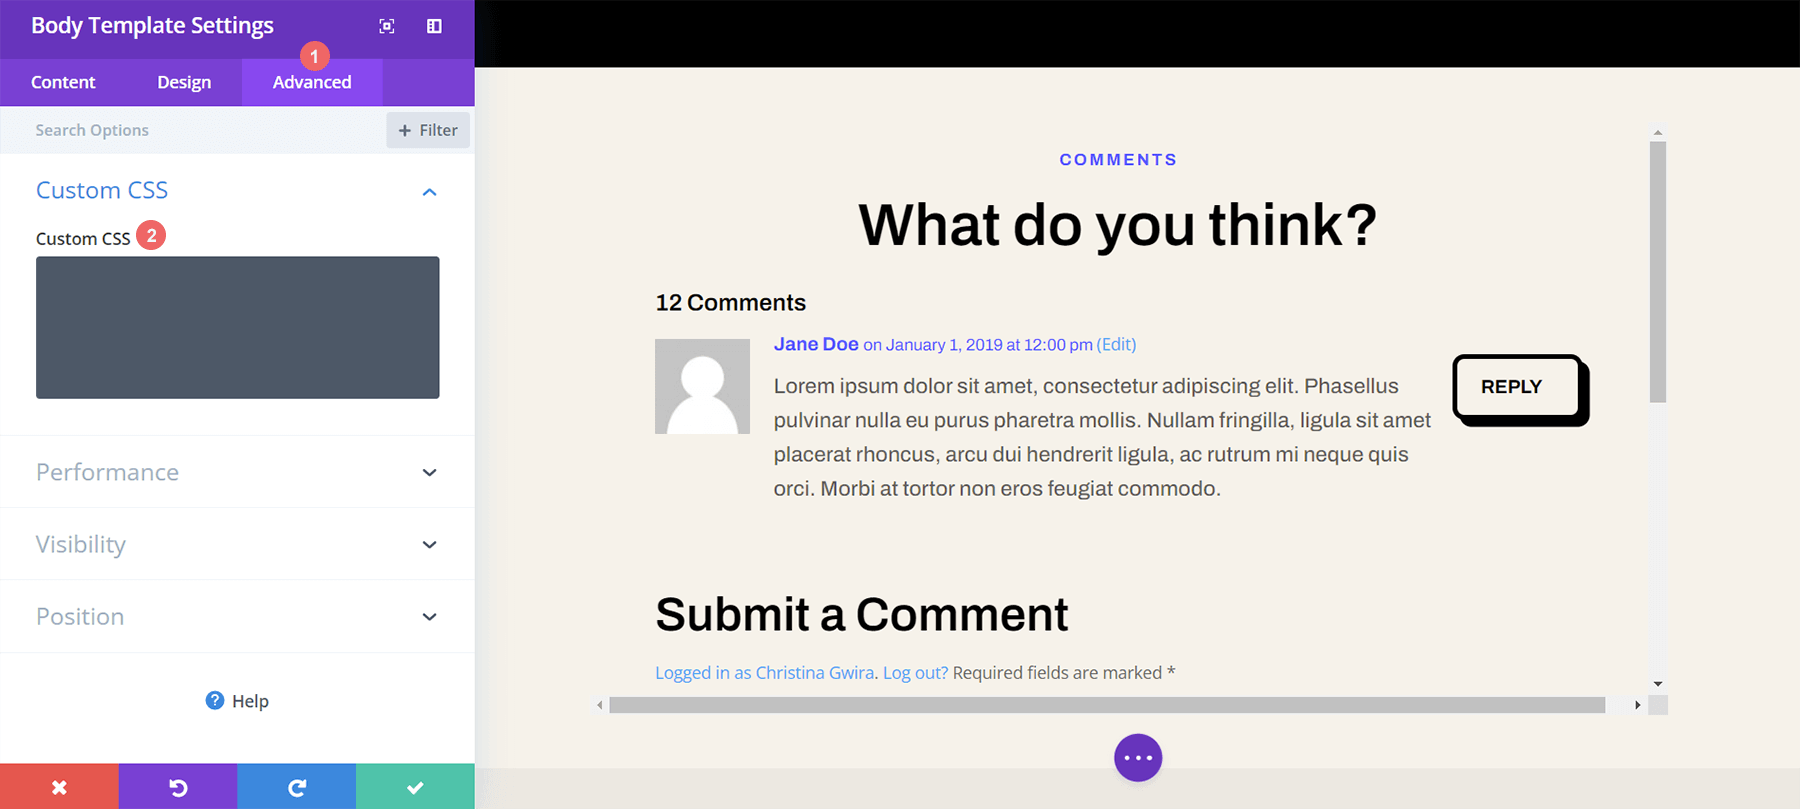
Once we’re in the Custom CSS section of the Body Page Template, copy and paste the following CSS code:
/* Custom Scrollbar CSS */
/* Firefox */
#scrollie {
scrollbar-width: auto;
scrollbar-color: #000000 #ffffff;
}

/* Chrome, Edge, and Safari */
#scrollie::-webkit-scrollbar {
width: 16px;
}

#scrollie::-webkit-scrollbar-track {
background: #ffffff;
}

#scrollie::-webkit-scrollbar-thumb {
background-color: #000000;
border-radius: 0px;
border: 3px solid #ffffff;
}
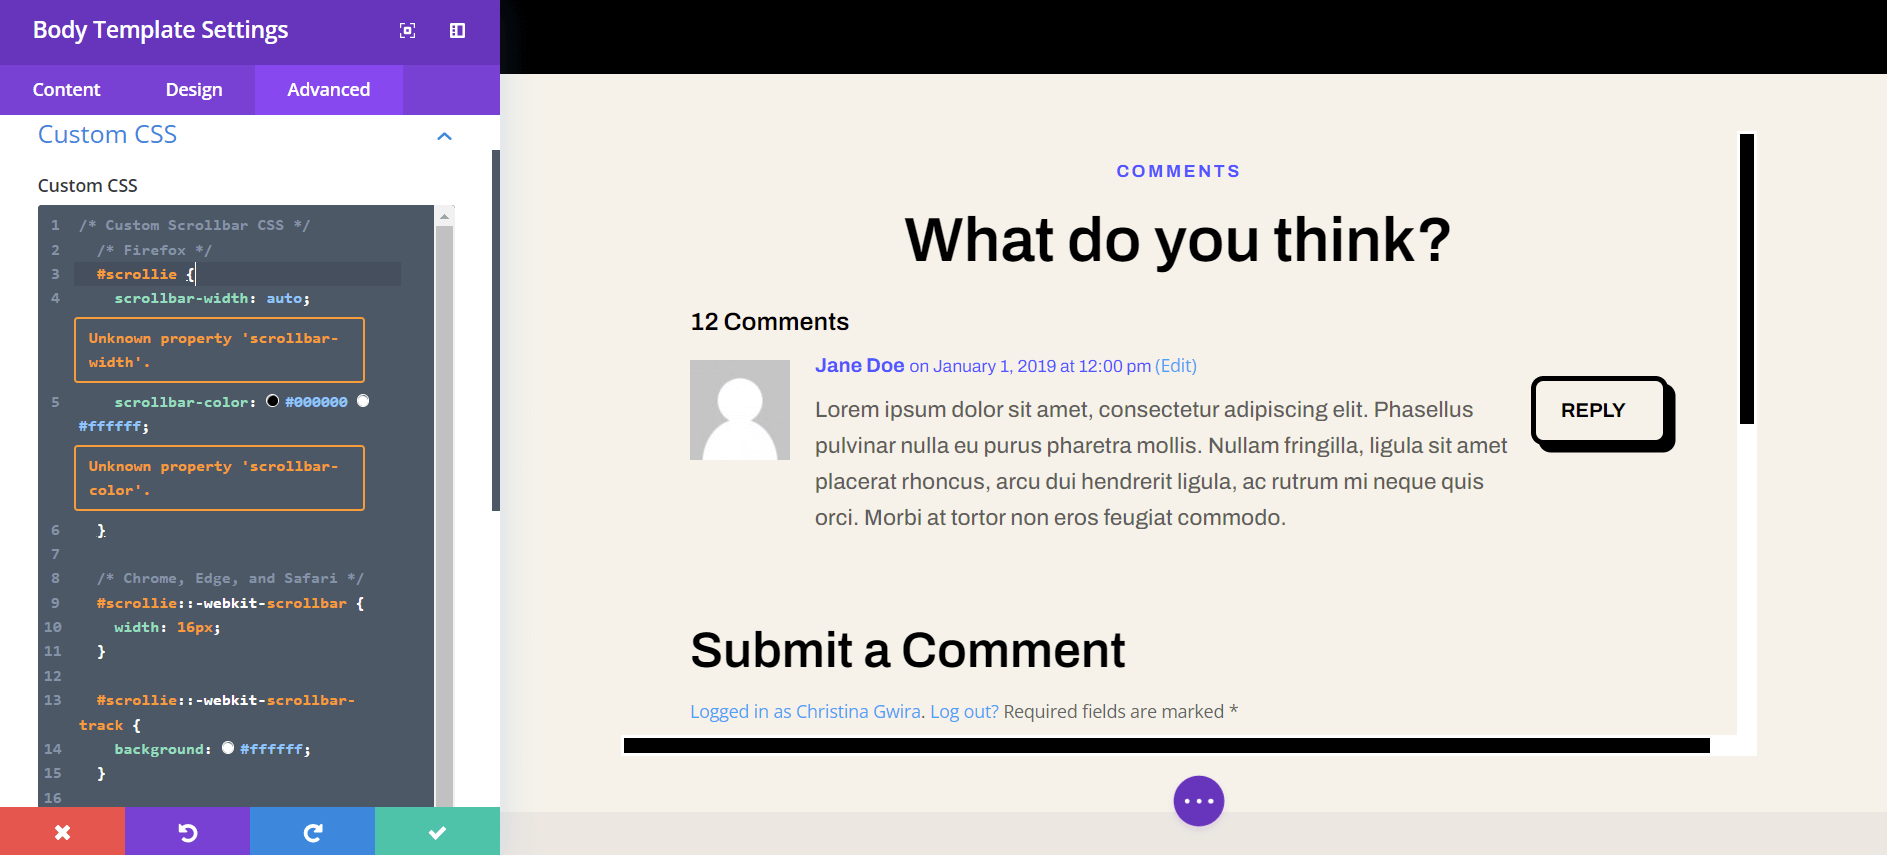
If you used a different CSS ID, ensure that you’ve updated the code snippet within your website to reflect this. You can edit the CSS or add to it to style your borders in a way that matches your brand and website. In our case, we went with a flat design to match the styling of the Divi Software Layout Pack.
Save Your Blog Post Template
Once you’re happy with your CSS edits, remember to save your Blog Page Template. Click on the green Save button on the bottom right-hand side of the bottom menu within the Divi Theme Builder.
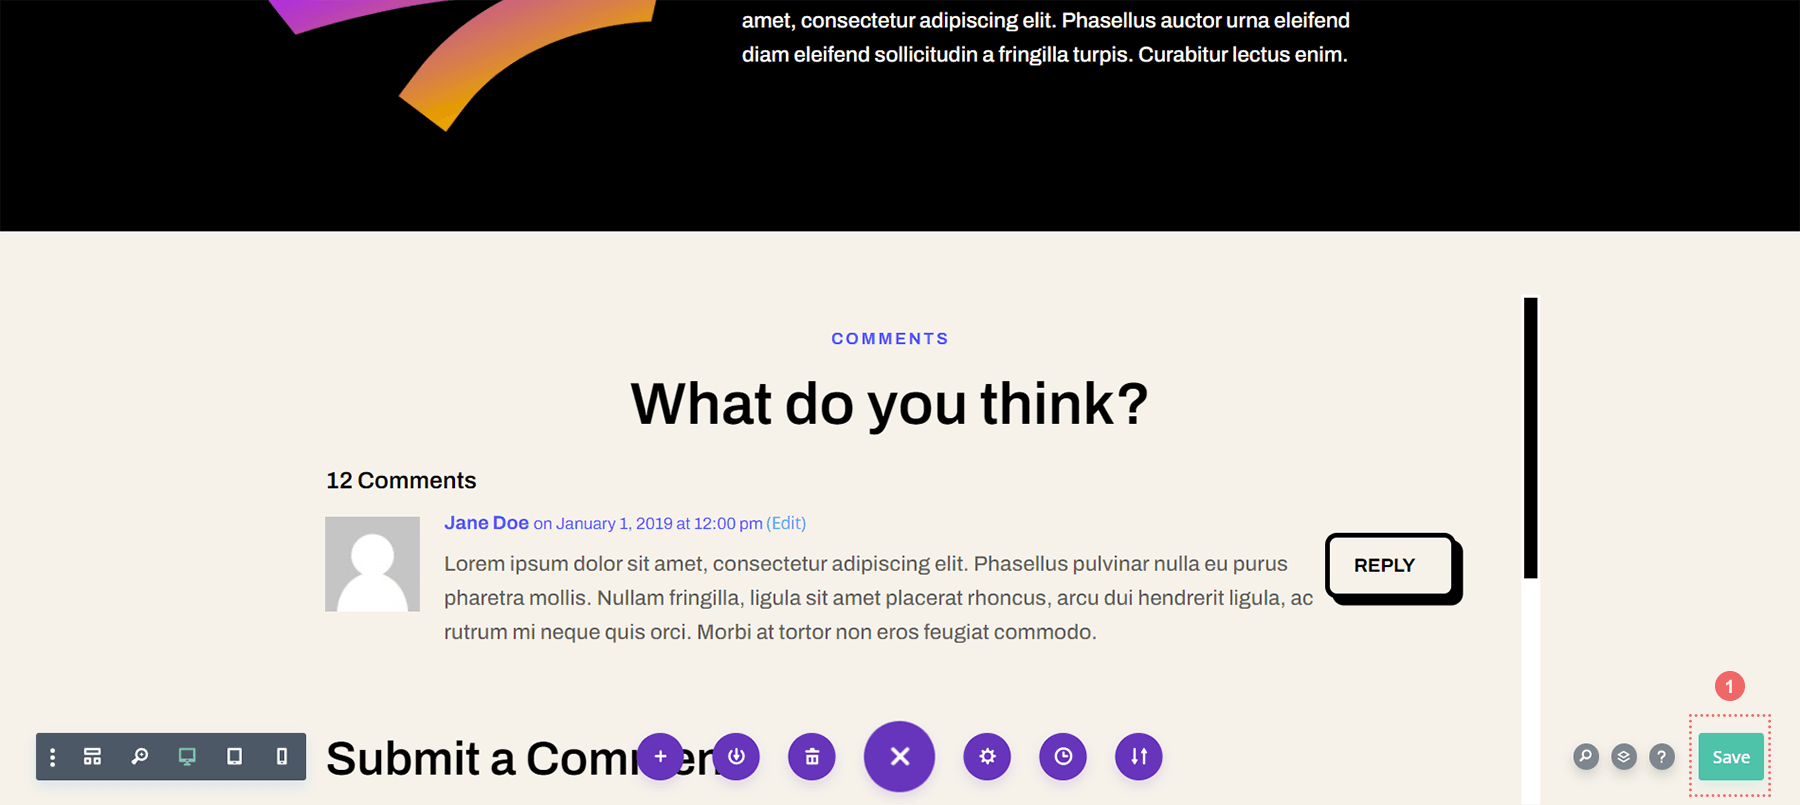
Once your settings are saved, visit your newly updated comments section on your blog!
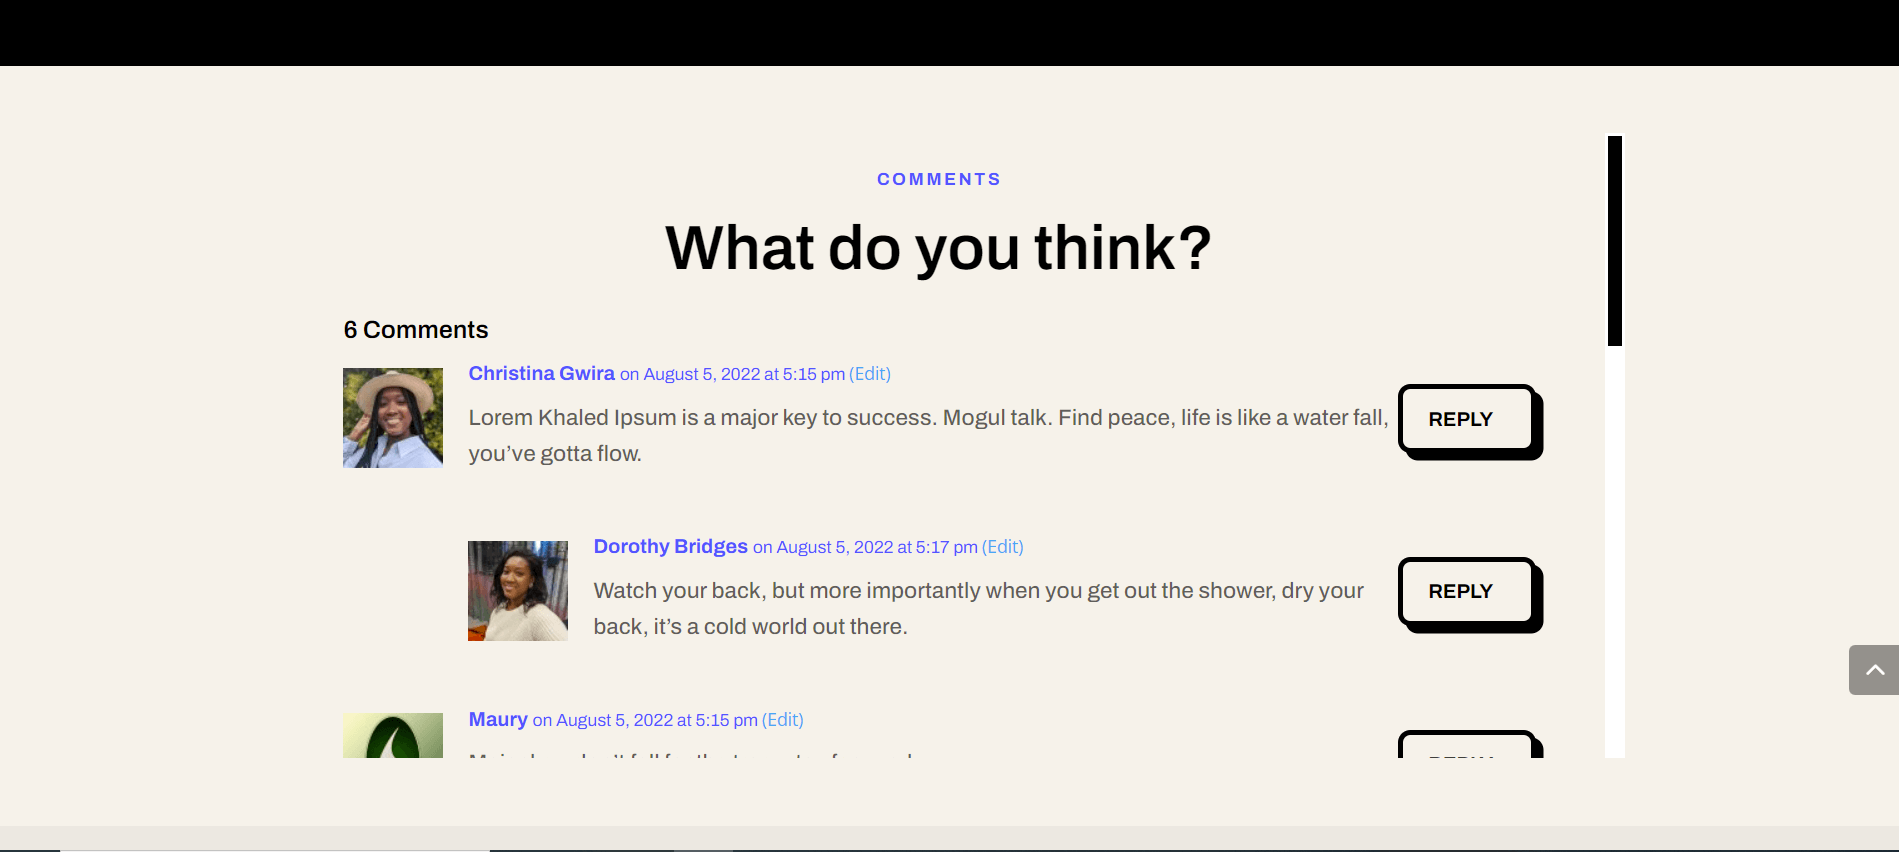
Scrollable Comments in Divi: The Conclusion
Creating a scroll container for Your Divi Comments Module helps your users to have a better experience with your comments section. User engagement is an important factor to nurture within your blog. By making your Comments Module scrollable, you are providing ease of use for your readers when they come to enjoy your various blog posts.



Very cool, but in your screenshots this has also added a horizontal scroll — presumably due to the padding?
I believe once the tutorial is complete and one moves to the frontend (outside of the builder), only the vertical scrollbar appears. However, I think that with the horizontal overflow settings, if the horizontal bar does appear, it could be hidden.
Dope cool feature. Divi is so amazing
Yup, Divi is pretty awesome 🙂