Every week, we provide you with new and free Divi layout packs which you can use for your next project. For one of the layout packs, we also share a use case that’ll help you take your website to the next level.
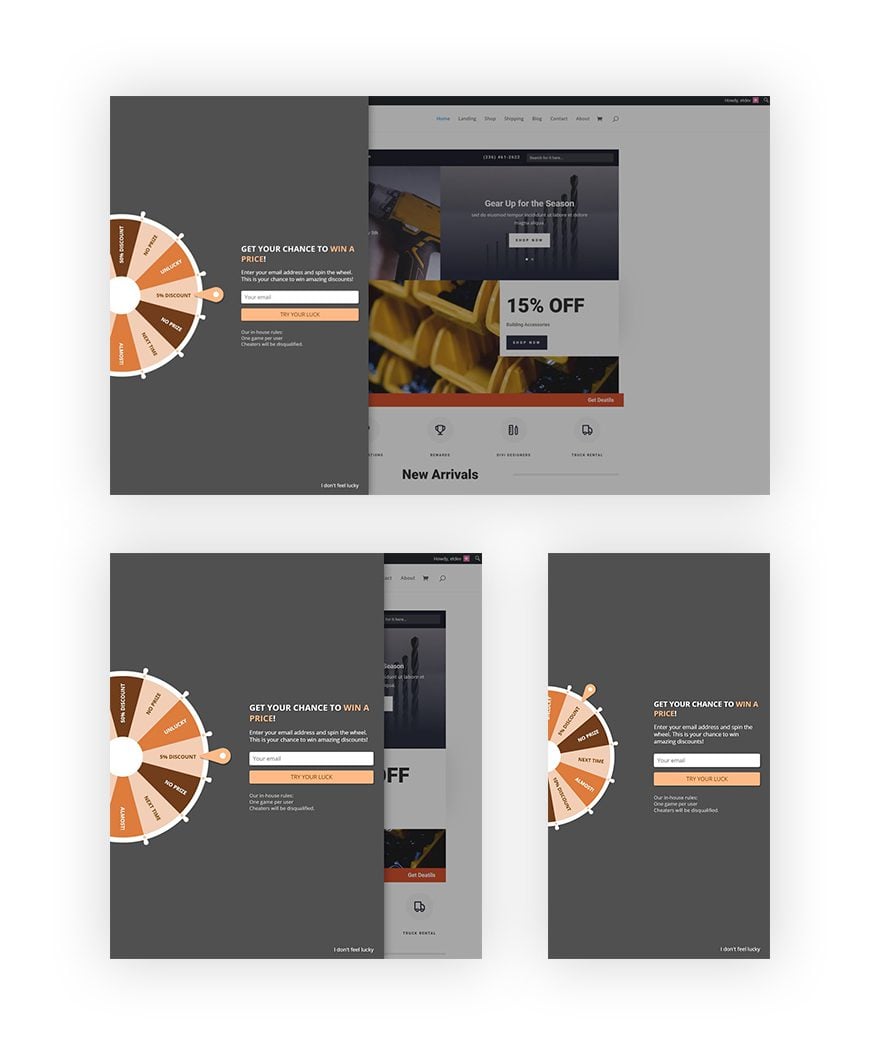
This week, as part of our ongoing Divi design initiative, we’re going to show you how to create WooCommerce lucky wheel optin forms with Divi and the WP Optin Wheel plugin. This tutorial will hopefully help you boost optin form conversion rates. The lucky wheel optin form’s gamification feature will allow you to interact with visitors and reward them with a discount code that they can use on their online purchases.
Let’s get to it!
Preview
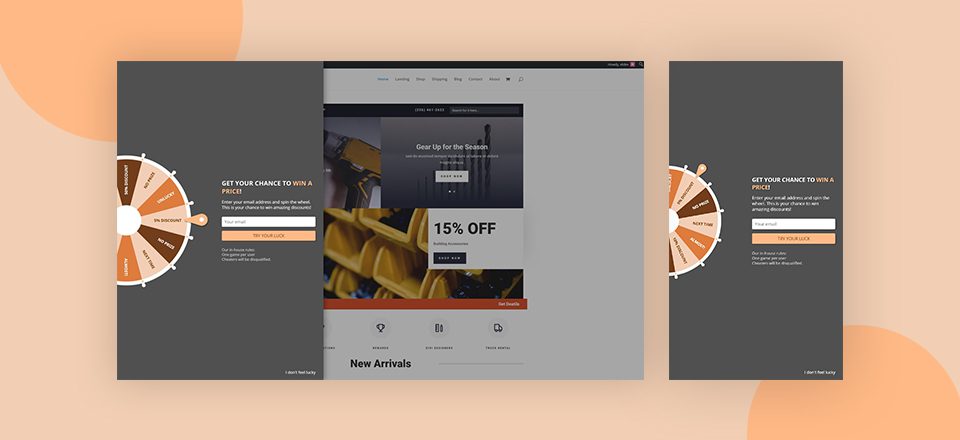
Before we dive into the tutorial, let’s take a quick look at the outcome on different screen sizes.
Install WooCommerce
Search for Plugin & Install
The first thing you will need to do if you haven’t already is to install WooCommerce on your WordPress website. We’re also assuming that you have set up the Hardware Store Layout Pack on the Divi website you’re working on.
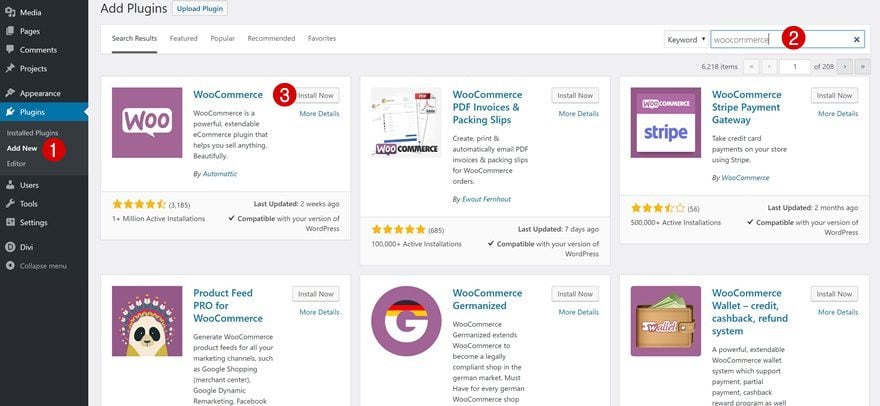
Go to your plugins and search for WooCommerce. Once you find it, click on the ‘Install Now’ button.
Activate
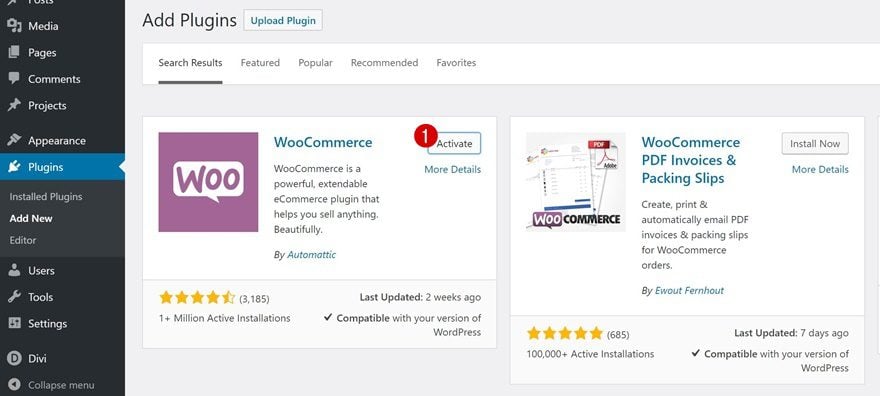
Make sure you activate the WooCommerce plugin right away.
Setup WooCommerce
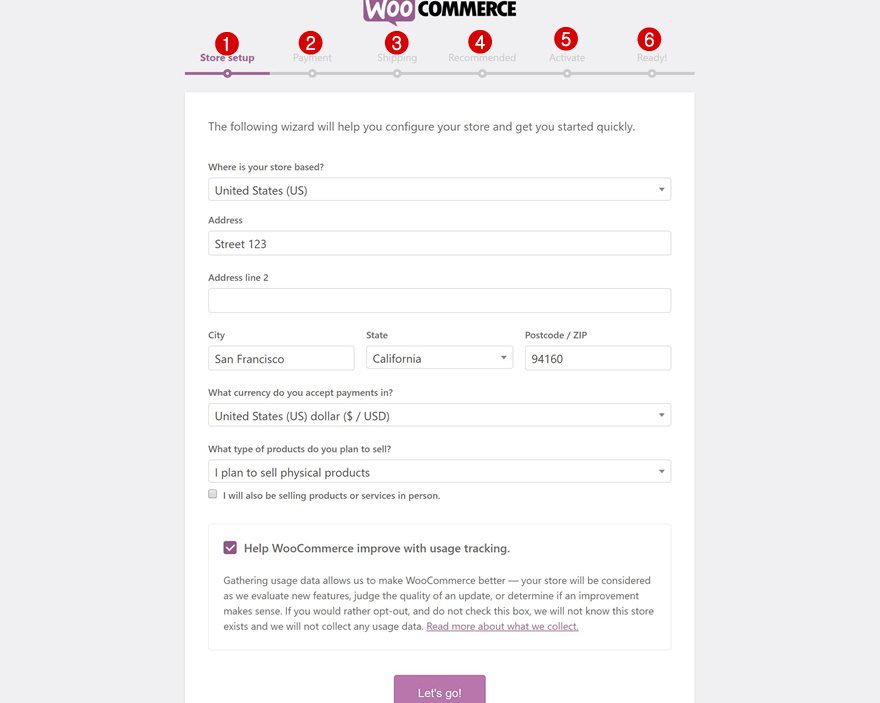
Then, WooCommerce will automatically redirect you to its setup form. Here, you’ll have to fill out all the details to prepare your store to go live. Once you go through this process, all of the needed WooCommerce pages will automatically be added to your website.
Install the WP Optin Wheel Plugin
Search for Plugin & Install
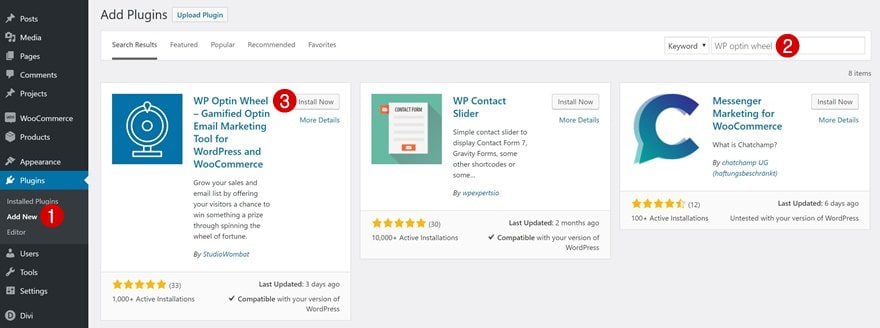
To create the lucky wheel optin form, we’re going to use a free gamification plugin called WP Optin Wheel. Go back to your plugins and search for the WP Optin Wheel plugin. Then, click on the ‘Install Now’ button.
Activate
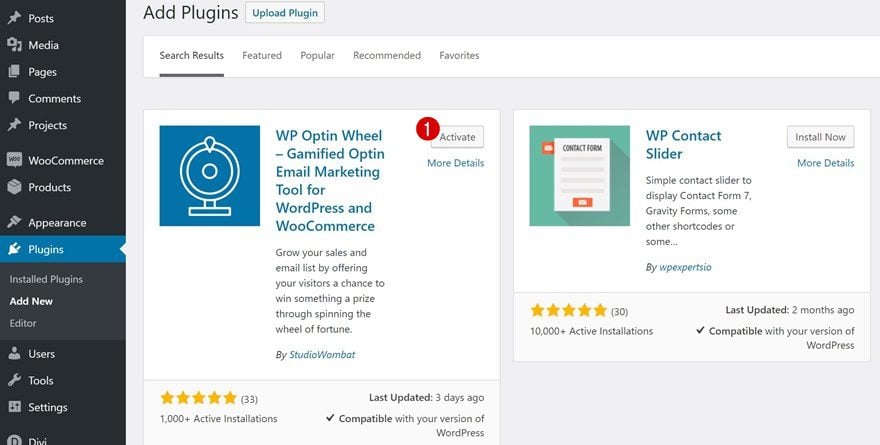
Continue by activating the plugin.
Add Products to WooCommerce
Add New Product
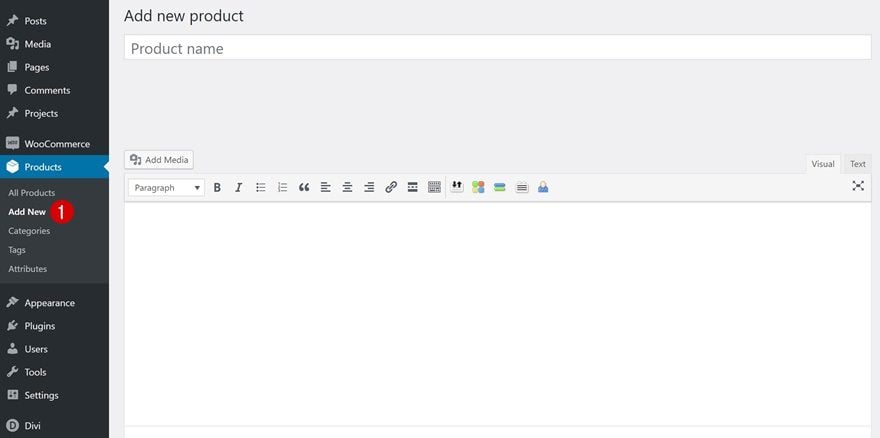
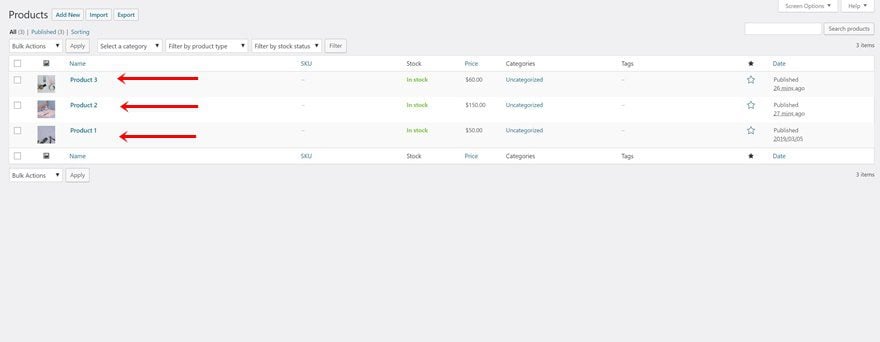
If you already run an eCommerce website, you can skip this part. If you, however, you are just trying things out, we recommend you add some products to your WooCommerce plugin. This will help you test the lucky wheel optin form afterward. To add a new product, go to Products > Add New.
Add Product Details
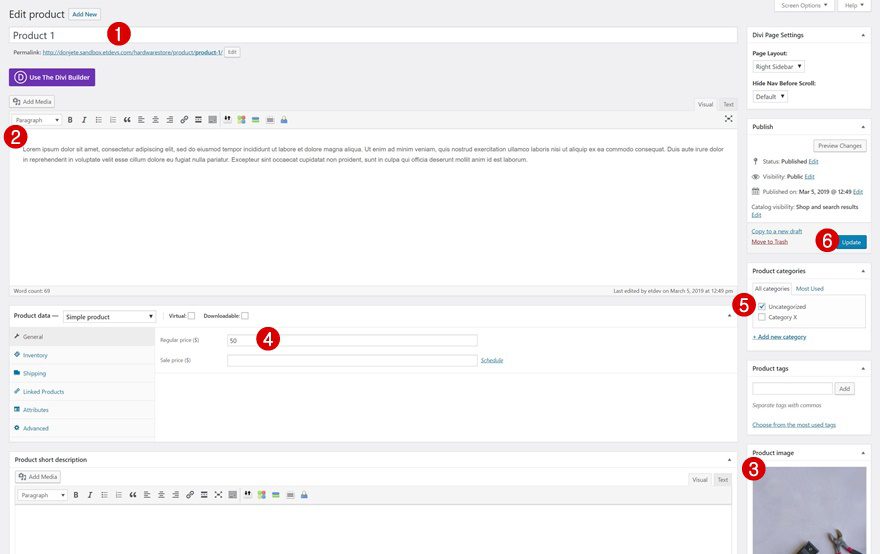
Fill out all the product details. This includes, but isn’t limited to, a product name, description, featured image, price and category. Publish the product page once you’re done adding these details.
Repeat for Each Product
Repeat the same step for each one of the products you want to add to your website.
Add Coupons to WooCommerce
Go to Coupons
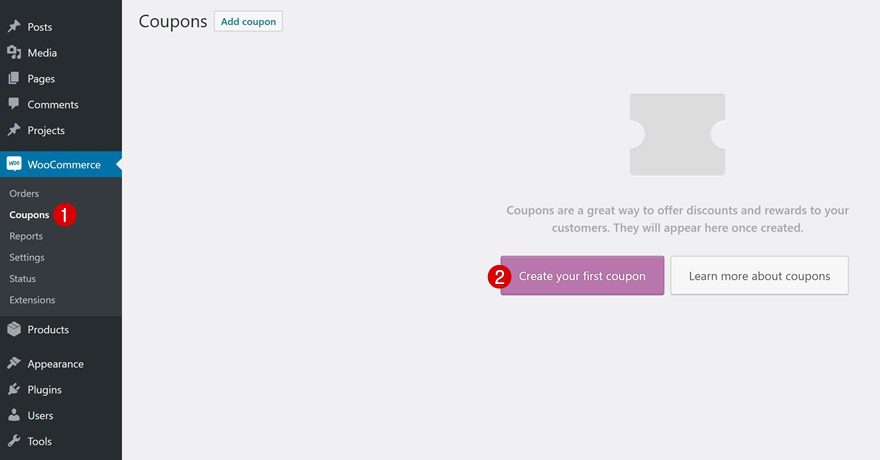
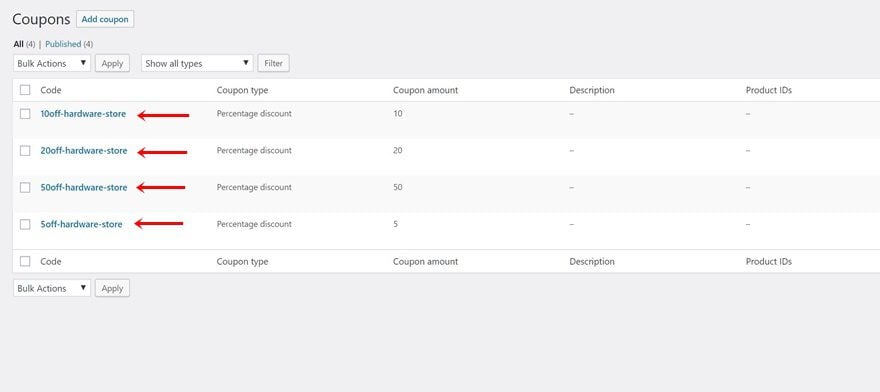
Now it’s time to add coupons. Later on this post, we’ll use the coupons we create in the lucky wheel optin form. Go to your WordPress Dashboard > WooCommerce > Coupons. Once you’re there, go ahead and start creating your first coupon.
Add Coupon #1: 5% OFF
General
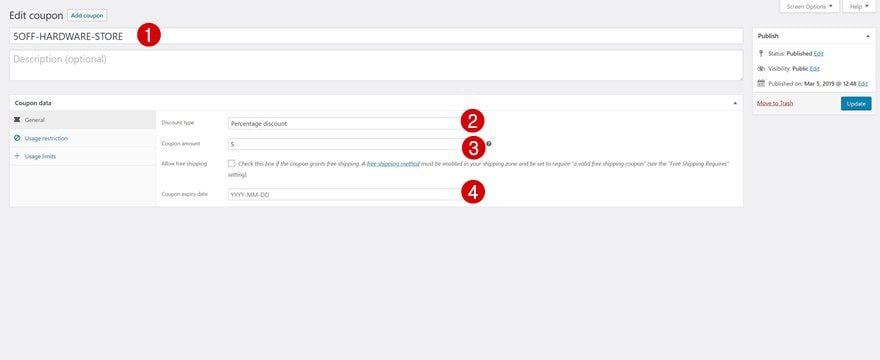
In the lucky wheel of 12 slices, you can decide how many slices include a prize. You can, for instance, offer 4 prizes, and create a different coupon for each one of them. You can also use a coupon for multiple spots on the wheel. Once you’ve created your first coupon, go ahead and enter the coupon code at the top of the page. Then, modify the general settings:
- Discount Type: Percentage Discount
- Coupon Amount: 5
- Coupon Expiry Date: Enter the date of choice
Usage Restrictions
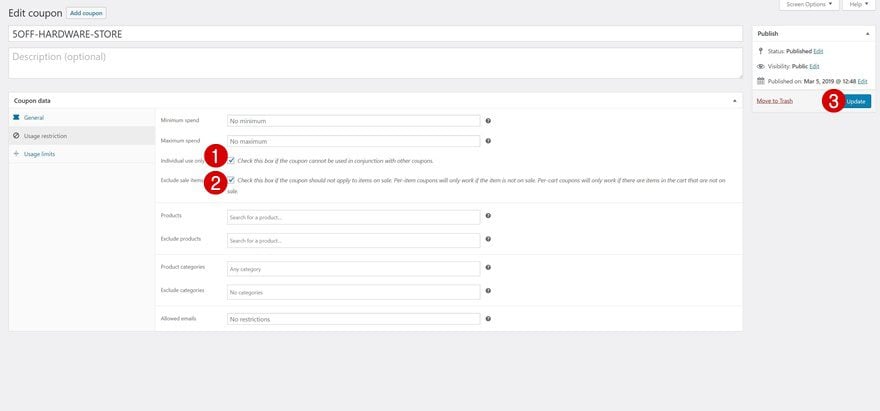
Continue by switching over to the usage restriction tabs. Here, you can decide if there’s a minimum and maximum spend linked to the coupon. You can also tick off the following boxes:
- Check this box if the coupon cannot be used in conjunction with other coupons.
- Check this box if the coupon should not apply to items on sale. Per-item coupons will only work if the item is not on sale. Per-cart coupons will only work if there are items in the cart that are not on sale.
Repeat Steps for 3 Other Coupons
Create as many coupons as you want by following the same steps that were mentioned above. You’re not limited to offering a percentage discount. You can also create a coupon that offers a fixed cart or product discount and include it in the lucky wheel.
Create Lucky Wheel Optin Form
Go to Plugin Settings
Now that we’ve gone through all the necessary steps to make the lucky wheel optin form work, we can start creating one! Go to your WordPress Dashboard > WP Optin Wheel.

Add MailChimp API Key
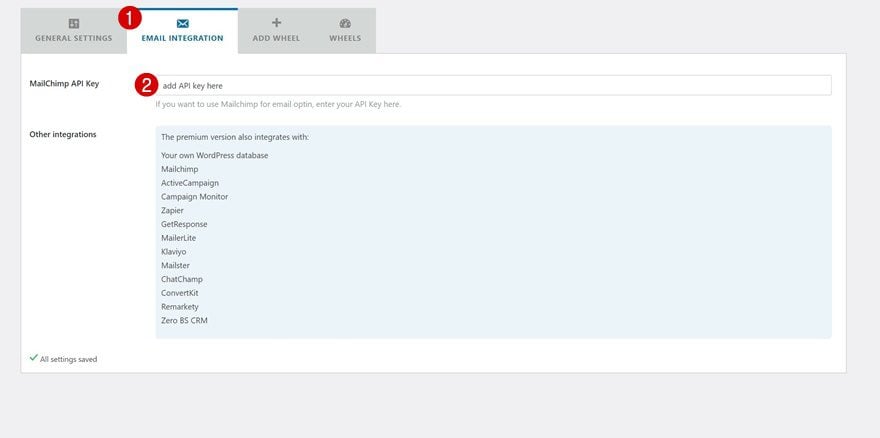
Before you can start creating a lucky wheel, you’ll have to add your MailChimp API key. The free version of the WP Wheel Optin plugin only offers integration with MailChimp. If you want to link the lucky wheel to another provider, you’ll have to switch over to the premium version.
Create New Wheel
Choose Theme
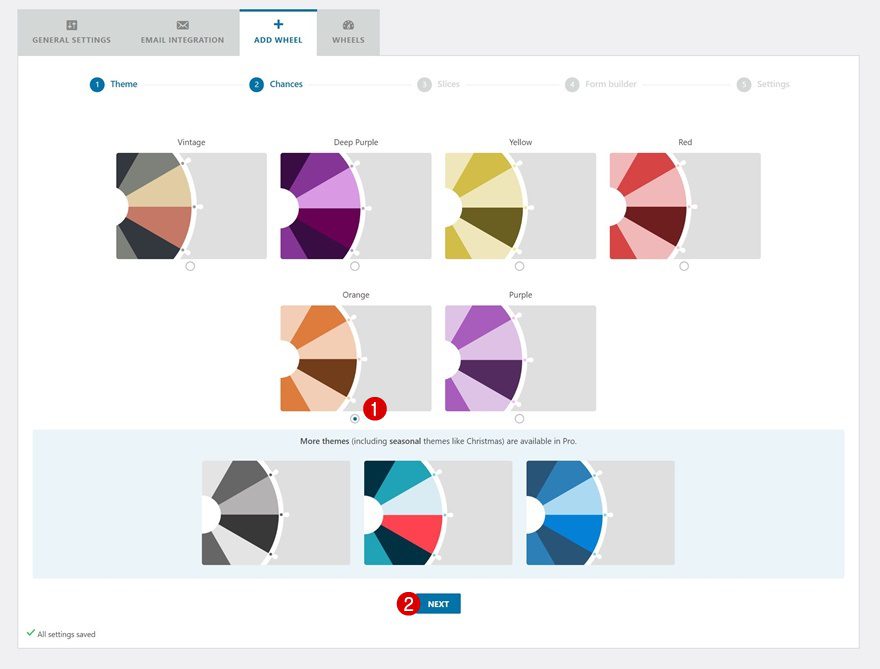
Let’s start creating the wheel! Choose a color palette of your choice. For this tutorial, we’re picking the orange one since it goes well with the Hardware Store Layout Pack‘s color palette.
Setup Chances
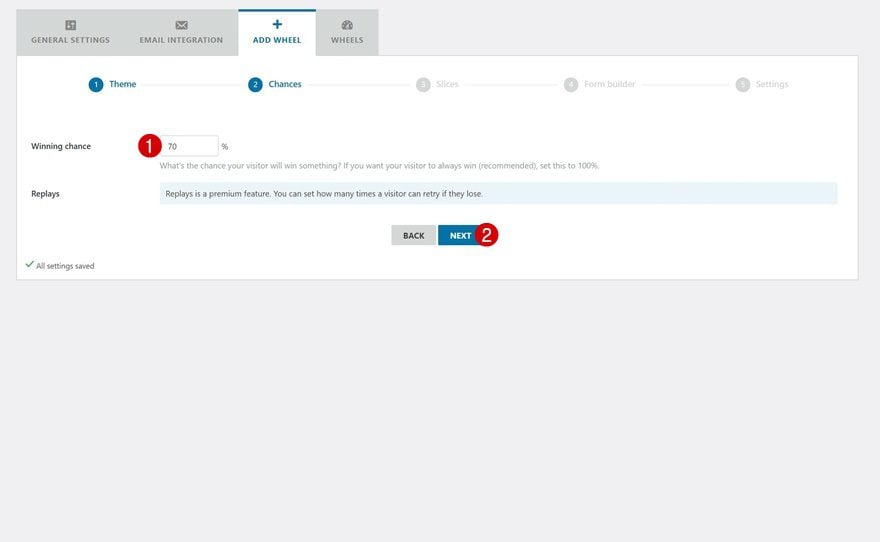
The next step in creating your lucky wheel optin form is choosing a winning change percentage. This percentage indicates how often people win something when spinning the wheel. In this case, every visitor that spins the wheel has a 70% chance of winning a coupon code.
Setup Slices
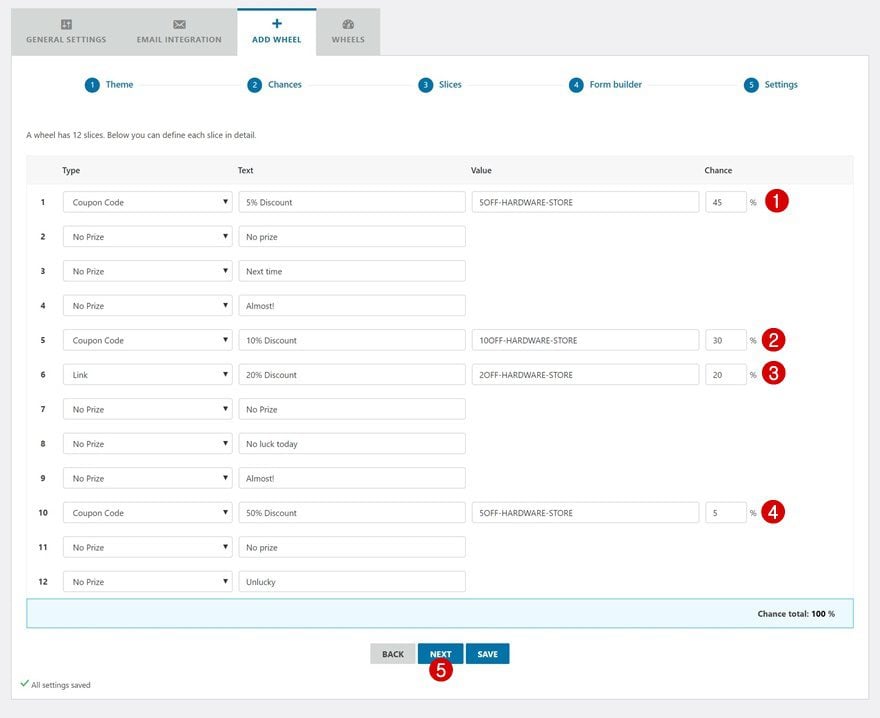
Continue by setting up the 12 different slices. You can dedicate each one of the slices to one of three options:
- No Prize: visitor doesn’t win anything
- Coupon Code: visitor wins a coupon code
- Link: visitors win an ebook, for instance
In this example, we’re using 4 of the 12 slices to add a coupon code. We’re also settings up the chances for each one of these slices individually.
Setup Form Builder
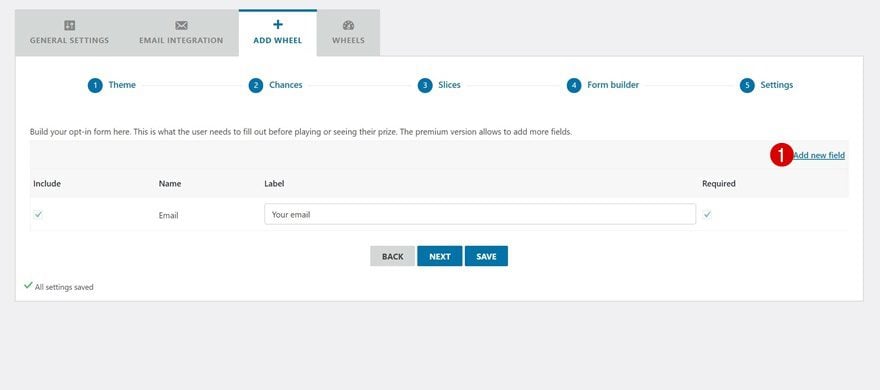
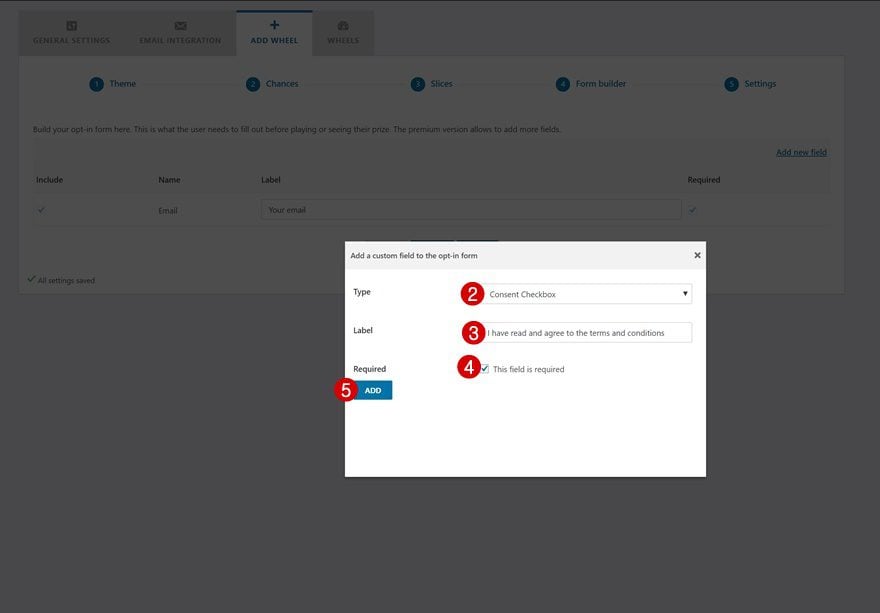
The next step helps you build the optin form itself. You’ll notice that there’s already an email field there. The only other type of field you can add to the optin form is a checkbox. They’ve specifically added this type of field to make the form GDPR compliant.
Content Settings
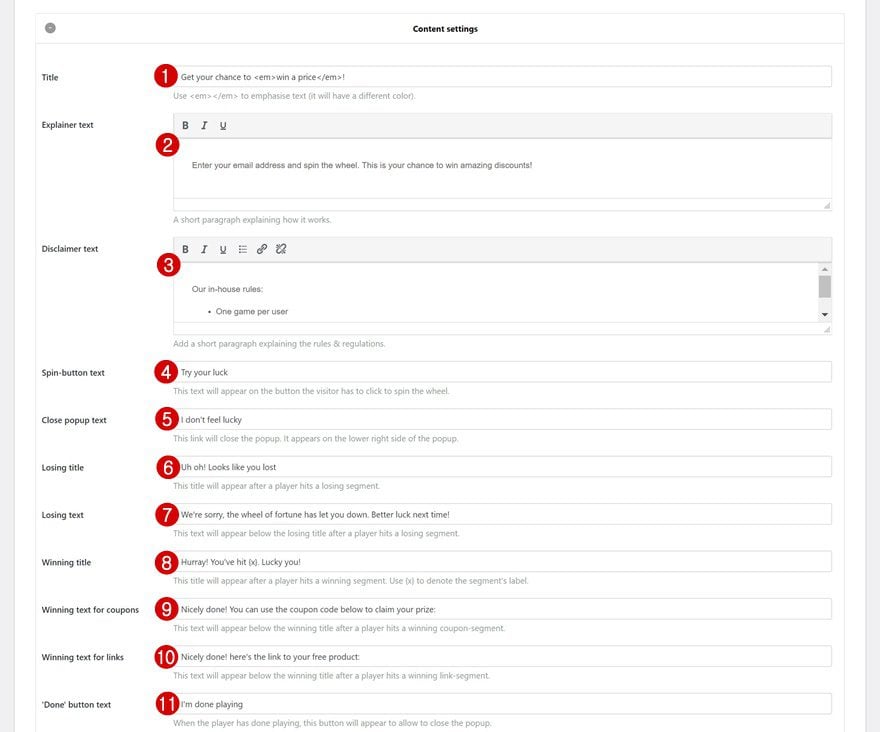
Moving on, you’ll be able to set up the lucky wheel optin form’s written content. Go ahead and change all the content to make it match with your website.
Design Settings
Open the design settings next and choose ‘No pattern’ for the background pattern option.

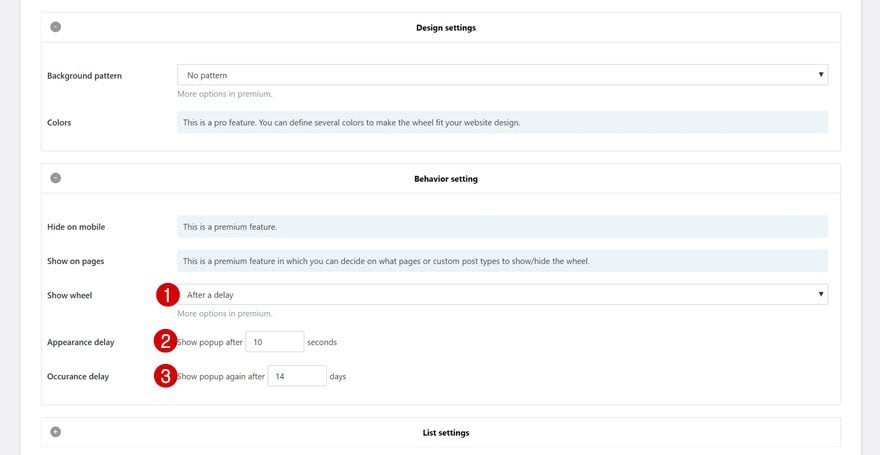
Behavior Settings
You also get to choose when the lucky wheel optin form shows up in the behavior settings.
GDPR
Last but not least, you can make sure that the data visitors share doesn’t get saved unless they’ve ticked off the different boxes in your optin form and you’re done! Save the lucky wheel optin form and go to your website to test it out.

Preview
Now that we’ve gone through all the steps, let’s take a final look at the outcome on different screen sizes.

Final Thoughts
This tutorial is part of our ongoing Divi design initiative where we try to put something extra into your toolbox each and every week. We hope this tutorial will help you build your email lists faster and in an interactive way. If you have any questions or suggestions, make sure you leave a comment in the comment section below!




This is such a cool marketing tool, it makes it interesting for the visitors.
Thanks for letting us know about this.
very nice article, i love this informational content. I am using kindom theme for my client and working perfectly.
I love these informational posts helping us wherever we get stuck. We use the themes by elegantthemes for our clients. I have loved these as a developer and our clients have loved them too.
Great interctive tutorial for Divi. I.m going to try it. Thanks Donjete for so good post.
I’m not using woocommerce on the site I’d like to have gamification opt-in. Is there a way to just issue them a coupon code to be used elsewhere?
Hi Laila,
The plugin doesn’t require WooCommerce. It can be used without it as well :-).
Awesome – thankyou. Just want to take this opportunity to say – I love working with Divi. Thanks for all the ‘amazingness’.
Thank You for this great article. There is lot to learn from it. Thanks once again
This is strange…today I was just looking at this plugin from another site. Thanks for the info! – Mark
Oooo la la! This, I like! Thank you very much for this tutorial! More, please!
Very cool! Hope to see more like this.