If you are building a website in the cryptocurrency space, you need a way to showcase real-time quotes on many different cryptocurrencies (or coins). If you have ever personally invested in (or traded) digital currency like Bitcoin, you may be familiar with the obsession of checking those real-time quote updates (I know I have). So whether you are are running a blog on cryptocurrency or a full-fledged online exchange, it’s always a good idea to keep that data visible to users.
In this use case tutorial, I’m going to show you an easy way to add real-time cryptocurrency data to your Divi site. To do this, I’ll be using the Premium Cryptocurrency Widgets plugin to embed real-time coin data using customizable widget shortcodes. I’ll also show you a great way to use these shortcodes with Divi to match the design of the Cryptocurrency Layout Pack.
Let’s get started.
- 1 Sneak Peak
- 2 What You Need for This Tutorial
- 3 Basics on How the Plugin Works
- 4 5 Widgets for Displaying Data for a Specific Cryptocurrency
- 5 5 Widgets for Displaying Data for a Multiple Cryptocurrencies
- 6 Adding Cryptocurrency Widgets to Divi’s Cryptocurrency Layout Pack
- 7 Adding Three Real-Time Quote Cards with Buy Buttons to Your Landing Page
- 8 Changing colors with custom CSS
- 9 Creating a Quote Table on The Landing Page
- 10 Adding Links to your Cryptocurrency Pages in Your Tables
- 11 Responsive?
- 12 Final Thoughts
Sneak Peak
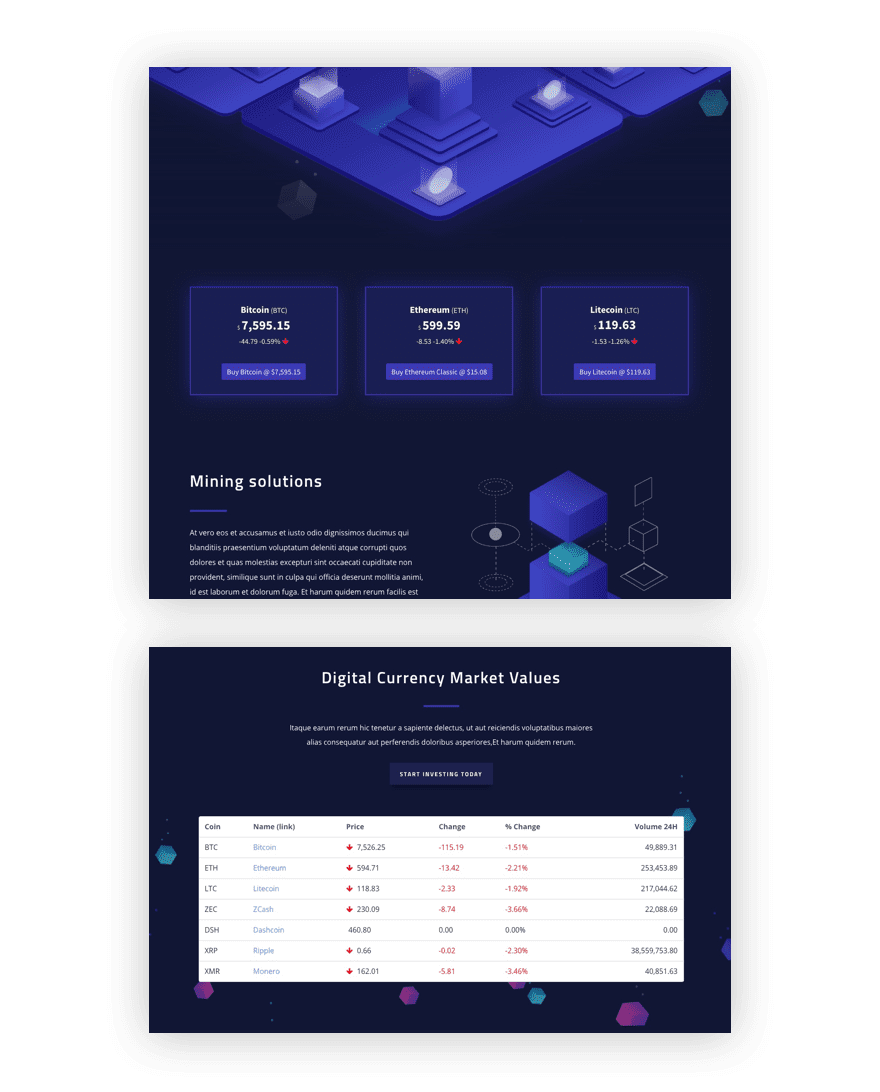
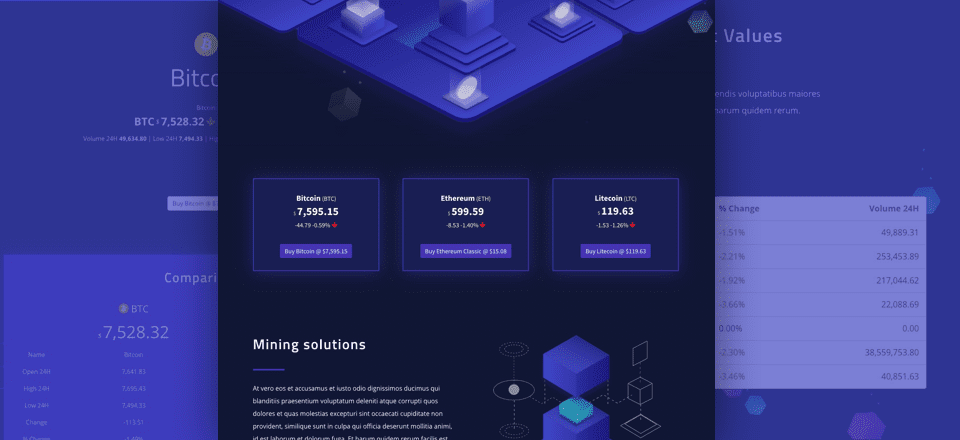
Here are a few snapshots of what I’m going to cover in this tutorial:
What You Need for This Tutorial
For this use case tutorial, you will need the following:
- Divi Theme (installed and active)
- Premium Cryptocurrency Widgets plugin (installed and active)
- Cryptocurrency Layout Pack
Basics on How the Plugin Works
The Premium Cryptocurrency Widgets plugin is surprisingly easy to use without much setup at all. Basically, all you need to do is decide on the widget you want, pick a theme and color for the widget, and use the shortcode it generates to display it anywhere on your site. You can view demos of all 10 widgets on their website to get an idea of how they work. But if you have the plugin installed, you will be able to see a live preview of your widget in real-time while customizing it in the WordPress Dashboard.
5 Widgets for Displaying Data for a Specific Cryptocurrency
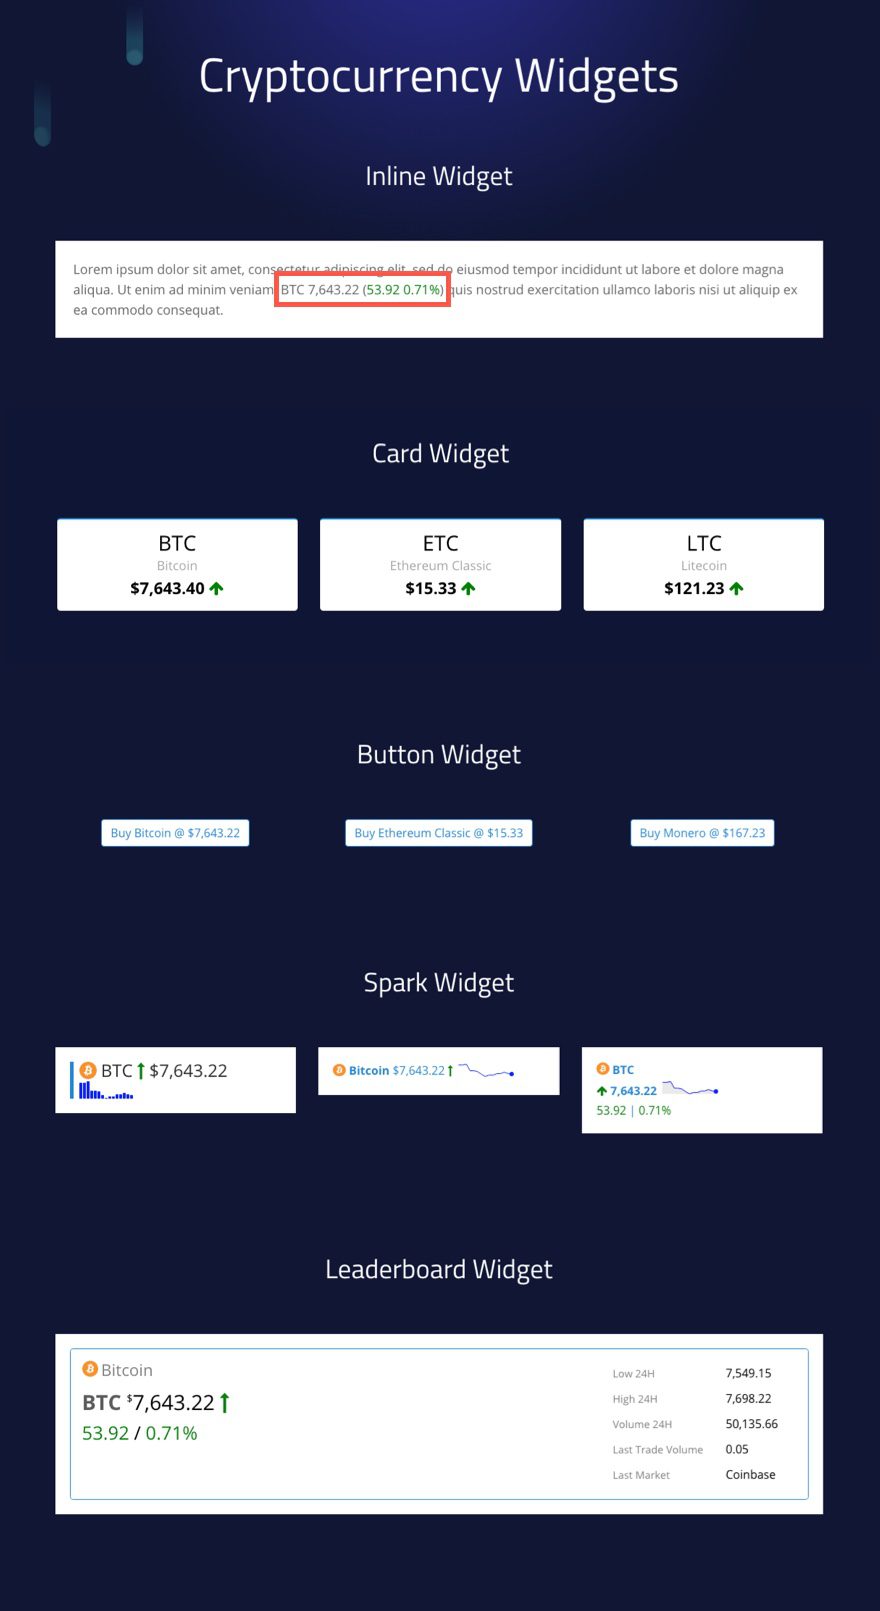
There are 5 widgets dedicated to displaying data for a specific cryptocurrency. These include the following:
- Inline – for displaying quotes within a line of text on your page/post.
- Button – for displaying quotes within button text to create a call to action that can be redirected to any url.
- Card – for displaying live quotes of a specific cryptocurrency in a card format
- Spark – for displaying live quotes with accompanying spark lines or bars to help users visualize price changes.
- Leaderboard – for displaying live quotes of a specific cryptocurrency (with a few additional metrics) in your page headers
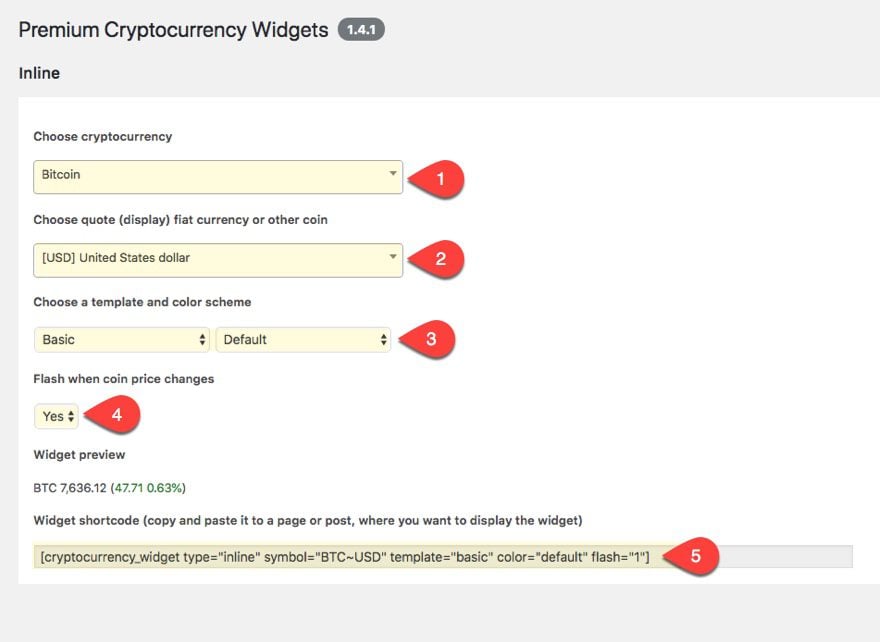
Each widget is customizable within the plugin settings. The options allow you to choose the following:
- A Specific Cryptocurrency
- A fiat currency or coin you want to quote
- A template and color scheme for the widget
- A flash effect when the price changes.
Once you have finished selecting your options, a widget shortcode will be automatically generated so you copy and paste it to your site (or text module).
5 Widgets for Displaying Data for a Multiple Cryptocurrencies
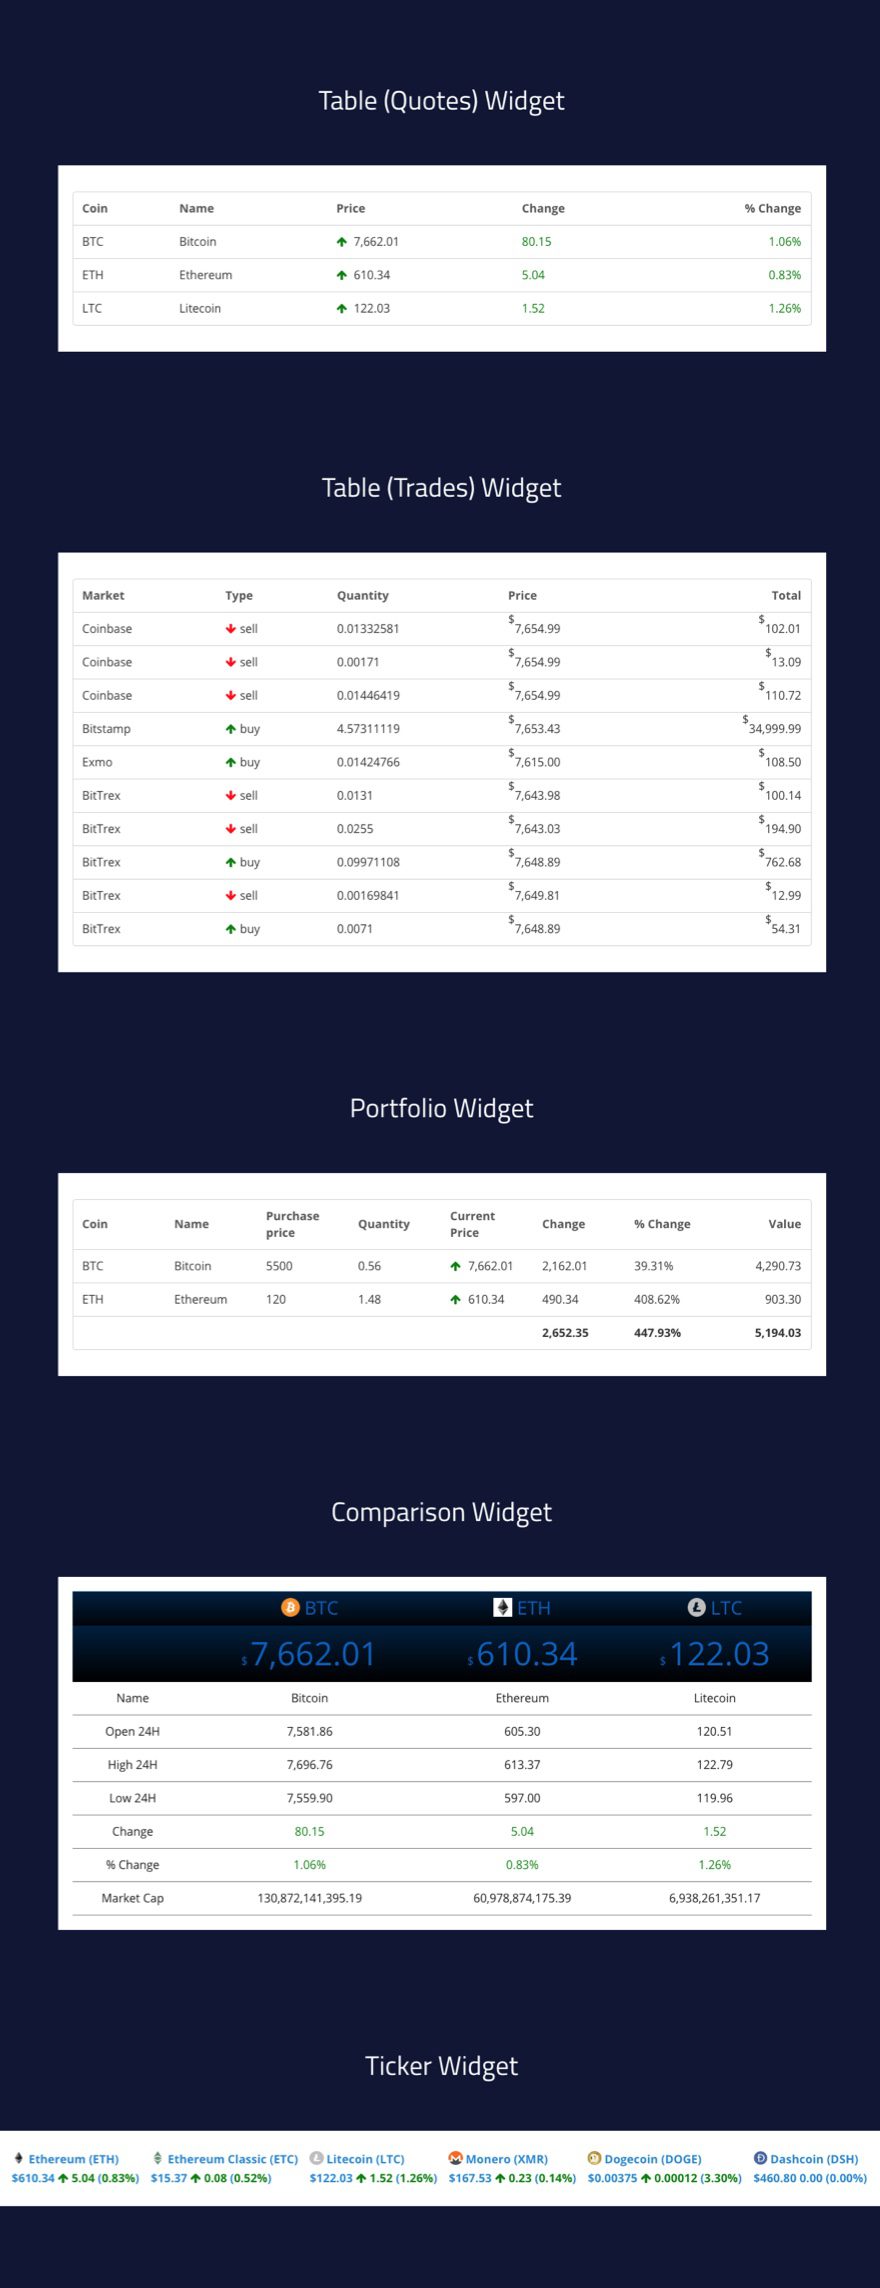
There are 5 widgets dedicated to displaying data for a specific cryptocurrency. These include the following:
- Table (Quotes) – for displaying quotes for multiple cryptocurrencies at the same time.
- Table (Trades) – for displaying real-time trade market updates for multiple cryptocurrencies.
- Portfolio – useful for showing how coin values change overtime for your current portfolio.
- Comparison – for comparing quotes of multiple cryptocurrencies side by side.
- Ticker – for displaying a scrolling ticker of the live prices of multiple cryptocurrencies.
The options for customizing will change slightly to allow for the selection of multiple currencies and custom fields to be displayed.
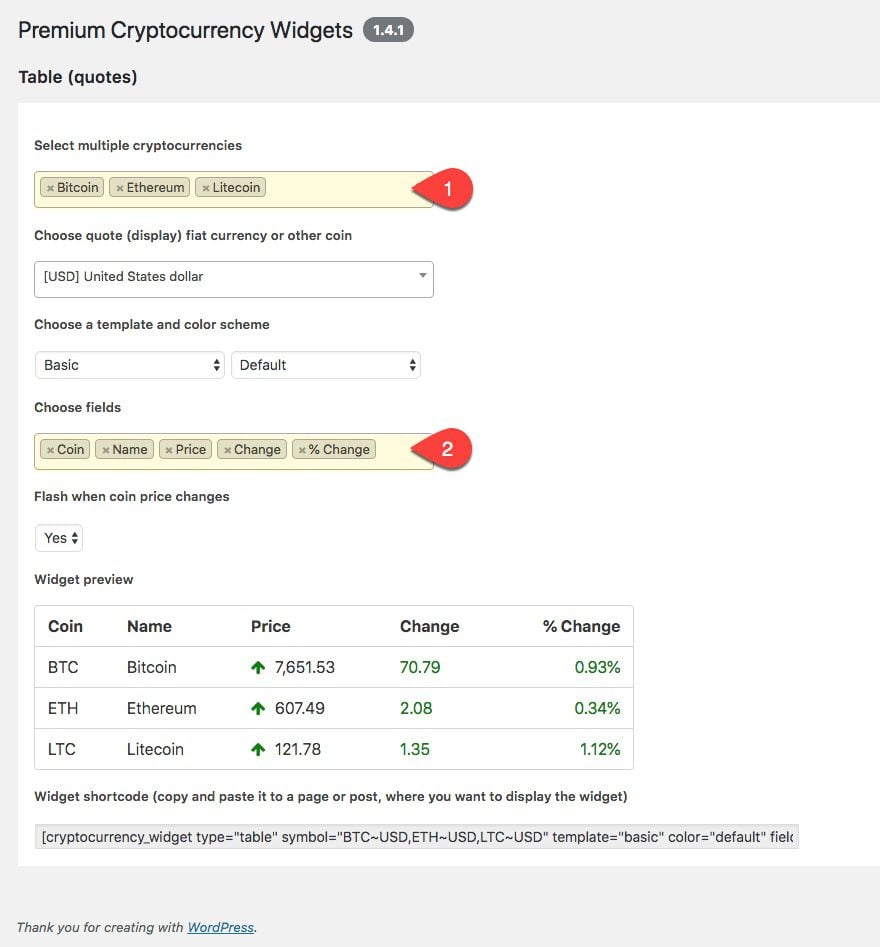
Most of these widgets will share the following options:
- Select multiple cryptocurrencies
- Choose quote (display) fiat currency or other coin
- Choose a template and color scheme
- Choose fields
- Flash when coin changes
The portfolio widget will have addition options to set a purchase price and quantity for each coin. The ticker widget will have addition options to set scrolling speed and direction. And the button widget will have additional options to enter a custom URL redirect and customize the button text with custom variables.
Adding Cryptocurrency Widgets to Divi’s Cryptocurrency Layout Pack
You can use these shortcodes on any wordpress theme, but one of the benefits of using the Divi theme is that you can easily add a shortcode to a module within the visual builder. Plus, sometimes you can use the module settings to override the plugin css used to style the shortcode content. This isn’t always the case (especially when the shortcode is displaying tables), but it is worth exploring in order to avoid additional custom CSS later on. I’ll address a few of these Divi “shortcut style overrides” in the examples below.
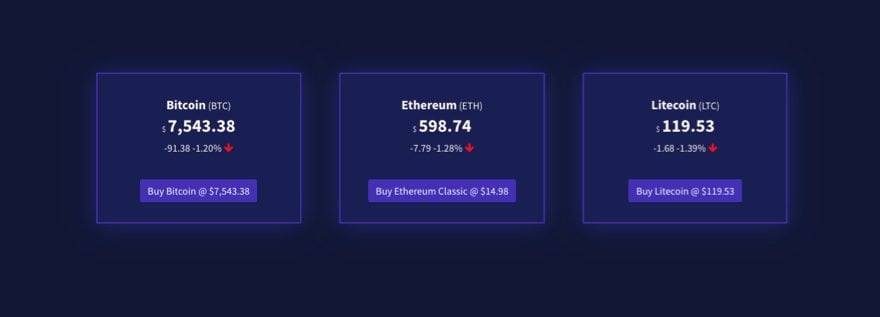
For this first example, I’m going to create three cards each with a quote for a specific cryptocurrency and a buy button under each (something similar to Coinbase). This setup would work well on the cryptocurrency landing page in order to feature a few popular coins for purchase. The trick is getting design to match your layout.
Let’s get started.
Create a new page by navigating to Pages > Add New. Give your page a title and deploy the visual builder. Open the settings bar at the bottom of the page and click the Add From Library button. Then find the Cryptocurrency Layout Pack and select it. Then click to use the Landing Page template.
Once the layout is loaded on the page, find and duplicate the section containing the three column row featuring service. This will serve as a great backdrop (already designed) for our three cards.
Now we need to go generate our shortcode for our first card. In a separate window, navigate to Cryptocurrency Widgets > Card. Update the options as follows:
Cryptocurrency: Bitcoin (to select a different coin, click the dropdown and start typing the name)
Fiat Currency or other coin: USD
Template: Color Background
Color Scheme: Navy
Flash: YES
This should generate the following shortcode:
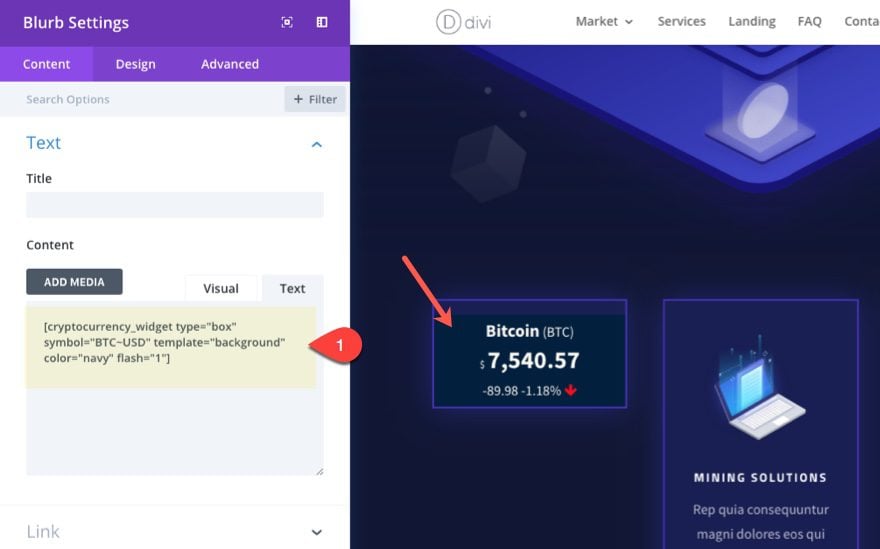
[cryptocurrency_widget type="box" symbol="BTC-USD" template="background" color="navy" flash="1"]
Now copy that shortcode to your clipboard and go back to the landing page. Open the blurb module settings for the blurb in the first column. Delete the title and image currently being used.
And delete the content there currently and paste in your shortcode.
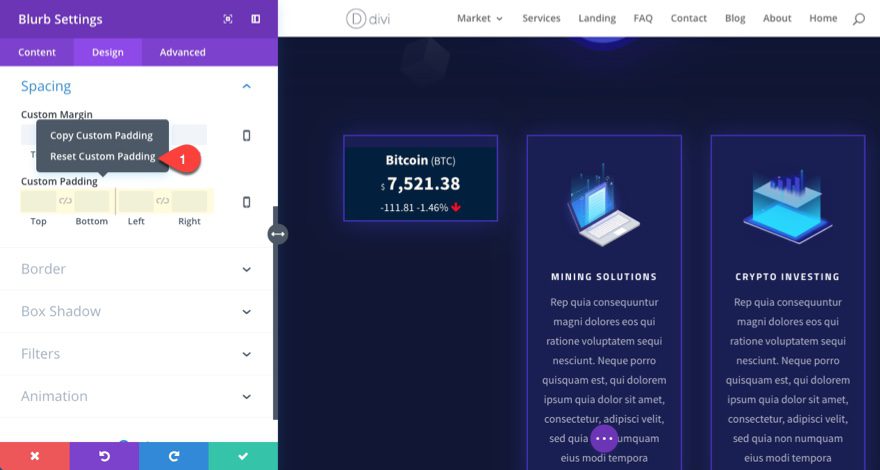
Next go to the design settings and restore the padding back to its default by right clicking on padding and clicking Reset Custom Padding.
Save Settings.
Tip: You can also change the Body Font and Line Height to further customize the text displayed in the widget.
Now delete the two modules in the remaining columns and copy and paste the module you just created to the remaining columns. Now all you need to do is repeat the process of creating new shortcodes and pasting them in the content area of the modules you just copied over. The shortcode options should remain the same except for the name of the cryptocurrency you want to display.
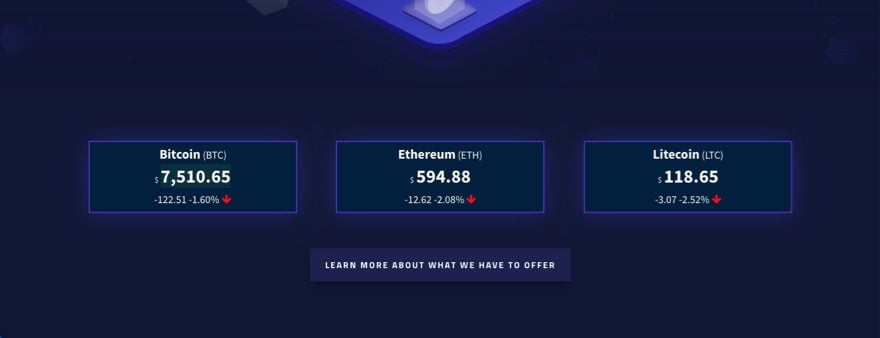
Here is what it should look like so far.
To create the buy buttons under each of our cards, first we need to create our first button shortcode. Navigate to Cryptocurrency Widgets > Button. Then choose the options for your button.
Notice, the default URL redirectly to Changelly to complete the process of purchasing. But URL can be set to anything you want. If you are wanting to offer the capability to buy/sell cryptocurrency on your own site, you would just redirect them to a registration process or check out page for that specific coin. You could also redirect them to another third part site to complete the purchase.
Also, the text variables available allow you to embed any real-time metric to be displayed on your button.
For this example, I’m going to update the following:
Cryptocurrency: Bitcoin
Template: Basic
Color Scheme: Navy
The rest I will leave as default.
This should generate the following shortcode.
[cryptocurrency_widget type="button" symbol="BTC~USD" template="color" color="navy" url="https://changelly.com/?ref_id=7c53196afedb" target="_blank" text="Buy {NAME} @ {TOSYMBOLSIGN}{PRICE}"]
Now copy this to your clipboard and return to edit your page. We will need to add a text module under the blurb module in the first column. Then enter your shortcode in the content box.
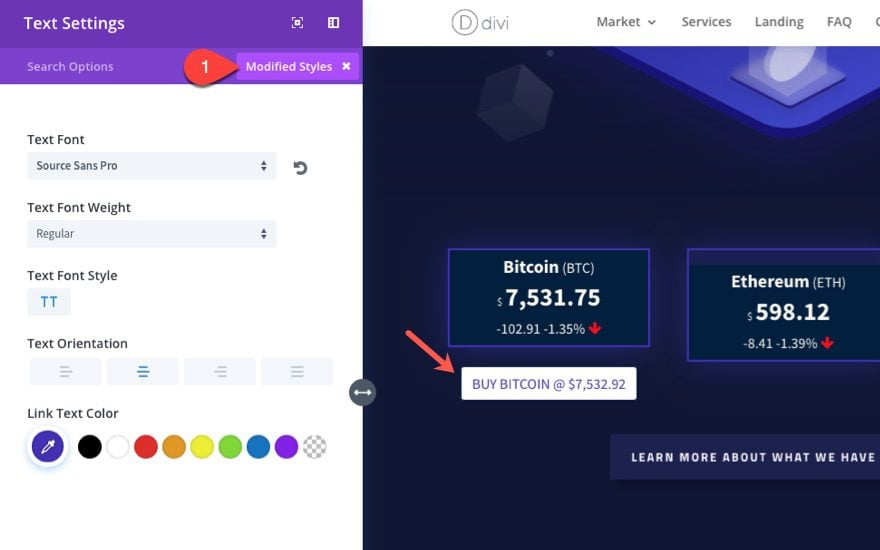
Update the following design settings in the design tab:
Text Font: Source Sans Pro (to match the layout font)
Text Font Style: TT
Text Orientation: center (this will center the button)
Link Text Color: #4328b7 (to match the purple in the layout)
For a quick check to see if you have everything, click the filter button at the top right of your settings box and click to show only modified styles. This is what you should see.
Now copy the text module with your new shortcode under each of the remaining blurb modules in your row. Then repeat the process of created a new shortcode for each of your cryptocurrency buttons.
Delete the row directly under the current row to clean things up.
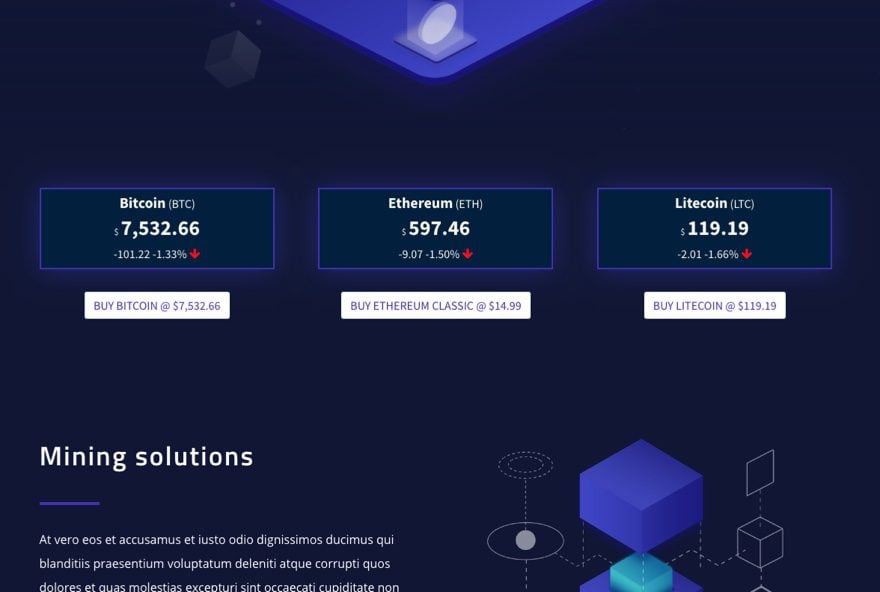
Here is the final result.
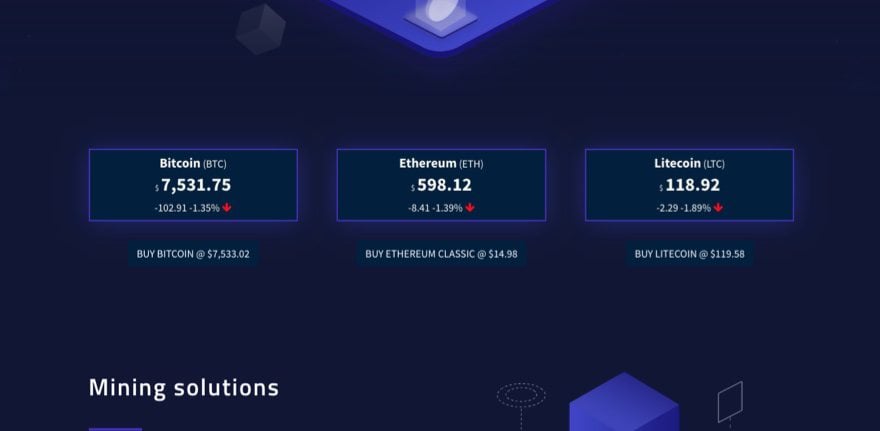
If you don’t like the white buttons, you can always choose the color template with the navy color scheme. Then reset your link color for each module back to the default white color. You will get the final results:
Changing colors with custom CSS
If you are frustrated with the built in color schemes, here are few css snippets to get the colors you want:
To get rid of the background color of the cards allow the module background color to show through (this will match the layout better), enter the following custom CSS in the Theme Customizer:
.pcw-box.pcw-background.pcw-ct-navy {
    background-color: transparent !important;
}
This will replace the color of the Navy color scheme on your card so make sure that color scheme is selected to get the CSS override.
To change the background color of your button to match the light purple button color on your layout, add the following Custom CSS:
.pcw-button.pcw-color.pcw-ct-navy {
    background-color: #4328b7 !important;
}
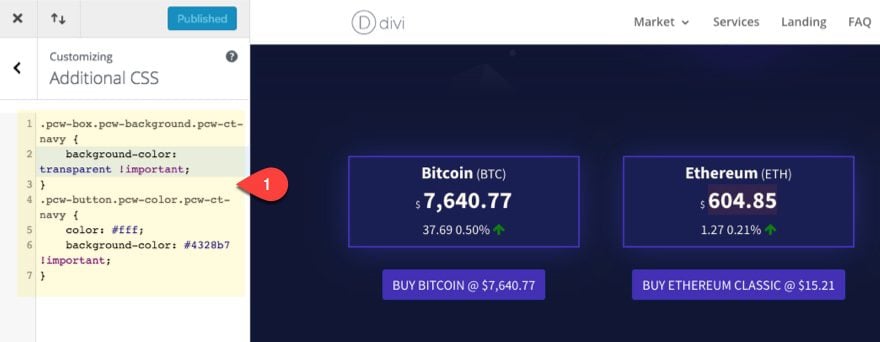
With the css snippets in place a few more design options are available. Now you can go back and add some custom padding to your blurbs to create some vertical space for your cards. Additionally, you can add your button shortcodes under each of the card shortcodes for each of your blurb modules to get an alternate box layout with the button inside.
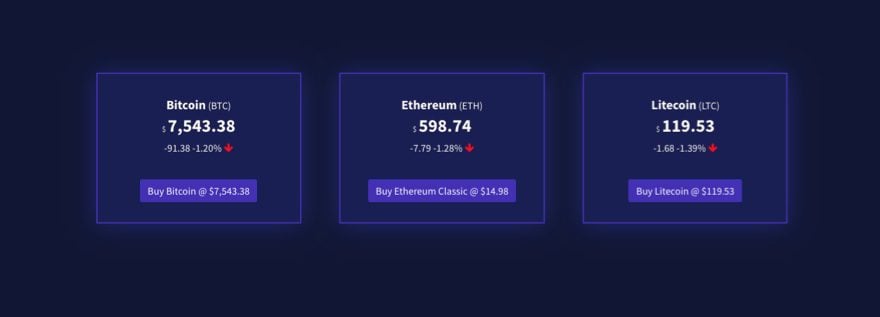
The final result is really nice.
Here is what the updates look like in real time.
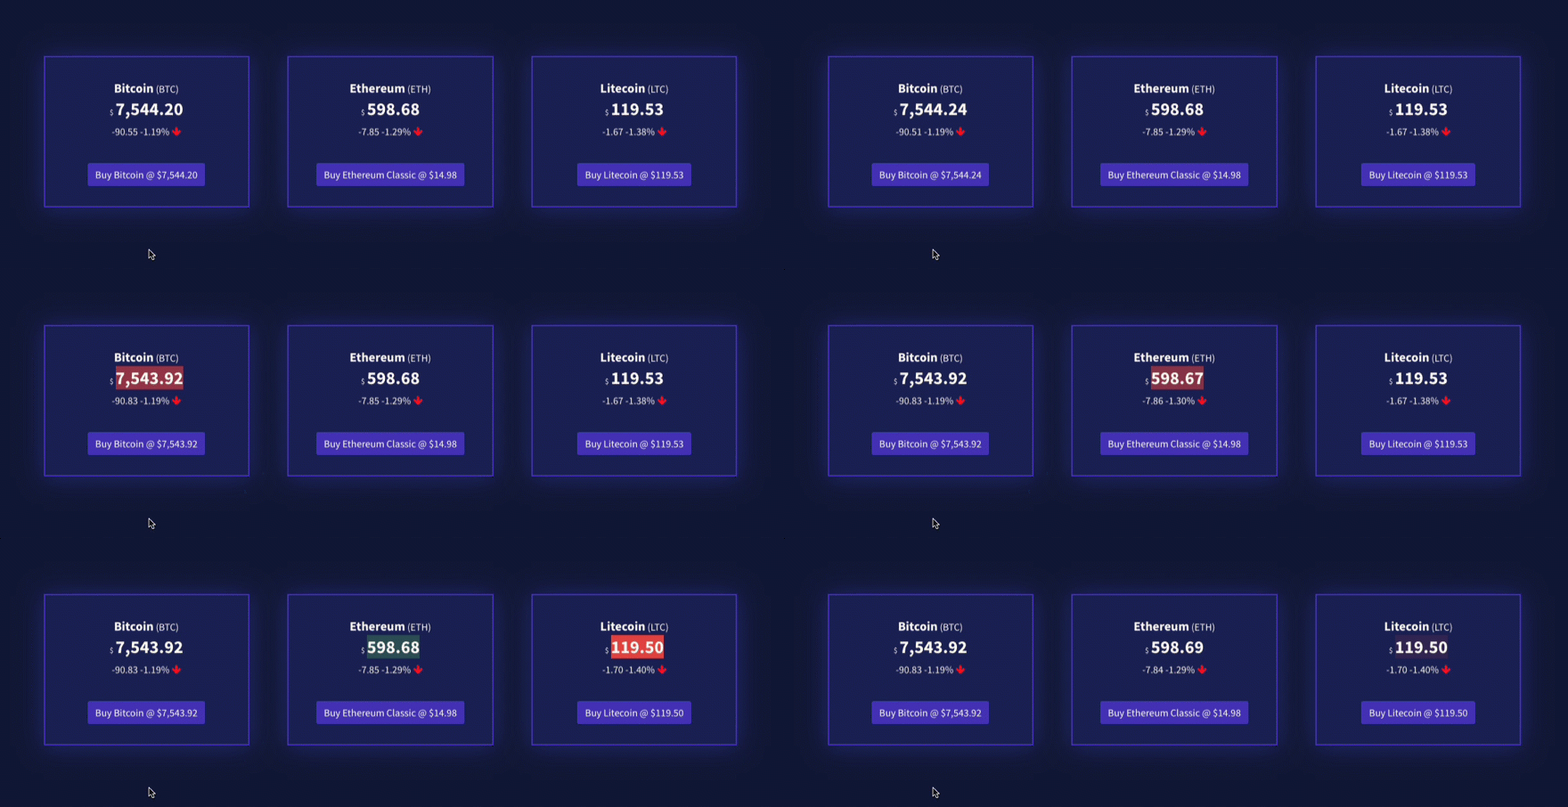
Here is what it looks like on mobile.

Creating a Quote Table on The Landing Page
If you scroll further down the landing page, you will see a section titled “Digital Currency Market Values” with an mock image of a table. You can add a table like this easily with the table(quotes) shortcode.
Navigate to Cryptocurrency Widgets > Table (Quotes). Then choose the options for your table. Make sure and add/remove custom fields to your liking.
For this example, I left the options to their default setting except I removed the Change field and added Volume 24H and Supply.
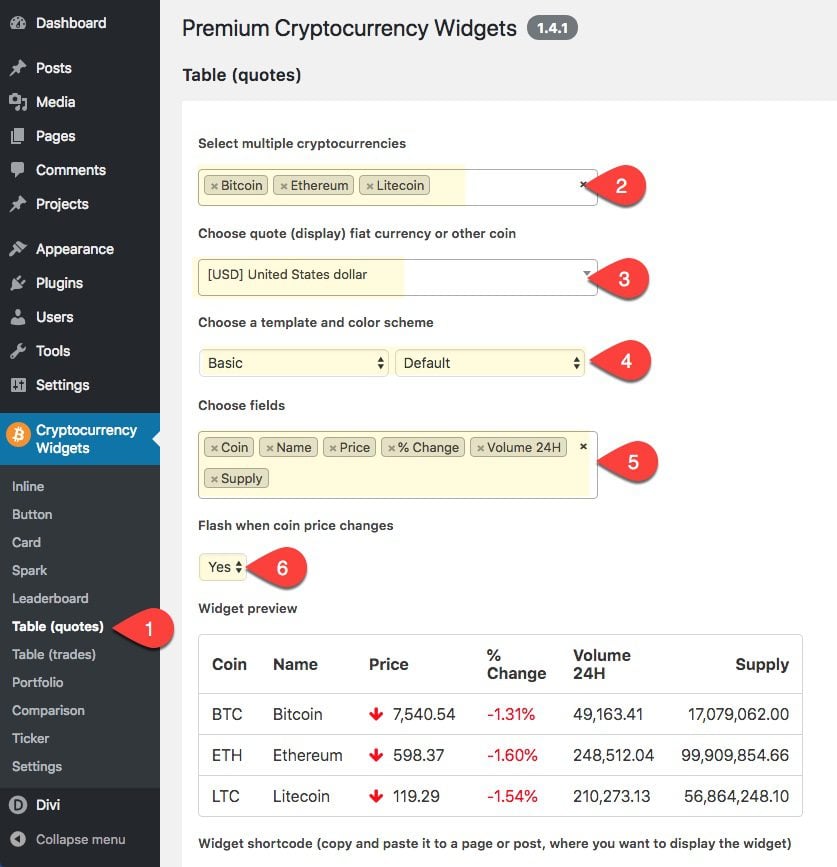
Now we just need to grab the shortcode and go back to the landing page.
Simply replace the image module displaying the mock table with a text module that has your new shortcode.
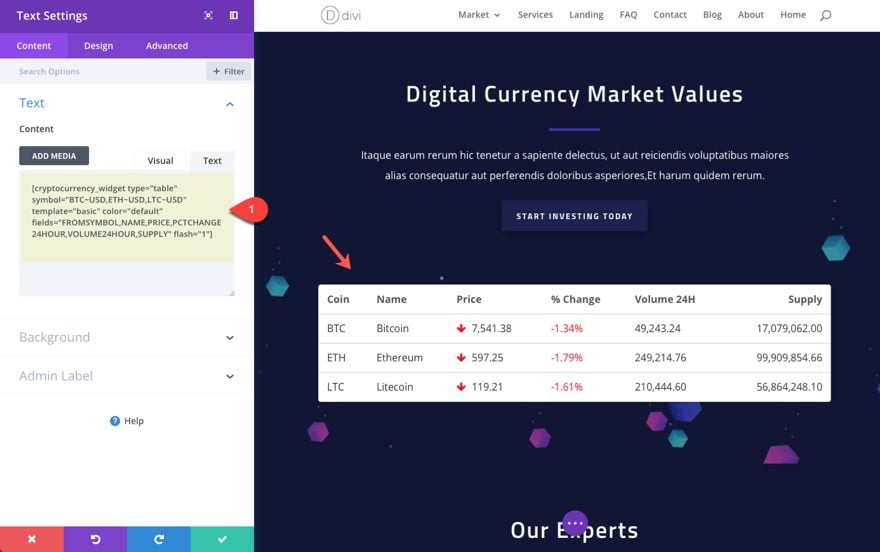
That’s it!
Adding Links to your Cryptocurrency Pages in Your Tables
If you are using the Table(Quotes) or Table(Trades) widget, you can choose to replace the Coin and/or Name field with a Coin (link) and/or Name (link) filed.
This will allow you to redirect users to specific coin pages on your site or to any url you choose.
To control the url structure of the links, navigate to Cryptocurrency Widgets > Settings. There you can set a generic URL path for all links and/or override links to each coin specifically.
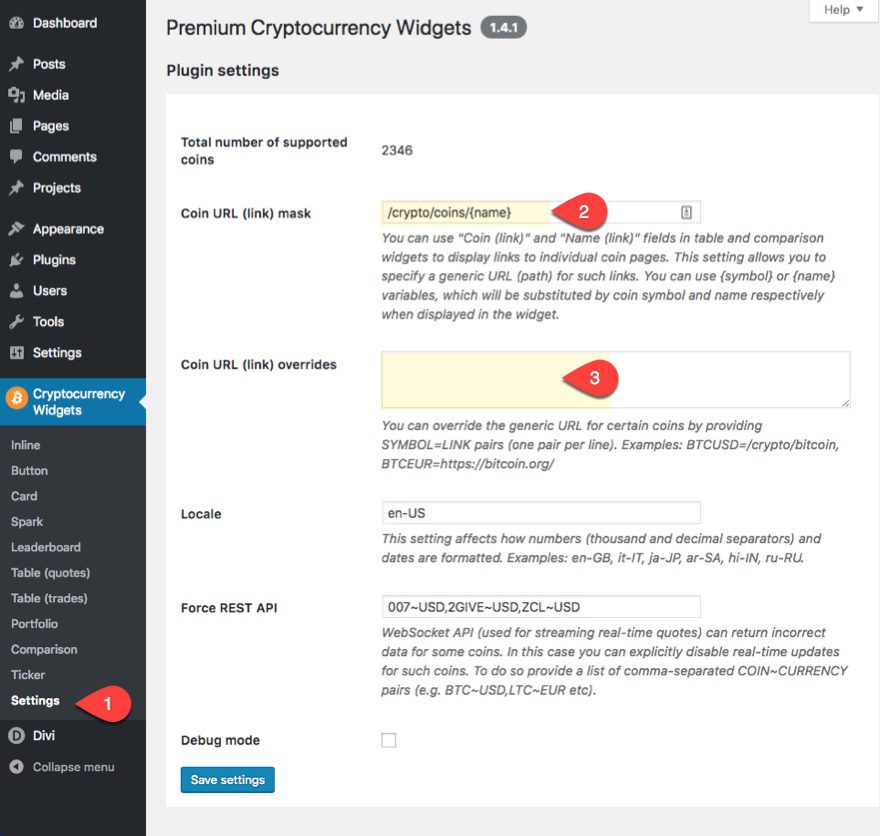
For example if you wanted to host your own coin pages and design them with Divi, you can set the url mask to “/{name}”. Then just make sure you page page title/slug matches the name of the corresponding coin. So if you wanted to create a dedicated page for Bitcoin, your permalink should look like this:
https://www.website.com/bitcoin
Before I let you go, here is a screenshot of a coin page I created with Divi using a Leaderboard widget, a Button widget, and a Comparison widget.
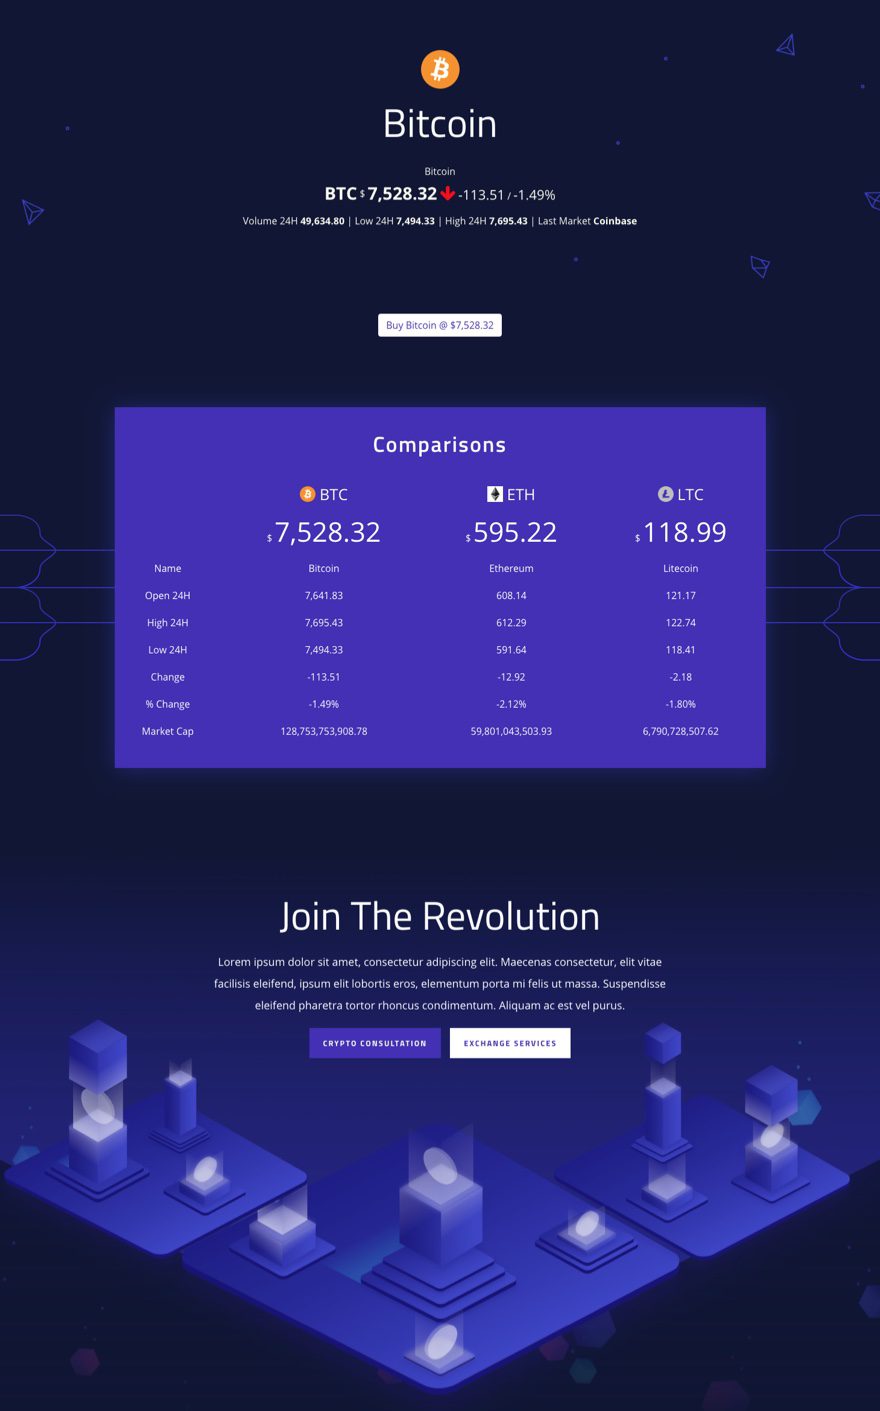
Maybe I’ll have time cover that in the livestream, but for now I hope it helps get the juices flowing.
Responsive?
I was a little concerned about the responsiveness of the widgets (especially tables) since adjusting the browser window to mobile size didn’t always produce the best results, but a quick check on my actual mobile device assured me that all of these widgets (including tables) do adjust nicely.
Here is an example of how a table looks on smartphone.

Final Thoughts
With 10 different widgets and multiple template and color schemes to choose from, the Premium Cryptocurrency Widgets plugin can easily generate all the real-time quotes on cryptocurrencies to your site would need. And combining the shortcodes with Divi Modules can really ease the pain of matching the design with your layout.
I hope this was helpful to all of you looking to make a splash in the cryptocurrency web design niche.
I look forward to hearing from you in the comments.
Cheers!



A good blog again related to the crytocurrency. Nice piece of information which has to be shared among everyone. keep sharing.
I need clarification. Is this a sponsored post?
No this is not a sponsored post.
Cryptocurrency Data on your Website? I want to point out that this isn’t another exchange. Since satoshi is the only exchange we’re on, all this does is list the current prices based on that. It’s cool but this doesn’t mean too much yet except for garlicoin is starting to be noticed more.
Is this a sponsored post? If so, it’s probably best practice to label it as such.
Elegant themes doesn’t seem to do sponsored posts (or at least that’s the official position they take). Although I agree with you that explaining an implementation of a feature with a premium plugin is.. not very helpful, they are obligated to label posts as sponsored when it’s not.
Sponsored post??? This is a plugin review for a premium plugin. We do have some free crypto currency plugins though.