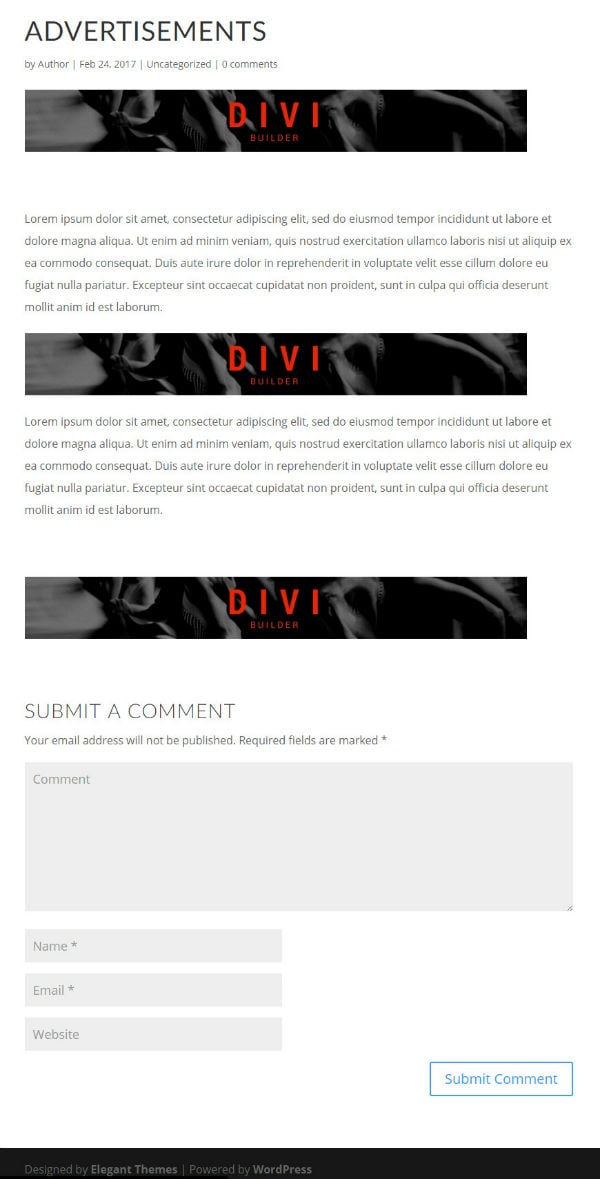
Divi makes it easy to insert ads into your blog posts. Built in to Divi Theme Settings, there is a section that allows you to place an “un-widgetized” ad image/banner or adsense code under your blog post content. But, this is somewhat limiting since it only allows you to place the ad in one spot – at the bottom of your posts.
Today, I will show you how to utilize Divi’s built-in features to insert an ad below, inside, and above your blog post content.
This flexibility allows you to test for yourself which placement works best for your audience, resulting in more conversions.
Let’s get started.
How to Insert Ads Above, Inside, and Below Your Divi Blog Post Content
Subscribe To Our Youtube Channel
Inserting Your Ad Below Your Blog Post Content
First, you need to create your ad image. If you are a graphic designer, this is fairly easy to do using a photo editing software like Photoshop. But if you are looking for an easier solution like I was for this tutorial, you can use a free graphic design software like Canva. Canva comes with free ad templates you can easily modify to fit your needs. All you need to do is create a free account. Then find the right graphic template, modify it, and download your ad image.
The dimensions for your ad image should be around 468px by 60px. My image is 728px by 90px because I want it to stretch the length of my post content.

Once you have your ad image, upload them to your media library.
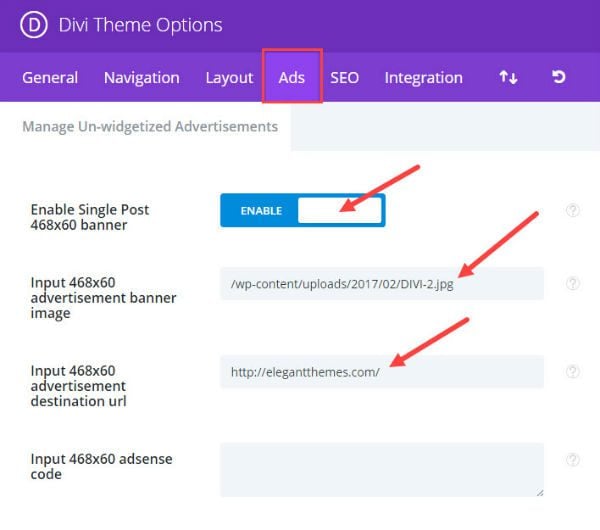
Next go to Divi → Theme Settings in your WordPress dashboard and click the Ads tab. The first option you see is “Enable Single Post 468×60 banner”. Click to enable this feature.
Insert the url for your ad image next to the option that says “Input 468×60 advertisement banner image”.
Then insert your destination url for the ad next to the option that says “Input 468×60 advertisement destination url”.
Alternatively, you could insert adsense code, but for this tutorial, I’m sticking to an ad image.
Save Changes
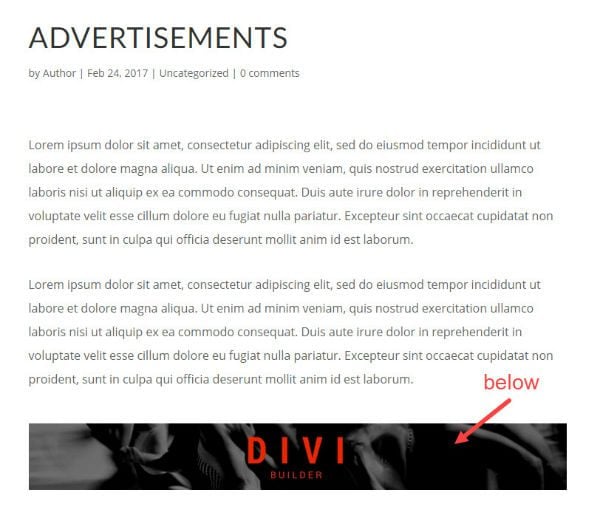
Now go and check out a blog post to see your ad. Notice it has been inserted below your post content.
That’s easy enough. But now I’m going to add the functionality to insert that same ad image above your post content. To do this you will need to modify the Divi theme files via FTP.
Inserting Your Ad Above Your Blog Post Content
Before you continue, it is a good idea to create a child theme before you start making changes to the theme files. Click here to learn how to add a child theme.
Once you have a child theme created and active on your site, access your child theme files using an FTP client like FileZilla. Copy the single.php file from your Divi theme folder and paste it into your child theme folder. Make sure you keep the file name exactly the same (single.php) and copy over all of the code that was in the original file.
Open the single.php file and locate the following php code:
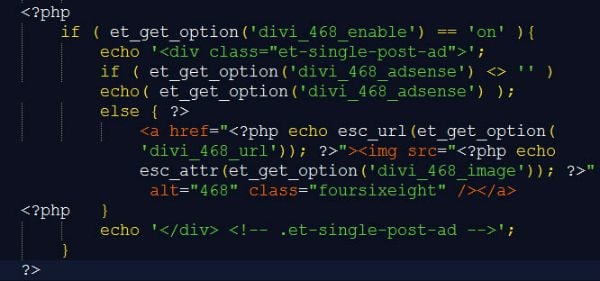
Copy the code and place it just above the following code:

Here is a screenshot of the single.php template highlighting the code your should copy and where to put it:

Save your template file and check out your blog post now. Your ad image should be showing above your blog post content (just below the header) and also below your content.
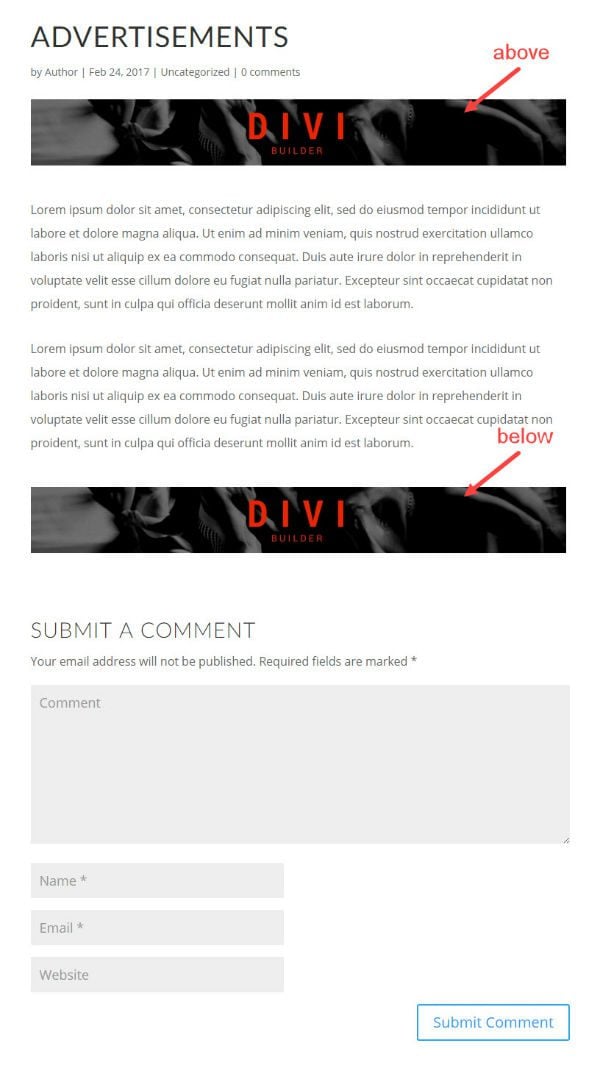
This method will automatically take the ad you entered in Divi Theme Setting and place it above and below every post you create. But, if you want to insert your ad on a specific post only, or if you want to insert your ad inside of your post content, use the Image Module via the Divi Builder.
Inserting Your Ad Inside of Your Blog Post Content Using the Divi Builder
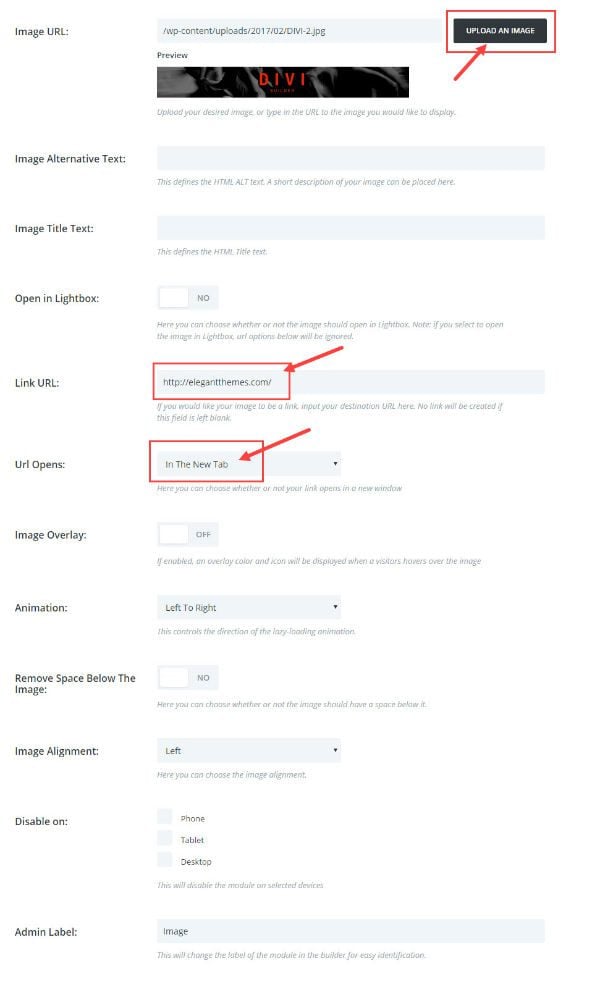
Using the Divi Builder, find the section of the post where you want to insert the ad. Insert an a fullwidth column, add an Image Module, and update the follow general settings:
Image URL: [enter image url]
Link URL: [enter link url]
URL Opens: In the new tab
Save & Exit
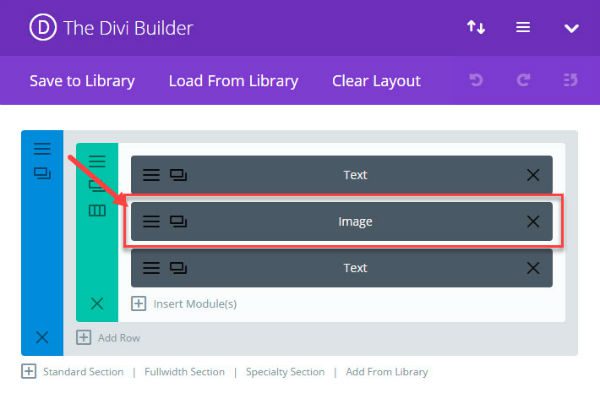
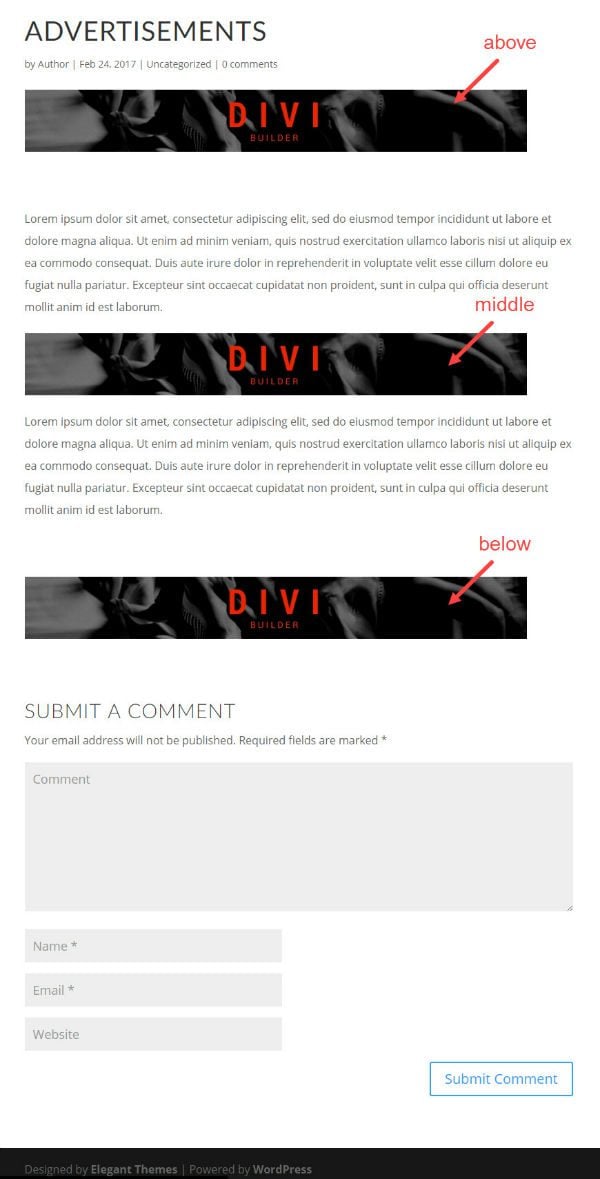
Now you have an ad inside of your post content.
Final Thoughts
If you are reading this, you are probably interested in monetizing your website. For a helpful breakdown of how to monetize your blog using Adsense, check out this post. You can also jump into this list of powerful advertising plugins for WordPress.
Also, If you are using the Extra Theme created by Elegant Themes, you can create ads using the built-in Ads Module. If you are interested, here is an overview of the Ads Module.
That’s it! I hope this helps your process of managing ads a little easier.
Feel free to post your questions and input in the comments.


Love the in-depth tweaks… thanks. The title and meta for this post is a little too far to the left on my hd monitor, gets cut off.
Thank You So much for this post. I really need this information. Your helpful post solved my problem. Thumbs up!
Why not just add this option to Divi and release it?
@Pablo I know right!?!? I love it! It’s definitely needed an update!
Jason,
Thanks for such an informative article! Very well structured tutorial and this will be *super* helpful for a lot of people, including me! There are a lot of ad plugins out there, but a lot of them are really whacky. This tutorial will solve that by allowing us Divi users to do it manually.
Exactly! Thanks Jacob.
Wait! Am I seeing a responsive Elagant Themes’ blog?
Way to go, guys!!
Why not simply using the divi builder for adding the top and bottom banners… i can imagine that on a bigger site with different subjects you want different ad banners on different posts.
Hi Herre. Yes, you are correct. You should use the divi builder if you want to customize the banners for individual posts. This way is for those who want to deploy the same ad on all posts by default, making it easier and quicker to update your ad.
Hi. Is it possible to insert advertising below post with other dimensions? e.g. 728×90 ?
Thanks
Jiri
How add AdWords?
What happens if/when ET change the original single.php file? Now child theme have different version of it. No broblem?