Divi’s email optin module makes it easy to build your email list from any Divi layout. The module has all the familiar Divi tools and it’s easy to use. However, it does require you to connect with your external email service provider before it can work. Fortunately, this is a simple process. In this post, we’ll see how to set up an email account using your email provider of choice inside Divi’s email optin module.
Let’s get started.
Divi Email Optin Account Options
First, let’s look at the Divi email optin module account options and see how it works. Divi’s email optin module has a list of email providers to choose from. The Divi email optin module only appears on the live website if you have selected an email provider. If you’ve placed an email optin module within your layout and it doesn’t appear, this is the reason.
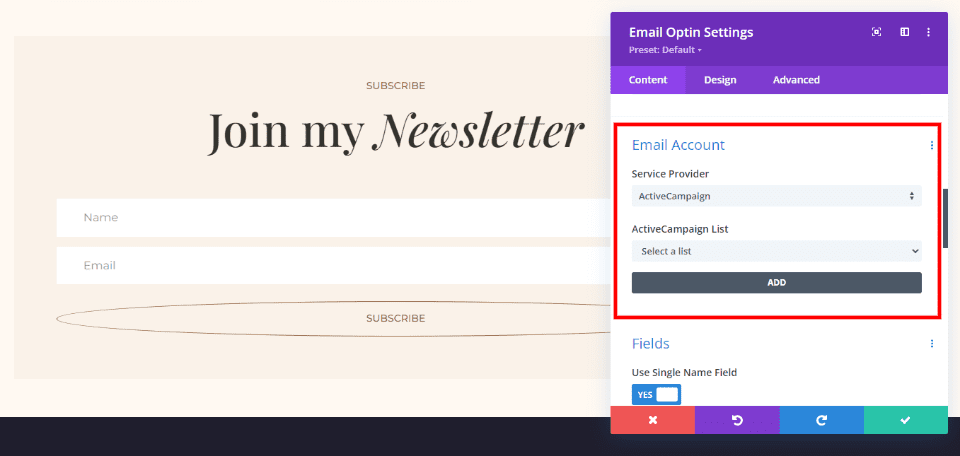
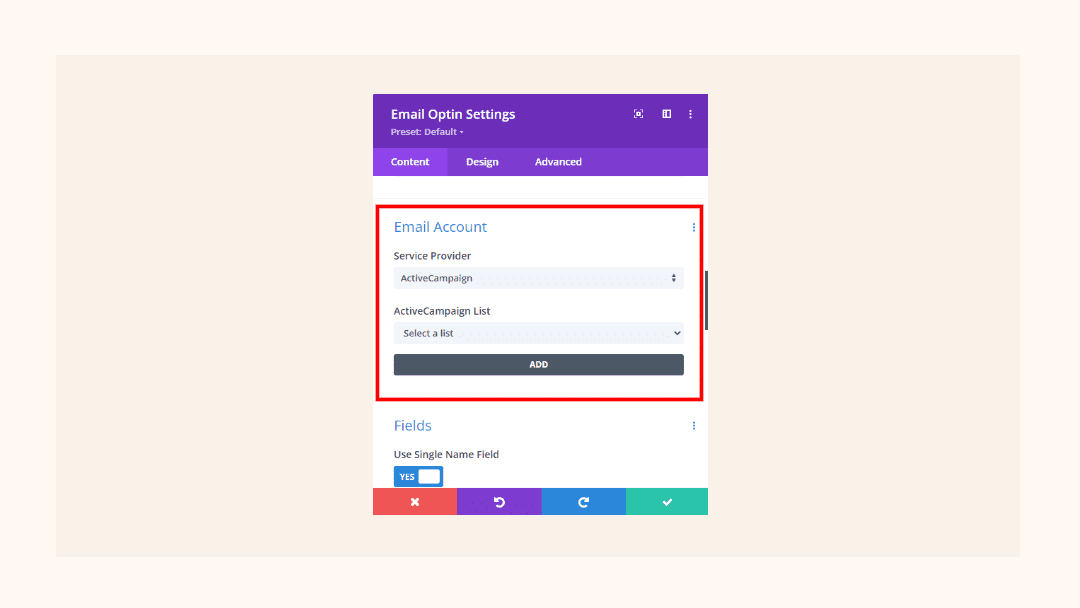
Open the module’s options and scroll down to Email Account. Here, you’ll see dropdown boxes for Service Provider and a list to choose your email account for that provider. If you have more than one newsletter, all of them will display in the list.
It also has a button to add a list for the service provider you’ve selected. This requires an API Key for that email provider. This allows Divi to connect to your email account.
What is an API Key and Why do you Need One?
API stands for “Application Programming Interface”. It’s a way of integrating platforms, such as displaying images from Instagram, comments from Facebook, or Google Maps within WordPress, while keeping your accounts safe from abuse.
The API Key is a string of code that’s used to authenticate an application so it can be used within another platform. It keeps your account secure. Since no one has access to your key, they can’t use your account for their own purposes.
APIs allow us to use email platforms within the Divi email optin module. Once the user submits their email address to subscribe to your newsletter, the API Key allows Divi to connect to your email provider and add the user to your list. The connection is fast and automatic, and it doesn’t matter which email provider you’re using. The process for the user is the same.
Setting up an email account with an API Key is simple. We’ll go through the process of setting up a few of them. For my examples, I’m using the email optin form in the free Fashion Designer Layout Pack that’s available within Divi.
Setting up an Email Account
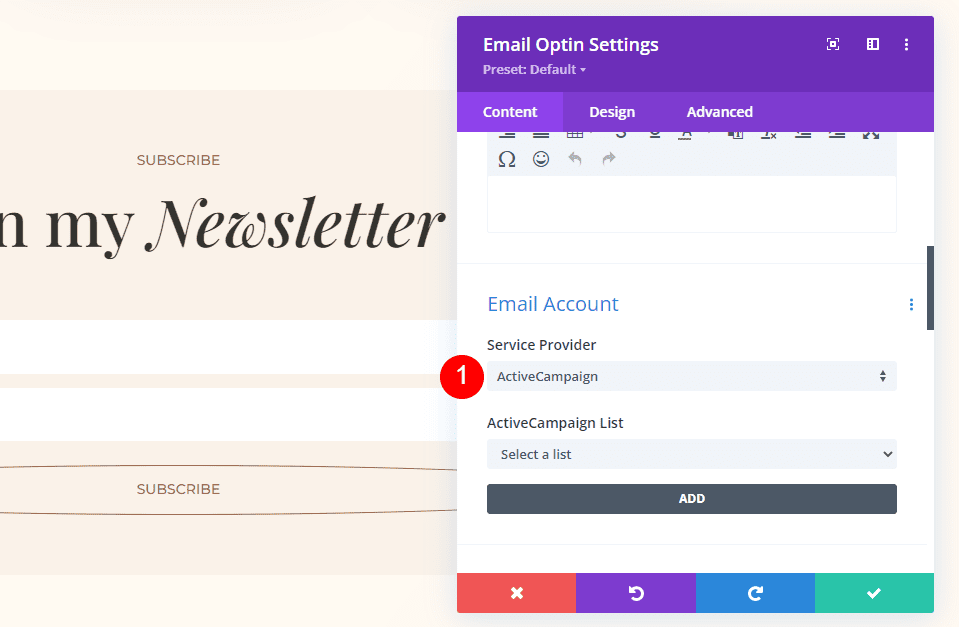
To use Divi to set up your email account, first, open your email optin module and click the Service Provider dropdown box to see your options.
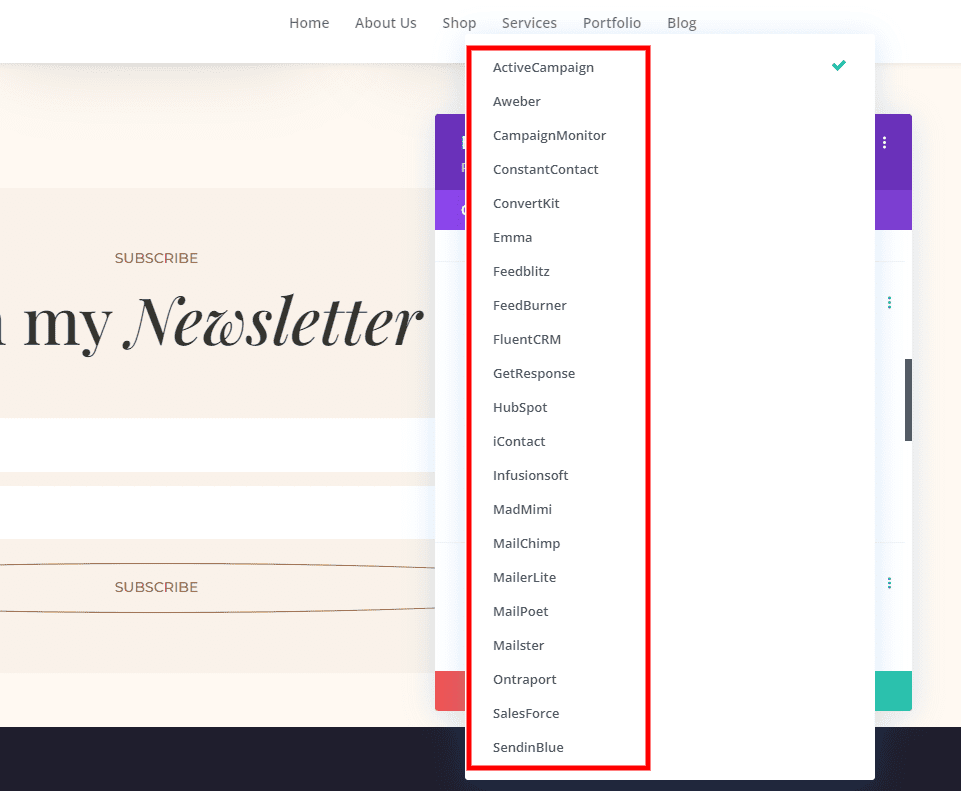
This gives you a list of 21 email service providers to choose from. Next, select the email provider you want to use from the Service Provider dropdown box.
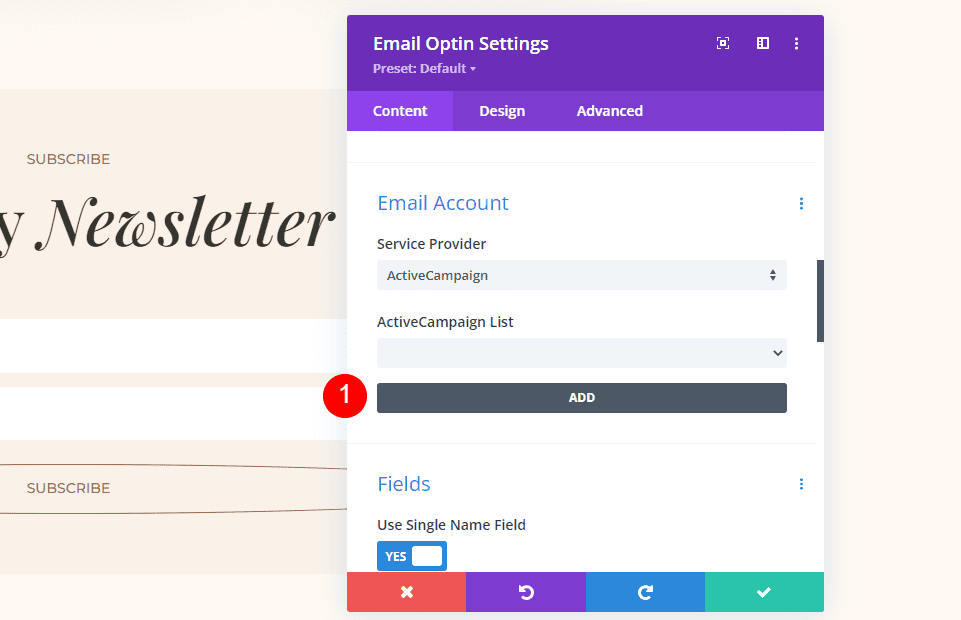
Lastly, you’ll need to connect your account with your email service provider to Divi. Click the Add button.
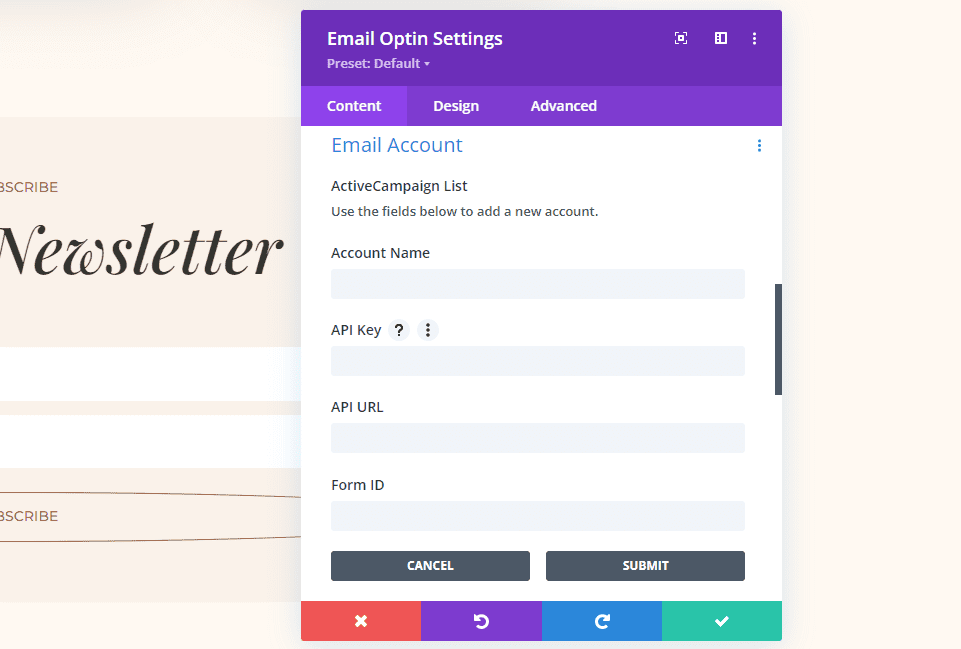
This shows a list of the information you’ll need for this specific email provider. There are differences between the service providers, so you’ll need to see what information you need first. You’ll get this information from your provider, enter it into these fields, and click Submit. The example below shows the list for ActiveCampaign. This email provider needs the Account Name, API Key, API URL, and Form ID.
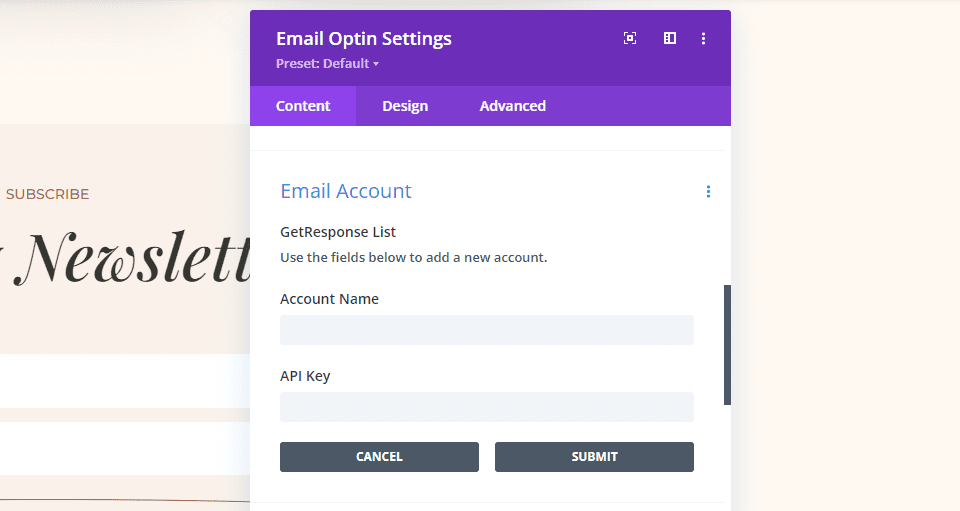
This example shows GetResponse, which needs the Account Name and API Key.
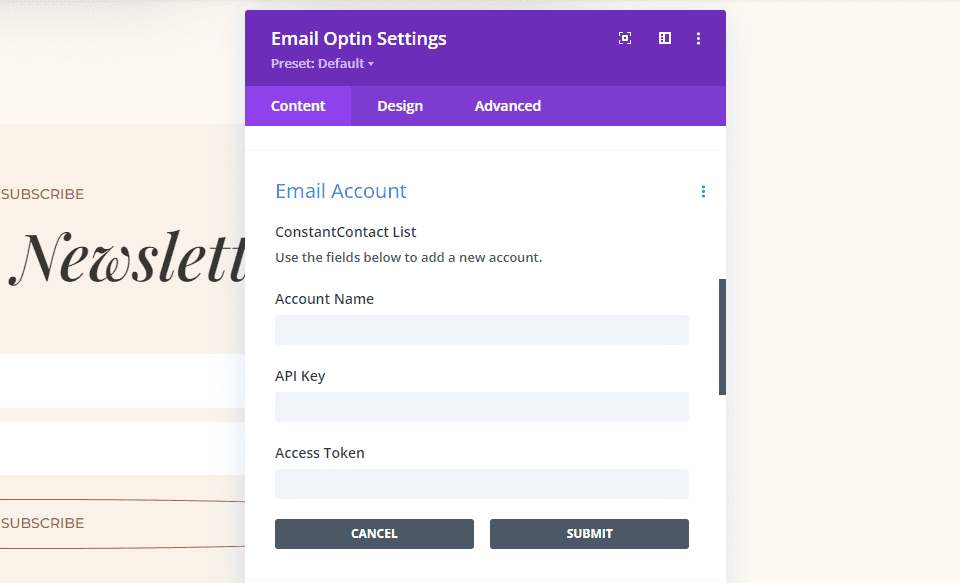
This example is ConstantContact. It needs the Account Name, API Key, and Access Token.
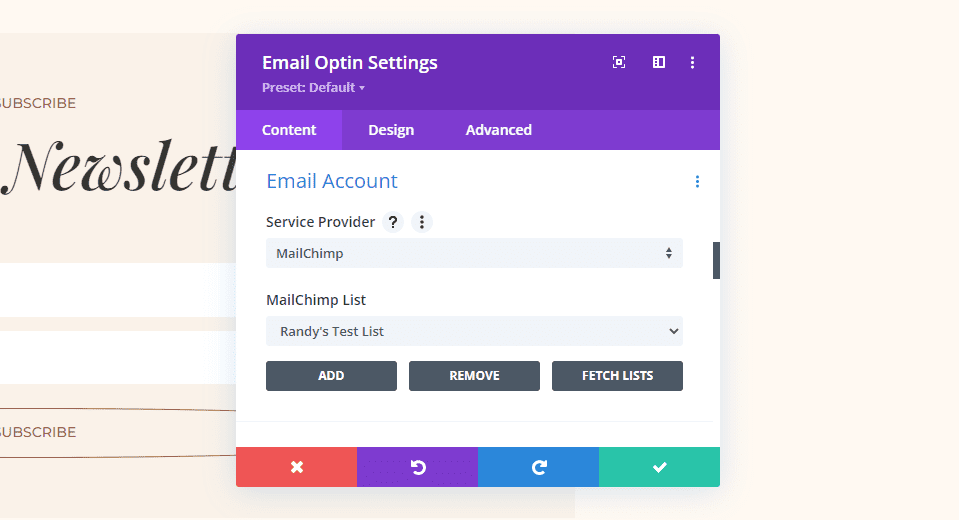
Once your newsletter is connected, you’ll be able to choose the newsletter from the dropdown box. You can also Add, Remove, and Fetch the lists again. This is especially helpful if you create a new email list and want to add it to your list of options.
Let’s step through examples of several email providers to see how the process works.
MailChimp Divi Set up Email Account Example
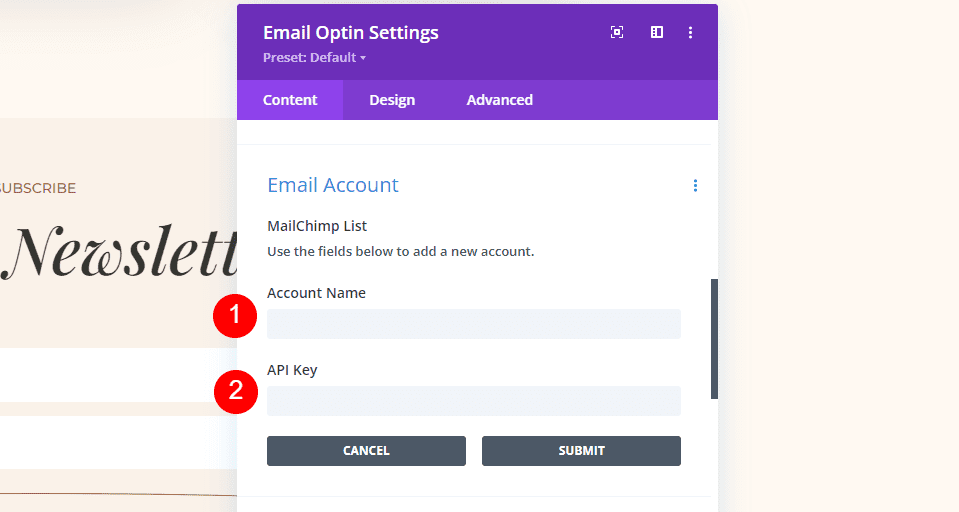
For my first Divi example, I’ll set up my email account for MailChimp. I’m using a paid account for my examples, but they also have a free account. It works the same regardless of the type of account you have. We see that MailChimp needs my Account Name and API Key.
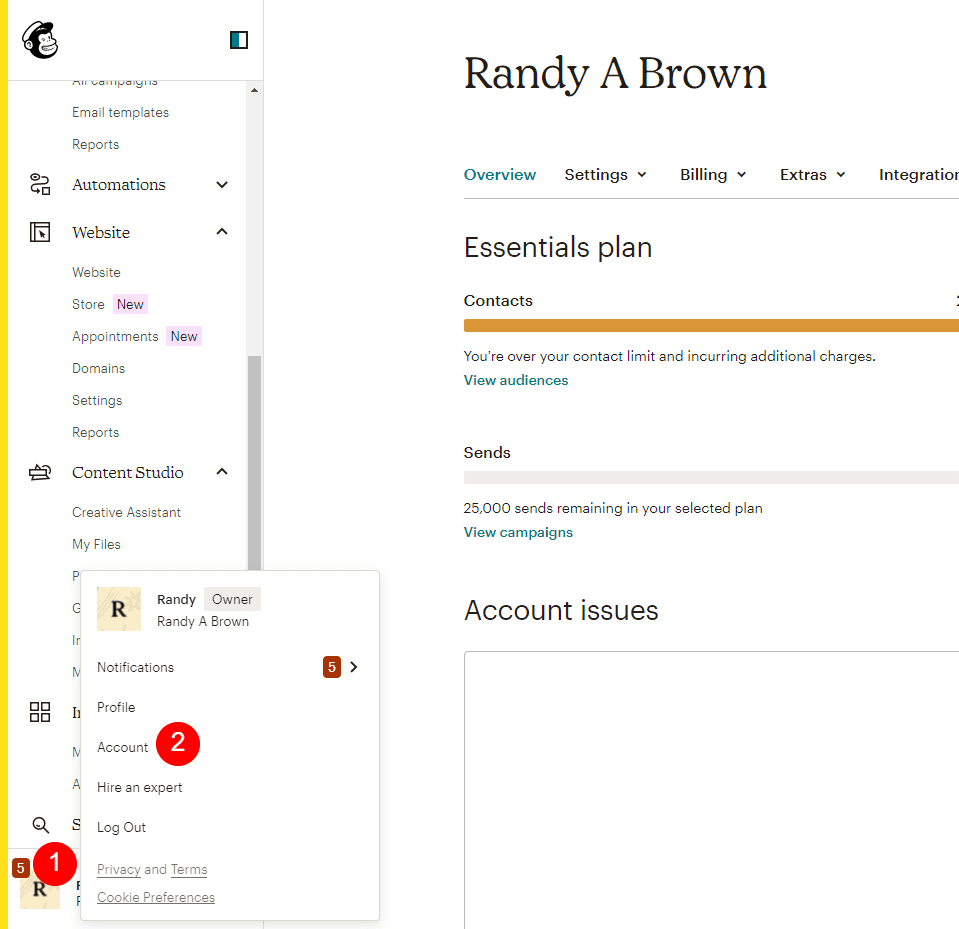
To find your MailChimp API Key, log into your MailChimp account and click your icon in the lower-left corner. Select Account from the popup.
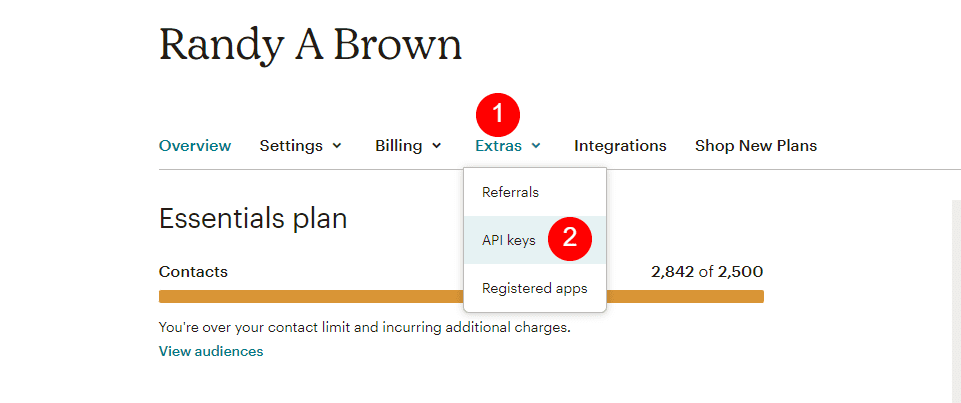
Next, click Extras in the menu under your account name. Select API keys from the list.
At the bottom of the screen is a list called Your API Keys. If you don’t have a key, click Create a Key. Next, copy the API Key.

Go back to your Divi email module and paste the key into the API Key field.
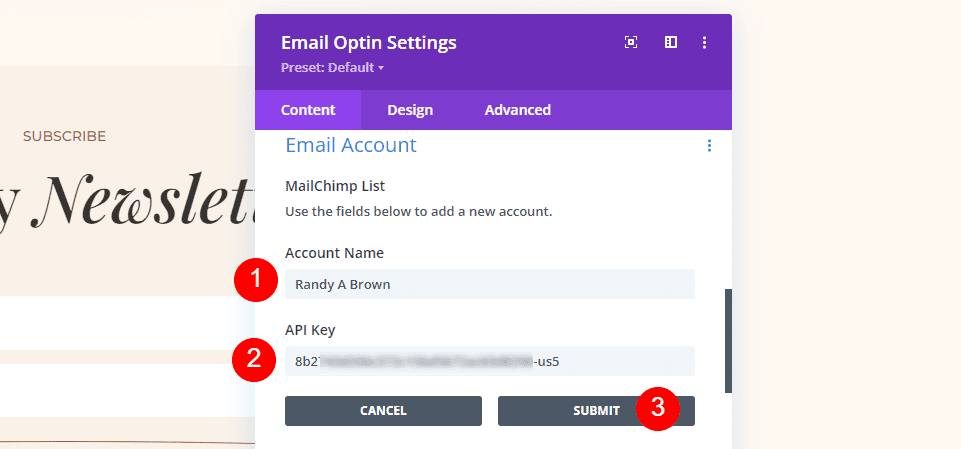
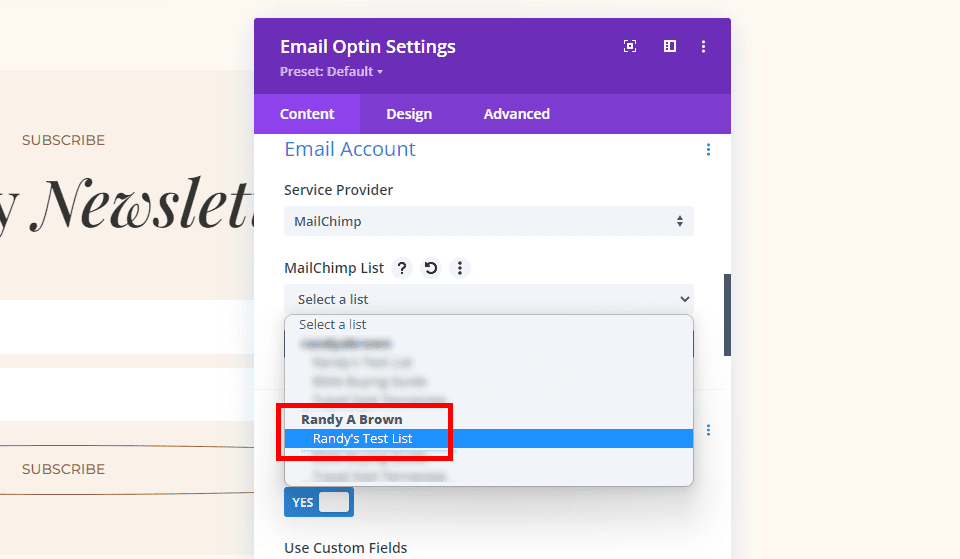
Now, when selecting the dropdown box for the MailChimp list, you’ll see all your MailChimp newsletters. Select the newsletter you want this email optin form to connect to.
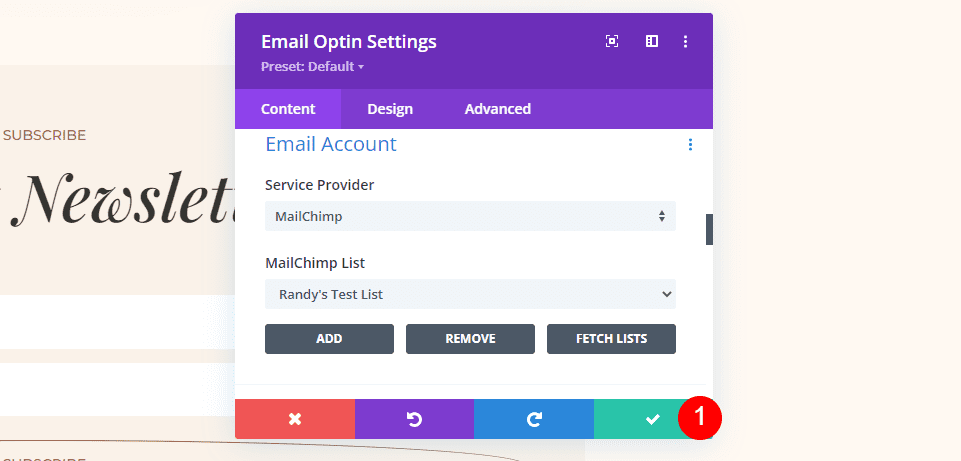
Now your email optin module displays MailChimp for the Service Provider and MailChimp List shows the name of the email list that I selected. Finally, close the module and save your work. The email optin module is now connected to your email newsletter.
MailerLite Divi Set up Email Account Example
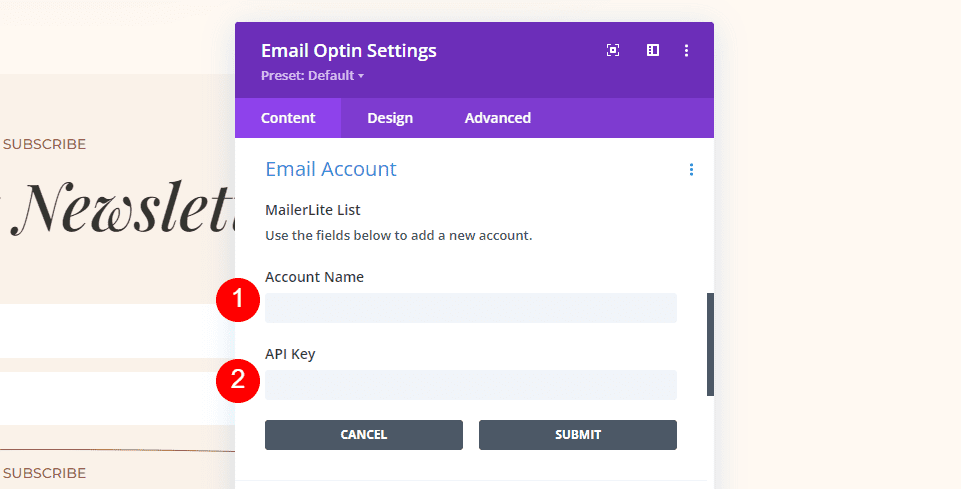
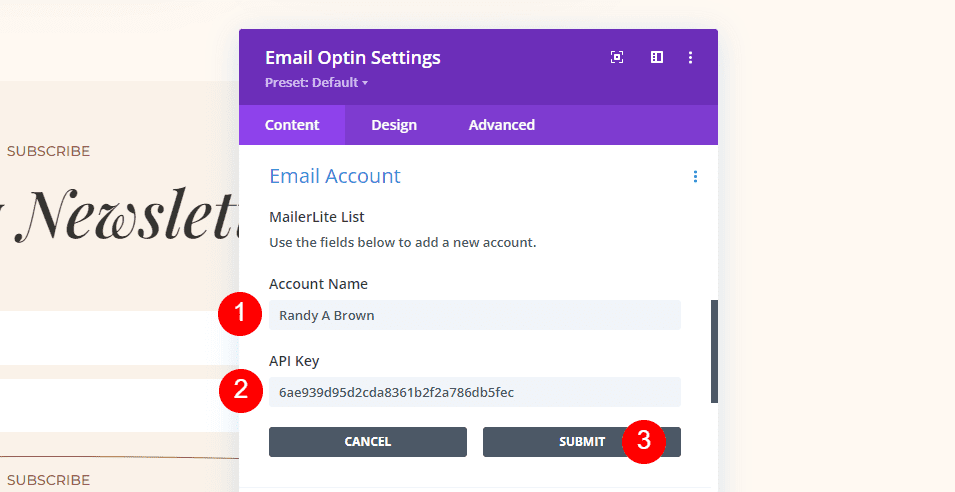
Let’s see another example using MailerLite. It also needs an Account Name and API Key. I’ve set up a free account for these examples.
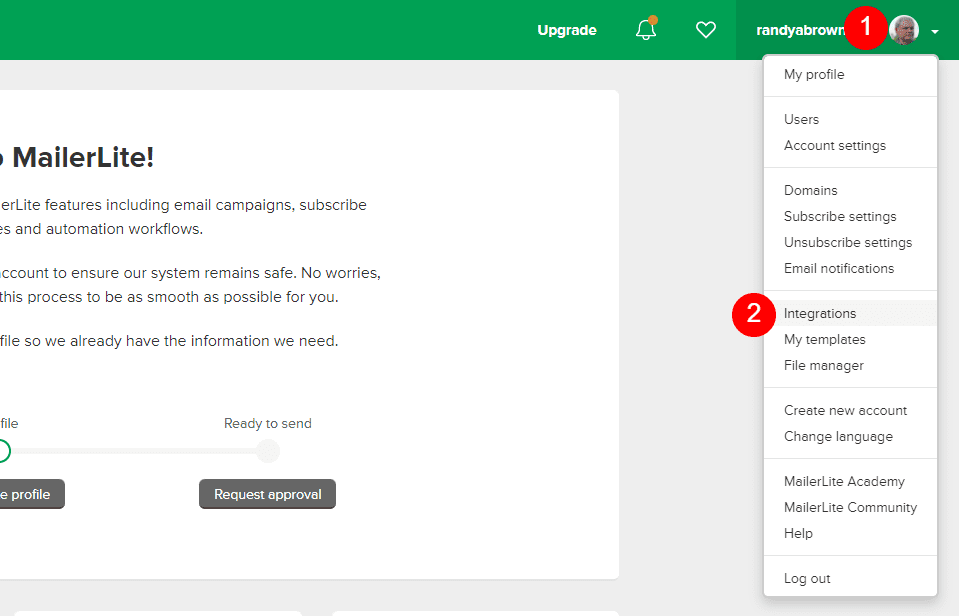
Log into your MailerLite account and click on your icon. Select Integrations from the list.
The first option on the Integrations page is Developer API. Click Use.

This opens the page where you can copy the API Key.

Next, go back to your Divi email optin module and add your Account Name, paste the key into the API Key field, and click Submit.
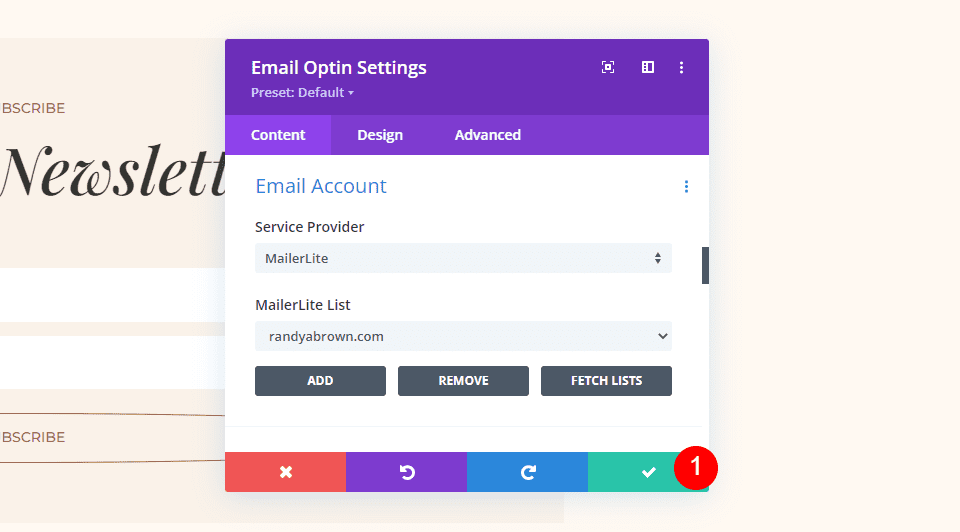
Once it’s connected to your account, you’ll see the newsletter in the MailerLite List dropdown. Select the newsletter and close the module.
SendinBlue Divi Set up Email Account Example
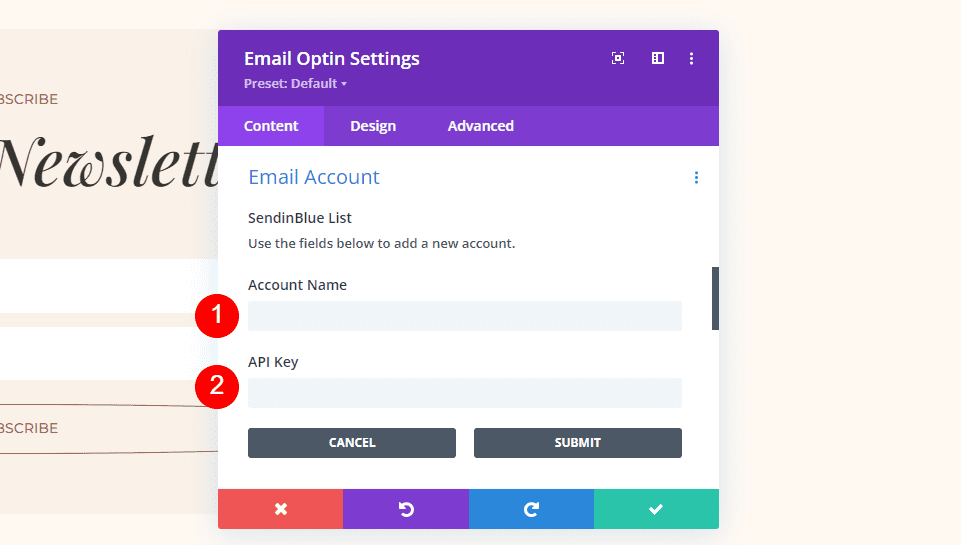
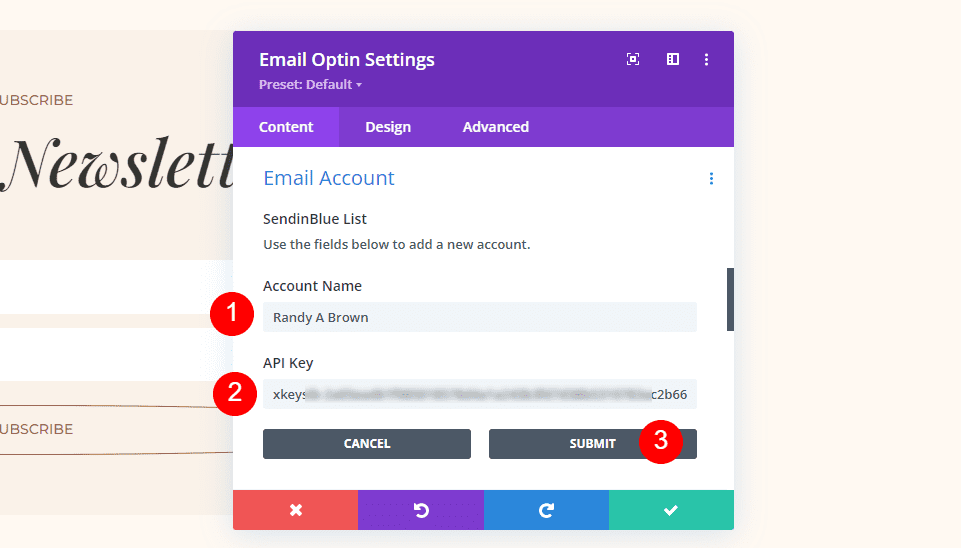
Let’s look at one more. This one is called SendinBlue. I’m also using the free account for this email provider. SendinBlue also needs an Account Name and API Key.
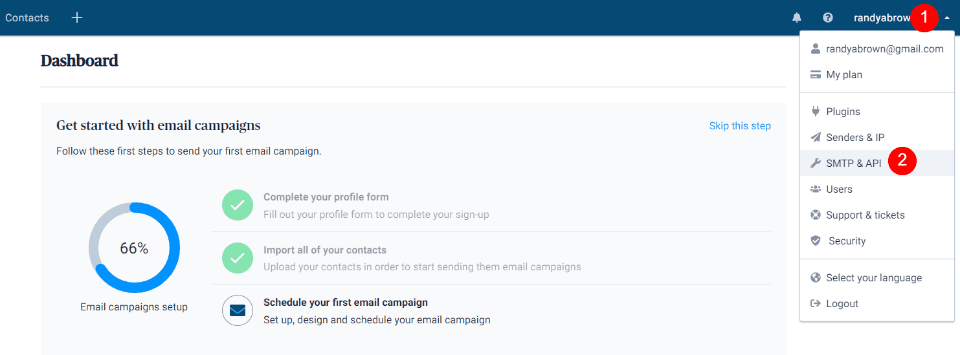
Go to your SendinBlue account and select your account name in the upper right corner. Choose the link named SMPT & API.
If you have an API Key, then it will show on this page. Copy it to paste into Divi to set up an email account in the email optin module. If not, then click Create New API Key.

Enter a name for the API Key and click Generate.

Next, simply copy the API Key and close the modal.

Add your Account Name and paste the API Key into the API Key field. Click Submit and wait for the account to connect.
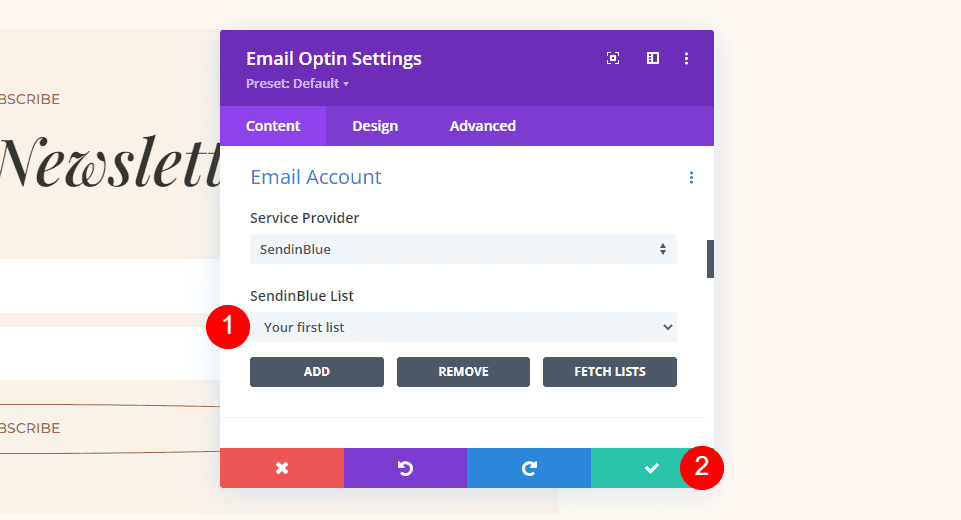
Finally, select the email list from the SendinBlue List dropdown box to make it the active list. Now, close the email optin module and save your changes.
Ending Thoughts
That’s our look at how to set up your email account in Divi’s email optin module. Using Divi to set up an email account is simple with the email optin module. While each email service provider does have different requirements to connect with your email form, they all need an API Key, and the process is similar for each of them.
The three email providers we’ve covered here are very different, but the process of obtaining an API Key and connecting your account is the same. Those that need a Secret Key, or a similar extra key, provide the key along with the API.
Regardless of which email service provider you choose, once you’ve connected it to Divi, you’re ready to build your email list.
We want to hear from you. Have you used Divi and set up your email account with your email service provider? Let us know about your experience in the comments.



While it’s a great module, we have experienced trouble in that the form falls over seemingly at random and people cannot register, which is a killer.
We can fix this by re-publishing the page the optin is on.
Some troubleshooting tips would be great, for example: Is it advisable to cache the page?
Could caching be a reason why the optin just stops working?
If you want to style your form, don’t use Bloom. It’s very old-fashioned and limited: you can’t even get a transparent background or change the spacing on the submit button. Having bought into Bloom as part of my ‘lifetime’ Divi package I assumed it was a really sophisticated extra, but it really isn’t. Save yourself a lot of time and hassle by using the normal Divi ‘Email optin’ module as described above. It’s much more flexible.
Hello, thank you for this post Randy, it is very well written and it helped me learning some things.
I think that is a great idea to Divi include different types of free e-mail providers, or another like Roundcub that is very used in my country. I feel that I lack this important feature because of this. Thank you!
Do someone find a solution for this issue. I have the same and can’t get the name or other fiedls sent to Sendinblue.
Thanks
Hi there, the optin doesn’t send atributes like names to sendinblue. I have tried it with Bloom too. The same. So, how does it work? I ask google, but i found no solution for this problem.
Best regards
This is quite a long process.. is there a way to make it less clunky?
Hi Randy,
thanks for your article about how to setup e-mail accounts in Divi.
While we are in Germany and using other e-mail providers than listed in the Divi modules we want to know, how to add these not listed e-mail providers.
Do you have any solutions on this?
Thanks in advance.
I set up Bloom in two websites and they were working and then stopped. I have no idea why. Elegant Themes is clearly having trouble with email related issues.
O my god this is complicated. I think I will move on to something else
Please make an update for the mailchimp connection.
Because mailchimp no longer allows you to create more than 2 lists (in the free version) and now you have to use the labels and in divi the option to choose the label to assign to users who fill out a specific form does not appear
I HAVE 3 MONTHS TRYING TO FIND THE 1 ROW SIGNUP/OPTIN FORM U_U