Videos are effective marketing tools for a website. And if a video seeks to promote and sell products or services online, it should include a clear call to action for potential customers. A simple way to provide a call to action is to include a button near the video that they can click. However, some buttons (or CTAs) make more sense to appear at a specific time when the user is watching the video. For example, there may be a segment of the video (like 20 seconds in) where a certain discount or promotion is mentioned. Having a “Get It Now” button appear at that specific time may be more effective.
In this tutorial, we are going to show you how to make buttons (or CTAs) appear at specific times when playing an HTML video in Divi. This technique will allow you to use videos and buttons designed with the Divi Builder and then have those buttons appear when the video reaches a specific time, when the user pauses the video, or when the video ends. All it takes is a few snippets of JQuery. No plugin needed for this one.
Let’s get started!
Sneak Peek
Here is a quick look at the design we’ll build in this tutorial.
Notice how the top button appears when the video’s current time reaches 5 seconds and the bottom button appears when the video ends.
Here the same top button appears when the video’s current time reaches 5 seconds and the bottom button appears when the video is paused.
You can also check out this codepen for a live demo of this functionality.
Download the Layout for FREE
To lay your hands on the designs from this tutorial, you will first need to download it using the button below. To gain access to the download you will need to subscribe to our newsletter by using the form below. As a new subscriber, you will receive even more Divi goodness and a free Divi Layout pack every Monday! If you’re already on the list, simply enter your email address below and click download. You will not be “resubscribed” or receive extra emails.
To import the section layout to your Divi Library, navigate to the Divi Library.
Click the Import button.
In the portability popup, select the import tab and choose the download file from your computer.
Then click the import button.

Once done, the section layout will be available in the Divi Builder.
Let’s get to the tutorial, shall we?
What You Need to Get Started

To get started, you will need to do the following:
- If you haven’t yet, install and activate the Divi Theme.
- Create a new page in WordPress and use the Divi Builder to edit the page on the front end (visual builder).
- Choose the option “Build From Scratch”.
After that, you will have a blank canvas to start designing in Divi.
Upload Soccer Club Landing Page Layout
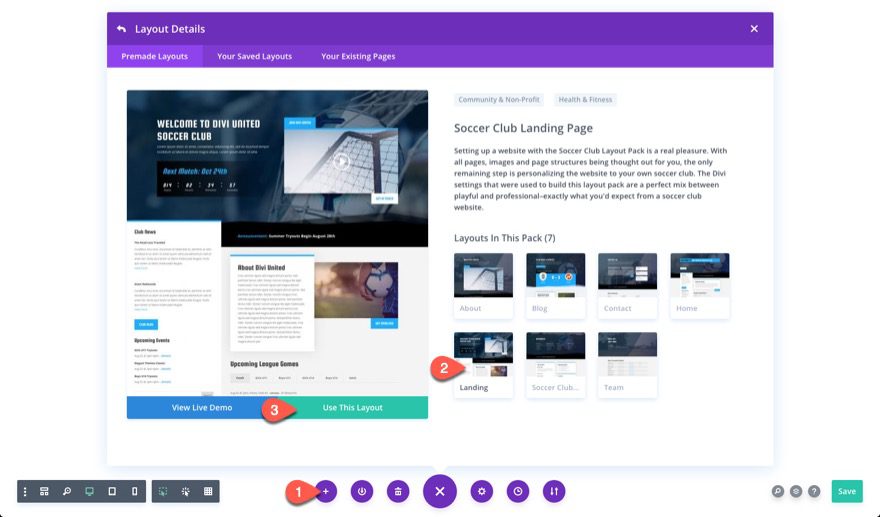
To get a jump start on the design, we are going to use the Soccer Club Landing Page Layout from the Soccer Club Layout Pack.
To do this, open the settings menu, click the add from layout icon, and find and use the Soccer Club Landing Page layout.
Update Video Module
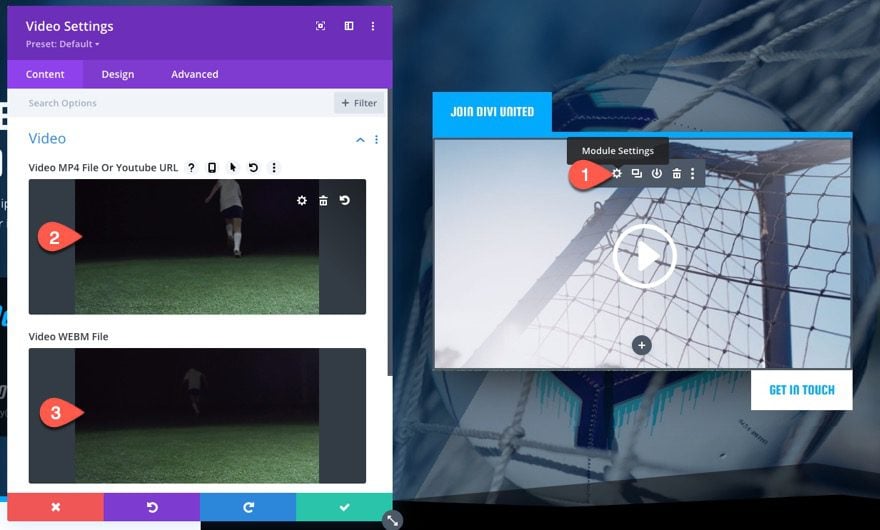
At the top section of the page, you will find a video with two buttons in the right column. We will use these elements to demonstrate the functionality of showing those buttons while playing a video.
Open the video settings and upload/add a video in MP4 file format. You can also include a WEBM file as well.
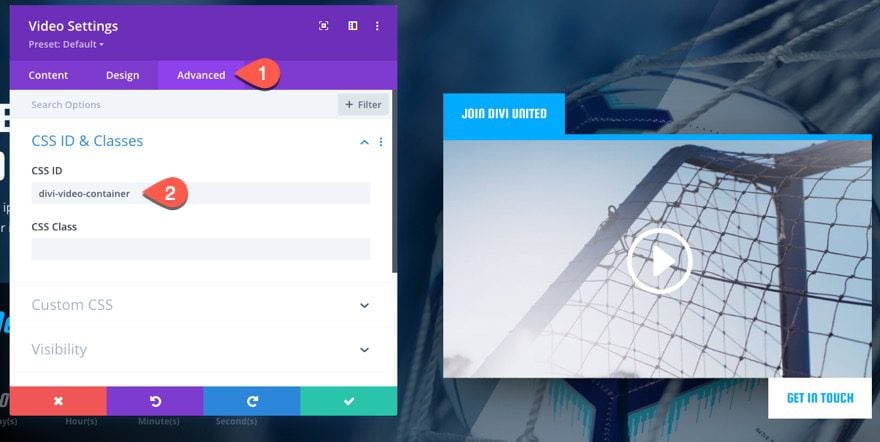
Under the advanced tab, give the video a custom CSS ID:
- CSS ID: divi-video-container
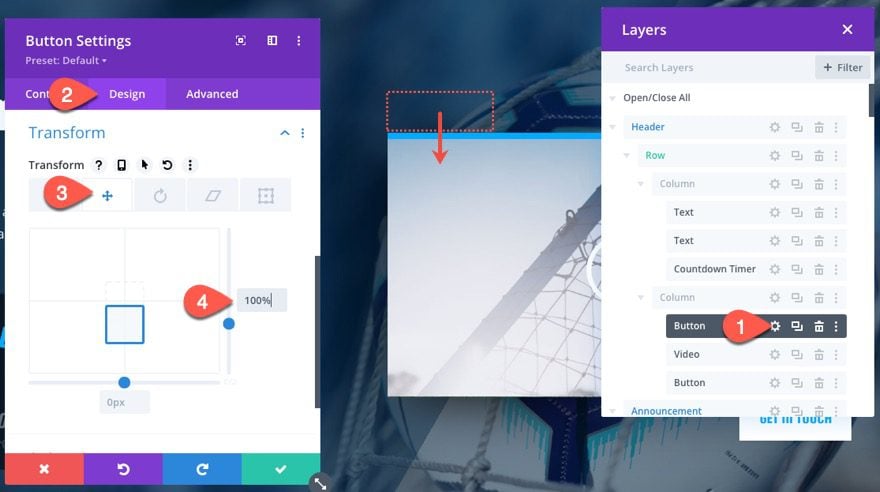
Next, open the settings for the button module above the video and update the transform option so that it moves the button behind the video as follows:
- Transform Translate Y axis: 100%
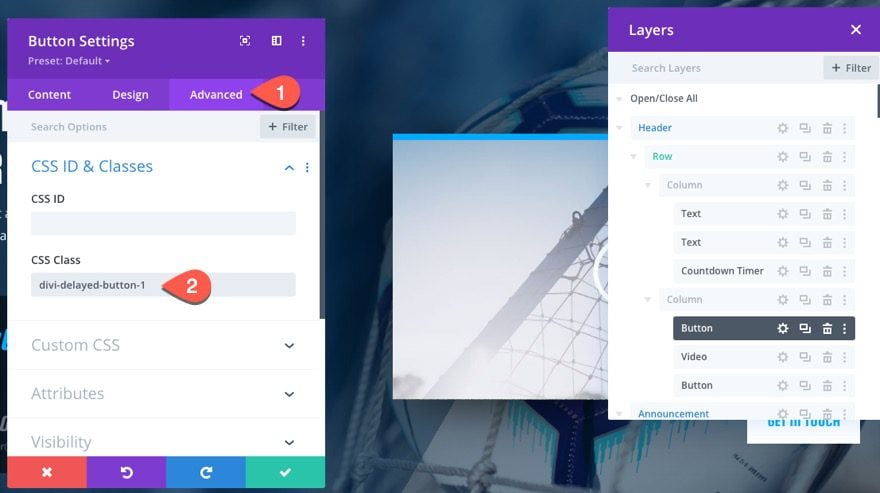
Then give the button the following CSS Class:
- CSS Class: divi-delayed-button-1
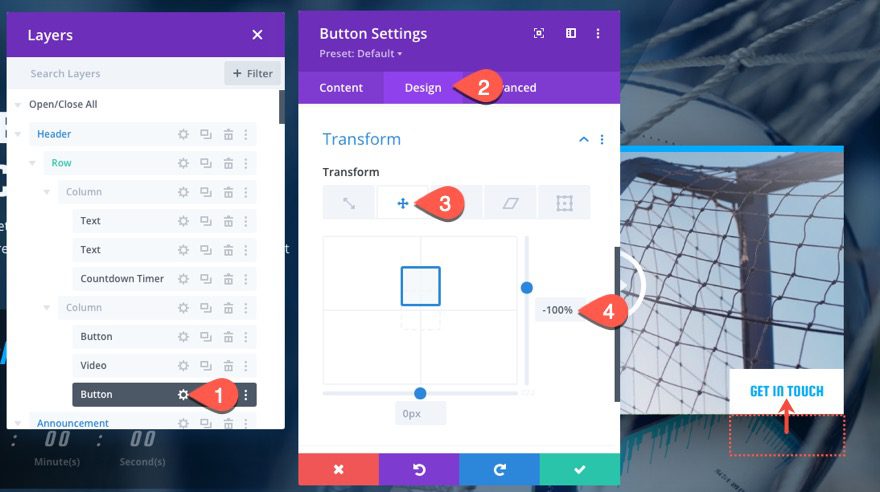
Next, open the settings for the button module below the video and update the transform option so that it moves the button upward as follows:
- Transform Translate Y axis: -100%
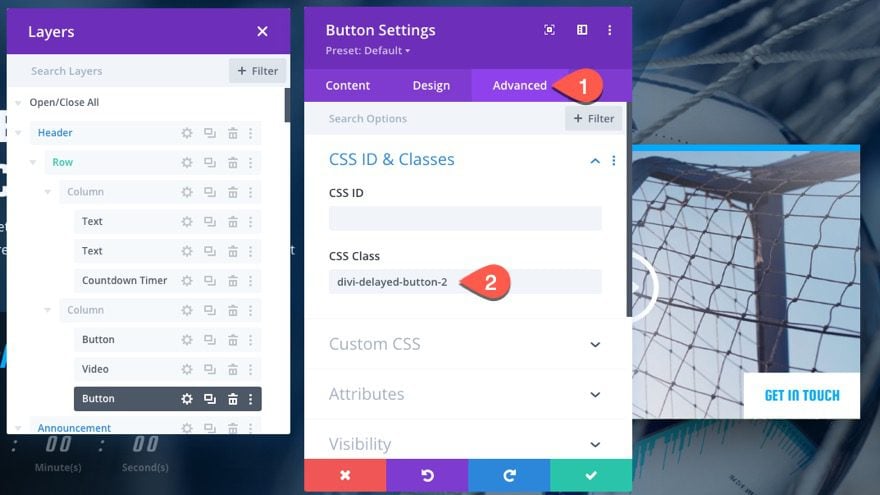
Then give the button the following CSS ID:
- CSS ID: divi-delayed-button-2
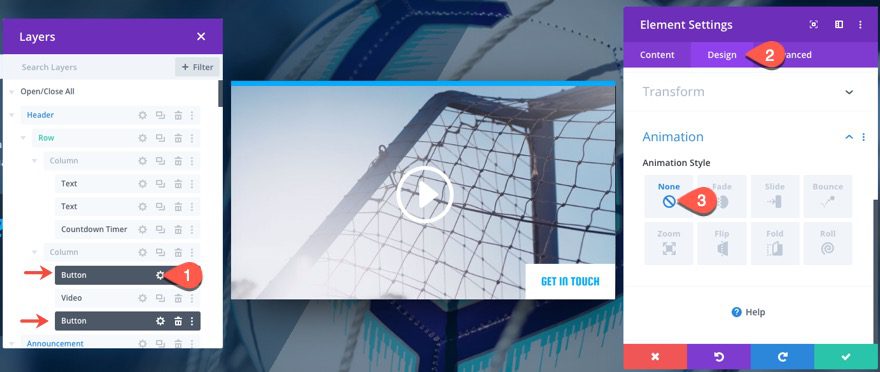
Since we don’t need the animations that were added to the buttons in the premade layout, we can take those out. Use multiselect to select both button modules (in the layers view modal). Then open the settings of either button module and set the animation style to none.
- Animation Style: None
Add the Code
For the final step, we need to add the cust0m code. To do this, add a code module under the bottom button.
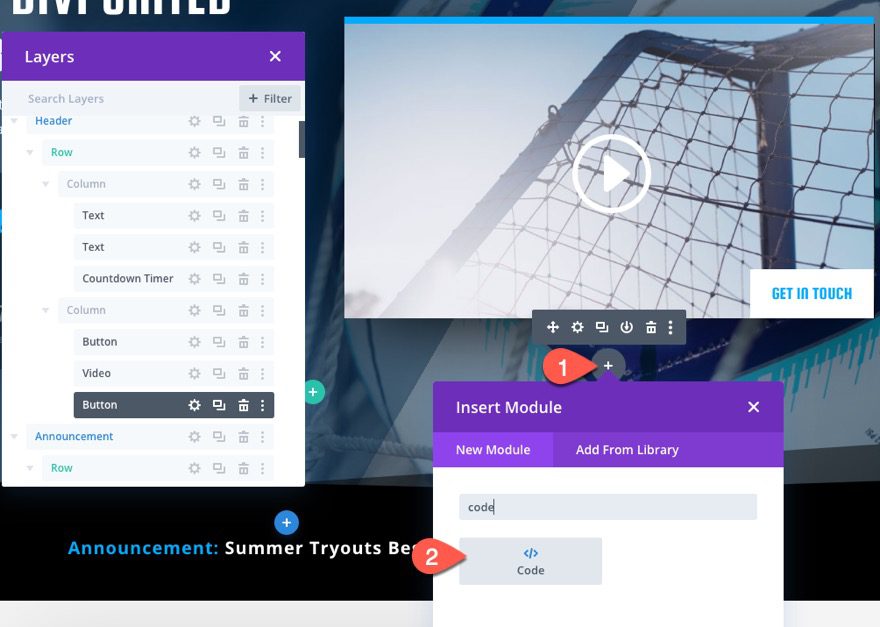
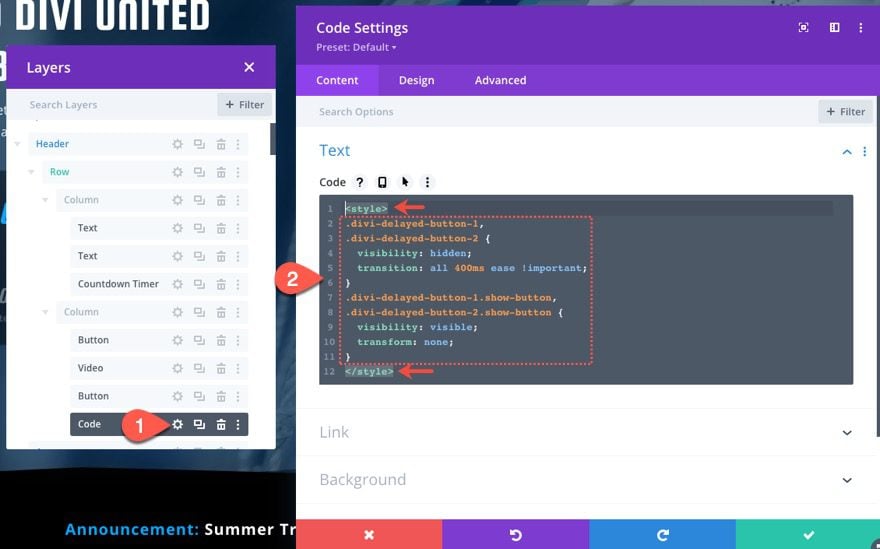
Inside the code settings code box, paste the following CSS making sure to wrap the code in the style tags.
.divi-delayed-button-1,
.divi-delayed-button-2 {
  visibility: hidden;
  transition: all 400ms ease !important;
}
.divi-delayed-button-1.show-button,
.divi-delayed-button-2.show-button {
  visibility: visible;
  transform: none;
}
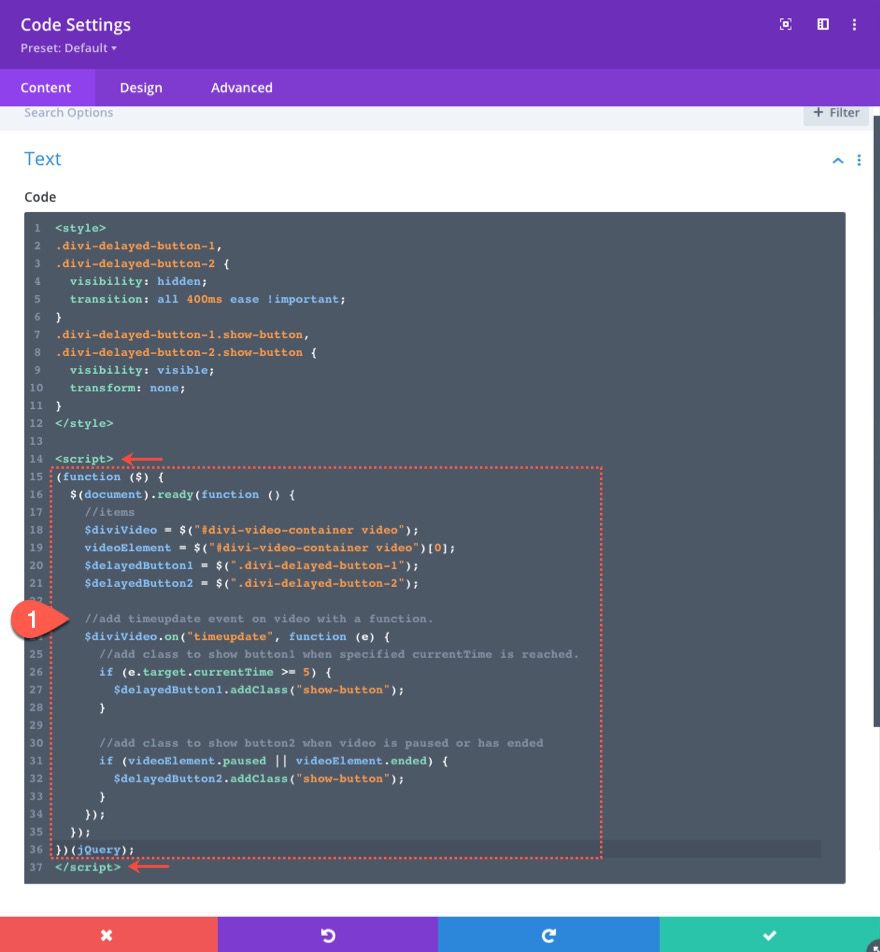
Then, paste the following JQuery code after the CSS making sure to wrap the code in the script tags.
(function ($) {
  $(document).ready(function () {
    //items
    $diviVideo = $("#divi-video-container video");
    videoElement = $("#divi-video-container video")[0];
    $delayedButton1 = $(".divi-delayed-button-1");
    $delayedButton2 = $(".divi-delayed-button-2");

    //add timeupdate event on video with a function.
    $diviVideo.on("timeupdate", function (e) {
      //add class to show button1 when specified currentTime is reached.
      if (e.target.currentTime >= 5) {
        $delayedButton1.addClass("show-button");
      }

      //add class to show button2 when video is paused or has ended
      if (videoElement.paused || videoElement.ended) {
        $delayedButton2.addClass("show-button");
      }
    });
  });
})(jQuery);
About the Code
The CSS
First, we hide the buttons and set the transition duration of the button animation.
.divi-delayed-button-1,
.divi-delayed-button-2 {
  visibility: hidden;
  transition: all 400ms ease !important;
}
Then we show the button when the “show-button” class is toggled via the JQuery and set the transform to none so that the button goes back to the original placement on the page.
.divi-delayed-button-1.show-button,
.divi-delayed-button-2.show-button {
  visibility: visible;
  transform: none;
}
The JQuery
The first thing we do is define the variables we will be using.
    //items
    $diviVideo = $("#divi-video-container video");
    videoElement = $("#divi-video-container video")[0];
    $delayedButton1 = $(".divi-delayed-button-1");
    $delayedButton2 = $(".divi-delayed-button-2");
Next, we add the timeupdate event on the video with a function so that we can dynamically determine the current time of the video during playback. For more, read about the timeupdate event here.
    //add timeupdate event on video with a function.
    $diviVideo.on("timeupdate", function (e) {

    });
Inside the function, we use an if statement to show button 1 (the top button) whenever the currentTime attribute of the video is equal to or greater than 5 seconds.
    //add timeupdate event on video with a function.
    $diviVideo.on("timeupdate", function (e) {

      //add class to show button1 when specified currentTime is reached.
      if (e.target.currentTime >= 5) {
        $delayedButton1.addClass("show-button");
      }

    });
NOTE: The condition of the if statement is e.target.currentTime >= 5 but you can change this to show the button at a different time when playing the video. For example, if you wanted to show the button when the video’s currentTime reaches 20 seconds, you can replace the condition with e.target.currentTime >= 20.
Then we use another if statement to show button 2 (the bottom button) whenever the video is paused or has ended (using the paused and ended HTMLMediaElement properties.
    //add timeupdate event on video with a function.
    $diviVideo.on("timeupdate", function (e) {
      //add class to show button1 when specified currentTime is reached.
      if (e.target.currentTime >= 5) {
        $delayedButton1.addClass("show-button");
      }

      //add class to show button2 when video is paused or has ended
      if (videoElement.paused || videoElement.ended) {
        $delayedButton2.addClass("show-button");
      }
    });
Final Result
Notice how the top button appears when the video’s current time reaches 5 seconds and the bottom button appears when the video ends.
Here the same top button appears when the video’s current time reaches 5 seconds and the bottom button appears when the video is paused.
You can also check out this codepen for a live demo of this functionality.
Final Thoughts
Showing a button based on the current time of a video can come in handy for marketing your products and services. Any successful promotional video deserves a compelling call to action anyway. Hopefully, this tutorial will give you a better understanding of how to tap into the functionality of HTML videos to serve up those powerful CTAs when and where you want.
If you are interested in other creative ways to use HTML videos in Divi, here are a few articles you may enjoy:
- How to Create Custom HTML Video Controls in Divi
- Adding 3D Effects to HTML5 Videos to Display Unique Product Animations in Divi
- How to Create a Sticky Promo Video with a Show/Hide Toggle in Divi
I look forward to hearing from you in the comments.
Cheers!


Hi Jason,
This has been a solution I’ve been looking for! My only issue is that if I set the delay for much longer ( swapping out the “5” for “2593”), the button still shows up a few seconds after the video starts playing. Any suggestions on what else I could do to get the the button to pop up later?
Hi Jason,
Great post blog! 🙂
This code work with a embedded Youtube or Vimeo video?
Thanks. Unfortunately not. This is for HTML videos.
Any other resources on how to create this with Vimeo videos?
Great question. I haven’t did much research on this, but this looks promising… https://developer.vimeo.com/player/sdk
Hi Jason,
Need Your recommendation can I use elegant themes on Affiliate site ?
Your answer highly appreciated
The Codepen example is not working for me there.
Sorry about that. I made some changes. Hopefully it works now.