

Managing multiple WordPress sites can be overwhelming, but tools like Divi Dash is can make it easier than it seems. Included with your Divi membership, this powerhouse tool lets you oversee all your sites from one sleek dashboard.
This step-by-step guide will show you what Divi Dash is, how to set it up, and all the options available to revolutionize your site management game. Ready to streamline your workflow, save precious time, and make managing your web projects a breeze? Let’s dive in!
What Is Divi Dash?
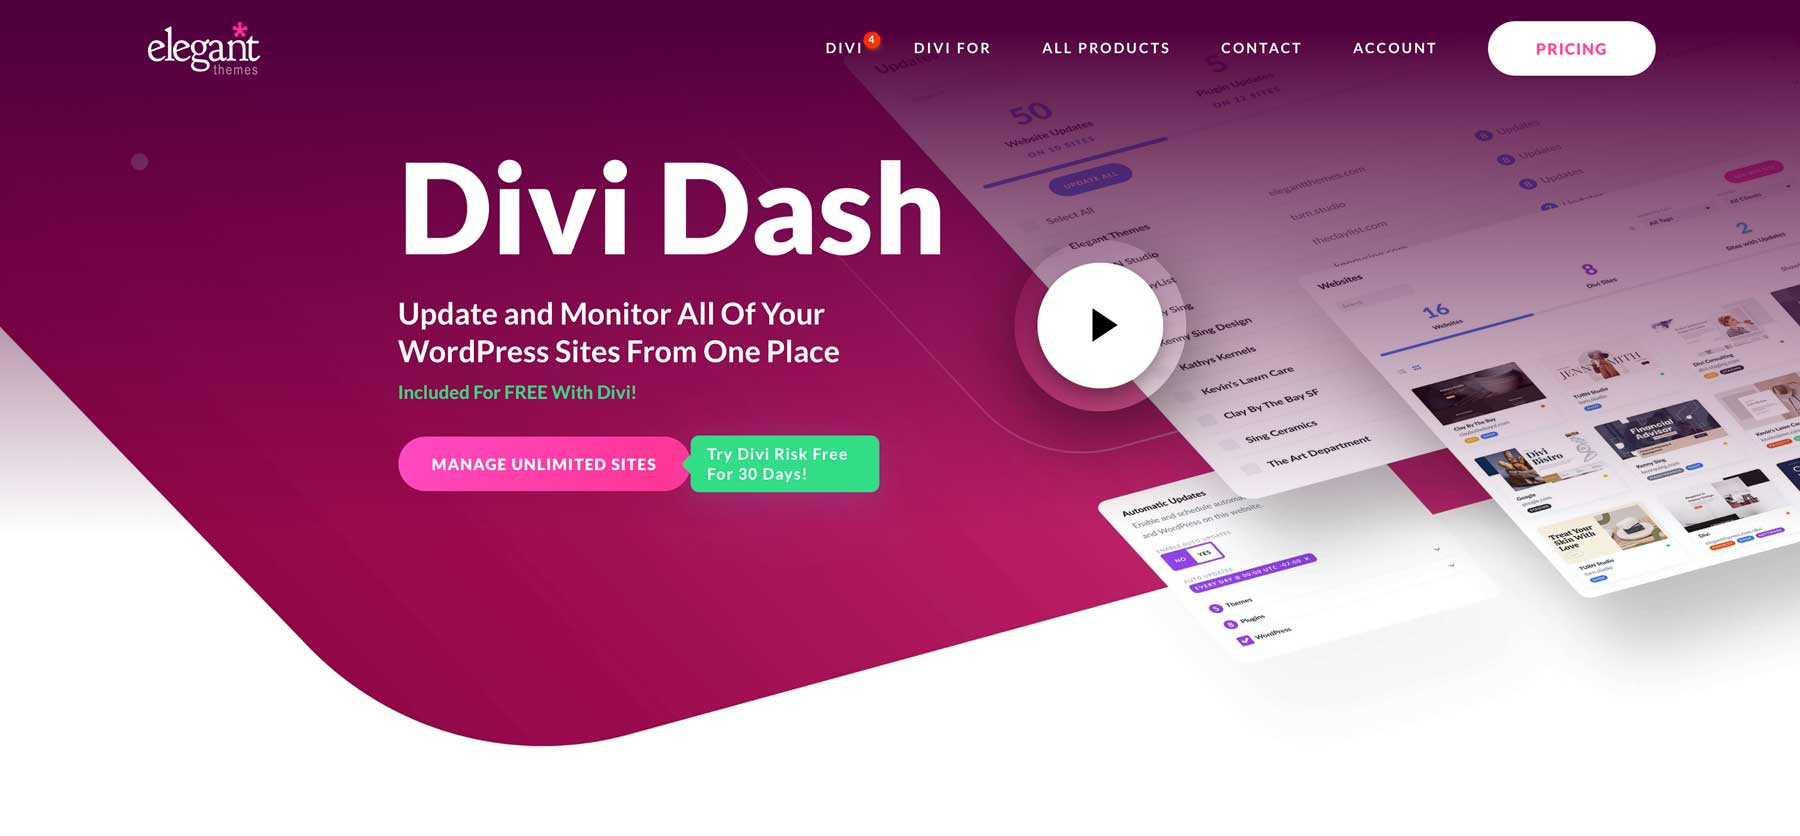
Divi Dash is a robust site management tool that is included with your Divi membership at no extra charge. This innovative solution simplifies the oversight of multiple WordPress sites, regardless of whether they use Divi.
Subscribe To Our Youtube Channel
The tool offers a consolidated view of all your sites on a single screen, making it easy to spot areas that require attention and effortlessly enabling you to monitor all your projects from one central location. The ability to update everything with a single click is a game-changer, eliminating the need to log into each site individually and saving you valuable time.
Beyond updates, Divi Dash allows you to manage users, optimize databases, and maintain notes for each site. The client management feature proves particularly useful for tracking site ownership. The interface also enables direct management of themes and plugins, eliminating the need to navigate between multiple dashboards.
You can also tag sites by client, enhancing your web design business workflow. As it’s included in your Divi membership, you might be able to eliminate other paid subscriptions for similar tools, potentially reducing your expenses.
For those working in teams, Divi Dash integrates smoothly with Divi Teams. This feature allows you to set specific permissions for colleagues and clients, fostering efficient collaboration and access to Divi’s support and resources.
Setting Up Divi Dash: Easier Than You Think
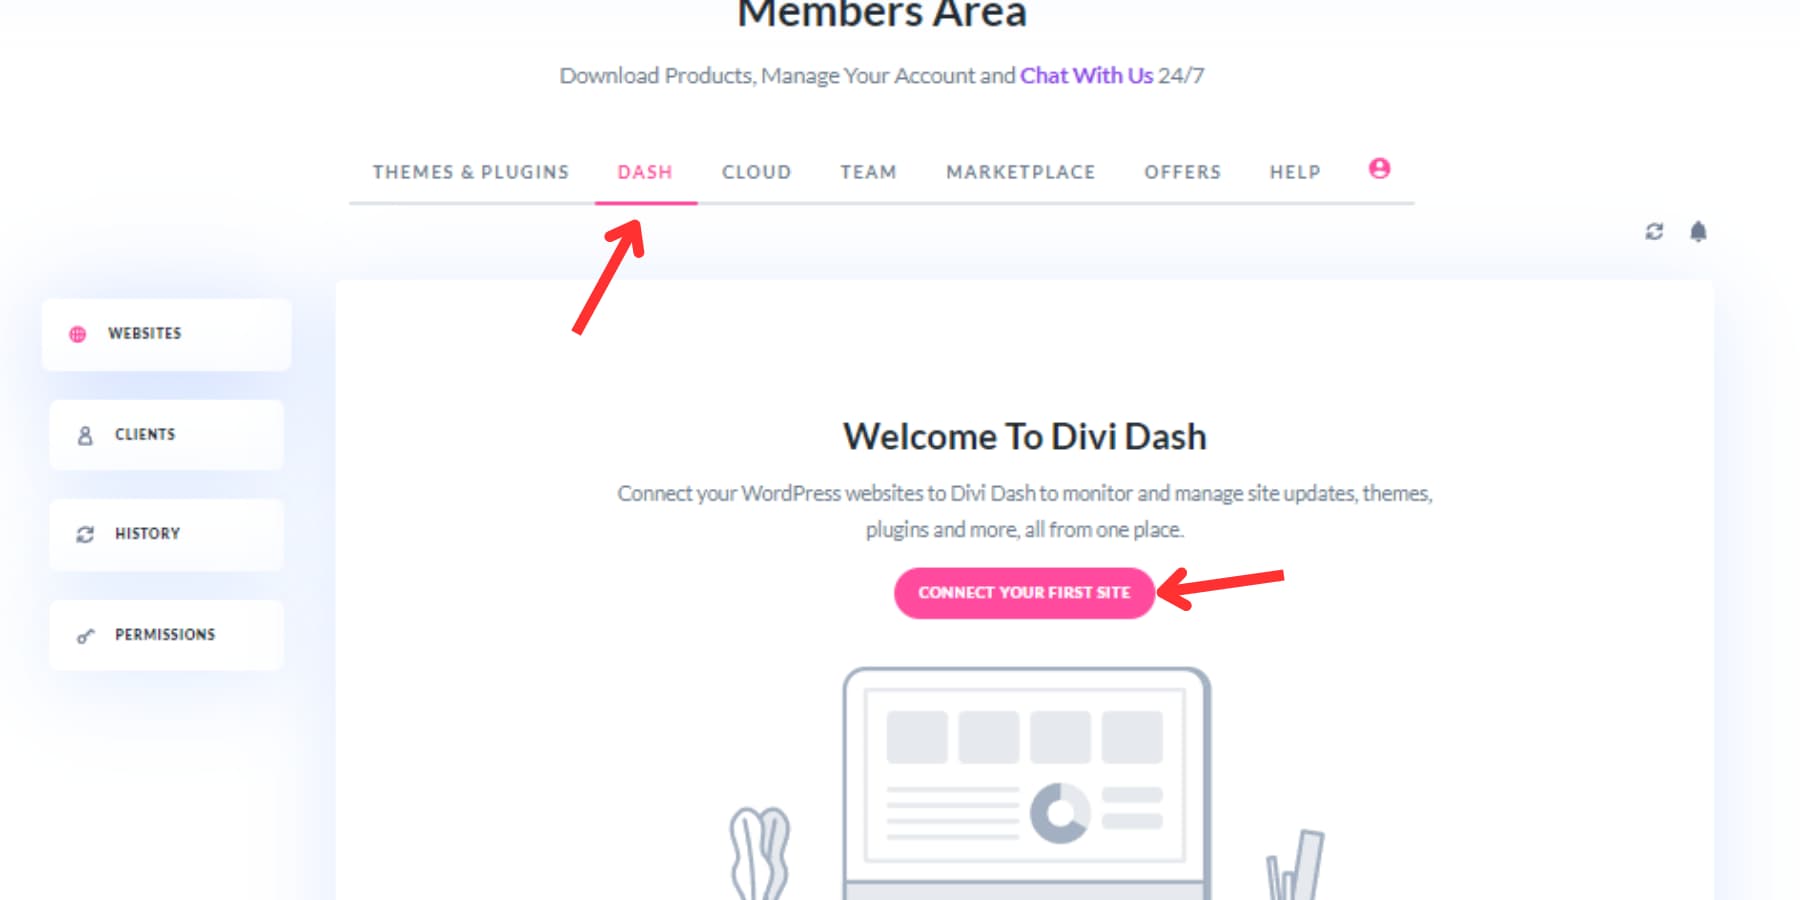
To begin using Divi Dash, navigate to the Elegant Themes’ Members Area and locate the ‘Dash’ option in the main menu. Next, click on the ‘Add Your First Website’ button.
A popup will appear, which will present you with two options for connecting your site to Divi Dash:
Using Username & Password
This is the easiest and most convenient way. Just enter the website URL, username, and password of any website admin account. When connecting the site, you may also select the option to install the Divi theme and the Bloom and Monarch plugins, which are ideal for adding new websites and saving the grunt work of manually downloading and installing them.
Divi Dash will log in, install its plugin, and handle everything else to connect your site to the dashboard. The connection is fully secure and encrypted. Plus, Divi Dash never stores your passwords or shares them with third parties, so you can trust that this method is entirely safe.
You can follow these steps for each of your websites. After adding your site(s), you’ll see a dashboard where everything necessary is organized and easy to manage.
Using Connection Key
If you still wouldn’t like to share your login credentials, using a connection key instead of a username and password to connect to Divi Dash makes things more trustable since you don’t have to share your login details.
To start, choose ‘Use the connection key instead’ below the log in fields. You’ll then need to enter the website URL and download the plugin by clicking the ‘Divi Dash Plugin’ button.
Once you’ve downloaded the plugin, install it on your site. After installation, click on the ‘Divi Dash Connection’ button on the plugin page next to the credits. A dialogue box with the connection key will appear. Click on the connection key to copy it.
And paste it into the Divi Dash setup popup.
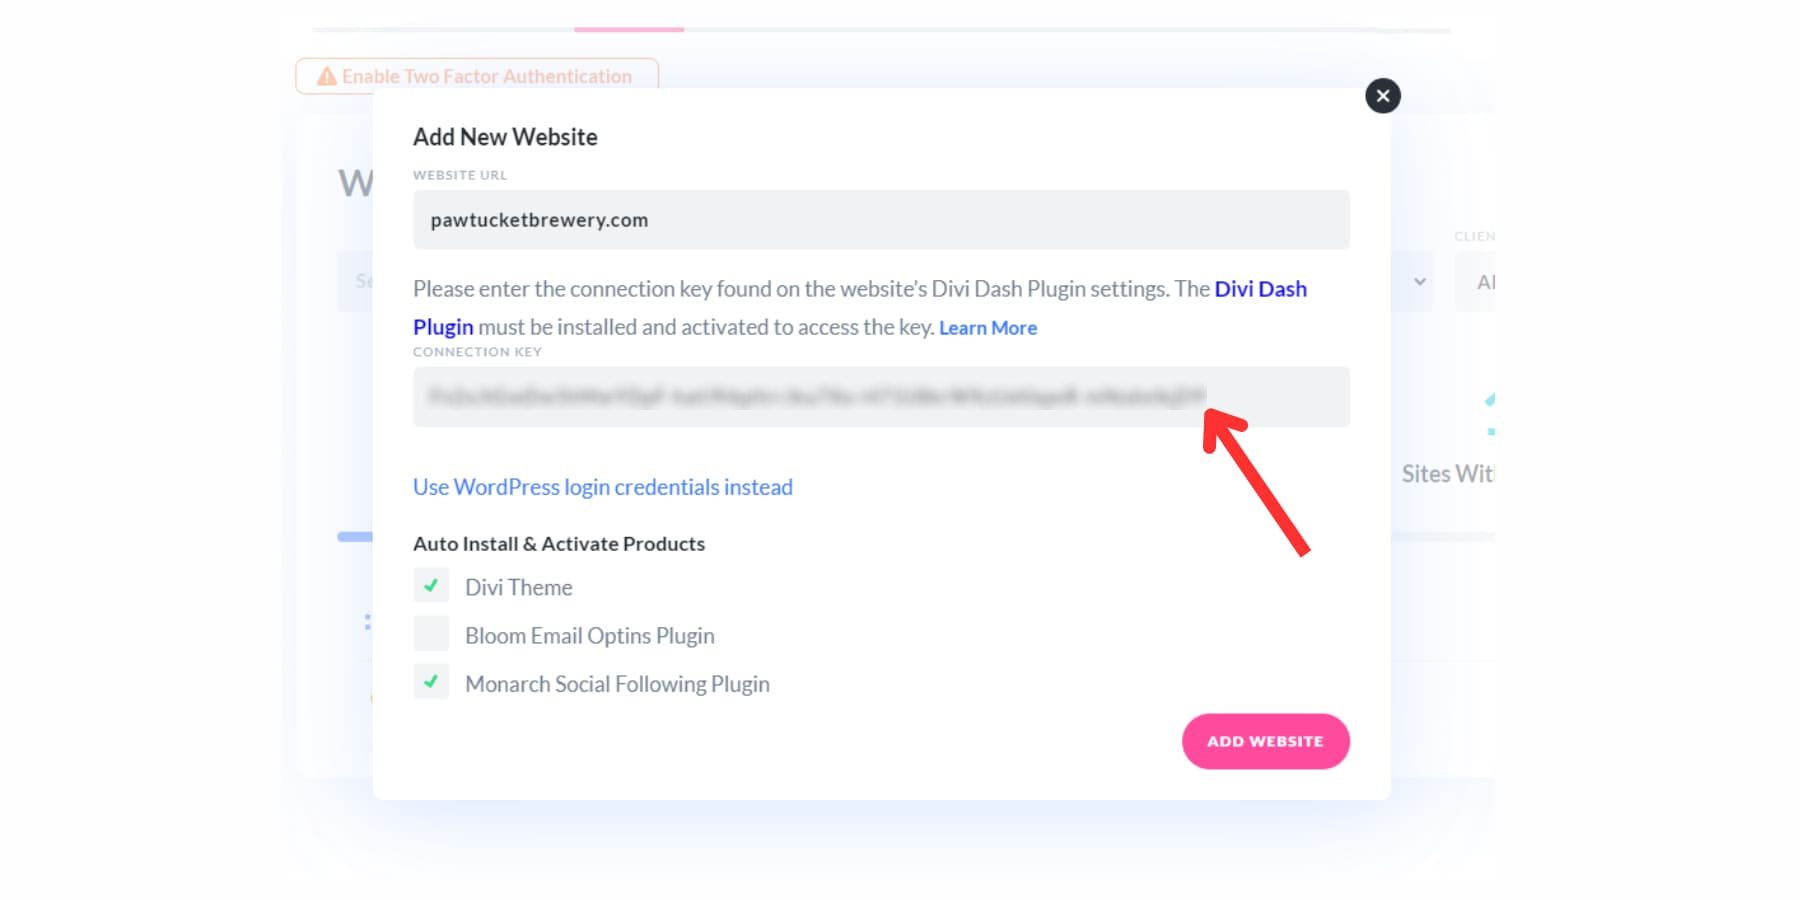
Decide if you want to install the Divi theme and other Elegant Themes plugins. Finally, hit the ‘Add Website’ button. Divi Dash will then connect to your site and handle the rest. Repeat the same for all websites you may want to add.
A Quick Overview Of Divi Dash’s Interface
Now that you have added your websites, let’s take a quick overview of all the options available in Divi Dash and how and where to access them. On the Divi Dash screen, you’ll see the following sections:
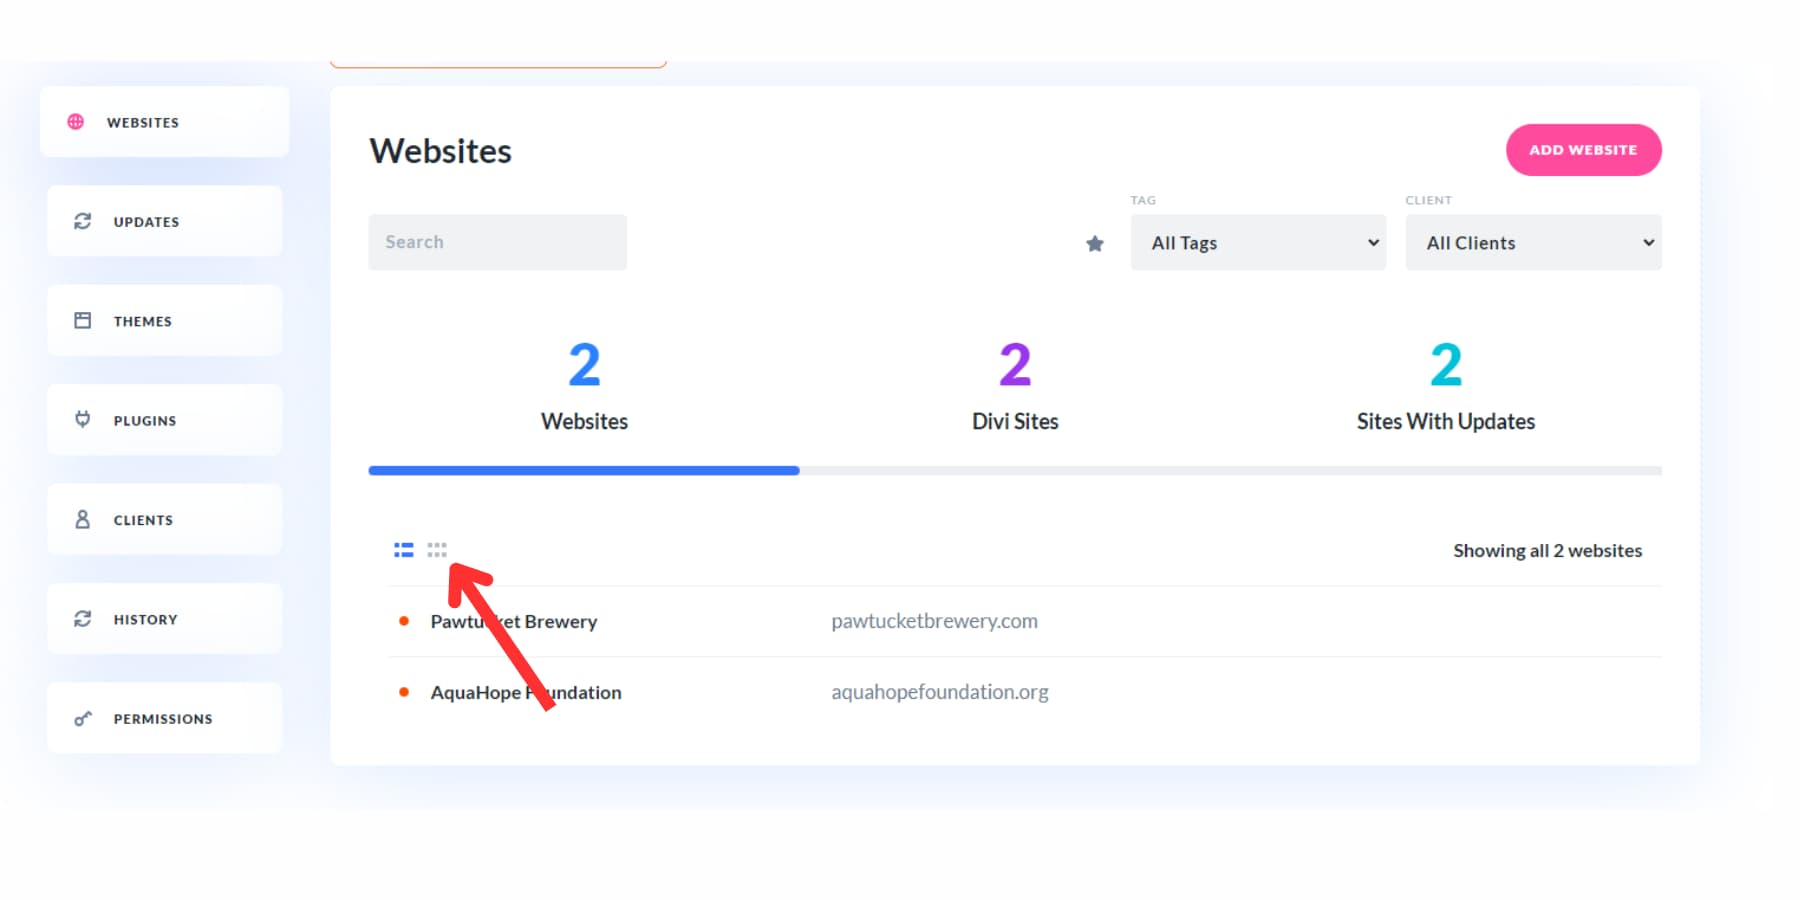
Websites
The Websites section in Divi Dash serves as a centralized hub for managing all your connected websites. This section offers multiple filtering options to streamline access, which is especially useful for connecting numerous websites. You can use the prominent tabs labeled All Websites, Divi Websites, and Sites with Updates to navigate different categories quickly.
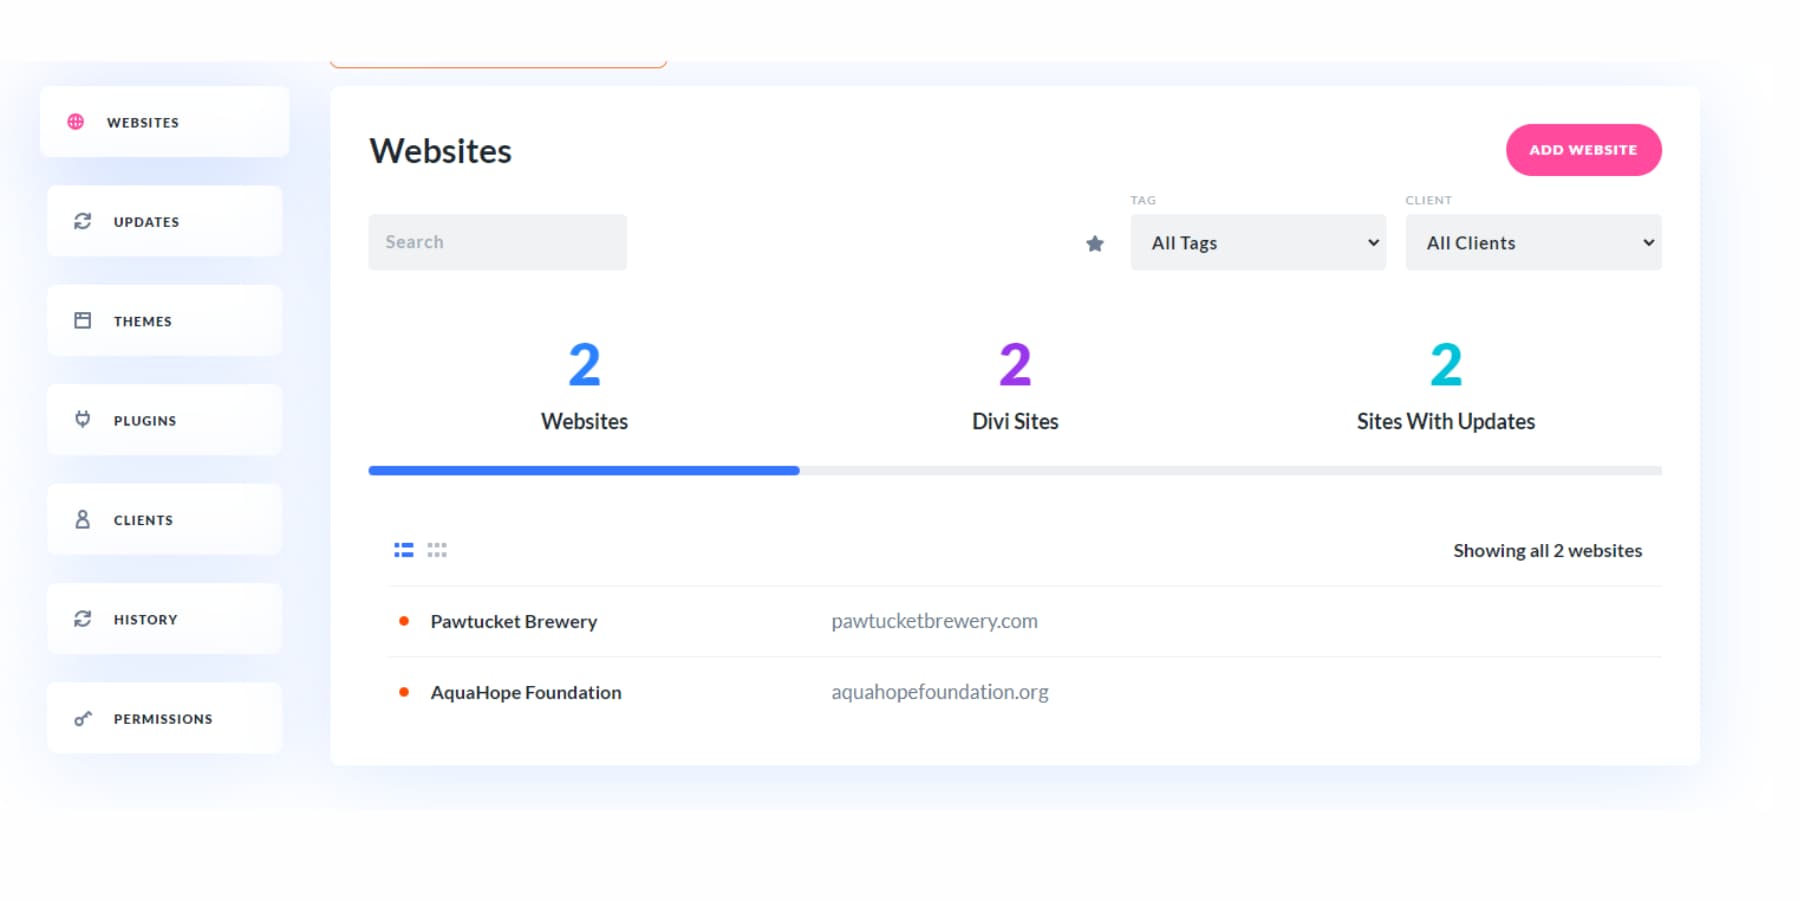
A search bar also facilitates quick and easy searches for specific websites. Beyond the primary filters, the platform allows you to sort websites by custom tags and clients, which you can assign to individual website dashboards. This feature simplifies organizing and finding specific sites based on your custom criteria.
To further enhance usability, Divi Dash allows you to mark certain websites as favorites. You can then click the favorites button to access these marked websites quickly.
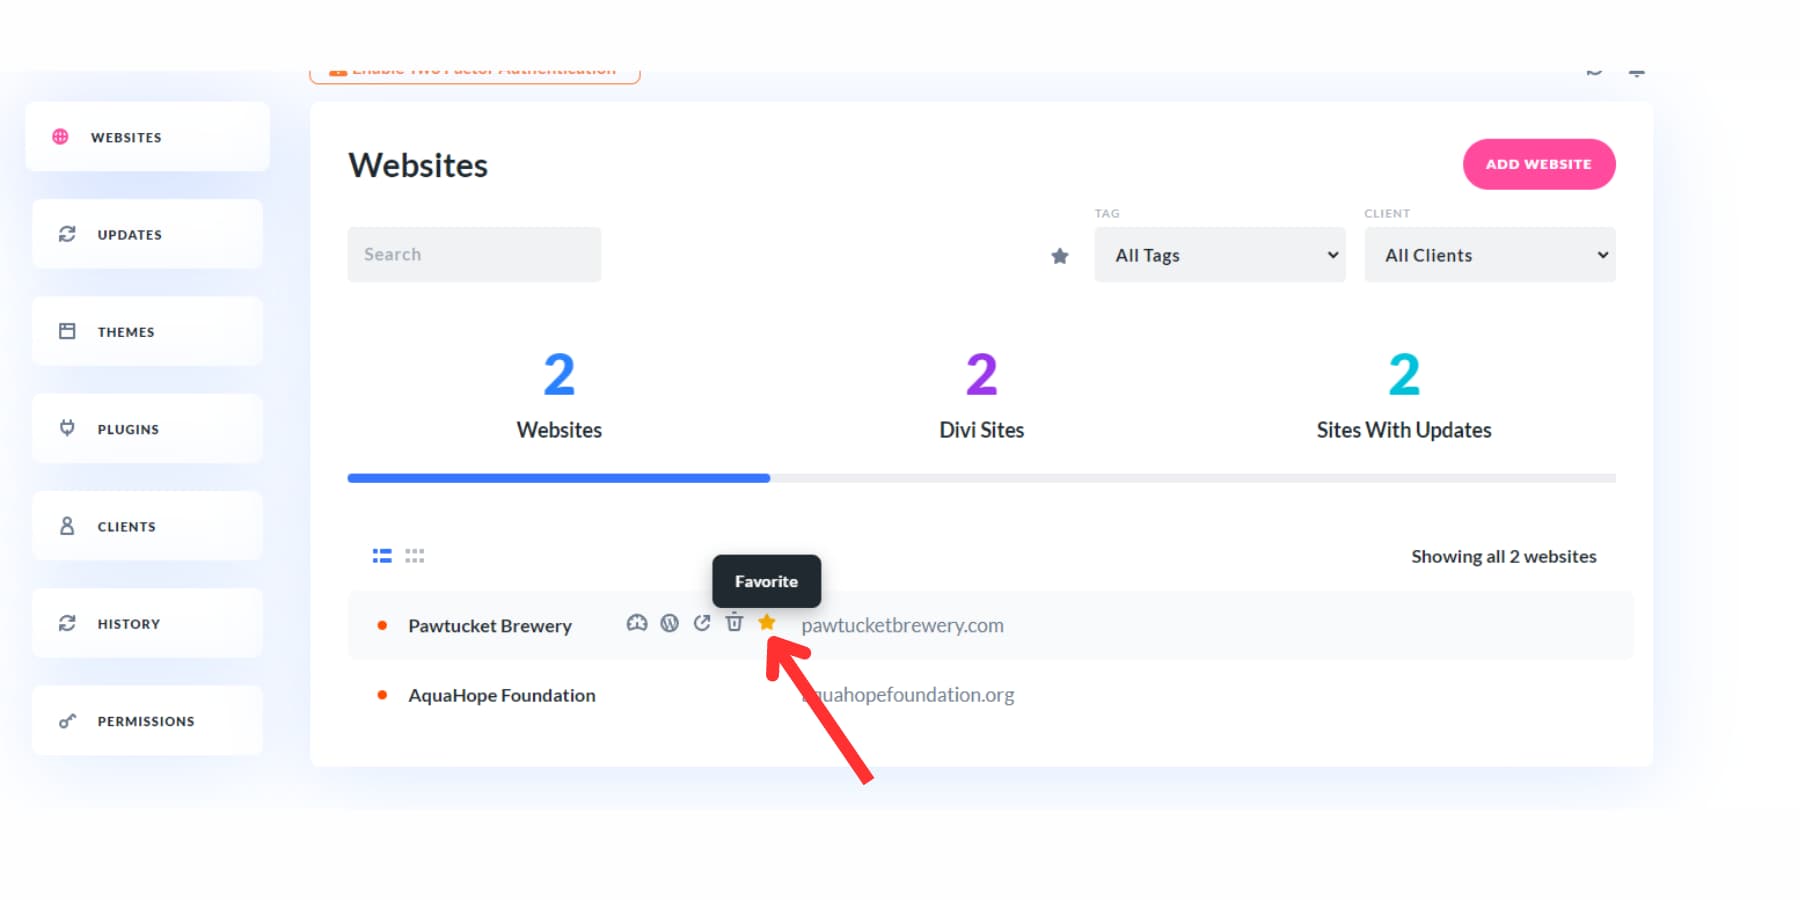
Additionally, if you are managing many sites, you have the flexibility to switch between Grid view and List view, allowing you to choose the layout that best suits your needs.
By combining these features, Divi Dash ensures that managing multiple websites is efficient and customizable to your preferences.
Updates
The update section allows you to efficiently manage updates across all your websites in one place. It also offers various sorting options to help you find and organize websites with updates.
You can use filters to search for a specific website, sort by your favorite websites, display websites with available updates or those you have ignored, check the activation status of updates, and categorize by website tags and clients.
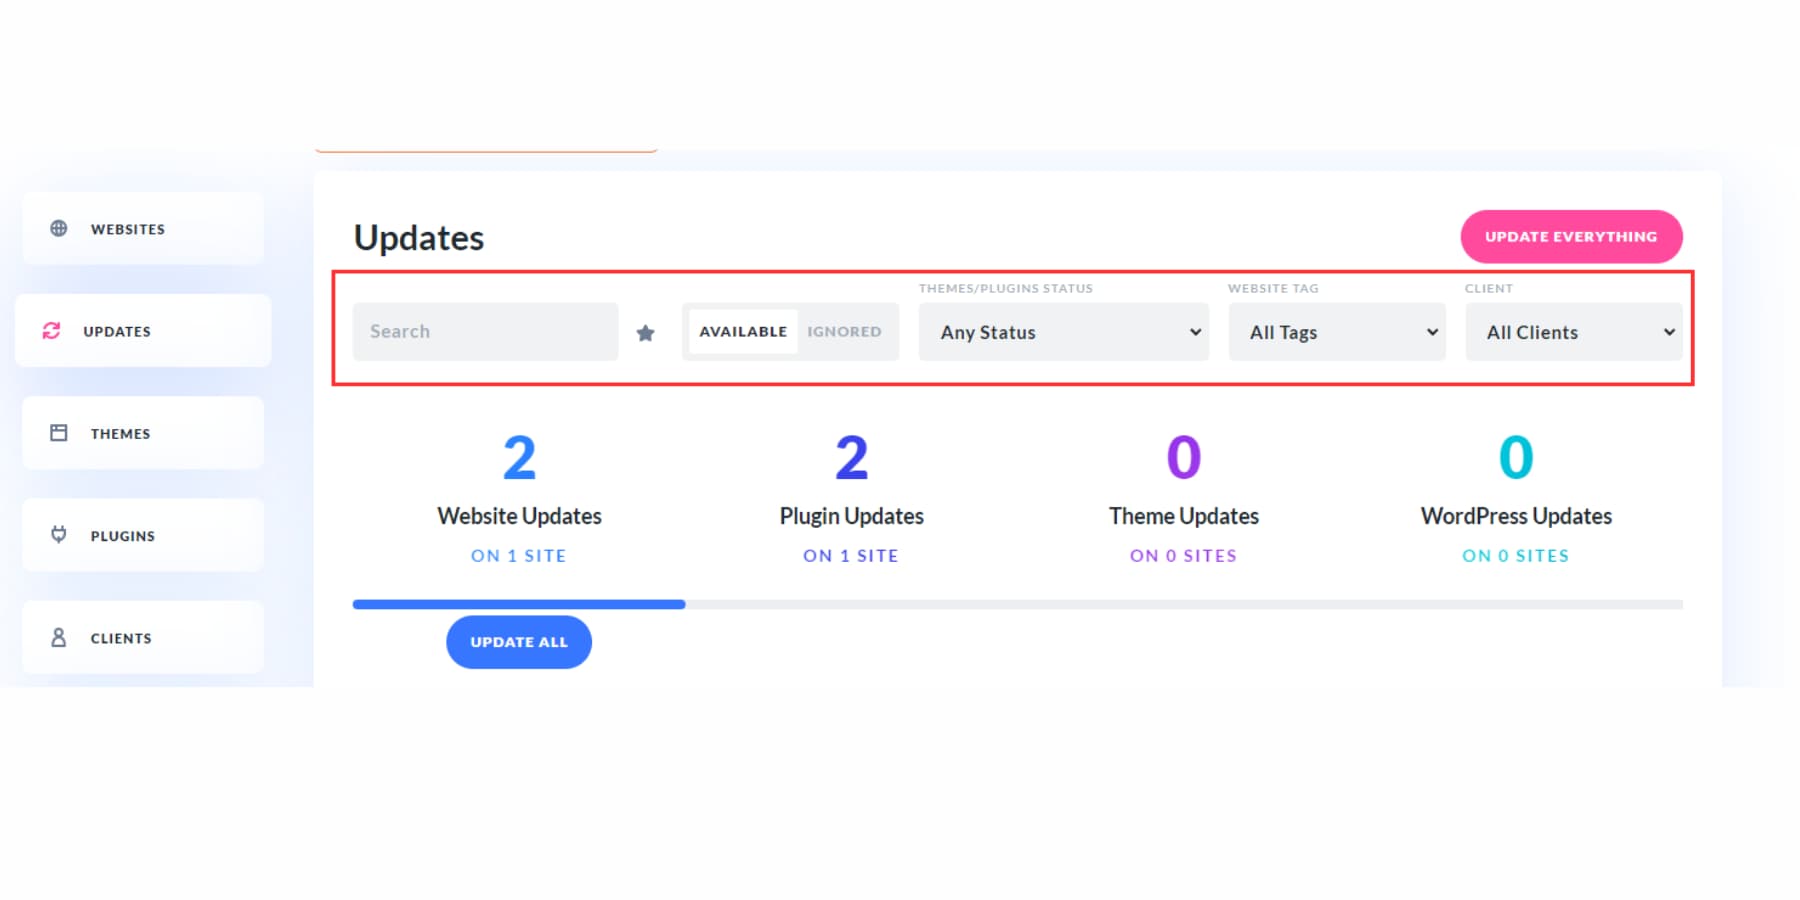
Additionally, you can sort websites based on different types of updates and view websites with all available updates, including those needing plugins, themes, and core updates. Each category has its checkboxes, enabling you to select individual websites for updates or choose to update all websites simultaneously.
At the top of this section, there’s an “Update Everything” button that allows you to perform all updates across all your websites with a single click. These features streamline the process, ensuring that your websites remain up-to-date effortlessly.
Themes
The theme section lets you centrally oversee and organize all themes across all websites. Using the search function and various dropdown filters, you can quickly locate specific themes or narrow your focus based on criteria such as favorites, theme status, tags, and client associations.
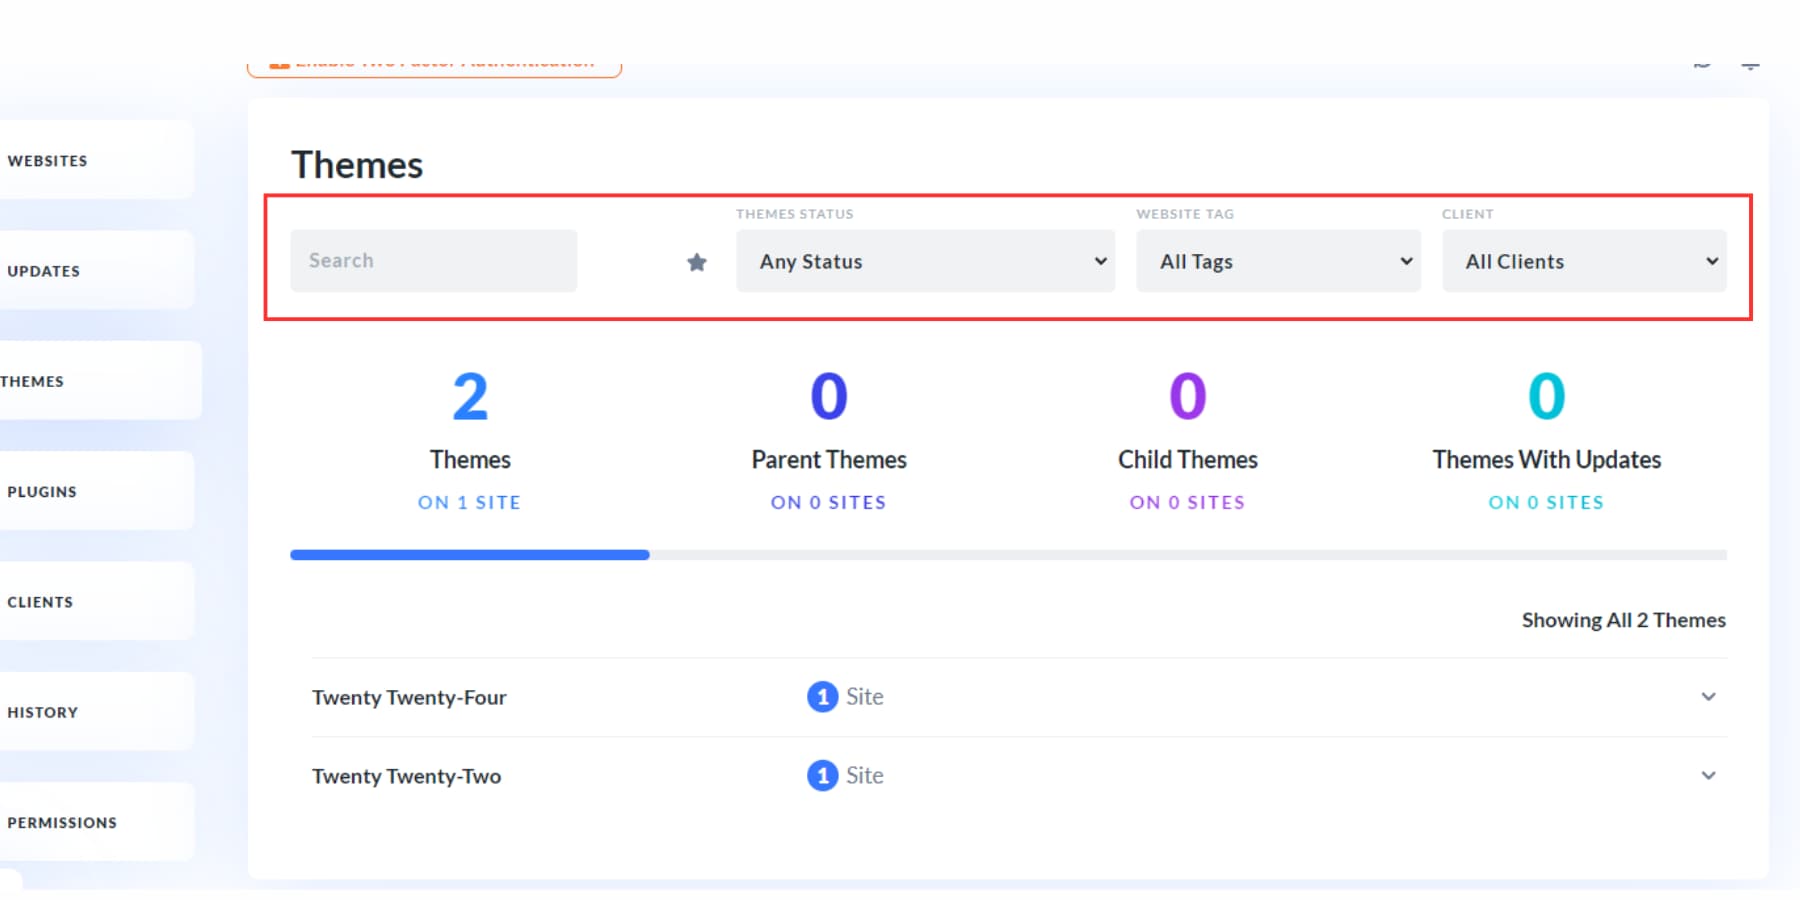
For more detailed organization, prominent tabs enable you to categorize themes into distinct groups: All Themes, Parent Themes, Child Themes, and Themes With Updates. This classification system provides a clear overview of your theme ecosystem, allowing for streamlined management and maintenance.
This section allows you to perform essential actions on individual themes. By selecting a specific theme, you can activate it on desired websites, deactivate it where it’s no longer needed, or remove it entirely from your system.
Plugins
The plugin section serves a similar purpose to the themes section, offering an organized way to manage your plugins. You can quickly sort plugins based on their favorite sites, status, tags, and clients, providing a streamlined experience tailored to individual needs.
Additionally, the convenient tabs enable you to filter plugins into categories such as All Plugins, Divi Products, and Plugins with Updates.

For added efficiency, the “Update All Plugins” button at the top allows for simultaneous updates of all plugins, ensuring that your site remains current with minimal effort.
Client
The client section lets you add new clients and link them to websites in your Divi Dash setup for easy tagging, filtering, and tracking.
To add a client, click the Add Client button. Enter their name, company name, email, and phone number, then assign them a specific website.
After adding several clients, you can sort them based on the websites that have pending updates. When you click on a client’s name, you can edit their information, view the websites assigned to them, and add custom notes like project details or personal information that might be useful for your collaboration.
History
The History tab helps you keep track of the changes being made to your websites. This is particularly useful if you’re working with a team or contractors.
You can search for activities by website, time frame (up to 60 days in the past), type of action, and the component involved.
Moreover, you can export this history as a CSV file, making it easy to keep records and archive information.
Permissions
By integrating Divi Teams with your Divi Dash, you can easily manage the permissions and authority of your team members on the sites you oversee.
Click the “Manage My Team” button to add or remove members.
You can also include your clients in your Divi Team, allowing them access to Divi’s support, which makes managing websites even simpler.
Get Divi Dash Today
Divi Dash is here to make managing your WordPress site a breeze, saving you tons of time and effort. With loads of features included in your Divi membership, it’s a total game-changer for web designers.
As we explored, Divi Dash is packed with handy tools, and there’s more on the way, like uptime monitoring, analytics, vulnerability reports, and other helpful updates.
Your Divi membership doesn’t just cover the Divi Theme and Dash. You can also access Divi AI and Quick Sites, which can whip up a complete website for you — pages, theme builder elements, templates, and personalized content and images — all tailored to your business by just getting some information about it.
Join now and experience how much easier building and managing WordPress websites can be!


Leave A Reply