
The arrival of Option Group Presets has opened up so many new possibilities within Divi 5. Nick said this was the most important feature to hit Divi in years, and as you test them out, you’ll see exactly why he said that.
You’re already used to Element Presets, but Option Group Presets adds a whole new layer of design control that you’ll never stop using. However, both types of Presets support “Default Presets.” That’s what I want to show you over the course of the following 2000 words.
What are Default Presets in Divi 5?
Default Presets are the first presets you’ll want to edit on your websites. In many ways, these are a total replacement for the Theme Customizer.
Subscribe To Our Youtube Channel
You have two types of default presets that you can work with immediately upon editing a page—Default Element Presets and Default Option Group Presets. Let’s cover Element Presets first because it’s more familiar, but you’ll want to start all your designs with Option Group Presets.
Default Element Presets
Element Presets make quick work of designing an element you’ll use many times across your website. With Element Presets, you can take a module like the Blurb Module and edit the module’s Default Preset. Once the Default Preset is edited, it uses those same styles when adding a new Blurb Module to your site (because new items use the default settings).
How to Edit a Default Element Preset
Editing a Default Preset is straightforward. Click on the element you want to change default settings for (in this case a Text Module). In the top-right, click on the Preset Selector.
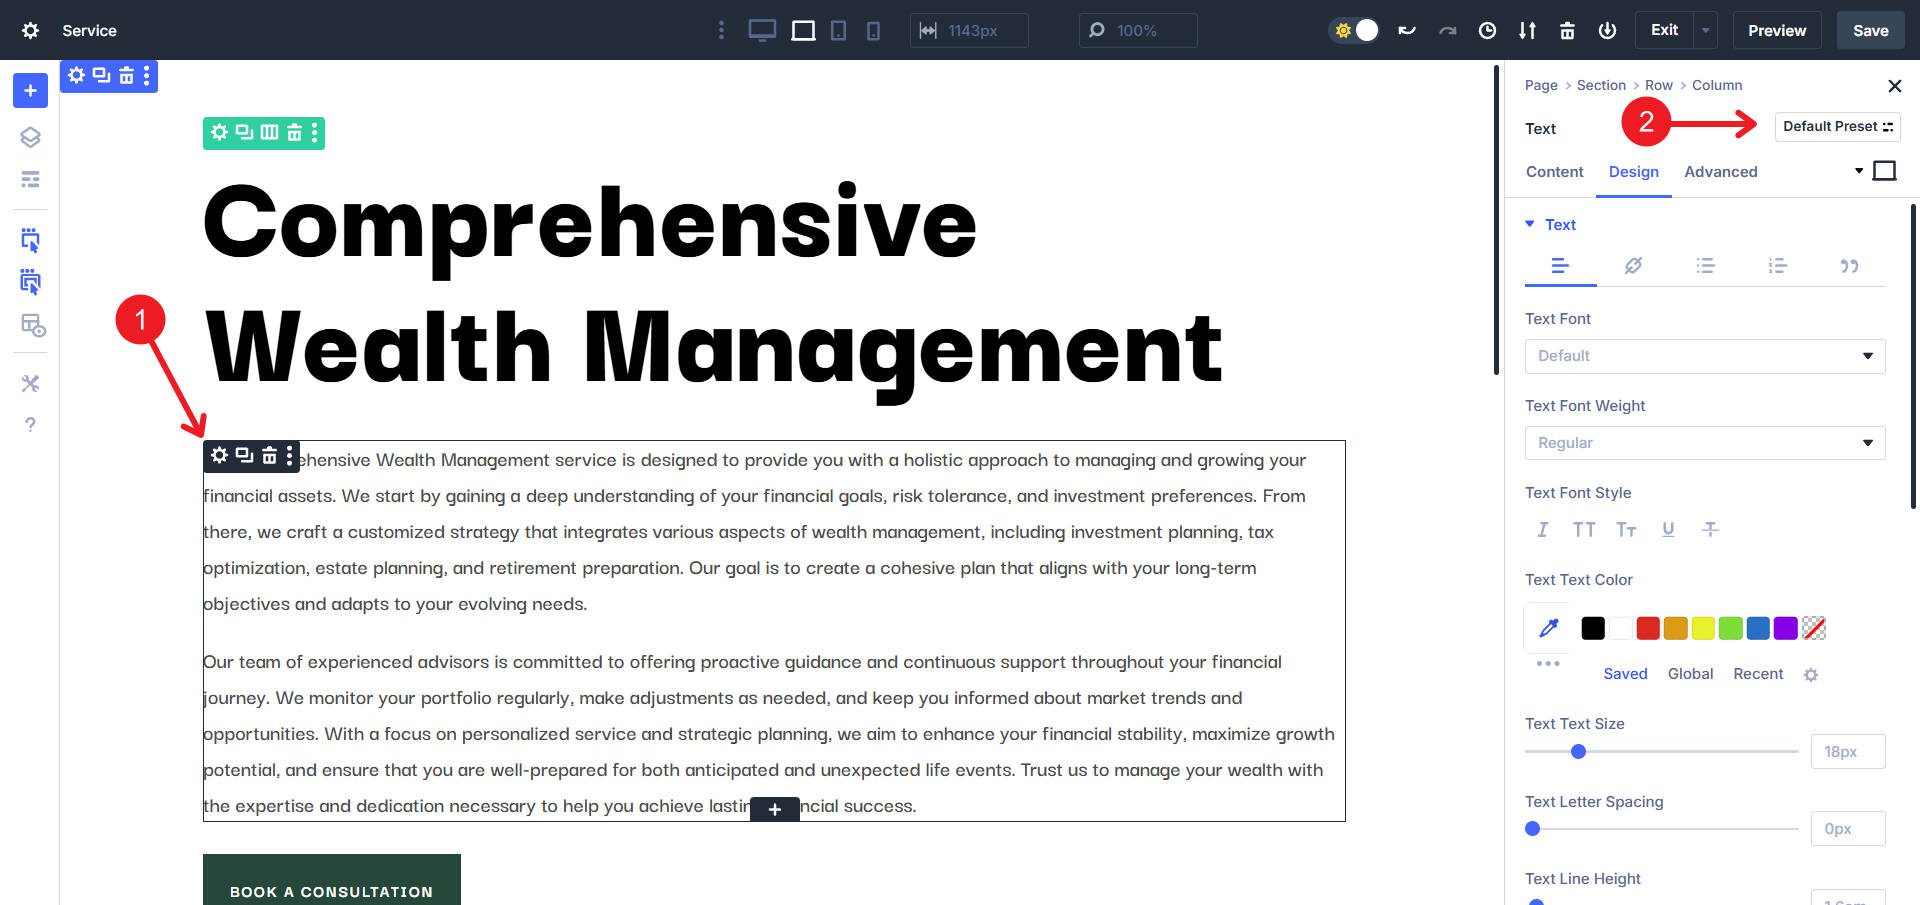
You should see at least one Preset in the dropdown menu—the Default Preset for that element. Find the Settings (Gear icon) and click it to change the Settings options from the specific page element to the Settings options for the Default Preset.
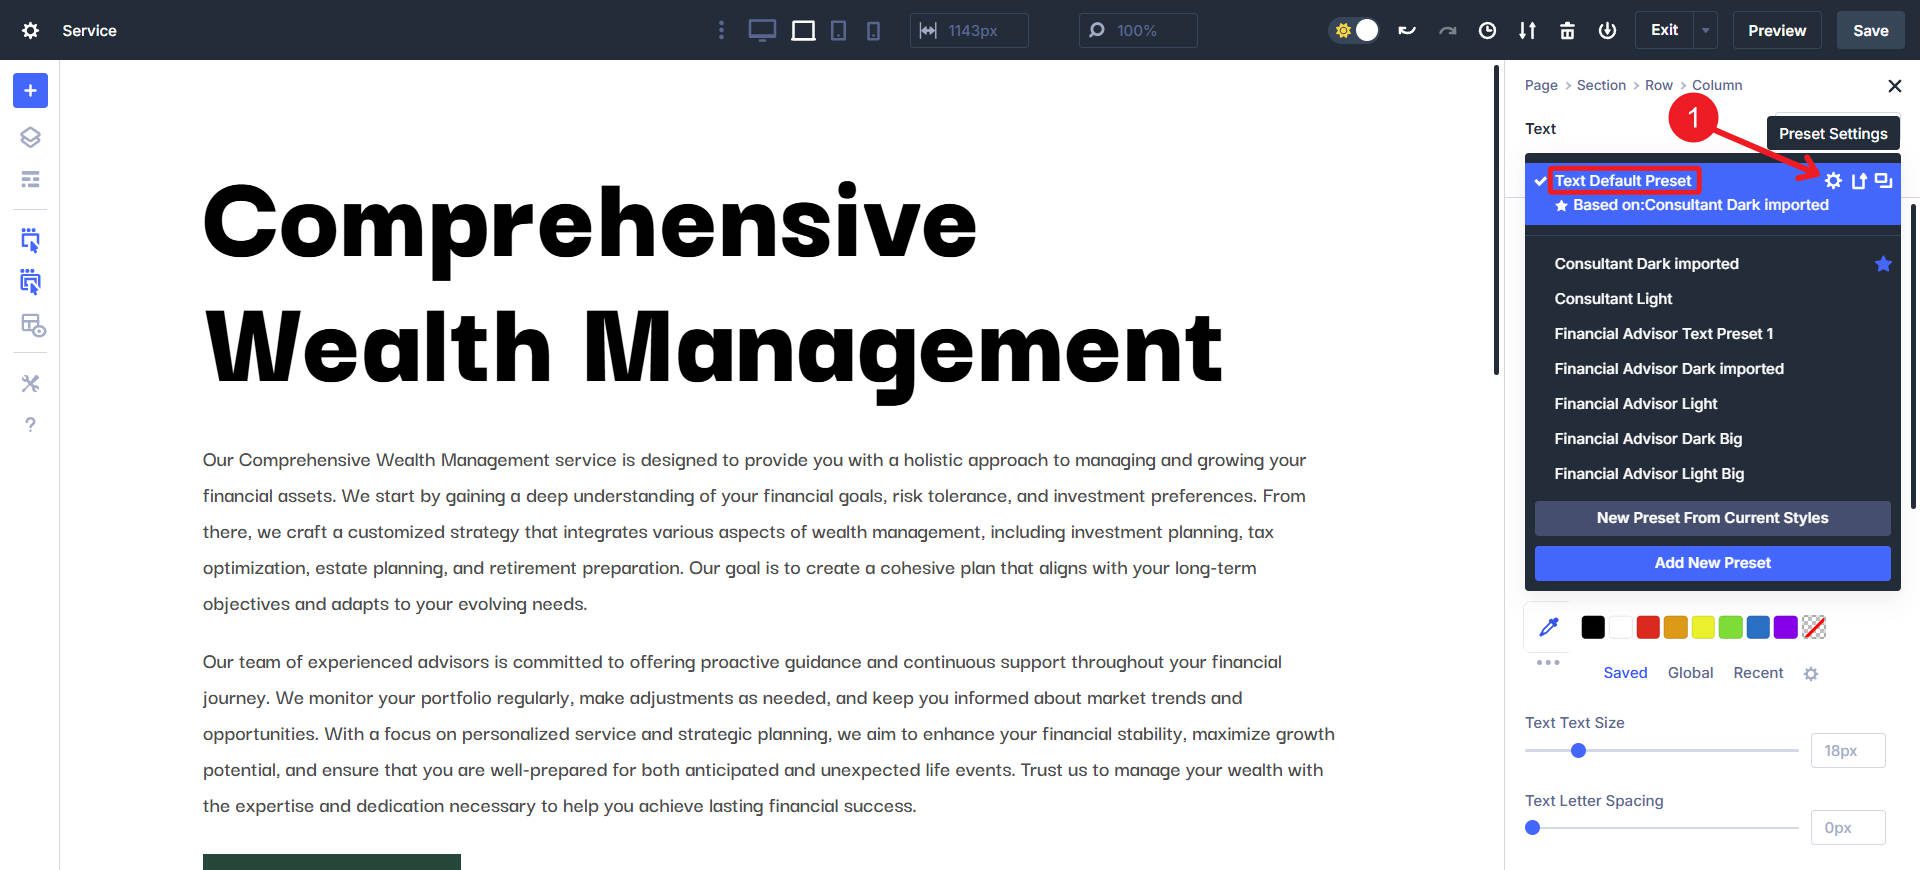
You’ll know you’re editing a Preset when the breadcrumbs (showing the nested position of the element you were working on) disappear and the word “Preset” appears in the top left of the settings panel. You’ll also notice the Preset Selector says “Default Preset,” and it turns Blue. From here, navigate to the Element Option Group you’d like to edit. In this case, I’ve decided to go to the Design tab > Text > Text Size to edit the size of the text content for this module.
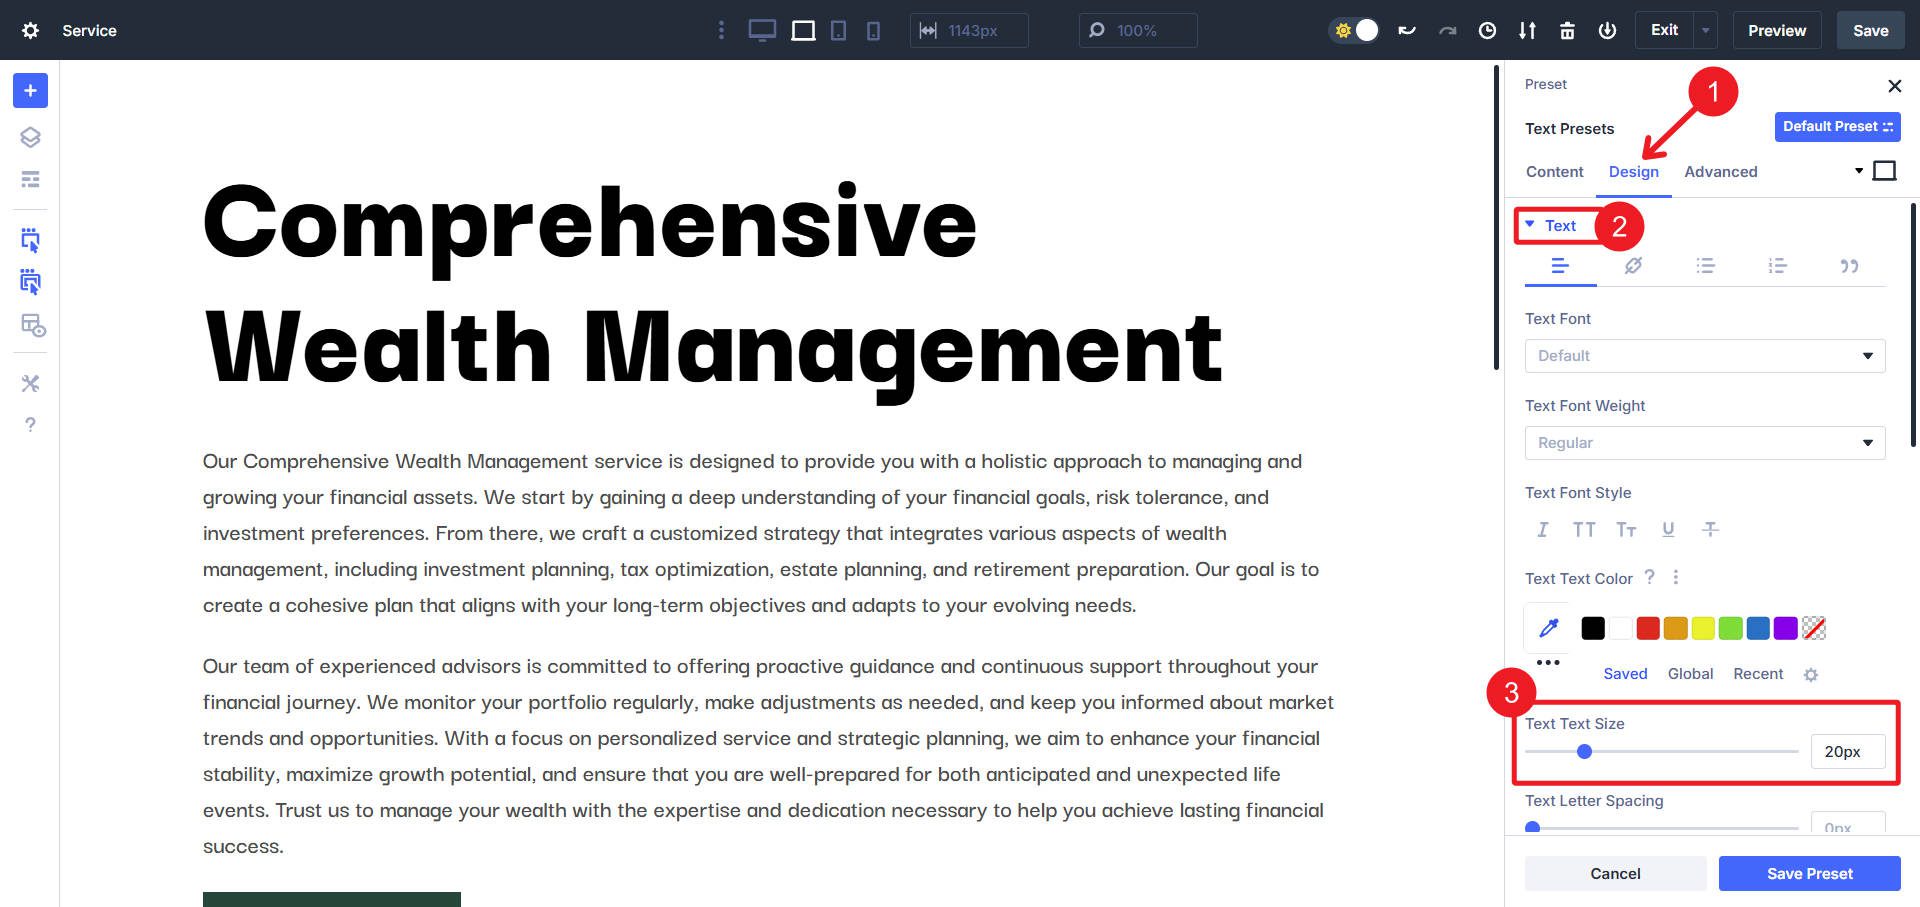
Click “Save Preset” to have your changes take hold sitewide.
If you’ve been around Divi for a while, you know about Module Presets. Element Presets are the same as Module Presets, but calling them module presets was confusing because presets can also be used on non-module elements such as Sections and Rows.
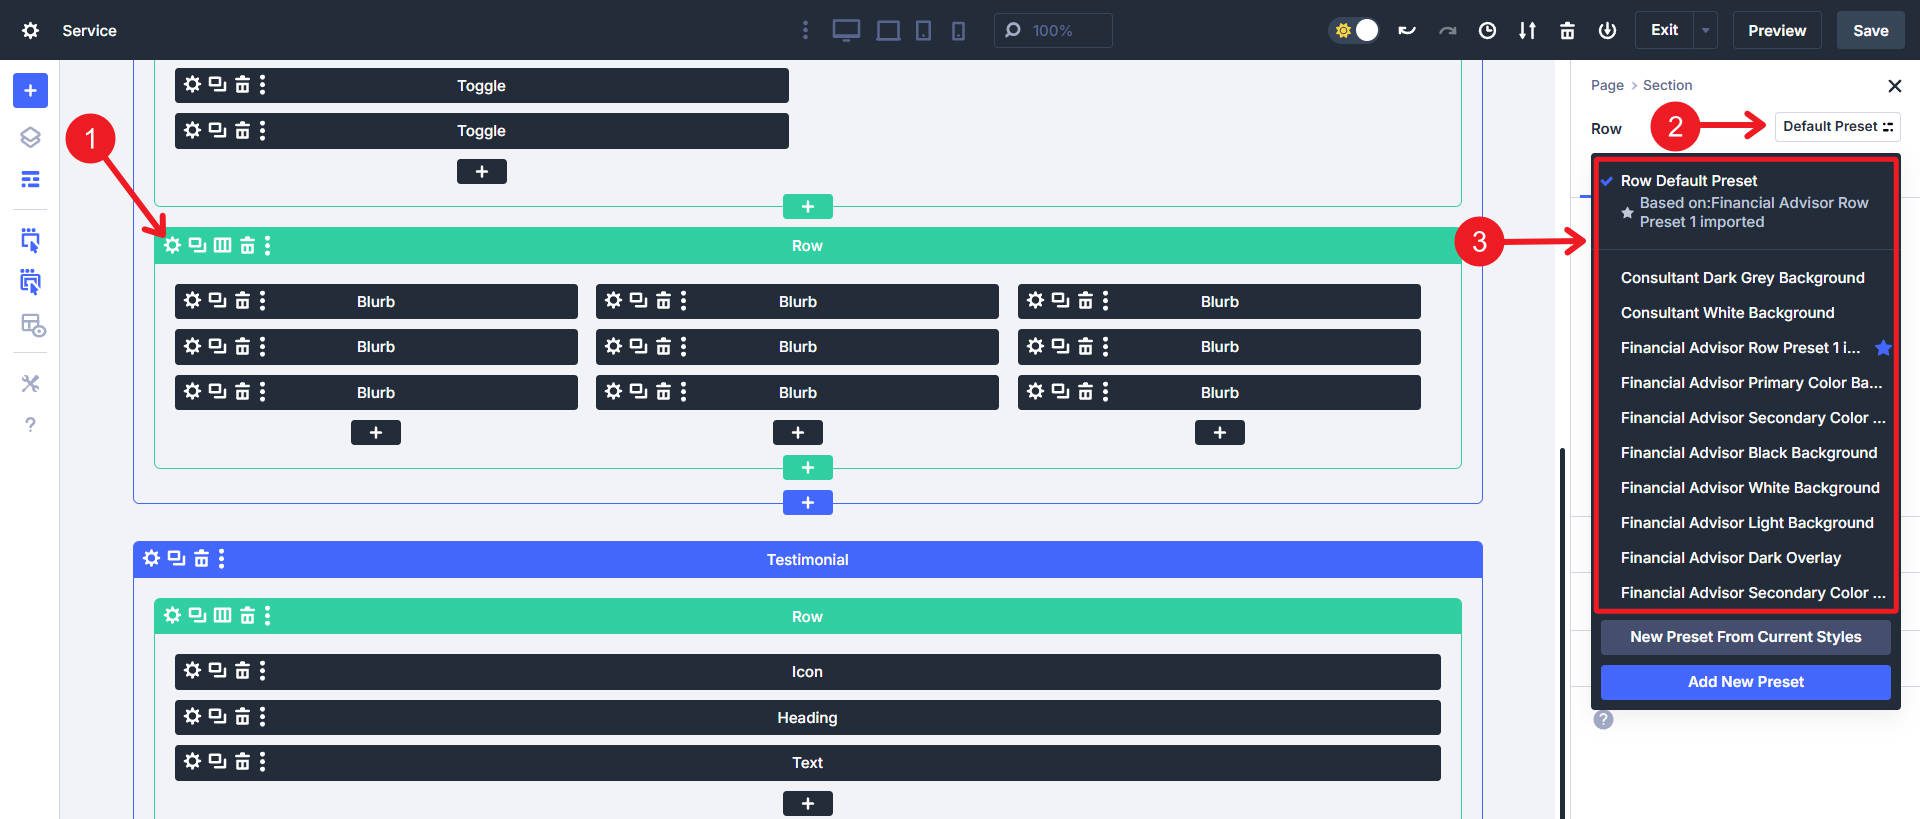
Wireframe view of a page in Divi 5. Notice how this Row has presets while not fitting the criteria for being a Module but rather a container.
Default Element Presets can be “overridden” simply by applying a different Custom Element Preset to the module (more on this below) or by applying styles directly to a specific module or element. Divi, like CSS, works with specificity rules, and in this case, settings applied to a module directly are more specific than settings applied to a Default Element Preset.
But there’s a new Preset on the block that you should be designing your Divi Websites with first.
Default Option Group Presets
Divi’s new Option Group Presets allow you to create default styles that span various modules and elements that may use similar option groups. This is all done with “Default” Option Group Presets. If you are fuzzy on the details of this new concept of Option Groups, you can read more about it in our post, which tells you everything you need to know about them.
Learn About Option Group Presets
In short, different Modules have different compositions (see the table below for an example comparing four different elements).
| Versatile Web Design w/ OG Presets | Call to Action Module | Countdown Timer Module | Sections & Rows |
|---|---|---|---|
| Text (Design) | ✅ | ✅ | ❌ |
| Title text (Design) | ✅ | ✅ | ❌ |
| Body text (Design) | ✅ | ✅ | ❌ |
| Button (Design) | ✅ | ❌ | ❌ |
| Number text (Design) | ❌ | ✅ | ❌ |
| Separator text (Design) | ❌ | ✅ | ❌ |
| Label text (Design) | ❌ | ✅ | ❌ |
| Background (Content) | ✅ | ✅ | ✅ |
| Sizing (Advanced) | ✅ | ✅ | ✅ |
| Spacing (Advanced) | ✅ | ✅ | ✅ |
| Border (Advanced) | ✅ | ✅ | ✅ |
| Box Shadow (Advanced) | ✅ | ✅ | ✅ |
| Filters (Advanced) | ✅ | ✅ | ✅ |
| Transform (Advanced) | ✅ | ✅ | ✅ |
| Animation (Advanced) | ✅ | ✅ | ✅ |
| *Option Group Presets let you apply designs widely across modules/elements that support overlapping Option Groups. | |||
When one element’s composite features overlap with another’s, they can share styles on the Option Group level—meaning that you save time when designing similar motifs across different modules and elements (like Title Text across many modules). Particularly with headings, body text, shadows, animations, sticky functionality, borders, spacing, and buttons, you will be designing websites much, much faster.
How to Edit a Default Option Group Preset
To edit a Default Option Group Preset, go to a module or row/section’s Settings panel. Hover over the available Option Groups (Text, Title text, Button, Background, etc.). Options Groups that support Presets will reveal a Preset Icon on the right side of that OG field when hovered over. Click the Presets icon to show the Default and any Custom Presets for that Option Group.

Here’s a video demonstrating the difference between editing a particular aspect of a single module and editing that same aspect with an Option Group Preset.
You know you’re editing an Option Group Preset when the UI changes from light to dark (unless you were on dark mode, in which case it is the opposite) for only the Option Group you are currently editing. You must save changes for them to take effect.
What’s the Difference Between Default and Custom Presets?
Default Presets are the styles automatically applied to any new elements (modules/sections/rows) placed on a page or template. No matter what, every element and every option group within Divi will have a Default Preset. See below where default styles come from.
Custom Presets are additional presets that are as easy to manage and apply as default presets but won’t be used automatically (you have to apply these custom presets in place of the default). They are used in special situations, such as dark sections, sidebars, and dense content displays—whatever your design needs.
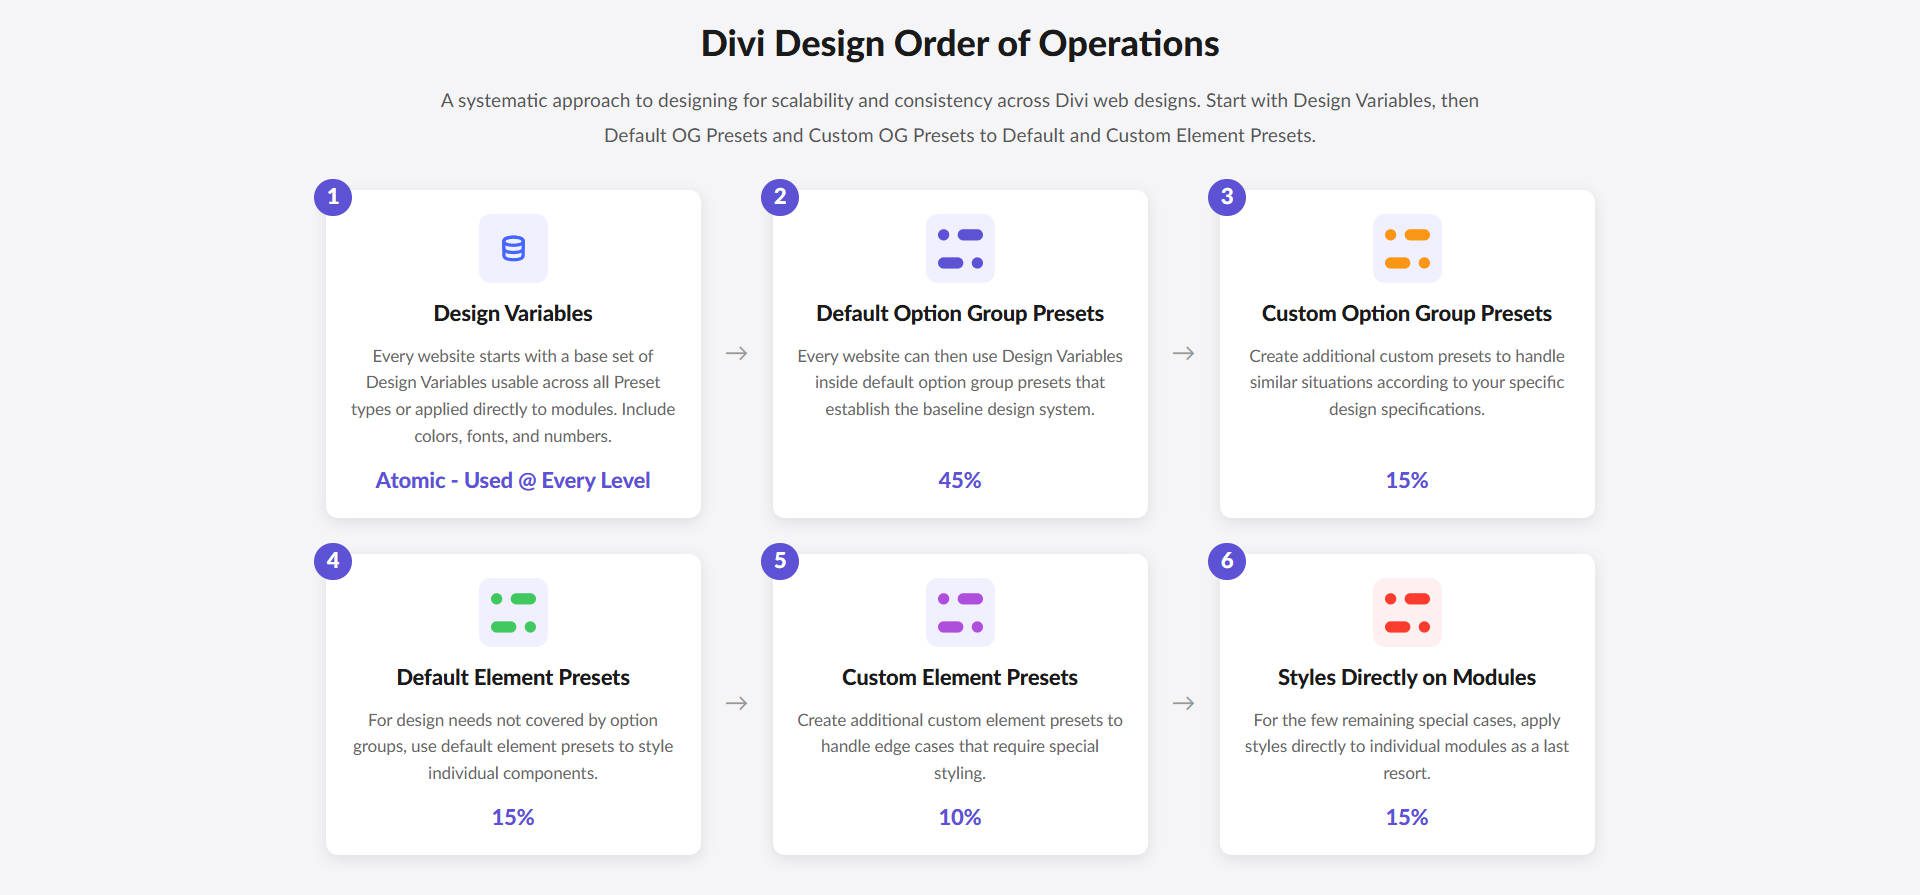
Every website should be designed using default option group presets as far as possible. Then, additional Custom Option Group Presets should be created to handle similar situations per your design specs. Whatever is not covered by those OG Presets can be designed with Default Element Presets and then Custom Element Presets. You could directly apply styles to individual modules for remaining edge cases that still need to be designed.
Divi is at an exciting stage with all the new features rolling out. I strongly suggest you create Design Variables first and then use them throughout your Presets. You can use all sorts of design variables, but for default presets, you’ll often be using color, font, and numerical (made even more helpful with Advanced Units) design variables.
The future is looking bright for designers and developers on Divi 5!
How to Turn a Custom Preset into a Default Preset
We have Default Presets and we also have Custom Presets. We saw how to apply a custom preset instead of a default one, but what if we like it so much that we want to make it our default?
Well, that’s easy. Go to the Element Presets or the Option Group Presets dropdown. Hover over the Custom Preset you want to make your default and click the Star icon. Then save your changes. Your preset is now the default preset across your entire website.
Where Do the Styles Inside Default Presets Come From?
Unedited Default Presets simply inherit style values found in the Theme Customizer. Nearly all WordPress themes still use some aspect of the Theme Customizer (even Block Themes), though Divi has made it so that it’s connected but is not necessary to use. We’ll likely replace the customizer at some point in the future, but for now, it’s a relic carried over from WordPress core that is a quirk of even modern WordPress themes.
Say I used the Financial Advisor Starter Site (as one concrete example). In the Theme Customizer, the Header Text Size is set to 30px.
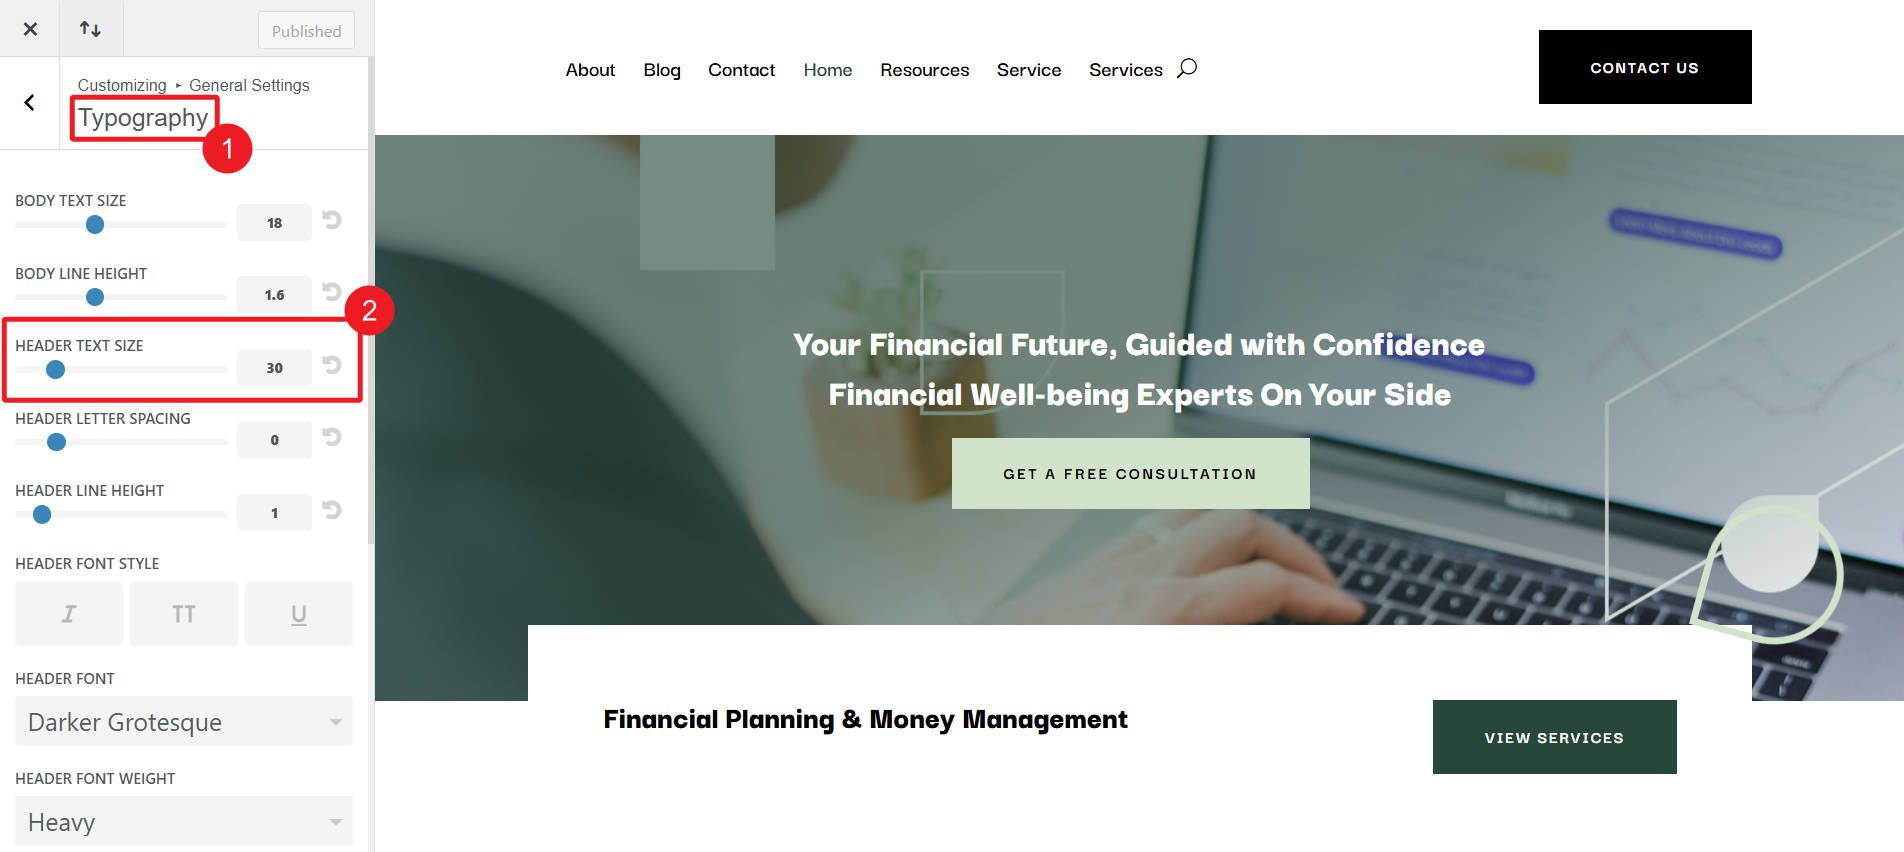
I can see that same value (30px) used in Default Presets by going into the Visual Editor for a page, clicking the “Default Preset” for a Heading or Text Module, and checking under Design > Heading Text for the H1 elevation.
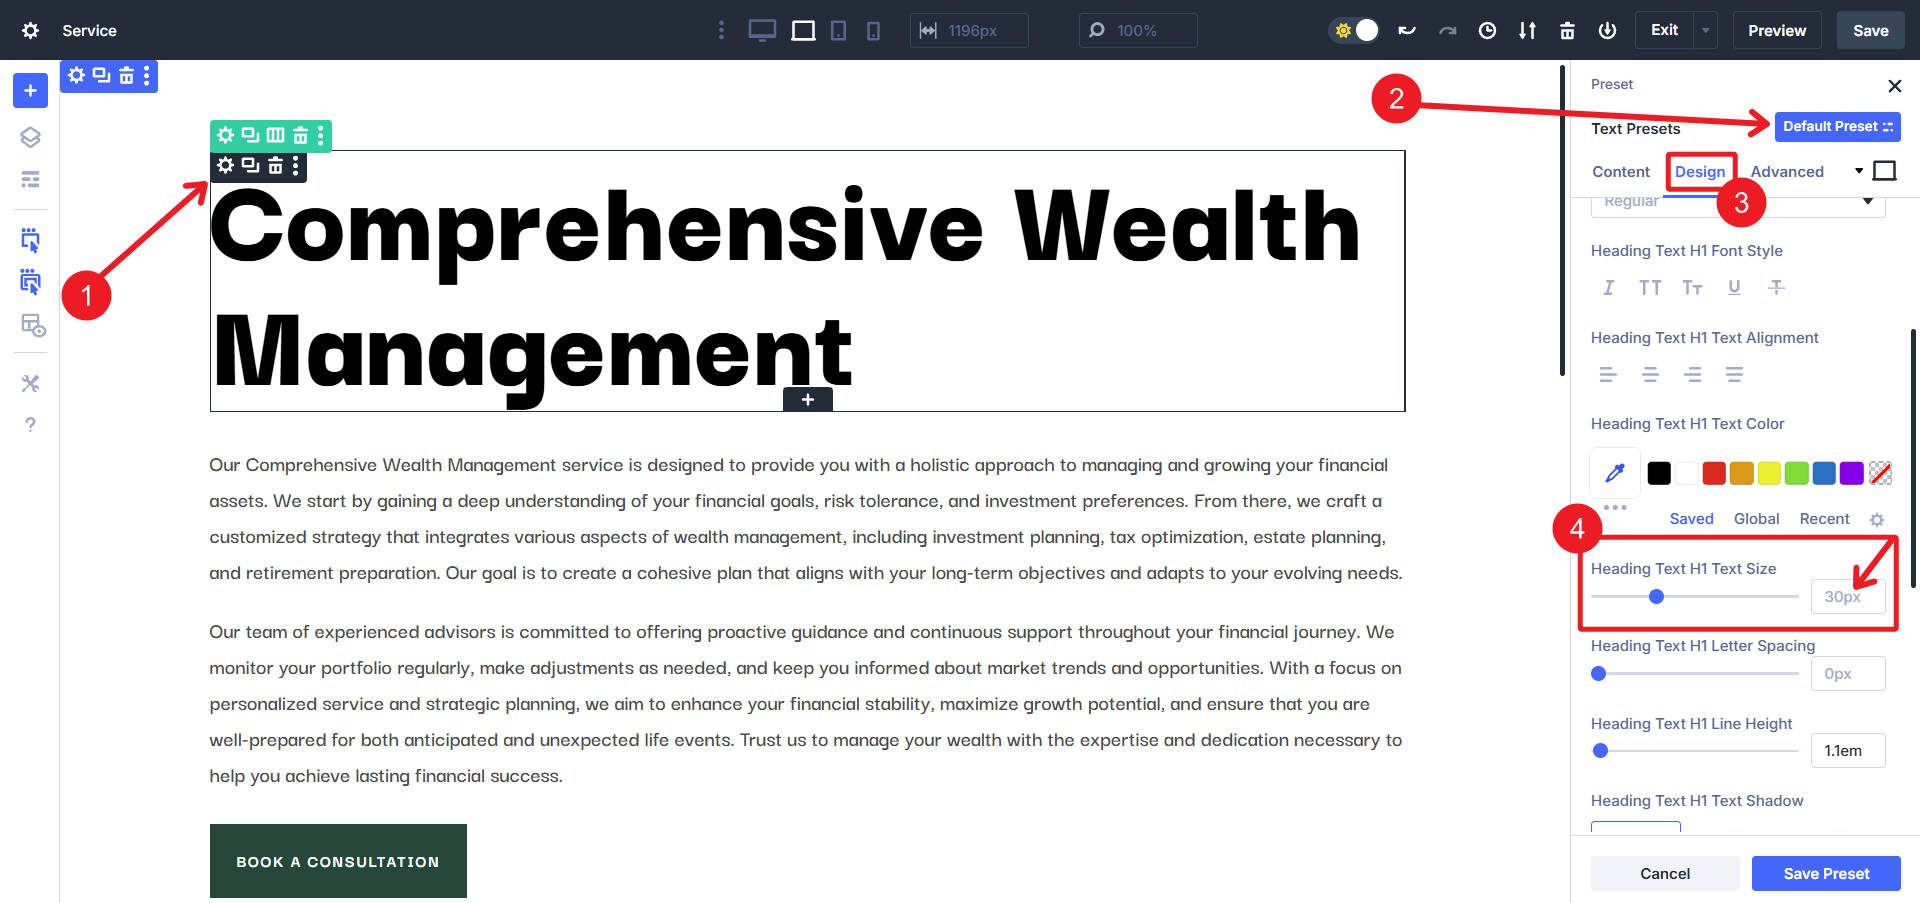
A gray value in a Divi 5 field means that it’s an inherited value, in this case, inherited from the Theme Customizer
But that’s simply the default set by this Starter Site. If you used Presets from an imported Layout Pack or started from scratch, different default values would be set in the Theme Customizer.
You do not need to use the Theme Customizer. I just wanted to show you where the Default Preset values come from before they are edited in the Visual Editor. You will get much better mileage if you edit your Default Presets themselves and not touch the Theme Customizer.
How to Use Default Presets to Build a Website
I recommend starting your builds with a couple of pages of wireframes. Lay everything out on a few pages with what you know you’ll need to have designed.
Try relying on the simplest modules to get the job done and repeating the use of the same set of modules when possible. Consider how you can use the Heading, Text, Blurb, Menu, Image, Accordion/Toggle, and Video Modules to build out most of your page’s wireframes. Add other Modules as needed, but sticking to a core set of Modules for most things will make it much faster to use both Option Group and Element Default Presets.
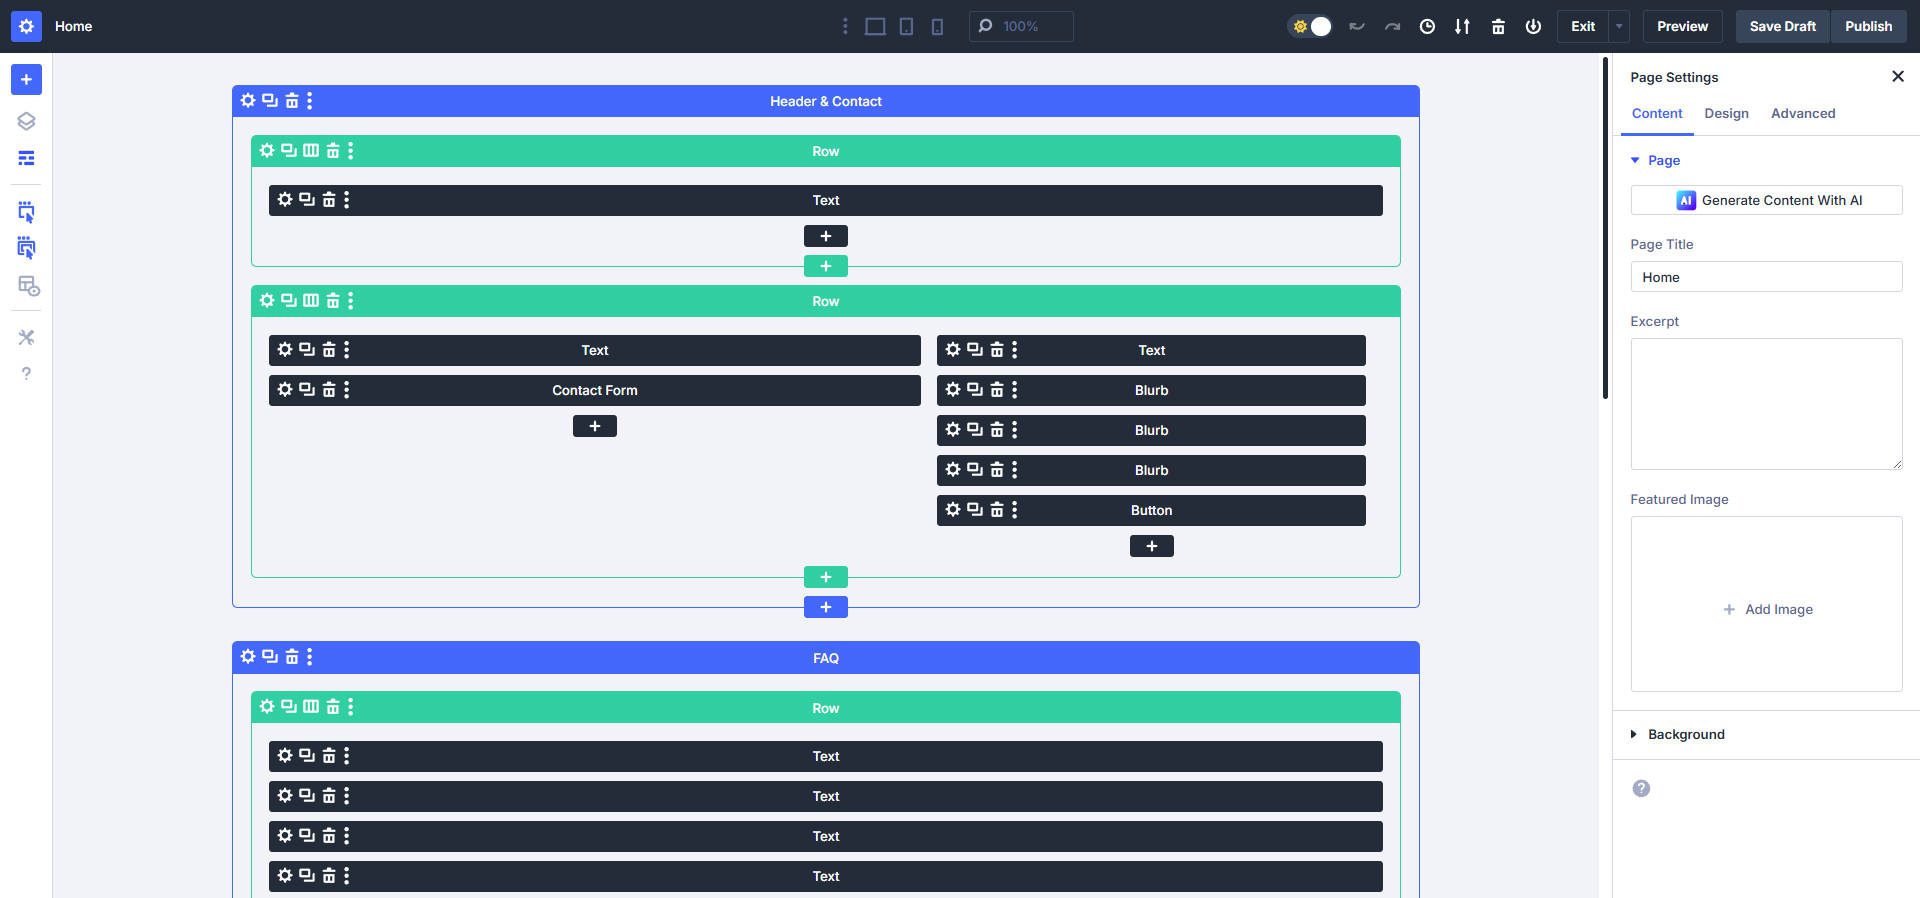
This page uses Sections, Rows, Columns, Text, Blurb, Image, Button, and Menu Modules. By keeping things as simple as they can be for this particular page, I reduce the number of Option Groups I need to design with.
Next, you’ll want to start designing your most sweeping changes with Default Option Group Presets. For most designs, this will be:
- Section Spacing: Include top/bottom margins, left/right margins, and any required padding.
- Section Background Colors: Create a Default Option Group Preset you want to use in most cases and a custom Option Group Preset for an alternate/contrast background color. Remember that Default Presets to the Background Option Group Preset can also be applied to the background of columns.
- Typography: Start with your H1-H6s. Depending on your module usage, you’ll want to start these in the Default Option Group Presets under Heading Text for Heading and Text Modules and Title Text for things like Blurb Modules. Then, work on normal text, focusing on the Text Option Group in Text Modules and Body Text Option Groups found in things like the Blurb Module.
- Other Design Settings: Create Option Group Presets for Borders, Box Shadows, Filters (if you are styling images), and Animations. For these, I tend not to use Default Presets but create Custom Presets that I can selectively apply to page elements.
- Advanced Settings: This is similar to the step above, but I create Option Group Presets for things like Transitions and Scroll Effects. I also tend not to use Default Presets but create Custom Presets that I can selectively apply to page elements.
Creating Default Option Group Presets in this fashion will automatically start applying your styles across your site. Each time a default OG is updated, the relevant elements across your websites automatically accept those changes.
Default Presets Will Save You Hours
Default Presets, both the Element and the Option Group variety, will save you massive amounts of time. I can’t wait for you to start building sites with these features using Divi 5’s blazing-fast builder. And that’s not even the end of the new features rolling out in Divi 5.
With Divi’s new and planned features, you’ll have a veritable design system at your fingertips. Have you tried editing a site using Default Presets first? How did it go? Let us know in the comment below and share how you use these features.


Leave A Reply