Adding a map to your website can make it easy for your website visitors to see where your business is located or to see where an event might be taking place. Divi comes with two built-in options to embed Google Maps to your page design: the fullwidth map module and the regular map module. With the fullwidth map module, you can add a big, eye-catching map that spans the width of your page. You can customize the look of the fullwidth map module using the fullwidth module settings, and it can be a great design element to add to your layout. You can add Divi’s regular map module to any regular section. The design options are endless as you can combine module, row, and section options to create unique layouts for your website.
In this tutorial, we will show you how to create two different layouts using the fullwidth map module and the regular map module.
Let’s get started!
Sneak Peek
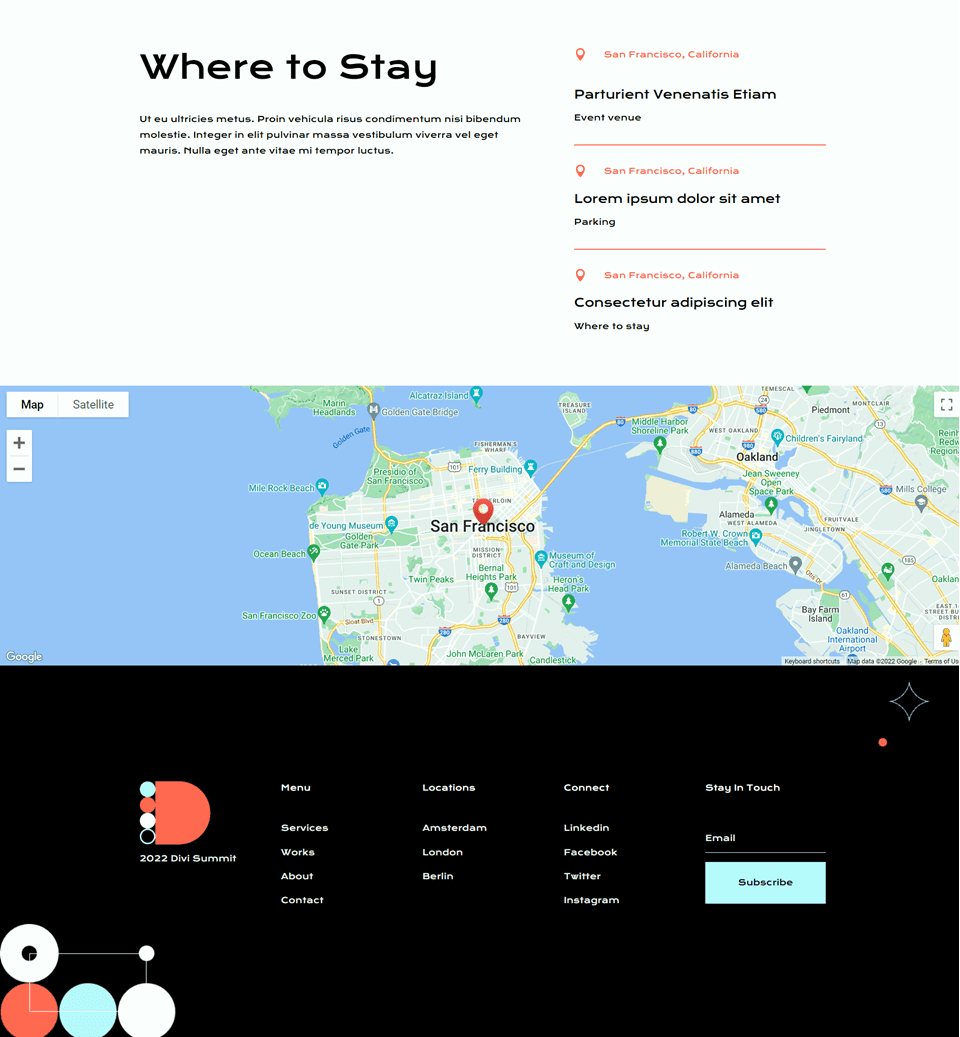
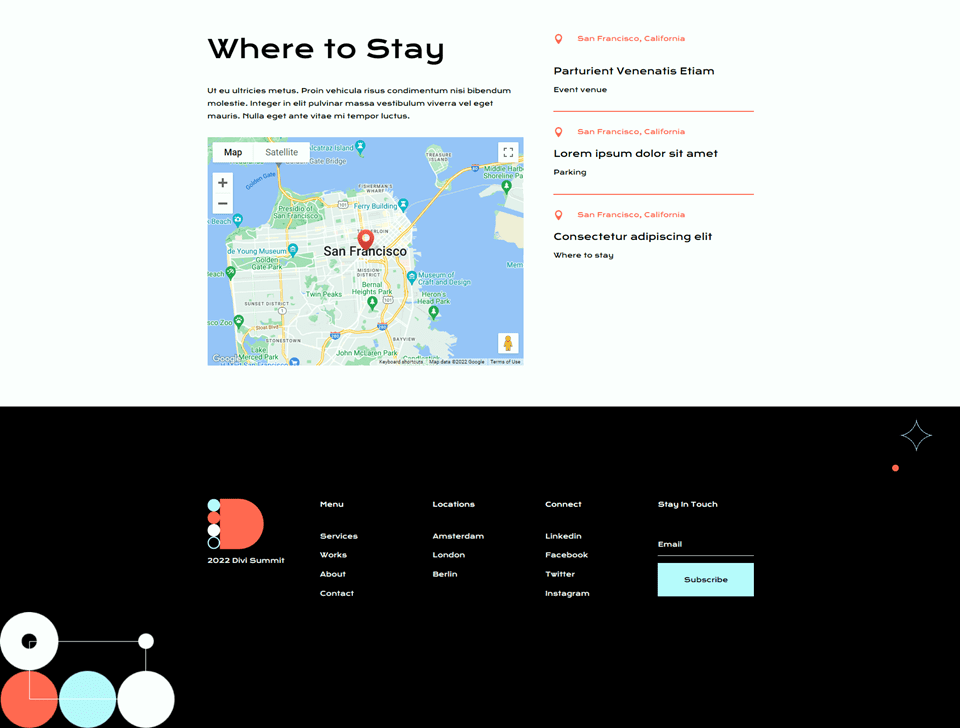
Here is a preview of what we will design.
Layout 1 – Fullwidth Map Module

Layout 2 – Regular Map Module

What You Need to Get Started
Before we begin, install and activate the Divi Theme and make sure you have the latest version of Divi on your website.
Now, you are ready to start!
Using the Divi Fullwidth Map vs Map Module
Create a New Page with a Premade Layout
Let’s start by using a premade layout from the Divi library. For this design, we will use the Conference About Page from the Conference layout pack.
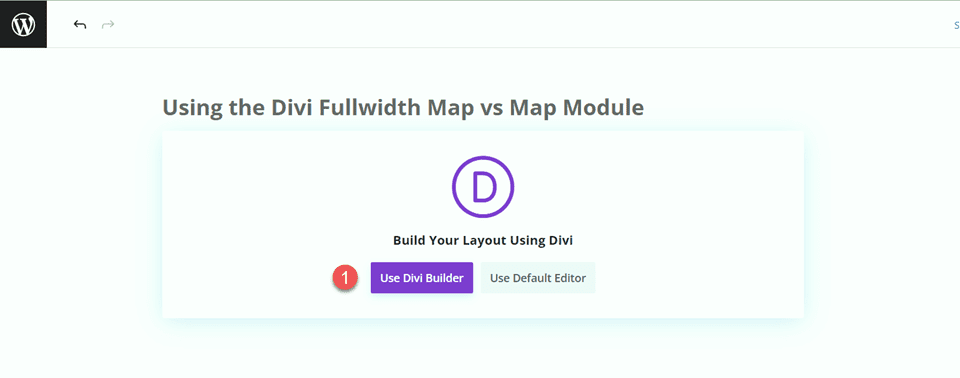
Add a new page to your website and give it a title, then select the option to Use Divi Builder.
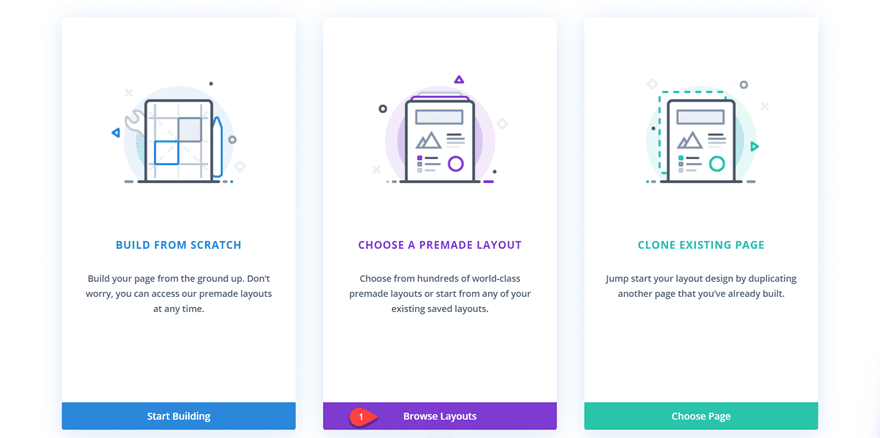
We will use a premade layout from the Divi library for this example, so select Browse Layouts.
Search for and select the Conference About Page layout.
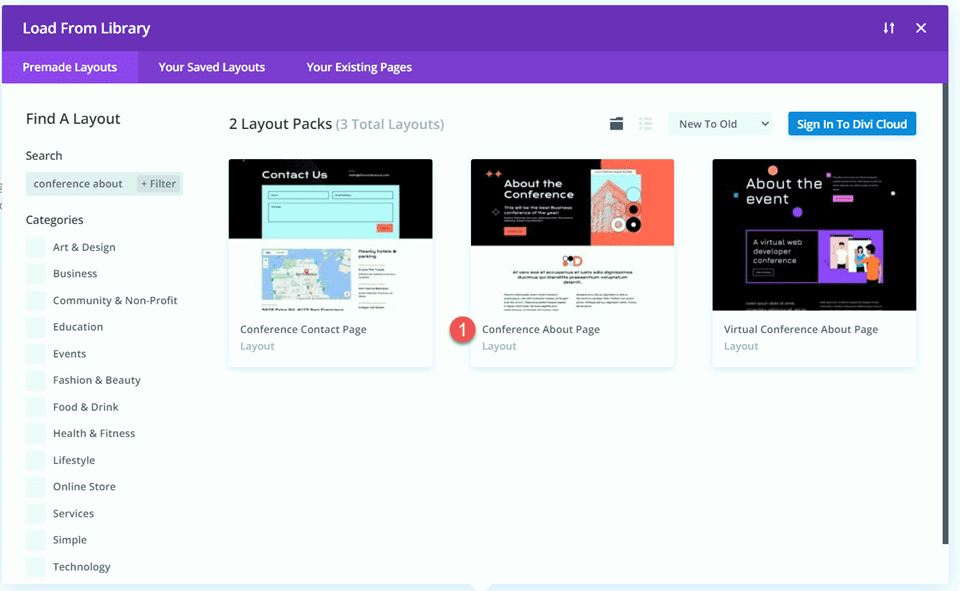
Select Use This Layout to add the layout to your page.
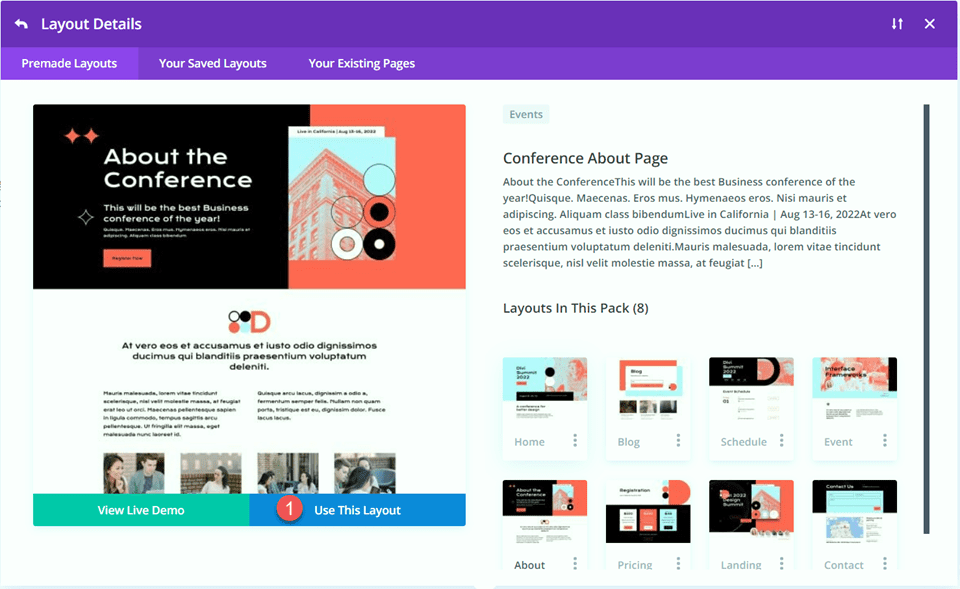
Now we are ready to build our design.
Layout 1 – Fullwidth Map Module
For our first layout, we will add the fullwidth map module to the footer, right above the black footer section with all of the links. Instead of adding this element to the page, we will use the theme builder in Divi’s settings to create a footer section for this page, then add the map. Let’s get started.
First, right-click on the footer section or click the three dots in the section toolbar, then copy the section.
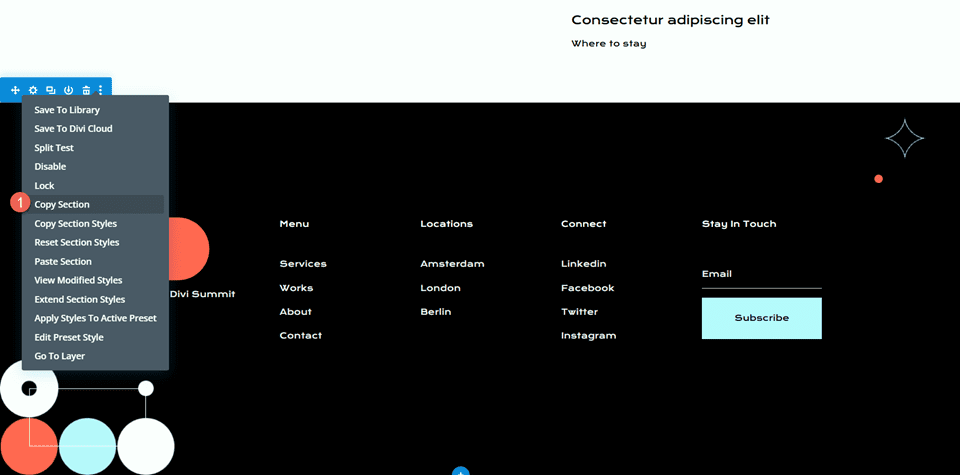
Then, delete the section from this page.
Design the Footer Layout with the Theme Builder
From the WordPress dashboard, navigate to the theme builder section within Divi’s settings. Click Add a New Template.
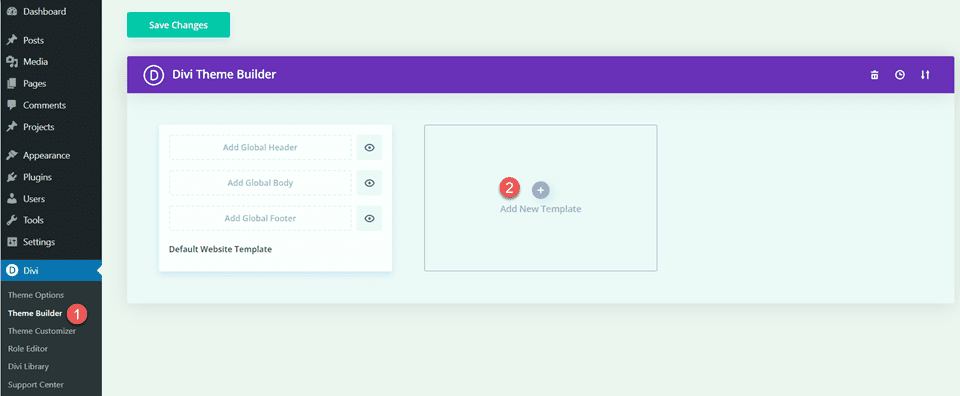
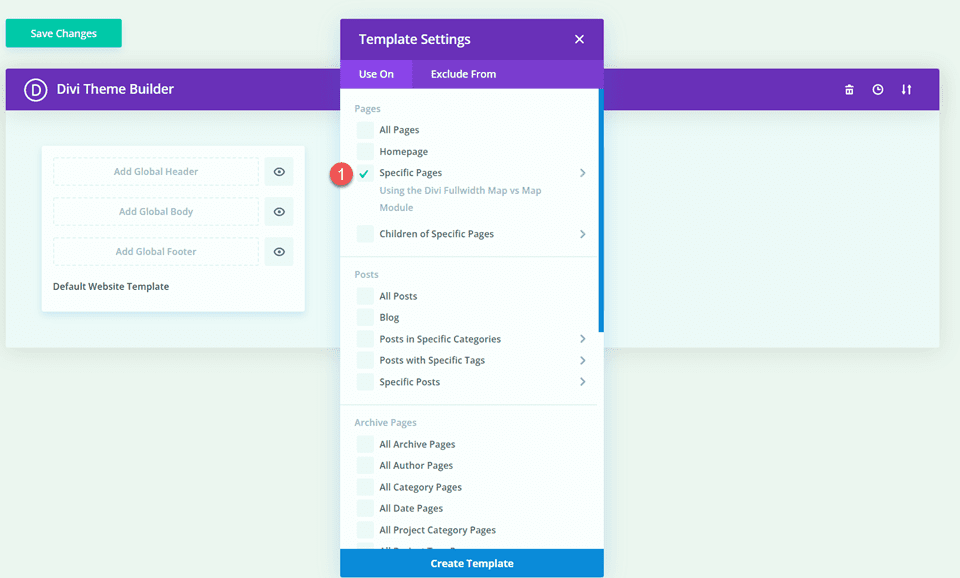
For this design, I am only enabling the template for the page with our Conference About Page template.
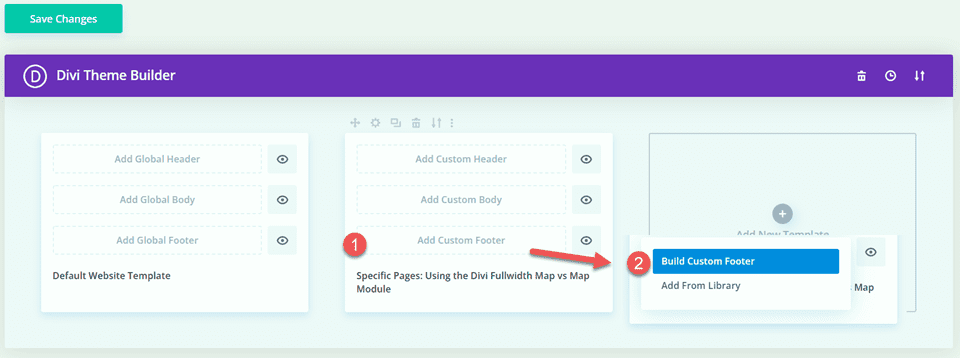
Next, click Add Custom Footer and select Build Custom Footer.
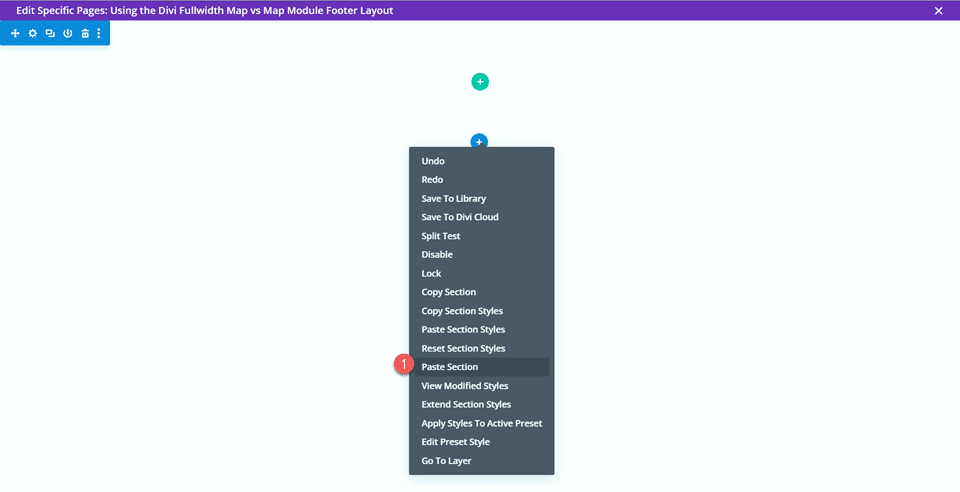
Now that your custom footer settings are open in the theme builder, paste the footer section you copied from the original layout.
Add a new fullwidth section above the footer layout you pasted.
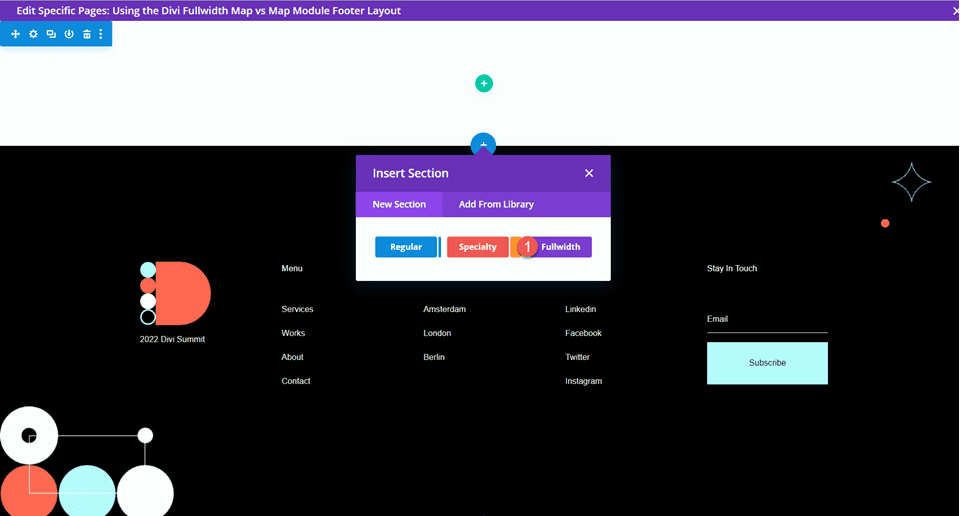
Then, add the fullwidth map module.
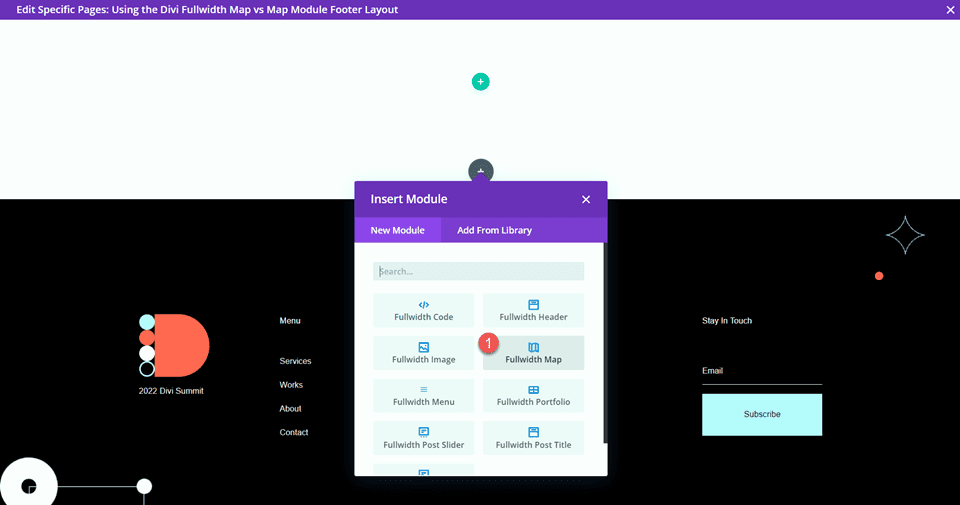
Fullwidth Map Module Settings
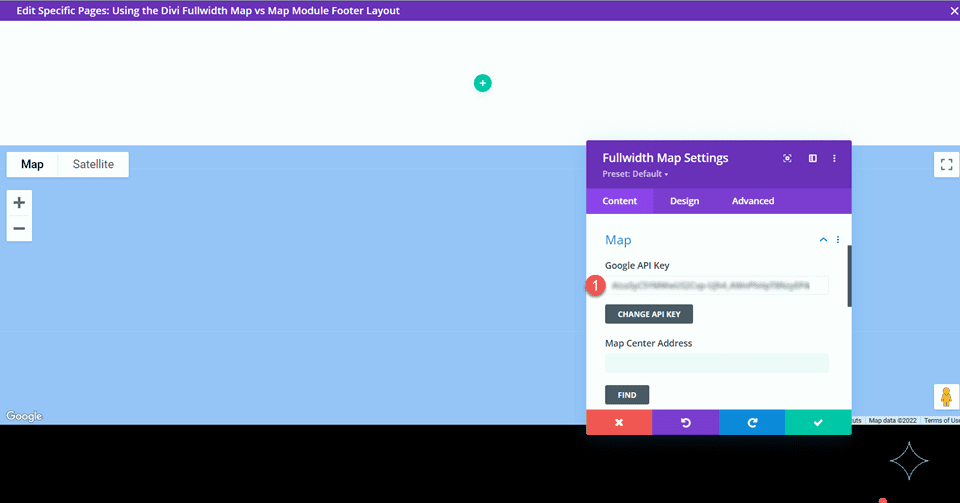
Open the map module settings. If you haven’t already, add your Google API Key so that the map can be displayed. (Learn more about the Google Maps API Key requirement here.)
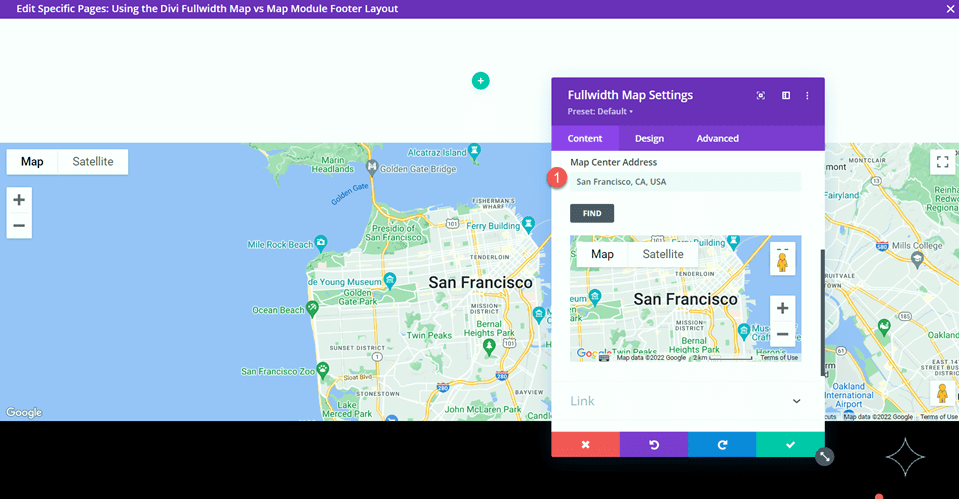
We need to add a Map Center Address under the Map settings on the Content tab so that our map is positioned to display a specific location. We will center our map on San Fransisco, California for this layout.
We also want to add a pin to the map. Under the Content tab, click Add New Pin.
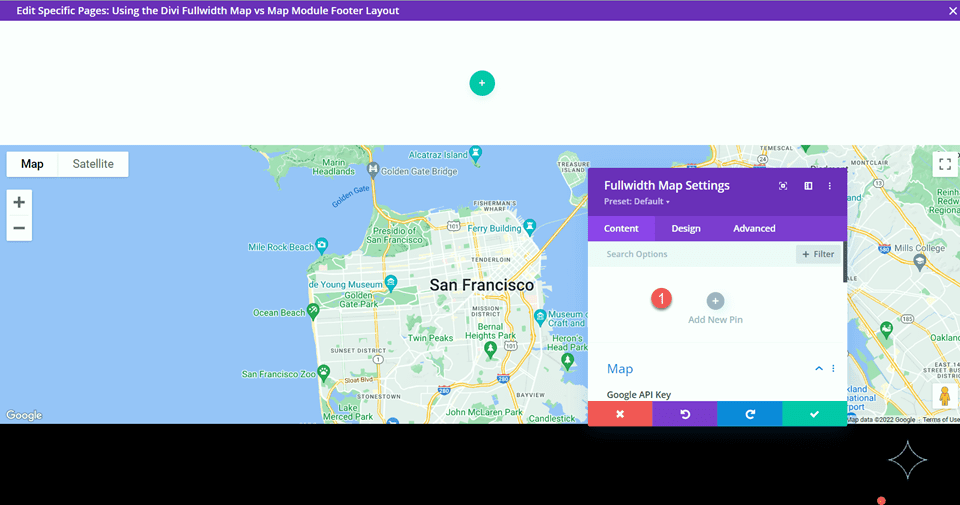
Enter the pin address.
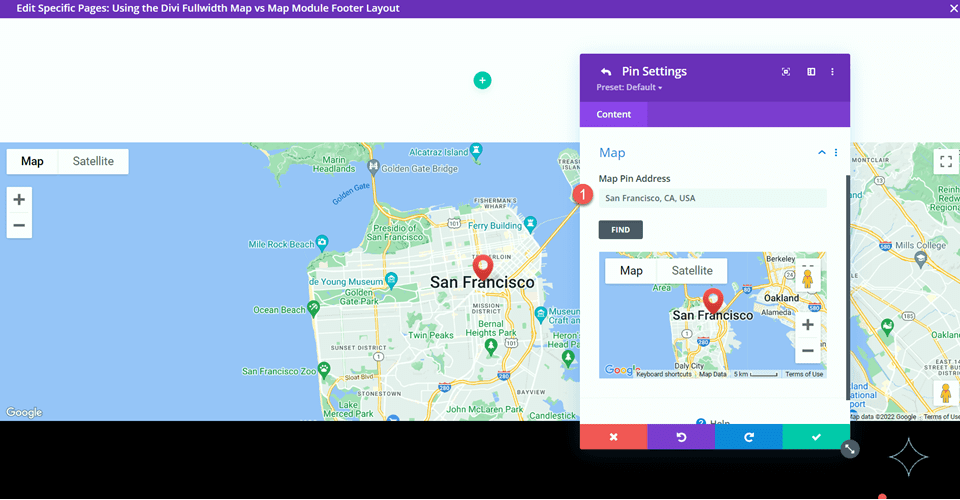
Finally, delete the empty section from the footer layout.
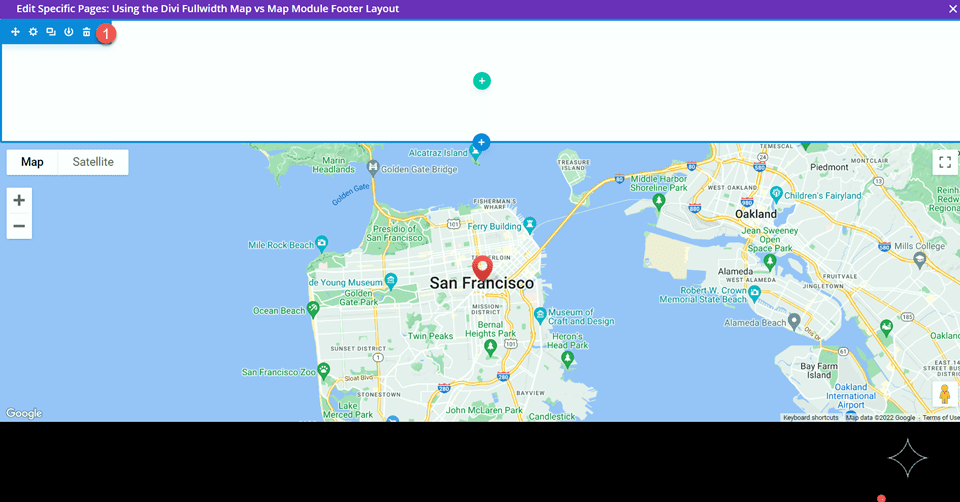
Fullwidth Map Module Final Design
Here is the final design with the fullwidth map module.


Layout 2 – Regular Map Module
For our second layout, we will be using the regular map module. Similar to the last design, we will incorporate it into the footer design using the theme builder settings. For this design, we will add a map to the “Where to Stay” section.
Design the Footer Layout with the Theme Builder
We’ll follow the same steps as the fullwidth map module layout to create a custom footer design in the theme builder. In a new tab, open the WordPress Dashboard and navigate to the theme builder section within Divi’s settings. You should have the original layout design open in another tab.
Click Add a New Template.

Once again, I am only enabling the template for the page with our Conference About Page template.

Next, click Add Custom Footer and select Build Custom Footer.

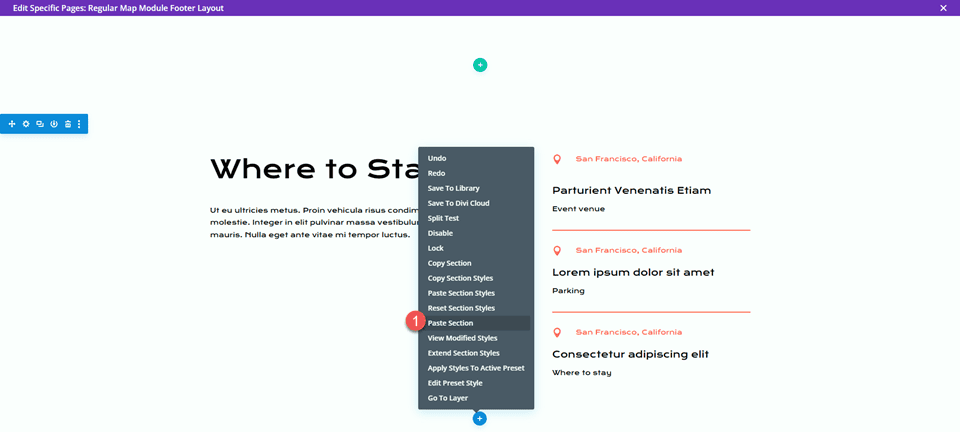
Now that your custom footer settings are open in the theme builder, go back to the tab with the original layout and copy the “Where to Stay” section.
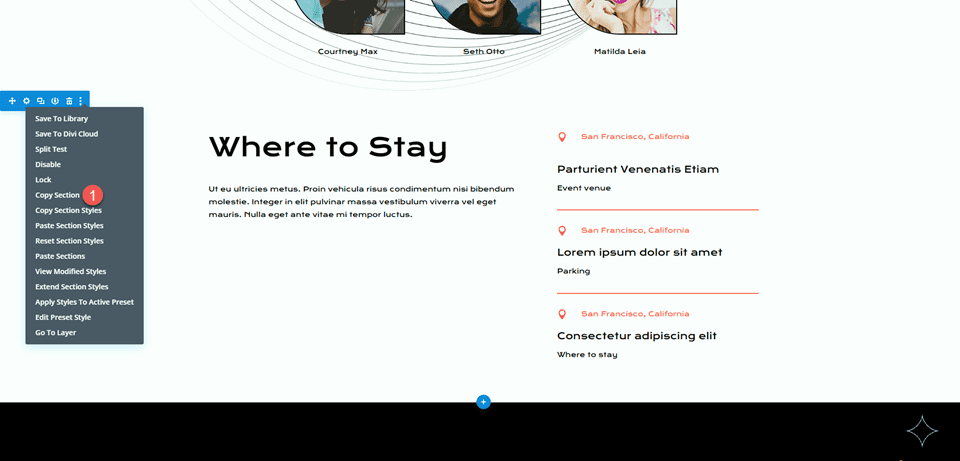
Paste the “Where to Stay” section in the custom footer layout.
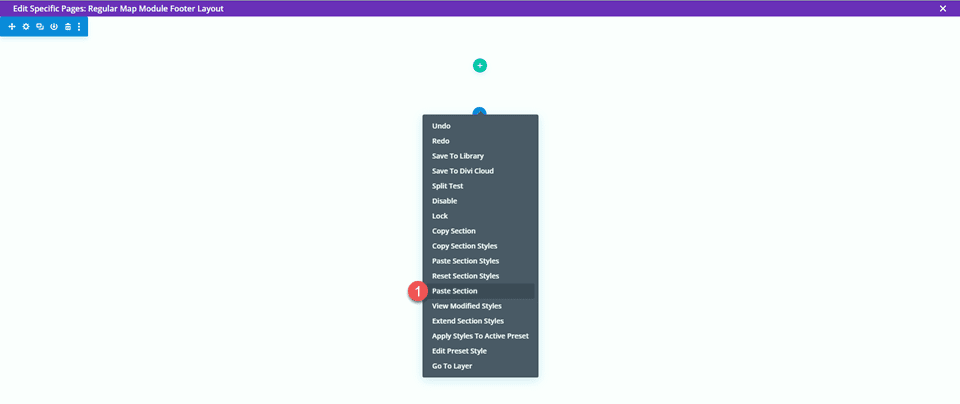
Go back to the original layout and copy the footer section.
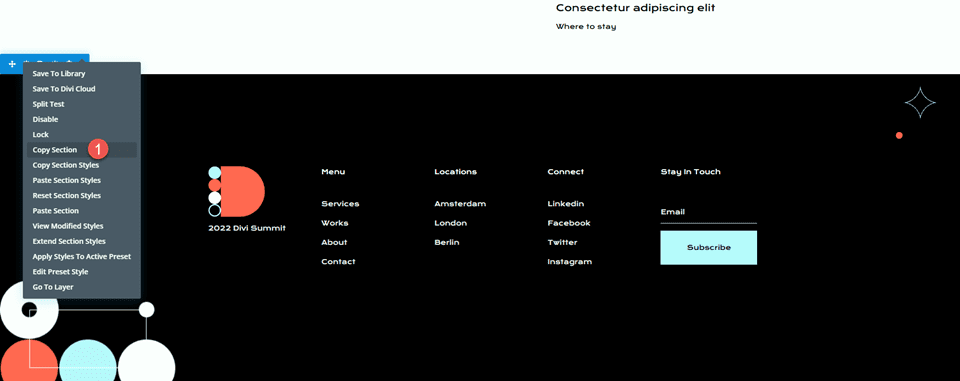
Then, paste the footer section below the “Where to Stay” section in the custom footer layout.
Delete the “Where to Stay” section and the footer section from the original layout.
Finally, delete the empty section from the custom footer layout.

Fullwidth Map Module Settings
Add a map module below the “Where to Stay” body text.
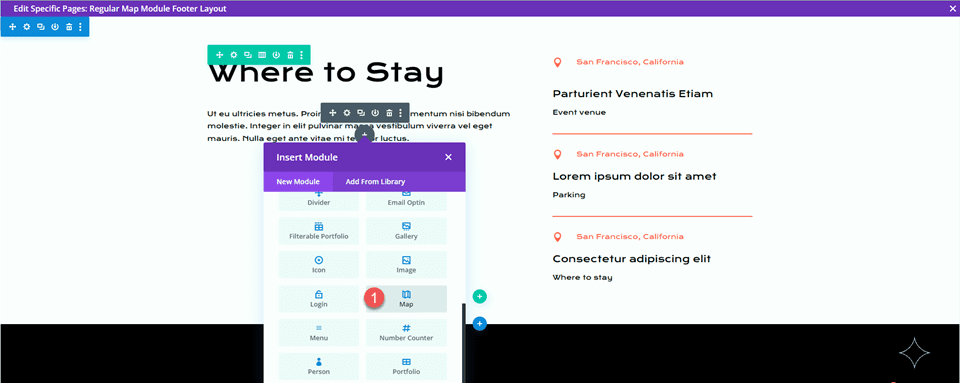
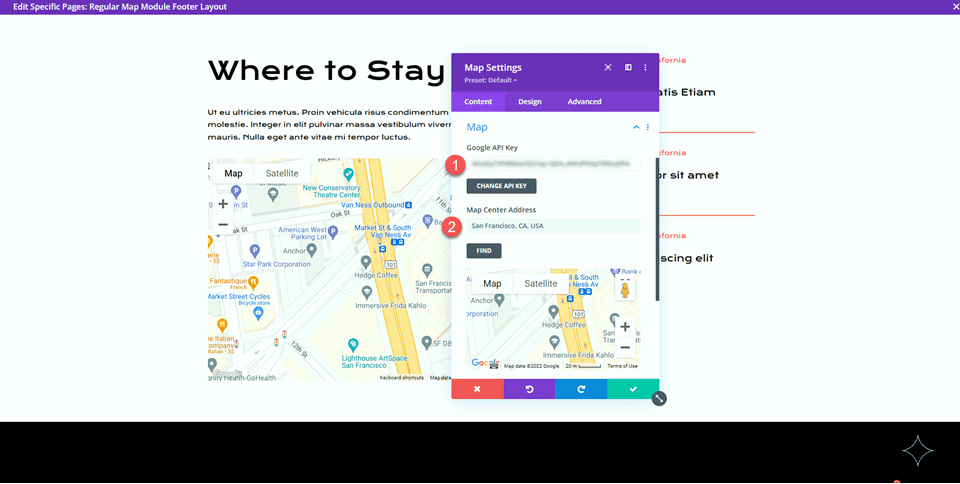
Then, open the map module settings. Once again, ensure you have added your Google API Key to the Map settings so the map can be displayed.
Add a Map Center Address so that the map is positioned to a location. For this example, we will set it to San Fransisco, California.
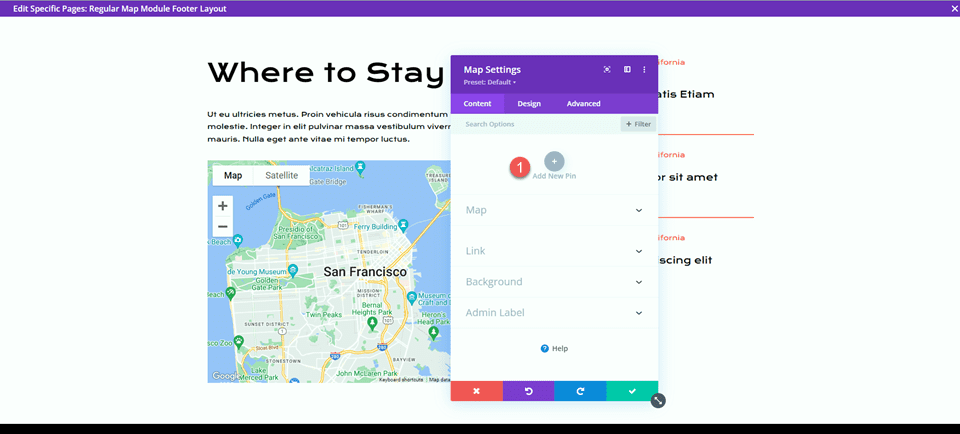
Next, add a pin to the map.
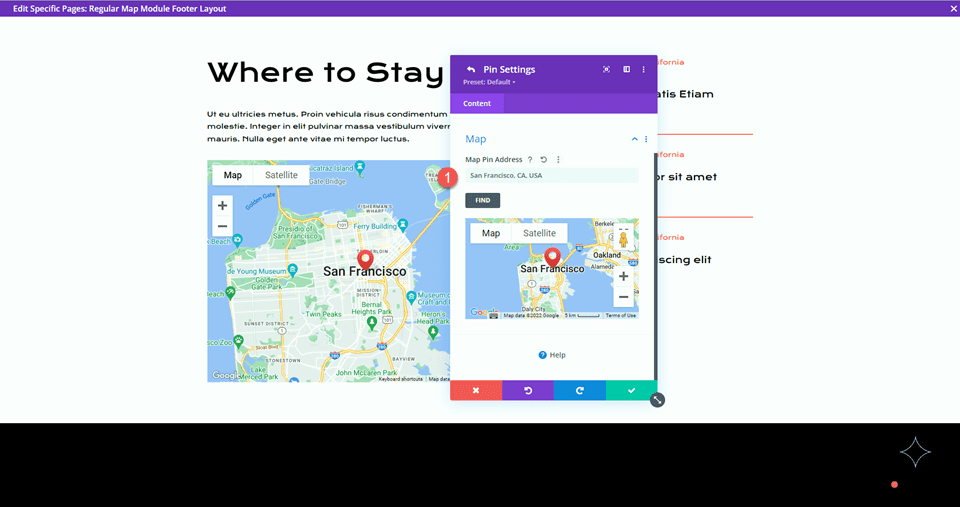
Enter the pin address.
Regular Map Module Final Design
Here is the final design with the regular map module.


Final Result
Now let’s take another look at our final designs together.
Layout 1 – Fullwidth Map Module


Layout 2 – Regular Map Module


Final Thoughts
The fullwidth map module and the regular map module are an easy way to add an eye-catching design element to your page, not to mention it provides valuable information to your website visitors. You can easily customize these sections using the various module, row, and section settings, and they can be combined with other design elements on the page to create dynamic layouts for your website. If you want to learn more about what the map modules can do, check out this tutorial to add a fixed map toggle to a page template.
Do you use a fullwidth menu module or a regular menu module on your website? Or both? We’d love to hear from you in the comments!



Leave A Reply