Shoppers love a quick and smooth checkout. But if there’s even a tiny distraction, they will abandon their carts without a second thought. That’s how quickly you lose a sale.
With the default WooCommerce checkout page, you might already be losing precious customers. Customizing it can provide a consistent branding experience, remove distractions, and simplify completing purchases for your customers. That’s how you can improve your average order value and increase sales.
Keep reading this post as we show you how to customize a WooCommerce checkout page as easily as possible and guide you through optimizing it for improved conversion rates.
- 1 Why Customize a WooCommerce Checkout Page
- 2 Ways to Customize WooCommerce Checkout Page
-
3
Why Divi Is Perfect for Customizing WooCommerce Checkout Pages
- 3.1 1. Divi Quick Sites to Generate a WooCommerce Site (With a Checkout Template)
- 3.2 2. Professionally Designed WooCommerce Site Layouts
- 3.3 3. Divi’s Native WooCommerce Checkout Modules
- 3.4 4. Divi Theme Builder to WooCommerce Sites Quickly
- 3.5 5. Built-in Marketing Tools to Optimize Checkout Pages
- 4 How to Customize Your WooCommerce Checkout Page (Step by Step)
- 5 More Ways to Optimize WooCommerce Checkout Templates
- 6 Tools Needed to Build WooCommerce Checkout Templates
- 7 Divi + WooCommerce is the Ultimate E-commerce Solution
- 8 FAQs on Customizing WooCommerce Checkout Pages
Why Customize a WooCommerce Checkout Page
You earn revenue only when they’re checking out, so your checkout needs to be optimized carefully. With WooCommerce, you already get a pre-designed checkout along with other pages, but it’s plain and unnecessarily lengthy, which risks your customers leaving without performing any desired action.
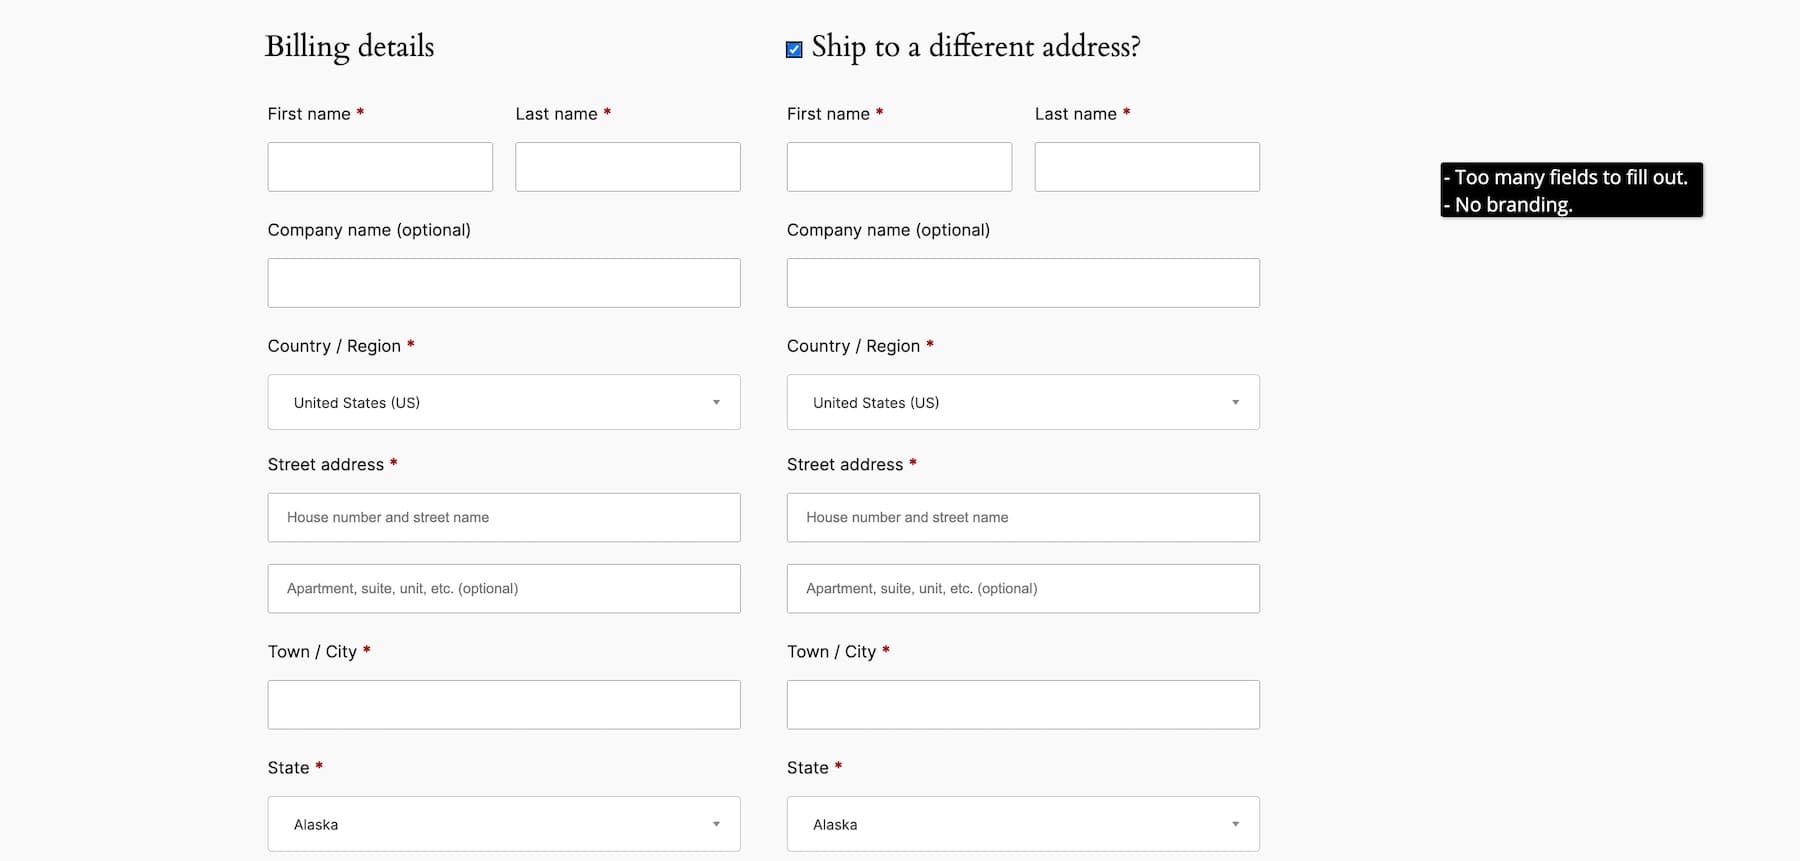
However, if your checkout is customized, it helps you:
- Increase Average Order Value (AOV): You simplify your customers’ checkout process by eliminating unnecessary steps, enabling one-page checkouts, and auto-filling basic details. This fastens payment completion and makes customers want to order more often.
- Improve User Experience: You optimize checkout based on the product type. For a single product, you let them check out as a guest. For monthly SaaS subscriptions, you allow them to log in with their Google account details. For rental or other online bookings with a lengthy (but essential) process, you enable a multi-step checkout to break it down.
- Maintain Brand Consistency: Checkout is still part of your business, so customizing it to add your branding and remove distracting elements like the footer and header is a great way to ensure your customers complete their purchases.
Ways to Customize WooCommerce Checkout Page
Depending on how much you want to customize, you can use WordPress’s Site Editor or a WooCommerce builder to modify your checkout page. For example, with WooCommerce Blocks, you can make minor changes in branding, like colors, fonts, and size. But with a WooCommerce builder like Divi, you can modify every inch of your checkout page.
I’ll show you how to do it in both ways.
1. Using Site Editor and WooCommerce Blocks
Note that you can only access WordPress Site Editor if you have a Block theme installed, meaning it won’t work if you’re using a classic or a third-party theme. For our example, we’re using the Twenty Twenty-Four theme.
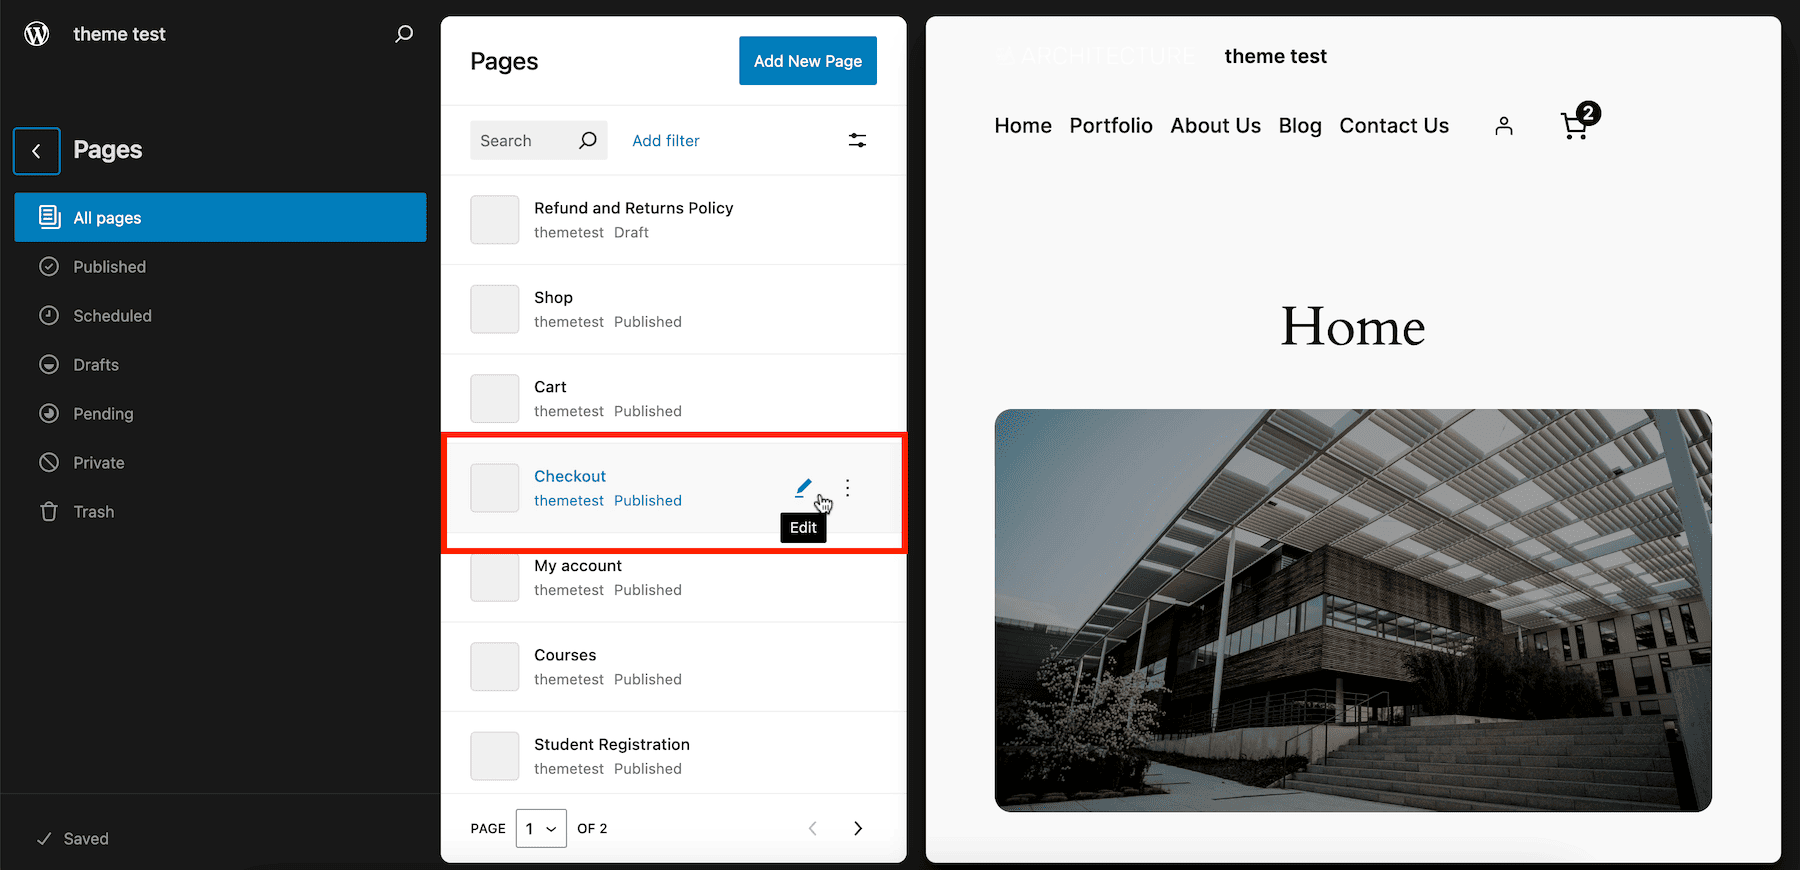
Go to Appearance > Editor > Pages > Checkout > Edit to access Site Editor. (If you’re using a classic theme, you can modify the checkout page by going to WordPress dashboard > Pages > Checkout > Edit.)
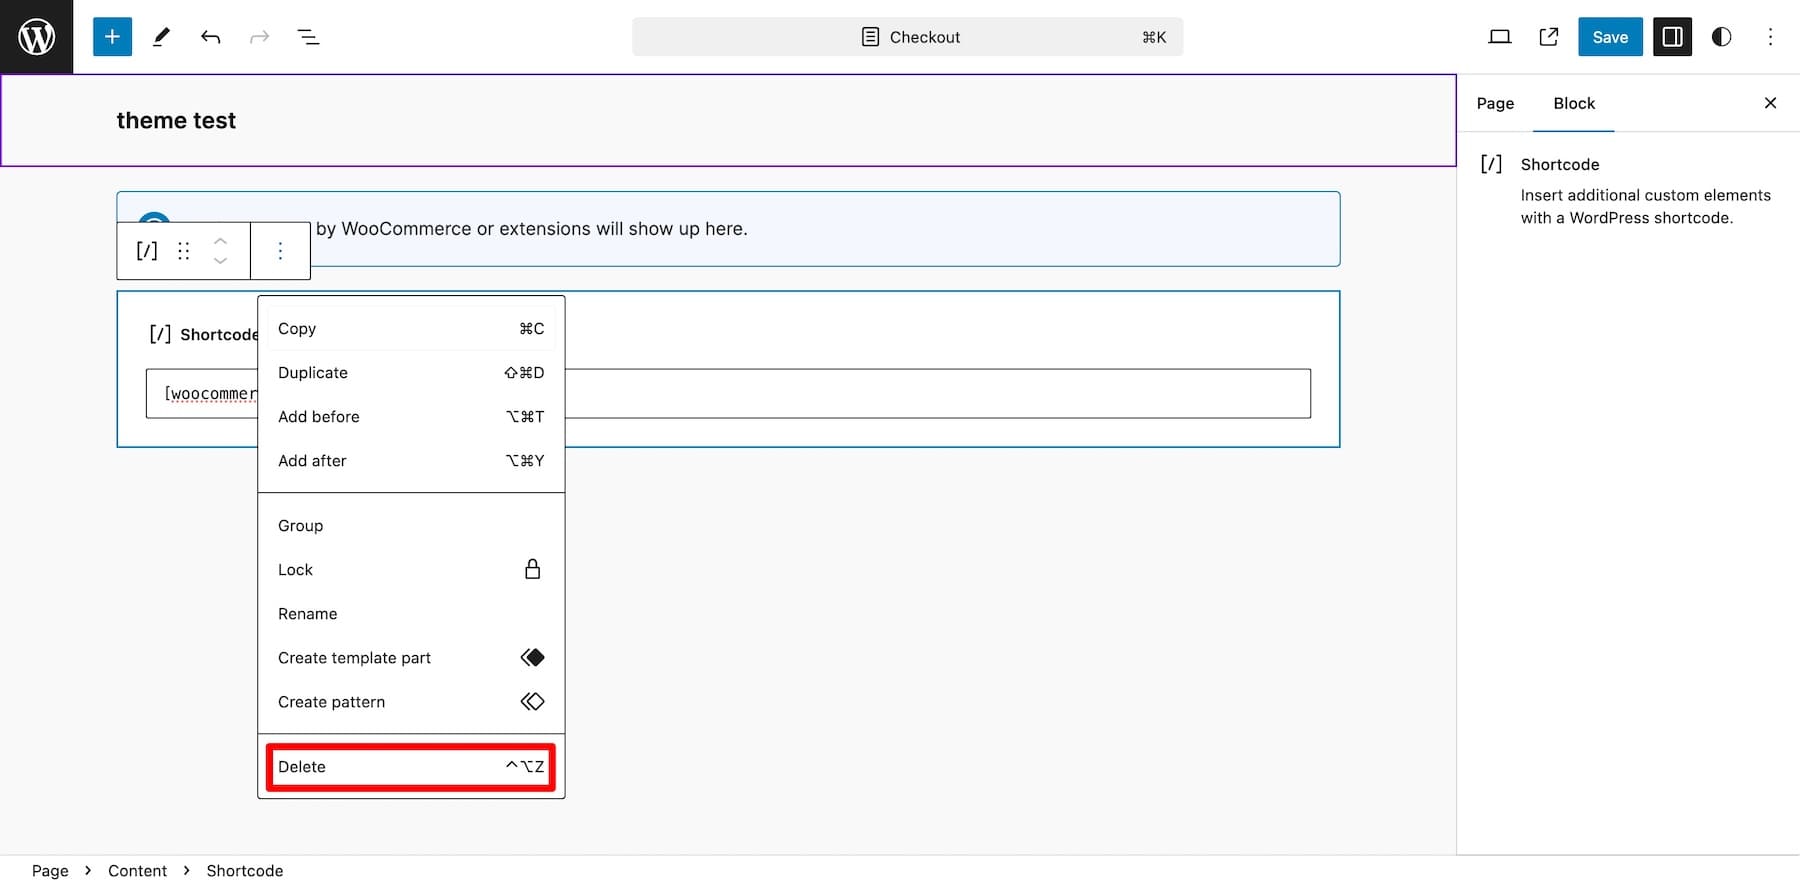
You’ll see the default WooCommerce checkout shortcode. Delete it because you can’t customize it at all.
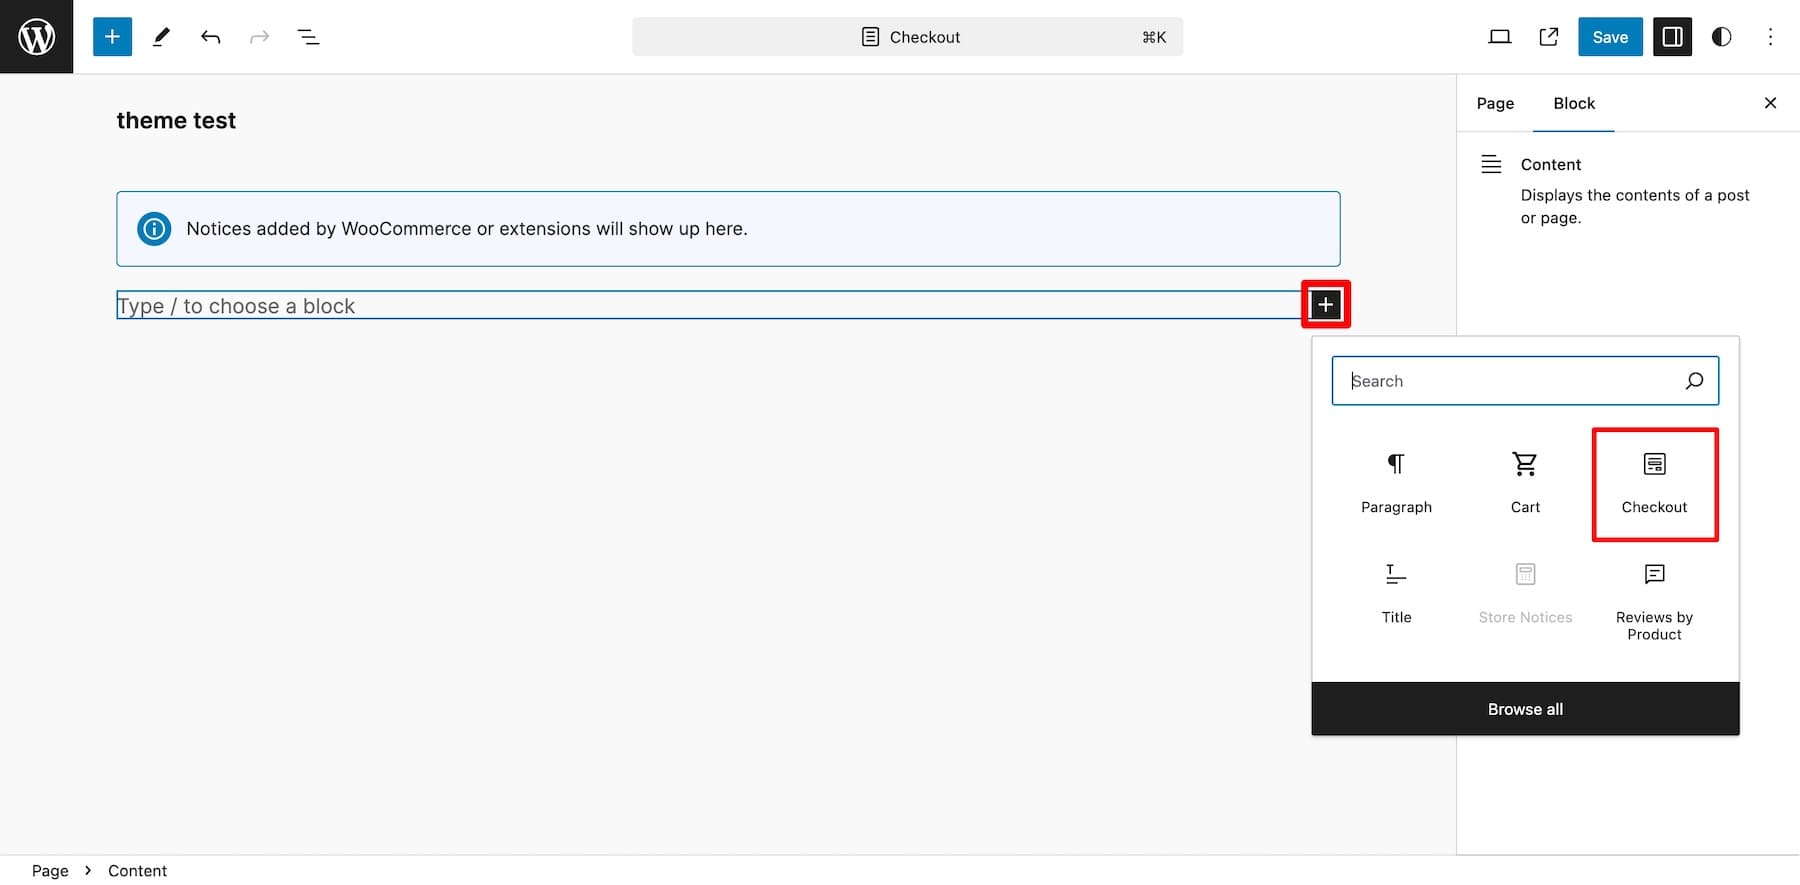
Add the Checkout WooCommerce block by clicking the plus icon.
Remove some of the block’s elements, such as order notes, terms and conditions, phone numbers, section headings, return to cart links, etc. To delete an element, click the three dots (settings) and then Delete.
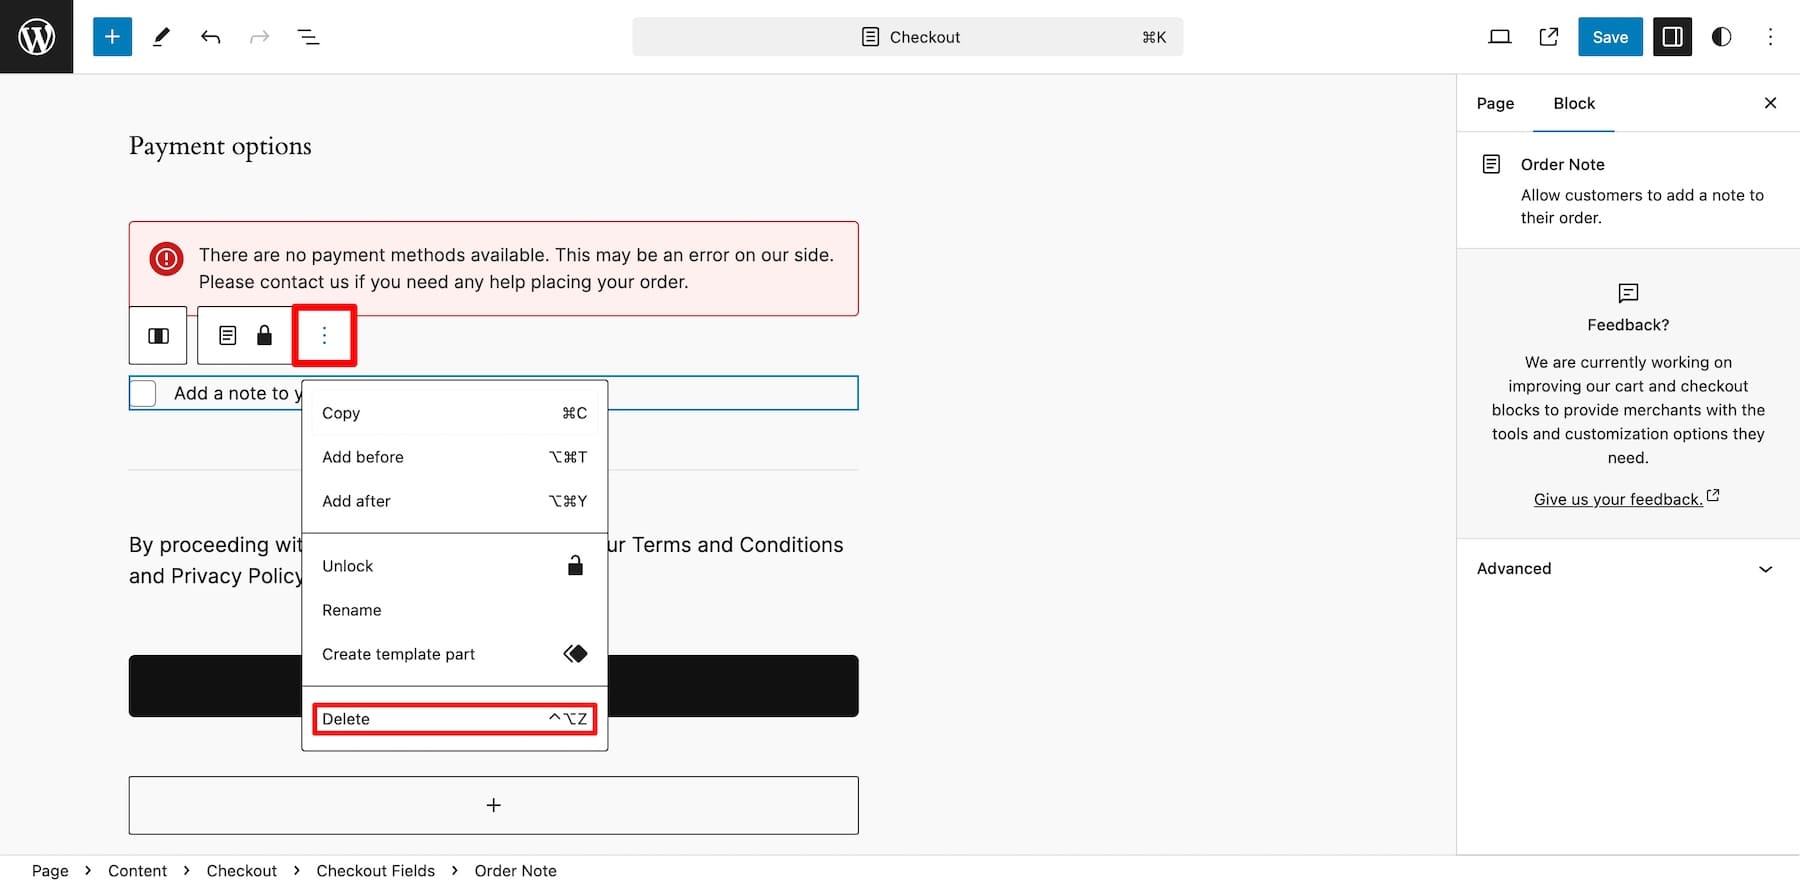
Review the template and decide which elements to remove. Don’t overdo it, though, as removing critical steps can prevent you from obtaining the necessary information for your customers. For example, you can remove the Address 2 line, as customers mostly leave it empty, but not the phone number column if you plan to send marketing messages through SMS or WhatsApp.
Since WooCommerce’s Checkout is a parent block made by combining many child blocks, you can’t directly modify style settings such as font and color. As parent blocks adapt styles from the theme’s global settings, WordPress Gutenberg is limited in customization. You can’t customize much unless you code or purchase extensions, which ultimately leads to spending more money.
2. Using a WooCommerce Builder Like Divi
If you like complete control over your online store design and saving money, customizing your checkout (and other pages) with a WooCommerce builder like Divi is what you need. It simplifies customization, offers unlimited flexibility, and lets you modify every corner of your online store, including the checkout page.
Divi is ideal for customizing WooCommerce checkout pages (and building e-commerce sites) because of its no-code, drag-and-drop builder for beginner-friendliness, dynamic WooCommerce checkout elements for functionality, and stunning pre-made checkout and website layouts, which makes designing easy. Divi pairs perfectly with WooCommerce, thanks to its marketing tools like Divi Leads, which let you run split tests and Conditions that help you optimize for different user journeys.
You also get unique tools like Divi Quick Sites to design a checkout page, an online store, or a website in two minutes and Divi AI to create page layouts, optimized copy matching your brand style, and beautiful images in minutes. Divi has everything you need to run and grow your online store without investing in third-party extensions to add functionality.
Why Divi Is Perfect for Customizing WooCommerce Checkout Pages
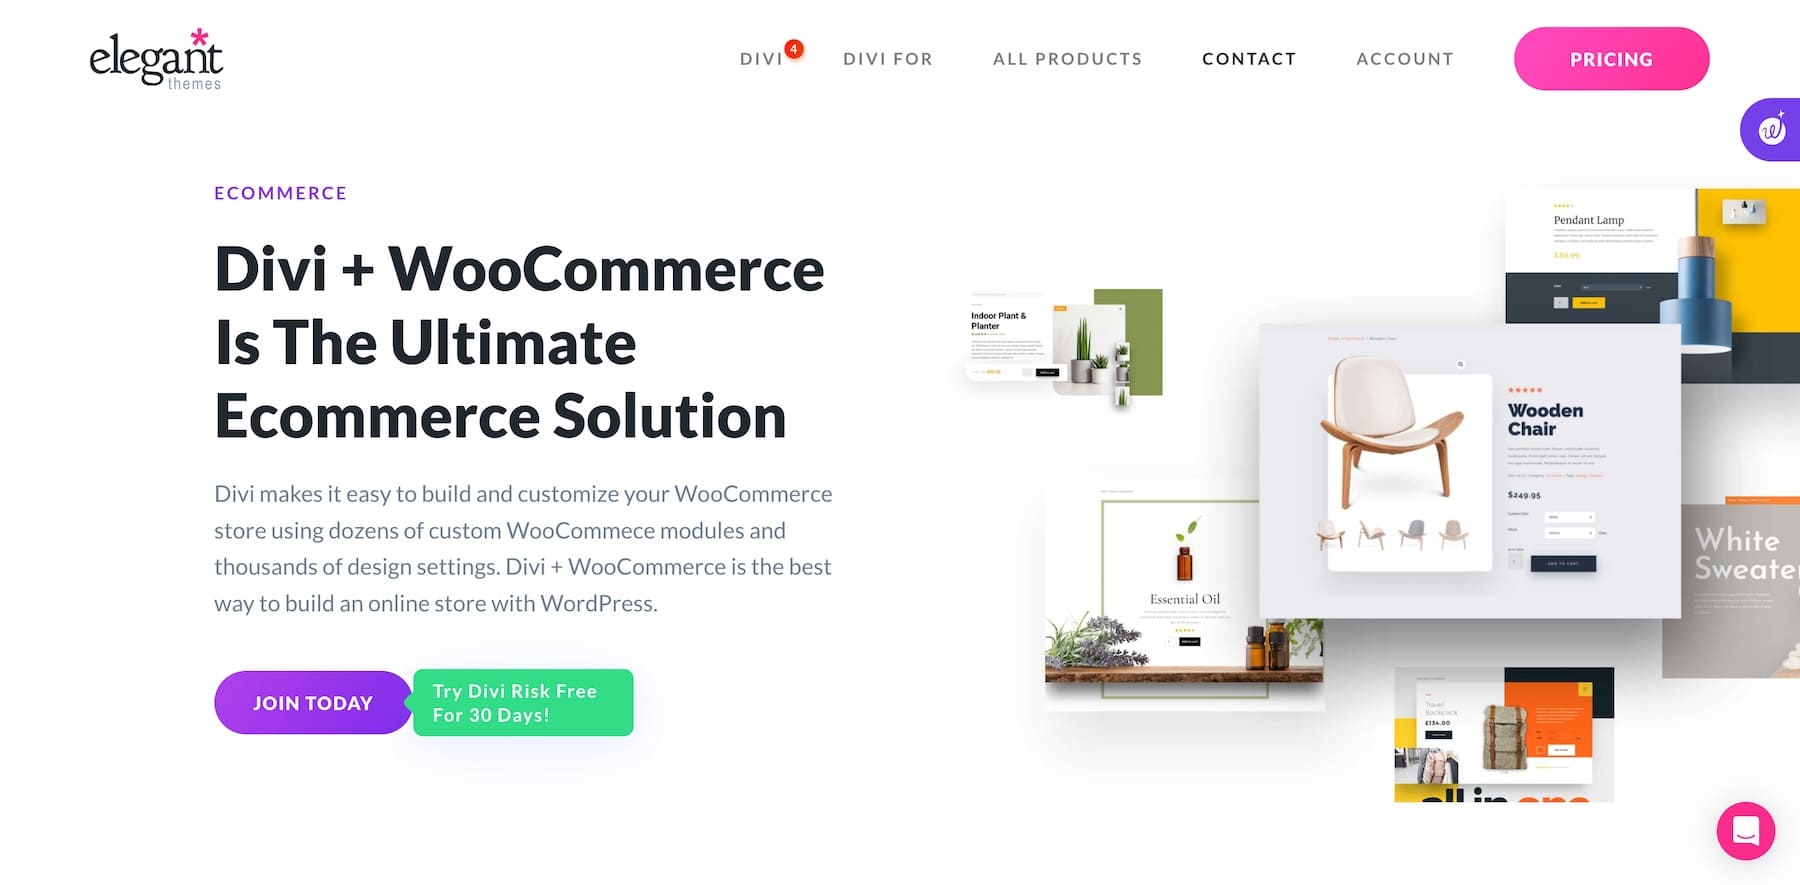
Paired with WooCommerce, Divi is a perfect e-commerce solution that helps you design branded online stores and checkout pages effortlessly. It complements WooCommerce because of these powerful features:
1. Divi Quick Sites to Generate a WooCommerce Site (With a Checkout Template)
Divi Quick Sites is a lifesaver for site owners who don’t like designing their site from scratch. You won’t even touch a line of code or move your cursor. Divi Quick Sites will build a branded online store for you in less than two minutes. All you need to do is turn on the Shop button while filling in your site details, and it’ll install and activate WooCommerce automatically. It also creates branded WooCommerce page templates such as product, cart, and checkout.
Go to Divi > Generate a New Site > Choose a Pre-Made Template.
Your site is ready! Go to Divi > Theme Builder > Checkout to access your Checkout page template. Click on the pencil icon next to the Custom Body to edit it.
2. Professionally Designed WooCommerce Site Layouts
If you hate staring at the blank screen like me, Divi has got you covered. With over 2000+ Divi layouts, you can import professionally designed website layout packs for e-commerce websites in any industry. Once you import one, it can be customized using the Divi builder and WooCommerce modules, which makes designing a branded checkout template easy.
Let’s not forget the free checkout templates we released to simplify it even more. Import the template, adjust the branding, and it’s done! Divi experts (who know the ins and outs of web design and UX optimization) created these templates, so every design is conversion-optimized to get you more sales.
3. Divi’s Native WooCommerce Checkout Modules
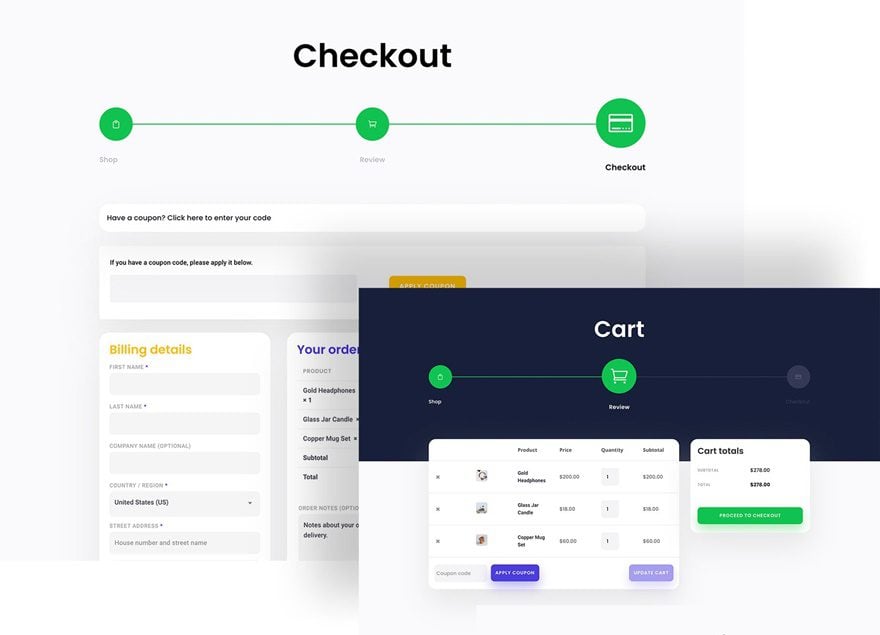
Divi has 200+ native and 30+ WooCommerce modules, including checkout modules, so you can avoid building them from scratch. Divi’s Checkout modules include only the necessary fields to keep it quick and short for your customers.
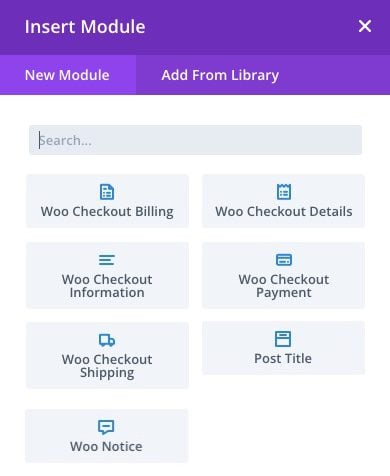
Unlike WooCommerce’s Checkout block in Site Editor, which was one parent block with many child blocks that can’t be edited separately, Divi’s modules are separate, so you decide which elements to include. For example, add Woo Checkout Information only if you sell personalized products and need customers’ input.
4. Divi Theme Builder to WooCommerce Sites Quickly
Divi Theme Builder lets you design and customize your entire website and WooCommerce pages at the site level using the drag-and-drop Divi builder. For example, you create one Checkout page template (which largely depends on customers’ carts), and Divi Theme Builder, combined with Divi’s dynamic content ability, helps you give your customers a consistent branding experience without manual effort from your side.
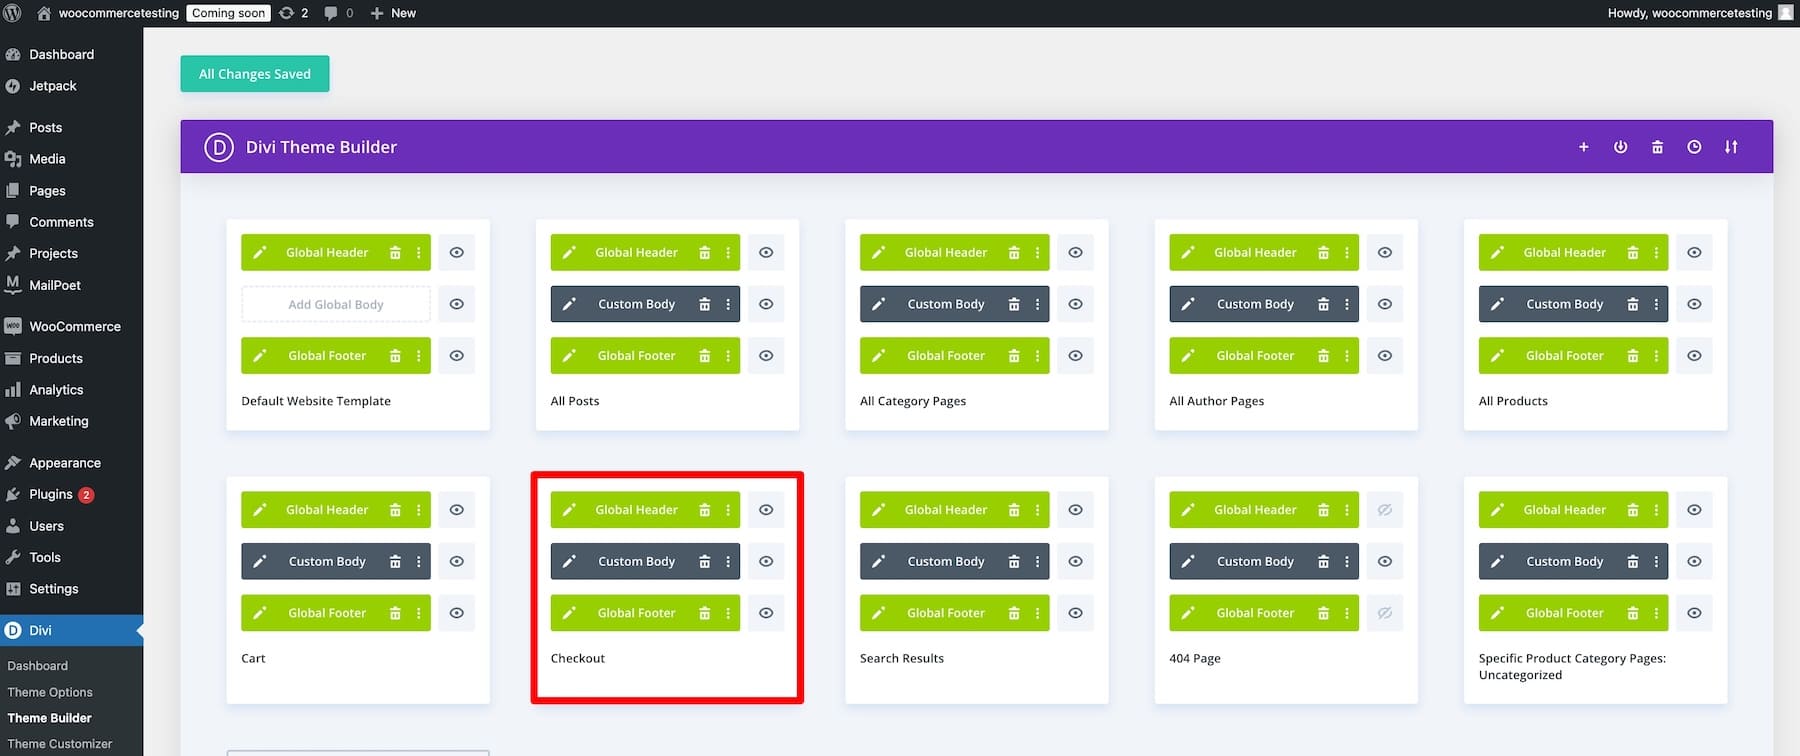
When you make changes in a template, these get updated everywhere. This is great for stores with multiple products, as you only customize the product template to modify all product pages. Similarly, you can build and customize templates for other WooCommerce pages, such as cart and even product-specific landing pages.
5. Built-in Marketing Tools to Optimize Checkout Pages
Divi has powerful marketing tools as built-in features to help you optimize your checkout pages for better conversion rates. For example, Divi Leads lets you run split tests and choose a winner between two elements. You can test entire checkout pages, headings, description copies, CTAs, or other components.
Suppose you’re unsure about whether to hide the site header on your checkout. You can easily create a split test and choose a winner based on a high conversion rate between the two.
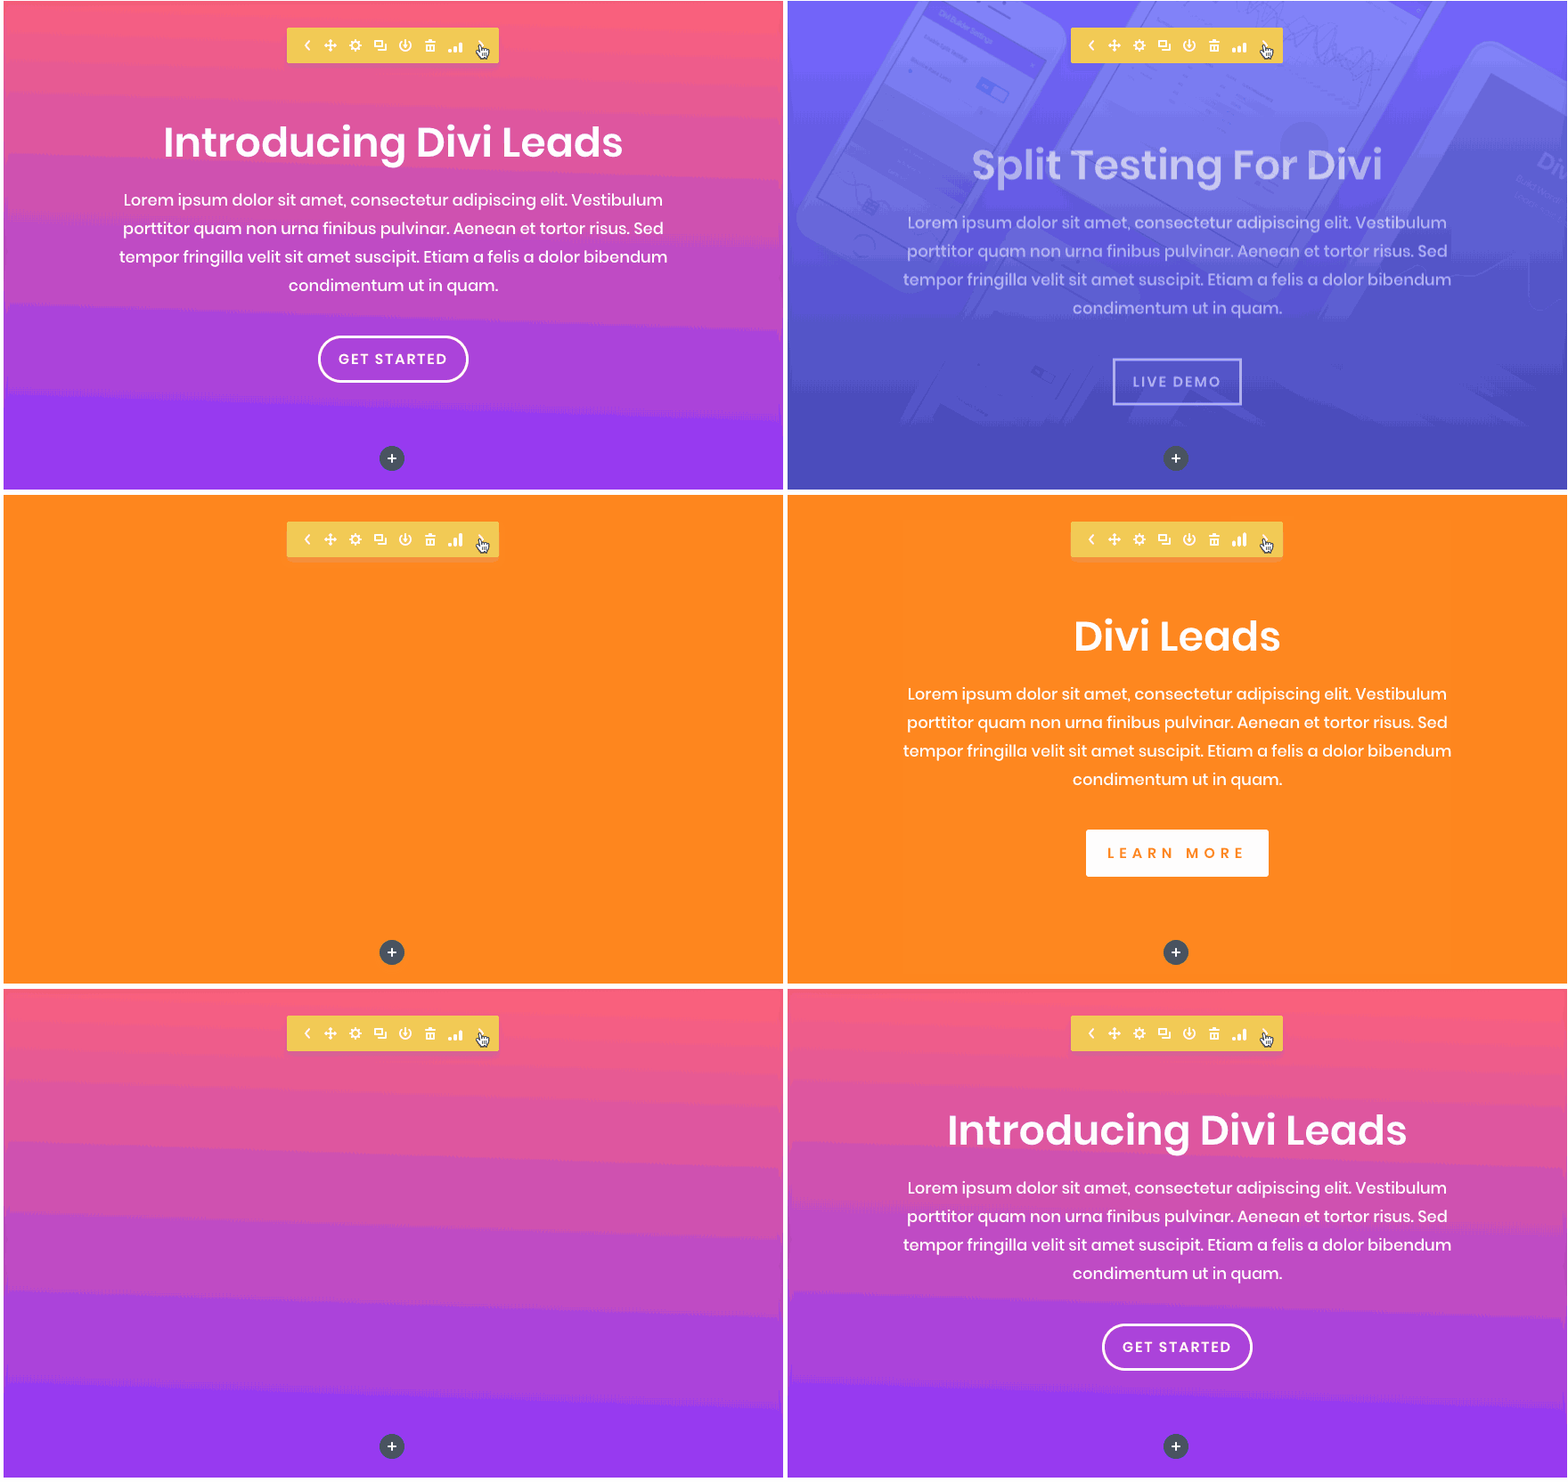
Similarly, Conditions lets you create personalized purchase experiences. For example, you can show dynamic messages to users, such as a “Welcome Back!” to logged-in customers or “Exclusive Discounts for Members! Create Your Account Now!” to first-time visitors. Divi also includes premium plugins like Bloom to create high-converting email optins and Monarch to market and drive more traffic.
How to Customize Your WooCommerce Checkout Page (Step by Step)
This tutorial focuses on customizing a WooCommerce checkout page. For a step-by-step process for starting an online store, read our guide on setting up an e-commerce store.
You need the Divi theme installed and active on your online store to follow through with this tutorial.
The annual Divi membership costs $89, but you can get it for a lifetime at a one-time payment of $249. Once you’ve purchased Divi, log in with your Elegant Themes credentials and download the Divi.zip file. Upload the zip folder to your WordPress Appearance > Themes > Add New tab. Finally, activate your Divi license.
Here’s a step-by-step tutorial on installing and activating Divi:
1. Create a Checkout Page Template
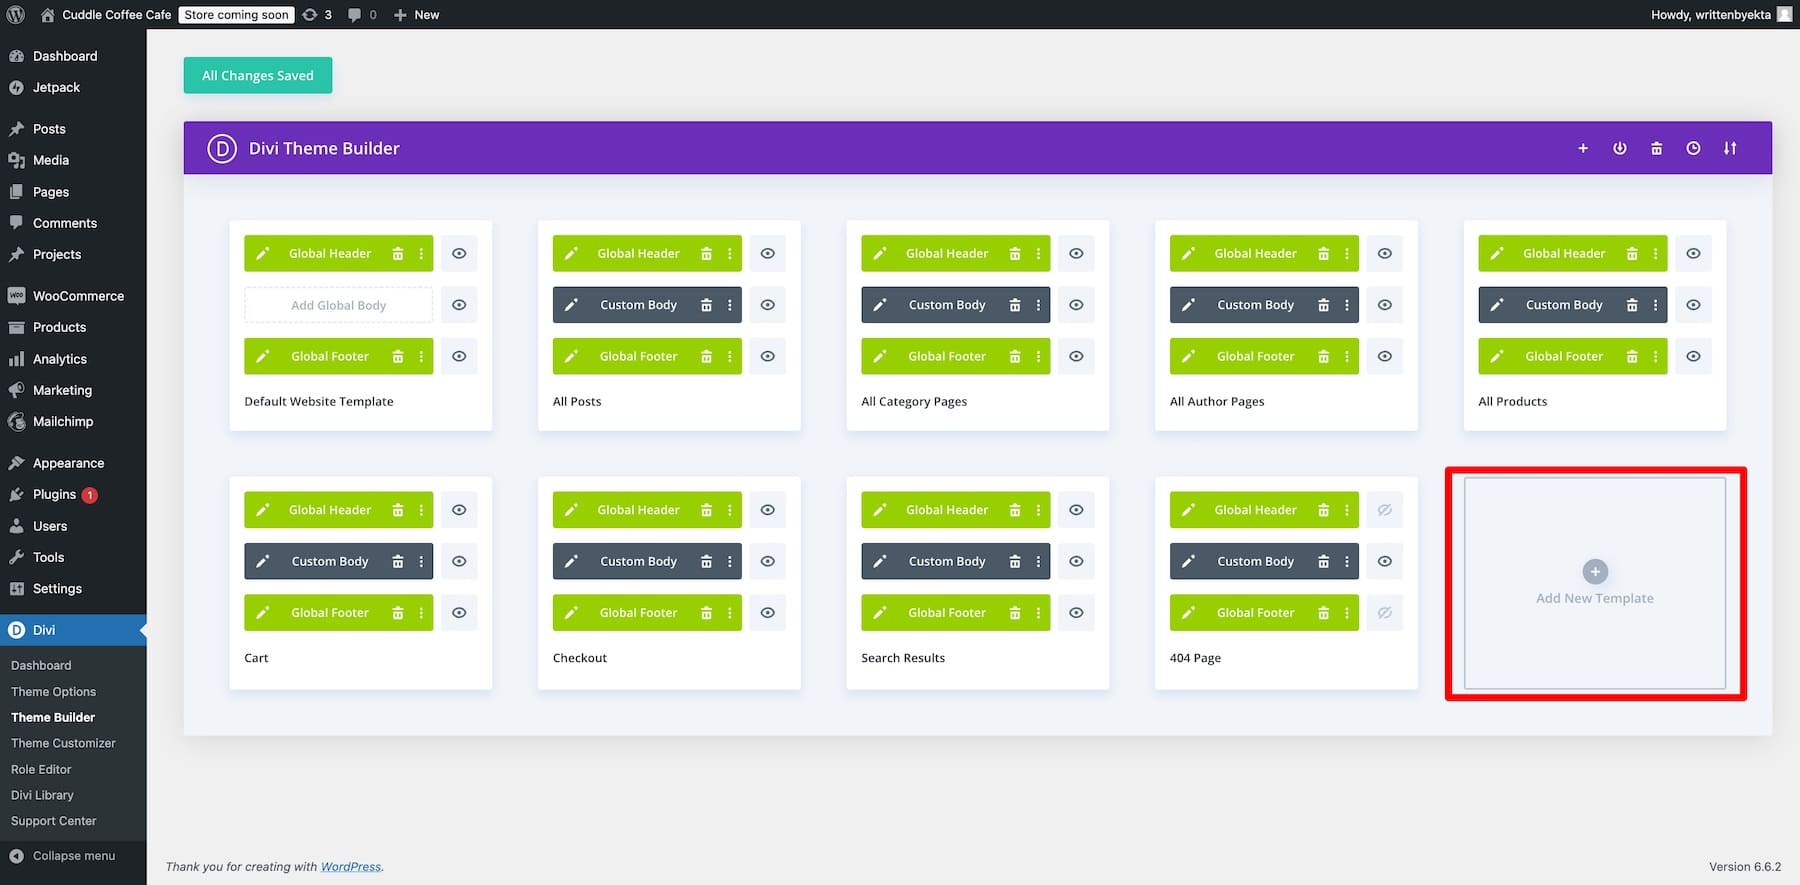
Go to Divi > Theme Builder > Add New Template to build from scratch.
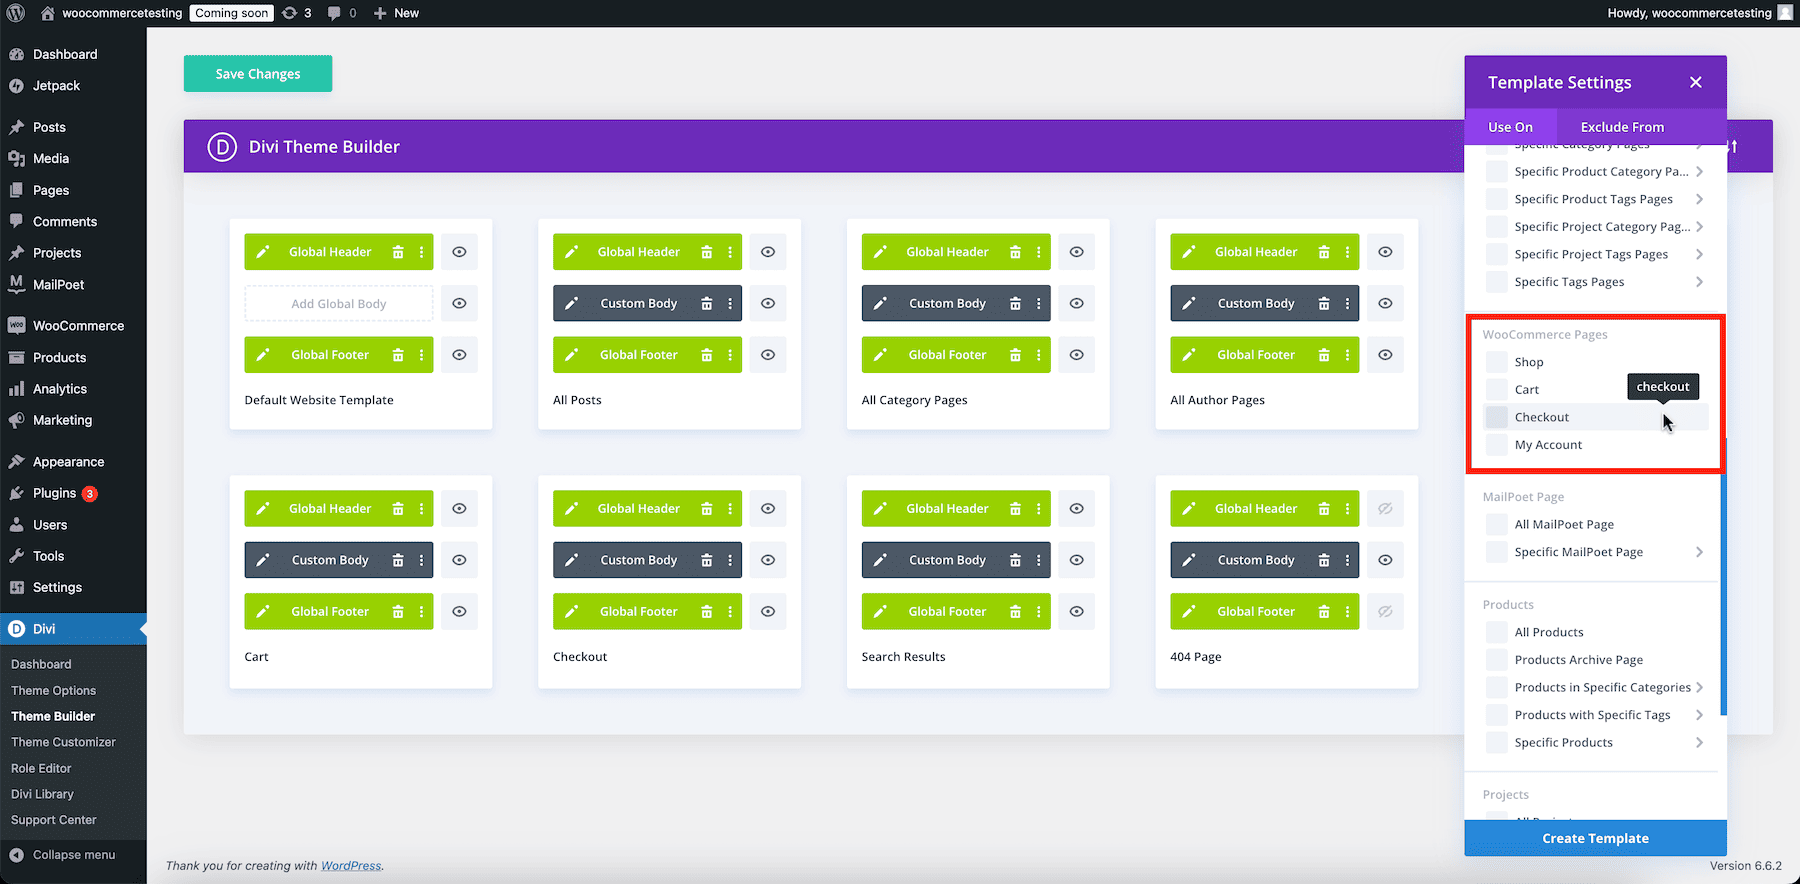
Choose Checkout from WooCommerce Pages as the source.
The next window is the drag-and-drop Divi builder to design your checkout template. Hover over it and click the plus icon to add a row and create a checkout page template using the Divi Theme Builder.
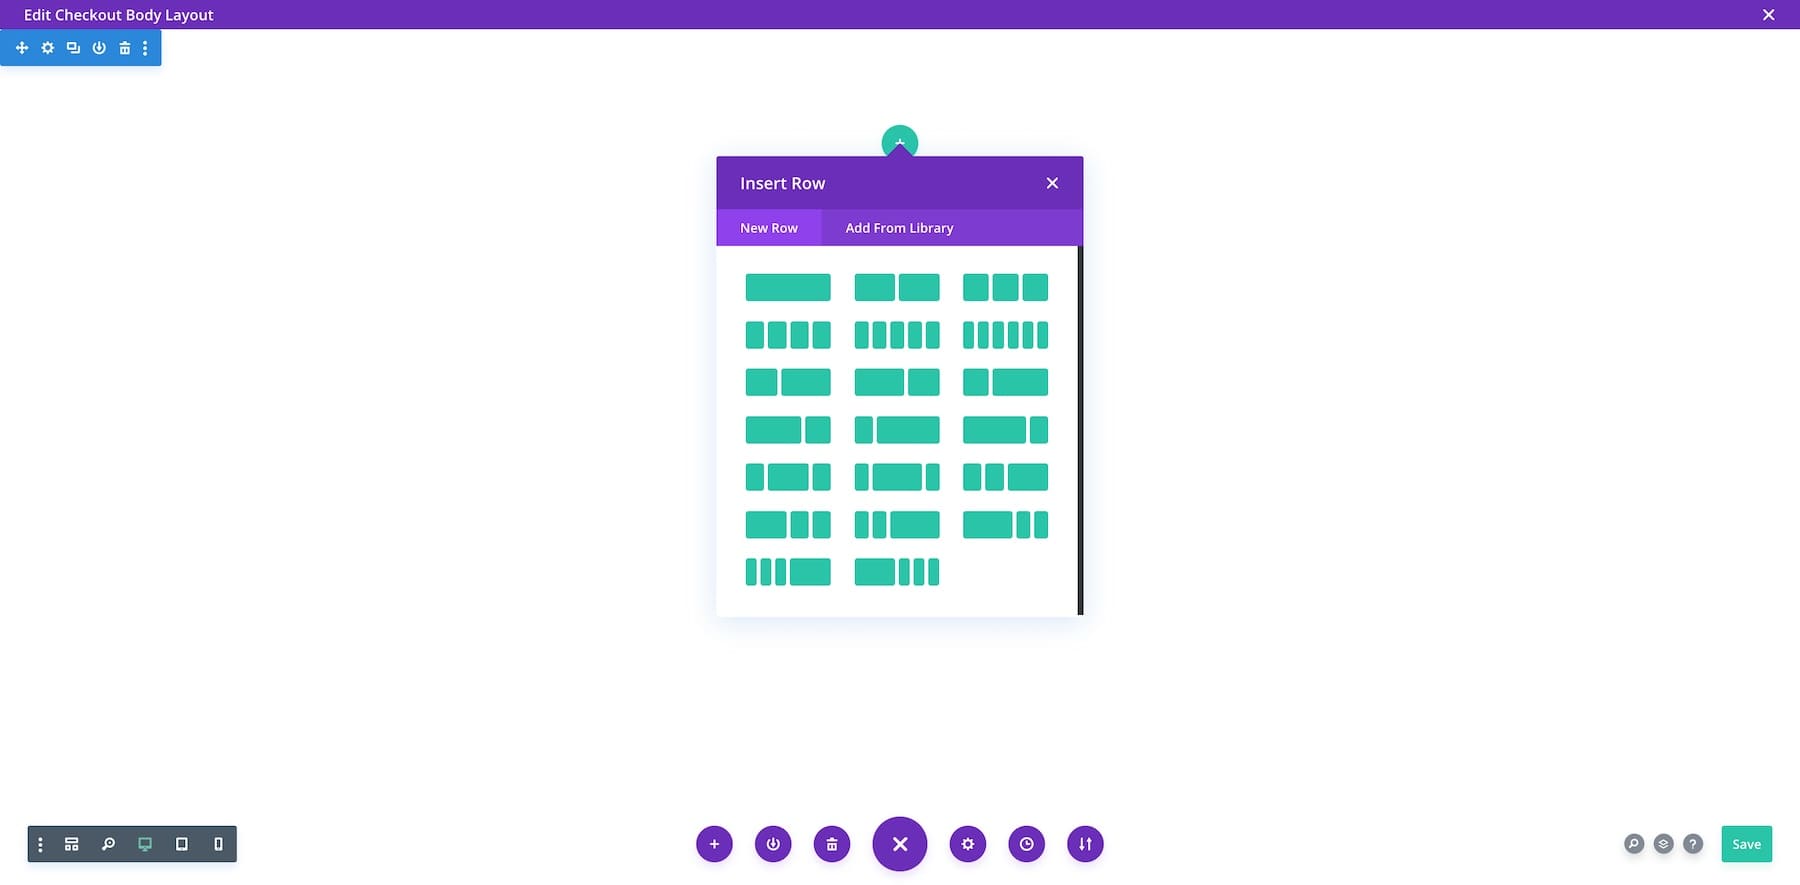
If you don’t want to create one, import a pre-designed template or ask Divi AI to build one using Build with AI.
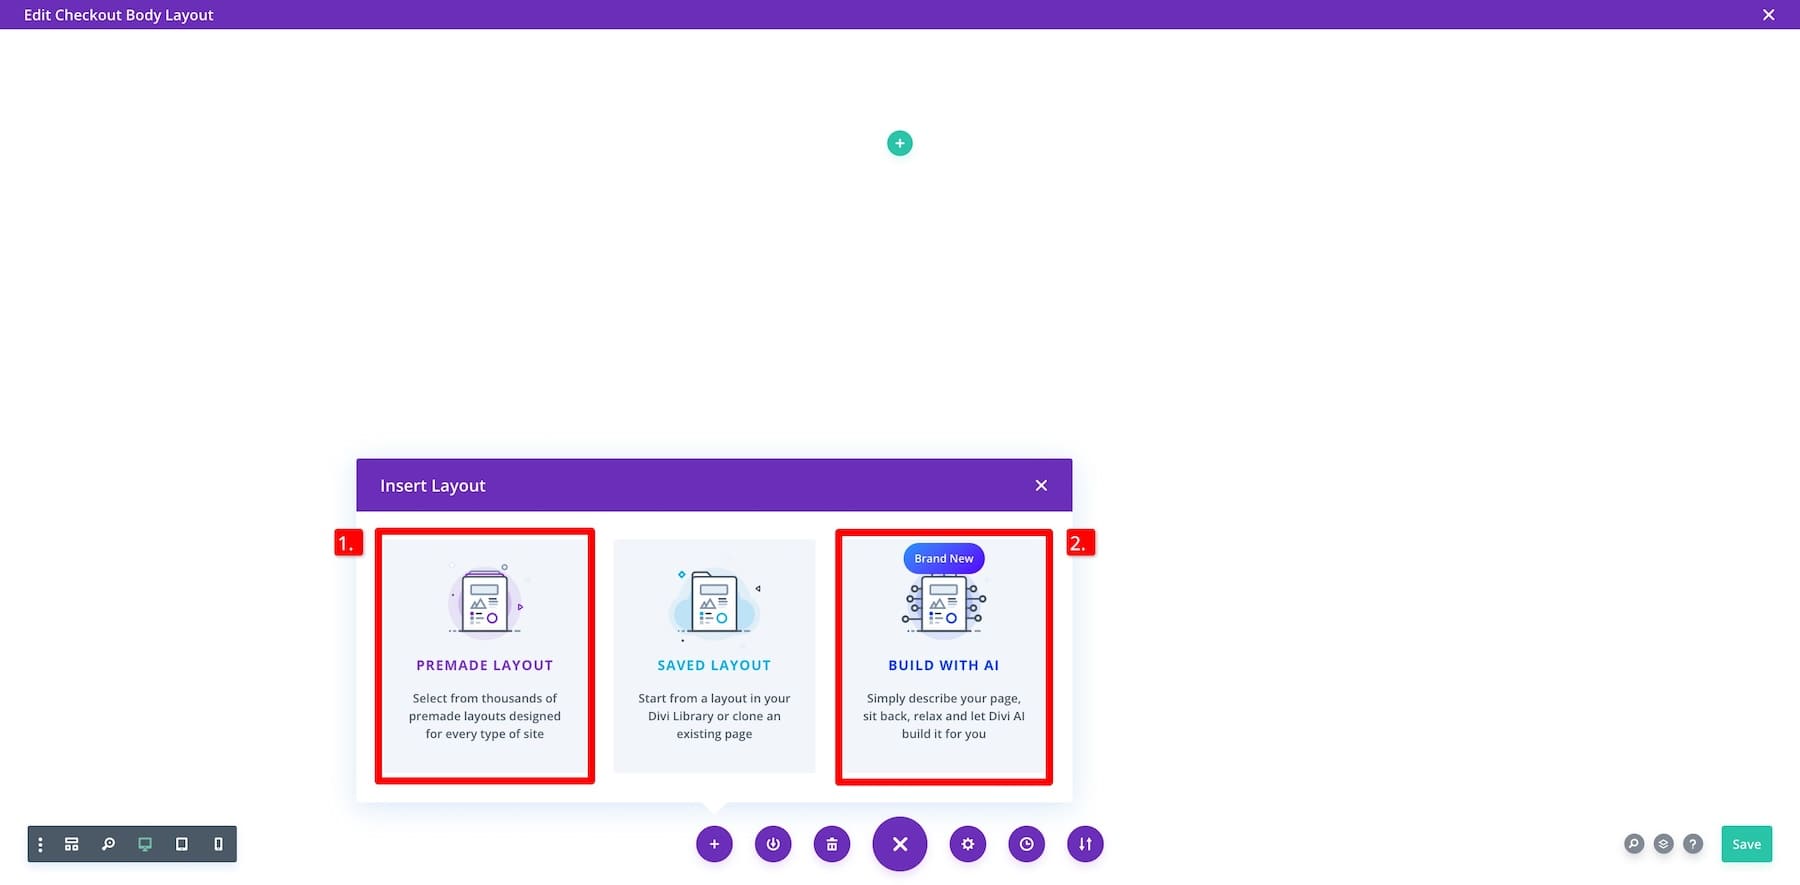
Remember that you don’t have to build from scratch if you don’t know where to start. You can always generate a branded checkout template with Divi Quick Sites.
2. Customize Your Checkout Page Template
I’ll use the Divi Quick Sites checkout template we generated above to show you the customization process. Here’s how it looks:
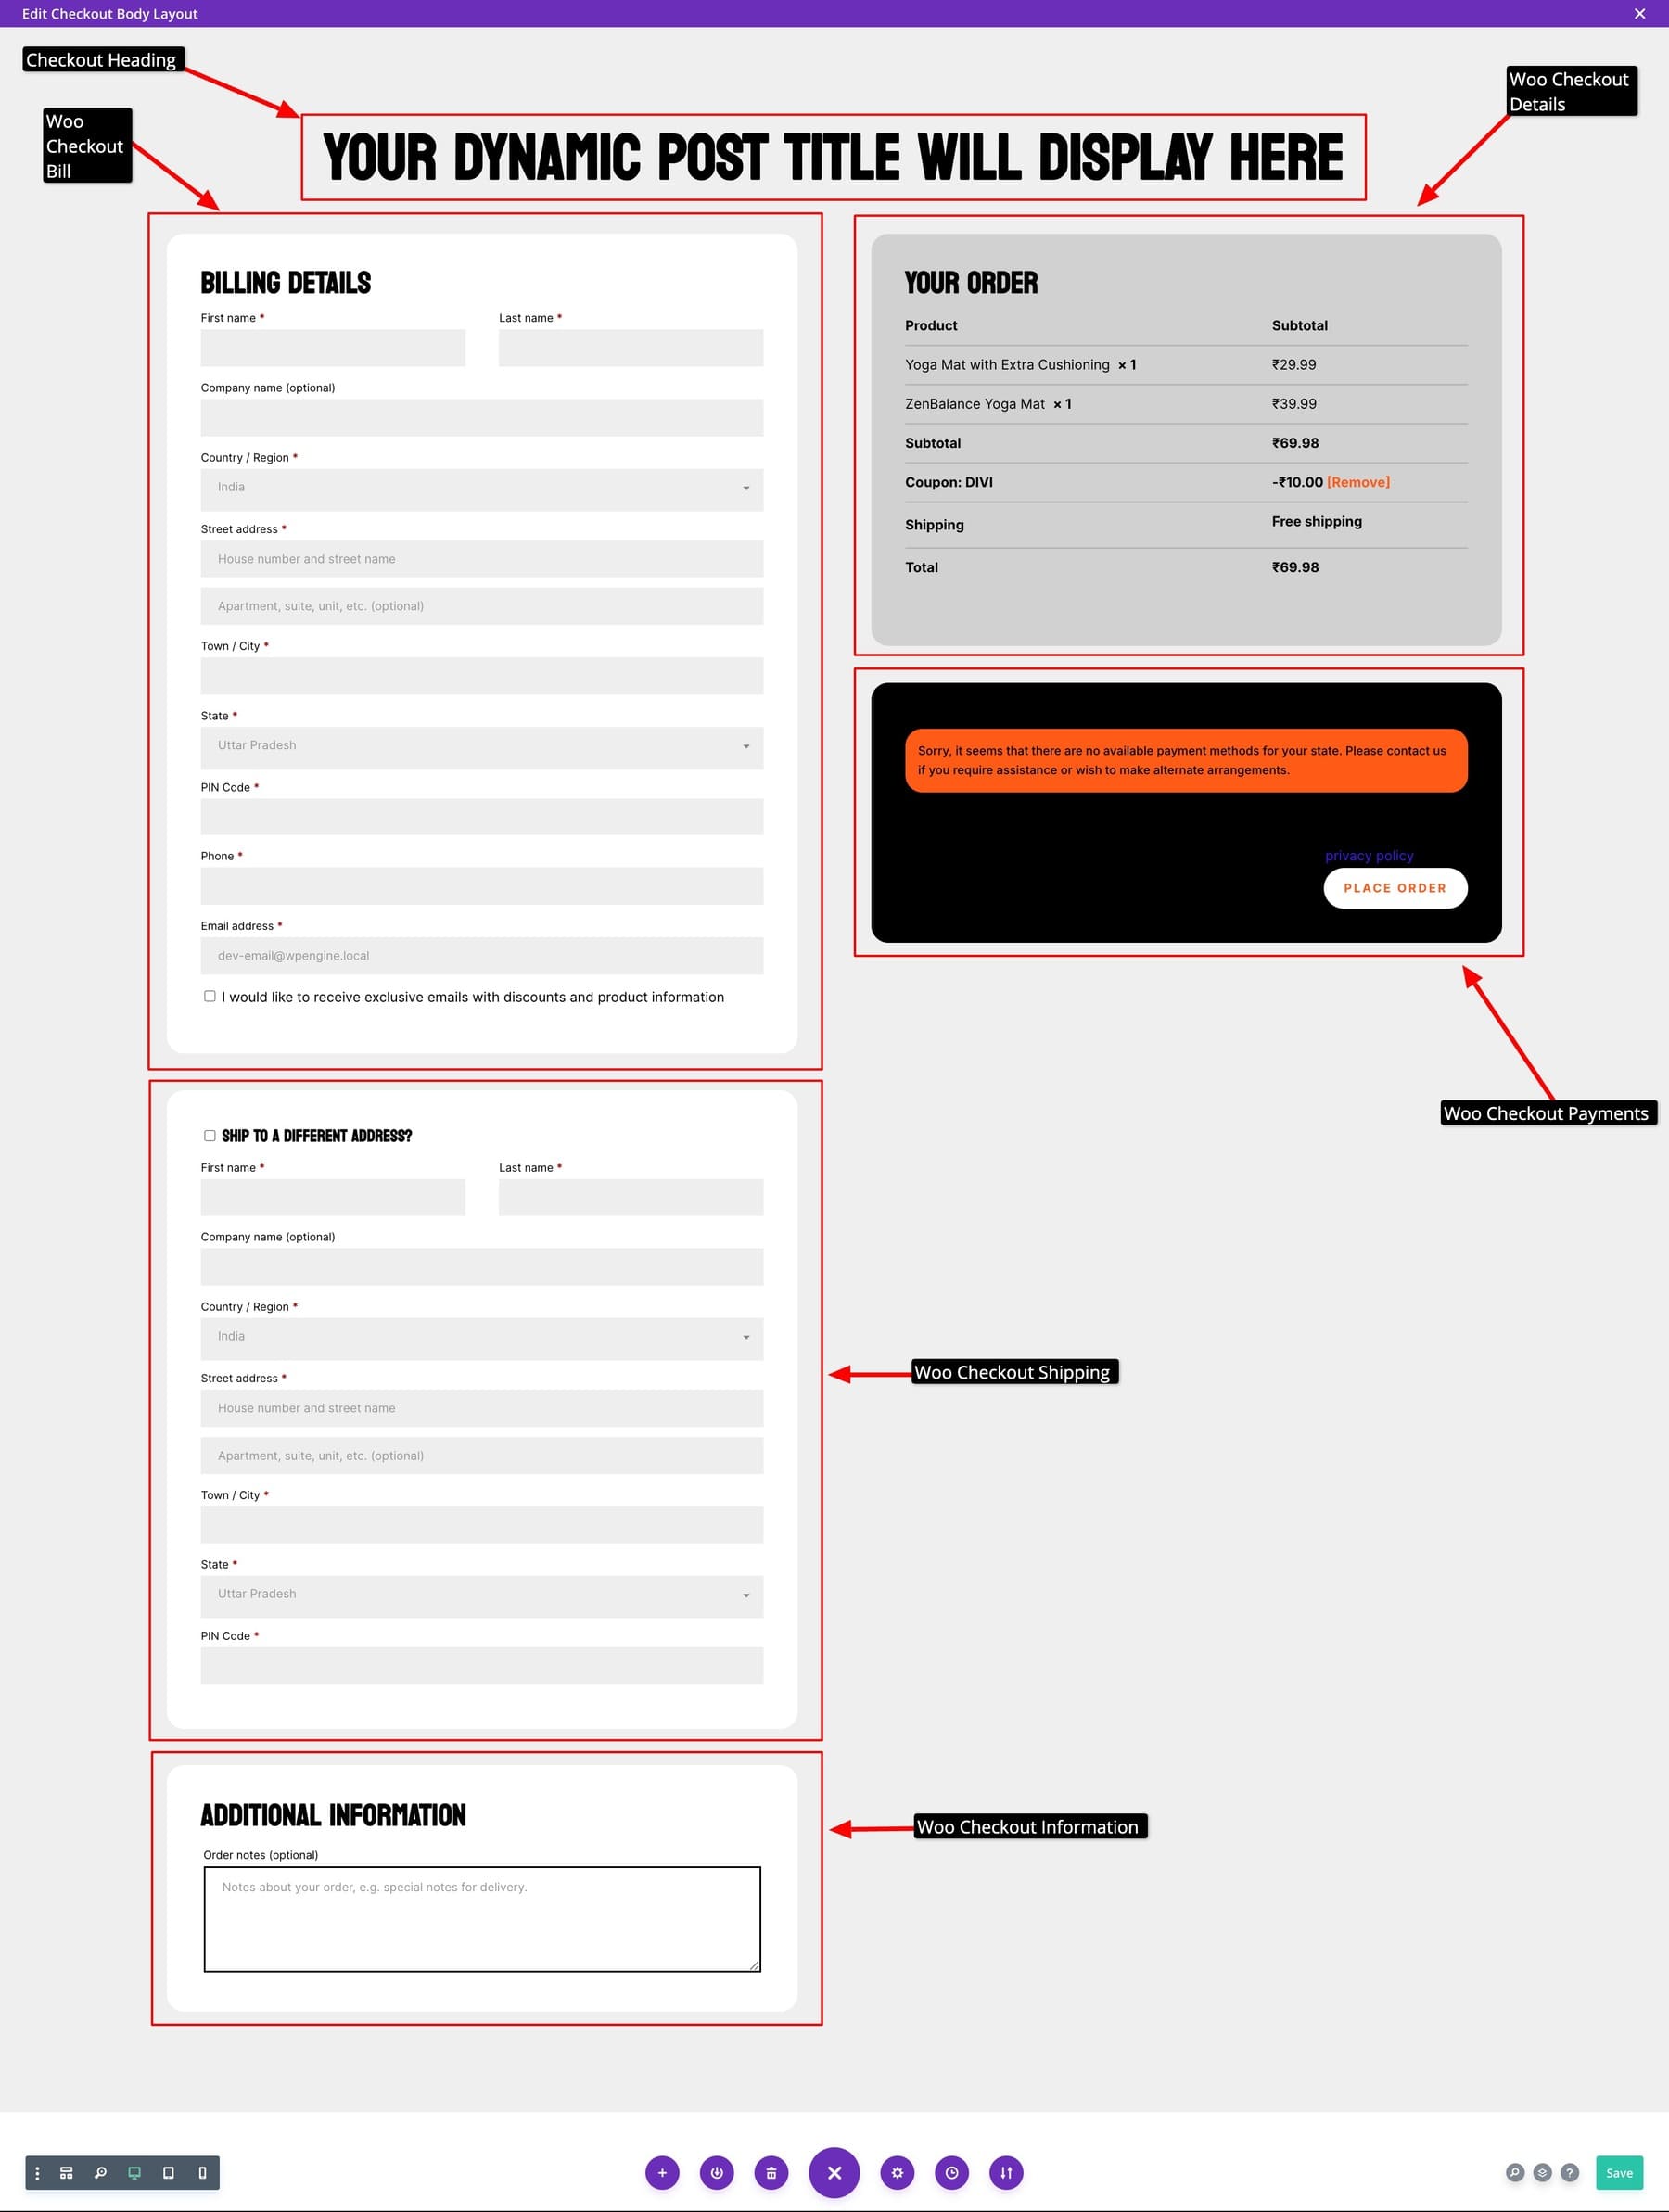
As you can see, the template generated by Divi Quick Sites already includes the necessary WooCommerce checkout modules, so you won’t have to do much other than add your payment methods (WooCommerce > Settings > Payments) to make it functional before publishing.
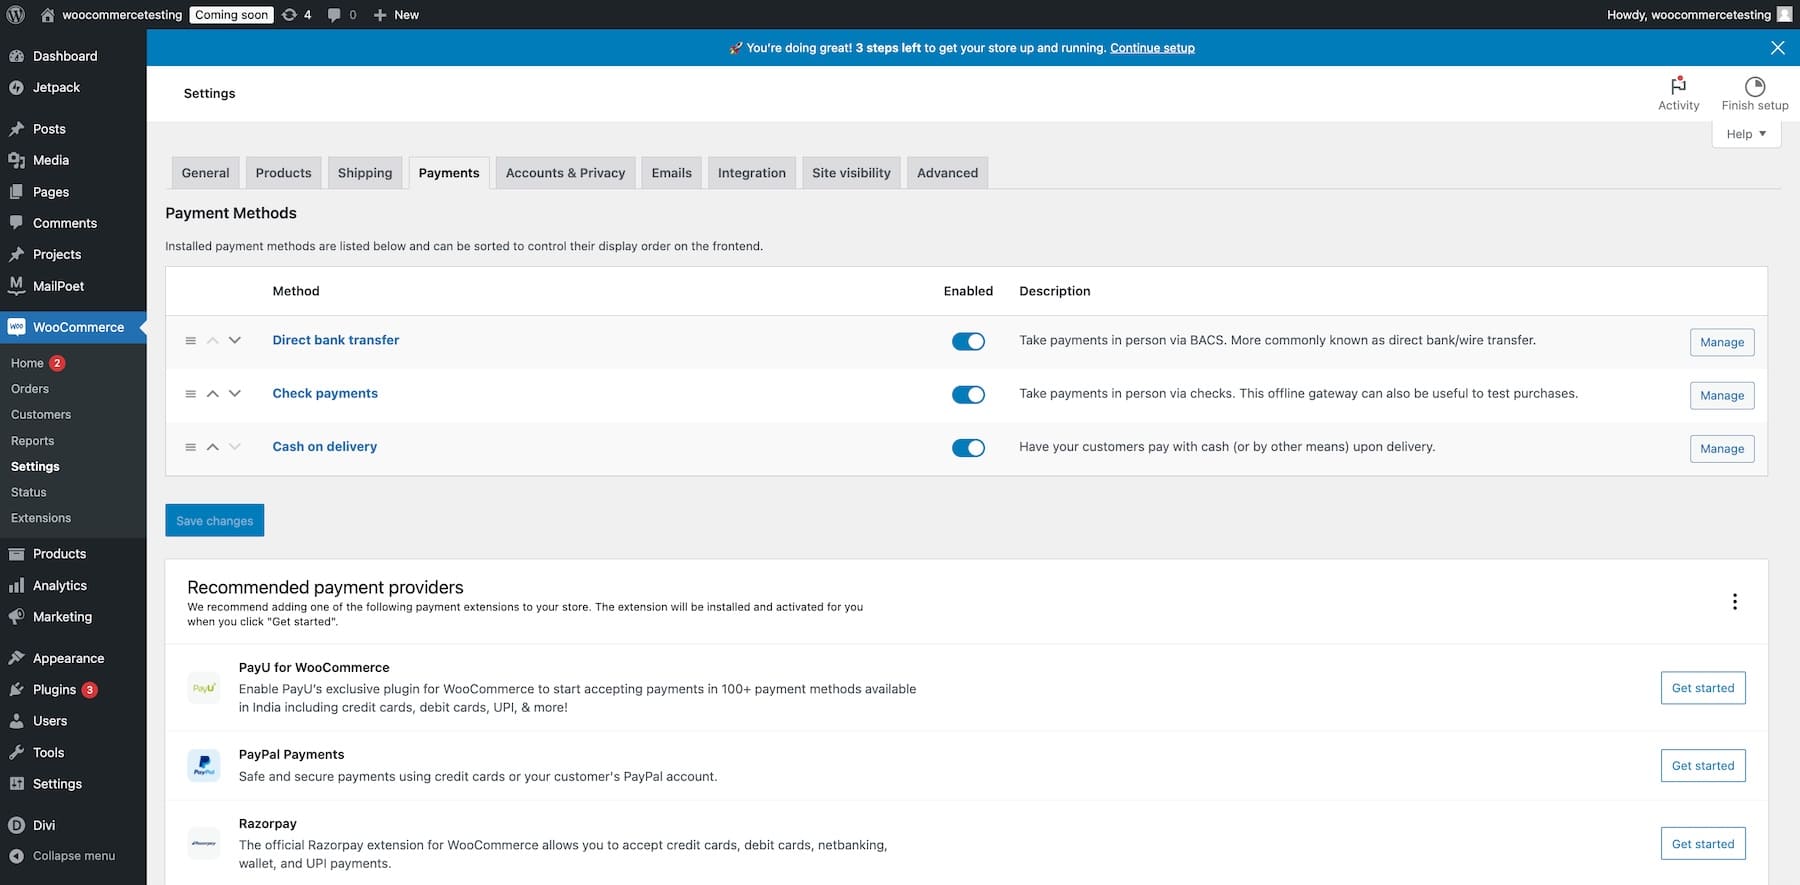
Pro Tip: Install the WooPayments extension to allow customers to use their preferred local payment methods, such as Paytm in India and Pix in Brazil. It also offers many benefits, such as automatic bank deposits and multi-currency support. Adding multiple payment methods increases the chances of your customers completing the payment process.
Use Divi’s WooCommerce Checkout Modules
Let’s review the Divi’s WooCommerce checkout modules you have access to. Unlike WooCommerce Blocks from WordPress Gutenberg, Divi’s WooCommerce modules are optimized for speed. For example, the Woo Checkout Bill module only includes the necessary fields, with (optional) field labels and titles if they are not essential.
Other than that, instead of one parent block, Divi checkout modules are separate, so you decide whether to add a different shipping address with Woo Checkout Shipping or add order notes with Woo Checkout Information.
You can easily customize a module’s style by clicking on the gear (settings) icon and switching to Design from Content. You can change colors, fonts, buttons, and other settings quickly.
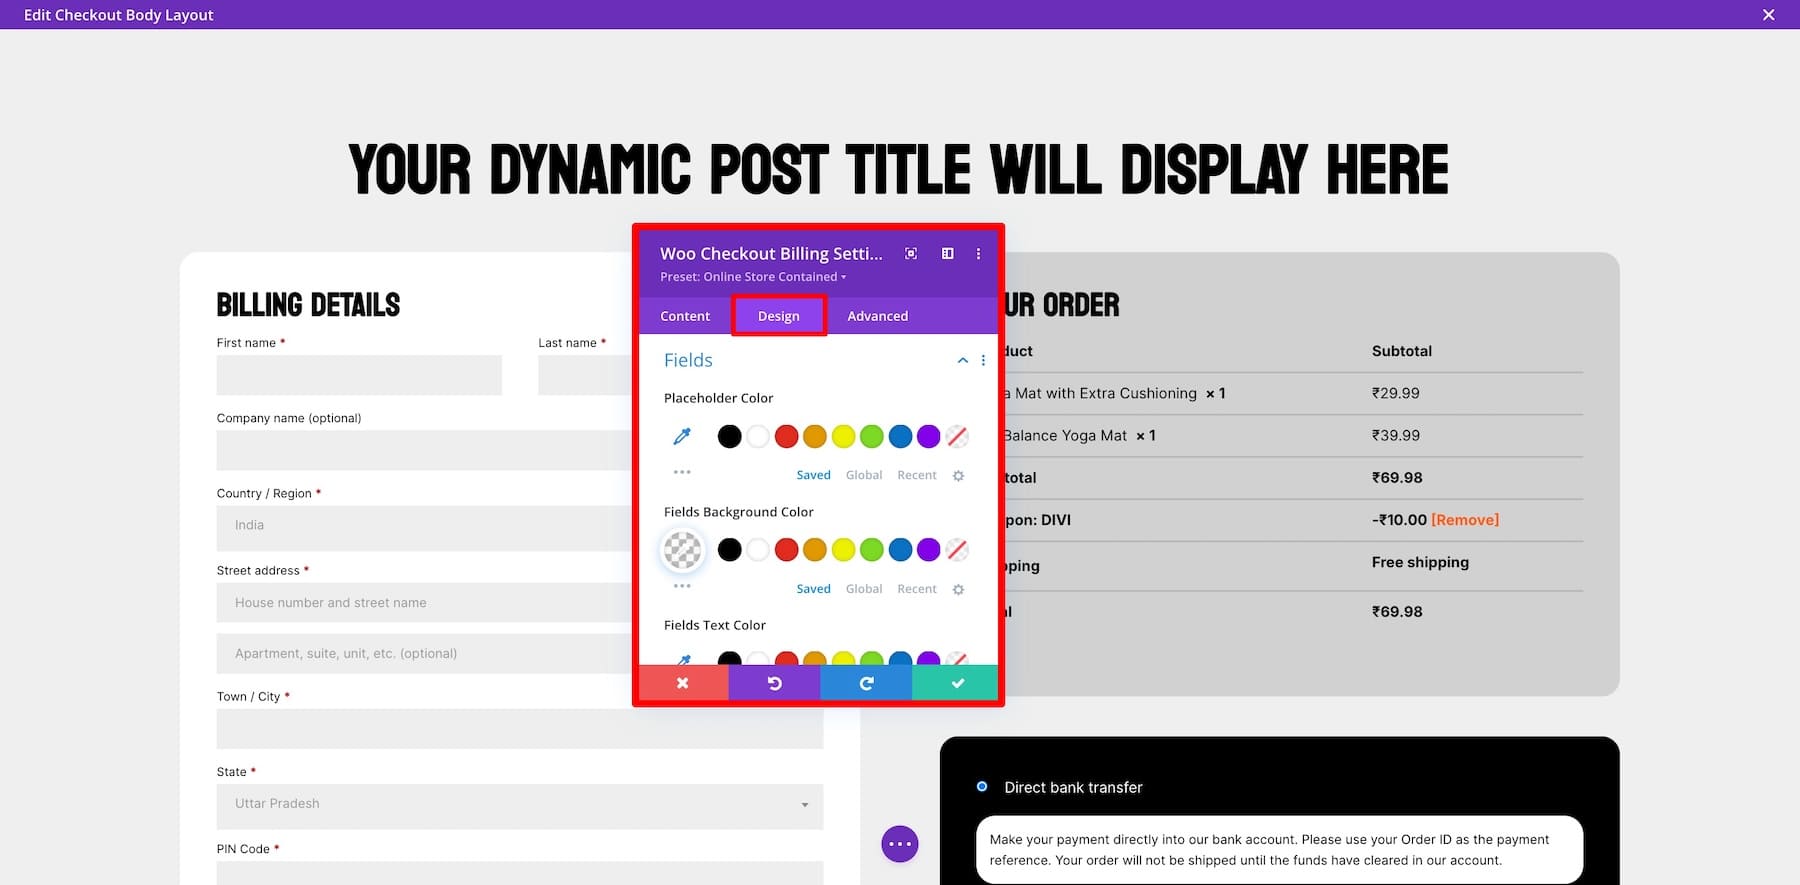
The best part about using Divi is its 200+ native content modules to enhance your checkout page for more conversions. In the following sections, we’ll use different Divi settings and modules to optimize this checkout template.
Add a Testimonial to Build Credibility
Showing social proof on your checkout is a great way to help buyers overcome last-minute doubts and complete their purchases. Using Divi’s native Testimonial module, you can add a permanent customer testimonial to build credibility. Go to its settings to make it stand out by adding a background color or border or changing the font, colors, etc.
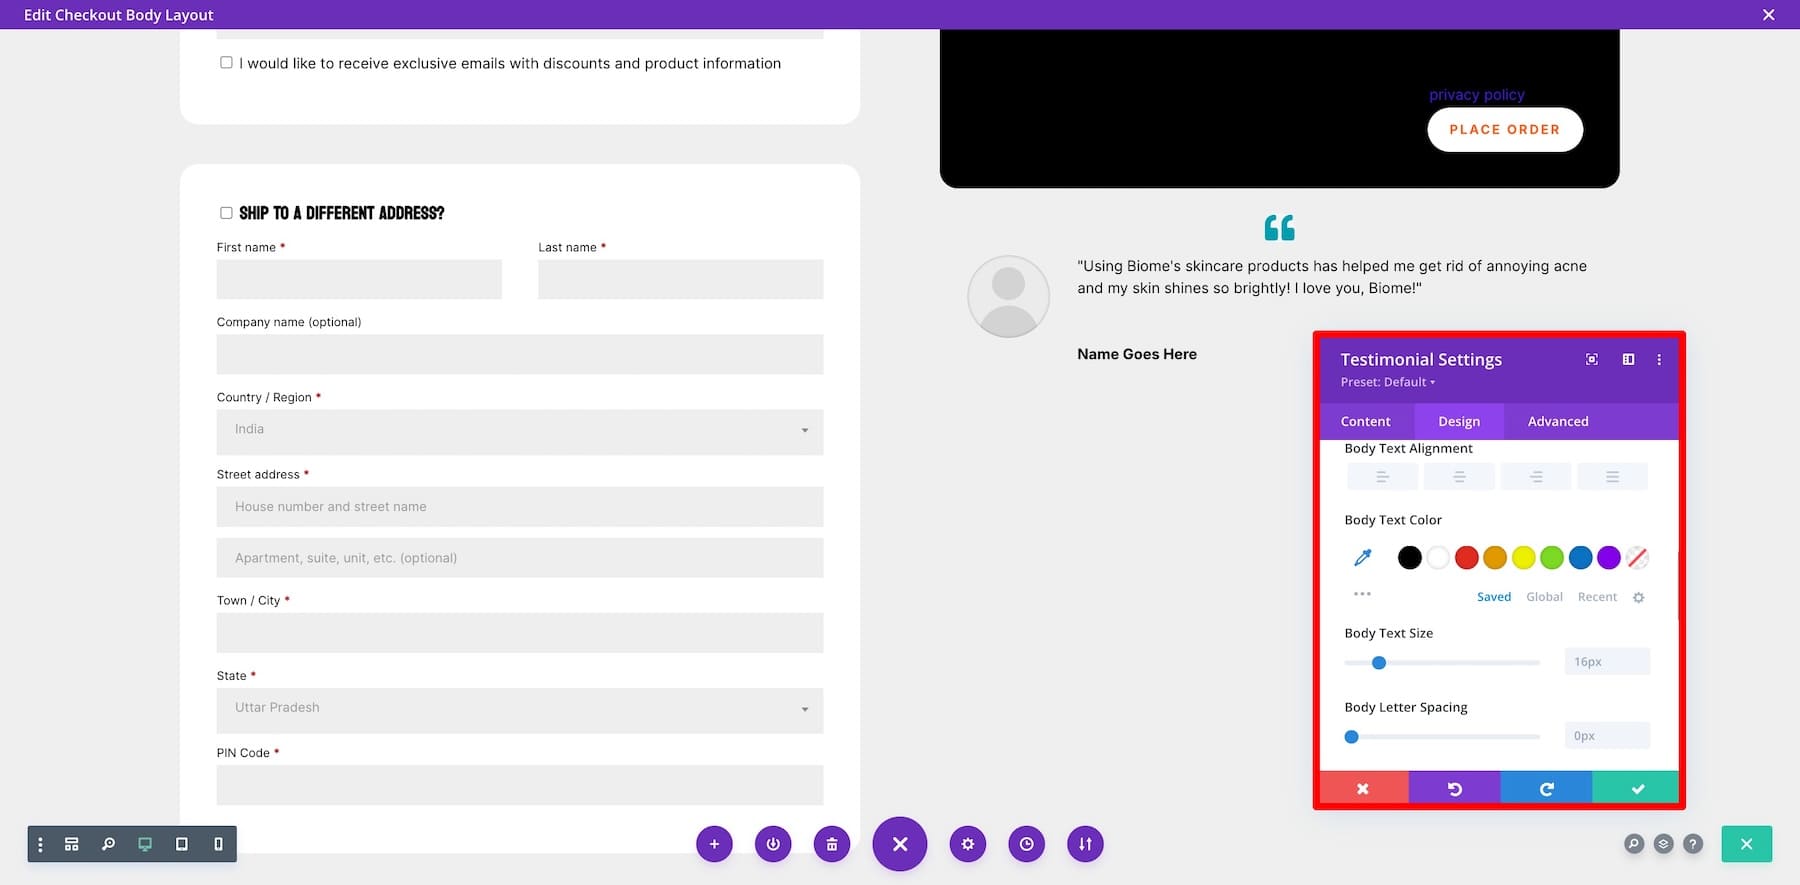
Since it isn’t dynamic, the testimonial will appear the same to all customers, so make sure to pick a brand-specific testimonial instead of a product-specific one—something that portrays the brand as trustworthy and reliable.
Create a Guarantee Section
You could also create a Guarantee section on your checkout to remind your customers why they should trust shopping with your brand. For example, here at Elegant Themes, we give a 30-day money-back guarantee with a no-questions-asked policy. That’s because we believe that once our customers get used to Divi, they’ll love it instantly and forget about a refund.
You can also display something simple, like your company values, customer count, etc., to highlight your brand authority.
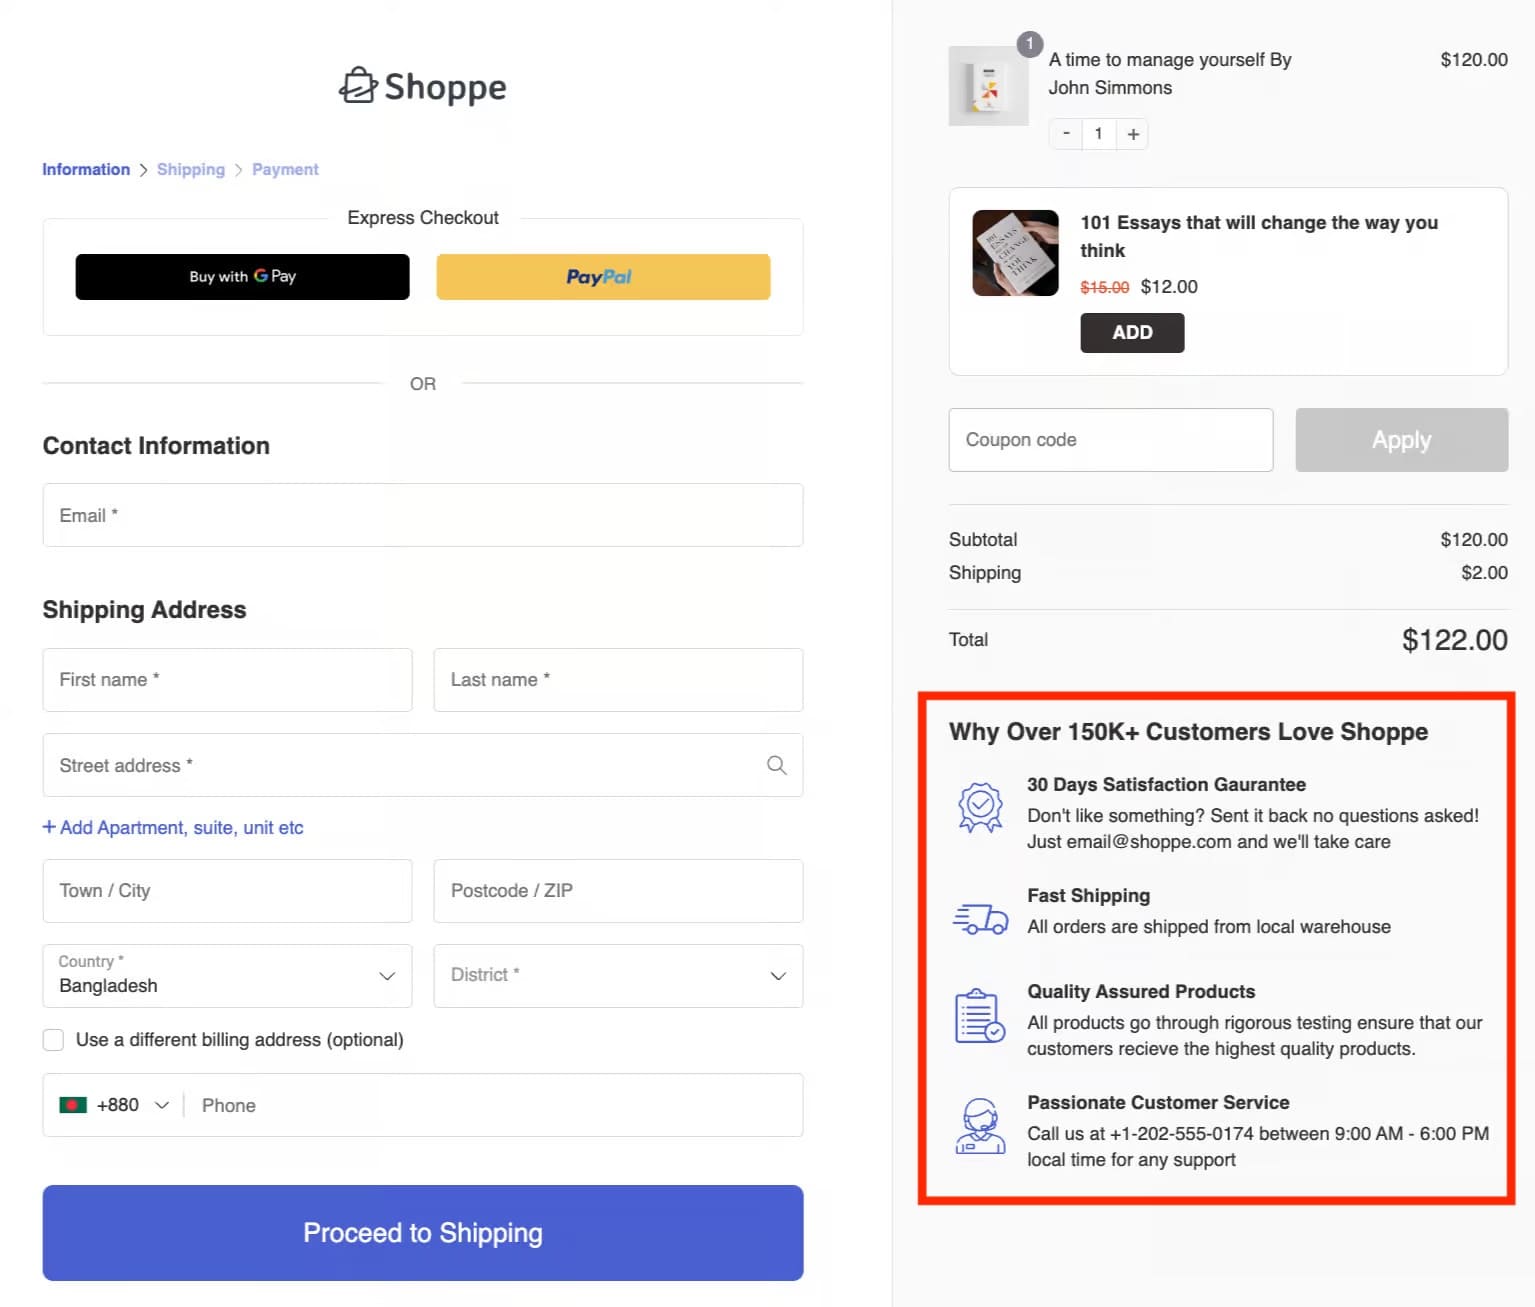
To create a section like this, use Divi’s native Title, Icon, and Text modules. Follow this tutorial to use Divi Builder and modules to add and customize elements.
Create a Last-Minute Discount Banner Using Divi’s Dynamic Content Functionality
Another great thing about Divi modules is that they’re dynamic, meaning they pull data from specific products automatically without having you manually enter it. For example, when your customers set up the cart and select the products, the information is filled out automatically in Divi’s Woo Checkout Details module.
You can also modify dynamic content settings in certain elements to personalize users’ experience even more. For example, create a last-minute discount banner with a time limit to create urgency and encourage users to complete their purchases. For this, use the Countdown Timer module. Here’s how to customize it:
Show Special Discounts for Logged-In Customers Using Divi’s Conditions
Divi’s Conditions is another powerful feature for optimizing buying journeys based on different customers. For example, create an exit-intent discount banner popup to retarget customers who didn’t complete the purchase after going to the checkout page. Or showcase a logged-in user-only discount code or free delivery offer to customers who have created a customer account.
First, create an image banner and add it using Divi’s Image module. Then, go to Settings > Advanced > Conditions. Now, choose the Logged-in for User status. Here’s how to showcase a discount code to logged-in users.
Remove Site Header and Footer to Avoid Distractions
Removing distractions from your checkout is necessary to ensure your customers are focused on completing the purchase. These distracting elements could be buttons or links that could take your customers away from checkout, generally in your site’s header and footer. So, hide them. But how do you make sure that they’re visible on other pages, except checkout and cart? Doing so with Divi is super easy, thanks to Divi Theme Builder.
While creating templates with the Divi Theme Builder, you create and assign specific target pages on which you’ll use them. For example, we assigned Checkout from WooCommerce Pages to our checkout template, so any changes will affect only checkout pages.
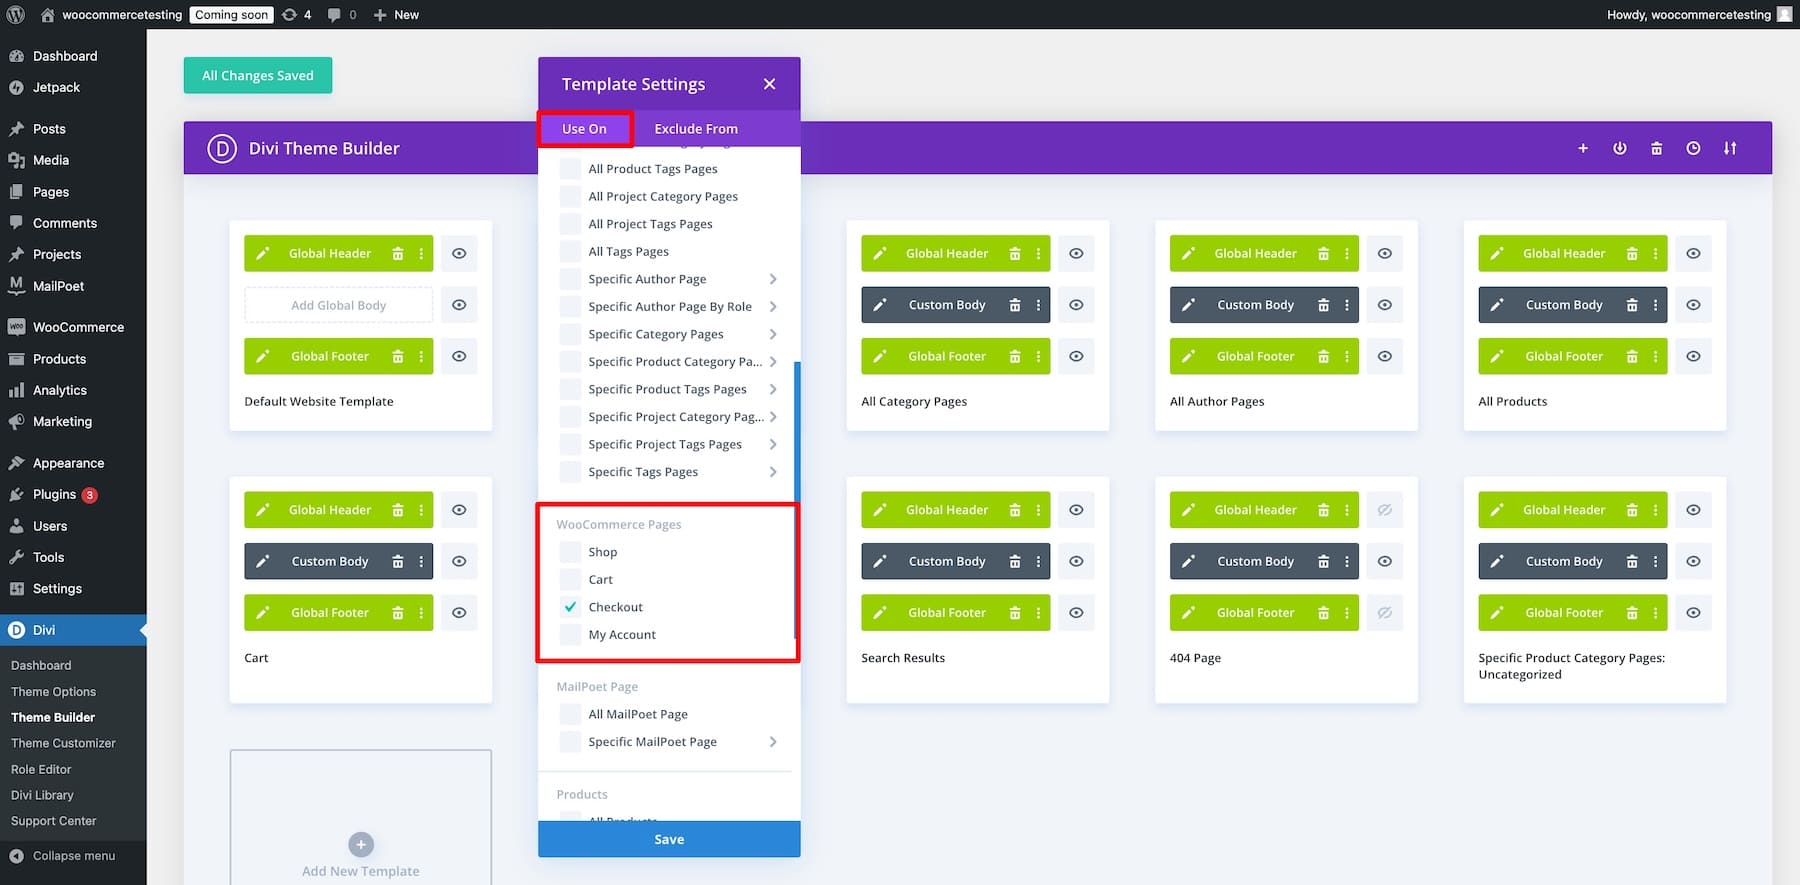
To hide the header and footer from your checkout template, click the eye icon next to them and Save Changes. The eye icon represents visibility, and since we’ve turned it off, it means they’re not visible.
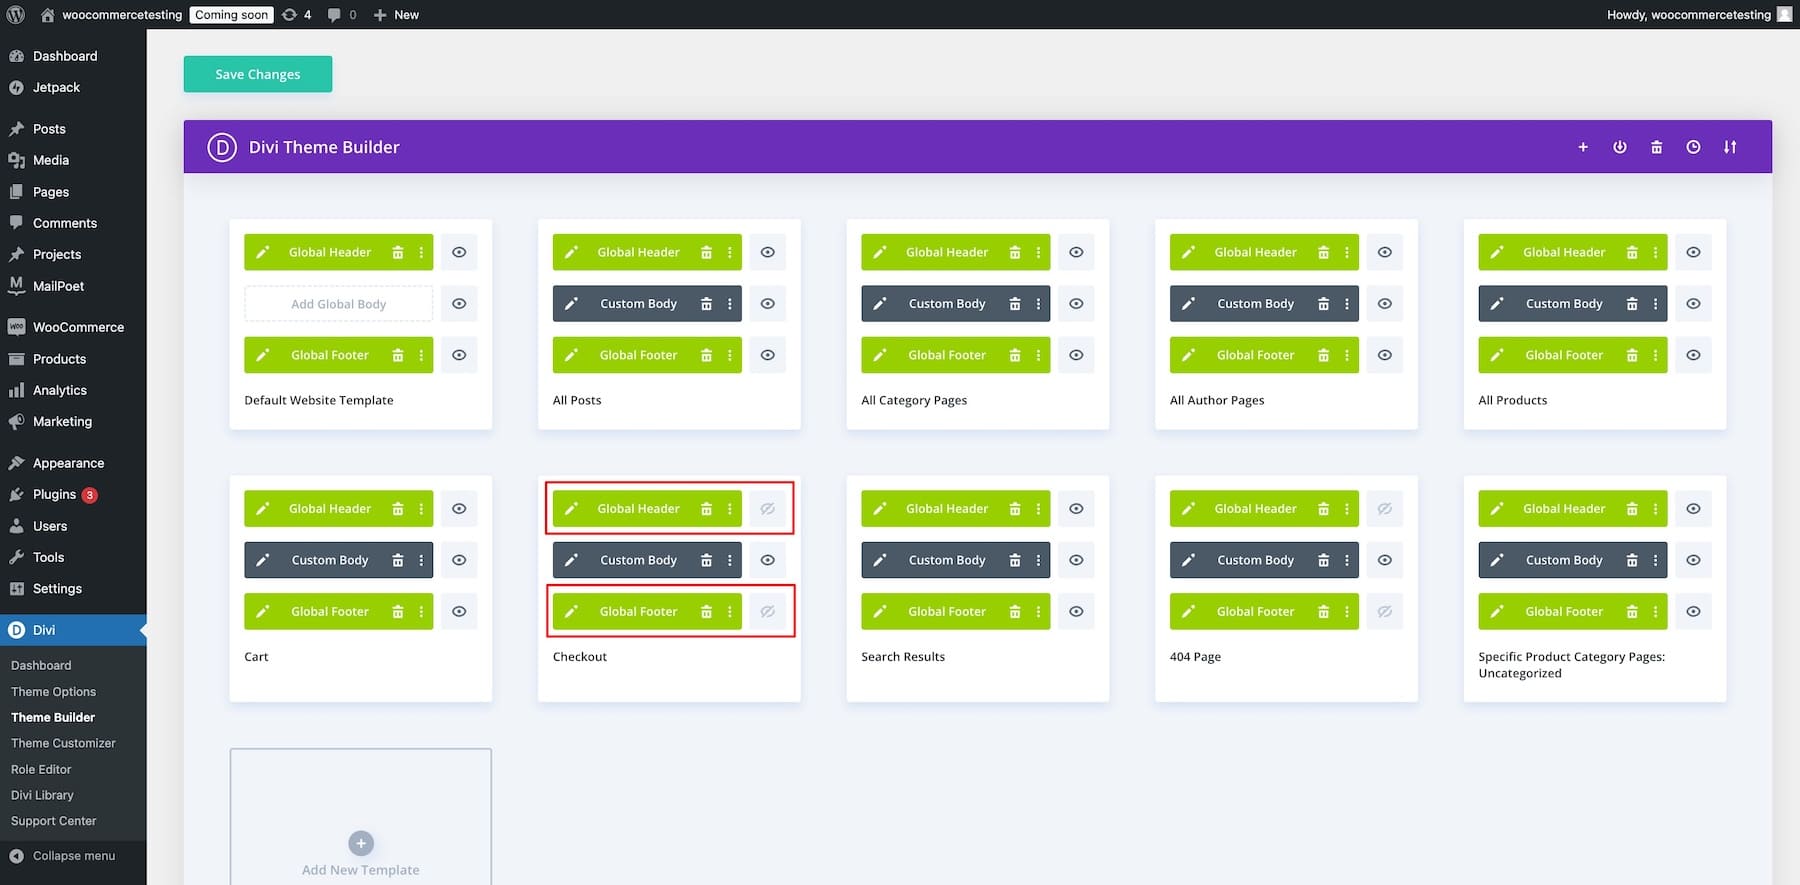
If you don’t want to hide your header and footer completely, you can create more simplified versions for your checkout page. Just click to edit the header or footer area of your checkout page template and use the builder to make adjustments.
Optional: Adding an Email Optin Popup Form
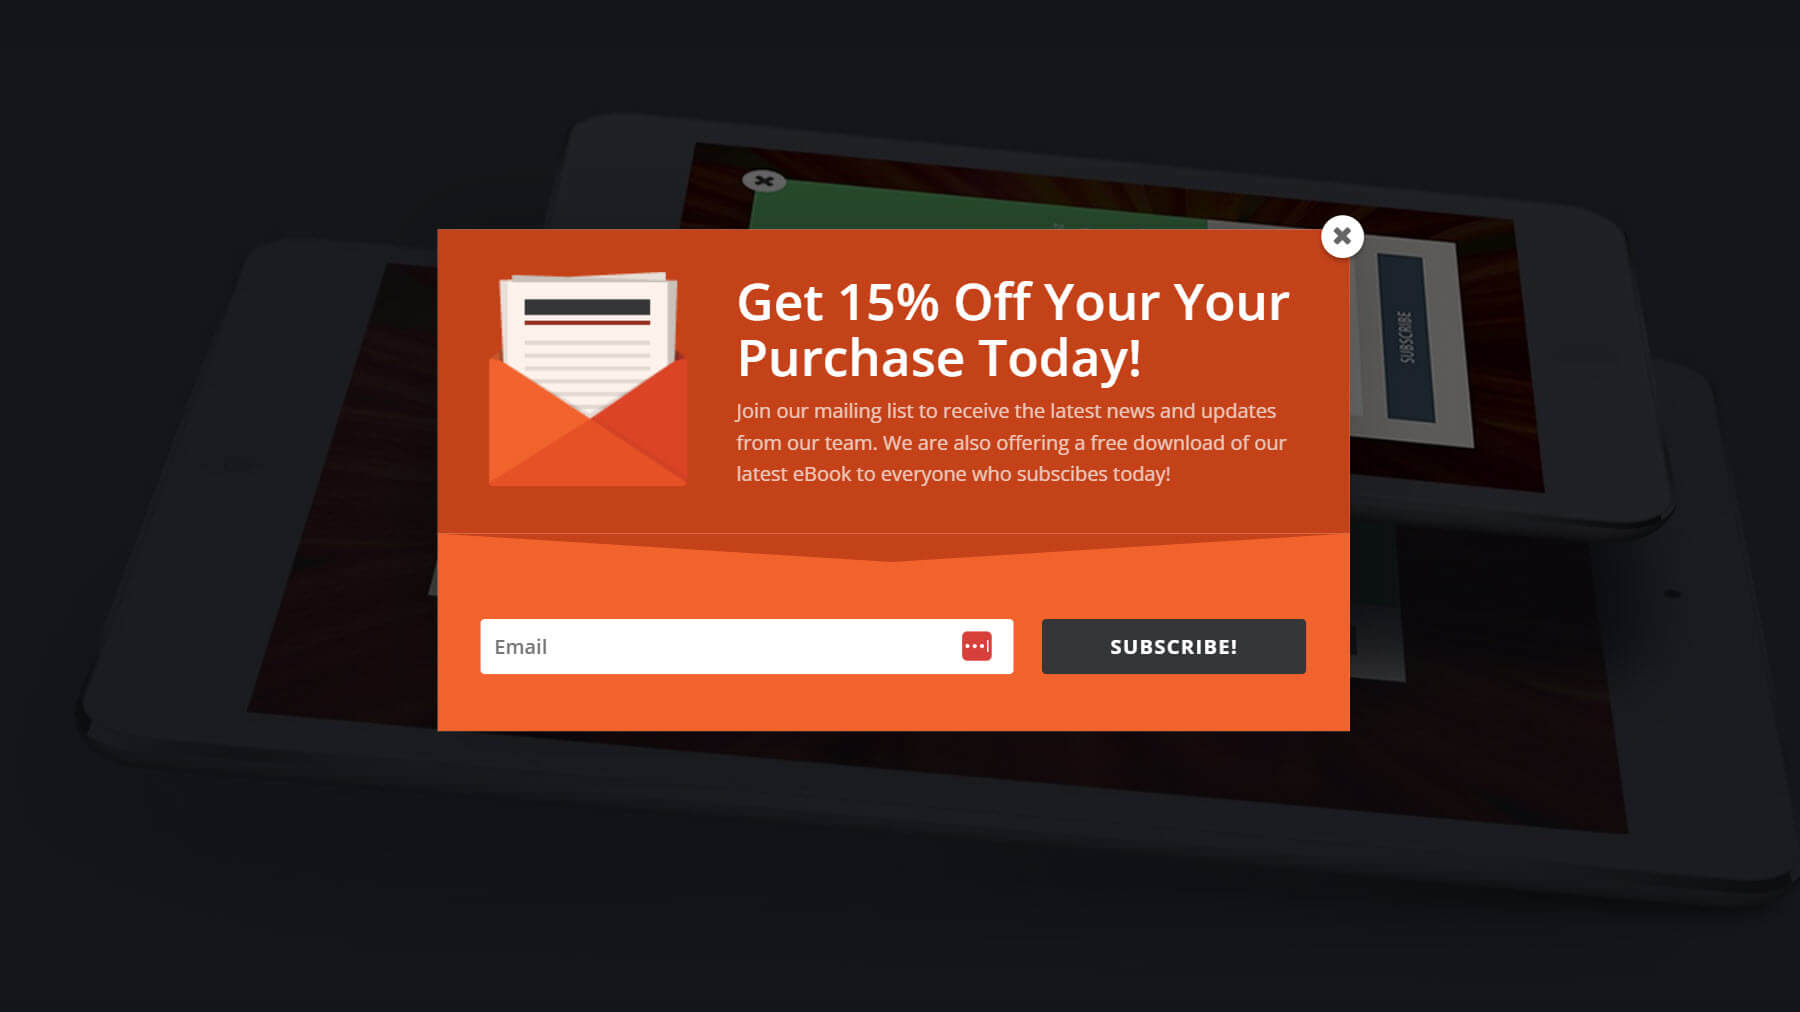
You can also use Divi’s Bloom plugin to create an email opt-in popup with discount coupons exclusively for email subscribers. Bloom has many different display types, including trigger-specific popups. For instance, you can show the popup if a user is inactive on the product page. Or trigger a custom popup on the thank you page after they complete the purchase. This would be a great time to offer a discount to join your email list so you can get more sales.
3. Save and Preview Your Checkout Template
Once satisfied with your design, click the Save button on the lower right of Divi Builder.
More Ways to Optimize WooCommerce Checkout Templates
Other than customizing your WooCommerce checkout with Divi, here are some essential plugins and WooCommerce extensions that’ll help you optimize your checkout even more:
- Bloom: To reduce abandoned cart rates, collect email leads directly from your checkout pages by offering special discounts or updates in exchange for email sign-ups.
- FunnelKit: Optimize your customer’s buying journey by creating automated sales funnels and one-page checkouts.
- DiviFlash: Increase your sales with conversion-optimized, stunning WooCommerce layouts for shop, product, cart, and checkout pages. Also, see Ultimate WooCommerce UI Kit.
- Divi Checkout: Offer several payment options, including Google Pay and Apple Pay, to simplify payment processing for your customers.
- WooCommerce One-Page Checkout: Reduce time spent on checkout by creating one-page checkout processes.
- WooPayments: Accept payments in 135+ currencies and integrate 100+ payment methods to give your customers their preferred choices.
- Checkout Fields Manager: Customize WooCommerce checkout field labels easily.
- WooCommerce Custom Fields: Add custom fields dropdown, checkbox, and multi-select to your default WooCommerce Checkout block.
- WooCommerce SEO Plugins: Optimize your site for WooCommerce SEO using plugins that simplify the process of indexing and optimizing products, categories, and other WooCommerce pages.
Also, if you haven’t settled on a theme yet, you can check out these WooCommerce themes, which offer more customization out of the box.
Tools Needed to Build WooCommerce Checkout Templates
| Task | Suggested Tool | |
|---|---|---|
| 1 | Reduce abandoned cart rates by collecting email leads from checkout pages | Bloom |
| 2 | Optimize customers' buying journeys by creating automated sales funnels | FunnelKit |
| 3 | Increase sales with conversion-optimized WooCommerce layouts for shop, product, cart, and checkout pages | DiviFlash |
| 4 | Check out an extensive WooCommerce UI Kit for beautiful layouts | Ultimate WooCommerce UI Kit |
| 5 | Simplify payment processing with multiple payment options (Google Pay, Apple Pay) | Divi Checkout |
| 6 | Reduce time spent on checkout by creating a one-page checkout process | WooCommerce One-Page Checkout |
| 7 | Accept payments in 135+ currencies and integrate 100+ payment methods | WooPayments |
| 8 | Customize WooCommerce checkout field labels easily | Checkout Fields Manager |
| 9 | Add custom fields like dropdowns, checkboxes, and multi-select options to WooCommerce checkout | WooCommerce Custom Fields |
Divi + WooCommerce is the Ultimate E-commerce Solution
Divi and WooCommerce are all you need to build a unique and functional e-commerce store that your customers rave about. Divi’s customizability perfects WooCommerce’s e-commerce functionality, so you can create quick and smooth checkout pages, optimize them for more conversions, and reduce abandoned cart rates.
FAQs on Customizing WooCommerce Checkout Pages
How do I customize the WooCommerce checkout page without a plugin?
How can I improve my checkout conversions?
How can I change the default WooCommerce checkout page?




Leave A Reply