Do you feel like you can’t stay on top of the news sources you love? Or maybe you know that you’re missing a lot of great content that’s being published, but you have no clue how to stop letting it slip through your fingers. For a way to gather all of the content you want to read in one place, you need a tool to help you out.
That’s where Feedly comes in – it’s a content curation tool on AI steroids. Not only can you follow your favorite sources and topics, but you can also have Feedly work on your behalf to seek out the content you’re (probably) interested in but wouldn’t find on your own.
On top of being a simple way to keep track of the content you want to read or save, Feedly can also be used for these purposes:
- Content creation that requires sources and/or quotes
- Content curation
- Ongoing research (keywords, competitors, topics, etc.)
- Social sharing
The service is free to start out – and if you’re happy with limited functionality, it can be free forever. Or you can upgrade to access customized-just-for-you features.
In this guide, we’re going to explain Feedly’s benefits, features and plans, and we’re also going to show you step-by-step how to set up your account to get the info you want – and ignore the rest.
Getting Started with Feedly
To sign up for a Feedly account, go to the home page and click the green Get Started for Free button.
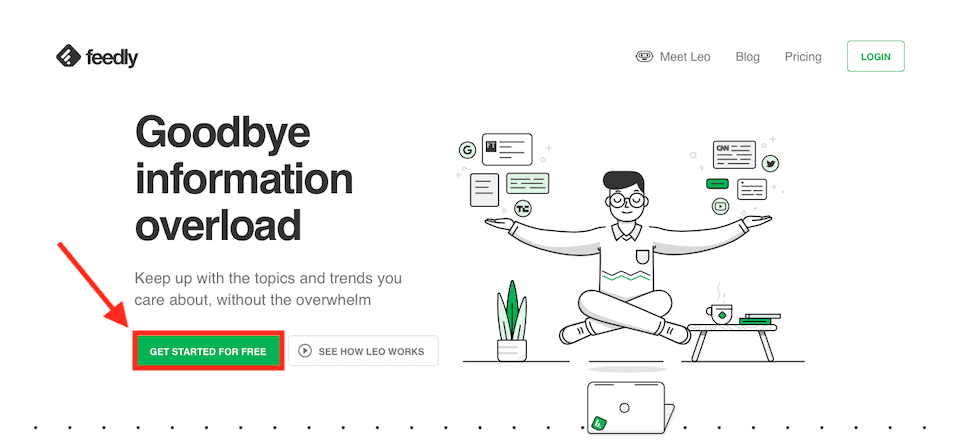
You’ll then have a few options for how to set up your Feedly account, like using Google, a social media login or Feedly itself. Once you select your preferred account creation tool and you fill in your info (I chose Google, so it auto-added information for me), you’ll be brought to your dashboard.
The Feedly Dashboard
We’ll go over a lot of the tools that you find in this Dashboard throughout this article, so here, we’ll just give you a super-quick overview.
The Navigation Bar
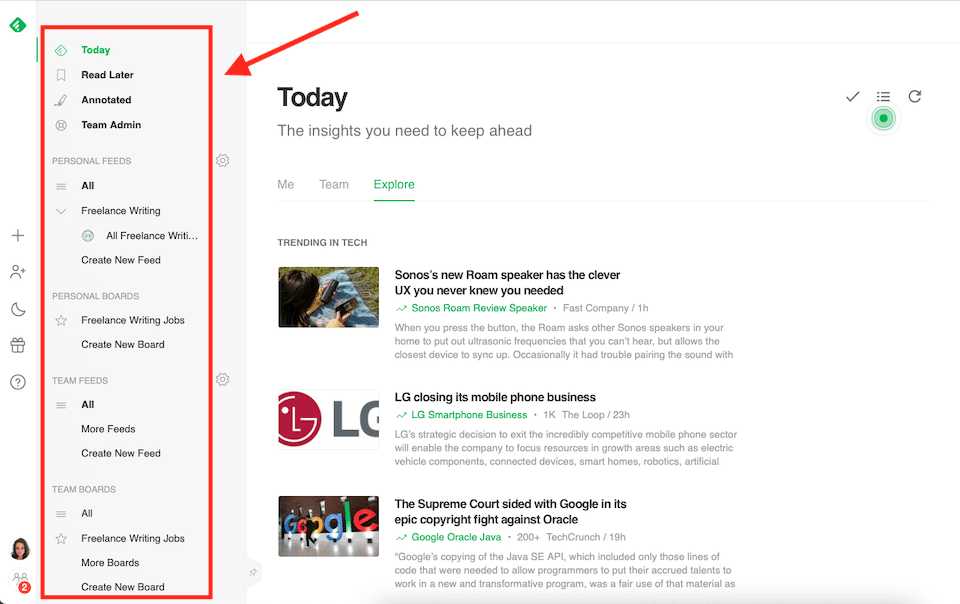
When you start with a free account, on the top-left of the page, you’ll see two bolded options:
- Today: This is where today’s collected articles will be stored so you can keep up with the latest and most relevant content.
- Read Later: You can create your own to-read-later list so the articles that are most important to you are waiting for when you’re ready.
If you upgrade to a Business plan, you’ll also see these options in the same area:
- Annotated: This is where you can find articles you’ve added Notes and Highlights to.
- Team Admin: This is where you’ll find everything team-related, including your added users, newsletters and analytics.
Under that is where you’ll see your feeds and boards, as well as your Team Feeds and Boards if you have a Business plan. Toward the very bottom, you’ll also see a Recently Read where you can see articles you’ve browsed or read recently in case you want to return to them.
Integrations
At the very bottom of the left-side navigation bar is a link for Integrations. If you want to connect any of the other tools you use, this is where to do it. You can connect the following:
- Buffer
- Google Apps
- Microsoft
- Okta
- Oracle
- Salesforce
- SAML infrastructure
- Security infrastructure
- Slack
Changing the Theme
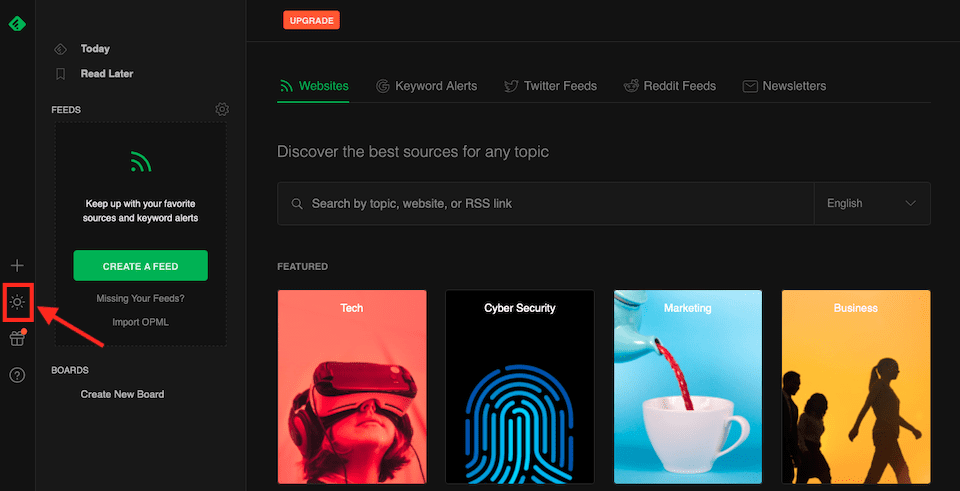
By clicking the Moon icon on the far-left navigation bar, you can switch between a light and dark theme. (When you have the dark theme on, that icon becomes a sun.) The light theme is on by default; here’s what the dark theme looks like:
New Features Feed
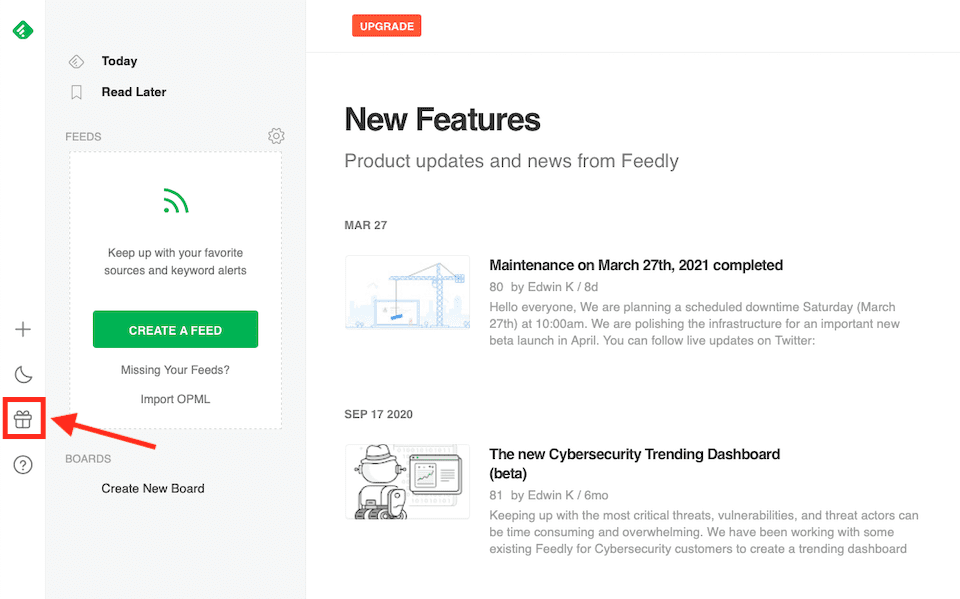
If you click the Gift icon underneath the Moon icon, a New Features feed will pop up with Feedly-related news and product updates.
Accessing Customer Support
Underneath the gift icon is a Question Mark icon, which gives you various support options:
- Contact support
- Getting Started guide
- Keyboard shortcuts
- Knowledge base
- Slack community
- Twitter account
Feedly Plans
Feedly has five plans, including a free version. Let’s go over them.
Free
With the free Feedly plan, you can follow a max of 100 sources and create up to three feeds. This is a good way to start out with Feedly to see if you like the interface (and if you actually read all the content you gather).
Pro
The Pro plan costs $6 per month and is billed annually. Here’s what you get:
- Follow up to 1,000 sources
- Hide ads
- Notes and Highlights
- Power Search
- Publish public boards
- Save to Evernote, OneNote and Pocket
- Premium fonts and support
- Share to Buffer, Hootsuite, IFTTT, LinkedIn and Zapier
Pro+
With the Pro+ plan for $8.25 per month, billed annually, you get everything that’s included in the Pro plan, plus:
- Follow up to 2,500 sources, including newsletters
- Google News and Twitters feeds
- Leo AI skills
Business
The Business plan costs $18 per month, billed annually, and requires a minimum of three users. You get everything in the Pro+ plan, plus:
- Follow up to 5,000 sources
- Microsoft Teams and Slack
- Shared Notes and Highlights
- Team Feeds, Boards and Newsletters
The Business plan comes with a free trial, too.
Enterprise
The Enterprise plan has custom billing, and you can speak with a sales rep to figure out exactly what you need and how much it’ll cost. On top of everything included with the Business plan, you also get:
- Follow up to 7,500 sources
- Advanced Leo options
- API access
- Newsletter customization
- Onboarding and training
- SSO/SAML
How to Add and Organize Sources in Feedly
Now that your account is set up, you’ll add your favorite sources to Feedly. A source is a place where you get content, such as:
- Blog
- Keyword alert
- News site
- Newsletter
- Podcast
- Research journal
- RSS feed
- Trade publication
- YouTube
Feedly will add and organize content from all of these sources. You’ll organize your sources into feeds, which you can categorize by industry, project or topic.
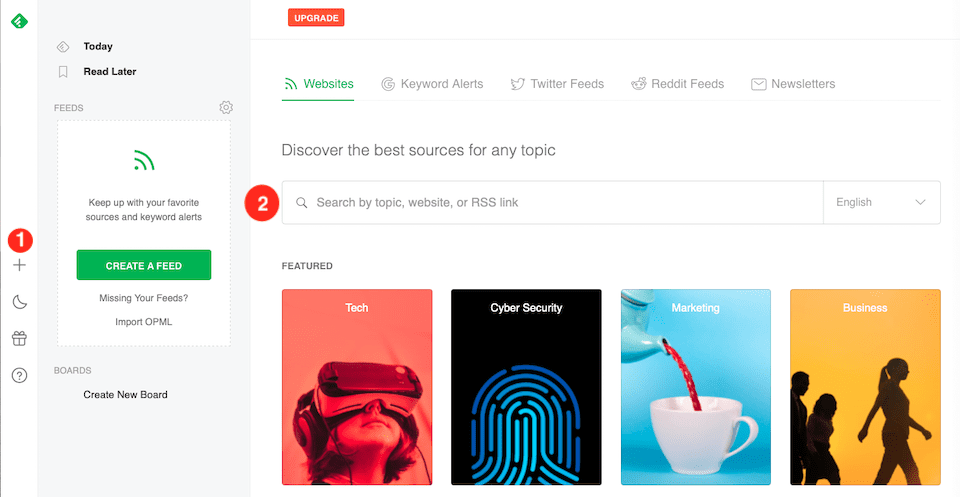
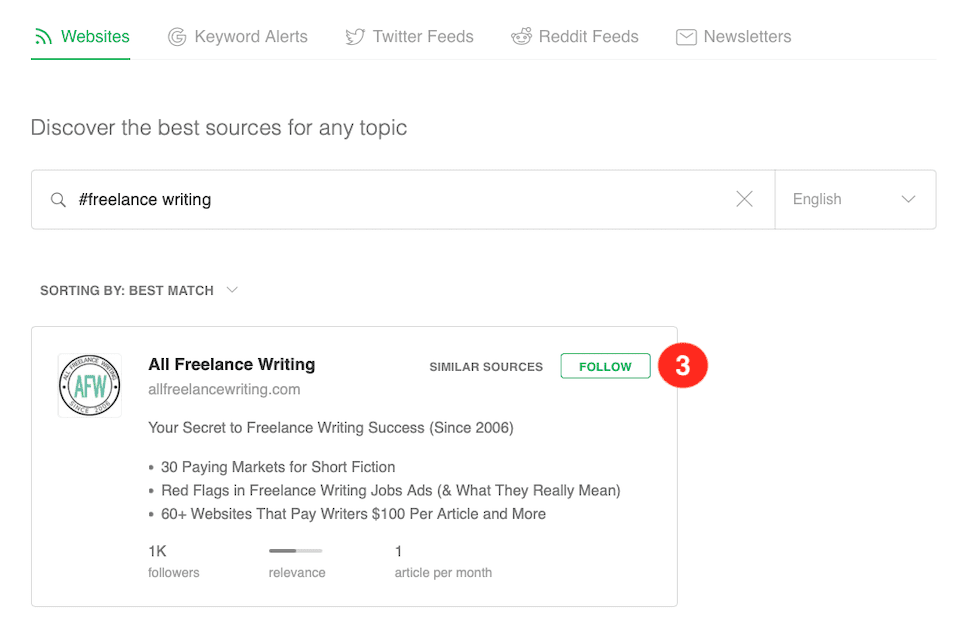
First, search for a source by clicking the Plus Sign on the left-side navigation bar and entering a topic, website or RSS link in the search field. Choose from the results in the drop-down menu, then click Follow to add a source to a feed.
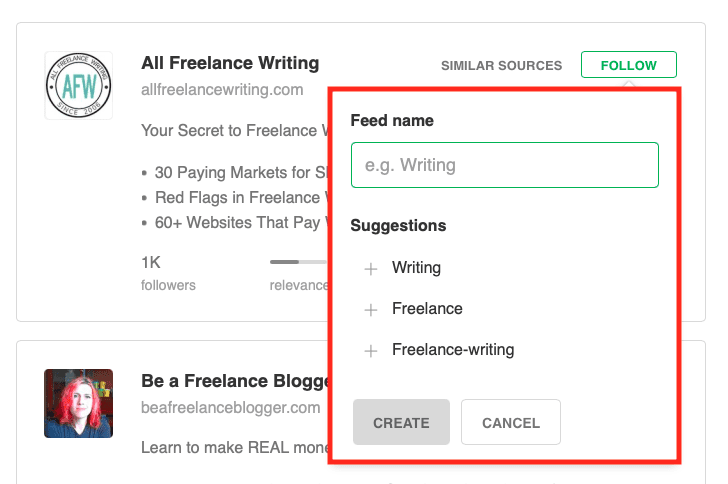
Select a name for the feed that feels suitable – whatever makes sense for you. You can go with their suggested names or you can create your own.
Continue adding sources and organizing them into existing feeds or creating new feeds as you go.
Team Feeds
If you have a Business or Enterprise plan, you can organize content with Team Feeds, which will sync for all users. The process is the same as outlined above. When choosing feed names, just make sure to choose wording that everyone will be able to decipher.
Boards
Boards are simply another way to organize your content on Feedly. When you find an article that’s especially valuable, you can add it to a Board or multiple Boards (you can create Team Boards, too). This is sort of like creating a library of content from the content that’s auto-added to your feeds. Your Boards can be found in the left-hand navigation bar.

Saving Content to Boards
When you come across an article in Feedly that you want to save to a Board, click the Star with Plus Sign icon. You can do this from the list of articles (pictured below) or when you open the article to read it in full – the icon is the same either way.
![]()
If you stumble upon an article off-site (as in off-Feedly), you can add that to a Board as well. Copy the article’s URL, then click Add Article in the Feedly Board. Paste the URL into the designated space.
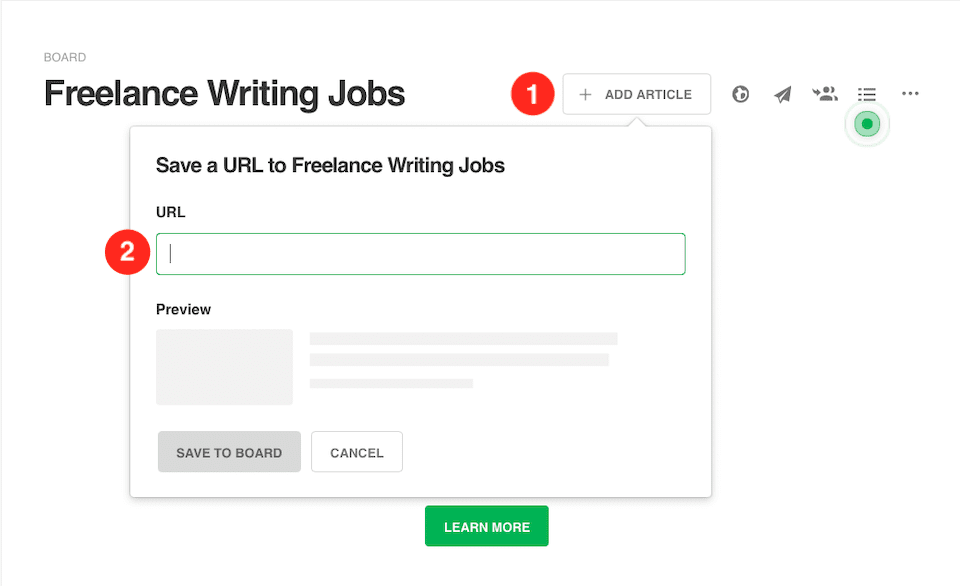
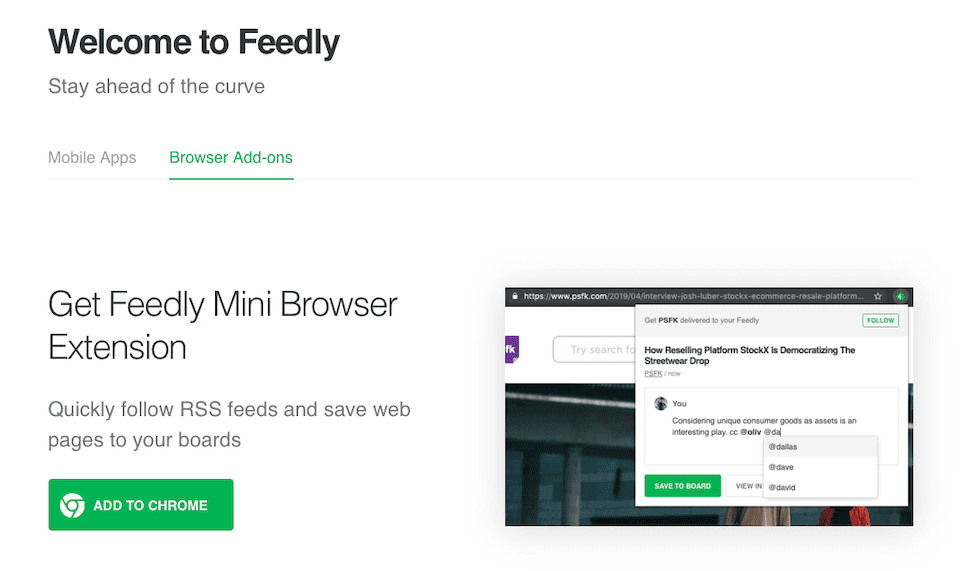
Even easier, though, is downloading the browser extension, which lets you save content to a Board directly from the URL (pictured below). On mobile, you can use the Share menu to select the Feedly app.
How to Discover New Sources
If you want to find new sources based on topics or skills, you can do that with Feedly, too. You’re not limited to only the sources you already know. The Explore page has the top sources on practically any subject.
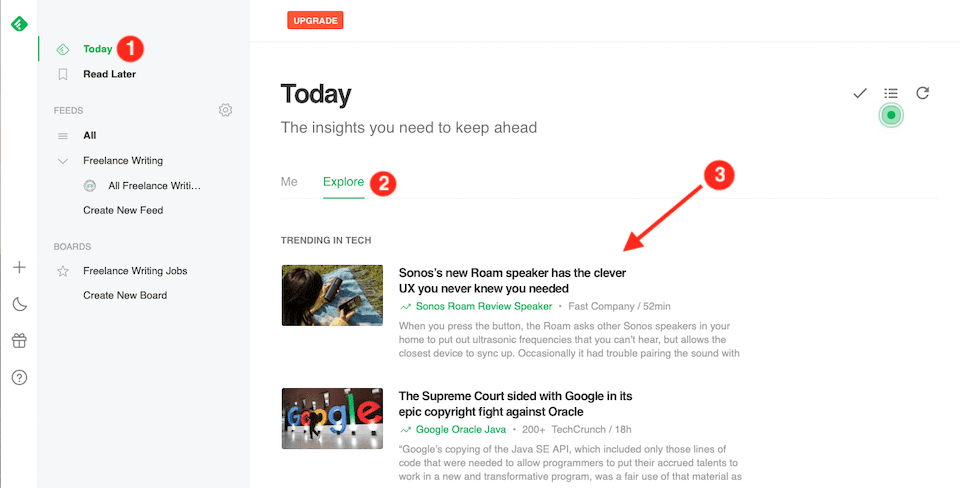
To get to the Explore page, click the Today link at the top of the left-hand navigation bar. (That link should be present wherever you are in Feedly, but if you need to get back to the home page for some reason, click the green Feedly icon on the very top-left of the page.) Next, click the Explore tab to the right of the Me tab. This is where you’ll see recent articles covering trending topics, separated by category (which you’ll see as you scroll down).
How to Train Leo, Feedly’s AI Assistant, to Cut Through the Noise
You use Feedly to make content less overwhelming, not more, right? Even with Feedly’s simplification tools, though, there can still be a lot of content to cut through. Enter Leo, the artificial intelligence (AI) assistant that’s here to help narrow down the options that are best for you. And like most AI assistants, you can train Leo to become better with time.
Here’s why Leo’s so helpful: let’s say you connect a source that publishes content several times a day. If you have a few sources like that, and you gather every new piece of content from all of them, your Feedly is going to quickly become cluttered – too cluttered to find what you need (let alone enjoy what you read). Leo will go through those sources and filter just the content that’s most important to you, leaving the rest out of your Feedly.
When Leo selects an article for you, it’ll have a special green label with information about why it was chosen. You can then tell Leo that it did a good or bad job so that similar content is or is not prioritized in the future. This is how Leo learns from your feedback, becoming better and better at selecting relevant content.
Leo is also able to remove near-duplicate content and news (when multiple sources report on the same thing) and summarize articles so you can skim them to get the info quicker. Plus, by selecting certain keywords and/or topics that you don’t care about, you can have that content muted.
Note that Leo is available for Pro+, Business and Enterprise subscribers.
Define a Priority for Leo
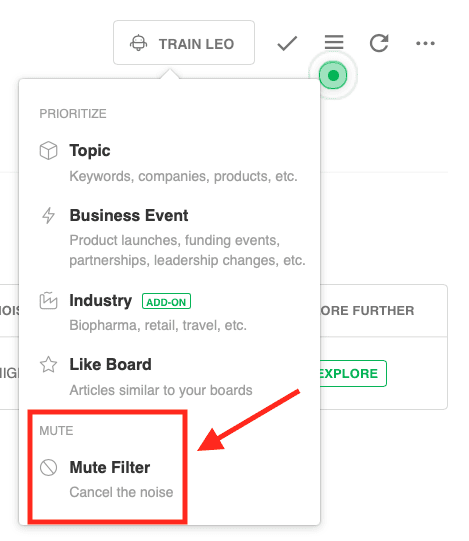
To start training Leo by defining priorities, select Train Leo, which you can access from the All tab under Personal Feeds or Team Feeds or from a specific feed.

There are four main Priority types to choose from:
- Business Events: Leo will select content related to funding events, partnerships, product launches and similar happenings.
- Industry: Leo will select content related to a specific industry, like retail or travel.
- Like Board: Leo will select content based on other articles you’ve saved to Boards.
- Topic: Leo will select content with mentions of companies, keywords, people, products, topics, etc.
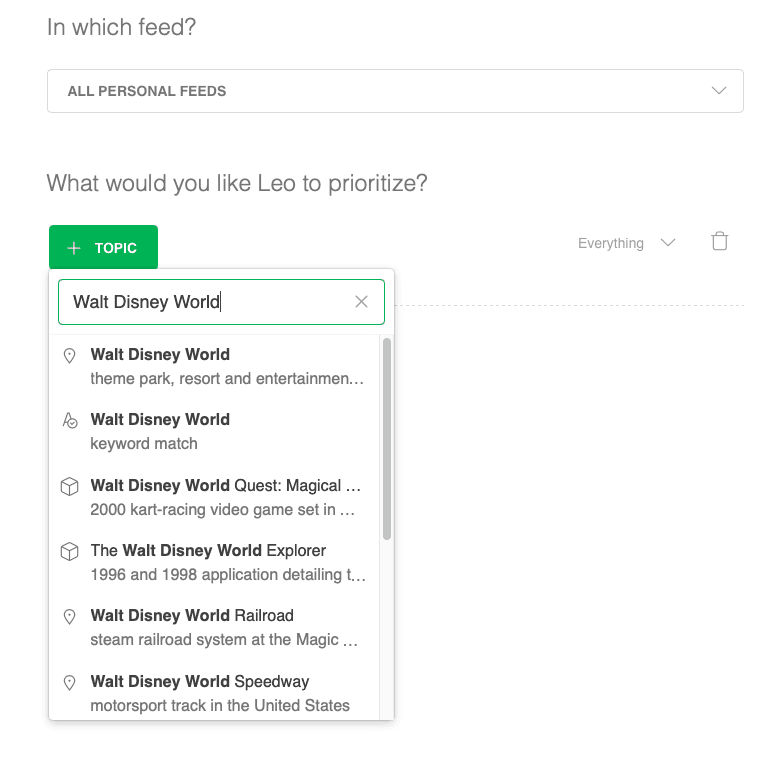
Multiple priorities can be set for a single feed. Let’s say we want Leo to find articles about Disney. We’ll start by adding “Walt Disney World” and “Disneyland” as topics.
Topic is the selected Priority type. In the search box, I’ll add “Walt Disney World” as the first topic. I’m going to choose the location, not the keyword or related topics.
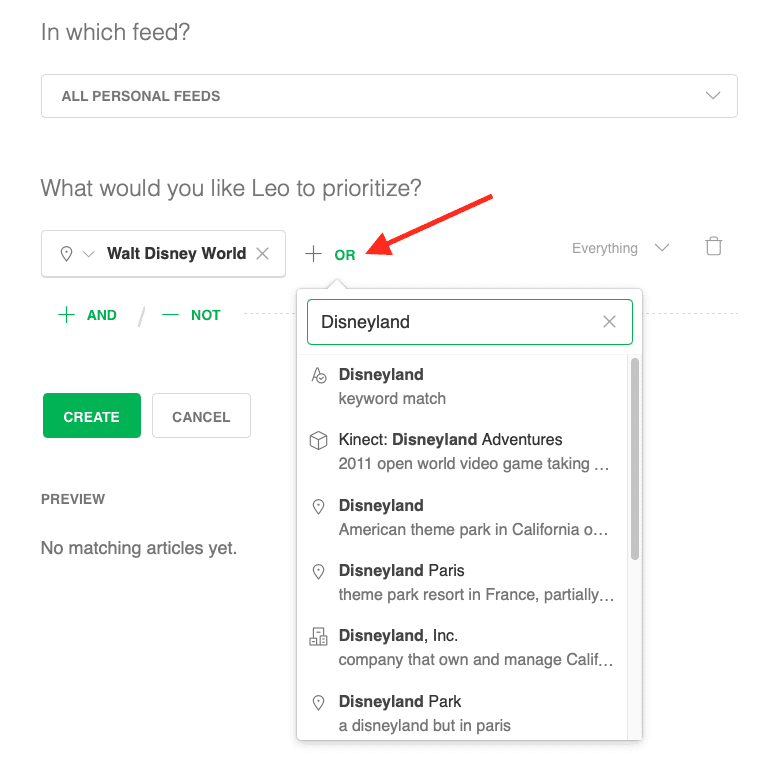
Next, I want to add “Disneyland” as a second topic. I’ll click the Plus Sign with Or to the right of “Walt Disney World,” then follow the same process as above.
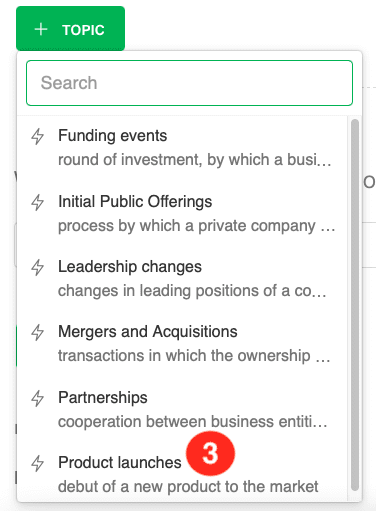
Now, if I want to add a different type of Priority to further refine this rule, I can do that by clicking the Plus Sign with And. I’ll choose Business Event as the Priority, then select Product Launches as the type of Business Event. This way, I’ll get information about product launches that have to do with Disney Parks.

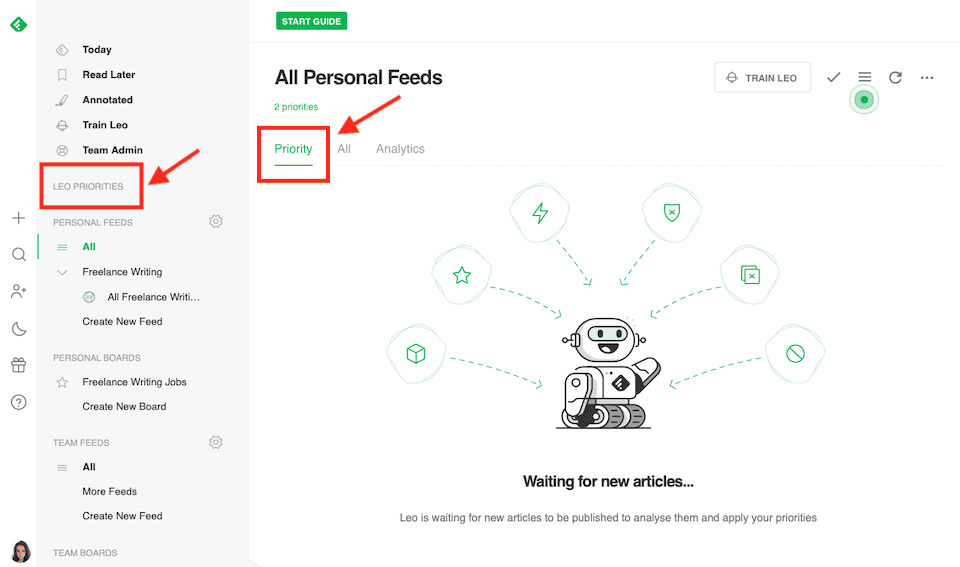
Once you’ve set your rules, you can find Leo’s Priority articles in the Priority tab of any of your feeds or in the Leo Priorities section, which is in the left-side navigation bar.
Set a Deduplication Skill
If you want to get rid of duplicate articles from your feeds, Leo can do that, too. Even better? It’s automatic. Leo already has this skill activated for your keyword alerts and feeds, getting rid of any articles that are very close to ones that are already there (85% or more content overlap). You can see how many duplicate articles have been removed by viewing the small gray box on the bottom-right of your feed.
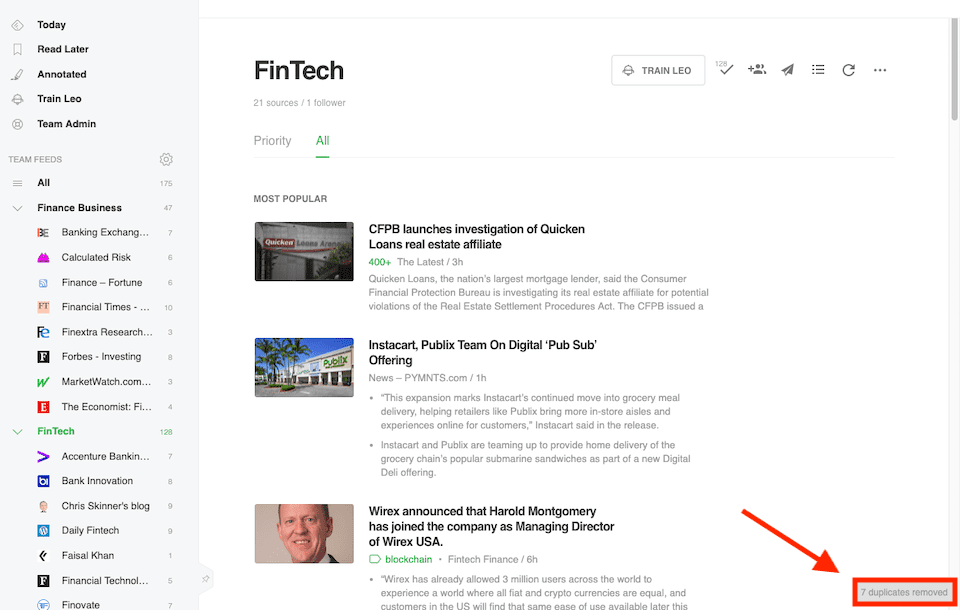
Source: Feedly
You can also see how many total duplicates were removed by heading to your feed’s Analytics tab.
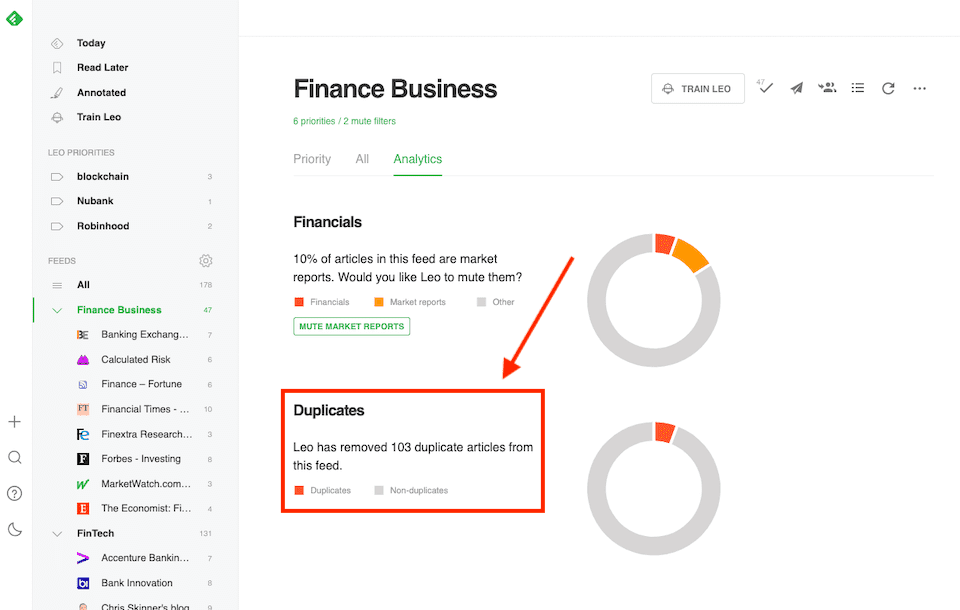
Source: Feedly
Note that this skill is only available with a Pro+ or Business account. Also, articles under 200 words can’t be deduplicated at the moment, but this feature may be coming in the future.
Set a Mute Filter
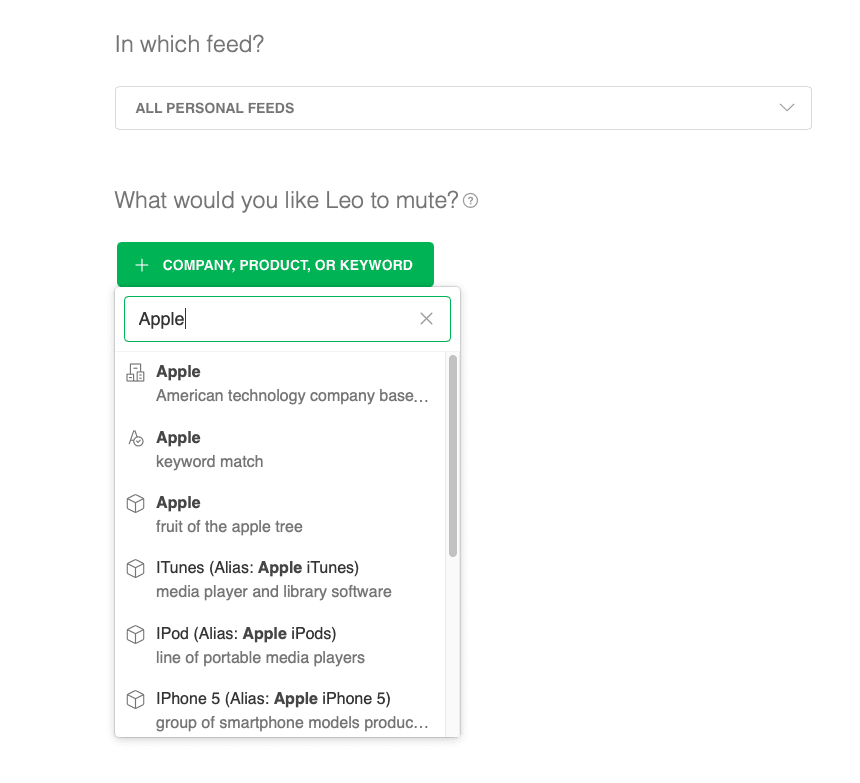
Figuring out what you don’t want is just as important as figuring out what you do want. With Mute Filters, you can get rid of content that includes keywords, whether that’s a specific author, company, topic, website, etc. To create one of these filters, select Train Leo, then Mute Filters.
You can then enter a company, product or keyword that you want Leo to mute, and you can choose which feed you want it muted in, including all of your feeds. Here’s an example of muting Apple-related information:
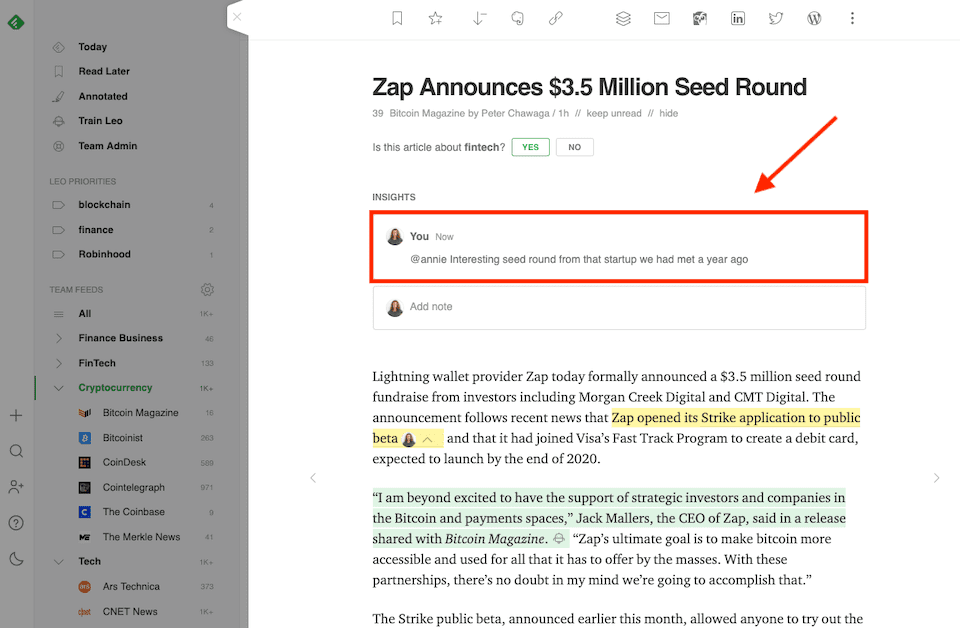
With Feedly, you can add Notes and Highlights to your saved content, and you can also share articles and annotations with the rest of the team.
Annotate Your Feedly Content
Feedly has Notes and Highlights annotation tools to let you interact with the content you deem the most important. And since Boards don’t expire, you can access those annotations whenever you need to.
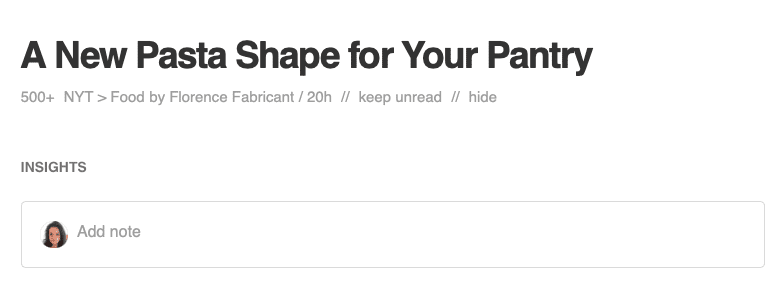
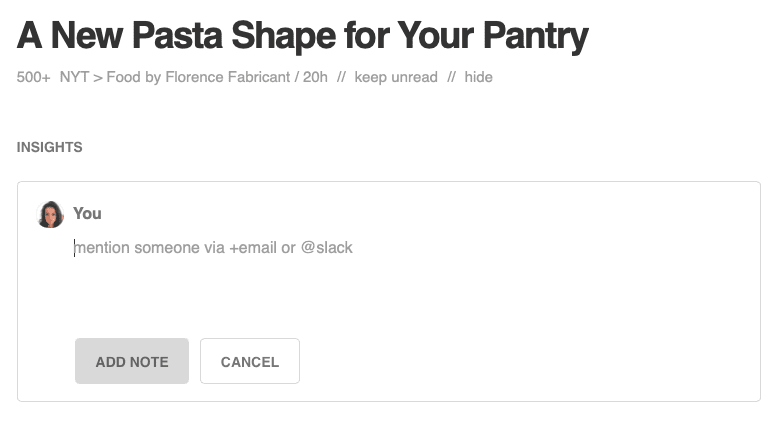
To add a Note to an article, open the article and click the Add Note box at the top. This will open up a slightly larger pane where you can write your Note.
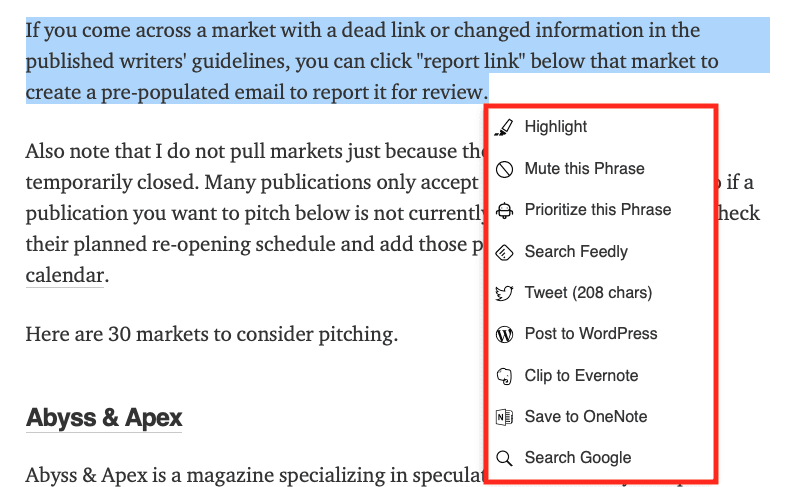
To add a Highlight, hold and drag your cursor over the segment you want to save. A menu will automatically pop up with several options, including Highlight at the top. You can also opt to mute or prioritize a selected phrase, search Feedly or Google for related content, or share the clip to one of your connected platforms.
Note that you need a paid plan to access this feature.
We mentioned in the section above how you can share a portion of an article to one of your connected platforms. If you want to share an entire article via email or social media or to a connected app, you can do that at the top:

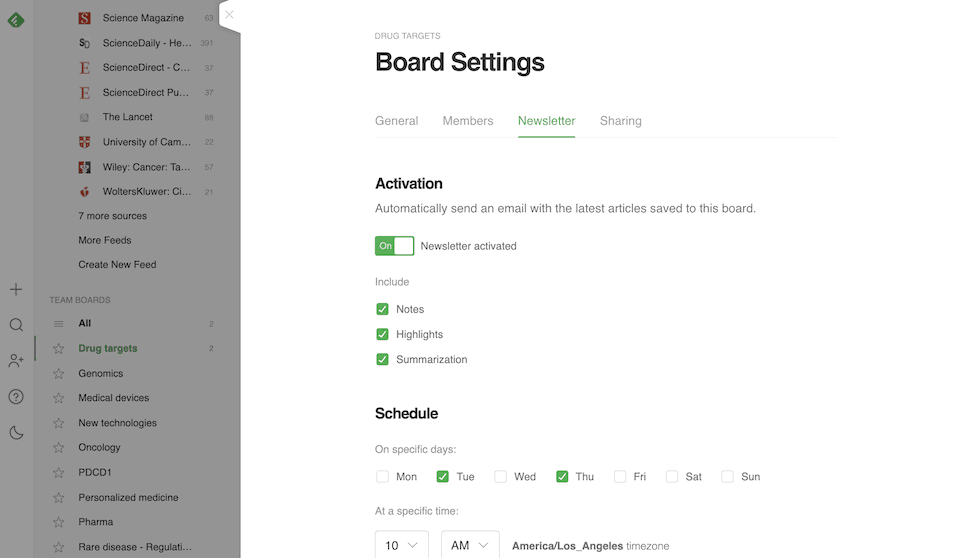
Beyond that, if you have a Business plan, Team Feeds and Team Boards are a way to share high-value info with everyone on your team(s). You can also tag team members in the Notes and Highlights you leave on articles to catch their attention, and you can send Team Newsletters that round up the best content from your Boards.
Source: Feedly
Source: Feedly
Wrapping Up
There are all sorts of reasons for wanting to stay on top of content. You may have to perform ongoing research so you can remain competitive in your field. Maybe you have a trip coming up and need to know the latest info about the destination you’re traveling to. Or maybe you need to follow the status of a company or product launch so you can create your own content the minute information goes public.
Whatever your reasons for wanting to fill your daily reader, Feedly can help. And if you’re willing to shell out a bit of cash, you can make it work for you so you can spend more time soaking up information and less time trying to find something you want to read.
Want to give your productivity even more of a boost? Check out these 25 productivity apps for busy professionals or learn how to use the urgent-important matrix to set your priorities.
Featured Image via FGC / shutterstock.com





Thanks for this helpful post !
I’ve been using Feedly Pro for years to keep up with the news topics that interest me. This application saves me a lot of time by allowing me to aggregate the best sources of information.
I had feely Professional Version for years it’s great but I stopped using it… What I really needed was a way I can send things from feedly to my wordpress/elegant theme etc. blog. Can you elaborate on how I might do that.. I will resign up with Feedly if I can and I like it…