It’s a tough gig to keep your email subscribers coming back for more. While a solid headline and well-written content can take you so far, drip email campaigns are the equivalent of a captivating cliffhanger. They can help send targeted messages, engage new and existing customers, and drive more sales. However, to be successful, this marketing strategy needs to be well thought out and expertly executed.
This article will cover drip campaigns, their core elements, and some tools that can help you run them. Then, we’ll offer a step-by-step to getting started with your first campaign, and take a look at how our own Divi and Bloom can help.
An Introduction to Drip Campaigns
Drip email campaigns typically comprise a series of targeted emails sent to potential and existing customers. They can vary greatly in structure and content, but usually share similar overall goals. An effective drip campaign should engage readers and persuade them to take action, ultimately leading to higher conversions.
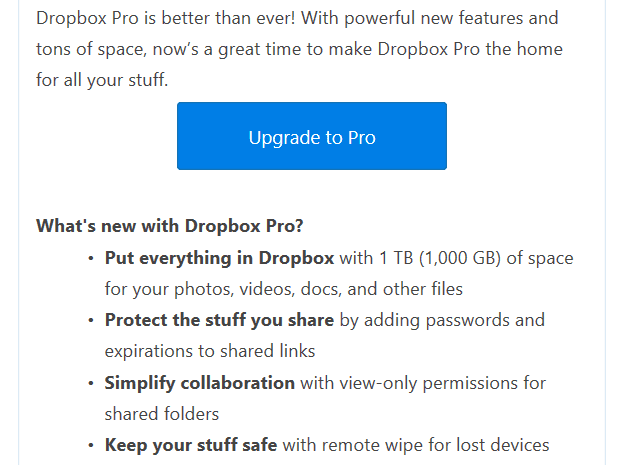
For example, this email is targeted at a user of Dropbox’s free service. It gets right to the point, encouraging the reader to opt for a paid upgrade:
Drip campaign emails are typically automated and are either scheduled strategically or sent in response to a trigger. Triggered responses might include:
- Welcome messages for new subscribers.
- A list of recommendations based on the products viewed or purchased.
- Reminders that a shopper has items in their shopping cart.
- A confirmation email in response to a purchase or booking.
These are just a few examples – although the emails you use in your own campaigns will be tailored to suit your business and your customers.
3 Core Elements of a Drip Campaign
Effective drip campaigns are made up of three core elements. Let’s take a look at each of them.
1. The Target Audience
Defining your target audience is one of the most important factors in any marketing campaign, and your job is made easier by focusing your marketing efforts on appealing to a specific group of people.
Ideally, you’ll have defined the target market for your product much earlier than the marketing stage. However, since drip campaigns enable you to segment your audience, you can refine your target market even further for each individual email. Some studies have shown that segmented campaigns result in a massive 760% increase in revenue.
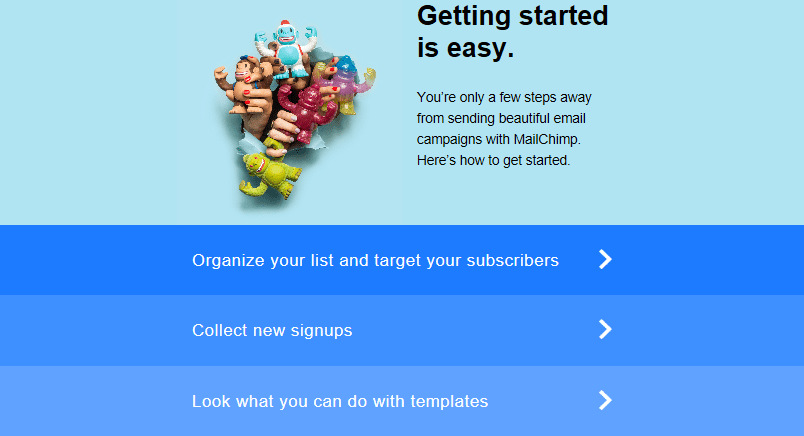
One common target for drip campaigns is new subscribers. For example, MailChimp sends a series of welcome emails with links to beginner tips on how to use the service:
When defining your own target segments, you might want to consider the following:
- Your existing customers: It’s invaluable to find out who is buying your product or service, and how and why they are using it.
- Your competitors: Take a look at who is buying competitor’s products (and how the competition is selling to them), and incorporate that into your strategy.
- The product or service: Closely examine your product or service and all the benefits it has to offer.
- Your demographics and psychographics: Knowing demographics such as age, gender, and location (and psychographics such as values and interests) can really help you refine your target audience profile.
Once you know who you are targeting, you can focus on creating content that speaks directly to them.
2. The Content
The content of your emails refers to everything the email contains, including the subject line, body, sign-off, and any included media. All of the elements should be focused on engaging the target audience for that particular message.
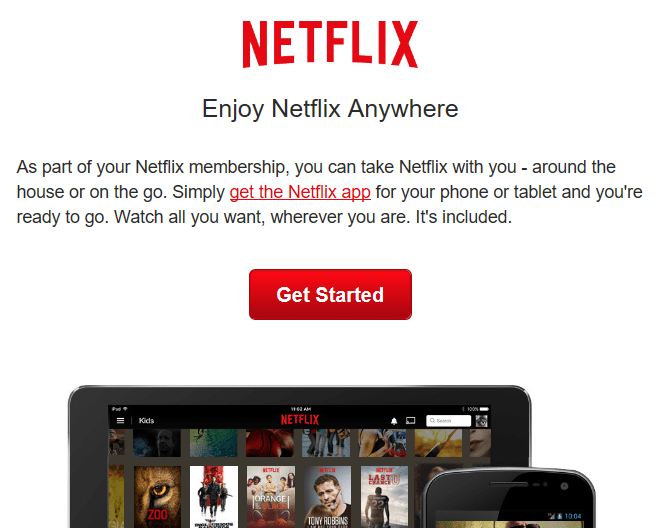
For example, this Netflix email was sent to subscribers during a free month trial, and encompasses some of the key elements required:
With the above example in mind, here are some tips for the various components of your email:
- Subject: Short, custom subject lines tend to get better open rates.
- Body: Keep it brief and relevant, while focusing on the benefits for the reader.
- Call To Action (CTA): Choose a short and simple CTA that directs and urges the reader. Look to repeat a single request rather than having multiple.
- Sign-off: Try getting creative here, and use something that will speak well to your target reader.
- Images: When using images, make sure they’re relevant and are accompanied by appropriate ‘alt’ text.
The Netflix example above included a short subject line reading “More Ways to Enjoy Netflix”. It uses a brief body of content, a repeated CTA throughout, and relevant and suitable images.
We’ll revisit some of these areas later, but first we’ll address the length and frequency of your emails.
3. Their Length and Frequency
Simply put, emails that are too long might go unread due to time constraints (or boredom), whereas short emails may not offer enough depth. A recent study suggests the perfect email length is between 50–125 words.
For example, this email is a little overwhelming in length. The body of the email comes in at around 170 words:
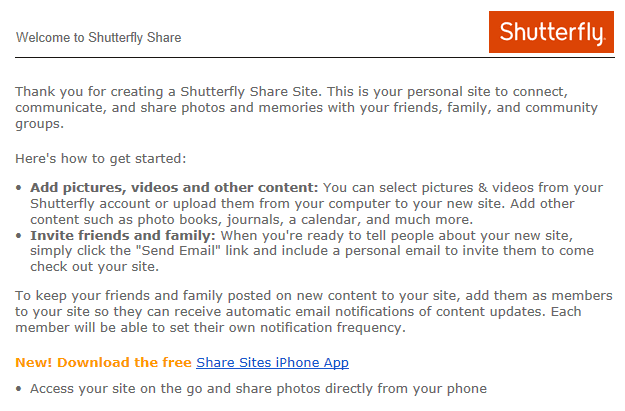
If the main purpose of this email is to persuade the reader to download the app, it might not need all of the preceding content. In contrast, the email below is a much shorter message sent to a new language software user, reminding them to login to access an upcoming event:

It just makes the optimal range at around at around 60 words, but it contains all of the information a reader will need to take action. Of course, there will be times when less words will suffice, or more depth is required. Ultimately, the appropriate length will be dependent on the product in question, the purpose of the email, and the target audience.
Similarly to overly long emails, those sent too frequently could overwhelm or even annoy the reader. In fact, the number one reason people for unsubscribing is down to a high frequency of emails.
To sum up, here are a few general guidelines for creating emails that are the ideal length and frequency:
- Length: Try to keep it between 50-125 words.
- Scheduled emails: For sales emails it is recommended to send at least one per week at a consistent time.
- Triggered emails: As mentioned earlier, frequency doesn’t have to be determined by a schedule. It can instead be based around user triggers.
Let’s now take a look at some tools to help you create a successful drip campaign.
2 Tools to Help You Create a Drip Campaign
Now you know the basis of an effective drip campaign, you may be wondering what kind of tools are available to help you execute it. For simple campaigns, you can use the in-built options of solutions such as AWeber and MailChimp.
However, if you want to tailor your campaign around more advanced customer behavior, there are some specialized options available to you. Here are two recommended tools for crafting a targeted drip campaign.
1. Drip
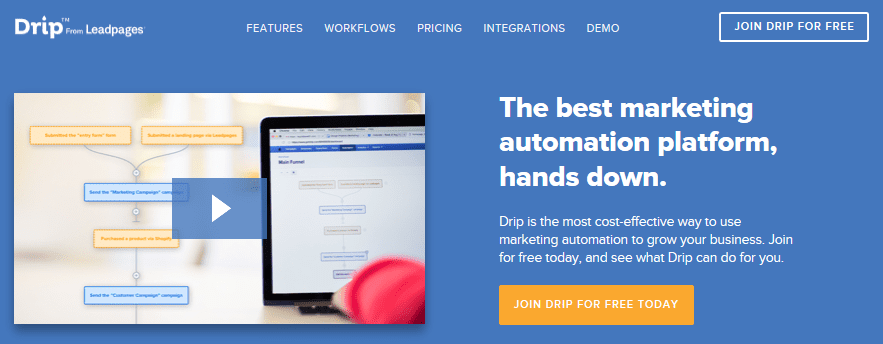
Drip has an intuitive interface that enables you to quickly build dynamic workflows. You can design your campaign based on user behavior such as actions, decisions, delays, and exits so that you’re sending the right message at the right time. Drip makes it easy to import existing subscribers, and also has its own opt-in forms. It also offers easy to understand analysis so you can measure performance and tweak as you go.
Key Features:
- Includes a visual workflow builder.
- Offers automation via triggers and actions.
- Provides a ‘best lead’ identification metric.
Price: Free | More information
2. Customer.io
Similar to Drip, Customer.io is a platform that enables you to send messages in response to customer behavior. Once integrated, your web or mobile application will send data to the platform. You can set up criteria that determines which messages are sent to the customer, and under which circumstances. Emails are created within the platform, and are triggered based on the information it receives.
Key Features:
- Offers segmentation options.
- Includes user profiles.
- Offers conversion tracking.
Price: Free | More information
Using platforms such as Drip and Customer.io can save time and increase conversions. Next, we’ll look at the components you’ll be feeding into these tools to create a successful campaign.
How to Plan and Create Your Drip Campaign (in 4 Steps)
Using the information and tools above you’re now equipped to lay out a plan or outline for your campaign. It should include the following components:
- The topic of each email.
- The time to wait between scheduled emails.
- User triggers and the corresponding responses.
When writing emails, you can start them from scratch, or alternatively you can use templates from sources such as Pardot or Sendwithus. However, each campaign will differ depending on your product or service and what you are trying to achieve – so you may need to tailor them to suit.
Now we’ll outline the key steps involved in planning and creating your drip campaign.
1. Write a Compelling Headline
It’s important that every email you send stands alone as an effective piece of marketing content. Each one has the potential to engage readers, but can also cause people hit the Unsubscribe button too.
Once you’ve decided on the topic for each email, you need to make sure it will get opened. A big factor in this is the subject line, with studies suggesting that 33% of email recipients decide whether to open an email based on the subject line alone.
Take this email for example, which bore the subject line “How did your first week go?”:
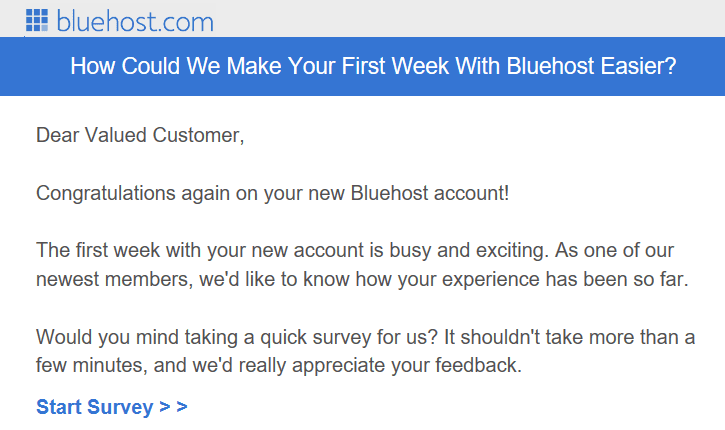
This was highly targeted and personal, designed to engage the reader and increase the chance they would follow through on the CTA contained within the email.
2. Choose the Time Between Scheduled Emails
As we mentioned earlier, email frequency is of huge importance. In one study, when asked how email marketers could improve, the overwhelming response was “less frequent emails”. However, such a blanket rule can’t be applied to every situation. Different parts of your drip campaign may warrant less or more frequent emails.
For example, this email is part of an abandoned shopping cart campaign. Similar emails were sent daily during the week immediately following abandonment, with a reduction in frequency as time went on:
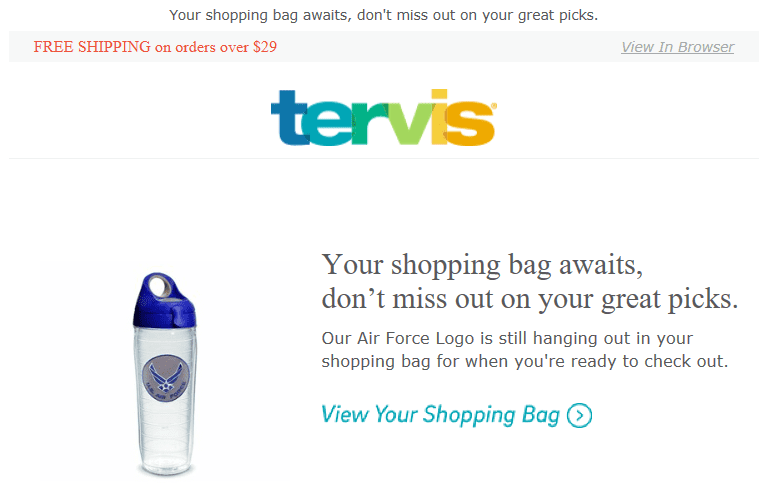
Also, consider a series of welcome emails for new subscribers, followed by less frequent support or sales emails further down the line. Conversely, you might want to ramp up the frequency after a customer views the same product page several times, but doesn’t make a purchase.
Test campaigns are one way to determine the optimal frequency for your emails. While this involves more effort up front, it takes some of the guess work out of finding the right strategy, and will hopefully pay off later.
3. Add Triggers to Your Email
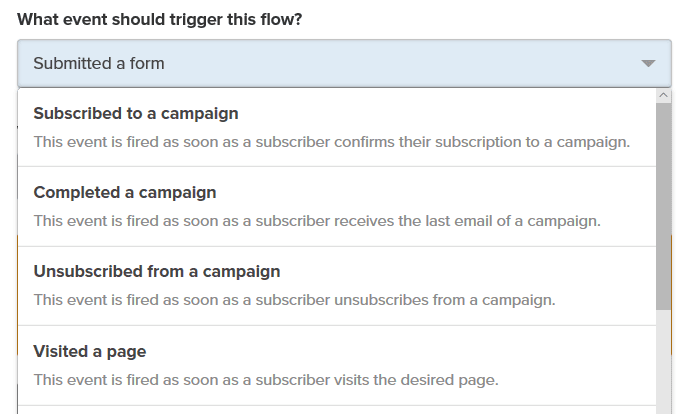
We looked briefly at triggers earlier, but they might include a new subscriber, an email being opened, a page view, or a product purchase. The triggers available to you will be dependent on the tools you use. Here are just a few of the 18 trigger options available with the Drip platform:
A Drip workflow with triggers and responses might look something like this:
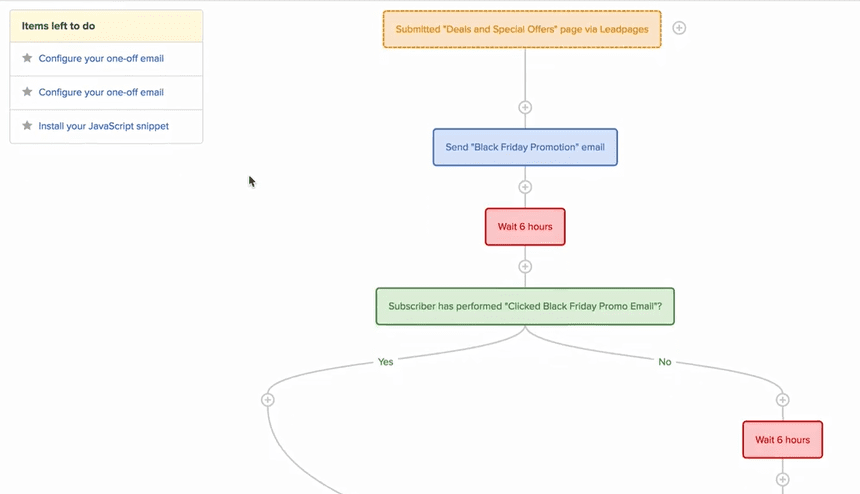
The important factor here is that you get to control the content your customers see at any particular point. Simply put, you want to make sure people are receiving messages at the right time.
For example, if someone has opened an email but not clicked the CTA, you may want to send them a scheduled follow-up that offers more benefits, or even a free trial. Conversely, you probably don’t want someone who has already purchased your product to be notified about a special offer or receive a push to purchase.
For a real-world example, this email was sent to a reader the day after purchase. It invites them to upgrade to a more advanced set of products:
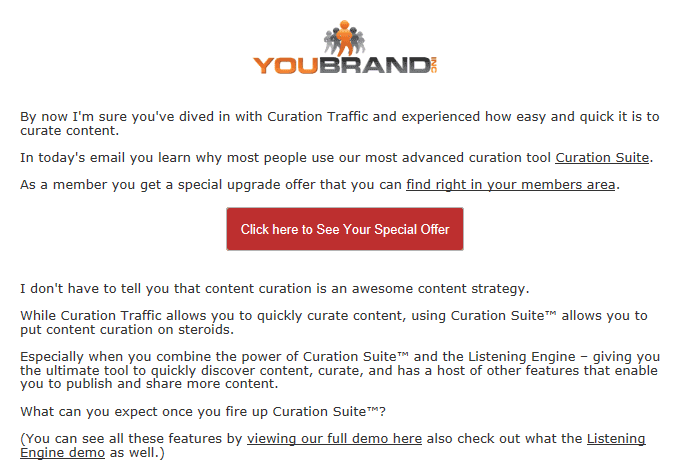
Of course, it would be inappropriate to send this to someone who had already upgraded.
Put simply, triggered responses allow for highly targeted messages. Simple triggers can be acted upon within basic email tools, but for more advanced targeting, you’ll need to consider one of the more complex solutions presented above.
4. Create Your Responses
Once you have your campaign mapped out, you can carefully craft the content of each email. This can definitely be a daunting task and likely the most time-consuming section of the process. Thankfully, many online tutorials are available to help you create welcome emails, sales pitches, follow-ups, and more.
Let’s take a look at a couple more examples of well-executed emails for inspiration:
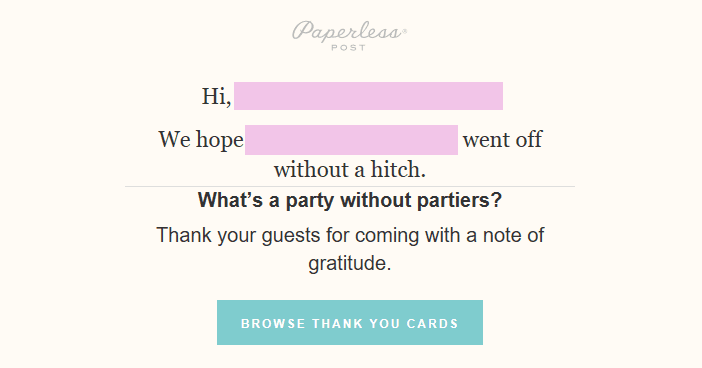
This email was sent the day after a scheduled event, and I took the opportunity to offer a problem and solution to the reader. It started with the recipient’s name and the event title, so it was highly personalized. The message is shorter than the recommended email length, but this works in a mock greeting card format. The highlight of this email is the natural flow of its clear and simple CTA button.
The next email was sent to subscribers shortly after they bought a domain name. The subject line was “Is Your Free Webmail Really Free?” and is clearly crafted to intrigue the reader. The line “When your business is young…” is targeted directly at new business owners. This email offers another great example of a clear and concise CTA button:
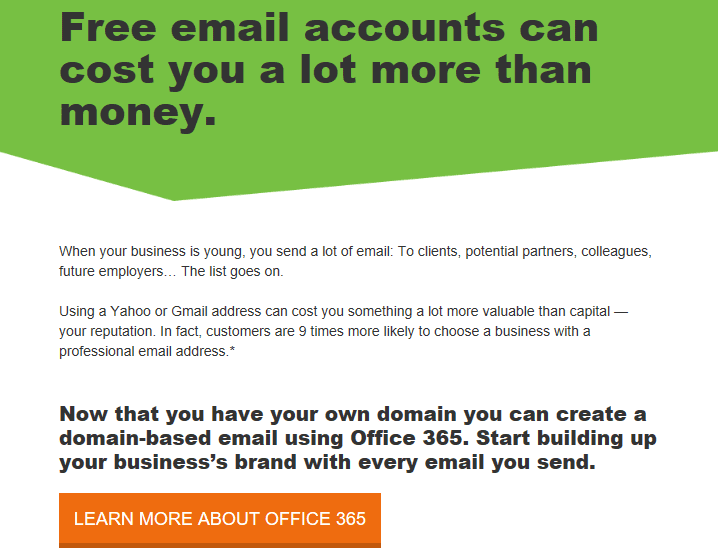
As with email frequency, you can also undergo testing to discover what works to convert your readers. Sometimes, a simple split test can be a huge help in figuring out the right introduction or the perfect CTA.
Elegant Themes Members: Divi & Bloom Can Help You Increase Subscribers
Of course, before you can execute your drip campaign, you need subscribers.Divi includes a handy Email Optin module that you can place anywhere on your site. This module can be completely customized and easily configured with AWeber or MailChimp:
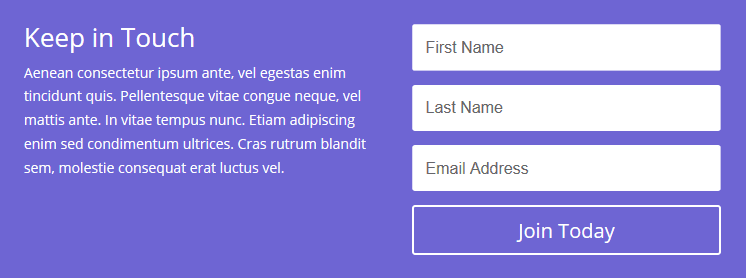
If you’re looking for something a little more complex, take a look at Bloom, which provides you with almost everything you need to gain new subscribers:
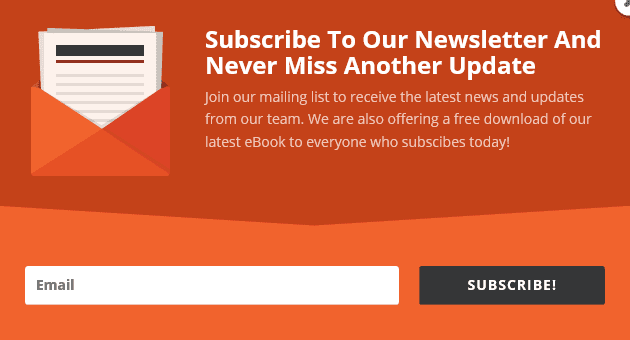
With Bloom, you can create eye-catching opt-in forms that can be placed almost anywhere on your site. It has six display options, including automatic fly-ins and widget area forms. You can also select triggers such as scrolling down the page or making a purchase. Finally, Bloom is compatible with 16 popular email marketing platforms, including Campaign Monitor and Constant Contact.
Conclusion
Drip email campaigns are an excellent way to connect with your customers and drive sales conversions. A well-planned campaign will enable you to engage your target audience and encourage them to sample your services. If executed correctly, it could see your subscriber numbers increase and your conversion metrics improve.
In this article, we’ve provided you with all of the information you need to get started with drip campaigns. We’ve offered plenty of tips, a guide for crafting them, and tools to help you. Let’s quickly recap the major points of creating a successful drip campaign:
- Write a compelling headline.
- Choose an appropriate delivery time for your emails.
- Add user triggers.
- Create your responses.
Of course, you can also use the Divi Email Optin module or our Bloom plugin to help you build your list of subscribers.
Do you have any tips for a successful drip campaign? Let us know in the comments section below, and don’t forget to subscribe so you can follow the conversation!
Thumbnail image by Sokolova July / shutterstock.com.



Thanks for the interesting read!
Based on this, its unclear to me however, whether bloom and divi are compatible with Drip and campaign.io? Or just the more simple email marketing tools? Does Drip include its own opt-in forms or does it require a separate plugin/system for building a list of subscribers?
Good questions
If you have any questions about Bloom and Divi, feel free to drop us an email (https://www.elegantthemes.com/contact/). As for Drip, you’ll need to contact its developers for an answer. 🙂