If you own a website that allows people to create accounts, you’re most certainly aware that your website sends out WordPress notifications. These email notifications help you communicate with admins, editors, subscribers and more. On top of the default WordPress notifications (such as a lost password email notification), you can also send out additional notifications to specific user roles. These notifications can empower the communication between your users and you. Plus, they can also drive more traffic to your website.
To help you get things going, we’re going to show you how to create and customize WordPress notifications. To accomplish this, we’re going to use the highly-rated and free ‘Better Notifications for WordPress’ plugin. First of all, we’ll go through the different types of notifications that are available and afterwards, we’ll also show you how to create one from scratch.
Let’s get to it!
Download & Install The Free ‘Better Notifications for WordPress’ Plugin
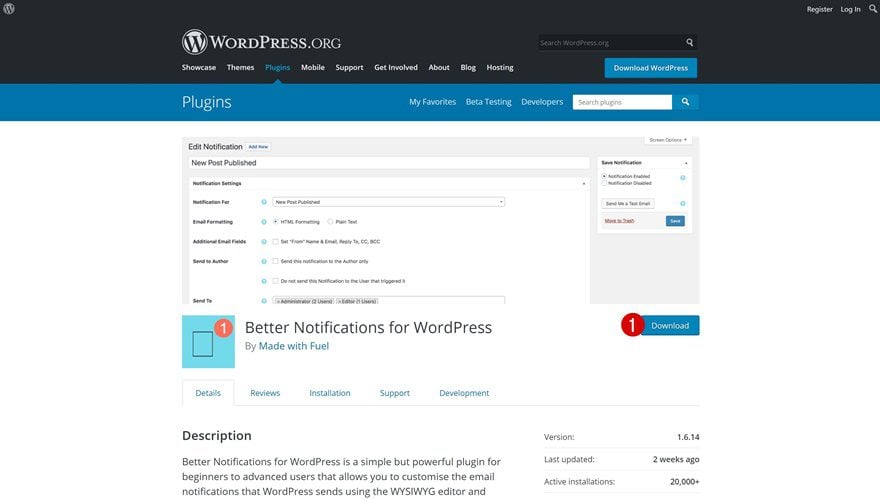
The first thing you will need to do is download the free ‘Better Notifications for WordPress’ plugin by going to the following page and clicking on the blue download button. After downloading the plugin, upload it to your WordPress website and make sure you activate it once it’s uploaded as well. The Better Notifications for WordPress is an easy-to-use plugin that allows you to send out notifications using shortcodes in your email templates. It includes a ton of notifications types and you can choose which individuals or user roles receive a certain notification. After creating a notification, you can enable or disable it at any time.
Types of Notifications: Overview
Now, you might be wondering what types of notifications you will be able to send out using the Better Notifications for WordPress plugin. To help you find exactly what you need, we’ve listed the types of notifications below.
Admin
- New User Registration
- User Lost Password
- Password Changed
- User Role Changed
- WordPress Core Automatic Background Updates

User
- New User Registration
- User Lost Password
- Password Changed
- User Email Changed
- User Role Changed
- Comment Reply

Post
- New Post Published
- Post Updated
- Post Pending Review
- New Private Post
- Post Scheduled
- New Comment/Awaiting Moderation, Category, Tag, New Trackback, Pingback

Page
- New Page Published
- Page Updated
- Page Pending Review
- New Private Page
- Page Scheduled
- New Comment
- Comment Reply

Project
- New Project Published
- Project Updated
- Project Pending Review
- New Private Project
- Project Scheduled
- New Comment
- Comment Reply

Tryout: New Post Published Notification
To show you how easy it is to set up and customize new WordPress notifications, we’re going to walk you through the setup. For this scenario, we want users to be notified once a new post is published on our website. After setting up the notification on your WordPress website, an email will automatically be sent to the user roles of your choice. Before making a notification go live, you can also send a test email. Plus, at any time, you’ll be able to disable or modify this notification and any other notification you add.
Add a New Notification
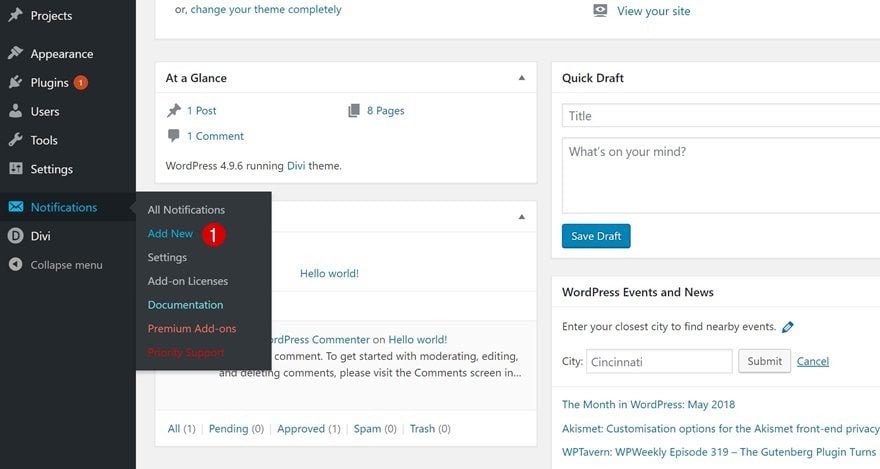
The first thing you’ll need to do, assuming you’ve uploaded and installed the plugin at the beginning of this post, is going to Notifications > Add New.
Choose Notification Type
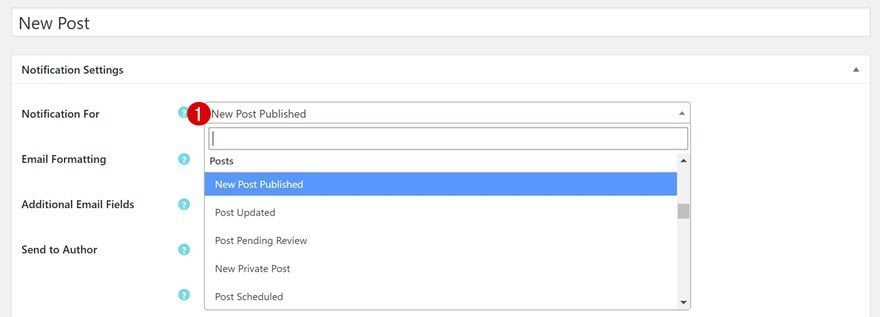
In the previous part of this post, we’ve gone through all the notifications you’re able to send out to specific users on your website. For this tryout, search for the ‘New Post Published’ notification.
Choose Email Formatting
The Better Notifications for WordPress plugin allows you to choose your email formatting. You can choose between HTML formatting and plain text. With HTML, you can create stunning email templates that match the branding of your website perfectly.

Select Recipients
After you’ve chosen the notification type, you can choose which user roles you want to notify about the recently published post. Do you want to notify the author of the post, for instance? Choose the ‘Author’ user role. Doing so can remind your author to interact in the comment section of his/her post. You can also choose to send out the email to your subscriber list to increase the traffic on your website.

Modify Email Content Using Shortcodes
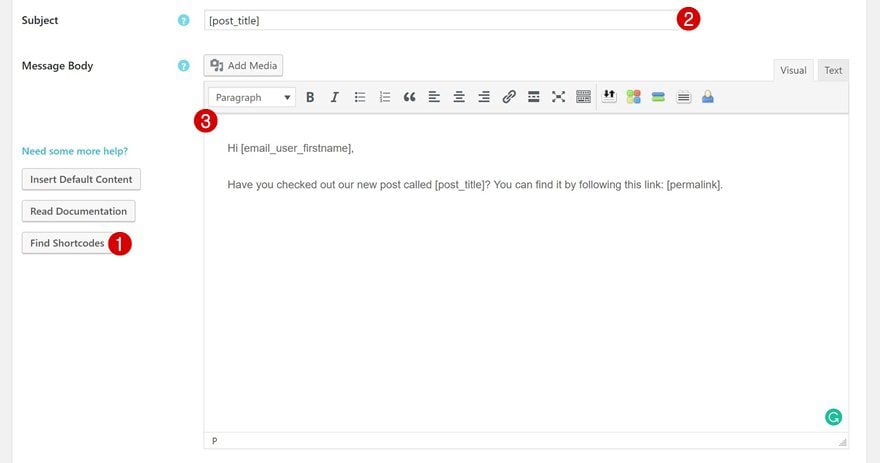
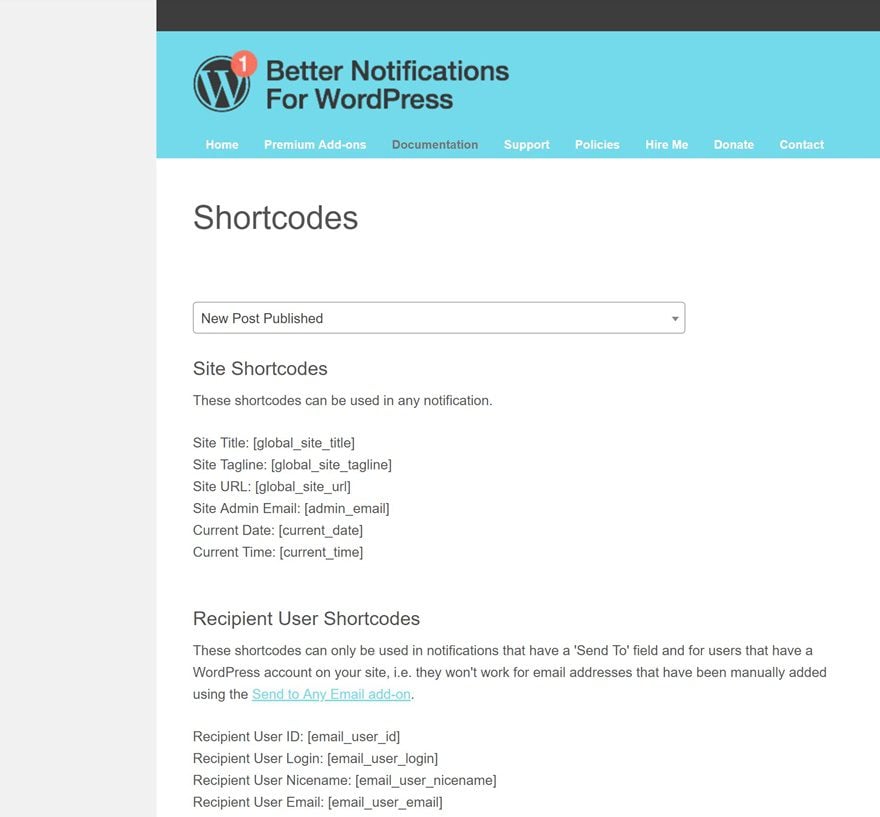
There’s no purpose in customizing each one of the email notifications manually, right? It takes a lot of time and energy. Automate what you can automate and this plugin allows you to do just that. In the print screen below, you can see a button that says ‘Find Shortcodes’. By clicking on this button, a new tab with all shortcodes will open. These shortcodes allow you to add relevant information. You can, for instance, add your post title in the subject line without having to type it down manually. You can also approach your reader personally by mentioning their name. There are a ton of shortcodes available and you can play around with these to see what fits best.
Send a Test Email
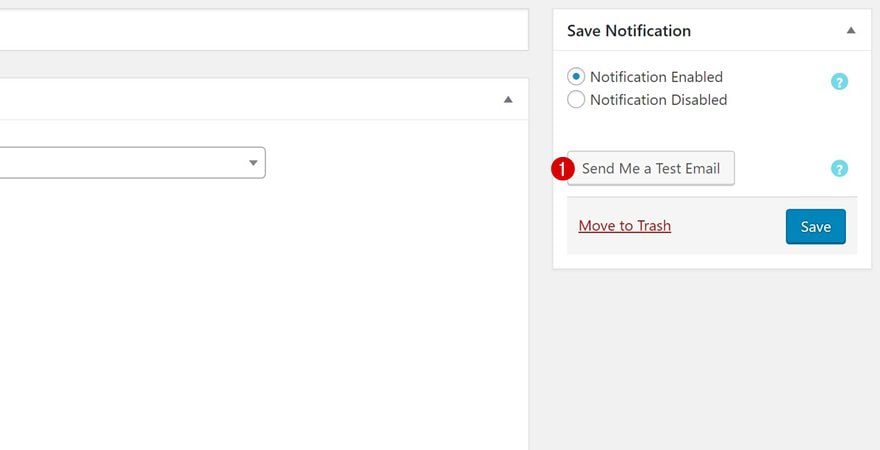
Done modifying your email content? What better way to see if everything looks good than by sending out a test email to yourself? In the top right corner of your new notification, you can send out a test email. This email will be sent to the email address linked to your WordPress account.
Disable Notification When Not Needed
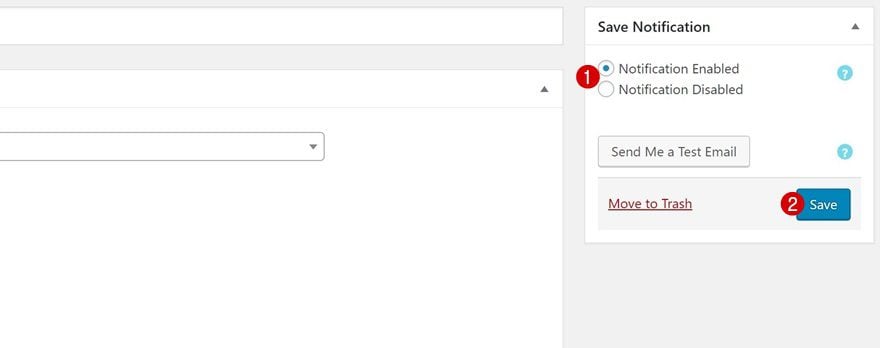
Not all notifications are meant to be repeated. That’s why you can easily enable and disable notifications at any time on your website in the same box at the top right corner of your notification. You can also modify your notification after setting it up.
Final Thoughts
WordPress notifications are an important part of membership websites. WordPress sends out default notifications to its user, depending on their user role. You can, however, also send out additional notifications. In this post, we’ve shown you how to do that using the free ‘Better Notifications for WordPress’ plugin. If you have any questions or suggestions, make sure you leave a comment in the comment section below!
Featured Image by Golden Sikorka / shutterstock.com



great post
This is just amazing and easy to use the plugin. I followed the instructions and it worked smoothly.
Thanks