If you’ve ever taken the time to thoroughly research and create an excellent blog post only to have it ignored by the internet at large, you’re likely missing a key element of your content marketing strategy: promotion! That’s precisely where a tool like CoSchedule can come in and supercharge your process with powerful features like their editorial calendar, automatic social postings, and much more. In today’s post we’ll be going over it all, so strap in and let’s get cracking!
- 1 Introducing CoSchedule
- 2 Why You Should Use CoSchedule Within Your Content Marketing
-
3
How to Use CoSchedule to Supercharge Your Content Marketing (in 5 Steps)
- 3.1 Step 1: Sign Up For a CoSchedule Account and Adjust Its Settings
- 3.2 Step 2: Navigate the Dashboard and Set Up a New Calendar in CoSchedule
- 3.3 Step 3: Add a New Task to CoSchedule
- 3.4 Step 4: Manage Your Tasks and Contributors in CoSchedule
- 3.5 Step 5: Supercharge Your Content Marketing Using CoSchedule’s Additional Features
- 4 How to Integrate CoSchedule With WordPress
- 5 Conclusion
Introducing CoSchedule
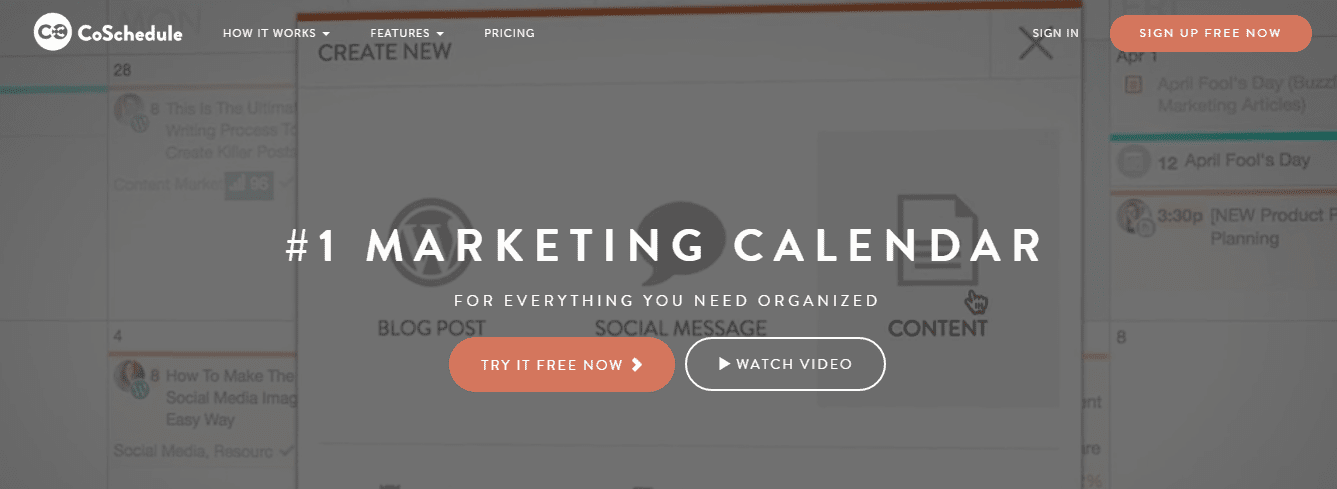
CoSchedule is a premium editorial calendar that enables the user to schedule, plan, and promote their latest blog posts, all in one place. It has a user-friendly dashboard, intuitive planning features, a variety of integration options, and even a WordPress plugin (which we’ll discuss later). For many, it’s ideal for streamlining and organizing your content marketing.
Key Features
- Integrates with WordPress, Google Docs, and Google Analytics.
- Provides in-app messaging between team members.
- Includes a drag-and-drop calendar with customizable views.
Price: There are four plans to choose from, ranging from $30 per month to $1,600 per month.
Why You Should Use CoSchedule Within Your Content Marketing
In brief, content marketing uses blog posts, videos, and social media posts to draw in readers and convert them to customers. If you’re a blogger or creative, you’re already part of the content marketing industry.
However, what happens when your content isn’t drawing in readers? While this doesn’t necessarily mean that your content isn’t worth reading, it does mean your content marketing strategy needs a boost.
Enter CoSchedule. Its task-based workflow enables you to promote your blog’s posts across an array of social media platforms, and its overall functionality is designed to enable your team to simply create content. In a nutshell, it’s ideal for those who feel they have too much on their plate marketing-wise.
How to Use CoSchedule to Supercharge Your Content Marketing (in 5 Steps)
Now you’re up to speed on what CoSchedule offers, you’re likely chomping at the bit to get started! Let’s show you how in five steps, beginning with the signup process.
Step 1: Sign Up For a CoSchedule Account and Adjust Its Settings
First things first, you need to open an account if you don’t already have one. To begin, navigate to the CoSchedule signup page and input your information.
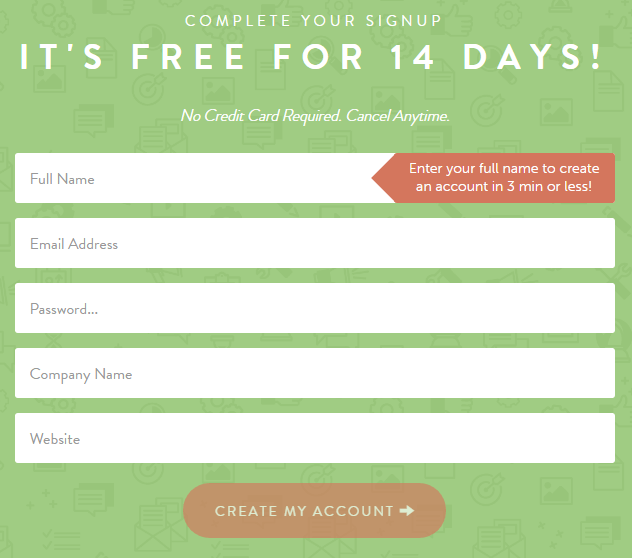
Once you click Create My Account, you’ll be taken through a short onboarding process, which includes linking your account to WordPress. Once complete, you can begin to adjust CoSchedule’s settings:
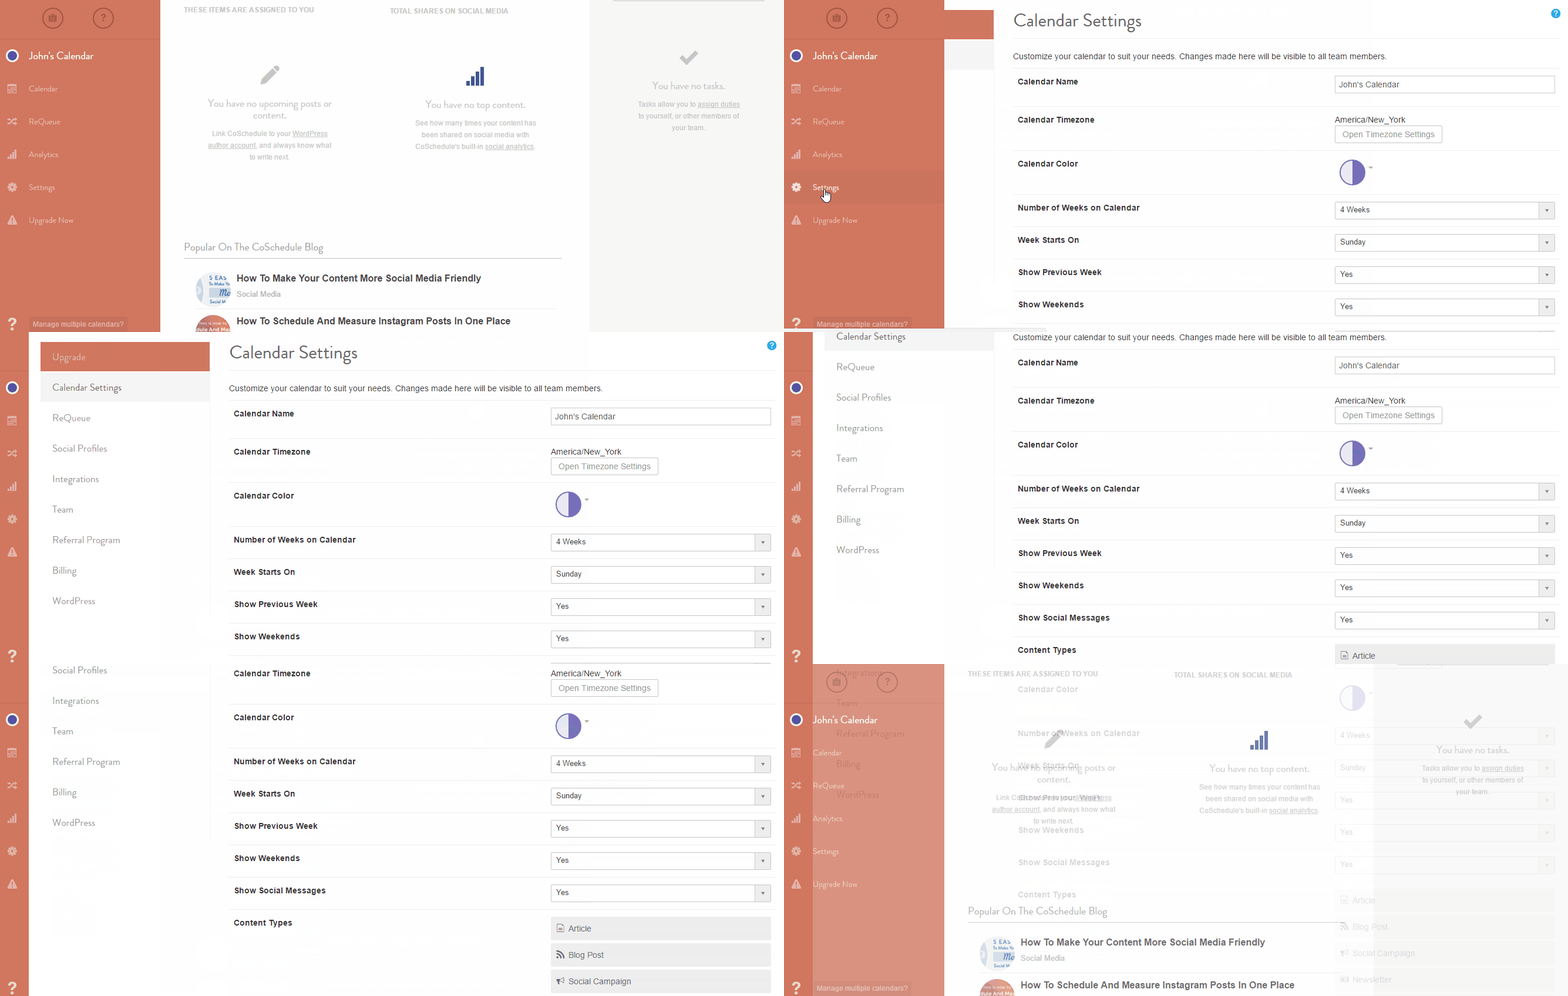
Whatever you select here will depend on your exact requirements. However, we recommend setting the correct timezone and the content types you’ll include at a minimum. You can always delve deeper into the rest of the settings later.
One of CoSchedule’s greatest assets is its flexibility. It includes a drag-and-drop calendar that enables you to rearrange tasks and due dates in an instant. However, before we get into that, let’s take a quick tour around the dashboard.
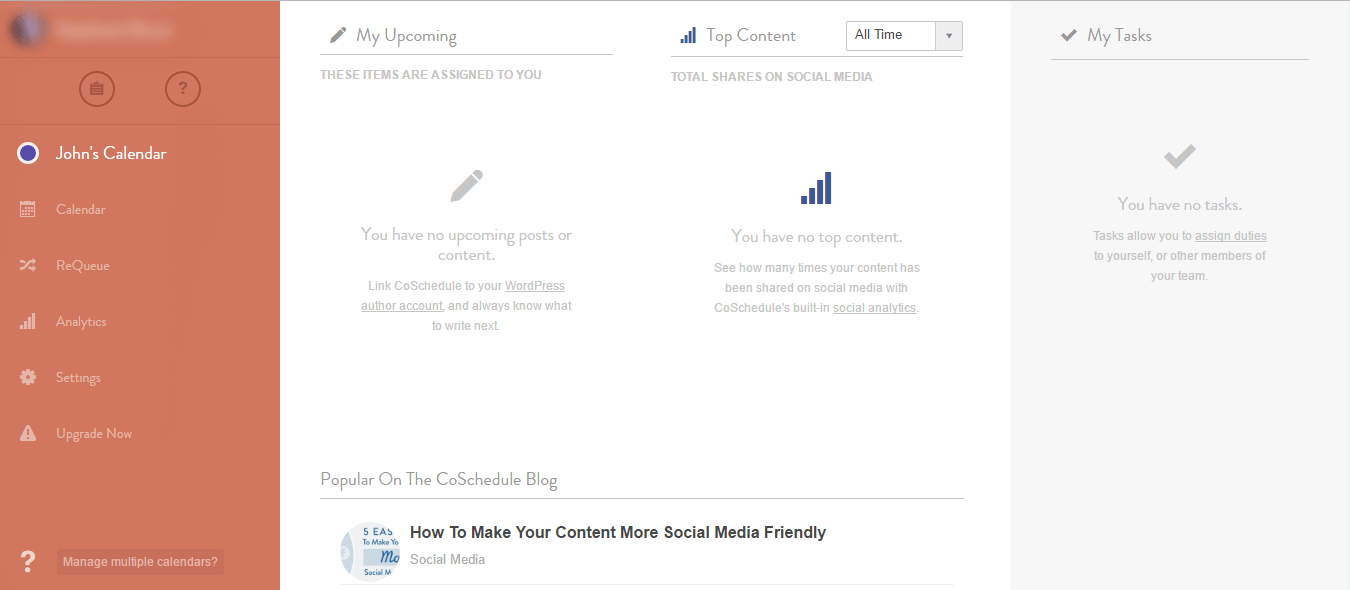
The left-hand side is the main way of navigating around CoSchedule, and includes options such as your current calendars and the Settings page. The center contains two sections: My Upcoming and Top Content. These offer an at a glance view of your schedule, and your social media shares and mentions respectively. Finally, on the right, you’ll find the My Tasks list, which shows any project tasks that are due.
To set up a new calendar, click Manage multiple calendars? or +Add new calendar (depending on the number of calendars you currently have) from the bottom left-hand side of the dashboard page:
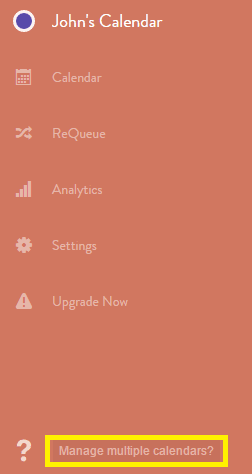
You should have already created your first calendar at the signup stage, but you’re also able to add additional calendars (which require a separate subscription). However, you can link them to the one account to make them easier to manage. Once you’ve ran through the steps, you’ll see your new calendar on screen:
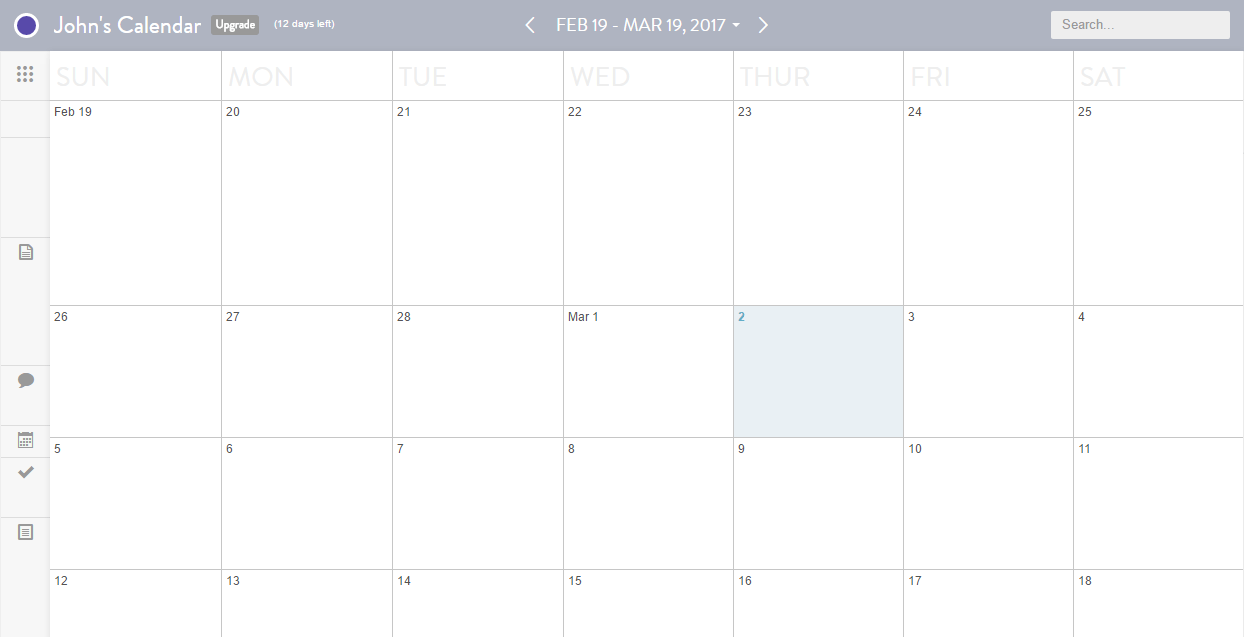
Of course, a blank calendar needs to be filled. To add a new event, select a suitable date, click the Plus icon in the top right-hand corner, fill out the details, then click Add Event. You can also create WordPress posts directly in CoSchedule, following an almost similar process.
Step 3: Add a New Task to CoSchedule
Tasks are the lifeblood of your CoSchedule editorial calendar. They help you to break down your larger projects into manageable chunks, and enable you to assign each member of your team to them accordingly.
Many editorial calendars utilize a status-based workflow – i.e. adjusting a state from something like In Progress, with the goal being to get to Completed. On the other hand, CoSchedule utilizes a task-based workflow. This keeps the ball rolling, ensures that all members of the team know what they should be doing, and enables them to work autonomously towards the overall goal.
In CoSchedule, there are two types of tasks – either content-specific, or a standalone task. To set up a content-specific task, firstly, select a pre-existing piece of content on your calendar, such as a blog post or email newsletter. On the right-hand side of the screen, you’ll find the task list. Simply type into the New task… field, and your task will be added to the Before Publish list underneath:
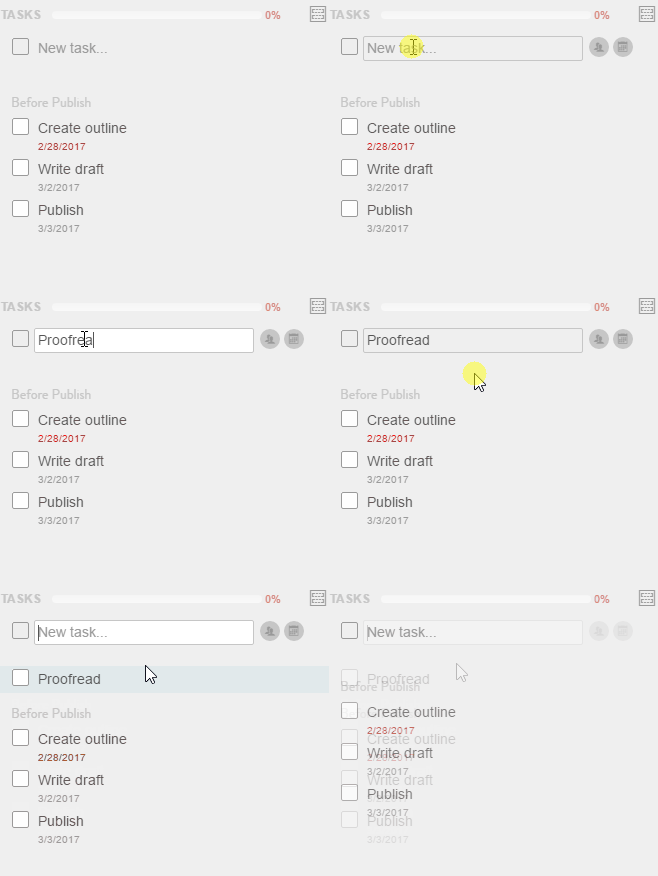
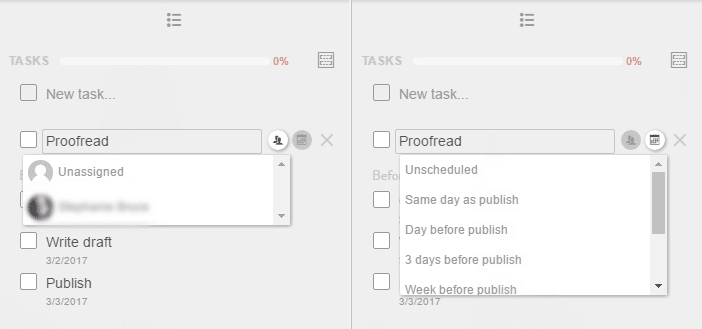
After a task has been created, you can also assign and reassign them to different team members, as well as set due dates:
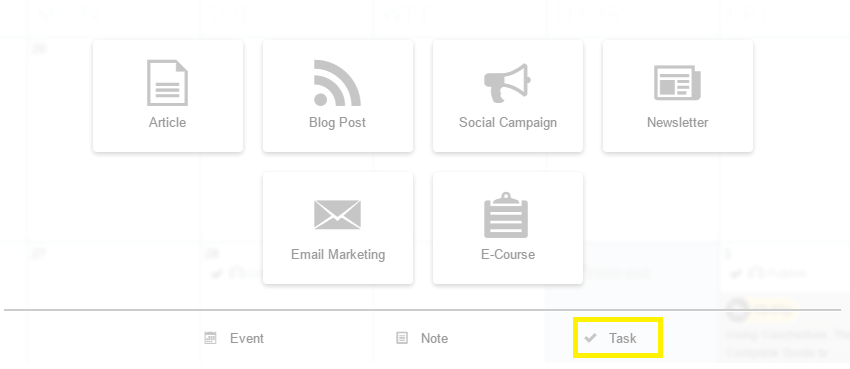
To set up a standalone task, go back to the visual calendar, choose a date, then click the Plus icon as previously. However, rather than click Event, choose Task:
Next, fill in the Task field, assign it to a team member, add a color tag if you wish, and set a suitable due date:
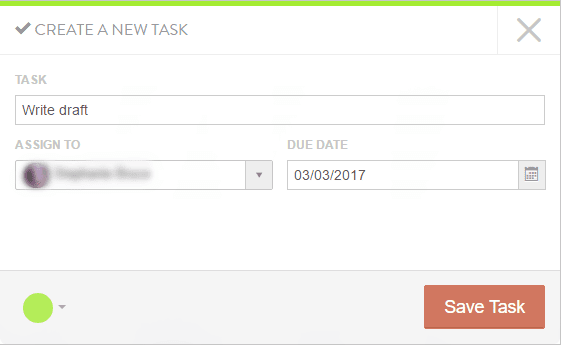
Once you’re ready, click Save Task.
Step 4: Manage Your Tasks and Contributors in CoSchedule
Once you click on an element within your calendar, you’ll notice four buttons at the top of the screen. You’re able to specify the type of content being produced, set a label color, and assign a team member. You can also set the content deadline from here:

Further on down the page, you’ll see some editing options:
 With CoSchedule, you can create your content within the CoSchedule app using Text Editor, upload a file from your computer, or pull it in from external sources such as Google Docs, WordPress, and even Evernote.
On higher pricing tiers, you’ll also have access to the Discussions tab. This enables you to chat about the project, and every discussion is preserved for easy access throughout the project.
Finally, we have the task checkboxes. This may seem simple, but checking off tasks as they are done is one of the key concepts of CoSchedule – what’s more, it’ll give your team members a burst of adrenaline and keep them productive!
Step 5: Supercharge Your Content Marketing Using CoSchedule’s Additional Features
CoSchedule is jam-packed with functionality, and we simply can’t include everything here. However, some features are worthy of more attention. One is derived from CoSchedule’s online Headline Analyzer. Once enabled, this built-in feature grades your headline, which you can then optimize to make it more compelling, or redress a balance between the words used.
Another such feature offered by CoSchedule is Best Time Scheduling. This will take the guesswork out of your social media campaigns by posting them to the various supported social media platforms during peak times. Speaking of social media campaigns, CoSchedule also lets you plan your social media messages in bulk, which will be an instant timesaver for many. Finally, the Analytics tab (located on the red navigation pane on the main screen), lets you see how social media users are responding to your posts.
There are plenty of features we haven’t discussed here, but the good news is that CoSchedule has a comprehensive knowledge base, and in-depth guides to every aspect of its workings.
How to Integrate CoSchedule With WordPress

WordPress users can also install the CoSchedule plugin (which enables you to connect your account with your site), and it also enables you to perform tasks such as in-post social media posting. To make the process simple, you can install and connect the plugin from within CoSchedule.
To utilize in-post social media posting, navigate to the blog post you’d like to promote. From there, scroll down to the CoSchedule plugin section:
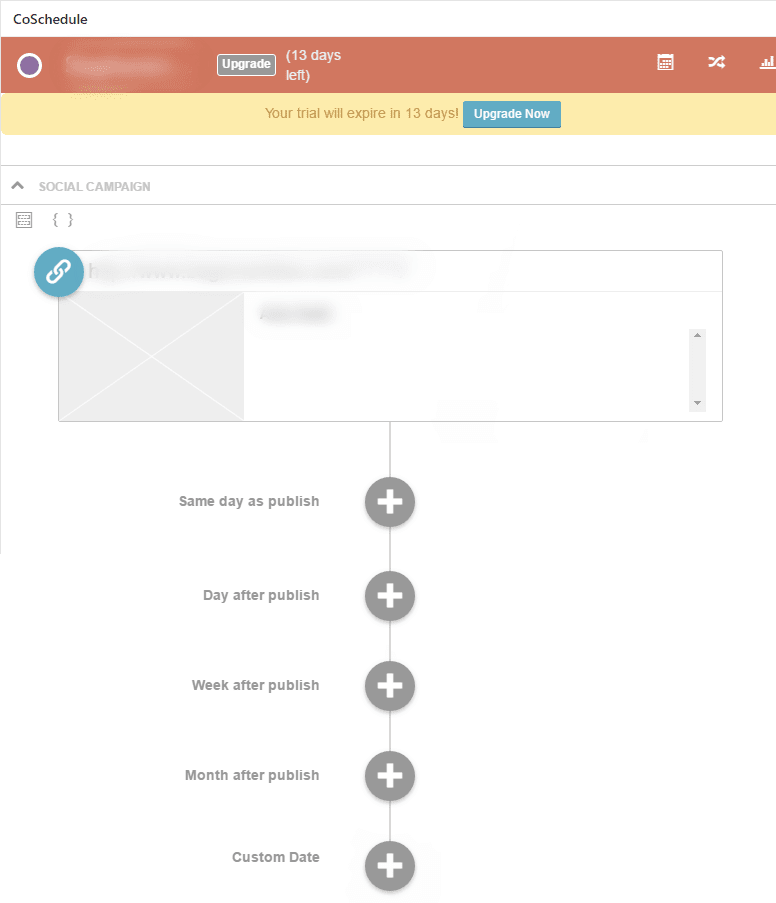
Click on the plus sign corresponding to the date you’d like to post on…
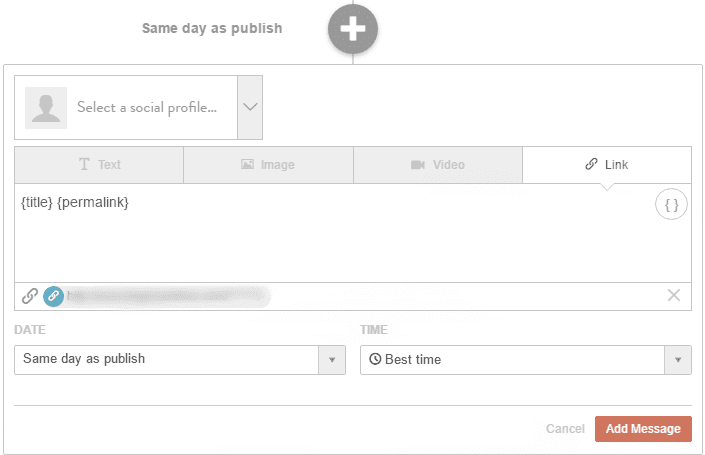
…then choose the social media profile you’d like to share to. You can also add text, images, video, or a hyperlink, and schedule the social media post to be sent out on the day and time of your choosing.
Conclusion
Content marketing is difficult to get right at the best of times. If you’re looking to optimize and streamline your content marketing strategy, CoSchedule’s functionality and variety of powerful features could be just what you need.
In this post, we’ve shown you how CoSchedule can assist you in achieving your content marketing strategy goals, as well as the steps you can take to supercharge your strategy. To recap:
- Sign up for a CoSchedule account and adjust its settings.
- Set up a new calendar.
- Add a new content type.
- Set tasks and manage them (and your team members) from the CoSchedule editor.
- Supercharge your content marketing using CoSchedule’s additional features.
How will CoSchedule’s functionality help your content marketing efforts? Subscribe to the post and let us know in the comments section below!
Article thumbnail image by Tetiana Yurchenko / shutterstock.com.



This looks like an excellent tool for scheduling updates to posts. What I need is the ability to schedule webpage updates. Do you know of a good feature that can help us do that?
As in, you have a page with information that changes at certain pre-determined times? And if so, what type of information are we talking about? If you mean schedules or event calendars or something similar, there are plugins for that.
Thank you for giving articles containing good strategy, I love it
Are there any alternatives to this? I’m on a grandfathered plan for $10 a month, and could never afford the $30+ (US$$) they currently charge, especially as a blogger who isn’t selling anything.
Hi, Eric! We’d suggest contacting the developer directly (http://help.coschedule.com/hc/en-us). Since you’re on a grandfathered plan, it’s possible they might have a special offer you could take advantage of. It’s worth checking out. 🙂
Great post @John. I haven’t been using coschedule for any projects recently, but some of the other features I absolutely love about coschedule are:
– I can see how many people shared or interacted with each post. Both from the post dashboard, and the overview within cochedule dashboard.
– I can create a checklist template, which saves me time (and makes sure I don’t forget a simple task) – those checklists are so handy, like you said.
– If for some reason I need to reschedule a posts, all of my preplanned social media shares move too… avoiding any “oops”If for some reason you need to move a post to another day. Just drag the post to a new date, and all of the social media shares attached to that post move with it.
– I can click on this button & sort by date, popularity, etc & bring old posts back to life again (reshare it)
– I can schedule recurring posts to my Facebook group, keeping engagement up. Plus, I have a terrible memory, so instead of relying on it, I can rely on the tool to ask those important group questions (like, on Monday ask, “What would you like to achieve this week? and then on Friday, “how did things go? Did you reach your goals?”
I’m looking forward to reading other peoples favorite features in the comments too. Great blog post John.
Hi Loralee! Thanks for sharing your insights, and we look forward to the other comments too. 🙂