Let’s be honest here: WordPress is pretty great. Sure, it’s got a few frustrating things about it, but, overall, it’s an amazing content management system. That’s why it’s often difficult having to consider using tools outside of the platform.
Luckily for us, there is the Adobe Creative Cloud (CC) software suite. While it was met with frustration and pushback when it was first introduced, I think most people have come to realize how awesome it is. Much like WordPress, the flexibility and power of this software suite is what draws users in.
Now if you’re reading this, you already have a CC membership or you’re thinking about getting one. Either way, my guess is that you want to put this suite of software solutions to good use for your website. Regardless of your level of experience within the Creative Cloud, the following list of tips, tricks, and tutorials will do just that.
28 Amazing Things You Should Be Doing with Adobe Creative Cloud
Photoshop and Illustrator tend to get the most attention because of what they do for web developers and designers. But the Creative Cloud is much more than that. Elegant Themes touched on this topic briefly earlier this year.
That’s why the following list includes tips for many different apps. I chose to focus on those hidden gems that would be useful to the WordPress developer and designer. Especially, as if they pertain to modern design trends like animation, minimalism, and responsive design.
If you’re ready to start exploring Adobe Creative Cloud’s potential, let’s get started.
Libraries

When talking about productivity apps and how to keep website assets in order, Dropbox is usually one of the first apps you’ll hear about. But whether you work alone or you collaborate with team members and/or clients the Libraries tool in CC should be your go-to from now on.
The following tutorial covers everything you need to know about what the libraries do, including:
- Cross-app syncing
- Asset management and the types of assets you can manage (which include files, stock photography, styles, colors, icons, and more)
- Sharing and collaboration
- Linking assets
Illustrator
2. Export assets all at once

For those of you who work in Illustrator, you know how important it is to find shortcuts. You want to spend more time designing and less time on mundane tasks like exporting files for clients and team members to review.
If you haven’t used the Export Assets functionality yet, take a look at this tutorial. It’ll show you how easy it is to export multiple design assets, in multiple sizes, for different devices, and in a variety of formats, all at once.
3. Intuitively draw with shapes

Take a look back at this recent post on material design and you’ll see that this design trend makes use of a lot of lines, shapes, and color. If you’re as big a fan of this trend as I am, you’ve got to check out the new Shaper tool in Illustrator. It makes the entire process of drawing, merging, and editing various shapes within a single image much easier.
4. Design custom lettering
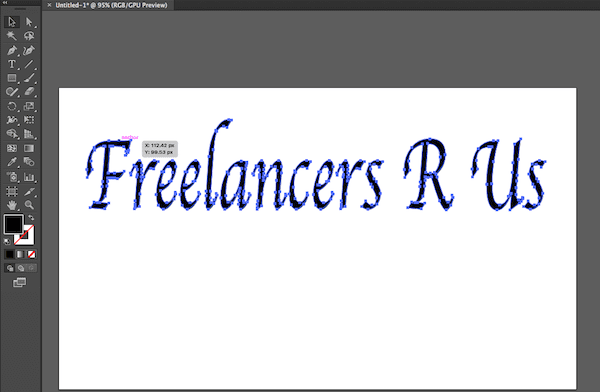
For designers and developers looking to add a unique flair to logos and other lettered content on their website, Illustrator will actually allow you to do that. Take a moment to read through this tutorial and you’ll learn how easy it is to create your own lettering, and then to merge them with shapes and colors for a design completely unique to your brand.
5. Create a color palette
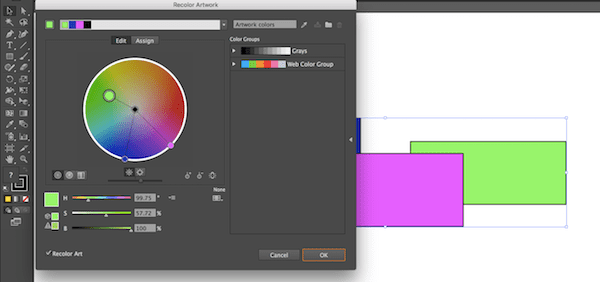
While there are plenty of color palette tools available online, why limit yourself to what one tool tells you is a good color combination?
Within Illustrator you’ll find the easy-to-use Live color tool. Whether you want to select and edit a color palette for your designs or you want to work with the tool’s color harmony recommendations, you have full control over the recoloring of your artwork.
6. Control individual letters

Have you ever wanted easier and quicker control over the individual letters or characters within your design’s content? This tutorial gives a brief overview of how to use Illustrator’s Touch Type tool to adjust the scaling, kerning, and rotation of individual characters.
7. Developing wireframes for your website’s design
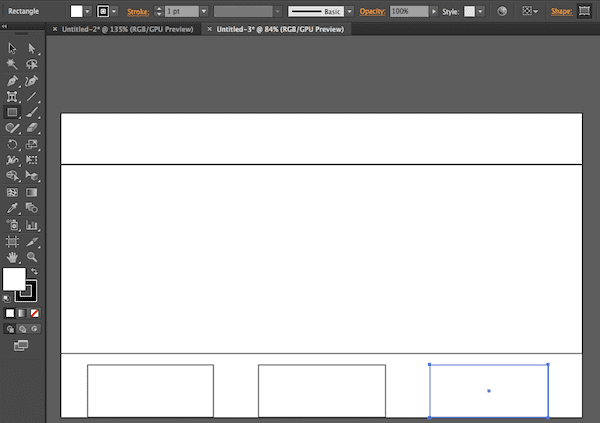
I know that for some developers, the creation of wireframes is a really important step in the overall process of building a new website. Wireframes help you establish a general layout (that you can run by your team or clients for pre-approval) before committing to the full-on creation and implementation of an actual design. This tutorial will show you how to get started with this in Illustrator.
Illustrator Draw App
8. Sketch designs using your finger and a mobile device
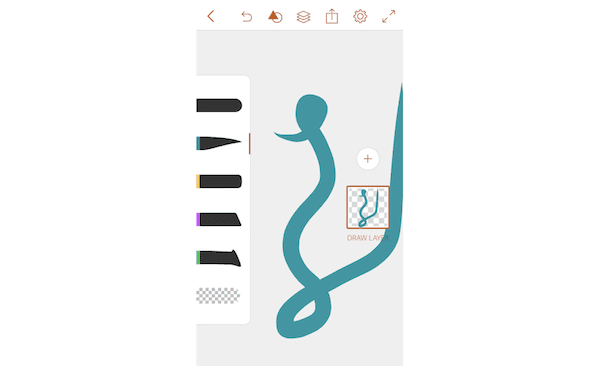
The Adobe Illustrator Draw mobile app is a great add-on for anyone wanting to sketch their own designs. This mobile app allows you to ditch the mouse and use your finger to draw designs, textures, characters, signatures, and more for your website. And because this app syncs with the rest of the CC, it automatically saves to your libraries for use in Illustrator (or any other app you want).
Photoshop
9. Conduct real-time reviews of content

There is a free Photoshop plugin called LiveShare PS that enables you to share your Photoshop content in real-time with internal teams and clients. No matter what stage of the process you’re at with your site’s designs, you can share comps or full pages with others. Then as you receive feedback, you can implement those changes in Photoshop for everyone to view in real time. It’s the perfect way to collaborate, communicate, and finalize content for your website.
10. Insert dummy text
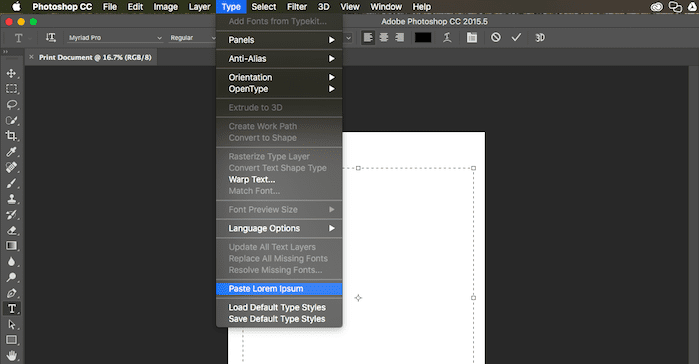
As you work on your clients’ websites, content isn’t always ready to go by the time your designs are set. And that’s okay. But rather than spend time hunting around online for Lorem Ipsum placeholder text for your mockups, why not just import it directly from within Photoshop? While this might not seem like a big deal, this can save you a lot of time in the long run.
11. Identify fonts from photos
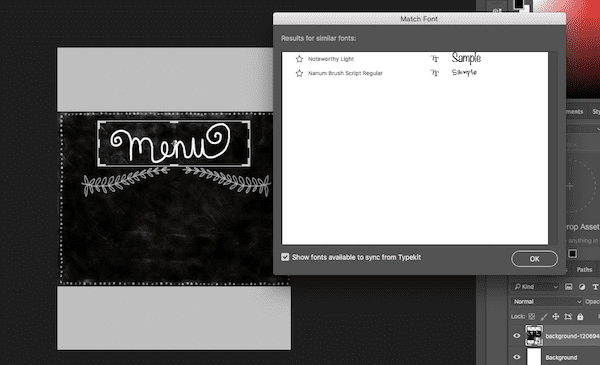
Have you ever been out and about, and noticed a really cool font that you wanted to make use of in your designs? Lucky for you, the Match Font tool in Photoshop can help. Just upload a photo that includes the font, and let the software find your match.
12. Reduce camera shake
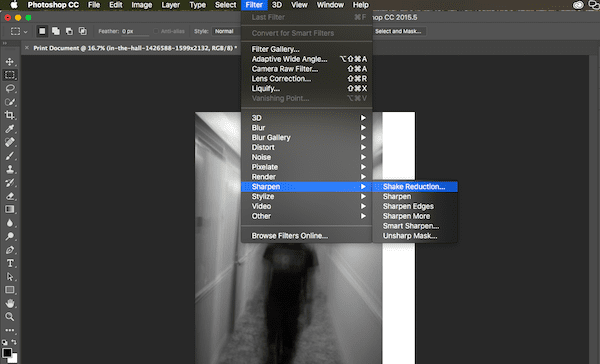
For some websites, it just makes sense to use your own photography. However, there is nothing more frustrating than finding that the “perfect” photo is blurred from camera shake. Photoshop has a Shake Reduction tool to take care of this specific problem. Check out this tutorial to find out how you can bring sharpness back into your photos.
13. Greater photo awareness
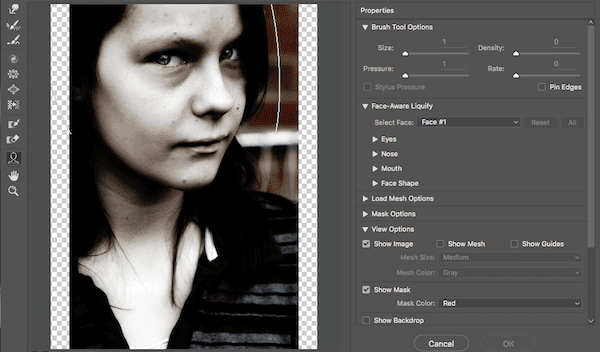
In a recent recap of the 13 Photoshop tutorials to help boost your web design game, two new Photoshop features were showcased. The Face-Aware Liquify tool uses facial recognition software to help enhance specific facial features. The Content-Aware Crop tool helps designers fill white space with matching details from the rest of the photo. Both of these “smart” new tools are worth taking a second look at.
Photoshop Fix App
14. Retouch images from your iOS device

Photoshop Fix is a free iOS app you can use on your mobile device (phone or tablet) to retouch images on the fly. Bring in any image you want to edit from your pho ne, Adobe stock, Lightroom, or your CC library and make adjustments right from your mobile device.
PhotoShop Lightroom
15. Create a panorama from multiple photos
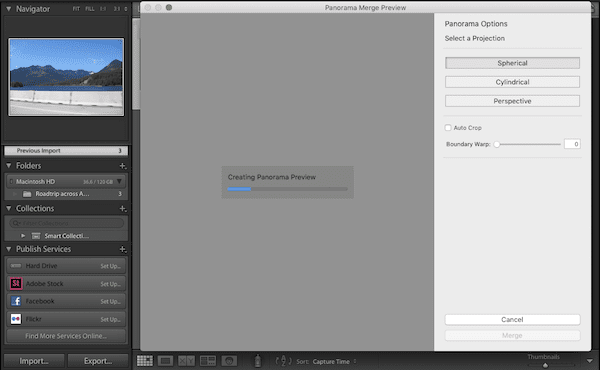
Let’s say you or your photographer took a number of photos of a landscape or cityscape. If you decide later on that you want all those photos merged into a single panorama, you can now do that with the Lightroom merge tool.
16. Make dramatic edits to photos
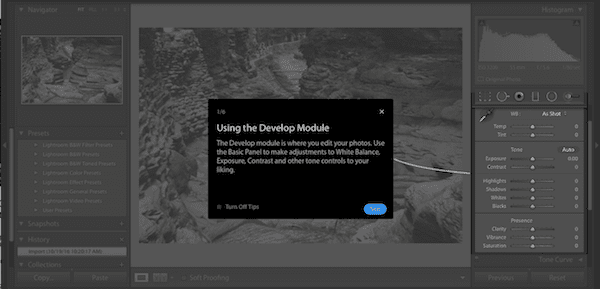
One of the best parts about working with an application like Lightroom is that there is always room to play around. This tutorial does a great demonstration of how to use the Dehaze tool to create a more dramatic look for your photos. All you have to do is integrate strategic shading, enhanced lighting, and a hazy filter.
17. Fix image alignment
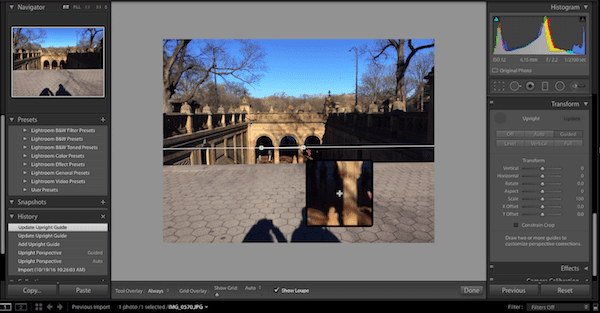
Another great new feature you can find in Lightroom is the Upright Guided feature. If you’ve ever encountered an image that looks off-center or distorted, this tool will help you auto correct the alignment. This tutorial will cover a number of options you can use to guide your images into proper alignment.
InDesign
18. Retain text’s original formatting
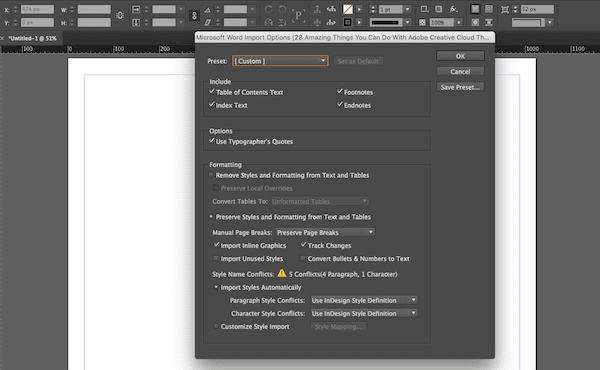
Unfortunately, Copy + Paste isn’t a simple command you can use to transfer copy from a Word document into Adobe applications. This tutorial will cover how you can preserve your original text’s formatting when copying into Adobe applications like InDesign or InCopy.
19. Create simple animations
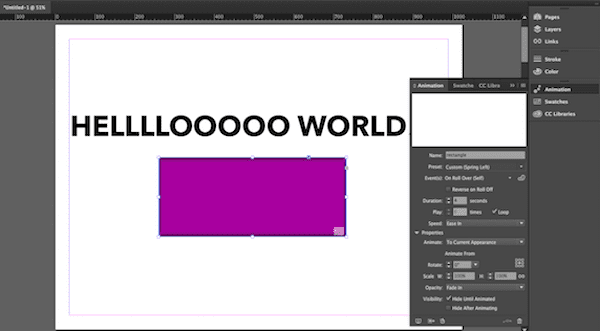
Animations have proven to be a particularly useful part of web design, especially in easing visitors from one page to another. This tutorial will show you how to create simple and fun text and object animations to add to your website. You’ll learn how to play around with movement, timing, speed, and more.
20. Develop grid-based wireframes and prototypes

Since InDesign was originally created for print designs and grid layouts, it’s also proven to be quite useful in developing wireframes and prototypes for digital design. If you prefer InDesign to Illustrator or Photoshop, know that you have the ability to create wireframes in this application as well (see #7 above). This tutorial will walk you through everything you need to know about developing mockups in InDesign.
Dreamweaver
21. Create responsive web layouts

If you want to build your website from scratch, you’ll need to know how to create responsive design without the help of a pre-built theme. This tutorial will show you how to use Dreamweaver’s Fluid Grid Layout to build a perfectly responsive design on your own.
22. Add and edit CSS settings in visual editor
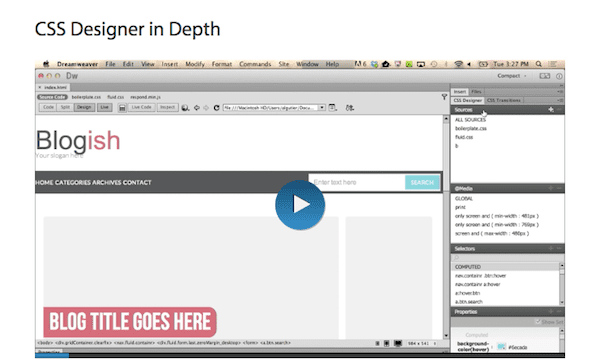
If you’re a fan of using Dreamweaver to develop your site’s designs, then you’ll find this tutorial helpful. The Dreamweaver CSS Designer tool helps developers add and adjust a design’s CSS settings in one panel while viewing the real-time changes to the design in another. The intuitive visual editor tool also helps ensure that you keep your website’s coding clean and organized.
23. Integrate animations within your website
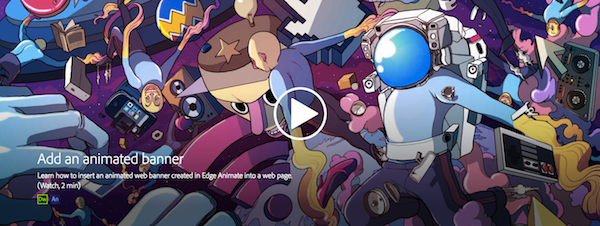
Photoshop’s Edge Animate lets you add dynamic CSS transitions, animations, or interactivity to your website. This tutorial will show you how to export that animation file, integrate it into your web design within Dreamweaver, and preview it in your browser.
Photoshop Capture App
24. Create vector images from your photos

In tutorial #8, you learned how to use the Illustrator Draw mobile app to sketch your own drawings for use in web designs. This tutorial will show you how to capture images from real life using your phone’s camera and the Capture app, and then transfer them to Illustrator to develop cool-looking vector images.
25. Develop digital color palettes from real life
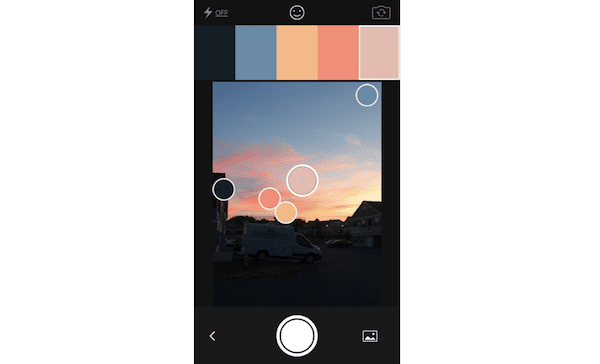
This feature within Capture is a lot like #11 above, only this time you’ll be able to capture colors from your photos. If you should happen to take a photo of something with a really interesting set of colors, you can use Capture to develop a color palette and brushes from those colors. This tutorial will show you how to do that as well as how to save the palette to your library for use across all Adobe CC applications.
Premiere Pro
26. Edit video coloring and shading

For websites that include video, it’s just as important to make sure you’ve nailed the look of your videos as you did with all your other content. In Premiere Pro, you’ll be able to make adjustments to colors and shading using presets, automatic fixes, or your own adjustments.
Typekit
27. License fonts from Adobe
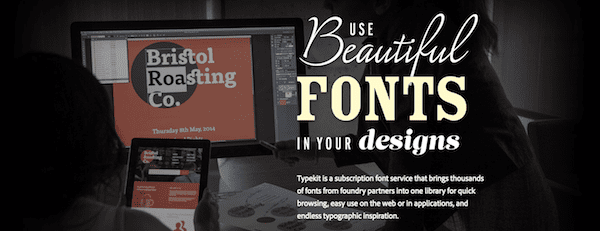
What sort of fonts are you looking to use on your website? The Elegant Themes blog has suggested the best professional fonts, the perfect sans serif fonts for headings, and even cursive fonts to give your site some extra flavor.
If you’re already working within CC, you should take advantage of their Typekit integration. They make it super easy to license any of the 872 font families from their stock and any fonts you do license automatically sync across all your Adobe applications.
Adobe Stock
28. License photos from Adobe
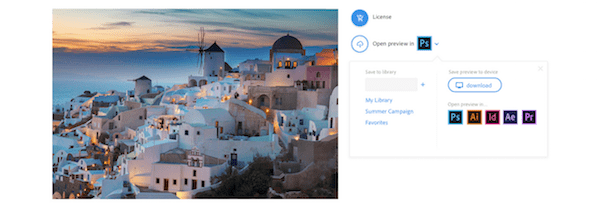
In addition to offering built-in access to the Typekit stock of fonts, Adobe also offers built-in access to their own stock photography. So if you want to cut down on the time you spend hunting through websites like Shutterstock and iStock trying to find the right image for your site’s design, license your images right from within your Adobe libraries and applications.
Wrapping Up
There are a lot of amazing things happening with Adobe’s Creative Cloud applications—and a lot of time-saving features that could greatly benefit your website building process.
Now over to you: what is your favorite application in the Creative Cloud and what’s the coolest thing you’ve done with it?
Article thumbnail image by Your Design / Shutterstock.com


I think I’ll be revisiting this post often to remind myself that it is worth paying that ever increasing monthly subscription for Creative Cloud.
Anyway, as a photographer and web designer, this has been a very helpful post – thanks. Now I just need to find a use for all the other applications in the subscription.
What a fantastic post, It not often you see such an informative article for Adobe CC. Being an avid user of the Adobe CC suite for years, I think this will help identify just how good it really can be for novice users looking to learn the suite.
Keep up with the good posts.
🙂
Sorry to all the people that are wanting air time for other solutions… The Abode Creative Sutie wins easily with respect to workflow and training. If you are in a position where $50/month is an issue then I completely agree and you should go and get the best of the free stuff out there. I think this article is aimed at the people that have already chosen Creative Suite for their workflow and how to get even more from it.
Personally, I have moved through all of the free tools over 20 years and today, I would not use anything other than Adobe. My workflow is clean and fast and I can spend my time being creative rather than converting/translating/correcting. every minute is money.
I am lovin it 🙂 Great post… As always..
I must say I completely agree with Craig (and Nicholas) here. The alternatives suggested are considerably cheaper but not in any way inferior. The Affinity tools are excellent alternatives in terms of replacing Photoshop and Illustrator (imo the essential 2 CS graphic tools needed by most) for a fragment of the price of recurring subscription fees…
I’ve been a designer på 14+ years and Adobe tools has long been the design industry standard – but there’s a downside to the monopoly, namely the price level vs value aspect of the tools but also the tendency towards using closed code and file formats that require certain Apps (and even latest versions) gets limiting and annoying down the line… in a larger perspective it’s
From the humble perspective of a freelance designer who is not serving multinational companies but rather startups and small business the subscription fees of the Adobe Cloud apps are really hefty no matter how clever the marketing and how strong the brand name is. You don’t need any particular app or brand to be a visual designer… speaking from experience just a bit of game adjustment and the interfaces of said apps make the transition quite easy as they basically exhibit the same logic in terms of layout as the Adobe apps.
Less is oftentimes more… and a gifted designer can accomplish exactly the same visual output using any of these significantly cheaper tools. Something any upcoming independent designer should have in mind before settleing on a design platform.
Besides Affinity designer, Xara and I can also recommend Sketch as a vector alternative with a significantly lower price tag. Another even cheaper option although less advanced is Pixelmator (TIP: use a keyboard shortcut can change the GUI from pixelbased to vector). I have used all of these – and currently my primary tools of choice are the Affinity apps along with Sketch…
In terms of export/import of master files just make it a habit to use an open file format such as .eps or similar rather than using the .ai defaults (to use Illustrator as an example). However, I do believe all the apps I mention can handle the native .psd and .ai formats – just talking best practice if you don’t like being in Adobe’s pocket or vice versa every month. .
Anyway, Sry bout the rant – just a bit one-tracked to see excellent cheaper alternatives not getting the spotlight over Adobe. I don’t mean to campaign against Adobe – just don’t wan’t people to think it’s the only way to go.
Trust me – it’s not! 🙂
/Mads
Sry – also agree with Tony – you just beat me on the reply bottom 🙂
I guess I should add that Adobe’s subscription does include some amazing video tools.
As someone who used to either pay hundreds of dollars time and time again for Adobe software, I certainly appreciate their subscription model. If you’re part of a full time design agency, it’s absolutely essential. However, if you’re a digital nomad like me and you just need to pull off some great designs here and there, then I highly recommend Pixelmator. It’s available for Mac and of course IOS devices like the iPad and iPhone. If you need a cloud… iCloud, Google Drive or Dropbox. If you need to save as PSD, go ahead. Did I mention that it’s just under $30 once, instead of $50 a month for life? No, I don’t work for them. I’m just a fan.
Very disappointed that you are promoting Adobe CC without giving any thought or press to the negative aspects, particularly for smaller design firms or individual designers/developers.
1. Expensive and unnecessary. Most often you are paying for product features and/or updates that are not needed.
2. You are locked into Adobe for life. Even if you later decide to use other tools, you will have to continue your Adobe subscription if you ever need to access/edit old files created with their products. So you will be paying whether you use it or not.
I would like to see Elegant Themes presenting alternatives such as:
– Serif Affinity Designer
– Serif Affinity Photo
– Xara
– Gimp
– Inkscape
as well as optional collaboration resources.
I think that would prove valuable to individual designers and small to medium businesses.
I know most of them, but use Corel. I think it’s as good as Adobe, but far cheaper. The gnu stuff is good for hobbies, but having a good workflow from an actual suite does help.
Craig;
Actually for a single app purchase it is a very reasonable investment and what you get for the money now is far better than the days of when you paid $650 dollars for Photoshop alone. You can pause your subscription at any time and then re-start it when you need it again, which again saves on costs. I know people who pay more for specialty coffee each week that could cover the cost of one app per month.
I too have used Open Source tools, but unfortunately they have not matured enough over the years. For example, you cannot import certain files into inkscape that were created in Illustrator, and the layout for Gimp (I care not how many mods you make) the interface is terrible. Plus, if you include it in your expenses if you are a paid designer, the subscription will pay for itself in no time. In this case, I would rather pay for quality tools that have less hassles until the open source world can catch up.
To each their own I guess…
Shawn:
I agree that the open source options may have some limitations, but the Serif Affinity products and Xara Designer are not open source and Affinity Photo and Designer are winning over Adobe users left and right. And they all open the Adobe files without a hitch.
Affinity Photo – $50.00
Affinity Designer – $50.00
Xara Designer Pro X365 – $199.99 (if you own Adobe prod.)
Try them out or check some of the tutorials on you tube.
You might become the next convert 🙂
In Australia the subscription adds up to $1000 per year or more for using PS, illust, Acrobat etc. Not worth it, I get away with mac apps: pixelmator, autodesk graphic and a set of pdf editing apps all which work flawlessly with dropbox for under $100, a one off cost on either my ipad or desktop.
I was trained on Adobe, but am a Corel user. Consider it as an alternative.
I’ve been using Photoshop since v1.0 and Illustrator since 1988; Premiere, Audition, InDesign since they first appeared. There is always more to learn, it never stops. I was happy to get the subscription model, happy to pay $50 a month and always have the latest upgrades rather than shelling out $750 per collection every other year. Thanks for uncorking a few more great tips.
I use Illustrator, InDesign, and Photoshop every day and wasn’t aware of all of these things I can do. I pay for all of the Adobe products through the Creative Suite subscription and don’t take advantage of all the products they have to offer… no I’ll set aside time to dive in. Thanks!
I agree. The advice from other people in the same market as us is like Gold Dust. As a company, we don’t have time to go and find this stuff, the value is immense. 20% of it applies to what we do today, but this post is available to refer back to. Thank you Elegant Themes for breaking the boundaries of your product. Very much appreciated by the community i think.
The best thing you can do is to wait for affinity publisher and say goodbye to adobe 😛
Adobe Muse is missing in your list, definitely worth checking out! You can create great websites with it 🙂
Yes I also miss it 🙂
Muse is AMAZING!! Does things a whole lot easier than pagebuilders and more. Look out Divi, Beaver, Elementor and the rest. There are some other really cool things you can do with Muse, but since I am also an ET lifer, I will let y’all do your own “Google” research and find out for yourselves 😉
Nicely Done – even though I knew about a few of these – it’s always wonderful to have a concise run-down all in one place. Keep up the great work.
Developers should have 36 hours a day to learn everything we want to. ?
I’ll vote in favor of this idea on one condition: this is 36 additional hours exclusively for learning and experimenting.
I so totally agree, Andre. 🙂
Awesome guide! I use Photoshop almost every day and I’m always learning new things. The dummy text tip is life changing. I’m just starting to have use for Illustrator and InDesign now too, so thanks for these tips as well!