Ever wished you could go back in time and see your site as it looked a month ago? A year ago? 5 years ago? The Wayback Machine from the Internet Archive makes your wish a reality.
And while that’s cool enough by itself, you can also use The Wayback Machine to automatically create specific time-based snapshots of your site that you can always access from anywhere in the world. Whether you need to recreate an old page or visually monitor how changes affect your site’s performance, it’s a helpful tool.
In this post, I’ll give you a bit more information about the Wayback Machine and how it can help you. Then, I’ll dig into some methods by which you can easily create and access time-based snapshots of your WordPress site with the Wayback Machine.
What is the Wayback Machine?
If you’re not already familiar, the Wayback Machine is basically a time-based archive of the entire Internet (or as much of the Internet as its robots can consume). It works by crawling the web, much like a search engine.
Only instead of using the data from its crawling to create a search engine, the Wayback Machine lets you search specific pages/websites by date.
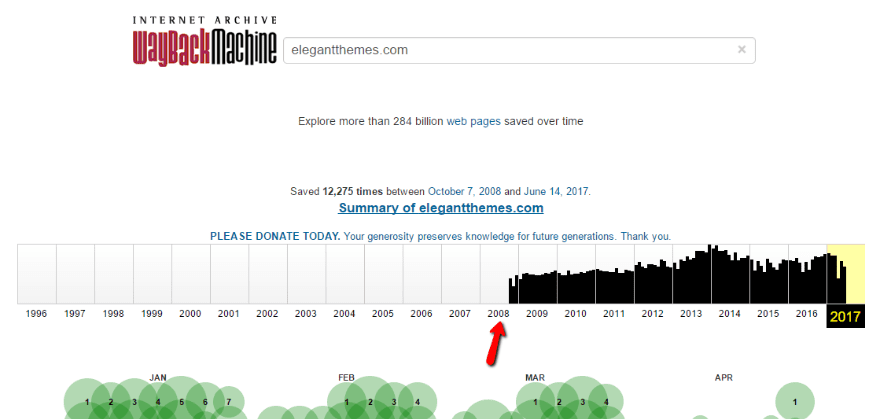
For example, if I wanted to go see what the Elegant Themes homepage looked like all the way back in 2008, all I need to do is enter elegantthemes.com in the search box and choose my desired time range:

And then I can see exactly how Elegant Themes looked on December 2nd, 2008:

The design looks just a little bit different, doesn’t it?
By itself, the Wayback Machine is already a pretty neat party trick. That is, even if it served no practical purpose, it’s just plain cool to be able to see how some of your favorite sites have changed over the years.
But you can also put the Wayback Machine to work for your WordPress site as a sort of complementary backup tool.
How the Wayback Machine Can Help Your WordPress Site
By getting the Wayback Machine to archive your own content, you can create an easily accessible backup version of your site.
I’m by no means advocating getting rid of your regular backup protocol in favor of exclusively using the Wayback Machine – that’s a horrible idea.
But as a complementary method, it has a couple advantages over complete backups of your site.
For example, say you build out a complicated layout using the Divi Builder. Then, through some twist of fate, that layout gets completely blown out. It’s gone for good.
While you could restore from backup…restoring your entire site to save one post is overly complicated. Wouldn’t it be nice if you could just pop in the URL to the messed up page and instantly see a copy of how it looked? Then, all you need to do is quickly recreate the design and you’re back to normal.
How to Create an Archive of WordPress With the Wayback Machine
At this point, you may be wondering how to actually get your site crawled by the Wayback Machine. While the Wayback Machine will eventually make it’s way around to your site, there’s no guarantee of when, or how often, its crawler will visit your site.
Thankfully, you can employ some more surefire methods to ensure your site gets archived by the Wayback Machine. I’ll show you how to do it both manually and with a handy WordPress plugin.
Manually Submitting Pages to the Wayback Machine
The Wayback Machine offers you a manual method to submit specific URLs to its archive. You can access this functionality in two ways.
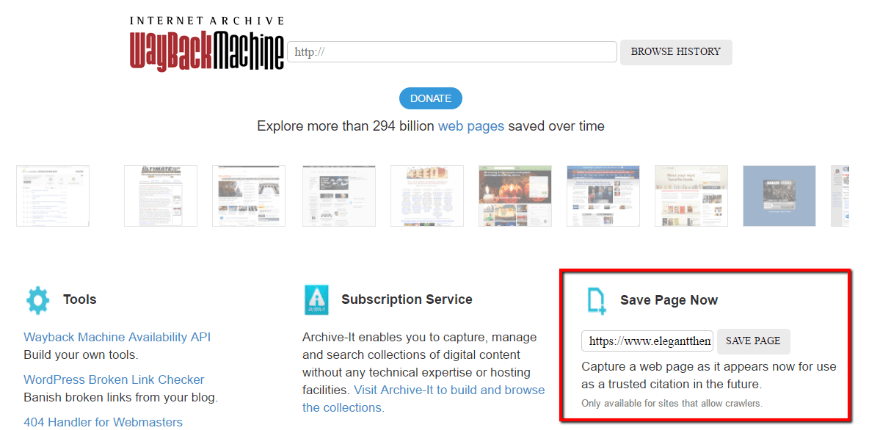
First off, there’s a Save Page Now box on the Wayback Machine homepage that you can use:

Once you click Save Page, the Wayback Machine will give you a specific URL that you can use to always access that page exactly as it looked at the time that you saved the page:

The other way to manually have your pages archived is to just prepend web.archive.org/save/ in front of the URL you want to archive.
For example, to archive the Elegant Themes homepage, you’d just go to:
web.archive.org/save/https://www.elegantthemes.com/
Then, exactly like before, the Wayback Machine will give you a URL to access the page as it appeared at that moment in time.
Using the Archiver Plugin to Create Wayback Machine Snapshots
The manual method is totally fine if you just want to submit your site’s core pages. But if you want to go further and:
- Create snapshots for all of your content
- Automatically update those snapshots whenever you update content in WordPress
- Easily access each date-based snapshot from your WordPress dashboard
Then the Archiver plugin is a great solution.
Archiver was born at the NerdWallet hackathon from Mickey Kay and John Lee’s desire to create a visual archive to see how content changes affected SEO and performance. To that end, it helps you both quickly create and access Wayback Machine snapshots of your WordPress site.
Archiver is free and listed at WordPress.org, so you can install it directly from your WordPress dashboard.
Once you activate Archiver, you can instantly start using it – no configuration required.
Archiver works in a few different ways.
First, it adds a new Archiver option to your WordPress admin bar that lets you:
- Manually trigger a snapshot with the click of a button
- View all the existing snapshots

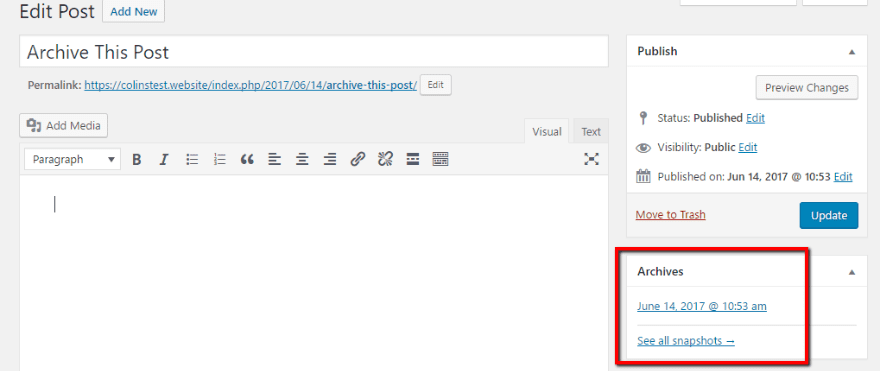
Beyond that, you also get a new meta box inside the WordPress Editor interface that lets you see all of your snapshots by date:

And finally, whenever you update a piece of content, Archiver will automatically create a snapshot to capture the change. No manual intervention is required.
For serious use, the automation offered by Archiver will save you a ton of time over using the manual submission method.
Consider Supporting the Wayback Machine If It Helps
Both the Wayback Machine and the Archiver plugin are 100% free. However, trying to crawl and archive the entire Internet is very much not free. If you feel you benefit from the Wayback Machine, you might want to consider a tax-deductible donation to the Internet Archive (the non-profit that runs the Wayback Machine).
While not required, it goes towards keeping this free service available to everyone around the world.
Wrapping Things Up
The Wayback Machine won’t eliminate the need to create backups of your content, but it does give you a visual history of your site that can help you recreate specific pages and associate tweaks with changes in SEO or site performance.
If you just care about archiving your main pages, you can use the manual method and be just fine. But if you want to easily archive your whole site, as well as automatically create new snapshots whenever you change your content, then the Archiver plugin is a good option.
Now over to you – do you ever use the Wayback Machine to help manage your websites? If so, what’s your best tip for others to take advantage of?
Article thumbnail image by Rashad Ashurov / shutterstock.com


Great article. I didn’t know that you can manually submit your URL to the archive. However, when I check how my website looked like a few years ago, it looks like the stylesheet is missing, as the website doesn’t load the theme. Do you know what could be the problem?
Great article ! The Wayback machine had recorded our site since 2013 but only once in may 2017. Now thanks to you I registered it manually, had no idea !
The TIA has been a great resource for when I forgot to take a ‘before’ snapshot of a site I’ve redesigned.
However, not all sites get stored correctly as many graphics and other assists such as flash don’t always get stored.
Also, really old sites like one of the first sites I created don’t render like they used to, heh heh:
https://web.archive.org/web/19980109015404/http://ezref.com:80/
Great Scott!!! Thanks for the info.