If you’re reading this blog, chances are that in the past couple of years you have probably heard the term Git being tossed around. Designers and developers of all types use Git to make the code they write the best it can be by versioning it. You don’t have to be a programmer of any sort to use Git. In fact, Git works for all file types so if you’re a writer, blogger, designer or nearly anything computer related, the assets you create can be versioned with Git.
If you’re new to Git this tutorial is for you. It will cover the basics of what Git is and how you can use it in your workflow. Although Git utilizes the Command Line to perform its operations. New applications are available which offer a GUI (Graphical User Interface) for the application. For the purposes of this tutorial we will be using a command line editor such as Terminal on Mac. Git is available on any platform. You should be able to use the commands git has established upon any platform as well.
Overview
What is Git?
Git is a free open source version control system designed to handle everything from small to large projects with amazing speed.
When starting out many people will confuse Git for Github. But those two things are actually very different. Git is a local version control system. By local I mean that your Git installation remains on the system you installed it on. I’ll speak more of Github later in this tutorial.
A huge reason people use Git is for the sake of working in teams. Each member of the team typically wants the most up to date assets with whatever project they are working on. If they are using Git, each member can get access to the latest changes as well as resolve any conflicts when working collaboratively. Whether you’re on a team or not Git is a great addition to your workflow that you should be using.
What is Version Control?
Version Control is a system that records changes to a file or set of files over time so that you can recall specific versions later.
Think of Git as a screen capturing plugin. When you’re editing a document of any type, Git is watching for changes you make. At any point you can ask Git what any changes have been made and commit those changes to keep an updated screenshot of your code. This process is similar to updating any file on your computer and hitting save.
Where Git excels over this scenario is with every save there is a version that is accessible at any time.
Benefits To Using Git
There are so many benefits to using Git that there are too many to list but some that stand out are
- Backups to all of your files from start to finish
- No more awkward file naming conventions
new-document-copy-v2.html - Not just for code (any type of file can be versioned).
- Collaboration Friendly – work on the same code within a team no matter where you are.
- Tiny footprint with fast performance – Git takes up little space inside your projects root folder
- Branching and Merging capabilities – Make copies of your existing Git repo and modify without effecting the master version
Installing Git
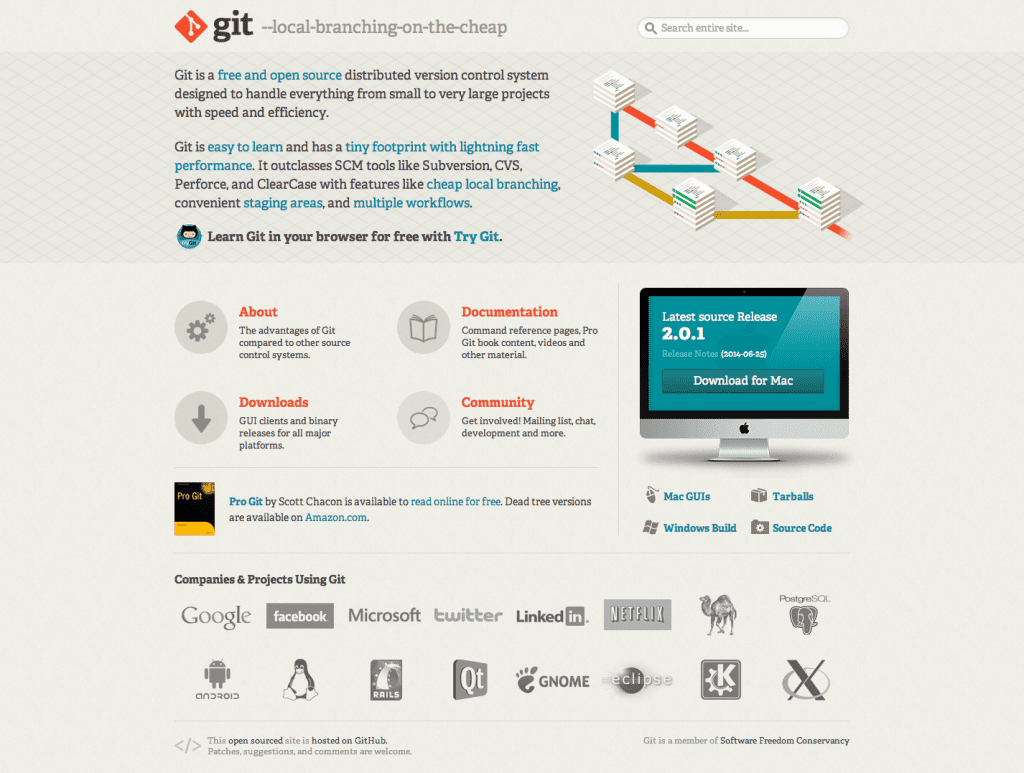
To install Git, head to http://git-scm.com and look for the download button. The first time you install Git it will be just like any other installation you have done in the past. Follow the steps within the installation wizard until complete. Depending on your operating system there should be options for whichever platform you use. At the time of this writing we will be installing git-1.9.2 for Mac. If you’re on Windows check out mysysgit and if you’re on Linux you can simply run apt-get install-git-core.
If you need more help installing then visit git’s homepage or read the Pro Git book for free online.
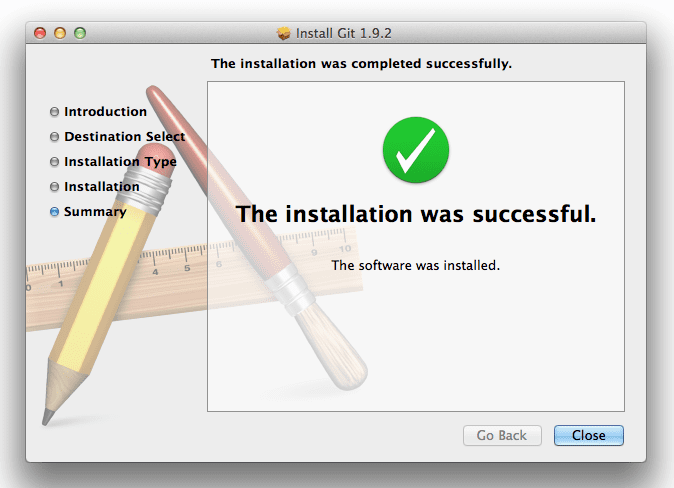
As our installation completes we get a success message.
With git installed you can now verify using the command line. Open your command line app of choice and type the following:
$ git --version
Note – the dollar sign ($) before “git –version” above simply indicates that we are working inside a command line editor. There is no need to copy and paste this character when using this code. It’s used as simply as a context placeholder.
If everything worked correctly your command line should have returned the code
git version 1.9.2
First Time Setup
Now that you have git on your system you’ll likely want to customize your Git environment. Git comes with a tool called git config that lets you get and set your personal configuration variables. This allows you to customize the way Git looks and operates based on your specific needs.
Identity Setup
To establish your identity type the commands below using your own credentials:
$ git config --global user.name "John Doe"
$ git config --global user.email [email protected]
The -global code above allows you to set these parameters for your entire system so that you don’t need to reconfigure this for each new project you work on.
With these parameters saved you can verify them by running
$ git config --list
Your editor should output something similar to below:
credential.helper=osxkeychain
[email protected]
user.name=John Doe
filter.media.clean=git-media-clean %f
filter.media.smudge=git-media-smudge %f
core.excludesfile=/Users/johndoe/.gitignore_global
push.default=matching
core.repositoryformatversion=0
core.filemode=true
core.bare=false
core.logallrefupdates=true
core.ignorecase=true
core.precomposeunicode=true
Using Git
Git is working! Now what? Let’s create a sample file inside a folder on our desktop. You can go about this in multiple ways but lets use the power of the command line to create a folder on our desktop and initialize a git repo inside it.
Here we change our directory or cd to the desktop folder.
$ cd /Users/andyleverenz/Desktop
Next lets make a folder called GitSample using the mkdir command.
$ mkdir GitSample
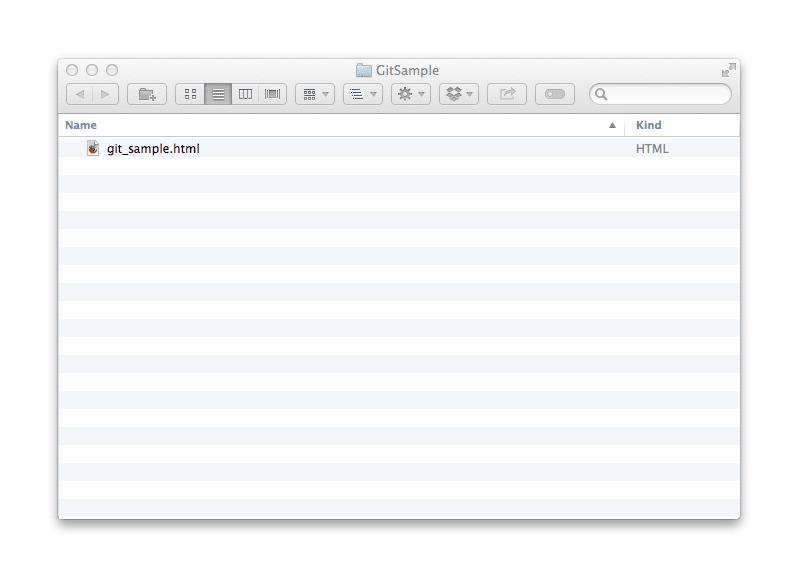
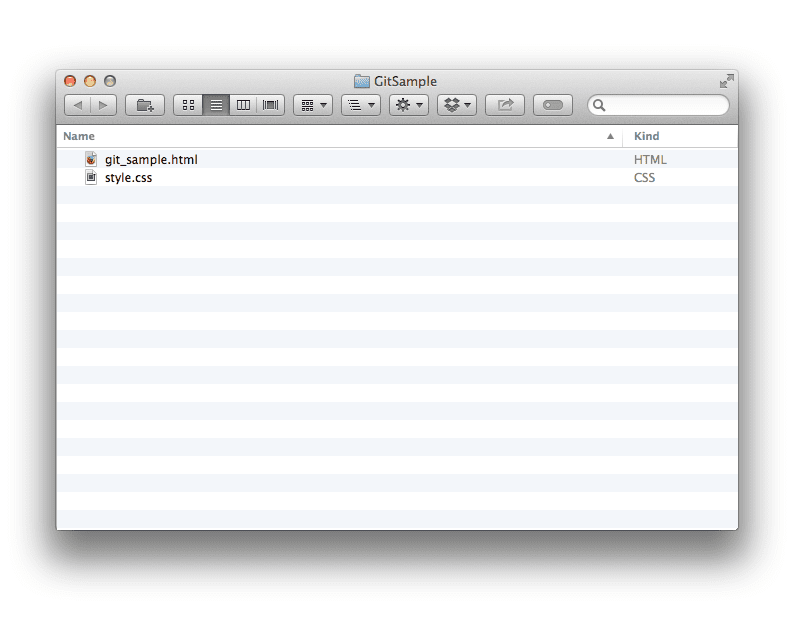
If you look on your Desktop you should now see a new folder called GitSample
Let’s change directories to be inside the GitSample folder. Type the command below:
$ cd GitSample
Now you should be inside the GitSample folder. You can either open this folder in a code editor (such as Sublime Text, TextMate, Dreamweaver, etc…) for here out or you can create the file like we are going to do via the command line on a Mac. Type the command below:
$ touch git_sample.html
Our new folder titled GitSample now has the contents of a HTML file called git_sample.html.
Changing files
Let’s add some basic HTML to our new file. Add the lines below and save your changes. Again feel free to use any code editor of your choice.
<html>
    <head>
        <title>Git Sample Page</title>
    </head>
    <body>
        <h1>Git Sample Page</h1>
        <p>Our sample Git project file</p>
    </body>
</html>
If you preview the code in your browser you can see that it’s pretty plain. We won’t worry about styling this page too much as it isn’t the goal of this tutorial.
Initializing A Repository
With a file and folder in place we can now utilize the power of Git. With your command line editor still open and inside your project’s folder type the command below:
$ git init
Your editor should return something similar to:
Initialized empty Git repository in /Users/andyleverenz/Desktop/GitSample/.git/
What we did here is create a new empty repository within our project’s folder. If you look inside your folder on your desktop you won’t see the new git related files and folders. These are invisible files on your system and you likely will never need to edit them.
With git enabled lets add some content to our HTML file. Change the contents to as follows:
<html>
    <head>
        <title>Git Sample Page</title>
    </head>
    <body>
        <h1>Git Sample Page</h1>
        <p>Our sample Git project file</p>
        <p>Git is awesome!</p>
    </body>
</html>
Save your file and head back to your command line editor. Type the command below:
$ git status
Your editor should return:
On branch master

Initial commit

Untracked files:
  (use "git add <file>..." to include in what will be committed)

    git_sample.html

nothing added to commit but untracked files present (use "git add" to track)
After we changed and saved our file Git has taken upon itself to spot these changes. It will do this action for any files changed in a given project at any given point. Git will also track newly created files as well as deleted files.
Staging Files
The next step in our workflow is to stage the files. Staging the files sets them up to be commit or “captured” as I discussed earlier. After you reach a good point in your project you can stage and commit your files to create a new version to refer to later if needed.
To stage our project type this command:
$ git add --all
Here we add our entire project to the staging area. If you type
$ git status
your editor should now return
On branch master

Initial commit

Changes to be committed:
  (use "git rm --cached <file>..." to unstage)

    new file:   git_sample.html
Committing Files
With our file staged we can finally commit it. Run the code below:
$ git commit -m "Initial Commit"
The git commit command captures our code at it’s current state and the -m character is simply a message of what is being changed. With each commit you will need to include a message summarizing your changes to help you reference your versions down the road.
Your editor should have output something similar to:
[master (root-commit) ceb271b] Initial Commit
 1 file changed, 10 insertions(+)
 create mode 100644 git_sample.html
If this is your first time using Git, Congrats on your first commit! We can verify our commit by typing:
$ git log
Git log returns the code like below. Yours will be different based upon your credentials you set Git up with.
commit ceb271b881777948d5e879df2a6114283053e622
Author: John Doe <[email protected]>
Date:   Sun Jun 29 11:42:10 2014 -0500
Moving Forward With Our Project
Let utilize Git some more. I’ll add a stylesheet to our project and link it to our HTML file to add some basic styling.
Changes to our HTML file are below:
<html>
    <head>
        <title>Git Sample Page</title>
        <link rel="stylesheet" type="text/css" href="style.css">
    </head>
    <body>
        <h1>Git Sample Page</h1>
        <p>Our sample Git project file</p>
        <p>Git is awesome!</p>
    </body>
</html>
I’ve also added a new file to our project folder called style.css.
Inside our style.css file I have added the code below:
body {
    font-family: Arial, sans-serif;
    font-size: 16px;
    background: PowderBlue;
}
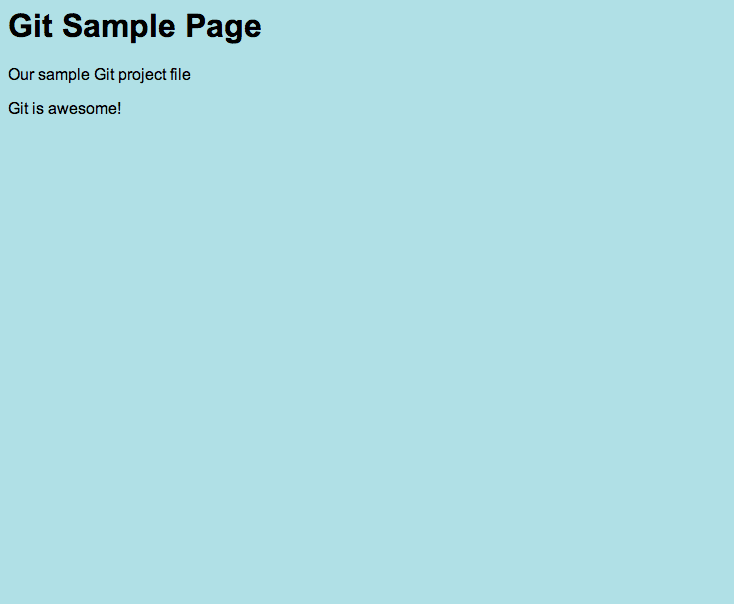
Our page now looks a little more styled.
Let’s stage and commit our changes with Git. Head back to your command line editor and type:
$ git status
We check the status of our project. Your editor should output the code below:
On branch master
Changes not staged for commit:
  (use "git add <file>..." to update what will be committed)
  (use "git checkout -- <file>..." to discard changes in working directory)

    modified:   git_sample.html

Untracked files:
  (use "git add <file>..." to include in what will be committed)

    style.css

no changes added to commit (use "git add" and/or "git commit -a")
Notice how git found our new style.css file and saw the changes made to our git_sample.html file? Awesome!
Let’s use a new command to stage and commit our files all in one line
$ git commit -am "Stylesheet added"
Your editor should output something like below:
[master 362760b] Stylesheet added
 1 file changed, 1 insertion(+)
The one line we wrote was just a condensed version of what we wrote earlier that took two steps. This is useful if you want to update all the files within your project but there are times you may want to stage and commit single files and not others. You can do that by typing something like below:
$ git add index.html
$ git add style.css
$ git commit -m "Sample commit"
The result would tell Git to only version the above two files index.html and style.css. Pretty cool right?
Lets view our log again to see the latest commits:
$ git log
You should now see two commits similar to the code below:
commit 362760b4739b5a654e60554614b59cc96746dafa
Author: John Doe <[email protected]>
Date:   Sun Jun 29 12:12:50 2014 -0500

    Stylesheet added

commit ceb271b881777948d5e879df2a6114283053e622
Author: John Doe <[email protected]>
Date:   Sun Jun 29 11:42:10 2014 -0500

    Initial Commit
Branching
With Git you can make a copy of your project and use it without effecting your master version. Git offers a branch command to do this all in one easy step. Lets make a branch called testing and switch to it.
$ git branch testing
$ git checkout testing
or shorthanded
[/php]$ git checkout -b testing[/php]
Your editor should return
Switched to branch 'testing'
The commands above created a new branch called testing and switched to it from our master branch. If you run
$ git branch
you editor should return both the master branch and the testing branch we just created. Each branch at this point are exact duplicates. At any point you can switch between the two branches. A great reason to work with branches is to debug code, try something new with existing code, and much much more.
Let’s make a change to our code. Say we want to delete some code from our HTML file. Lets do so below:
<html>
    <head>
        <title>Git Sample Page</title>
        <link rel="stylesheet" type="text/css" href="style.css">
    </head>
    <body>
        <h1>Git Sample Page</h1>
        <p>Our sample Git project file</p>
    </body>
</html>
All we did is delete the second p tag on the page. With our changes in place lets merge our branch with our master to have our code up to date. Before we merge we need to make a commit so Git knows of the changes.
$ git commit -am "Modified git_sample.html"
So now your editor should output
[testing 30f98d0] Modified git_sample.html
 1 file changed, 1 deletion(-)
Notice our branch testing is now being output instead of master like before.
With our changes committed lets merge our testing branch back with our master branch to update our master since the code within the testing branch is how we want our code to be saved. To merge our changes type the commands below:
$ git checkout master
$ git merge testing
your editor should first tell you that you have switched to the master branch and then output
Updating 362760b..30f98d0
Fast-forward
 git_sample.html | 1 -
 1 file changed, 1 deletion(-)
Git noticed we modified our HTML by deleting some code.
Reverting To A Previous Version
If you decide you’re not happy with the files you are working on and want to revert back to a specific commit Git allows for this. The best way to revert back is to run:
$ git log
and notice the unique longer ids for each commit. Let’s copy and paste one we made from before (yours will be different but similar) and use it to revert to by typing:
$ git revert --no-commit 30f98d01a24a51a8f0aa608ecf6f1fc5f93b5c33
This looks complicated but you’ll just need to copy and paste. Within each id there is a commit message in which we wrote which helps tell you what you’re changing back to. If you ran the command above you should now notice that the HTML has reverted back automatically to what we had before.
<html>
    <head>
        <title>Git Sample Page</title>
        <link rel="stylesheet" type="text/css" href="style.css">
    </head>
    <body>
        <h1>Git Sample Page</h1>
        <p>Our sample Git project file</p>
        <p>Git is awesome!</p>
    </body>
</html>
Since we decided we like our code better this way after all we still need to commit. If you are ever unsure if you are caught up on your commits you can run $ git status and Git will let you know. Lets commit our changes.
$ git add git_sample.html
$ git commit -m "Reverted back to original"
Github
Github is commonly mistaken for Git but now that you’ve written some of the most common git commands I can better explain that all of the changes we have made have been local. Github is live on the web. Github works with git to push your changes live to allow for even more save versioning of your files. In order to push your changes live you first need to create a Github repository.
First Steps
To use Github.com you’ll need an account. You can signup for free at github.com. Once you signup you’ll need to create a repository from within your admin area. Look for a green button to the right of your newsfeed and click it. Let’s call this repo GitSample.
For the description field you can just add “Repo for Getting Started with Git”. Don’t worry about the rest of the options for now. Next click Create repository.
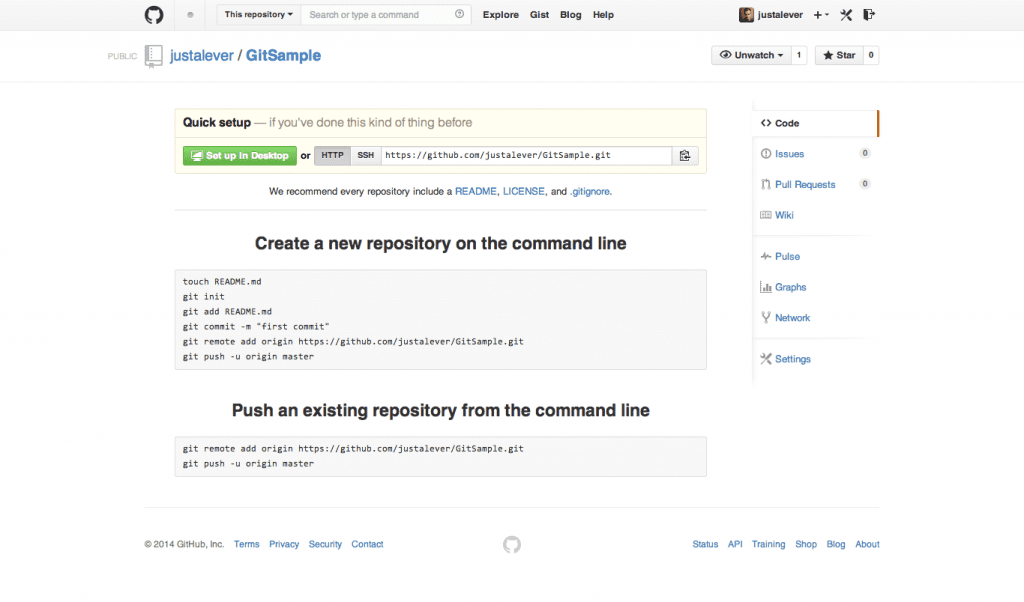
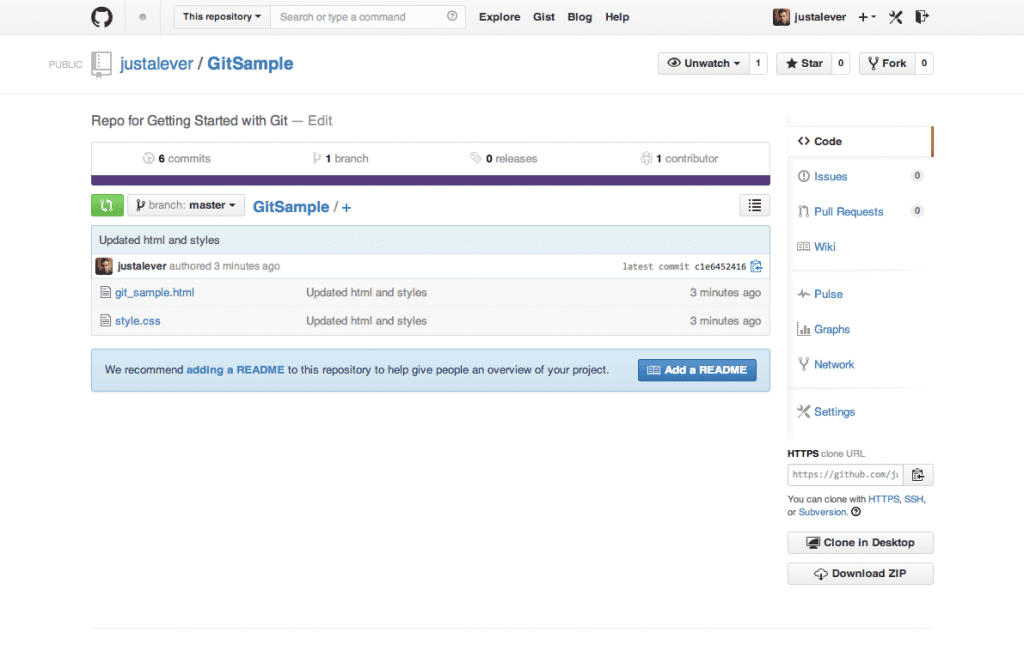
With your repo created you should see a screen similar to mine below:
Pushing To GitHub
Git provides you with instructions to either create a completely new project or push an existing one to your newly created repository. We will choose to push our existing local repository so that it’s live on Github. In your command line editor type:
$ git remote add origin https://github.com/USERNAME/GitSample.git
$ git push -u origin master
Your editor may ask you for your system password or error do to not having the correct SSH access. You can create SSH keys to allow you access to Github. This needs to be done one time and you should be granted access whenever you complete it. To add a SSH Key you’ll need to visit your Account Settings. While inside look on the left sidebar for SSH Keys. You can add a new one for the system you are currently working on if you haven’t added one before.
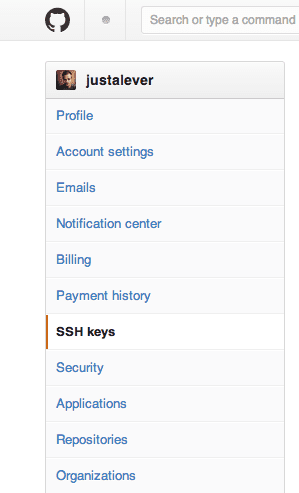
Adding your SSH Keys allows for quick access to Github when working with Git.
If the commands above worked correctly your editor should have output something like:
Counting objects: 14, done.
Delta compression using up to 8 threads.
Compressing objects: 100% (11/11), done.
Writing objects: 100% (14/14), 1.36 KiB | 0 bytes/s, done.
Total 14 (delta 2), reused 0 (delta 0)
To https://github.com/USERNAME/GitSample.git
 * [new branch]      master -> master
Branch master set up to track remote branch master from origin.
If you navigate to your repo live on Github you should now see your changes made live.
Let’s a couple more changes to our project. I want to add one more line of text in our HTML file and modify our background color inside our stylesheet. Below is the updated code for each file.
<!-- git_sample.html-->
<html>
    <head>
        <title>Git Sample Page</title>
        <link rel="stylesheet" type="text/css" href="style.css">
    </head>
    <body>
        <h1>Git Sample Page</h1>
        <p>Our sample Git project file</p>
        <p>Git is awesome!</p>
        <p>Github is awesome too!</p>
    </body>
</html>
/* style.css */
body {
    font-family: Arial, sans-serif;
    font-size: 16px;
    background: Tomato;
}
Let’s commit our changes locally and then push them to Github as well.
$ git add .
$ git commit -m "Updated html and styles"
$ git push
In three lines of commands we successfully staged our changes, committed them locally, and push the same commit to our live repository on Github. Our webpage now displays our latest changes:
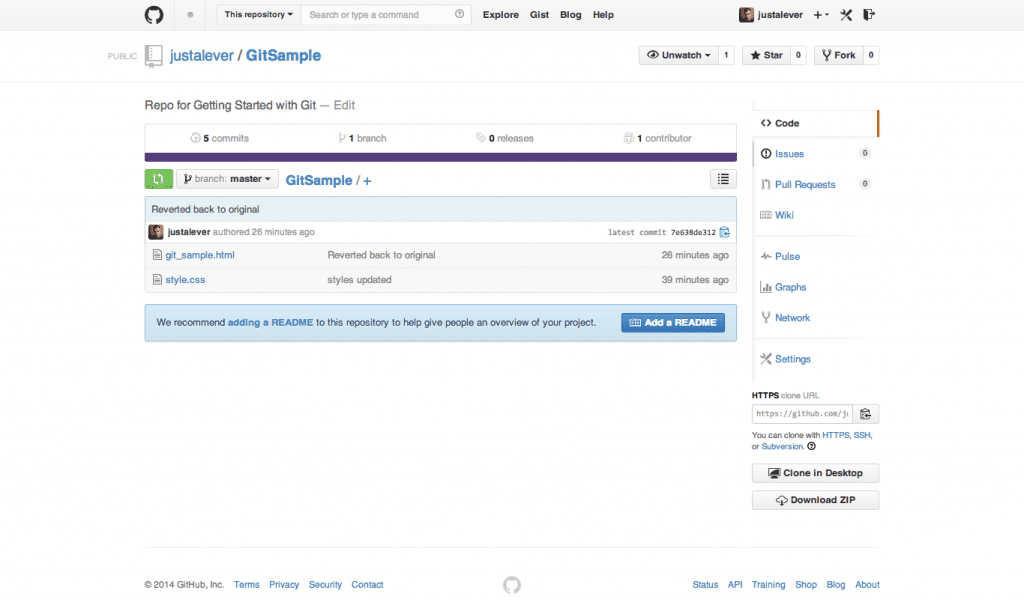
Our changes are also shown within our Github account.
Conclusion
We’ve come a long way exploring what Git is, how it is used, and just how powerful it can be. Our tutorial was a rather minute working example of just what power Git has when working with much larger projects. I’ve only cracked the surface on getting started with Git. If you’re for more information on Git or want to learn how to use it with a team check out these links.
Useful Resources
Official Git Website
ProGit Book – read it online for free!
Try Git – an interactive tutorial which is a great starting point for
people new to Git
Github Help – Great resources for learning how to use GitHub with Git
Github GUI Application – Mac – Use a graphical interface application to use Git
Github GUI Application – Win – Use a graphic interface application to use Git







Hi Andy!
Recently I presented a talk at [WordCamp Salvador] (http://2014.salvador.wordcamp.org/programacao/), in which I talked about git.
https://speakerdeck.com/calheira/use-git-e-perca-seu-medo-de-errar
The aim of the lecture was to present the great features that git offers and help developers to lose their fear of making mistakes.
So I did a search looking for tutorials that could enrich my lecture.
Your article is excellent and was very helpful. But I spotted a small inaccuracy.
When you say:
*”Let’s use the new command to stage and commit our files all in one line
$ git commit -am “Stylesheet added”*
The previous command only includes the file git_sample.html into stage. The stlyle.css file was not being tracked, so it is not included in the stage.
According to the git commit manual:
*-a, –all
Tell the command to automatically stage files that have been
modified and deleted, but new files you have not told Git
about are not affected.*
10,000 thanks for this. Another great article from your team 🙂
This was sooo over my head. You know what though, I couldn’t stop reading! Added this and your resources on my to-learn list…thanks, no really, thanks!
Very nice and detailed. If you are developing in the free Microsoft WebMatrix, it has built in support to install and use GIT.
That was a very detailed and helpful guide to Git. Though I am using git for a couple of months now, I just came to know that I skipped some basic lessons !!
Thanks for the excellent write-up. Keep it up 🙂
Thanks, I’m really grateful for this. I’m a content writer and strategist (but can cope okay with the command line), and I’ve been looking for a long time for “just enough GIT” to see if it will solve the version control problem for editorial content that is true of so many web sites or digital projects I work on. (Love WordPress though I do, it’s sort of clunky for version control at the drafting and review stage.) All the tutorials have been so exclusively code development oriented that I haven’t been able to parse them, but this one I get and now am eager to try it on drafts. Thanks again. a
Arthur great to hear. I’m happy to hear another perspective in the community using git as opposed to always being developers. It’s a great tool to have at your grasp. Good luck with everything!
I have been using GIT for a couple of years now, it’s great. If you like to visualize things, I suggest pushing your git repo to bitbucket every now and then. Bitbucket allows you to very easily view the history of changes of specific files, and highlight differences between one version (“commit”) and another.
However very important to note, and this has ben my pet peeve with all version control systems… I have yet to find a tool that can track database changes nicely. If you have database structures that must match your code at certain points in time, it may get tricky. The best option I have come across thus far is to do a daily export of the mysql structure (without the data).
Sam, Github and Bitbucket are very similar. You’re correct the visual display is a great feature allowing you to quickly verify your commits. I believe Atlassian the makers of bitbucket offer a GUI application for handling your commits. View it here.
Github also offers a GUI application found here but I think most users of git still prefer the command line as that’s how it originally started.
Database changes might be tough to track. I’m not sure what to offer for that. If you come across anything feel free to link share! Thanks!
No need for such manual labor anymore, checkout versionpress being developed which will give you all the GIT goodness for WordPress in a stunning plugin 🙂
http://versionpress.net/
Very true! But if you already use git in your workflow, adding your wordpress site to the chain couldn’t hurt. And it’s dependent on you rather than you depending on a plugin 😉
I thought Git was already installed on Mac in OS X
You might be thinking of ruby? Git doesn’t come preinstalled. Yet… either way it installs like a traditional app and is accessible via command line (terminal app).
Very well written article. I found that you wrote for linux you can use “apt-get…” , you mean’t ubuntu and those derivatives using aptitude 🙂 Nice and elaborate article, i must confess.
Nice guide on Git. Thanks for sharing it. I learned new things today
Glad to hear Ashmita!
Check VersionPress – the Undo button for WordPress, and more.
http://versionpress.net/
A great plugin!
Thanks Andy, though your posts targets WP developers, I love it. Cheers 🙂
Very true but anyone can use git for nearly any type of file. It looks hard and complicated on the surface but don’t let it keep you from trying it out. 😉
Great article with very depth information and tutorials about Git & Github. Thanks for share Andy 🙂
Thanks for the comment!
Pretty much informative tutorial, definitely helpful for beginners. Am glad to know that i can use Git locally. Thanks for great share.
Thanks Sarah!
Thanks Andy!
Am looking forward for more useful stuff like this from your side.
Cheers!
The tutorial may look great for developers but its meaningless to dummies who have no clue about coding or using command line. Can you point to any tutorial that solve this problem? (Good efforts though).
A google search will give you a crash course on the command line. It “looks” advanced but you actually use a lot of the same commands often so they are easy to memorize. Git isn’t just for developers either. People who are writers, accountants, artists and more can all benefit with the files they create, edit, and manage. Thanks for the comment Jim
A great in-depth tutorial to Git. Used it for approx. 4 months and it’s a GREAT tool!
Couldn’t agree more Kim 🙂
great tutorial… Cary on..
Thanks!
Thanks for the in-depth tutorial!
Thank you Clay!
Oh. I never thought I could use git locally. Hahaha. I’ve been using it via Bitbucket since last year. 😀
Yep 🙂 Git is meant to be used locally or on a local network. It’s big on “team work”. Github and Bitbucket just take your repos live.
So far, I had been using SVN for client repositories. However, due to pricing on providers, I am thinking in switching from SVN to Git.
This posts seems to be written for me, since I am just ocnsidering the change (a complete change of paradigm, if you ask me).
Thanks for the help :).
SVN is definitely different Carlos but Git is super easy to get the hang of and it will save you a lot of headache if you make full use of it!
This was a very well written blog post. I have been using Git for about a year now, and I just have to say that it changed my mind. Instead of github we use Atlassian’s Stash which allows us to do our own repository privately. Using a behind the firewall git server allows for collaboration while maintaining security over the data used.
One thing to note is that if you use multiple different types of servers you can download SourceTree from Atlassian. It’s free and you can use it to interface github, bitbucket, stash, Team Foundation Servers, and others.
Enjoyed it!
We are using bitbucket for our products too. It allows up to 5 developers to collaborate for free in unlimited free repos.
This is awesome for start ups like mine.
Thanks Joseph! There are a lot of providers like github, some offering even more features. Thanks for sharing.
Haha, Changed my life. Not changed my mind.