Dates are a prominent component of WordPress. Whether you are using this software to create a blog or build a more traditional website, it’s likely they will be featured in some way, throughout your project.
Many of us are now hooked on tracking down and consuming the latest content in order to stay up to date on the topics that we are most interested in. This means it’s vital that your website recognizes this growing trend and is configured accordingly.
Seemingly out of the date content can easily repel your target audience, especially those who are looking for up to date information; while providing your visitors with the latest information regarding upcoming events can become a useful feature of your website.
In this article we will take a look at a few of the different ways you can work with dates and times in WordPress. From ensuring your visitors can tell that your content is up to date, through to listing forthcoming events, displaying a timer counting down to the big day, and even retiring old content automatically, there are plenty of different ways you can use time and dates to your advantage.
So without further ado, here are some different ways you can work with dates and times on your WordPress website.
-
1
Display the Date Each Post Was Lasted Updated
- 1.1 Editing Your Theme Files to Display the Updated Publication Date
- 1.2 Using a Plugin to Display the Post Last Modified Date
- 1.3 Removing the Date of Publication from Posts and Pages
- 1.4 Only Display Publication Date on Recently Published Posts
- 1.5 Quickly Set the Publication Date to the Current Time and Date
- 2 Creating Timed Content with an Expiry Date
- 3 Display a Countdown Timer
- 4 Displaying a List of Event Dates
- 5 Conclusion
Display the Date Each Post Was Lasted Updated
If you’re in the practice of updating the content of your blog posts on a regular basis, then there are a few reasons why you should consider displaying the date each post was last updated, rather than the date it was first published.
Using the default WordPress configuration of displaying the published date could be costing you visitors and negatively affecting the bounce rate of your website.
If your visitors are looking for the latest and most up to date content, and your posts are still displaying their original publication date instead of the date that content was last updated, then those visitors may well be hitting the back button as soon as they arrive at your site.
Furthermore, search engines such as Google, often prioritize new content over old in their results pages. Therefore, publishing the date your content was last updated, can help with the SEO rating of your website, and increase its chances of ranking more prominently in the search engines.
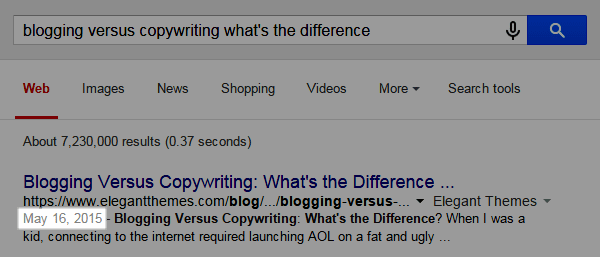
Post dates in the Google search engine results
Not only that, but as search engines also display this date in their results pages, any potential visitors hunting for fresh content might skip over your listing. If you are displaying the original publication date, your potential visitors have no way of knowing that the content has been recently updated. This means that even if your posts and pages are ranked highly in the search engines, you still might not be receiving all the visitors you could.
Thankfully there are a few different ways to overcome this issue, including modifying your theme files, or installing a free plugin. So if this sounds like something you’d like to implement on your WordPress website, we will now take a look at some of the options available to you if you want to start displaying the date your posts were last updated, rather than their original date of publication.
Editing Your Theme Files to Display the Updated Publication Date
This method will update your WordPress theme to display the date of the last time you hit the Update button on a post. This means your visitors will see a publication date that corresponds with the last time that content was updated – rather than the date it was first published.
It’s important to point out that this modification can be achieved differently, depending on your chosen WordPress theme. For this example, we will be using the popular Divi theme.
Before making these changes to the theme files, a post that was updated would still display its original date of publication to your visitors.

Before: date post was first published
However, after modifying the theme files, the date the post was last updated is displayed as the publication date.

After: date post was last updated
If you’d like your website to display publication dates in this way, it only involves editing one line of code. Before you get started, it’s highly recommended that you create a child theme. This will prevent any changes you make being overwritten when you next update your theme.
The file we are going to be editing is the functions.php file. This file is located in the root directory of your theme. To make changes to this file, you have a few options for doing so. You can download the file from your server using an FTP client, make those changes in an app like Notepad++, and then re-upload it to the server.
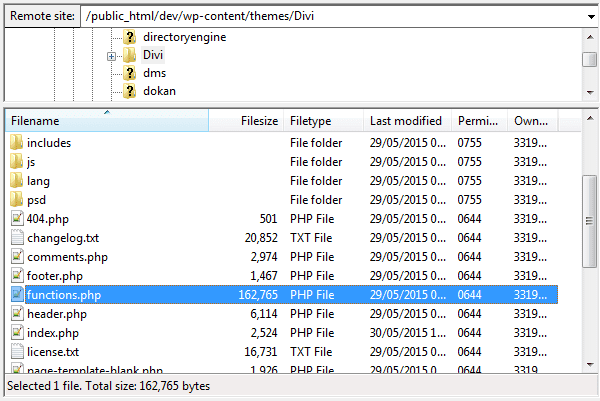
Finding the functions.php file with an FTP client
Alternatively, you can edit the file directly from within your WordPress admin area. This option is quicker, but more risky. If you make a mistake, you could break your website and even lock yourself out of it.
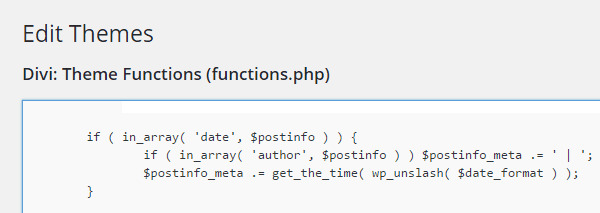
Editing the functions.php file with the Theme Editor
Whichever ever option you choose, be sure to make a backup copy of the functions.php file we are about to edit.
If you do want to edit the file from within your WordPress admin area, first login to your dashboard area, and navigate to the Theme Editor. This can be found under the Appearance menu.
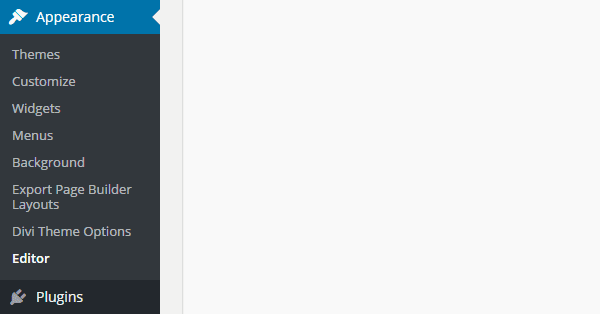
Locating the WordPress Theme Editor
Then, from the list of files on the right-hand side, click on the Theme Functions (functions.php) item.
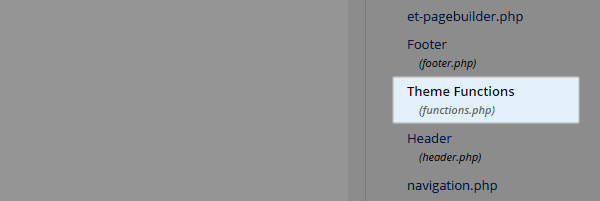
Locating the functions.php file through the Theme Editor
That file should now be open in the main editor window, as indicated by the title text. Now hit the Ctrl + F keys to open the browser find tool, and look for the line that contains this code:
$postinfo_meta .= get_the_time( wp_unslash( $date_format ) );
Then change the line to the following:
$postinfo_meta .= get_the_modified_date( wp_unslash( $date_format ) );
After you’ve done that, hit the Update File button at the bottom of the screen. Now try updating a post, and then viewing it from the front end of your website. The date the post was saved should now be displayed as the post date. This also extends to the blog post archive page.
As mentioned, this example works with the Divi theme. If you are using a different theme, please contact the supplier for instructions on how to enable this effect on your website.
Using a Plugin to Display the Post Last Modified Date
If you don’t want to edit the files of your WordPress theme, another option is to install a plugin that will enable you to display the date each post was last updated. By going down the plugin route, this last updated information will be displayed in addition to the original date of publication.
If this option appeals, then the plugin to install is the free WP Last Modified plugin. After activating this plugin on your WordPress website, the date the post or page was last updated is then displayed in your content.
Through the plugin settings you can choose the position of the time stamp, as well as selecting a date format. You can also add some text to accompany the date, such as last updated on, for example.
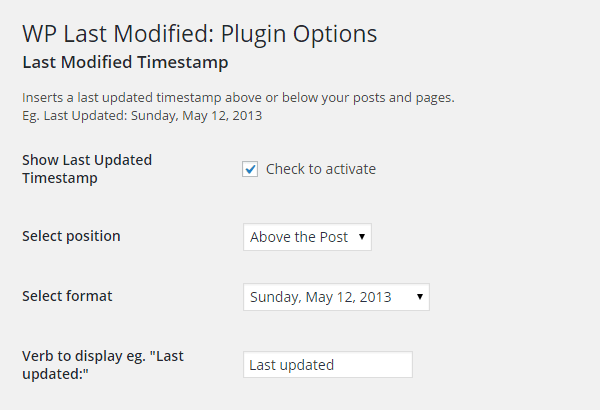
WP Last Modified plugin settings
Now, depending on your chosen settings, the date of the last updated will be displayed to your visitors when they reach your site.
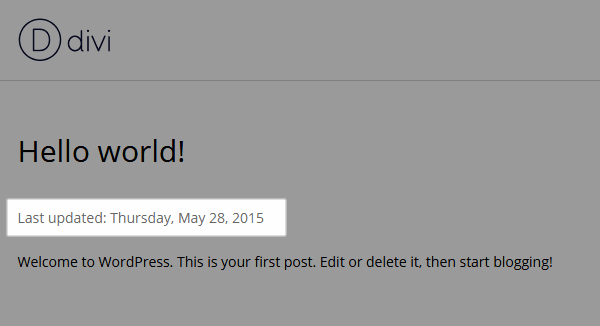
WP Last Modified plugin results
If your content isn’t time sensitive at all, you could go one step further and consider removing the publication date from your posts altogether.
Removing the Date of Publication from Posts and Pages
If you are using an Elegant Themes product, such as the Divi theme, then you can quickly stop displaying the publication date on your posts by disabling this option on the ePanel.
To do so, simply login to your WordPress admin area and navigate to Appearance > Theme Options screen. Then click on the Layout Settings of the ePanel. From the Single Post Layout tab, click on the Date icon to disable it. Be sure to click on the Save button to apply your changes.
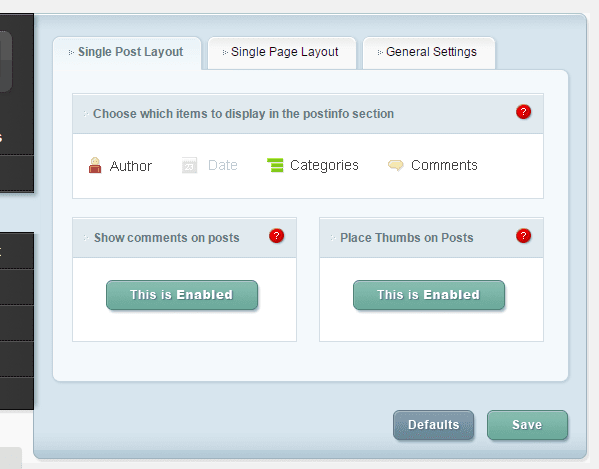
ePanel Single Post Layout settings
This will then prevent your theme from displaying the published date on your website, when a visitor is viewing a single post.

ePanel Single Post Layout front end results
However, the post date is still displayed on your website when the posts are listed, such as on the blog post archive page.
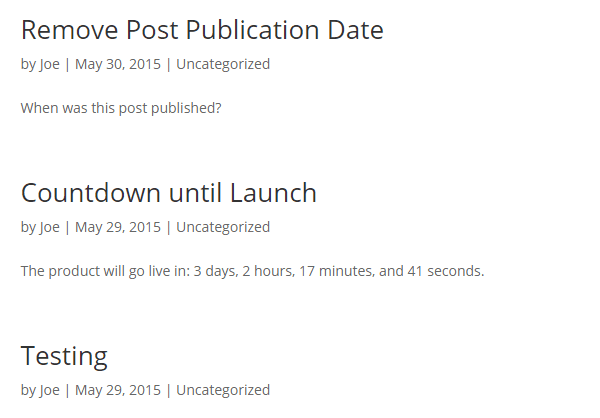
Results fom changing the ePanel Single Post Layout settings
If you want to rectify this, return to the ePanel, and switch to the General Settings tab. Then click on the Date icon until it is greyed out. Then hit the Save button to apply your changes.
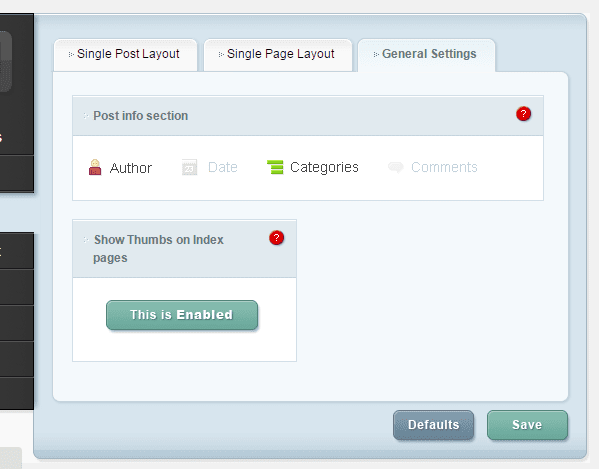
ePanel General Settings
Now when your visitors browse the post list pages, they will no longer see the date of publication.
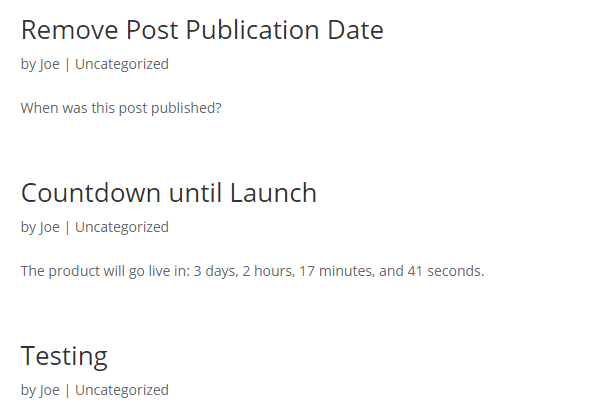
Dates removed from the post list archive page
If you aren’t using a theme with a control panel that makes it easy to hide the post date, then the free WP Date Remover plugin might be able to help you achieve this. Testing this plugin produced mixed results, with it working on some themes, but not on others. Therefore, it might work for your chosen theme, or it might not.
Only Display Publication Date on Recently Published Posts
If you only want to display the date of publication on your most recent posts, then the free WP Old Post Date Remover plugin might be a better option. This plugin allows you to enter a cutoff point, after which point, any posts older than a certain date won’t display when they were published.

Old Post Date Remover plugin settings
Again, when tested this plugin produced mixed results. It worked well on some themes, while not on others, including not working with the Divi theme. Although if you post the details of your specific theme in the plugin support forum, the developer seems willing to help others find a solution.
Quickly Set the Publication Date to the Current Time and Date
Another free plugin you might find useful if you are regularly updating your content, is the Date/Time Now Button plugin. This tool adds a new button to the post editor screen, which when clicked, changes the publish date of the post to the current time and date.
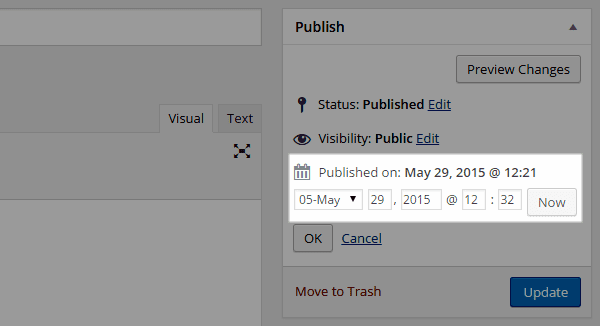
Set the post date to now
Clicking on the edit button that is located under the current publication time and date, reveals the discrete now button. Once you’ve updated the post with the new post date, this information will be published on the front end of your website.

Publication of the new post date
Your visitors will now assume this is the original publication date of your post. This then helps to make your content more appealing to anyone who is looking for up to date information. Using the Date/Time Now Button plugin is a nice alternative to modifying your theme to display the last updated date for each post.
If you want to display your most recently updated posts in the sidebar of your website, this free plugin and its widget can help you achieve this with ease.
Creating Timed Content with an Expiry Date
Another interesting way you can work with dates and times in WordPress, is to create scheduled or timed content. Typically this content is only available for set periods of time, before it’s automatically archived and no longer available to your visitors.
Some examples of uses for this could include limited offers, where you provide a discount on your products or services for a set period of time. Or maybe your blog includes predictions, forecasts, or announcements relating to future events. As this content is no longer needed after the event has occurred, managing the visibility of the post or page with a scheduling tool can automatically remove it from your site.
Whatever your reasons, whether you want to restrict access to an entire post, or just a portion of it, there are two free plugins that can help you easily achieve this. We will now take a look at two of the options that are available, in order to demonstrate how you can create content on your blog that automatically expires after a set time and date.
Post Expirator
Post Expirator is a free plugin that gives you the ability to set your posts and pages for automatic expiration on a certain time and date. Once the plugin has been activated on your site, a new control box is added to the WordPress post and page editor screens. From this control box, you can enable post expiration, and then set the time and date of expiry.
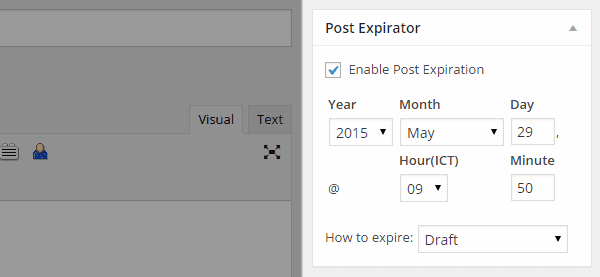
Set content expiry dates with the Post Expirator plugin
When creating an expiration date, you can choose how the post expires. These options include changing the post status to draft, private, or simply deleting the post and moving it to the trash. Alternatively, you can change the category of the post upon expiration.
If a visitor tries to access an expired post, for example by following an old link, they will be presented with a page not found 404 error. If you haven’t done so already, now would be a good time to create a custom 404 error page for your WordPress website. This can then help you to avoid confusing any new visitors attempting to reach an expired page.
Through the plugin settings page you can set a default expiration for all new posts. You also get the option of automatically inserting the time and date of expiration into the post content. This gives your visitors a warning that the post or page they are viewing will no longer be available past a certain point in time.
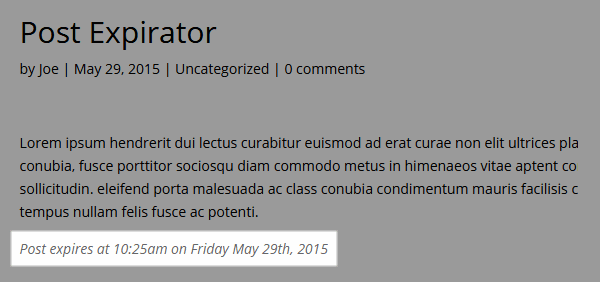
Post Expirator message
Scheduled Content
If you want to expire portions of a post or page, rather than the entire article, then the free Scheduled Content plugin might be a better option for you. With this plugin installed on your website, you can place the content you want to control inside the shortcode.

Scheduled Content shortcode
The shortcode parameters give you the ability to hide and display the content, according to your preferences. This allows you to display the content until a certain time and date, or reveal it after a set point in time.
The Post Expirator and Scheduled Content plugins can be used together on the same website. This gives you plenty of options for how you automatically control the visibility of your content.
Display a Countdown Timer
If you’re launching a product or service, or hosting an event, then using a WordPress countdown timer plugin is something you might like to consider.

WordPress Countdown plugin premium timer
The free WordPress Countdown plugin and its premium alternative, is a tool that gives you an easy way to display countdown timers on your website. The plugin includes a handy post editor button for adding timers to your content, as well as a widget for displaying them in your sidebar areas.

WordPress Countdown Plugin free timer
While the above free countdown timer doesn’t feature the most attractive design, it is very easy to set up. Upgrading to the $13 premium option gives you access to a much bigger selection of countdown timer designs.
If you want to build anticipation in the lead up to an important date, then adding a countdown timer to your blog is a great way to do so.
Displaying a List of Event Dates
Displaying a list of upcoming events is another way you might want to work with dates on your WordPress website. If you want to display any kind of list of dates on your site, this can be a handy tool to make use of.

Upcoming Events Lists plugin
One option for achieving this is to use the free Upcoming Events Lists plugin. This plugin adds a new Event post type to your website, allowing you to enter the details of each event. Each event can have a start and end date, as well as a location. You can also give each event a title, a description, and a featured image.

Event info
The published events can be accessed individually by your visitors. You can also display a set number of events in the sidebar of your website. This can be achieved by using the included Events widget.
Another similar plugin, is the Very Simple Event List plugin. This option works in a similar way, except that it includes a shortcode for displaying all the events on your website, in a single post.

Very Simple Event List plugin list of events
By choosing one of these plugins, your visitors can now quickly see your forthcoming events in either the sidebar, or a dedicated post or page on your website.
Conclusion
As you can see there are some interesting ways you can display dates and date related content on your WordPress website.
Changing your website to display the date when your post was actually last updated, rather than when it was first published, can really help improve the shelf life of your content. Whether you are publishing guides, tutorials, reviews, or other timely content, making it easy for your visitors to see when that information was last refreshed is something that is easy to implement and can deliver some quick wins.
While the other time and date features, such as expiring content and countdown timers, might be better suited to more niche projects, I hope this article has encouraged you to think how you can work with dates and time differently on your website.
What are some of the other ways you’d like to work with dates and times on your website? Have you made any interesting changes to the way your website handles this type of data? How important is it that the content you are looking for is up to date? Please share your thoughts in the comments below.
Article thumbnail image by Jane Kelly / shutterstock.com


I have a recipe blog and revive old posts to publish again. Currently, I chande the post to draft, schedule a date to publish in a few days and update. This allows ne to didplay the recipe on my home page as the newest post as well as allowing it to show in my RSS feed.
1) Is this the best way to achieve these results?
2) I run giveaways that expire. If I use the post expiration plugin, how will this affect the display with my related posts plugin? Would it show as an orphan on any posts that use it as related? Would I need to rerun the database collection for the plugin?
Thanks for all this info!
Awesome things! However, as some have said, I want to show both the publication date and last modified day, how can I do this? Any work around in the code to achieve this?
Thanks in advance!
two quick questions — one on topic and one slightly off.
1) I like the idea of including the original date and the last modified date. How could one modify the code you showed above to accomplish this?
2) I am also using the divi theme. But, I wish the dates were more prominantly displayed for each post. is there a way to make them appear the way they do on this very blog (a circle with the month and date next to the title)?
Hi Joe, great article. Thanks for that. If you turn off the date in the Appearance>Theme Options screen (which I did), will that turn off the date showing in Google search results?
What I mean is that when you do a Google Search, I want to turn off the date that shows up in the SERP results. Hope that makes sense.
Nice article. But don’t all wordpress themes let you just click “edit” on the post page? Then you can just change the date to current date instead of uploading another plugin.
Am I missing something? Thanks.
True. But if you don’t manually change the date on the Edit screen, the original publication date is still shown – even when you hit the publish button.
By editing your theme, the updated date is automatically displayed, whenever you edit your content.
Both approaches work, but the second one is more automated – this can be helpful when running a multi-author blog, or creating sites for clients who might forget to manually edit the post date each time they make a change to the content.
Hey! I am new to web designing and development. I am making a blog on WordPress to make my profile or you can say a portfolio. Your post helped me understanding the importance of time and date especially for a blog post. Thanks again.
Anyway to automatically update the publish date of a post to the current date and time?
Do mean, so that whatever the date and time the reader is viewing the post, that will be displayed as the published date? Not sure if that is possible to be honest.
Can I ask why you might want to do this?
Great article Joe! I do this on my blog. I change it to say “Last Updated on…” I work with a lot of evergreen content and I think it is only fair to both the reader and Google to know if I spent time updating the article.
Thanks Brian. Yes I think that is the best approach.
Thankfully as WordPress is so flexible, everyone is free to choose how they label the date information on their website.
It’s awesome that WP is so flexible that allows us to do all kinds of things like this. However, I consider annoying when I go to a post and it doesn’t have a date. Also: I think that displaying the “last updated” date as “published date” something a bit unethical.
I would rather see (as a reader) date and time for both: published and last-updated meta data. But at least, I think that the *real* published date, should not be missing from any respectable site.
There are some good tips here — thank you. Coming from a publishing background and not a web development one, I’m a little disappointed to see the first tip on changing the publication date to the last modified date, though, because the way it’s put into use doesn’t make it obvious that it’s a last modified date and not a publication date. Actual publication dates are very important, and it is deceptive to hide it simply for SEO reasons. Users don’t want to be tricked into thinking something is new, clearly. So the best thing to do is to display both the publication date and the last modified date, so that users can see that content is not new, but still fresh.
As someone who is much more of a web user than developer (I don’t work in this field, I just do it for myself), it’s tiresome having to figure out the real date of an article. Some sites don’t display a date at all in the hopes of making their content evergreen. That doesn’t work — I simply don’t trust sites like that…
Hopefully developers will soon realise that gaining user trust is most important. I bet Google agrees 😉
Thanks for informing about date time related plugins for altering publishing date, post expiry, scheduling content and events.
Thanks, glad you found it useful Mahesh.
Hi!
I want to the publication date from each post on my blog. Will this move affect the search engine rankings? I’ve read it somewhere the removing date from the article will boost SERP and the article will appear on the 1st page of search engines. Is this true?
Again, I doubt changing the date will have that big of a difference on where your posts are ranked – and I think its safe to say that removing the date won’t catapult an article to page one in Google I’m afraid.
Although if it does, please let us know!
Thank you Joe for a great article! I’ve been thinking about refreshing dates of some of my most popular content that I often update but didn’t dare.
Somebody told me that if I refresh dates of my older but popular articles then I would lose the high rankings they currently get.
Is it really so? Does somebody have some kind of experience on the matter?
Apparently Google has 200 ranking signals they look at to determine where to list a page in their results. So I doubt changing the date of a post will make a big difference either way.
However, from what I’ve read, it seems Google prefers to rank newer content for some topics, especially if you are covering news items.
Thank you Joe!
Hi Joe,
Useful tips, thanks! I have also been playing around with some of these. I did not modify Divi’s functions.php for my purpose however (as you know, you need to do this straight in the Divi theme and not your child theme and every time Divi gets updated, your edits may get lost) but in the single.php of my child theme (and only for a single category and its descendents) and the code looks like:
<?php if (in_category('tortenelem') || post_is_in_descendant_category('tortenelem')) echo 'Originally published: ‘,get_the_date(‘Y. F j.’),’ Last time updated on the site:’; ?> <span class="date updated" itemprop="dateModified" content="”>
This will print the original publish date of the article (sometimes years back) and the time I uploaded / last modified on the site. Google will pich up the latter in search results.
Thanks for that information!
Hm. My php was somehow partially stripped (quite understandably actually 🙂
Anyway, great article, thanks again!