One of the most-visited pages on a website is the About Me page. When a new visitor arrives on a site and likes the content, they tend to want to know who created it so they can put a face to the name. In addition to having a great About page, having an author bio image on each of your WordPress posts helps personally connect visitors with you, your content, and your overall online brand.
You can do this with a number of plugins or services, but one of the most prominent and ubiquitous is Gravatar, or the Globally Recognized Avatar. WordPress and a number of other sites and platforms use it to add author bio images and profile pictures to posts and comments, and it is by far the easiest way that you can add a face to the byline on your content.
Subscribe To Our Youtube Channel
A WordPress author bio image is a photo or picture that appears alongside your name. This might be a traditional head shot, or it could be an image that you want to associate with your brand, such as your company logo. Depending on the type of content you’re posting, you may even opt for something informal such as a cartoon or caricature. What matters is that the user sees you exactly as you want them to.

One of the easiest ways to add an author bio image to WordPress is through the service Gravatar. In a nutshell, you sign up for a Gravatar account and no matter whose site you’re on (your own or leaving a comment on someone else’s), the same author bio image will show up for people to easily recognize you.
Gravatar is a great set-it-and-forget-it service, too. You can use the same email on any number of sites or services and still not have to worry about having to set up a profile image. That feature alone is worth taking the time to set this up.
How to Set Up Your Gravatar
The first step is to check out your WordPress user profile. Make sure that the email registered to the WordPress account is the same one that you intend to use with Gravatar. That’s how Gravatar knows that you’re you when you post or comment somewhere. To check which email is registered, you just need to go to Users – Profile (1). You could see just Profile in the sidebar depending on your permissions .
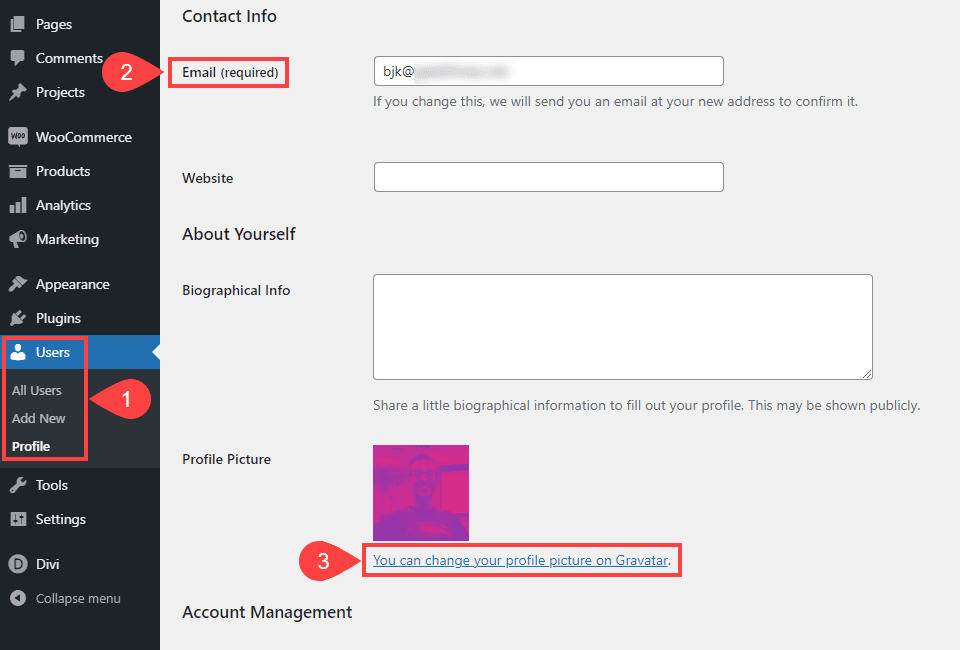
Scroll down until you find the Contact Info section and check what email (2) is registered to the account. If it’s not the one you want to use with Gravatar, change it and go through the confirmation process. Once that is done, you will see a section called Profile Picture. WordPress calls the author bio image your profile picture.
Most WordPress themes come with Gravatar integration of some kind, so click the link that says You can change your profile picture on Gravatar (3) to begin the process.
Note: the profile picture in the image above is my Gravatar that I have already set. This will be blank if you have not or if you are using an email not connected to your Gravatar account.
Register for and Upload Your Gravatar
Clicking on that link will take you to gravatar.com, so feel free to navigate there on your own at any point. If you have never used Gravatar before, you will need to press the Create Your Own Gravatar (1) button.
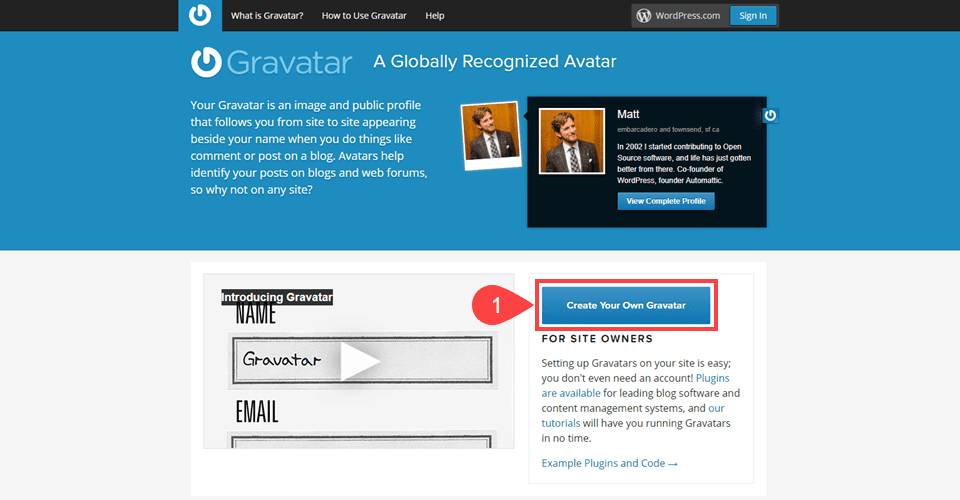
Doing so will prompt you to create a WordPress.com account. If you already have one, great! Just sign in with it. If not, it’s a simple process. But make sure that you use the email registered to your WordPress user account from Step 1.
You should see a variation of this screen. You can either Add a New Image (1) or choose to Add an Email Address (2). Since you’ve already connected the two accounts, you should be fine with the email. But it’s a simple form/confirmation to add an email.
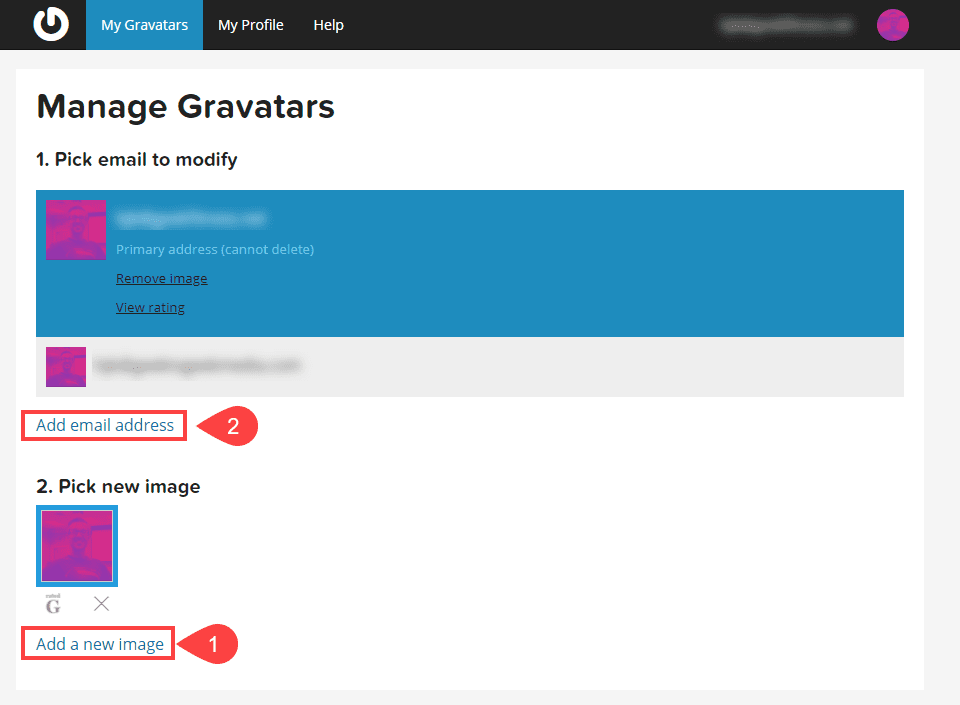
To add the WordPress author bio image using Gravatar, click Add a New Image (1). The next screen prompts you to upload an image (3).
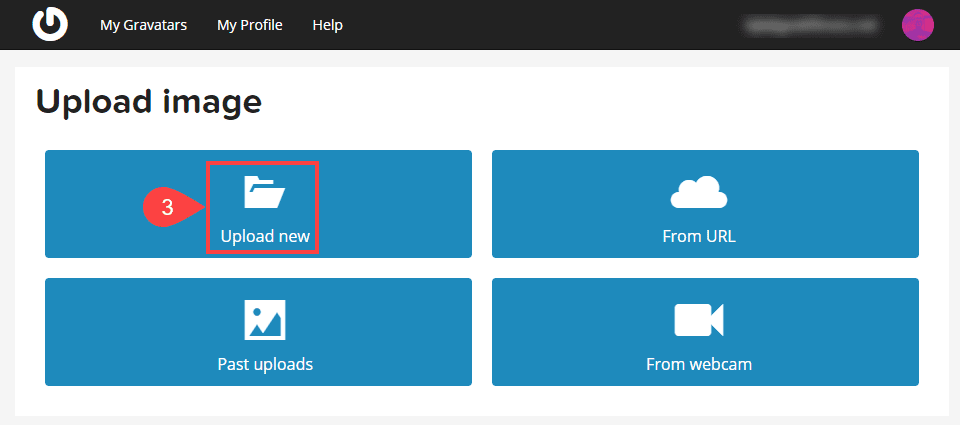
Click on Upload New (3) to start the process.
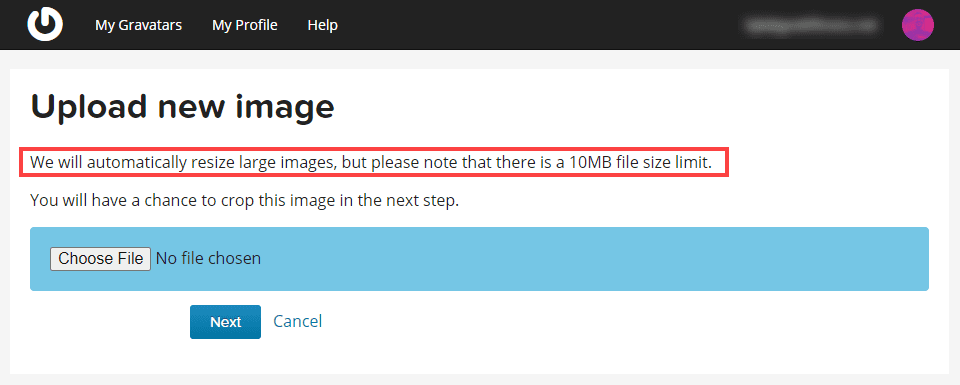
Just as a reminder, Gravatar images are square, so when you choose your author bio image for WordPress, make sure that you don’t upload a gigantic 16:9 HD picture. A small square is fine.
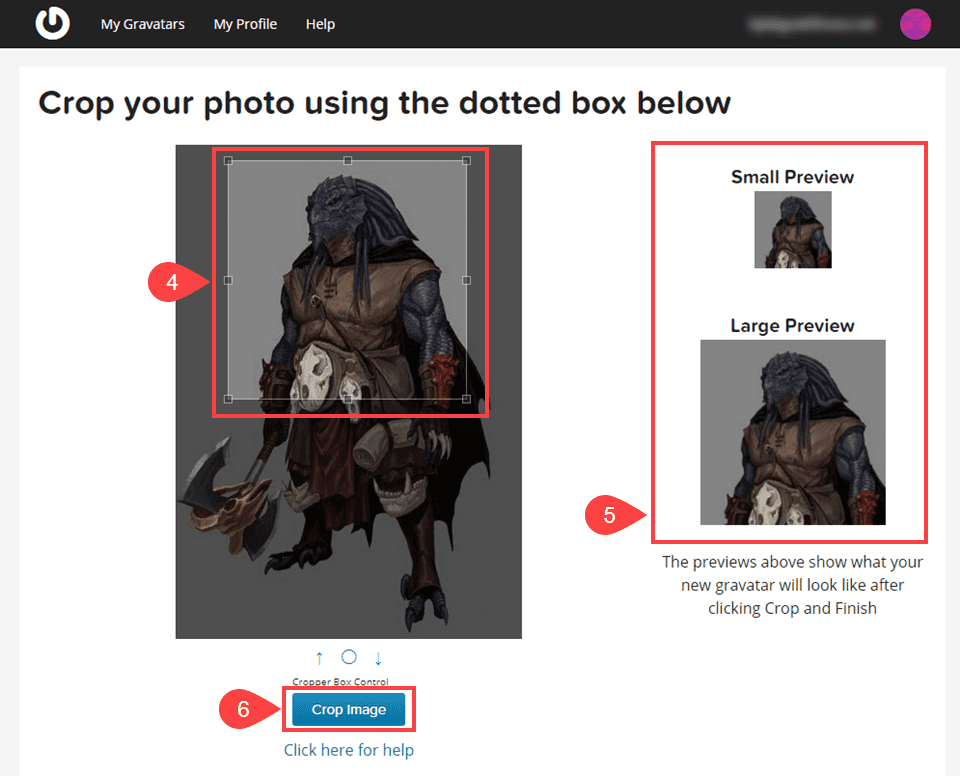
If, however, you don’t have an already-square image, that’s fine. You can edit and crop the picture (4) on the next page. Just resize the square and check the previews to the right (5) to ensure that your new author bio image is discernable at the smaller sizes at which it will be displayed. Then just press the Crop Image (6) button.
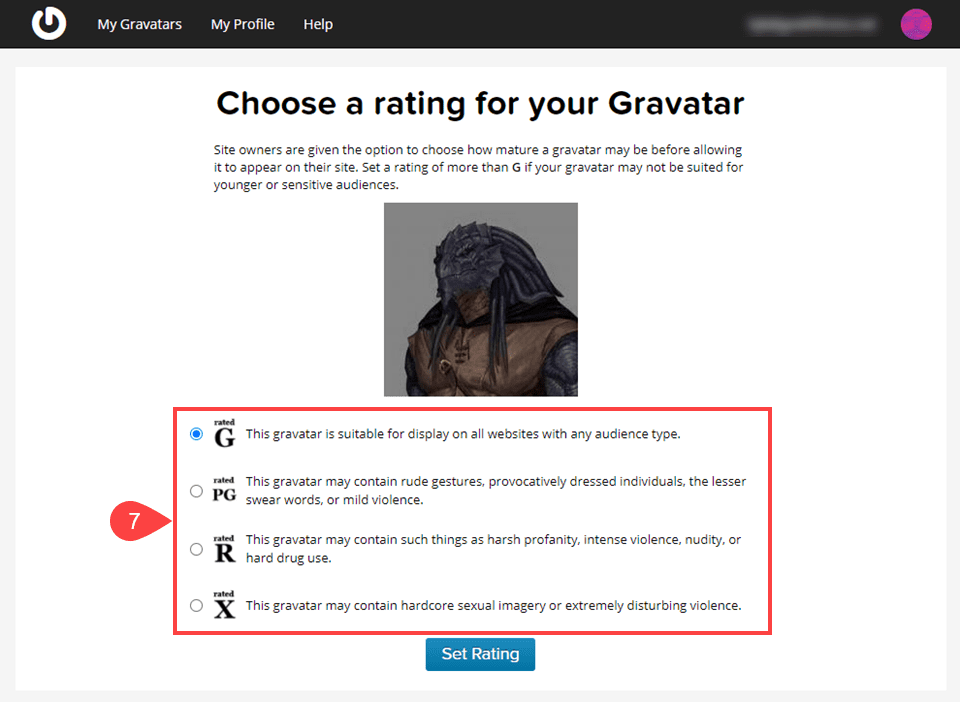
The only thing left is that you need to choose the rating for the photo so that your site and others can display the content only to those for whom it’s appropriate.
After that, your Gravatar is ready to go!
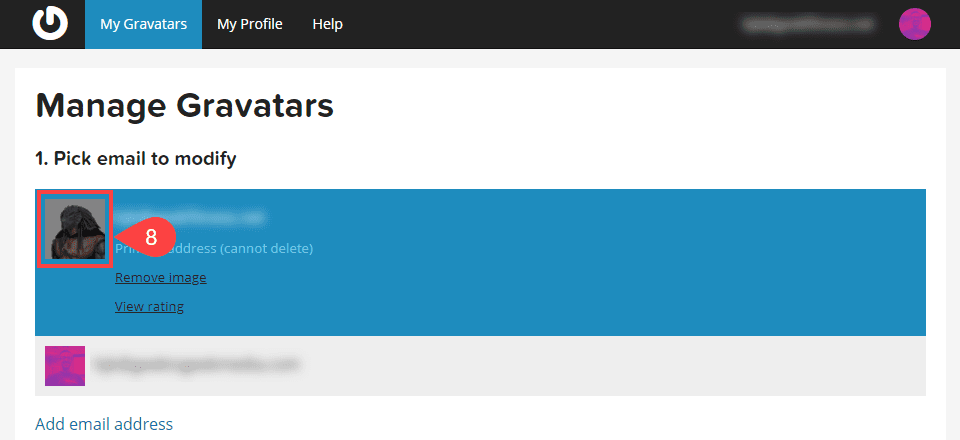
It will automatically populate to your website and anywhere else you’ve commented with that email address (that has Gravatar enabled, that is).

By adding an image to your author bio, you’re putting a face to your name. That’s a great way to connect you with your audience on a person-to-person basis. And, if you’re working on building a name for yourself, using Gravatar for your author bio image is a great way to do that.
With so much content being published online, it can be difficult to establish your identity. By adding a bio image to your WordPress profile, you immediately make yourself more recognizable – even if someone is posting similar content under an identical name.
Do you have any questions about adding an avatar to your WordPress author bio? Let us know in the comments section below!
Featured Image via Majid Nawaz / shutterstock.com


Hello B.J.
Well explained article. Now I got an idea about how to add an author bio on WordPress and to register and create an account on Gravatar.
I have one question. Once I register on Gravatar through an email id, can I change the email anytime?
You can! You can change the email on the Gravatar account or your WP account at any point, and as far as I know there’s no limit on Gravatar emails. Just make sure you change your WP user email, too, to line up with whatever is on Gravatar.