

Anyone with a WordPress site will, at some point, run into a situation where they need to alter some of the code. That isn’t to say that you are expected to be a web developer, writing out JavaScript and PHP like a pro. More likely, you will need to tinker with HTML and basic CSS, the fundamentals of any webpage, WordPress or not.
We have a great tutorial on the most common and beginner-friendly HTML codes you will need. Take a look and read up on that, too. This time around, we want to walk you through some of the most basic CSS snippets and ideas that will help you tweak your site into looking and acting exactly like you want it to.
Subscribe To Our Youtube Channel
1. Selectors, Classes, and IDs
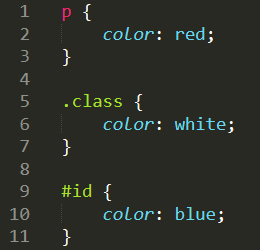
In CSS, the basis of everything is a selector. Simply put, it’s an abbreviation that tells the code what to target. You can target all the individual paragraphs on the site with a p {}. (Any code that applies to the selector is placed between curly braces.) In many cases, these element selectors will line up to the HTML tags you build the webpage with (such as p {} targeting <p> or h2 {} and <h2>).
After that, you have classes. These are specific types of selectors that you (or your theme/WP itself) define. If you want to target only the H1 headings for posts, you might have .post-title {}. A CSS class selector is noted by the dot/period in front of the selector itself. These are used to target site-wide elements, but not the foundational elements such as a simple H1. Note that base selectors don’t have a dot or other indicator, meaning they are the base HTML.
IDs in CSS work exactly the same as a class. Except for two minor differences. They are indicated by a # in front of the selector, and they are named for a single, specific instance (or limited number of instances) of an element that need specialized styling. Such as #email-subscribe-about-page {} or #email-subscribe-after-post {}. These IDs indicate that instead of targeting a specific type of element, they’re selecting individual elements themselves.
p {
	color: red;
}

.class {
	color: white;
}

#id {
	color: blue;
}
Other Selectors
Since we are discussing CSS basics, we aren’t going to dive into the more complex selectors, but they do exist. You can also target what are called pseudo-classes that may only apply to when a link is hovered over. Or an attribute selector that will only target elements that have a particular parameter attached to it. Also, you can enable the CSS to be relative to the position of an element using p::after and img::before.
These can be incredibly advanced and complex to get right, so for learning basics, they’re not something you should worry about. We did, however, want you to know there are much more specific ways you can interact with the document.
2. Colons and Semicolons
We mentioned above that all CSS code is between curly braces. Within those braces, however, each line of customization must end with a semicolon (;). That indicates to the browser that particular style is complete. Spacing doesn’t matter with CSS except for readability, but the semicolon itself is non-negotiable.
Also, between the actual CSS style and the value, you place a regular colon (:). Again, the spacing here doesn’t matter at all. You can have spaces on one side of it, both, or none, and the CSS will still render.
Note that while you can leave these spaces, it’s generally accepted that you shouldn’t. However, with most websites and themes offering CSS minification, all spaces are removed regardless.
3. CSS Comments
If you need to include documentation in the CSS code, you can do so with comments. CSS comments are opened and closed with /* and */ symbols. Commenting your code is important not only for you to return to the CSS later, but also for later developers. In general, CSS comments are used to indicate what a particular snippet does.
You can see above that the code just says what the next snippet does. It is very important to keep doing this, as your CSS file can get very convoluted over time.
/* This is what a CSS Comment Looks Like */

img {
	display:none;
}
4. !important
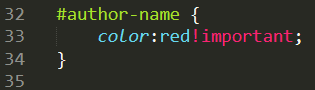
It’s hard to overstate how important the !important tag can be for CSS. Pun intended. It’s one of the most often used elements of CSS, but it’s also one of the most misused and overused elements, too.
You see, !important declares that whatever line it’s in is to override any other styling for that selector. Anywhere in the stylesheet. So if you wanted to make sure that a particular element always has a particular color, you would use !important to do so. Be sure to note that the entire !important tag goes between the value and the semicolon, not after.
#author-name {
	color:red!important;
}

#author-name {
	color:blue;
}
5. display: none;
This particular CSS snippet is one of the most important for newcomers to learn. All it does is make whatever element you target simply disappear. For example, if you need a page not to have a header menu, for instance, you would simply put this code in:
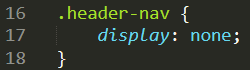
Doing this with a class that appears on nearly every page can completely remove it from the site. So you need to be careful about what you apply this to.
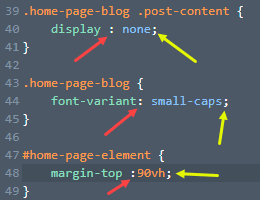
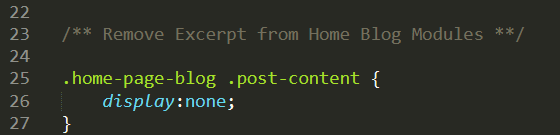
You can use this on specific WordPress Posts or Pages to remove individual elements such as the meta data from the post itself. In Divi, you can customize the individual blog module to not have the post excerpt by using this code:
.home-page-blog .post-content {
	display:none;
}
Very briefly, you may also use the visibility:hidden; CSS to remove an element from the screen. Keep in mind there is a difference between this and display:none; in your code.
The display;none; code will completely remove the element from the page. The browser will not render the element at all, as it has been removed completely. With visibility:hidden; the element still renders and loads into the page, but it is invisible. For all functional intents, it’s still there. The user just can’t see it.
So you would generally only use this if you needed the function for something, but didn’t want it showing. Like a tracking pixel or other pieces that would interact with the other elements on screen.
#code-module {
visibility:hidden;
}
7. Margin and Padding
Margins and Padding are misunderstood by newcomers to CSS. They appear the same at first, but once you dig in, you will see they’re entirely different.
Margin is the space around an element. It is invisible and transparent, and can even be negative. Having a larger left margin will push the element to the right. A larger top margin then pushes the element toward the bottom. A negative margin does the opposite. A negative top margin will pull the element up, for instance.
Padding, then, buffers the size of the element. Padding on the left will extend the element’s background to the left. It is essentially increasing its physical mass. Like adding a second sweater on a cold day. You get more padding on your body. You’re thicker than you were before. That’s how padding in CSS works, too, and because of that you cannot have negative padding.
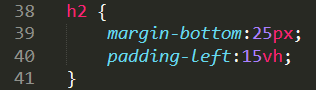
When using it as code, you can use either the default margin:15px; or padding:1vw; for uniform spacing around the selector. Or you can use the margin-top, margin-left, margin-right, or margin-bottom to affect only that side and have different levels for each. Padding, too, with padding-left, and so on.
h2 {
	margin-bottom:25px;
	padding-left:15vh;
}
8. Coloring Elements
Changing the color of various elements is one of those things that you may start tweaking from the first day you start a site. In CSS, you can define a color in two ways.
The main way is using its 6 digit hex code: #ffffff for white or #000000 for black, as examples. You can define any RGB color with a hex code, and if you don’t know them, don’t worry. Plenty of websites and tools exist to help with that.
The second way is using a predefined color word. Basic colors such as blue and black and red are predefined and you can use them without having to remember any hex codes. But if primary tones aren’t what you need, hex codes are the best bet.
Using the Color Codes
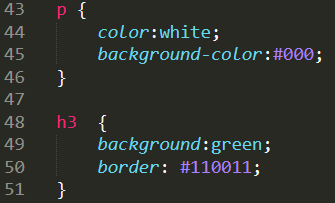
In terms of actually using the color codes, there are a number of ways. For any text that needs to be changed, simply use color:#ffffff; and any text within that selector will change. You can do the same for title headings like H1 and H2 with color.
p {
	color:white;
	background-color:#000;
}

h3	{
	background:green;
	border: #110011;
}
Changing things like background-color:red; or background:green; of an element are just as easy. Add a color value. You can also use color:#000; values for selectors such as a:hover that will change the color of a link when hovered over. Or even border:blue; to put a colored edge around any element you want.
Wrapping Up CSS Basics
CSS can be overwhelming. And you can do a lot more than swap colors around and show/hide elements. However, if you’re just learning CSS and how to manipulate a website via code, internalizing these particular basics will get you comfortable reading and tweaking code even if you’ve never opened up a code editor before.
What is some basic CSS that you use often on your sites?
Article featured image by darkwark / shutterstock.com


Not to be a jerk here but how does your example in #8 actually work out for you? Yes it’s nice to encourage learning some CSS but the tips in this article aren’t the way to go about it. First – it’s very poor practice to throw around important tags. And as in #8, there’s a system to doing this – calling out a color without a border style and border width won’t result in anything. It’s better to focus on the basics before jumping to shorthand styles and important tags. Also I would never combine units like vh with px in the same rule like #7. And visibility hidden has one giant difference to display – it’s not that the item is “there” – it’s that visibility still reserves the space in the UI.
/* To set link colors and styles in sections with colored backgrounds that don’t work with default link color — */
.lighttext a:link {color:#f1f1f1; text-decoration:underline;}
.lighttext a:visited {color:#f1f1f1; text-decoration:underline;}
.lighttext a:hover {color:#f1f1f1; text-decoration:underline; font-weight:bold;}
.lighttext a:active {color:#f1f1f1; text-decoration:underline; font-weight:bold;}
/* Remember: a:hover MUST come after a:link and a:visited in the CSS definition in order to be effective.
a:active MUST come after a:hover in the CSS definition in order to be effective. */
Interesting and useful article for those who are new to the CSS code.