The buttons on your website play a significant role in its appearance and usability. They help visitors navigate across different pages, and make it easy for them to perform important actions (such as downloading content or subscribing to your newsletter). It’s crucial that you have a simple yet effective way of inserting and customizing this essential element. Fortunately, the WordPress Buttons block can help.
In this post, we’ll explain how to add the WordPress Buttons block to your posts and pages, as well as how to use it. We’ll discuss each of its settings and configuration options, and provide you with some best tips for using the block effectively. Then we’ll wrap up by answering some frequently asked questions.
Let’s get started!
Subscribe To Our Youtube Channel
To add a button to your WordPress content, first navigate to the post or page where you want to insert it. Next click on the Add block icon (1), search for “buttons” in the text field, and select the Buttons option (2):
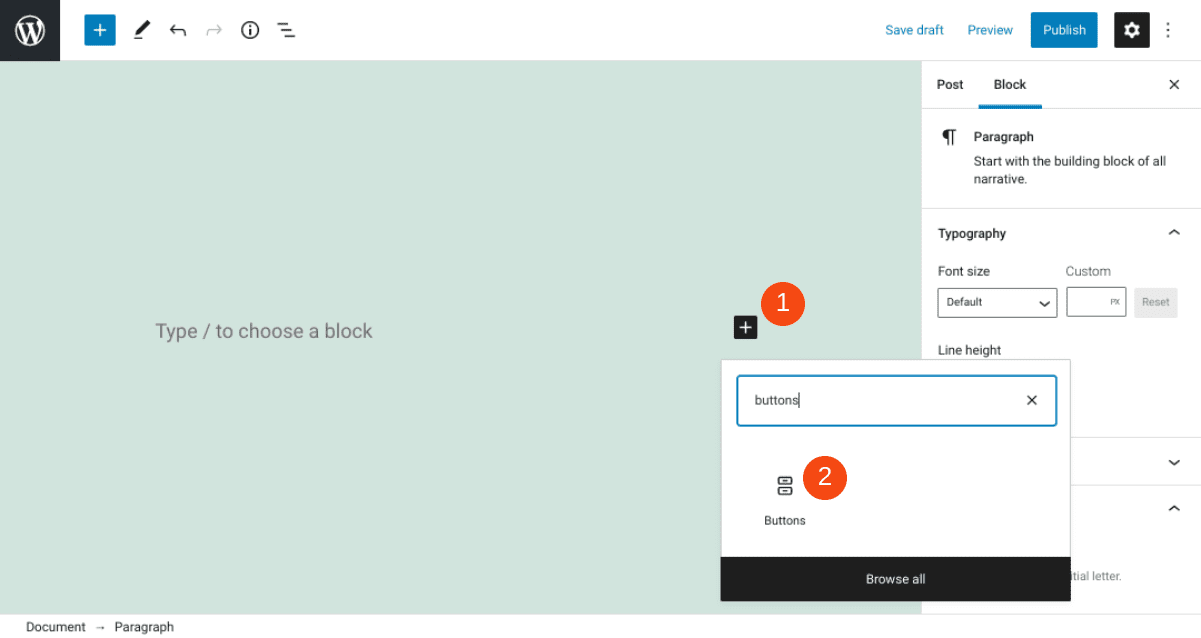
You can also add the Buttons block by typing “/buttons” into the text editor, and hitting Enter key on your keyboard. After inserting the block, you’ll get access to a new toolbar menu, which we’ll discuss below.
Each WordPress block comes with its own set of controls and configuration options. When adding buttons, there are quite a few options for linking, aligning, and styling them. We’ll start by exploring the text and link settings.
Text and Linking
When you first insert the Buttons block, a default button will be added with placeholder content:
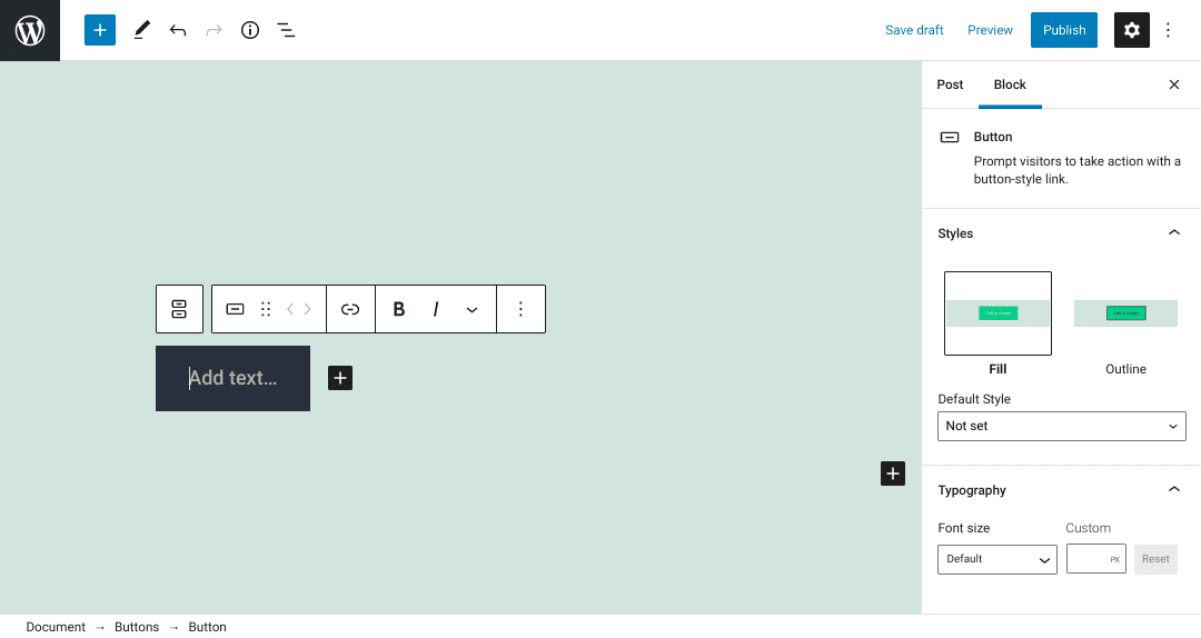
When you click on the text field, you can change the text to whatever you want the button to say. For example, you could add a Call to Action (CTA) such as “Learn More”.
The second toolbar option is the link icon, which you can use to determine where the button will direct users:
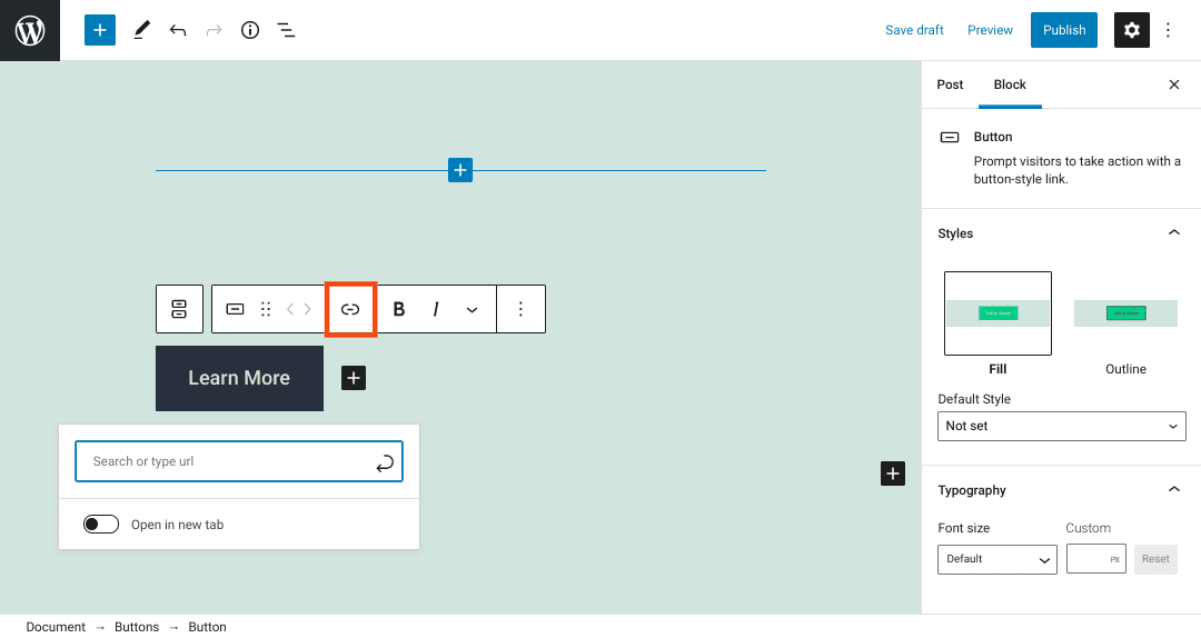
You can search for the internal page you want to link to by typing in the text field. You can also enter or copy/paste the URL of an external page. Then you can either select the arrow icon or hit Enter to insert your link.
Note that you can also toggle the Open in new tab option. This will determine whether users are taken to the new page within the same window, or in a new tab.
Once you add your button’s text and link it to the right destination page, you can begin to format and customize it. First, you can choose to bold or italicize the button’s text, using the respective icons along the toolbar:
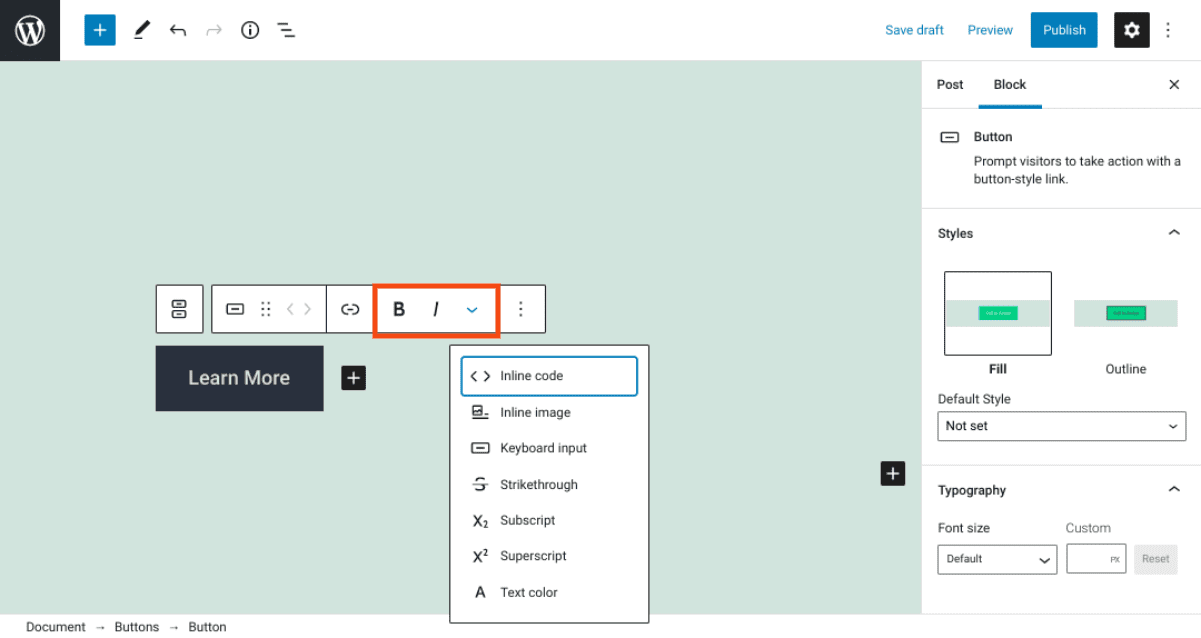
If you click on the down arrow, you’ll also see some additional options. For example, you can change the text color, and include subscript or superscript text.
Styles, Typography, and Color
The last step in customizing your button is to select its style, typography, and colors. You can do this all using the controls in the block’s sidebar menu:
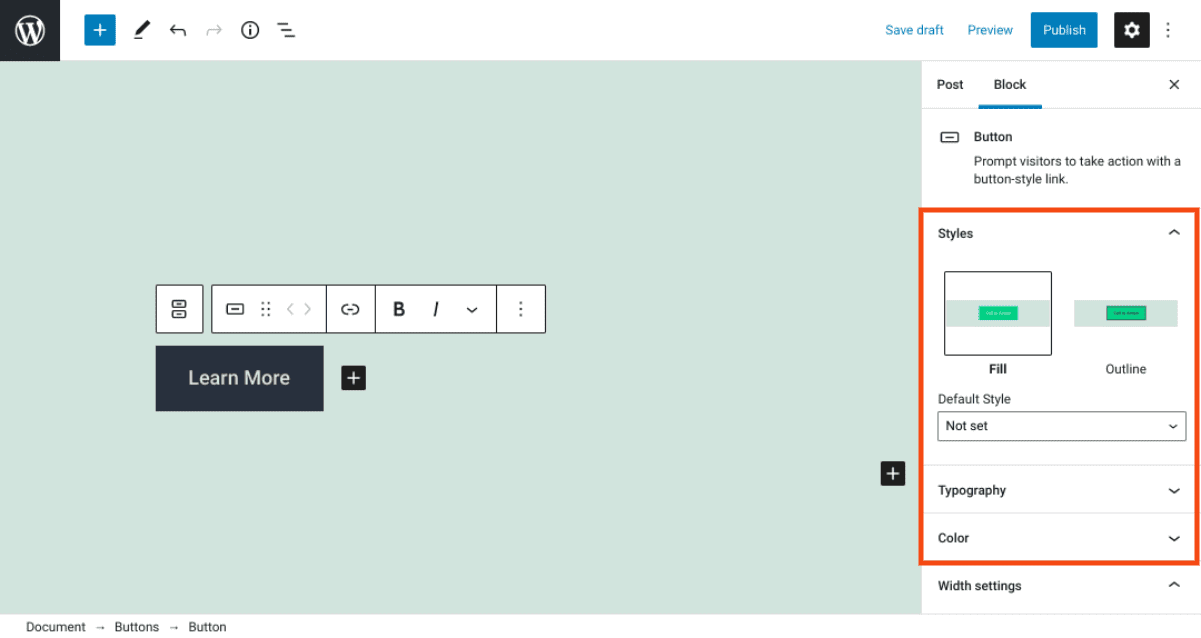
The two style options you have are Fill and Outline. Fill will make the button a solid color, whereas Outline will provide a transparent button with an optional colored border. You can make your selection by clicking on the icon with the preview, or selecting your desired look from the Default Style drop-down menu.
Next, under the Typography section, you can choose a font size for your button’s text:
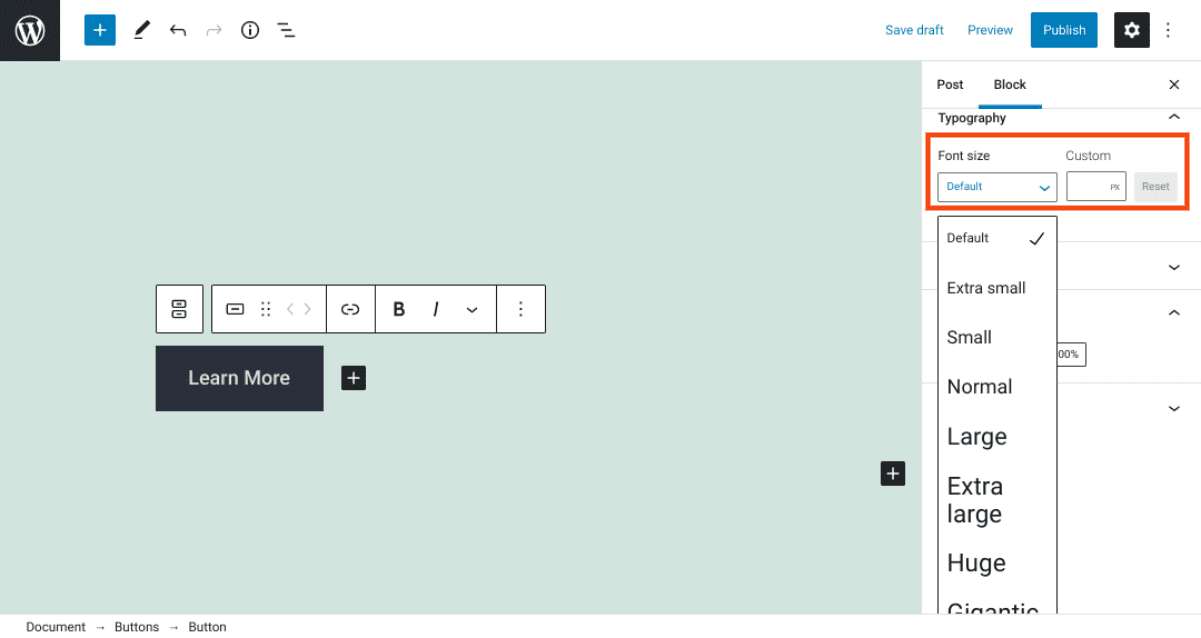
The options range from Extra small to Gigantic. You can also enter a custom size.
In the Color panel, you can find options for changing text and button colors. For both, you can choose from the list of available options or select a custom shade:
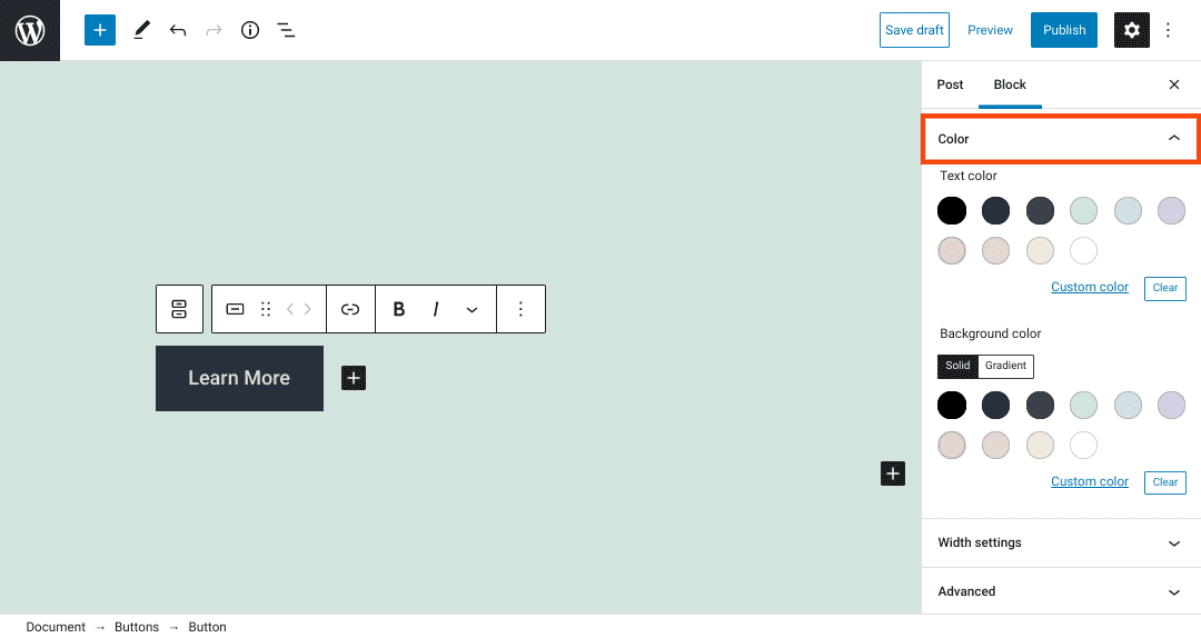
Note that for your background color, you can pick between Solid or Gradient:
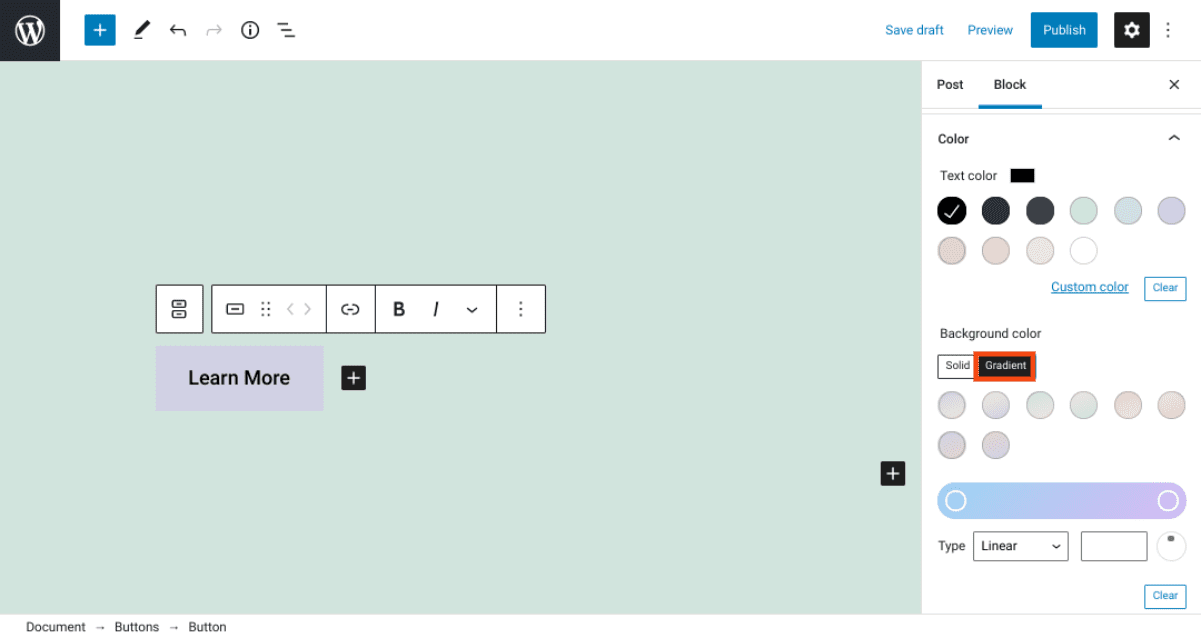
If you choose Gradient, you can select from various blended transition colors. You can use the color slider to determine the prevalence of each color, as well as the direction of the gradient.
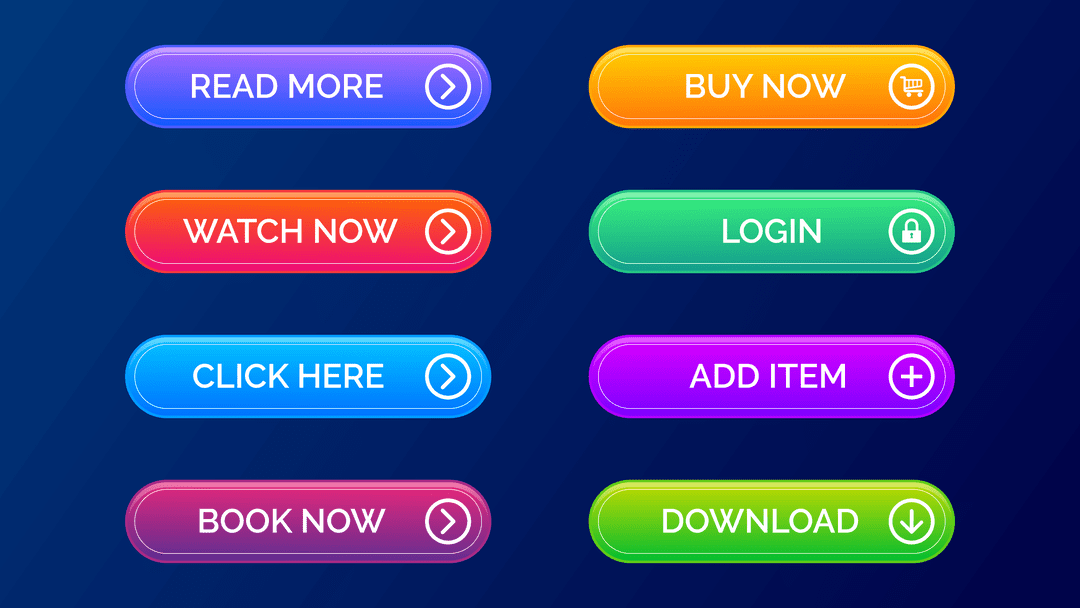
There are a lot of ways you can use buttons on your WordPress site, although they’re most commonly used as CTAs. These can include buttons prompting visitors to:
- Read/Learn More
- Buy Now
- Download
- Add to Cart
- Book Now
When you’re creating your CTA, or any other type of important button, it’s important to make sure it stands out on the page. Otherwise, your visitors may overlook it, and you might not get the level of engagement or conversions you’re aiming for.
Therefore, we recommend taking advantage of WordPress’ built-in button styling options when inserting them into your posts and pages. For example, changing the button background color to a shade that has high contrast with your theme’s background can make it more distinguishable.
Also, it’s smart to be strategic about the placement of your buttons. Typically, it makes sense to place them somewhere on the page where your visitors’ eyes will naturally fall. For example, you might add a button at the end of a blog post, when you’re ready to point users to a new page.
Depending on the purpose of your buttons, it may also make sense to add them in sidebars so they are constantly visible as users browse your site. This is an especially good idea if you’re creating a Contact or Subscribe button.
By now, you probably have a solid understanding of both what the Buttons block is and how to use it. However, to make sure that we’ve covered all the essential information, let’s review some of the most frequently asked questions about this block.
You can find this block by navigating to the post or page (or widget area) where you want to add a button. Next, you can either search “/buttons” and hit Enter, or click on the Add block icon and search for “buttons” in the text field.
The Buttons block lets you link to internal and external pages in a visually-distinctive way. You can insert a button that points visitors to another piece of content on your website or a third-party site, and customize it to look exactly the way you prefer.
You can add buttons on any of your posts and pages. What’s more, you can insert them wherever you have access to the Block Editor. For example, this means that you can often insert a button in your footer or sidebar (depending on your theme’s options).
Conclusion
Buttons are an important element of effective web design. They guide your visitors where they want to go, and help you increase engagement and conversions. Therefore, it’s essential to have a way of quickly and seamlessly inserting and editing them throughout your site.
As you now know, the Buttons block can make adding these elements to your site significantly easier. Once you insert the block, you can use the settings and controls to customize its appearance, and determine where visitors will be sent when they click on it. You can even add a custom button to your reusable blocks, so you can use it repeatedly across your site.
Do you have any questions about using the Buttons block? Let us know in the comments section below!
Featured Image via RobinKhan / shutterstock



Hi Will,
this was helpful!
What if when I want to add a button, it doesn’t even show in the widgets section?
Thanks!