If you run a blog on your WordPress website, it’s important to make your content easy to navigate. Fortunately, there are multiple methods you can use. One of them is to employ the WordPress Categories block. This block provides a simple way to dynamically display your blog’s categories in any block-enabled area – such as posts, pages, sidebars, headers, and footers.
In this post, we’ll explain how to add the Categories block to your content area, and explain its various settings and options. We’ll then provide some tips and best practices for using this block, before finally answering some frequently asked questions.
Let’s get started!
How to Add the Categories Block to Your Post or Page
Adding this block to your WordPress content is a quick and painless process. To get started, open the page or post where you want to use the block.
Next, click on the Add Block button, which is marked by a plus icon (1). Type “categories” into the search field (2), and then select the first option (3):
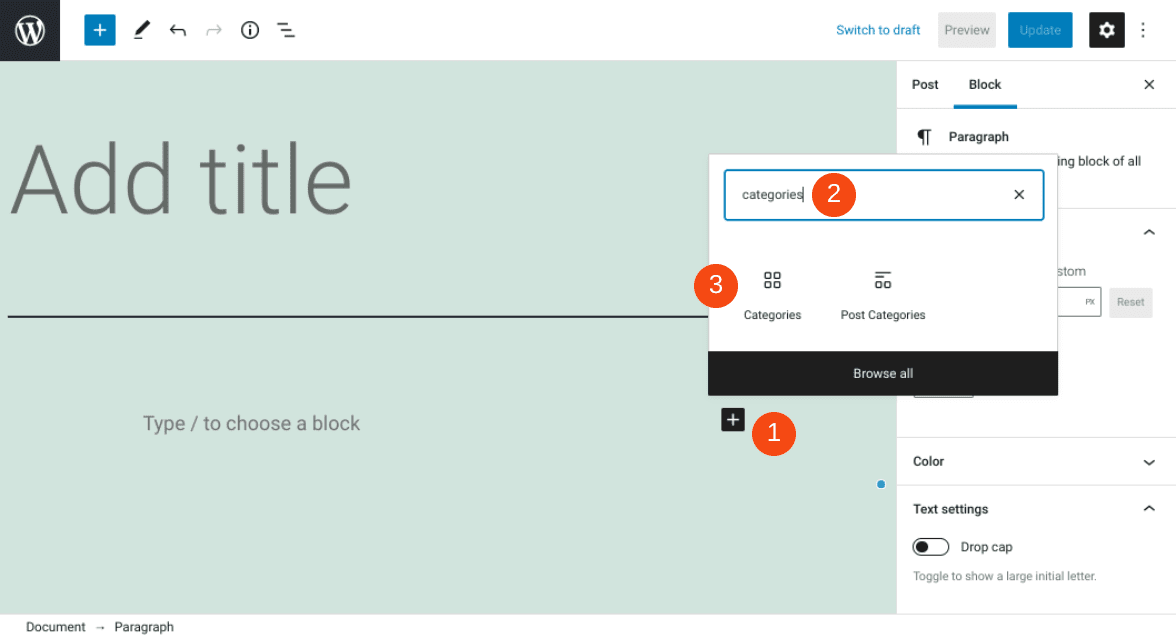
Alternatively, you can type “/categories” into any paragraph block in the editor. Once you hit the Enter key, the block will automatically be inserted into the page or post.
It’s important to note that the post categories that appear will reflect whatever categories you’ve already created and saved on your WordPress site. You can find these by navigating to Posts > Categories in your admin dashboard:
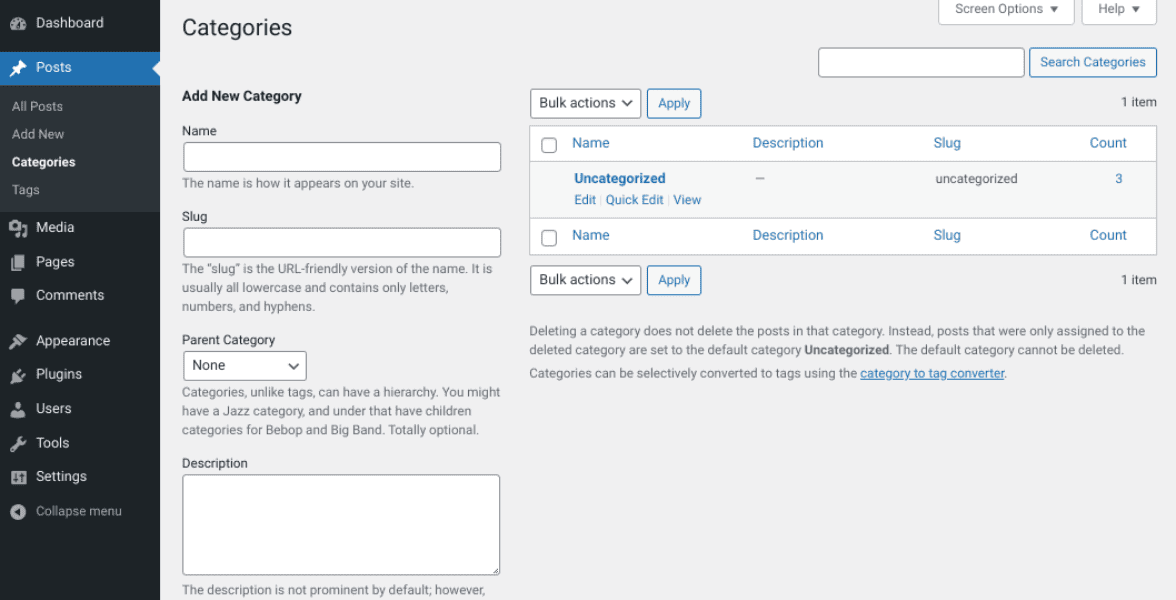
By default, WordPress adds Uncategorized as an option. However, you can delete this and add as many new categories as you want.
Every WordPress block comes with its own settings and controls. In the next section, we’ll explore each of the options for Categories.
Categories Block Settings and Options
Once you insert the block into a page or post, a toolbar will appear at the top:
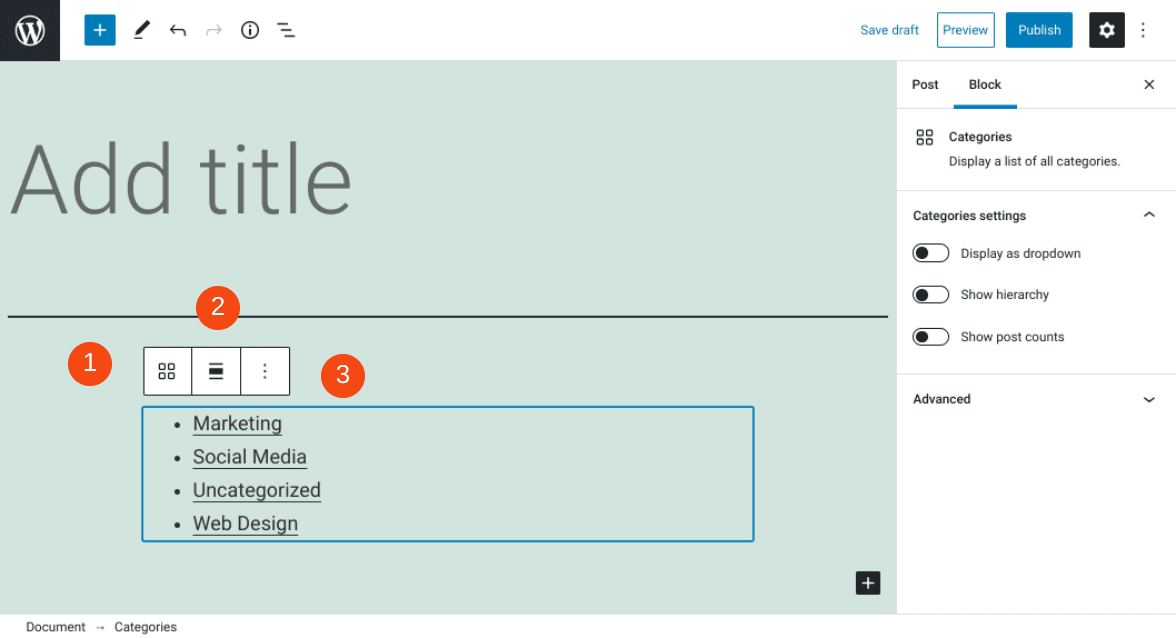
The first icon is Transform To. This option lets you to create Groups or Columns.
The second icon is Change Alignment. You can position the block to the left, right, or center of the page, and choose between “full” and “wide” width.
The third button is More Options. There you will find a menu of additional settings, including the option to add a block before or after this one, duplicate it, remove it, or add it to your Reusable Blocks.
Within the right-hand sidebar, you can find a few more controls under the Categories settings:
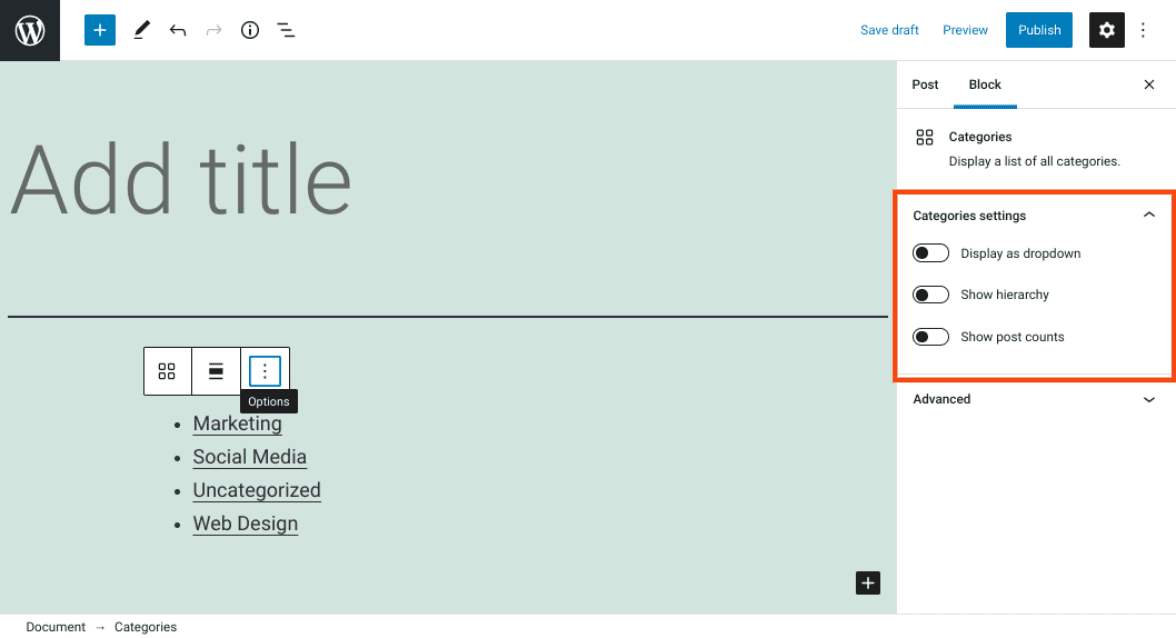
There are three options. The first lets you change the categories display from a bullet list to a drop-down menu. You may want to consider this option if you have a large number of categories, or if you’re simply looking to save space on the page.
The second icon enables you to apply a hierarchical structure. This can come in handy if you have parent and child categories. You can use this option whether you’re displaying the list in bullets or as a drop-down menu.
The third icon lets you display the number of posts in each category. The number will appear next to the category link in parenthesis.
Finally, there’s an Advanced section. This is where you can add your own custom CSS.
Tips and Best Practices for Using the Categories Block Effectively
The Categories block is simple and easy to learn. However, there are some tips and best practices you may want to keep in mind in order to use it effectively.
First, it’s important to understand what categories are and what purpose they serve. As a Content Management System (CMS), WordPress provides multiple ways to organize and group your content. One of them is to use taxonomies.
By default, the two taxonomies that WordPress comes with are categories and tags. Both features are essential to your site’s User Experience (UX) and Search Engine Optimization (SEO).
You can use a block to display your chosen categories on just about any type of website, from a personal blog to a large e-commerce shop. However, this feature is particularly useful when you have a content-heavy website, and you want to make it easier for visitors to explore your blog posts.
For example, categories are commonly displayed on business and agency sites that regularly publish articles. This is also a handy tool when you’re running a site where people go to get news, tutorials, resources, and so on.
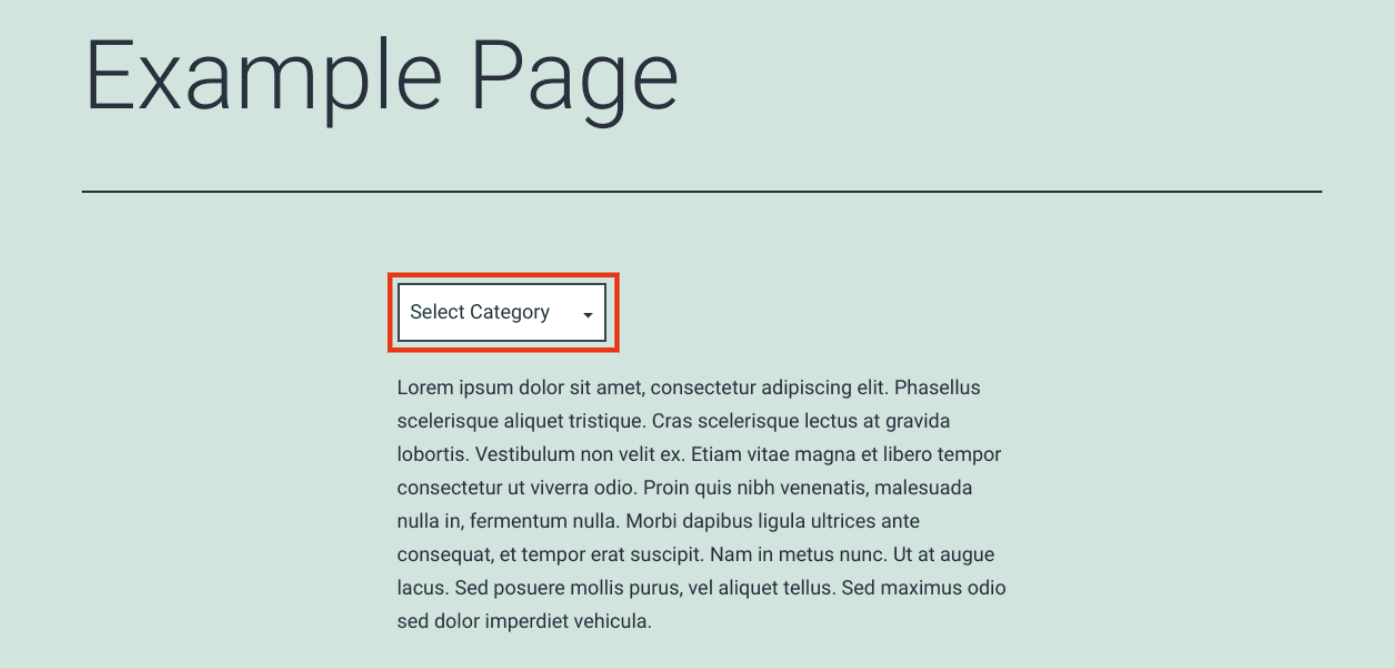
When placing a Categories block on your website, there are multiple ways you can draw attention to it. The key is to be strategic about where on the page you place this element. For example, if you want to display it as a drop-down menu, you might consider inserting it on top of your posts, so it’s one of the first things readers will see:
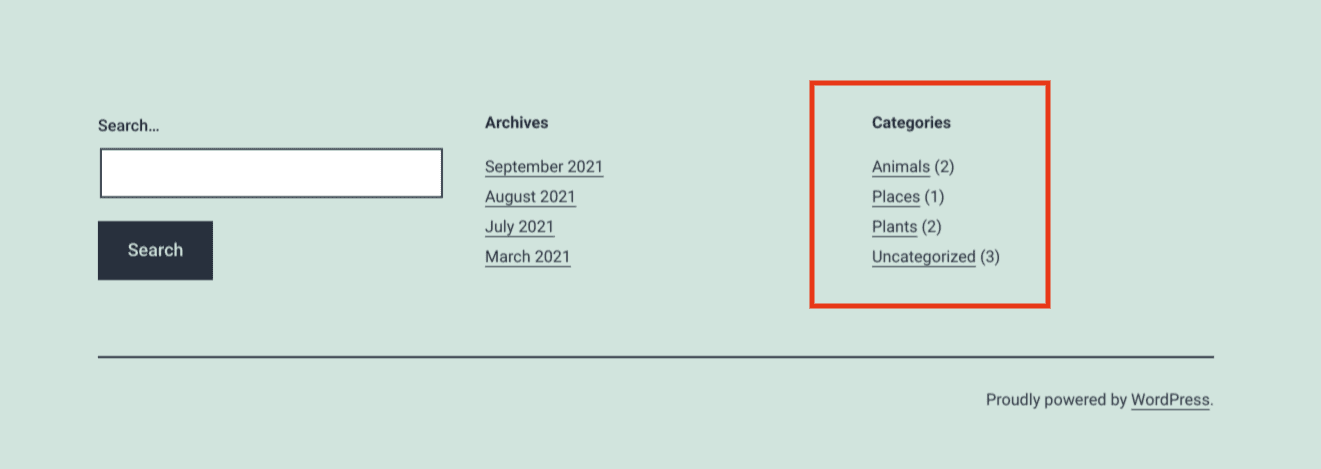
You could also add the Categories block to your site’s footer. This can be useful if you have a minimalist design, or want to avoid encouraging readers to click away from the current page too soon:
If your WordPress theme enables you to, you may want to display the Categories block within your site’s sidebar. This can be the perfect way to ensure that the list of links is accessible without being the main focus of the page.
To keep navigation as simple and seamless as possible for your audience, we also recommend using the Categories block alongside the Search block, rather than in place of it. While the two elements have similar functions, the latter is more helpful for users who are looking for very specific content, rather than just an overarching topic.
Frequently Asked Questions About the Categories Block
At this point, we’ve covered just about all there is to know about the Categories block and how to use it. However, to make sure we cover all the key information, let’s take a moment to answer some frequently asked questions.
How Can I Find the Categories Block in WordPress?
You can find this block by navigating to the page or post you want to insert it into, and then clicking on the Add Block button. Then you can search for “categories” and select the first option. Alternatively, you can type “/categories” into the paragraph block of the editor, and hit your Enter key.
What Does the Categories Block Do?
Categories are part of WordPress’ built-in taxonomy system, which is used to organize and describe content. This block lets you dynamically display a list of your categories within any block-enabled area on your WordPress website. This makes it easier for readers to navigate your posts in order to find what they’re looking for quickly.
Can I Add the Categories Block Anywhere in WordPress?
You can add this block anywhere in WordPress that gives you access to the Block Editor. Therefore, you can insert the block into any page or post. Also, you can add it while editing your WordPress widgets, along with some custom post types.
Conclusion
Keeping your content accessible and well organized is an important part of managing any website. WordPress offers a handful of features to help you do this, including the Categories block.
As we’ve discussed, this element lets you dynamically display a list of your blog categories across your website. This includes your pages, posts, headers, and footers. You can quickly add it to a page by clicking on the Add Block button, and then searching for “categories”. After that, you can adjust the alignment to place and position it wherever it looks best on the page.
Do you have any questions about using the Categories block? Let us know in the comments section below!
Featured Image via Bibit Unggul / shutterstock



As I am currently learning WordPress. And keep searching for it. And I really like your article. And it turned out to be quite helpful for me. Thanks for sharing.
You’re welcome, Harry. I’m glad you found it helpful 🙂