Featuring a specific product in your online store can be an effective way to increase your sales. For instance, you may want to showcase your newest item on your home page, or promote it in a blog post. Fortunately, the Featured Product WooCommerce block enables you to easily highlight any product on your WordPress site.
In this article, we’ll take a closer look at the Featured Product block and show you how to add it to your site. We’ll also discuss some best practices for using this feature effectively.
Let’s get started!
- 1 How to Add the Featured Product WooCommerce Block to Your Post or Page
- 2 Featured Product WooCommerce Block Settings and Options
- 3 Tips and Best Practices for Using the Featured Product WooCommerce Block Effectively
- 4 Frequently Asked Questions about the Featured Product WooCommerce Block
- 5 Conclusion
How to Add the Featured Product WooCommerce Block to Your Post or Page
The Featured Product block enables you to showcase a particular item on a post or page. This can encourage customers to add that product to their shopping carts, which may result in higher profits for your WooCommerce store.
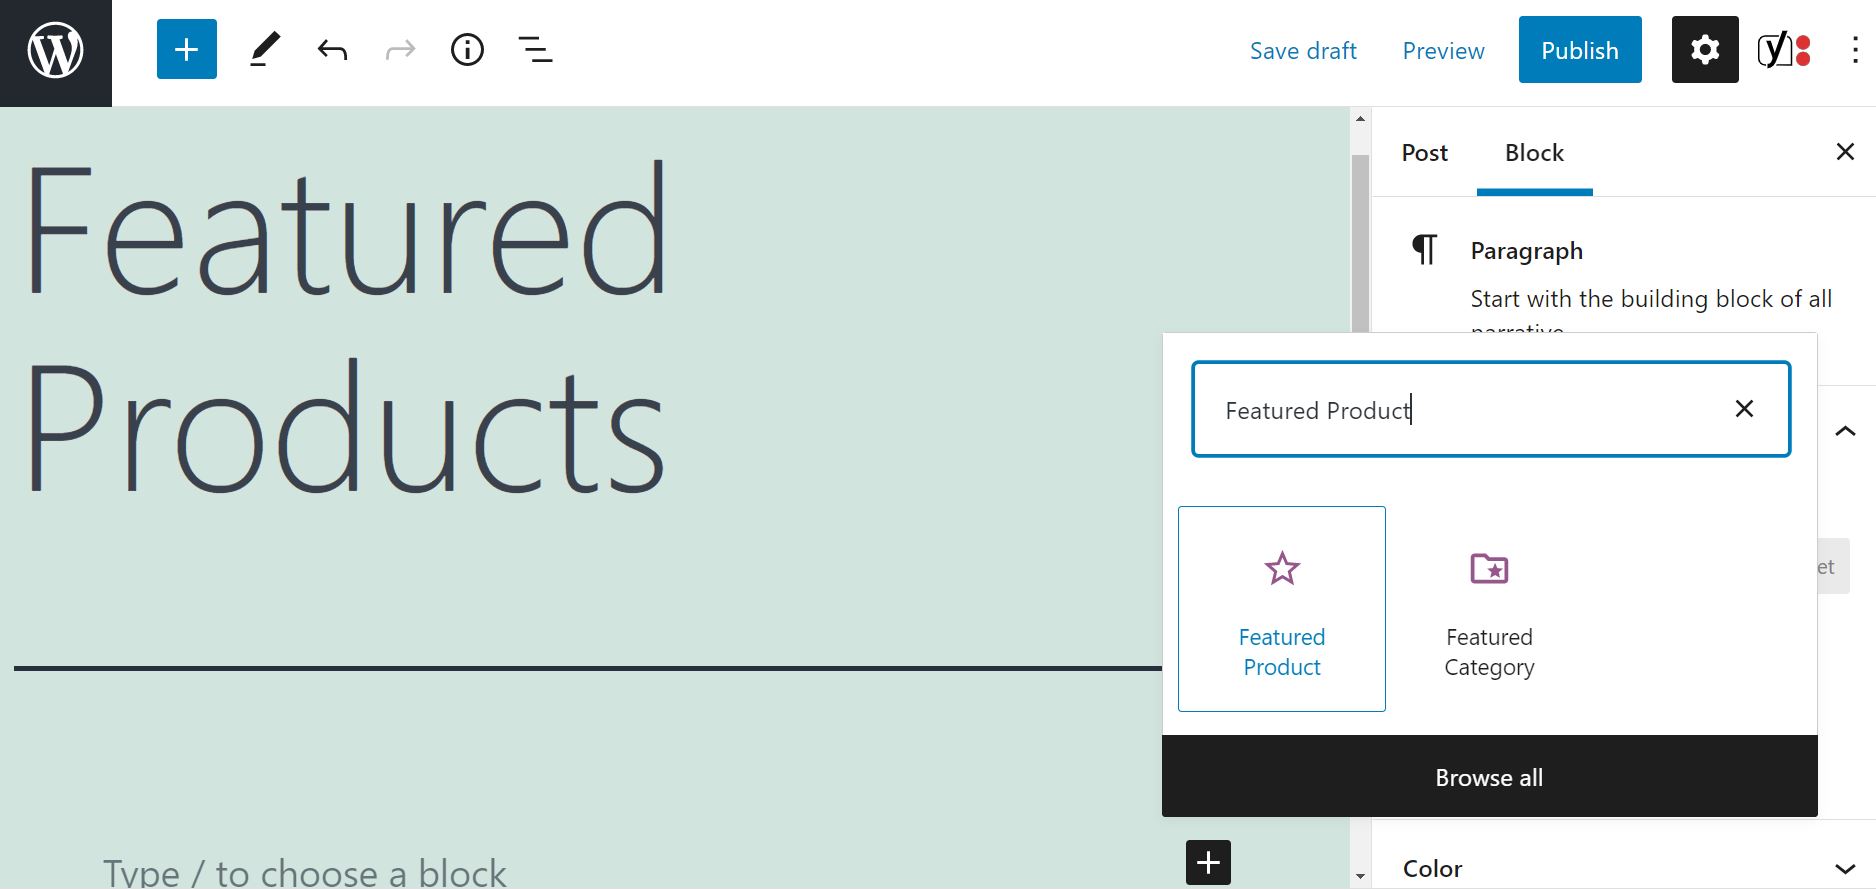
To use this block, open the page or post where you want to display your special item. Then, click on the plus sign (+) to add a new block, and use the search bar to look for the “Featured Product” option:
Once you insert the block, you’ll be asked to select the product you want to display. You can choose an item from the available list, or look for it using the search bar:
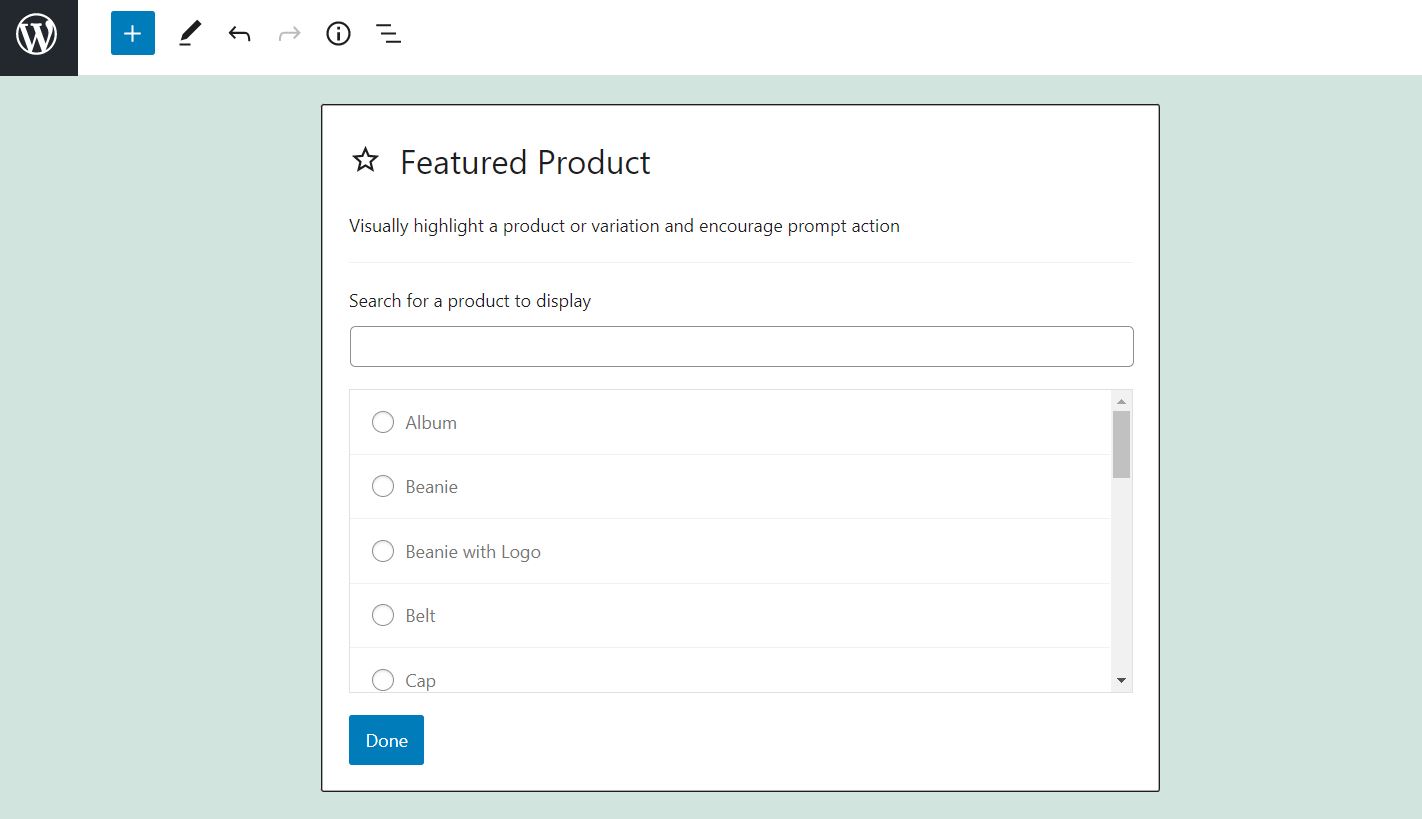
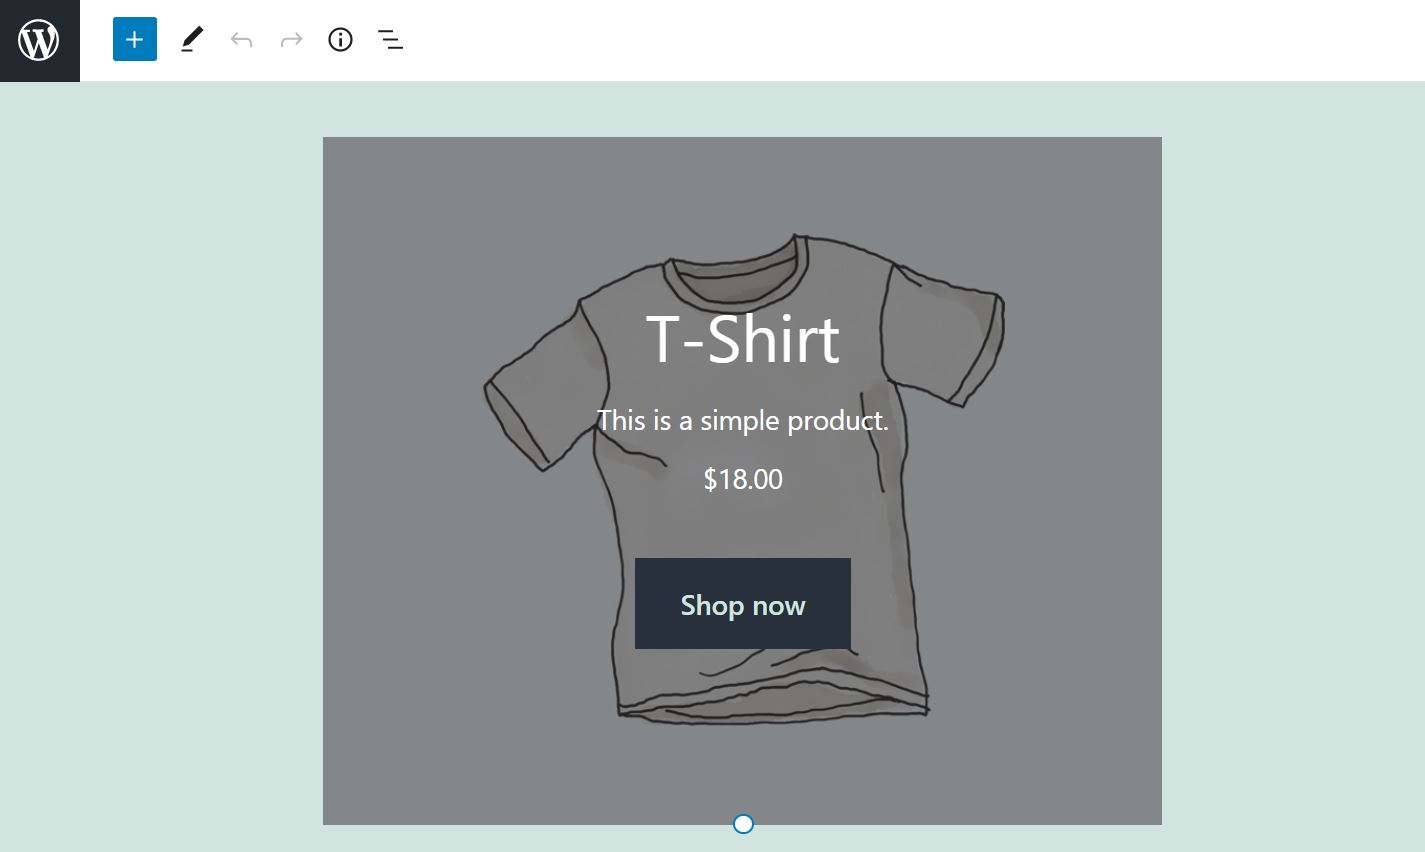
Select your product once you’ve found it, and click on Done. The block will then display your selected item:
Note that this feature is only available if you’re using WooCommerce. If the plugin is activated on your site, you’ll also get access to all the other WooCommerce blocks in the Block Editor.
Featured Product WooCommerce Block Settings and Options
If you like, the Featured Products block can be customized so that it better fits your site’s functionality and style. If you click on the block, you’ll get a toolbar with six main settings:
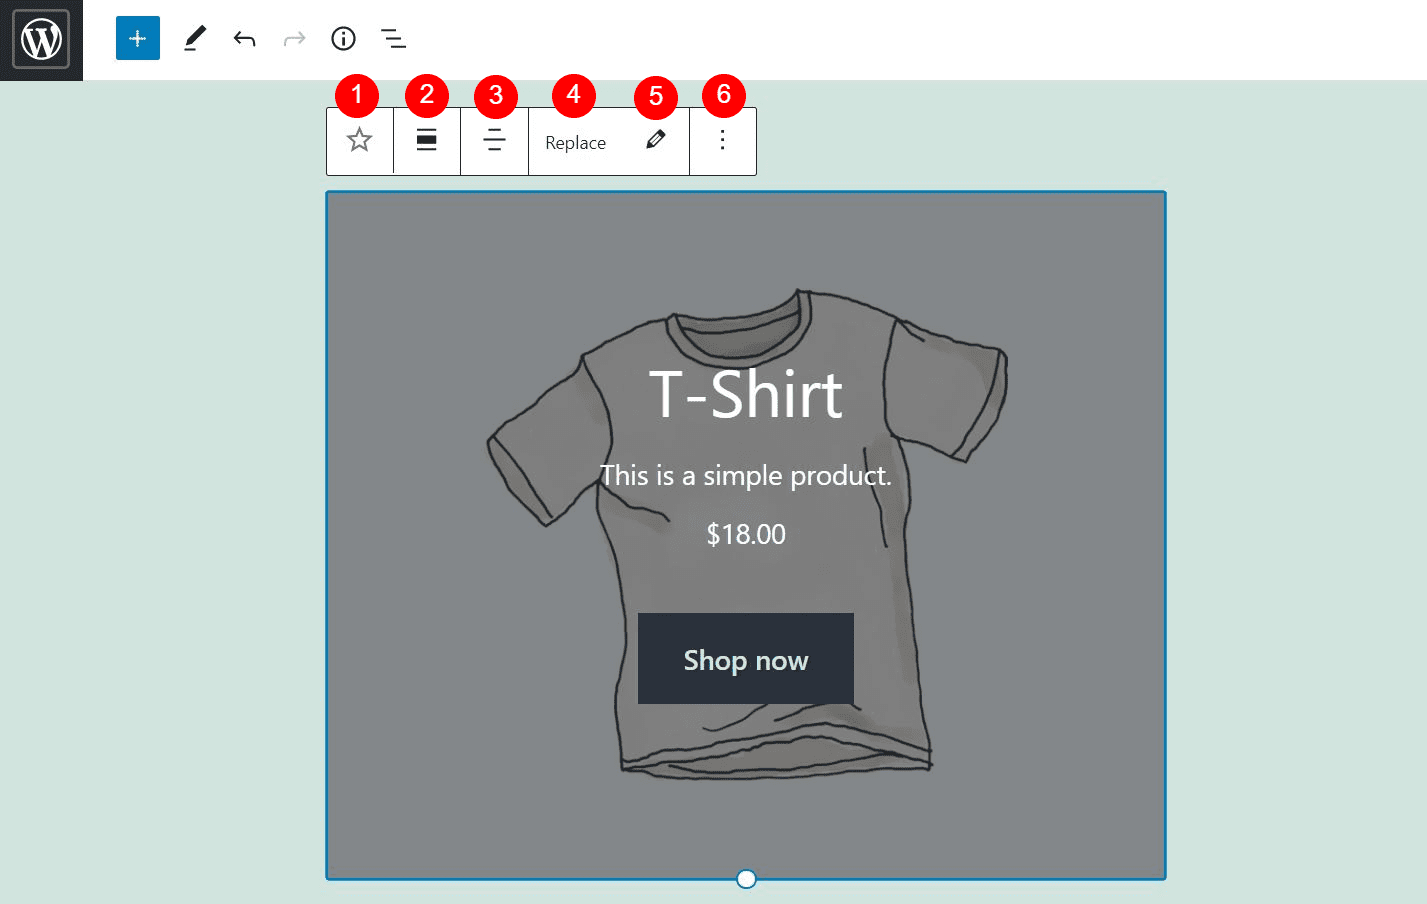
Here’s a quick overview of each option:
- Change block type or style: You can transform this element into a Group or Columns block.
- Change alignment: You can select a full width or wide width layout.
- Change text alignment: You can align the text within the block to the left, right, or center.
- Replace: You can change the image within the block.
- Edit: You can use this option to replace the featured product with a different item.
- Options: You can copy the block, group it, add it to your Reusable Blocks, or remove it.
Furthermore, you can modify the Call To Action (CTA) button within the block. All you need to do is click on it, and a dedicated toolbar will appear:
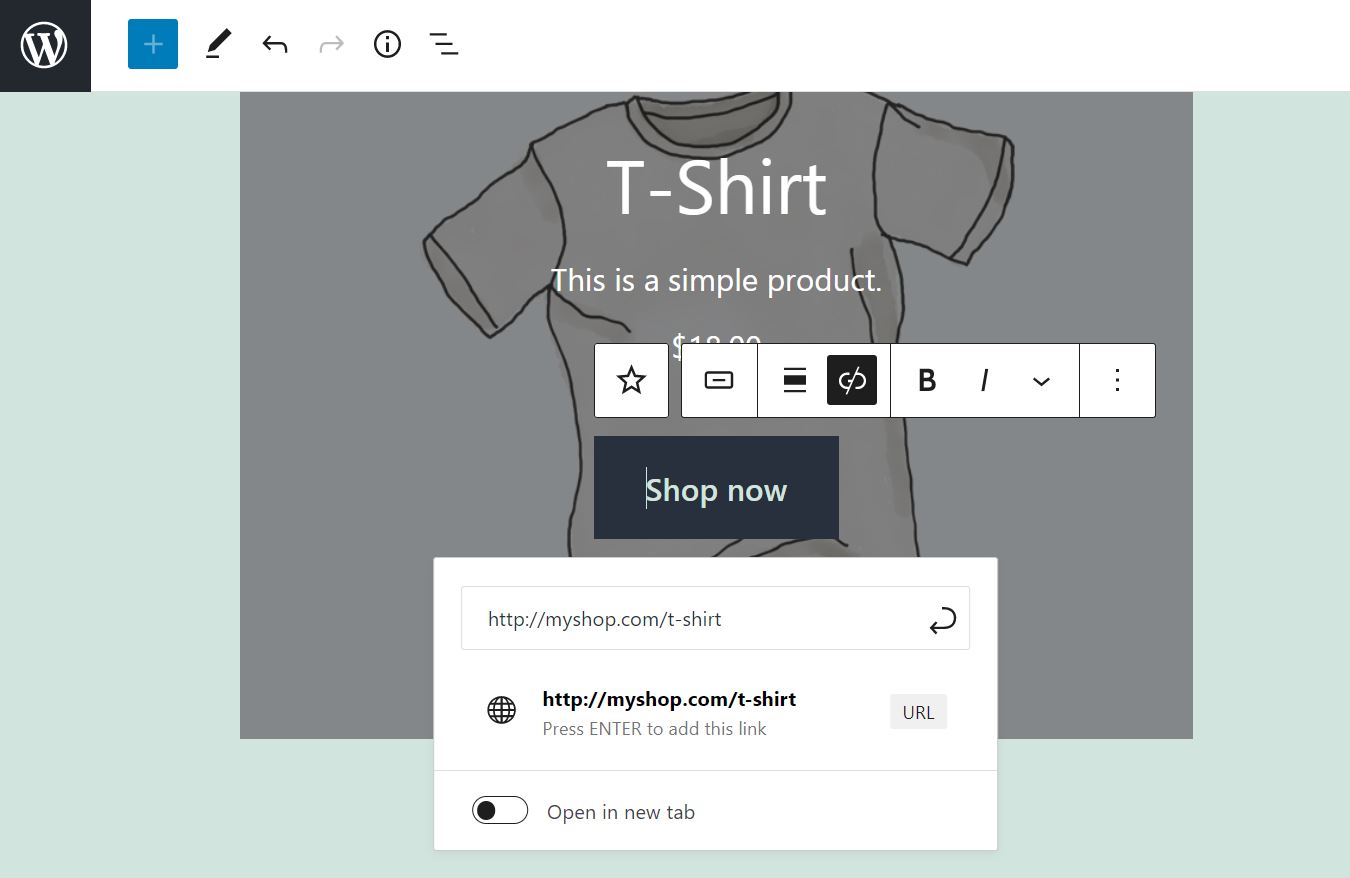
For instance, you edit the text on the button, change its alignment, and format its style. You can also edit the link to the product page, and set it to open in a new tab.
You can also find more settings for the CTA button in the right-hand panel:
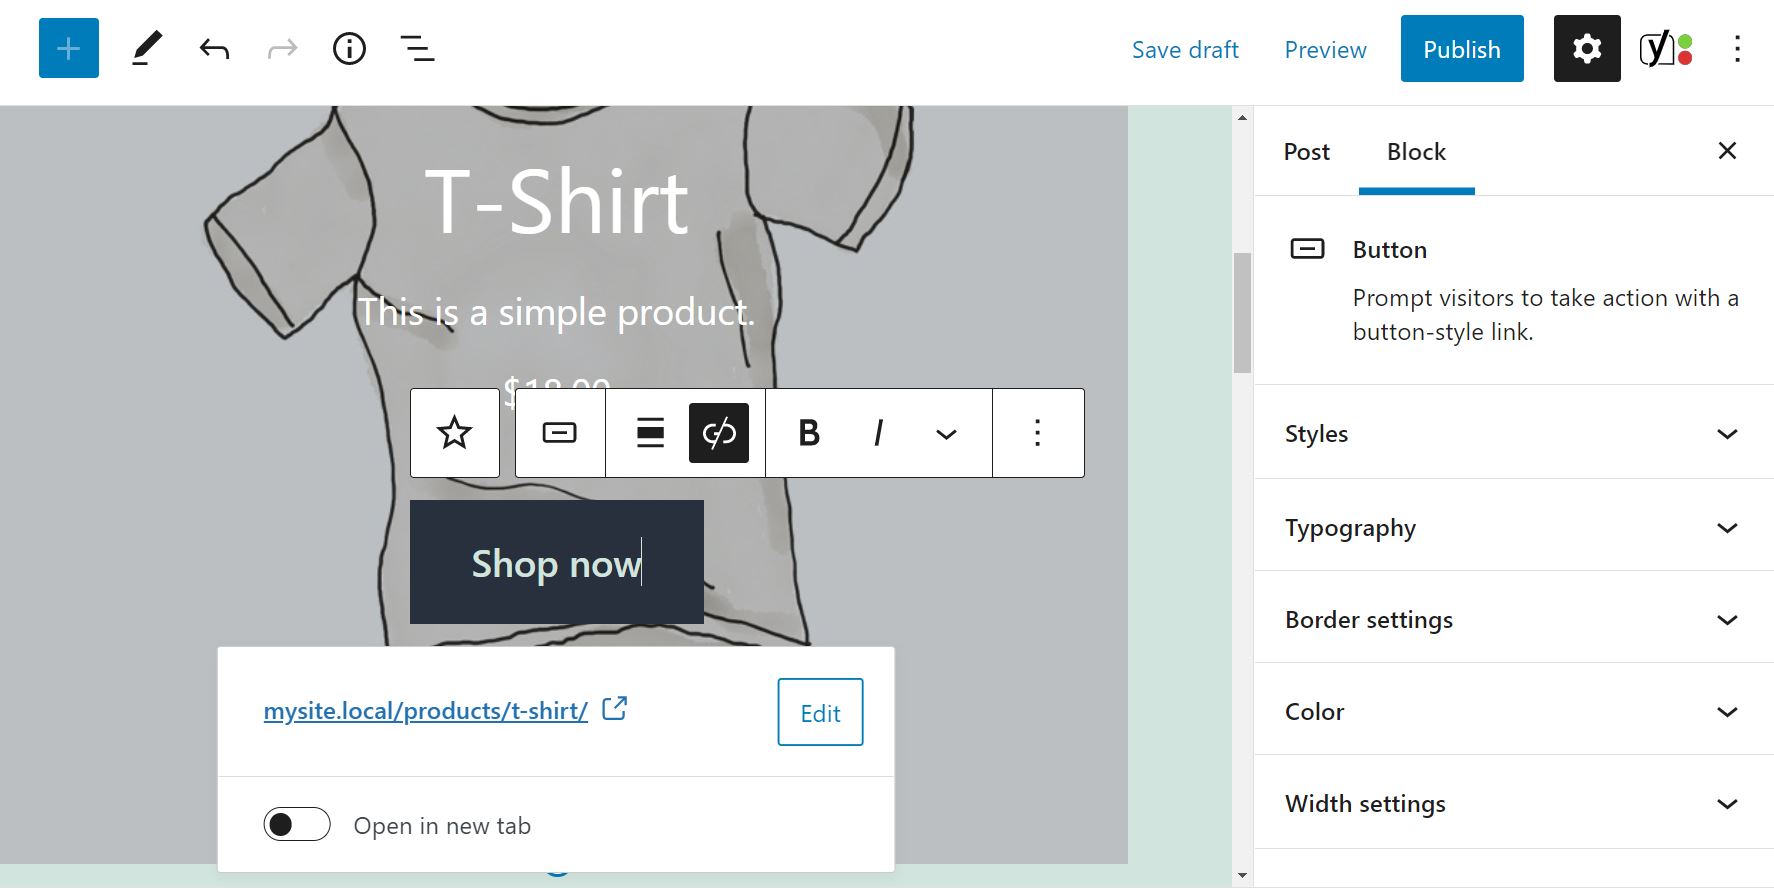
Here, you can change the text’s font and styling. You can also choose a different color for the text as well as the button.
Block Settings
Now, let’s return to the block. When you select it, you’ll also see some additional settings in the right-hand panel:
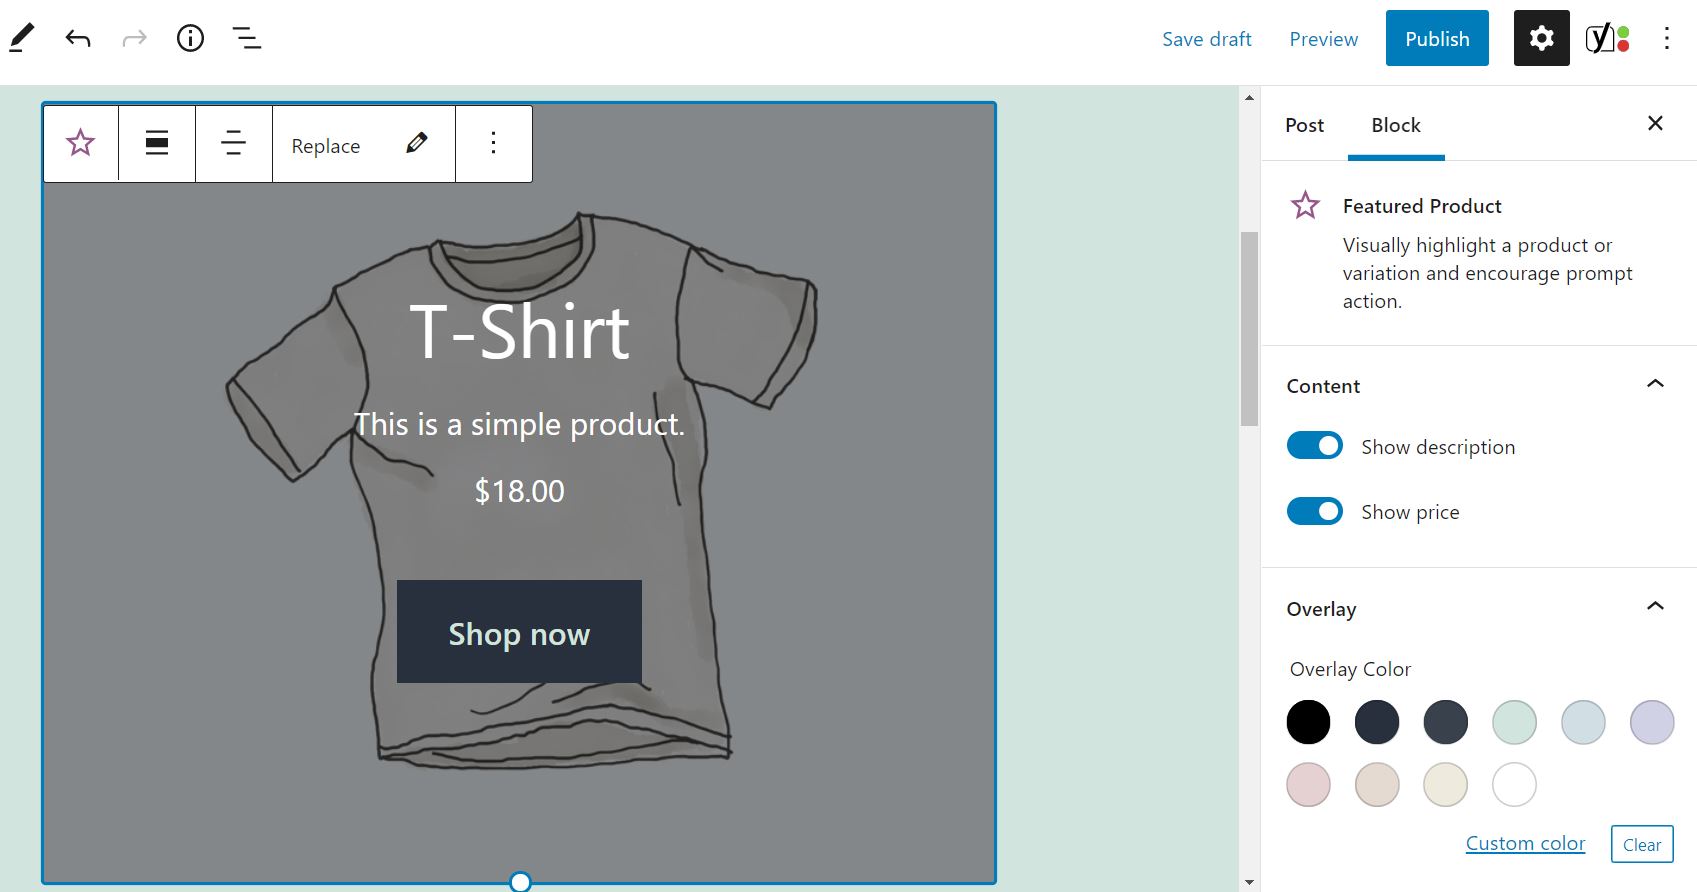
By default, the Featured Product block displays the description and price of your product. However, you have the option to hide this information. All you have to do is toggle the corresponding switch.
You can also change the overlay color of the block, and adjust its opacity:
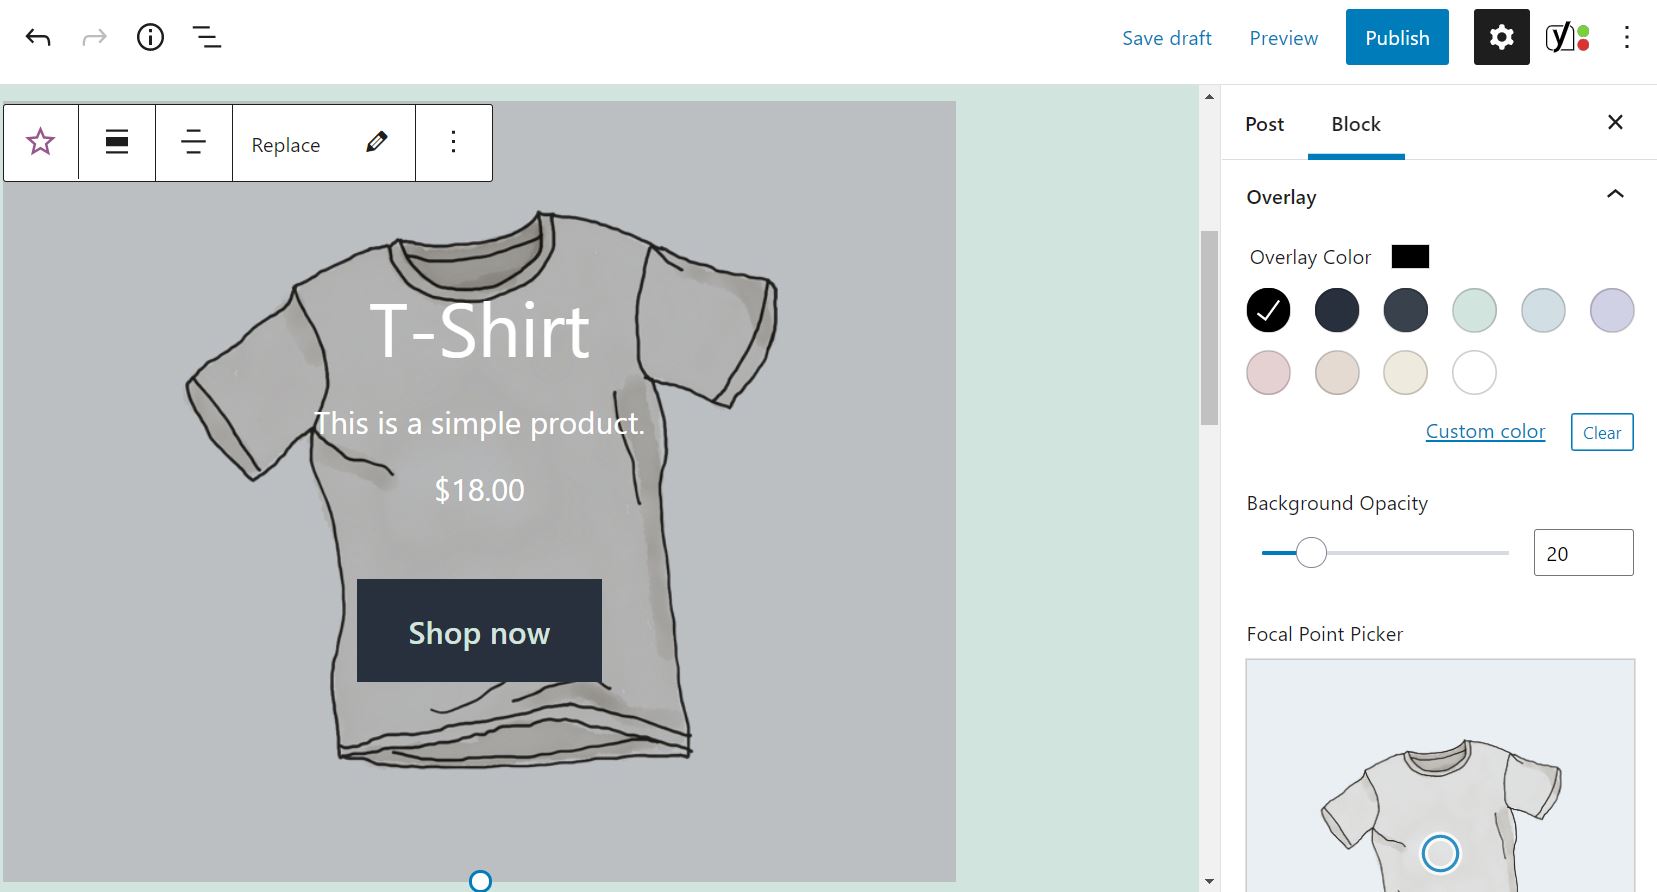
Meanwhile, the focal point picker enables you to shift the object around within the block. In our example, this is the t-shirt:
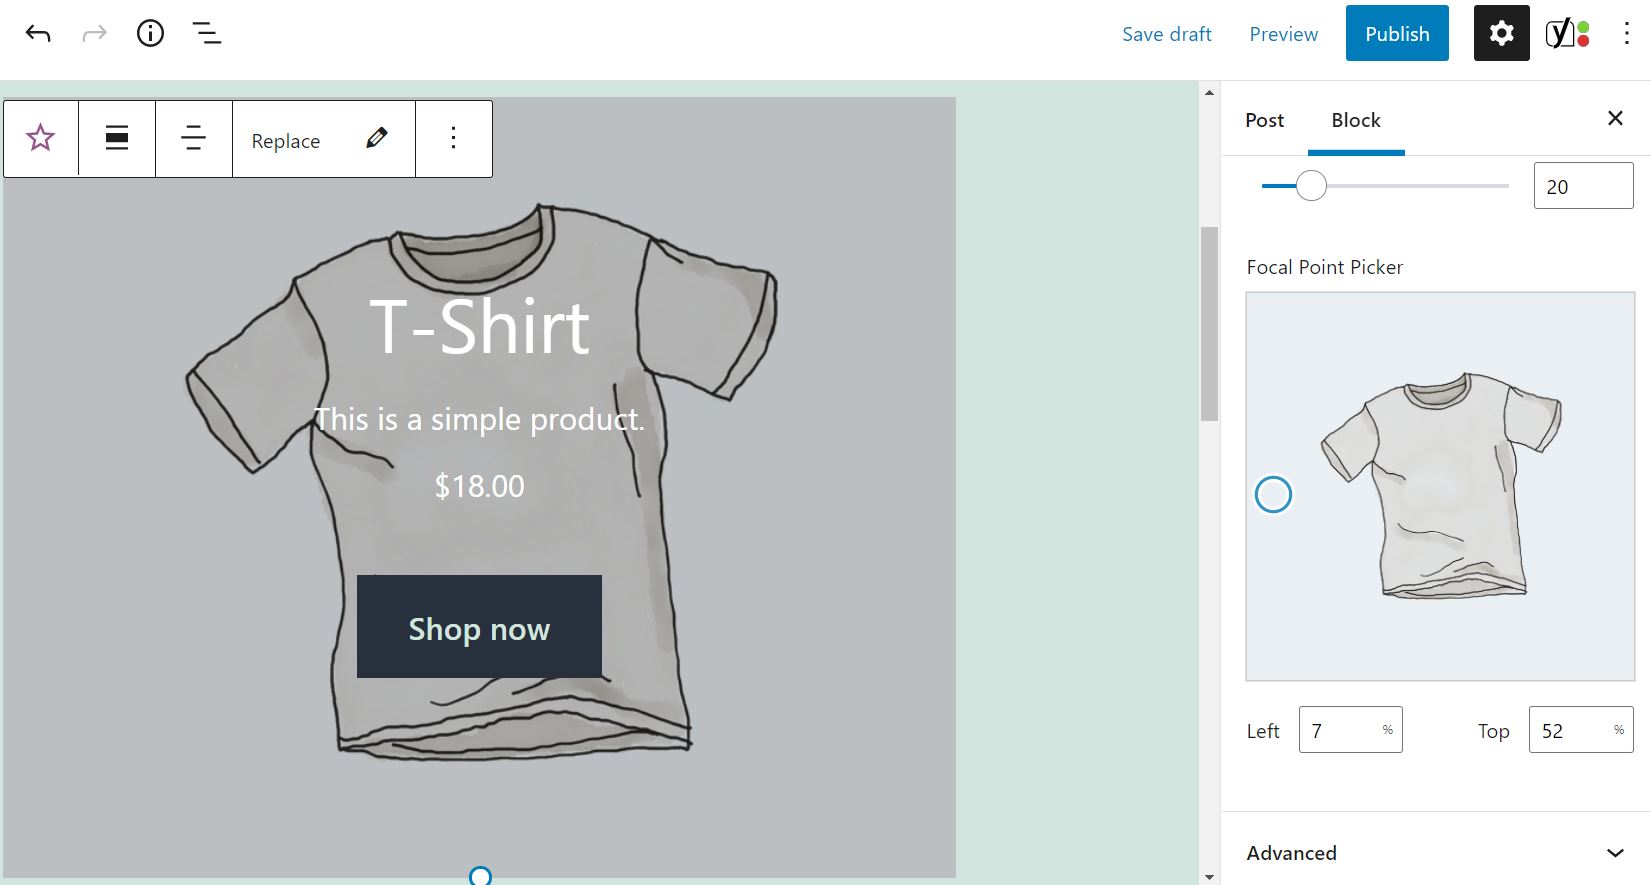
For instance, you may want to move the main image towards the top of the block, so that the text is more visible. You can do this by dragging the tiny circle across the Focal Point Picker field, or defining values in the Left and Right boxes.
Finally, there’s an Advanced settings option. This enables you to add new CSS classes to the block. However, we recommend that you only use this feature if you’re experienced with stylesheets.
Tips and Best Practices for Using the Featured Product WooCommerce Block Effectively
As we have seen, the Featured Product WooCommerce block enables you to highlight a product on a page or post. For instance, you can showcase your newest item, or try to revive interest in an older product. Whatever the case may be, there are some things to consider when using this feature.
Since the goal of the Featured Product block is to prompt customers to buy your item, you’ll want this element to be visually appealing and informative. For this reason, we recommend that you choose a lighter overlay color, to ensure that your product image is clear.
You’ll also want to make sure that the name, description, and price are easy to read. Unfortunately, the block doesn’t allow you to change the font and color of these elements. Therefore, you’ll need to adjust the overlay color and opacity so that both the image and text are visible enough to grab visitors’ attention:
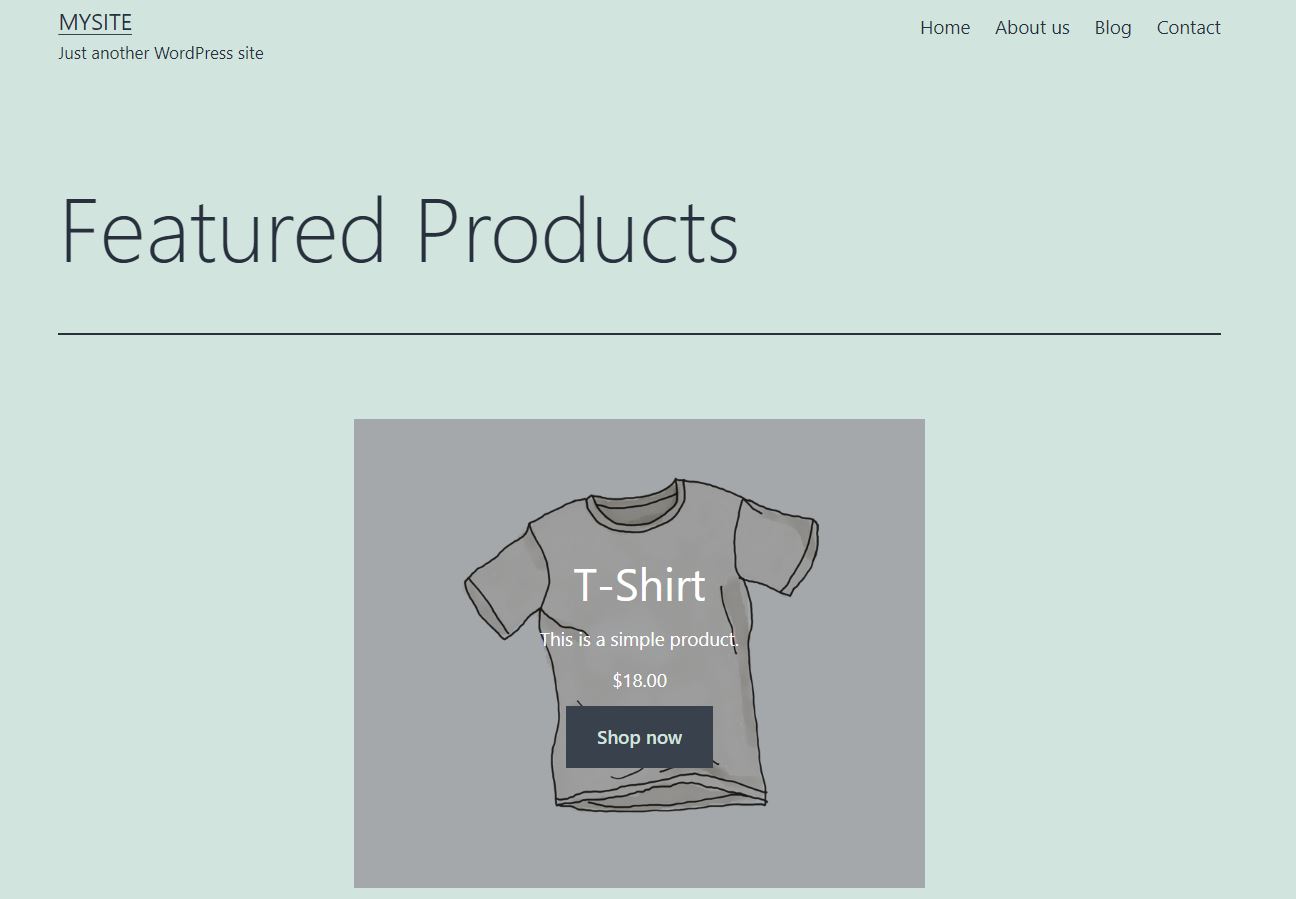
Finally, you’ll want to ensure that the CTA button links to the relevant product page. That way, visitors who are interested in the item can visit its page to learn more about it. We’d advise checking the block out on the front end to make sure it’s working perfectly before hitting Publish.
Frequently Asked Questions about the Featured Product WooCommerce Block
As you can see, the Featured Product WooCommerce block is very easy to use. However, you might still have some questions about what this feature can and can’t do. Let’s cover a few key considerations.
Can I Update the Product Details From the Block?
You can upload a different image for your product, but you can’t modify any other product details from within this block. If you wish to update the information for your featured product, such as its name or price, you’ll need to make these changes from the Products page.
Can I Display More Than One Featured Product?
This block only lets you display one product at a time. However, you can add several Featured Product blocks, and choose a different item for each one.
Can I Add More Information About the Product?
By default, the Featured Product displays the most basic details about the item, mainly the name, description, and price. You have the option to hide some of this information, but you cannot add more elements to the block. If you want to include further details, you’ll need to add a paragraph (or other content) block.
Conclusion
The Featured Product WooCommerce block enables you to highlight a particular item on a page or blog post. This can be a powerful way to promote a new item and make more sales.
As we have seen, this block comes with a CTA button that encourages users to buy your featured product. It also enables you to use a unique image for the item, and adjust the overlay color and button styling to make the block more visually appealing.
Do you have any questions about how to use the Featured Product block in WooCommerce? Let us know in the comments section below!
Featured Image via FOTOSPLASH / shutterstock.com





Theses Gutenberg integrated blocks are making life so much easier! Even more with the Jetpack unique blocks right inside the editor, cant recommend them enough!
I agree, David 🙂
Thanks for this feature WooCommerce.. They have been adding many relevant features for web development
Can I use the Woocommerce blocks with Divi? Because on all these posts you explain how to use them on the block editor, but is there a workaround to use them with Divi’s visual editor?
This article is really useful, learned so many things about WooCommerce Block. Thank you
You’re welcome, Janet 🙂