Expanding your WordPress website’s team? Bringing clients into the fold? Or perhaps you’re building a thriving online community? Whatever your goal, adding new users to your WordPress site could be vital.
WordPress has robust user management tools that let you create different user roles and assign specific permissions. This post will explore the various user roles and two simple methods for adding and managing users. We’ll also show you a trick to streamline user management across multiple websites. Let’s get started!
The WordPress Roles Explained
Subscribe To Our Youtube Channel
To ensure the security and privacy of your WordPress site, it’s essential to grasp the concept of user roles before adding new users. WordPress categorizes users into five distinct types, each with varying access to site functionalities. This hierarchy helps prevent unauthorized users from performing actions like adding or removing plugins, publishing posts, or modifying site settings. Let’s take a quick look at the default ones in order of their “authority”:
Administrator
The administrator role, popularly known as admin, on a standard WordPress site offers the highest level of access. If you own the website, you are usually the administrator. You can create new posts and modify or remove any posts from other users. In addition, you can install, modify, and delete plugins and themes to customize your site. Another power of an administrator is managing users. You can add or remove users and update their details, including passwords, without their consent or approval.
Editor
Users with the editor role in WordPress possess complete control over the content sections of their website. They can add, edit, publish, and delete any post, including those written by other authors. Editors do not have the authority to change site settings, edit pages, install plugins and themes, or add new users. However, they can moderate, edit, and delete comments.
Author
Users with the author role can write, edit, and publish their posts. They also have the option to delete their posts, even after they have been published. They can view comments, including those pending approval, but they cannot moderate or delete any of them. Likewise, authors cannot create new categories; they can choose from existing ones and add tags to their posts. This role does not grant access to site settings, plugins, or themes, making it a relatively low-risk position.
Contributor
The contributor role allows users to add and edit their posts but not publish them. Another significant limitation of this role is the inability to upload files, which means images cannot be added to their posts. Users may select from existing categories and create tags but not add them when writing posts. Furthermore, they lack access to website settings, plugins, or themes, preventing site configuration changes. However, Contributors can view all comments on the website, yet they do not have the power to approve or delete any of them.
Subscriber
The subscriber role on your WordPress site is ideal for membership sites, online stores, or any site where users can register and log in. While it allows users to log in, update their profiles, and change their passwords, they still cannot write posts, view comments, or access other parts of the admin dashboard.
There’s also a “Super Admin” role that is exclusively used in WordPress multisite networks. This role grants the administrator of the entire network complete access to all sites within it. However, it is safe to ignore if you don’t use multisite.
Moreover, certain plugins may introduce more user roles to your WordPress installation. For example, adding WooCommerce to your site adds roles such as Customer and Shop Manager. You can even add your custom roles to your site.
These powers and abilities are not set in stone, though. Thanks to WordPress’ excellent user management features, you can customize what each user role can and cannot do beyond the default rules via PHP hooks or PublishPress plugins.
How To Determine Roles To Assign?
When it comes to WordPress security, user roles are critical. Granting only the minimum permissions needed for each user helps prevent unauthorized access. The Subscriber role is often a good starting point for new users.
Reserve the Administrator role for those who require complete control. To streamline your workflow, consider having one Editor handle publishing while multiple Contributors focus on writing. As mentioned, you can customize each role to your needs, so don’t feel compelled to stick to what comes out of the box.
Adding New Users to WordPress: 3 Ways
Now that we have covered the what, how, and whys of WordPress user roles, let’s move on to how to add users on WordPress:
1. The Quickest Way: Adding & Managing Users Through Divi Dash
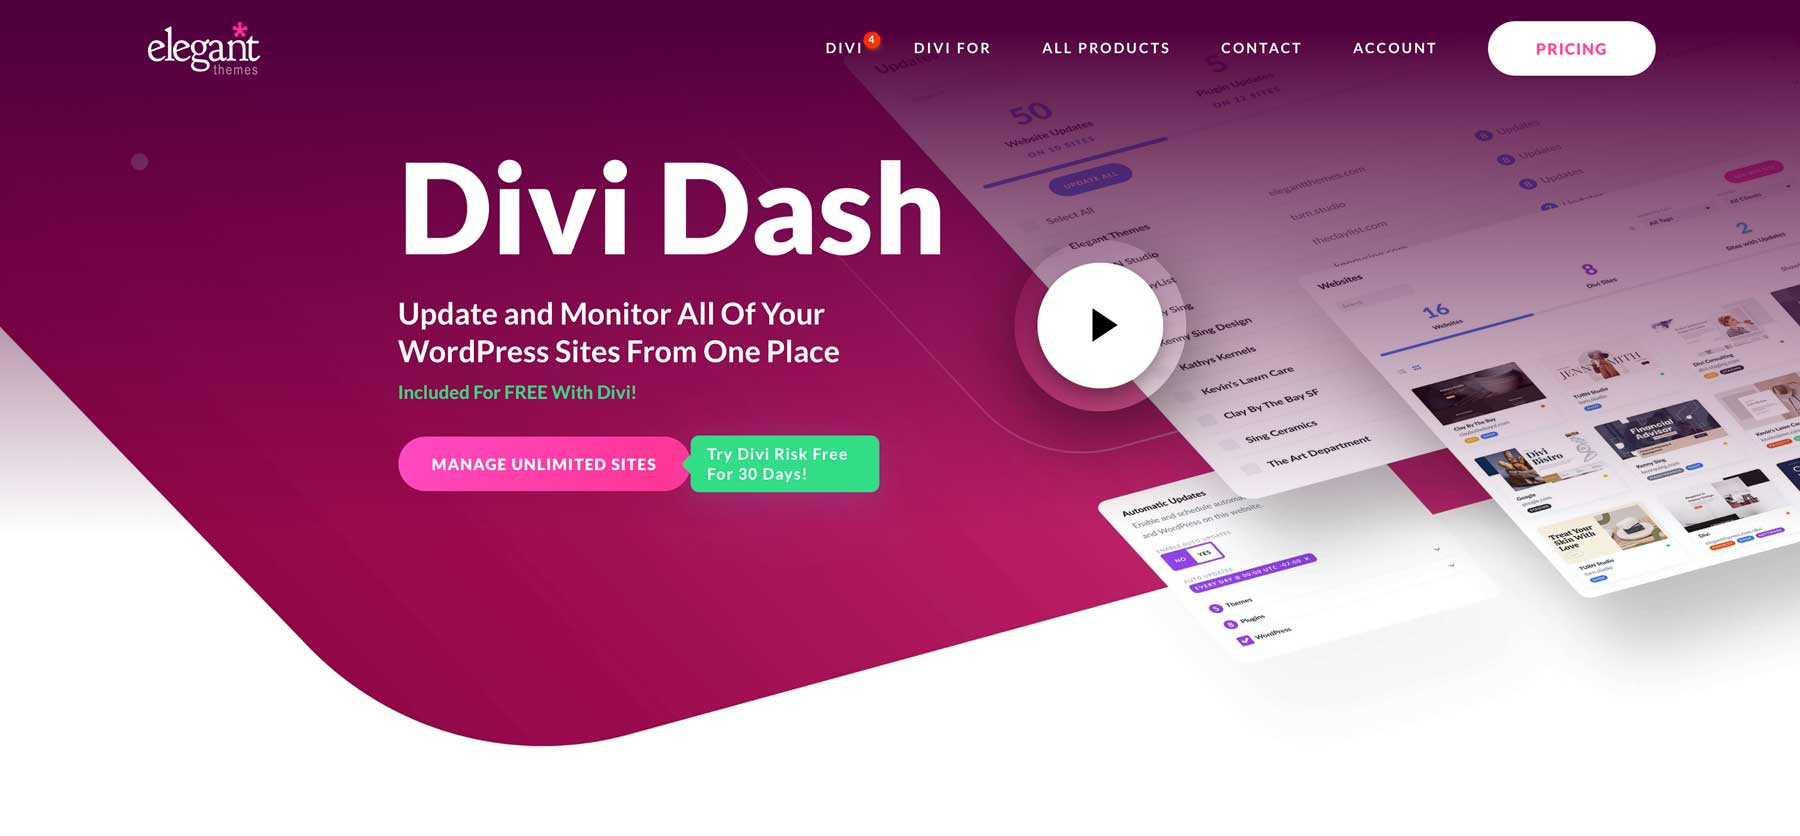
As a freelancer or website manager, you’ve likely foreseen the tedium of manually adding users to each site you oversee. While the process isn’t complex, repeating it across numerous websites can quickly become overwhelming. Enter Divi Dash: a game-changing solution for streamlined website management for WordPress users.
Let’s explore how to harness the power of Divi Dash, starting with adding your site to the platform. This section assumes you’re already a Divi Member. If not, consider joining today to unlock these powerful features. You can use Divi Dash on any of your WordPress websites, even the ones that don’t run on Divi.
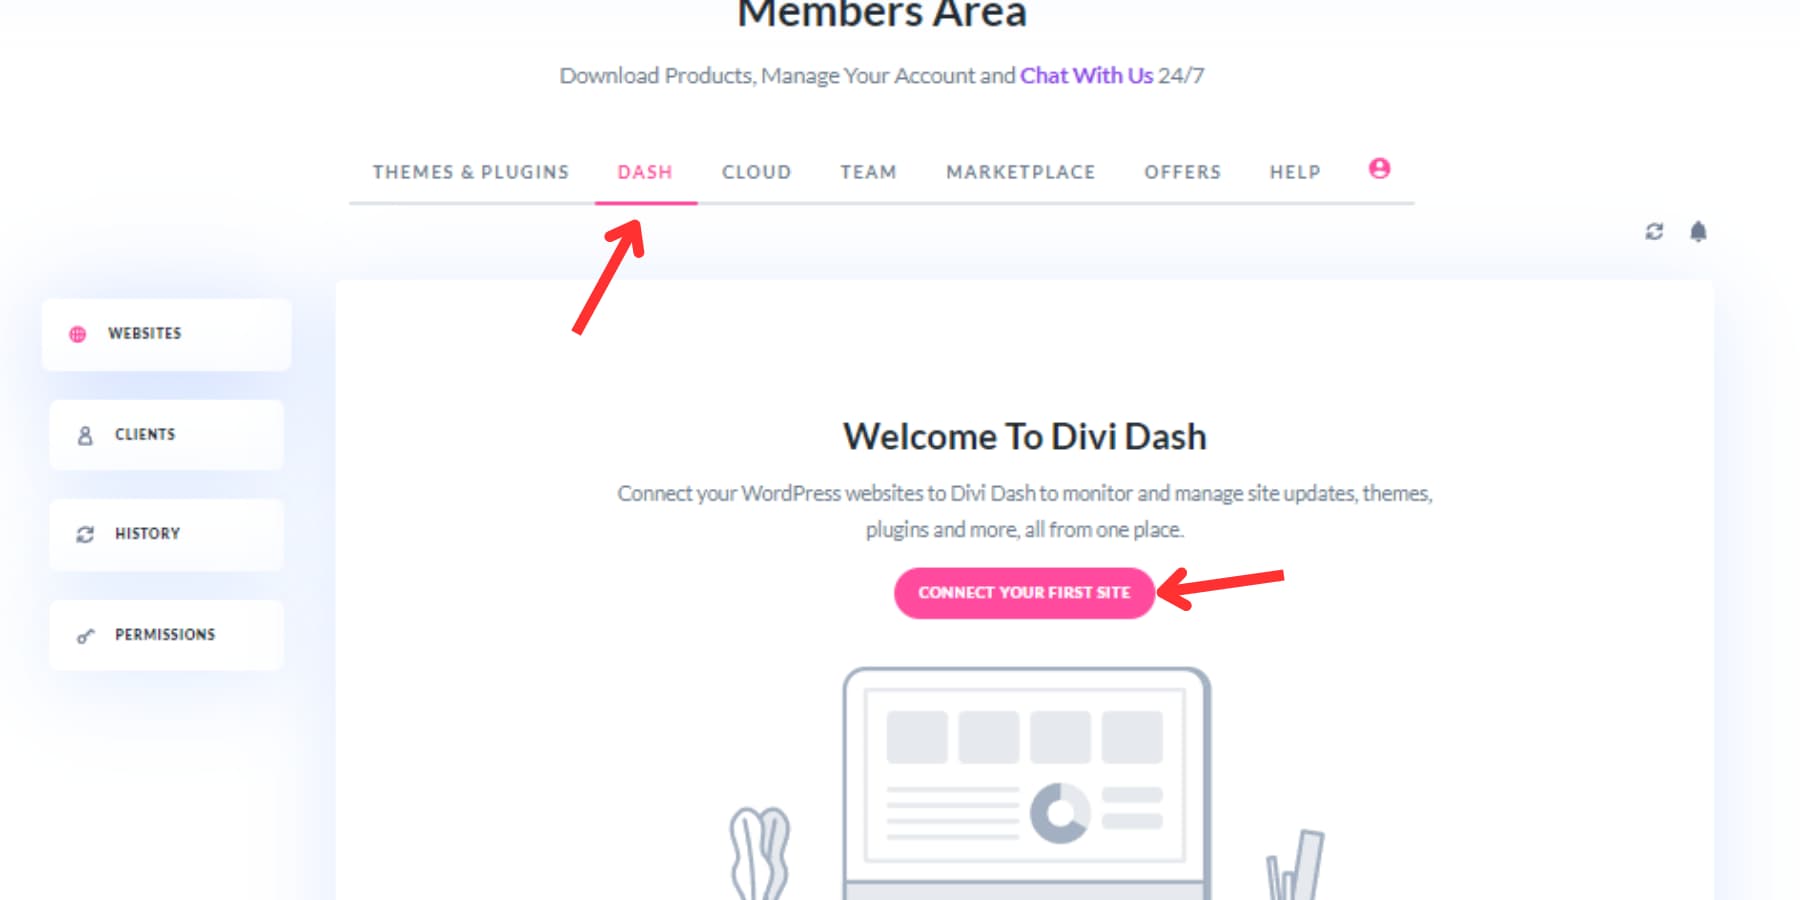
To start with Divi Dash, access the Elegant Themes’ Members Area and navigate to the ‘Dash‘ option in the main menu. Click the prominent ‘Add Your First Website’ button.
In the popup, enter your website’s URL, administrator username, and password. If you prefer not to input your password, use a connect key instead.
You can install the Divi Theme and complementary plugins during setup – an excellent time-saver for new client websites. Once your site is added, you’ll be greeted by a comprehensive dashboard.
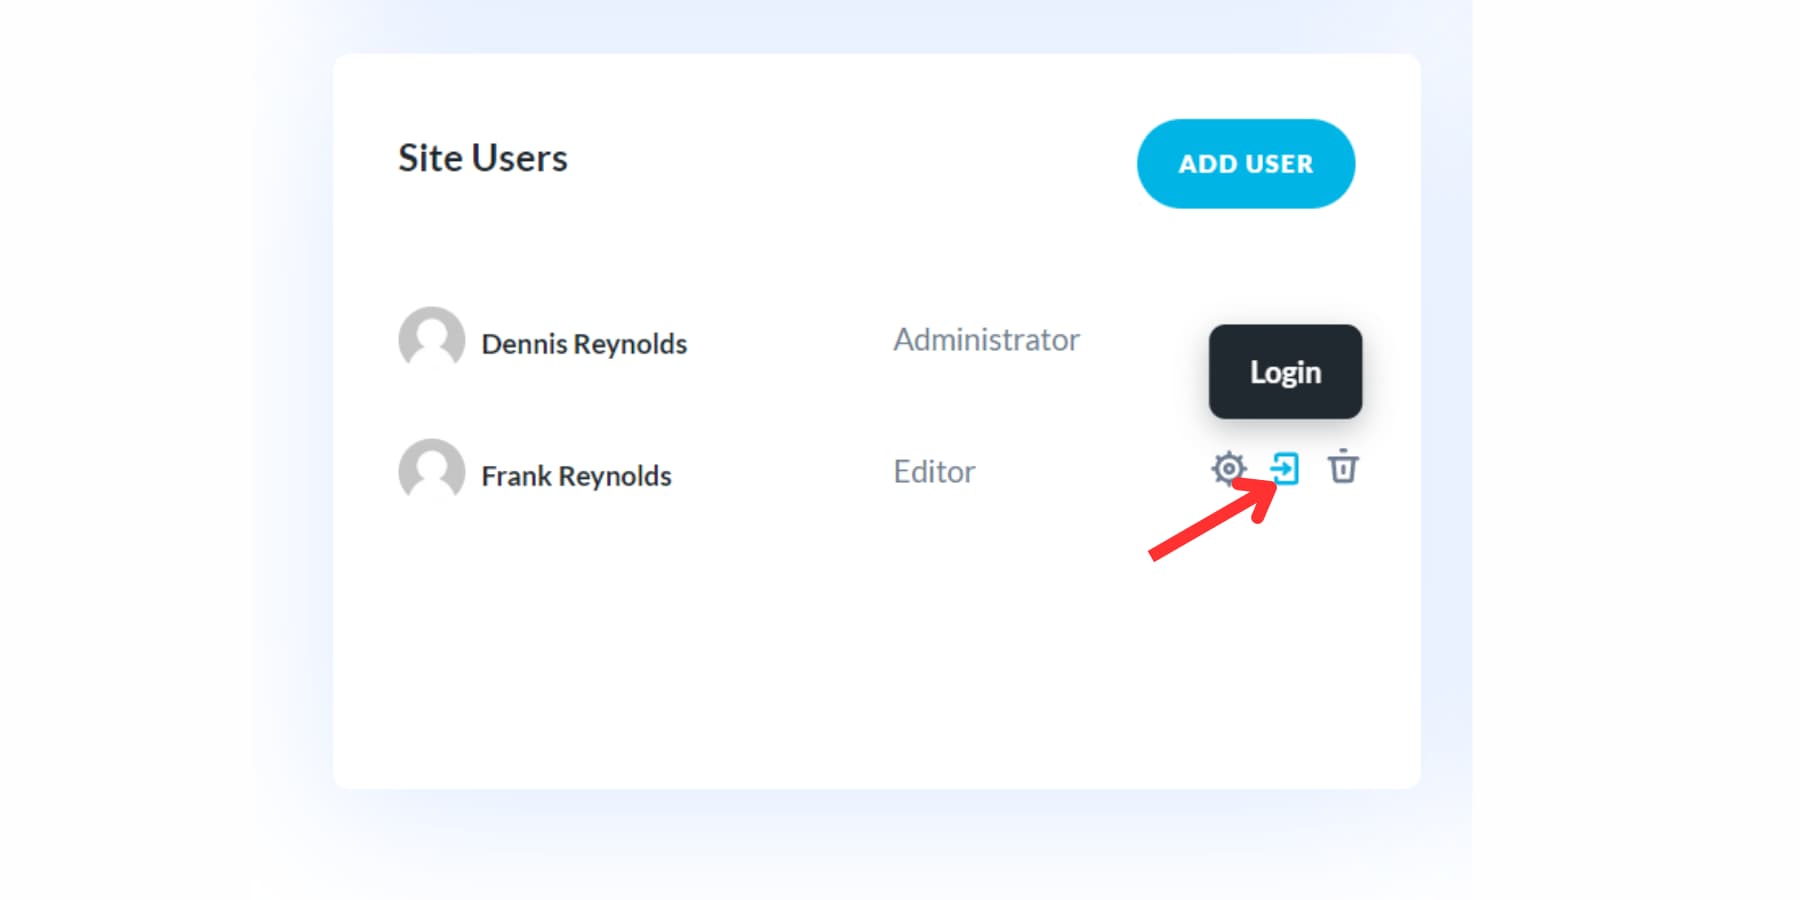
Scroll down to find the users section, where adding new users is as simple as clicking a button and filling in the required fields.
A handy feature allows you to hover over a username to find a one-click option (among others) to visit and automatically log in to the website as that user.
The true power of Divi Dash lies in its ability to replicate this effortless process across all your managed websites. With Divi Dash, you gain a centralized hub for user management, allowing you to add and oversee users across multiple sites, manage plugins and themes, handle updates efficiently, and much more, all from a single dashboard.
But that’s just scratching the surface. A Divi Membership unlocks powerful tools, including the Divi Theme and Divi Quick Sites.
Ready to revolutionize your website management workflow? Click on the button below to explore the full range of features available to Divi members and advance your web development game.
2. Adding Users Manually
Adding a handful of users to your WordPress site is a breeze with the platform’s built-in user management system. Ready to get started? Go to the Users → Add New Users page in your admin area.
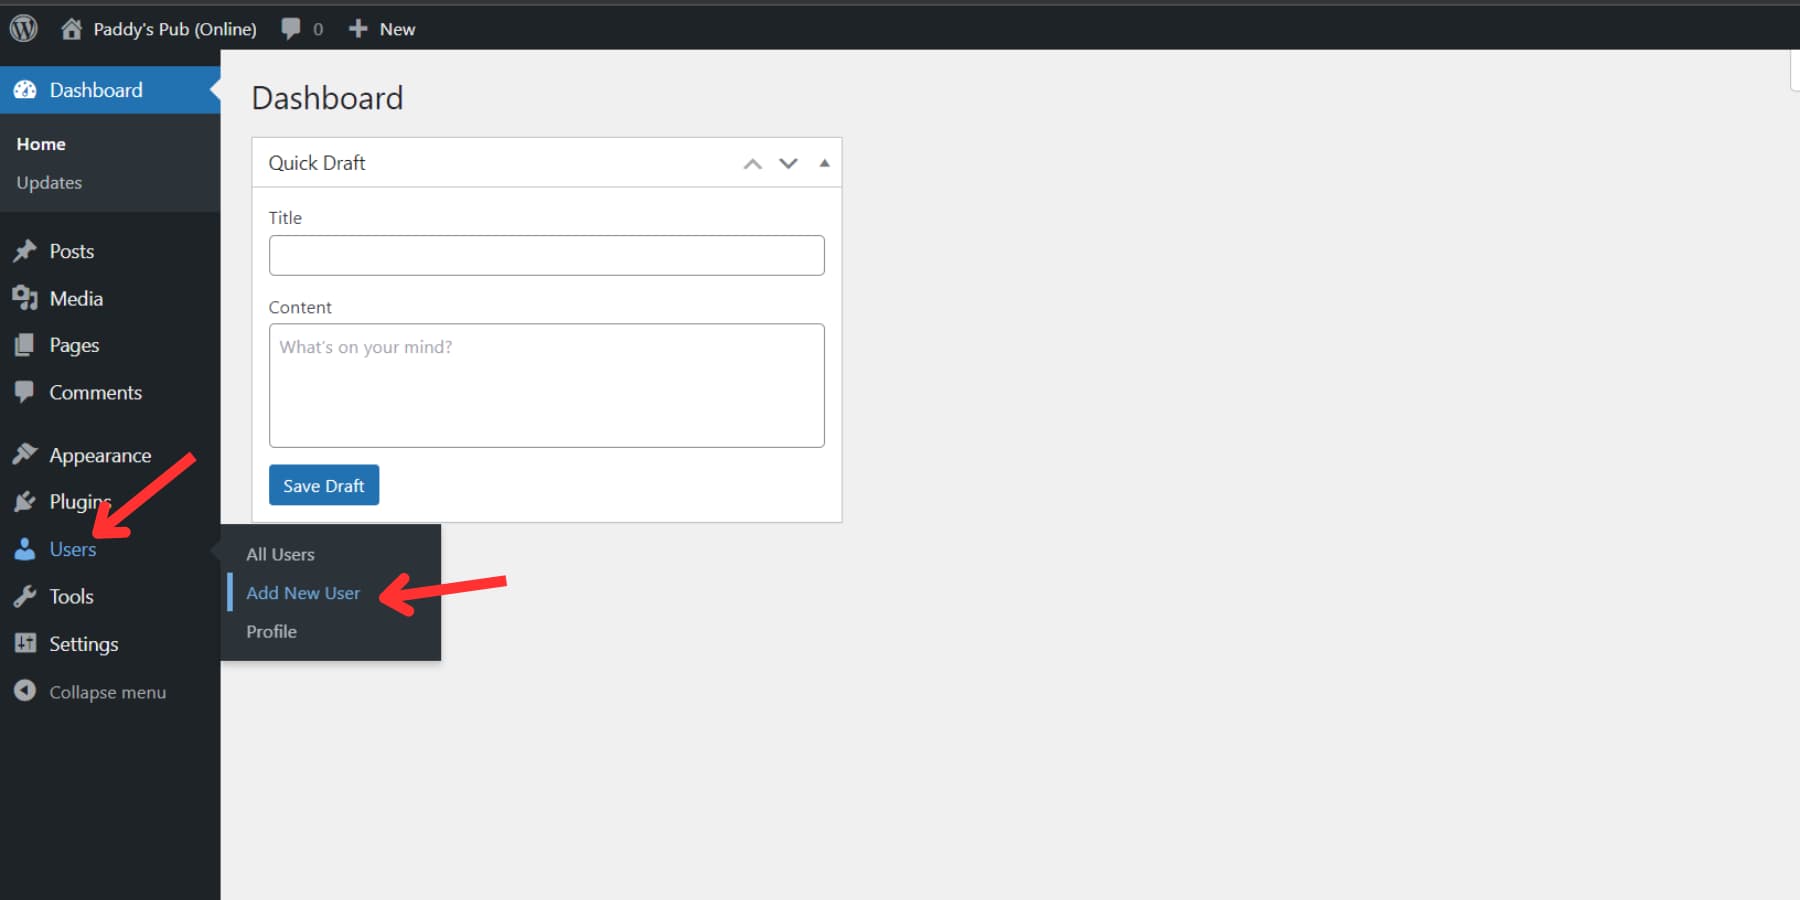
The first step is choosing a username. This and their email address will serve as the user’s login credentials. Remember that once usernames are set, they can’t be changed later, so choose wisely.
Speaking of email, double-check its accuracy – it’s crucial for password resets and notifications. However, emails can be changed later with a confirmation.
While at it, you can fill in optional details like first name, last name, and website URL. Don’t worry if you leave these blank; users can update their profiles later.
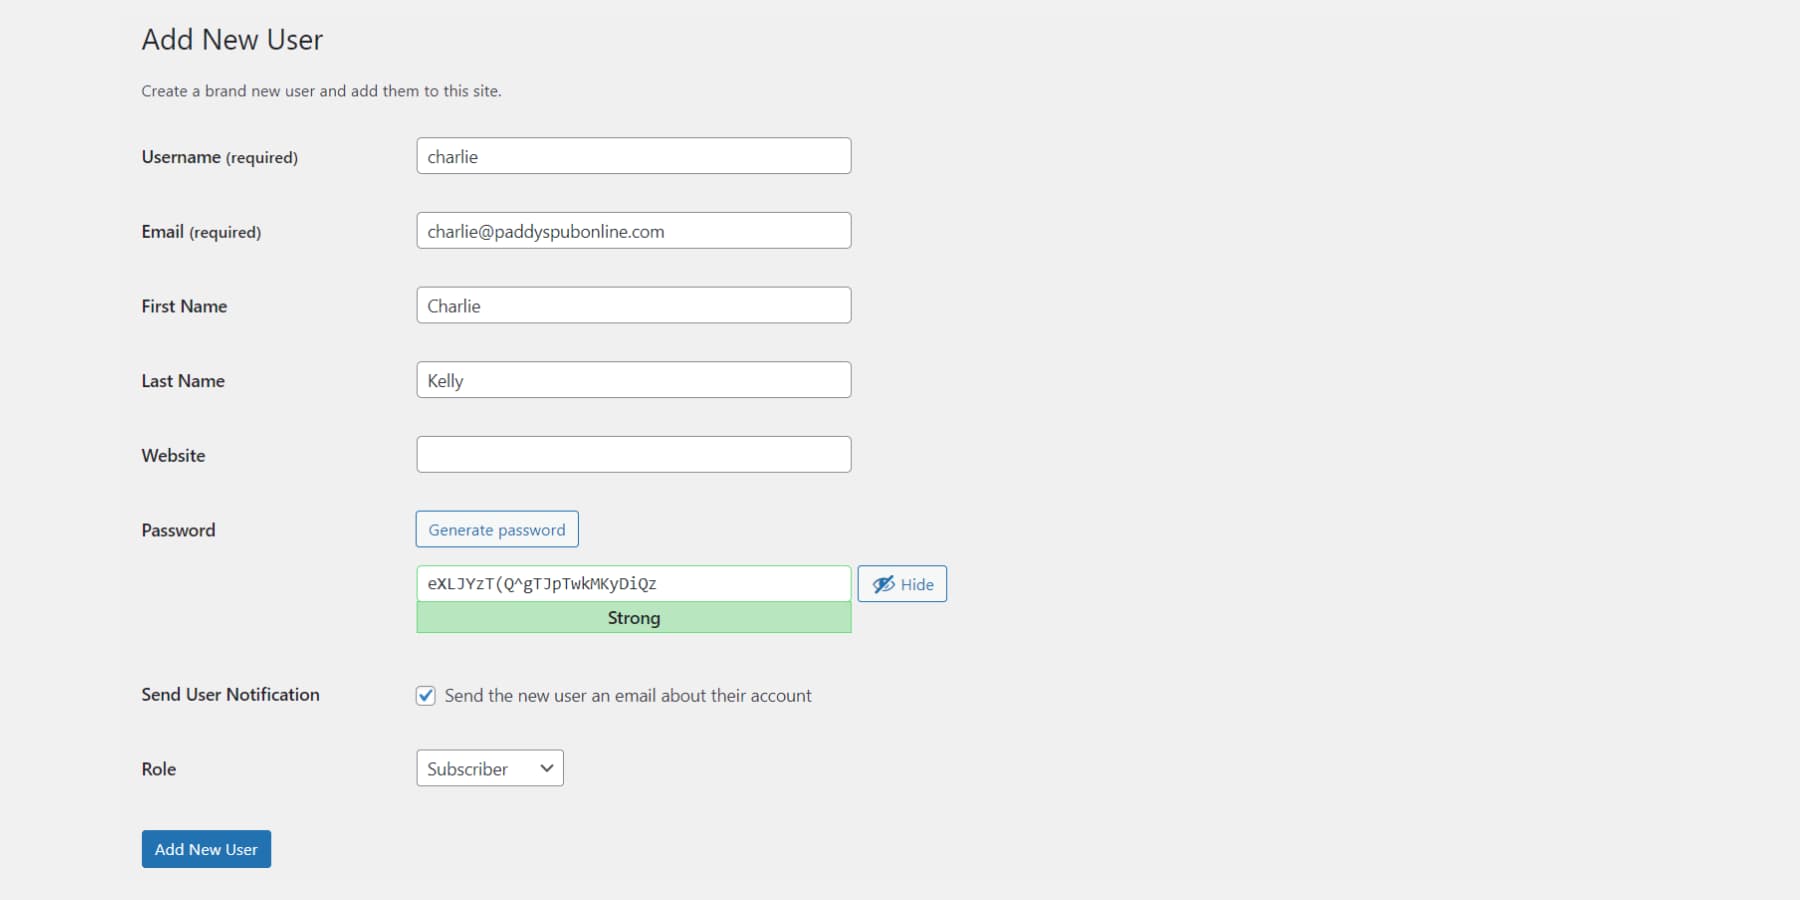
Now comes the important part: setting a password. By default, WordPress generates a strong, long-stringed password. You can also add a manual password or click the ‘Generate password’ to regenerate a robust and randomized password automatically.

You’ll also see a checkbox to notify the user via email about their new account and how to log in. Finally, you’ll need to assign a user role. This determines what the user can do on your site. Roles range from Subscriber (the least powerful) to Administrator (the most powerful). If you’re unsure, make a decision by referencing the guide we added in the above section.
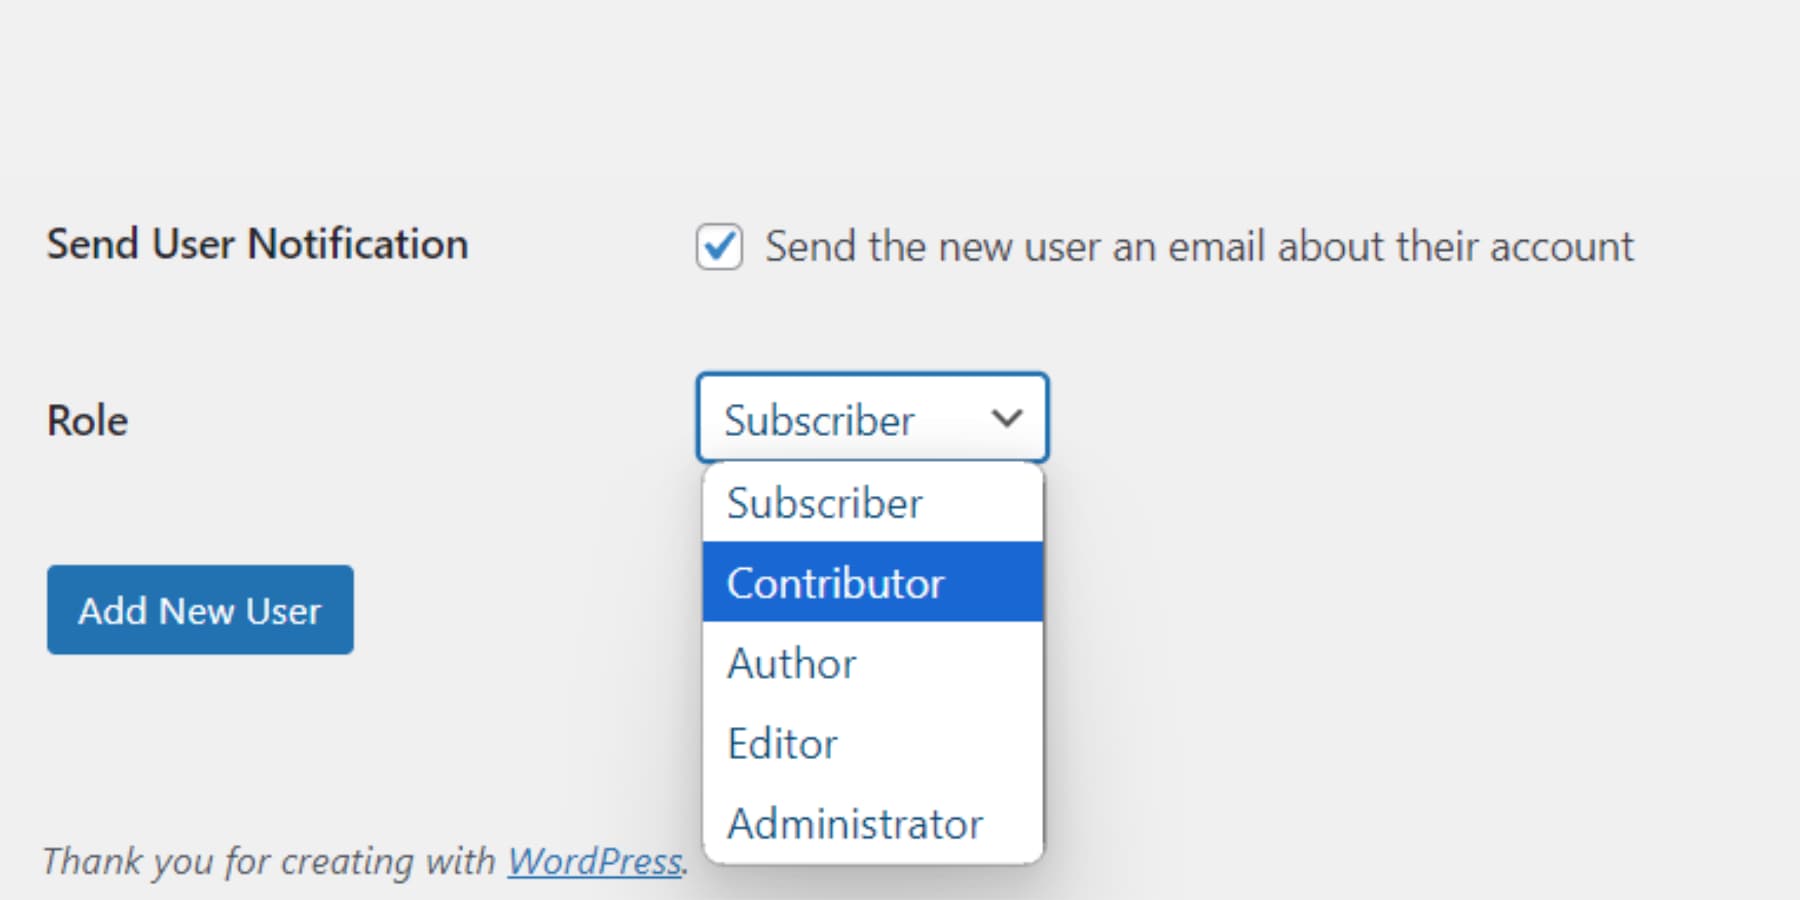
Once you’ve selected it, hit the ‘Add New User’ button, and voila! You’ve successfully added a new user to your WordPress site.
3. Enabling User Registration
If you have many users to add, doing it individually can be quite a hassle. Instead, you can allow them to create their accounts. This makes the process much simpler and more efficient for everyone involved.
To start, go to the WordPress admin panel and navigate to Settings → General.
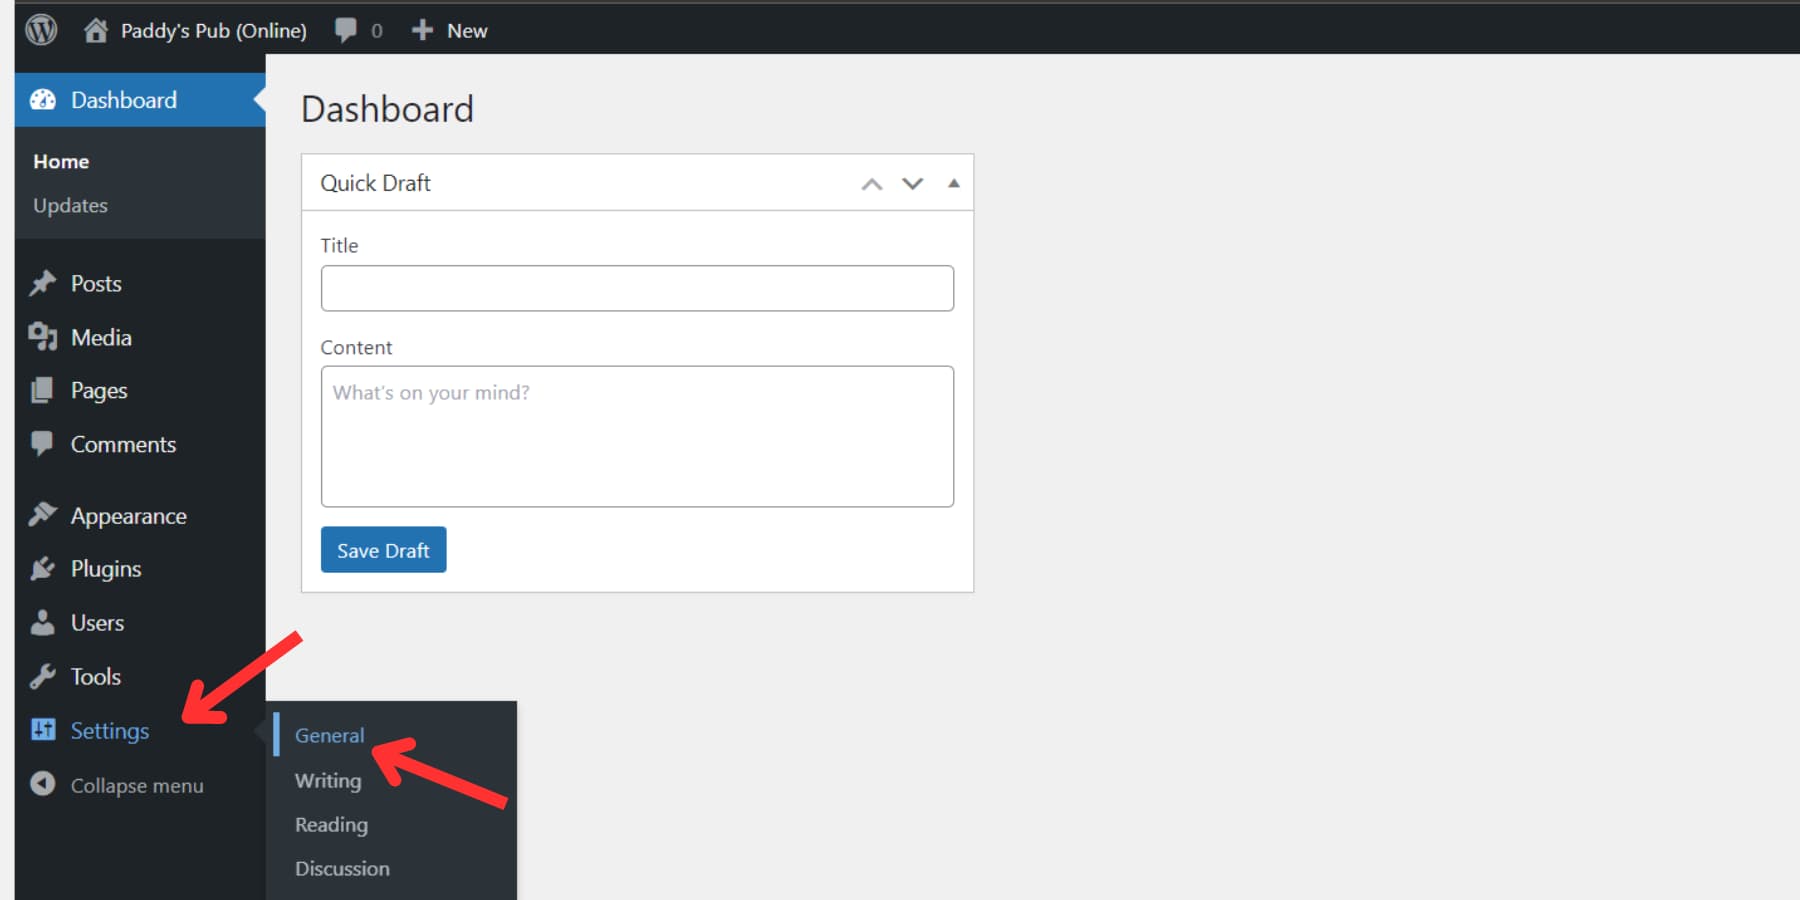
Look for the ‘Anyone can register’ option and check that box. This simple step allows user-initiated registrations. New registrants are assigned the Subscriber role by default. However, you can adjust this using the dropdown menu. While at it, consider carefully which role best suits your site’s needs.
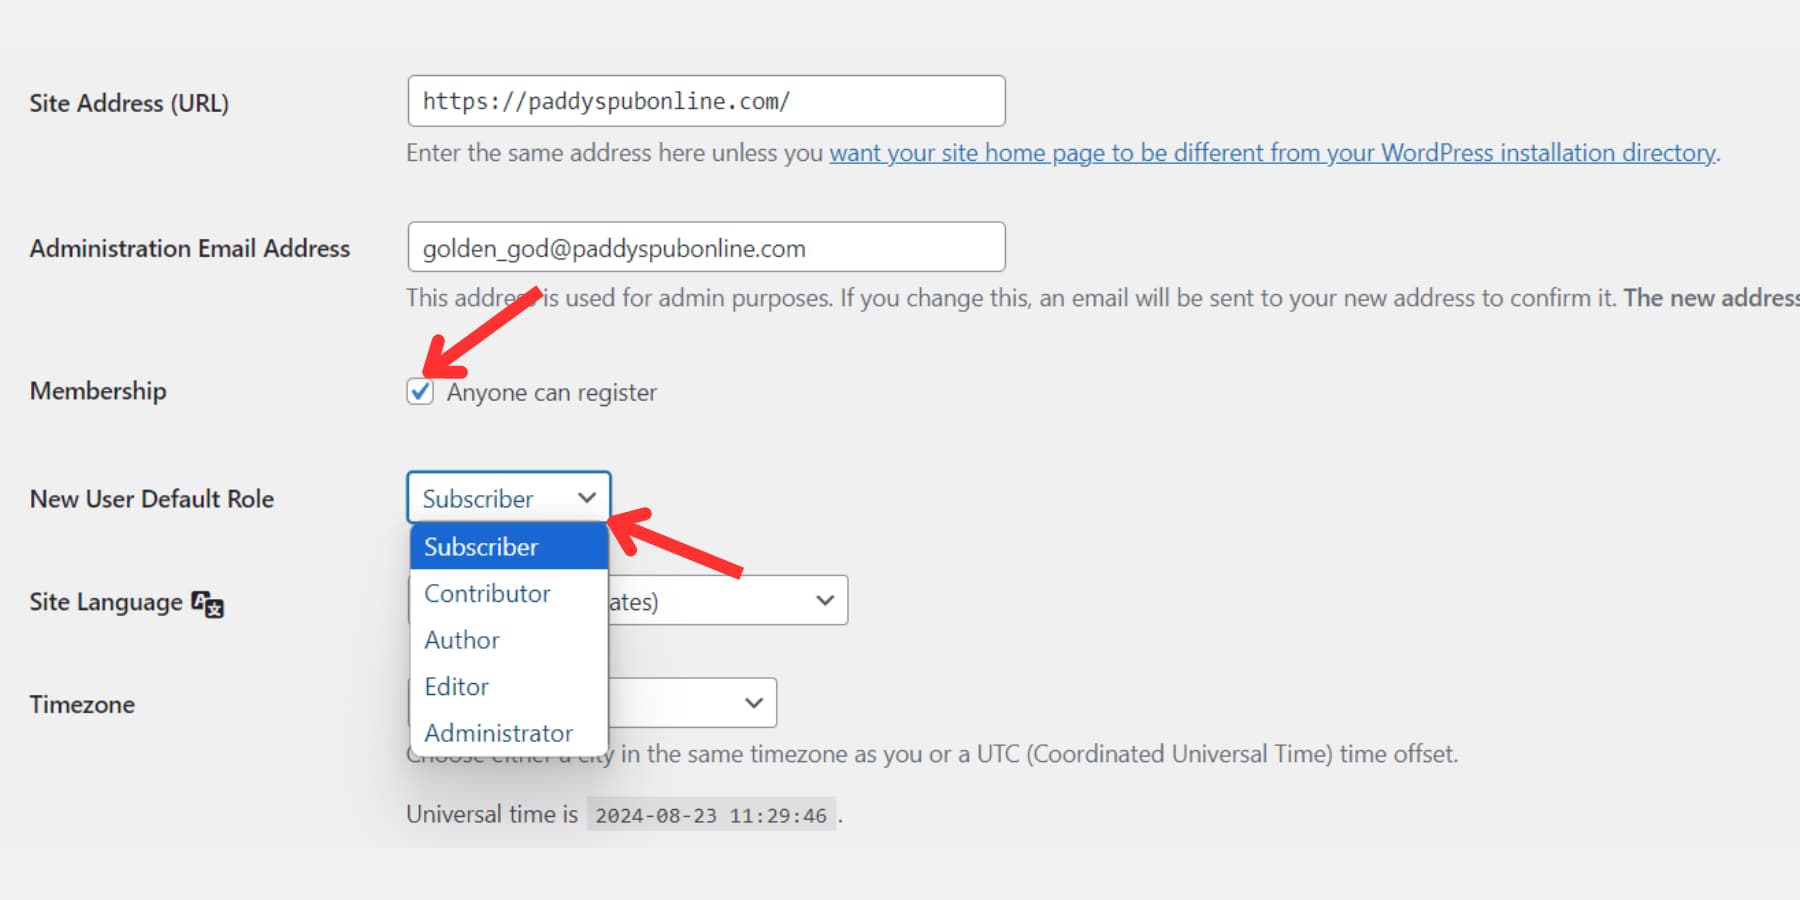
It’s wise to limit new registrations to ‘Subscribers’ or ‘Contributors.’ Right off the bat, granting ‘Author’ status could lead to unauthorized post publications. And here’s a crucial tip: never set ‘Administrator’ as the default role for obvious security reasons.
Before you wrap up, scroll to the bottom of the page and click the ‘Save Changes’ button. This ensures all your carefully selected settings are locked in and ready. Now, anyone can register for the roles you have set by going to your-site.com/wp-login.php
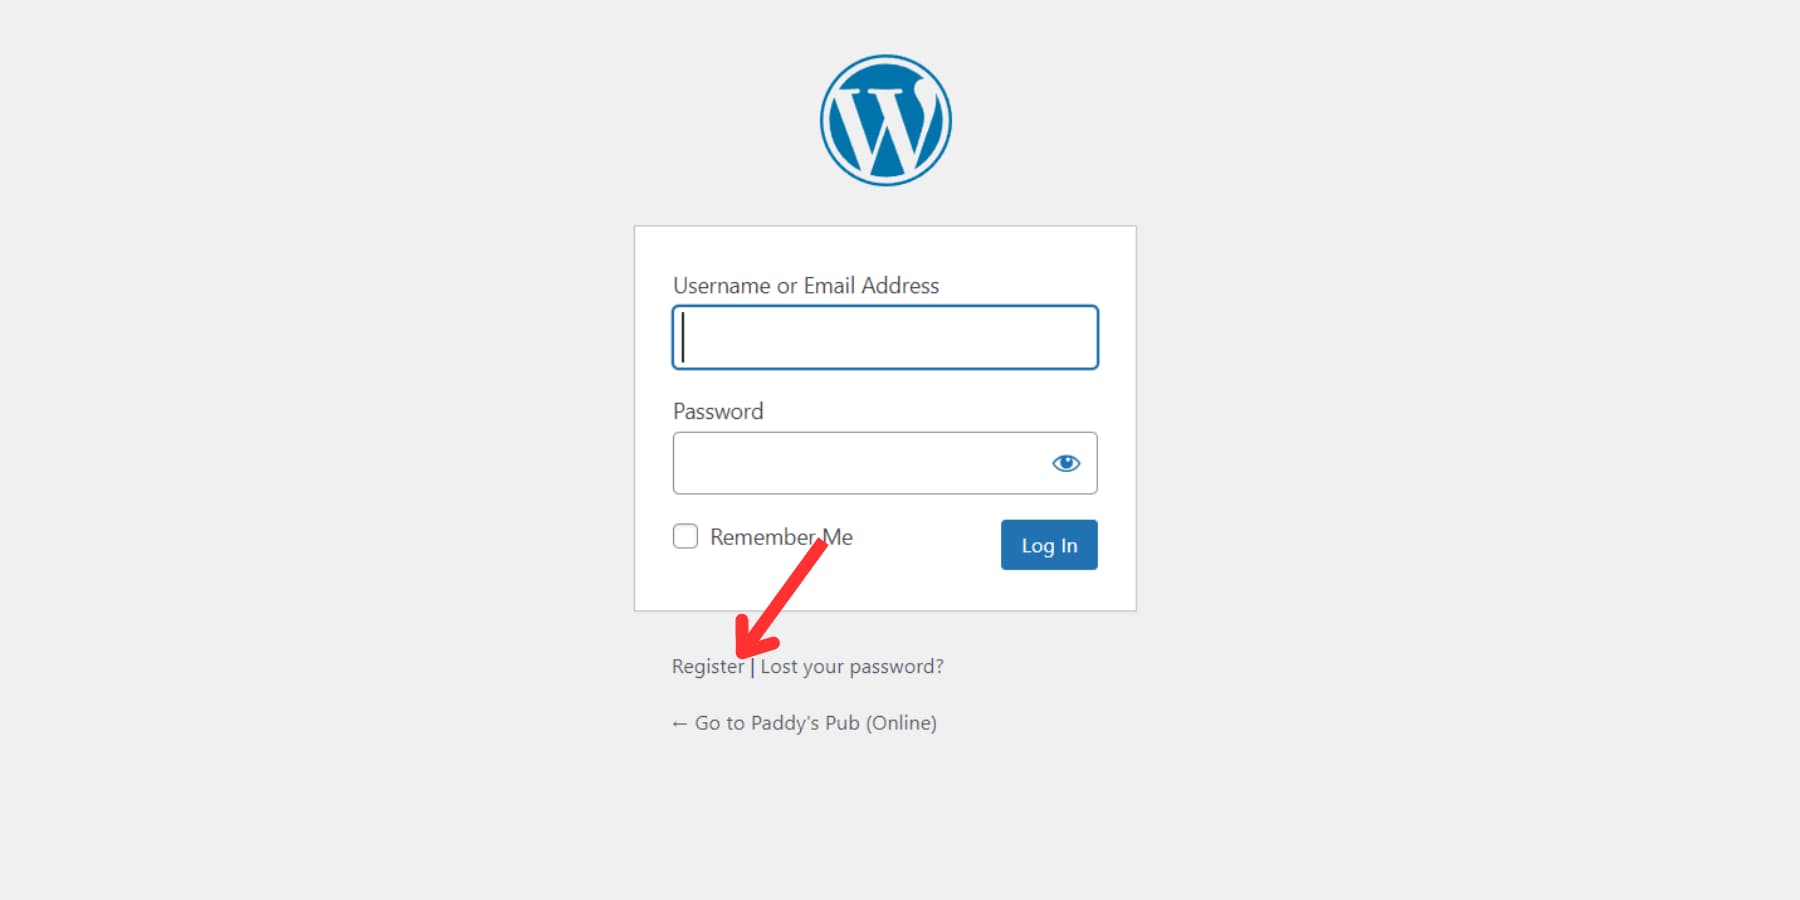
This option works well for membership, subscription, or eCommerce sites. If you prefer to limit the number of users who can sign up, uncheck the box in the first step after everyone you want has registered.
Remember that this option lets anyone, including people with malicious intent, sign up for your website. Depending on their role, they may not be able to do much harm to your site, but it could still be annoying to sort out real users from spammy ones, which is why we recommend you set up an anti-spam service like reCaptcha, Jetpack (Akismet), or Cleantalk.
Wrapping Up
Managing multiple users on a WordPress site isn’t as daunting as it seems if you understand the user roles. By assigning different user roles, you can efficiently distribute tasks and ensure that only authorized individuals can access sensitive areas. This not only streamlines your workflow but also bolsters your site’s security.
Moreover, these roles are not changeless. You can easily modify and even add custom user roles with custom capabilities to better match your website’s needs.
If you’re a freelancer juggling multiple projects or a business owner overseeing a complex website, Divi Dash can be a game-changer. As a Divi Member, you’ll gain free access to this powerful tool that simplifies user management across all your sites.
So, why wait? Join the Divi community today and experience the difference Divi Products, such as Divi AI, Divi Quick Sites, and more, bring to your WordPress website design and management workflow.




Leave A Reply