If you’re using a default WordPress theme, your website likely looks like many others. These built-in templates follow a one-size-fits-all approach, which limits your control over design and makes it hard to create something unique.
That’s why creating a custom WordPress page template is key to building a site that truly reflects your brand. Want to stand out instead of blending in?
Keep reading—we’ll show you how to build a custom WordPress template, why the WordPress Site Editor has its limits, and how Divi (and Divi Quick Sites) can help you create unique, branded templates effortlessly.
- 1 Why Create a Custom Template?
- 2 2 Ways to Create a Custom WordPress Page Template
- 3 How to Build a Custom WordPress Page Template (Step-by-Step)
-
4
Why Use Divi to Create Custom WordPress Templates?
- 4.1 1. Divi Quick Sites to Build Branded Websites (and Custom Templates)
- 4.2 2. No Limits to How Much You Can Customize
- 4.3 3. Import a Pre-Designed Template Layout for Quick Designs
- 4.4 4. Give Your Site a Consistent Look with the Divi Theme Builder
- 4.5 5. Save and Reuse Elements from Divi Library
- 4.6 6. Add Dynamic Content to All Your Templates
- 5 Generate Branded Custom Templates for Your Entire Website in 2 Minutes
Why Create a Custom Template?
WordPress is a powerful platform for building websites, but its default themes come with limitations. When you install one, it automatically applies pre-made templates that decide your site’s layout and structure.
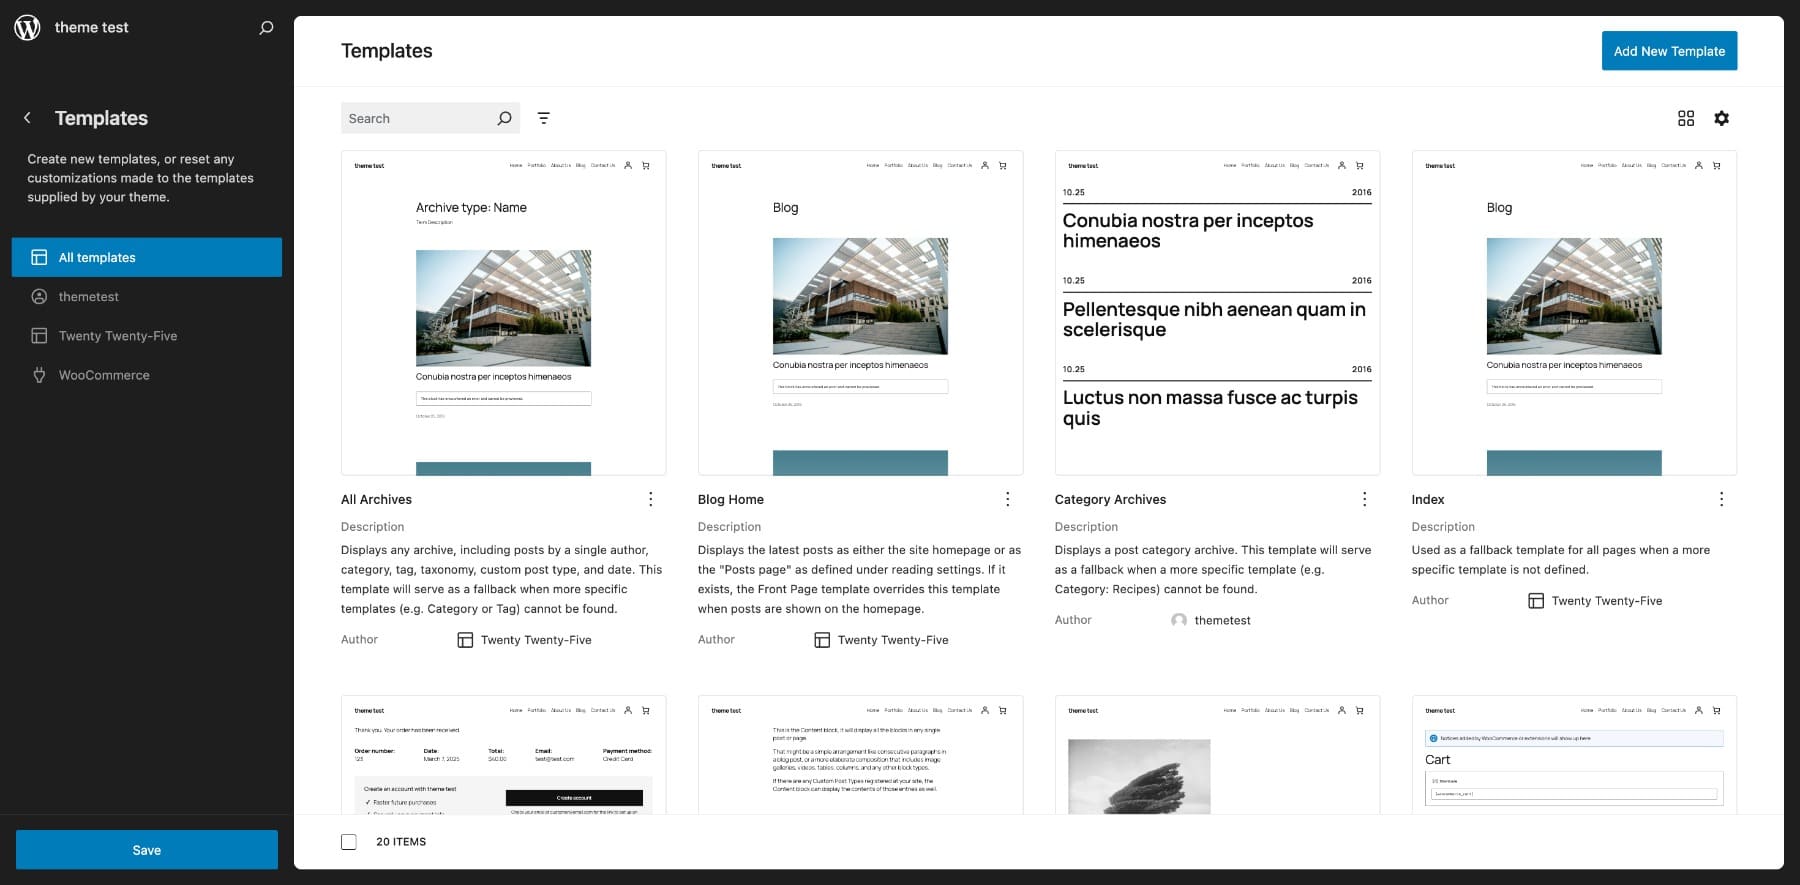
default templates of the Twenty Twenty-Five theme
The biggest drawback is the lack of customization flexibility. These templates follow a generic design that make your website look like thousands of others.
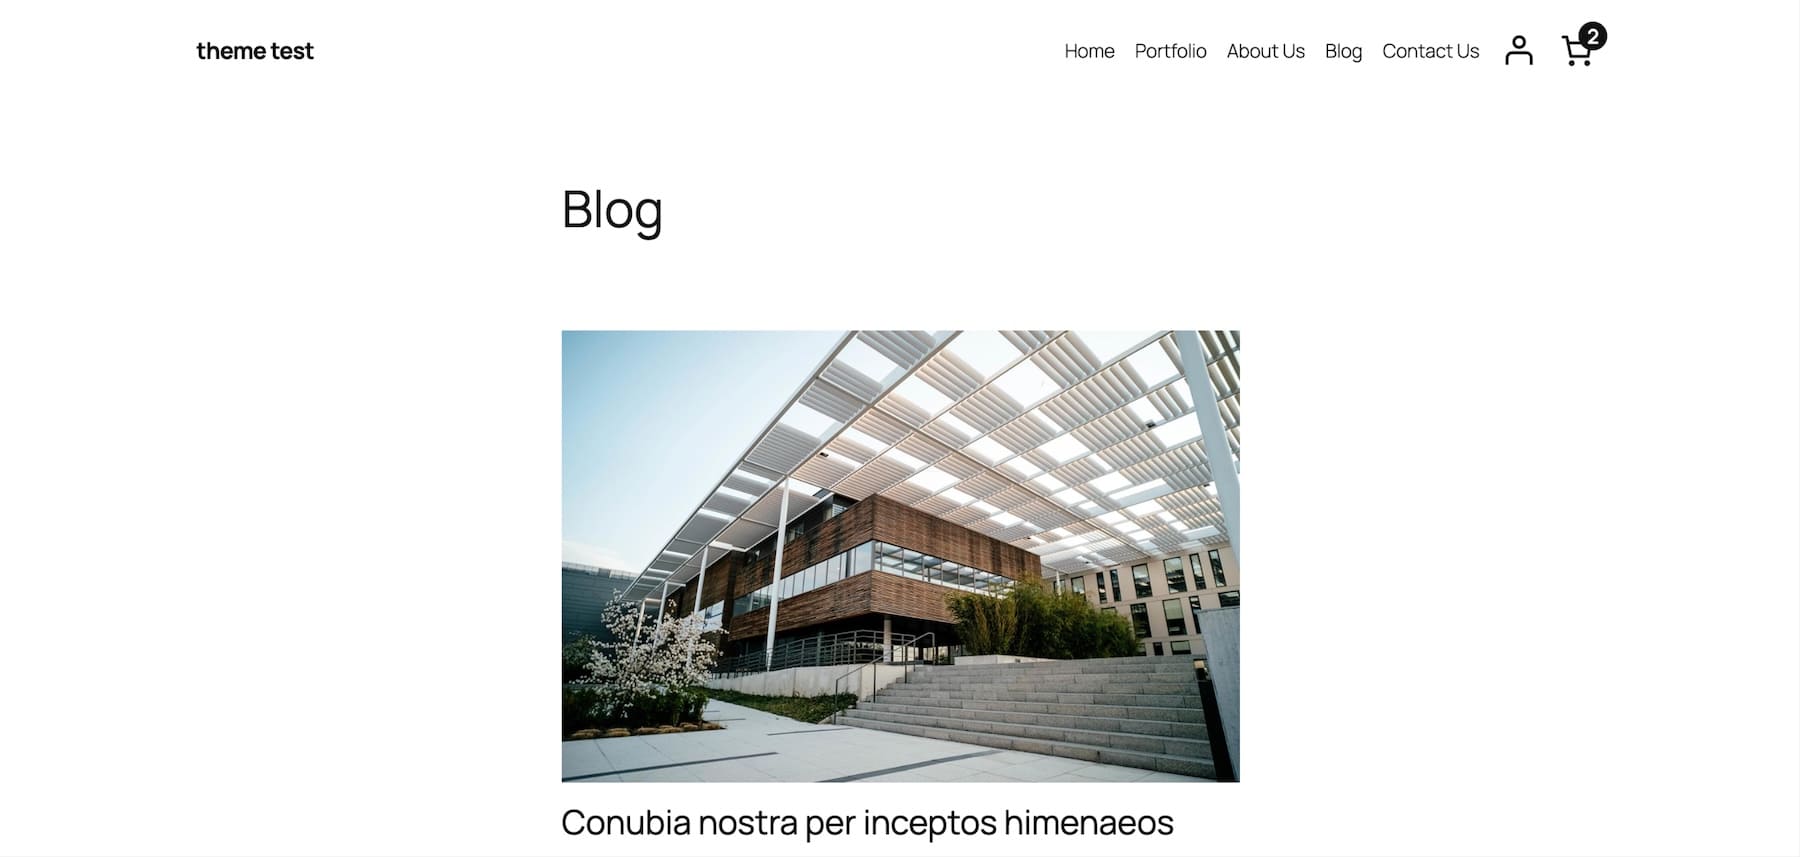
Blog Index page of the WordPress Twenty Twenty-Five theme
Having a generic website is not a problem if you’re creating a hobby blog, but it’s not ideal if you’re managing a business. When your business site looks common, it can lead to:
- Low Engagement: Visitors don’t feel a connection with a generic site and might leave quickly.
- Lack of Brand Identity: Your website fails to reflect your brand’s unique personality.
- Missed Conversions: A basic layout may not highlight your services, products, or CTAs effectively.
- Poor user experience: One-size-fits-all templates don’t cater to your audience’s specific needs.
If you don’t want your website visitors to reject your site just because it’s ordinary, you should design custom WordPress templates. They will help you brand your website how you like and even increase its performance and conversion if you’re strategic about them.
Let’s explore two ways in which you can design one.
2 Ways to Create a Custom WordPress Page Template
WordPress now lets you create your own templates from scratch. While this isn’t the most flexible method, it’s a simple way to customize your site’s layout. Let’s start with that.
1. Creating a Custom Template Using the Site Editor
If you’re using a default WordPress theme, you have access to WordPress’ Full Site Editing features. This is where you can find the Templates section and the option to Add New Template.
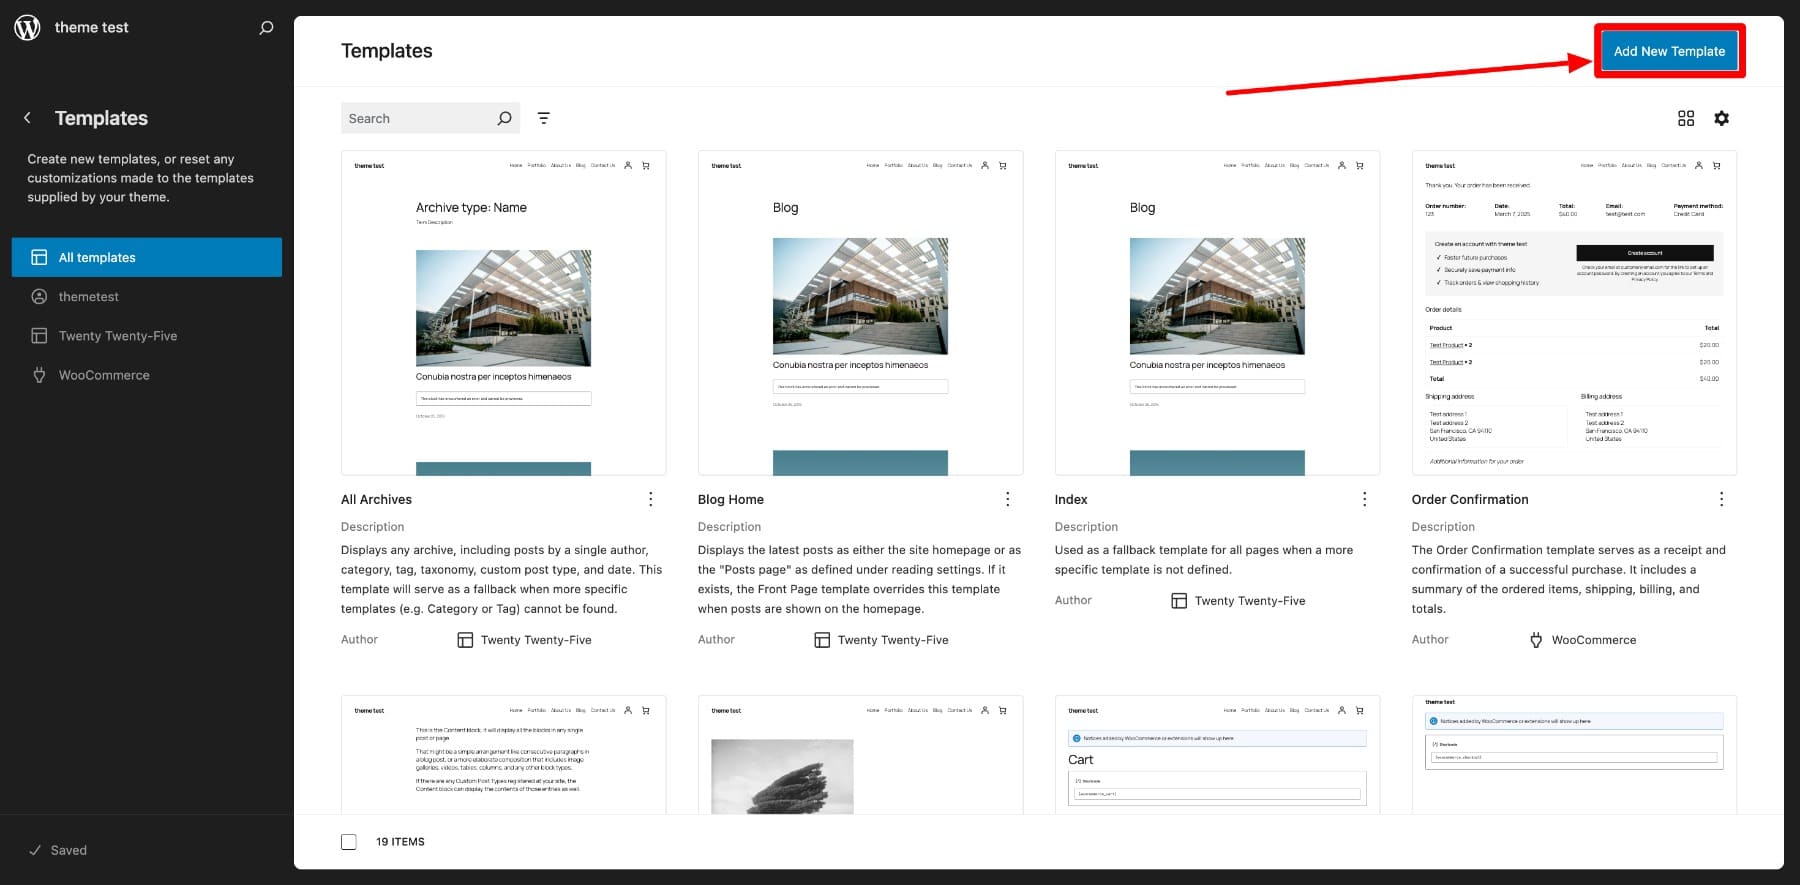
To access, go to Appearance > Editor > Templates from your WordPress dashboard.
Once you add a new template, WordPress will ask where you want to apply it. For example, selecting Single Item: Post will apply this template automatically to all posts. If you prefer to create a custom template without assigning it to a default location, choose Custom template.
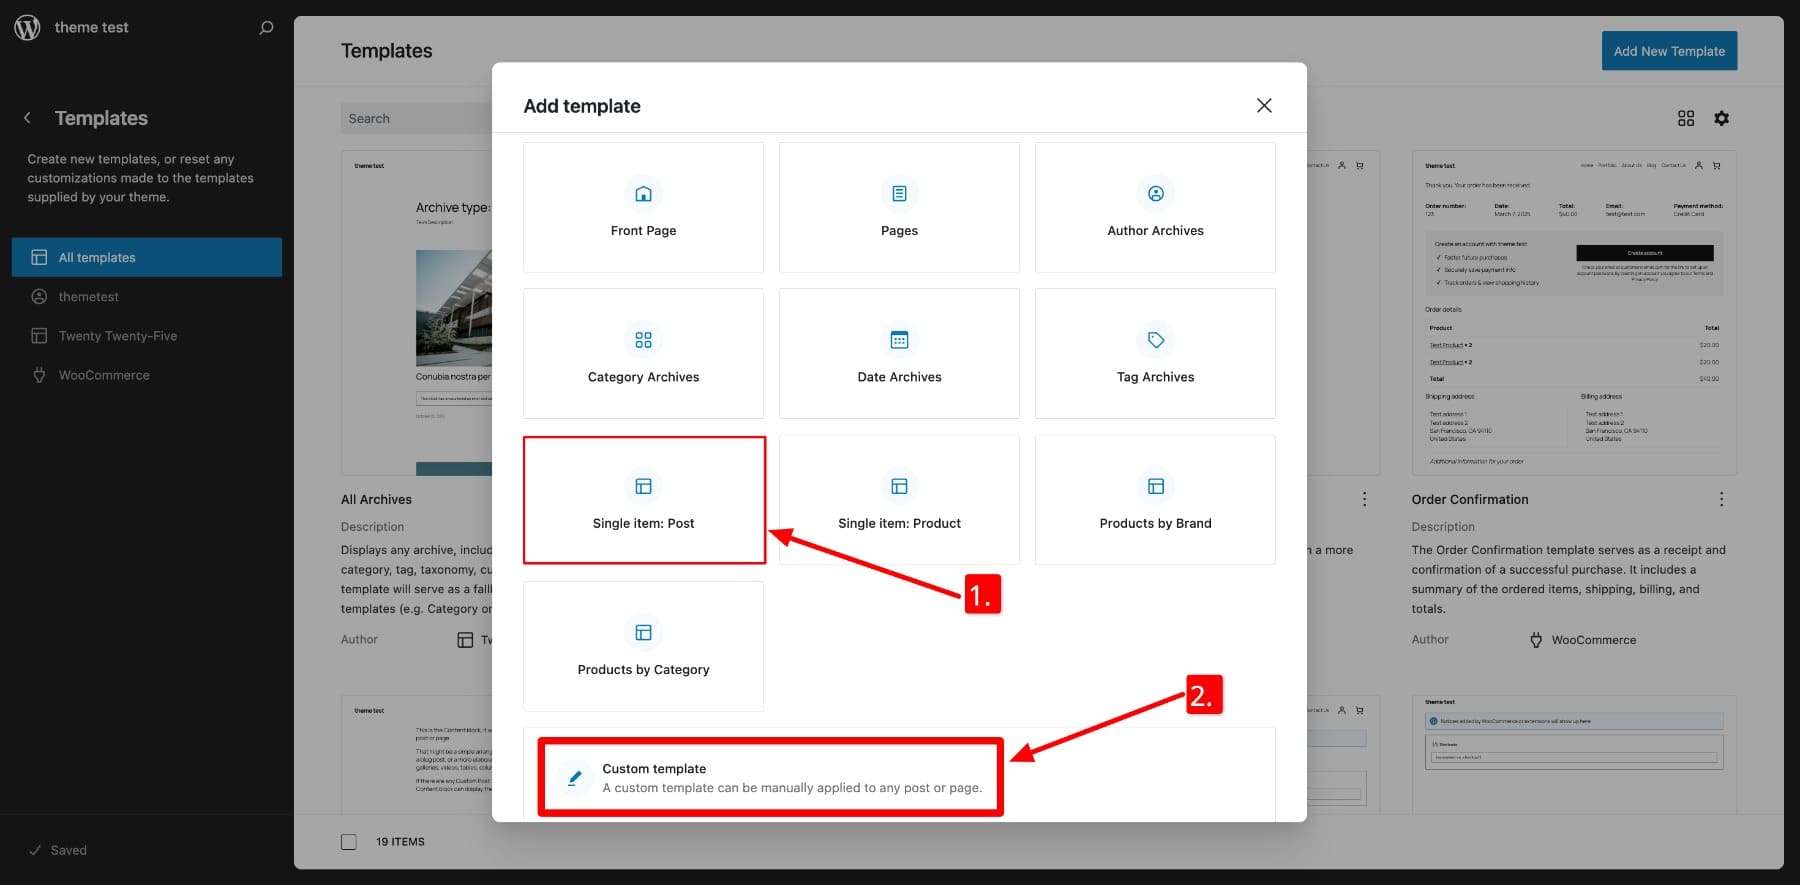
For this example, let’s create a Category Archives template, which will serve as an index page for all category pages. WordPress will then ask whether to apply it to one category or all. We’ll select All Categories so the design is consistent across all categories.

Next, WordPress will prompt you to choose a Pattern from its default templates. Since we’re building a custom template from scratch, click Skip otherwise it’ll look like the default blog index layout.
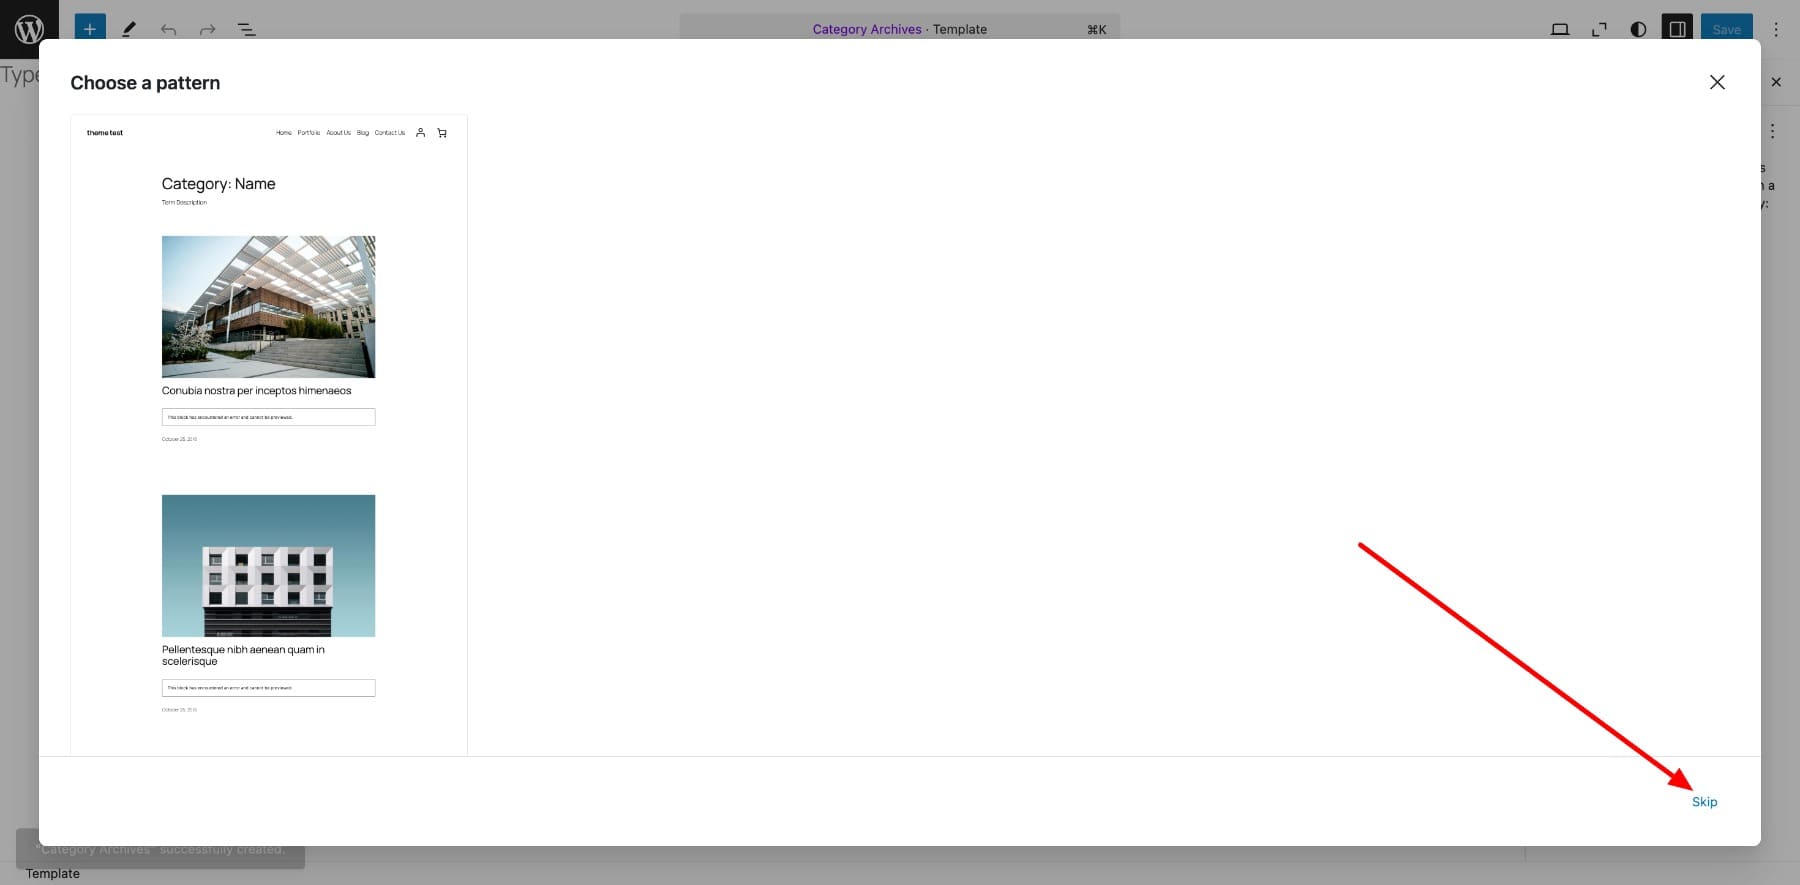
Now, you’ll enter the WordPress Editor, where you can start adding blocks to design your template. Let’s begin by adding a header and footer.
Next, move on to the main content area. You can select a pre-defined pattern to create the category index. Let’s choose one.
While patterns make layout creation easier, they come with limitations. You can make basic changes—such as adjusting text color, size, and font—but deeper customizations are restricted.
The WordPress Site Editor is beginner-friendly which makes it a great starting point for customization. However, it has some major limitations:
- Limited template patterns to choose from
- Restrictions on modifying pre-defined layouts
- No advanced customization options without coding
While this method gives you more control than a standard WordPress theme, it doesn’t offer true design freedom. If you’re looking for complete flexibility and a unique design, consider using a page builder—like Divi. That’s what we’ll cover next.
2. Using a Website Theme Builder
Website builders like Divi give you complete control over your website’s design. You can customize every corner of your site without writing a single line of code—thanks to Divi’s drag-and-drop interface and real-time editing.
Unlike other builders, which often make template building complicated, Divi simplifies the process. With its Theme Builder, you can create custom templates as easily as designing any regular page.
Divi also comes with pre-designed website layouts that include branded templates, making customization effortless. But what truly sets it apart is Divi Quick Sites. With it, you can generate a fully-functional, professionally designed website—complete with custom templates for all pages—in under five minutes.
To take it a step further, Divi AI can help you create page layouts, generate optimized copy that matches your brand style, and even design stunning images in minutes. With Divi, you get everything you need to build a truly unique and branded website without the limitations of the WordPress Site Editor.
How to Build a Custom WordPress Page Template (Step-by-Step)
This section shows you how easy it is to create a custom WordPress page template with Divi. For this, you need the Divi theme installed and active on your WordPress dashboard.
Here’s a step-by-step tutorial on installing and activating Divi:
1. Create a New Custom Template
To design a custom template using the Divi Theme Builder, go to Divi > Theme Builder from your WordPress dashboard.
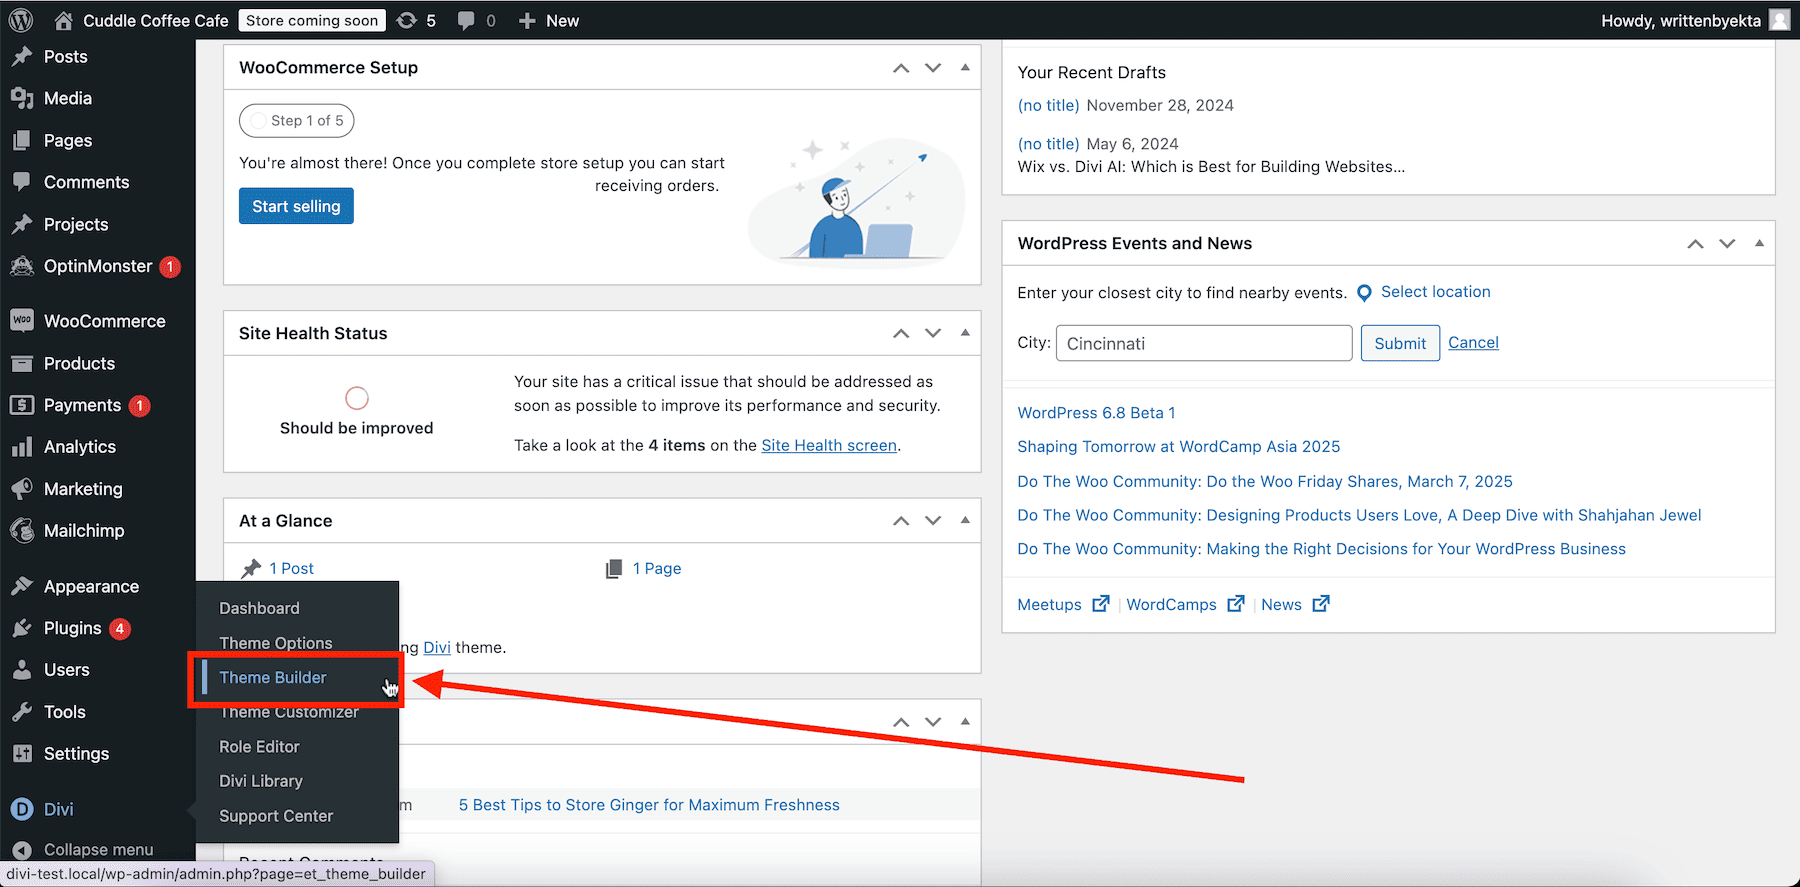
You see the default website template currently. To add a new template, click Add New Template.
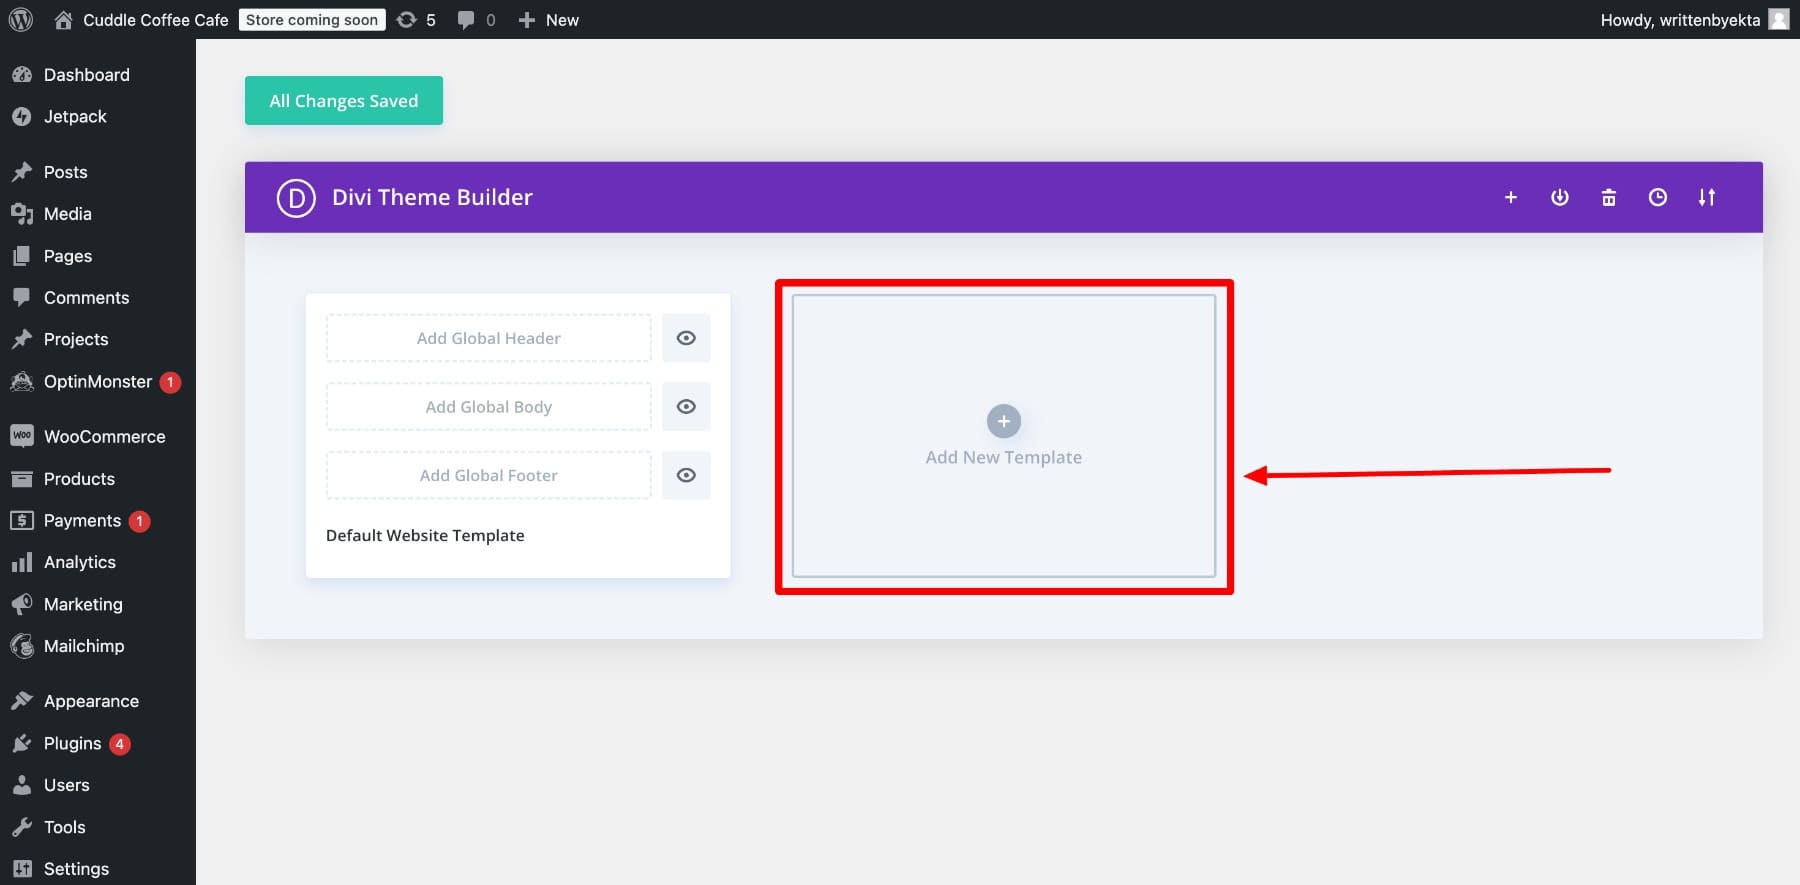
Since we’re building from scratch, choose Build New Template. It’ll ask you where you want to apply this template. I’m choosing All Category Pages to make it display in different category index pages.
2. Import a Pre-Designed Divi Layout
To add content, click on Add Custom Body. It’ll ask you to choose a template or build from scratch. You can do either, but I’ll show you how easy it gets just by choosing a pre-designed layout.
And that’s it! Now you only need to customize the template a bit to make it yours.
Add Dynamic Content
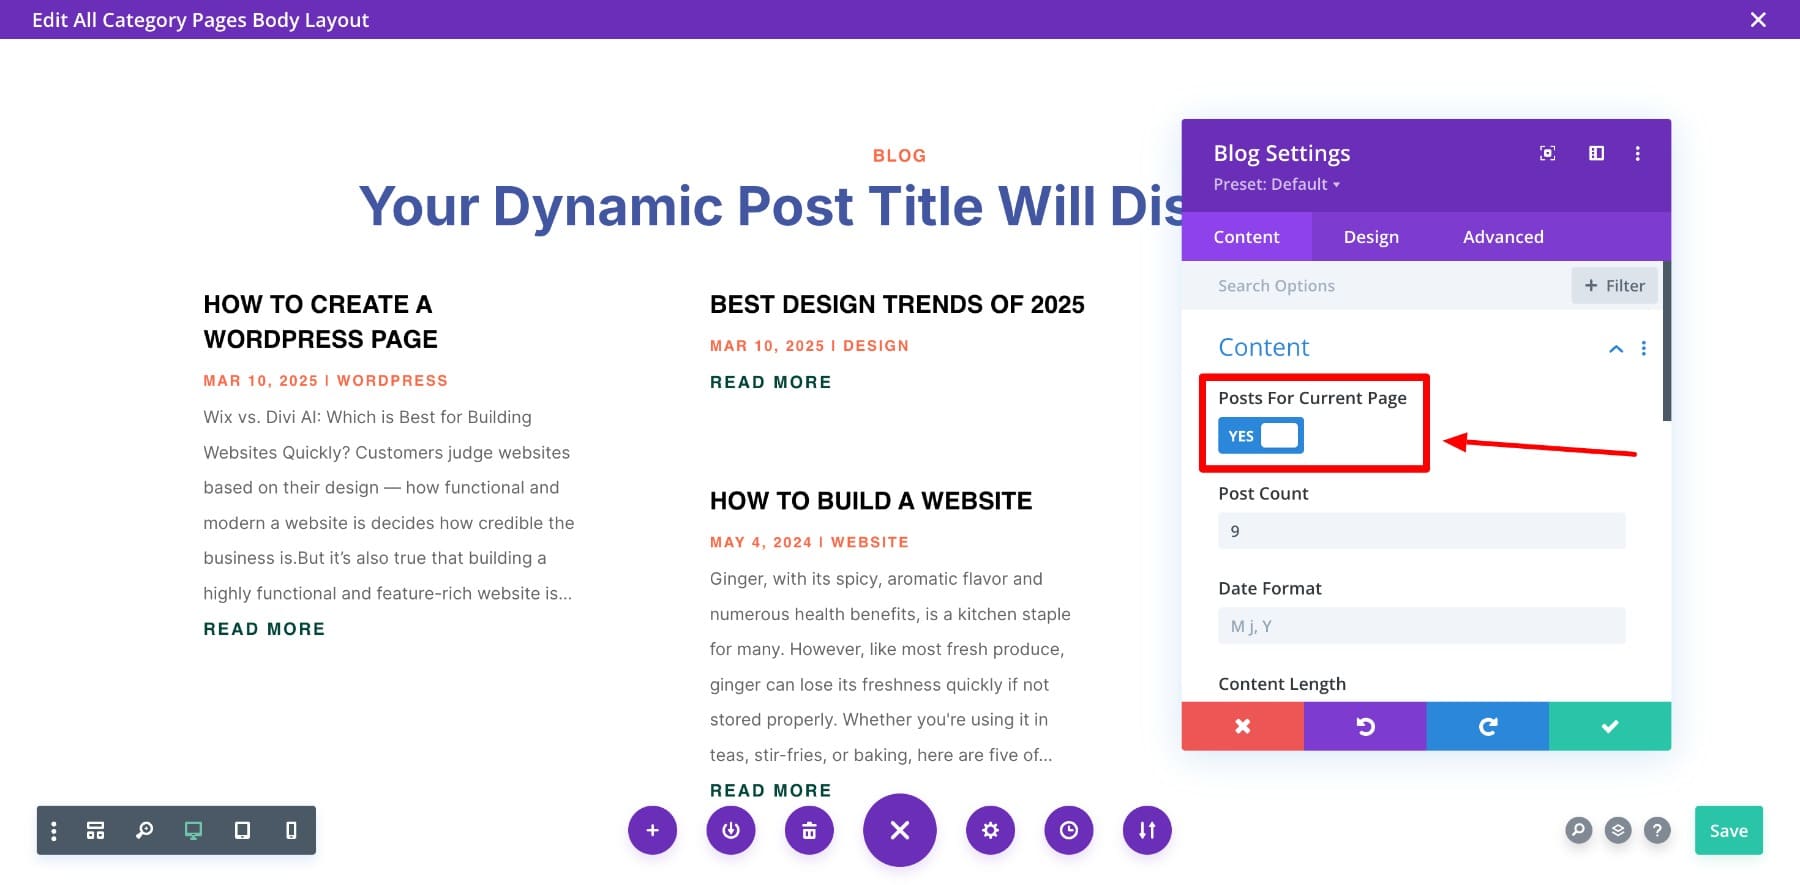
Divi lets you add dynamic content that pulls data from the page. For example, if the readers are in your Design category, the title displays Design Posts and the index includes the posts only from the design category.
You also need to turn on the Posts For Current Page option to ensure that the right posts from the category appear.
3. Save and Preview Your Template
After you’ve customized the template, make sure to save them both inside and outside of the builder.
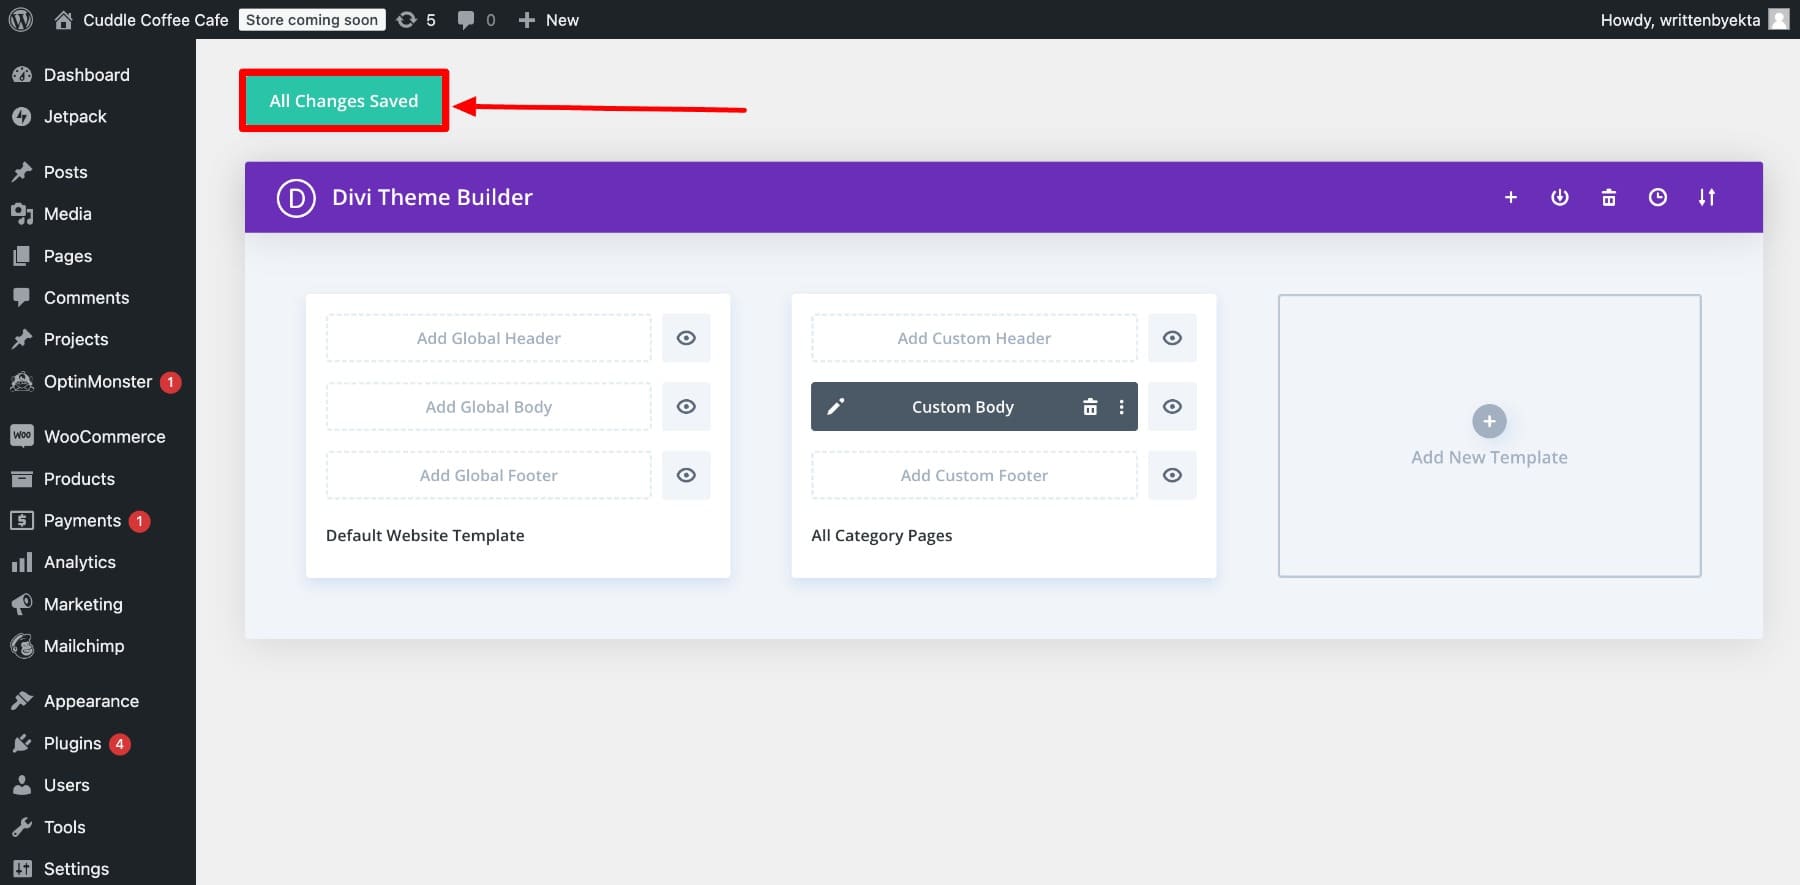
Let’s preview our design:
And it’s done! You can make more changes to your template using Divi’s amazing customization tools to make it completely yours.
Why Use Divi to Create Custom WordPress Templates?

Divi gives you everything you need to build custom templates and design a truly unique website—without touching a single line of code. Its drag-and-drop editor and powerful Theme Builder make website customization effortless.
Here’s why Divi is the best choice for building custom WordPress templates:
1. Divi Quick Sites to Build Branded Websites (and Custom Templates)
Divi Quick Sites is perfect if you don’t like spending time perfecting your site but still want to have a unique website. All you need to do is give Divi Quick Sites instructions and it will build a fully-functional website for you in less than two minutes.
The best thing about the sites created with Divi Quick Sites is that you also get custom templates for all your pages such as contact, blog index, blog front page, WooCommerce page templates, and other landing pages.
Go to Divi > Generate a New Site > Choose a Pre-Made Starter Site.
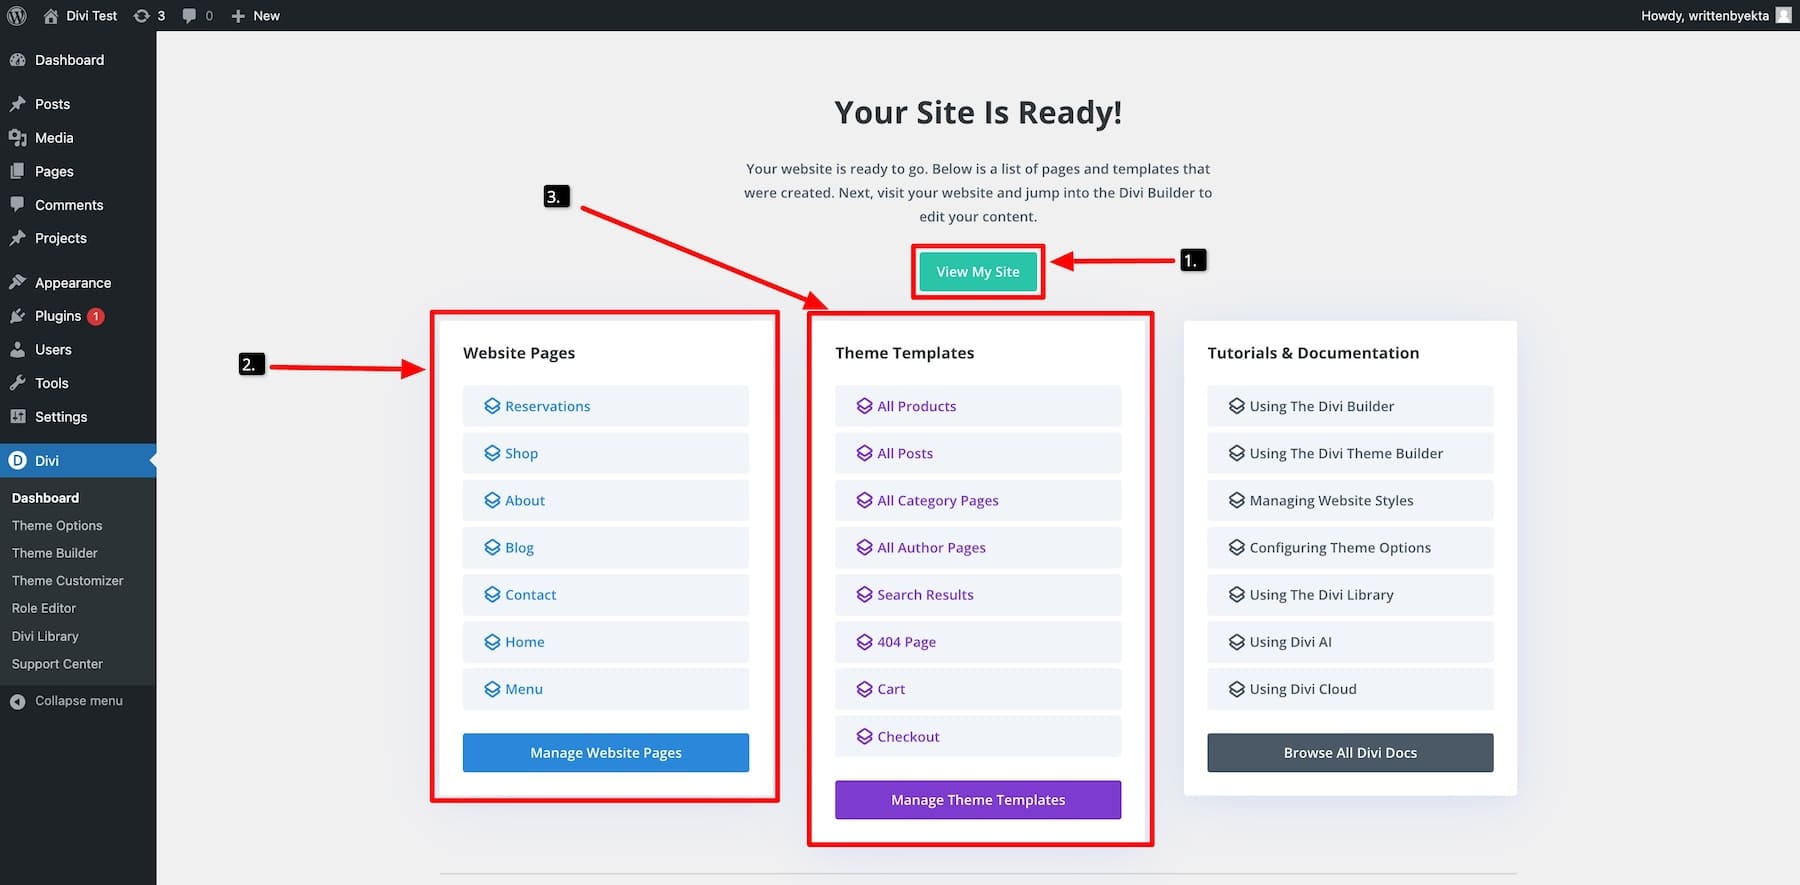
On Your site is ready page, access all your website, individual pages, and theme builder templates:
2. No Limits to How Much You Can Customize
Divi offers complete design flexibility. It allows you to customize every aspect of your website without restrictions which makes it a great choice for custom websites. With the Divi visual builder, you can modify layouts, adjust spacing, fine-tune typography, and apply advanced effects, all without touching a single line of code.
3. Import a Pre-Designed Template Layout for Quick Designs
Getting started with a professional design is easy with Divi’s pre-designed layout packs. Instead of building pages from scratch, you can quickly import a fully designed layout with a single click.
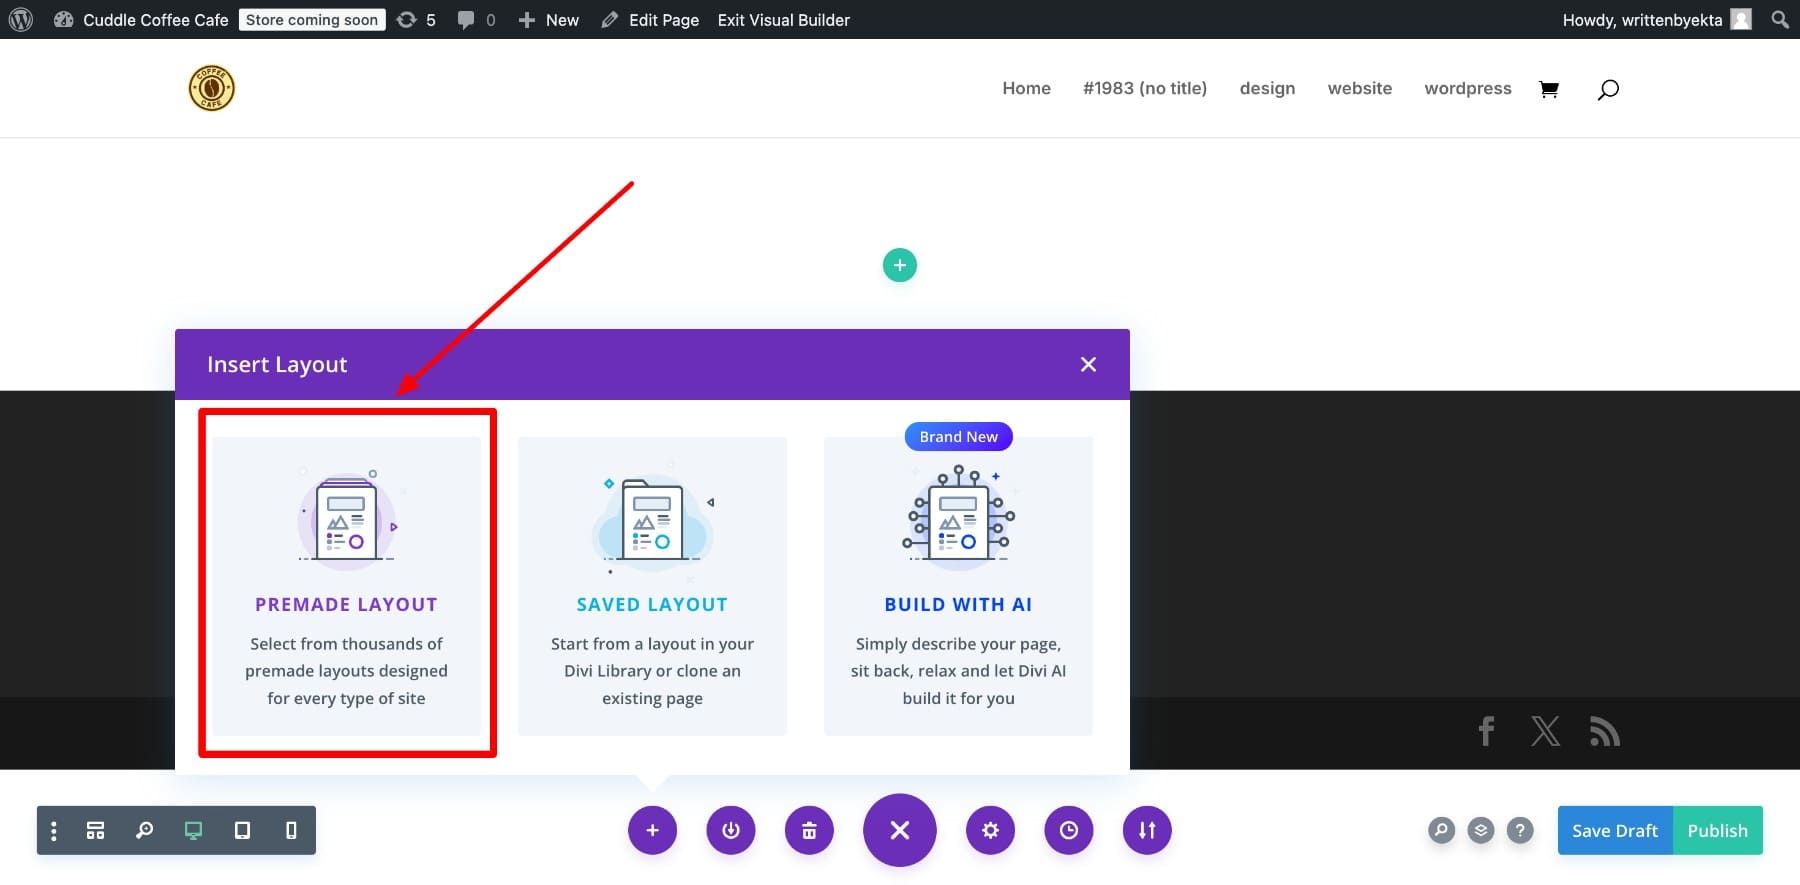
Divi layouts include templates from various industries and styles so you can easily find the one you like. You can also turn entire pages into templates and mix and match, so there’s no limitations to designing options.
4. Give Your Site a Consistent Look with the Divi Theme Builder
The Divi Theme Builder allows you to create global templates for headers, footers, blog posts, product pages, and more. Instead of manually styling individual pages, you can design templates that apply across your entire website.
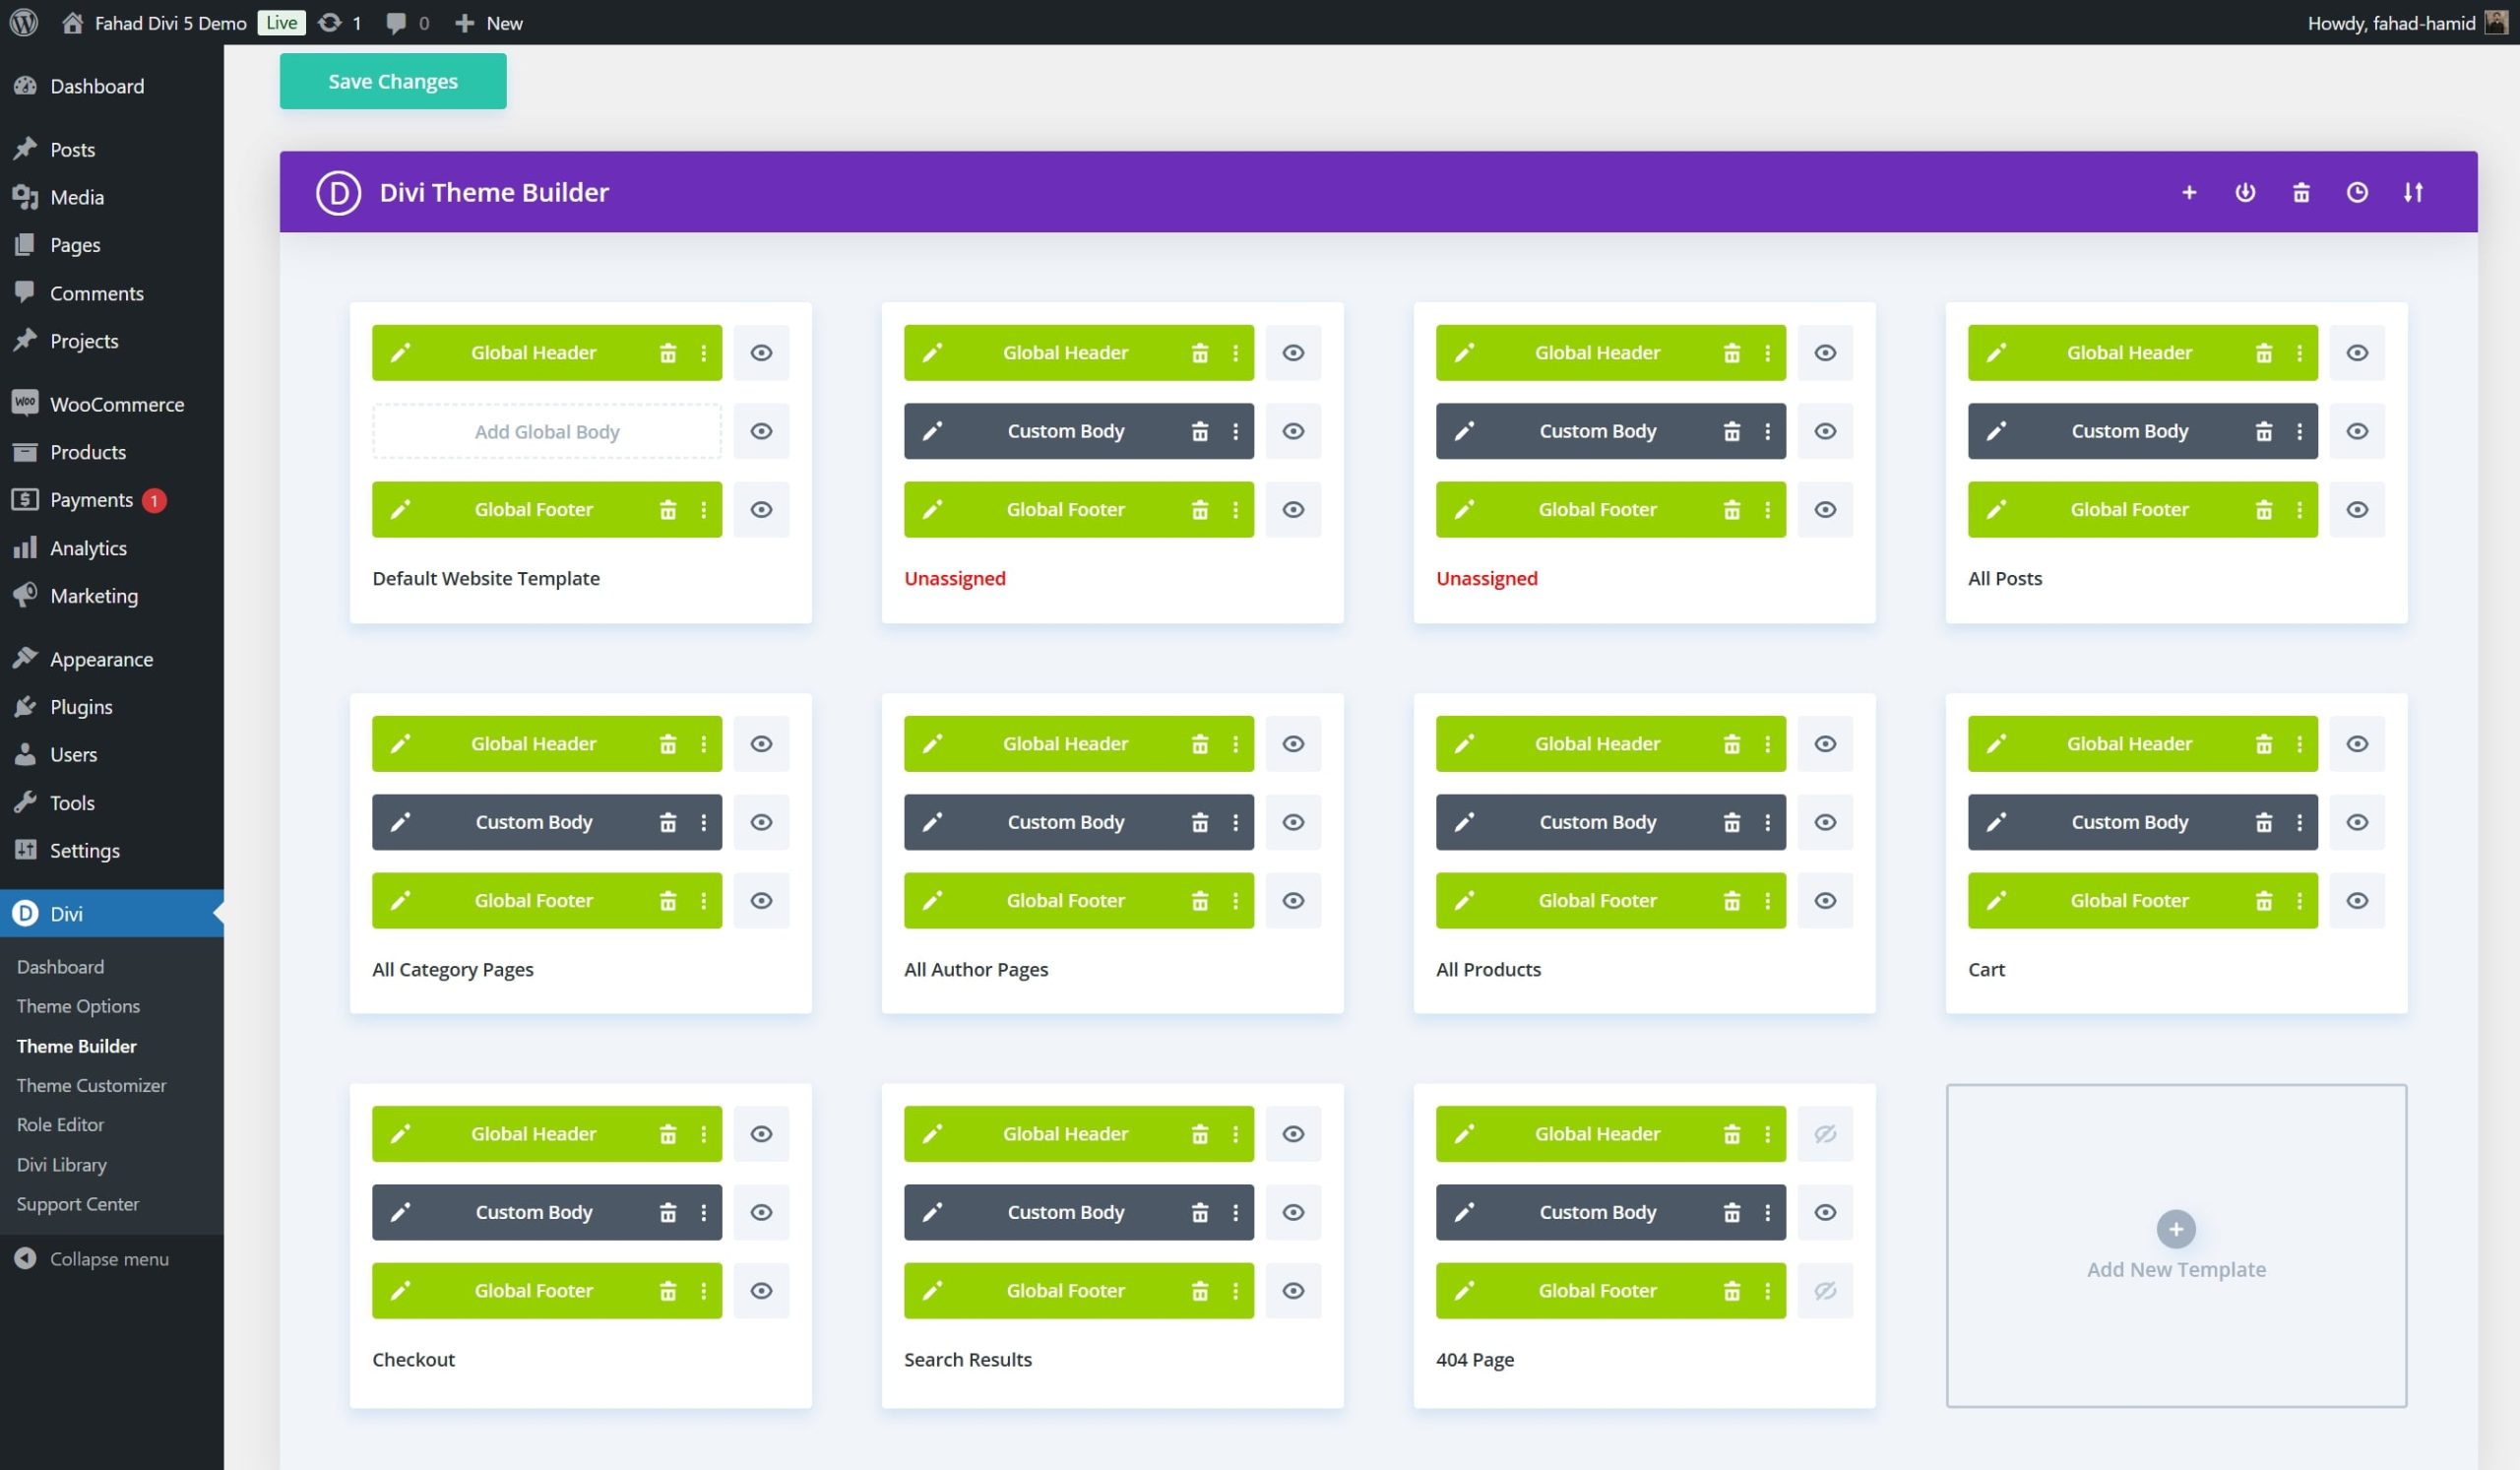
Divi Theme Builder helps you make sure your site has a cohesive look while saving time on repetitive edits. You can even set different templates for specific categories, pages, and even blog posts. (I’ll show you how to create a category index page later.)
5. Save and Reuse Elements from Divi Library
Divi’s Library feature lets you save custom sections, rows, and modules for future use which is perfect to maintain a consistent look in all your pages while saving time. If you frequently use a particular button style, CTA section, or pricing table, you can save it to your Divi Library and reuse it across different pages. This speeds up your workflow while maintaining design consistency.
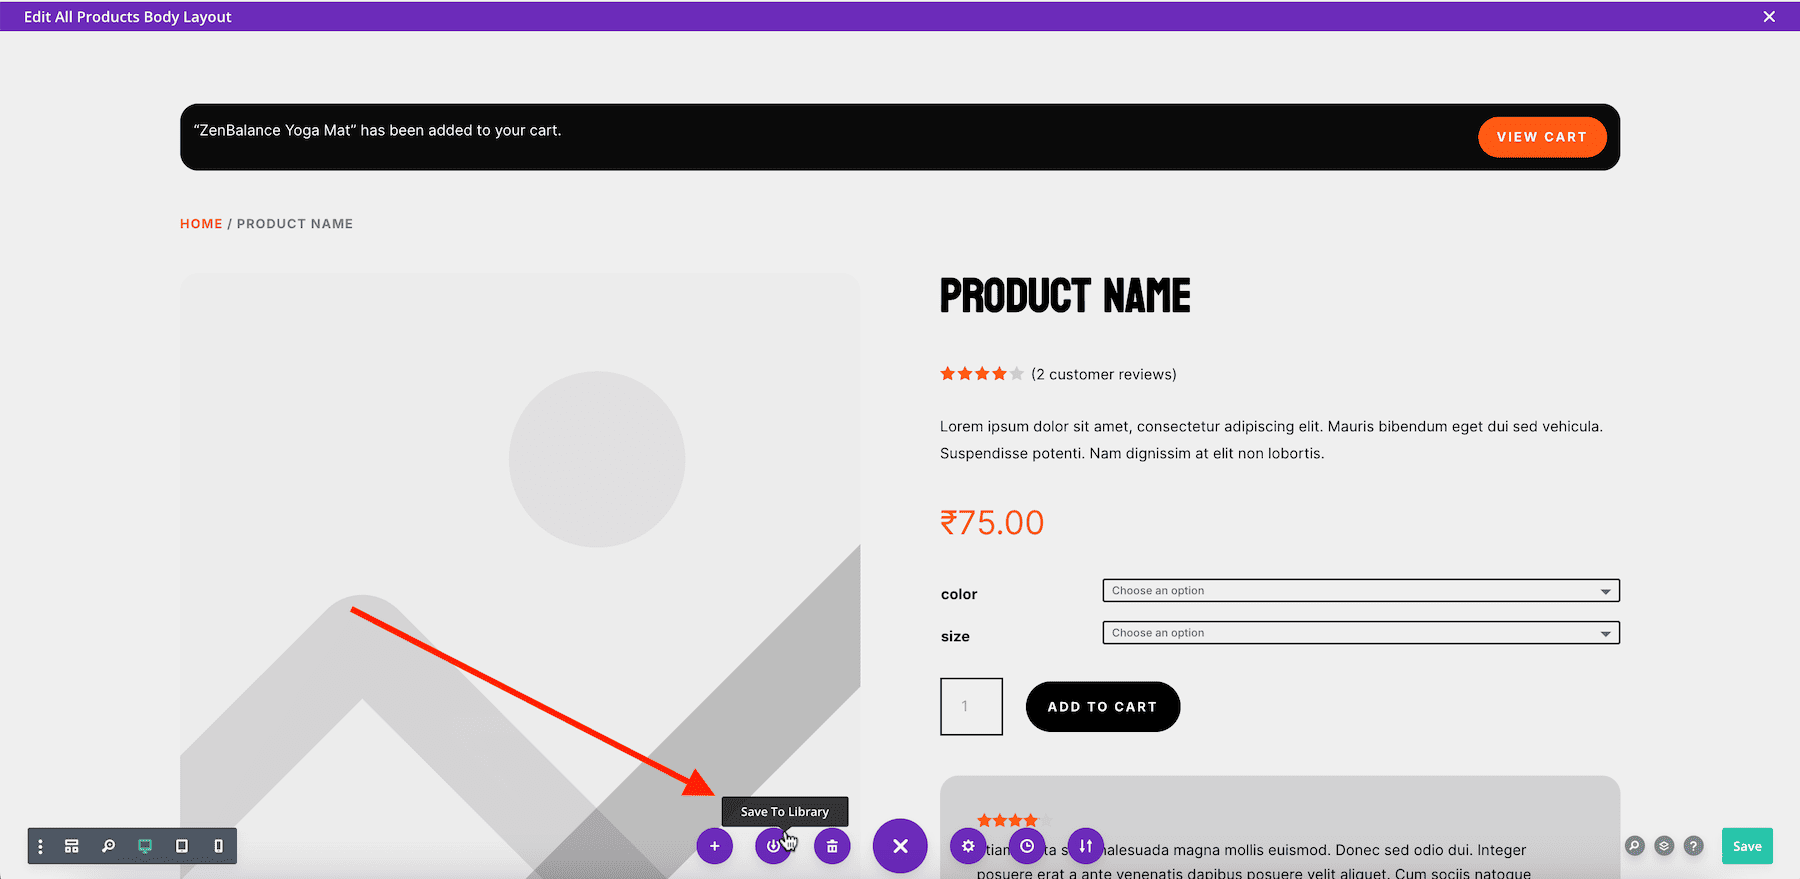
Plus, you can make global edits—change the saved module once, and it updates everywhere it’s used!
6. Add Dynamic Content to All Your Templates
Divi also lets you add dynamic content which means you can make your website smarter by pulling data dynamically into your designs. You don’t have to manually update text, images, or custom fields on every page, just link them to dynamic sources like post titles, author names, featured images, or WooCommerce product details.
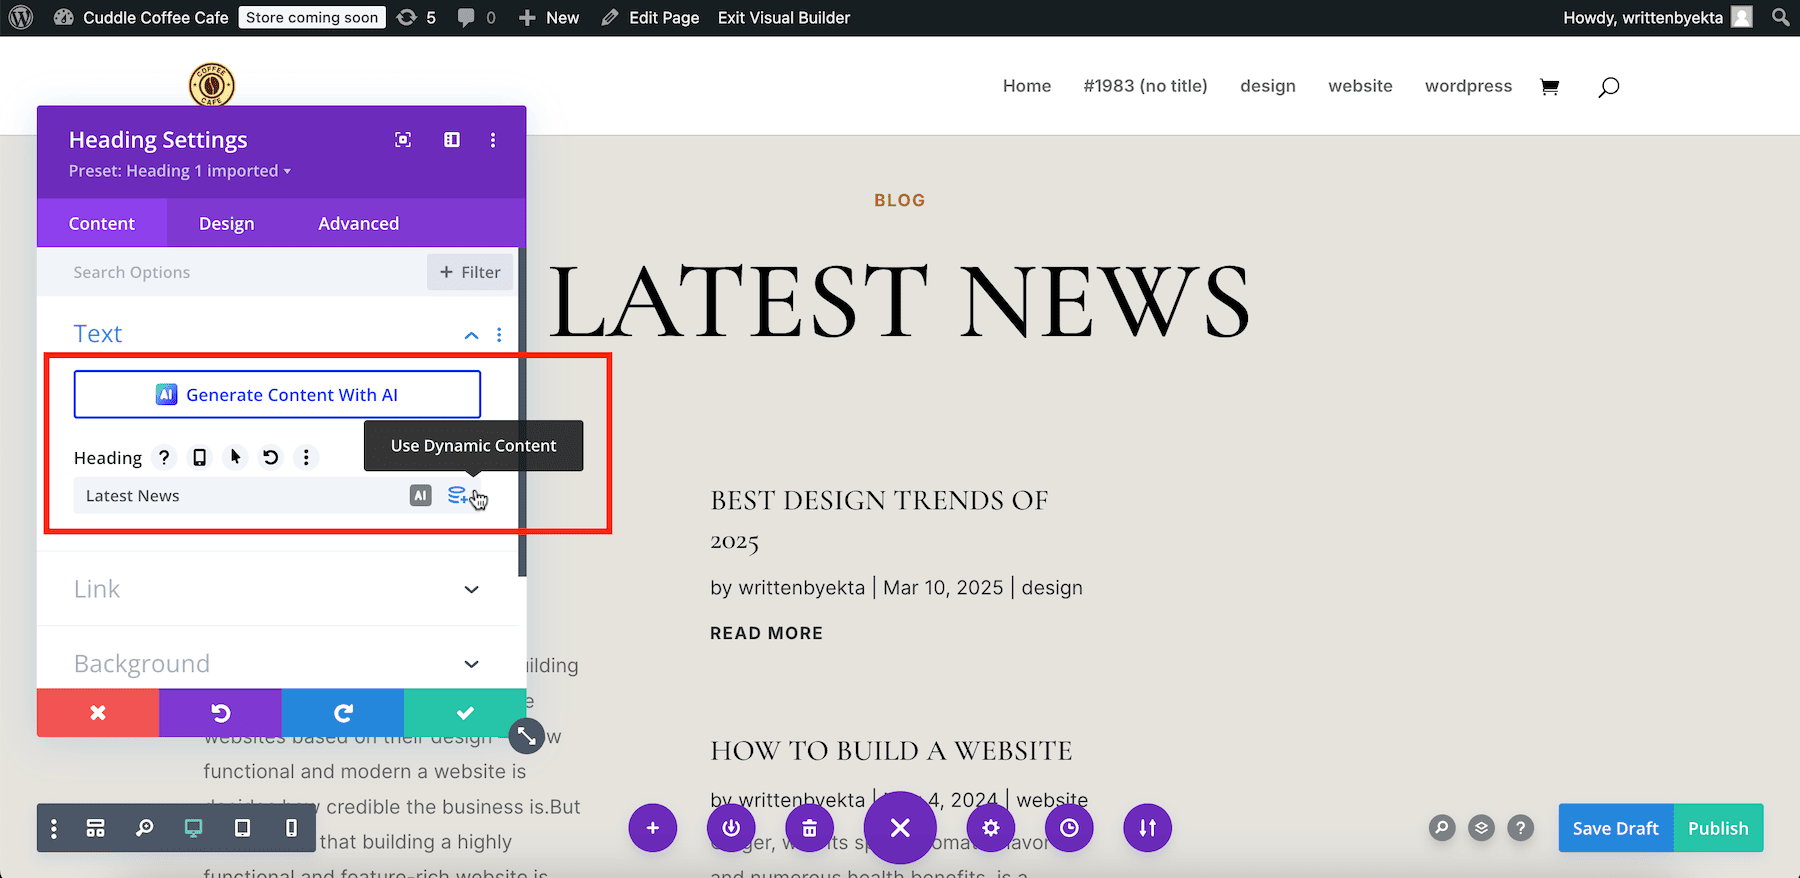
This is especially useful if you’re designing blog category index pages, portfolios, and eCommerce sites where content changes frequently. This helps you make sure everything stays updated automatically. (I’ll show you how easy it is to add dynamic titles to your category index page later.)
Generate Branded Custom Templates for Your Entire Website in 2 Minutes
Creating custom WordPress templates helps your site stand out from generic themes, but WordPress Site Editor has limitations. Divi simplifies this process with Divi Quick Sites, letting you generate fully branded templates for your entire website in just two minutes.
No need to build from scratch—use pre-designed layouts, the Theme Builder, and dynamic content to customize effortlessly. Whether for blog categories, landing pages, or WooCommerce stores, Divi gives you full control over design and functionality.



Leave A Reply