A pretty standard way of monetizing web content is to provide limited access to that content through a membership community. You can create this easily with one of many paywall plugins available for WordPress. The Patreon platform (which can be linked to WordPress, too) is also a very popular option. Some use MemberPress or another top WordPress membership plugin, and still others use WooCommerce. Woo might not be the first name to pop into your head when you think of membership sites, but we’re going to walk you through setting one up so that you can see the power and versatility the top ecommerce platform provides for membership sites.
WooCommerce Memberships
The first thing you need to do is make sure that WooCommerce is installed on your site. Many hosts will offer the option when you install WordPress. If that’s not the case, you can easily find it in the WordPress.org plugin repository.
Out of the box, however, WooCommerce doesn’t offer membership capabilities. For that, we recommend WooCommerce Memberships. With it, you can sell the memberships themselves as products in your store, sure. But you can also sell drip content, provide access to restricted content and products, give exclusive discounts, and assign member perks.
We do want to mention that WCM is a premium plugin that costs $199 per year. However, we feel the cost is more than offset because of the large amount of revenue the membership site will almost certainly bring in.
Installation and Setup
Once you’ve purchased and downloaded the plugin, go to Plugins – Add New to install it. Upon activation, a Setup option will appear in its entry on your list of installed plugins.

The link takes you to a setup page that resembles the original WooCommerce installation wizard. Here, you will decide on specifics as to how your membership areas appear to visitors and so on.
1. How Does Member Content Appear to Non-Members?
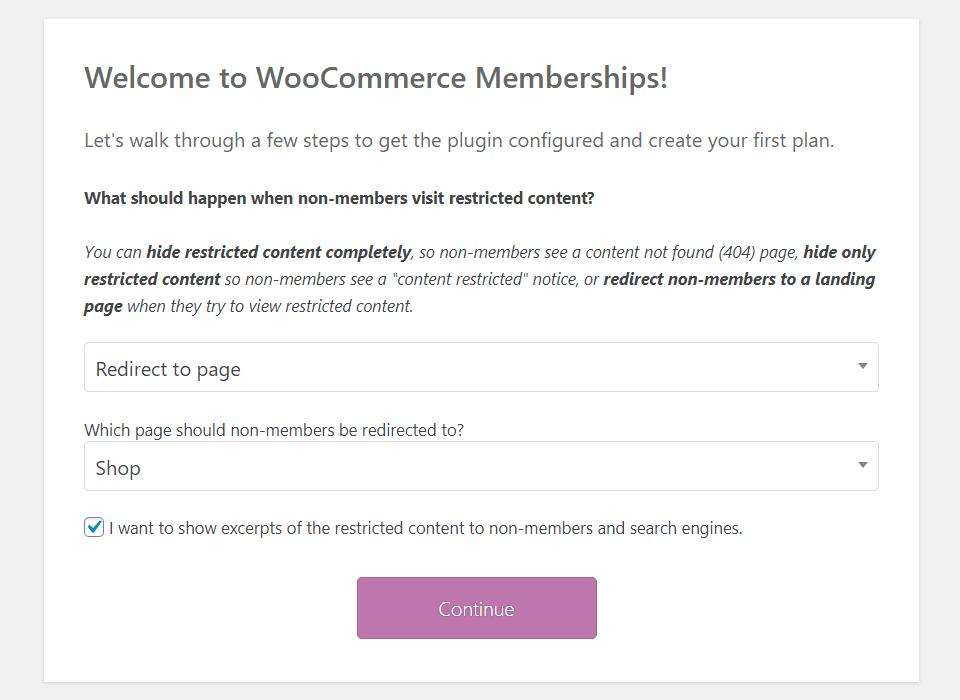
The first decision you must make is how the members-only content appears to non-members. You can hide it entirely, showing public users a 404 page. Selecting “hide only restricted content” shows users an alert that the content is for members only. And you can prompt them to subscribe. Or you can choose to redirect public users to a separate page altogether. Perhaps one that highlights and showcases your membership benefits and makes subscribing easy.
We also suggest that you enable the box labeled I want to show excerpts of the restricted content to non-members and search engines because that way you get SEO juice for the partial content that is indexed.
2. What Kind of Memberships Do You Sell?
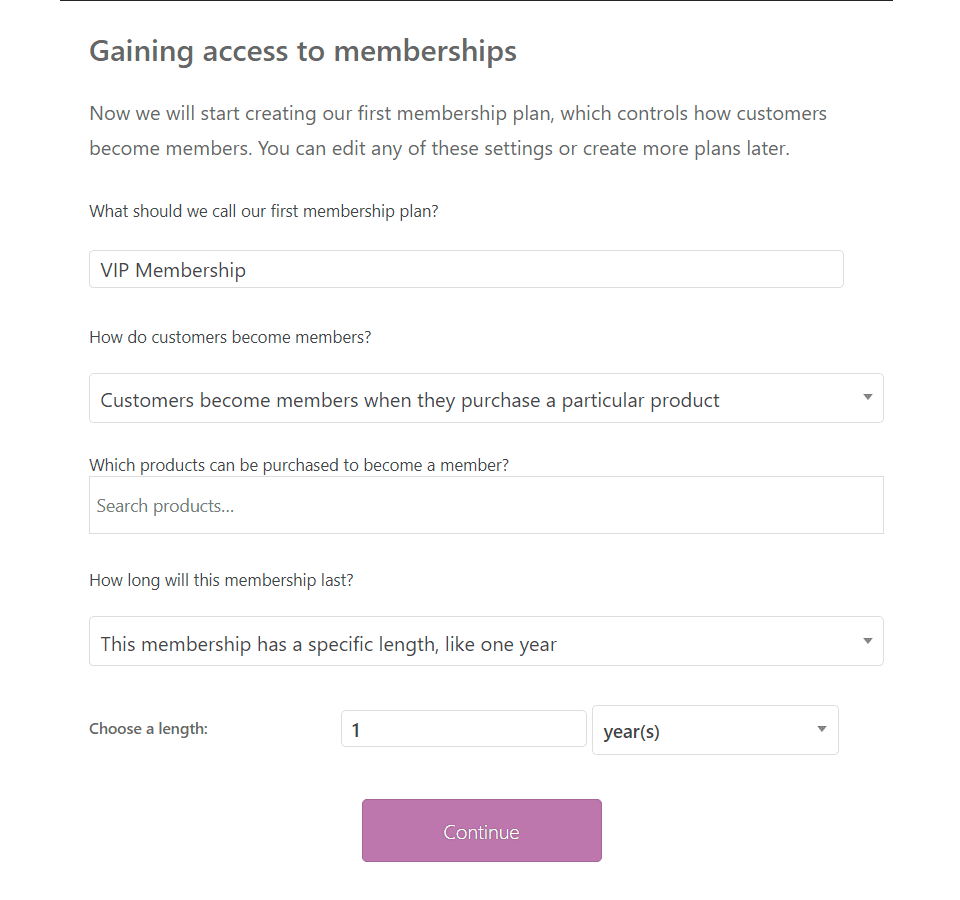
The second step is picking your type of basic membership. You can make it so that membership is granted upon WordPress user signup. But if you’re using WooCommerce, you’re probably going to want it so that they purchase a membership through your store. And since it’s a store purchase, you can decide when and if the customer needs to purchase it again.
3. Membership Perks
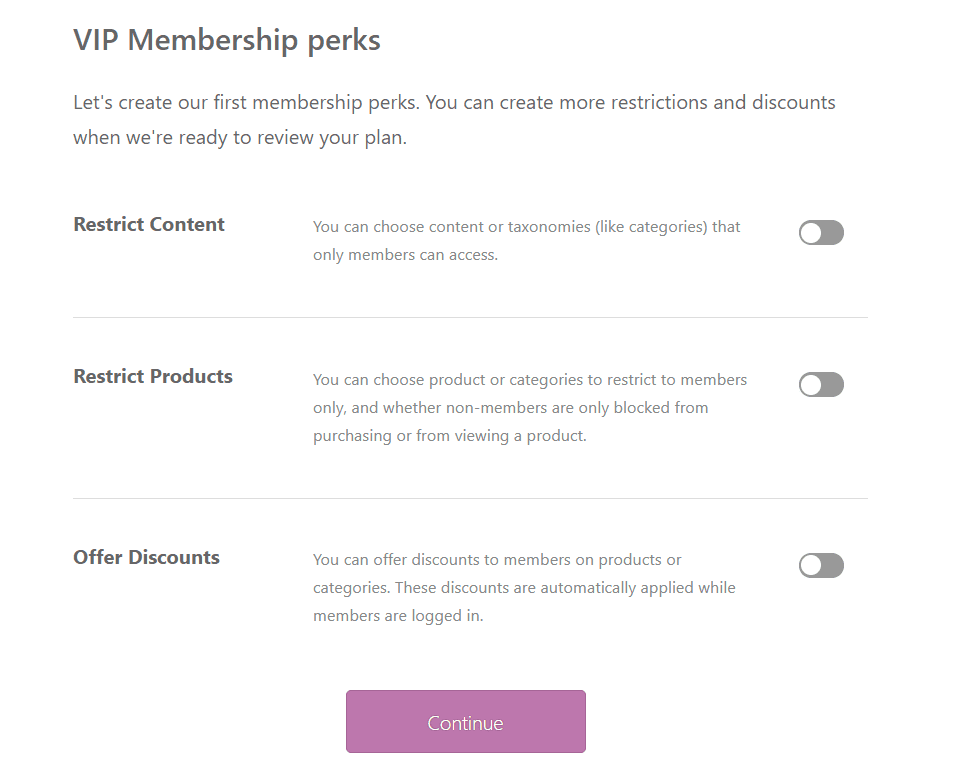
This one’s pretty easy to settle on. You choose what your members get as perks. Whether that is access to certain categories or post types, individual products, certain discounts, etc.
4. Emails
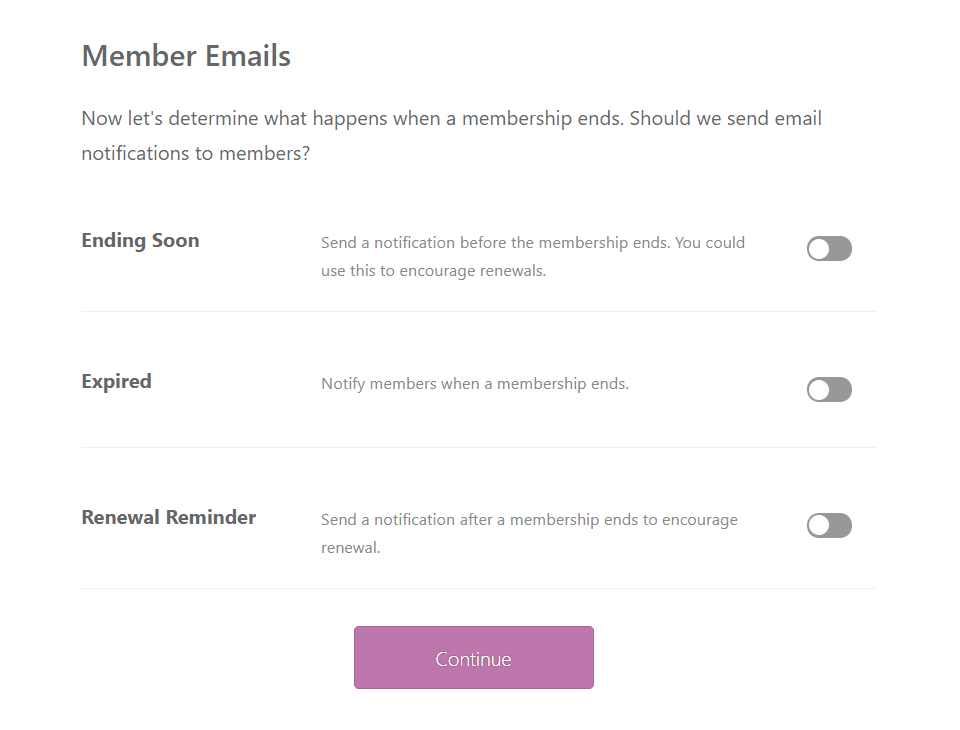
As you probably know, user retention is the hardest part of running an ecommerce store. One of the best ways to bring those customers back is through emails (such as an abandoned cart reminder). You can also do that with membership emails, reminding your users they need to re-up their subscriptions, both before and after expiry. Having a renewal reminder email with a discount code in it is a truly fantastic way to retain users for a minimal loss.
Membership Settings
When you finish the setup wizard, the plugin directs you to the Woocommerce – Settings – Memberships page. Here, you can reconfigure anything that you just set if and when you figure out what works for your membership site.
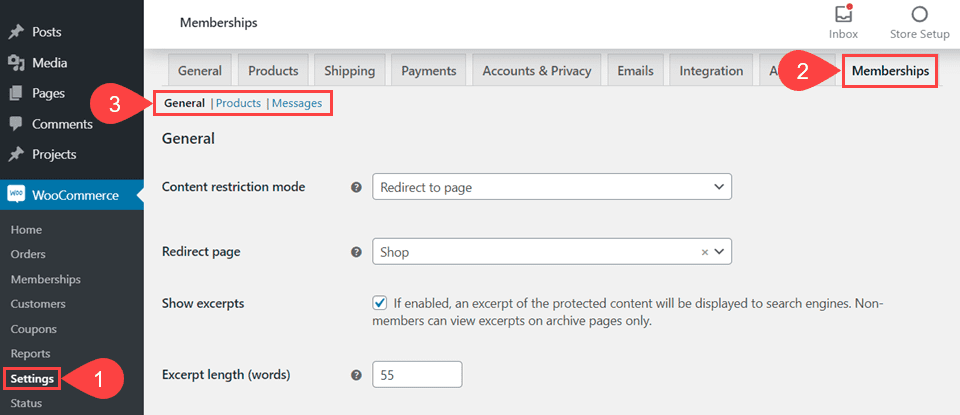
You can set the snippet length for the excerpts and that sort of thing, too. However, the other configurations that you need to check are under the Products and Messages tabs (3).
Under Products, you can more finely tune how your memberships function. Such as allowing multiple purchases of a membership to extend their subscription period, rather than having to wait on a renewal.

Being able to exclude certain products in your store from member discounts is very important, too. As valuable as your members are, sometimes even they have to pay full price.
Under Messages, you can “customize restriction and discount messages displayed to non-members and members.” This page is where you really get the opportunity to both upsell customers and sell potential customers on the benefits of becoming members.
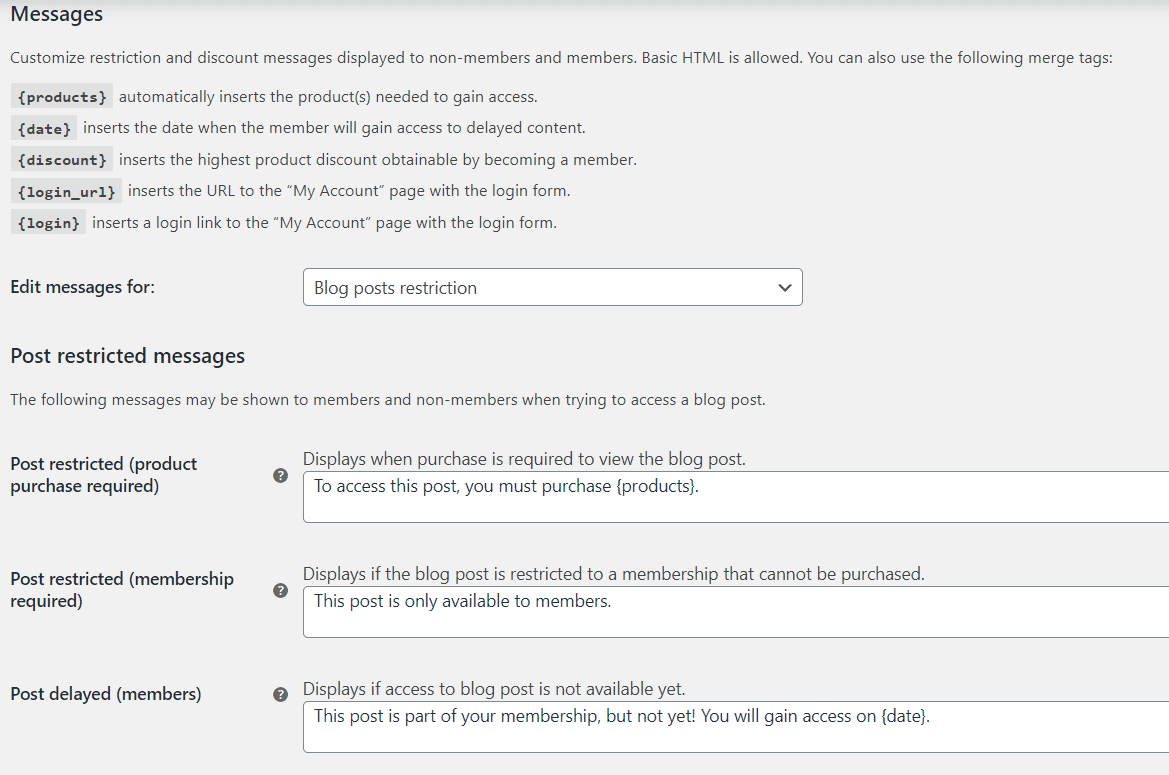
Since HTML is allowed, we suggest that you take advantage of it and make your messaging appear as eye-catching as possible.
And at any point, you can check out the WooCommerce Memberships documentation. We’ve found it incredibly useful for understanding and troubleshooting any issues that have come up.
Creating Purchasable Memberships
If you have ever created a WooCommerce product before, then you know almost all there is to know here (save a few specifics). If not, do’t worry. It’s incredibly simple and easy. The biggest boon for using the WooCommerce Memberships plugin is that everything is tied together by WooCommerce Products.
The basic idea is that your potential members will purchase an item from your shop, and upon purchase, the plugin marks their account as having an active membership of that level. That’s it. (Well, and creating the member content that you marked would be restricted during setup.)
But First…The Membership!
Before you actually create the product for the user to purchase, you need to set up the membership itself. In your sidebar, navigate to WooCommerce – Memberships and click on the Membership Plans tab.
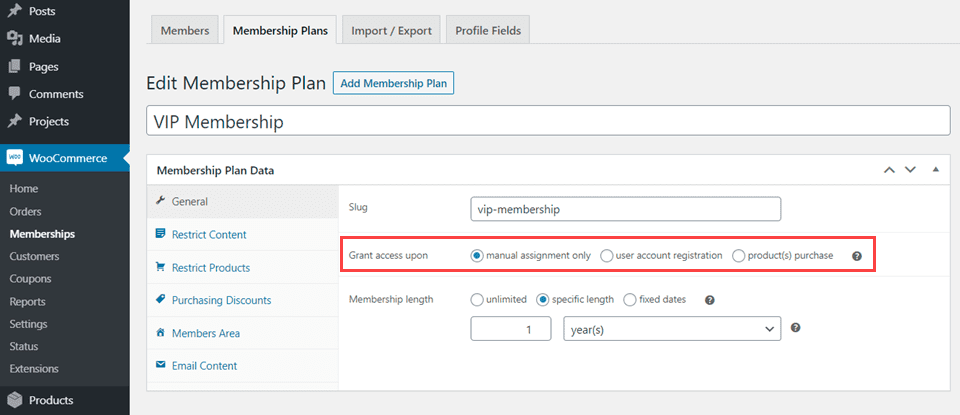
You can adjust all the details of what access the members at this tier have from the tabs to the left (such as Purchasing Discounts, Restrict Contents, Restrict Products). The main thing for this point, however, is the Grants Access Upon option. For now, you can leave it on Manual Assignment Only. Once you’ve created the purchasable item, you can come back and select Product Purchase. Doing so will then automatically apply this membership level to all customers who own that product.
Now Create the Membership Product
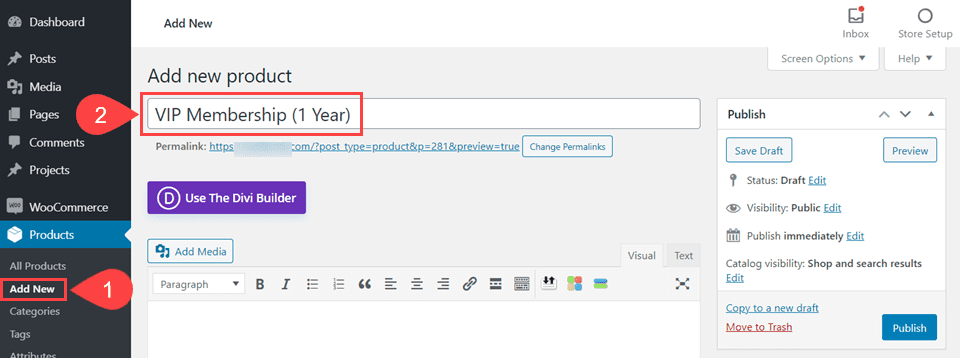
To begin, go under the Products – Add New menu item in your WP dashboard. As you would with a normal product, page, or post, enter a post name and any description that you want to appear on the product page to purchase the membership.
Scroll down a bit, and you see a metabox titled Memberships. In this box, you will see a number of options that you can set for this particular purchase. First, you decide if this product is going to be public despite all other restrictions. In most cases, this will be enabled on the items that apply membership. After all, you don’t want the public to ever be locked out of the ability to buy access.
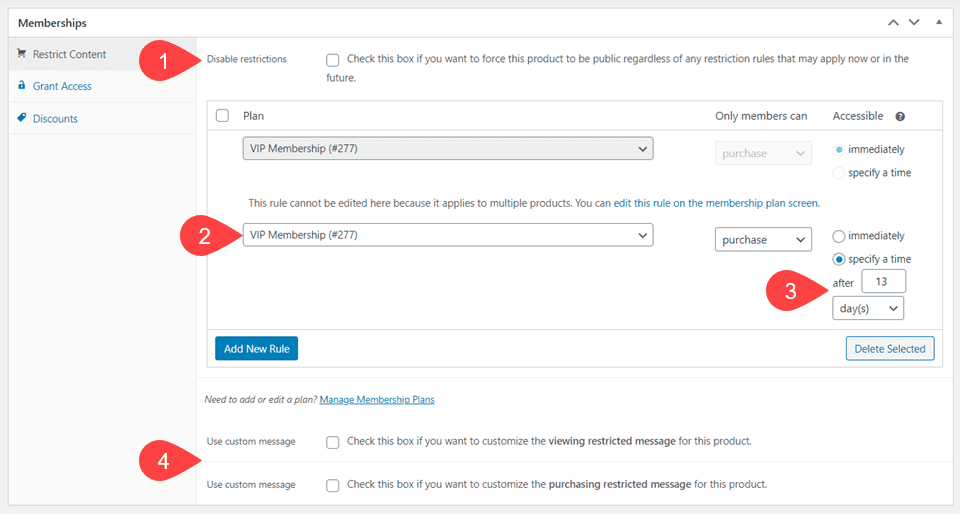
The Rules box under that checkbox indicates what plans have access to the item. If this were a normal item in your shop and not a membership itself, you could have it only appear to members of the Gold tier instead of the VIP tier, for instance. Note: this is not where you determine what membership this product applies.
This section is also where you can enable Drip Content for your members, making sure that only certain members get access to certain things at specific times. You can even set it to View or Purchase, depending on the content.
You will also be able to set custom messages for your users, which any of the custom messages that are applied through this metabox will override general ones in other settings.
In order to set what membership this product is connected to, go into the Grant Access tab to the left and select the membership tier that you created in the previous step.
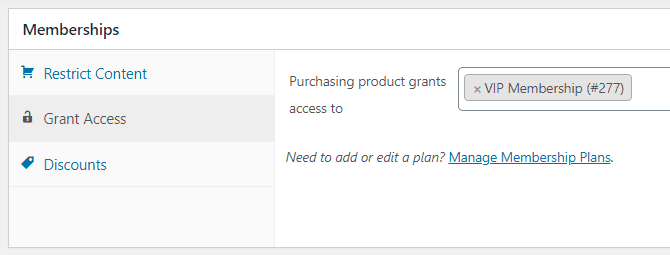
After that, anyone who purchases this item will automatically have all the rights, privileges, and benefits of whatever tier you assign.
Members and Membership Details
When you’re ready to dig into specifics of the options you just created, you will find a new Memberships entry under the WooCommerce menu item in your WordPress admin panel.
The first thing you’ll notice is the Members tab. This is where, once your site is live, you will see a full list of anyone who has purchased a membership to your site. The page provides a good amount of detail, too. The member’s last login, membership length, expiry, what level they are subscribed at, and their name and email.
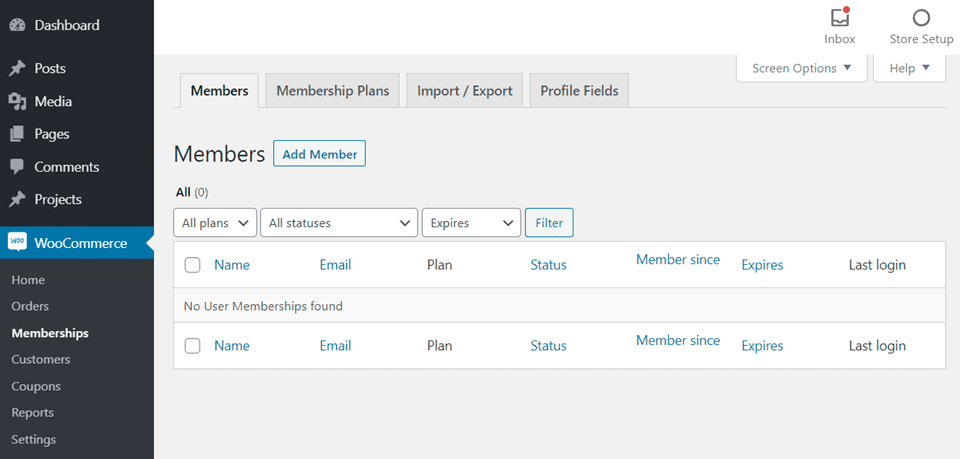
You can also manually apply membership to an existing (or new) user by clicking Add Member.
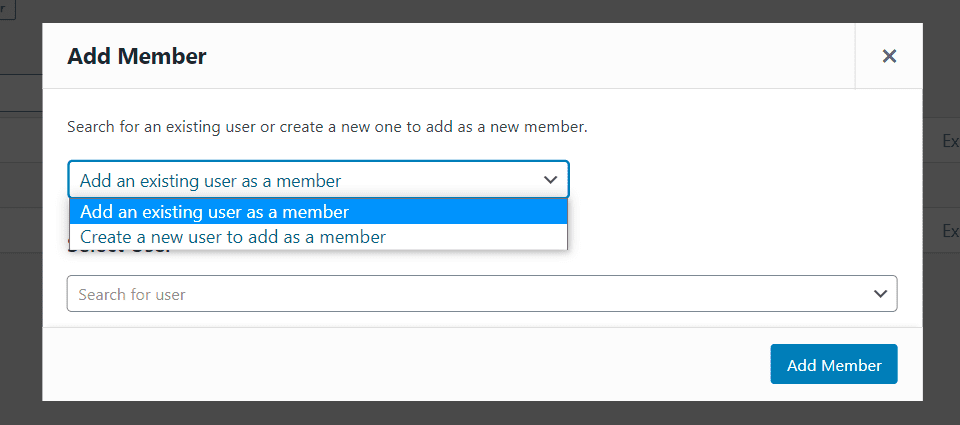
Once you’ve chosen or created a user, clicking Add Member takes you to their membership profile (which is different from their WordPress user profile).
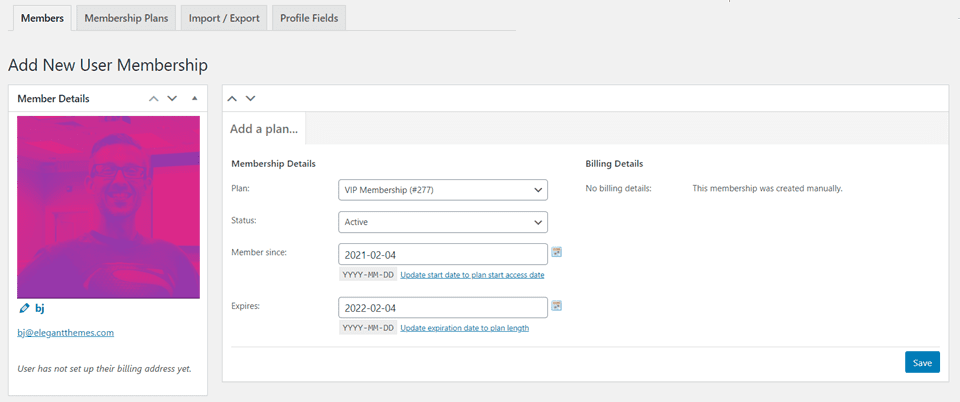
In here, you can adjust how long the membership lasts, what level the user has, and so on. You can also fill in any custom Profile Fields that you’ve created for your members, too, letting you “gather and store important information about your members to help you support and market your memberships more effectively.” These are found in the Profile Fields tab.
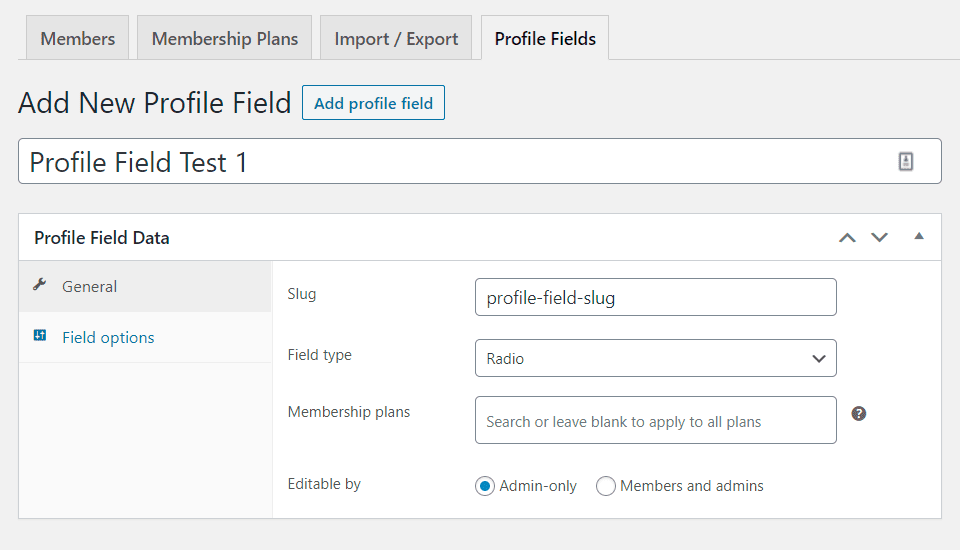
The Field Options tab to the left is simply where you provide labels for your field options.
From a User’s Perspective
On the front-end of your site, a user will see a standard WooCommerce product page.
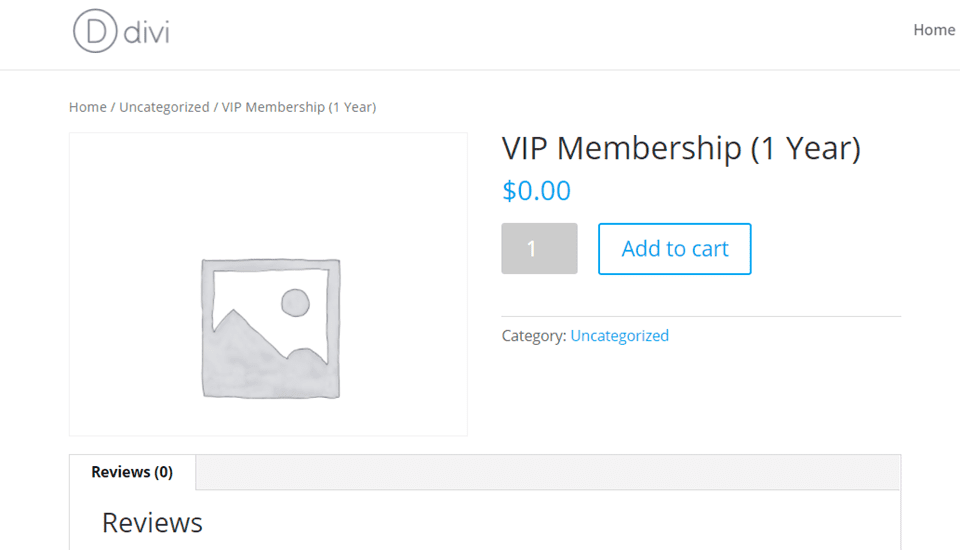
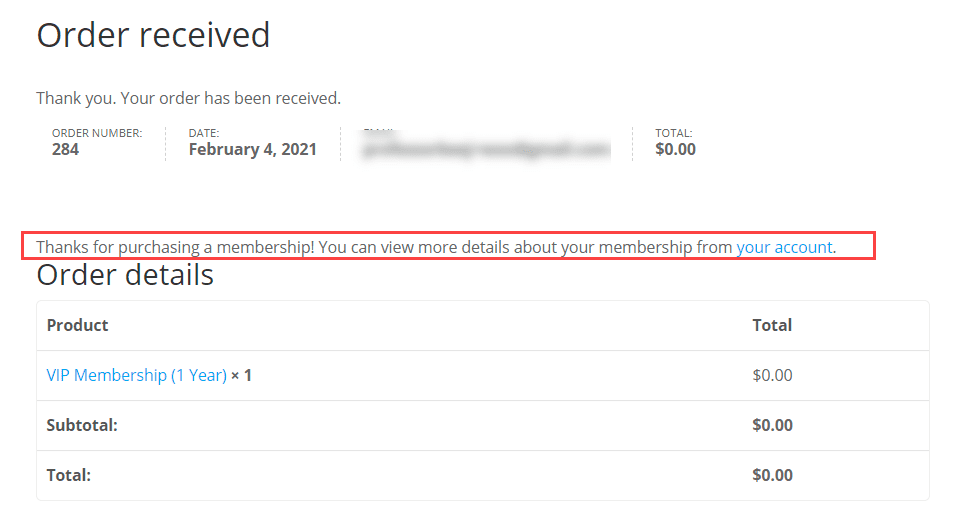
The checkout process is the same as anything else. When the customer is finished, their order confirmation will contain a link to their Member’s Area.
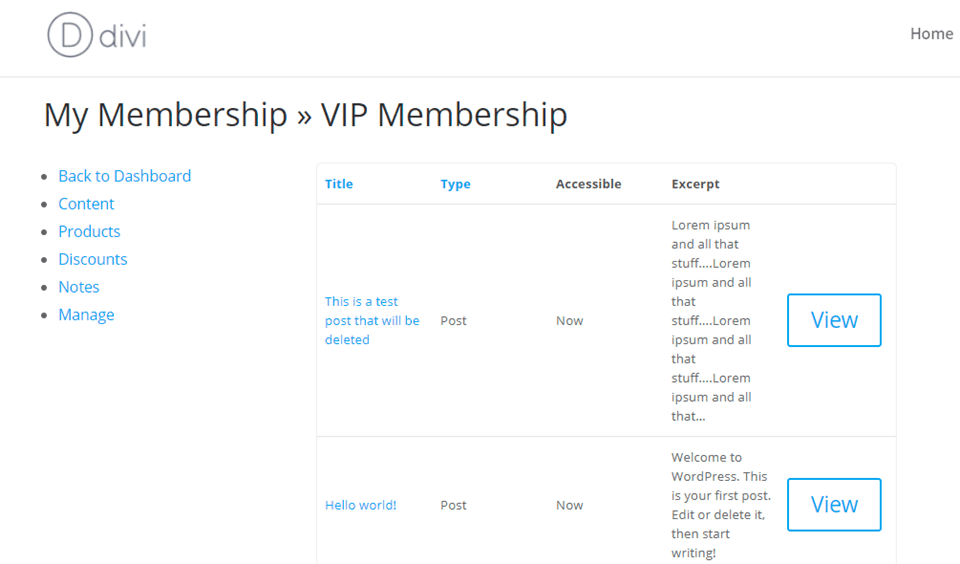
Clicking it (or going to the URL that you specify in settings) will show them a list of all the content they have access to.
And just like that…your WooCommerce Membereship site is complete. Well, completely set up. You still have the work to do of creating the content and getting members, but in terms of the site itself, you’re ready to start wrangling users and giving them access.
Wrapping Up
Starting a membership site is no small feat, and there are a great number of plugins and services that can help. But using WooCommerce and the WooCommerce Memberships plugin, you can combine the power of a membership site with the simplicity of the top ecommerce platform on WordPress. You can’t get a lot better than that.
What have your experiences been with WooCommerce Memberships?
Article featured image by TESCHA / shutterstock.com



Is it only for one year? what about renewal?
You’ll need the WooCommerce Subscriptions plugin for renewals.
I think it still worth it. Can we create post subscription like medium in divi???
Absolutely. You can use the content restriction features to allow only certain posts to be free or behind the paywall like Medium’s subscriptions. I haven’t tinkered with settings and other plugins enough personally to know how to allow a limited number of freebies before charging, but it’s surely possible.
Don’t forget that you need woocommerce subscriptions as well if you’re going to charge monthly or yearly.
Very true. I was going for the manual long-term subscription with this one, but if the membership site is going to be an automatic recurring charge, WooCommerce Subscriptions is the best choice to handle that.