The holidays are here! As a business owner, this means adjusting your offerings to grab the attention of seasonal shoppers. One way to do so is by creating WooCommerce gift cards for your online shop. Not only is setting them up easy, but it can be an effective way to boost sales.
In this guide, we’ll explain the benefits of offering WooCommerce gift cards and your options for it. Then, we’ll walk you through how to create WooCommerce gift cards in six simple steps.
Let’s get started!
- 1 Why Offer WooCommerce Gift Cards for Your Online Store?
- 2 3 Great Plugins for Creating WooCommerce Gift Cards
-
3
How to Create WooCommerce Gift Cards (In 6 Steps)
- 3.1 Step 1: Select and Install Your WooCommerce Gift Cards Plugin
- 3.2 Step 2: Create a New Gift Card Product
- 3.3 Step 3: Choose the Gift Card Amount(s)
- 3.4 Step 4: Configure the Gift Card Attributes and Variations
- 3.5 Step 5: Customize Your WooCommerce Gift Cards Design
- 3.6 Step 6: Add the WooCommerce Gift Card Product to Your Online Store
- 4 Conclusion
Why Offer WooCommerce Gift Cards for Your Online Store?
There are many benefits to offering gift cards as an online business owner. First, research shows consumers’ interest in gift cards is on the rise. They make for great purchases, especially as gifts, because they let the receiver decide which product to choose. Therefore, there’s more flexibility and variety in gift cards than other options.
Some benefits of offering WooCommerce gift cards include:
- Help in driving sales and revenue
- An opportunity to attract new customers to your site and expand brand awareness
- An ability to offer gift cards in any amount and determine when they expire (if ever)
WooCommerce doesn’t come with a default option for selling gift cards. However, the good news is that there are plugins and extensions you can use to add the functionality. In addition, you have a handful of powerful options to choose from depending on your budget and the specific features you’re looking for.
3 Great Plugins for Creating WooCommerce Gift Cards
Once you decide to sell gift cards to your WooCommerce customers, the next step is deciding how to go about it. There are a few options to choose from. Technically, there is a “workaround” method that doesn’t require any third-party plugins. This involves selling gift cards as a downloadable product, setting up a coupon code, and creating a gift certificate yourself.
However, this can be a lot of work. It also isn’t the best option if you want to offer gift cards in various amounts, as you’ll have to create a separate coupon code and a gift certificate for each one. This is why we recommend using a WooCommerce gift card plugin. Not only do you have options to choose from, but most are quick and easy to use. Let’s take a look at some of the best options, both free and premium.
1. YITH WooCommerce Gift Cards
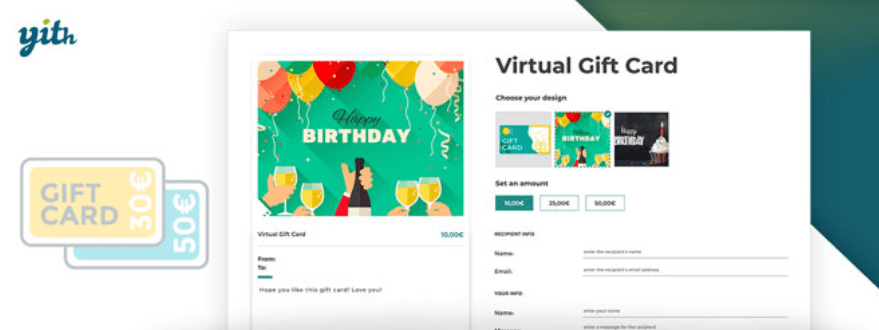
YITH WooCommerce Gift Cards is a freemium plugin that lets you create both digital and printable gift cards. It lets customers choose any amount and even customize the design of the gift card via templates. Users can also schedule gift card deliveries and send them to multiple people, and also download a PDF version to print or generate a QR code for it.
With nearly 60,000 users and a 4.4/5 -star rating, it’s definitely an option worth considering. The free version (which isn’t as highly rated) gives you access to all the features needed to create basic WooCommerce gift cards. However, if you want advanced features, such as setting an amount limit or selling physical gift cards, you’ll need to upgrade to premium. Licenses start at $129.99.
2. PW WooCommerce Gift Cards

Another popular and highly rated freemium plugin is PW WooCommerce Gift Cards. It makes setting up and selling digital gift cards quick and easy. Your customers can simply enter the amount, receipt details, and a personalized message. Then the recipient can redeem it via email.
An advantage of this plugin is that it is simple and straightforward. It’s also flexible enough to work with just about any theme. Users can view their gift card balance on the cart and checkout pages, as well as checkout as a guest.
The free plugin is a powerful choice if you only plan to sell digital cards. If you want to sell physical cards or leverage extra features such as the option to add funds to an existing card, you can upgrade to the Pro version. With licenses starting at $59, it’s a bit more affordable than YITH.
3. Smart Coupons

Smart Coupons is a popular plugin listed in the official WooCommerce extension library. Technically it’s not a gift card plugin. However, it’s robust feature offering does provide the functionality needed to create WooCommerce gift cards.
The plugin lets you create gift certificates that serve as the gift card for any amount. Users can email the gift certificate to themselves or another recipient at the time of purchase. As with other plugins, Smart Coupons lets customers customize the gift card design and messaging.
It’s worth noting that using Smart Coupons to sell gift cards on your WooCommerce store is similar to the “workaround” method we mentioned earlier However, it’s a powerful tool if you want to use it for coupons and other features. A premium license costs $99.
How to Create WooCommerce Gift Cards (In 6 Steps)
Now you have a better idea about some of the methods and plugin options you can use, it’s time to get to work. This post assumes you already have your WooCommerce store up and running. If not, feel free to check out our post about getting started with WooCommerce and Divi.
Let’s take a look at how you can create WooCommerce gift cards in six steps.
Step 1: Select and Install Your WooCommerce Gift Cards Plugin
As we mentioned, there are many options to choose from. For the purposes of this post, we’ll be using the PW WooCommerce Gift Cards plugin (free version). However, regardless of the plugin you use, the process will be largely similar.
Once you decide which plugin you want to use, the first step is to add it to your WooCommerce site. To do so, navigate to Plugins > Add New from your dashboard. Search for it in the relevant field, then click on the Install Now button, followed by Activate:
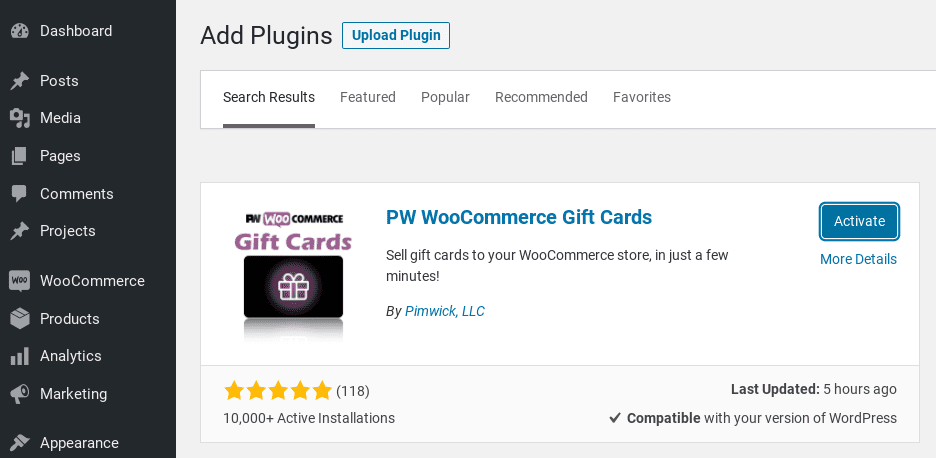
After it’s installed and activated, you can find it under WooCommerce > PW Gift Cards.
Step 2: Create a New Gift Card Product
When you first visit the PW Gift Card screen, it will prompt you to set up a new product. To get started, click on the Create the Gift Card product button:
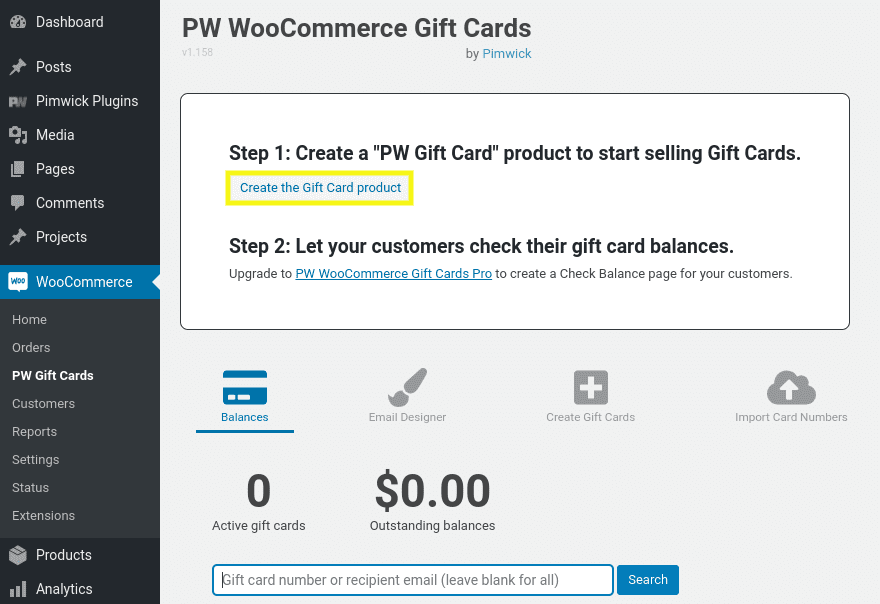
It will render a “Success!” message. Now, you can find the gift card product under the Products > All Products tab of your admin menu:
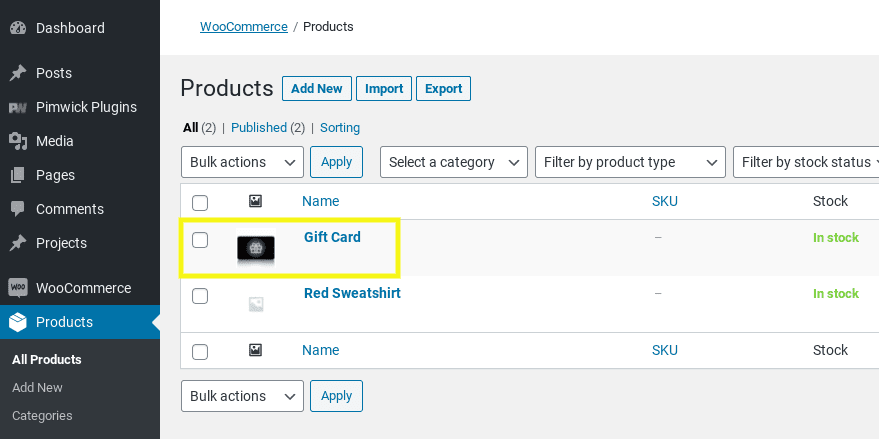
The gift card functionality is now added to your online store. However, you still need to configure some settings to customize the gift card.
Step 3: Choose the Gift Card Amount(s)
From the products list, hover over the gift card product and select the Edit link. This will bring you to the gift card product settings screen. Here, you can change the title of the product (for example, “Christmas Gift Card”) and add a product description.
Under the “Product data” section, you can configure the gift card amount denominations:

By default, the plugin adds gift card amounts of $10, $25, $50, and $100. You can also add a custom amount by entering the value in the text field, then clicking on the Add button.
Step 4: Configure the Gift Card Attributes and Variations
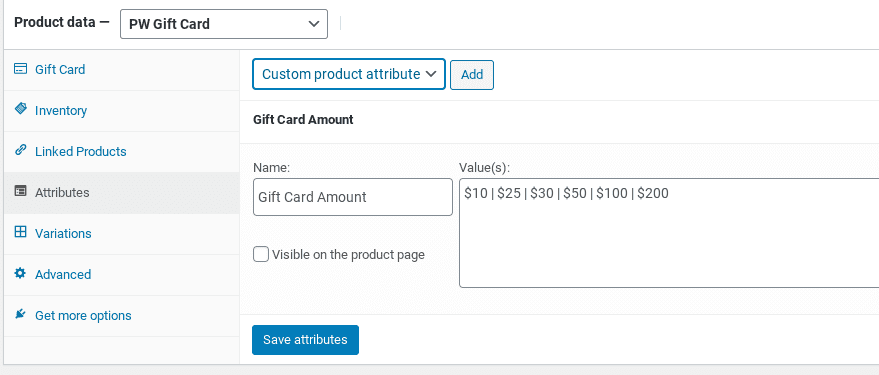
Next, navigate to the Attributes tab. This is where you can choose to add a custom attribute to the gift card product, as well as make the gift card visible on the product page:
Under the Variations tab, you can choose which form value is pre-selected. For example, if you want the default amount to be $50, you can select that from the drop-down menu:
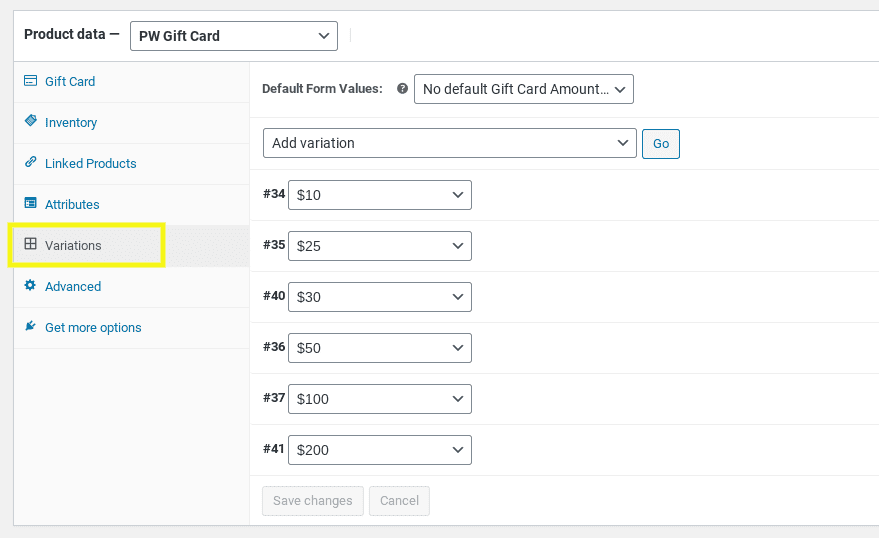
When you’re done, be sure to save your changes.
Step 5: Customize Your WooCommerce Gift Cards Design
Now it’s time to customize the appearance of your gift card upon being emailed to recipients. To do so, navigate to WooCommerce > PW Gift Cards, then select the Email Designer tab:
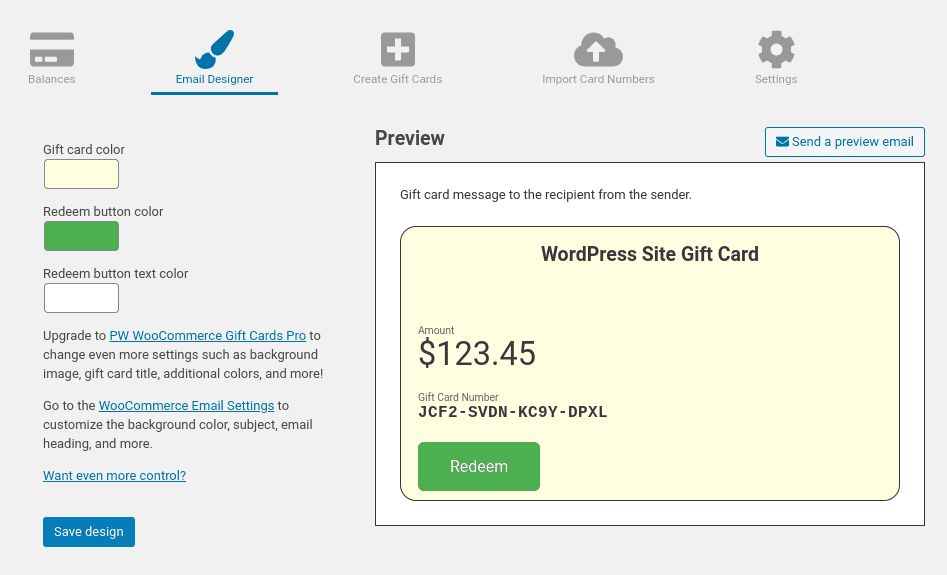
Here, you can preview how the gift card will look in emails, send a test email, and adjust the colors. If you have the Pro version, you can also change additional settings, such as adding a background image.
You can also customize how your WooCommerce gift card appears on your product pages. If you’re a Divi user, select the Build On The Front End button above the gift card product page editor. This will open the visual editor:
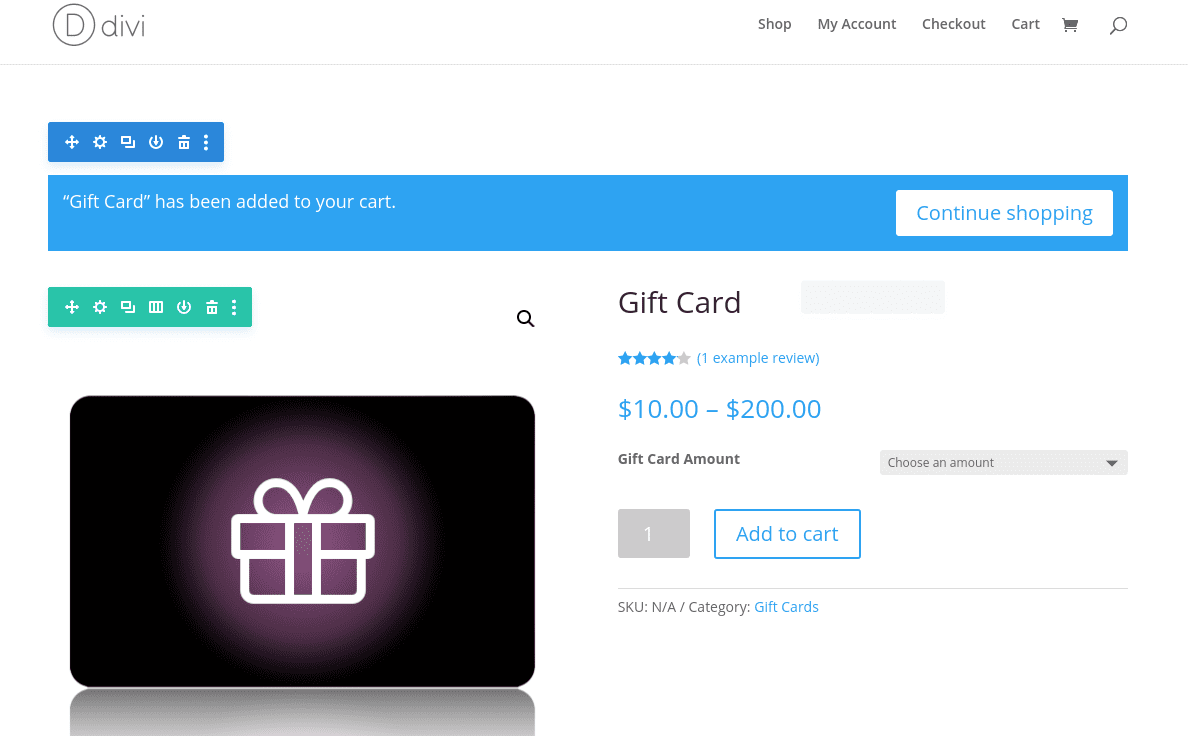
Now you can preview how it will look to customers and make changes as needed. You can change the design and layout, drag-and-drop sections, add modules and elements, and more.
Step 6: Add the WooCommerce Gift Card Product to Your Online Store
Once you’re done configuring the gift card settings, the only thing left to do is take it live. You can choose which product pages it appears on under the “Product categories” section of the gift card product page:
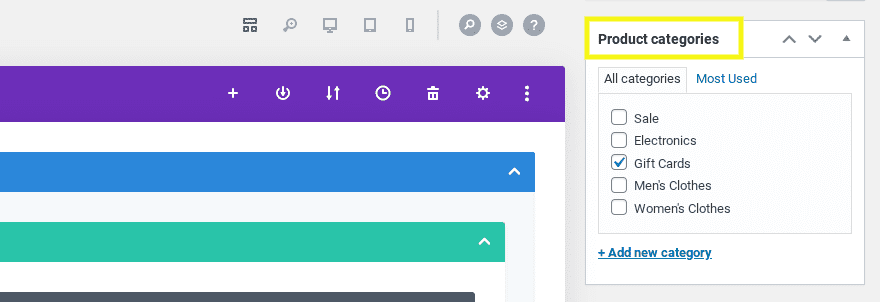
You can select all product categories if you want it to appear across the store. Another option is to create a new category specifically for gift cards, which you can do by clicking on the Add product category link. When you’re done, select the Update button.
That’s it! You’ve now added WooCommerce gift cards to your online store. Of course, there are many different ways to further customize and configure the gift card products on your site. The instructions and options for doing so vary based on the plugin you’re using. It’s best to refer to the tools’ official documentation for further guidance.
Conclusion
Offering gift cards to customers, especially during the holiday season, is an effective way to boost sales and increase revenue. However, WooCommerce doesn’t provide a gift card product feature by default, so you’ll need to add it yourself.
As we discussed in this post, you can create WooCommerce gift cards to sell in your online store in six simple steps:
- Install a WooCommerce gift card plugin such as YITH WooCommerce Gift Cards, PW WooCommerce Gift Cards, or Smart Coupons.
- Create a new gift card product to add to your store.
- Choose the amount(s) you want to offer the gift card for.
- Configure the gift card product variations and attributes.
- Customize the WooCommerce gift card appearance.
- Add the gift card to your store.
Do you plan on adding WooCommerce gift cards to your online store this holiday season? Let us know in the comments section below!
Featured image by Kit8.net / shutterstock.com



Hi,
I want to change my home page design without affecting my website other pages, how to do it?
Hi,
Is there any reason why the ‘Woo Related Product Section’ disappears when using PW WooCommerce Gift Cards?
Hello sir i want to change the theme of my amazon associate blog with divi without changing the previous layout and look so plzz guide me how to do so.
Thanks