Are your WooCommerce product pages feeling generic or underwhelming? Customizing these pages is essential for creating an engaging shopping experience that resonates with your customers. With tools like Divi, you can easily transform your product pages to stand out and deliver exactly what customers need to make confident purchasing decisions.
In this guide, we’ll walk you through the essential steps to customizing WooCommerce product pages, from adding functional enhancements to tailoring the design for better usability. By the end, you’ll discover the simplest ways to make your product pages more effective and boost customer satisfaction.
- 1 Why Customize Your WooCommerce Product Page
- 2 Methods of Customizing WooCommerce Product Pages
- 3 Why is Divi Perfect for Customizing WooCommerce Product Pages?
- 4 Customizing WooCommerce Product Pages with Divi
- 5 More Ways to Enhance Your WooCommerce Product Pages
- 6 Tools Needed to Build WooCommerce Product Pages
- 7 Divi + WooCommerce is the Ultimate E-commerce Solution
- 8 FAQs on Customizing WooCommerce Product Pages
Why Customize Your WooCommerce Product Page
Your product pages are where potential buyers decide whether to purchase—making them one of the most critical parts of your online store. A well-customized product page can transform how customers perceive your offerings and improve their shopping experience. Here’s why it matters:
- Improved User Experience: A well-designed and customized product page makes it easier for customers to find the information they need quickly, enhancing their overall shopping experience and encouraging exploration of other products.
- Increased Conversion Rates: Product pages that are tailored to your audience’s needs—featuring clear calls to action, cross-sell opportunities, and visually appealing layouts—can lead to higher sales and fewer abandoned carts.
- Enhanced Product Presentation: Customizing your product pages allows you to showcase features, benefits, and visuals that help potential buyers make informed decisions and feel confident about their purchases.
- Support for Dynamic Selling Strategies: Adding custom upselling, personalized offers, and reviews builds trust and encourages customers to add more to their carts.
By focusing on usability, relevance, and customer needs, you can turn basic product pages into powerful tools that drive sales and customer loyalty.
Methods of Customizing WooCommerce Product Pages
Customizing your WooCommerce product pages is crucial, but how you do it is equally important. Let’s look at some commonly used methods for customizing WooCommerce product pages.
Before customizing your product page, ensure that at least one product is published. If you’ve already added your products, great! If not, you can do that by going to Products > Add New.
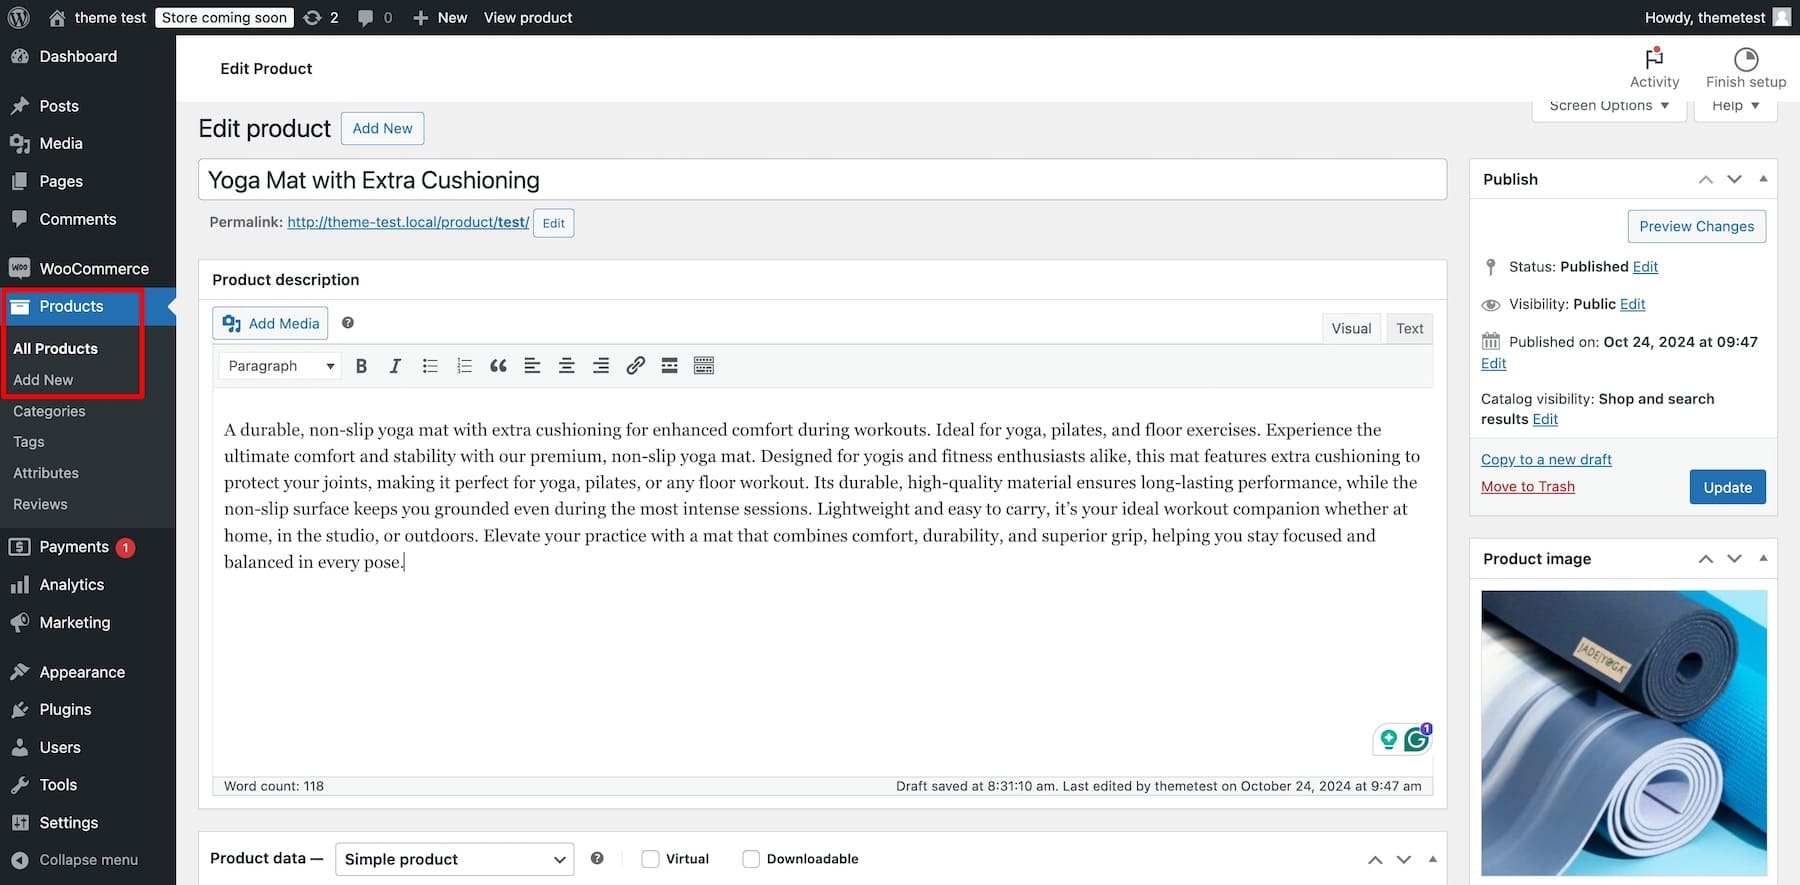
Enter a title, description, product image, and sale price. Once done, click Publish. When you view the product, here’s how the un-customized product page would look on the front end:
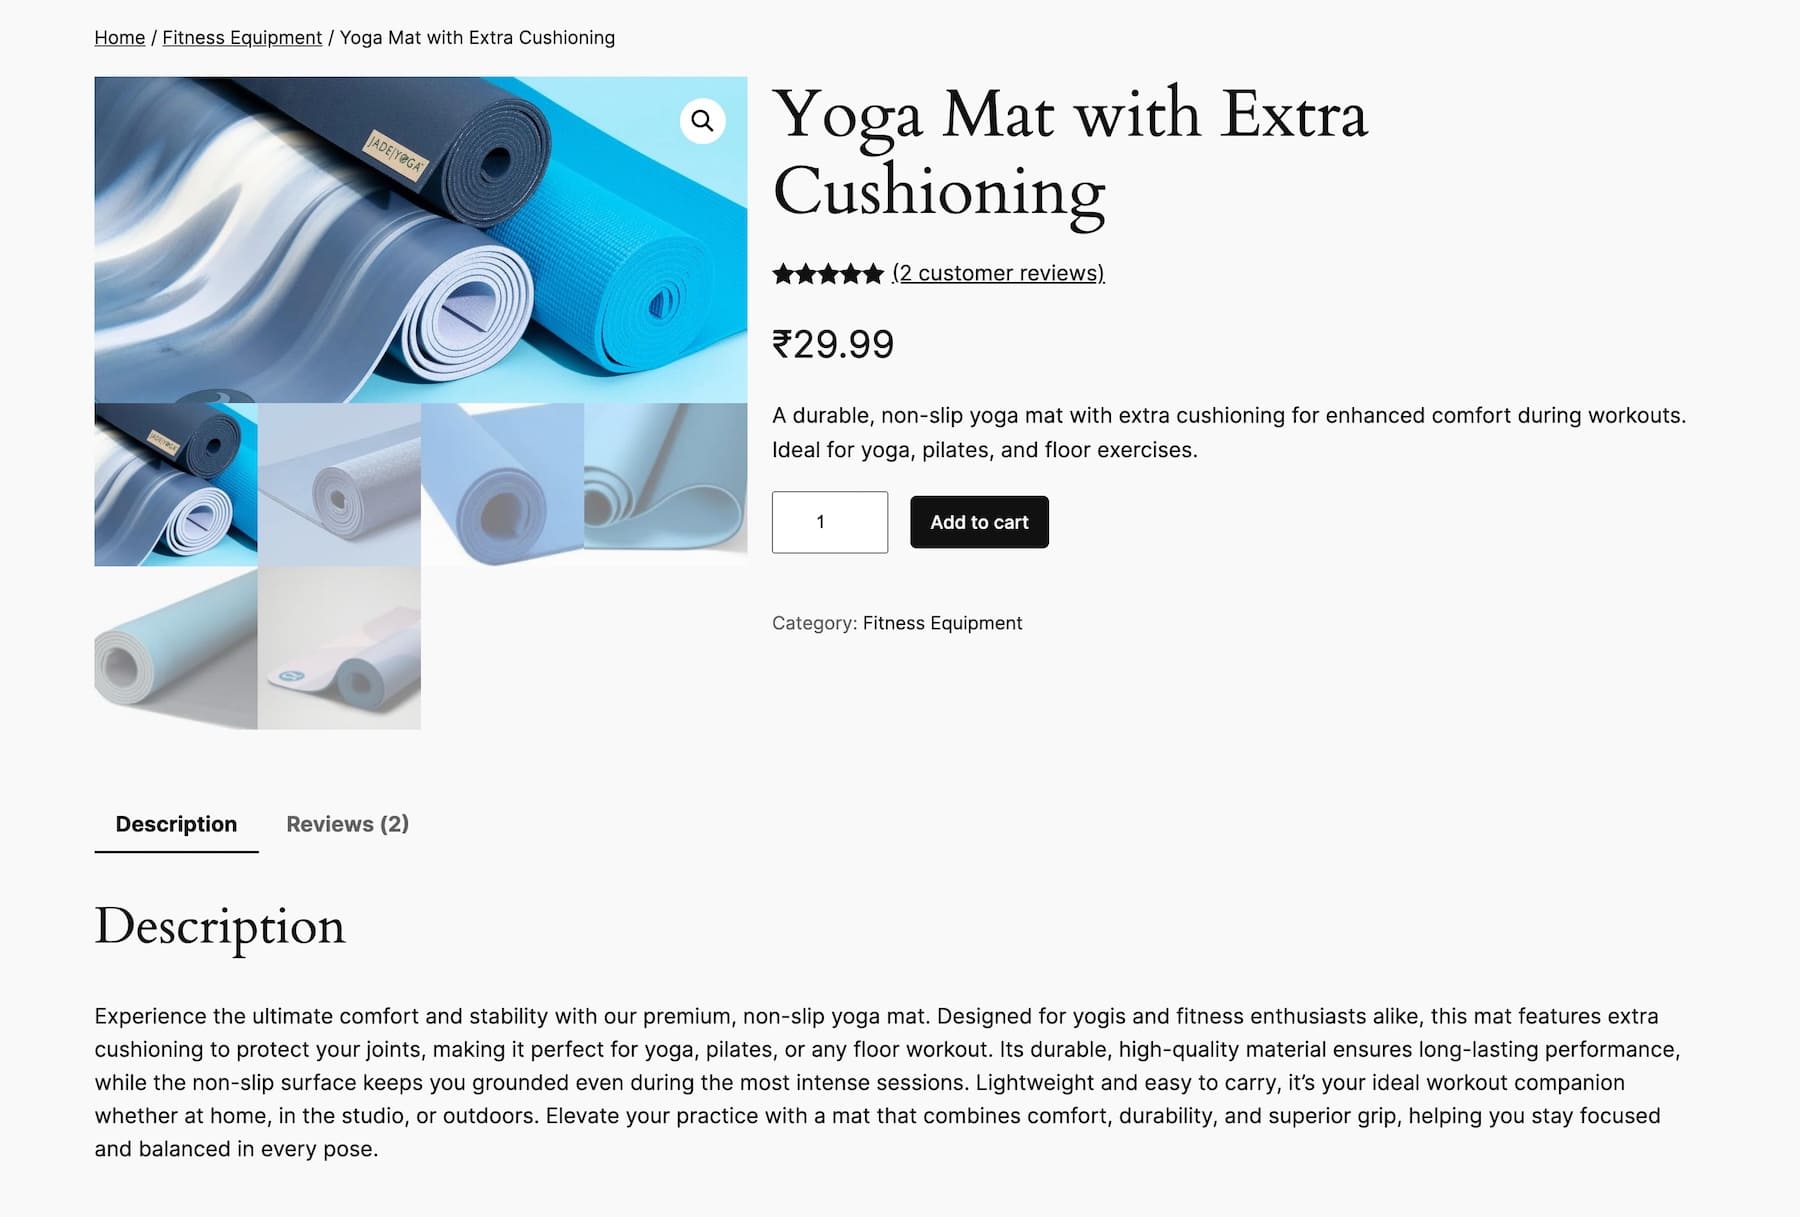
Currently, it looks plain and ordinary. Let’s customize it to make it stand out.
1. Using Default WordPress Editor and WooCommerce Blocks
WordPress Gutenberg’s drag-and-drop interface has made building page layouts easy using blocks. Its Block Editor also includes many WooCommerce blocks that simplify design, so you don’t have to touch code.
Note that you can access the WordPress Site Editor only if you have a Block theme installed, which means it won’t work with older classic themes. For this example, we’re using the Twenty Twenty-Four theme to customize the WooCommerce product page.
Go to Appearance > Editor from your WordPress dashboard to access Site Editor.
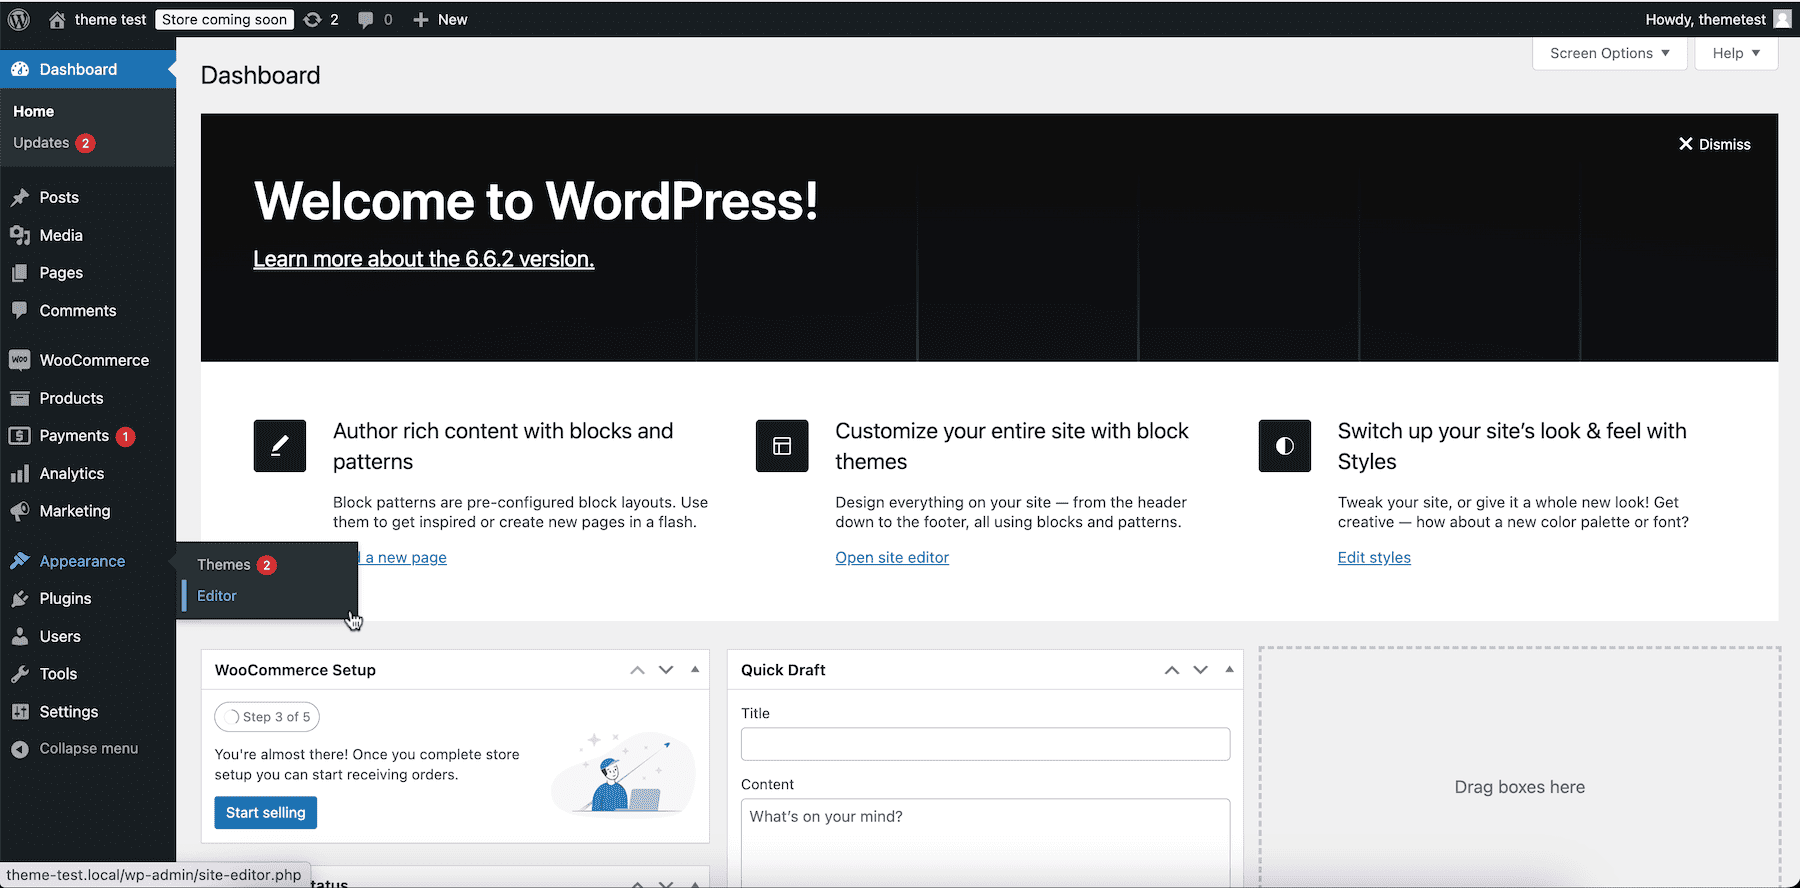
The next screen is WordPress’s Site Editor, which allows you to make changes by dragging and dropping blocks. Go to Templates.

Choose WooCommerce and select Single Product from the list of templates.
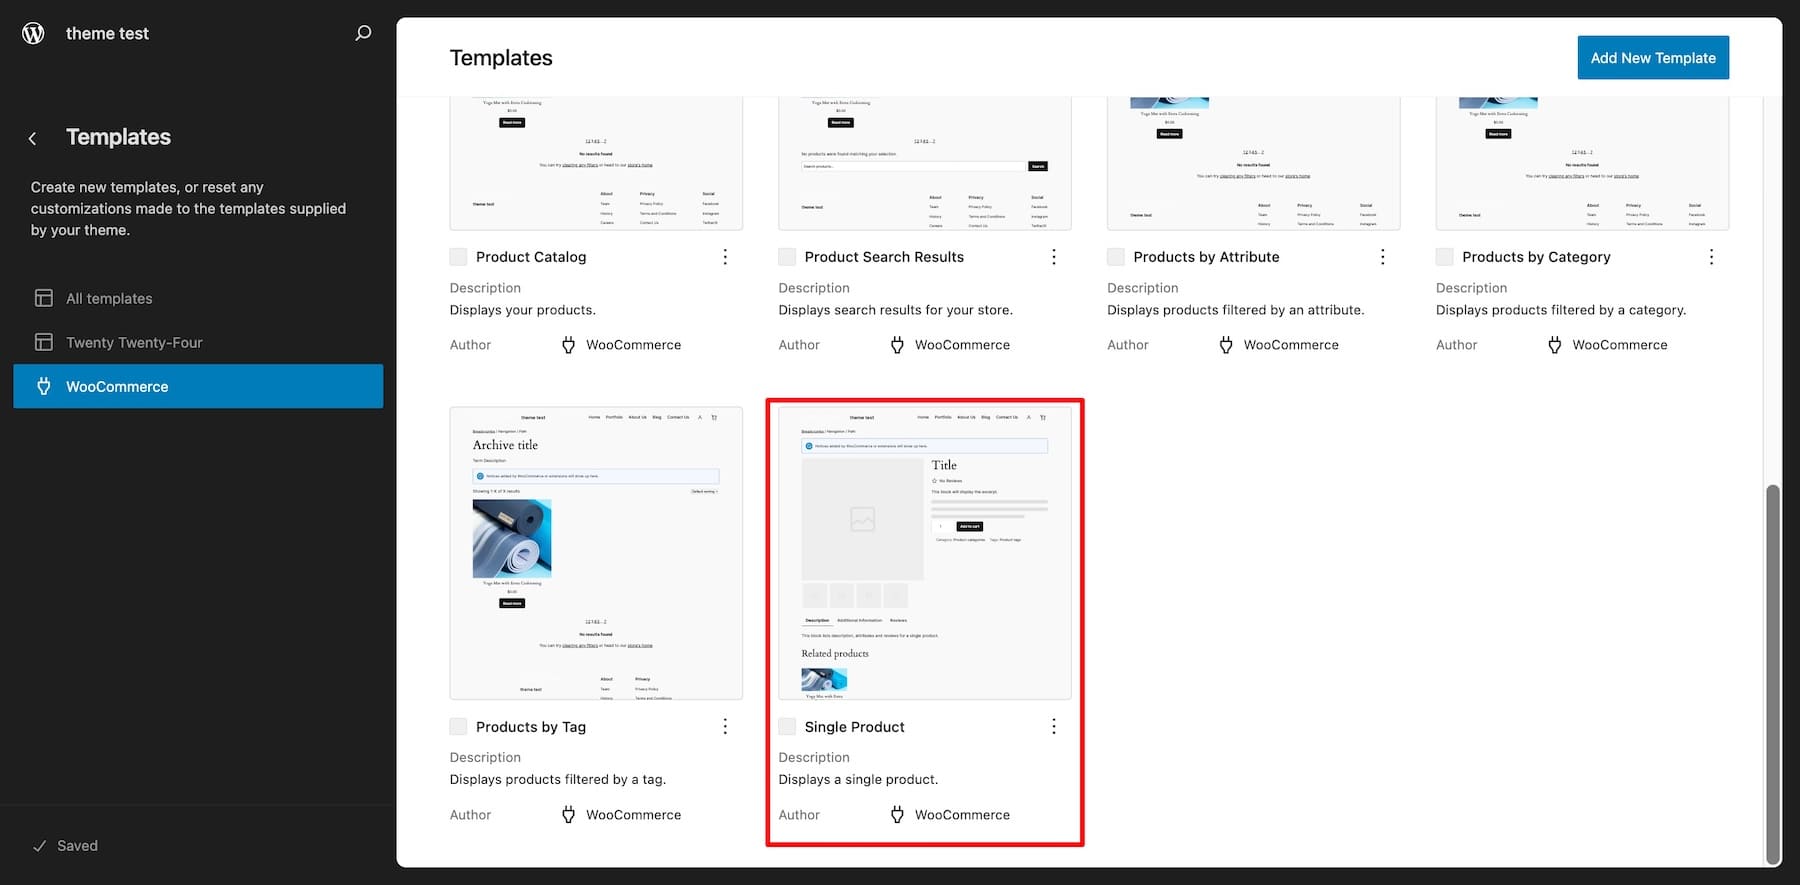
You can now edit the product page template using dynamic WooCommerce Blocks. Since this is a WooCommerce template, your changes will be reflected in all products.
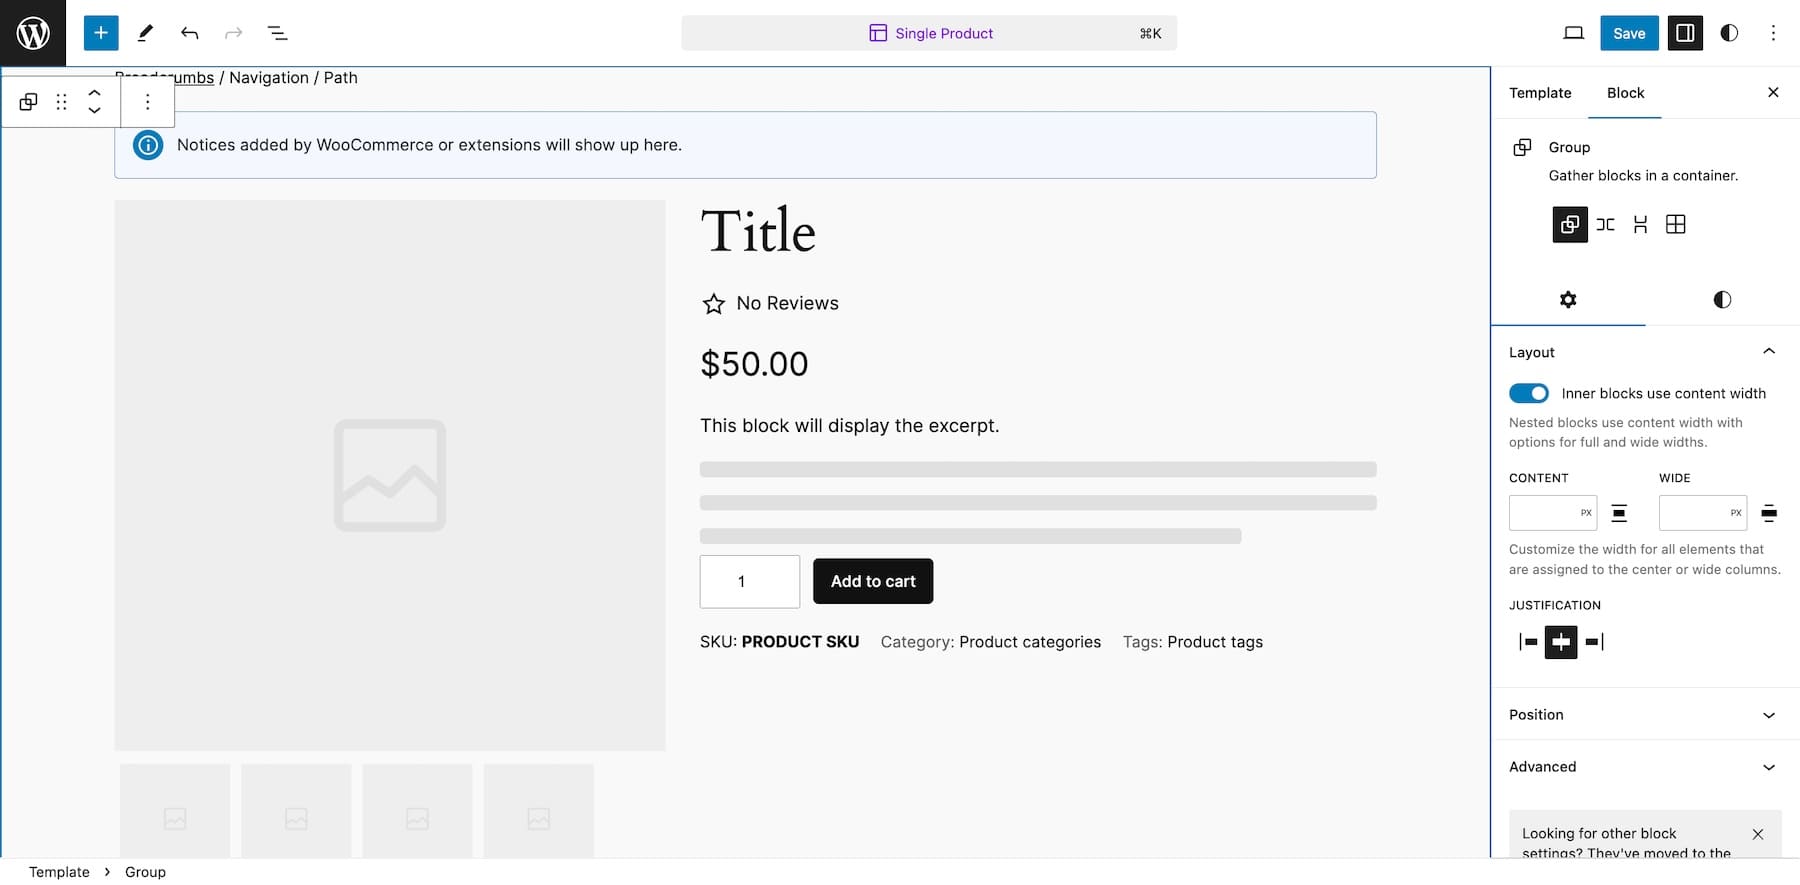
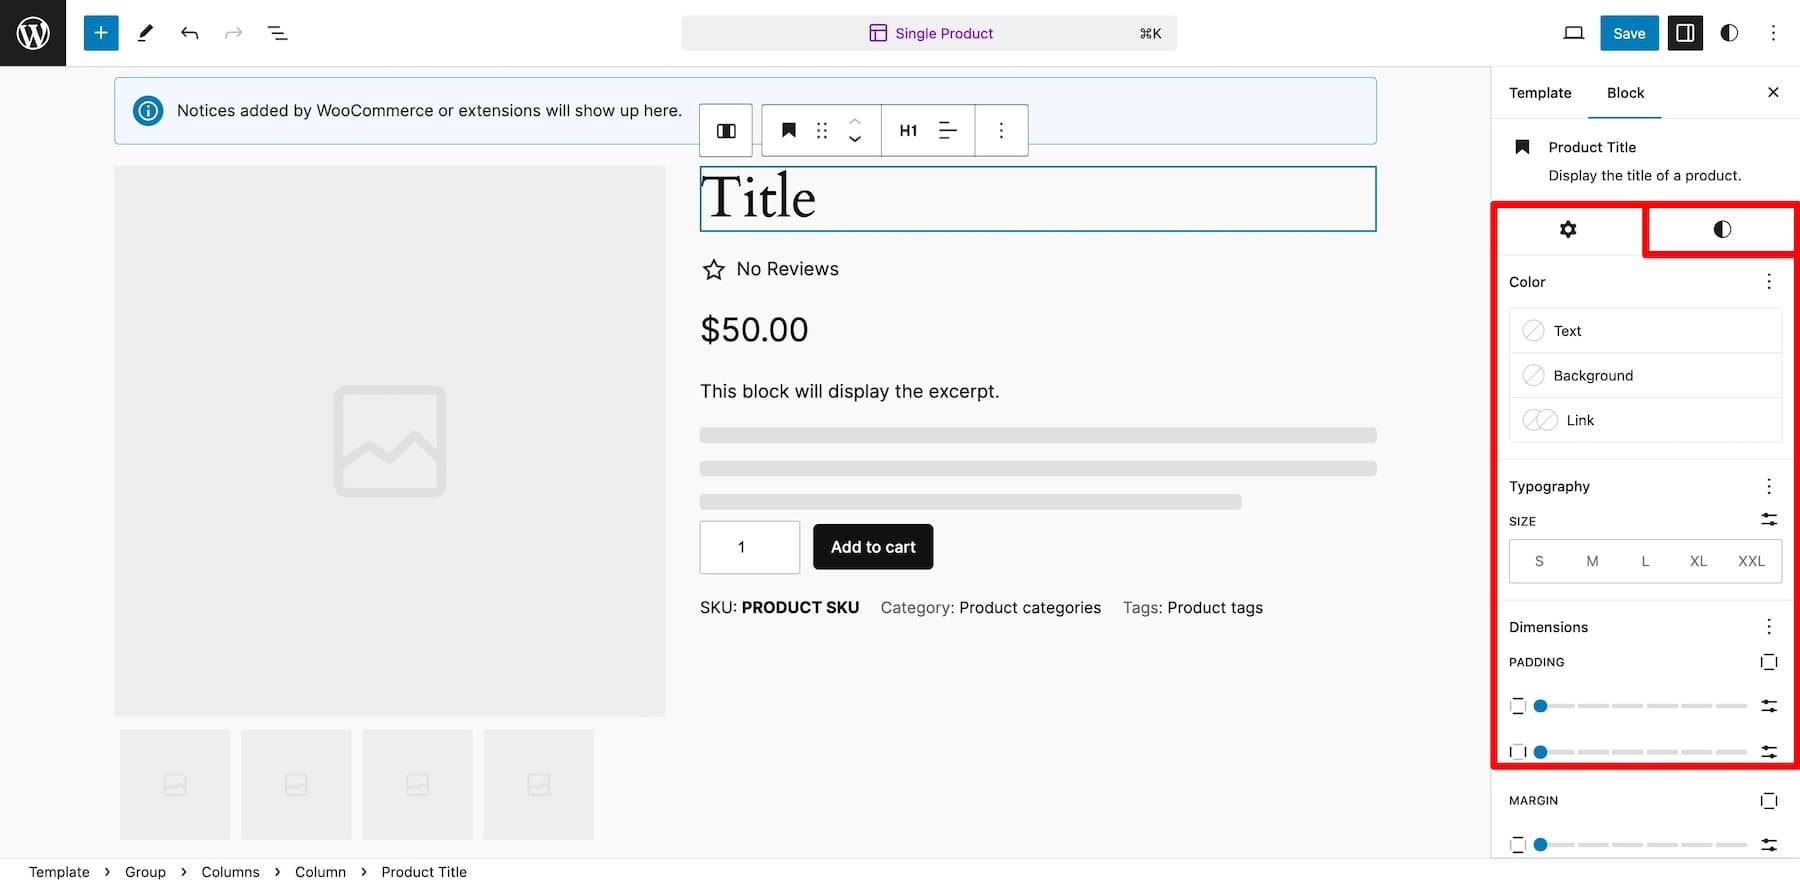
Click on an element to view its editing options. The mini settings panel that pops up lets you move up/down, left/right, drag, and change alignment. On the right sidebar, switch to Styles to customize fonts, colors, and other element options.
To add more WooCommerce blocks, click the plus button and scroll down to the WooCommerce section.
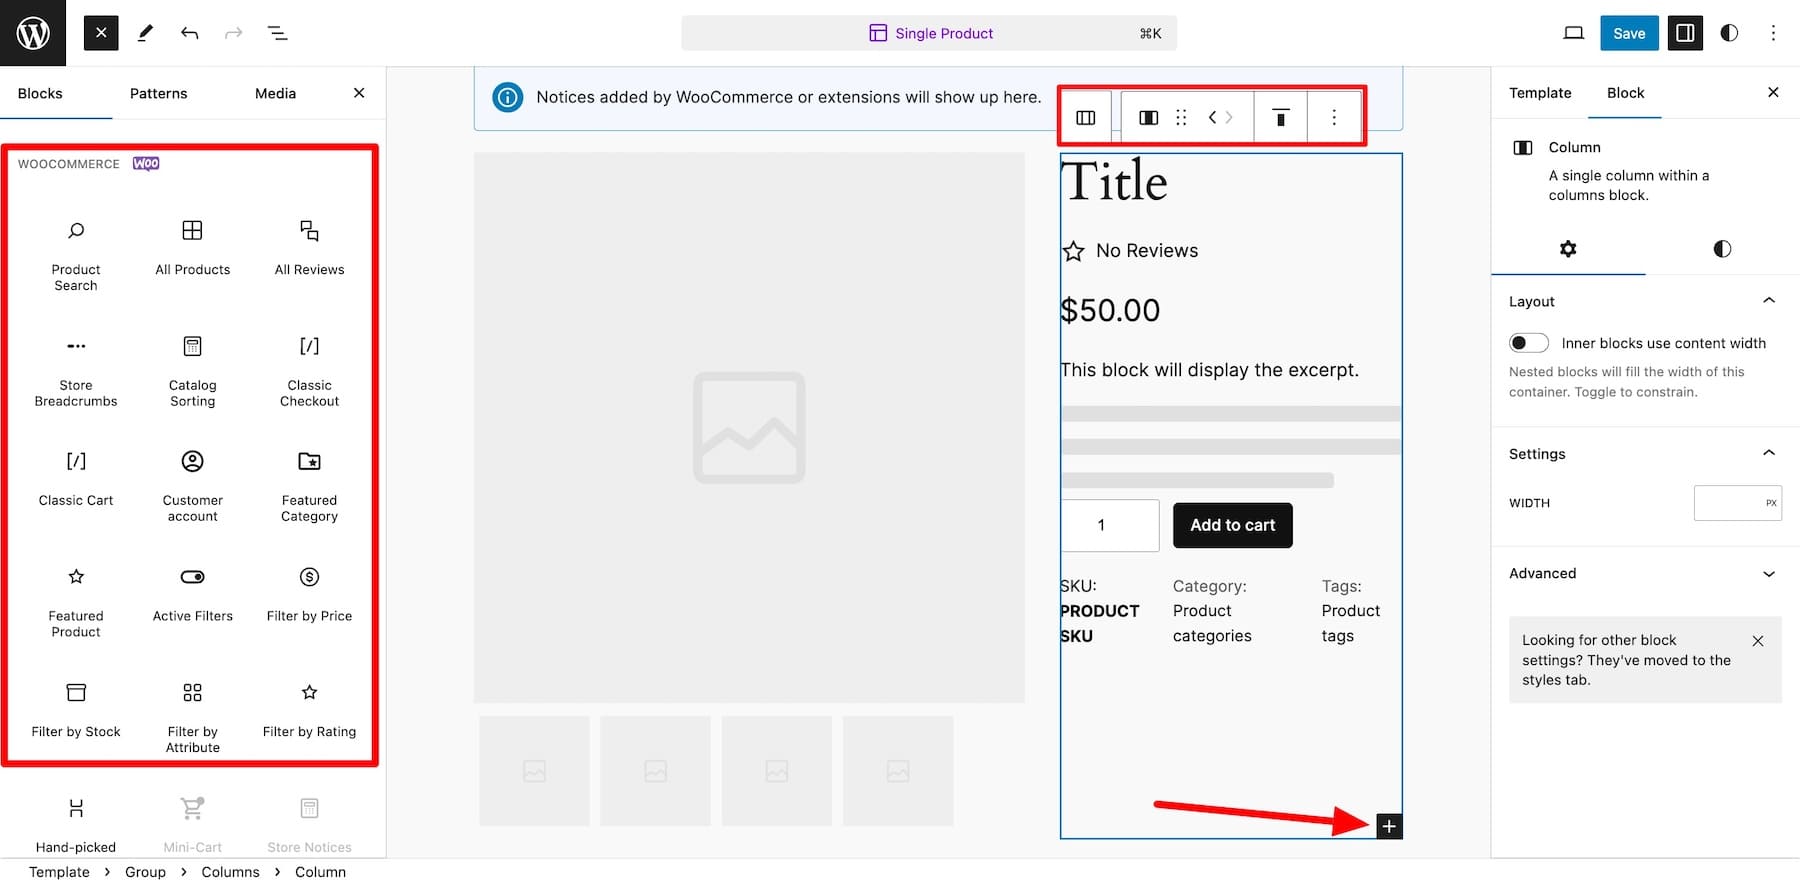
Here, you’ll find many WooCommerce blocks, such as Featured Product to display specific products or Product Gallery to showcase your products in beautiful photos. These blocks help you design a good product page; however, you’re limited in terms of customization.
Site Editor only lets you edit basic settings such as colors and fonts. And if you want advanced customization and extended functionality, you’re reliant on two options:
- Custom CSS/Coding: You can always customize the style of your blocks using CSS. And if you’re a web developer comfortable editing your website theme files, go for it. Otherwise, it might be a good idea not to touch core files, as doing so could break your site.
- WooCommerce Extensions: You can find great add-ons in the WooCommerce Marketplace to extend the functionality of your product pages. For example, Product Video for WooCommerce to showcase your products in videos and Product Addons to add extra options like gift-wrapping.
WooCommerce extensions are good as long as you don’t overuse them. Installing too many plugins can bloat and slow down your site, so use a few selected (see our recommendations below) to enhance product pages.
If you are looking for a streamlined solution for customizing product templates, some premium block themes are available with tons of built-in features, so you won’t have to rely so heavily on costly add-ons.
2. Using a WooCommerce Builder Like Divi
If you don’t like the limitations of the default block editor for your WooCommerce pages, you can use a WooCommerce Builder. WooCommerce builders are page builders for WooCommerce sites. They provide more robust customization features and integration with WooCommerce than typical WordPress themes.
Divi is perfect for building WooCommerce stores because of its intuitive drag-and-drop builder for beginner-friendliness, dynamic WooCommerce content elements for functionality, and stunning pre-made product page layouts, which make designing high-converting product pages effortless. It lets you build stunning product pages (and entire online stores) without touching a single line of code or installing third-party plugins for the sake of adding functionality.
Divi is armed with tools that simplify your work extensively. Want to generate a branded online store without touching a line of code? Divi Quick Sites will design it for you within two minutes. Don’t want to build or customize a product page from scratch? Ask Divi AI to create a page layout, product description, and images that match your brand.
Why is Divi Perfect for Customizing WooCommerce Product Pages?
Divi has everything you need to build a unique and branded WooCommerce product page. You can customize every inch of your site and add functionality without worrying about bloating your site with third-party add-ons. It’s especially effective to customize WooCommerce pages because of these reasons:
1. Professionally-Designed Product Page Templates
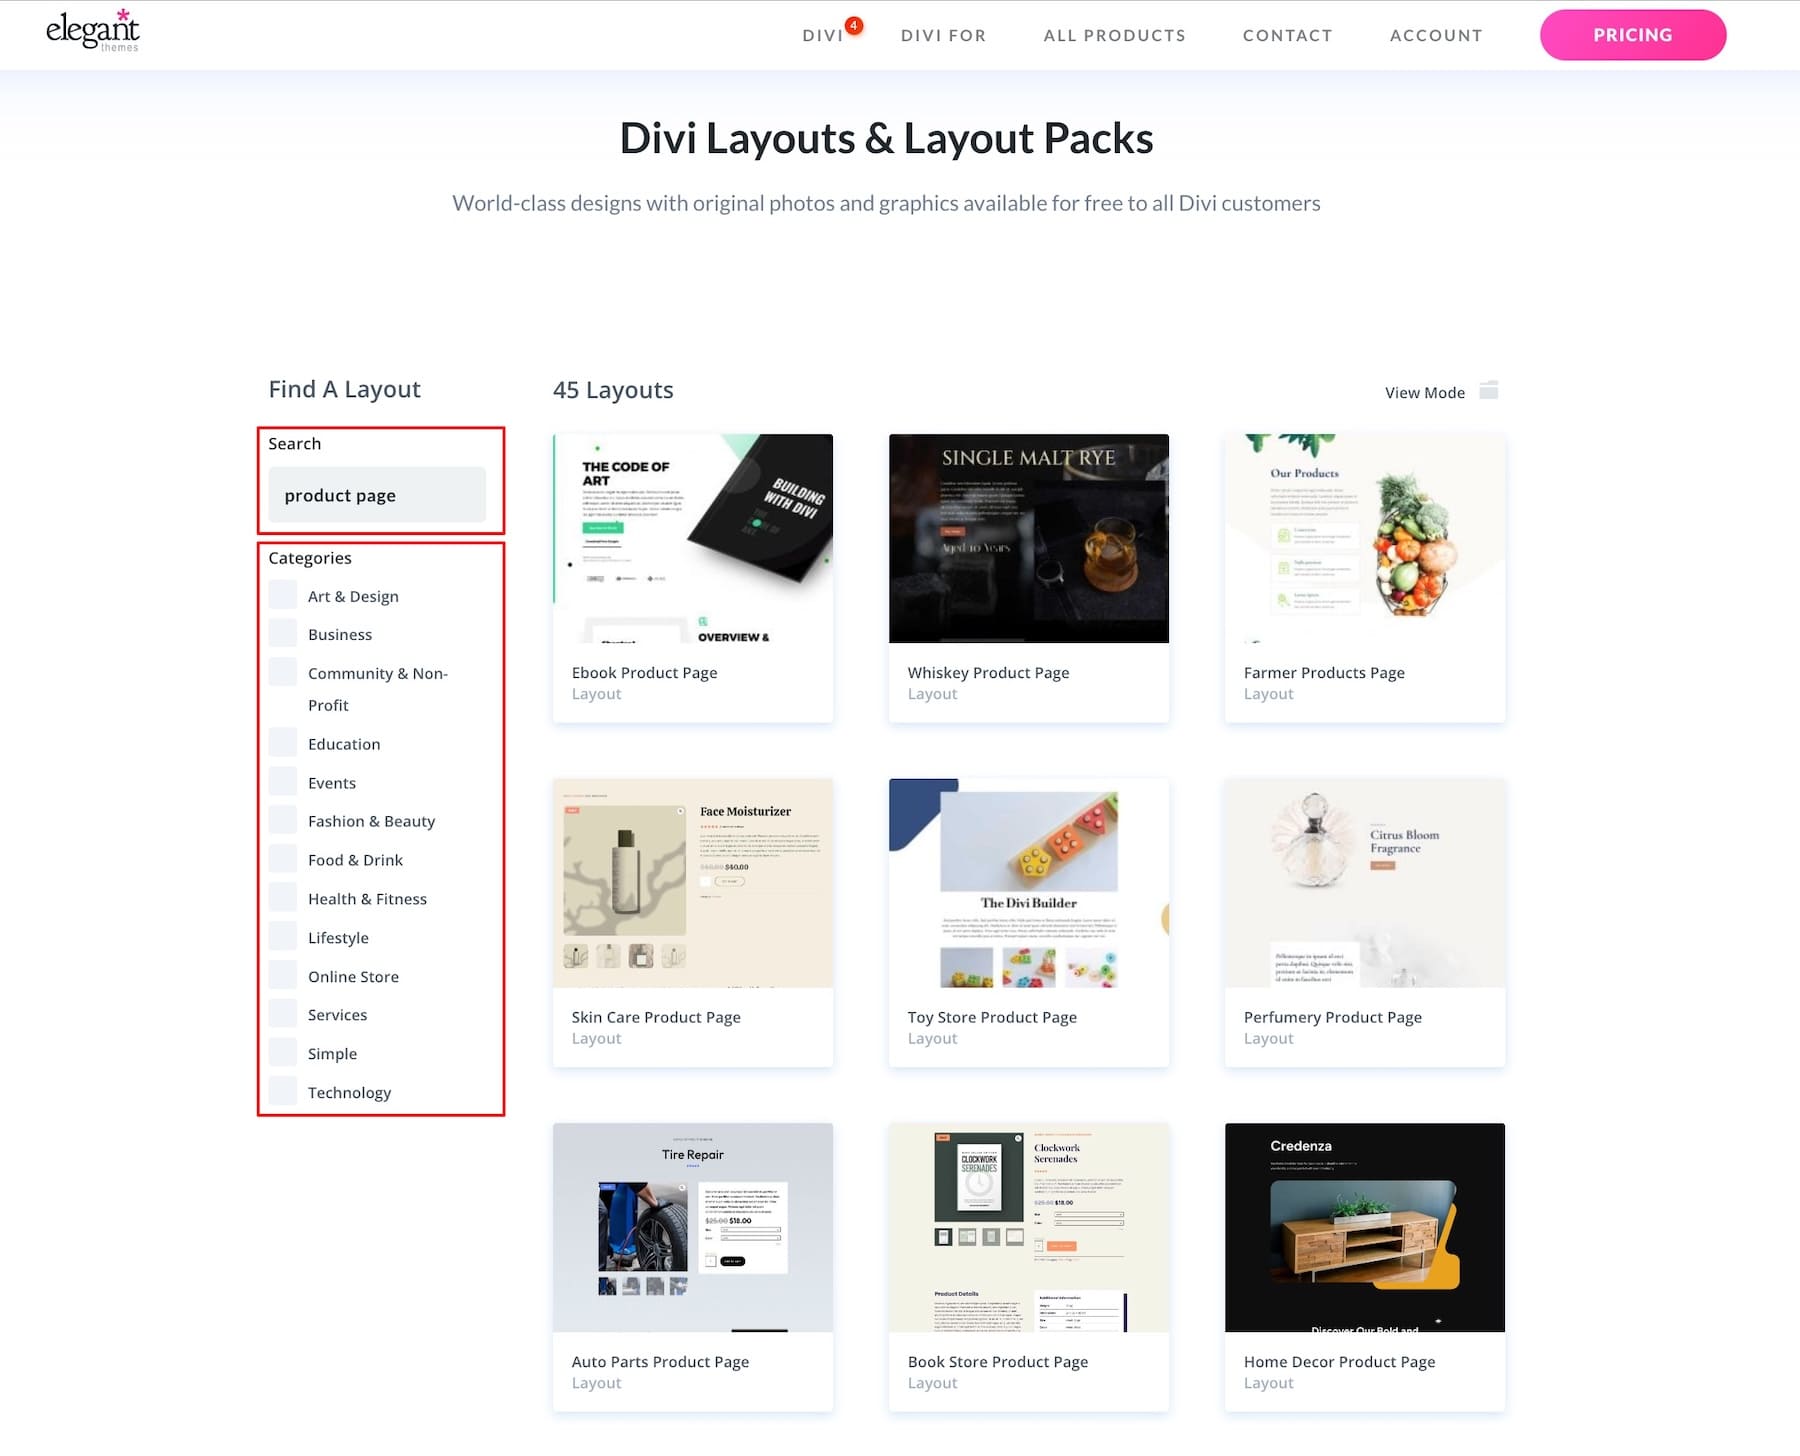
If you don’t like building from scratch, Divi saves your effort by giving you stunning pre-designed product page layouts. You can import these layouts to your product page in one click and make minor changes to match your brand, and that’s it. Choose from different industries and mix and match layouts to create a unique product page template.
2. Native WooCommerce Modules to Add Custom Functionality
Divi has various WooCommerce elements that save time and avoid custom-building WooCommerce modules from scratch. Add Product Tabs to display additional information and simplify shipping with Woo Shipping Information. Create Related Products, or You May Also Like sections with the WooCommerce Product Upsell and Woo Cross Sells elements.
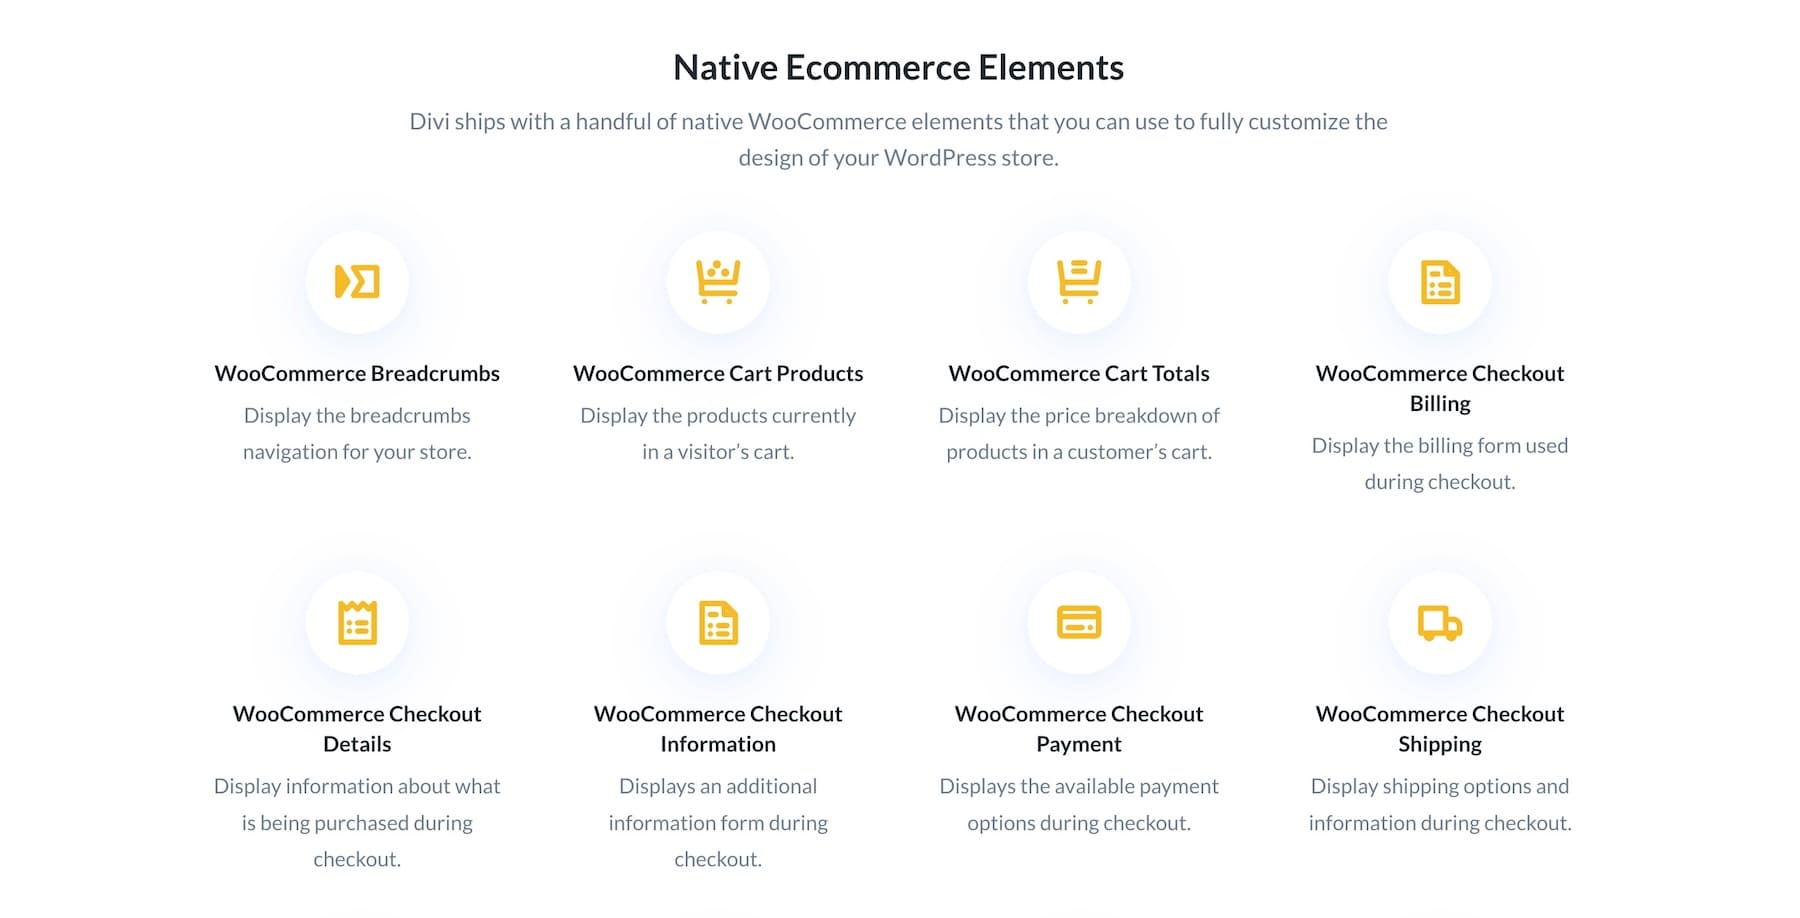
You also get access to 200+ Divi elements with dynamic content features that allow you to build personalized product pages and enhance shopping experiences easily.
3. Divi Theme Builder to Make Site-Level Changes Fast
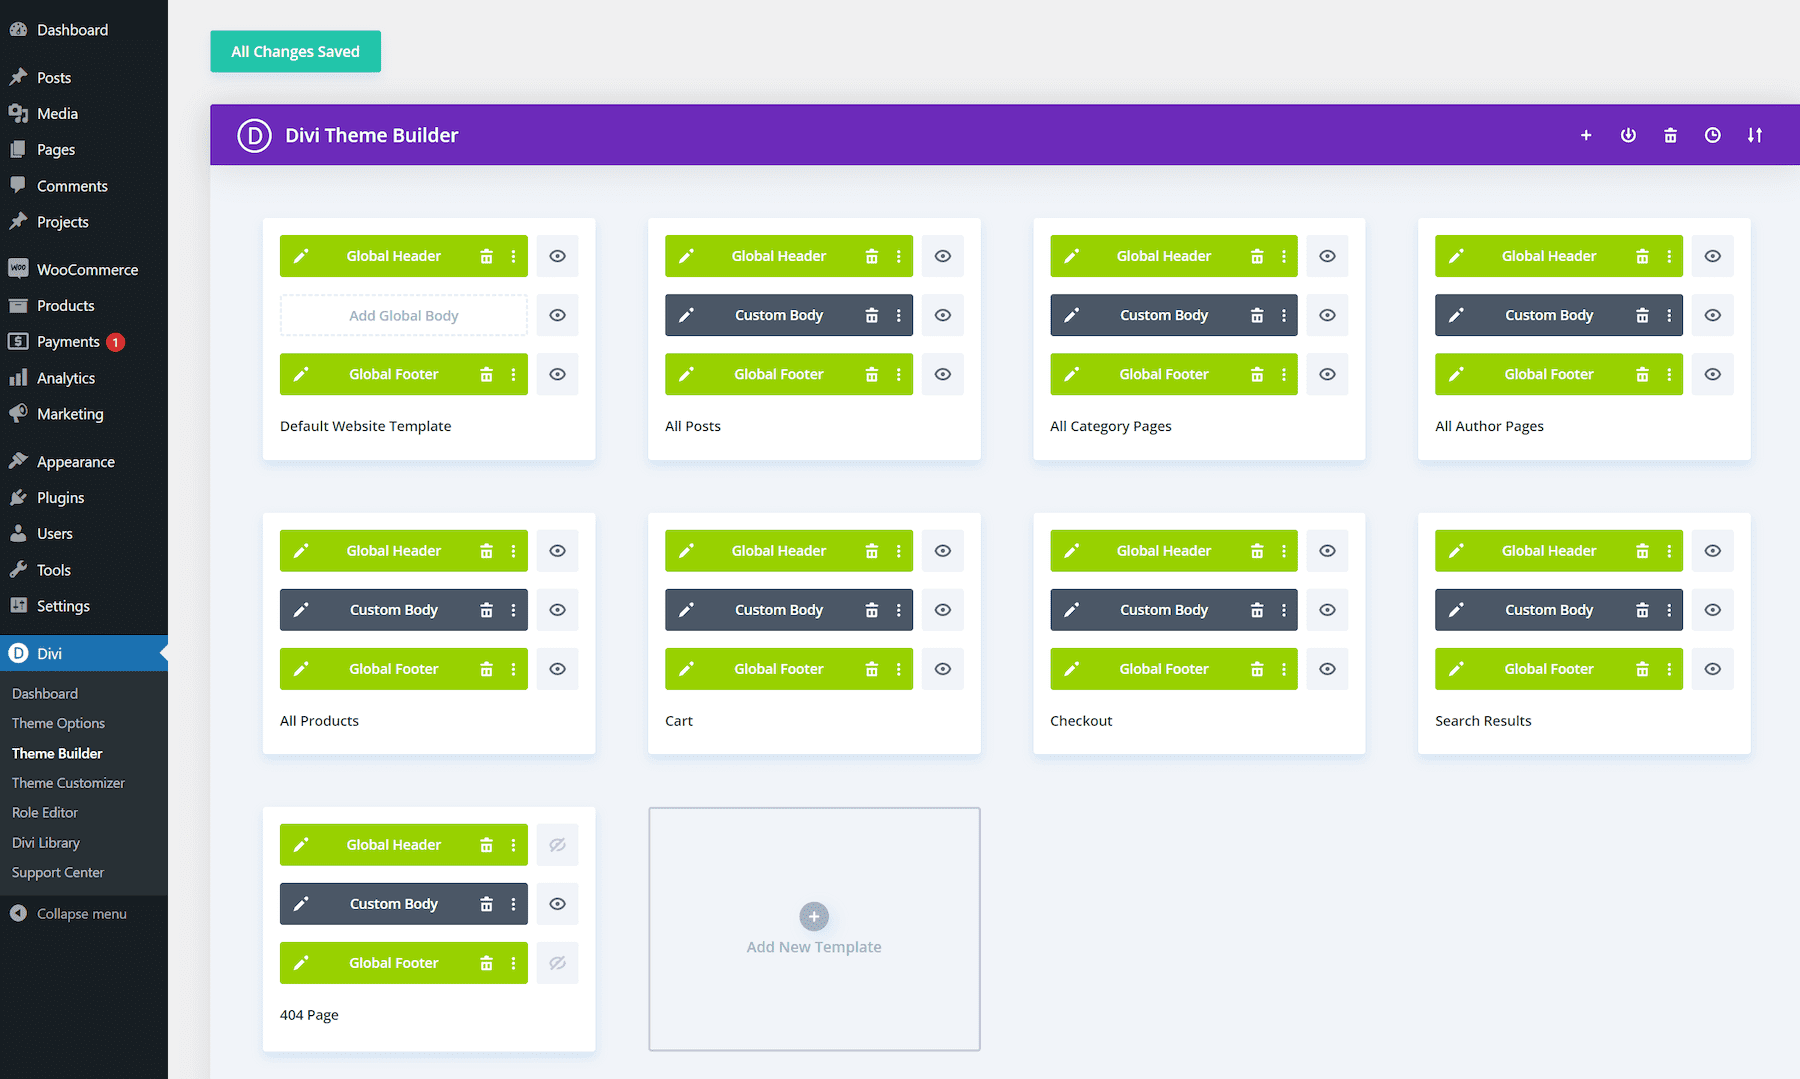
No need to customize each product page to add product-specific information. You can create product templates at a website level with the Divi Theme Builder, so when you make changes in the template, it also reflects on all product pages dynamically.
This is a lifesaver for situations when you have hundreds of product listings. Instead of developing and customizing product pages for each new product, you just create one All Products template and customize it to make site-wide, uniform changes and show them on all product pages.
4. Built-In Marketing Tools to Optimize Product Pages
Divi has incredible marketing tools as built-in features to help you increase your product page’s conversion rates. For example, Divi Leads lets you run split tests and choose a winner between two elements. You can run tests between entire product pages, headings, description copies, CTAs, or other components.
Similarly, Condition options let you create personalized upsells and cross-sell offers, such as showing a discount code banner to users who have added products to their cart but haven’t completed the purchase.
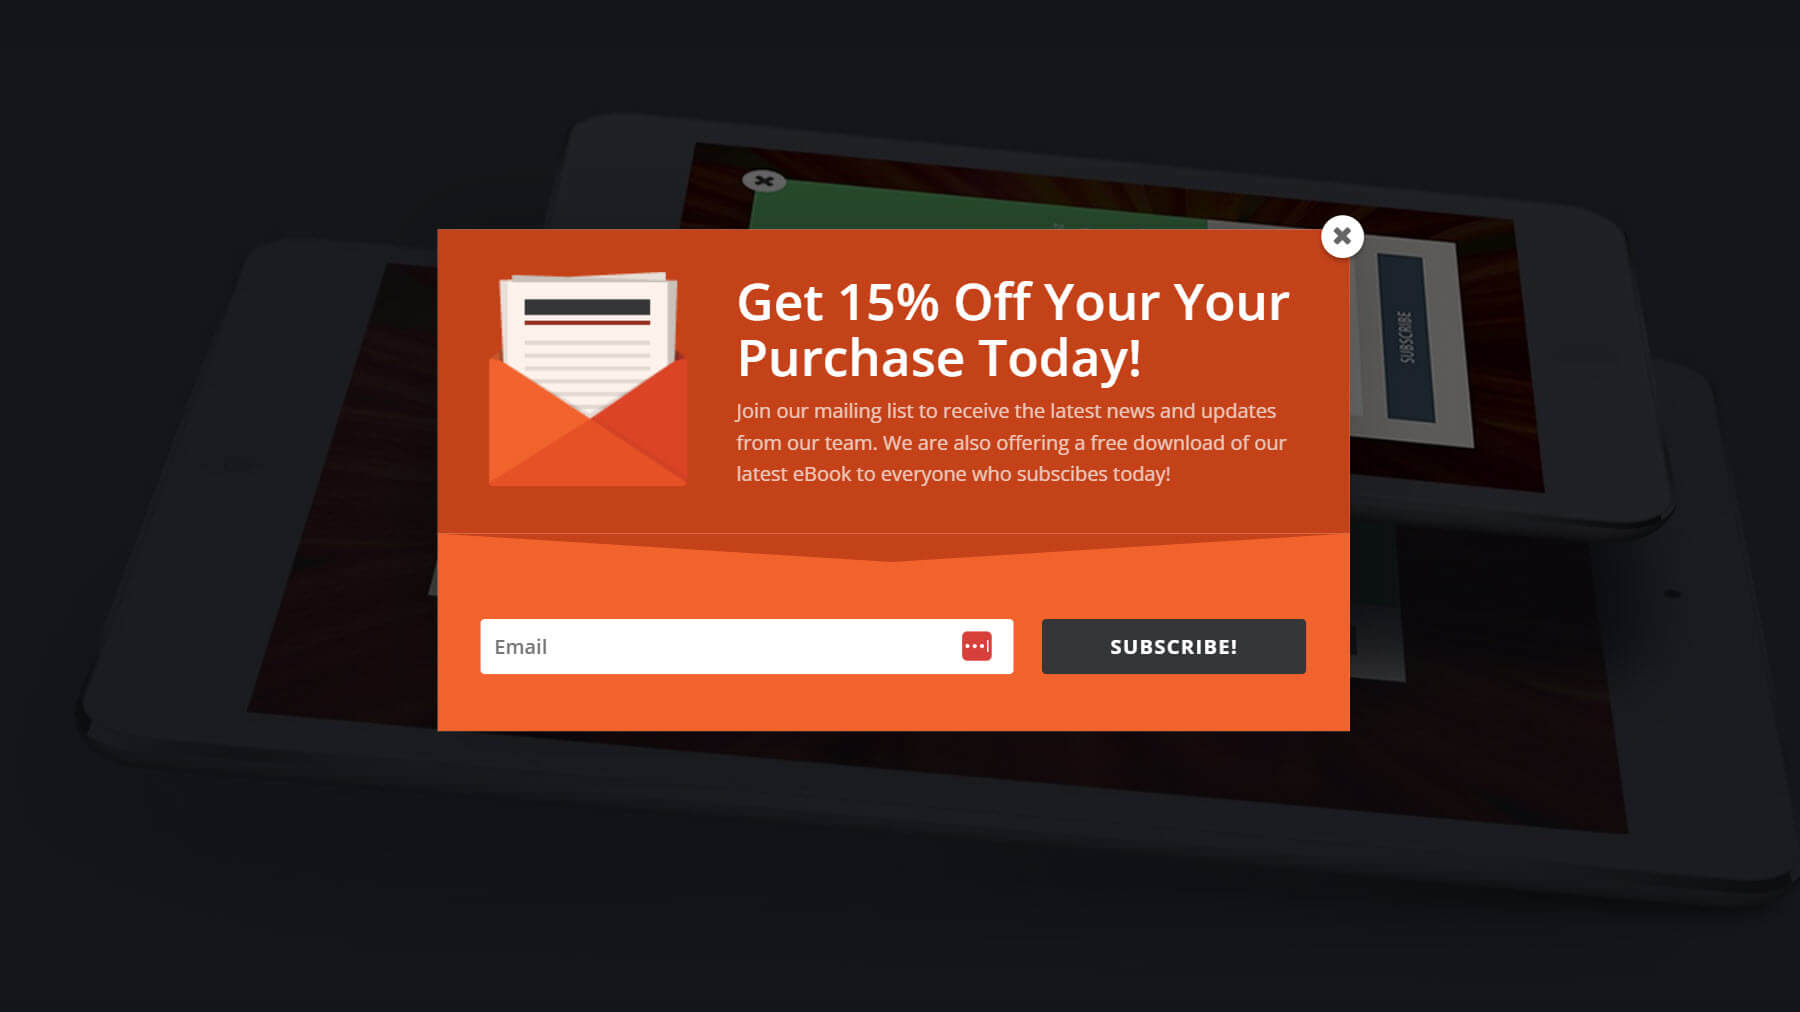
Email Opt-in Popup Using Bloom
You also get premium plugins like Bloom to create high-converting email opt-ins and Monarch to market and drive more traffic and sales. Don’t forget to check out many other built-in features like Divi’s Sticky Optionss which can create sticky elements on your product page. For example, add a sticky CTA to your product page to keep it visible while customers scroll to help conversions.
You could also use Divi’s Countdown Timer Module to create urgency for promotional offers on your product page, and more.
Explore Divi’s Marketing Tools
5. Divi Quick Sites to Generate a Branded Product Page Template
Don’t want to move your cursor to create a product page template? You don’t have to because Divi Quick Sites makes generating brand-new websites from scratch a breeze.
The best part is that sites generated with Divi Quick Sites have WooCommerce auto-installed. This means that while creating your online store, you’ll get WooCommerce configured with relevant page templates if you turn on the Shop option. These include branded shop, cart, checkout, and product page templates.
Customizing WooCommerce Product Pages with Divi
This tutorial is focused on customizing a WooCommerce product page, but if you’re a beginner building your online store with WooCommerce from scratch, you should start with our guide on setting up an e-commerce store.
To follow through with this tutorial, you need the Divi theme installed and active on your online store.
The annual Divi membership costs $89, but you can get it for a lifetime at a one-time payment of $249. Once you’ve purchased Divi, log in with your Elegant Themes credentials and download the Divi.zip file. Upload the zip folder to your WordPress Appearance > Themes > Add New tab. Then, activate your Divi license, and it’s done. Here’s a step-by-step video tutorial on installing and activating Divi:
Moving on, we promised the easiest way to customize a WooCommerce product page in the introduction. Here’s it:
1. Create a Product Page Template
Once you install and activate Divi on your WordPress dashboard, you can customize every WooCommerce page, including the basic-looking product pages. Look for the Use The Divi Builder button.
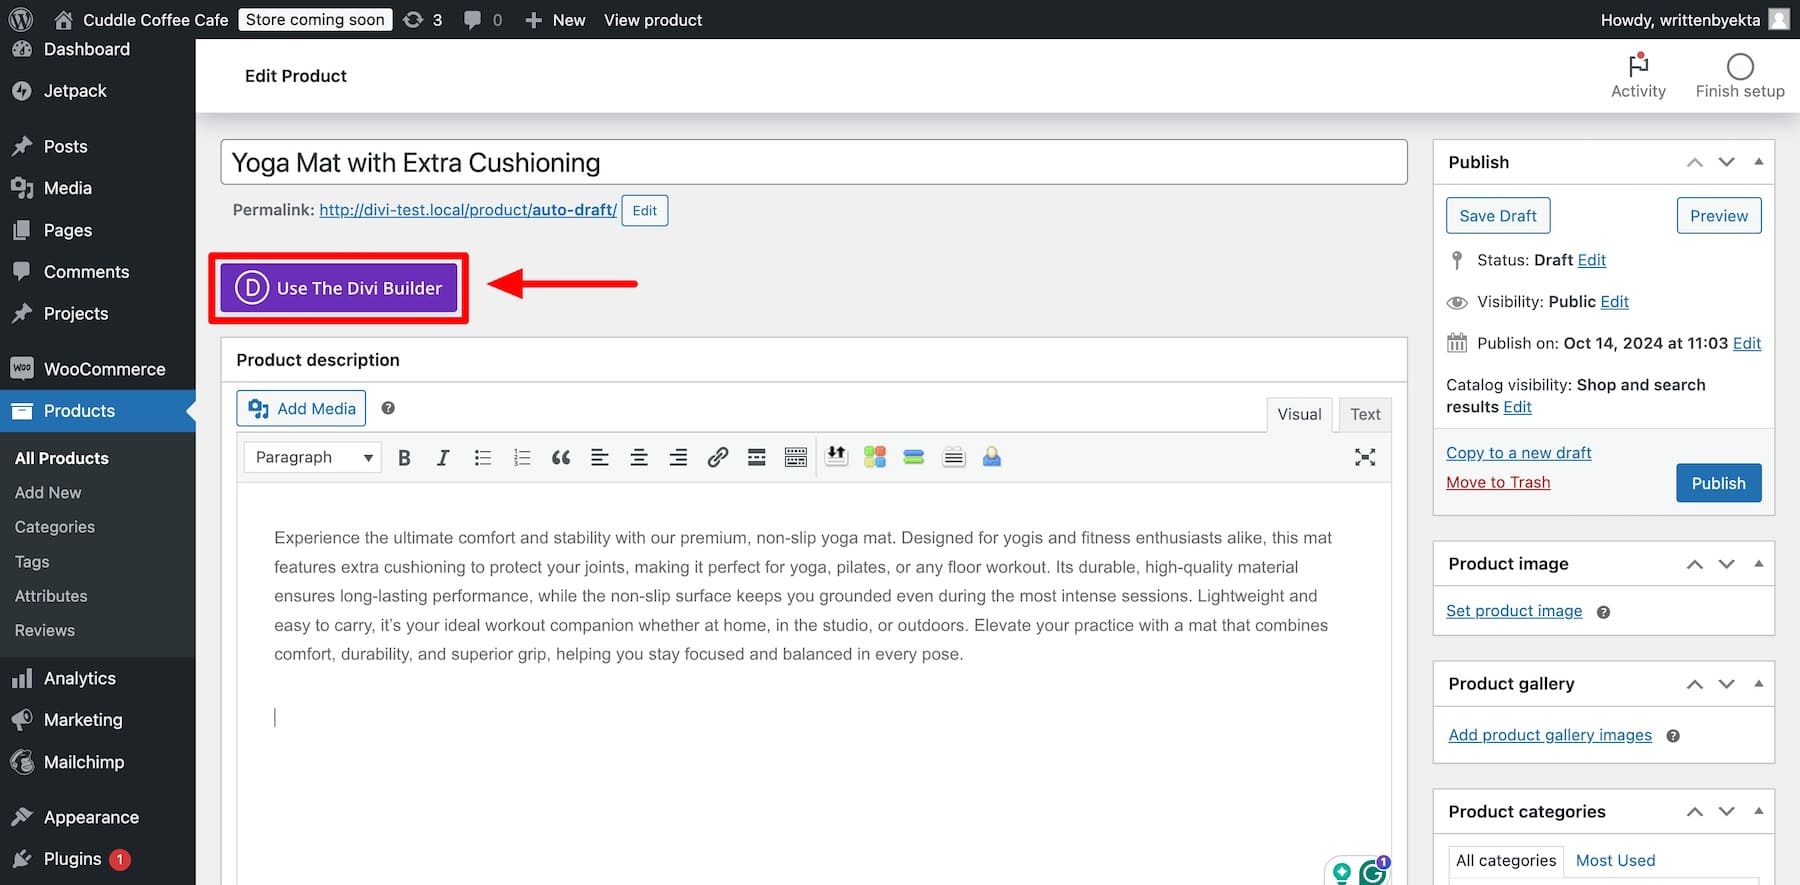
This option allows you to customize individual product pages using Divi’s drag-and-drop builder. However, redesigning each product page from scratch will take forever. But don’t worry—Divi enables you to customize the product page template at the site level so that the modifications appear on all product pages. To do so, create a product template in Divi Theme Builder.
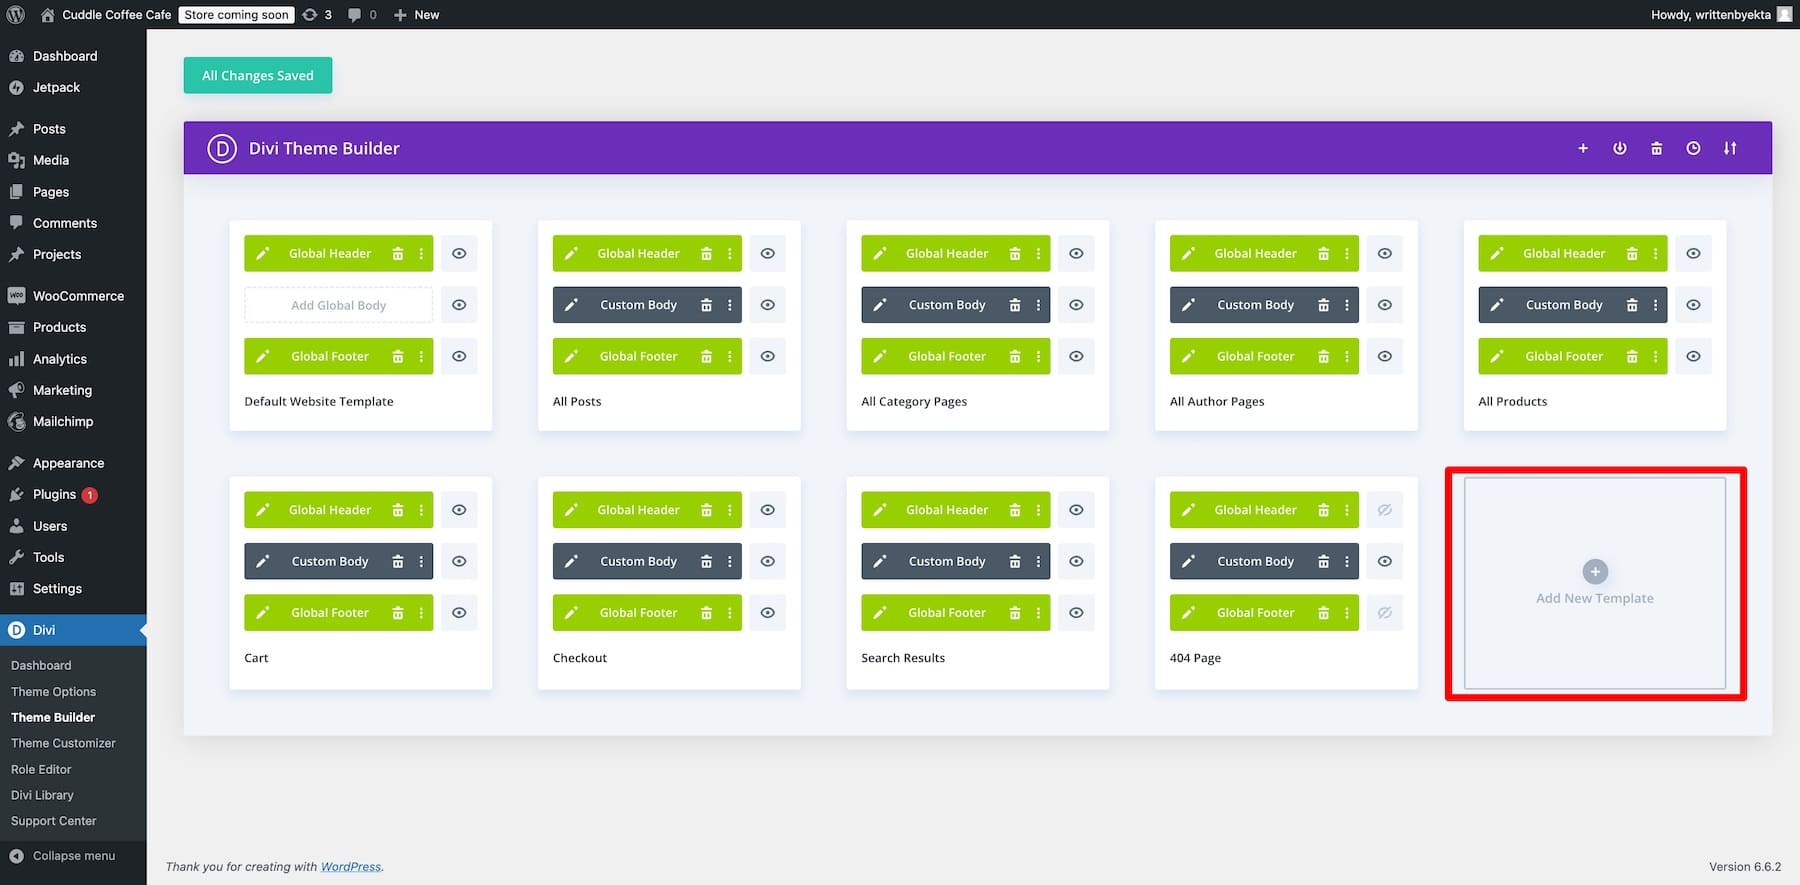
Go to Divi > Theme Builder and click on Add New Template. (You won’t see these many templates on your screen as you have just installed Divi.)
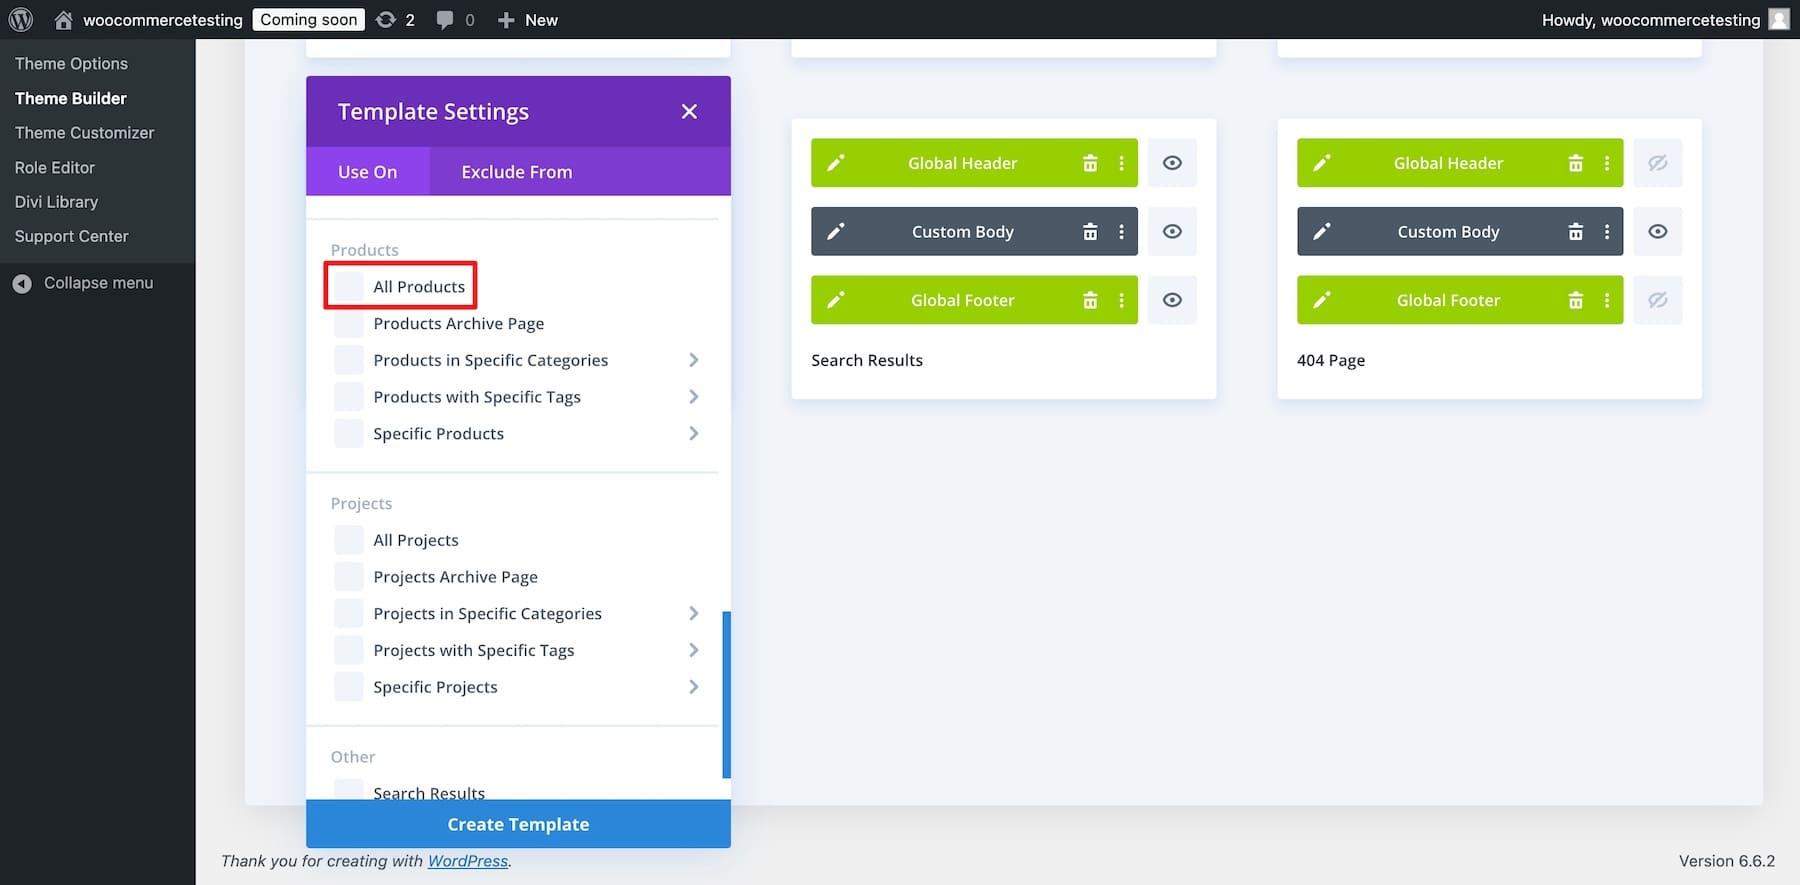
Since we want to design a product template, choose All Products as the category to use it on.
Now, you can access Divi’s drag-and-drop builder to design a product page template using the Divi Theme Builder. Once you create and save your template, all your product pages will have the template’s layout.
2. Import a Pre-designed Product Page Template
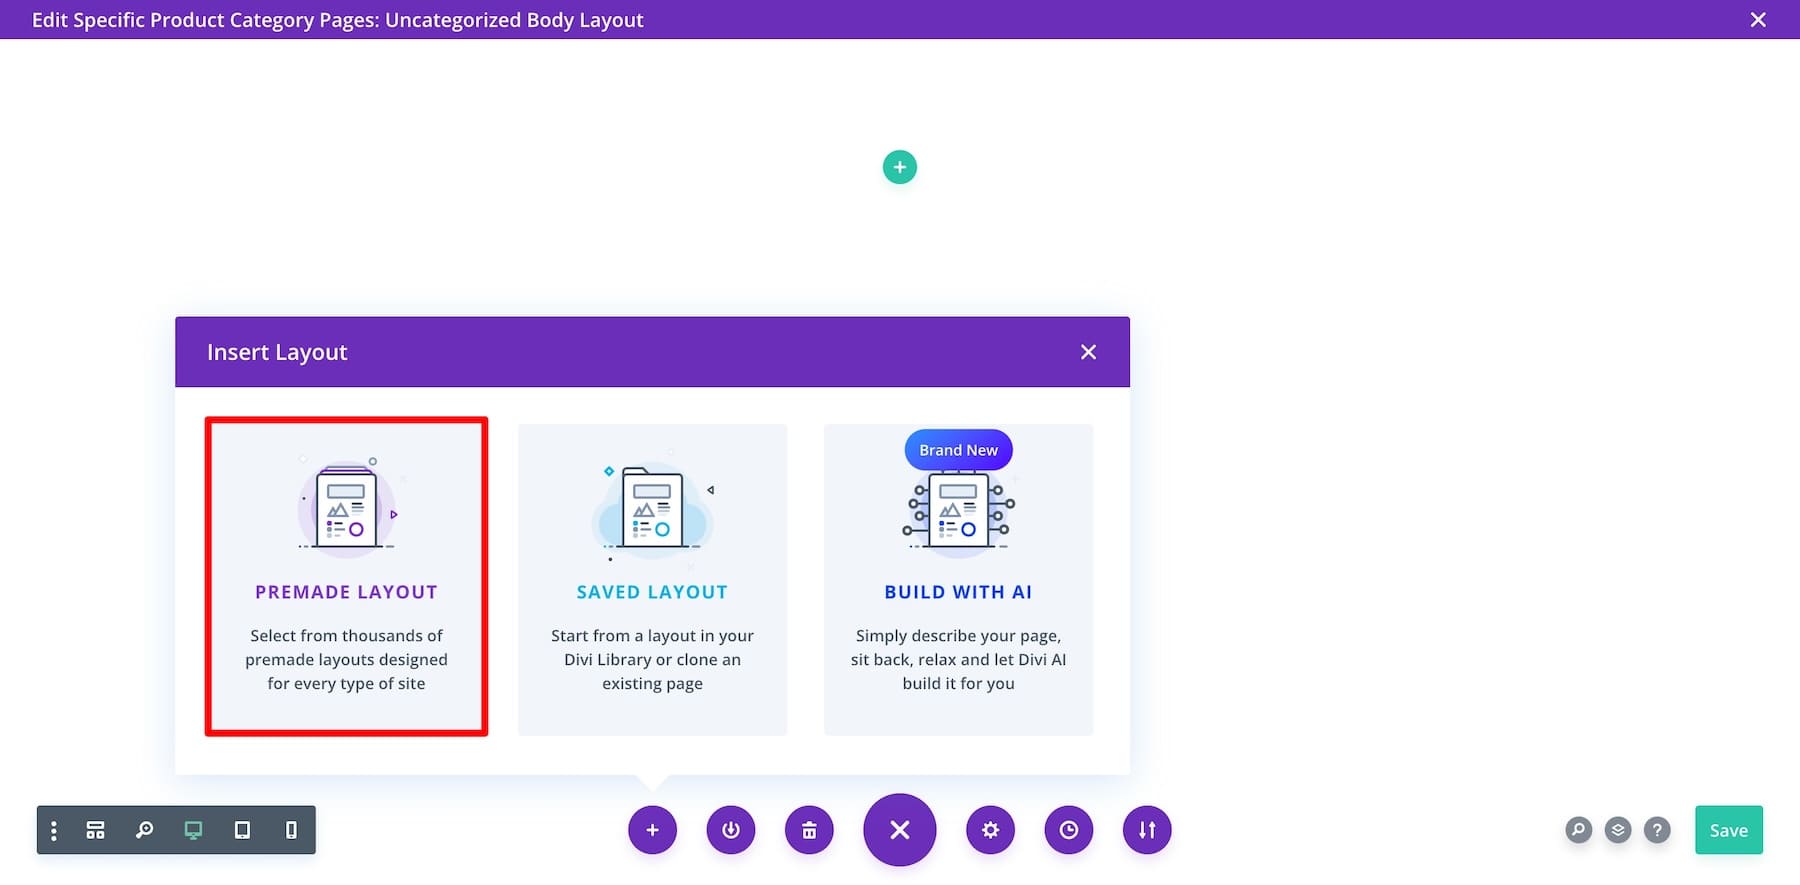
You don’t have to build from scratch if you don’t know where to start. As said earlier, Divi gives you access to many pre-designed product page templates, so it’s time to use them. You can easily import and customize a pre-made template to reflect your brand. Click the plus icon at the bottom left of the settings bar and choose Premade Layout.
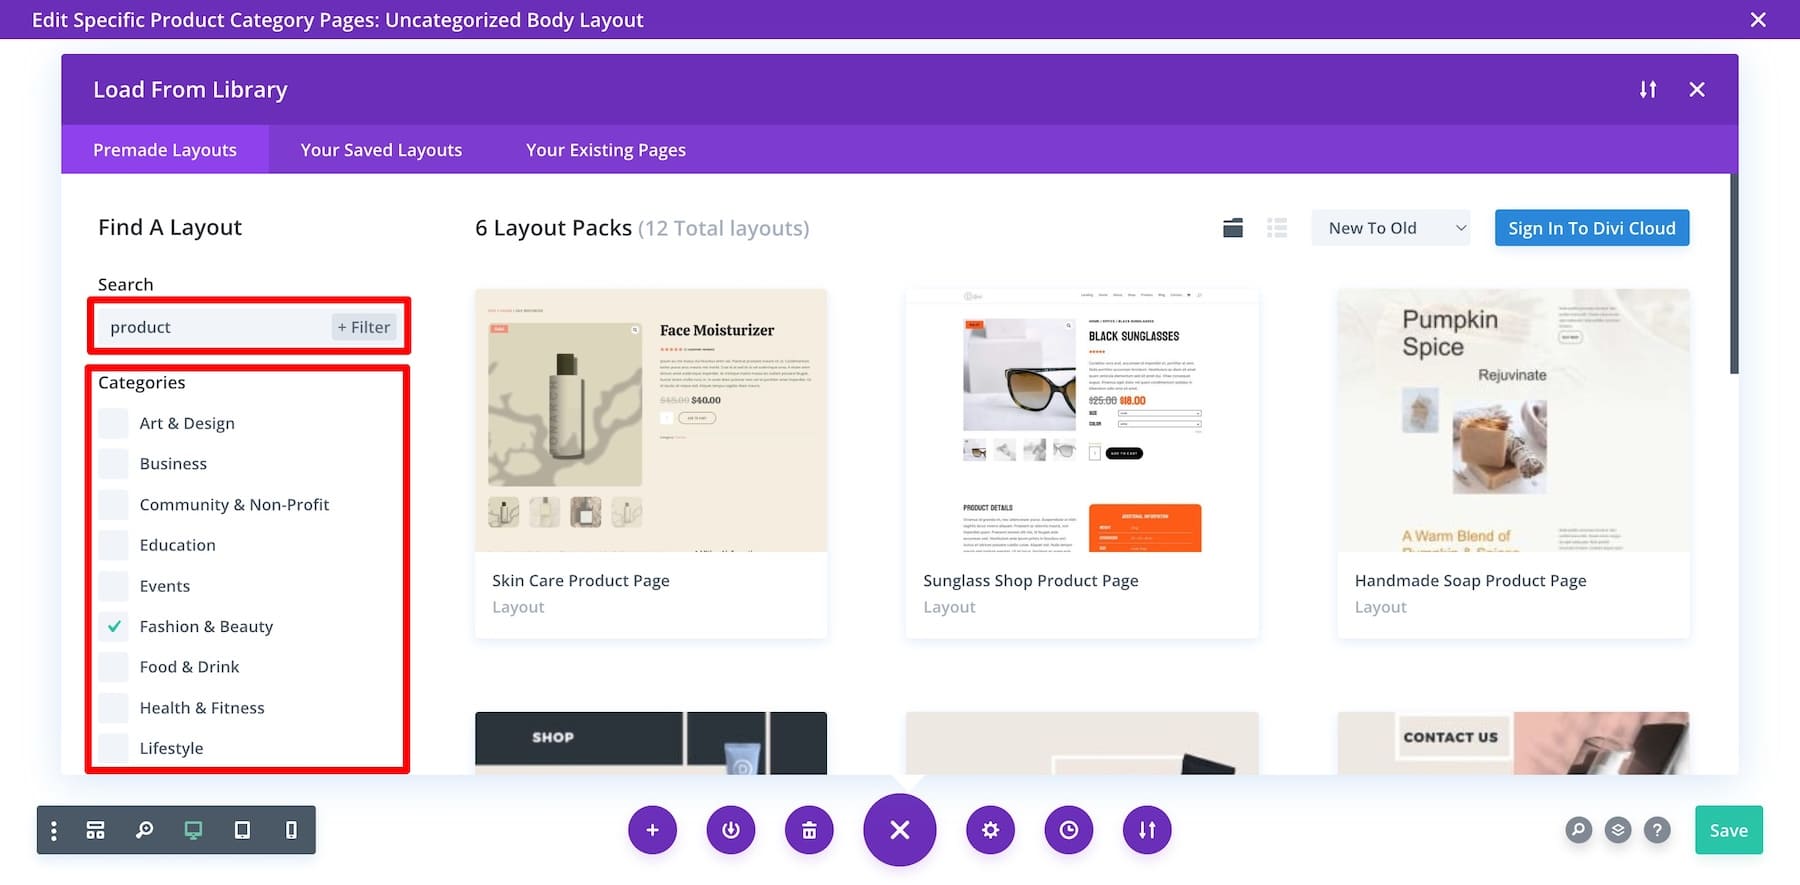
Scroll through and click to preview the one you like. Use the search bar and filters to refine your search.
Once you find one, click on Use this Layout and wait for the magic to happen.
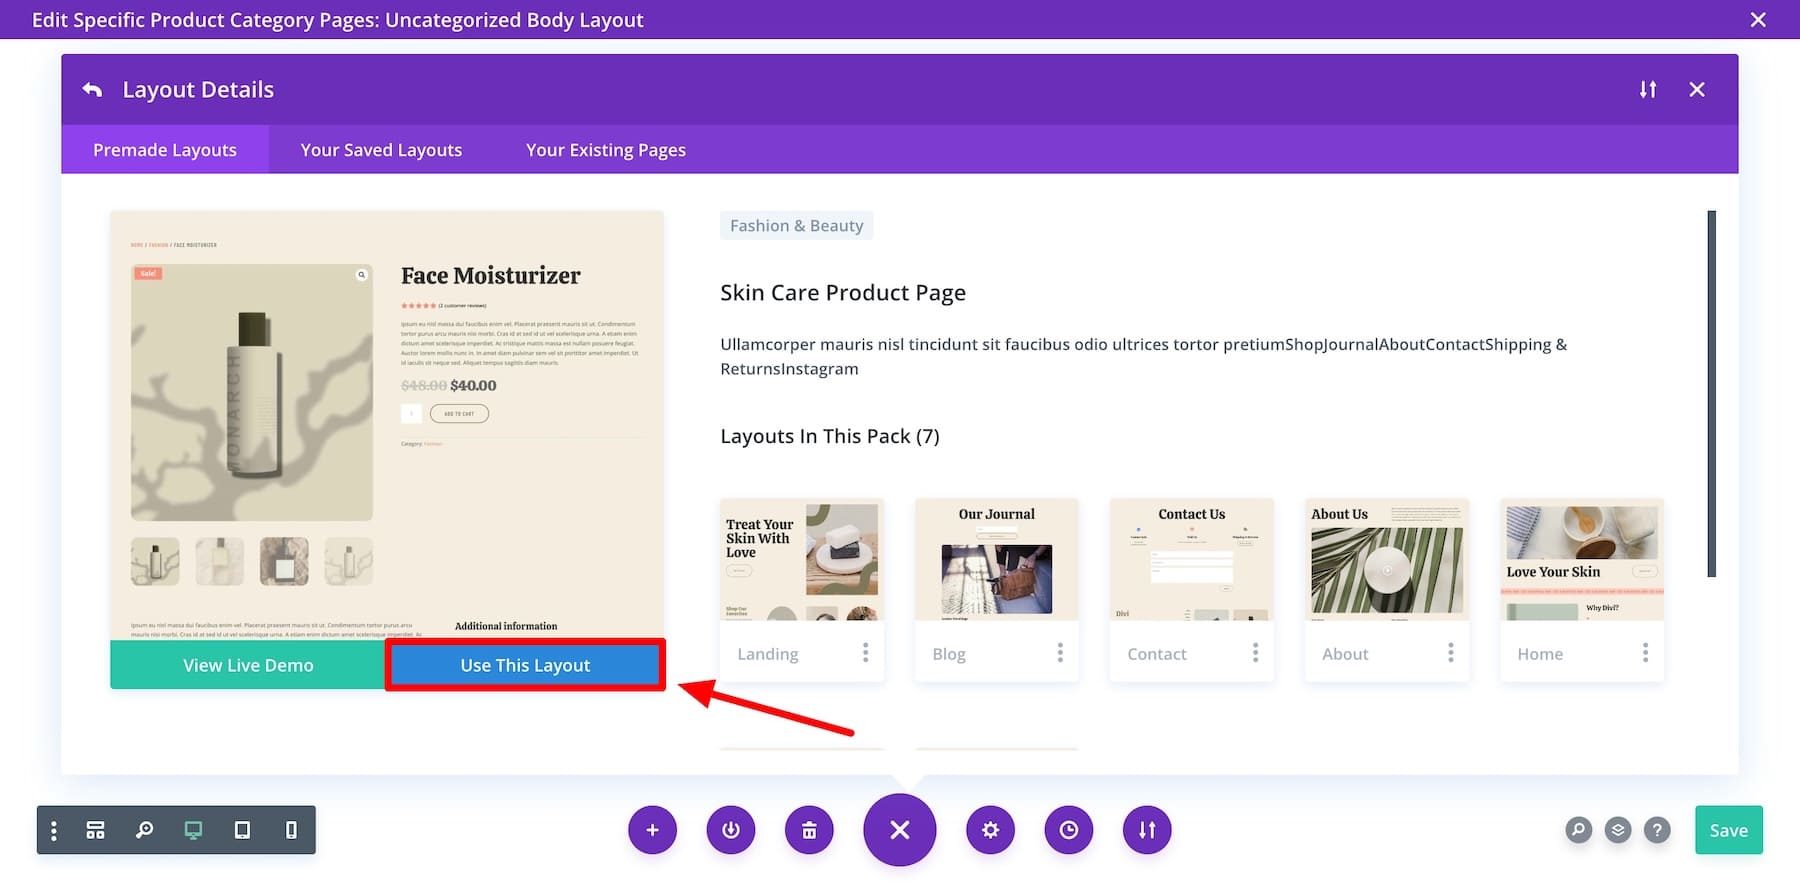
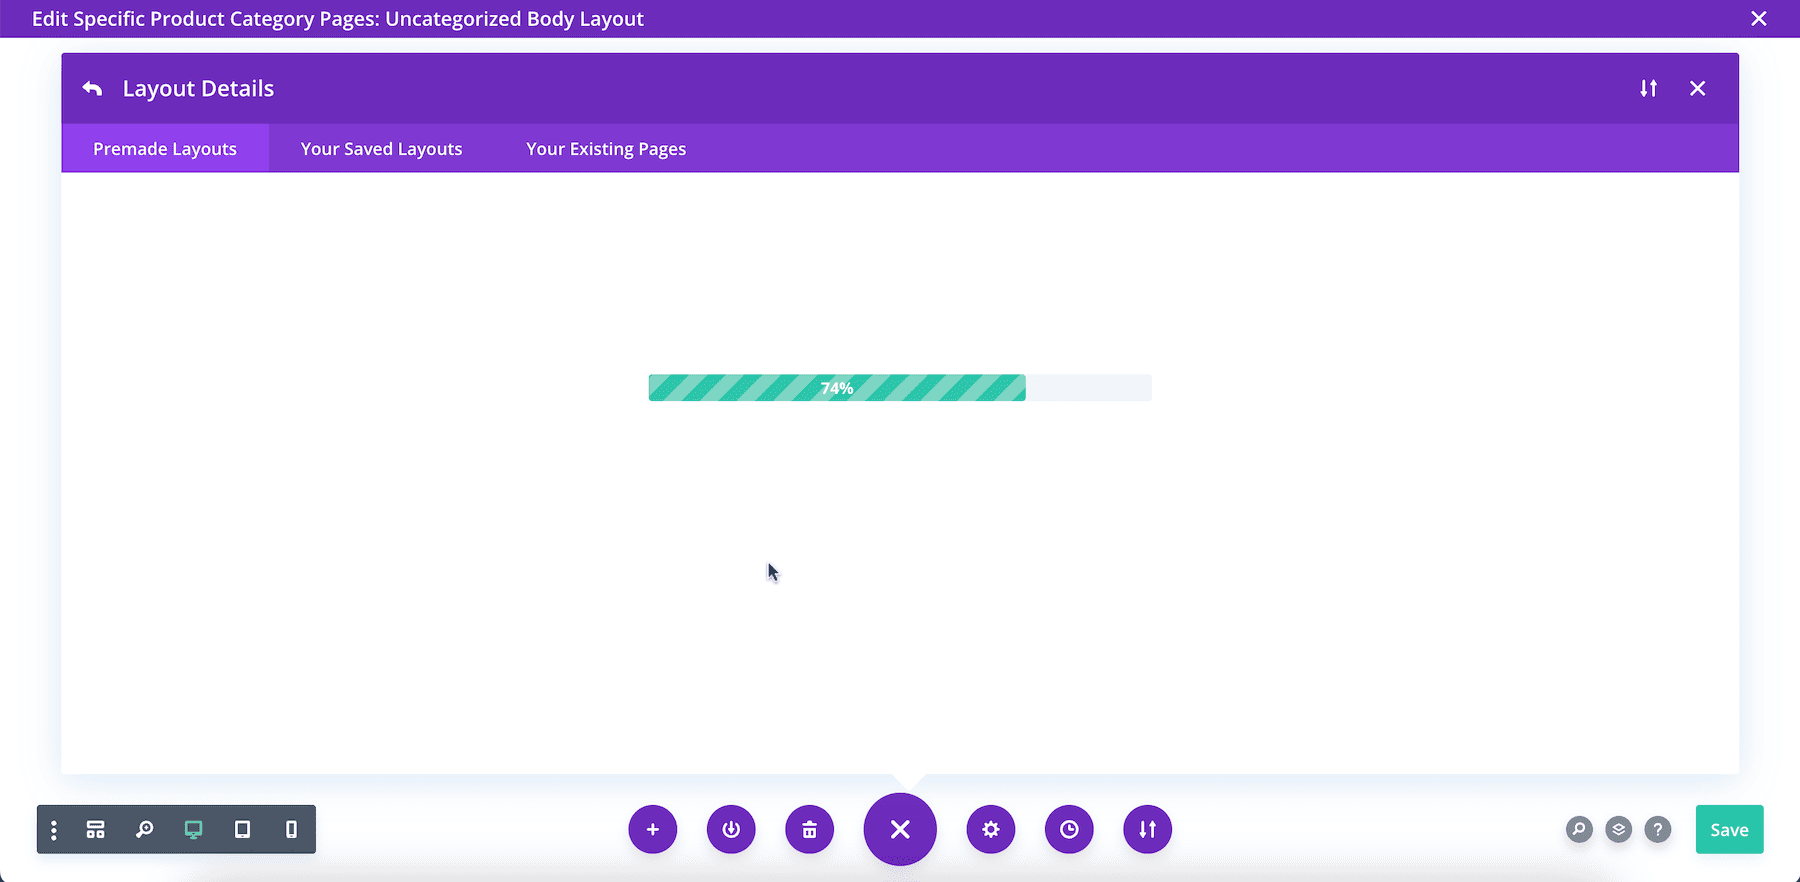
The Divi Builder has automatically started importing the layout to your page.
Your product page template is ready and looks way better than the default WooCommerce product page.
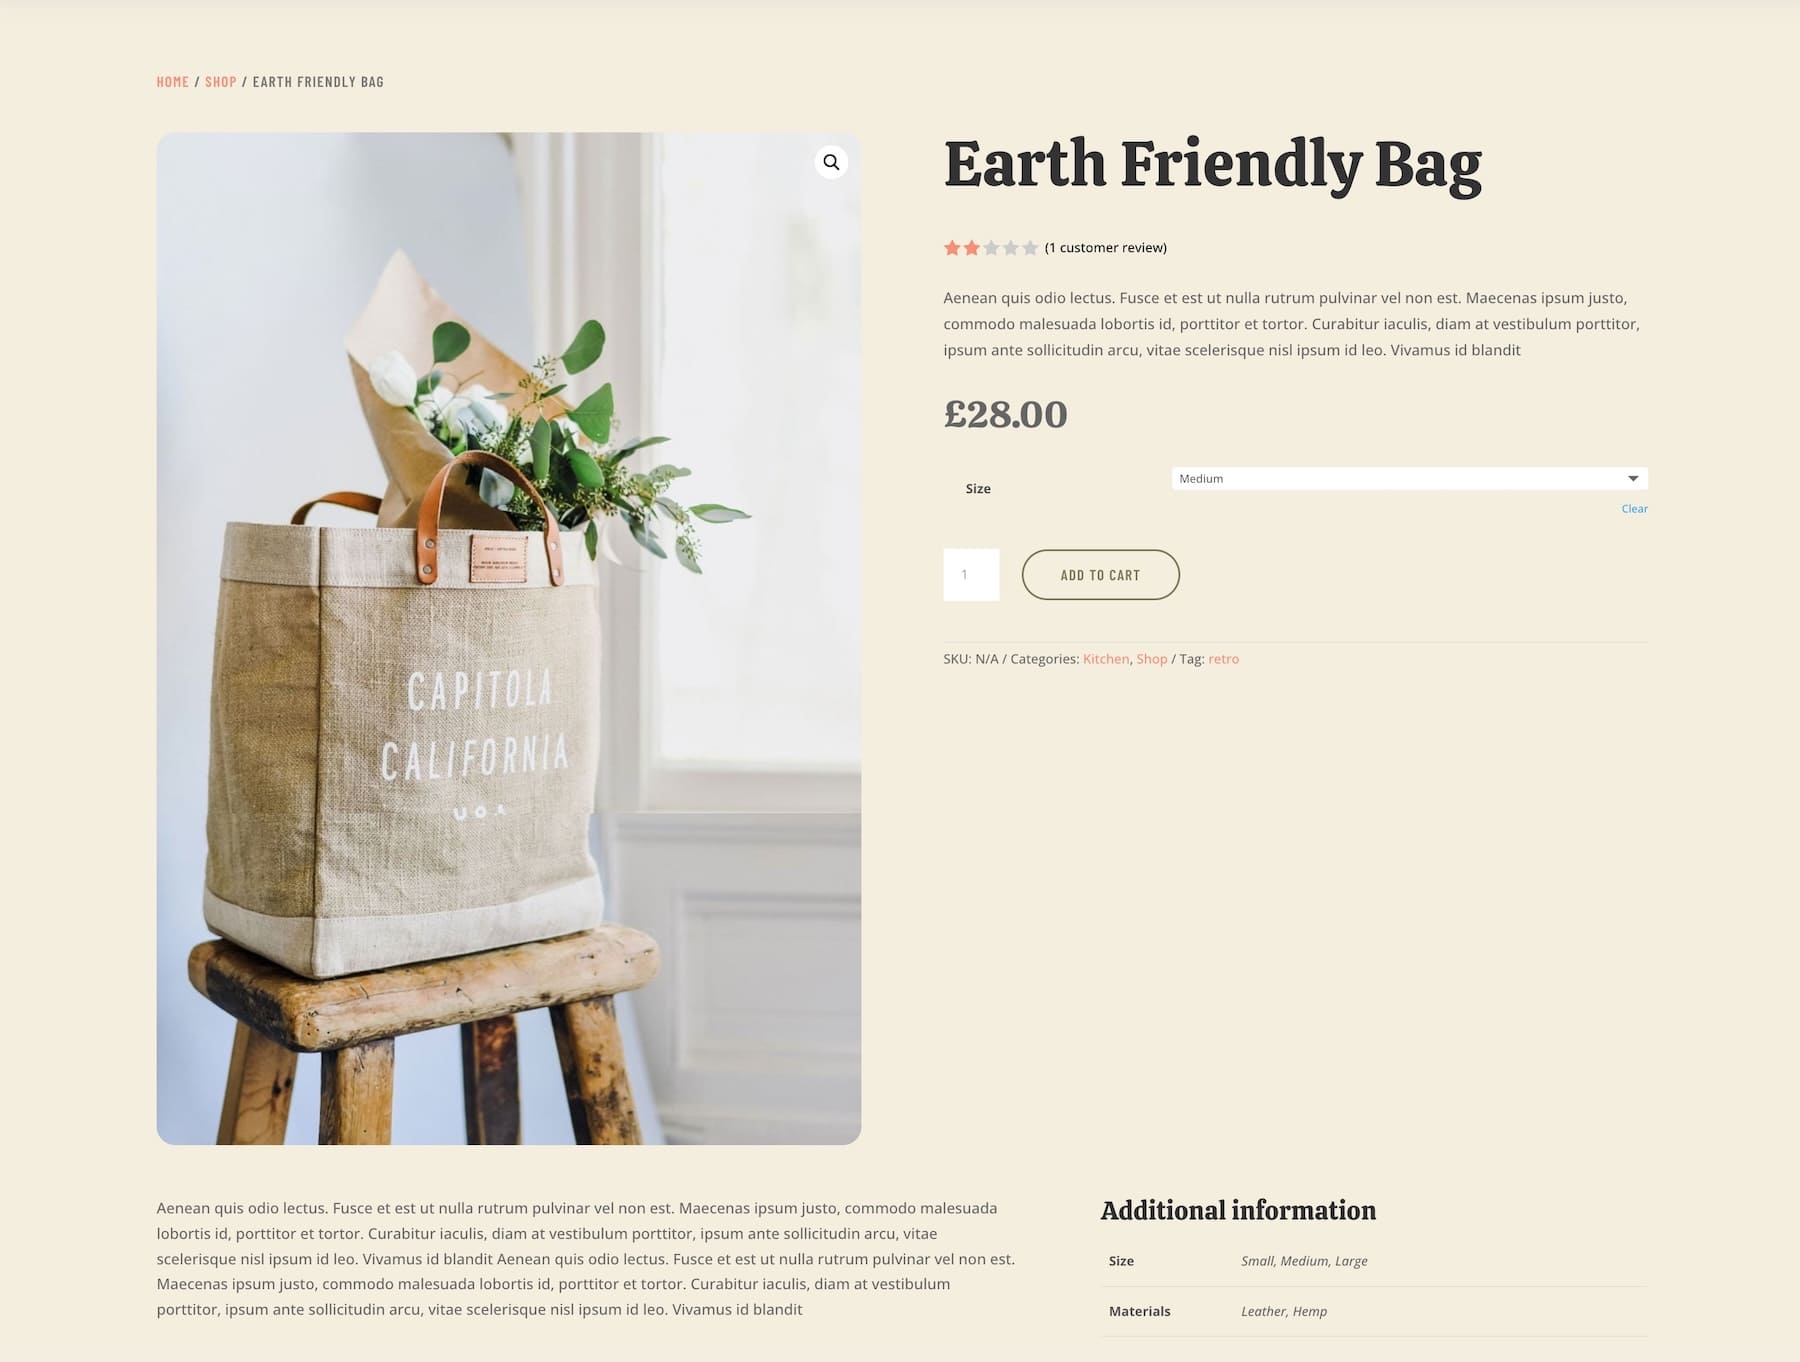
You’ll still need minor tweaks and branding adjustments to match other website pages.
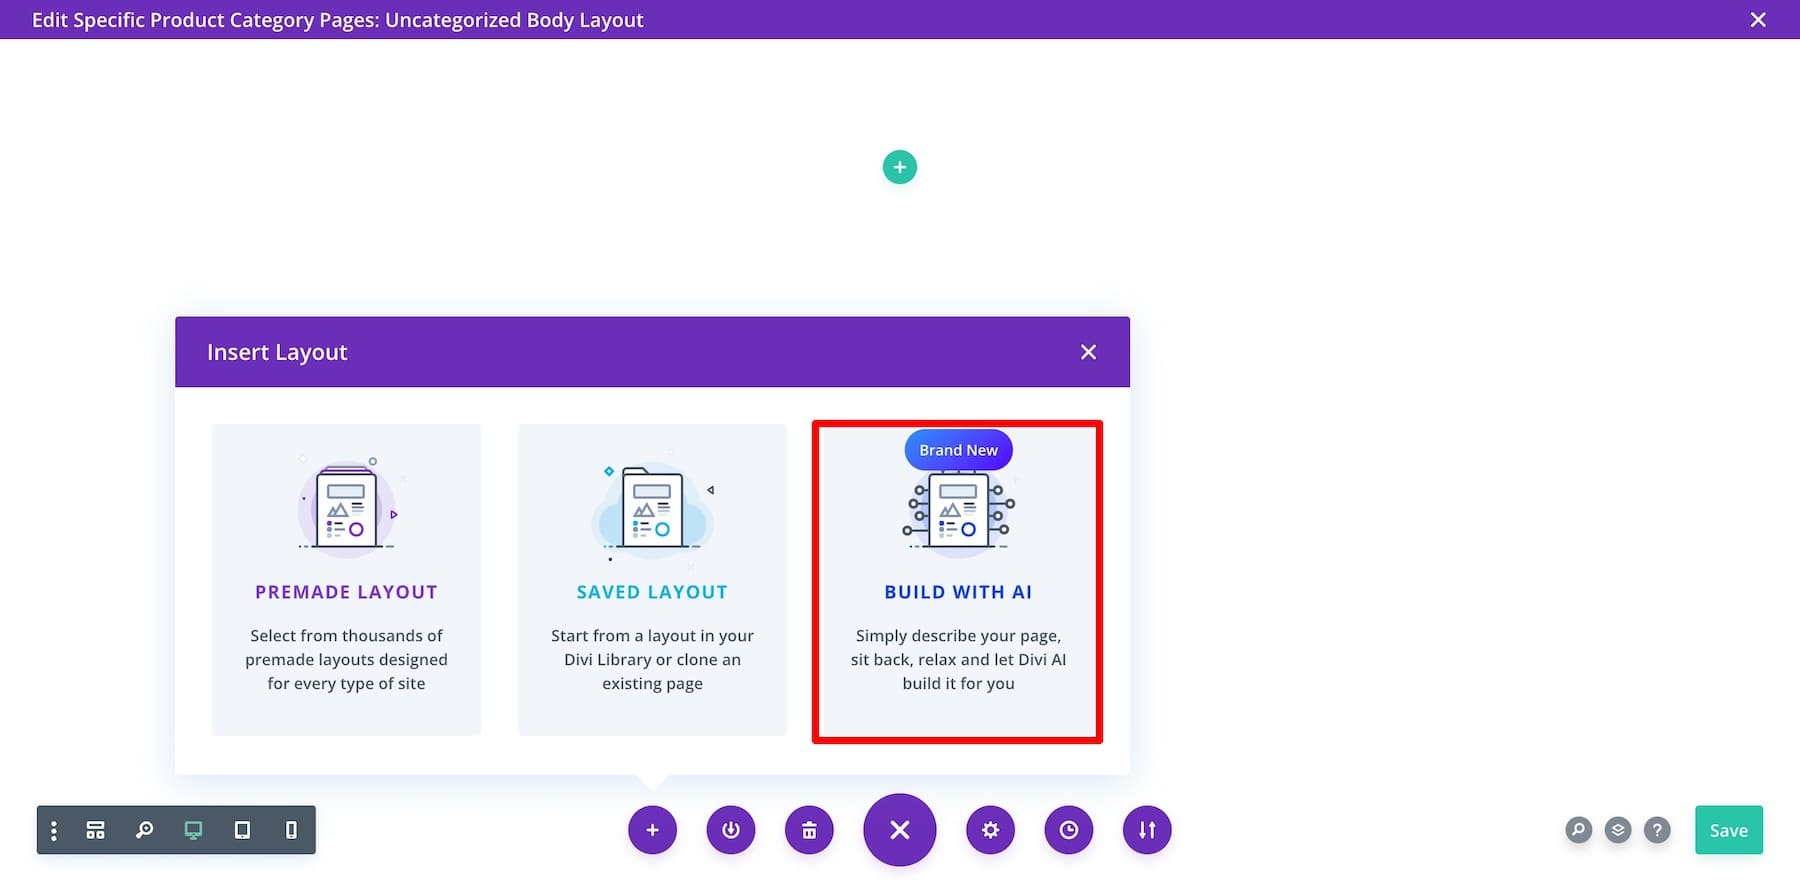
Optional: Not a fan of a pre-designed layout? You can also use the Build with AI option and instruct Divi AI to design a unique product page template.
3. Customize Your Product Page Template
Let’s start by ensuring we have the necessary elements of a high-converting product page. For example, see if you’ve placed upsells, cross-sell offers, and testimonials throughout your page to encourage customers to add more products to their carts.
Using Divi’s Native WooCommerce Modules
The best part about using Divi for WooCommerce is its native WooCommerce elements, which are easy to customize and save you money from purchasing third-party plugins or add-ons. Here are the Divi’s WooCommerce modules you need to make sure your product page template includes:
- Woo Product Images: To display your product images in beautiful layouts.
- Woo Product Title: To display your product titles dynamically.
- Woo Product Description: Showcase a brief product description under the title. Check out Woo Product Meta and Woo Product Information to add extra information.
- Woo Product Tabs: Displays complete product details, reviews, and additional information.
- Woo Product Add to Cart: Customers can quickly add products to their carts. (You can also add ratings with Woo Product Ratings.)
- Woo Breadcrumbs: Help users navigate your store.
- Testimonials: Build credibility by showcasing customer feedback.
- Woo Cross-Sells: To create People Also Bought sections.
- Woo Product Upsell: To offer deals and encourage customers to complete purchases.
Divi offers many other excellent content modules to simplify the online store-building experience. You don’t have to spend money on plugins when you can get them for free as in-built elements and features in Divi. Here’s what a pre-designed product page layout looks like with Divi’s WooCommerce modules:
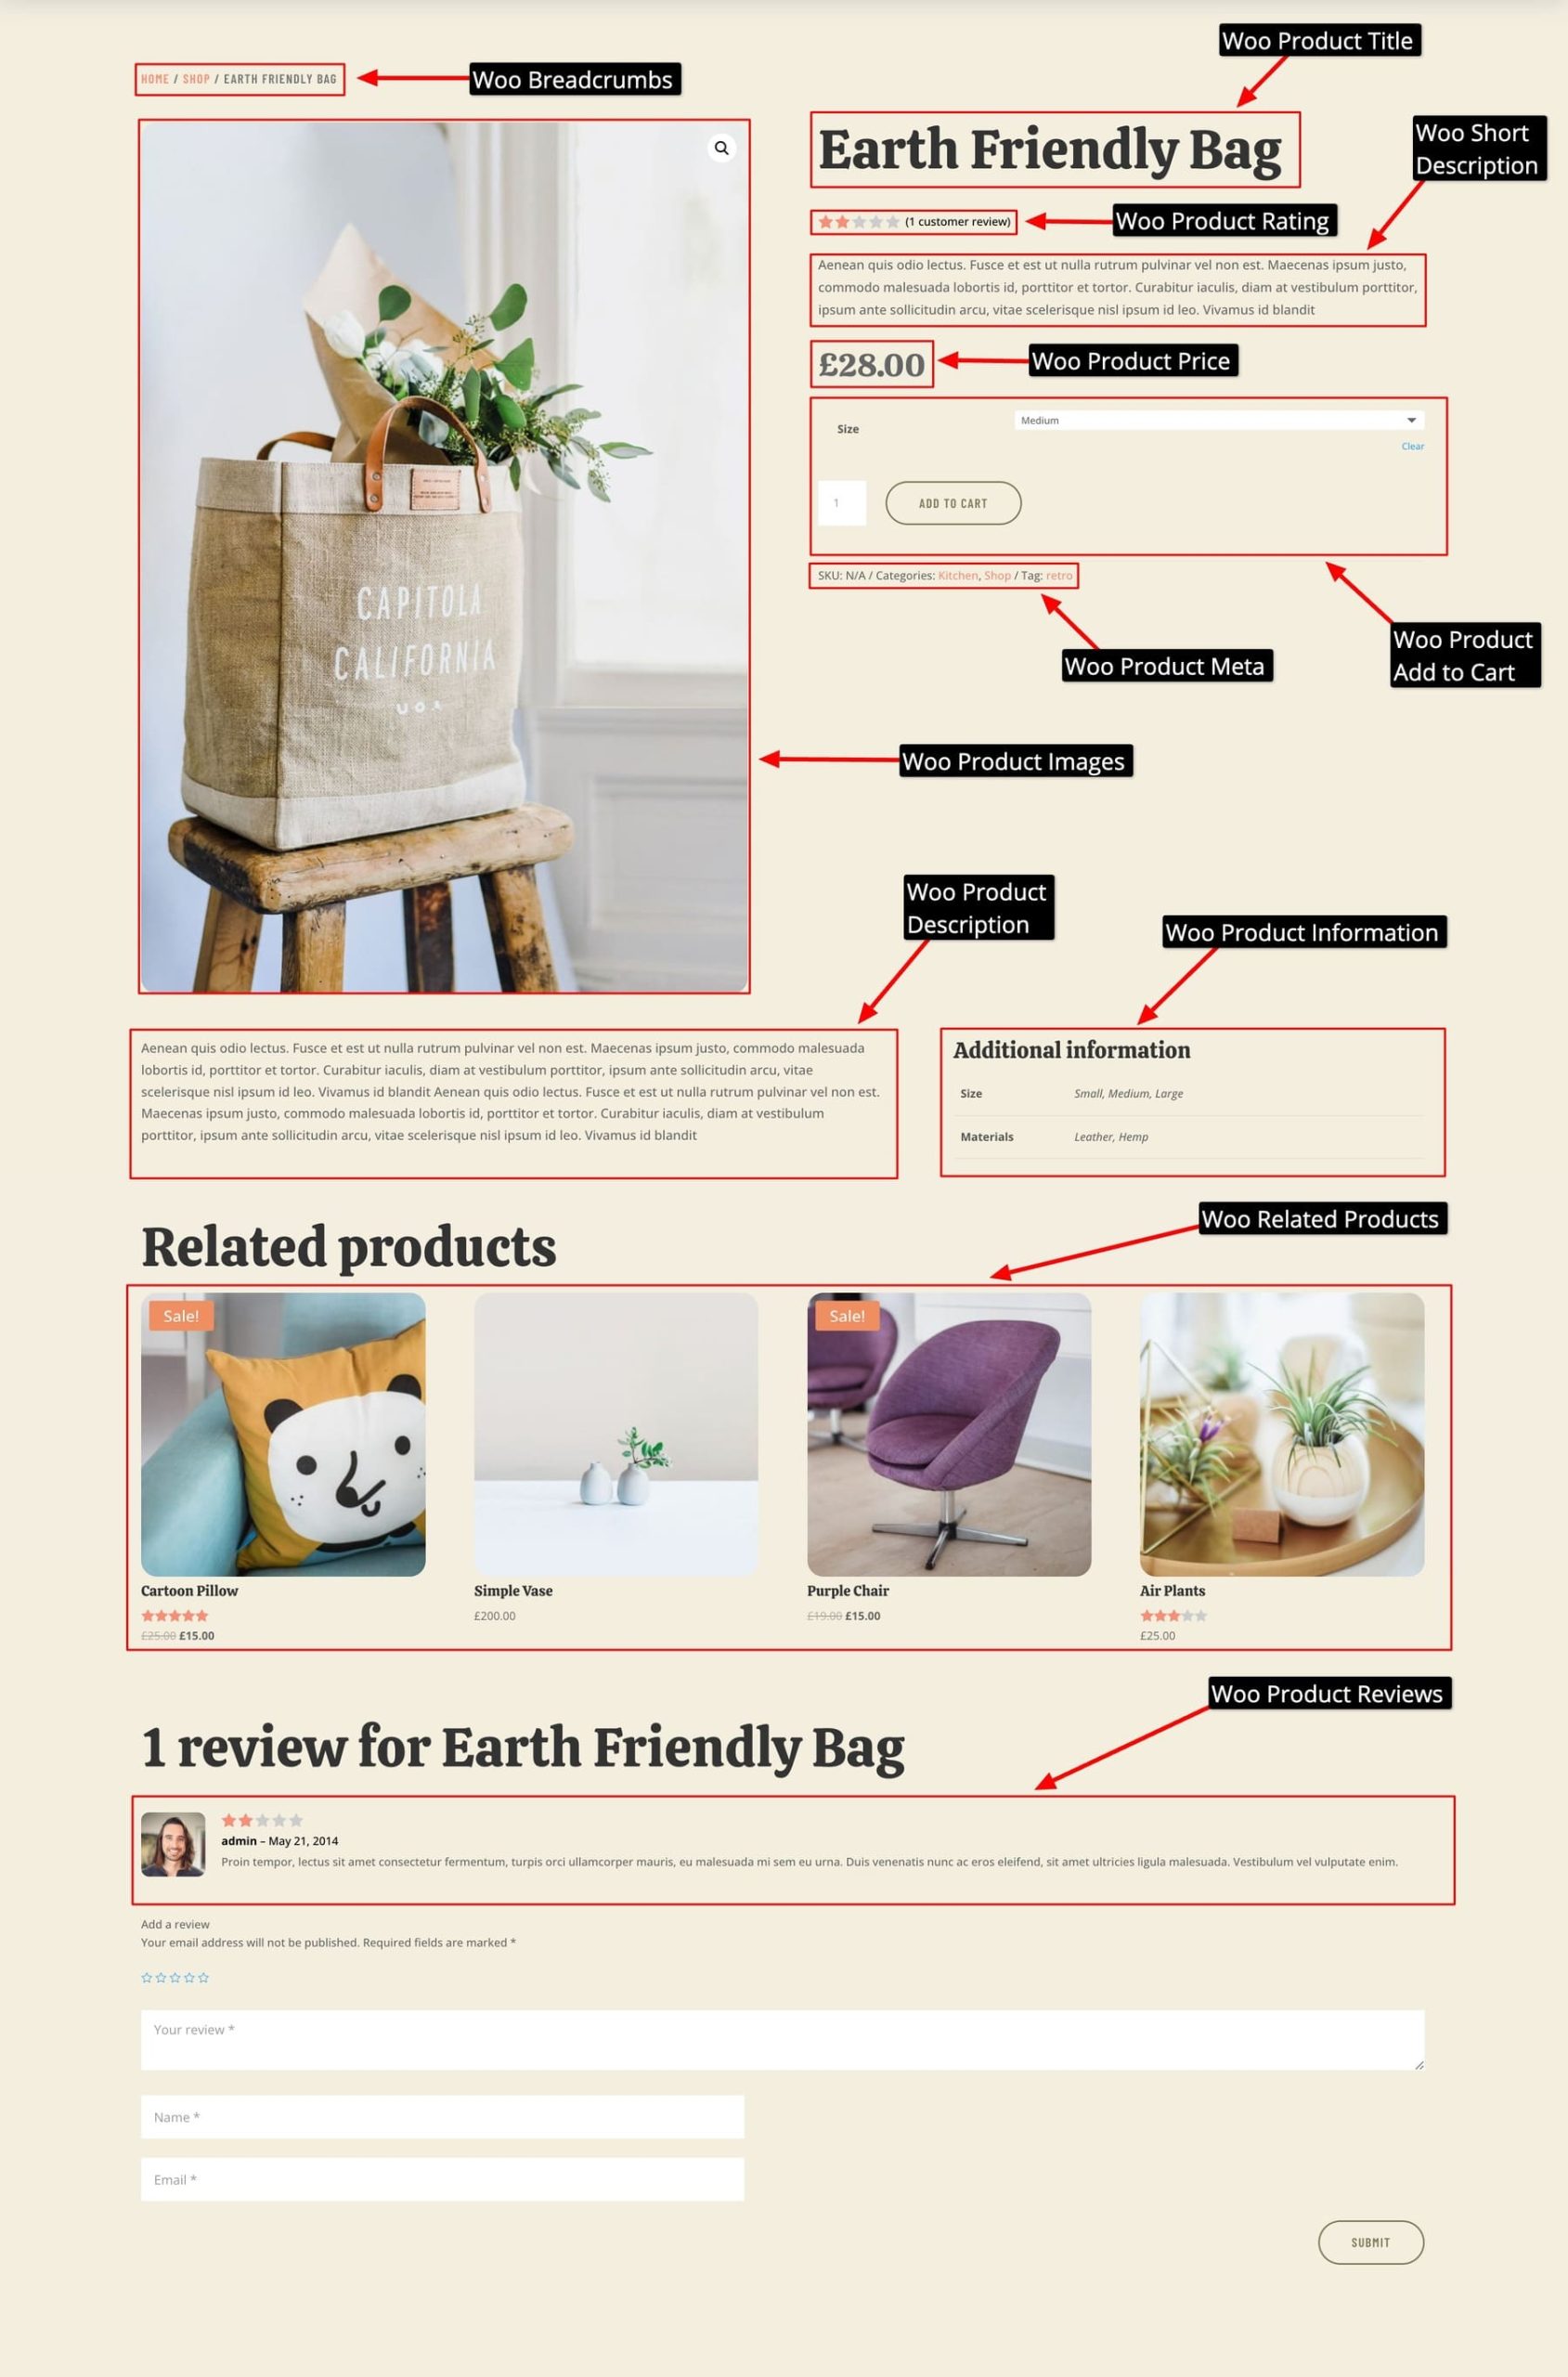
For our example, I generated a new online store using Divi Quick Sites in two minutes. I’ll use its WooCommerce product page template to show you the customization process.
If these elements aren’t already in your product page template, add them. To add a module, hover over the element after which you want to add a new one and click the plus icon. To encourage more sales, let’s try adding a You May Also Like section after the testimonials. For this, we need to add the Woo Product Upsell element.
The modules you add replicate the styles from your saved global elements, so you don’t have to worry about modifying branding for each module individually. However, you can customize the settings easily if you want.
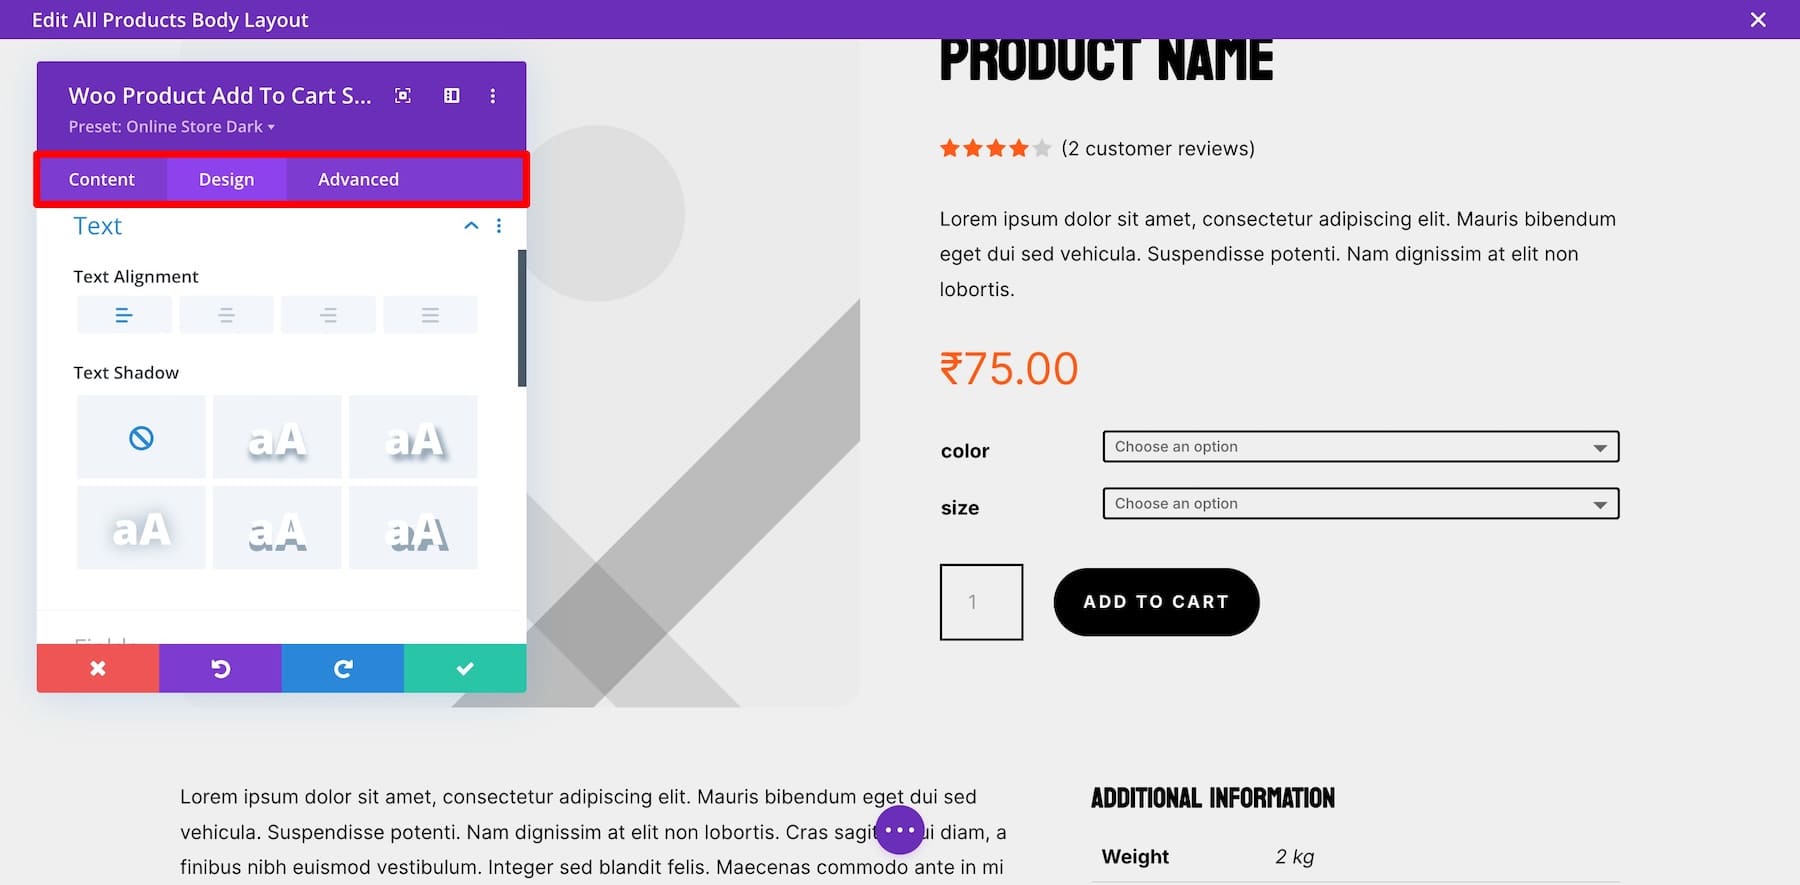
To do so, hover over the element and click the gear (settings) icon. The settings window pops up with three sections: Content (to modify element’s content), Design (to edit fonts, colors, size, and more), and Advanced (to edit custom CSS, add conditions, etc.)
Using Divi’s Dynamic Content to Pull Data for Specific Products
Divi’s native WooCommerce modules are dynamic by default, meaning they pull product-specific information from the correct elements without you having to enter it manually. However, you can also modify dynamic content settings in certain elements to personalize users’ experience even more.
For example, you could display additional details specific to each product to help buyers make informed decisions or discount offers for selected dates. First, add the element and hover over different settings to find the dynamic content option:
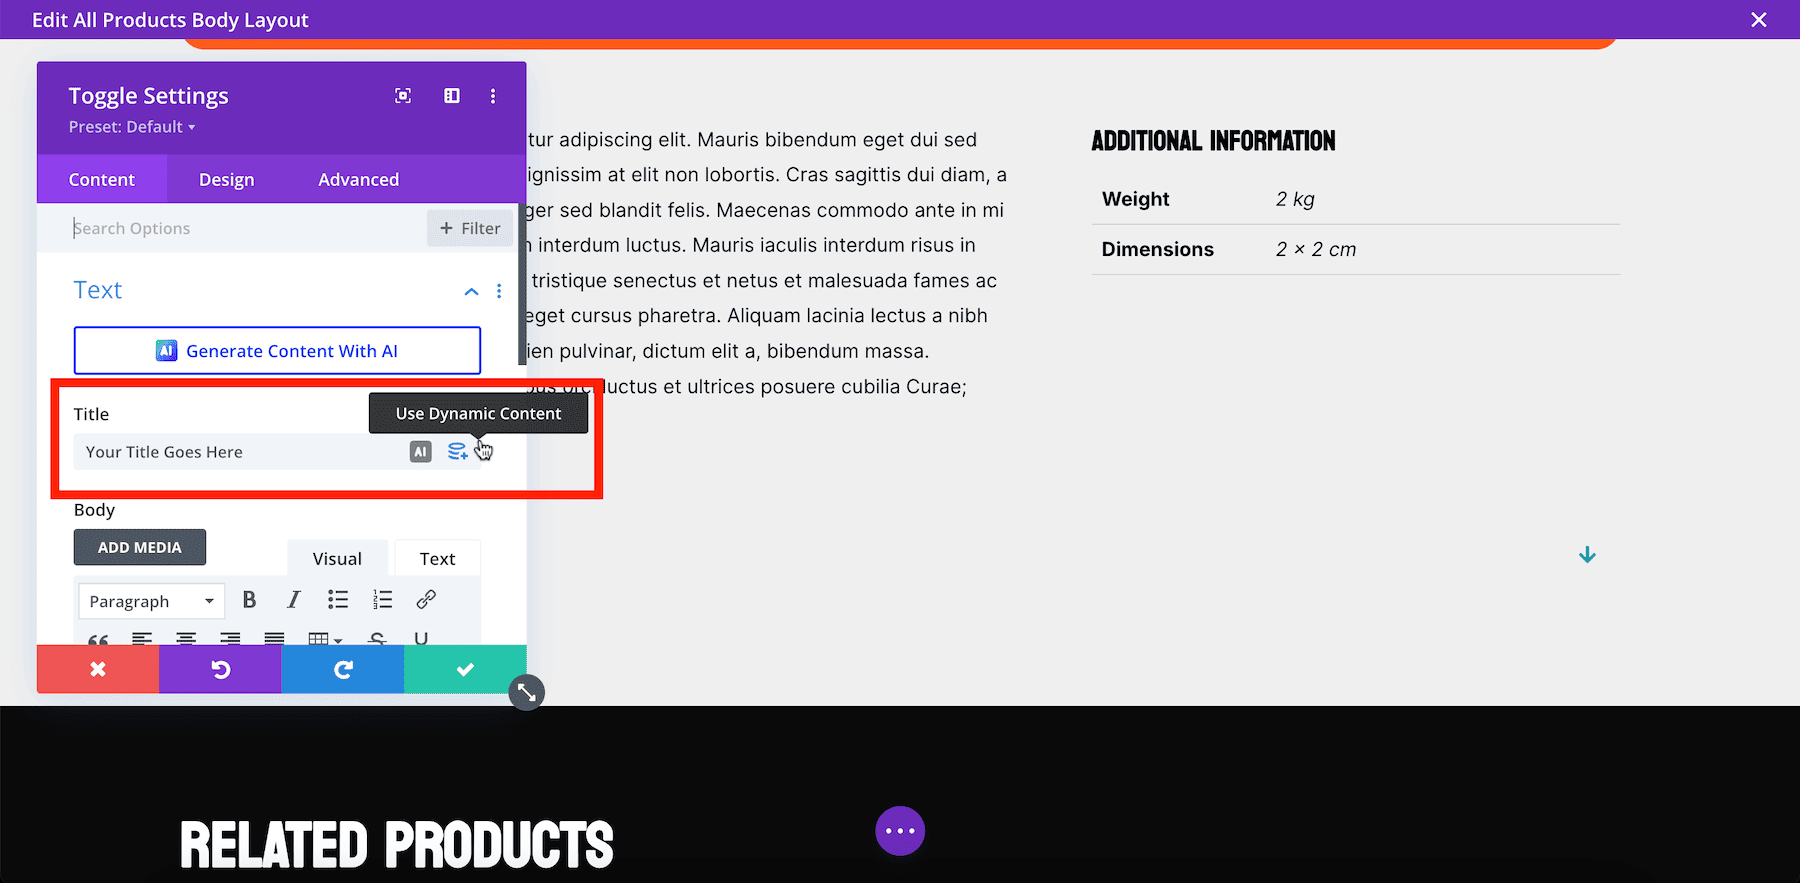
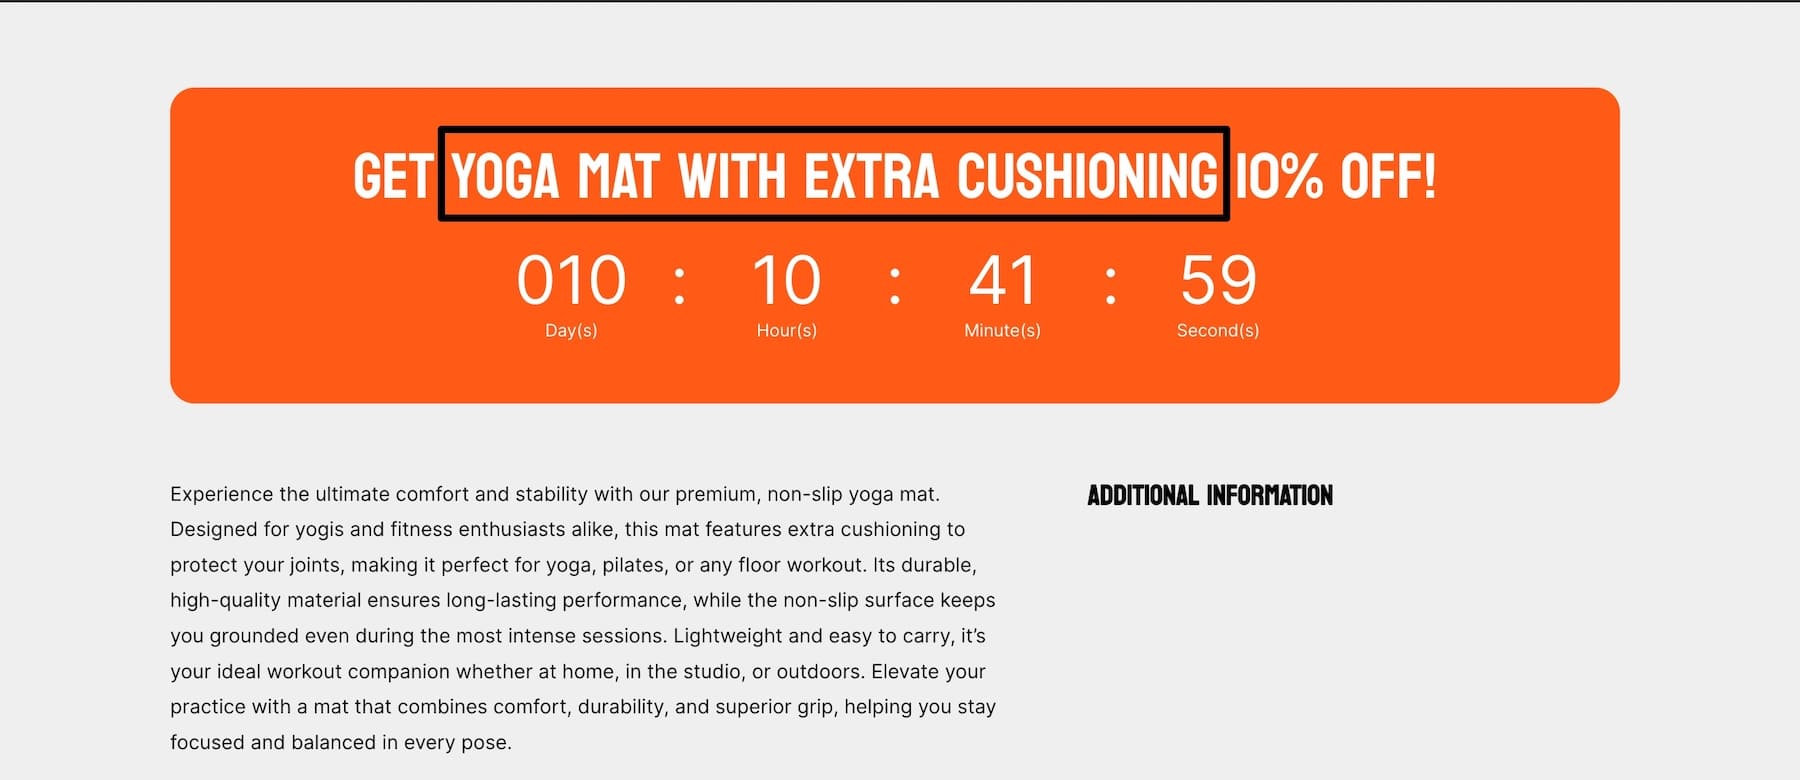
Let’s try adding a Countdown Timer for when you’re running sales, it dynamically displays the product’s title for different products. Here’s how to do it:
After saving the changes and viewing one of your products’ pages, you’ll see the countdown timer with the product’s name in the title.
Using Conditions to Personalize Content Based on User Behavior
With Divi’s Conditions, you can show or hide specific content based on user interactions. For example, you can display upsell offers only to returning visitors or users who have added products to their cart but haven’t completed the purchase. Here’s how you can display the You May Also Like section to users who’ve set their cart:
Divi’s Conditions options can be a game changer in building unique shopping experiences. For example, you can show different product page sections to logged-in users versus guest users.
Pro Tip: Highlight New Arrivals for returning customers and Bestsellers for new visitors. If a user has visited the product page multiple times but hasn’t purchased, you could display a personalized discount banner to encourage conversion.
Show Custom Testimonials for Specific Products
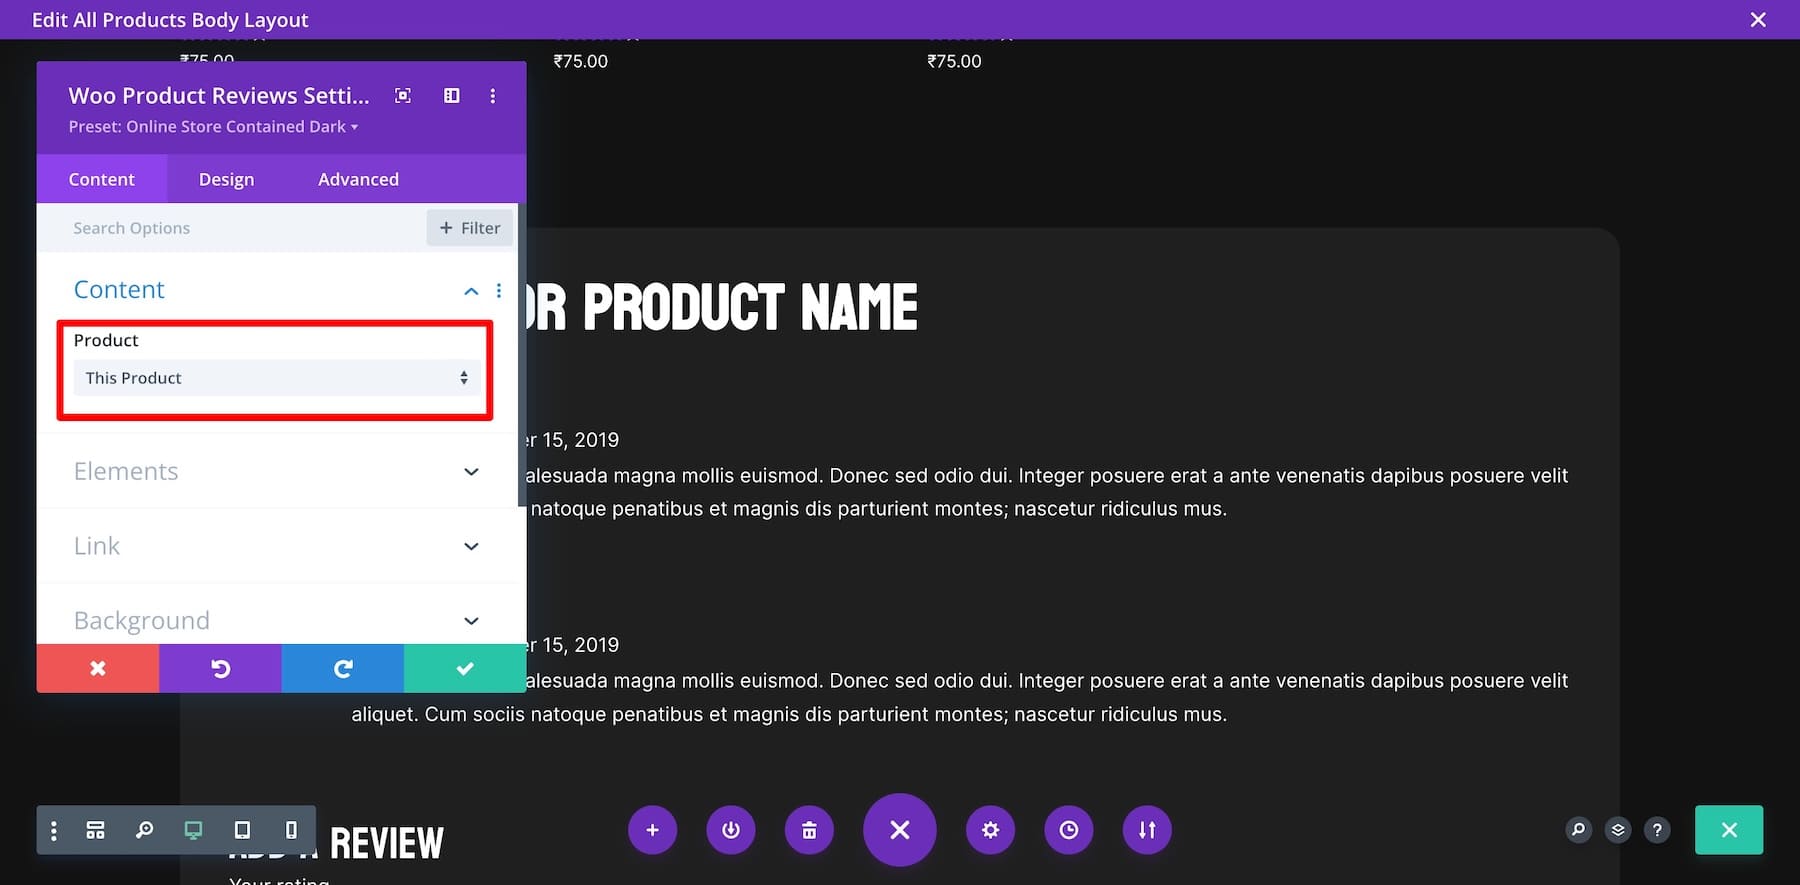
Using Divi’s Woo Product Reviews module, you can showcase product-specific testimonials that boost credibility and build trust with potential buyers. This is particularly useful for products that have received excellent feedback or reviews. Make sure to choose This Product so it pulls reviews from specific products.
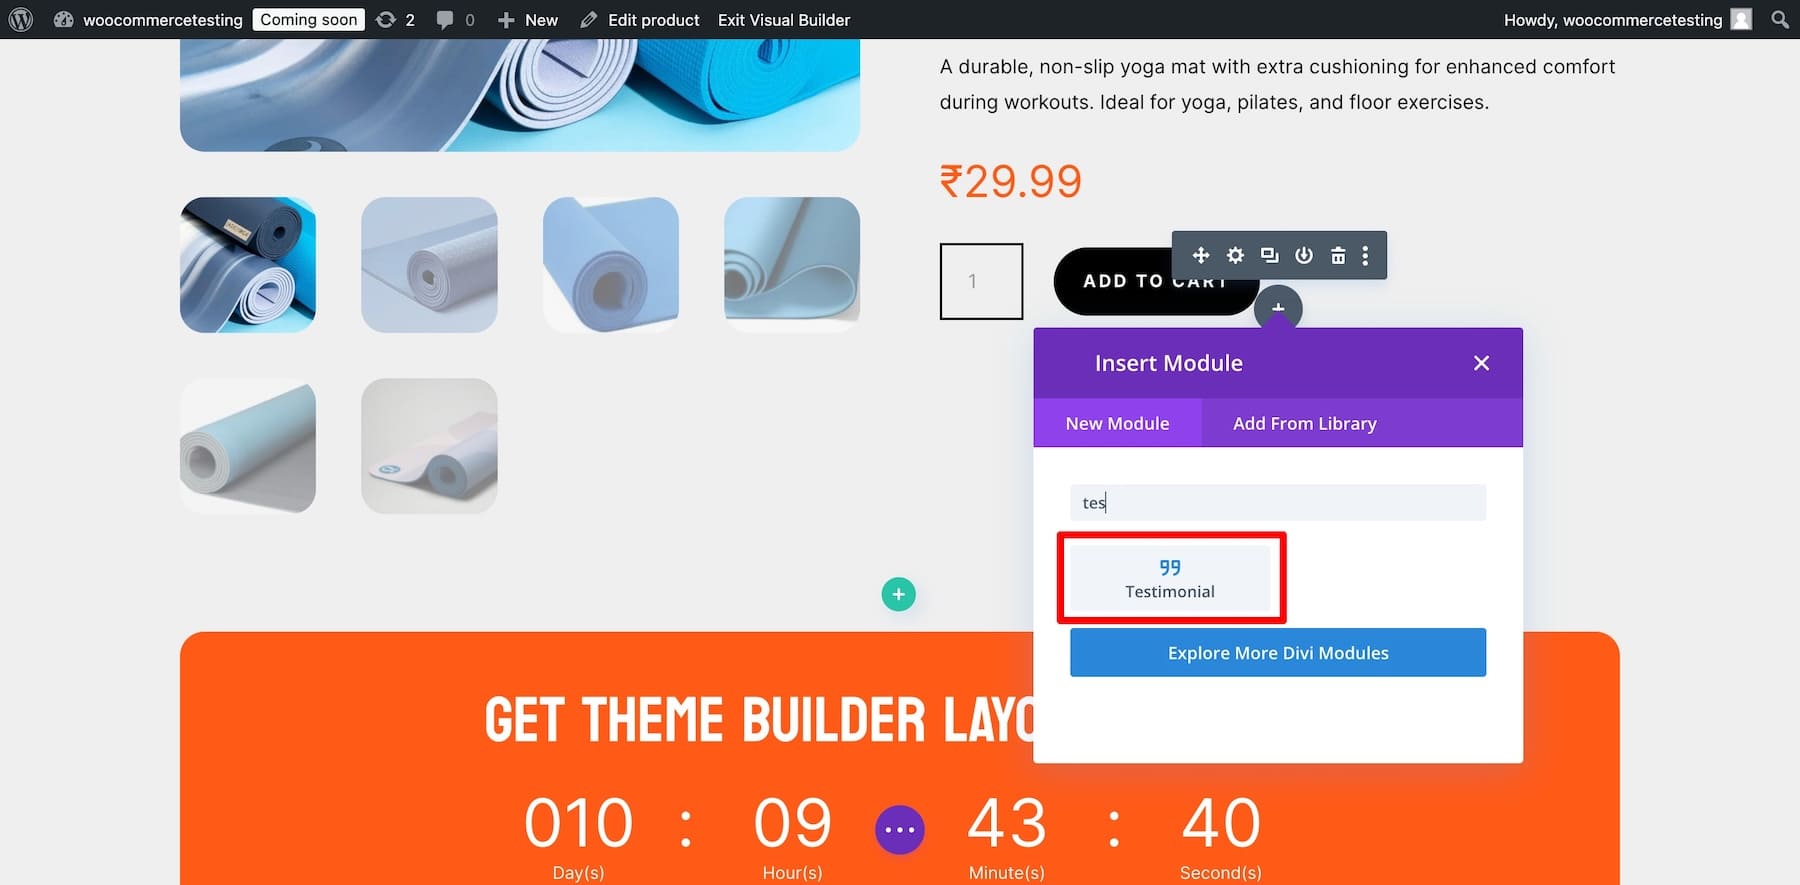
Pro Tip: Placing a Testimonial module near the Add to Cart button can boost the buyer’s confidence in purchasing. Note that the Testimonial module isn’t dynamic, so you’ll have to edit specific product pages using Divi Builder to add testimonials.
Using Bloom to Create Exit Intent Popups
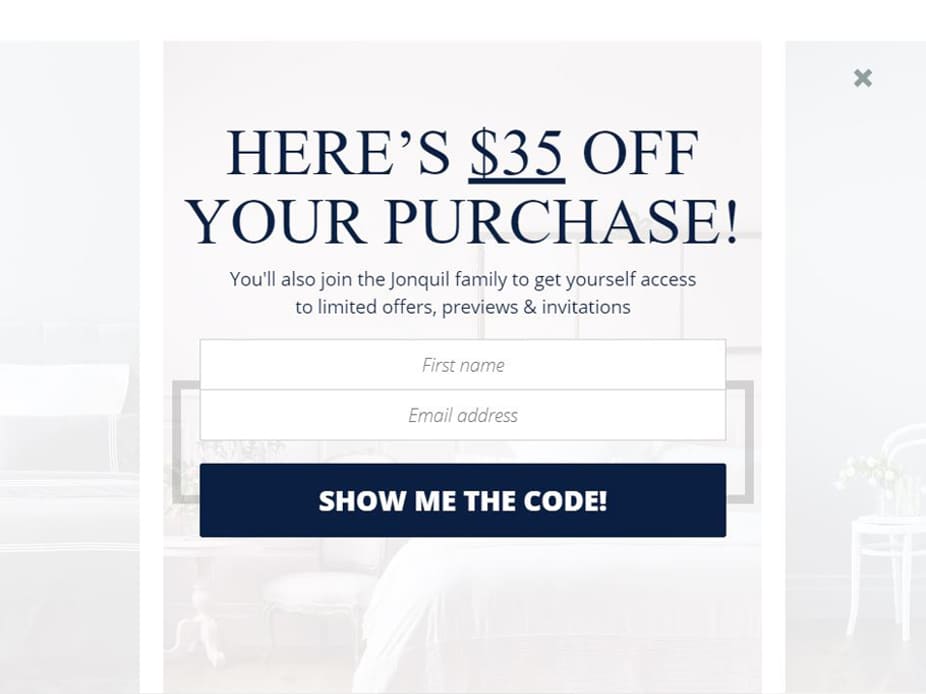
Your Divi membership includes Bloom, Divi’s premium email opt-in plugin. You can use Bloom to encourage users to opt into your email list by offering a coupon code. You can also set up Bloom for an exit-intent popup such that when users don’t add any product to a cart or make a purchase before exiting, a discount coupon pops up to encourage them to complete the purchase.
Divi offers several powerful modules for enhancing WooCommerce product pages. The Countdown Timer creates urgency for limited-time sales, driving faster purchases. The Pricing Tables module highlights product packages or deals. Use the Slider to showcase product images dynamically. The Product Tabs module organizes product details, reviews, and specs cleanly. There are many more, so play with other modules to create a unique WooCommerce product page template.
4. Save Changes and Preview Your Product Page
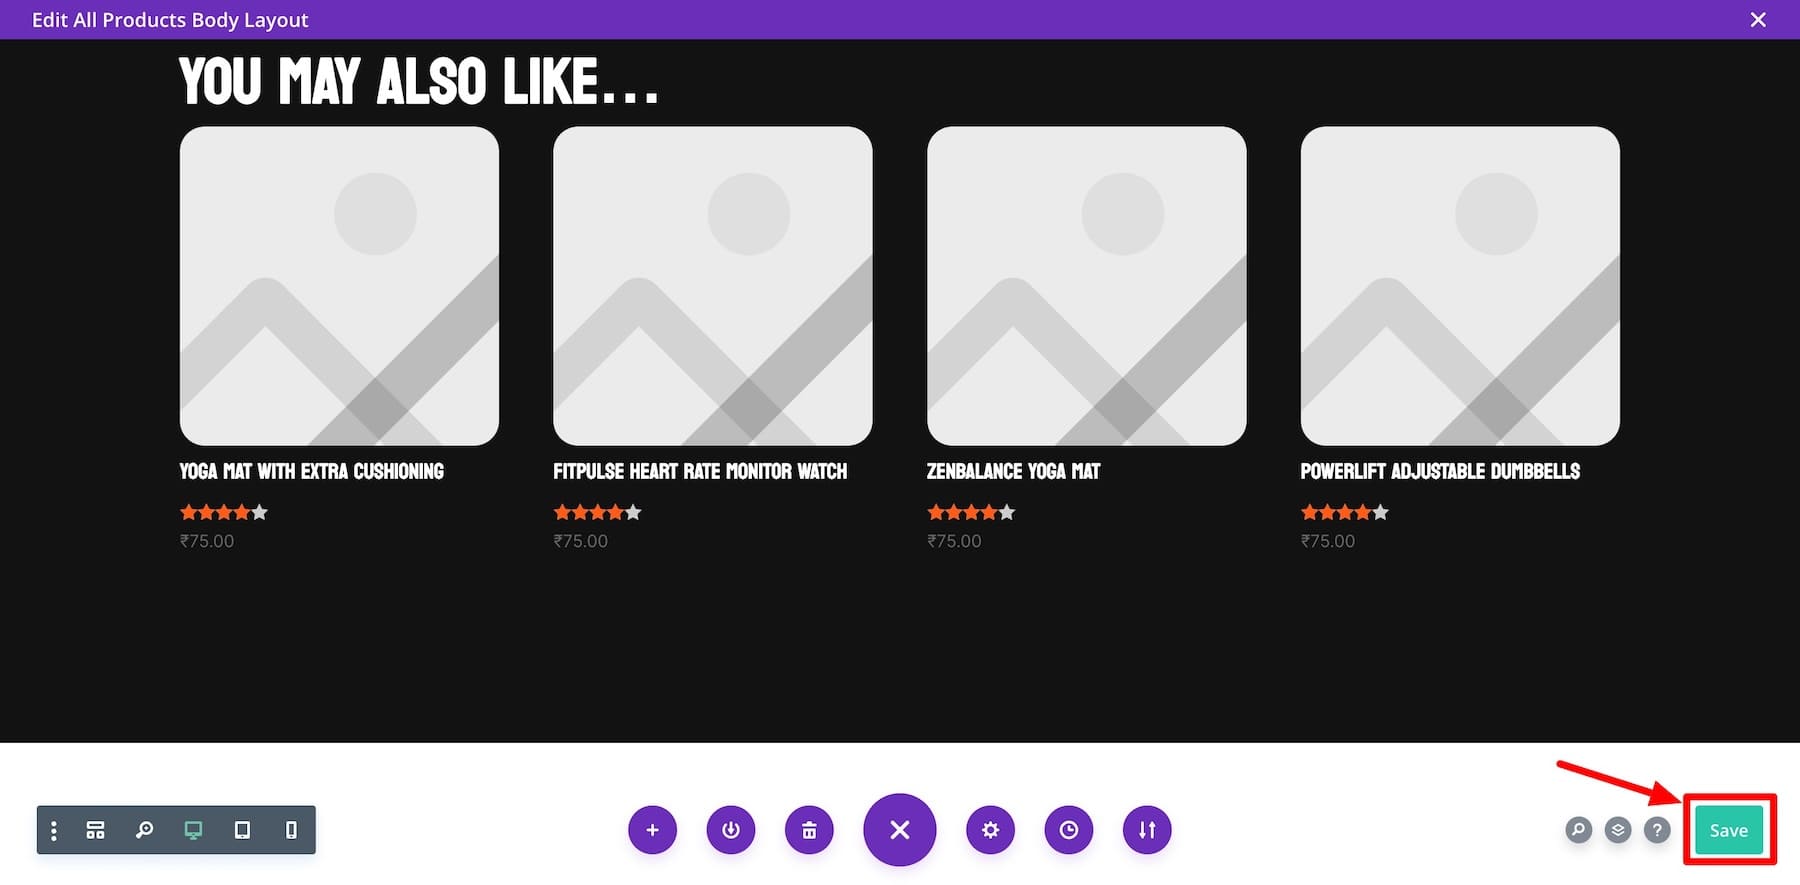
Once satisfied with your design, click the Save button on the lower right of Divi Builder.
View one of your products to see how it appears to your customers:
More Ways to Enhance Your WooCommerce Product Pages
Other than customizing your WooCommerce product page template, here are some essential plugins and WooCommerce extensions that’ll help you optimize your product pages even more:
- Divi AI: Generate high-converting product descriptions, titles, and other copy using AI.
- EWWW: Optimize your product images for faster loading times without sacrificing quality, ensuring a smooth shopping experience for users.
- Monarch: Encourage social sharing of your product pages with beautiful social media sharing buttons, driving more traffic to your store.
- Bloom: Collect email leads directly from your product pages by offering special discounts or updates in exchange for email sign-ups.
- WooCommerce Points and Rewards: Customers can be rewarded with points for complete purchases, which they can redeem for discounts on their next purchases.
- Product Compare for WooCommerce: Let your customers compare two similar products and purchase with more confidence.
- Bought Together for WooCommerce: Create Frequently Bought Together sections to encourage more items in the cart.
Tools Needed to Build WooCommerce Product Pages
| Suggested Tool | Task | |
|---|---|---|
| 1 | Divi WooCommerce Builder | Customize Product Pages without Coding |
| 2 | WooCommerce | Add Products, Payment Options, and Build an Online Store |
| 3 | Divi Quick Sites | Generate an entire WooCommerce website in minutes with customizable pages and templates. |
| 4 | Divi AI | Generate Product Description, Titles, Images, and Entire Layouts |
| 5 | EWWW | Compress Product Images Without Compromising on Quality |
| 6 | Monarch | Allow Customers to Share Products on Social Media |
| 7 | Bloom | Create Irresistible Email Optin Forms to Encourage Users to Sign Up for Your Email List |
| 8 | WooCommerce Points and Rewards | Encourage Customers to Shop More Products by Giving Them Reward Points |
| 9 | WooCoomerce Products Compare | Enable Customers to Make Confident Purchase Decisions by Allowing Them to Compare Similar Products |
| 10 | Bought Together for WooCommerce | Add Upsell and Cross-sell Offers by Creating a Bought Together Section |
| 11 | RankMath SEO | Optimize Product Pages for SEO and Drive Organic Buyers |
| 12 | Product Addons for WooCommerce | Offer special options like gift wrapping, special messages and more. |
| 13 | Product Video for WooCommerce | Boost sales by adding gallery and featured videos to your product pages |
Divi + WooCommerce is the Ultimate E-commerce Solution
Divi + WooCommerce is a powerful combination that provides a flexible, beginner-friendly solution for building e-commerce websites. Divi’s customizability perfects WooCommerce’s e-commerce functionality, so you can create engaging product pages, optimize for conversions, and deliver exceptional shopping experiences.



Will this also be not shown as comment?
Yes that is all great and i use DIVI as base for a lot of shops.
But can you please tell me if problem with advanced ajax filters, like yith wil finally work for prodct atributes etc. WHEN category page is theme builder created, and as CURRENT page set to target current category?
This is a must for any more advanced shop.