If you run a website, you’ll likely run into the occasional error. Most originate either at the server or application level (within WordPress). However, sometimes you’ll run into an error such as “DNS_PROBE_FINISHED_NXDOMAIN” which stems from your computer settings.
In this article, we’re going to talk about how to identify the DNS_PROBE_FINISHED_NXDOMAIN error and go over all the ways you can deal with it.
Let’s get to work!
What Is the DNS_PROBE_FINISHED_NXDOMAIN Error?
To explain what the DNS_PROBE_FINISHED_NXDOMAIN is, we need to go over the concept of a Domain Name System (DNS). A DNS is a database of IP addresses mapped to domain names.
Every server has an IP address, which is used to identify the websites saved on that computer. However, instead of typing an IP address into your browser to access web content, you can simply use its corresponding domain name.
A DNS can identify which IP address a domain name points to. When you type in a URL, it searches its database to find the site you’re trying to access.
However, in some cases, DNS servers might not be able to fetch the information you want. If you run into the DNS_PROBE_FINISHED_NXDOMAIN error, here’s what happened:
- You tried to access a website using its domain name (which you know should work).
- Your computer submitted your request to the DNS it uses to map domains to the IP addresses they can connect to.
- The DNS server told your computer “That domain doesn’t exist!”, hence the “NXDOMAIN” part of the error.
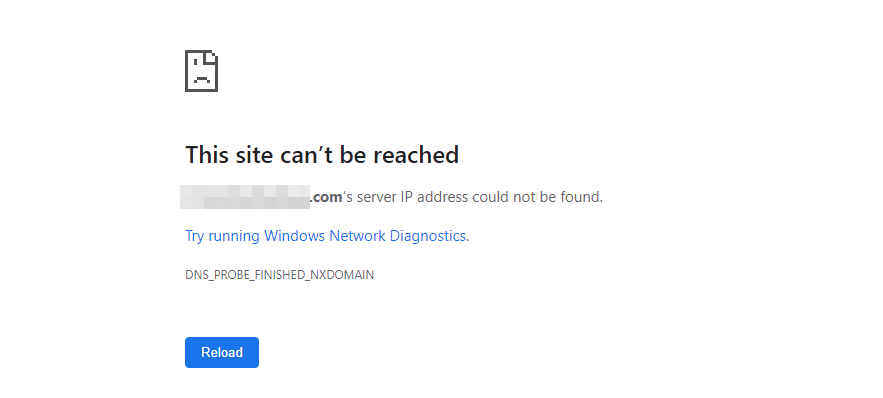
When that happens, you’ll see an error message that looks like this (if you’re using Chrome):

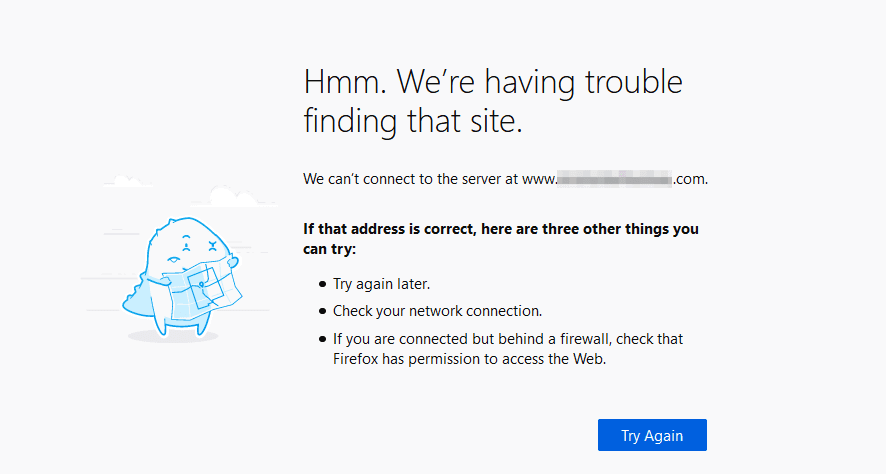
The wording can vary a bit depending on which browser you’re using, but the gist is always the same. For example, here’s the same error in Firefox:

If you run into the DNS_PROBE_FINISHED_NXDOMAIN error, take a second to doublecheck if you’re typing in the right domain. Assuming the domain exists and you entered it correctly, the problem usually lies with your computer’s configuration.
How to Fix the DNS_PROBE_FINISHED_NXDOMAIN Error (3 Possible Solutions)
There are a lot of ways you can fix the error in question depending on what the root cause is. Unfortunately, that can be hard to identify.
However, each of the fixes below should only take you a few minutes to implement. If you follow our instructions and proceed with one fix after another, the DNS_PROBE_FINISHED_NXDOMAIN should be out of your way soon.
1. Renew Your IP Address and Flush/Restart Your Cache
One of the first things you should try if you run into local connectivity issues (besides restarting your router) is renewing your IP address. The process varies slightly depending on your Operating System (OS), so we’ve included instructions for both Windows and Mac users.
Windows
If you’re using Windows, you can renew your IP address by opening the command prompt with administrator privileges. To do so, go to the Windows Start menu and type “cmd”, then select the corresponding option:

Once it’s open, go through the following three commands one by one, hitting the Enter key after each one to execute it:
- ipconfig /release
- ipconfig /renew
- ipconfig /flushdns
Those three commands will release your IP address, renew it, and then flush your local DNS cache.
Another option to flush the local cache is to use the two following commands:
- net stop dnscache
- net start dnscache
These prompts stop and restart the Windows service that manages your local DNS cache. After running both sets of commands, try accessing the problem website once more to see if the error persists.
macOS
On macOS, you can renew your IP address without using commands. To do so, follow these instructions:
- Go to System Preferences.
- Navigate to Network, select your active connection, and click on the Advanced button.
- Go to TCP/IP and select the Renew DHCP option.
However, you will need to use Terminal to flush the DNS cache. Open it (Go > Utilities) and then enter the following prompt:
dscacheutil -flushcache
Now you’re ready to try accessing the offending URL again. If it still doesn’t work, move on to the next fix.
2. Configure Your Computer to Use a Different DNS Server
By default, your computer will decide which DNS server to connect to automatically. In some cases, that DNS server might not have the best response times. Or, it might be unavailable, leading to errors such as DNS_PROBE_FINISHED_NXDOMAIN.
One way to determine if that’s the source of the problem is to configure your connection to use a different DNS server. Let’s go over how to do that on both Windows and macOS.
Windows
Open the Windows Start menu and type “Network Status”. Select the first result that comes up and on the next screen, click on the Change adapter options setting:

A new window will pop up including icons for all the connections set up on your computer:

Identify your active internet connection, then follow these steps:
- Right-click on the active connection and select Properties.
- Find the Internet Protocol Version 4 (TCP/IPv4) item, select it, and open its Properties setting.
- Select the Use the following DNS server address option.
You should then see this screen, only without any numbers within the Preferred DNS server and Alternate DNS server fields:

In the example above, we’re using Google’s public DNS servers. To do the same, enter “8.8.8.8” as your preferred DNS server and “8.8.4.4” for your alternate DNS server.
There are a lot more options when it comes to public DNS servers, so feel free to try out any of them. However, Google is usually a safe choice.
If you’re already using a custom DNS server and you run into the DNS_PROBE_FINISHED_NXDOMAIN, try using the opposite approach. That is, revert to the default settings to see if that fixes the issue.
macOS
Changing your active connection’s DNS server on macOS works much the same as in Windows. Here’s what you need to do:
- Go to System Preferences.
- Navigate to Network and select your active connection.
- Click on the Advanced button within your active connection’s settings.
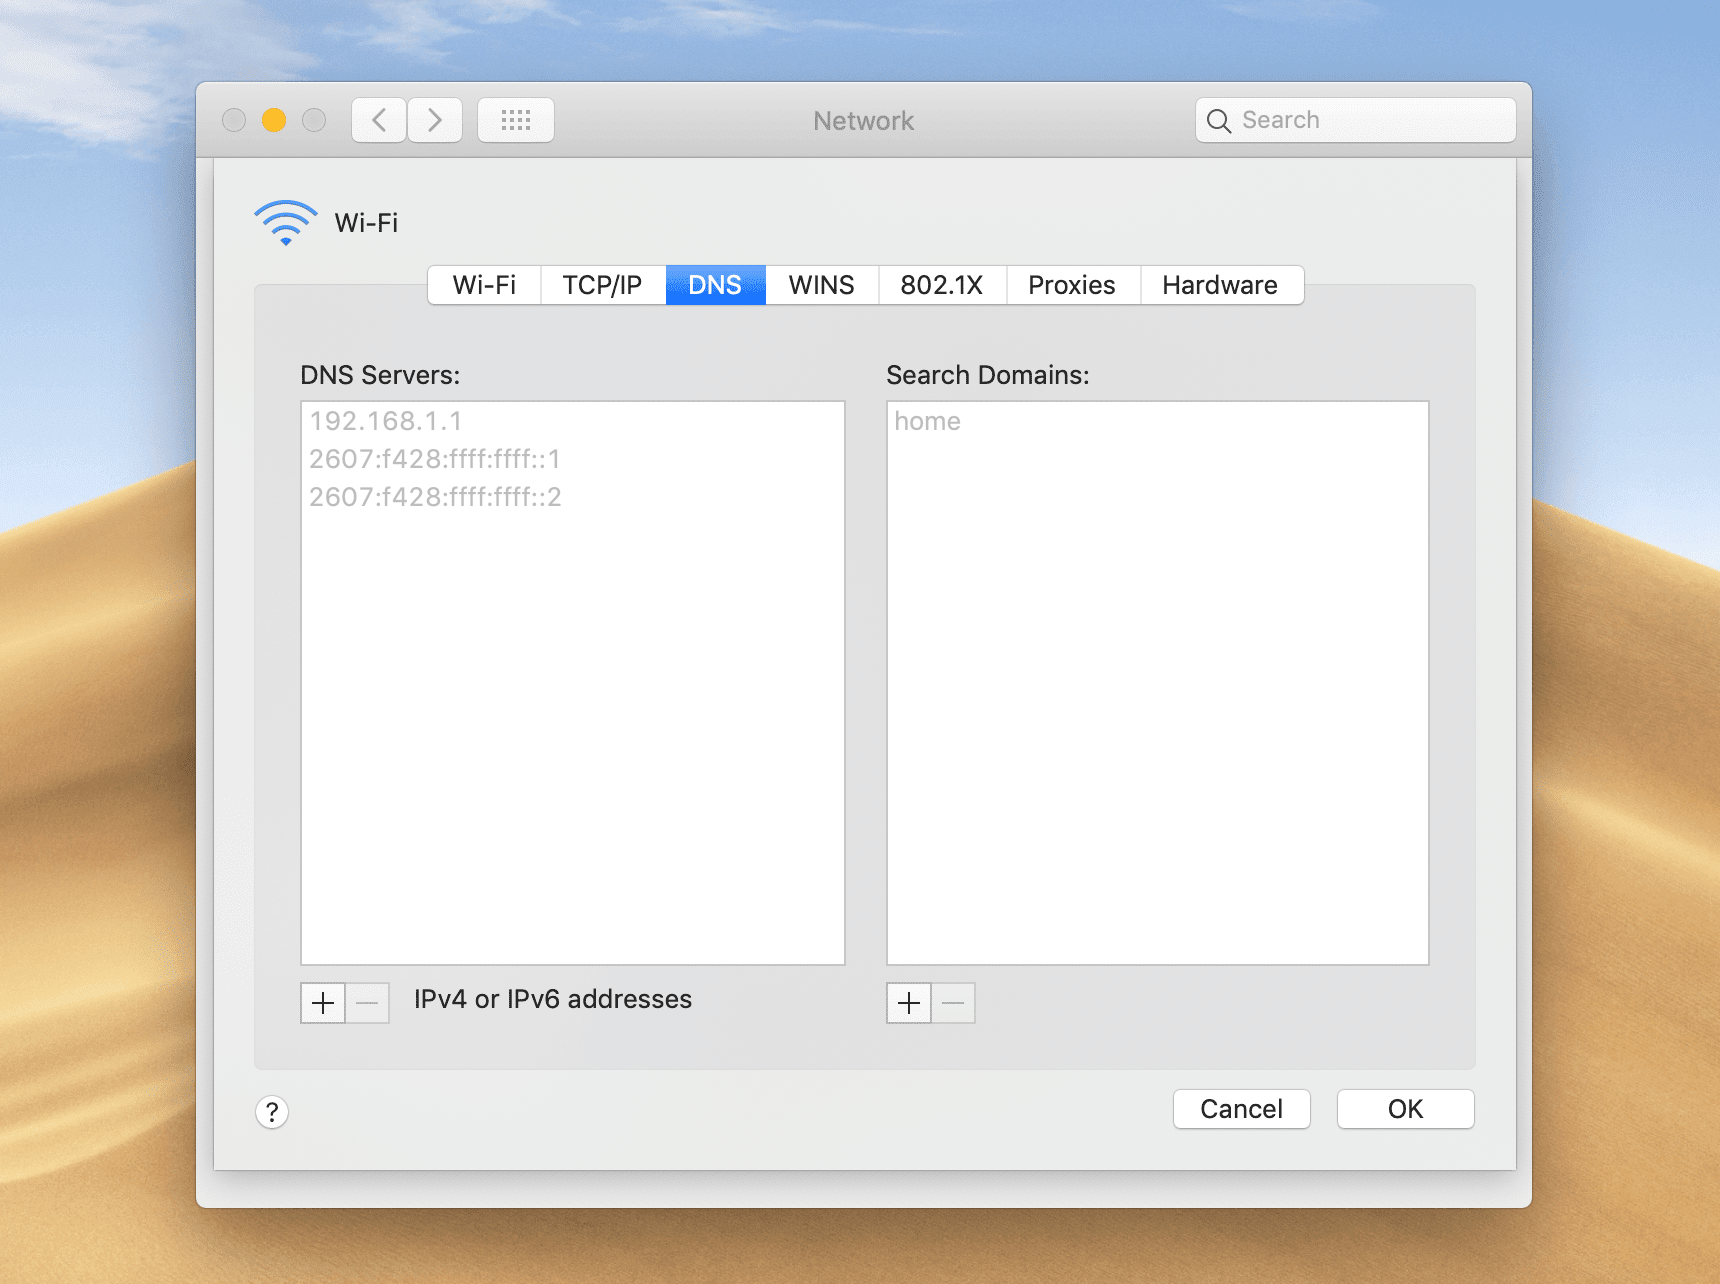
- Select the DNS tab and add the addresses you want to use.
During step four, you should see a screen like this one:

Just as with Windows, you can use any DNS server you want. Once you’re done, check if the DNS_PROBE_FINISHED_NXDOMAIN error persists.
3. Check Your Computer’s hosts File
Your computer’s hosts file enables you to map IP addresses to domains manually. That can come in handy for local web development, for example, since you can map local sites to custom domains without registering them.
In some cases, programs may edit your hosts file without your knowledge. This can lead to errors such as DNS_PROBE_FINISHED_NXDOMAIN. Here’s how to fix it.
Windows
First, locate and open your hosts file. You can find it by navigating to the local directory C:\Windows\System32\drivers\etc\:

Open the file using your favorite text editor. Keep in mind that you might need to set administrative privileges to edit it.
In your hosts file, you’ll likely have at least a few custom mappings set up. Check to make sure none of the entries match the domain name you’ve been trying to access.
If the target domain is listed, remove the entry and save the changes to your hosts file. Then try accessing the site again.
macOS
The easiest way to edit your hosts file on macOS is using Terminal. First, open the application and enter the following command:
sudo nano /private/etc/hosts
The command will open your hosts file using the Nano text editor with administrative privileges. If you’re more comfortable with another editor, you can replace that part of the command.
Take a look around the file to see if the domain that’s returning the DNS_PROBE_FINISHED_NXDOMAIN error is there. If it is, remove that mapping and save your changes to the file.
Conclusion
There are many ways to fix the DNS_PROBE_FINISHED_NXDOMAIN error. Fortunately, most of the fixes are remarkably easy to implement. If you know what to do, you should be able to regain access to the website you’re trying to reach in a matter of minutes.
If you happen to run into the DNS_PROBE_FINISHED_NXDOMAIN error, here’s what you can do to solve it:
- Renew your IP address and flush/restart your cache.
- Configure your computer to use a different DNS service.
- Check your computer’s hosts file.
Do you have any questions about how to fix the DNS_PROBE_FINISHED_NXDOMAIN error in WordPress? Let’s talk about them in the comments section below!
Image by Visual Generation / shutterstock.com


Leave A Reply