
")
In today’s digital society, people search for and expect to quickly find what they are looking for. That’s where an online directory can come in handy. A directory website acts like a modern-day Yellow Pages, combining listings for businesses, organizations, real estate, or similar.
One of the most versatile ways create a directory site is with WordPress, a versatile content management system (CMS) that allows you to create a beautiful website without coding. In this post, we’ll teach you how to make a directory website with WordPress. We’ll walk through the process step by step, outlining what you’ll need to be successful.
Let’s dive in.
- 1 What You’ll Need to Make a Directory Website with WordPress
-
2
How to Make a Directory Website with WordPress
- 2.1 Step 1: Purchase a Domain Name
- 2.2 Step 2: Purchase a WordPress Hosting Plan
- 2.3 Step 3: Purchase a Premium WordPress Theme
- 2.4 Step 4: Install and Configure a WordPress Directory Plugin
- 2.5 Step 5: Design Your Listings Page with Divi
- 2.6 Step 6: Style the Directory Page
- 2.7 Step 7: Enhance Your Directory Website with Additional Plugins
- 2.8 Extend Divi with Products in the Divi Marketplace
- 3 Making a Directory Website with WordPress and Divi is a No-Brainer
- 4 Frequently Asked Questions
What You’ll Need to Make a Directory Website with WordPress
Before making a directory website with WordPress, let’s gather the essential pieces you’ll need.
- Domain Name: This is your website’s unique address on the internet, like yourwebsitename.com. It’s the first impression visitors will have, so choose a name that’s memorable and reflects the focus of your directory.
- Web Hosting: Think of web hosting as the land where your website lives. It stores your website’s files and makes them accessible to visitors online. There are many reliable web hosting providers available, including SiteGround, which is our top choice.
- WordPress: This free and open-source platform is the foundation of your website. It’s user-friendly and lets you manage content, pages, and settings without writing code.
- Divi Theme: While not mandatory, the Divi theme is a powerful tool for customizing your directory website. It offers a drag-and-drop interface and beautiful design options, making creating a visually appealing and user-friendly experience easy.
- Directory Plugin: This is the secret sauce of your directory website! A directory plugin adds the functionality needed to manage listings, categories, and user submissions. Options, such as GeoDirectory and the Business Directory plugin are excellent.
How to Make a Directory Website with WordPress
Now that you know better what you’ll need, we can get down to business. From purchasing a domain name to designing your pages with Divi, we’ll walk you through each step so you’ll definitely know how to make a directory website with WordPress.
Subscribe To Our Youtube Channel
Step 1: Purchase a Domain Name
Before you can do anything else, you must purchase a domain name for your directory website. A domain name serves as your directory website’s address on the internet. It typically looks like yourwebsitename.com. It’s the first impression your visitors will have, so choosing the right domain is important. In some ways, it’s as important as naming your business. It should be easy for users to remember, type in, and reflect the focus of your business. Remember, a strong domain name can help establish your directory as a trusted resource, so take notice of this step.
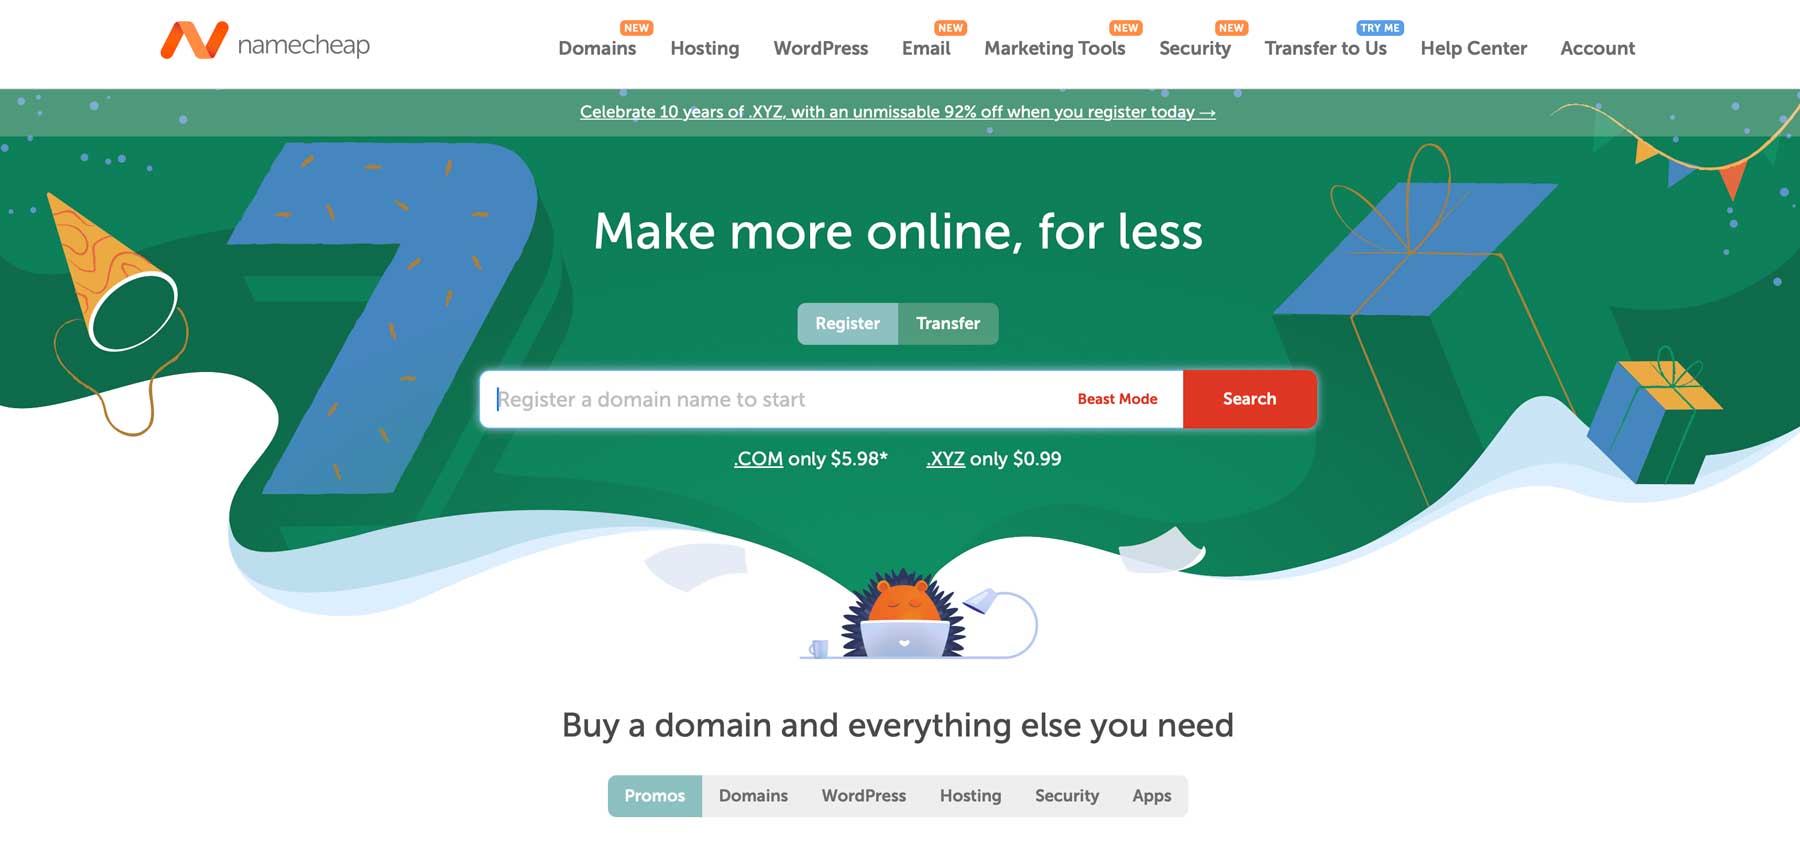
There are many different domain name registrars where you can purchase a domain name. One popular option, Namecheap, has a reputation for being a user-friendly registrar with excellent prices. You can usually get a .com domain for as little as $5.98 per year for the first year. Namecheap is one of the only registrars offering free privacy protection. This means that your private information, such as your registered name and address, is automatically kept private from prying eyes on the internet.
Step 2: Purchase a WordPress Hosting Plan
Once you’ve purchased a domain, the next step in making a directory website with WordPress is to purchase a hosting plan. There are many options out there, including shared, VPS, and dedicated hosting providers. That said, the best option for most is a hosting provider that’s optimized for WordPress. Optimized hosting means your website will have a high-performing hosting plan with settings specifically tailored for WordPress websites. These types of hosts typically install WordPress for you, too, taking the guesswork of getting started with WordPress.
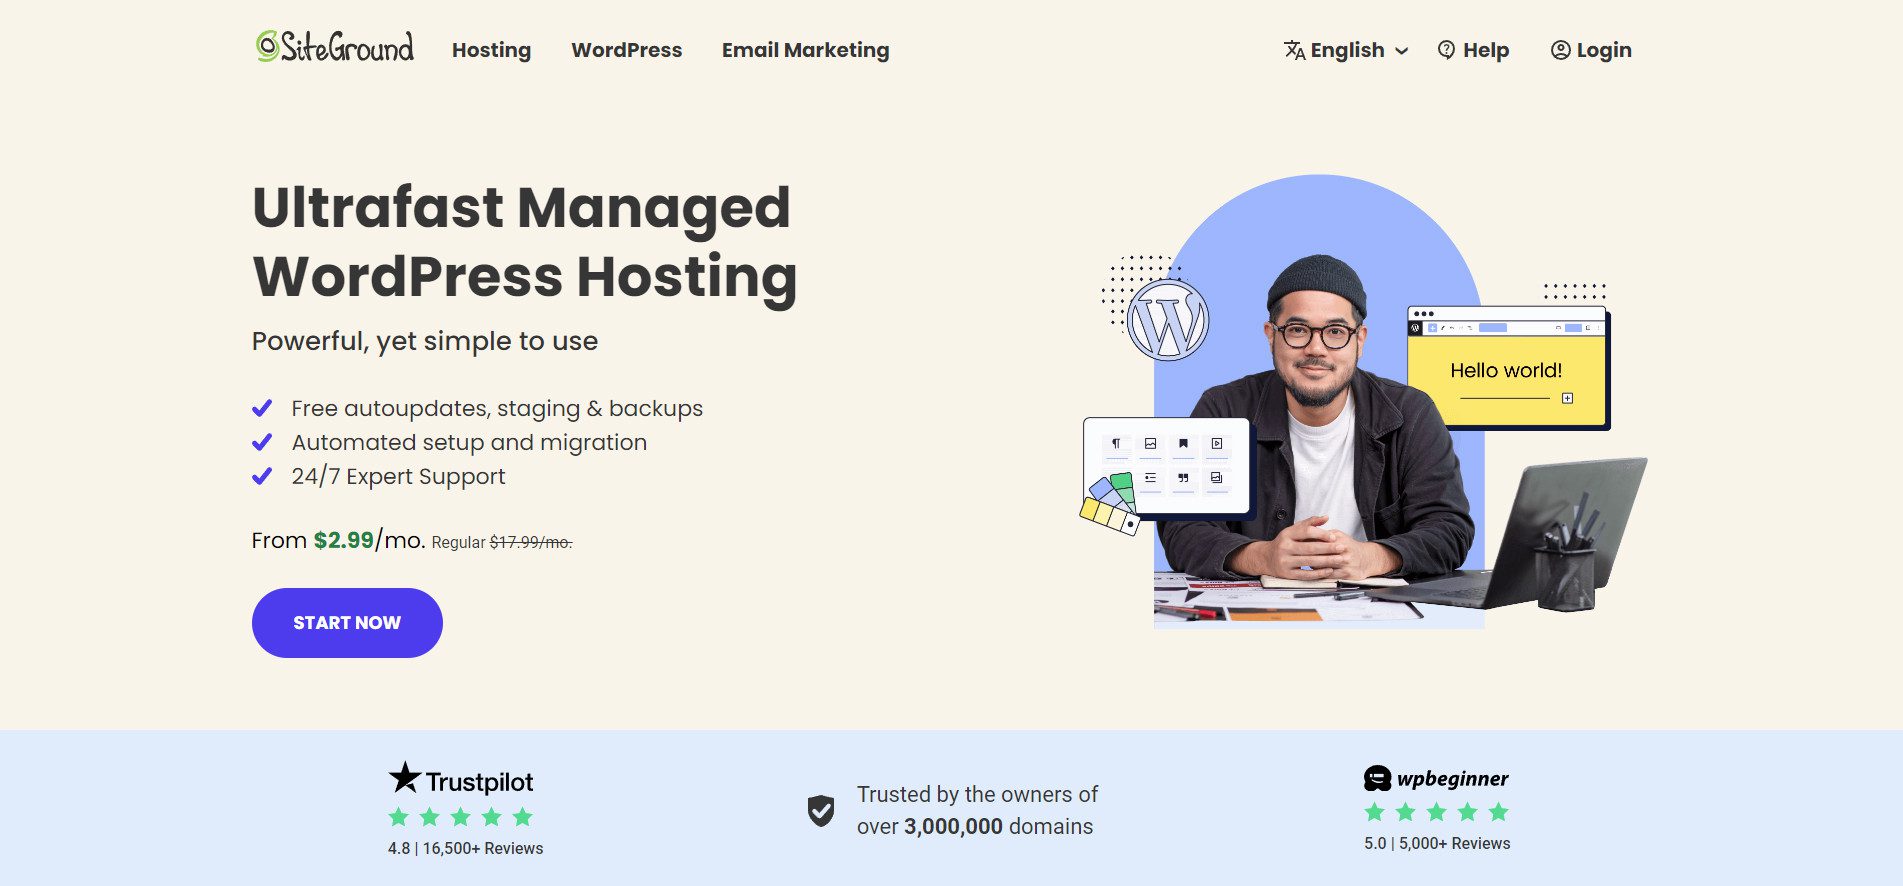
Our favorite option for optimized WordPress hosting is SiteGround. They are known for their amazing customer support, reliable service, and WordPress-specific features that make setting up your directory website a breeze. With one-click installs, you can have your WordPress website up and running in minutes, all without lifting a finger. SiteGround also offers free updates, site backups and migration, an SSL certificate, a free CDN, and more. Plans start at a very affordable $2.99 monthly and can easily be upgraded as your directory website grows.
While you can technically build a directory website with a free WordPress theme, there are some advantages to considering a premium WordPress theme. Premium themes often offer premium support, essential for new WordPress users. They also provide regular updates, so you don’t have to worry about security vulnerabilities. Also, premium themes typically offer more features, including drag-and-drop page builders, full site editing capabilities, and global styling options. Themes such as Genesis Pro and OptimizePress are good options, but they don’t hold a candle to another popular choice, Divi.

Divi boasts a vast library of premade layouts and design elements specifically crafted for different types of websites, including directories. You can create beautiful, functional websites with little effort, thanks to a drag-and-drop page builder, the Visual Builder. With Divi, you can customize everything from the overall layout of your directory pages to the specific details of your listing forms. Thanks to Divi’s Theme Builder, you can build headers, footers, archive pages, and more. Whatever you want to create, Divi gives you complete control over the look and feel of your website. For just $89 per year, Divi is yours to use on unlimited websites.
Step 4: Install and Configure a WordPress Directory Plugin
With a domain, web hosting plan, and premium theme purchased, the next step is to install a WordPress directory plugin. With a directory plugin, you can easily add, edit, and delete listings submitted by businesses or users. You can also create and categorize listings for better organization and user experience. The ultimate goal is for users to search for and find what they need with little effort. Several popular directory plugins, including GeoDirectory, are perfect for those looking to set up location-based directory websites. However, we highly recommend the Business Directory plugin for ease of use, robust features, and great value.
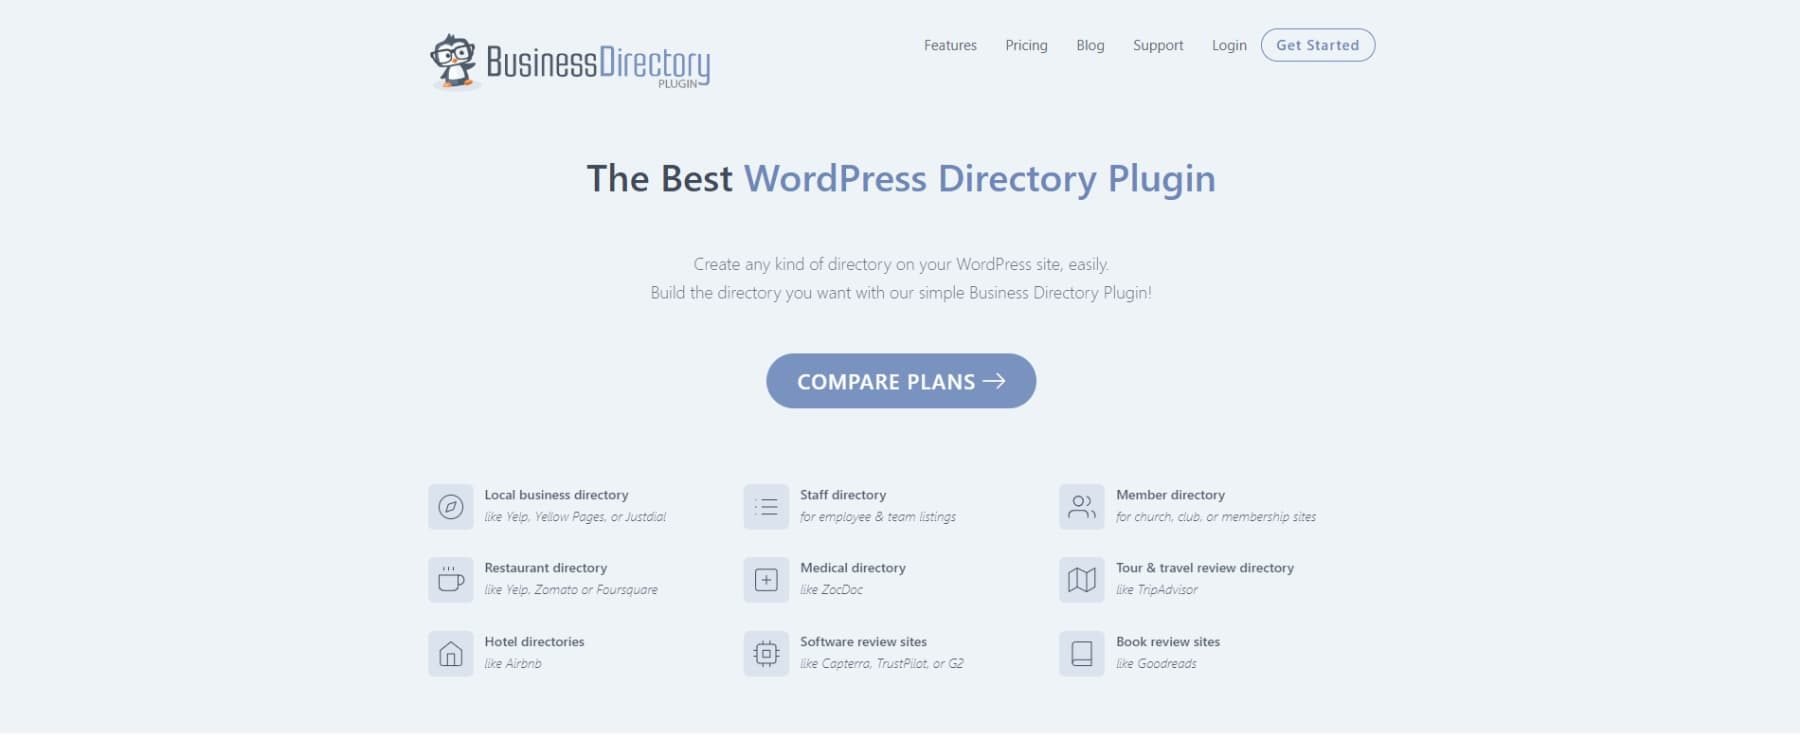
Business Directory allows you to create and manage listings for your website with ease. It’s SEO-friendly, supports integration for Google Maps, and allows you to create free and paid subscription options for generating revenue. Free and paid versions of the plugin have varying features available with each plan. For this section on how to make a directory website with WordPress, we’ll install the free version and walk through setting up the plugin, customizing the listing form, and creating business categories.
Install the Business Directory Plugin
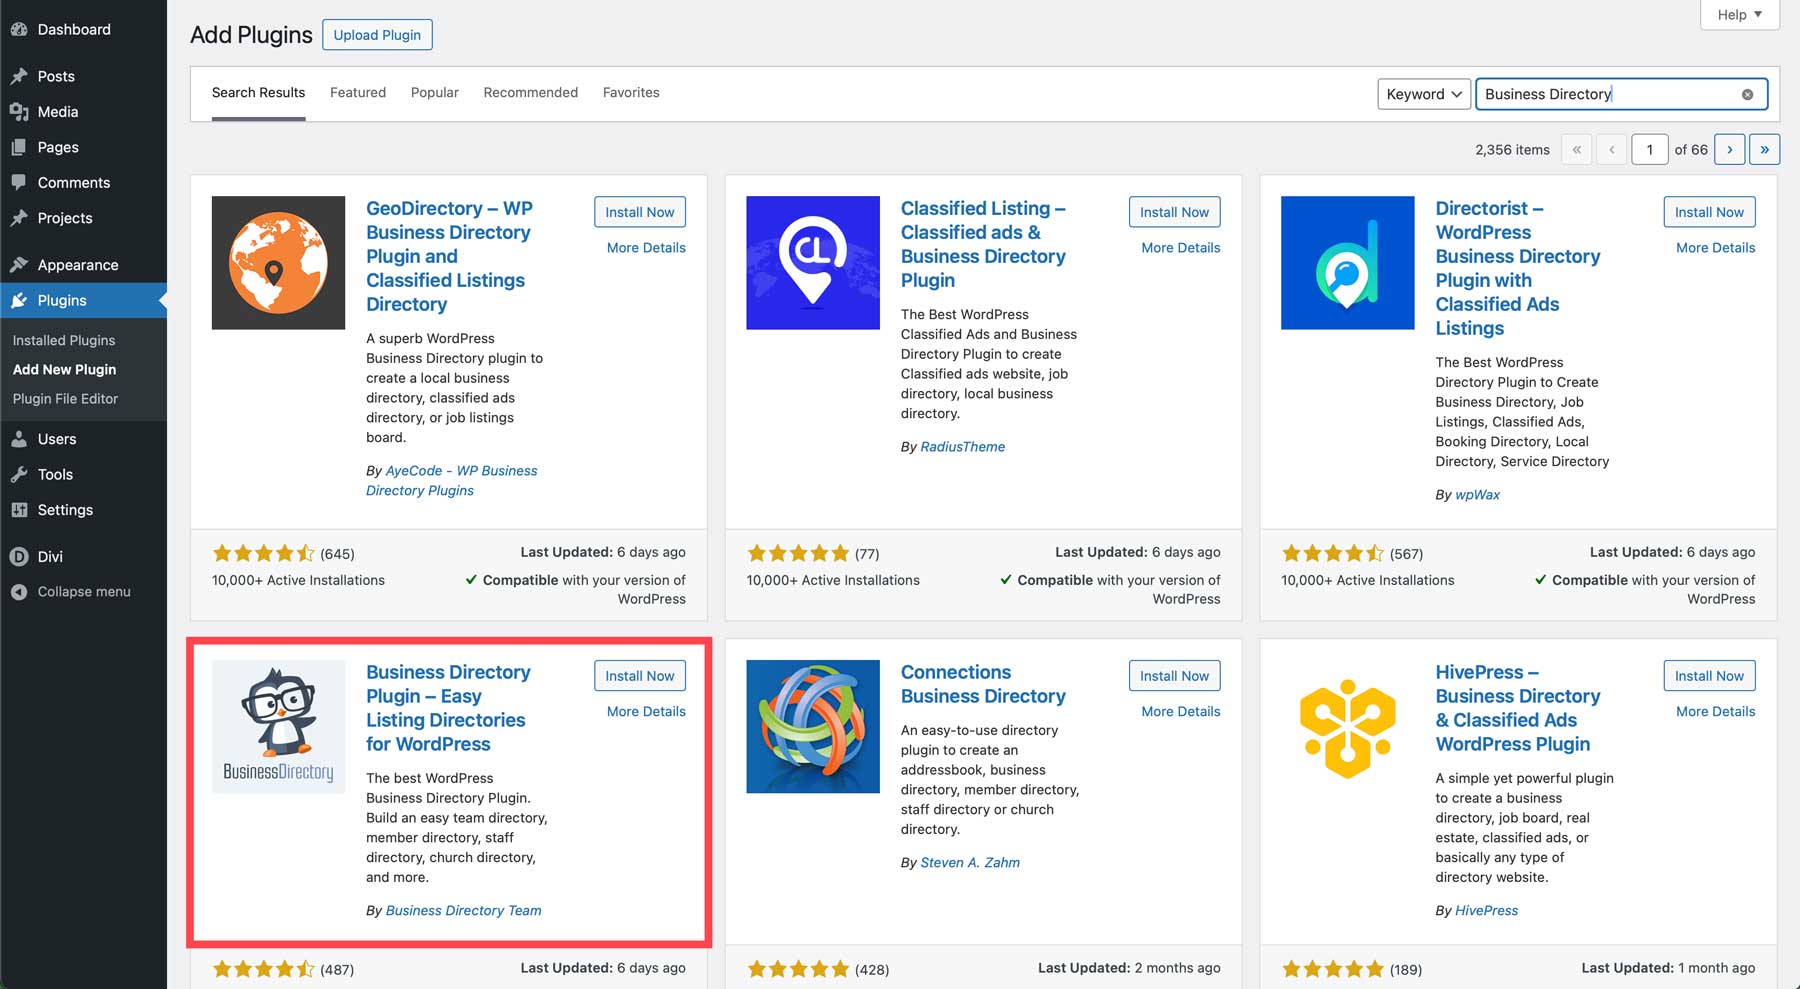
With all the other necessary pieces in place, we can start building the structure of our directory websites. While logged in to your WordPress website, navigate to Plugins > Add New Plugin. Search for Business Directory in the search plugins field.
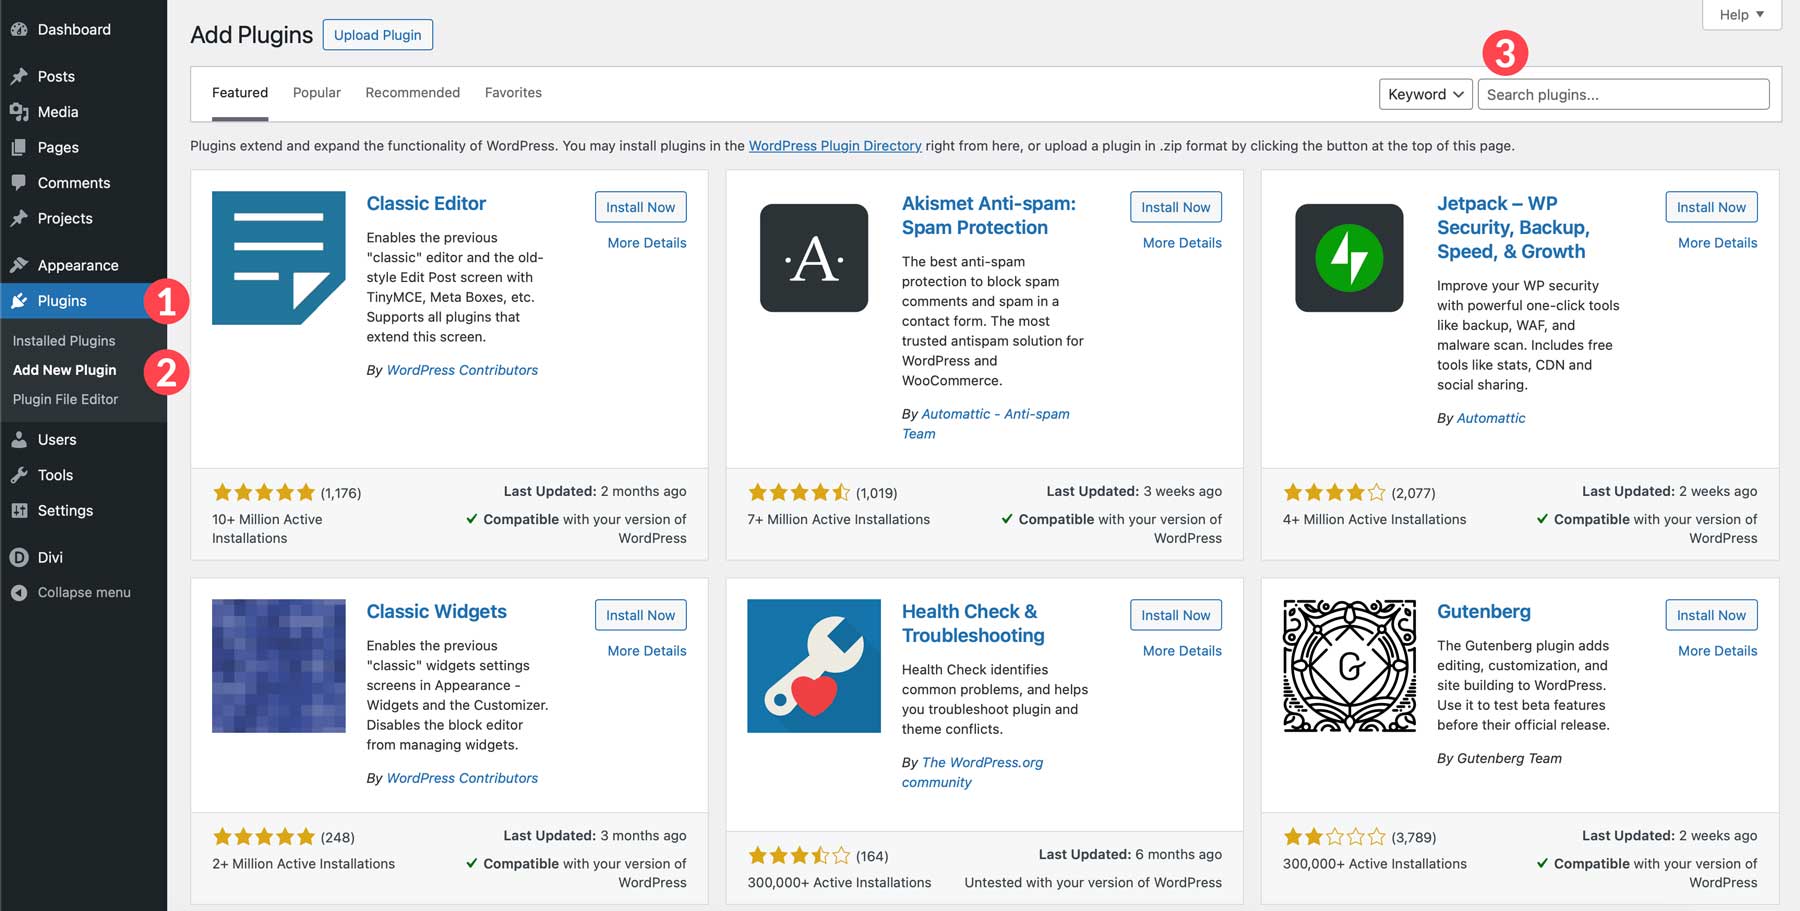
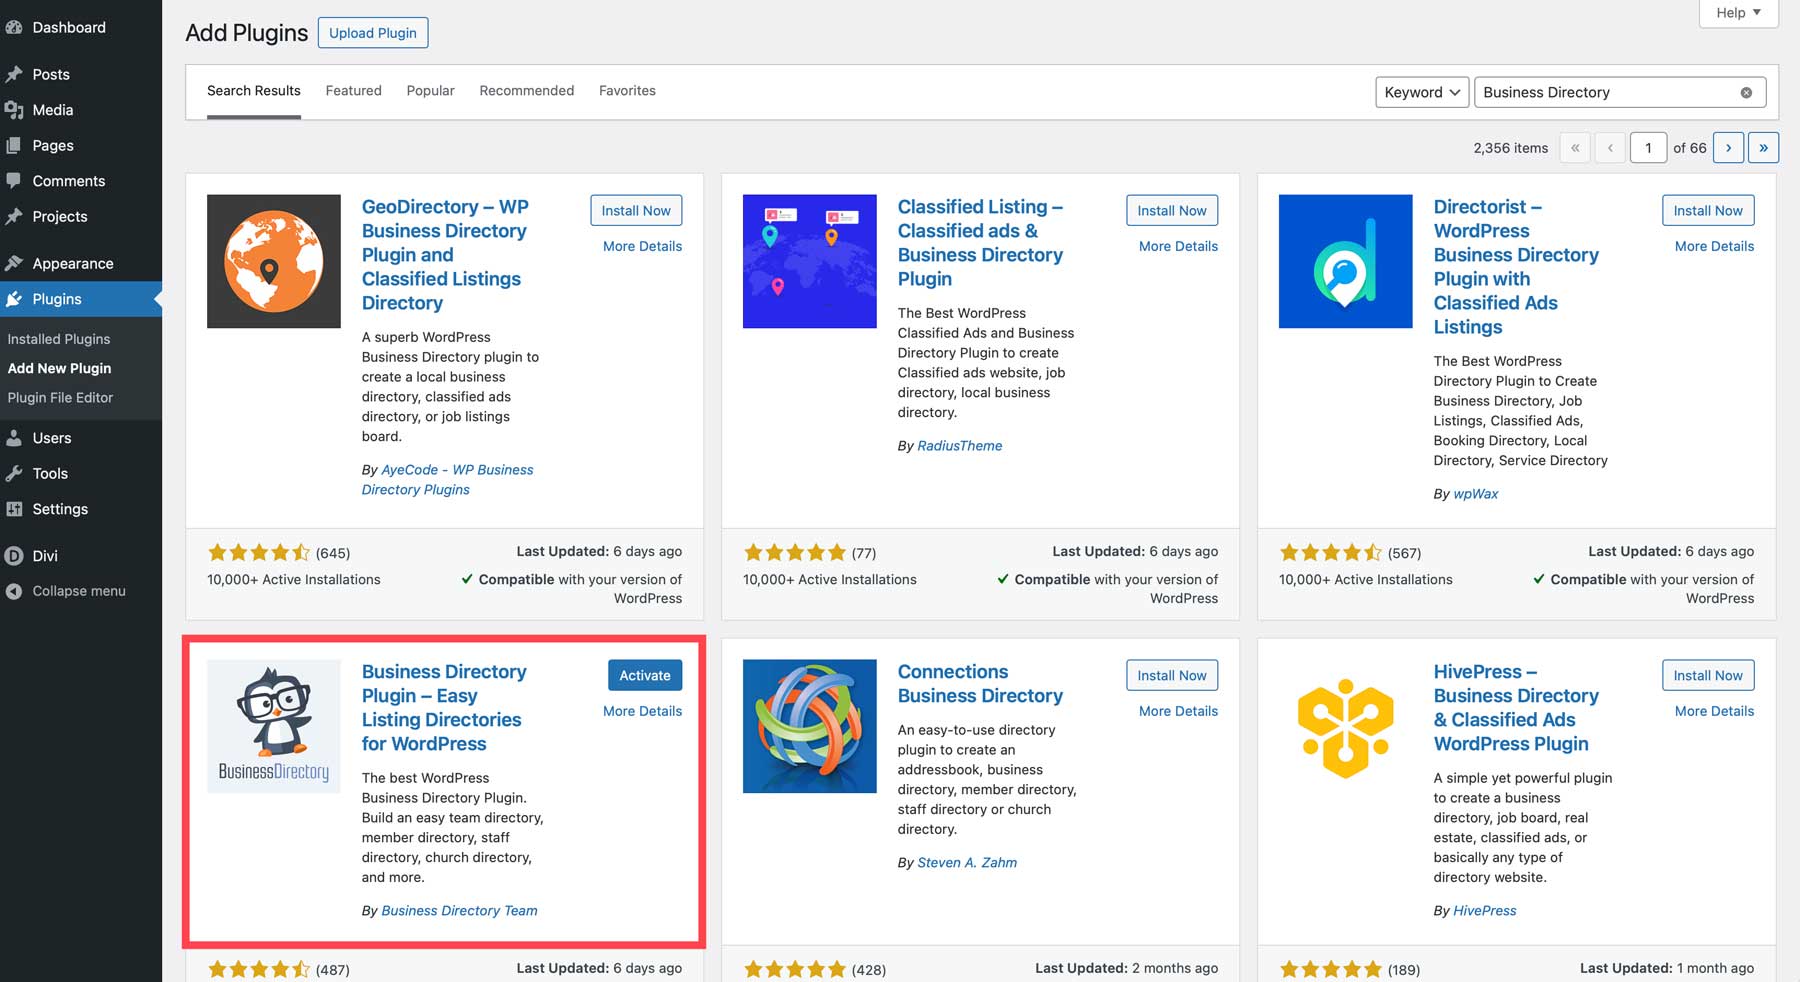
Locate the plugin in the search results and click the Install Now button.
Finally, click the Activate button to install the plugin.
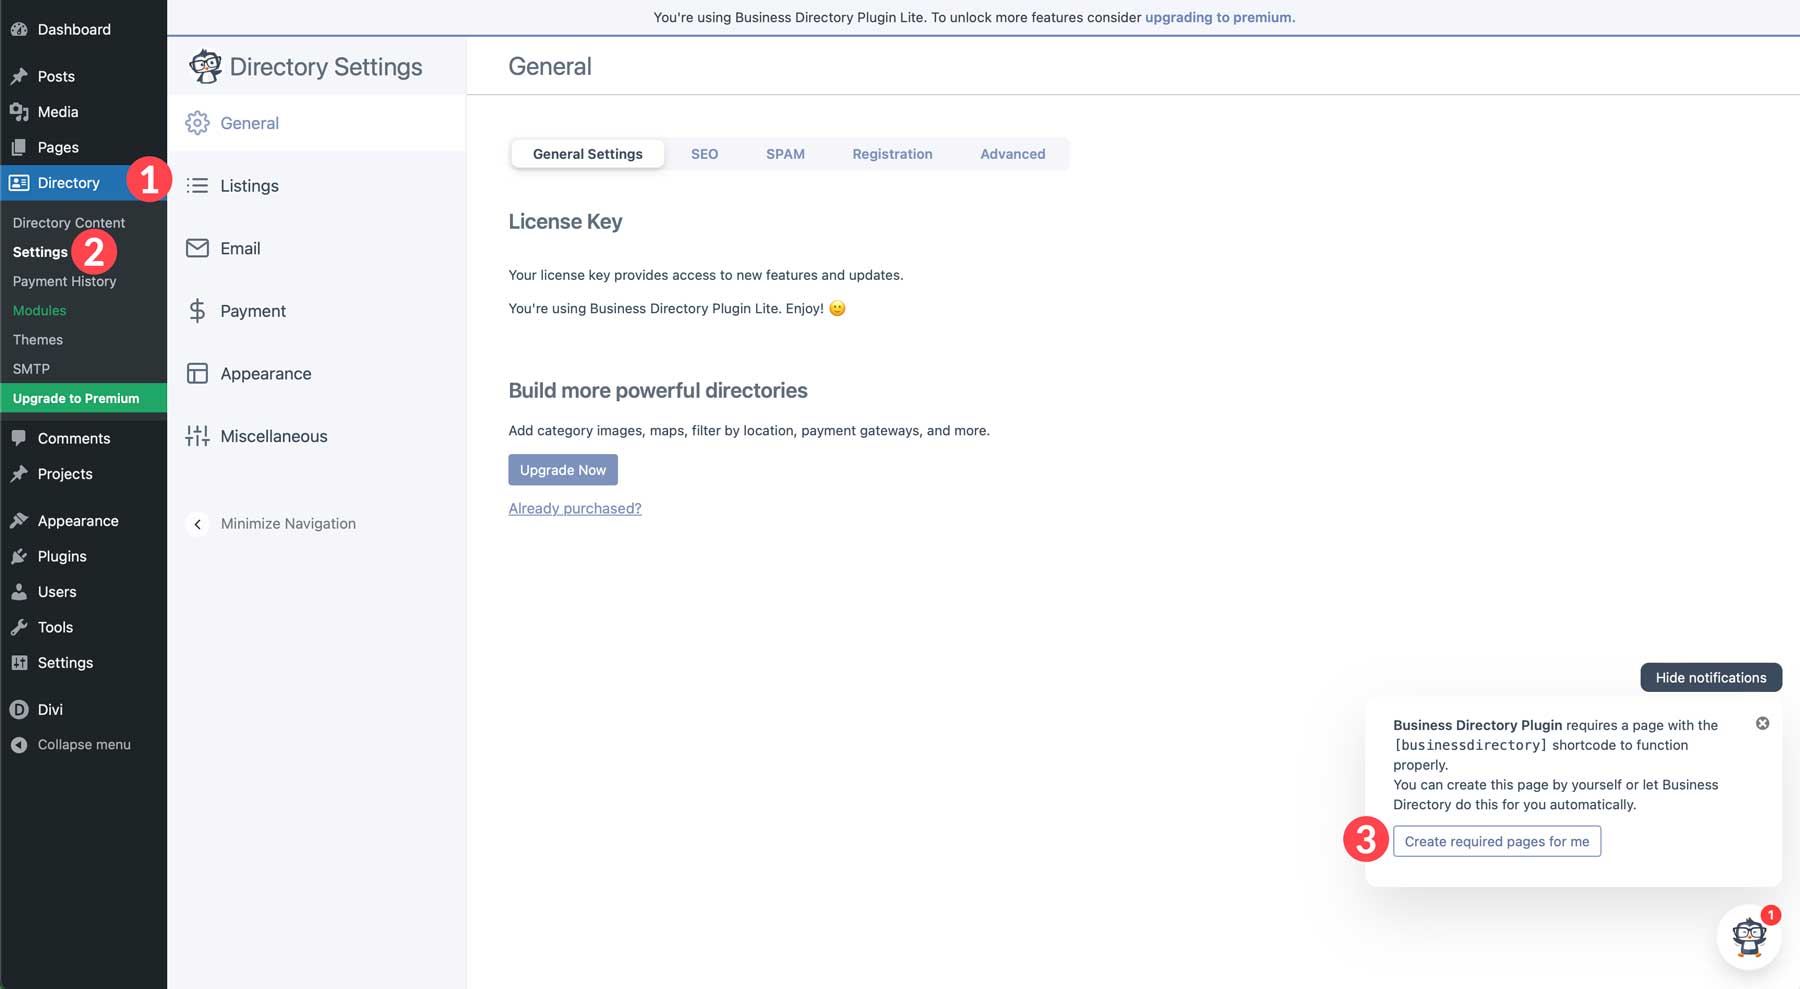
Set up Directory Pages
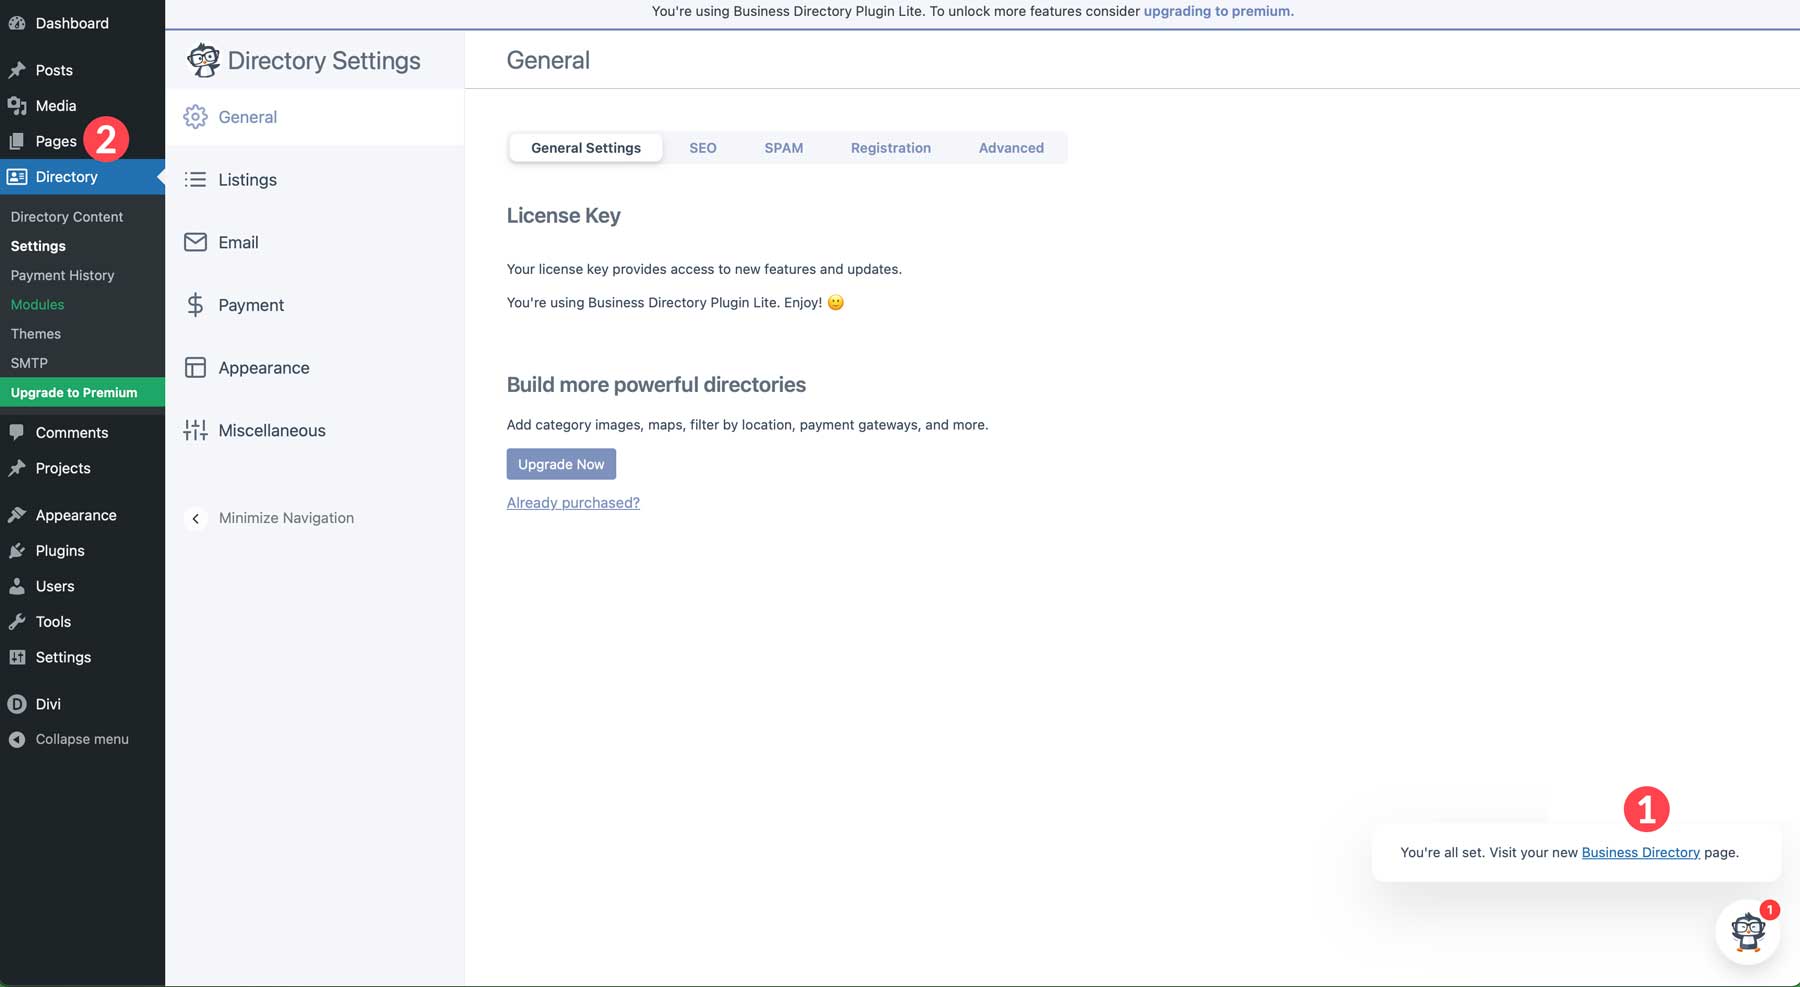
Once the plugin is installed, navigate to Directory > Settings. This plugin section lets you control all the settings needed to get started, including emails, setting up payments, and creating directory pages. On the General page, you’ll notice a small popup box at the bottom right of your screen. It explains that the plugin requires a shortcode to display listings. You can copy the shortcode or allow the plugin to create the necessary pages. Click the create required pages for me button to continue.
Once created, you can visit the page by clicking the link in the bottom right corner or view it by navigating to Pages.
However, before moving on, we recommend familiarizing yourself with the plugin’s settings. Here’s a brief overview of each tab in the Business Directory plugin’s settings so you’ll know where you need to go to make specific changes.
- General: Upgrade to the pro version of the plugin, remove the category slug to improve SEO, install reCAPTCHA, configure registration settings, and control user submission controls
- Listings: Set the number of listings to display per page, set a default listing status, configure messaging, set up search settings, and configure category behavior, button settings, and sorting
- Email: Choose whether to display email addresses on the front end, enable email notifications, and configure email form fields
- Payment: Enable test mode, set up a payment gateway, set a customized thank you message, or enable Authorize.net
- Appearance: Configure basic settings like button styles, primary color, and image settings. More advanced options, like directory layout styles, are available with the pro version
- Miscellaneous: Enable data collection or cleanly uninstall the plugin from your website
Customize the Listing Form
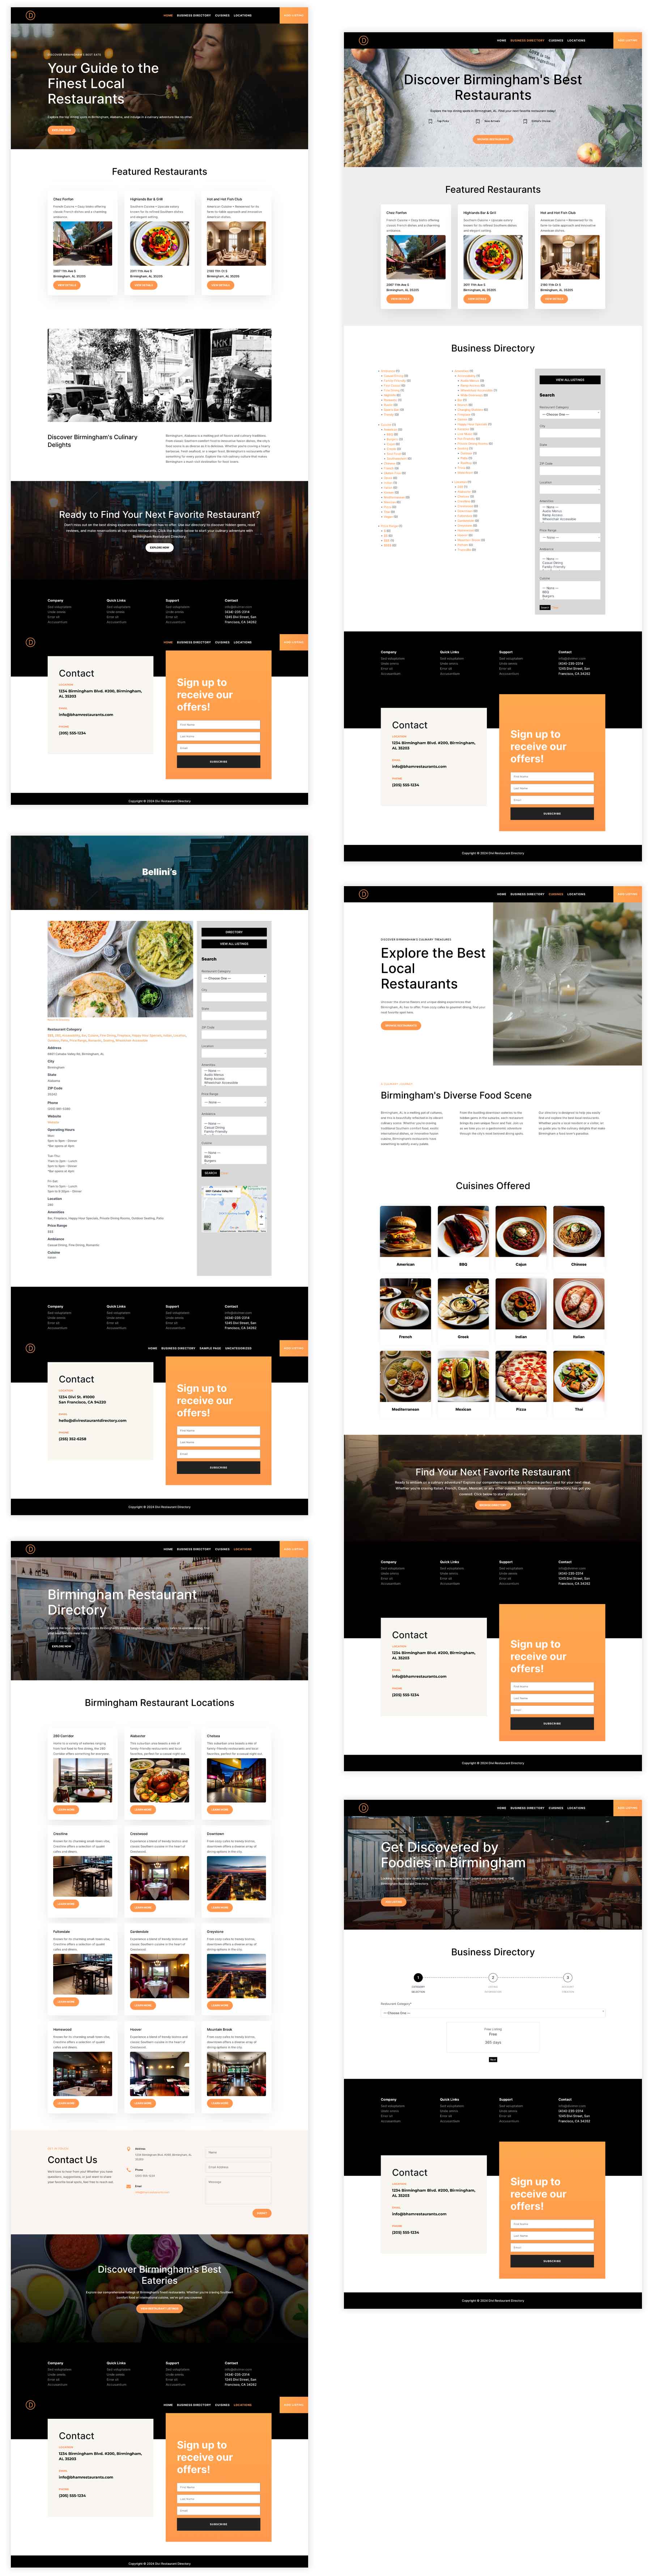
Now that the plugin is installed and the directory page is created, the next step is to customize a listing form. Most directory plugins, including the Business Directory plugin, allow you to customize the listing form easily. You can create fields, rearrange them in a particular order, and select different field types based on the kind of directory website you are building. For this guide, we’ll create a form for people to create listings for their favorite local restaurants.
When creating your listing form, balance capturing necessary details and keeping the form concise to avoid overwhelming users. Try to use clear labels, add relevant tooltips to guide users, and clearly indicate which fields are required to avoid confusion.
To create a new form, navigate to Directory > Directory Content. Next, select the form fields tab.

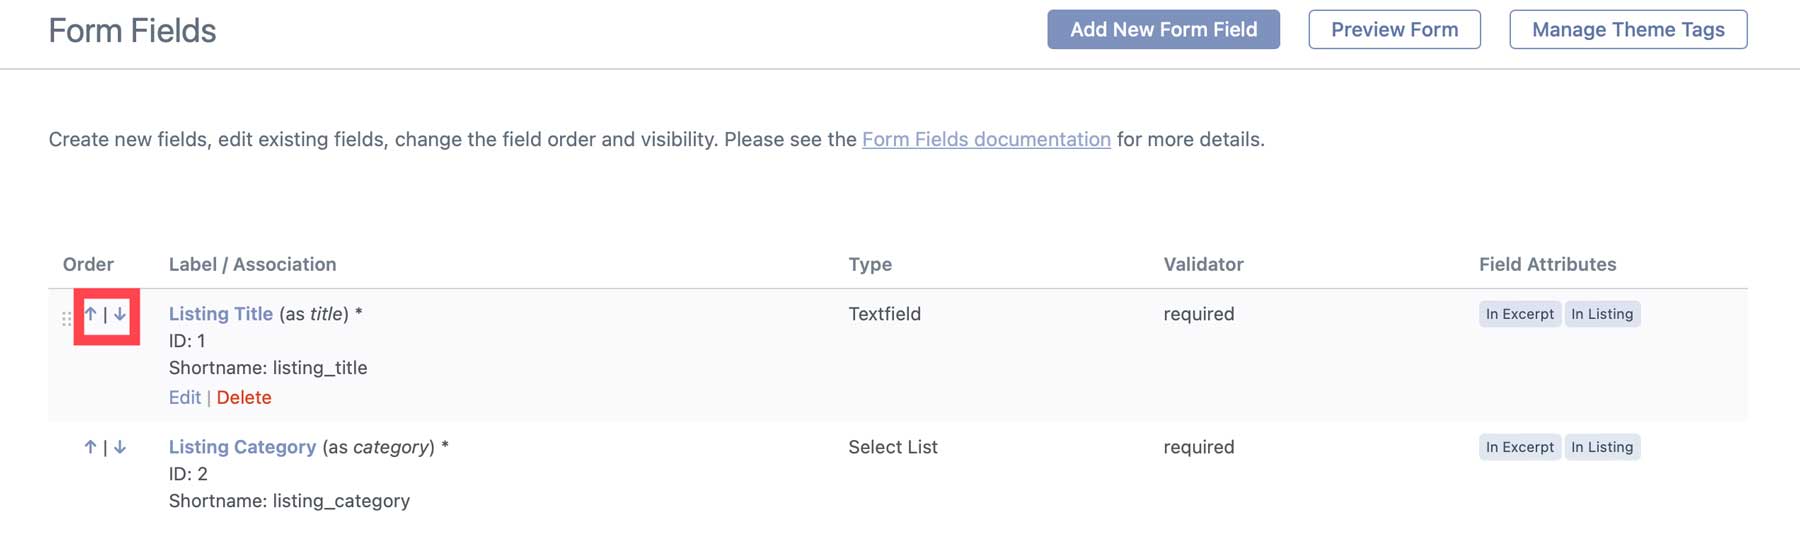
When you land on the page, you’ll see various fields already generated. These are the default fields associated with Business Directory. You can add, edit, delete, or rearrange the field order by clicking the up and down arrows next to each field name.
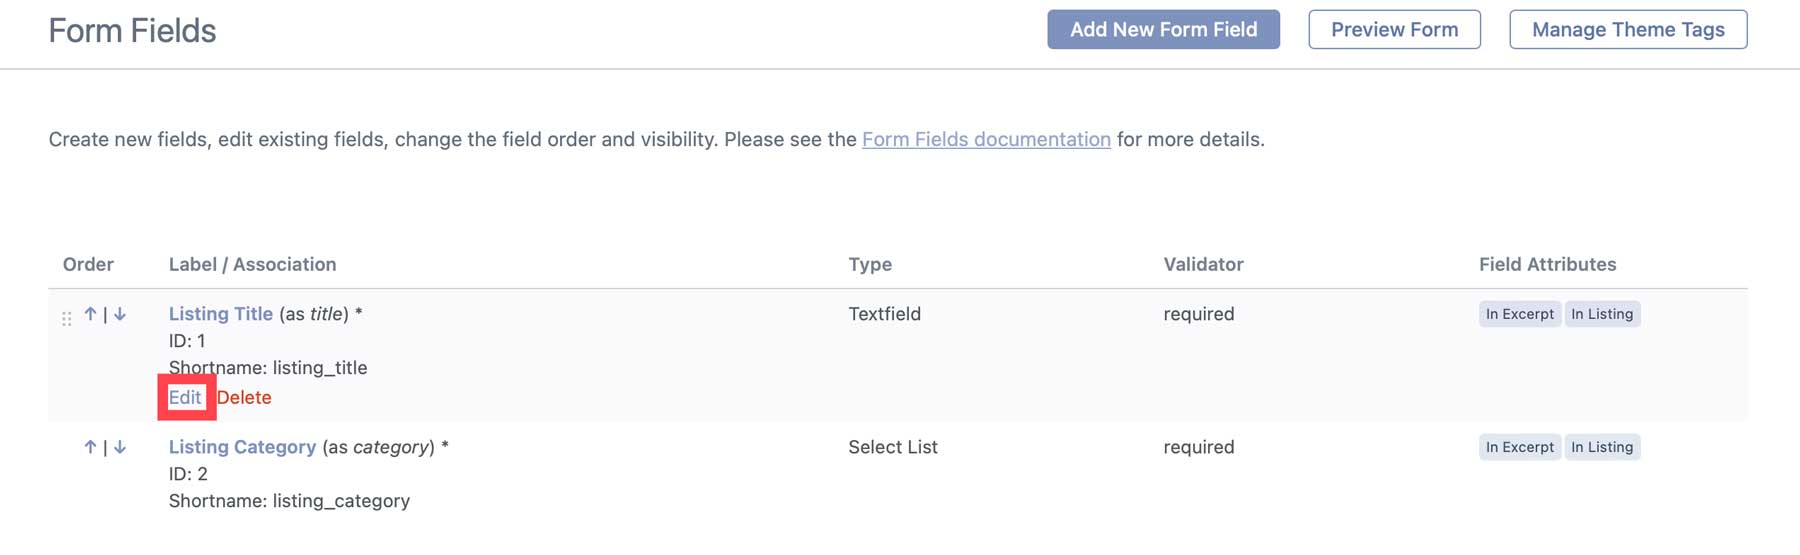
Click the edit link underneath the field name to edit a field.
To demonstrate, we’ll edit the Listing Title field. Since we’re creating a restaurant directory website, renaming the field to Restaurant Name makes more sense. When the page opens, you can view various options, including the field type, display options, an optional field description, and the field label. This is what we’ll need to change. Rename the label to Restaurant Name.
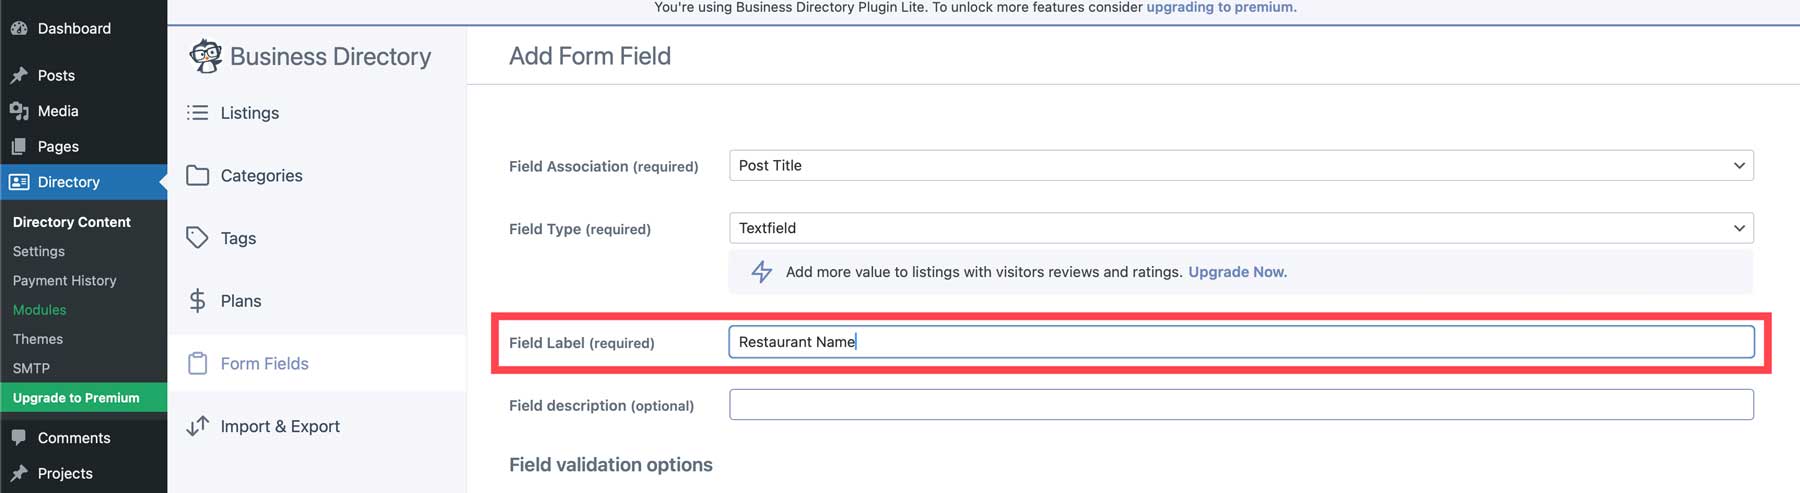
Click the update field button to save the changes.

Repeat the steps above to edit or add more fields to create your listing form.
Create Your Business Categories
Before you start loading listings onto your directory website, taking the steps needed to keep things organized is a good idea. Imagine walking into a library and seeing massive piles of books from floor to ceiling in no particular order. That would be overwhelming, wouldn’t it? Think of categories as sections in a library, keeping things organized and helping users find what they are looking for.
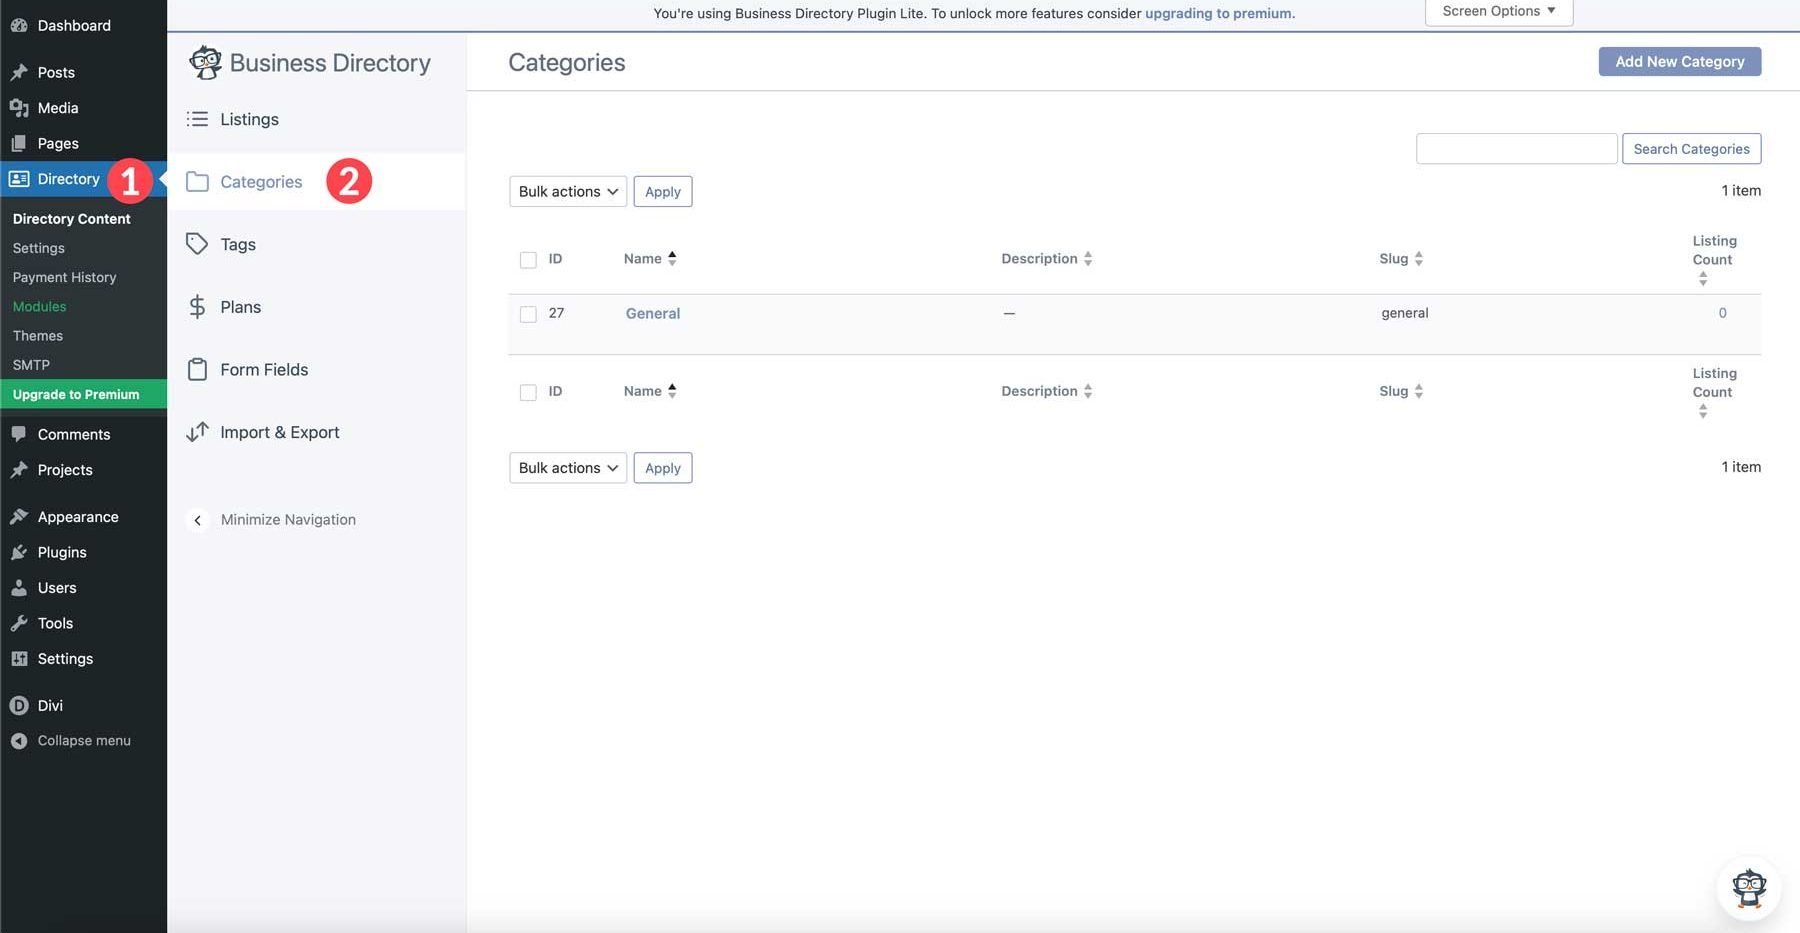
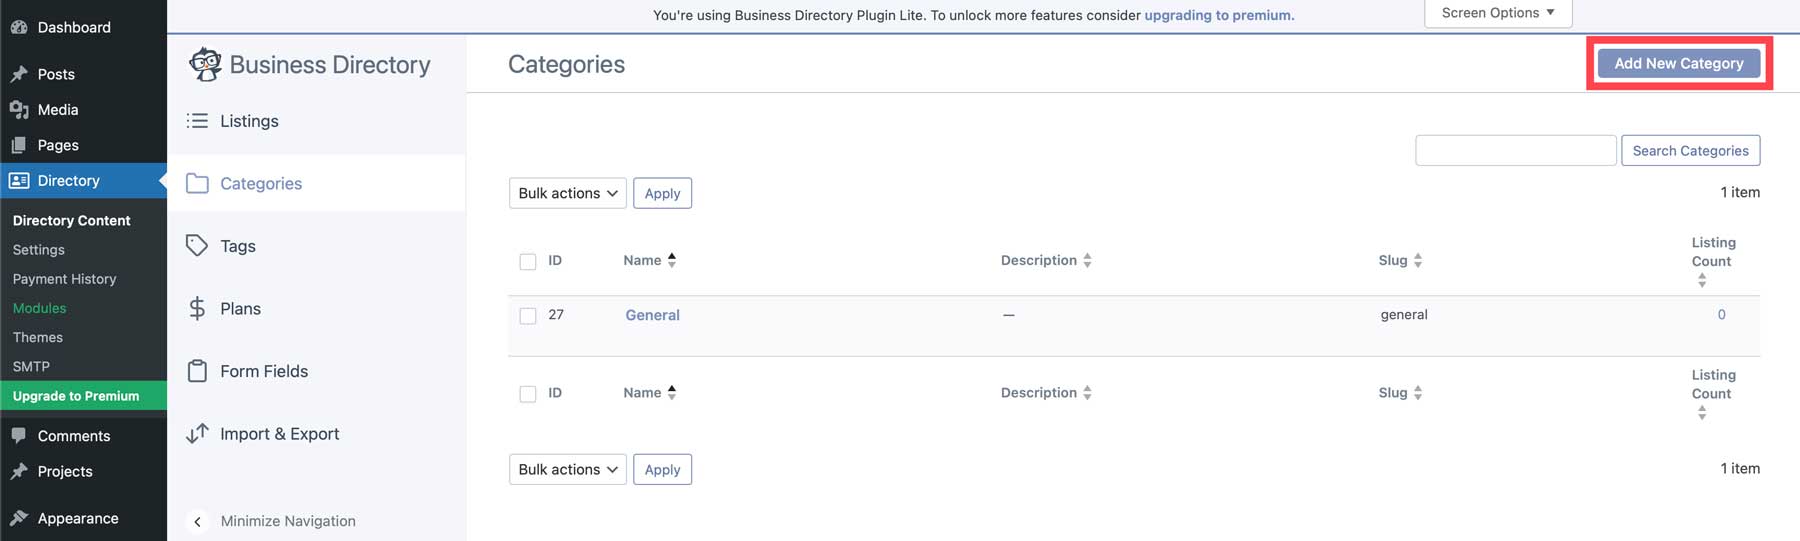
Creating and managing categories with the Business Directory plugin is a breeze. Navigate to Directory > Directory Content > Categories.
To create a new category, click the Add New Category button.
When the popup box appears, give the category a name, assign an optional parent category, and click the Add New Category button.
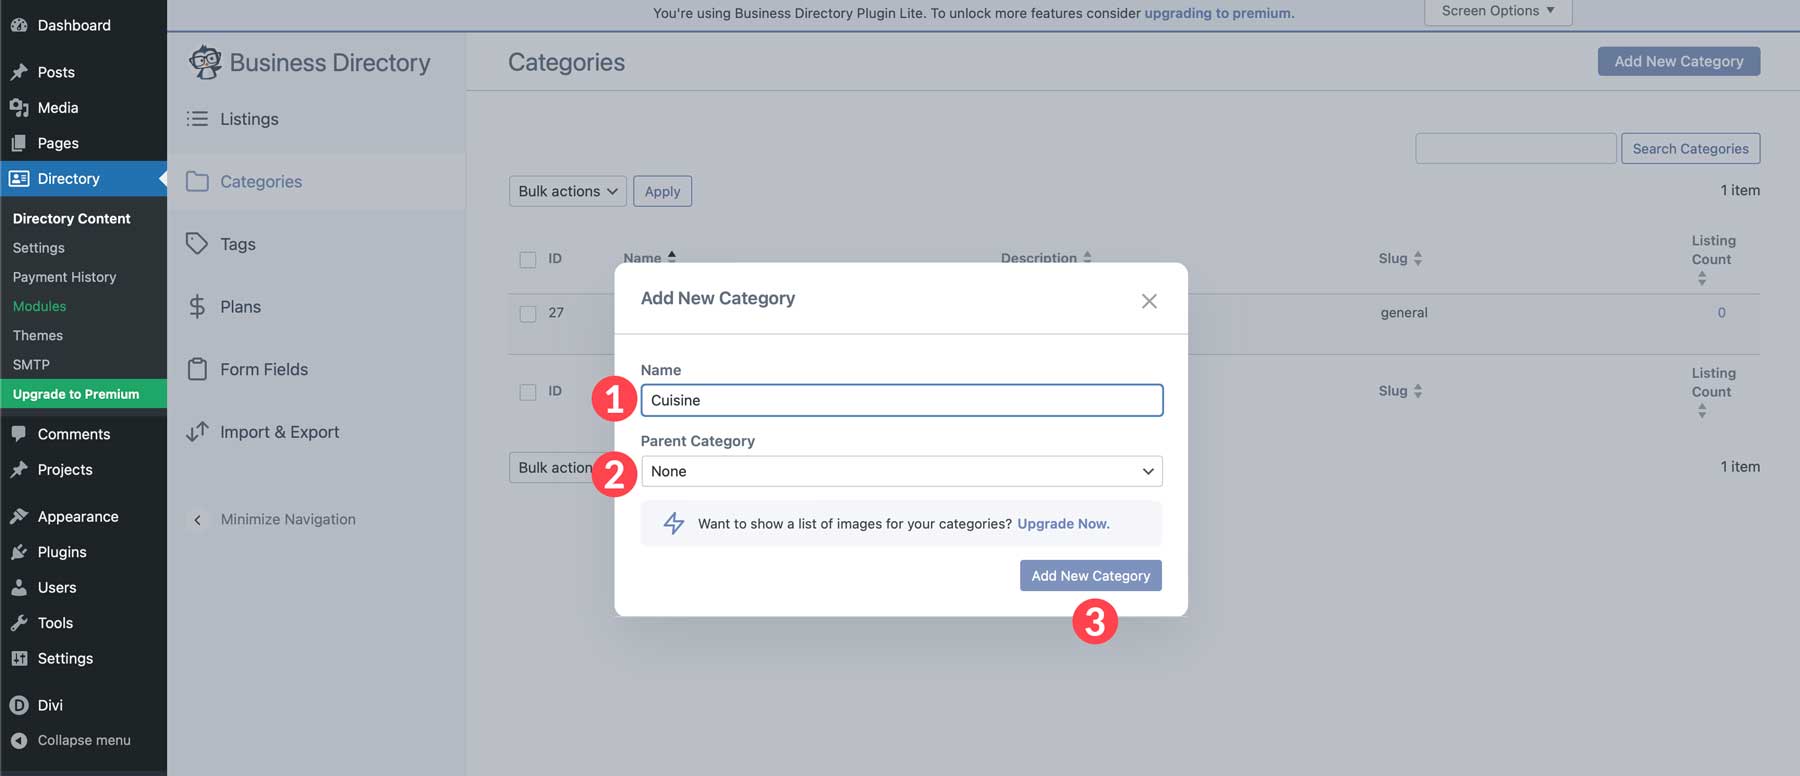
Repeat these steps to add any remaining categories for your directory website. Options include price range, location, ambiance, and amenities like a rooftop bar, live music, or event rooms. Once your category structure is in place, we can create our first directory listing.
Create a Directory Listing
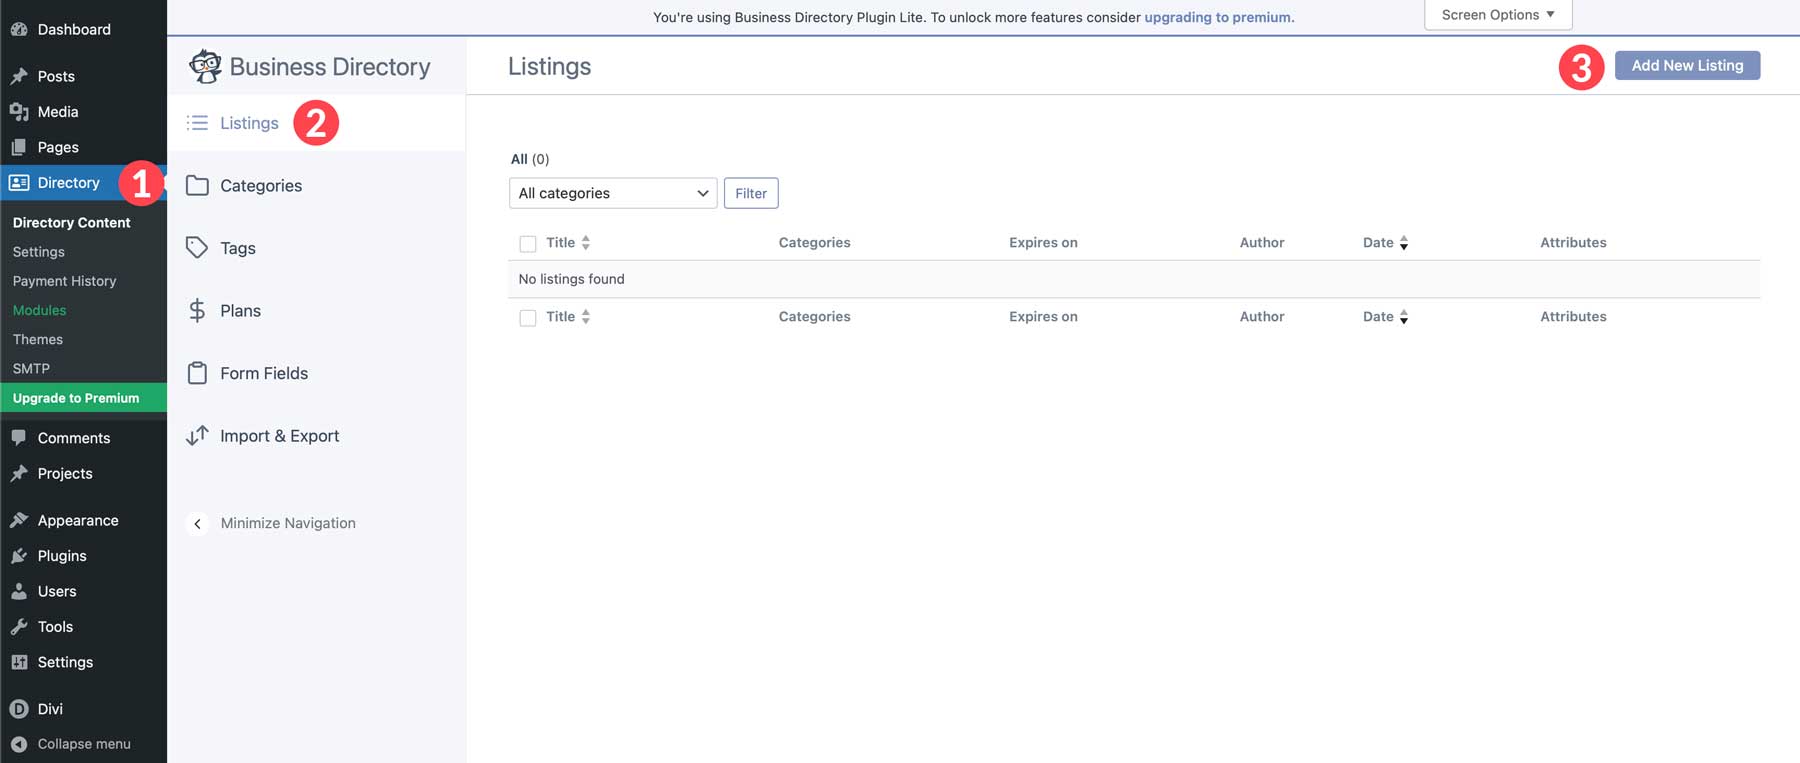
With your categories in place, you can now create your first listing. Navigate to Directory > Directory Content > Listings. Next, click the Add New Listing button.
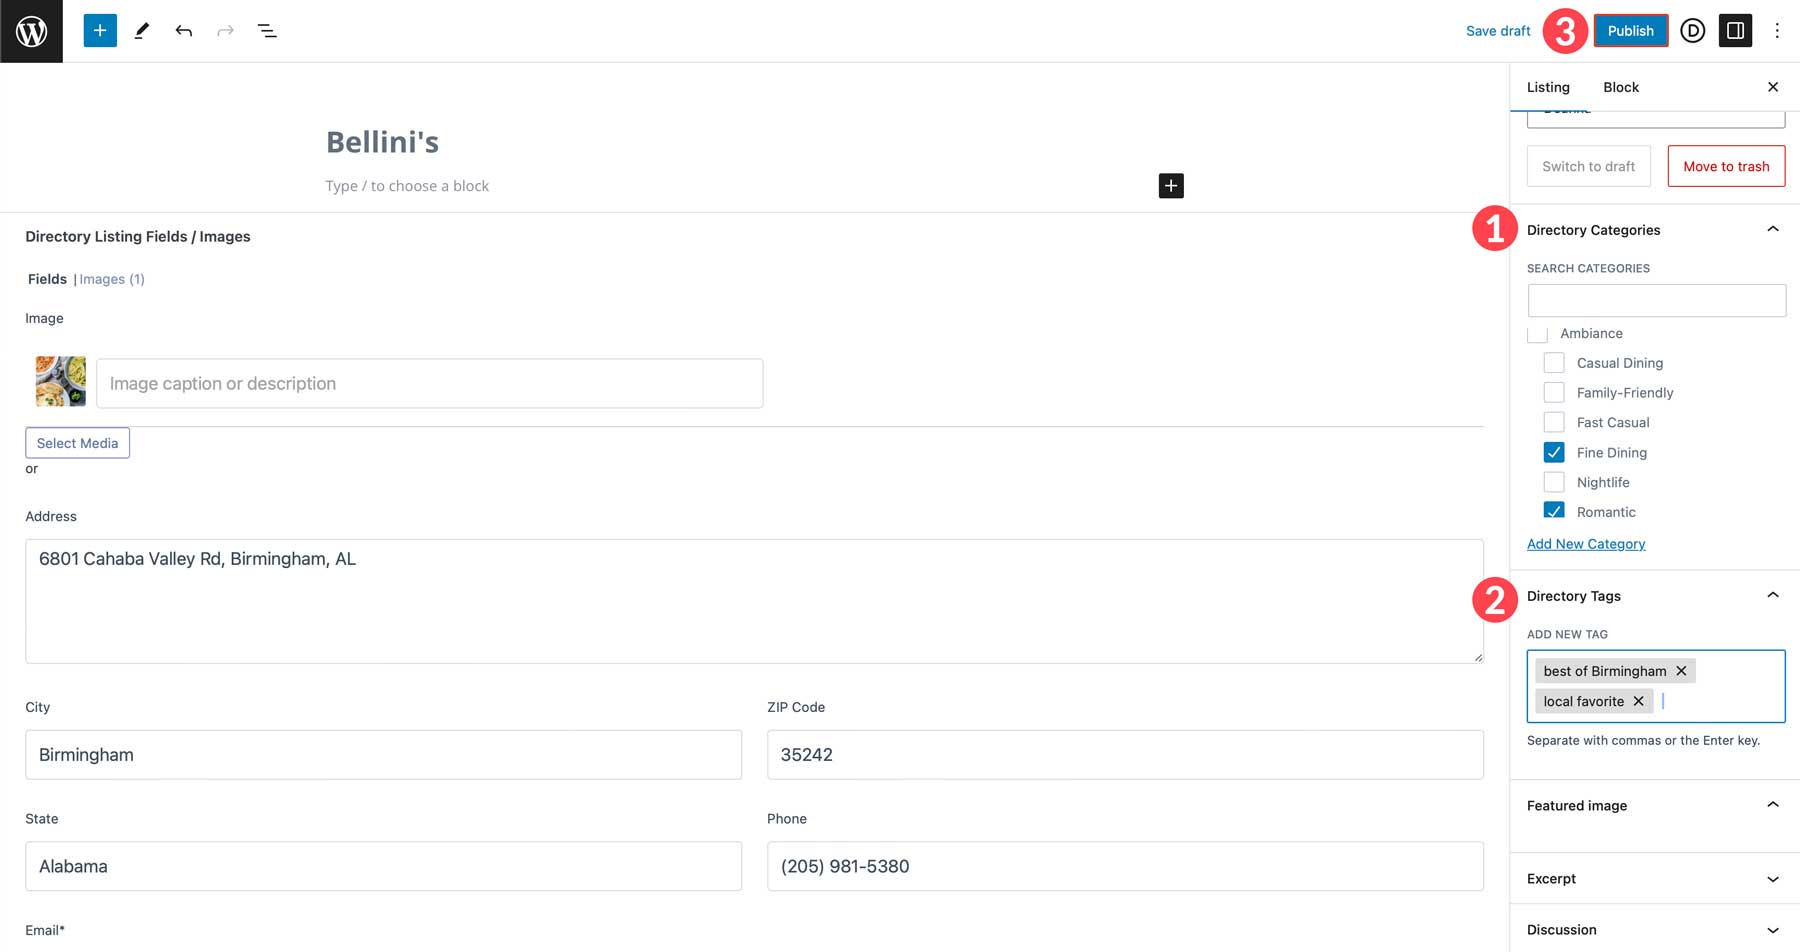
When the page refreshes, you’ll notice the form fields are all present in the listing custom post type. Start by adding a name for your listing and filling in the form fields.
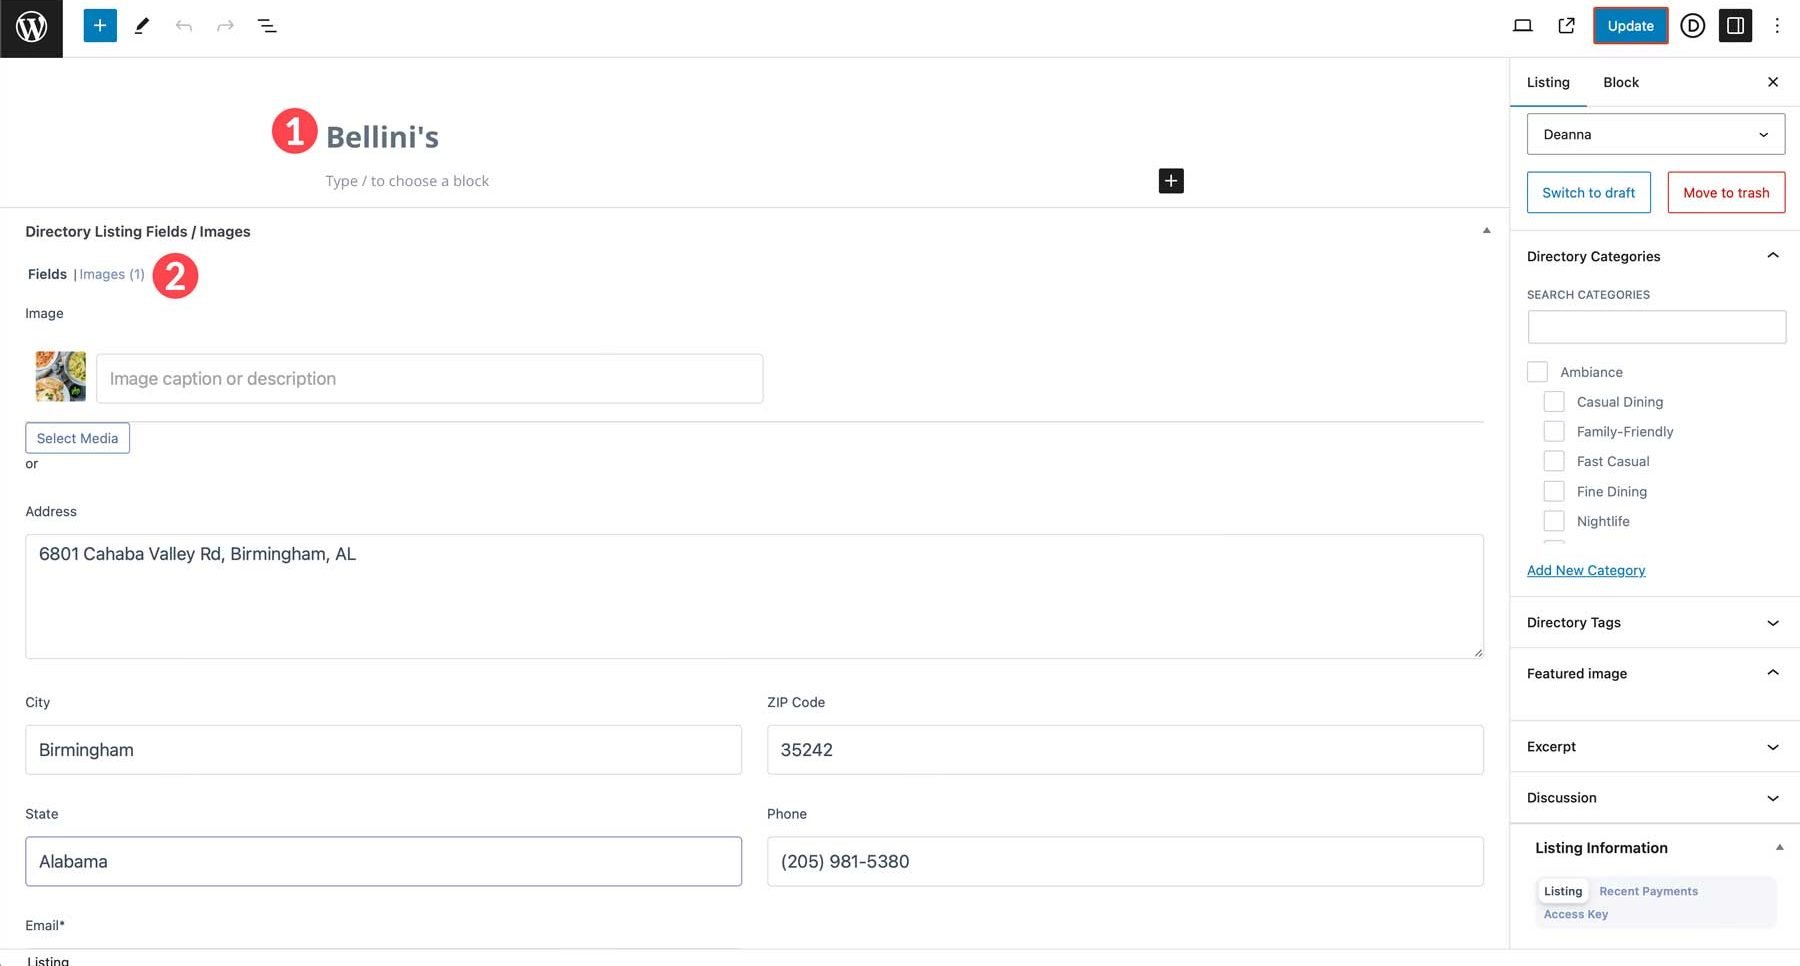
Next, choose the category or categories you’d like your listing to appear under, add any relevant tags, and click the Publish button.
When you view the directory listing, you’ll see that we have a lot of work to do. While the information is there, it could be more eye-catching.
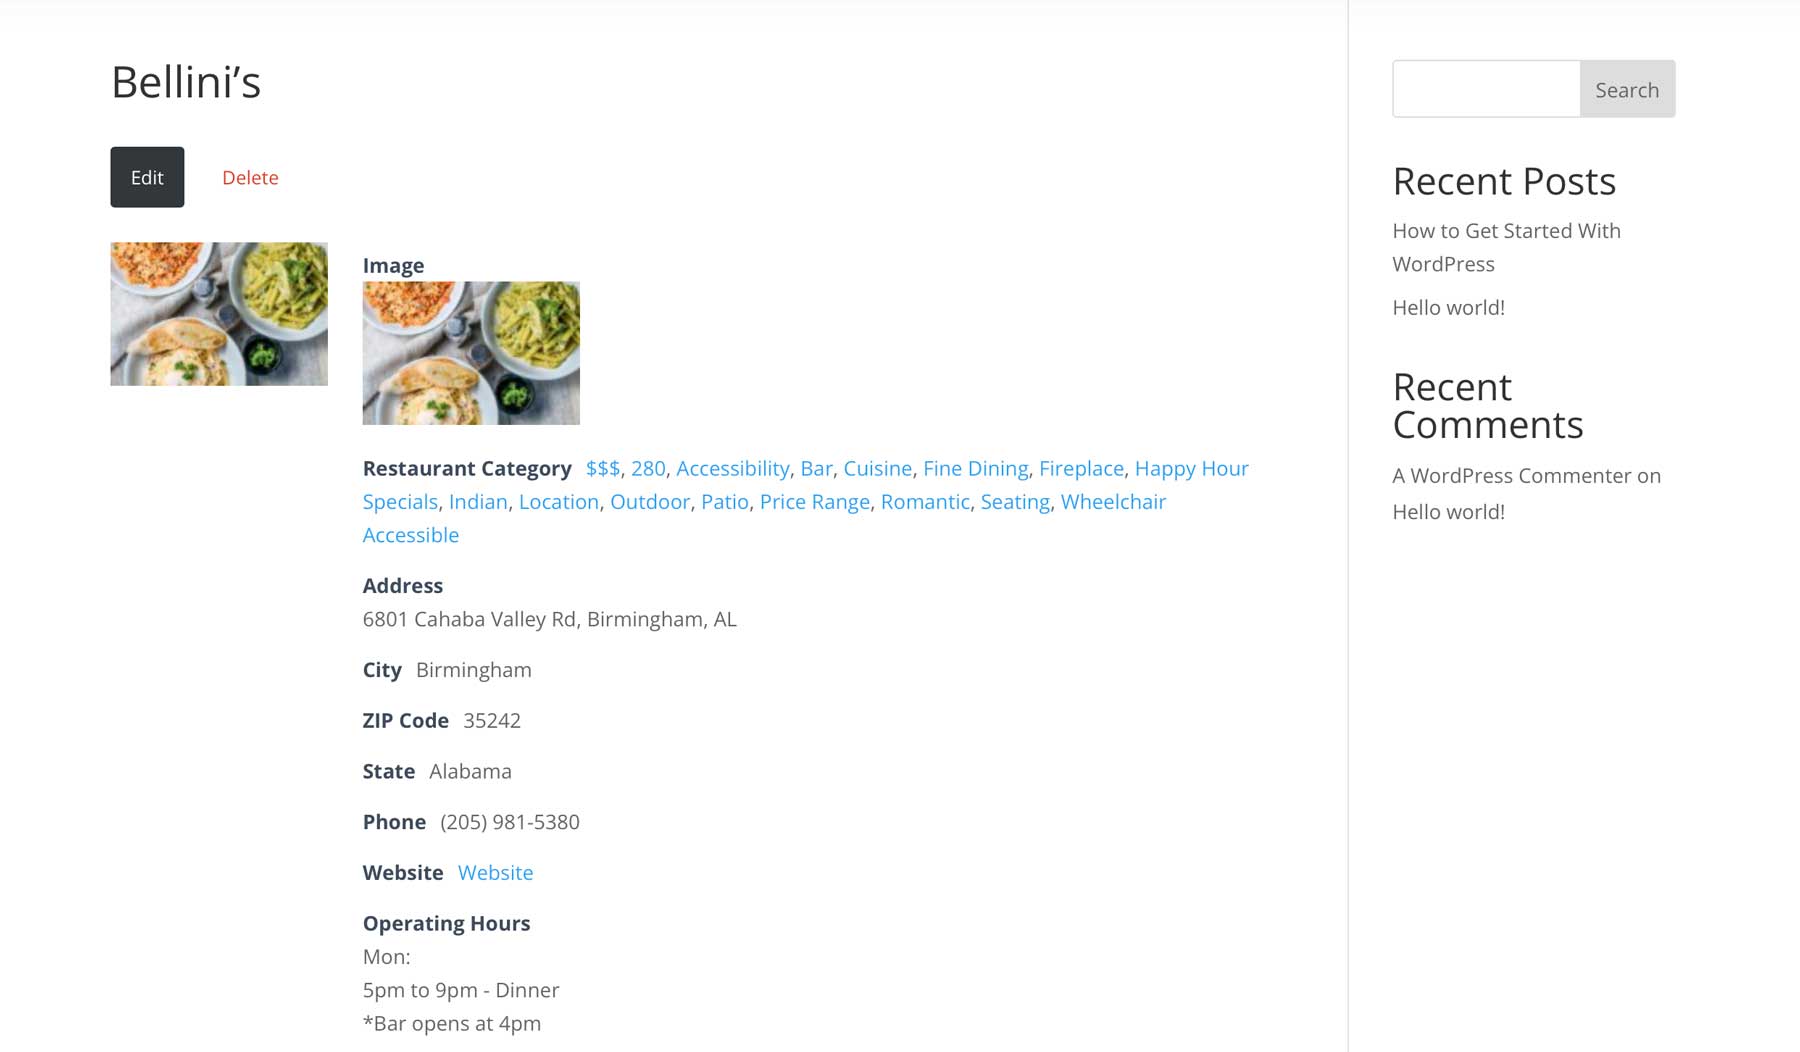
In the next section of our how to make a directory website with WordPress post, we’ll show you how to change that.
Step 5: Design Your Listings Page with Divi
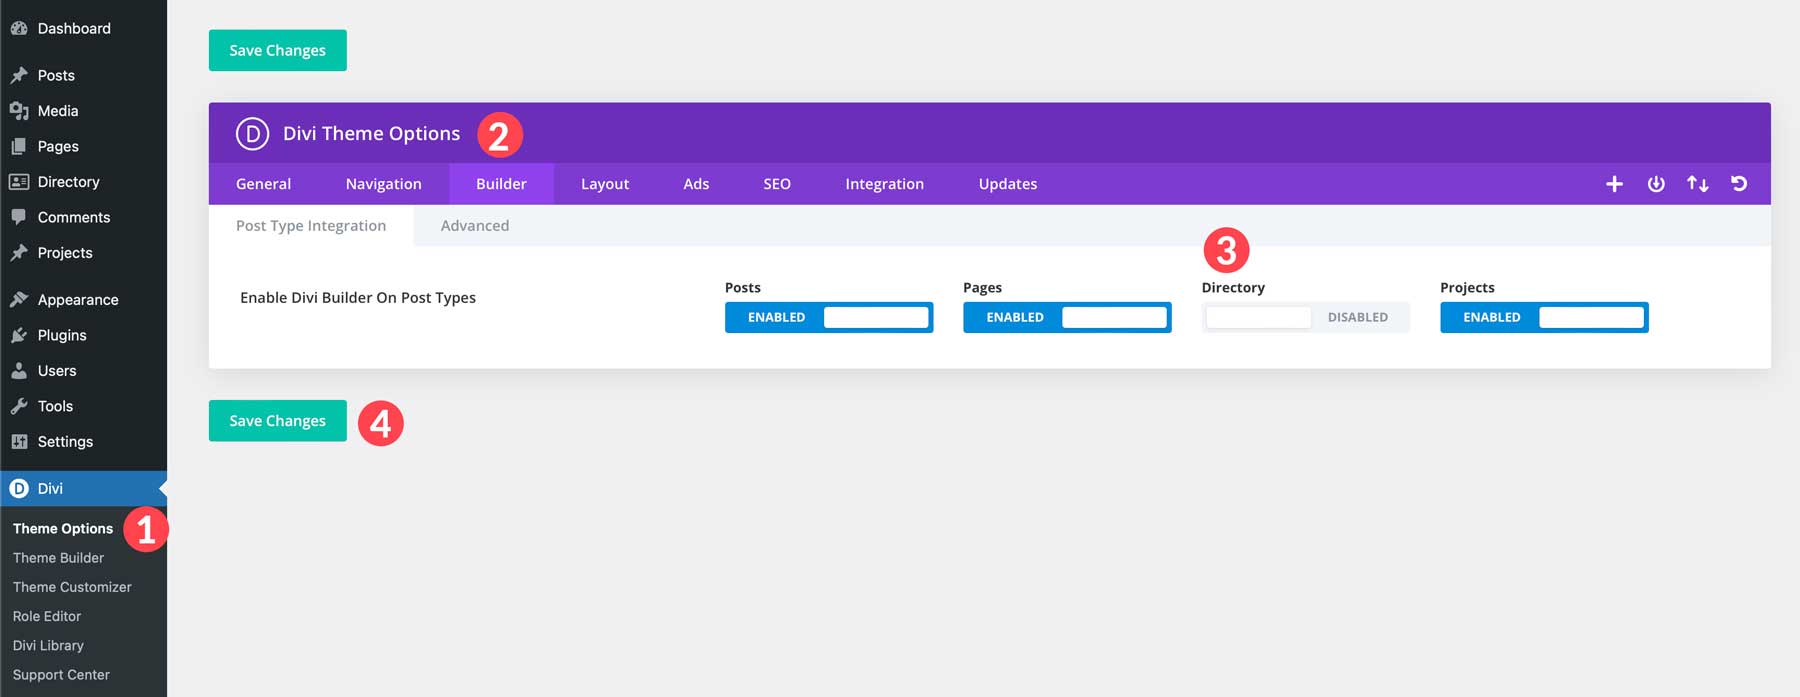
We’ve covered the core functionalities of your directory website, but now, let’s talk about making it visually stunning and user-friendly. This is where Divi comes in. One of the best things about Divi is its ability to design every aspect of your site. In fact, you can use the front-end, no-code Visual Builder on custom post types, too, such as listing pages. We need to enable that functionality before we can use the Divi Builder to create our listing pages. To do this, navigate to Divi > Theme Options > Builder. Next, enable the Directory toggle on. Click the Save Changes button to save your changes.
Create a Listings Template with the Theme Builder
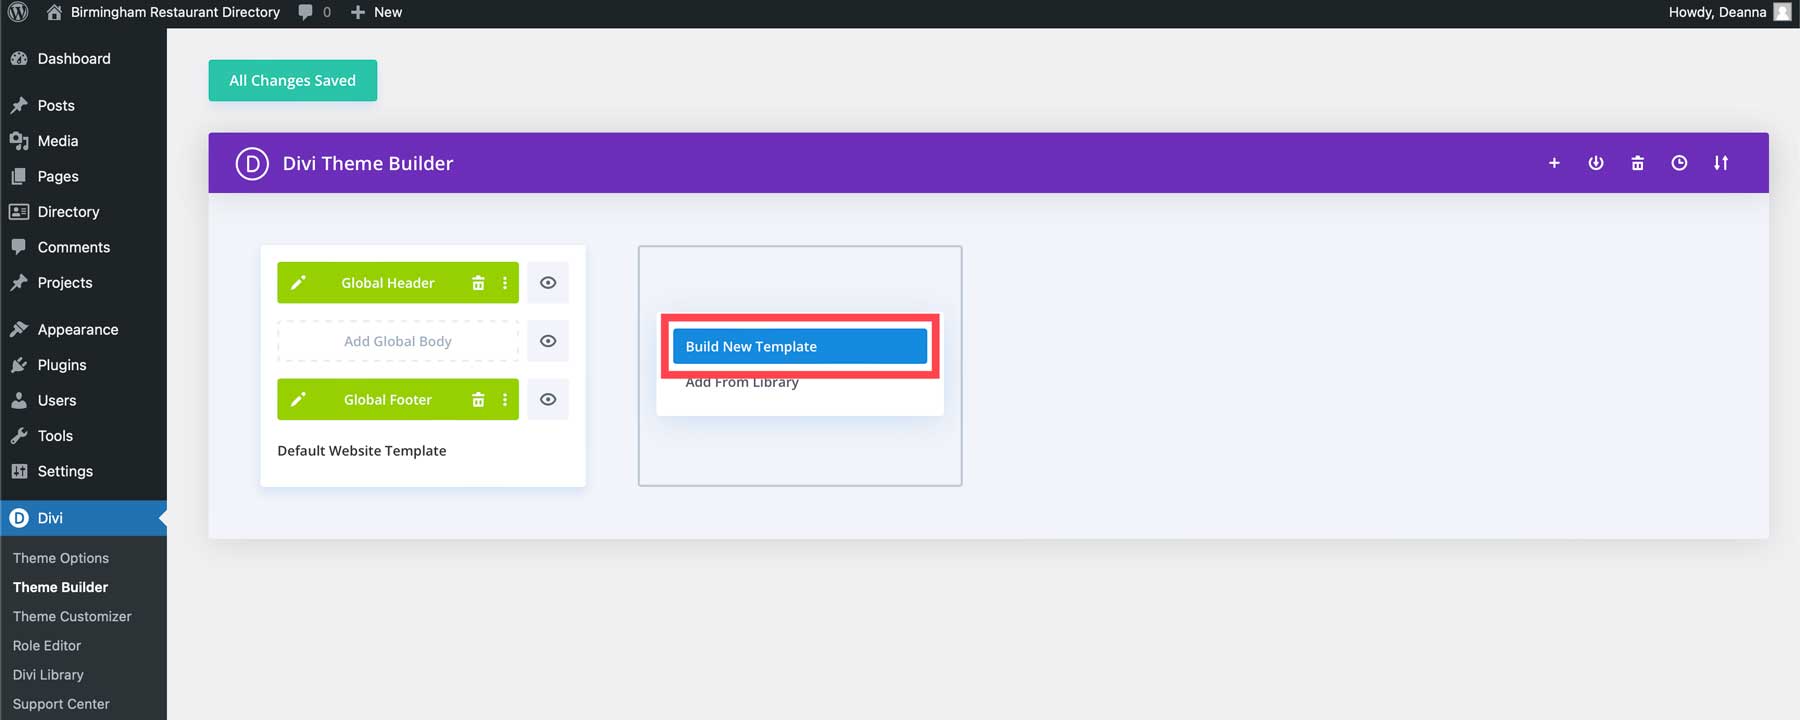
The next step is to create a template for our listings. The easiest way to do this is with Divi’s Theme Builder. Start by navigating to Divi > Theme Builder. Next, click the Add New Template button.

Next, click Build New Template.
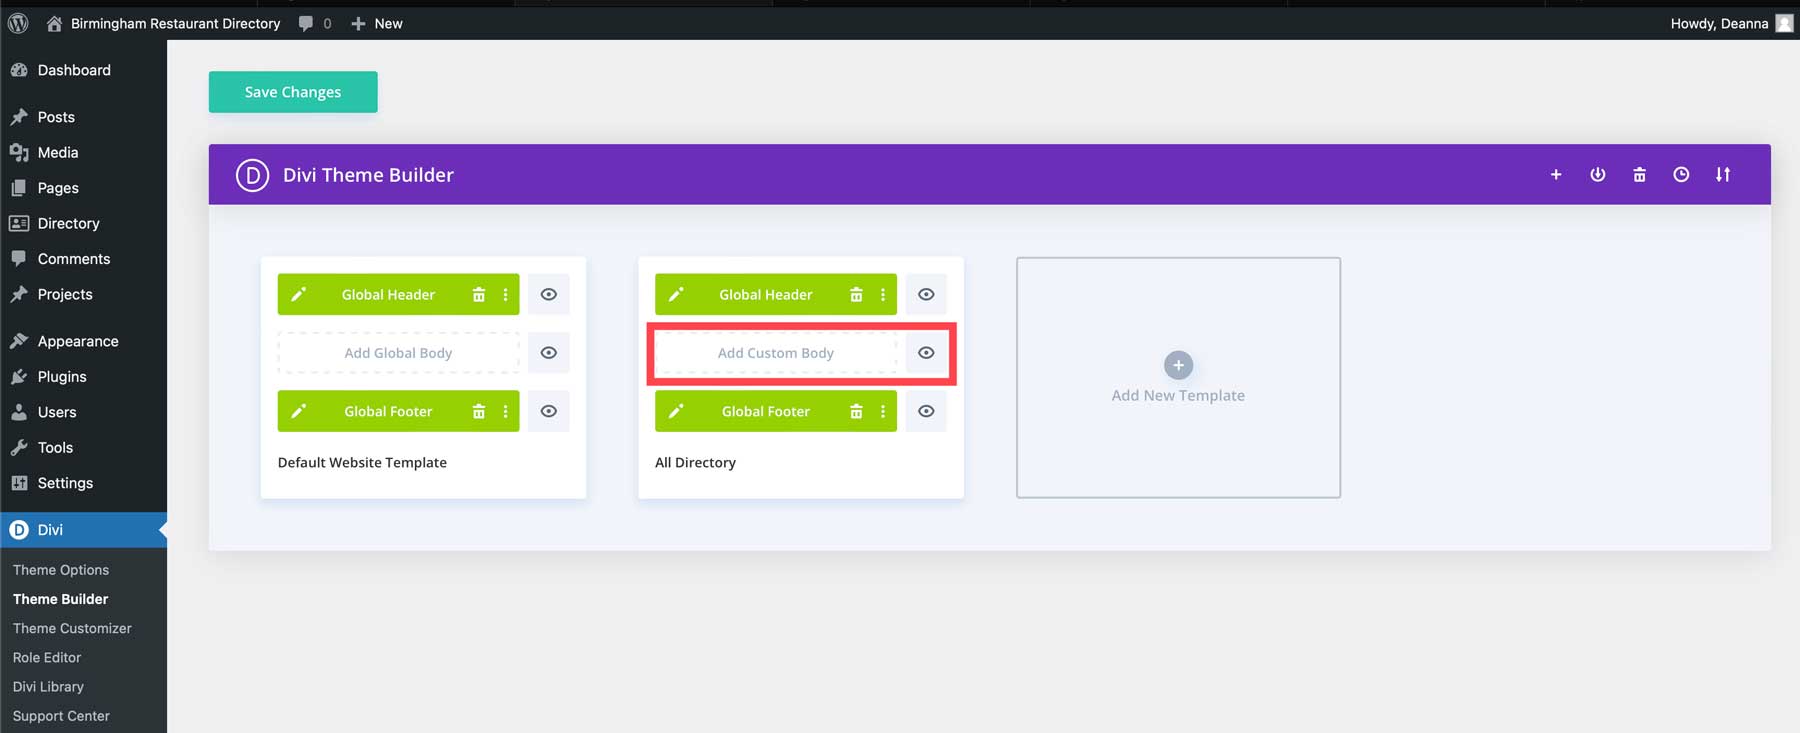
When the popup appears, scroll down and select Directory > All Directory. This will assign a new template to every created listing, giving them a uniform look. Next, click Create Template.

Next, click the Add Custom Body button.
Design Your Page Template with Divi
We can now take steps to design our listings template with Divi. You can start with a Theme Builder pack, one of our premade layouts, or create the page yourself. We’ll design the page from scratch to demonstrate how easy it is to use the Divi Builder. When you launch the Visual Builder for the first time, you’ll notice a green + icon towards the top of the page. This is Divi prompting you to add a row. Rows come in various layouts, allowing you to design any format for your desired content. For this layout, we’ll start with a single-column row. Tap the green + icon and select the first option, a single column row.

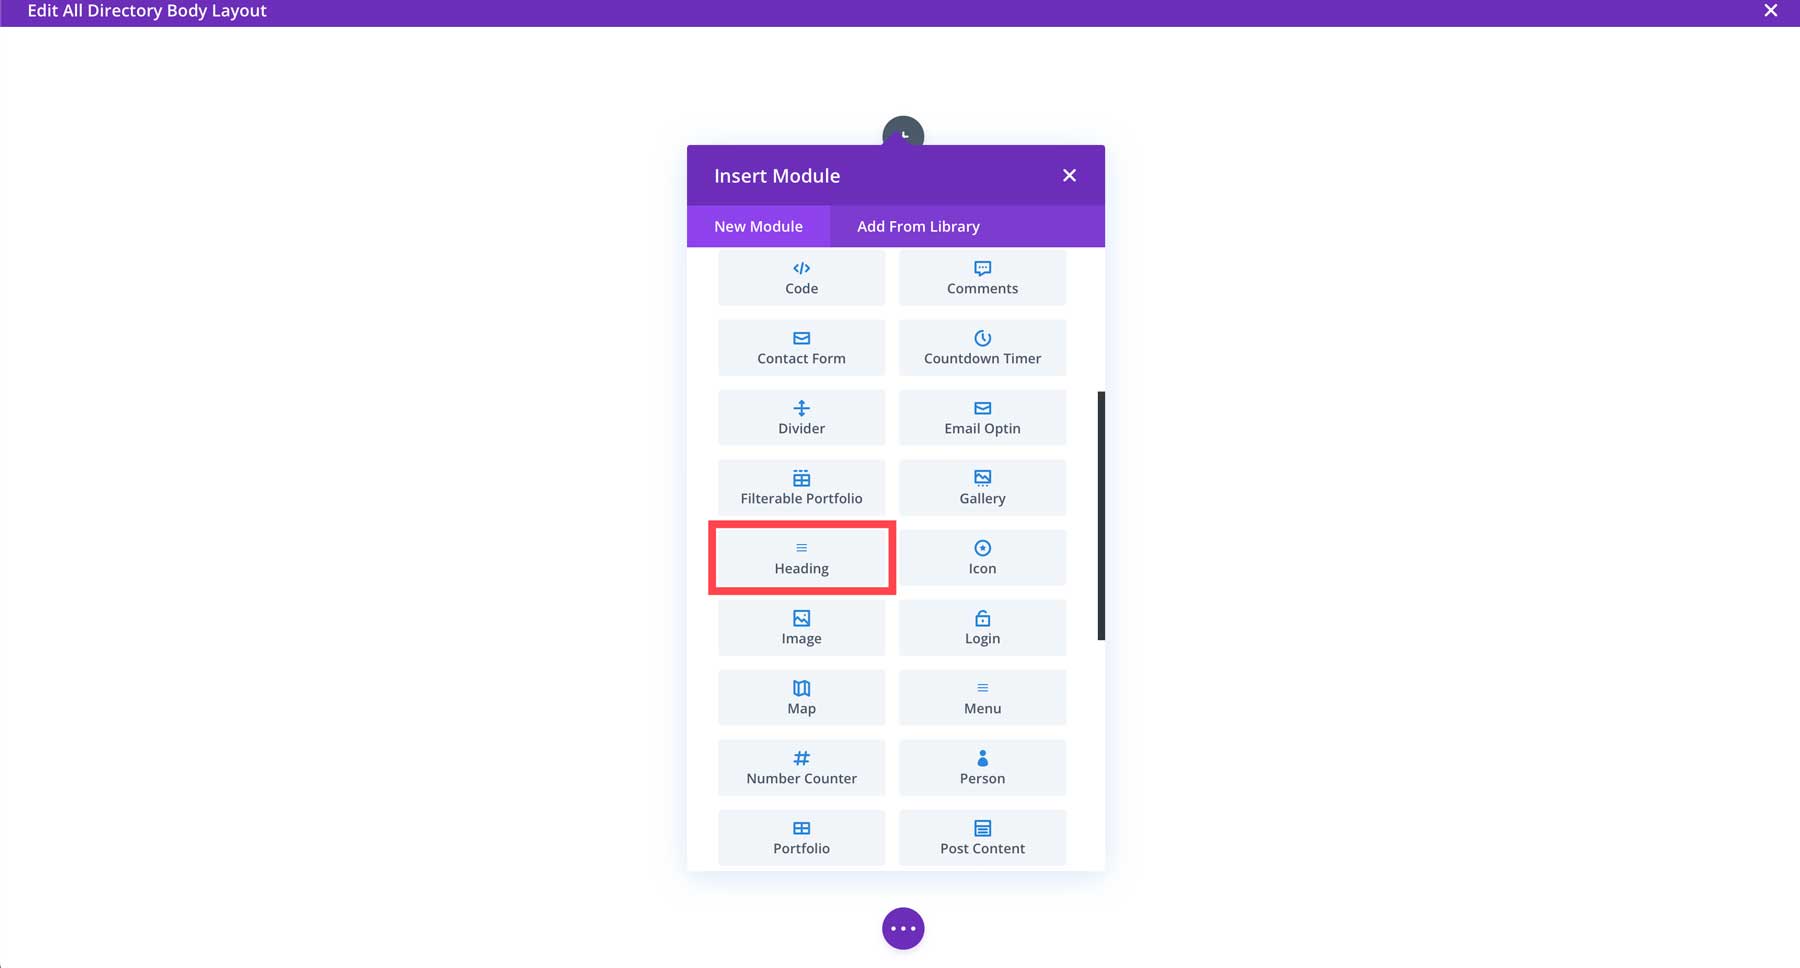
Search for and tap the Heading Module to add it to the template.
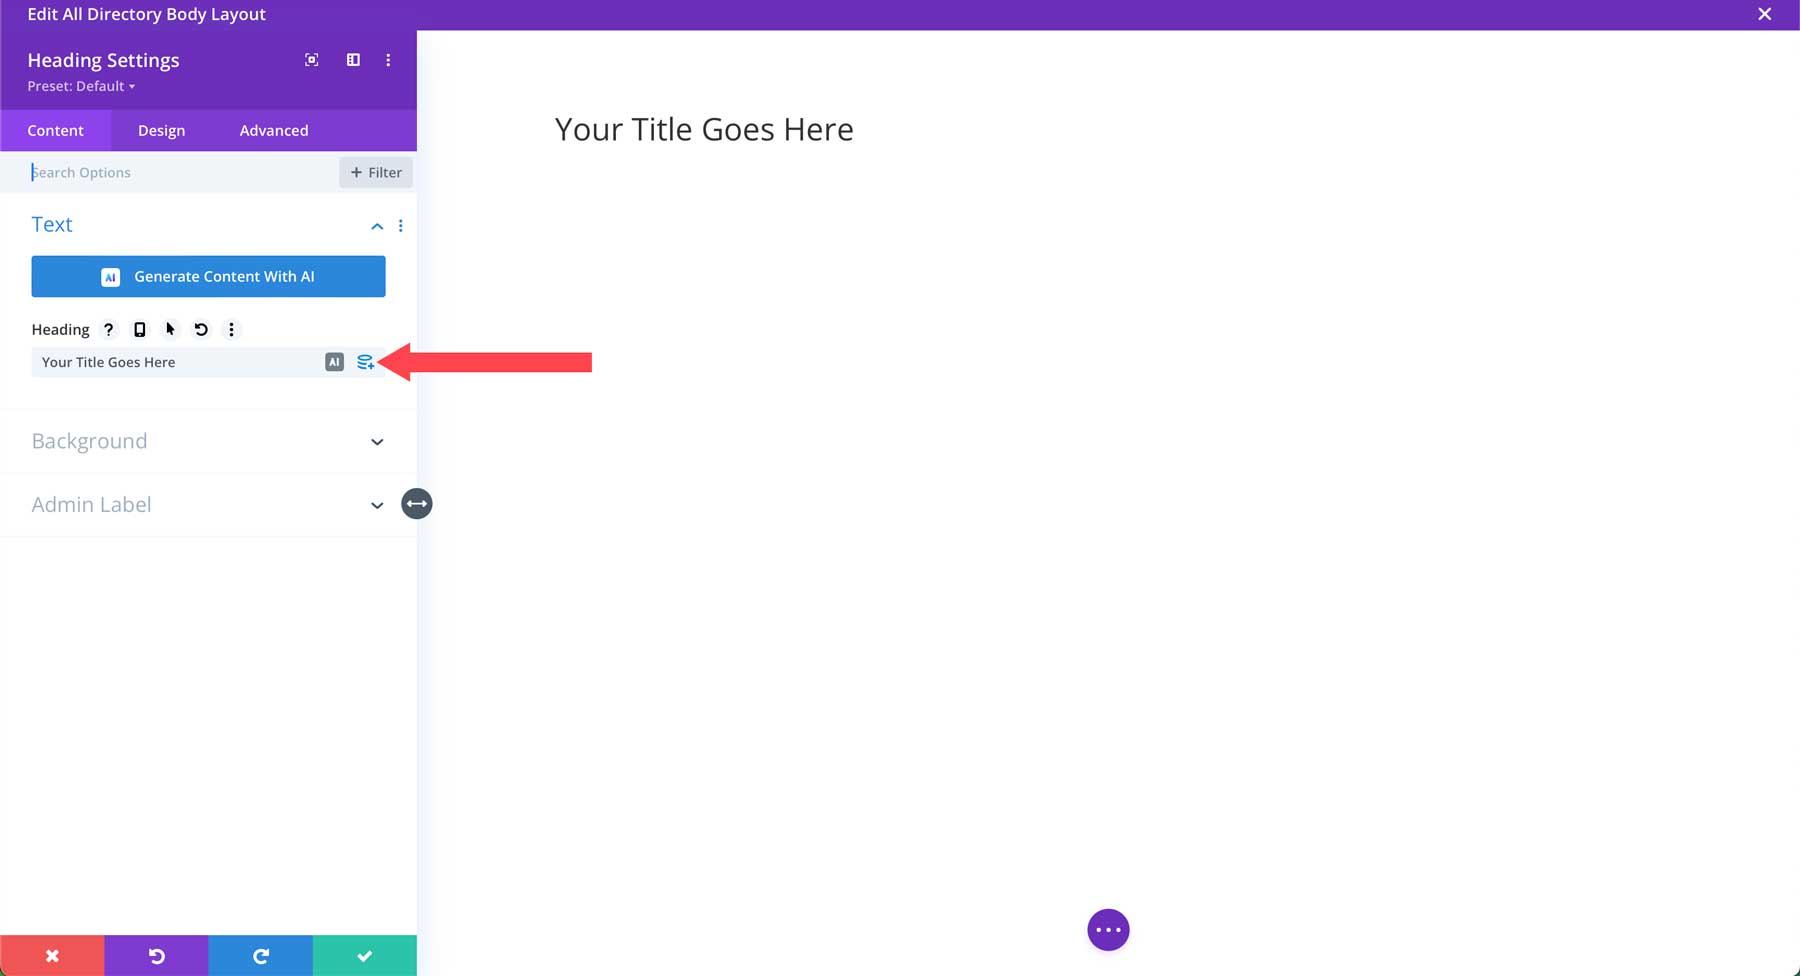
When the module settings appear, hover over the heading field to reveal the dynamic content icon. Click it to bring up the dynamic content options dialog box.
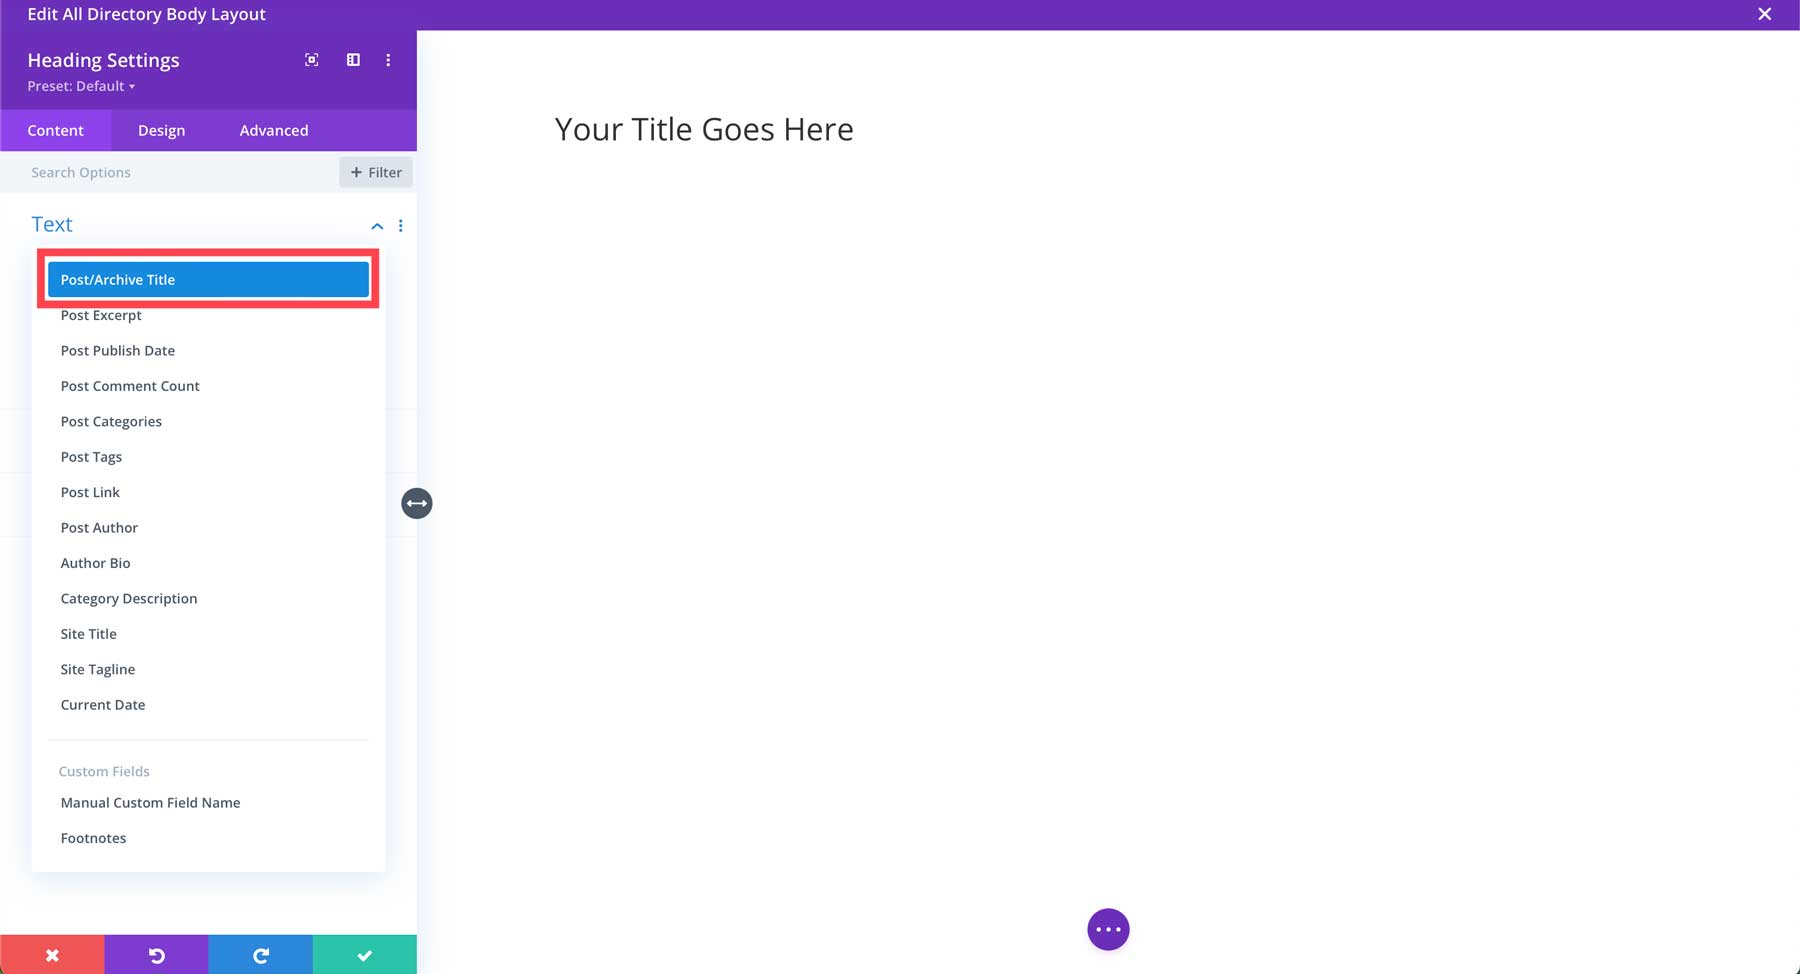
Select Post/Archive Title when the options appear. This will allow Divi to dynamically pull each listing’s title into our template. That way, we won’t have to edit our listings individually to change the design.
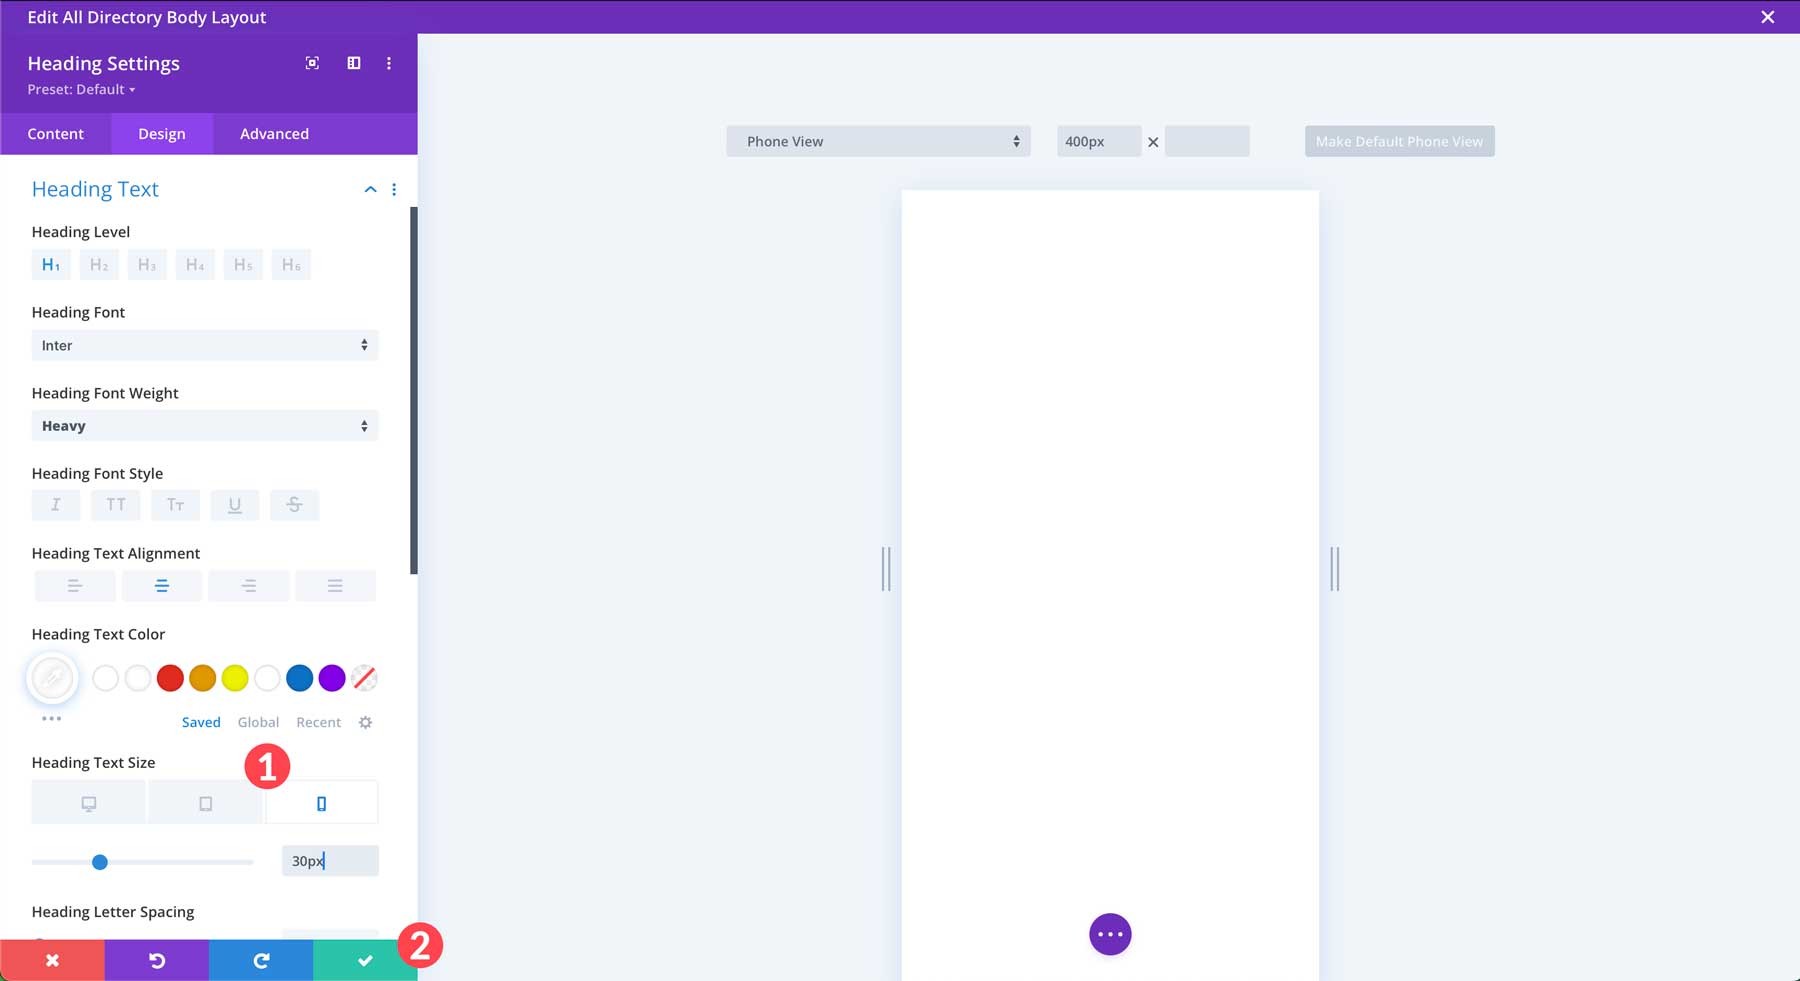
Next, click the design tab. Under Heading Text, select H1 as the Heading Level, Inter as the Heading Font, heavy as the Heading Font Weight, align the text to the center, select white as the Heading Text Color, and 48px for the Heading Text Size.

Scroll down to adjust the responsive Heading Text Size by hovering over the option to reveal the responsive settings.
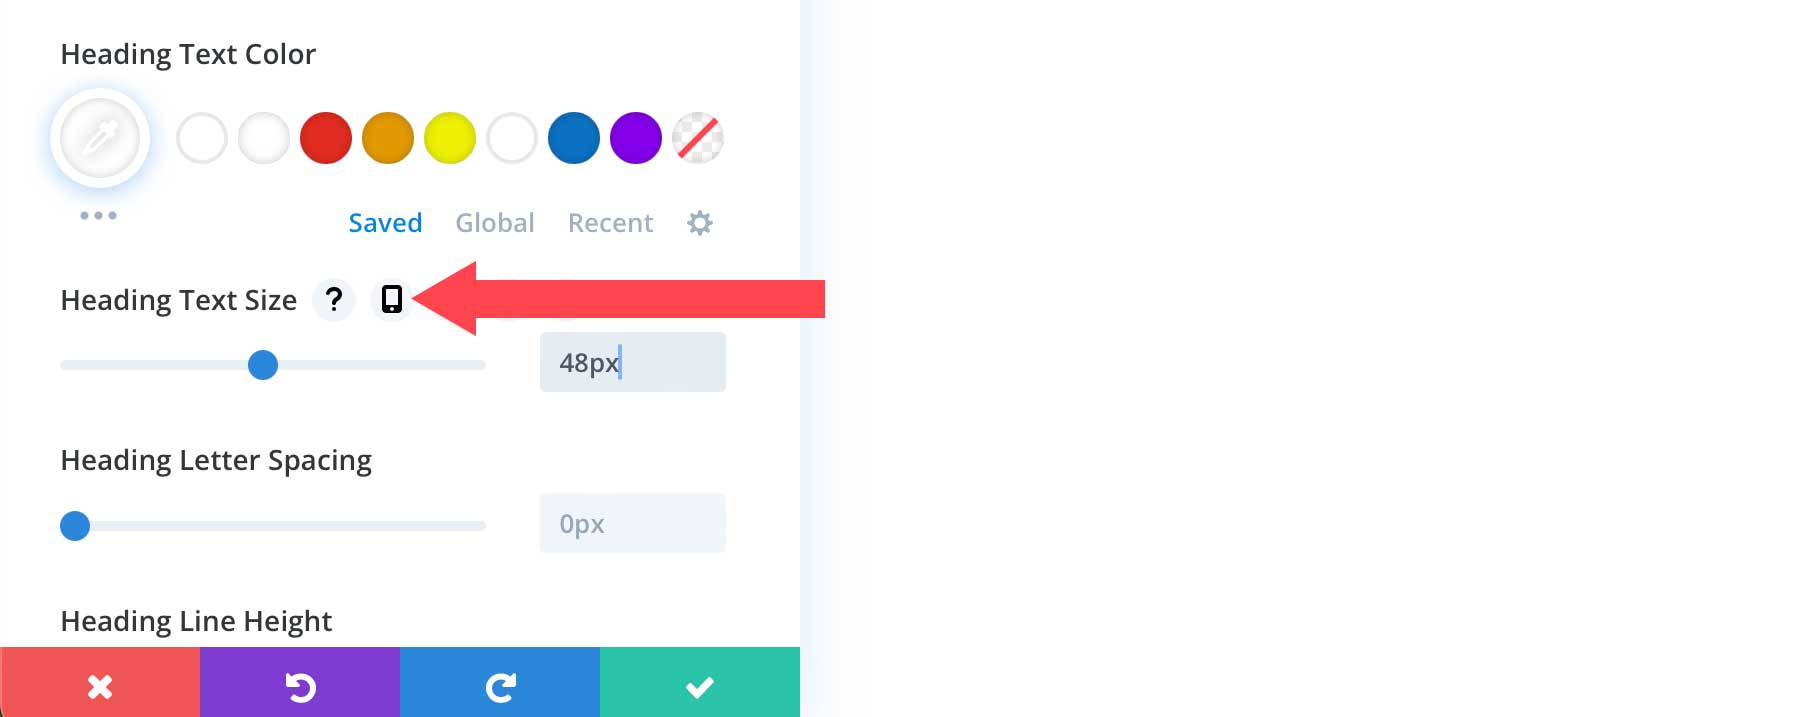
Adjust the tablet font size to 40px and the mobile font size to 30px. Save the module’s settings by clicking the green check button.
Add a Hero Background Image and Effects
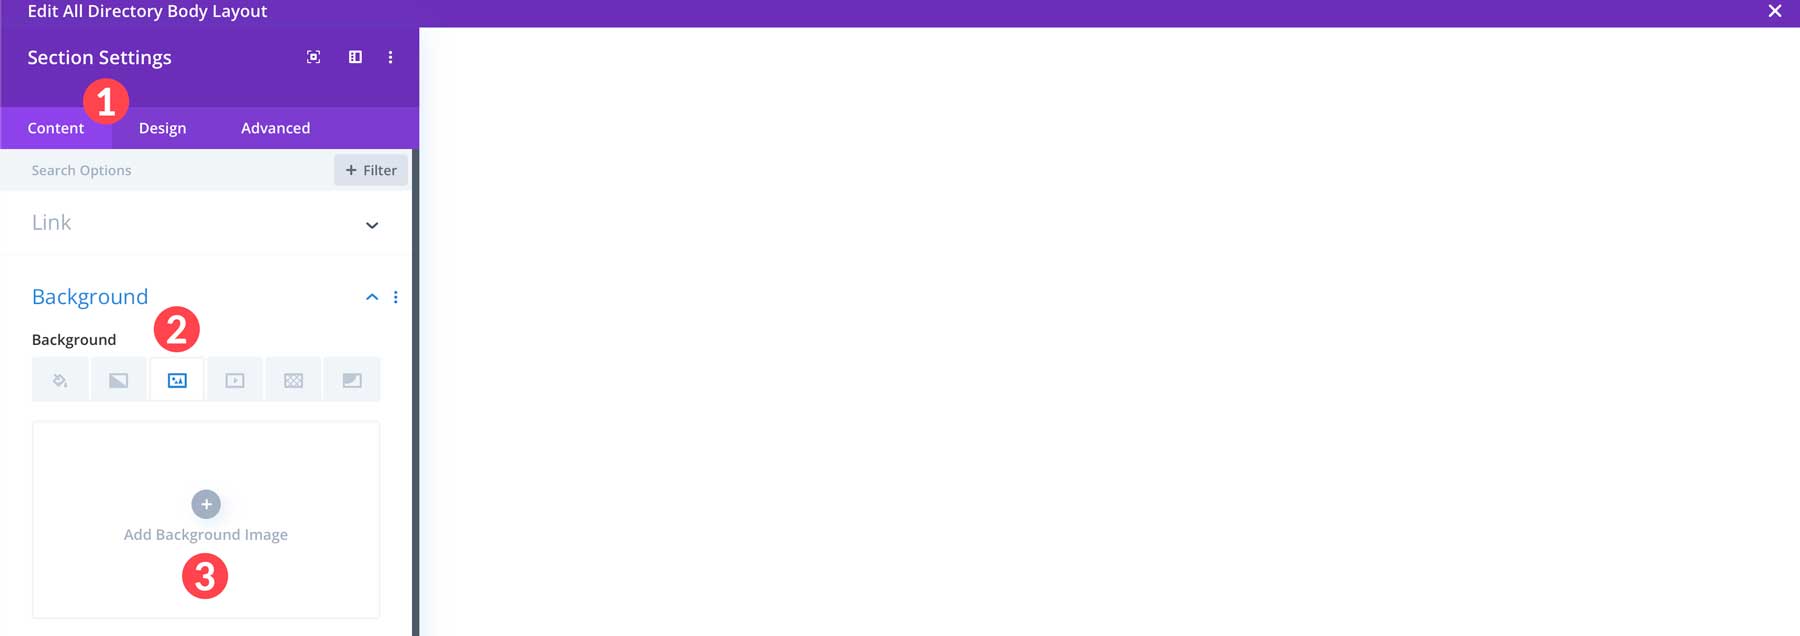
The next thing we want to do is add an interesting background design to our hero section. Hover over the top third of the page to reveal the section settings. Sections are outlined in a blue border, whereas rows are outlined in green. Click the settings icon to edit the section settings.

In the content tab, click the dropdown menu next to the Background tab. Click on the Background image tab. Click the Add Background Image button to add a photo.
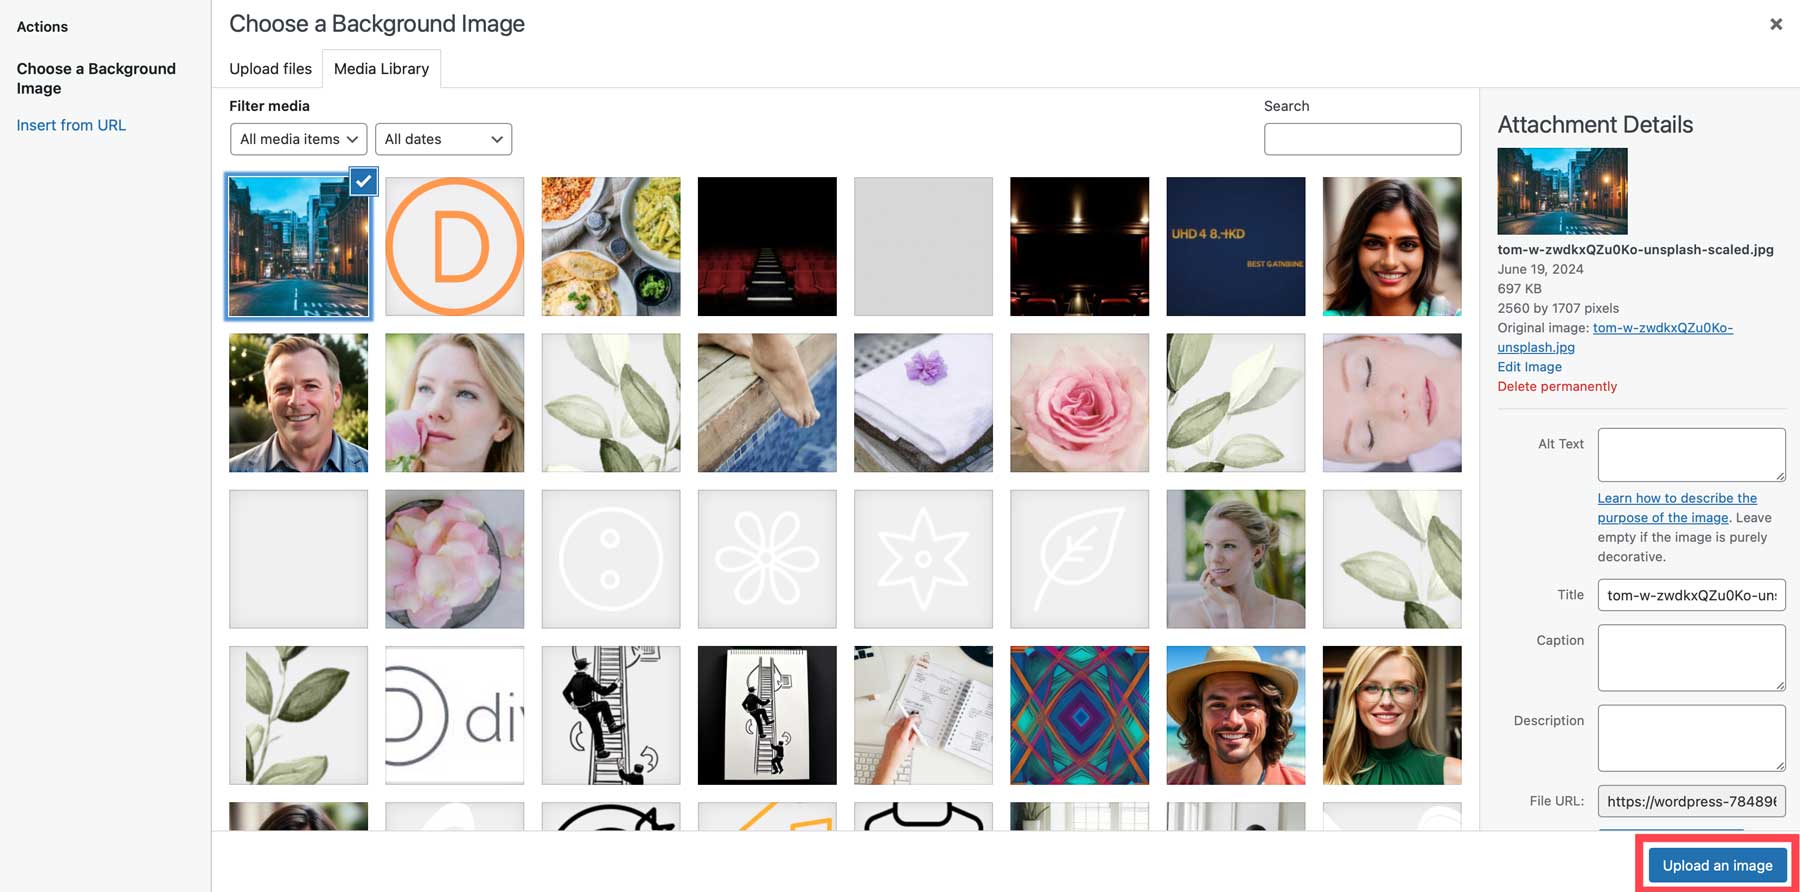
Select an image from the WordPress media gallery or upload one from your computer, then click upload an image. Note: background images meant to span a section’s width should be sized 1920px wide.
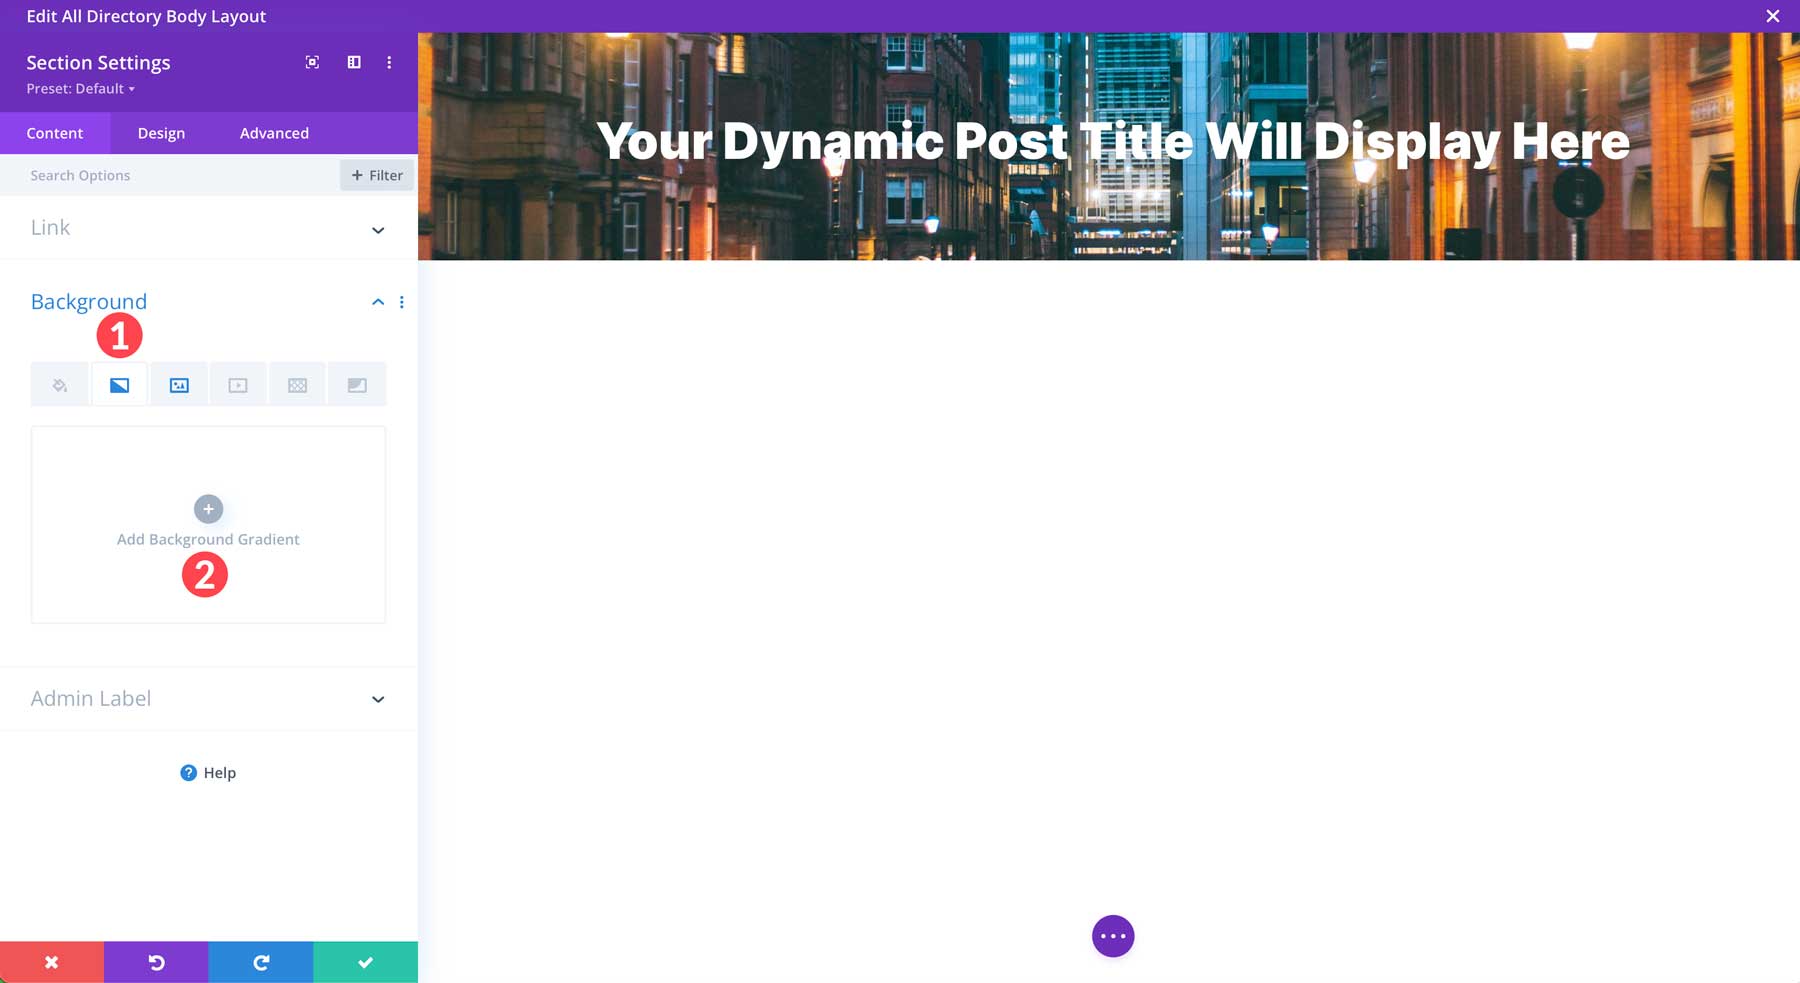
Next, click the Background Gradient tab. Click the Add Background Gradient button to add a new gradient.
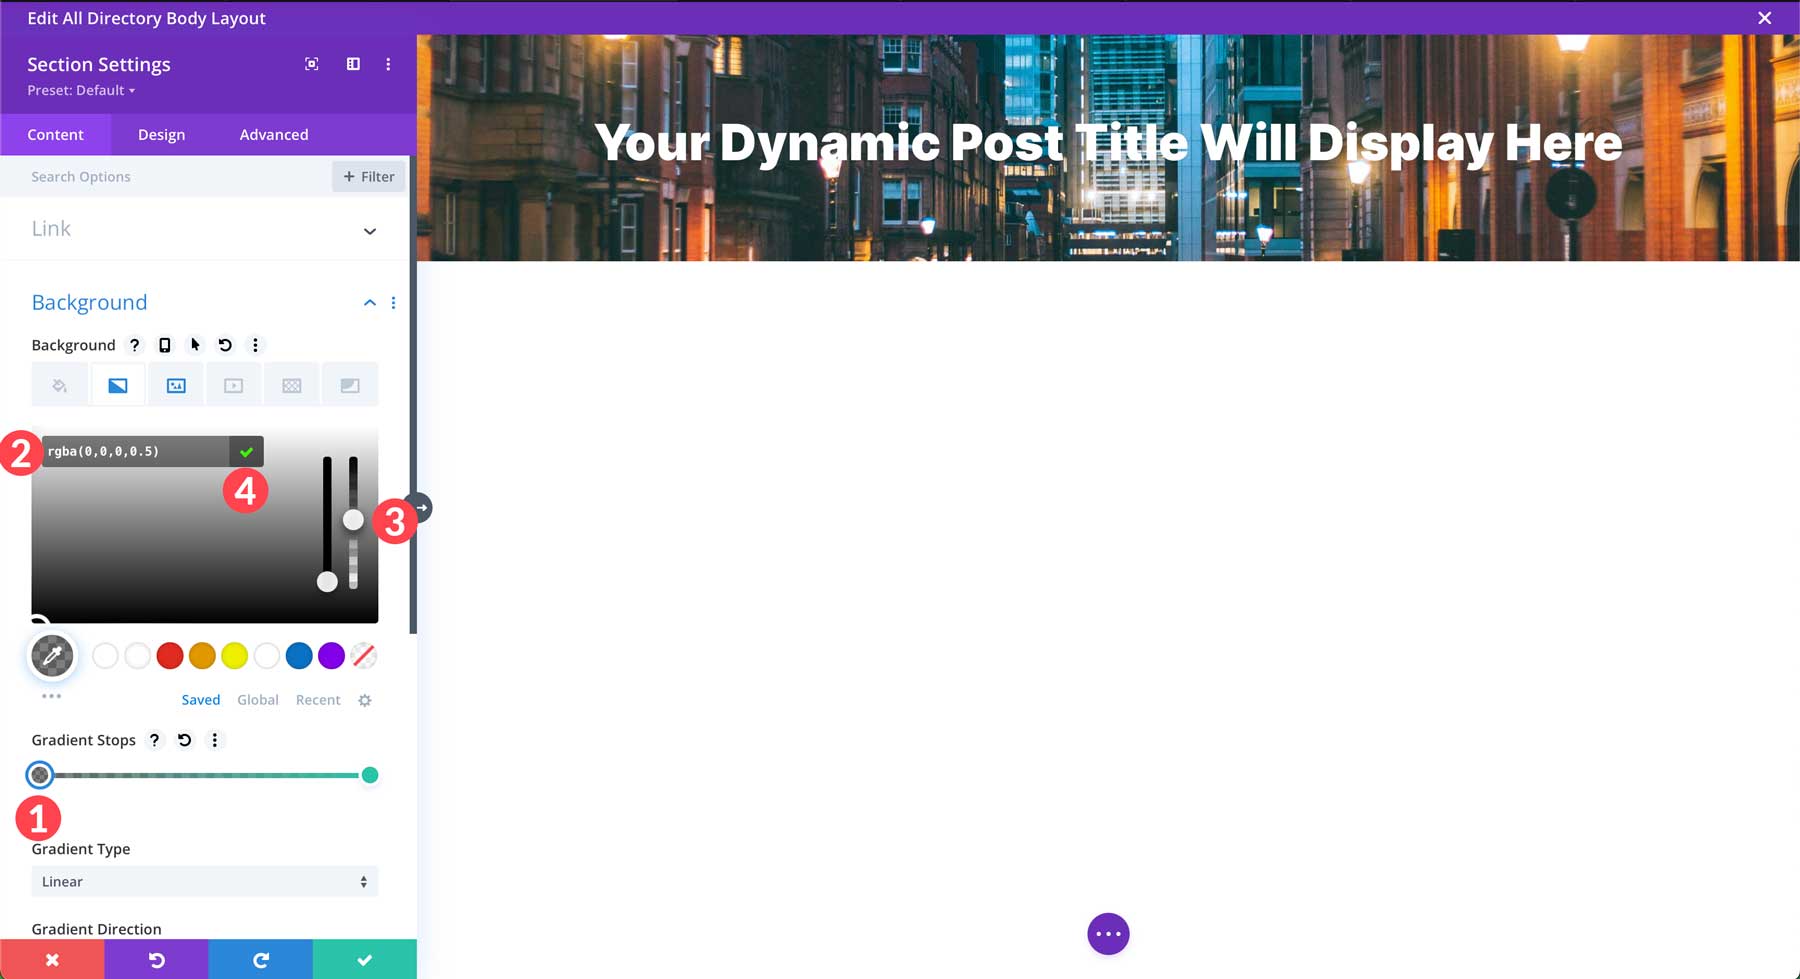
Click on the first color under Gradient Stops to replace the default gradient. In the hex code field, type in #000000. Next, adjust the transparency slider to 50%. Finally, click the green check to set the first color in the gradient.
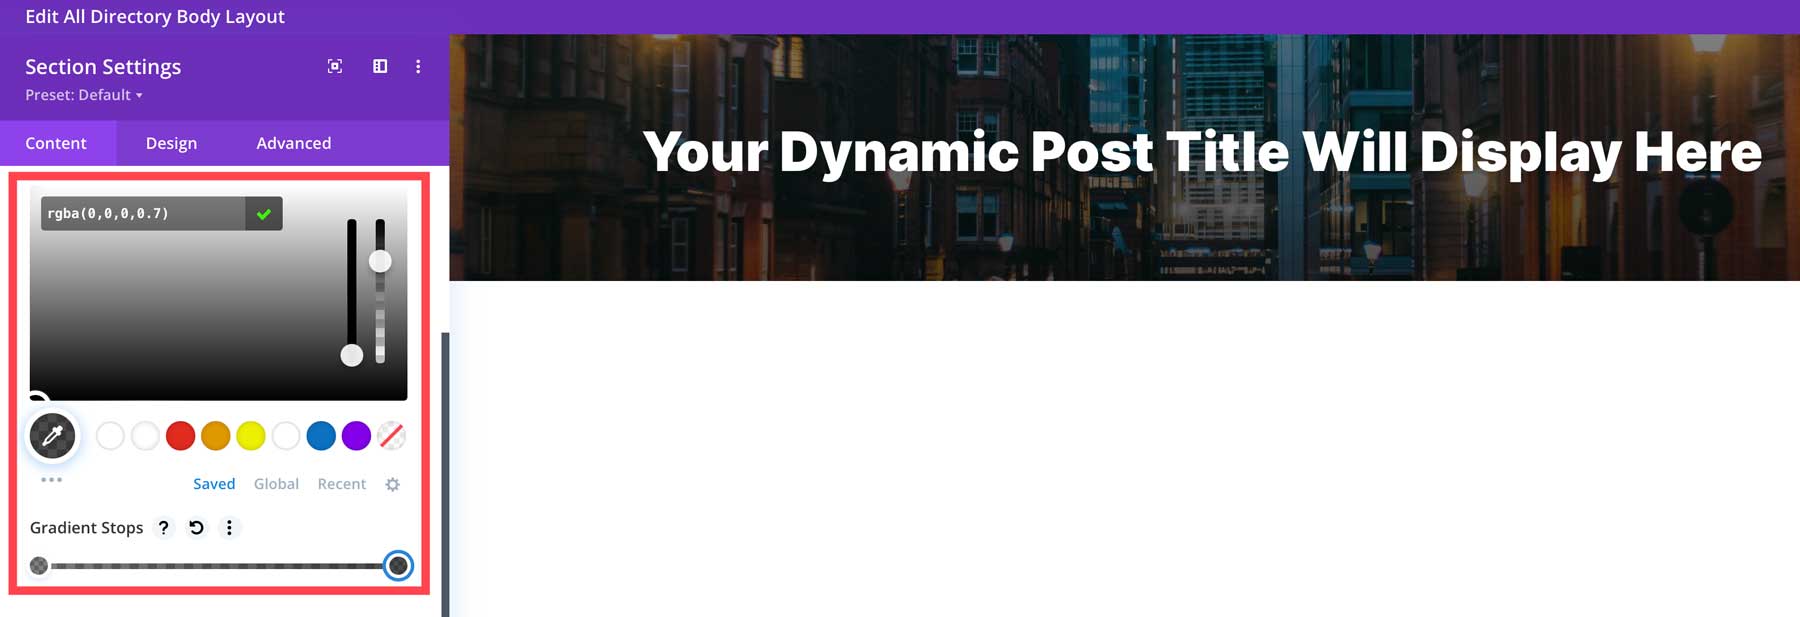
Repeat the steps to edit the second gradient stop. This time, set the transparency level to 70%.
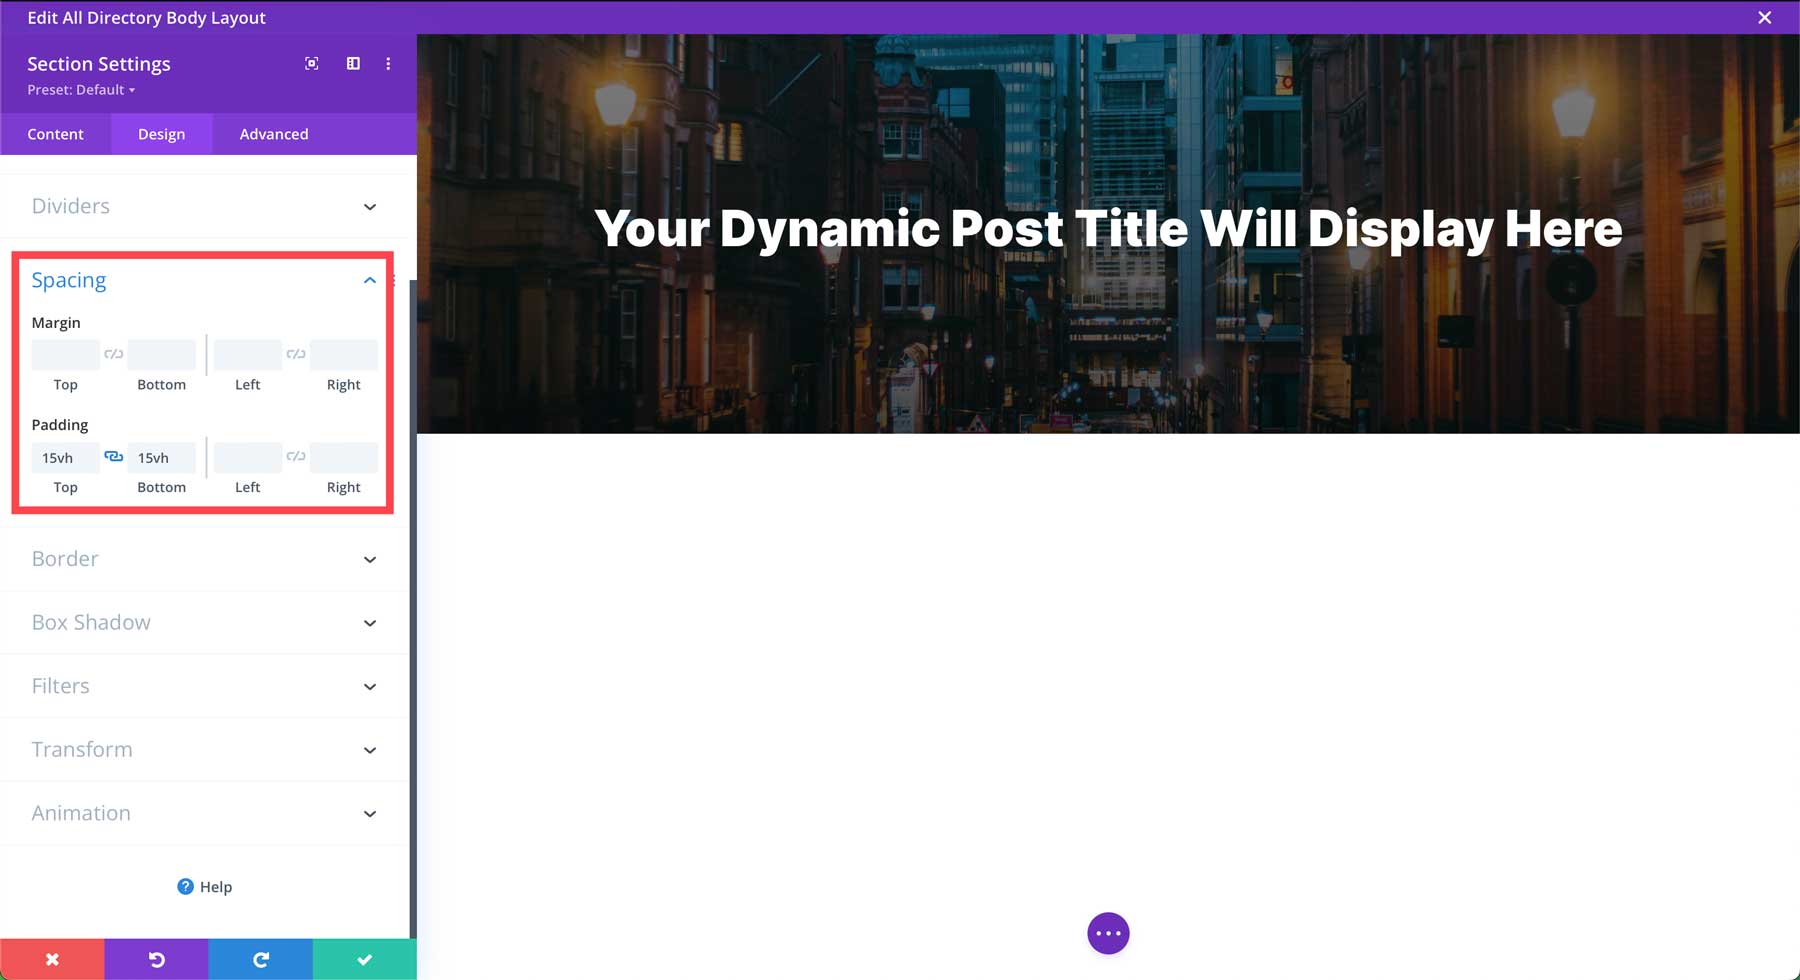
Next, click the Design tab and scroll down to Spacing. Add 15vh to top and bottom padding.
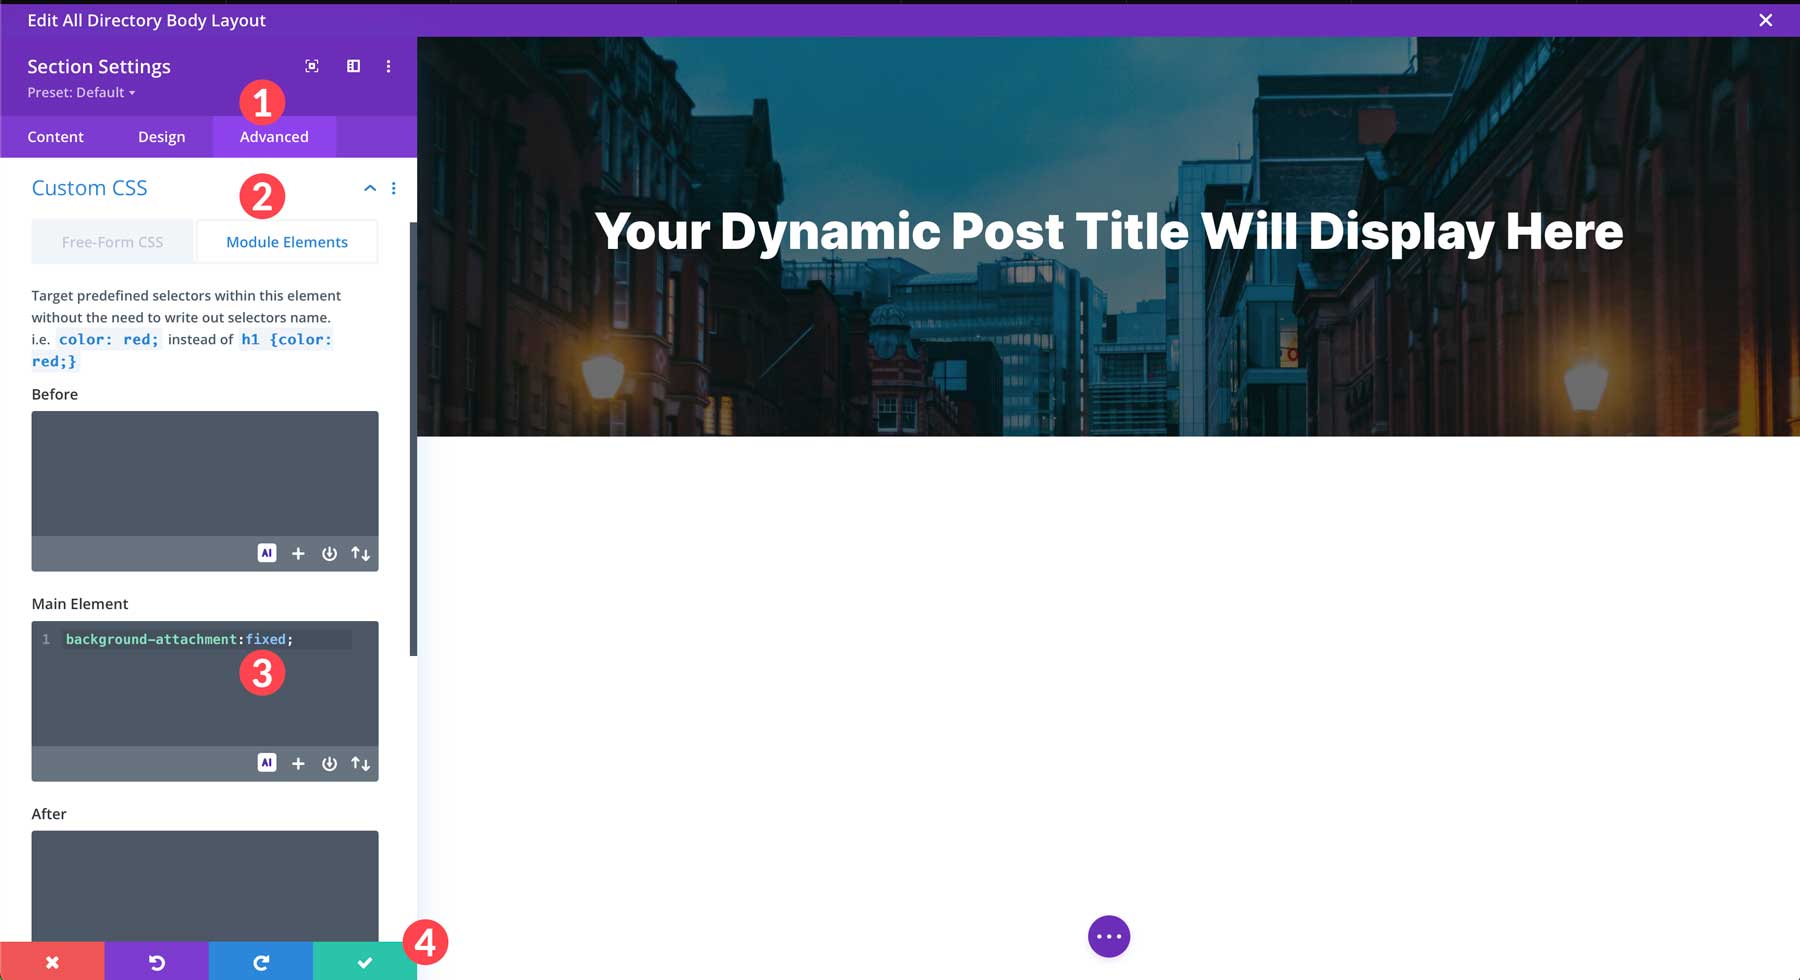
Next, click on the Advanced tab. Expand the Custom CSS dropdown menu and click the module elements tab. Under the main element, enter the following CSS rule:
background-attachment:fixed;
Finally, click the green check button to save the module.
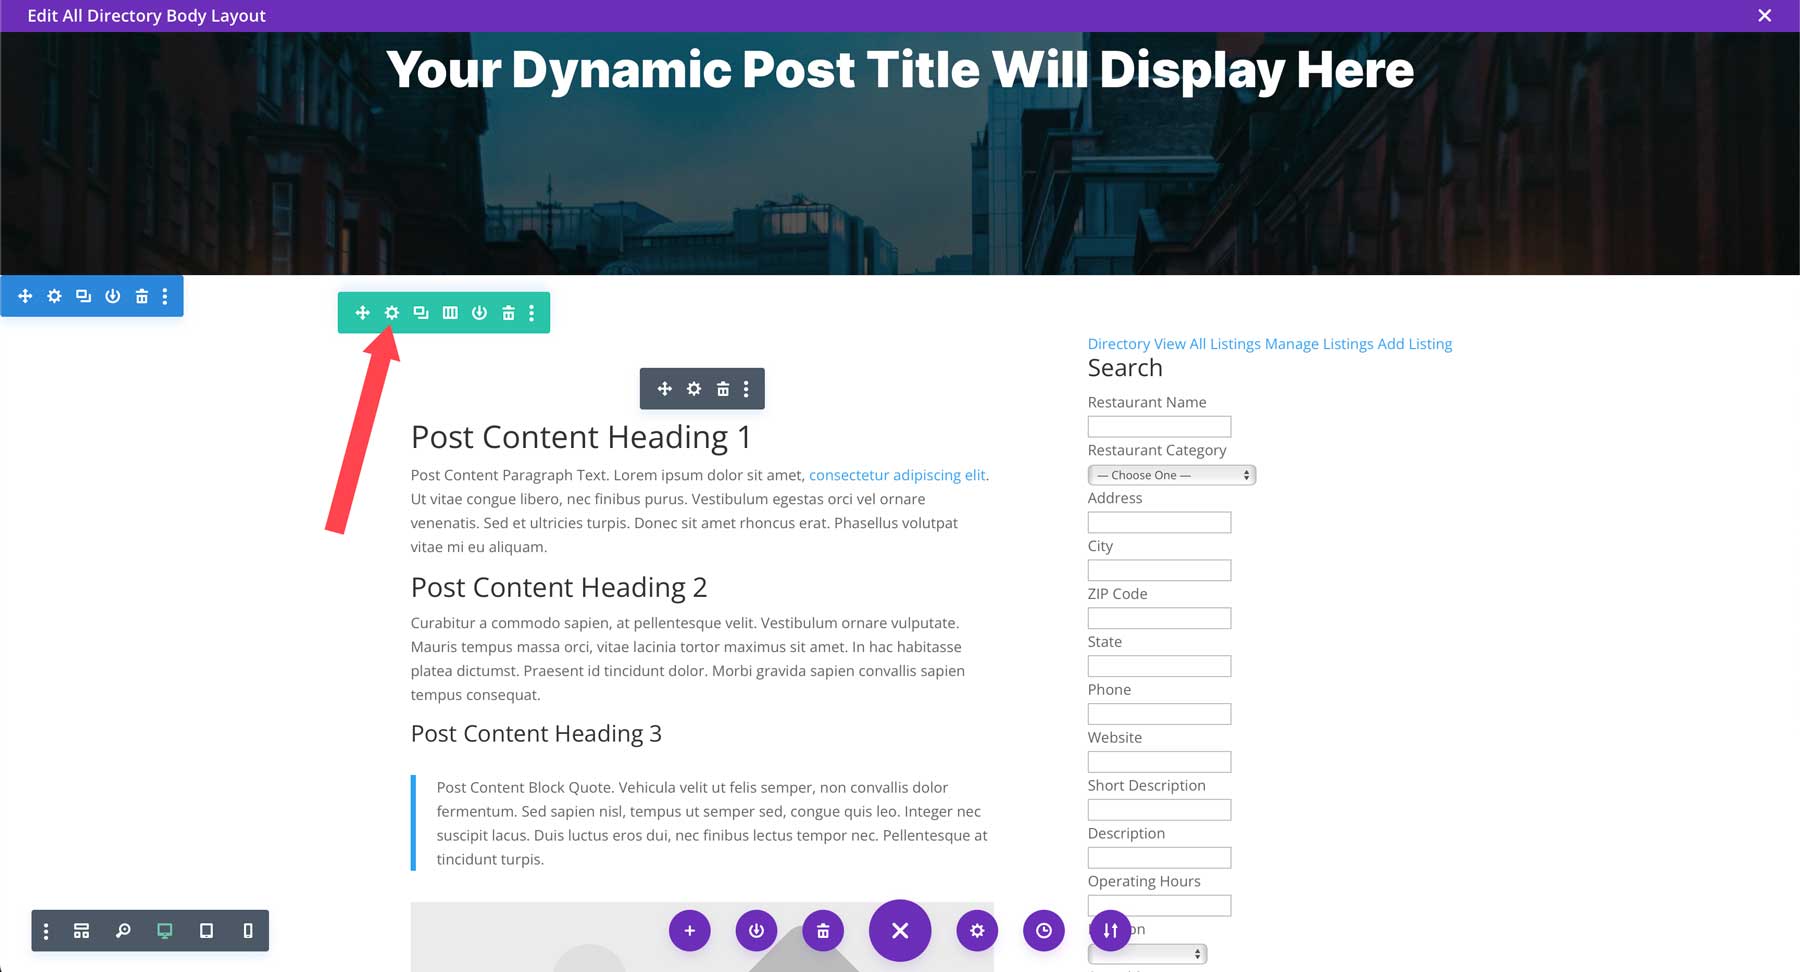
Add a New Section to the Template
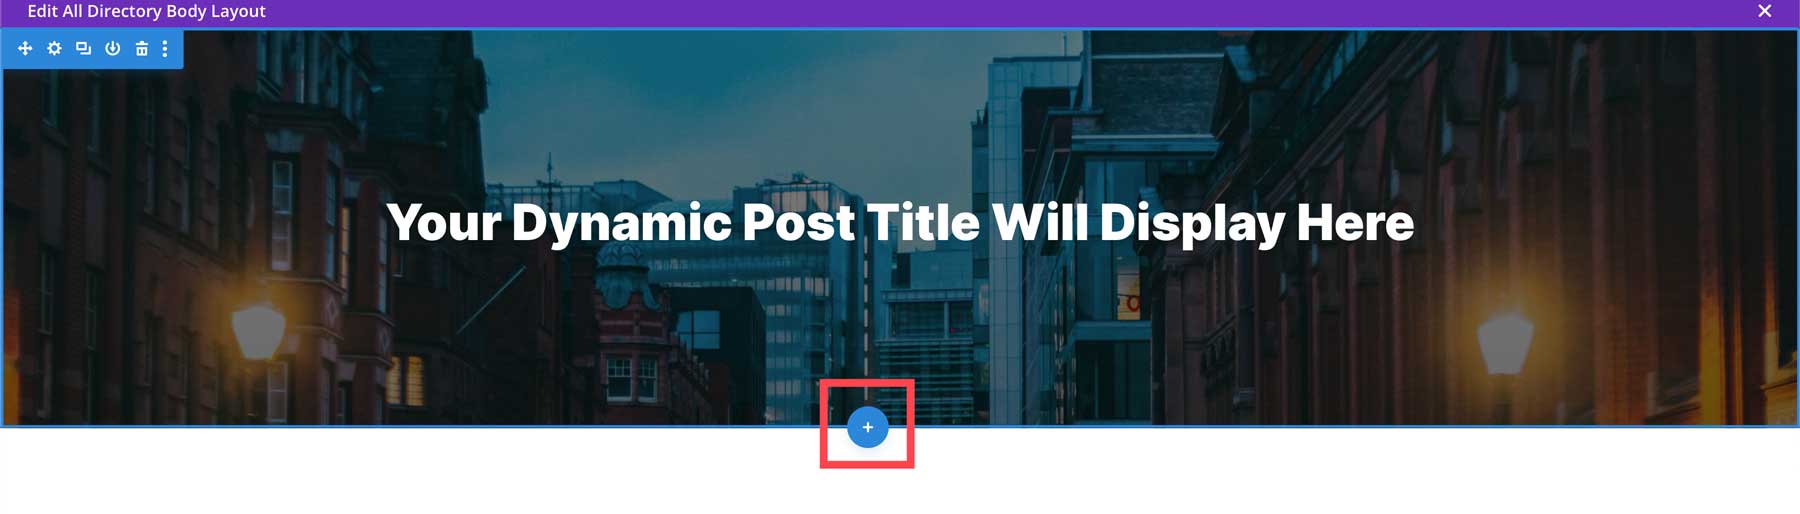
Next, we’ll add a new section to the template to display our listing information. Hover over the page and click the blue + icon to add a new section to the template.
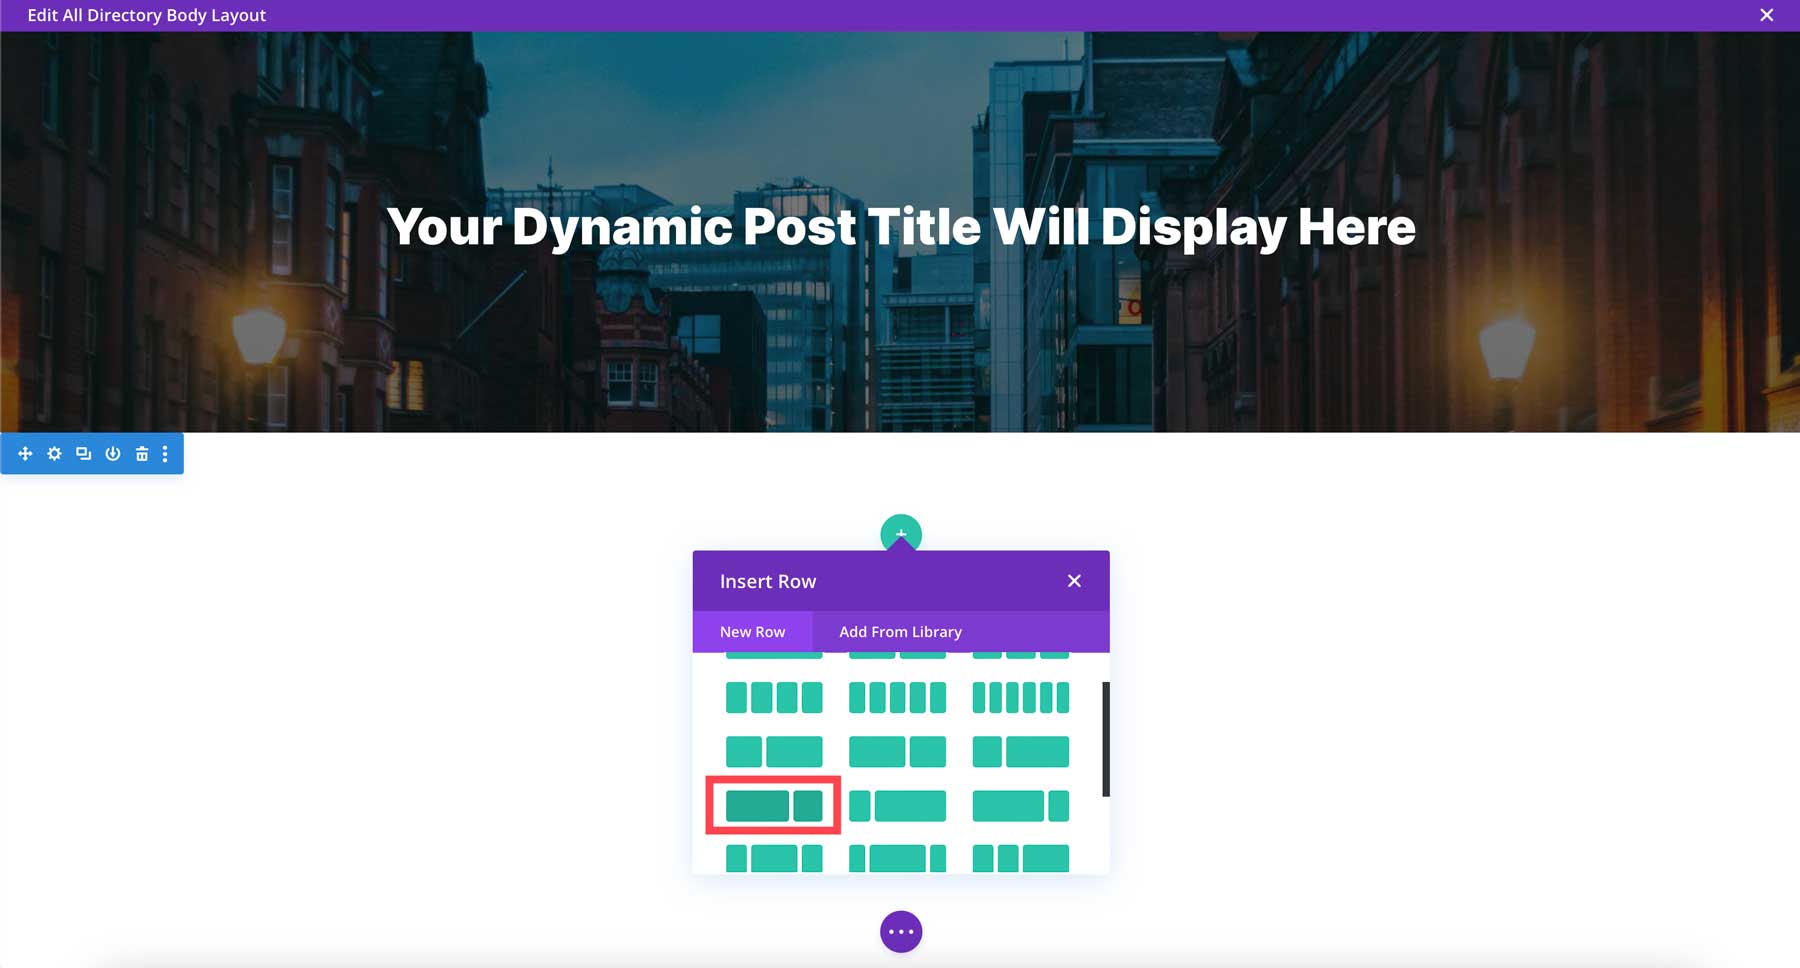
When the popup appears, choose the 2/3 + 1/3 column layout.
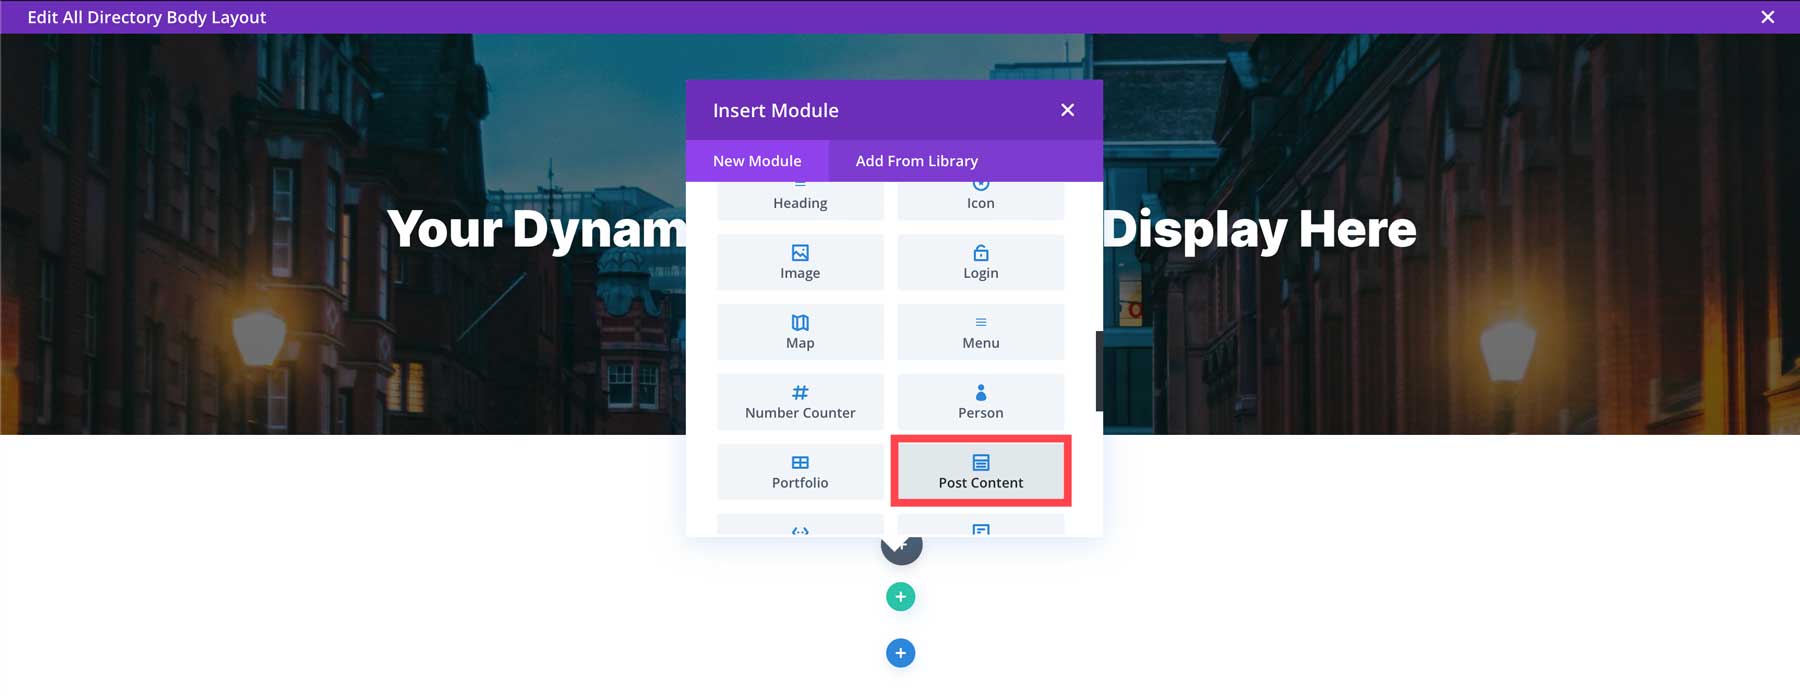
Place a post content module in the first column. This will allow all the content from our form fields to be displayed on each listing page.
Add a code module to the second column.
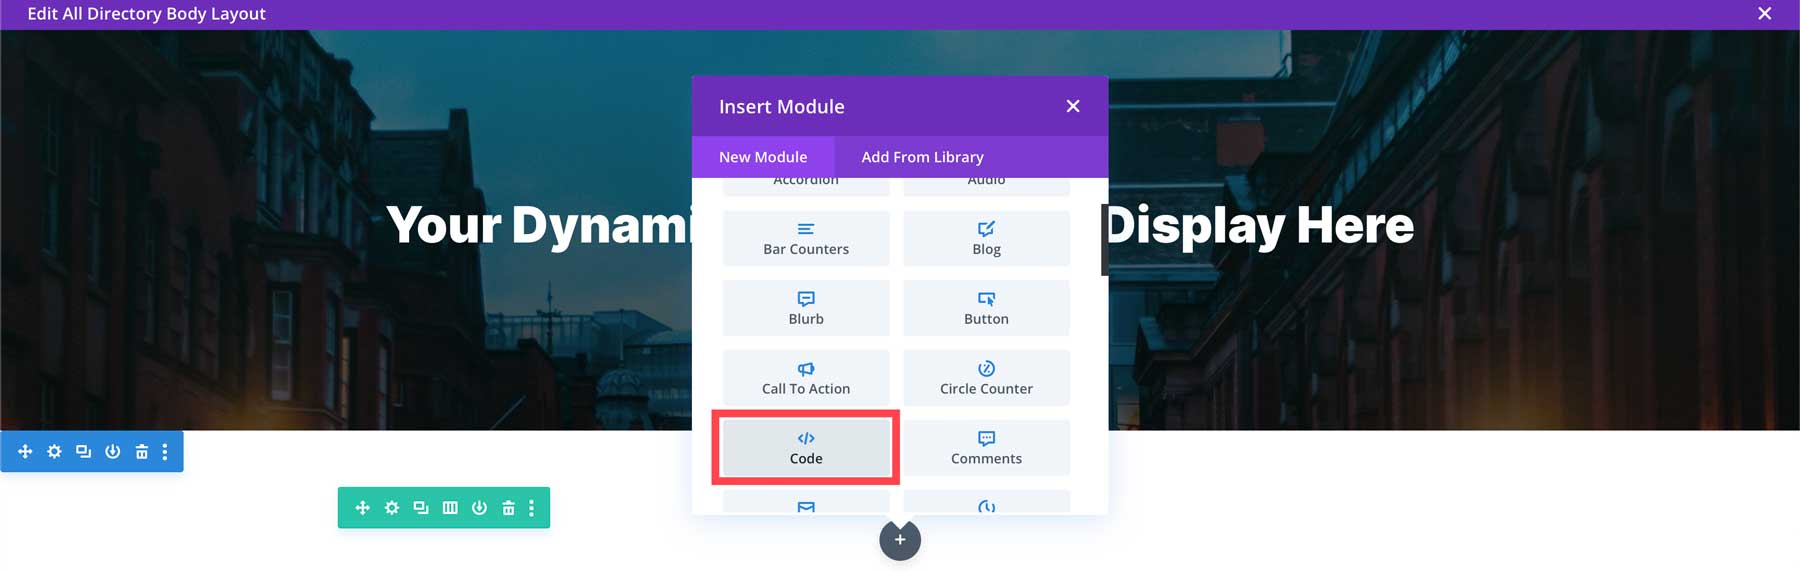
When the module settings open, add the following shortcode:
[businessdirectory-search]
This will add the Business Directory search bar to the page, allowing users to browse listings. Save the module to continue.
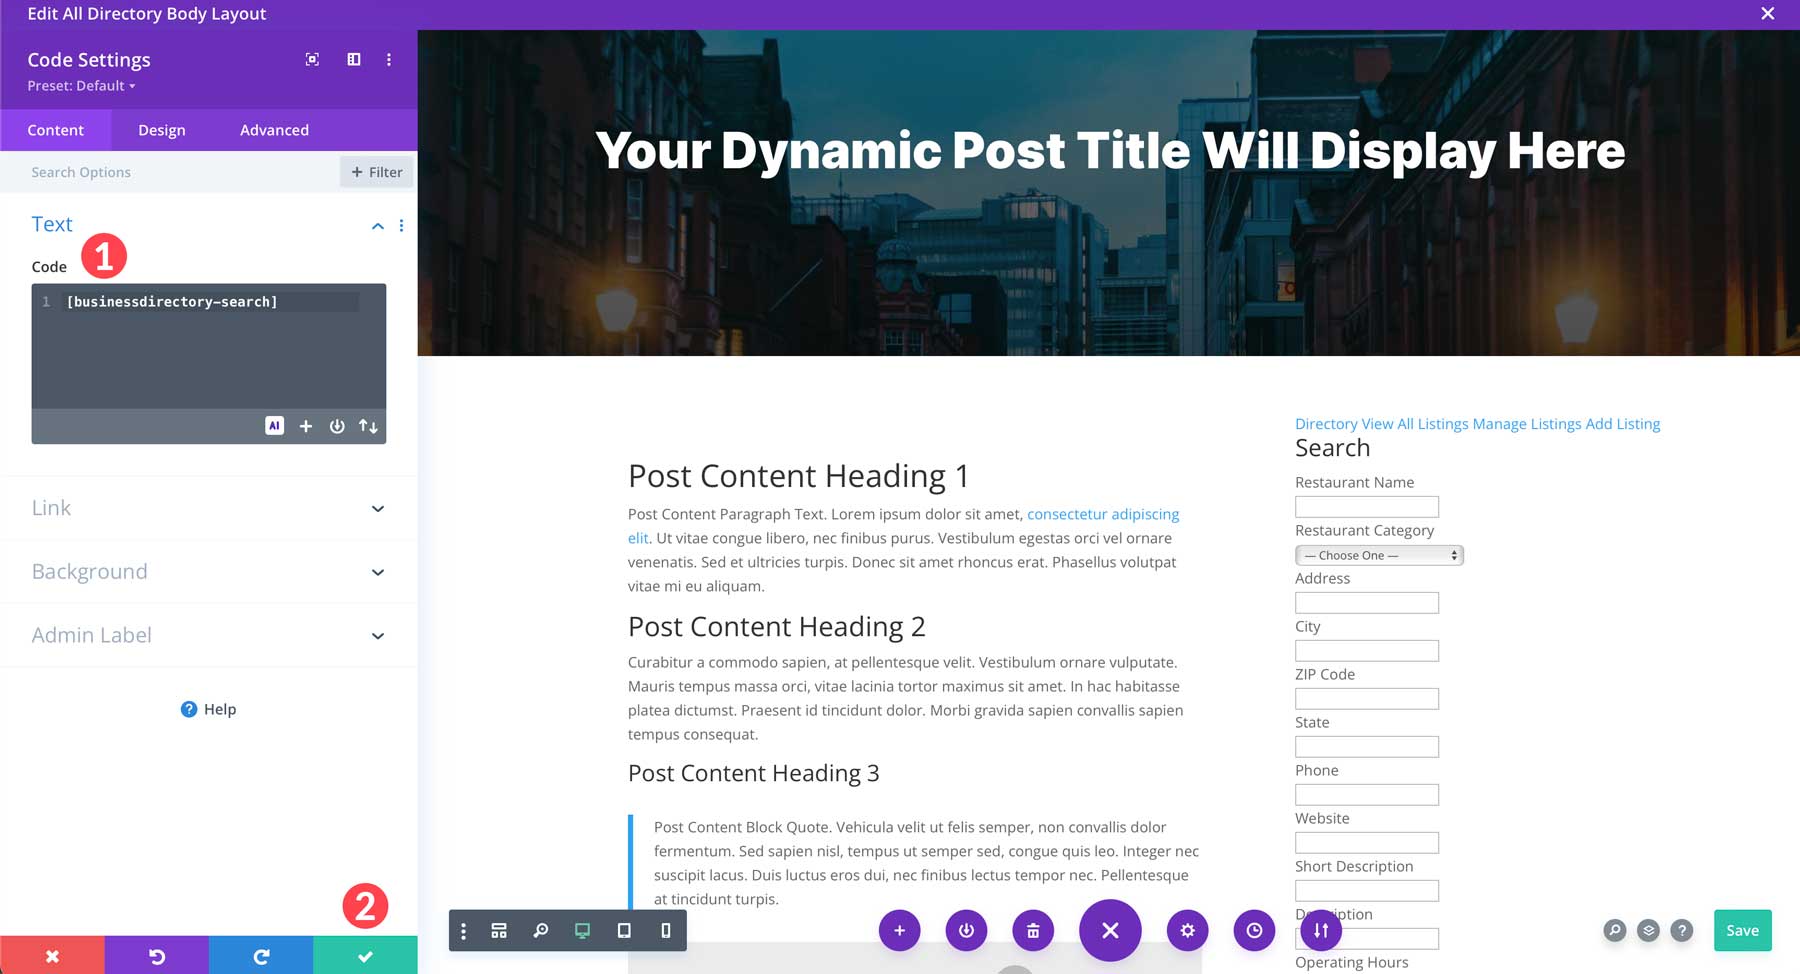
Next, add a new code module underneath the current one in the second column. This time, use the following shortcode to display a map of the current listing:
[businessdirectory-map]
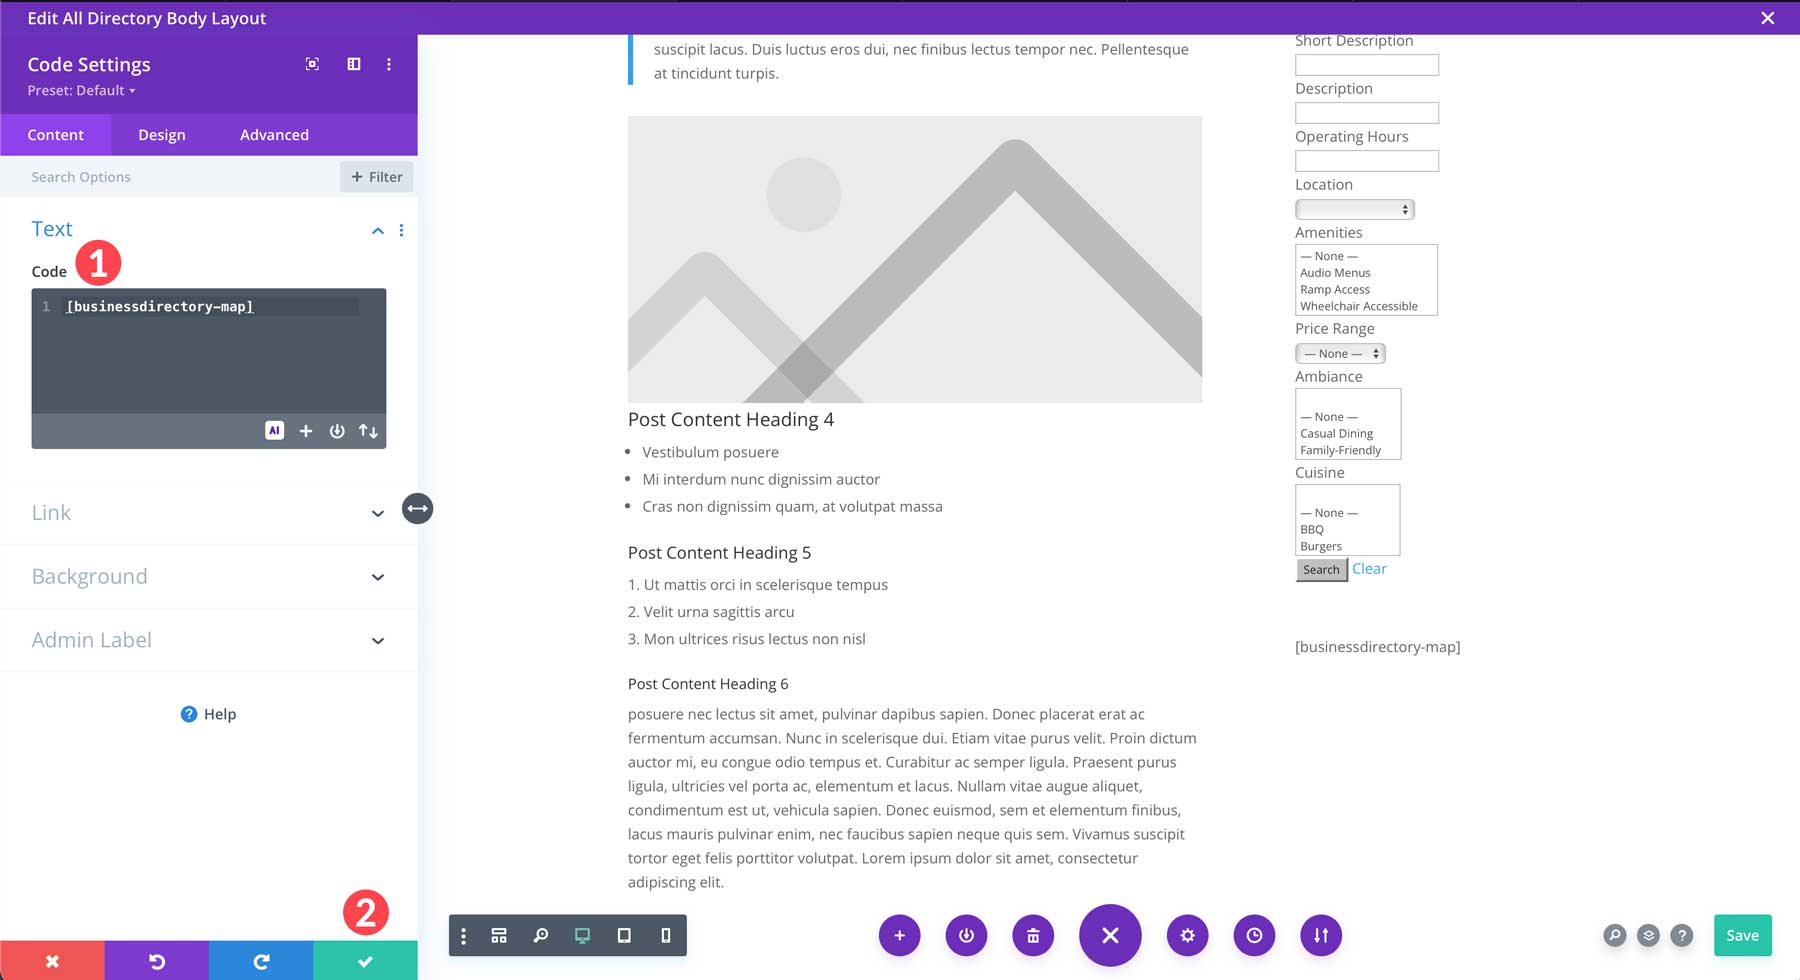
Style the Row
Now that the content is placed into our template, we must give it some styling. Hover over the row to reveal the green borer and click the settings icon.
Click the settings icon to edit the second column.
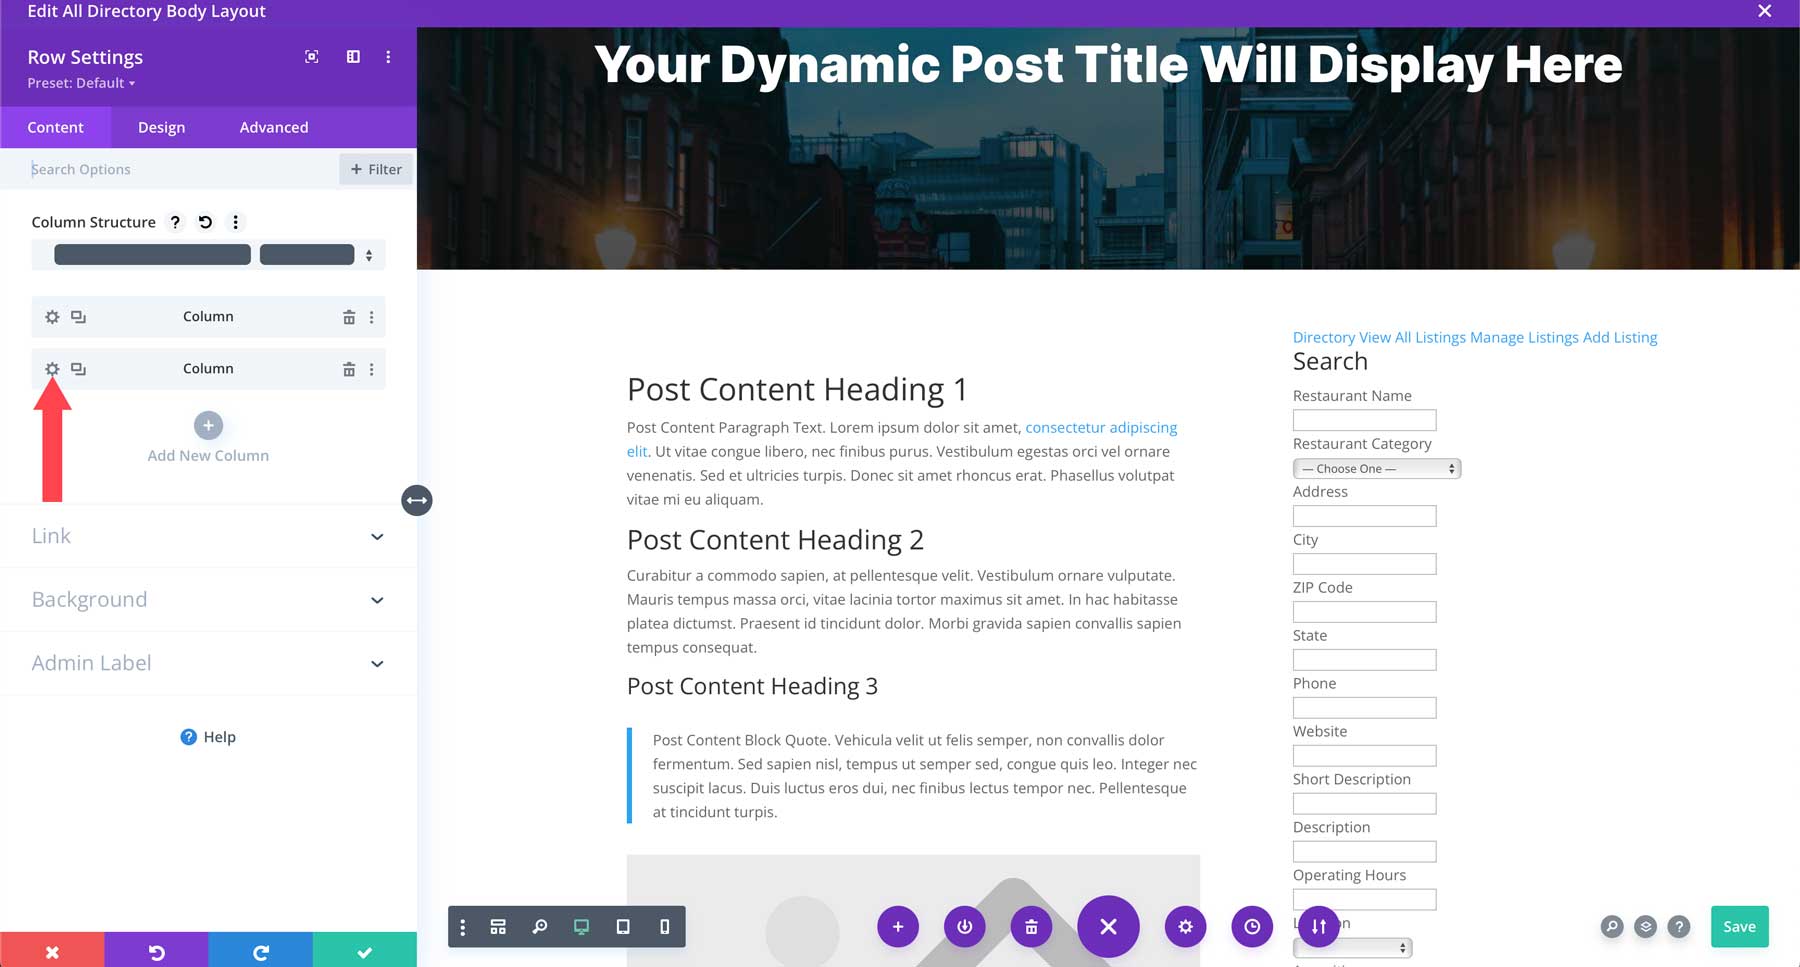
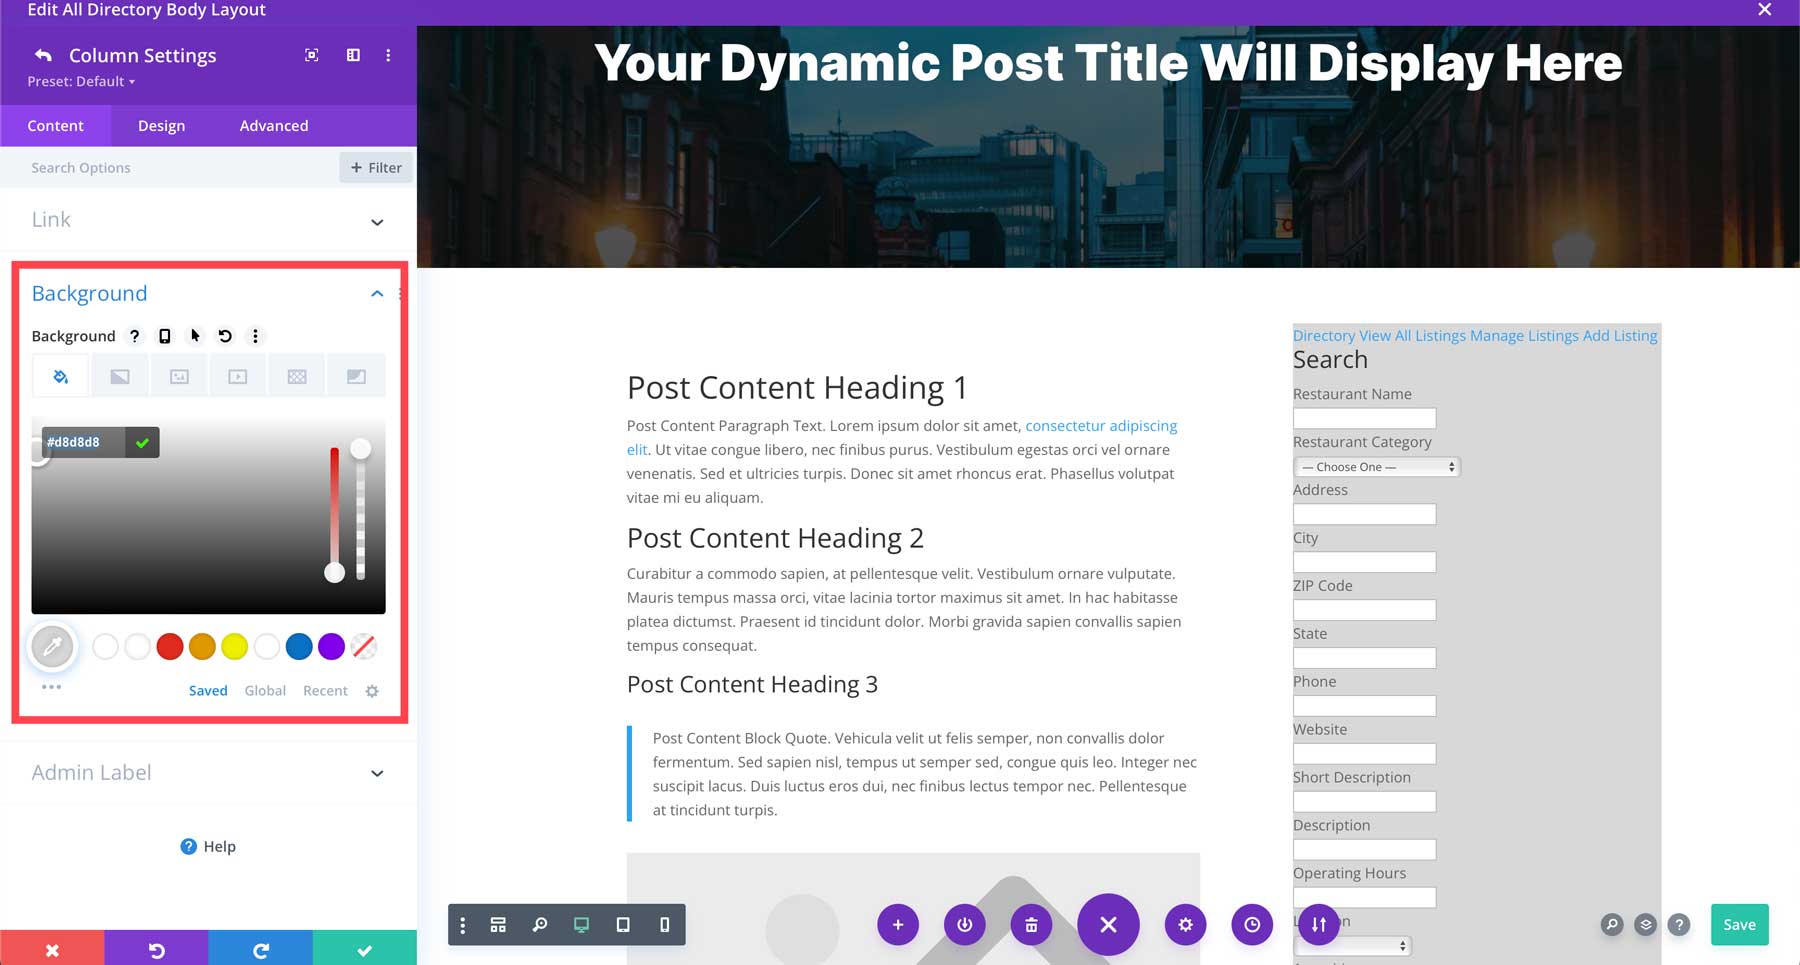
Click to open the background settings. Add #d8d8d8 as the background color.
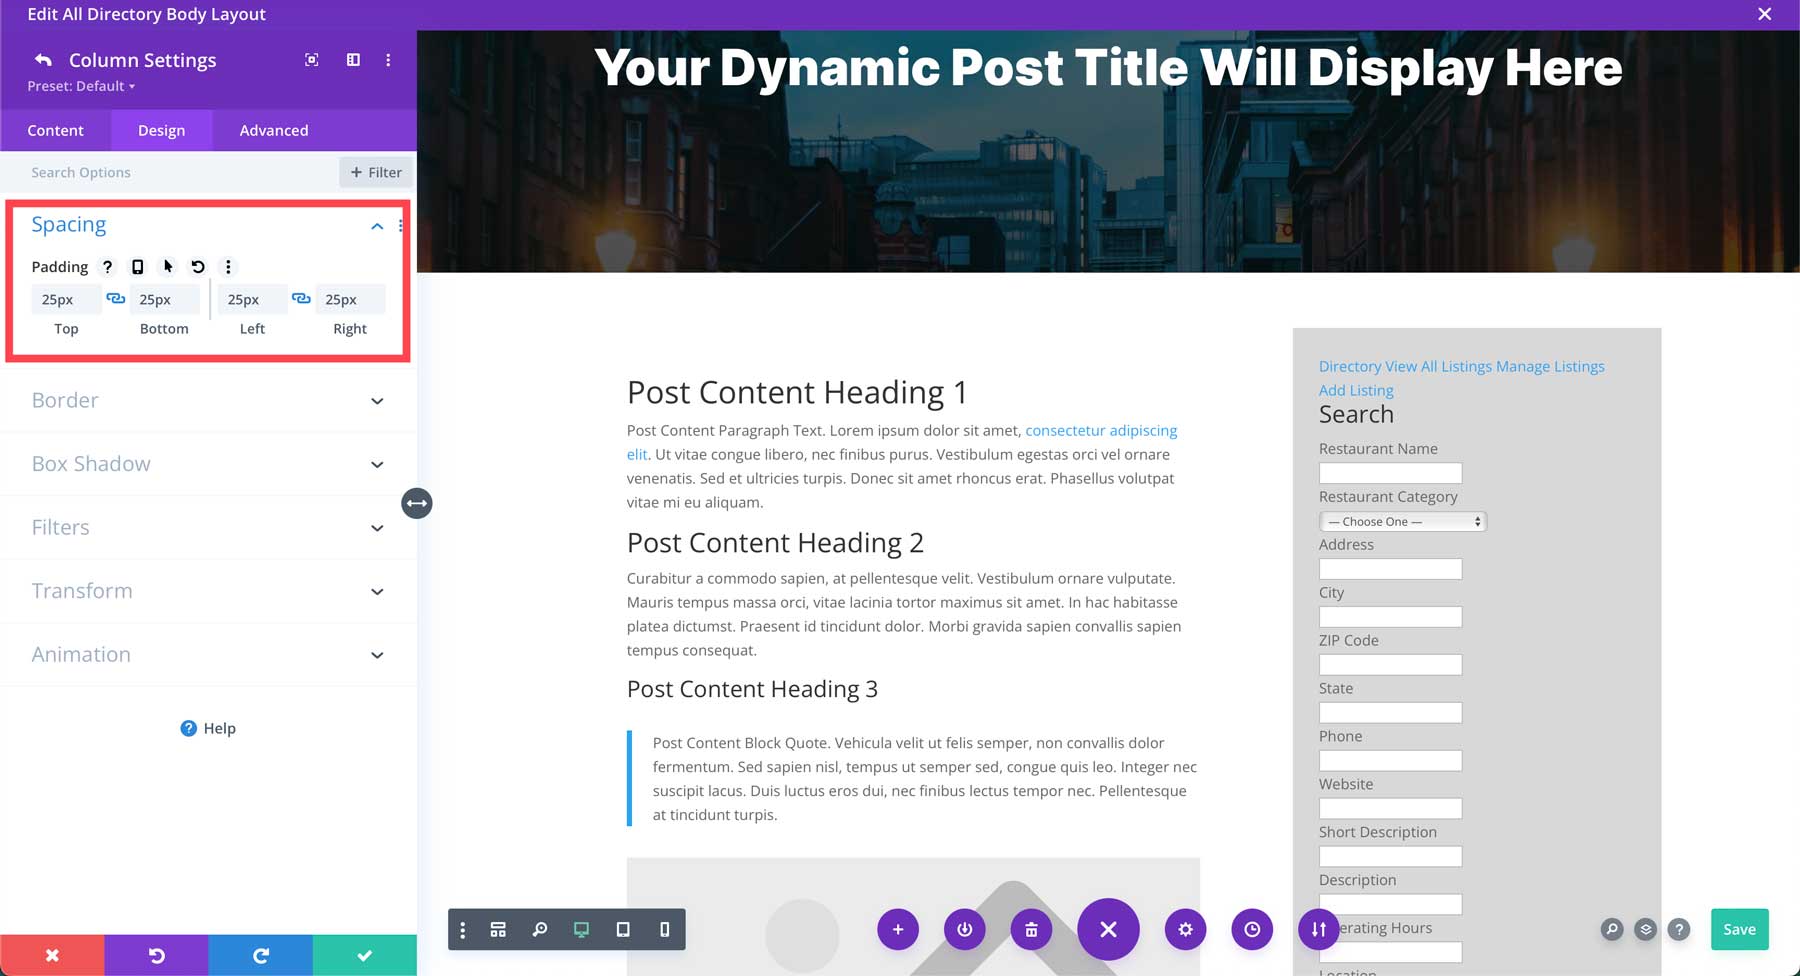
Click the design tab and give the column 25px padding on all sides. Save the module to continue.
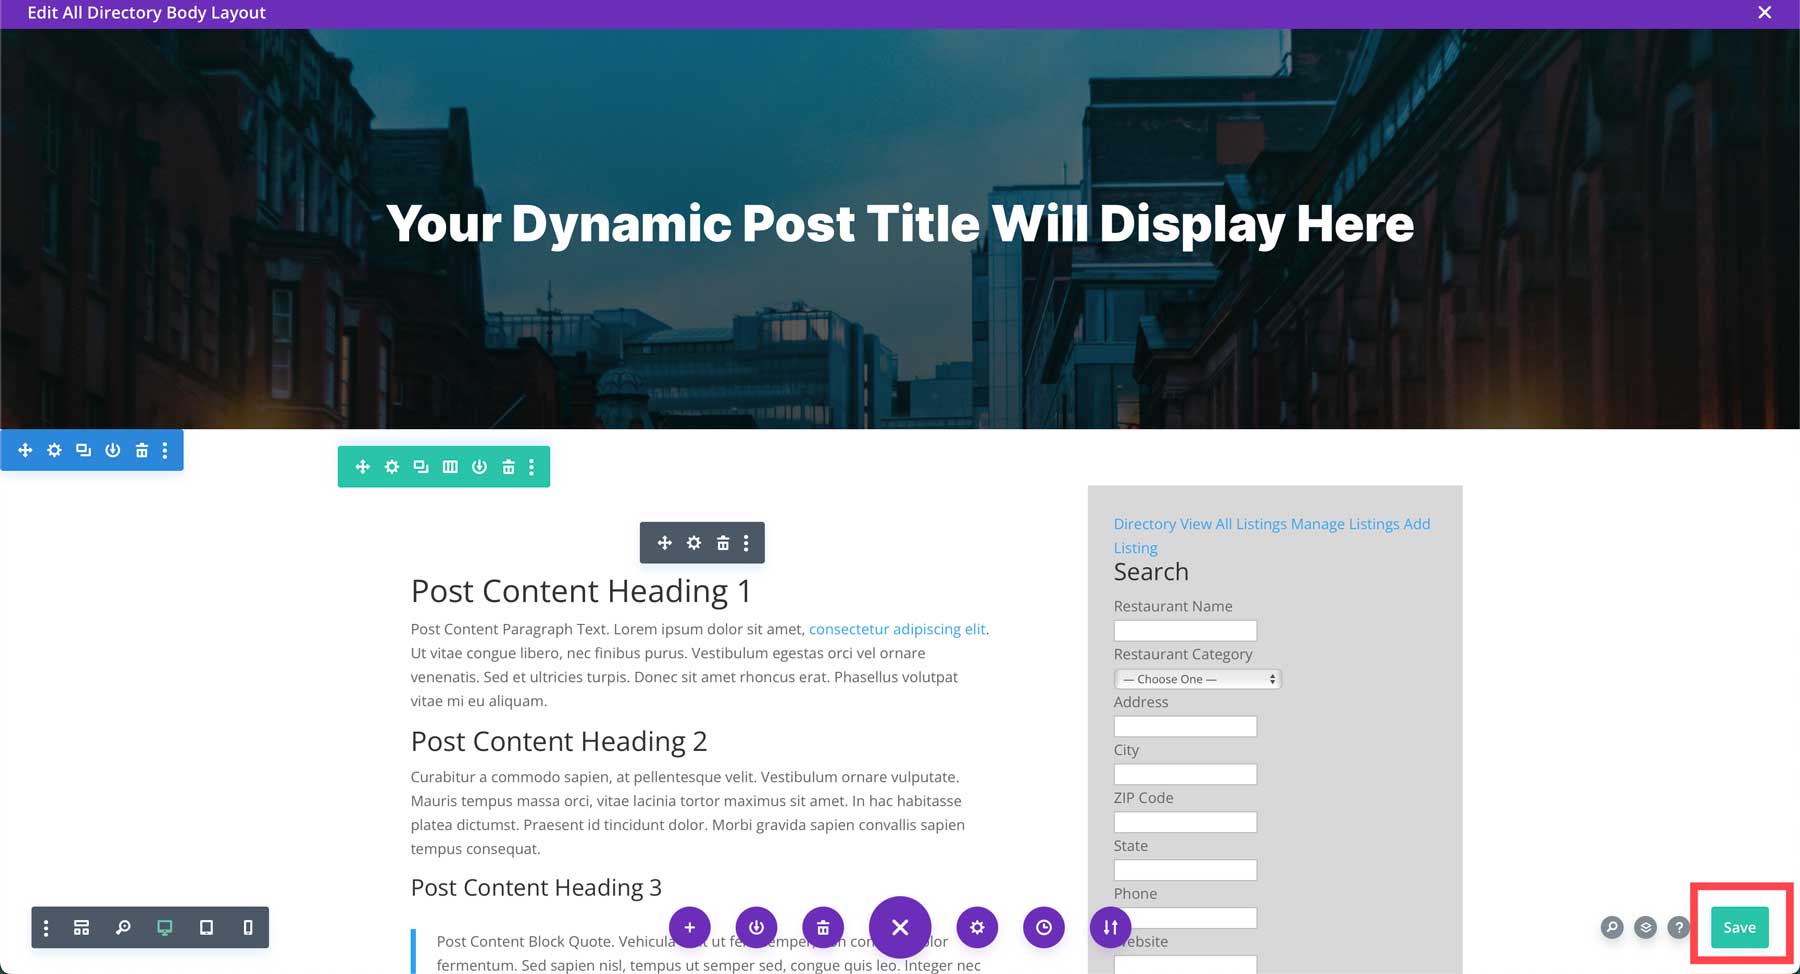
Finally, click the purple ellipsis menu at the bottom center of the screen to reveal the template settings menu.
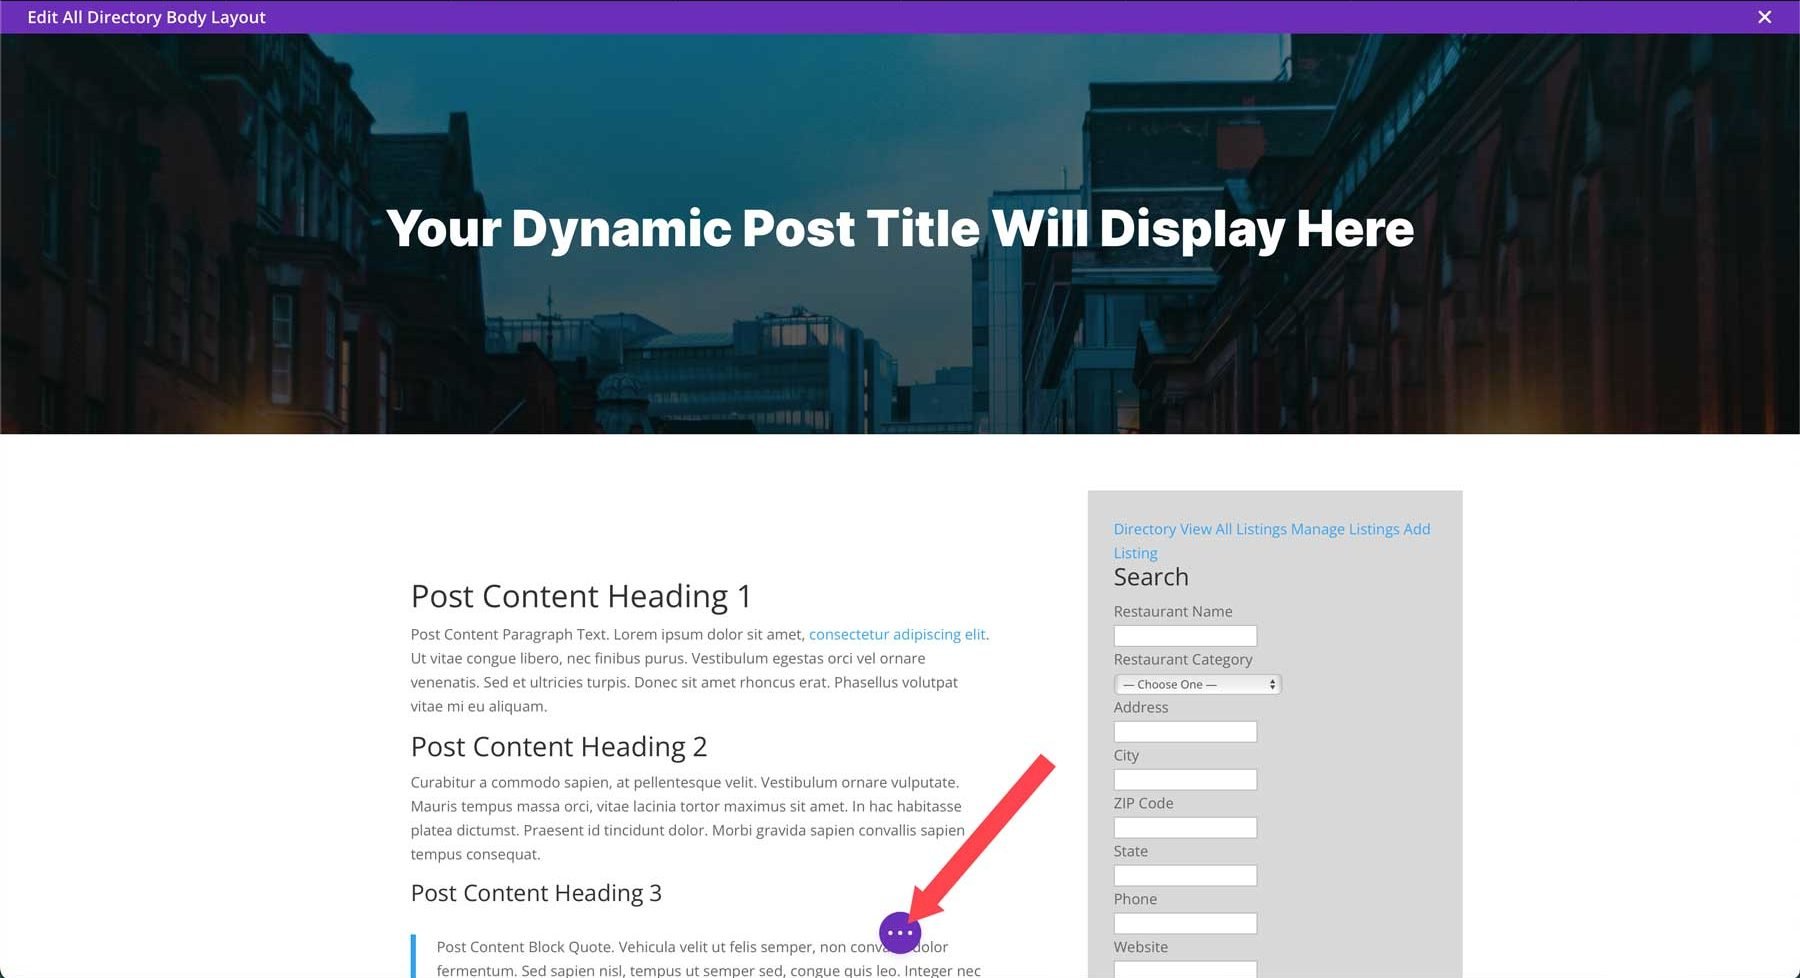
Save the template by clicking the green save button.
Style the Listings Page with CSS
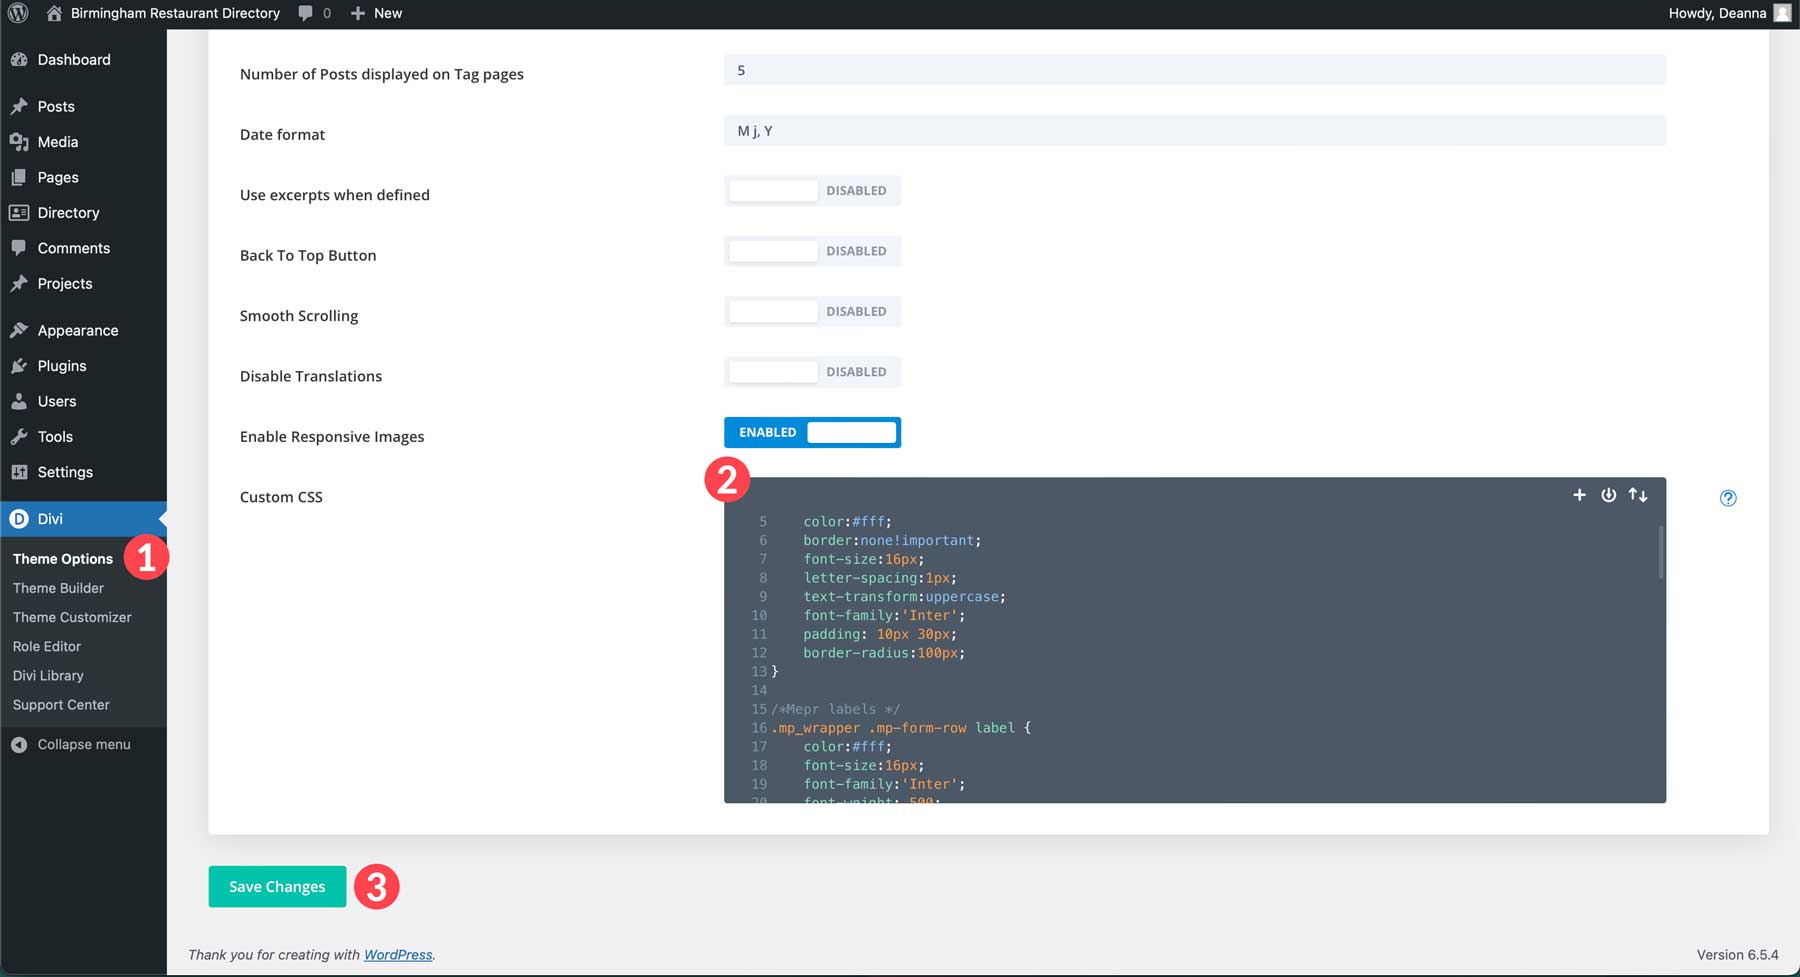
Our template has been created, but we still have some work. Looking at the listing we created, you’ll notice that the content is all present but needs some styling. Thankfully, a little CSS can make a world of difference. You can add CSS to Divi by navigating to Divi > Theme Options > Custom CSS.
Use this CSS to style our listings page’s links, buttons, and text.
/* Business Directory Listing Page Styles */

/*hide contact form */
.wpbdp-listing-contact-form {
	display:none!important;
}
/* hide comments */
#comment-wrap {
	visibility:hidden!important;
}

/* add listing button */
.wpbdp-main-links-tiny #wpbdp-bar-submit-listing-button {
 color:#fff!important;
	background-color:#000!important;
	border:none!important;
}

/* field labels */
.field-value label, .field-value .field-label {
 font-size:18px;
	font-weight:bold;
}

/* field content */
.field-value .value {
 display: block;
	font-size:16px;
	color:#666666;
	margin-top:5px;
}

/* form fields */

.wpbdp-search-page .wpbdp-form-field {
 grid-column: span 2!important;
}

.wpbdp-form-field-association-category .select2 {
 width: 100%!important;
}

/* directory buttons */

.wpbdp-main-links-tiny .button, .wpbdp-main-links-tiny .wpbdp-link {
 color:#fff!important;
	 text-transform:uppercase;
	font-weight:600!important;
	background-color:#000!important;
	padding:10px!important;
	font-size:16px;
 margin: 0 0 4px;
 width: 100%;
 text-align: center;
}

.wpbdp-search-page h2 {
	font-weight:900;
	margin:30px 0;
}
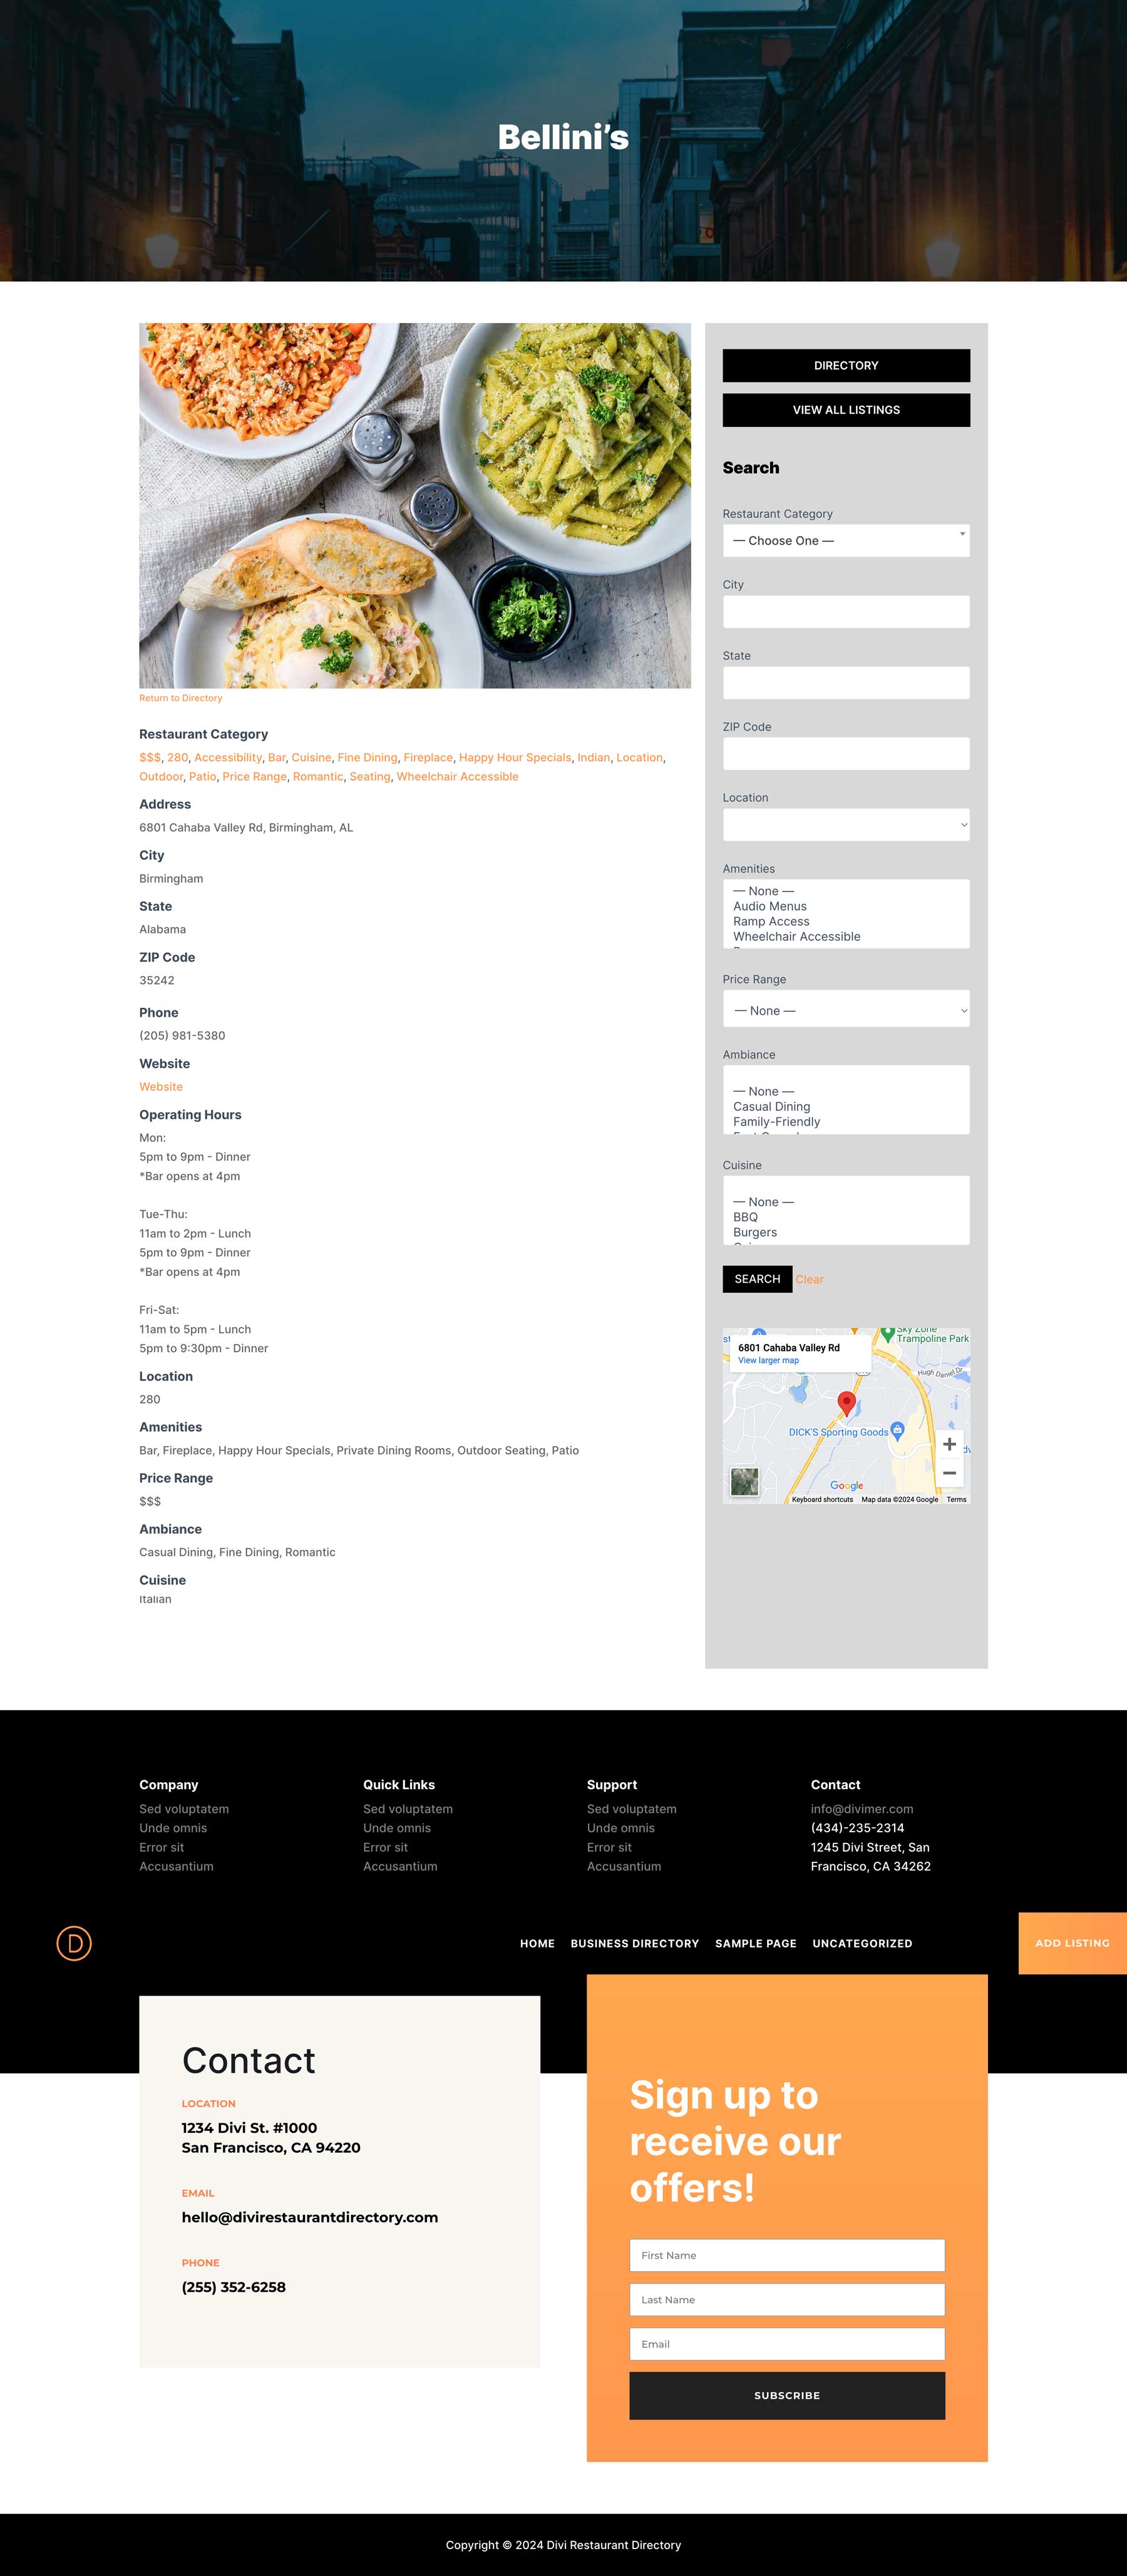
With the CSS in place, our listing page looks a lot better.
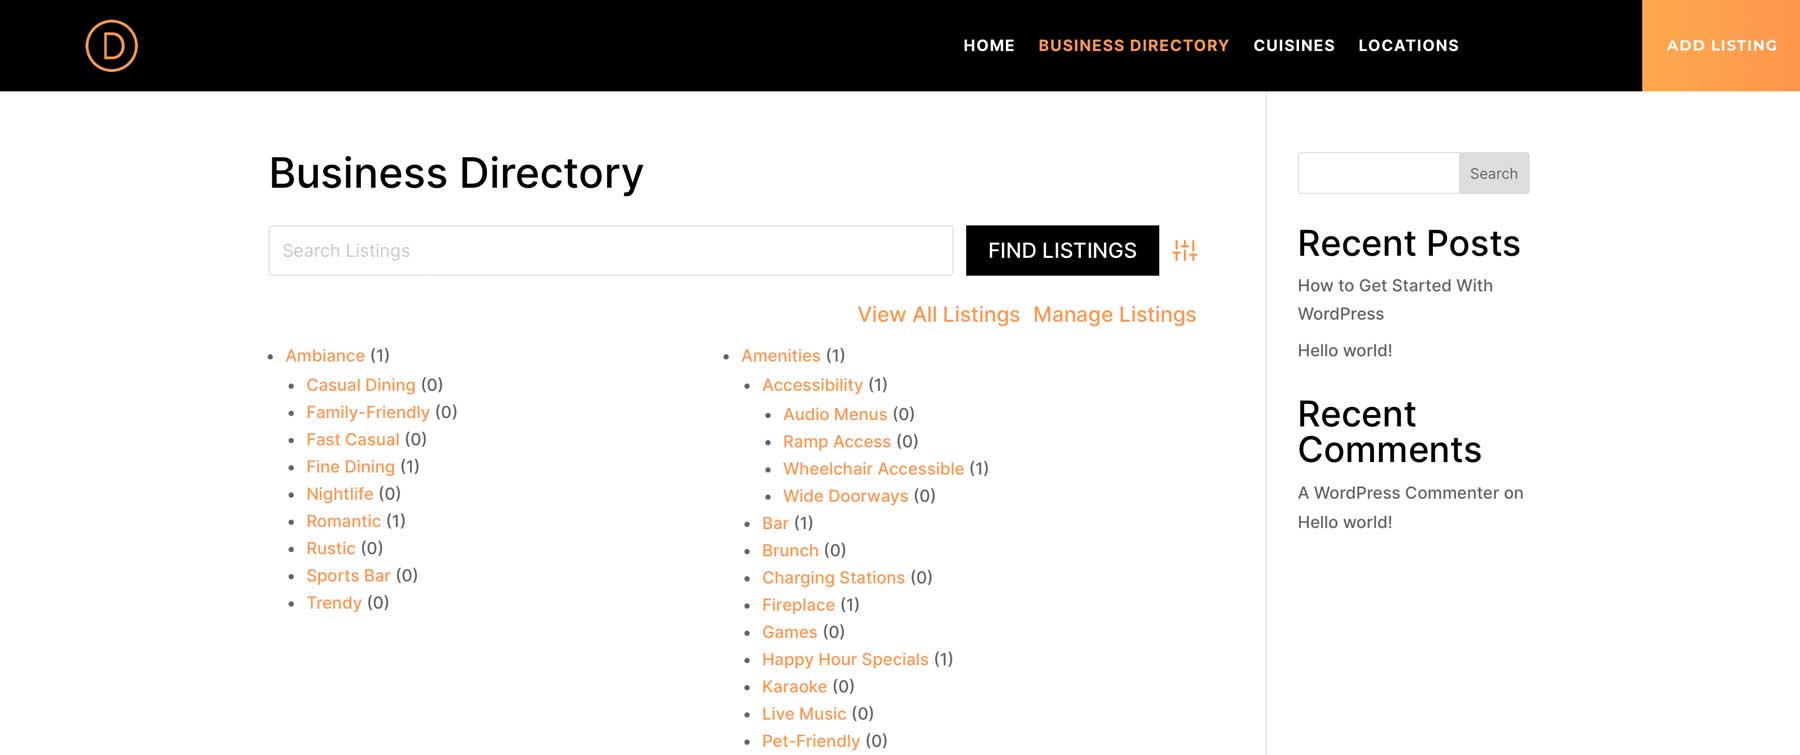
Step 6: Style the Directory Page
The Business Directory plugin uses a shortcode system to display its content. The main directory page uses the [businessdirectory] shortcode, which means as long as you utilize the shortcode within the page, you can design the surrounding content any way you’d like with the Divi Builder. By default, the directory page will look similar to this:
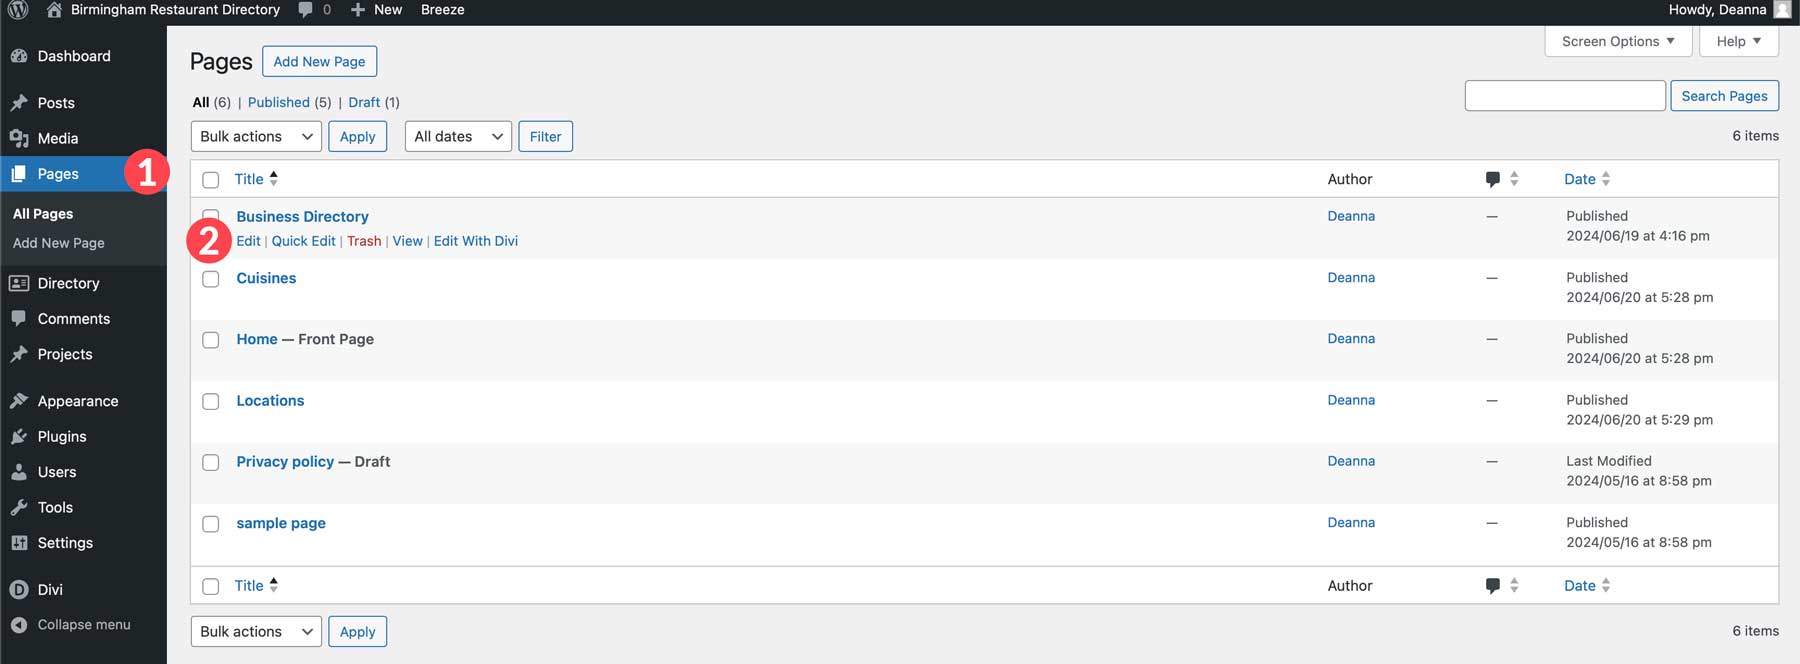
The good news is that there are multiple ways to style this page using Divi. We can build a page from scratch, use a premade layout, or use Divi AI. Navigate to Pages, then locate the business directory page. Click edit to begin.
What is Divi AI?
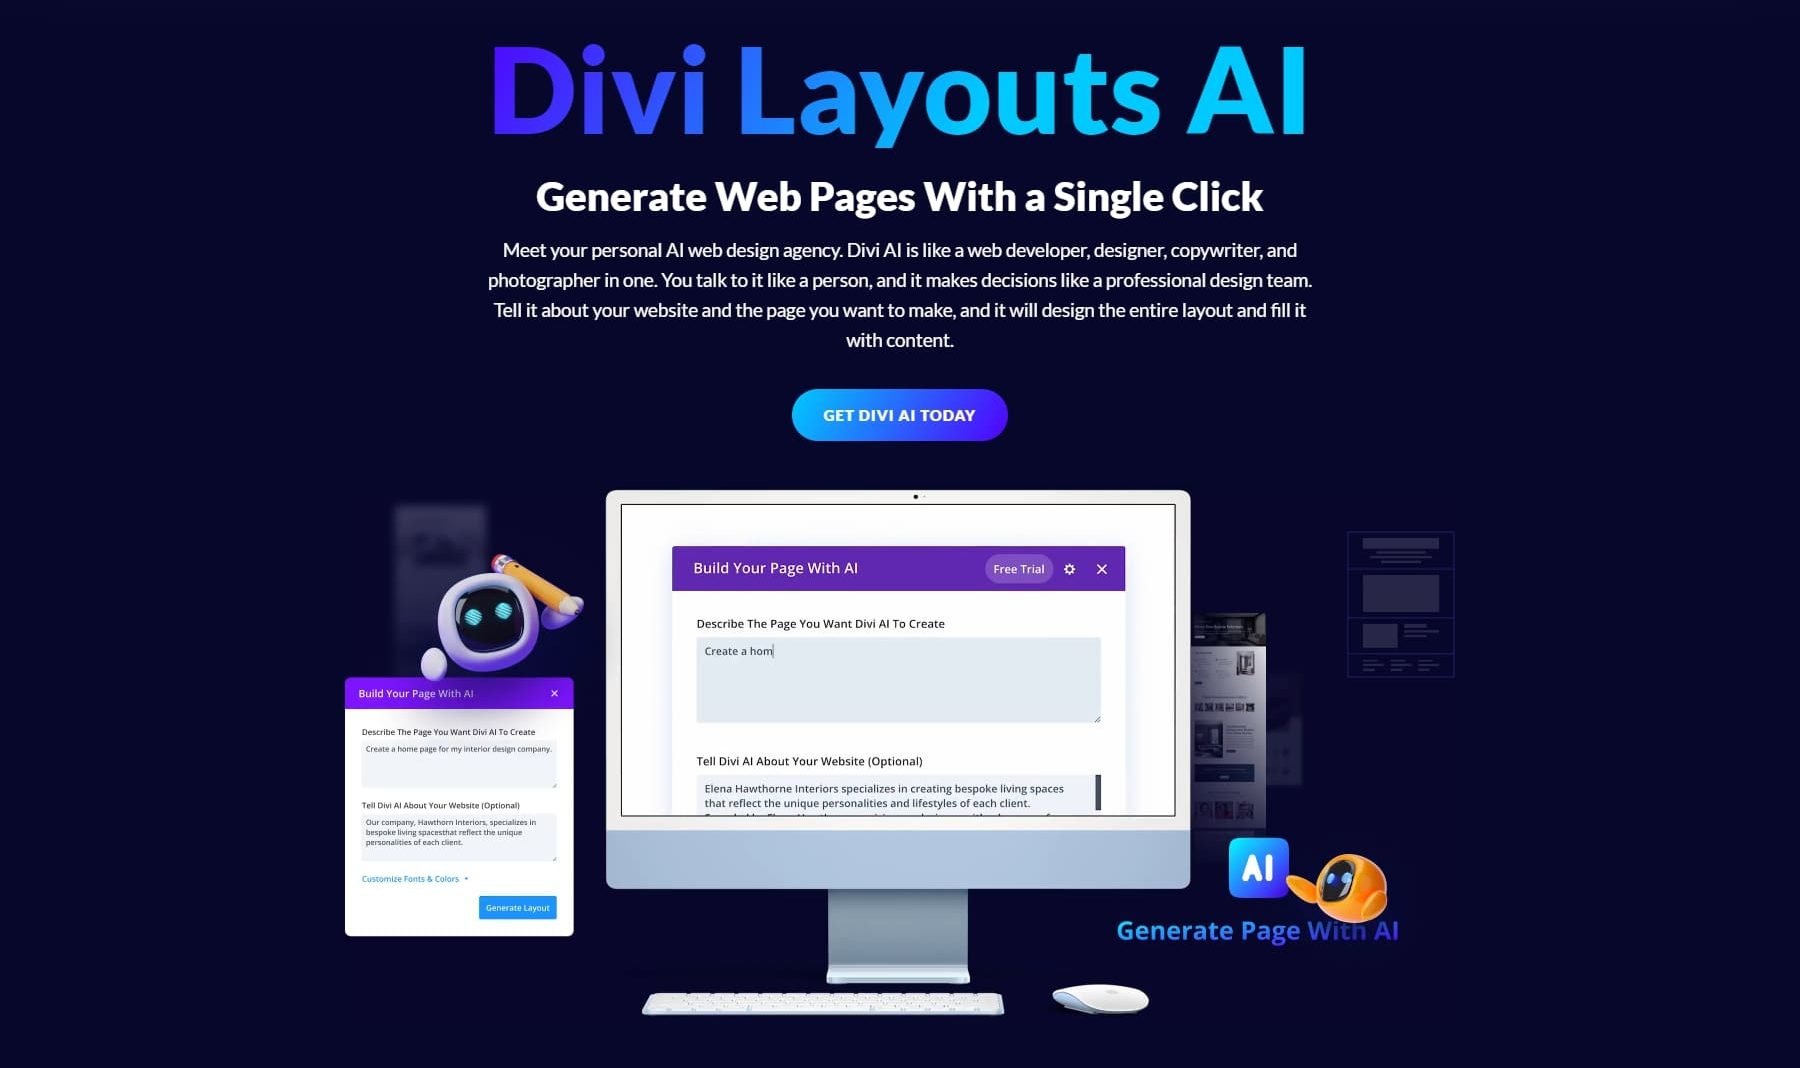
Divi AI is a relatively new and exciting addition to the Divi ecosystem. It provides artificial intelligence (AI) tools to write on-brand website copy, create stunning images, craft code snippets, or generate entire web pages with a text prompt. Divi AI is a great way to save time, break through creative blocks, and quickly enhance your website’s appeal. All Divi users can try Divi AI for free, up to 100 generations. Once you do, though, you’ll quickly realize that it’s an all-encompassing AI design assistant that you can’t live without. You can subscribe to the service for as little as $16.08 per month (billed annually). Every subscription comes with unlimited generations and website usage, so you can use it on every Divi website you own.
Generating a Layout with Divi AI
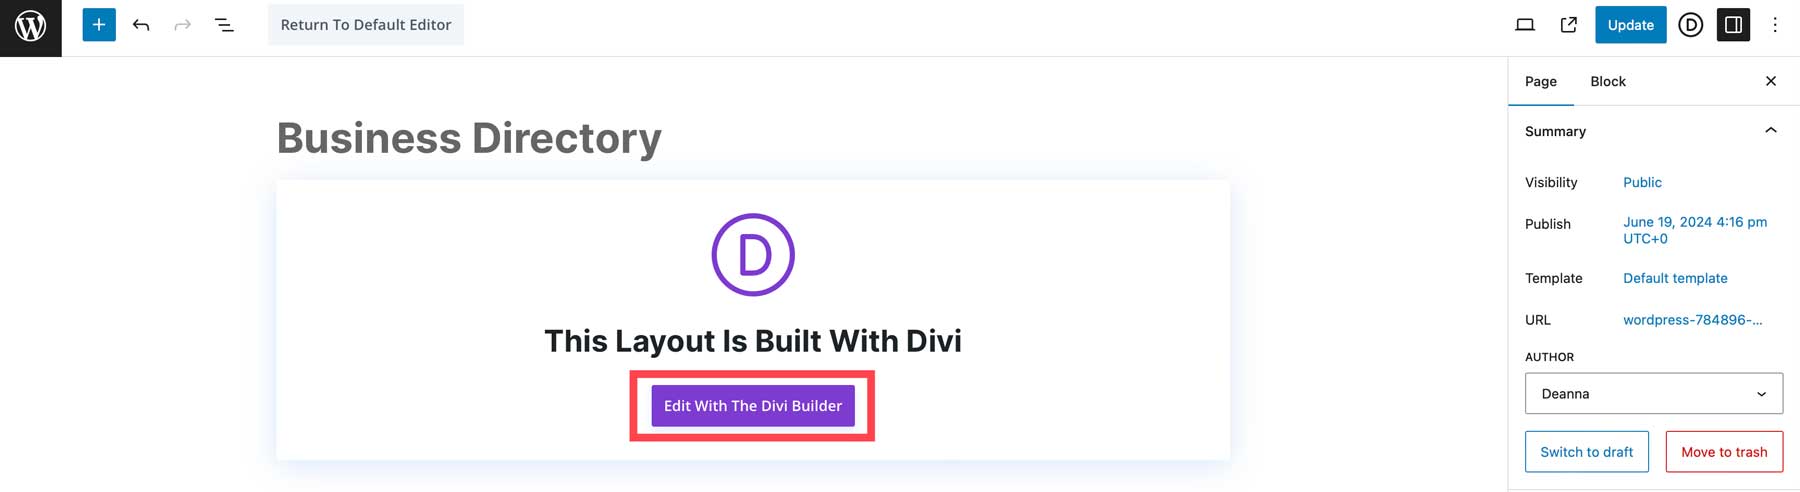
Getting started with Divi AI is simple. While editing the business directory page from the back end, copy the shortcode embedded on the page and click the Use The Divi Builder button.

Next, click Edit With The Divi Builder.
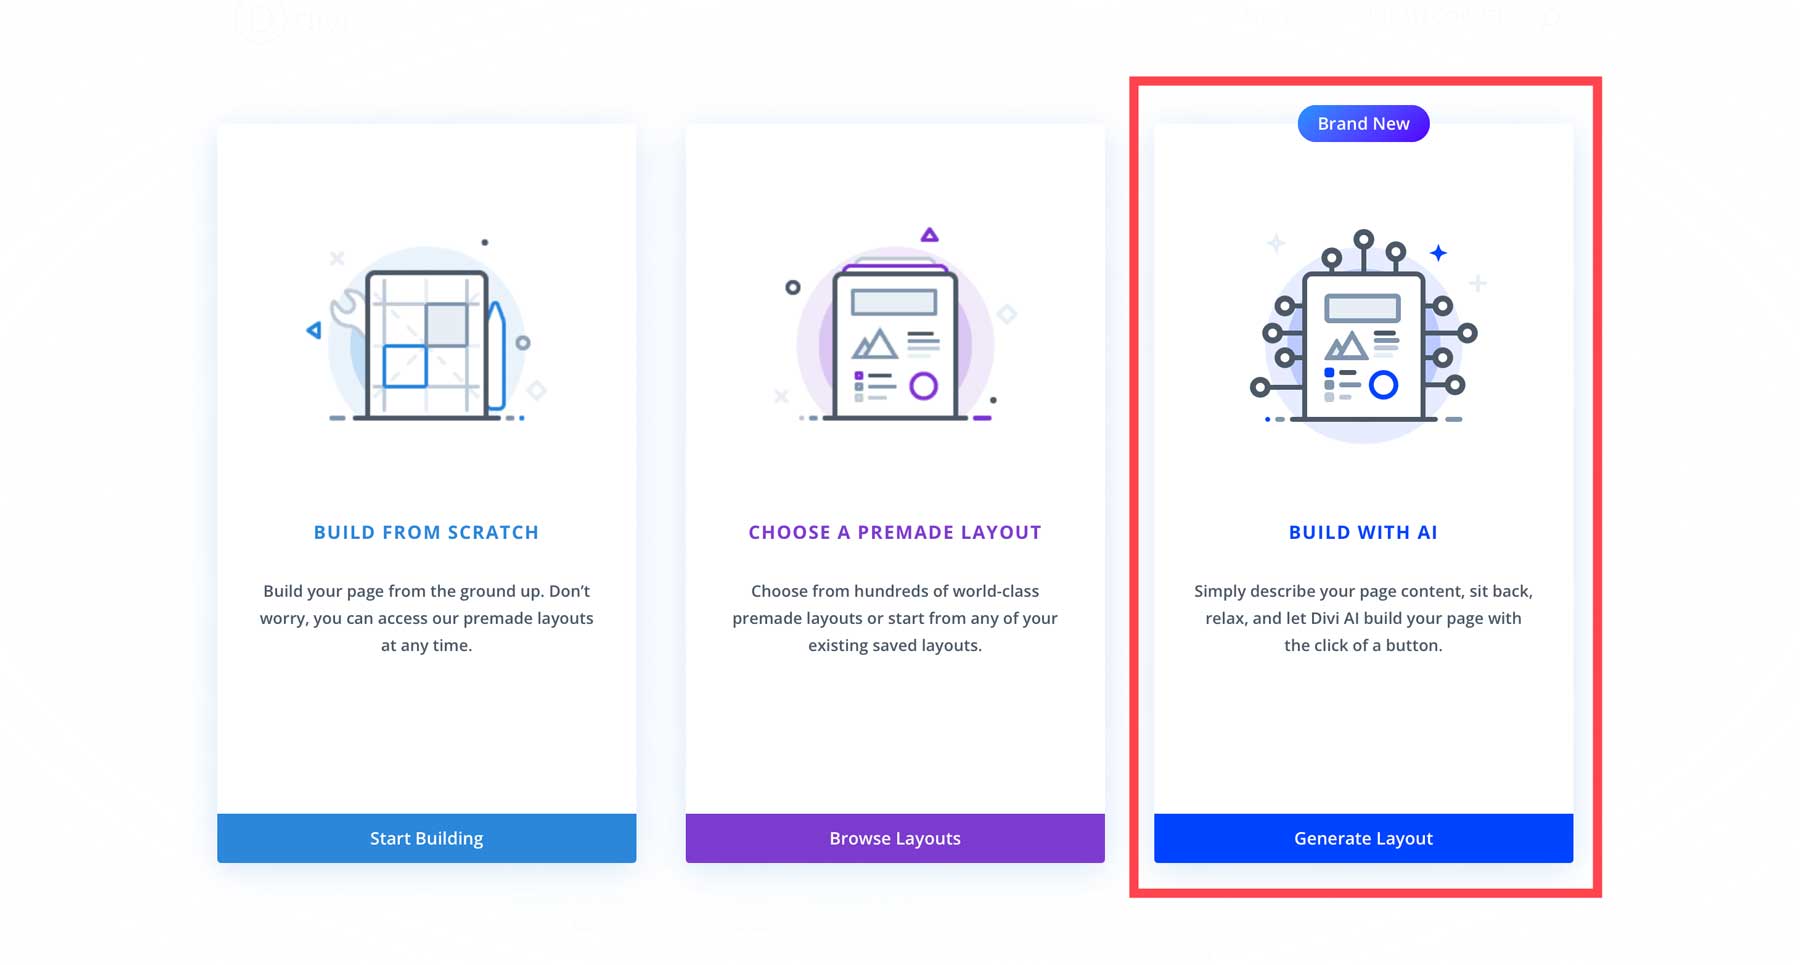
Choose Build with AI when the page loads.
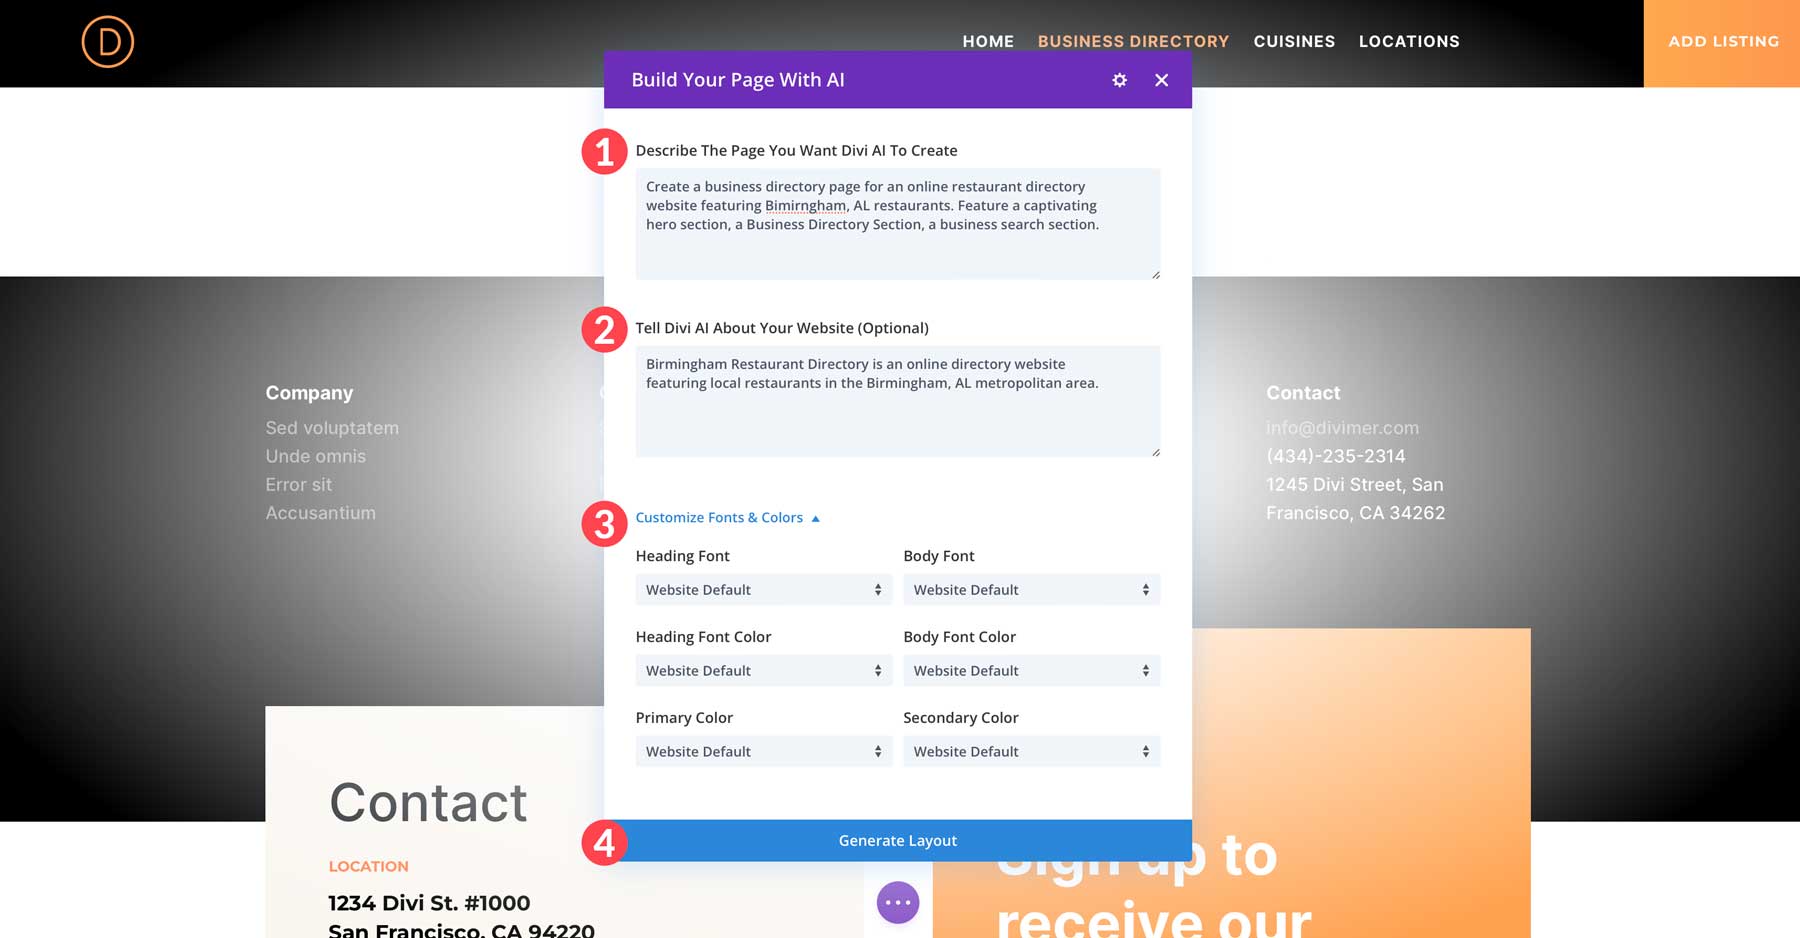
You’ll get your first look at the Divi AI interface when the AI dialog box appears. There are only a few fields to fill out, giving the AI more information about the page you want to create. Enter a prompt to describe the page, tell Divi AI about your website, and choose custom fonts and colors to use on your page. Several options include let AI choose, website default fonts and colors, Divi AI default, and custom. You can select the website defaults if you’ve configured Divi’s theme options. For everyone else, use the dropdown menus to make your choices. Once complete, click the Generate Layout button to create the page.
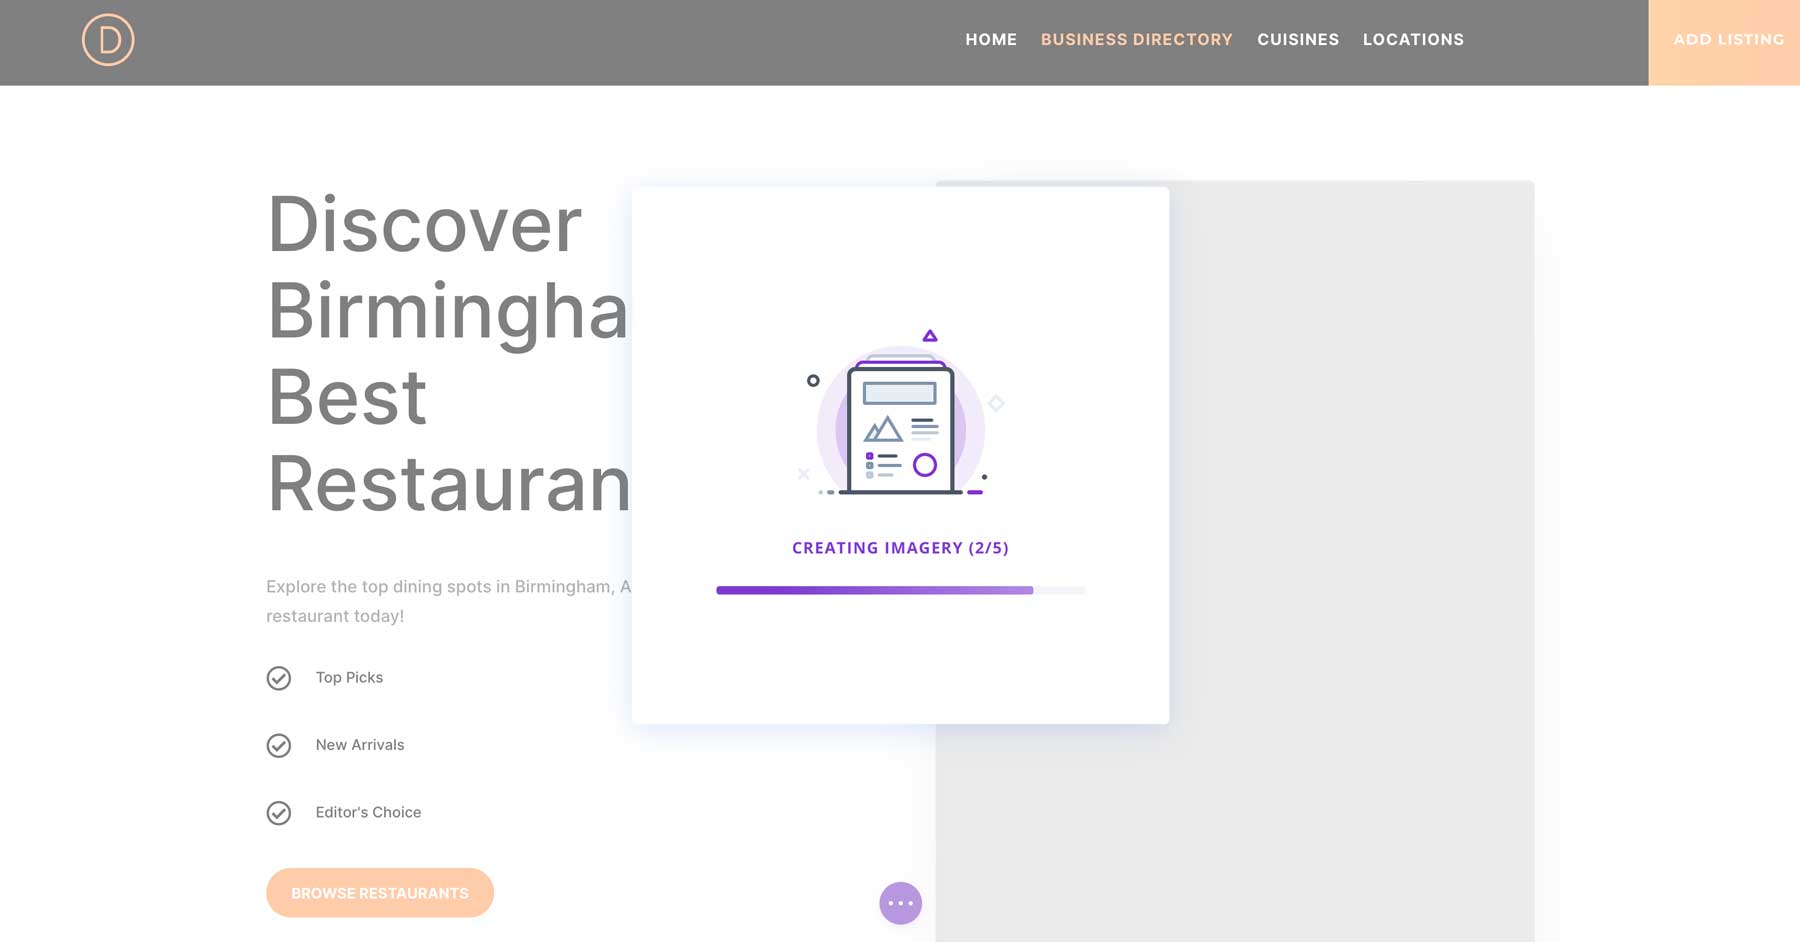
Divi AI will go through the steps to create a wireframe and add Divi design modules with text and images.
Edit the Business Directory Page with the Divi Builder
With our layout created, we can use the Visual Builder to edit the page. As mentioned, the Business Directory plugin requires a shortcode to display listings. That was removed when we created the page with Divi AI, so we must add it back to the page. Create a heading for the section to which we’ll add our shortcode and name it Business Directory. Next, add a code module and add the [businessdirectory] shortcode into the module.
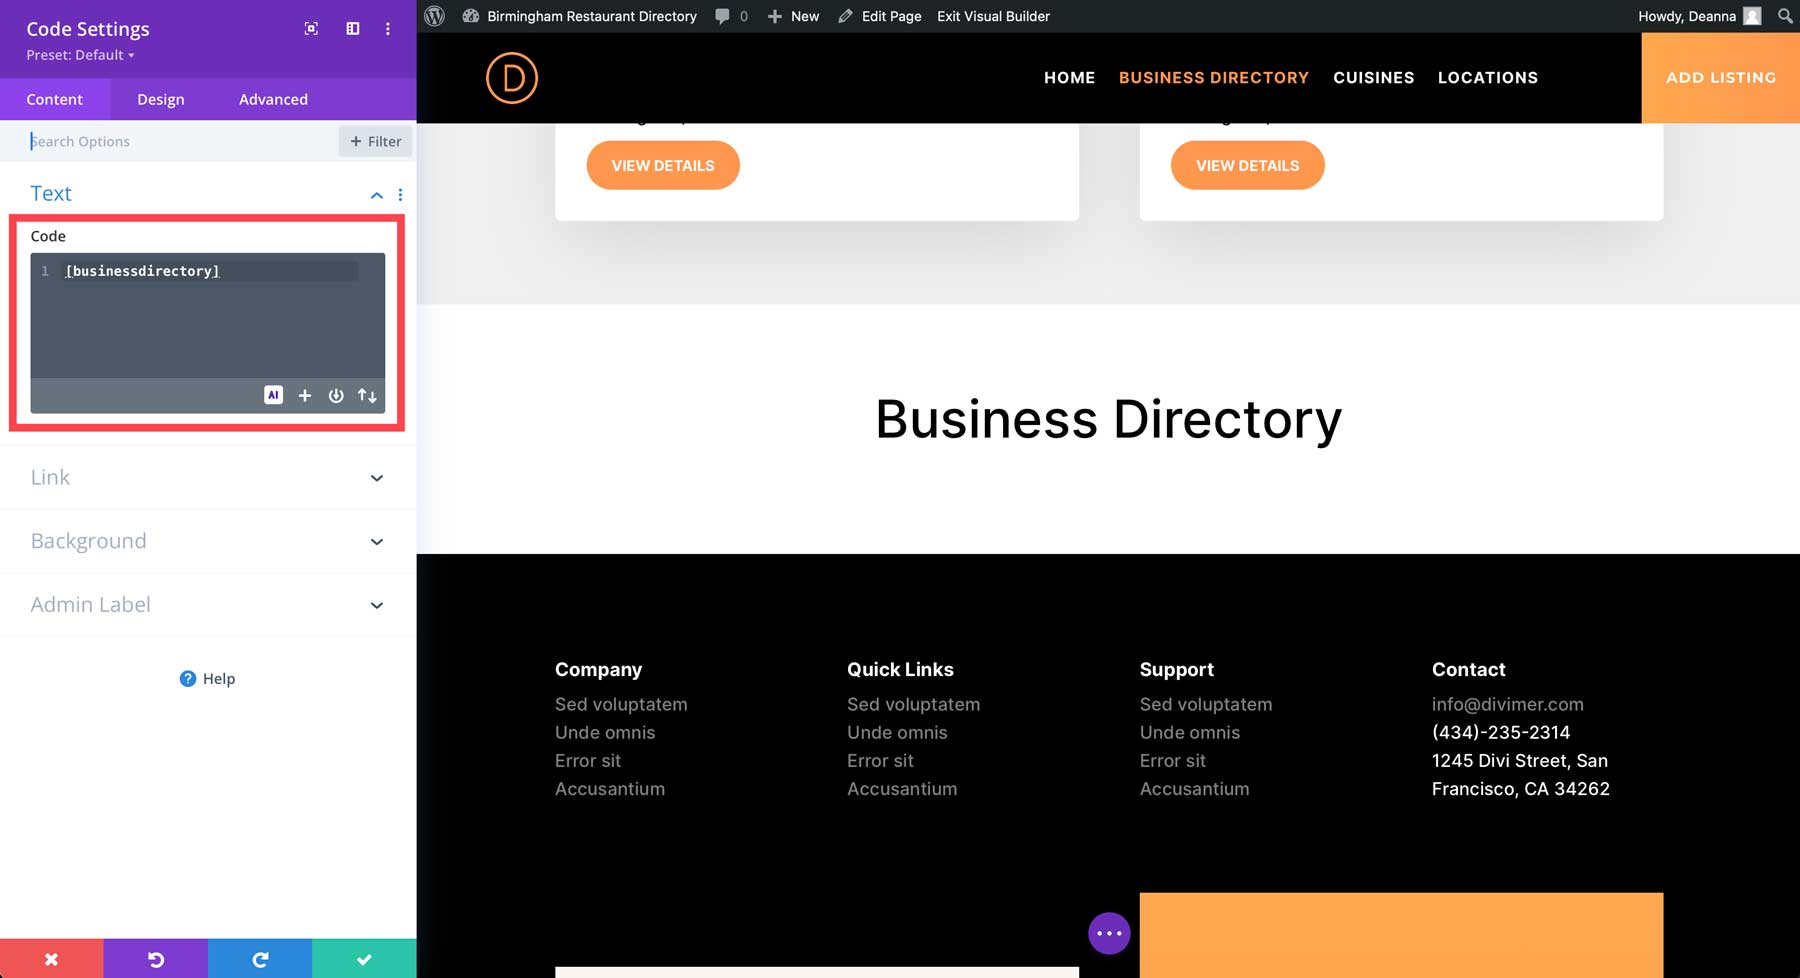
That’s all you’ll need to do to display your directory. However, experimenting with different modules and considering adding relevant info for your directory, such as featured listings, is a good idea. The plugin has a variety of shortcodes you can use to display information throughout your site, so the possibilities are endless.
Divi AI Can Design Your Entire Directory Website
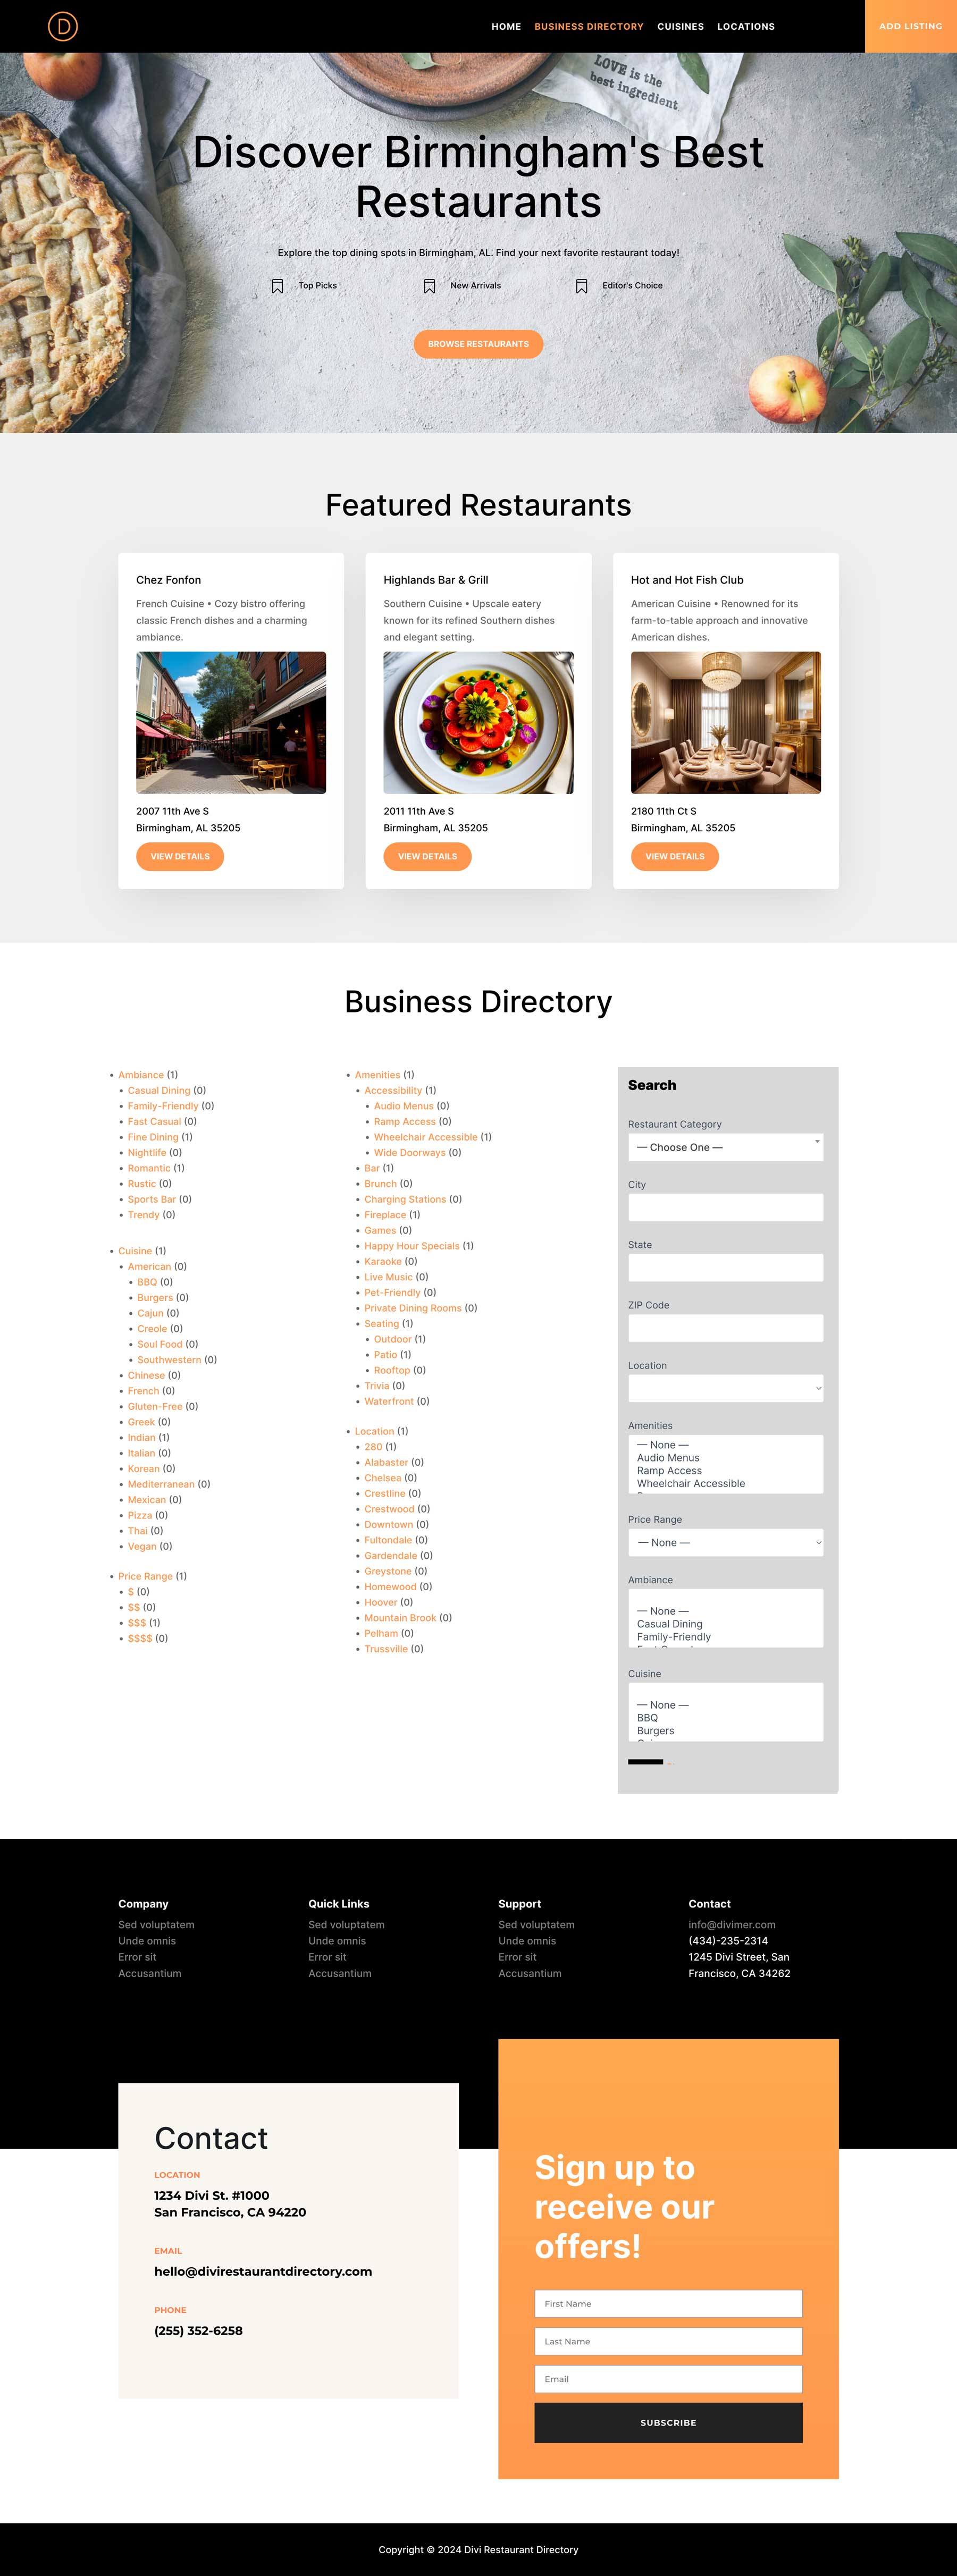
While Divi AI can’t single-handedly design your entire website from scratch (yet), it is a powerful tool that significantly streamlines your workflow. As we’ve mentioned previously, Divi AI can generate content for any section on your site, like product descriptions, blog posts, or even your home page hero section’s headline. However, Divi AI goes beyond simple AI generations. It can analyze existing content and suggest improvements, helping you maintain a consistent tone and style throughout your directory website.
Using Divi AI, we generated all of our site’s front-facing pages in minutes. That way, you can concentrate more on adding listings and less on designing the look and feel of your website.
Step 7: Enhance Your Directory Website with Additional Plugins
We’ve covered the essential steps to build a functional and user-friendly directory website with WordPress. However, there may be added functionality you’d like to add to make your site function the way you want. The beauty of WordPress is its extensive plugin ecosystem that allows you to add even more features. With that said, a balancing act is needed when adding plugins. You want to balance features and speed, especially since adding too many plugins can slow your site down.
Most of our basics are covered with a web host like SiteGround, including backup, security, and speed optimization plugins. However, there are a few plugins that you should consider for your directory website. Here are a few possibilities:
- SEO Plugins: Help your directory get found with an SEO plugin like Rank Math. Conduct keyword research, get help crafting catchy headlines, and optimize your directory website for the search engine ranking pages (SERPs)
- Review Plugins: You can encourage user engagement by allowing visitors to leave reviews about their favorite businesses. Review plugins, such as Starfish Reviews, is the perfect way to boost your site’s credibility. Plus, it’s good for SEO too
- Interactive Map Plugins: Help users visualize business locations by integrating an interactive map plugin, like Interactive Geo Maps.
- Search Plugins: Enhance your directory’s search function by integrating an advanced search plugin like SearchWP. These plugins allow users to filter listings based on specific criteria, like price range, amenities, or ratings, making it easier to find exactly what they are looking for
- Advertising Plugins: If you plan to monetize your blog, adding an advertising plugin like Advanced Ads is a great idea. You can display ads across your website, opening up opportunities to grow your revenue
Extend Divi with Products in the Divi Marketplace
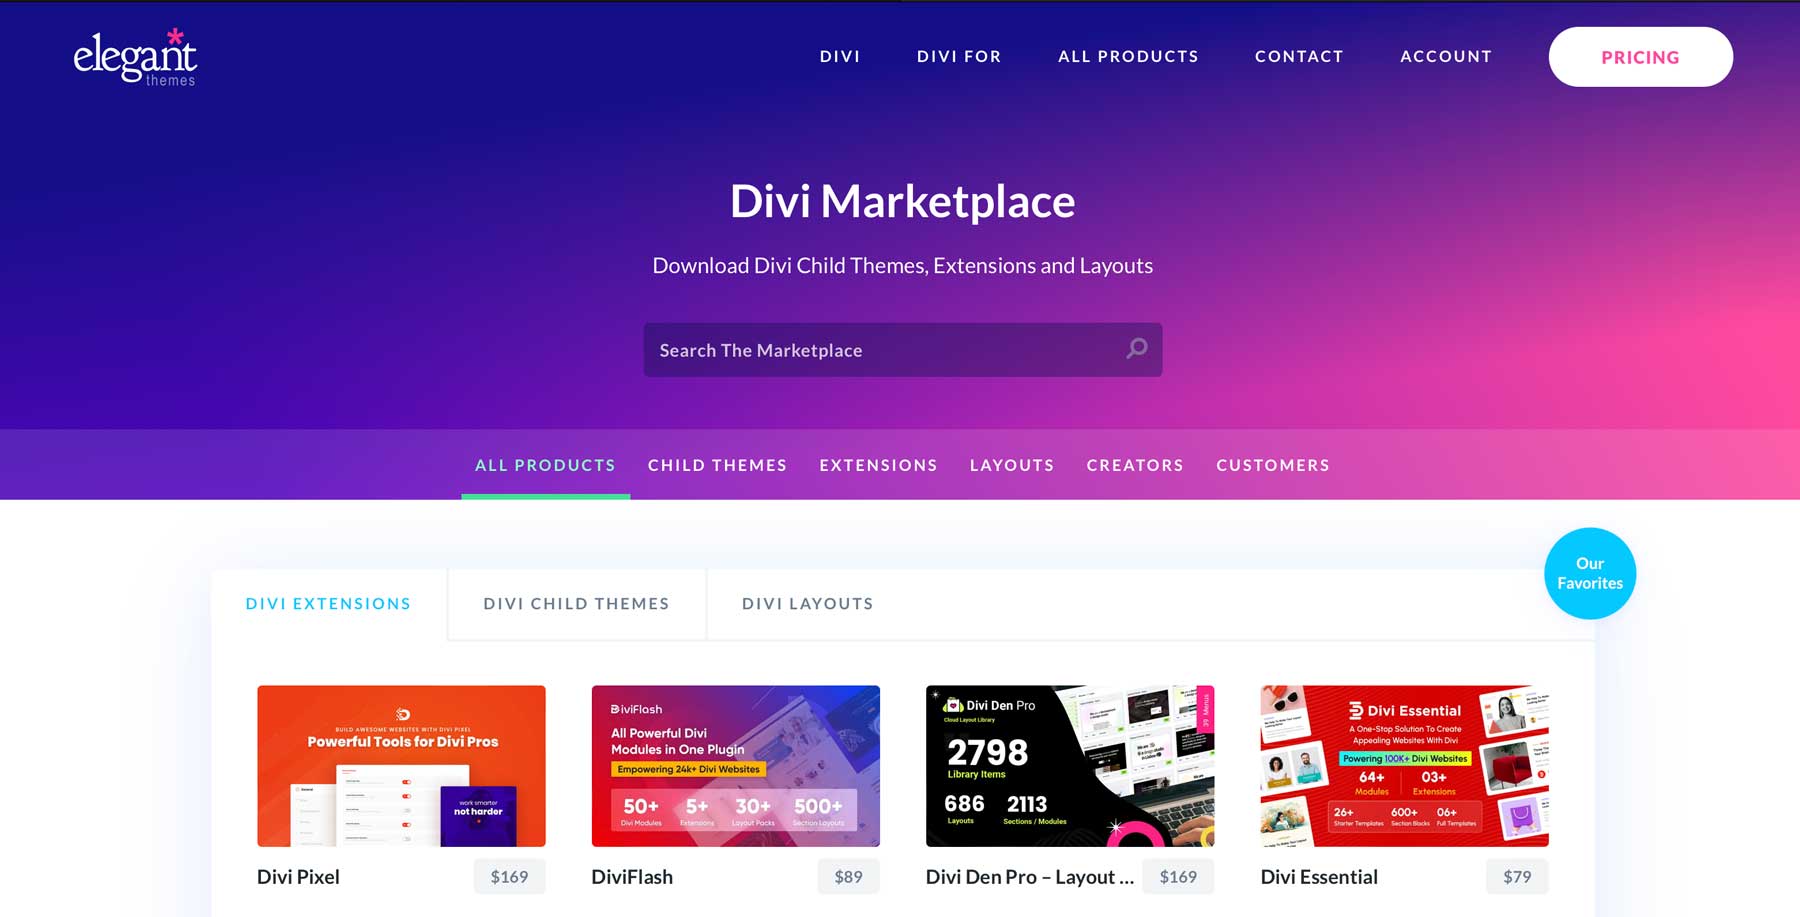
In addition to the WordPress repository and third-party offerings, there are hundreds of Divi-specific plugins, child themes, and layout packs available in the Divi Marketplace. Each product in the marketplace is designed specifically to work with the Divi theme. While Divi is already an incredible framework, the developers in the marketplace bring new functionality to the table. Whether you want a variety of layouts for your directory website, a unique way to showcase your listings, or a beautiful image carousel, Divi Marketplace has you covered.
Here are a few examples of products you could use to make your directory website even better.
Divi Carousel Maker
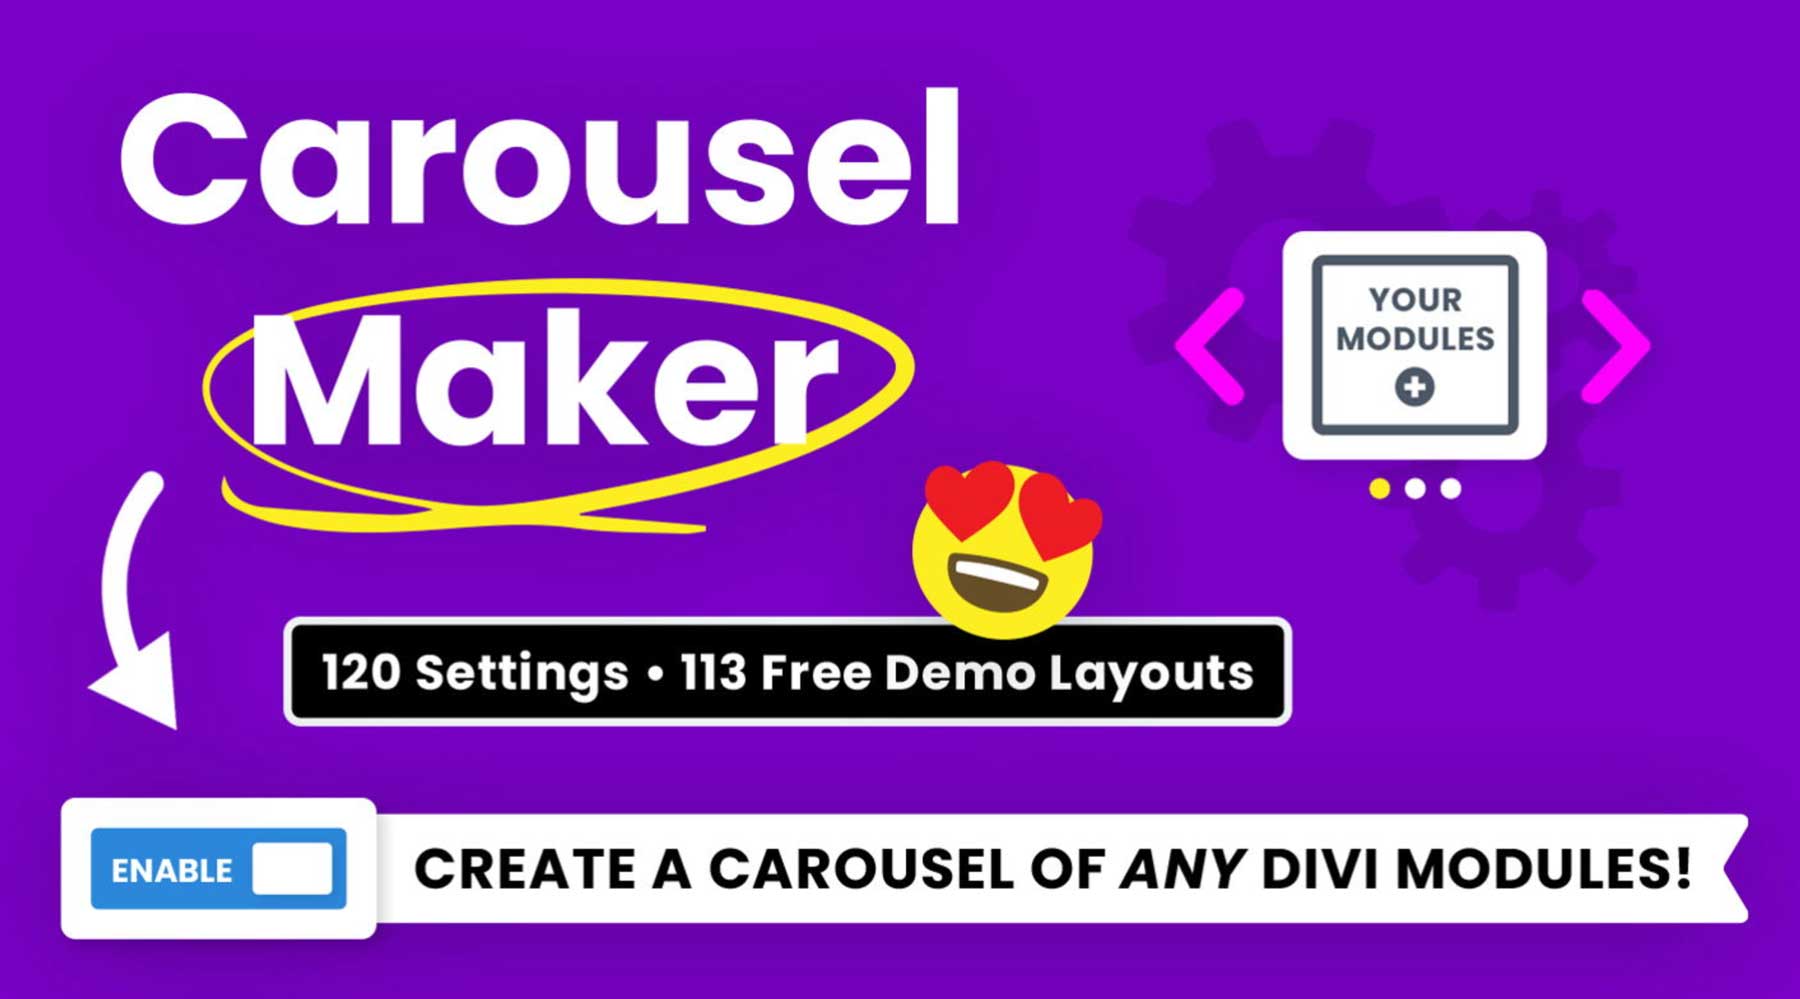
The Divi Carousel Maker extension allows you to create beautiful image carousels to showcase your photos. There are over 120 design settings, 110+ carousel layouts, and the ability to add Divi modules directly into the carousel. You can easily create beautiful carousels for reviews, videos, posts, and more. The best part? The extension is available for $29 per year and can be used on unlimited Divi websites.
Divi FilterGrid
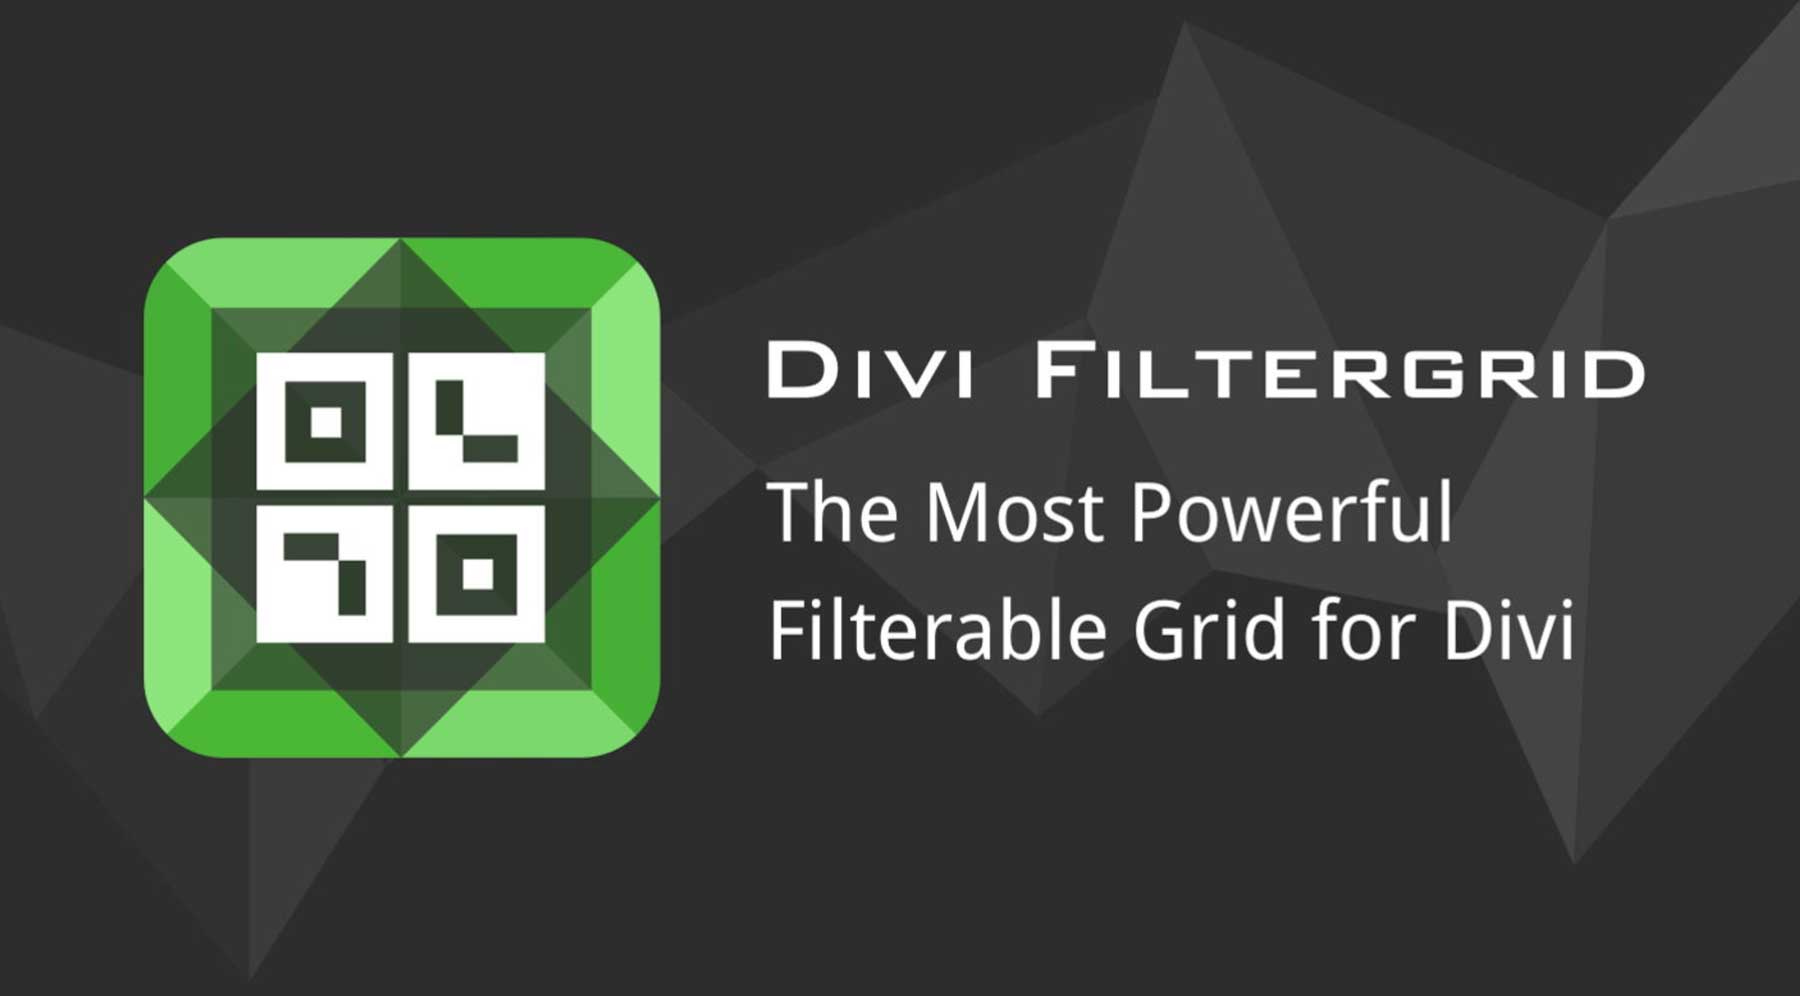
The Divi FilterGrid extension allows you to display blog posts and custom post types in a filterable grid layout. While the modules can be customized with the Visual Builder like any other Divi module, there is a collection of themed skins to choose from to provide different looks on the fly. In addition to displaying content in a grid layout, users can set up a lightbox and popup options so their visitors can view content without leaving the page. Divi FilterGrid is available for $79 per year with unlimited website usage.
Divi Headers Pack
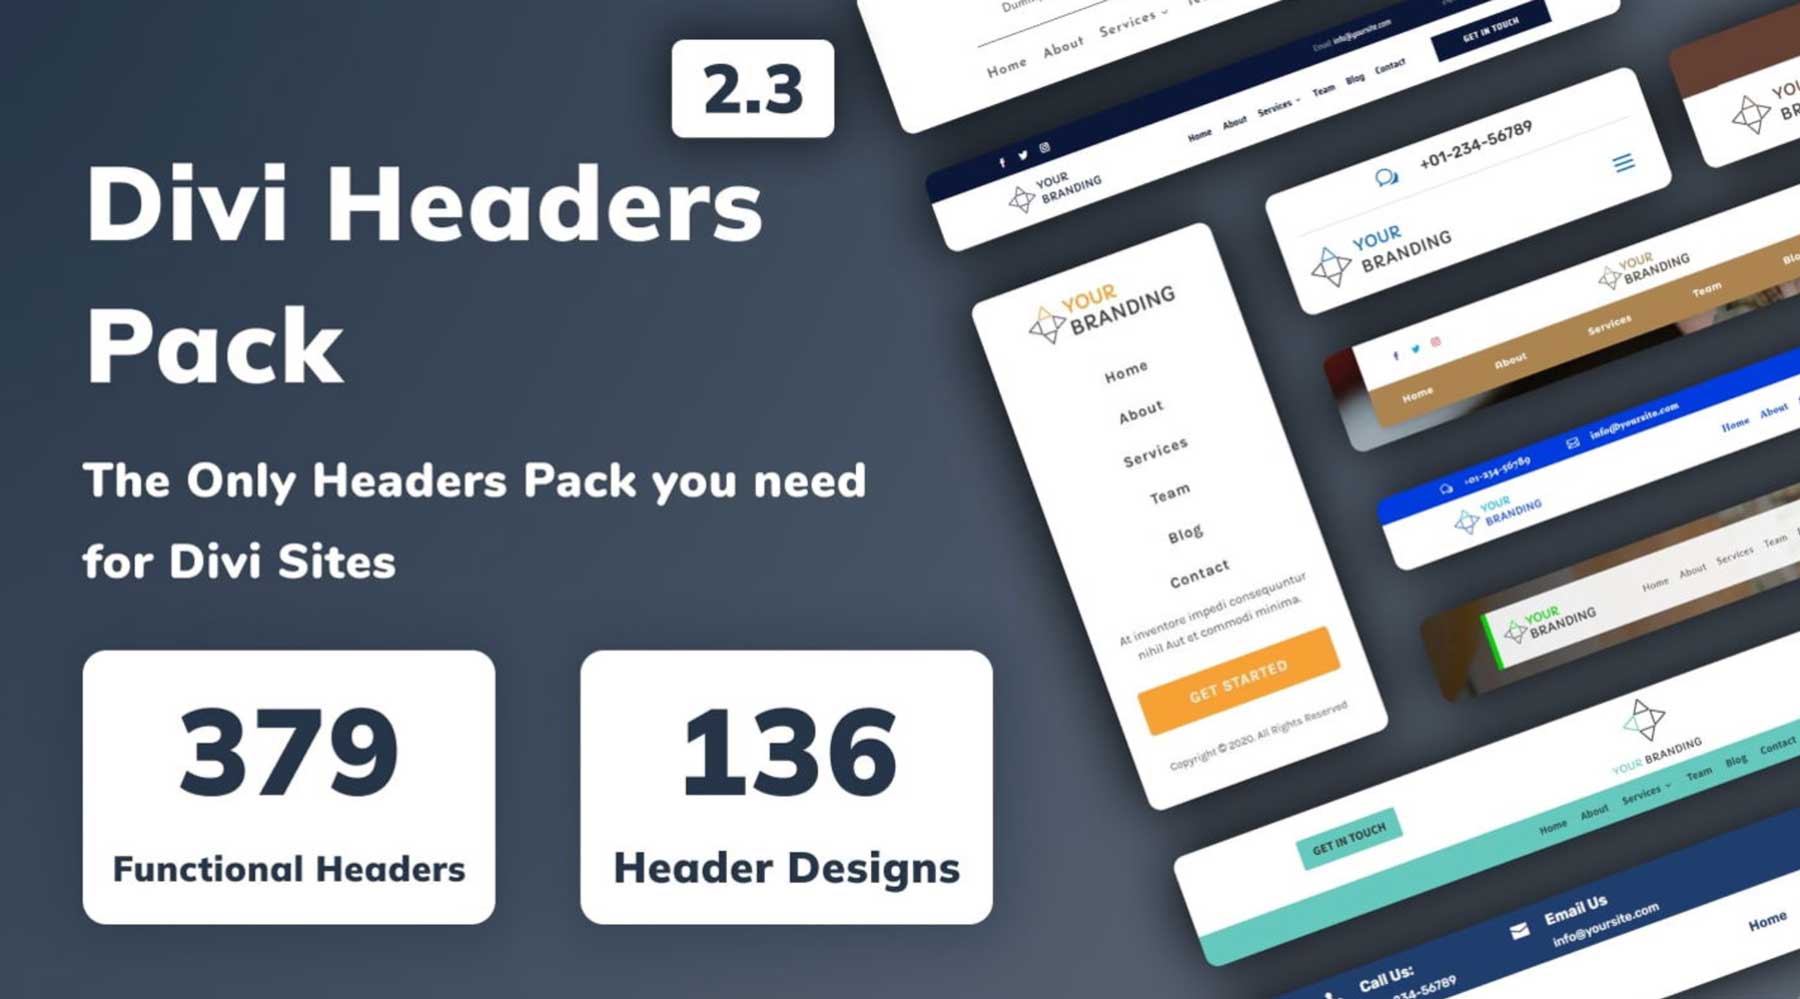
The Divi Headers Pack can help you overcome designer’s block, thanks to nearly 380 functional headers for your Divi directory website. There are various header styles, including standard, WooCommerce-compatible, creative, vertical logo, and right-to-left (RTL). However, some of its more advanced designs require some CSS knowledge, so beginners should keep that in mind. The Divi Headers Pack is available for a one-time fee of $19 and is suitable for unlimited websites.
Making a Directory Website with WordPress and Divi is a No-Brainer
We’ve explored the exciting world of building your own directory website. From purchasing a domain through Namecheap to buying a quality hosting plan through SiteGround to generating full web pages with Divi AI, we’ve covered everything you need to know to get started. With WordPress, the Business Directory Plugin, and Divi as your allies, a professional-looking and feature-rich directory website is more achievable than ever.
Interested in learning more about the products mentioned in this post? Check out the table below to find links and pricing for each one.
| Products Mentioned | Starting Price | Description | Action | |
|---|---|---|---|---|
| 1 | Namecheap | $5.98/year | Domain Registrar | Get |
| 2 | SiteGround | $2.99/month | Hosting Provider | Get |
| 3 | Divi | $89/year | WordPress Theme | Get |
| 4 | Visual Builder | Included with Divi | Page Builder Plugin | Get |
| 5 | Design Elements | Included with Divi | Page Builder Plugin | Get |
| 6 | Theme Builder | Included with Divi | Full Site Editing | Get |
| 7 | Divi AI | $16.08/month (billed annually) | AI Website Builder | Get |
| 8 | GeoDirectory | $139/year | Directory Plugin | Get |
| 9 | Business Directory | Free, $99/year | Directory Plugin | Get |
| 10 | Genesis Pro | $360/year | WordPress Theme | Get |
| 11 | OptimizePress | $129/year | Page Builder Plugin | Get |
| 12 | RankMath | Free, $6.99/month | SEO Plugin | Get |
| 13 | Starfish Reviews | $37/month | Review Plugin | Get |
| 14 | Interactive Geo Maps | $39.99/year | Interactive Map Plugin | Get |
| 15 | SearchWP | $99/year | Search Plugin | Get |
| 16 | Advanced Ads | €59/year | Advertising Plugin | Get |
| 17 | Divi Marketplace | Prices Vary | Extensions, Child Themes, and Layouts for Divi | Get |
| 18 | Divi Carousel Maker | $29/year | Divi Extensions | Get |
| 19 | Divi FilterGrid | $79/year | Divi Extensions | Get |
| 20 | Divi Headers Pack | $19/one-time fee | Divi Layouts | Get |
Frequently Asked Questions
Although we’ve tried to be as thorough as possible in this post, you may still have some questions that need to be answered. Take a look at the FAQ section below to find the answers.
Is WordPress a good platform for building a directory website?
Do I need any coding knowledge to build a directory website with WordPress?
What are some essential WordPress plugins for a directory website?
Can I build a free directory website with WordPress?
What are the benefits of using a theme like Divi when building a directory website with WordPress?
How can I categorize listings in my WordPress directory website?
How can I ensure my WordPress directory website ranks well in search engines?
Can I monetize my WordPress directory website?
How can I keep my WordPress directory website secure?
How can I back up my WordPress directory website?


Leave A Reply